Rik Thistle
-
Posts
873 -
Joined
-
Last visited
Content Type
Profiles
Forums
Gallery
Events
Everything posted by Rik Thistle
-
 Thanks James. Actually, now that you point it out the stern planks are most definitely not parallel with the false keel....hmm. Thanks for the heads-up. I think I had been relying on the fact that those planks will be heavily feathered as they reach the edge of the false keel, but even then they are a bit too squint. I'll see what I can do 😉 Regards, Richard
 -
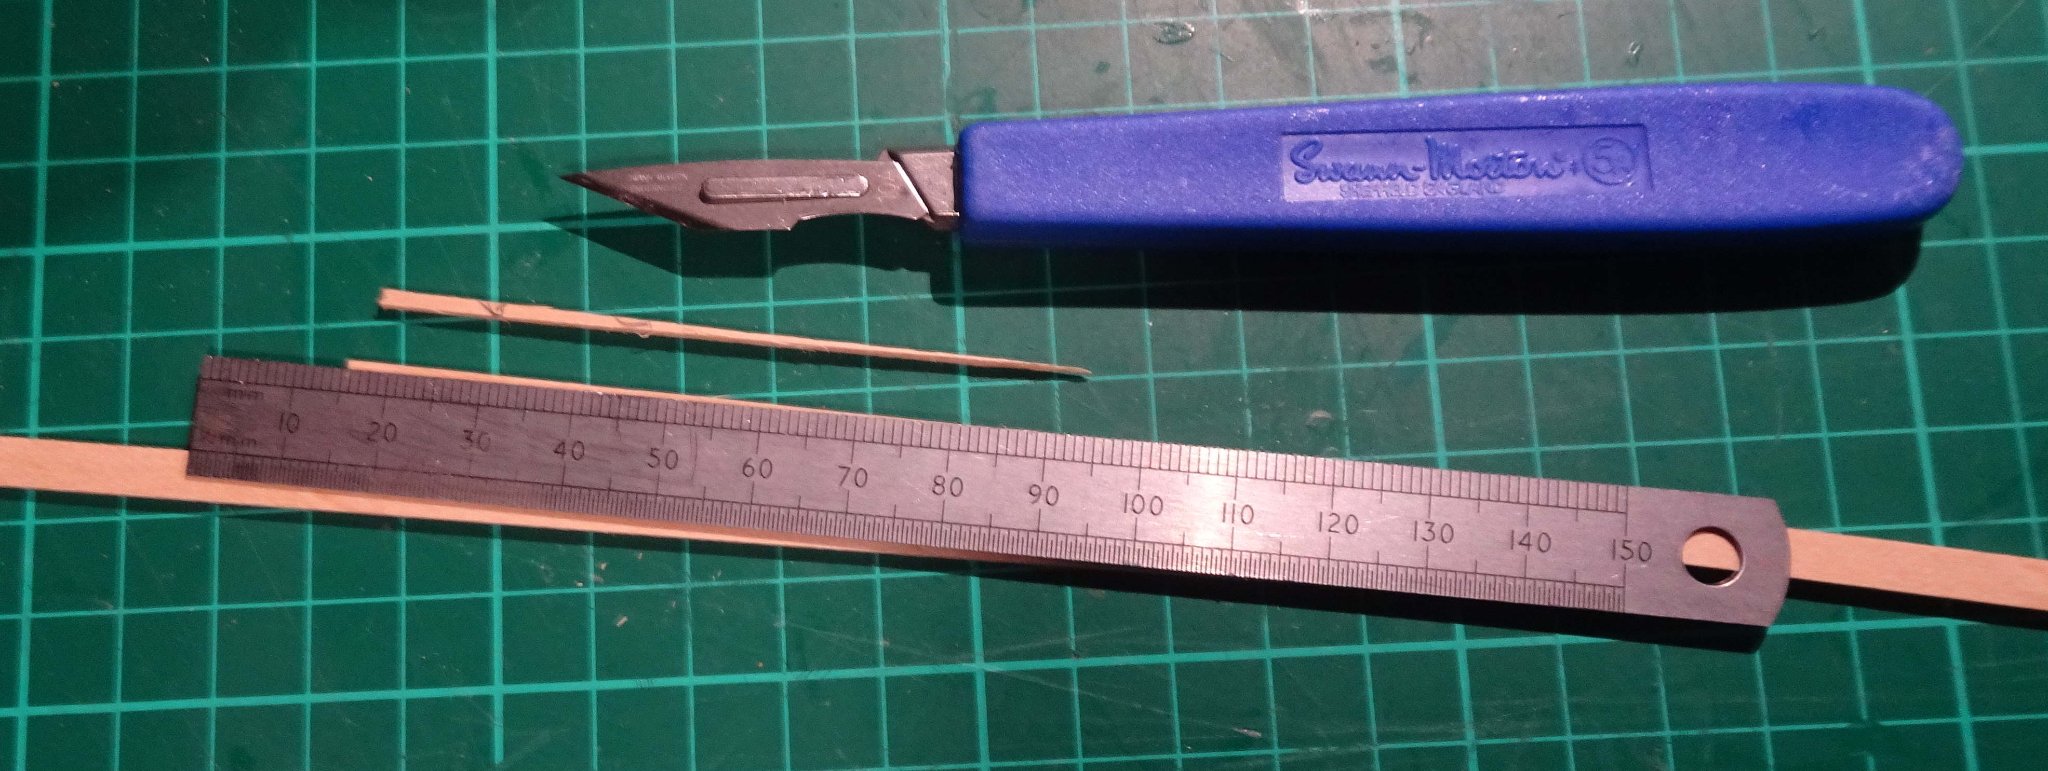
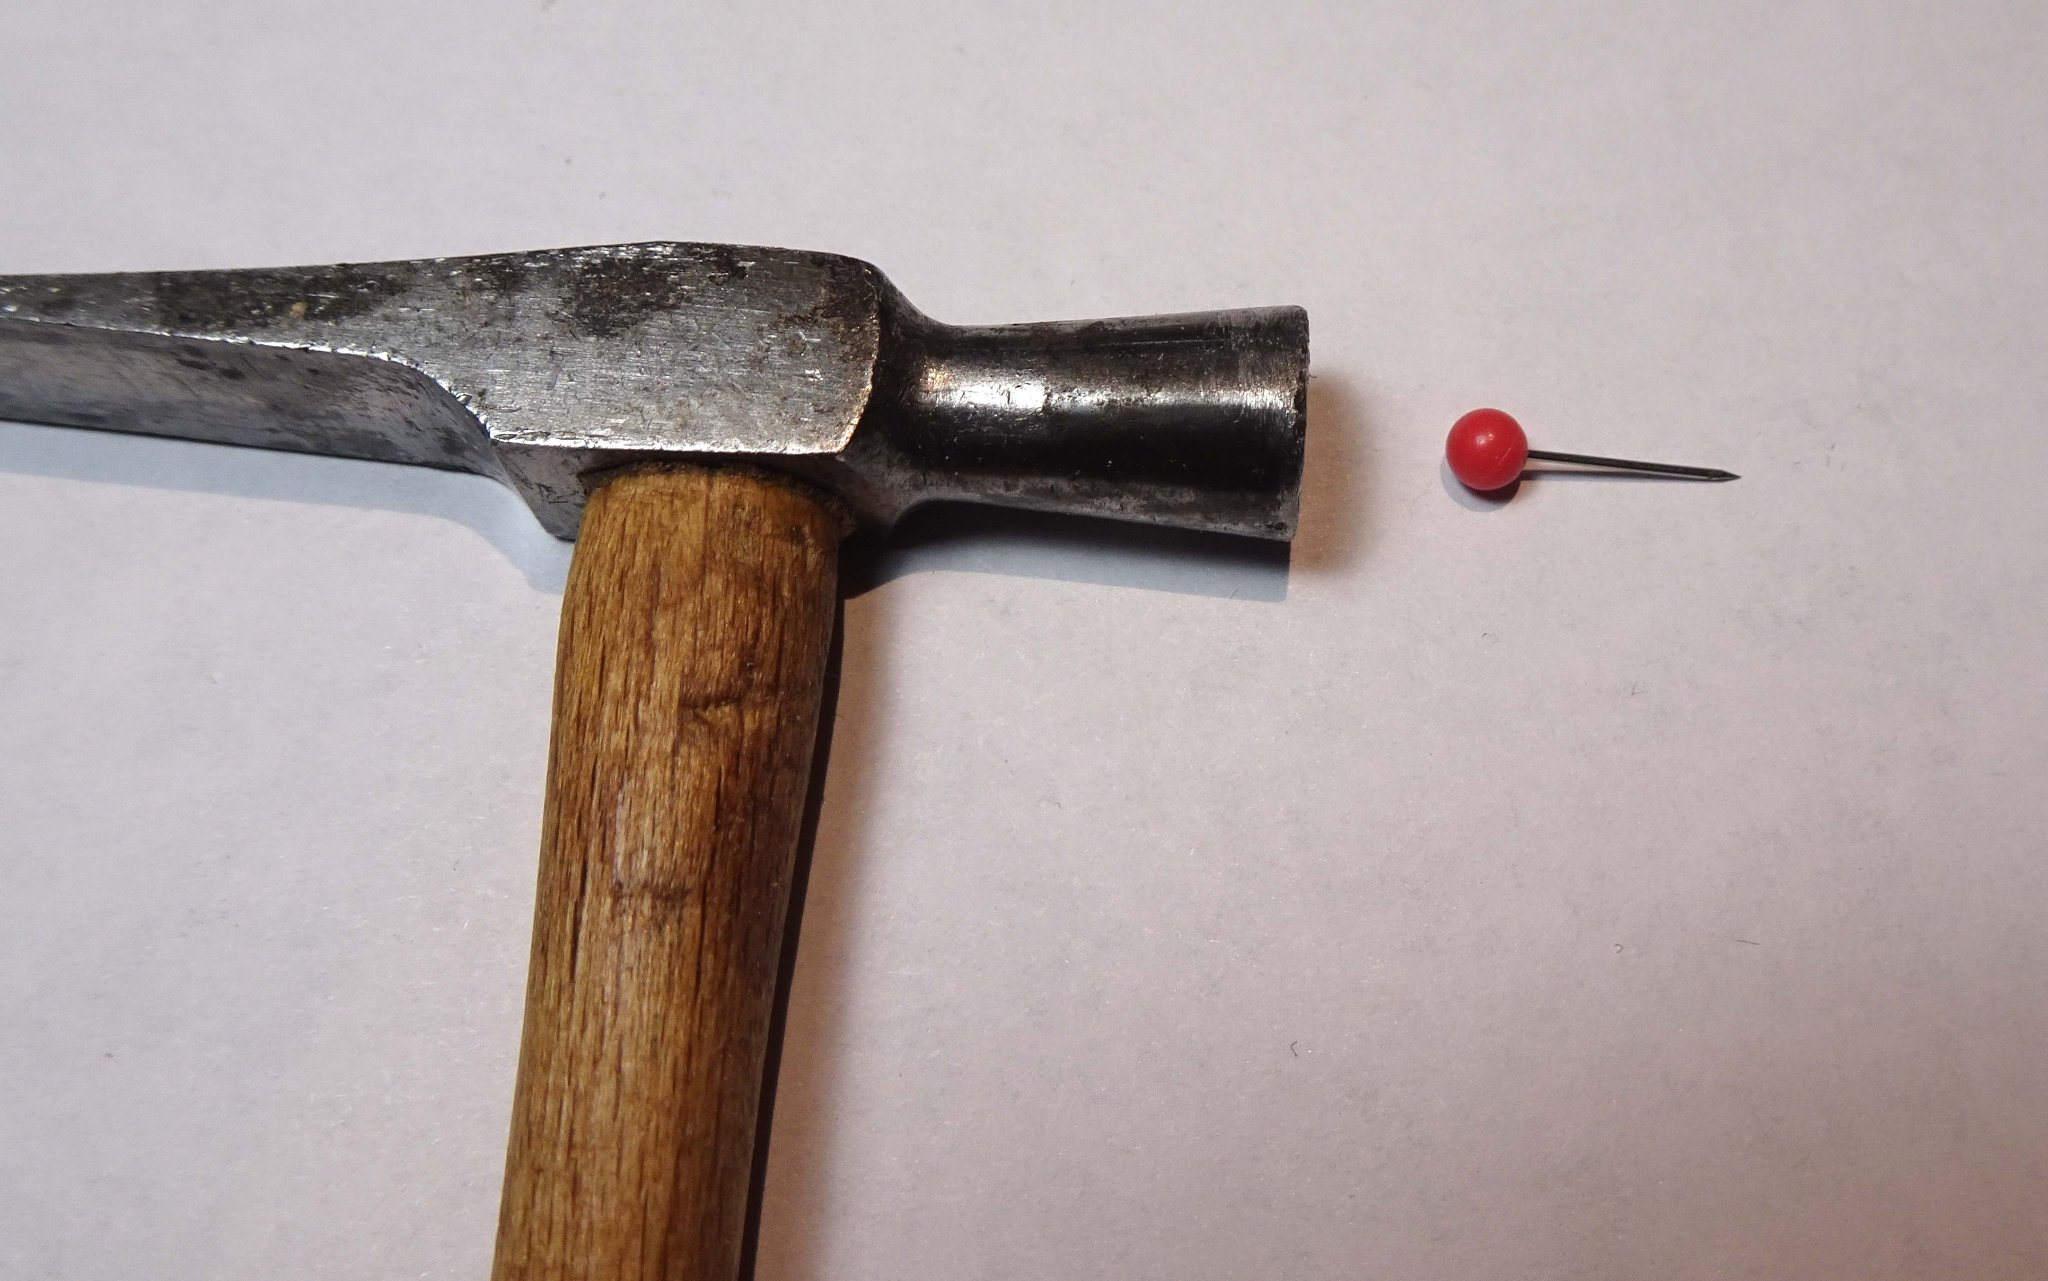
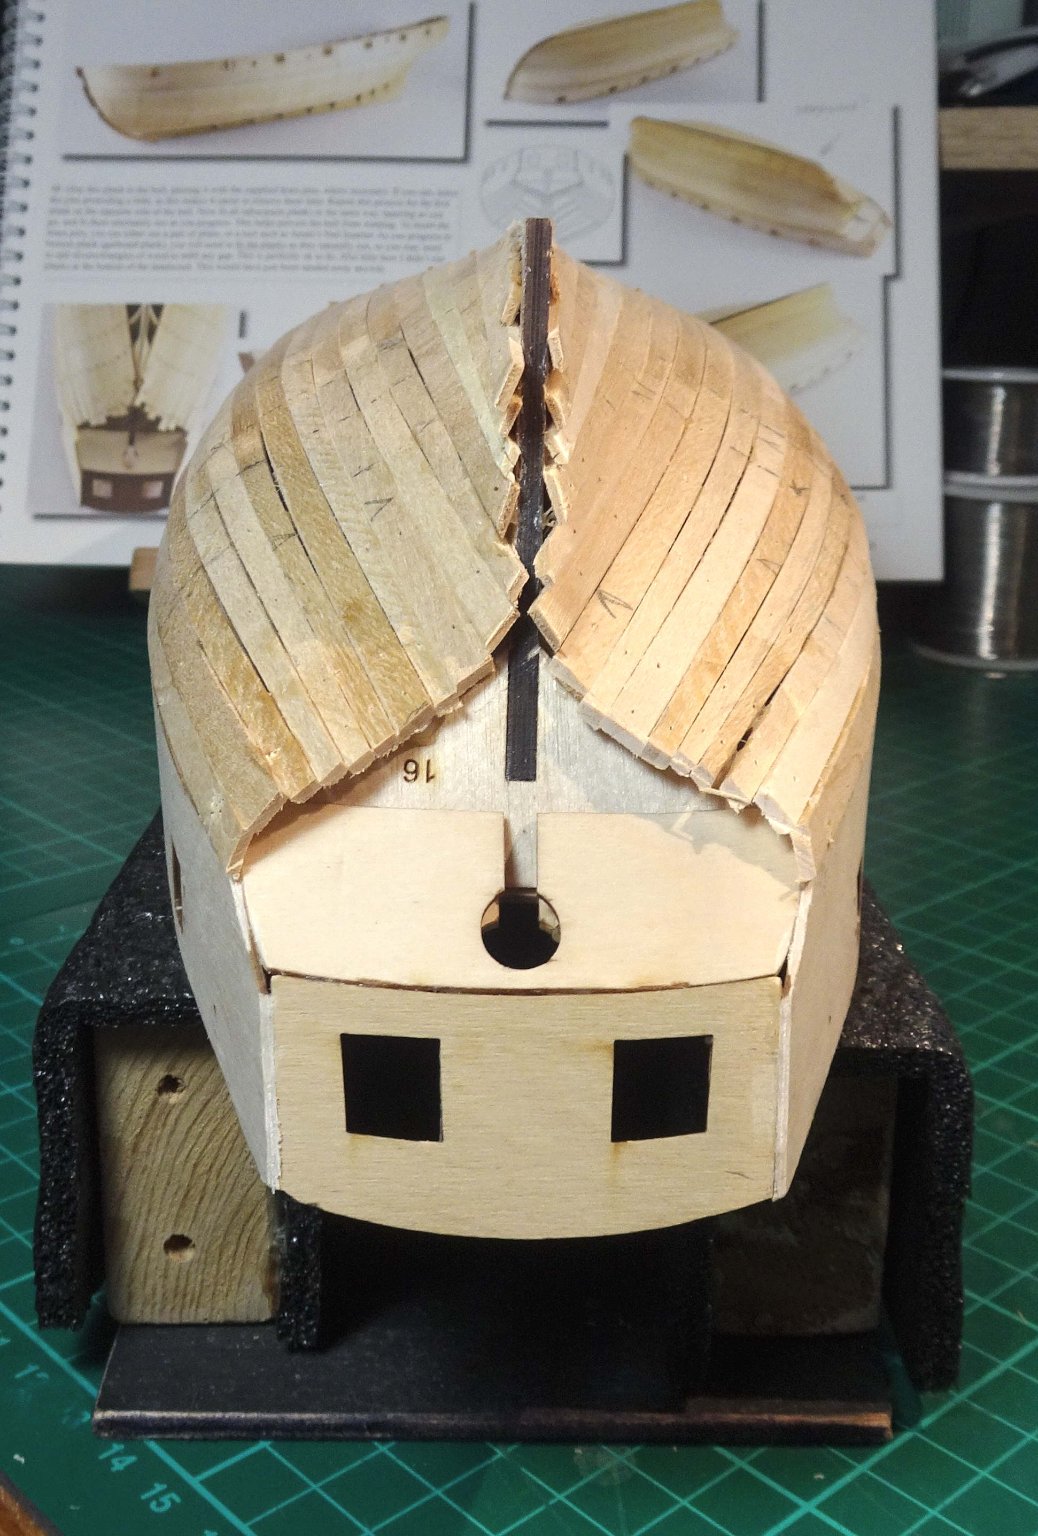
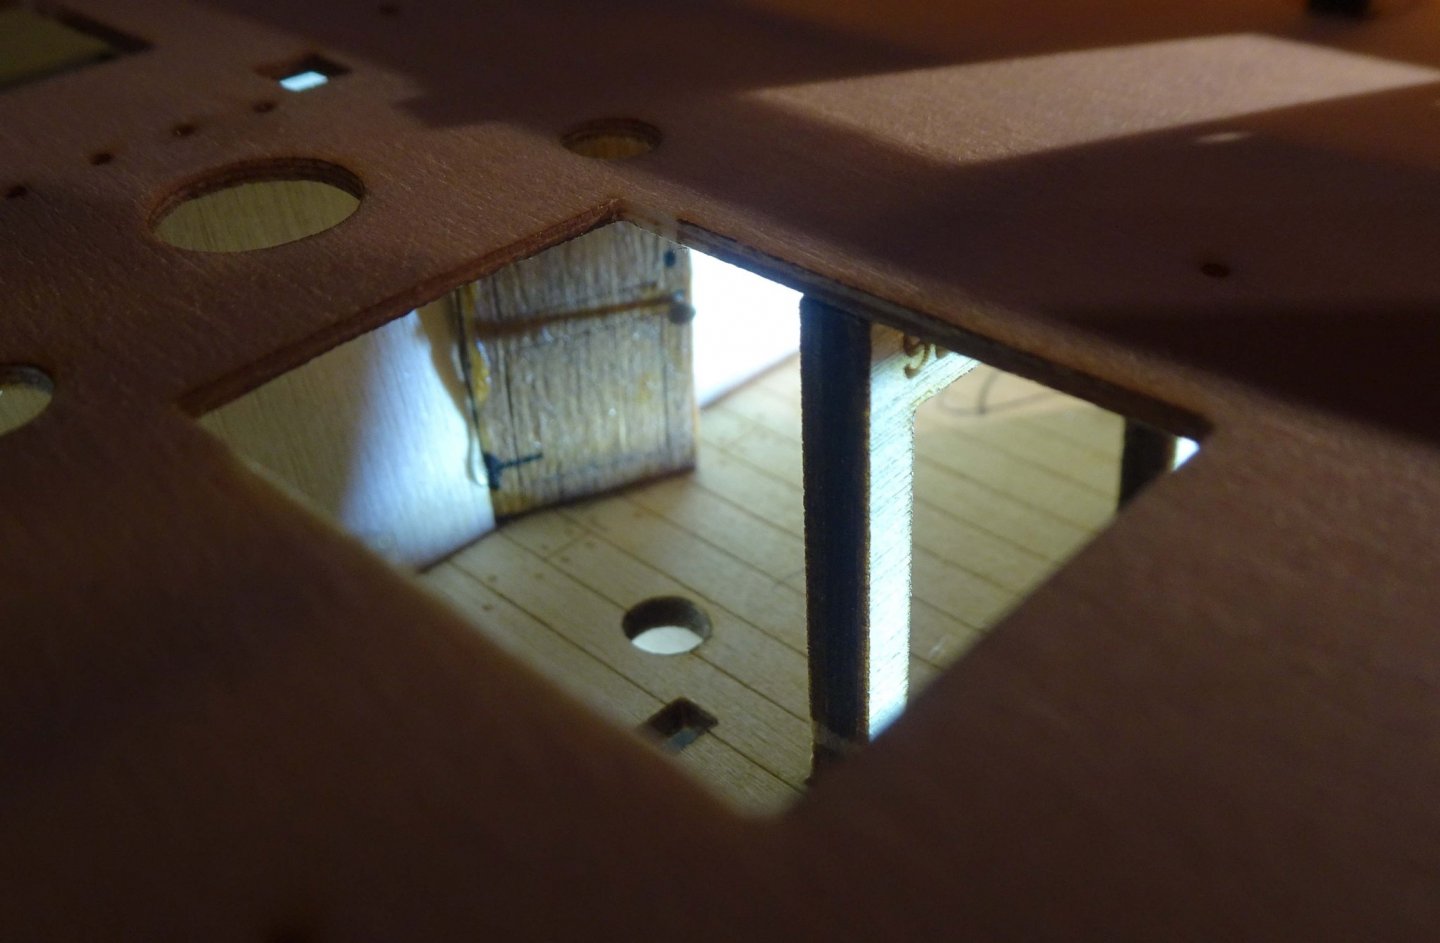
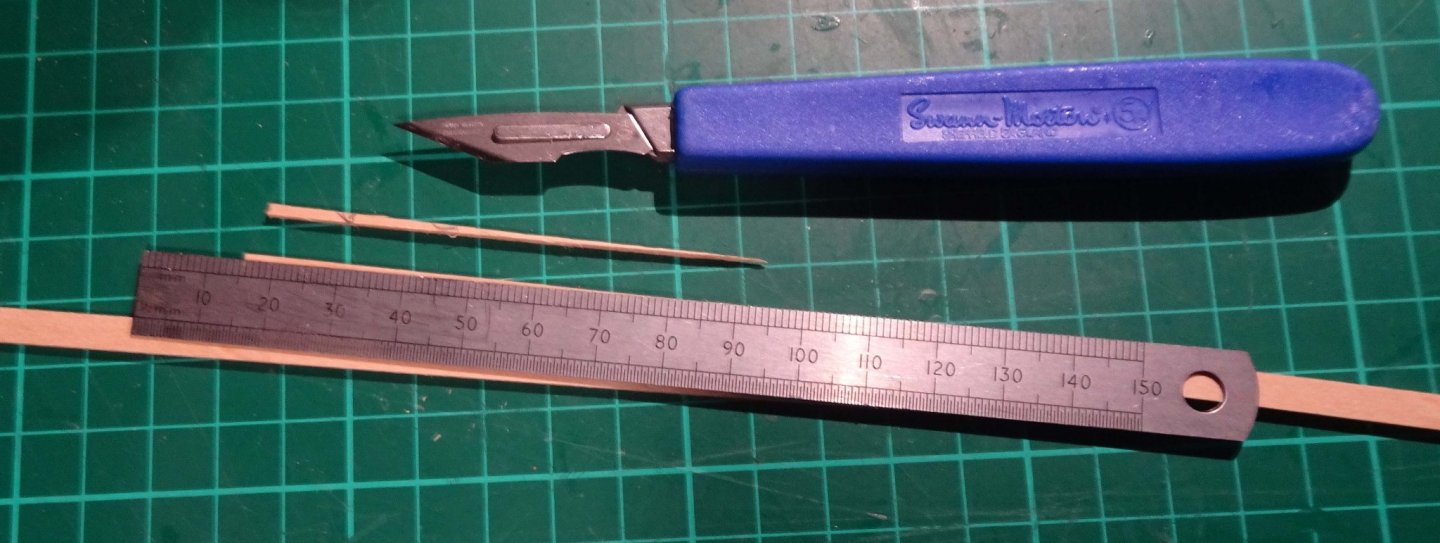
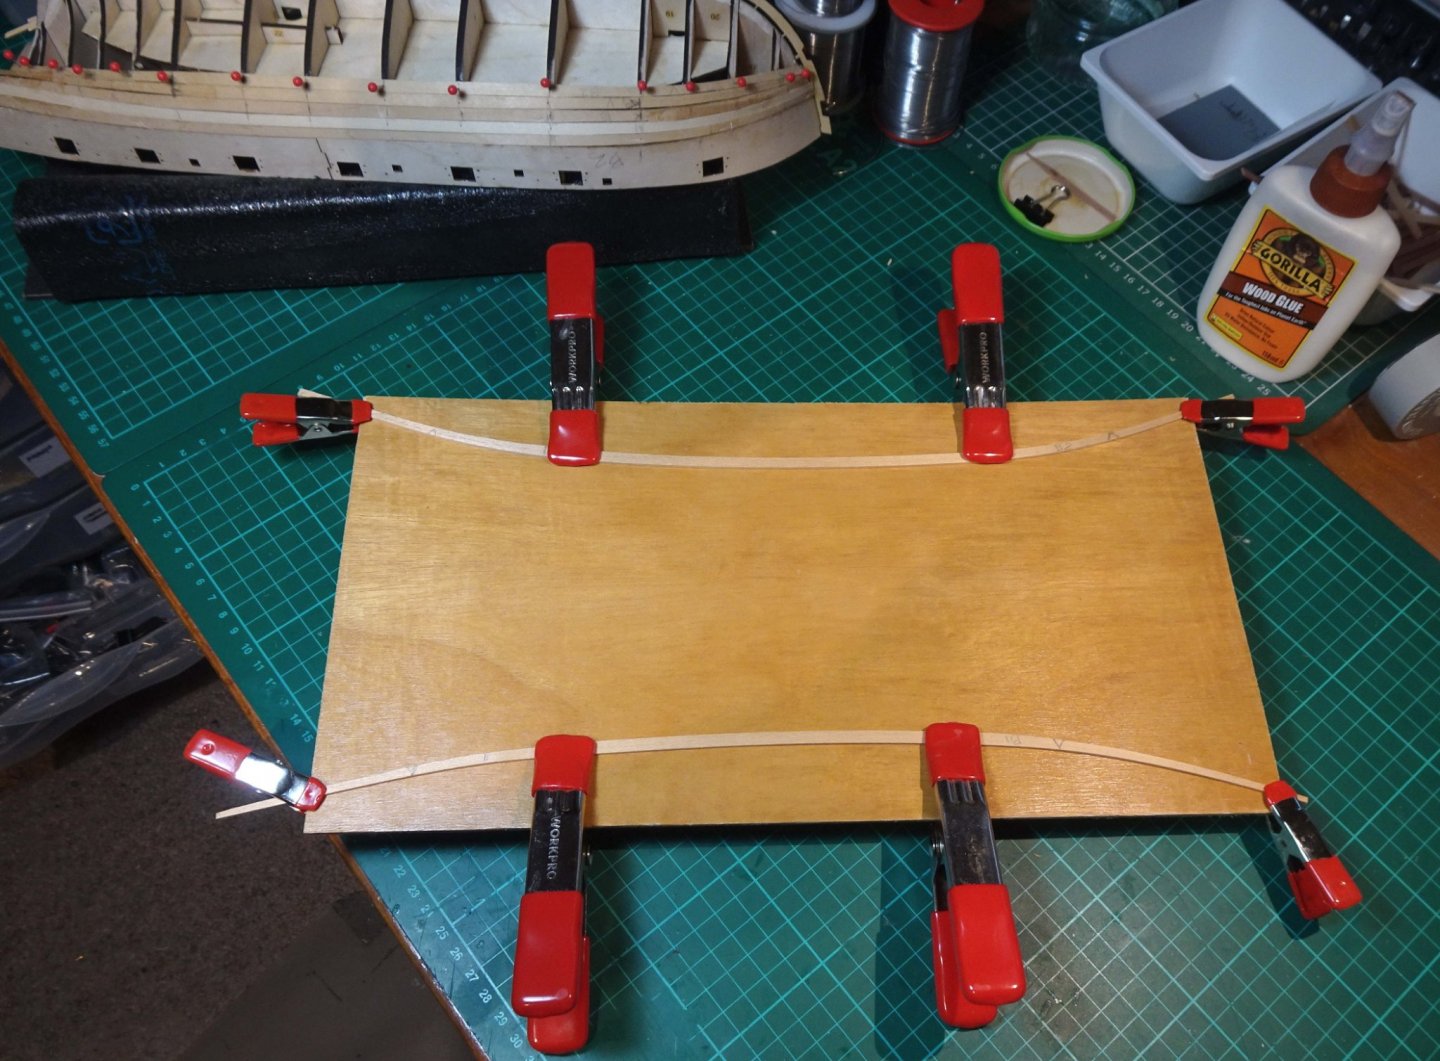
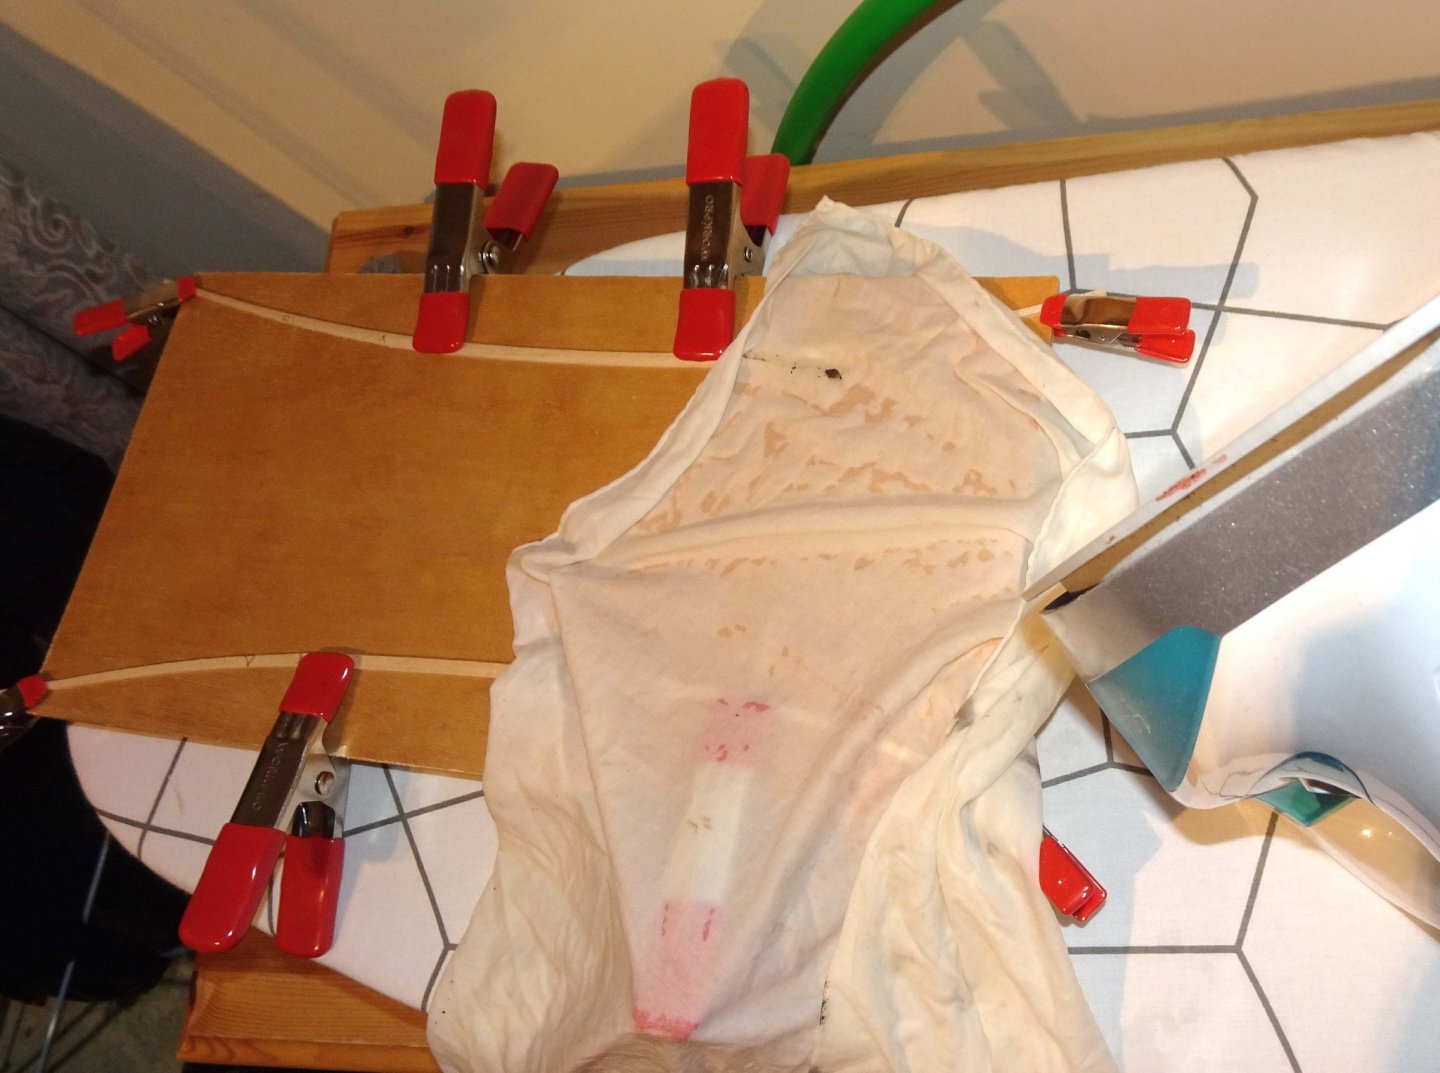
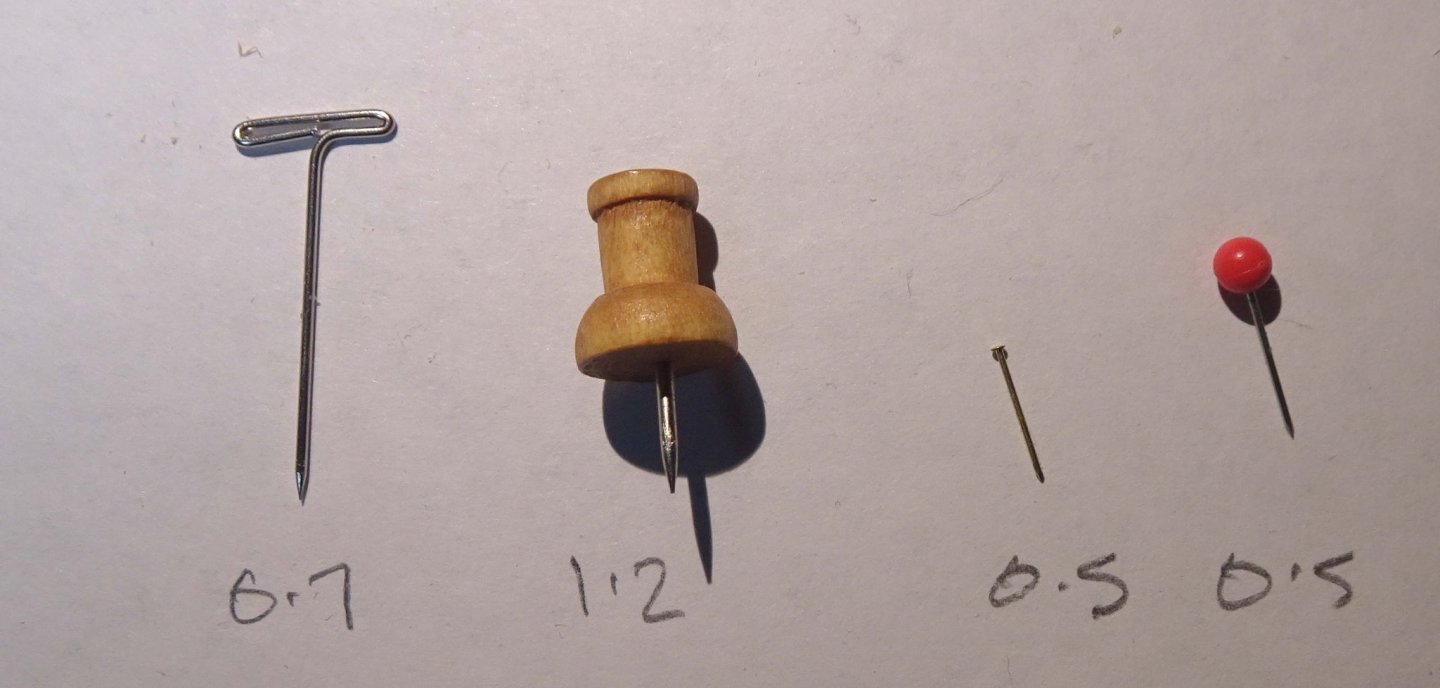
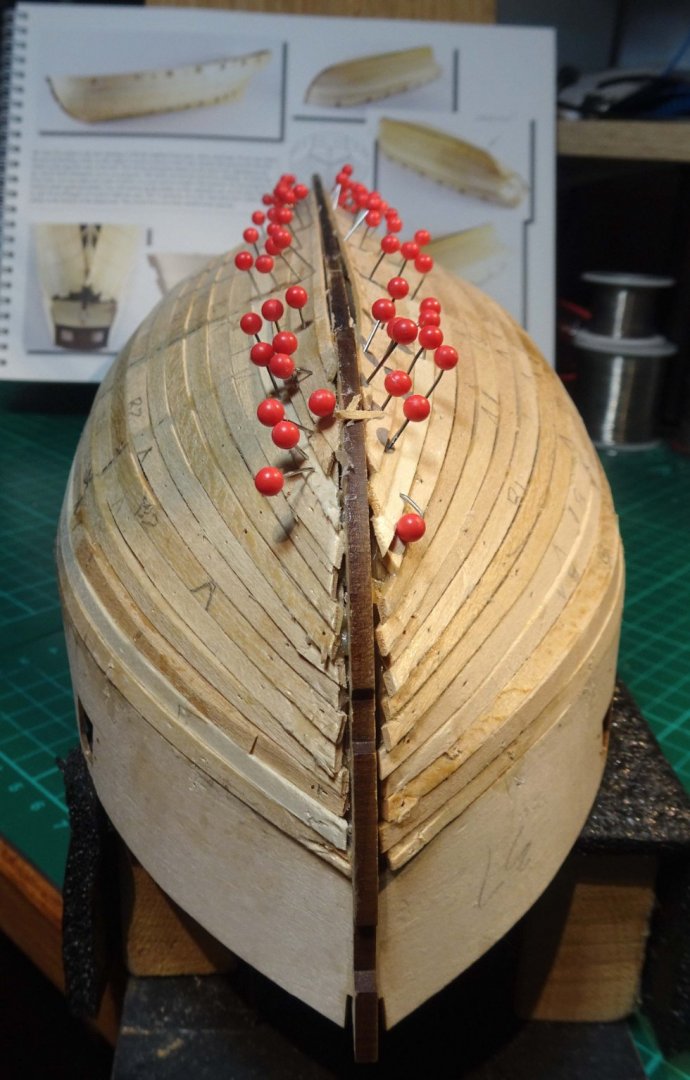
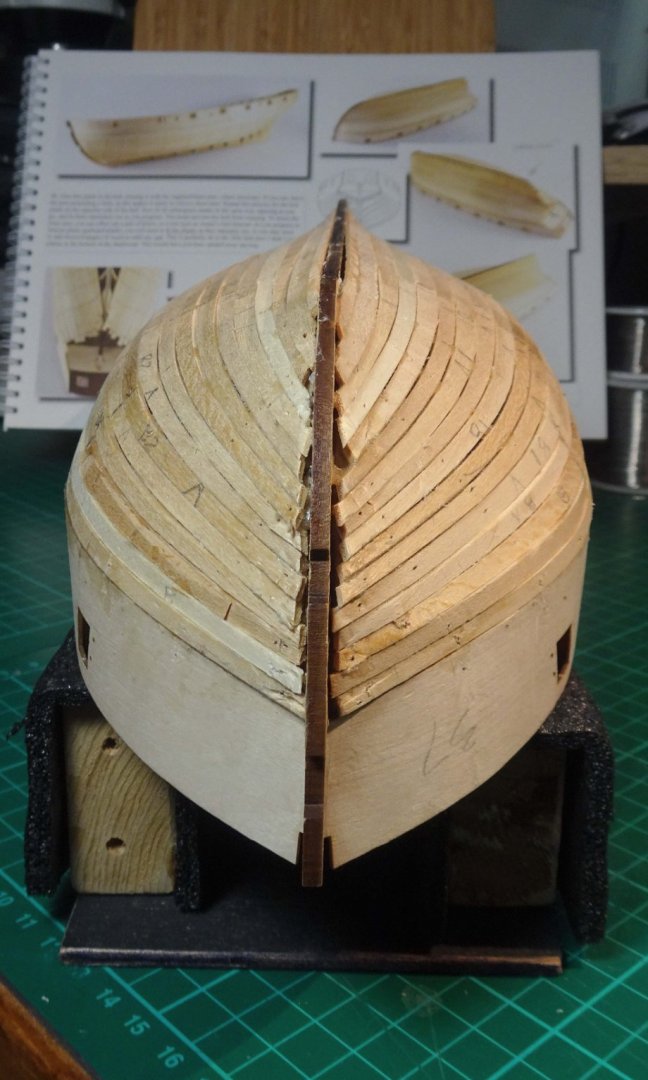
Hi all, Here's my weekly (or so) update on Flirt. Planking the hull with the first planking has been the main activity. But let's get the important stuff on first. The below-decks door that had fallen out has been glued back in position. Schrodie, the ship's cat, would probably be the only one that knew it was back but it's the thought that counts. Below, the door stuck back where it should be. A bit excess glue showing, but the door is ajar enough for the cat to wander about. Below. I've been using a 6" rule to cut planks etc but never felt comfortable with it for two reasons ... 1) my finger tips were dangerously close to the blade, and ... 2) the narrow width of the ruler caused it to tend to coggle over under pressure. Adding a scrap of wood on the opposite side stopped the coggling but reduced the clamping load on the part being cut. So I dug out my old 12" rule which has a nice finger-safe groove in the middle. Also, it's greater width reduces the coggling effect. So far it seems to be doing the trick. So, on with the hull planking. Below is my 'bending jig' - 1/4" ply. Ideally it needs to be a couple of inches longer since the Flirt planks hang over the ends, but it's good enough for now. And here is how I make the bends permanent. I use the same method for as for putting a sharp crease in trousers ie hot iron plus a wetted hankerchief. I'm still puzzling as to how to simply make bends in two planes, which is sometimes desirable on hulls. Below. I've also been looking at how the planks are pinned to the hulls. A comparison below shows some pin diameters (in mm....my schooling was at a time when the UK was switching from Imperial to Metric so I tend to switch between the two systems without thinking). 1.2mm is way too fat and splits wood too easily; 0.7mm is also just too fat; 0.5mm nails (as supplied with Flirt) are a perfect diameter but really need to be positioned with needle pliers, to be pushed in or tapped with a hammer. So I've ended up using 'Map Tack Push Pins 1/8"' (from Amazon), and am quite happy with them. The Map Pins can take a fair bit of hammering, and are also 'grippable' enough to be finger pushed into the (in this case) 1.5mm Lime planks. Below. Map Pins finger pushed into the plank and the plank glued onto the hull. Next is to tap the pins with a hammer into the bulkheads. The Map Pins can be easily reused by extracting with needle pliers (or if the red head comes off then gingerly use side cutters on the 2mm wire protrusion). Another benefit of the Map Pins is that if dropped on the floor they can't be missed! Anyway, back to the chase. The final hull planks held in position with the poppy field of pins. And below, two views of the hull before any cleaning up. It's a bit of an ugly duckling at the moment but hopefully it should brush up good enough. Bow view. Stern view. I now need to read up on what planks and where, there needs to be feathering before adding the second planking layer to the stern area and the hull. I feel I haven't progressed much since the last update but hull planking does take time. Fifie has a smaller hull so didn't seem to take too long. Ah well that's it for now. Hope everyone is fine, and that the 'vaccine competition' provides a worthy winner and soon. Regards, Richard


-
seeing a bit of the planking broadcasting through the paint, as I think it adds character and realism to the finish. Absolutely. I think seeing the 'joins' is all part of modelling the real life item. I'm fairly sure that straight after manufacture trawlers would not have smooth surfaces, and especially so after a few trips out to sea. And then there is the ongoing maintenance...painting, patching up damage, scrapes etc that happen in the course of the life of a trawler. Your Lady Isabella is looking great and I imagine you are having a fascinating, enjoyable time building her. Regards, Richard
- 222 replies
-
- 4
-

-
- First Build
- Lady Isabella
- (and 2 more)
-
Complete the machine plan
Rik Thistle replied to Bitao's topic in Modeling tools and Workshop Equipment
hyw, Thank you for answering all my questions. My only comment would be that it is usually best to have the emergency-off switch on the front side of the machine so that you (or a colleague) don't have to lean over anything....my left thumb can tell you why that is preferred 😉 But what an impressive piece of design and manufacture. Well done. Regards, Richard -
Thanks for the kind words Tom. As a noobie I was at first a bit apprehensive about putting up 'build logs' ...but once I got in to the swing of it I found it quite useful ie each post marks the end of a week or so of work, it gives me an opportunity to ask related questions and it provides me with a permanent record of what I did and that I can look back on in years to come. As you've possibly noticed, Flirt has self started her build (whilst I was busy looking for a non-ship project) so I have to continue work on her...which is no hardship. And probably good timing, what with the latest rounds of Lockdown. Take care, Richard
-
Complete the machine plan
Rik Thistle replied to Bitao's topic in Modeling tools and Workshop Equipment
Well, that just looks/is awesome! Ref: the last pic - All that capability mounted on a 2 foot (?) square table. What do you think the lathe's maximum acceptable depth of cut/feed rate -v- material is? Congratulations on constructing a stunning multi-function workshop in such a small volume. Best regards, Richard PS: Just out of curiosity, where is the 'emergency off' button? -
Hi Colin, Must've been very satisfying to have picked it up and completed it after all those years! You've hit the nail on the head. Dallas had been nagging me for 25yrs to finish her ...every time I went in to the attic I could feel her looking at me. On top of that I have a friend who bought a similar kit at the same time and we had planned to see the kits through to completion. My friend finished his about 15yrs after first buying the kit giving him bragging rights. So a number of things pushed me towards completing Dallas...the constant nagging feeling, letting my friend down and the pandemic lockdown. On top of all that I've always enjoyed 'making things' and learning new skills. And I think that is something I have in common with the members here, if not their skills and experience. This is a multi-faceted hobby ie making things, learning skills, working with materials, learning the history and culture of the vessel (a very big aspect as I'm beginning to realise), sharing thoughts/info with folks on here, research, setting your own pace, visiting museums and ships, reading books on the subject...OK, a looong list of pluses. Negatives?...well there is a strong impulse to buy new tools and machines, stock up on kits (for a rainy day)...and basically just spend money on things you want...actually, these are probably all pluses! That's enough rambling from me. Here's a good thread for future reference on kits to buy as you progress... https://modelshipworld.com/topic/18657-new-to-ship-modelling-but-what-do-you-build-first/ And/or just wander this website looking for projects that catch your eye. Your Revenue Cutter will give you many hours of concentration and enjoyment. Looking forward to the Build! Regards, Richard
-
Welcome Colin. Like you, I started an Artesania Latina kit (Dallas Cutter) 25 yrs ago and got as far as making the hull then gave up. Restarted her this summer and also joined this friendly and very helpful website...and am now pretty much addicted to the hobby. Looking forward to your SMSS Ranger build log. Regards, Richard
-
The level of research and detail is impressive. It certainly is. And very enjoyable to read and watch the progess plus the little diversions that invariably turn in to something special. I kinda hopes BE never finishes his journey with Muirneag 🙂 Richard
- 261 replies
-
- 3
-
-
- muirneag
- vanguard models
- (and 2 more)
-
i use strips along the bottom and elswhere Ah, good idea....thanks. I hadn't spotted the strips being used prior to gluing. Noted. Yes, I intend to take my pins out after the glue has set. Thanks and regards, Richard
-
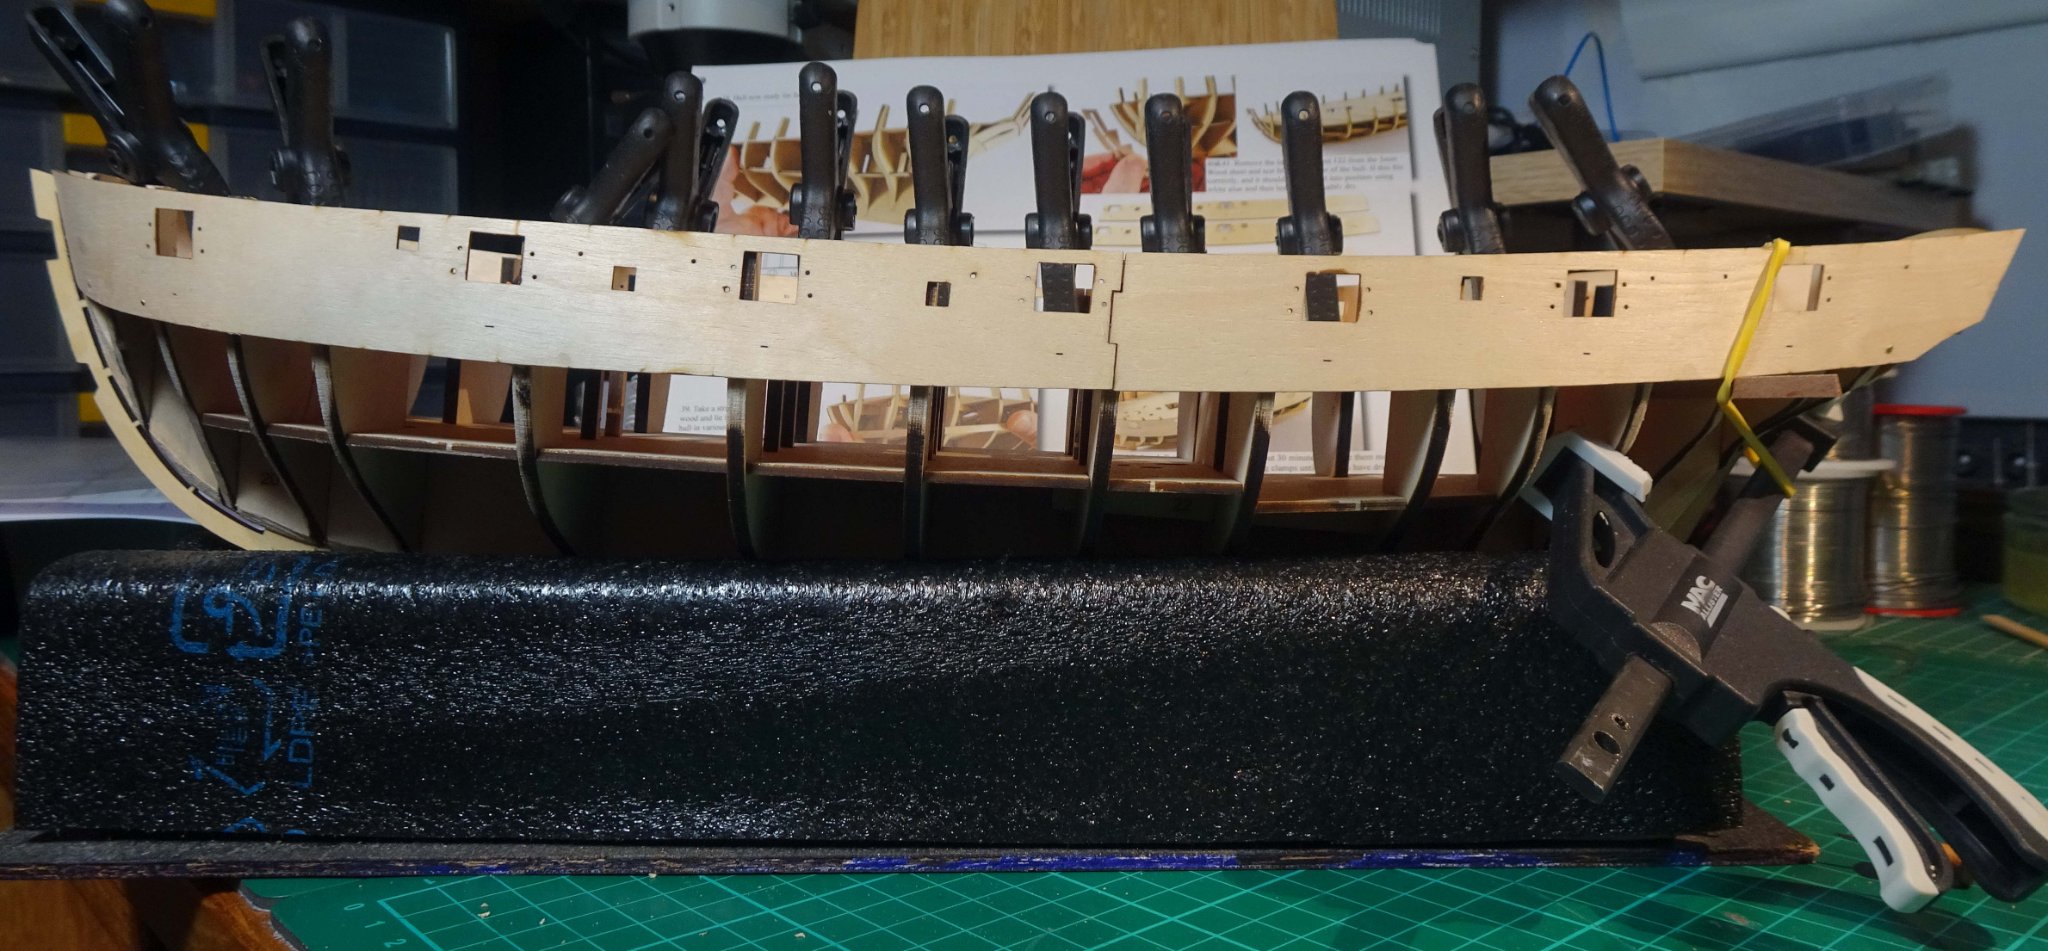
Hi Spyglass, Thanks for the info. My first planking layer will be 1.5mm x 5 mm limewood, so that thickness gives me plenty scope for sanding the planks to the same level as the bulwarks. I used PVA glue. I did pin the bottom edges, but would ideally like to aim for a solution where pins mostly aren't necessary. And that sure is a lot of rubber bands ;-) But maybe that's what I need to plan for before gluing. As I gain more experience I should be better able to look at a part to be glued and know what clamping is required beforehand to get the desired result. I did realise afterwards that a rod pushed though facing gunports would give me a couple of sturdy attachment points for rubber bands to hook on to and therefore put loads (in the necessary directions) onto the glued part. So it is a case of me building up a database in my head of 'best practice' clamping methods. Thanks again, Richard
-
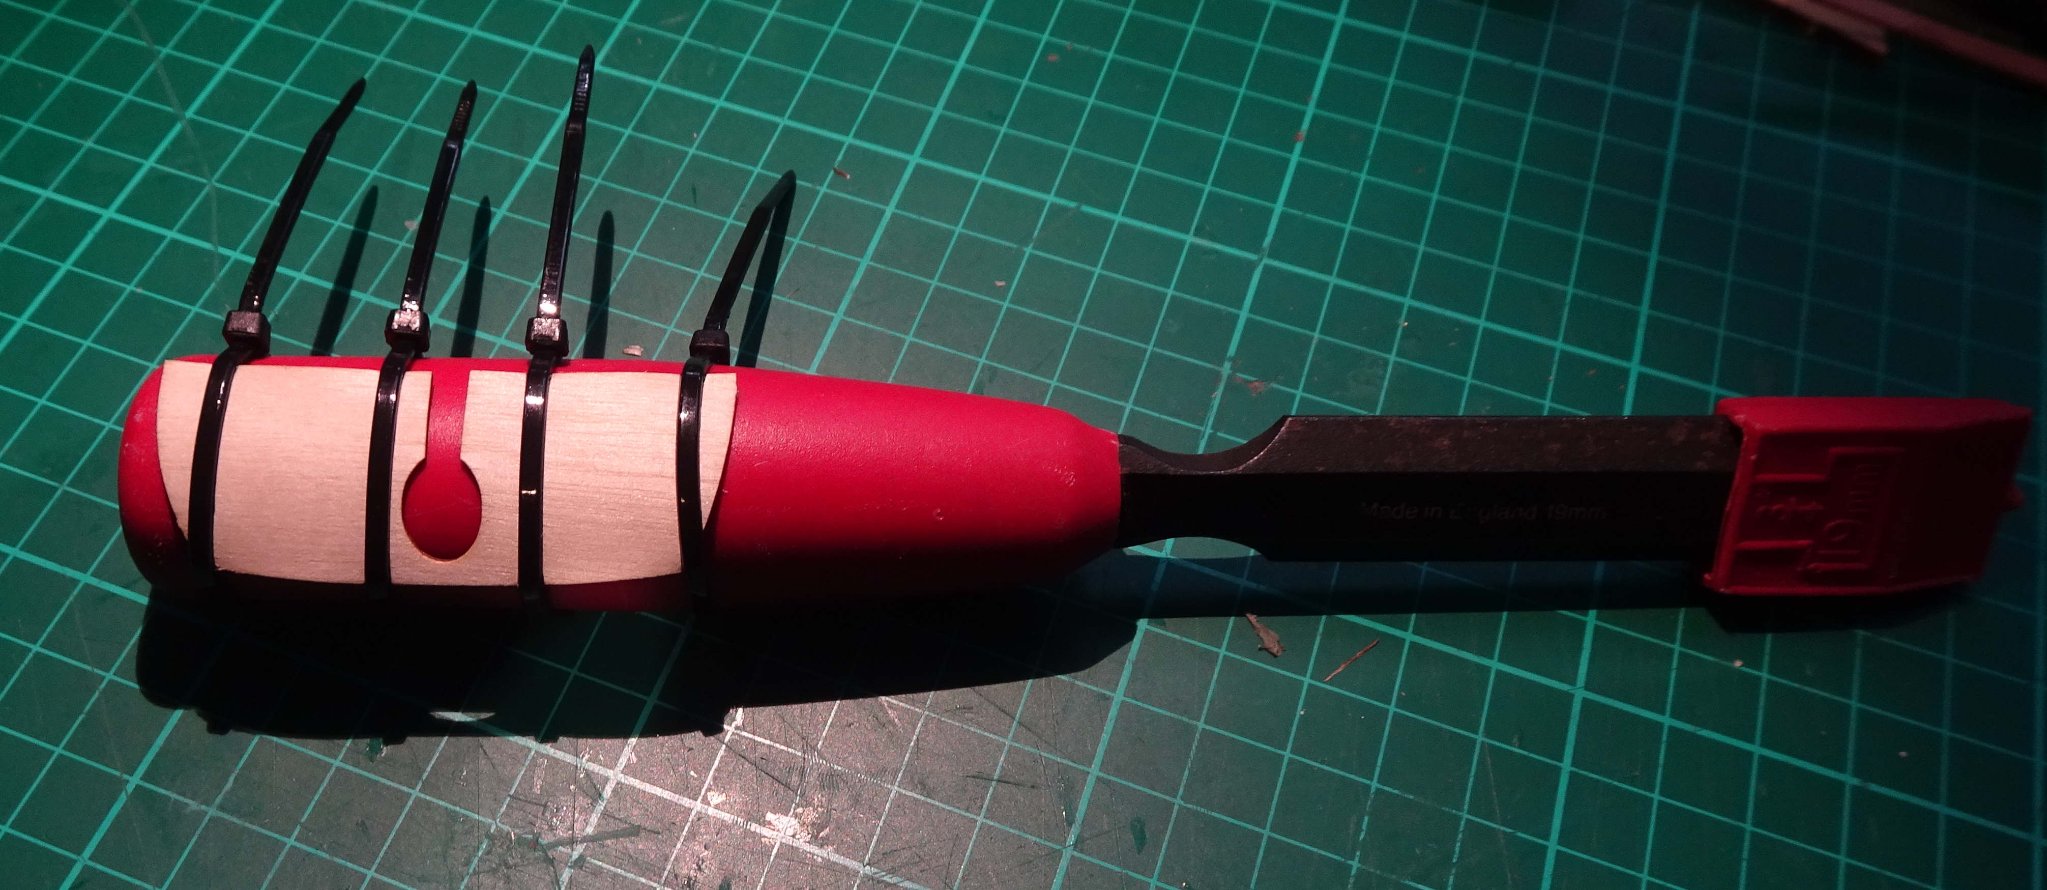
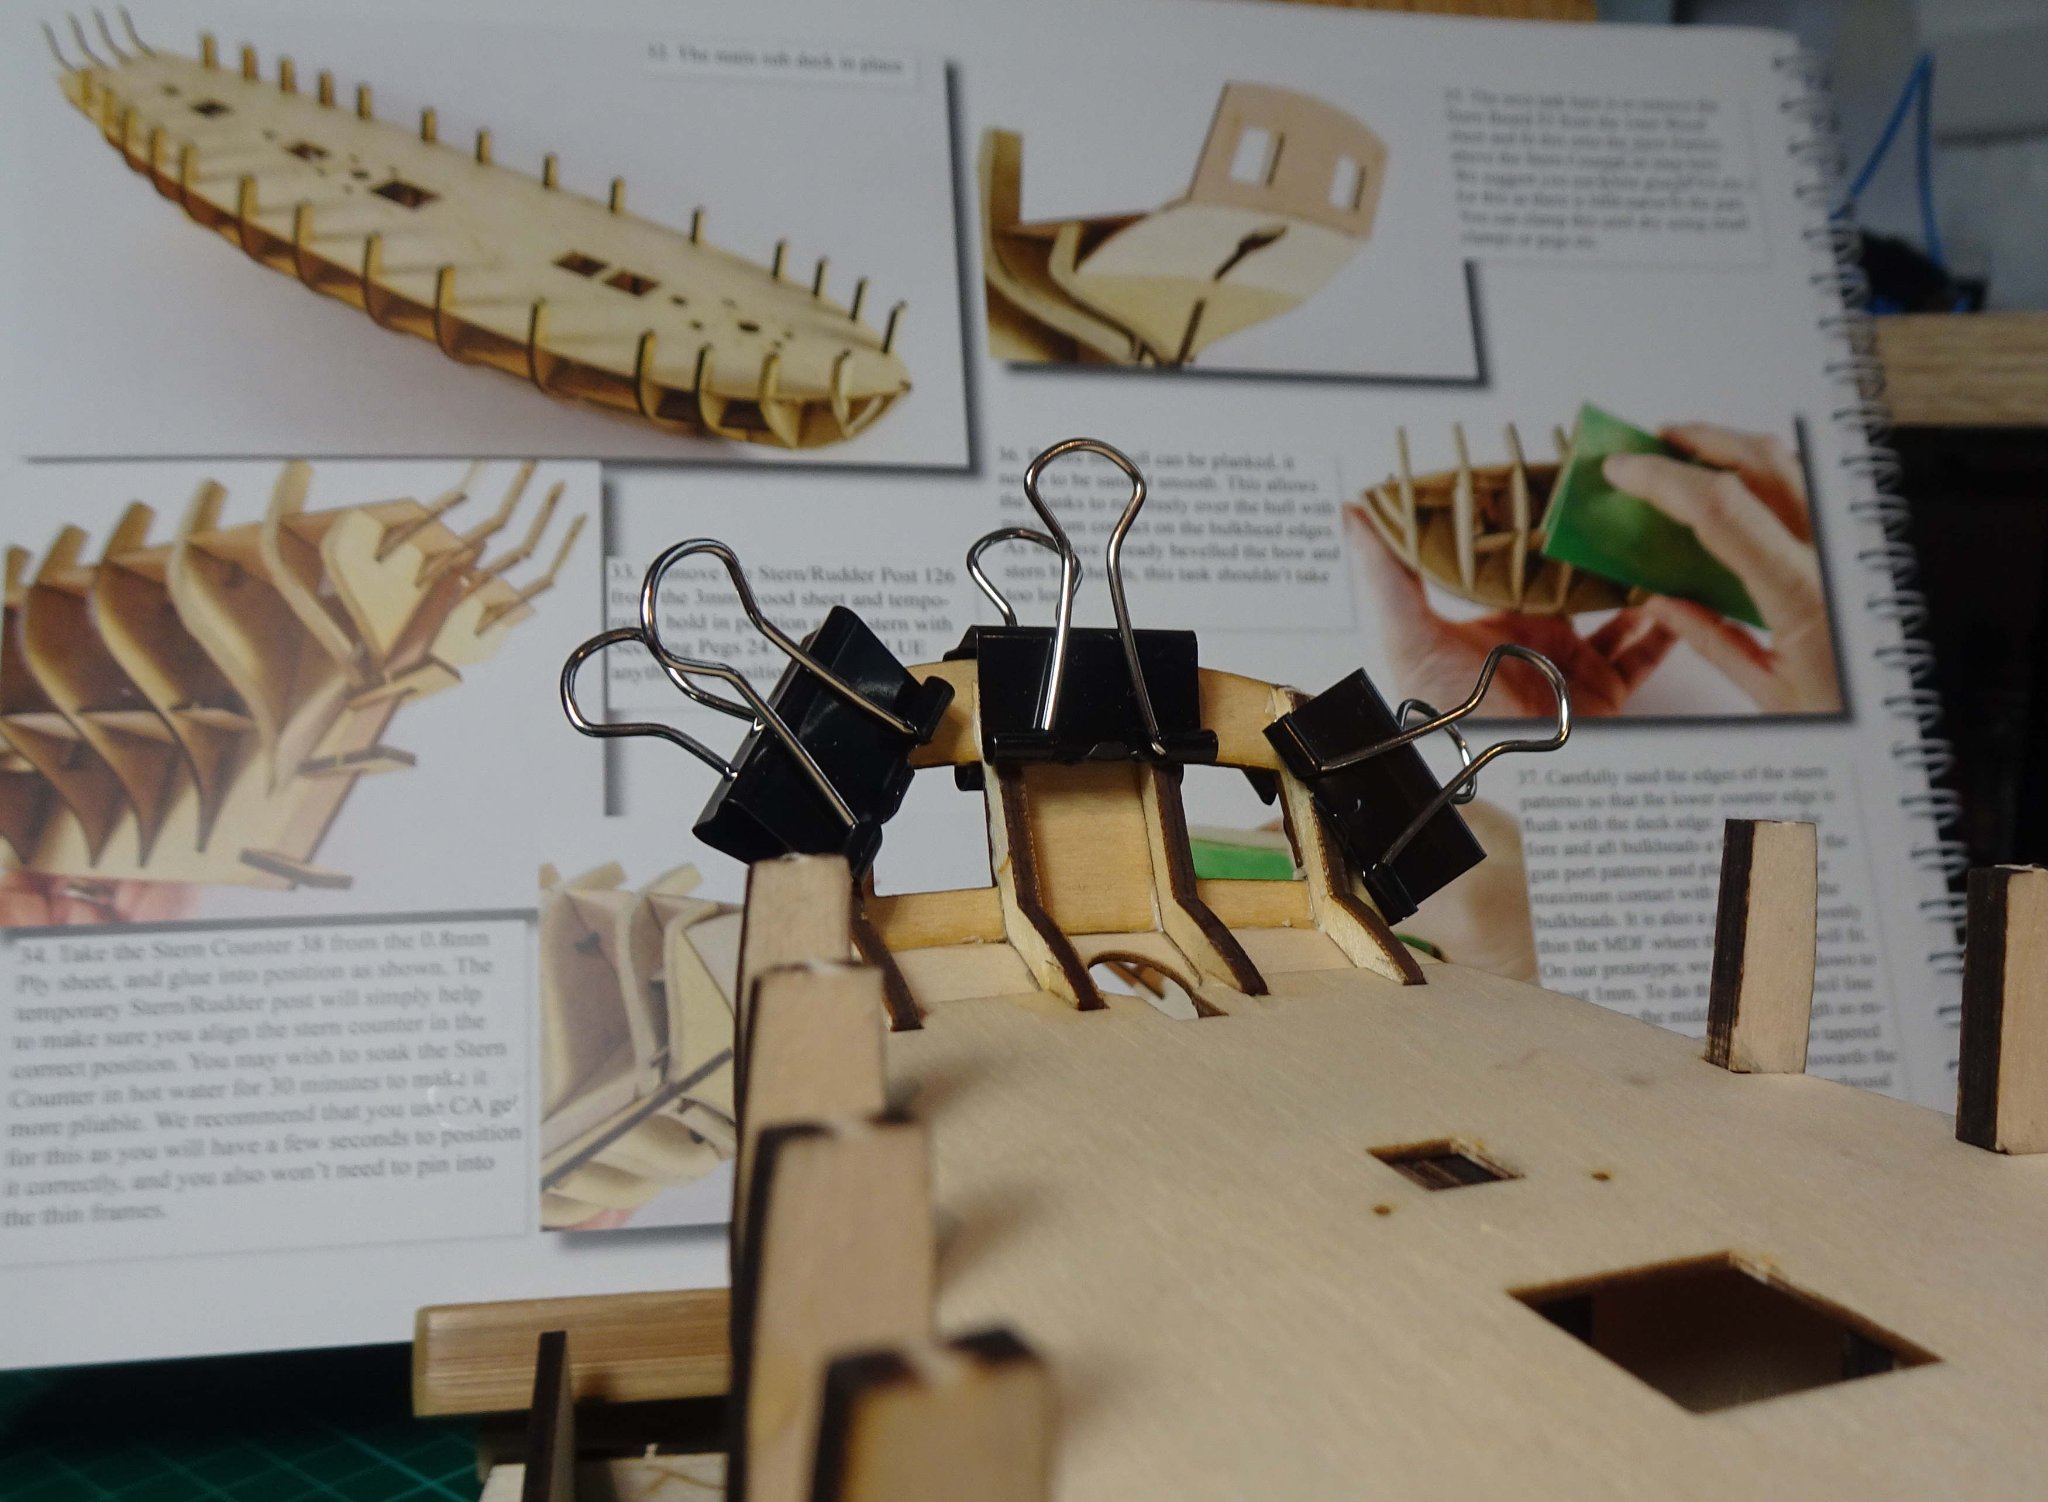
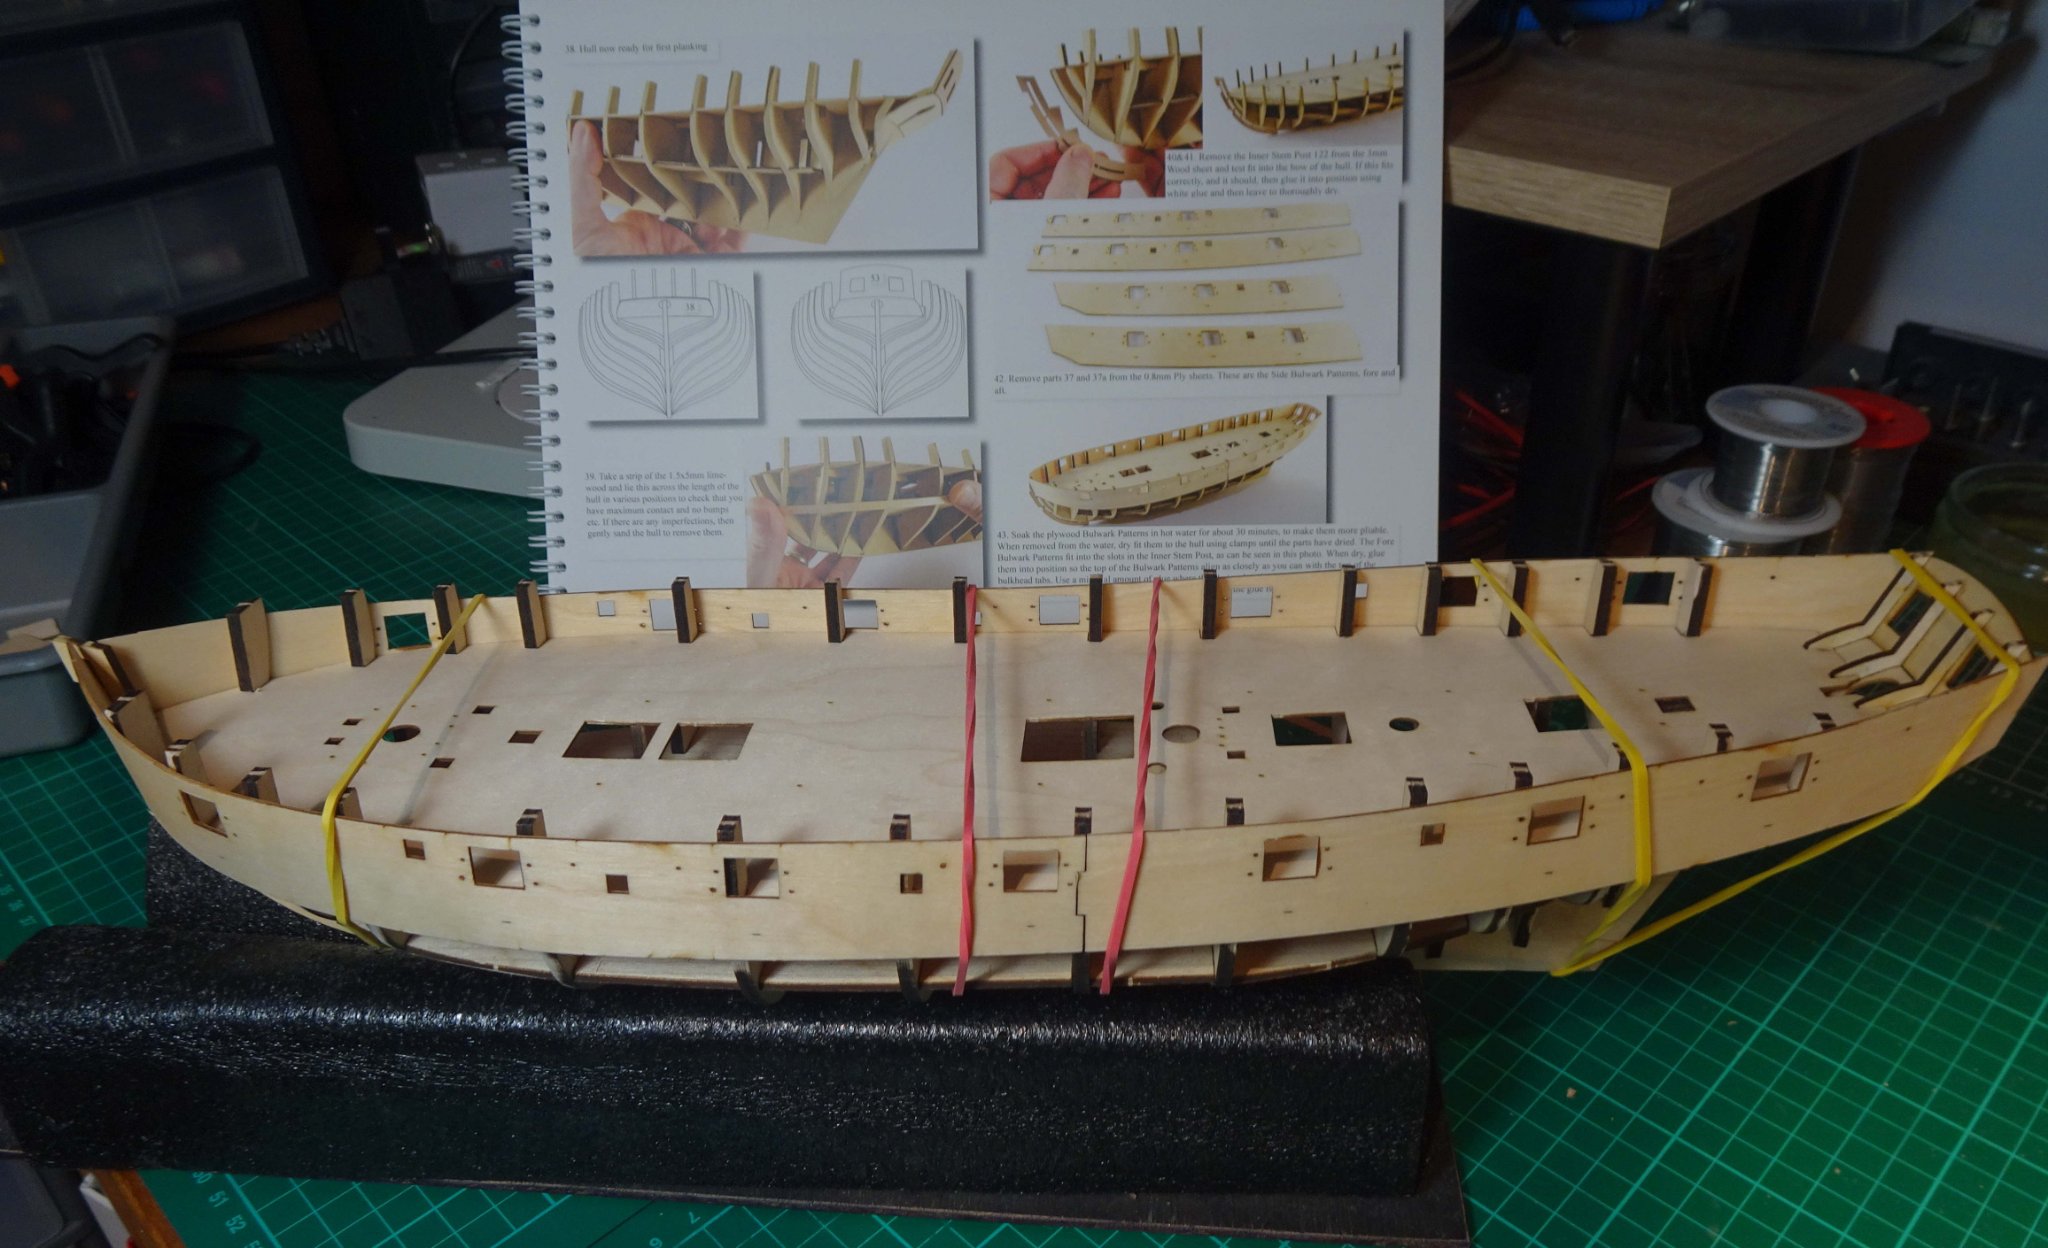
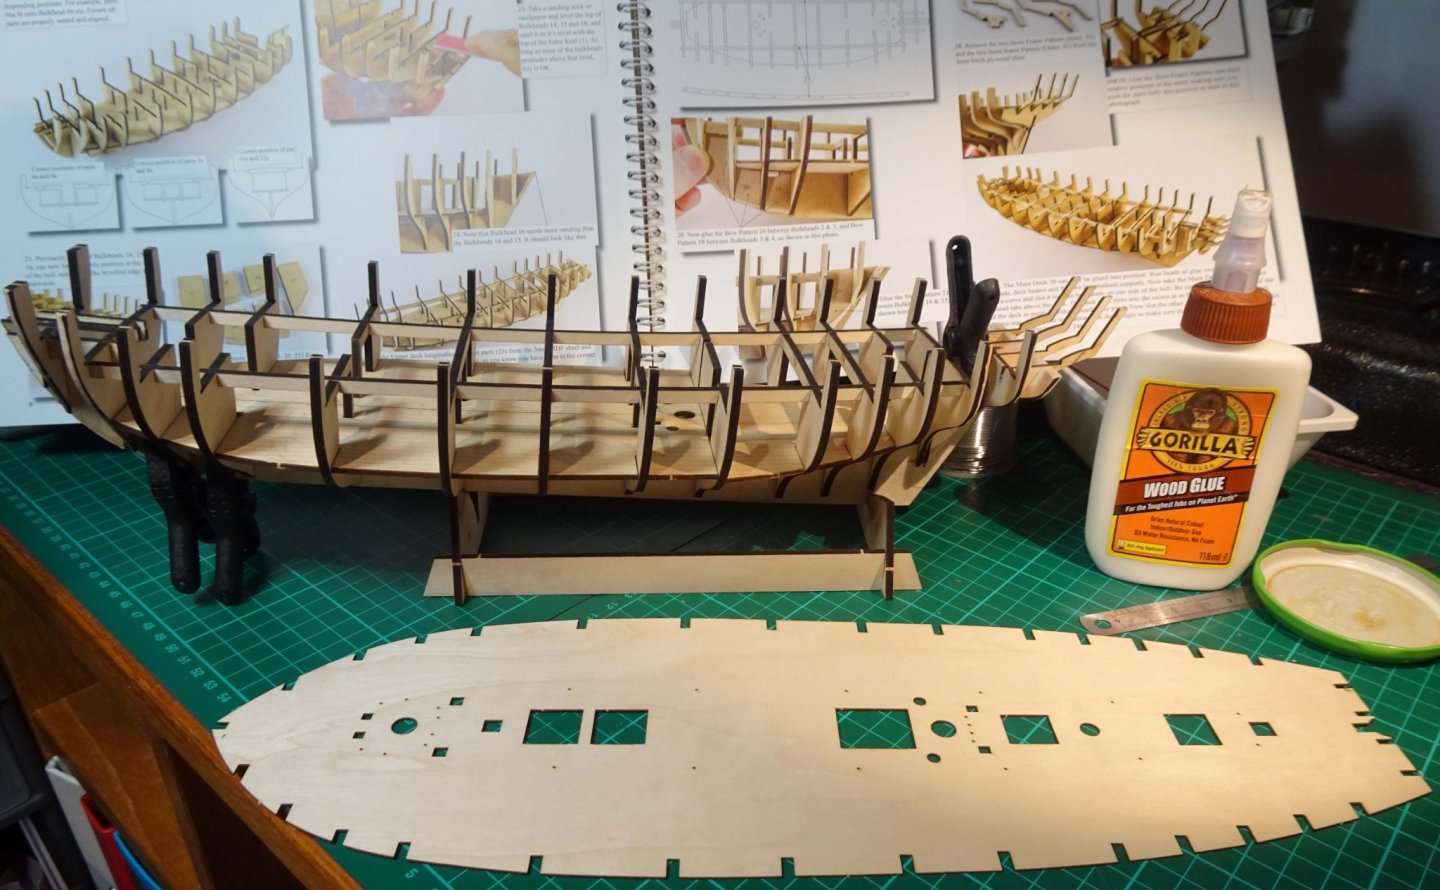
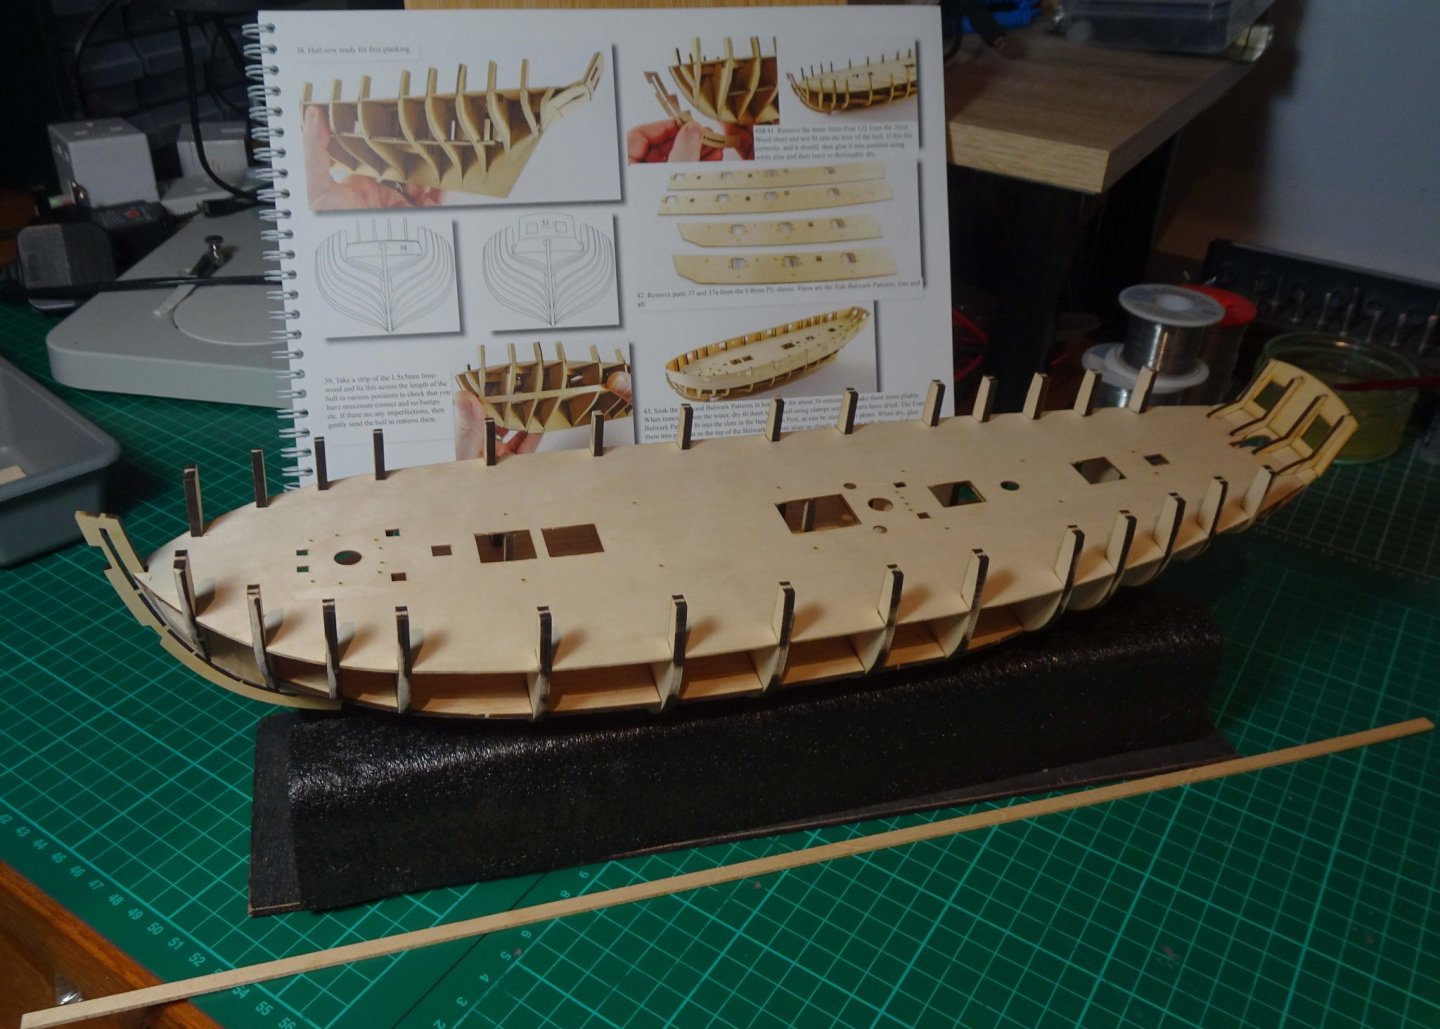
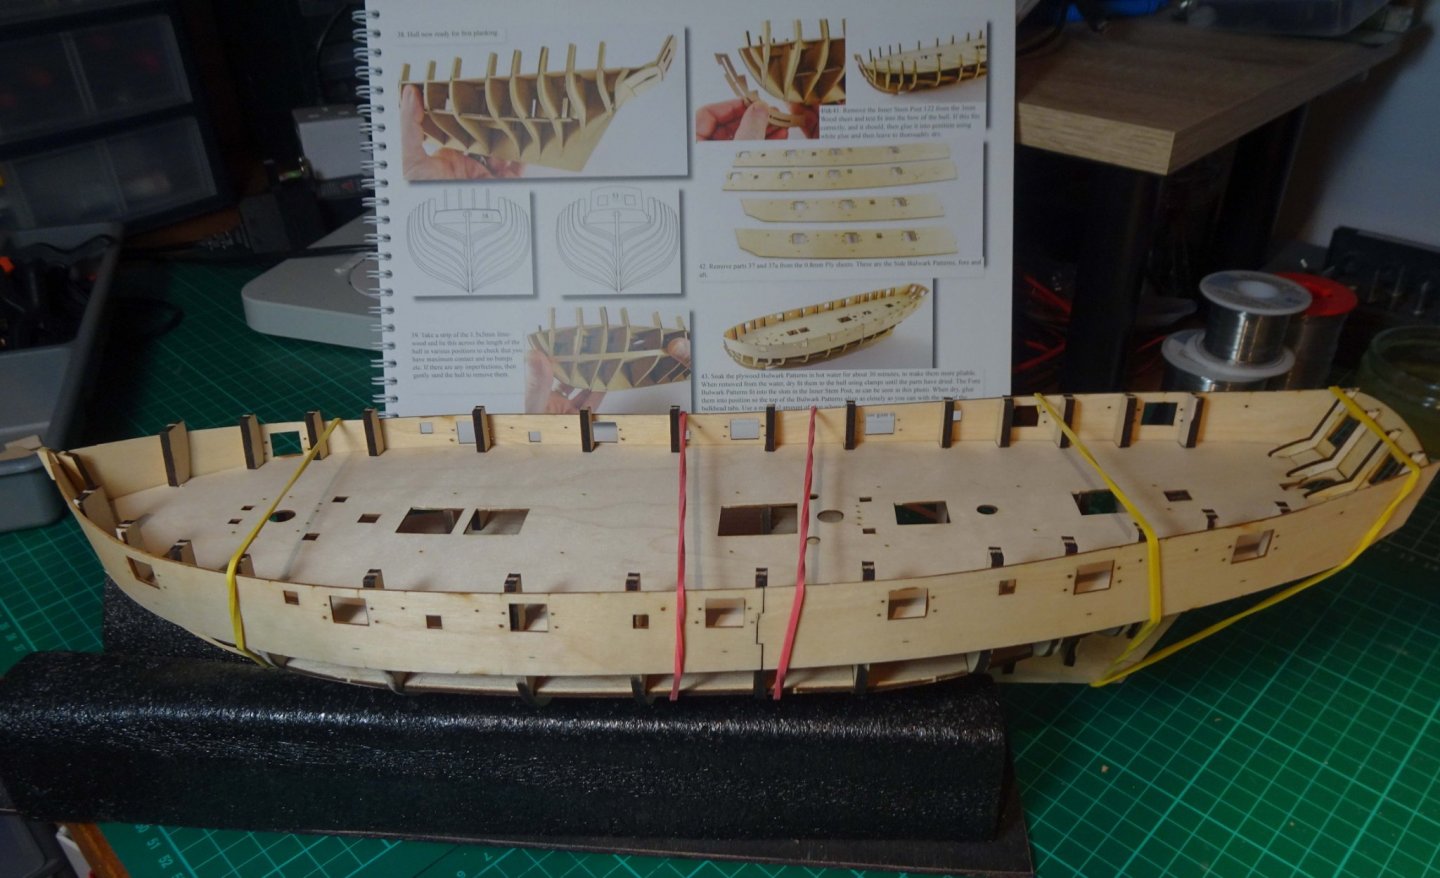
Hi all, HMS Flirt continues her construction, in spite of some minor distractions. Below, The lower decks have been glued in position and weighed down overnight. Everything seemed to fit fine. Bow patterns etc glued in to position, and now preparing to fit the Deck Beams. Upper deck longitudinal supports, Stern Frame Parrerns etc all glued. One of the Bow Patterns had slipped down a few mm during clamping but I don't think it will affect any later fittings. And Main Sub Deck ready for fitting. The Main Sub Deck, although accurately made, does take a fair bit of manoeuvring to get it to slot into all the bulkheads etc. As the instructions say, curving the deck longitudinally helps squeeze it into position. Even after I was convinced the deck was snugly in position I twice went round each bulkhead slot location pressing firmly down on the deck and on the secound round heard a couple of clicks as the deck found an even snugger fit....to the naked eye all had looked fine but there was obviously the odd 0.5mm here and there to still be taken up. And just to make sure the deck didn't try to free itself the heavy squad was called in for overnight duty. The (slightly curved) Stern Counter was soaked in hot water and clamped to a chisel handle for an hour or so. I really need to sit down and figure out better clamping methods - appropriate clamping is a subject that keeps raising it's head with me. 4x tie wraps isn't ideal but did the job. Bulldog clips clamping the stern Board. About to check the beveling of the parts that the planks etc will run over. Correct beveling is still an area of 'great mystery' to me. The plank showed good contact in all the places it should up and down the depth of the bulkheads, but the Bulwarks...ah, that's a different story. Bulwarks soaked in hot water and then clamped (rubber bands) overnight to achieve the desired curvature before gluing. It's fairly easy to get the curvature correct in one plane, but as the bulwark approaches the bow there are at least two directions of curvature. I still haven't figured out how to clamp in two planes. Bulwarks now glued in position. There are some small gaps between the bulwarks' lower edges and the bulkheads, near the bow and to some extent near the stern. The gaps are maybe approaching 1mm (worst case) - I've driven in some nails to push the bulwarks towards the bulkheads but I still see some 0.25mm - 0.5mm gaps. Probably nothing I can't fudge a solution to, but the gaps are the result of less than perfect beveling and not being aware of appropriate clamping methods....two areas I need to brush up on. OK, well the planking is next 🙂 My study, which not so long ago was a radio shack/electronics learning area has now been usurped by a shipyard. And boy, do shipyard tools, materials etc quickly spread to all corners of the room in a matter of hours. Fortunately, I have workshop training so at close of play the last thing done is a full tidy up. I'm not a fan of the 'clean desk' policy that some companies force on their employees but am in full agreement with tidying up the workshop at the end of the day....it pays dividends. All for now, Richard PS: There is a door to be fitted below decks...it was...but fell out... I need to figure a way to glue it back in position before planking commences... that is tomorrow's first challenge.


-
non-ship review 1:24 Istanbul diorama - OcCre
Rik Thistle replied to James H's topic in Non-ship kit reviews
James, I've just received the Istanbul Diorama and the associated Tram from Cornwall Models. I was swithering between this package, Stephenson's Rocket and a Stagecoach but your reviews swung it for me. They will go in the queue until I finish HMS Flirt, which is my 3rd ship in a row....I feel that I need a temporary change from ships. Having said that, I am very much enjoying HMS Flirt. It's good that you review these 'left field' products - they should present some new challenges for me and a chance to expand on my 'modelling' knowledge. I think one day (in the far, distant future), I'd like to scratch build but will very slowly work up to that. Regards, Richard -
Chris, I think clear drawings makes life so much easier for the customer. But maybe as a compromise you could use a single drawn line on the plan to represent a rope, but give the detail on the rope's end-fixings on a separate A4 sheet (or two) that includes all types of fixings (knots, seizing etc) used on that ship...each different type of fixing on the A4 sheet would have a unique number, and then the appropriate unique number would be indicated on the plan sheet at the end(s) of each rope. That would save you having to draw each fixing multiple times on numerous plan sheets. Kinda like a simplified version of welding symbols ... https://www.samsfabrications.co.uk/useful-tools/welding-symbols/ You could even keep a library of A4 fixing sheets on your website. Plus maybe some tips on seizing, knots etc. Just a thought, Richard
-
I've got the lower shrouds on now, but some life stuff is getting in the way and reducing my building time dramatically. I'll keep pecking away at it. Hi dkuehn, Your build is looking very good. I've just started a Flirt build and one of the reasons I bought it was to get more experience with ropes and rigging and ratlines which, when I look at the likes of the Victory builds on here, I just can't understand how folks have the patience and skill to manage all those ropes etc. Anyway, please keep the pics coming...they are great for picking up tips....and just good to look at. All the best, Richard
-
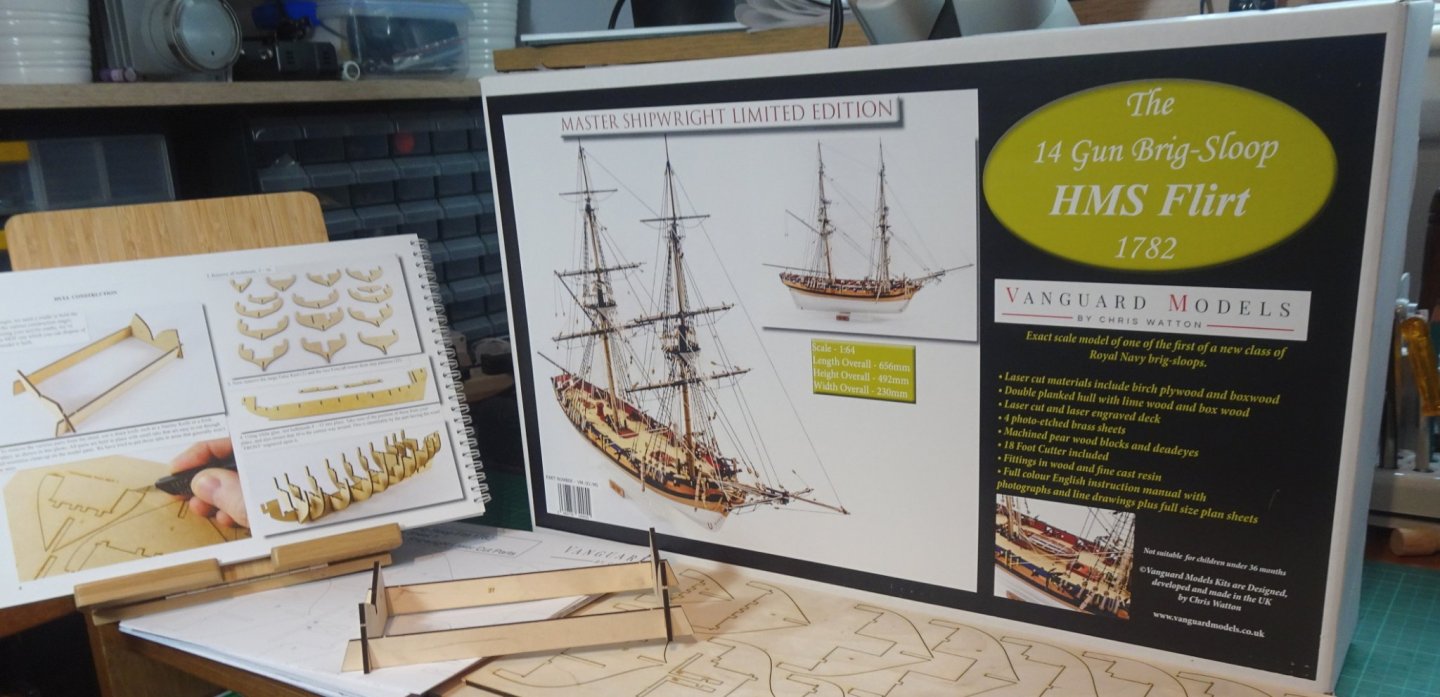
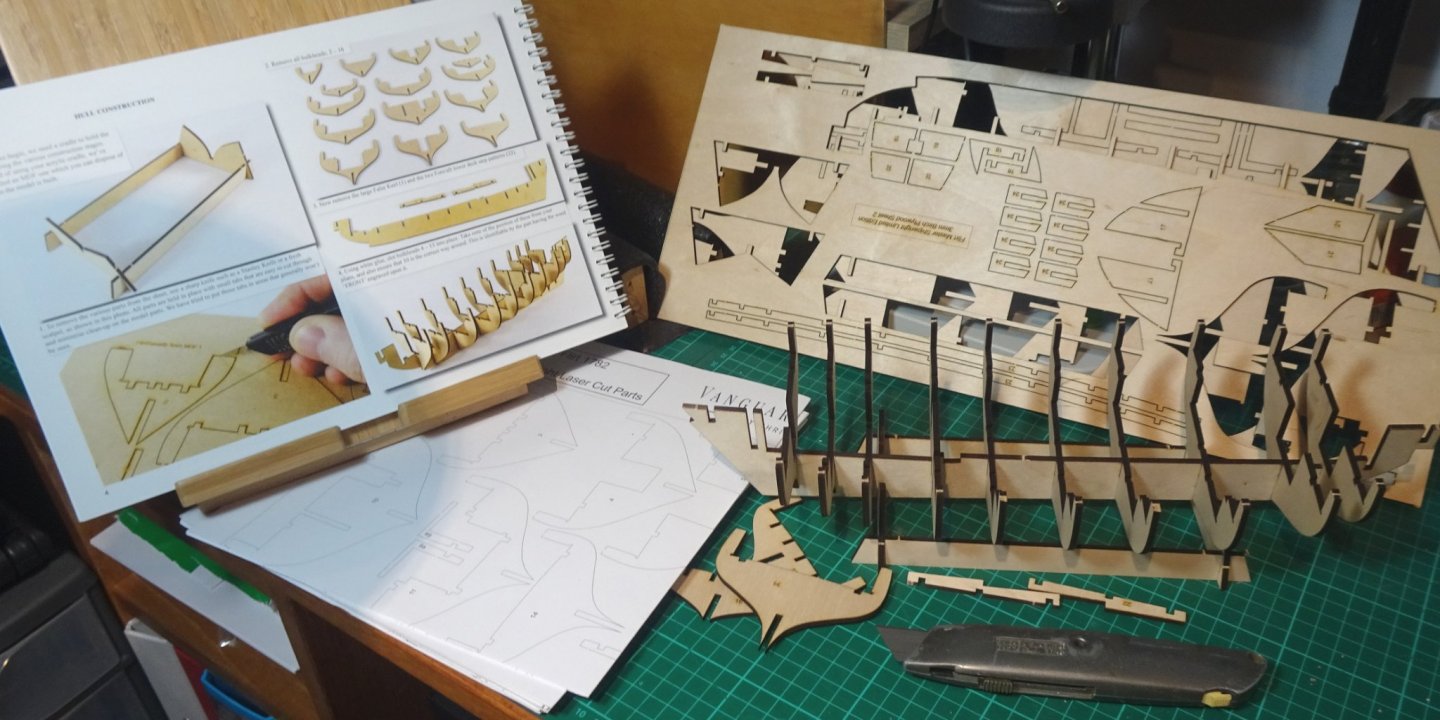
Hi all, After finishing VM's Lady Eleanor Fifie the other day I wanted some downtime. But by the next day the Flirt box had somehow found it's way into the shipyard, opened itself and started assembling parts...strange! Truthfully, I just couldn't stop myself. I haven't even read through the manual once or even looked at the plans. So that needs to be rectified over the next few days before further building continues (he says). I have read through the excellent Flirt builds on MSW and will take notes from them to supplement VM's instructions. Having built VM's Lady Eleanor I'm now a bit more familiar with the excellent layout style of the manual, the plans and how they relate to each other. I don't expect the Flirt instructions to be any different. Having experience of a company's way of conveying instructions shortens the learning curve. So here's a couple of pics to get started.... Below - manual, box cover and cradle. I think I actually prefer the wooden cradle to the plastic version. It's stronger and more rigid - I might try to paint/varnish the wooden version when all is done and use it as Flirt's permanent display cradle - we'll see. And some parts have already been dry fitted together.... The build should gather momentum once I've spent time reading the instructions and cribbing from MSW Flirt builds. And that's all for now, catch you soon, Richard
-
Thanks Ryland. I'm busy reading up on Flirt on the internet (not much there) but also reading through others' builds on MSW (a lot there). So once I have a bit more understanding of the Flirt build, and have had a little downtime, I'll commence my 'winter project'. All the best, Richard
- 49 replies
-
- 1
-
-
- Lady Eleanor
- Vanguard Models
- (and 1 more)
-
James, B.E., Thanks for the advice on the 'yard cleats' and that they are not used on this model. I'll keep them for a rainy day. Richard
-
Thanks VTHokiEE. I think the main inspiration for my small changes comes from Blue Ensign's extensive work on these type of vessels. I'm keenly watching where he takes his Zulu Muirneag 🙂 Richard
- 49 replies
-
- 2
-
-
- Lady Eleanor
- Vanguard Models
- (and 1 more)
-
B.E, Wonderful details. And I do agree that the stem plate looks much better unpainted...I think it's how the practically minded builders/fishermen would have installed it and maintained it. Yes, fishermen (and their families) worldwide can have a very hard life. I guess it was not easy to find other, safer employment ouside the areas they lived in. The same would apply to miners. Regards, Richard
- 261 replies
-
- 3
-
-
- muirneag
- vanguard models
- (and 2 more)
-
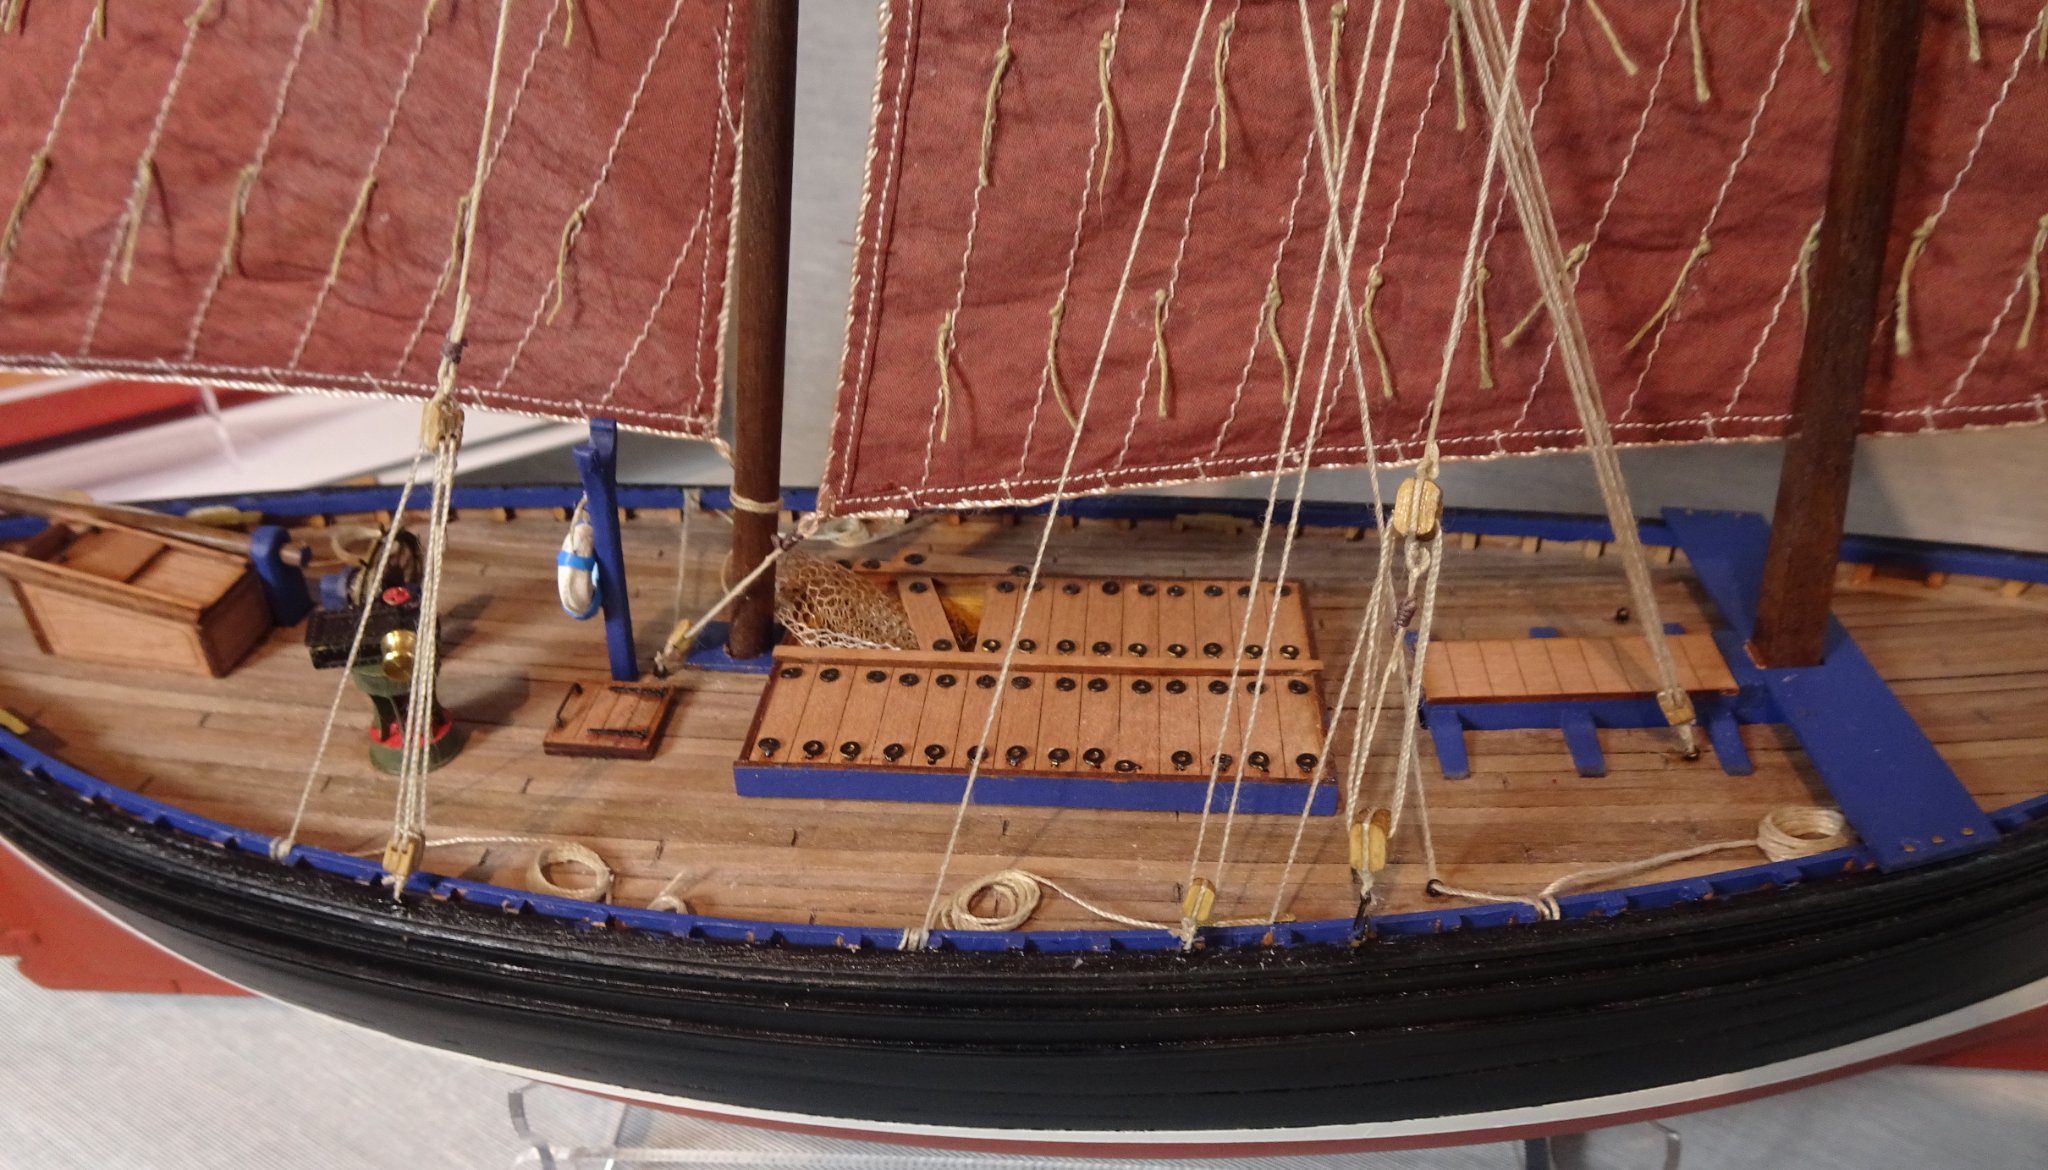
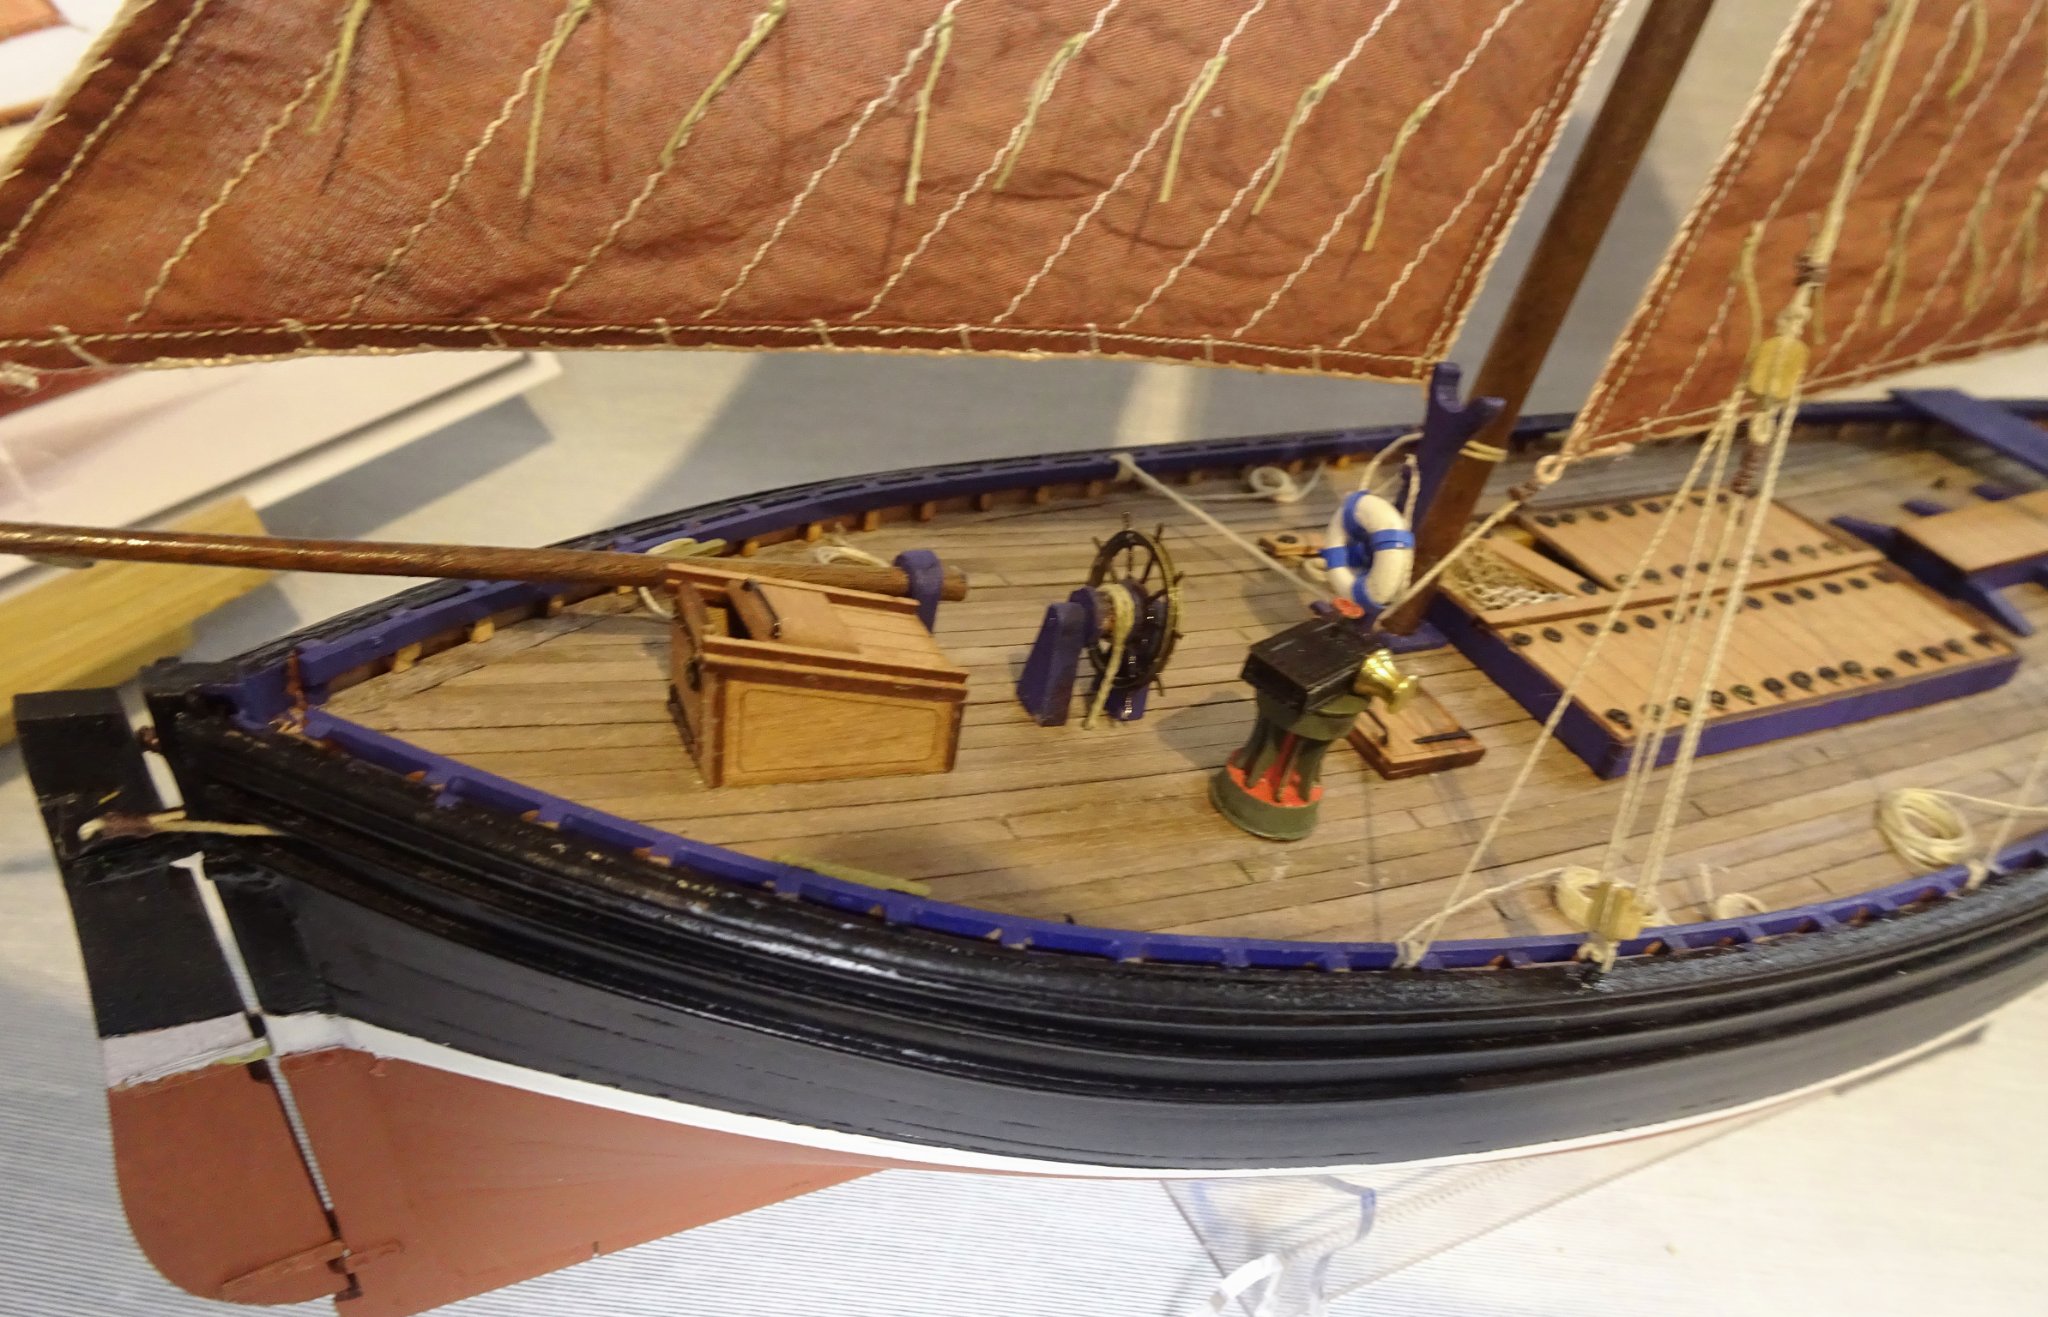
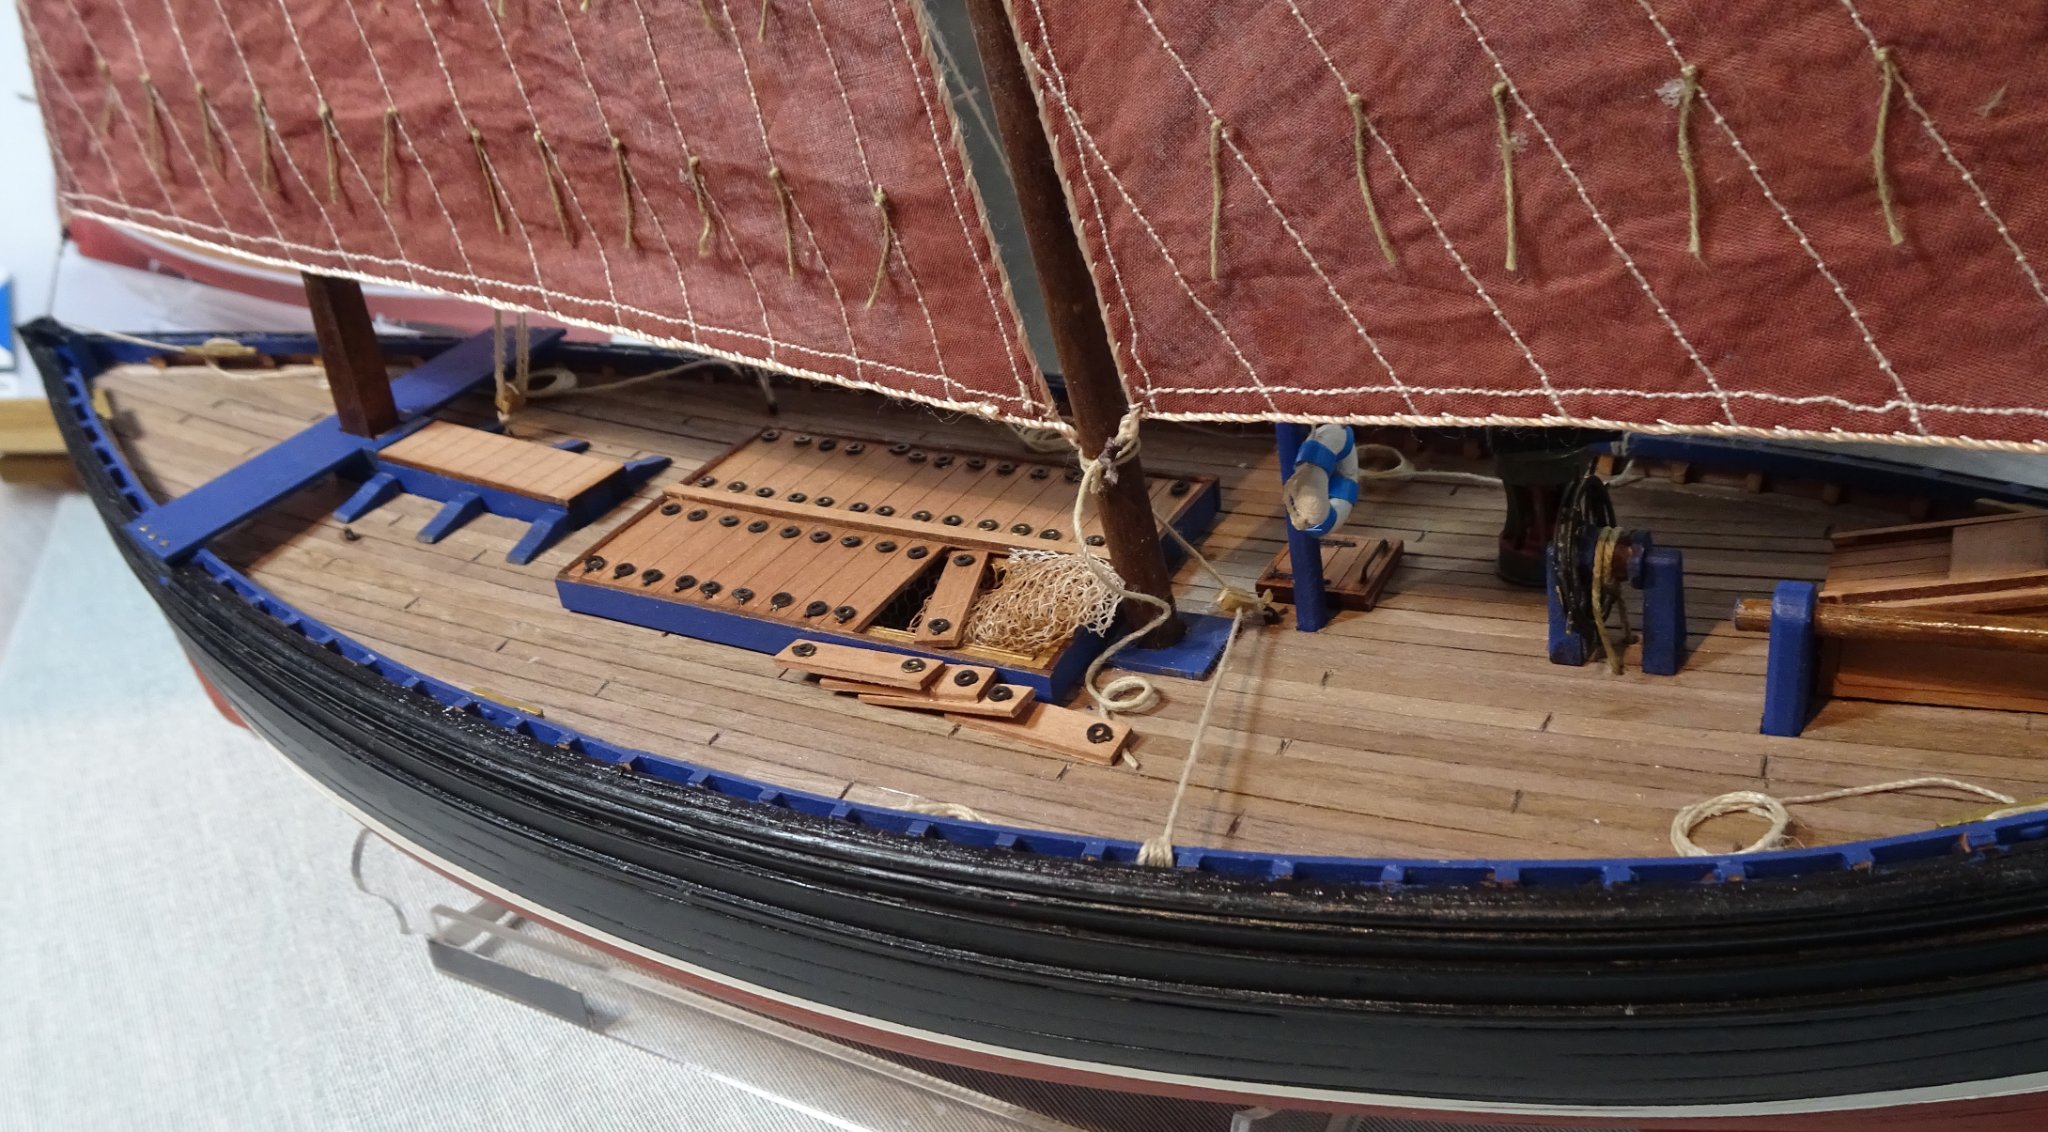
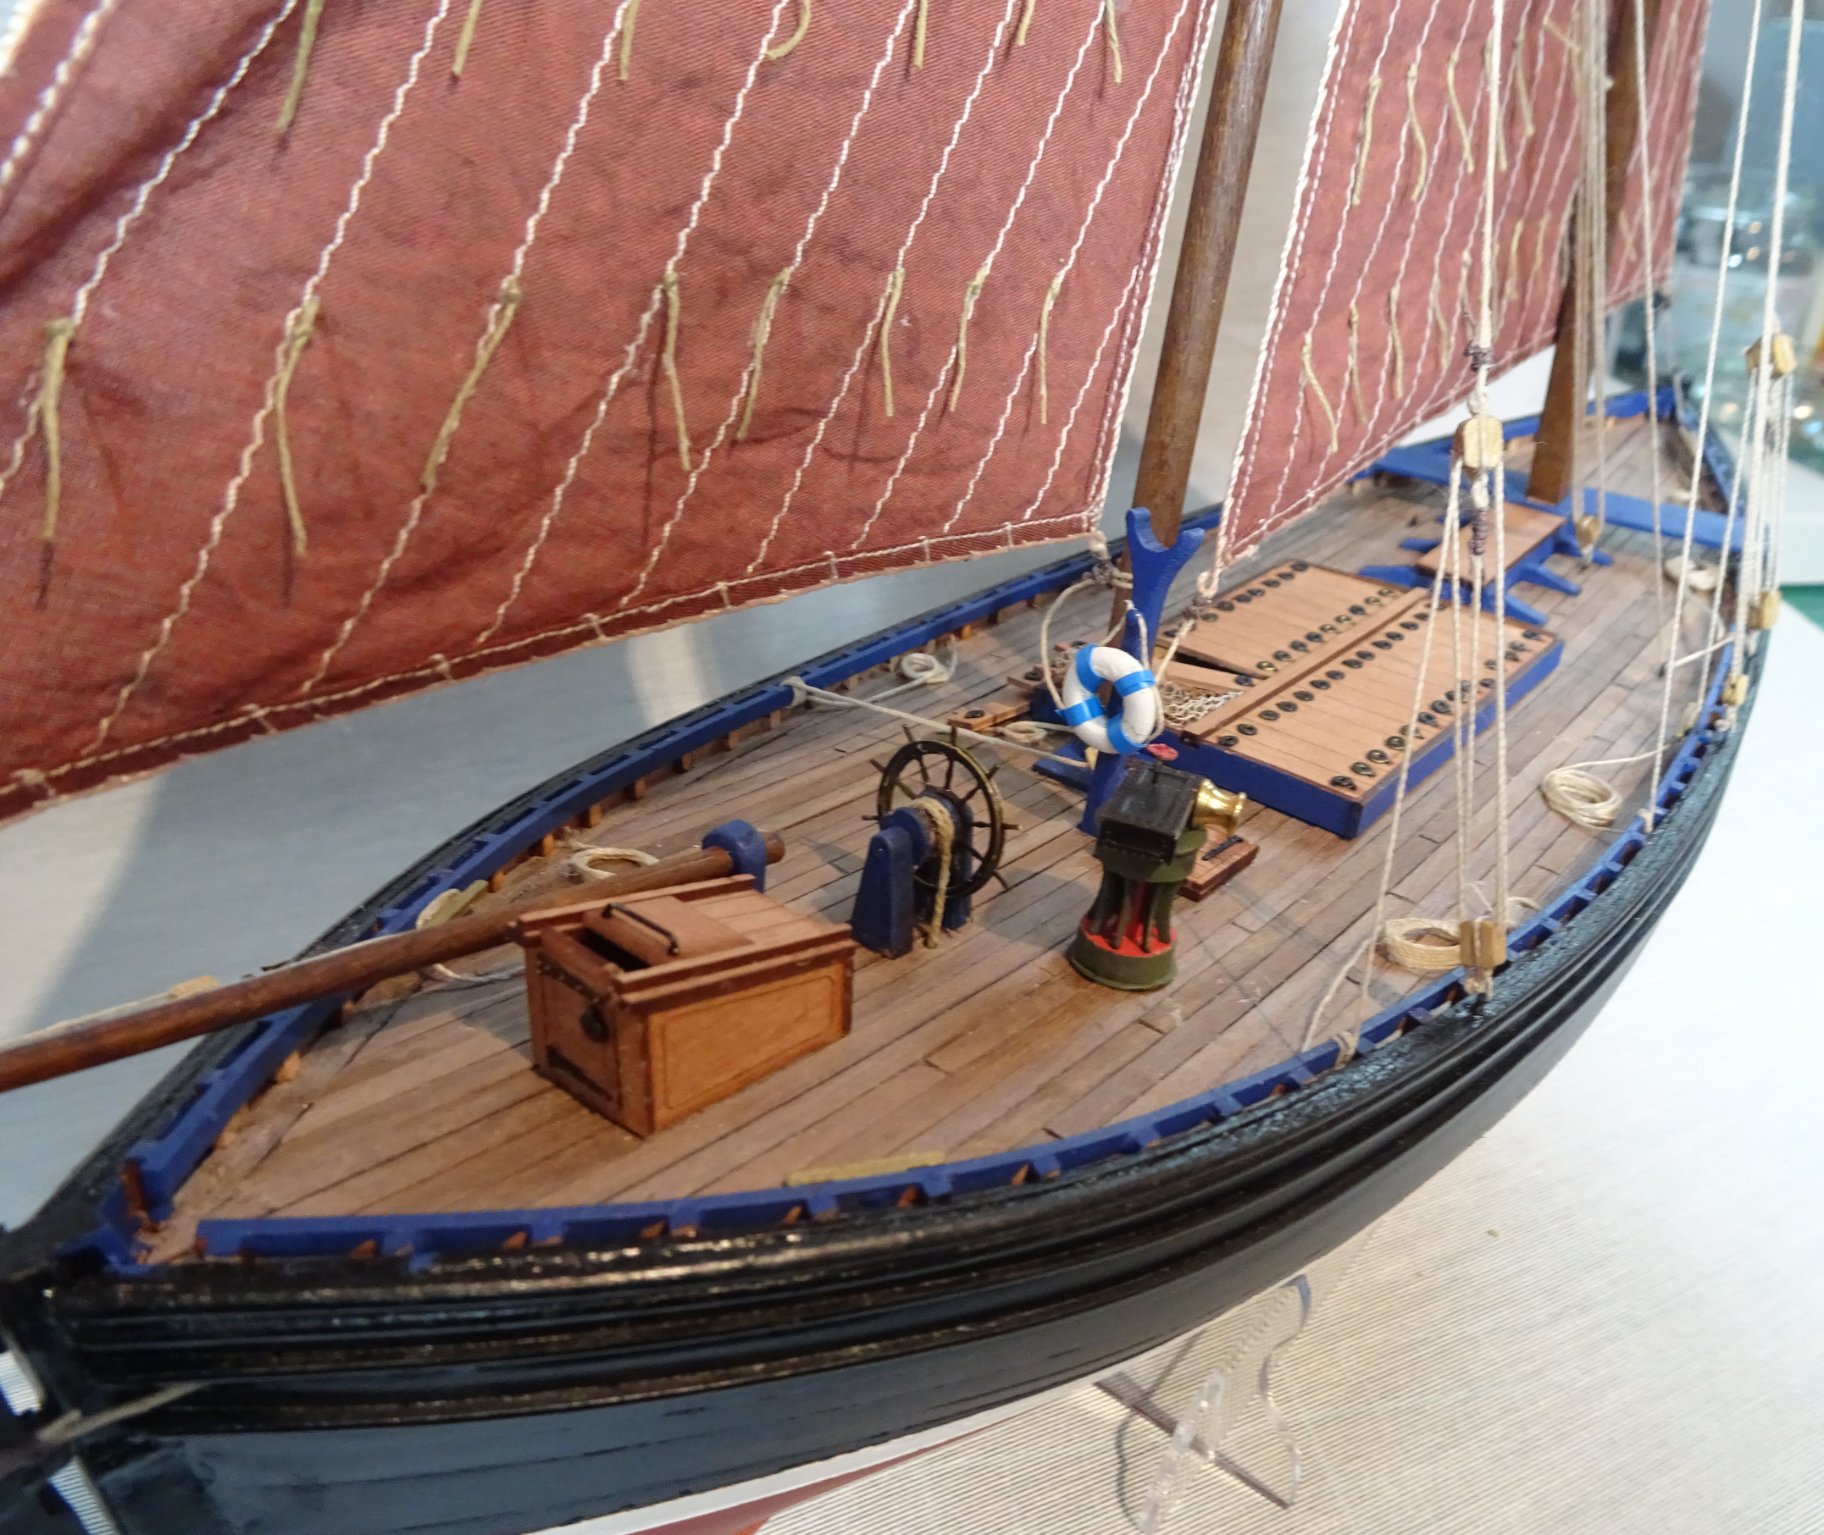
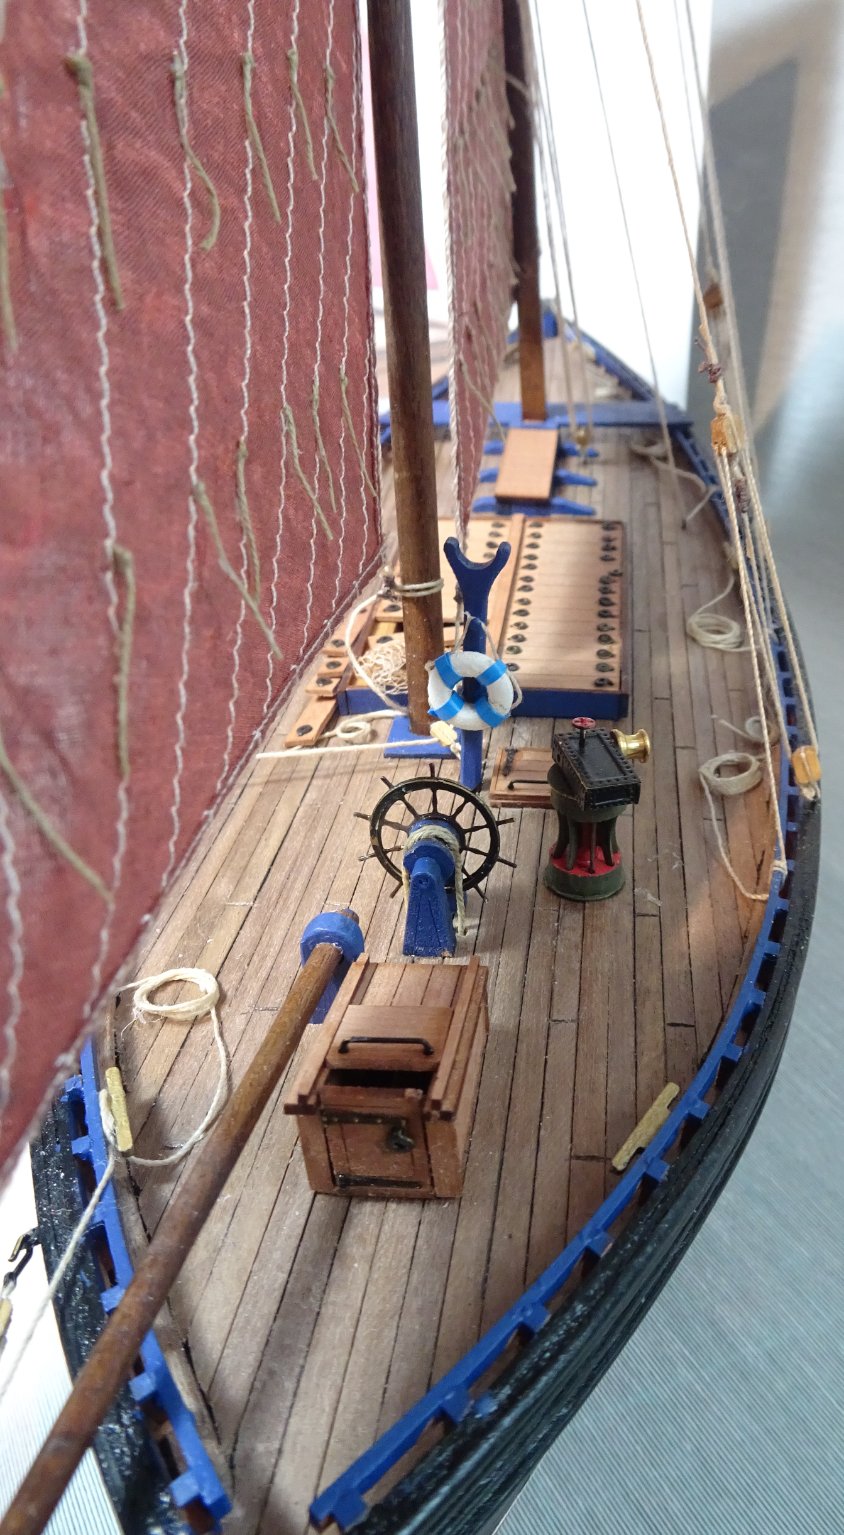
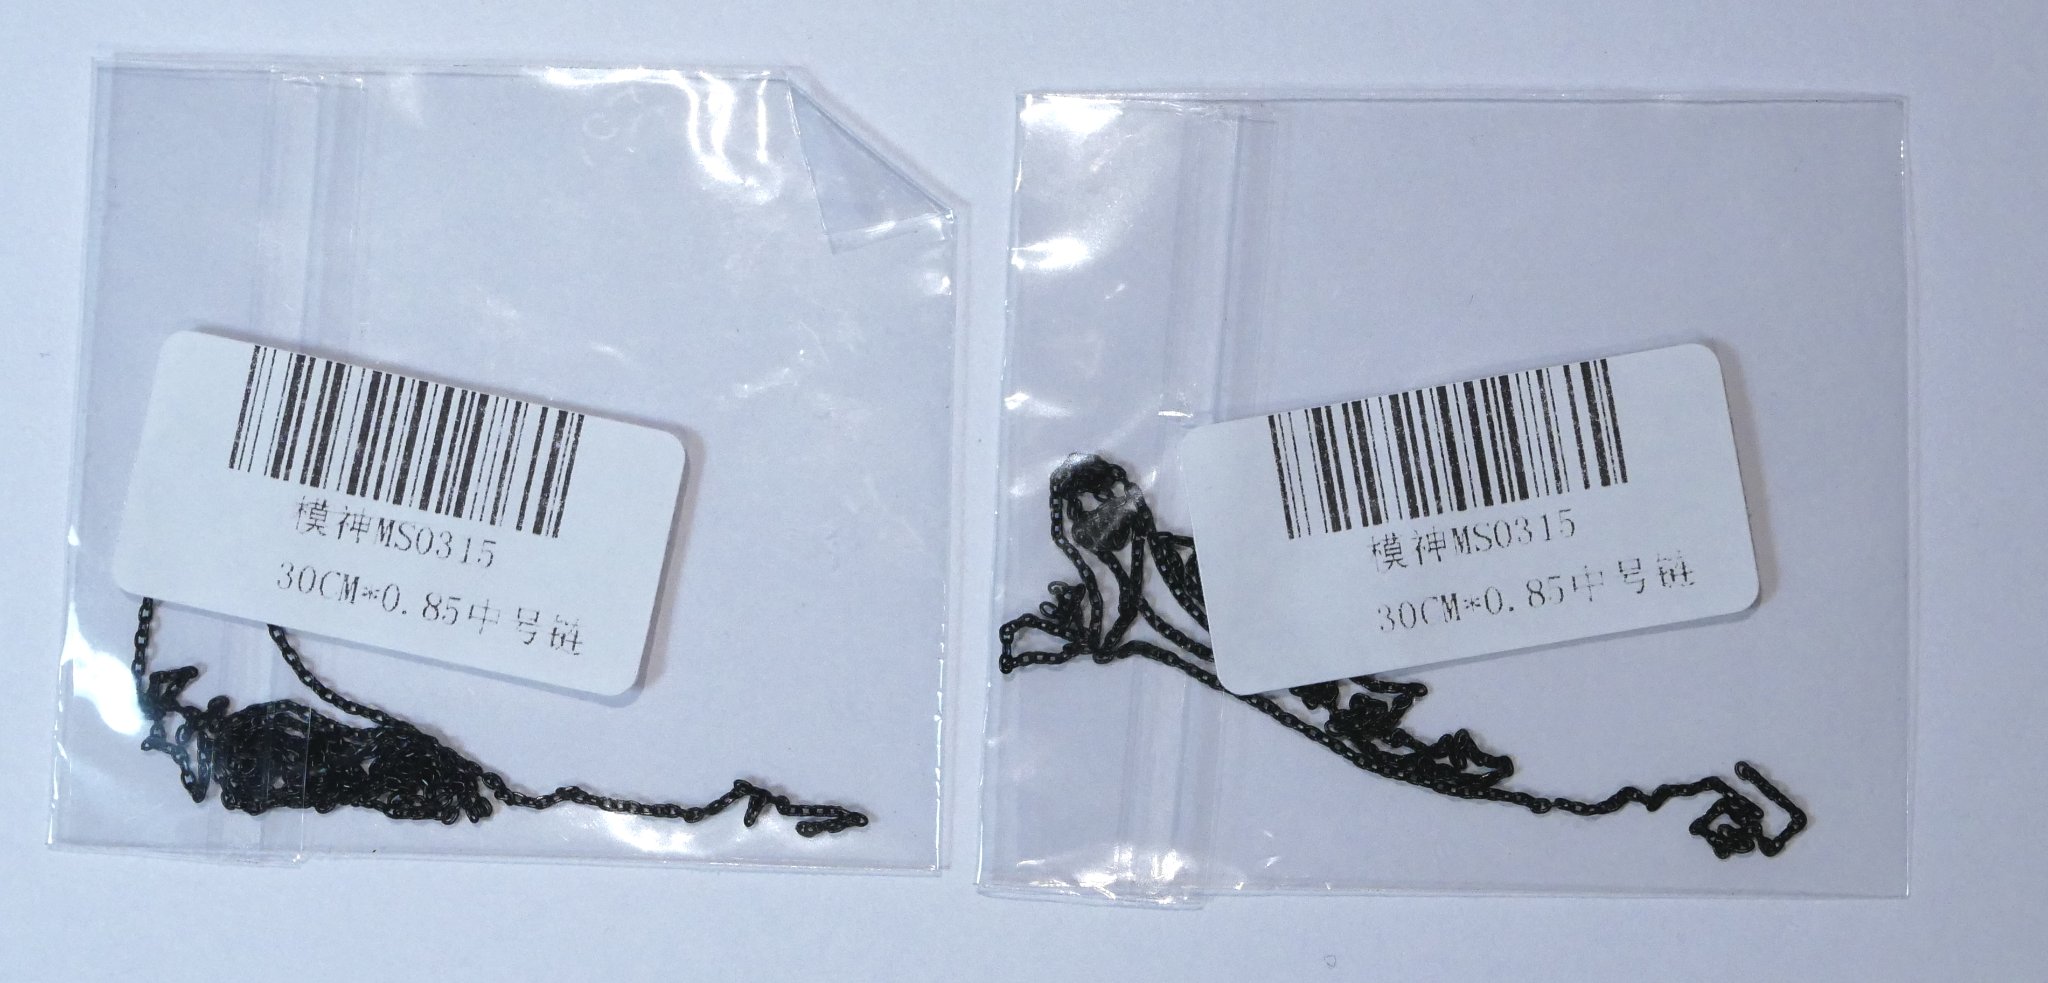
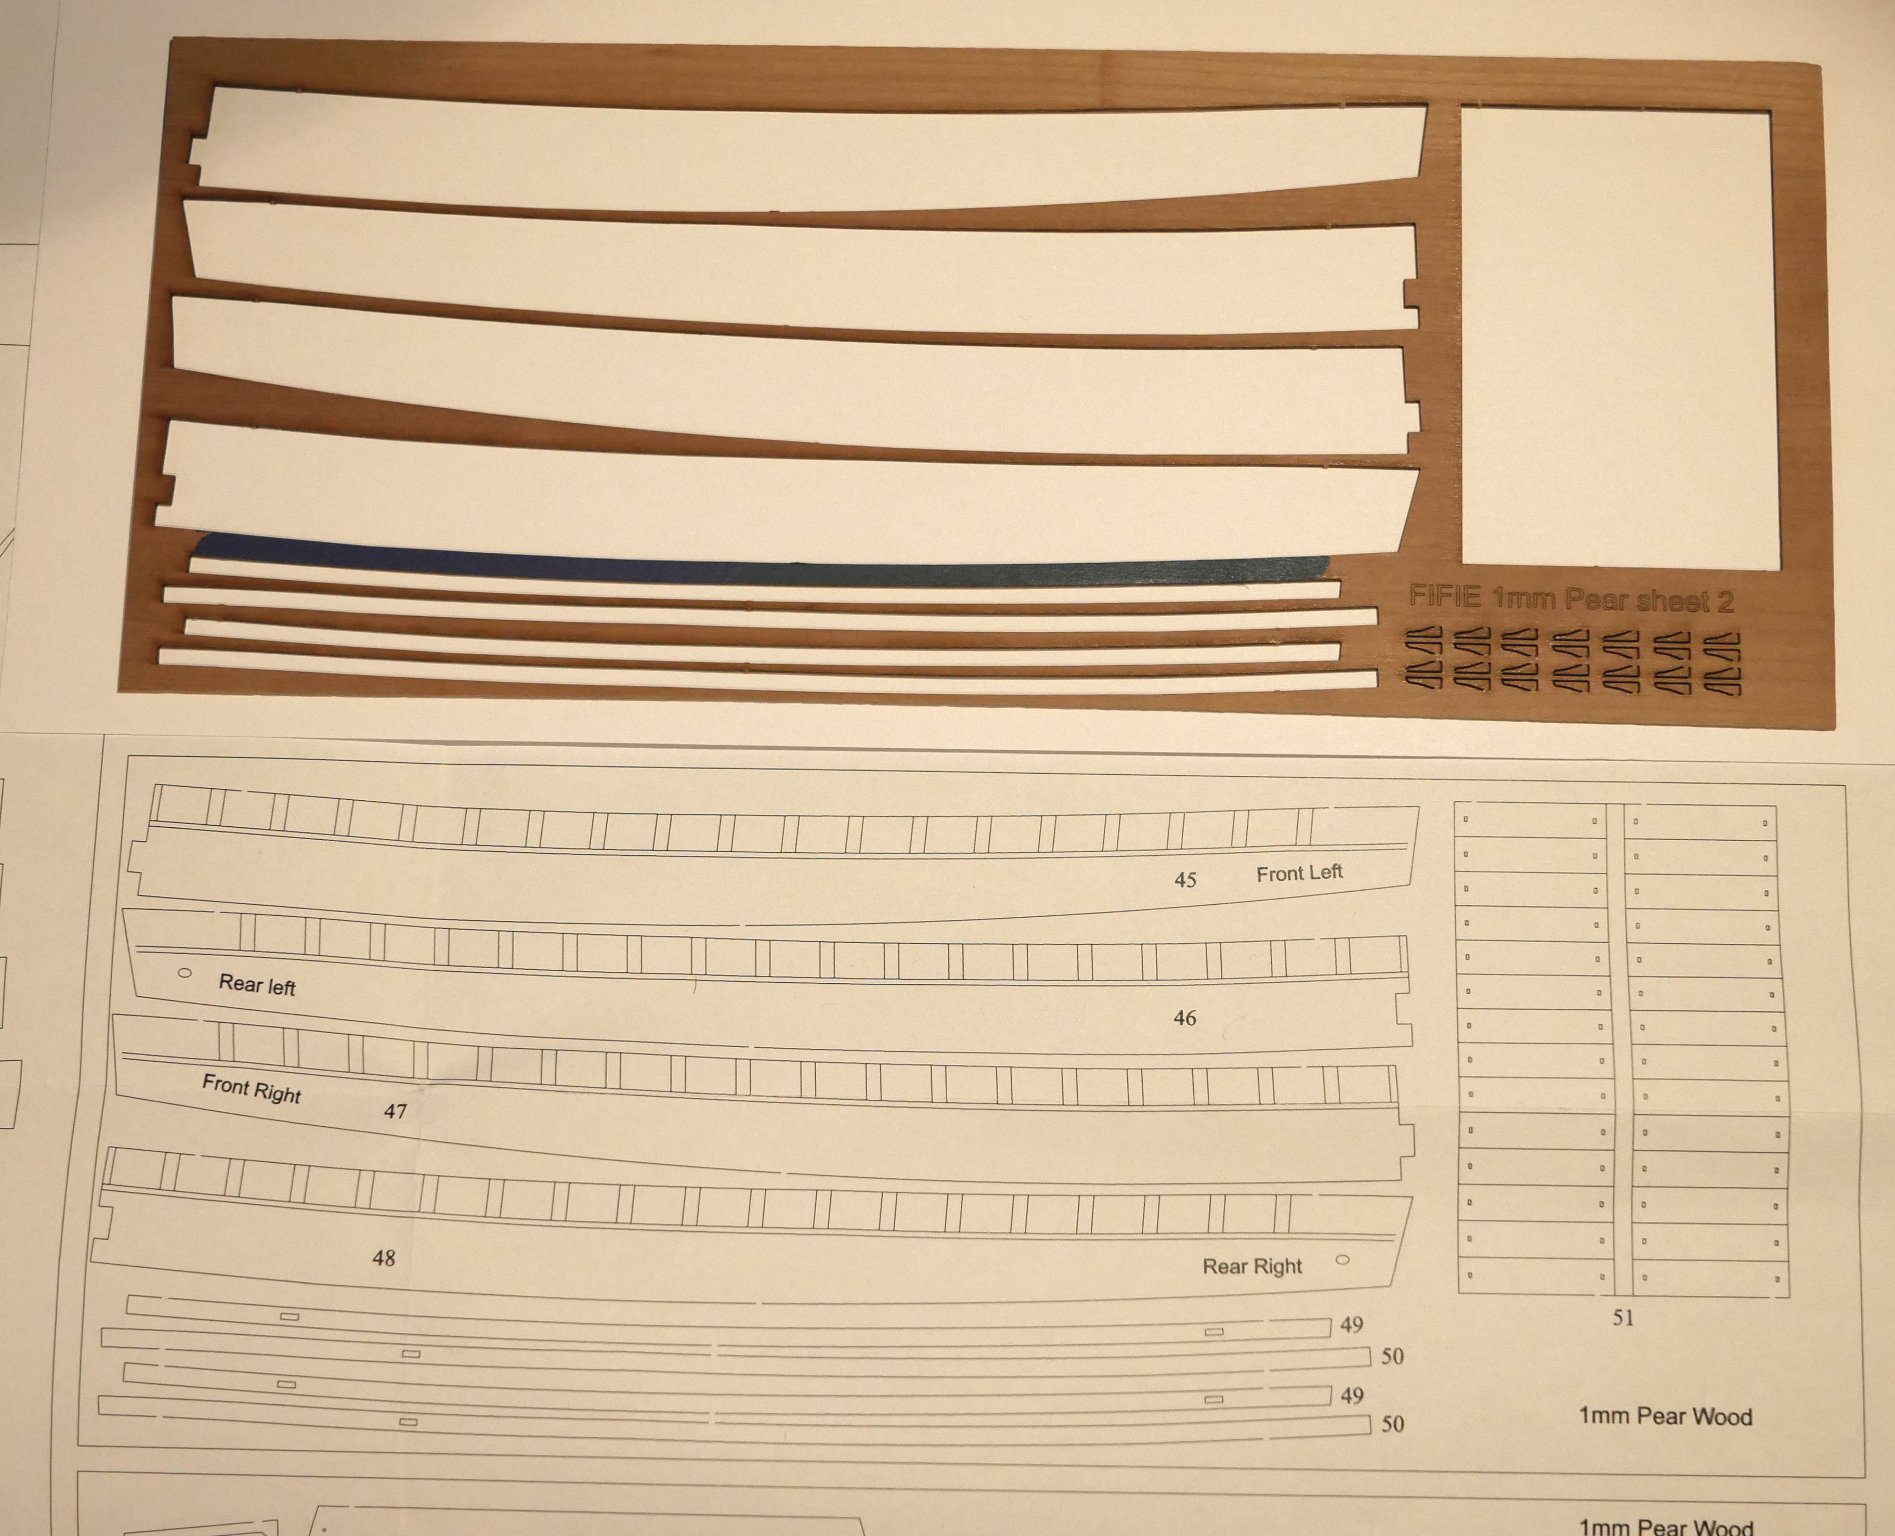
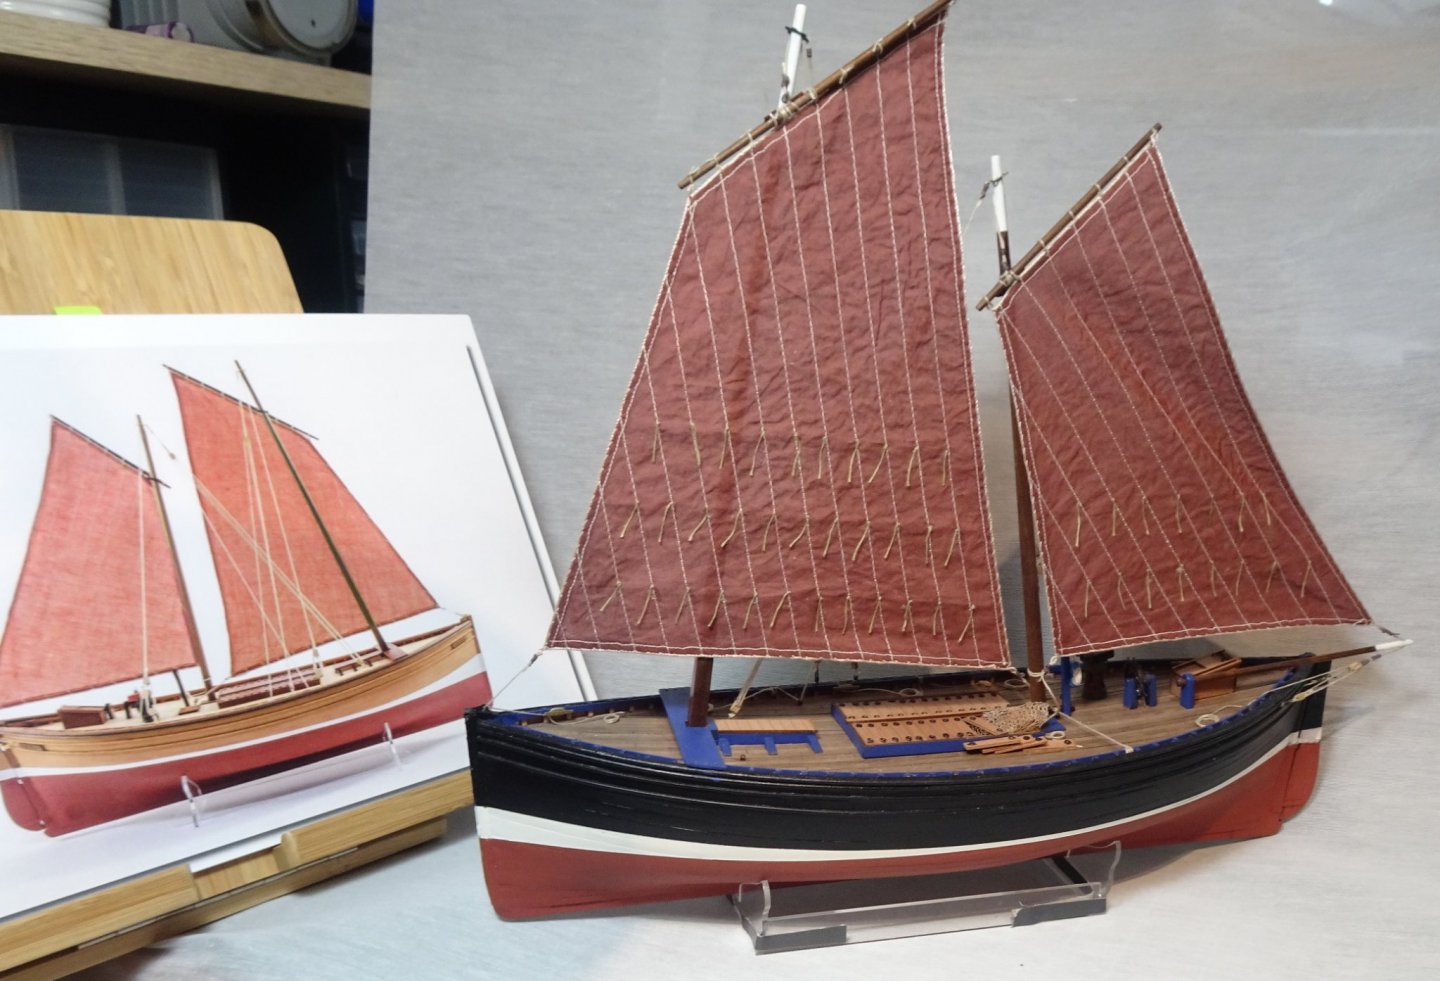
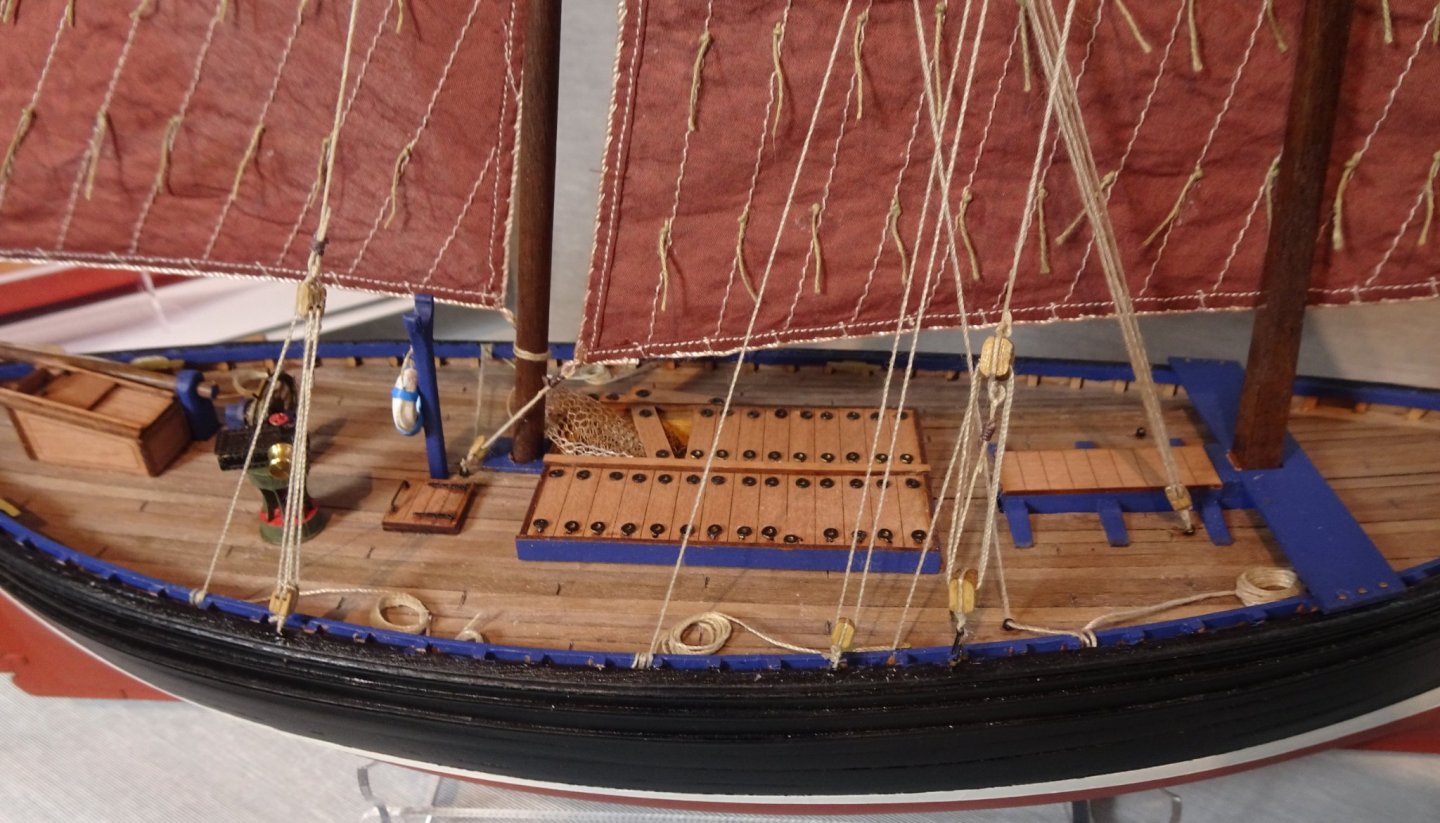
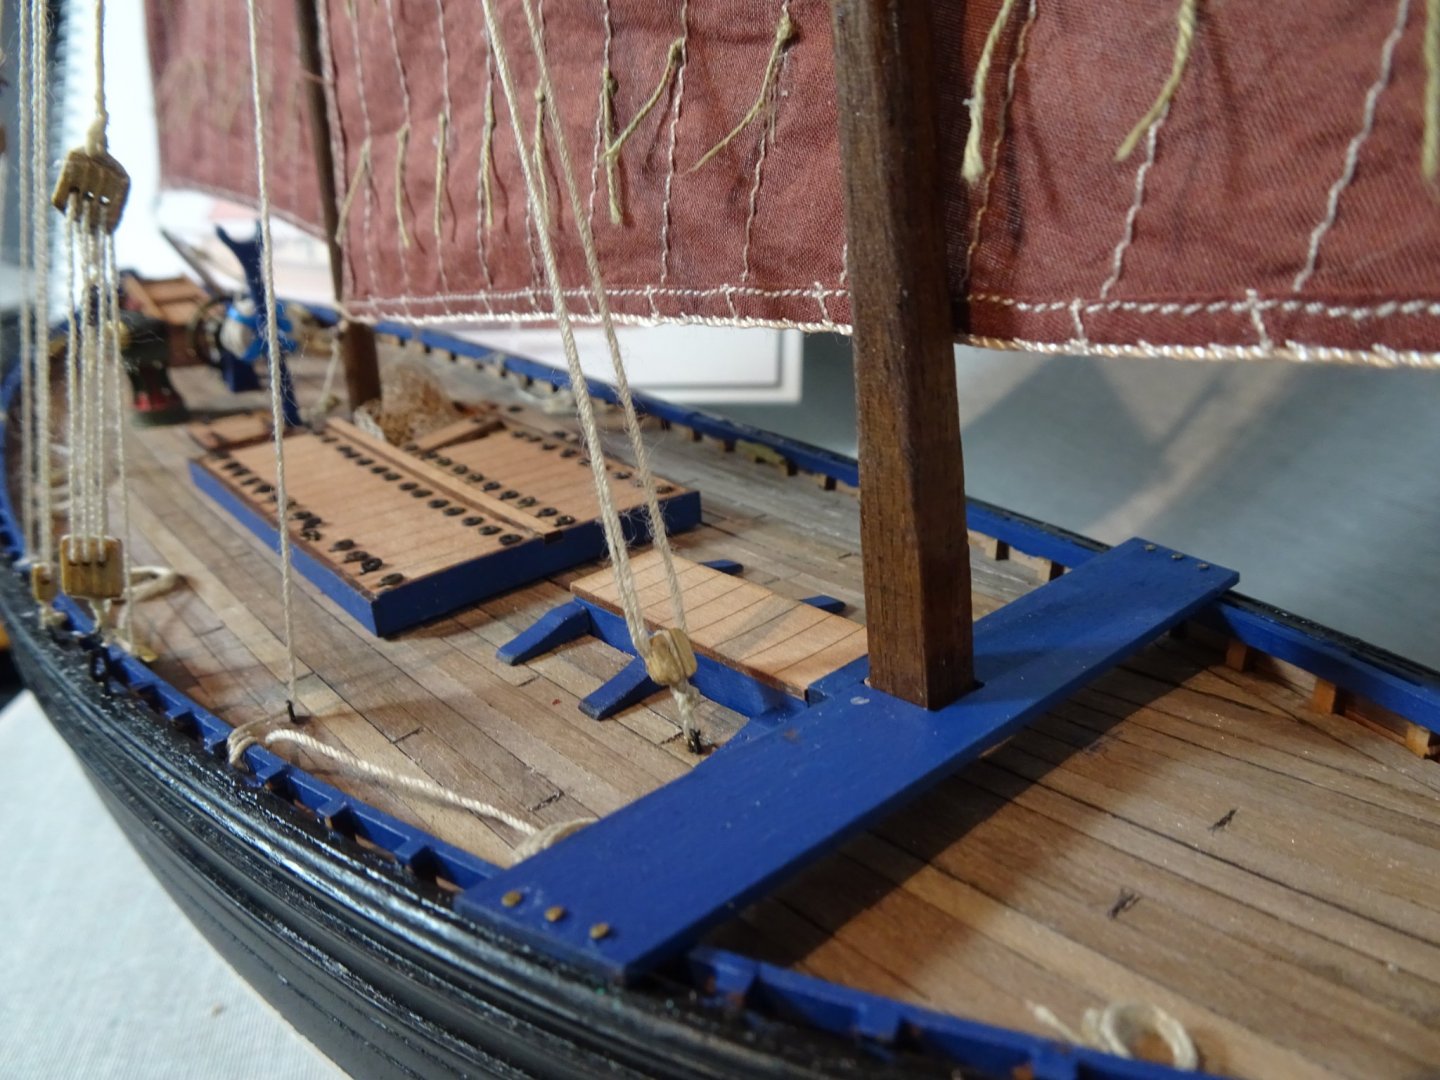
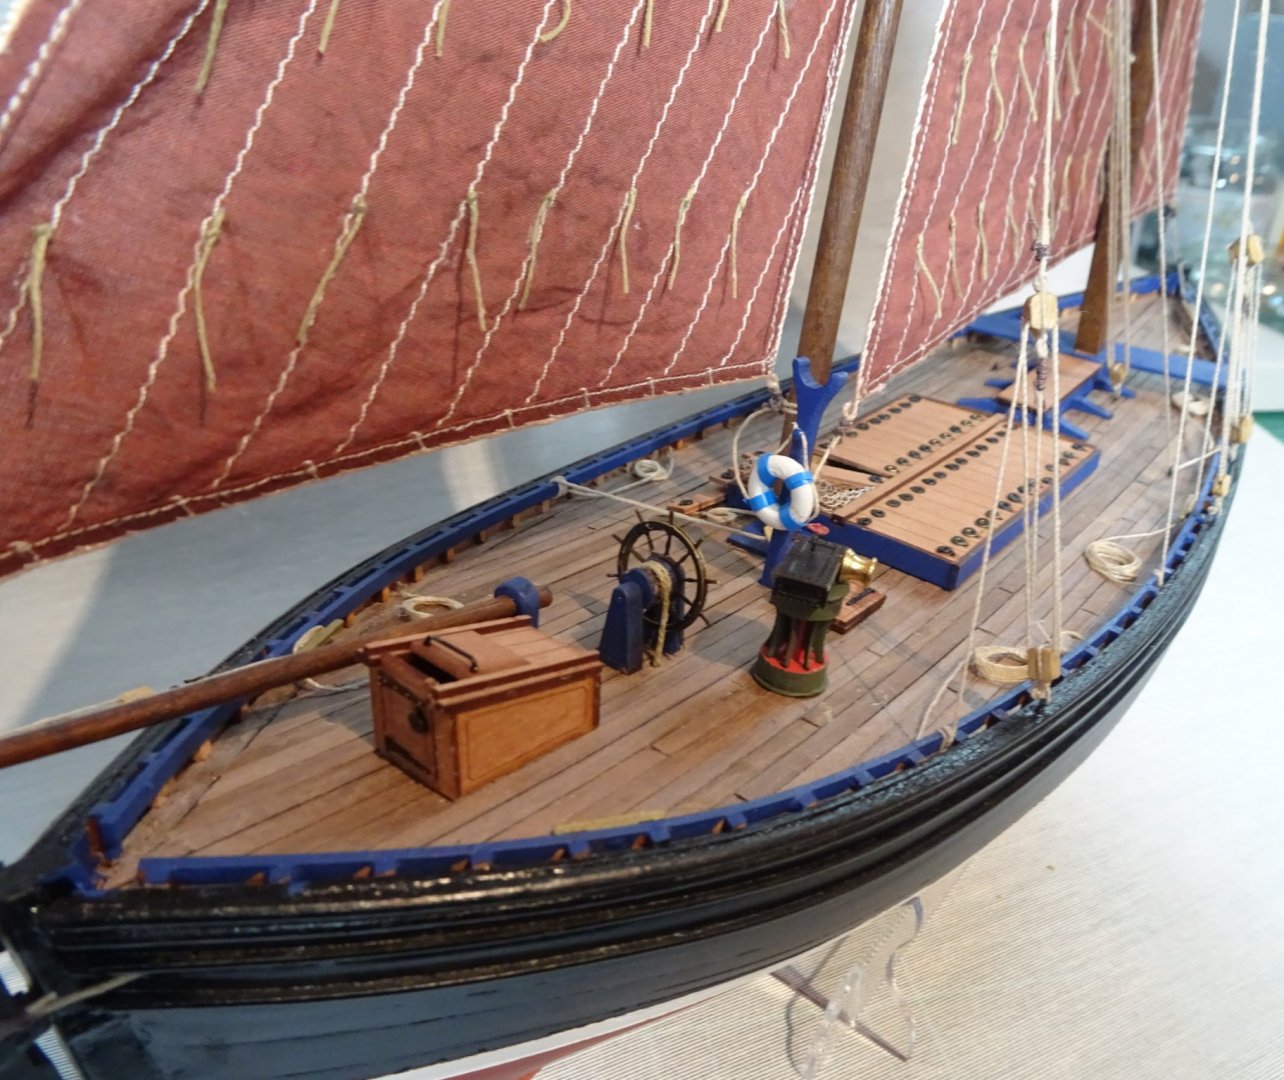
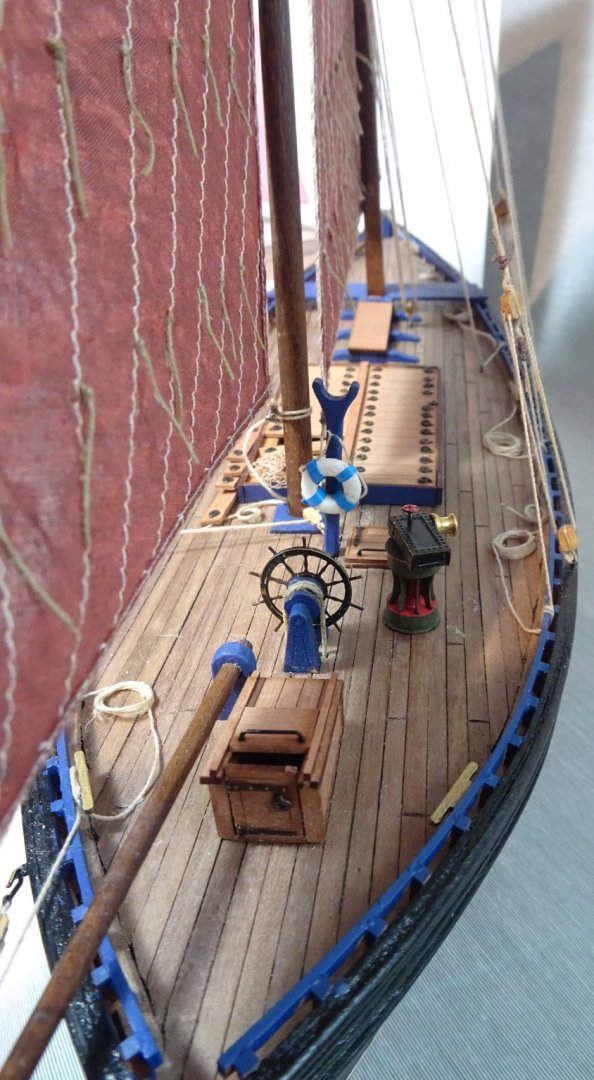
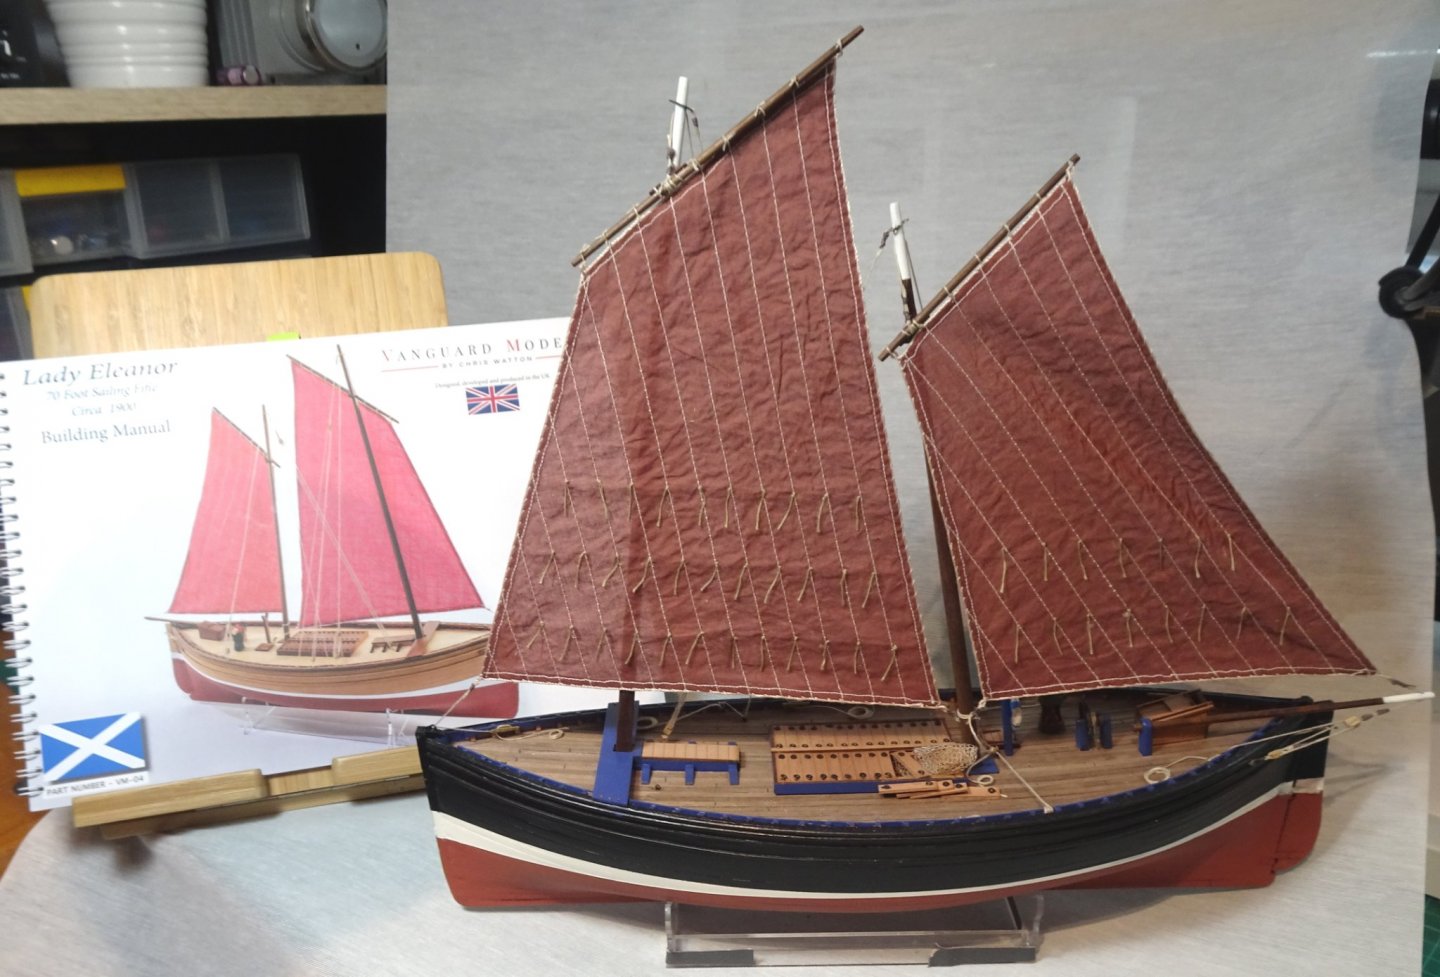
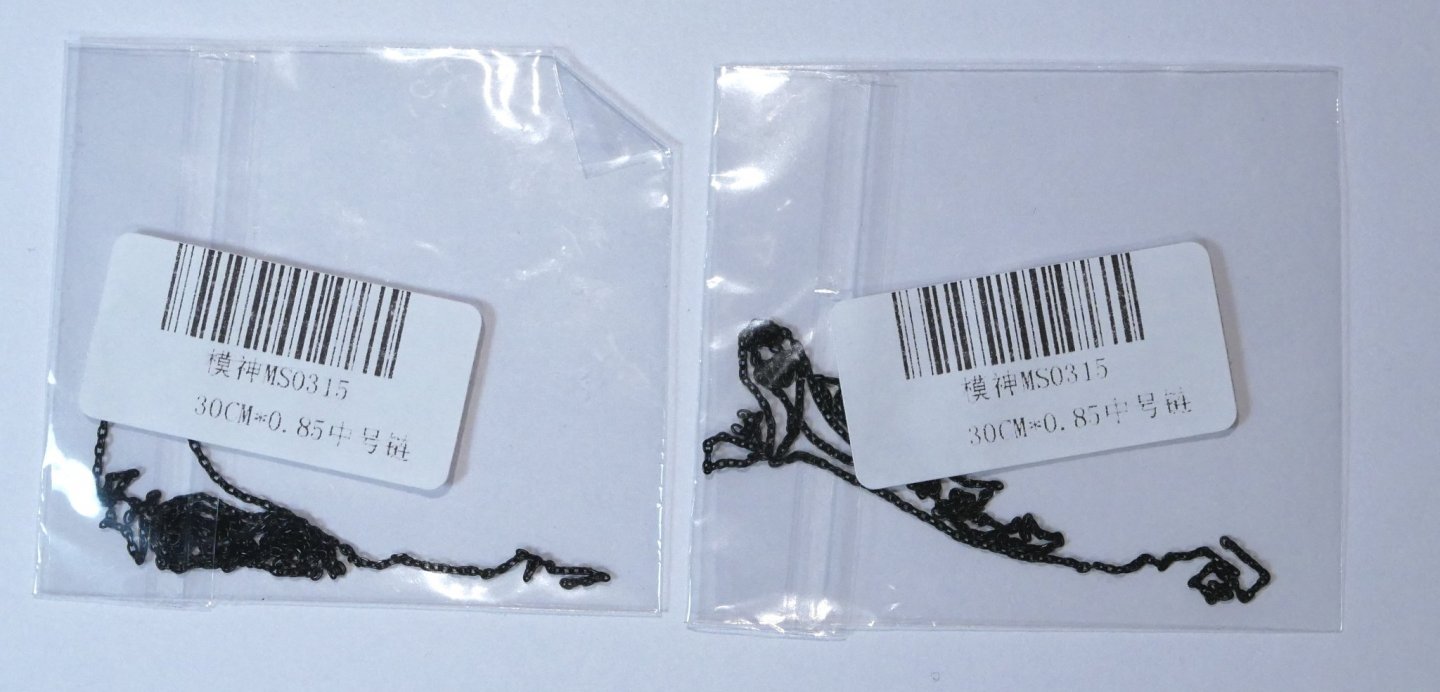
Hi all, Lady Eleanor is leaving the shipyard on her way to the fishing grounds around the coasts of Scotland and England. It's been an enjoyable build - the shipwrights working on it are a good bunch, and although they made a few mistakes I won't be docking any wages since I need them for the next build. Below, L.E. saying 'thanks' to her build guide. Close up of the deck. I've neatly coiled the ropes which is probably wrong for a working trawler...I guess they were more gathered together in a fashion that prevented tangling. I also added my own decking. Chris' laser engraved deck is absolutely fine, but I just like laying decks. I added a lifebouy and a rope around the steering mechanism. Another pic of the deck. I used full deck length strips of wood and then 'scored' them to represent planking - some of the scores look a bit brutal this close up but are OK from a distance. Hatch - I used a razor saw to remove some of the hatch cover planks and stow them at the side. I aslo added a 'weathered' net (lace curtain material). The Capstan looks like it has rotated a bit. It's not glued in so I must have nudged it. I may added a rope to the capstan later and attach it to the net once I find out the correct routing etc for the rope. Yup, that capstan has definitely moved! Finally, a big thank you to Chris and Vanguard Models for the work put in to producing The Lady Eleanor. It took me about 7 weeks, most days doing something, even if it only for 15 mins just to keep up the momentum. I've just noticed the name plates are missing...somebody's wages are definitely getting docked now! As luck would have it, a few weeks ago I ordered some black plastic chain for the steering mechanism...it arrived yesterday! And a question...Pear Sheet 2 has 14x pairs of little 'triangles' that I never used...what were they for? OK, well next in line is HMS Flirt (MSE). That's a bigger undertaking for me and will certainly get me through the winter...I wonder though if I shoud try something different first eg stagecoach, Stevenson's Rocket, Pagoda etc?...pondering Oh, and a big thank you to all the other Fifie/Zulu builds on this website and the always helpful comments and advice. This website is a great place to be. All for now, Richard


- 49 replies
-
- 10
-
-
- Lady Eleanor
- Vanguard Models
- (and 1 more)
-
I had a wander round Micro-mark the other day and there are definately loads of things to buy, but I can't justify enough of them at the moment. But I did do a test checkout cart at $80 and the total was $120 ie +50% shipping, which is a bit too much. But thanks anyway Erik for thinking of new ways to spend my money 😉 ....not that I need too much encouragement. All the best, Richard
- 222 replies
-
- 1
-
-
- First Build
- Lady Isabella
- (and 2 more)
-
Erik, Your hull and planking is looking very good. I feel that the Zulu is moving up my wishlist pretty fast 😉 I'm also still admiring your Foam Cradle...I did have a look for it in the UK but it doesn't seem to be sold on this side of the pond...shame. However, I've got my own Mk1 cobbled together version that I've used on my first two ships and it's been fine but maybe a bit harsh on paintwork. I've got a large chunk of foam in the attic that will soon be morphing into a Foam Cradle methinks. Regards, Richard
- 222 replies
-
- 2
-
-
- First Build
- Lady Isabella
- (and 2 more)
-
Thanks B.E. I think the reef points are a vital part of the functionality of the boat. So I really couldn't leave them out. And your build gave me all the guidance I needed. Yes, those fishermen had a very hard life. Very few become remotely wealthy on it...it was a case of just surviving at sea, and on land. I have seen lifebouys pictured/filmed on a number of Fifies/Zulus ... eg ...but they do look like very modern additions, and no doubt to comply with H&S. Back in the day, I can imagine crews attaching bladders to themselves ...even then the cold waters would would be very dangerous. Thanks for that insight. Before I started Lady Eleanor I knew little about the Scottish and UK fishing industries. But having trawled the internet for info and bought Inshore Craft by Greenhill & Mannering, I feel I have a better understanding of it all. Still much more to learn though. And that is an interesting 'side effect' of building models...the building is enjoyable and skills are developed, but my interest is also piqued by what made these things tick. In fact I'm beginning to appreciate what amazing 'machines' boats and ships are and the businesses/politics behind them. It's good stuff. Regards, Richard
-
Preformed sizing for dead eye installation
Rik Thistle replied to Runnymede's topic in Modeling tools and Workshop Equipment
I've not yet mastered the proper seizing method...ie pull the end of the thread back in to the thread bundle using the thread loop created. Instead, I tie the seizing thread around where the rigging loop (different loop) starts...to tie, you can do a reef knot (or a half reef knot, adding a touch of PVA to hold it in place)...then wrap the longer thread strand around the two strands of the rigging loop + the other end of the shorter thread (ie three items just like in proper seizing) and then after 6 or 7 wraps of the longer thread take the shorter thread strand that was being tied and make a reef knot with the longer strand at the far end of the wrap. That's maybe not the world's best explanation, but I hope it makes some sense. From a distance it's difficult to tell it's not proper seizing. One day I will master proper seizing. I tend to use a 3rd hand device to dangle the three lengths from whilst doing the wrapping. Regards, Richard