HOLIDAY DONATION DRIVE - SUPPORT MSW - DO YOUR PART TO KEEP THIS GREAT FORUM GOING! (Only 36 donations so far out of 49,000 members - C'mon guys!)
×

Rik Thistle
-
Posts
864 -
Joined
-
Last visited
Content Type
Profiles
Forums
Gallery
Events
Everything posted by Rik Thistle
-
 'Lugger'...nice one. Seems luggers were also used around the UK and France, sometimes for smuggling. Apparently Fifies and Zulus can be classified as luggers?...but I'm only reading this on the web just now and am no expert at all. Here's another interesting website .... https://intheboatshed.net/2008/10/23/spirit-of-mystery-crew-set-sail-for-australia-without-their-underpants/ ... including an Oz lugger adventure. Richard
- 222 replies
-
- 2
-

-
- First Build
- Lady Isabella
- (and 2 more)
-
Erik, Yeah, I like Vanguard's fishing boats...I secretly hope Chris adds to his line up...or maybe a tug or two? But I suppose tugs aren't sail driven so maybe not. Yup, I like the smaller size and bare functionality of working boats. As for timberheads, when I first saw all those tiny bits of wood in my Fifie's box I wasn't looking forward to fitting them...but after attaching a few it got strangely satisfying. Can't remember if I used PVA or CA. Your Isabella is taking shape very nicely and very cleanly....an enjoyable build to watch...thanks. Richard
- 222 replies
-
- 3
-
-
- First Build
- Lady Isabella
- (and 2 more)
-
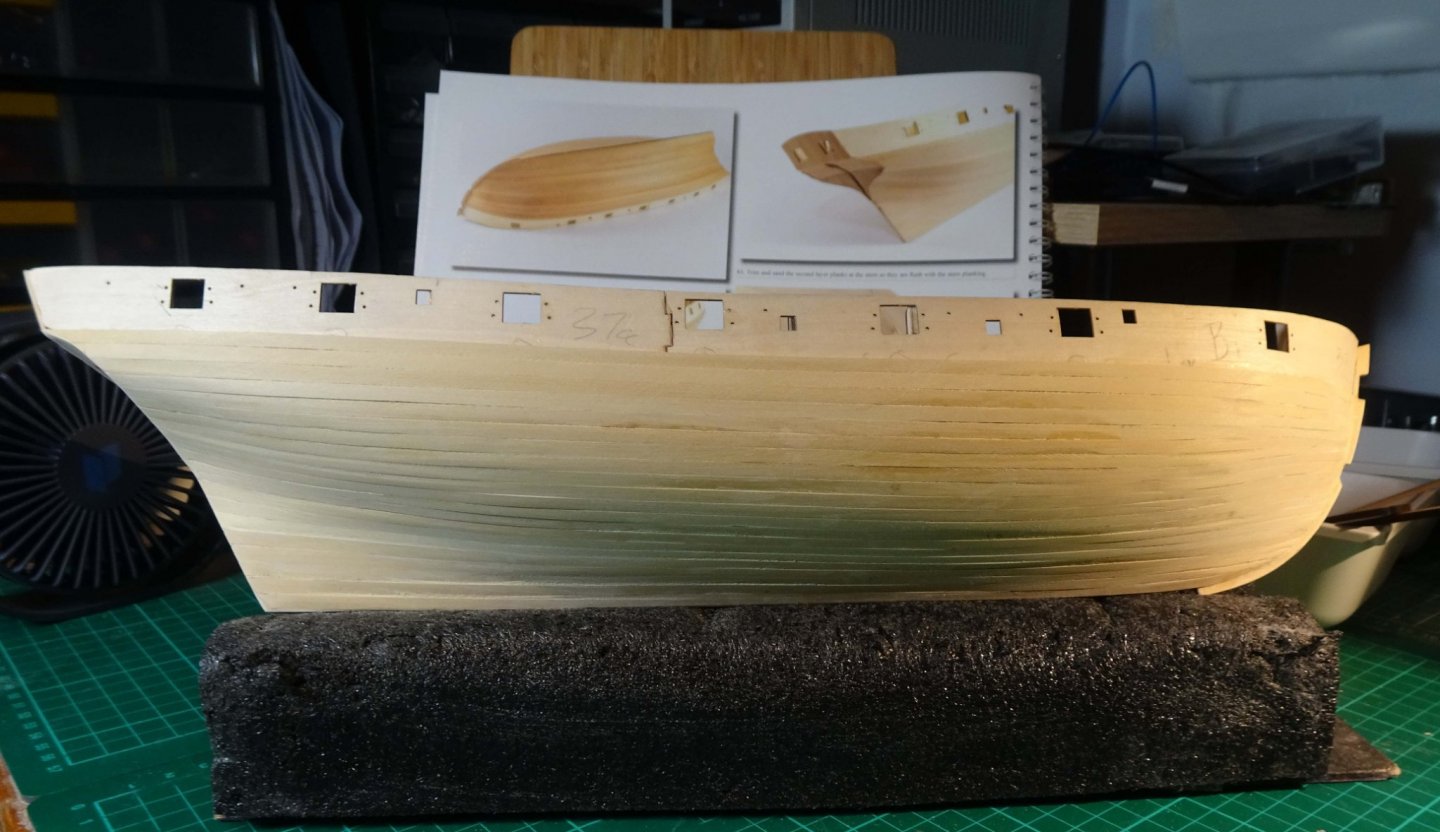
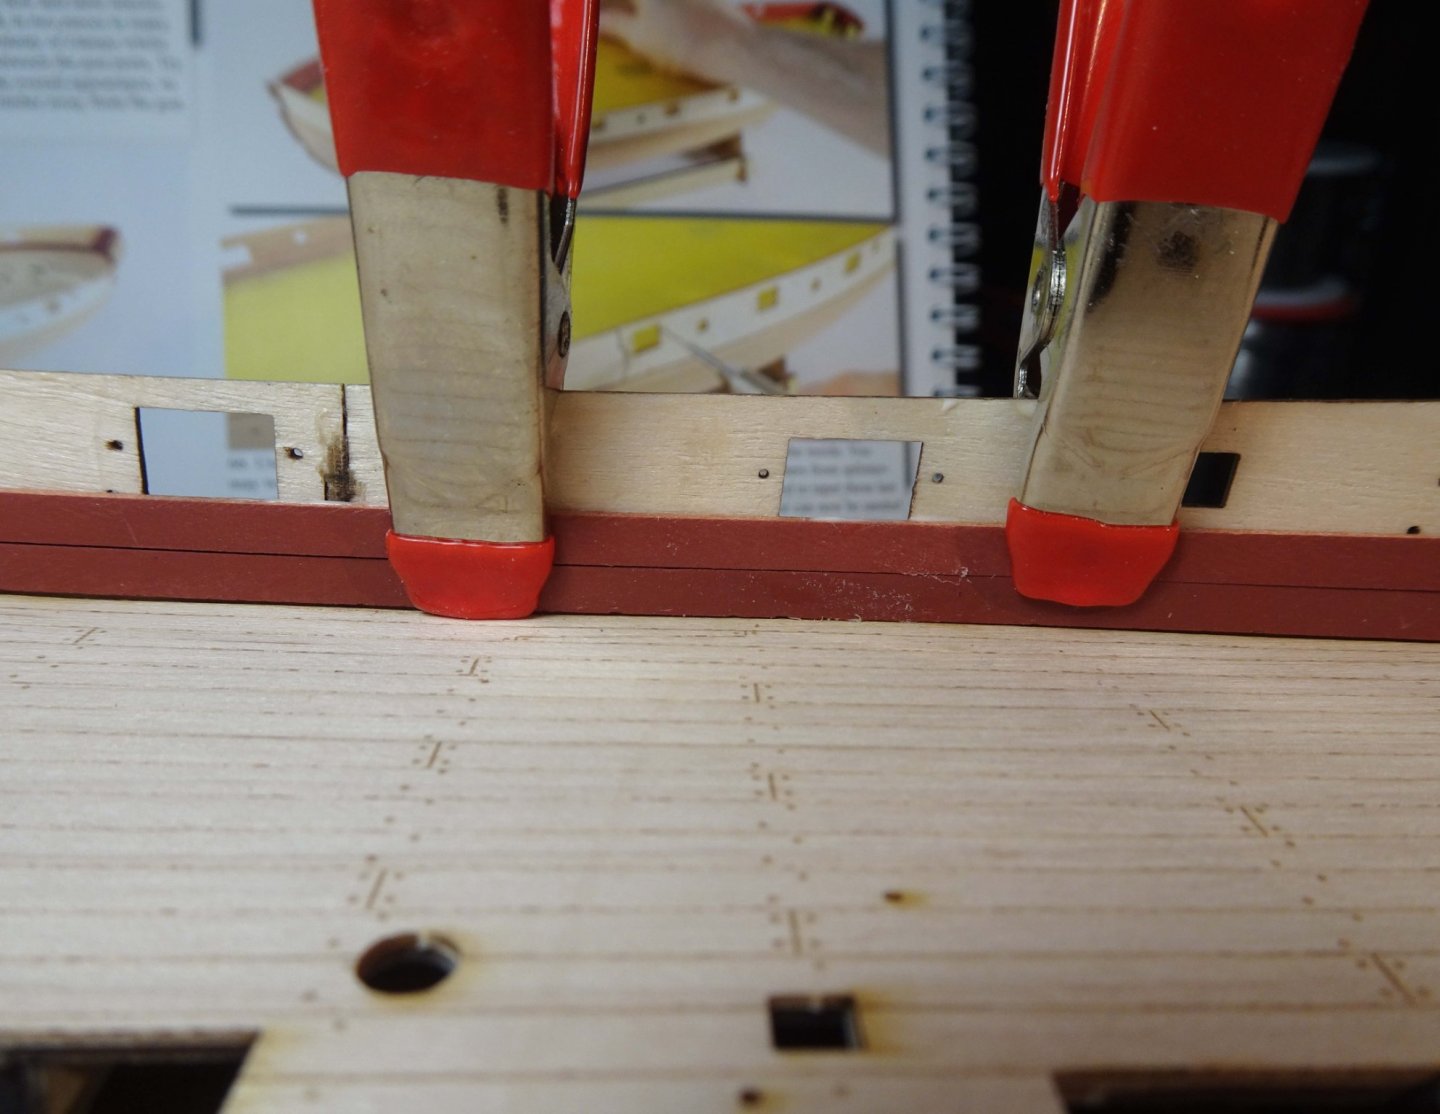
I've noticed at the bow and stern the bulwarks 'swoop' upwards which means that 4x plank widths will not be enough. Have I fitted the bulwarks incorrectly at the ship's ends?.... and how do I remedy this? ....I can always put in some 'stealers'...or sand down the bulwarks' height...hmm. Ah, I've just noticed on the .pdf version of the manual (pg 18), if I zoom in, there is a short tapered length of (5th row) planking added at the bow, and a longer length added at the stern which is then sanded (or cut) to follow the line of the upwards swoop of the bulwark. All is good 🙂 Richard
-
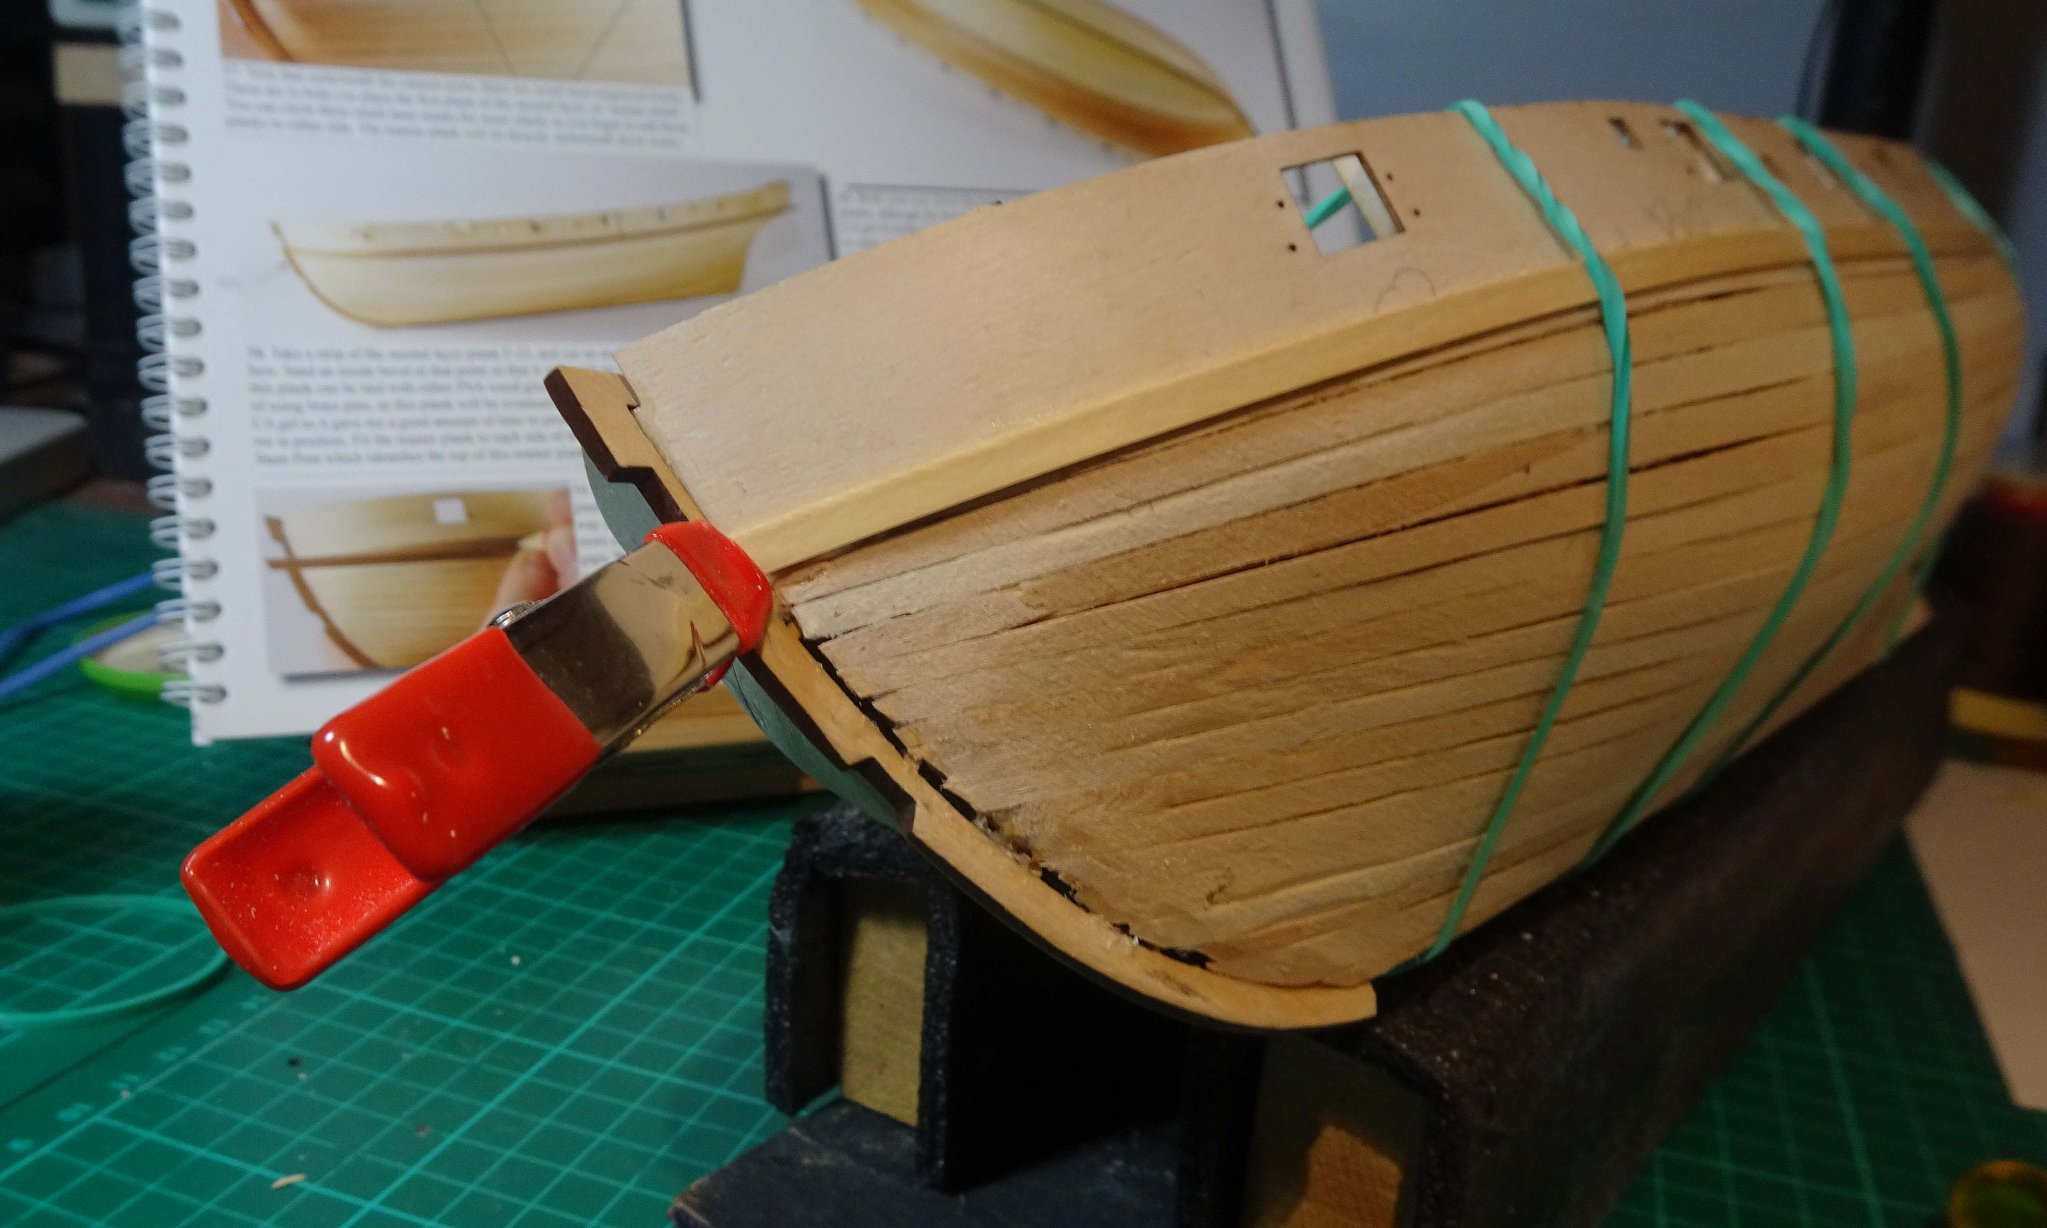
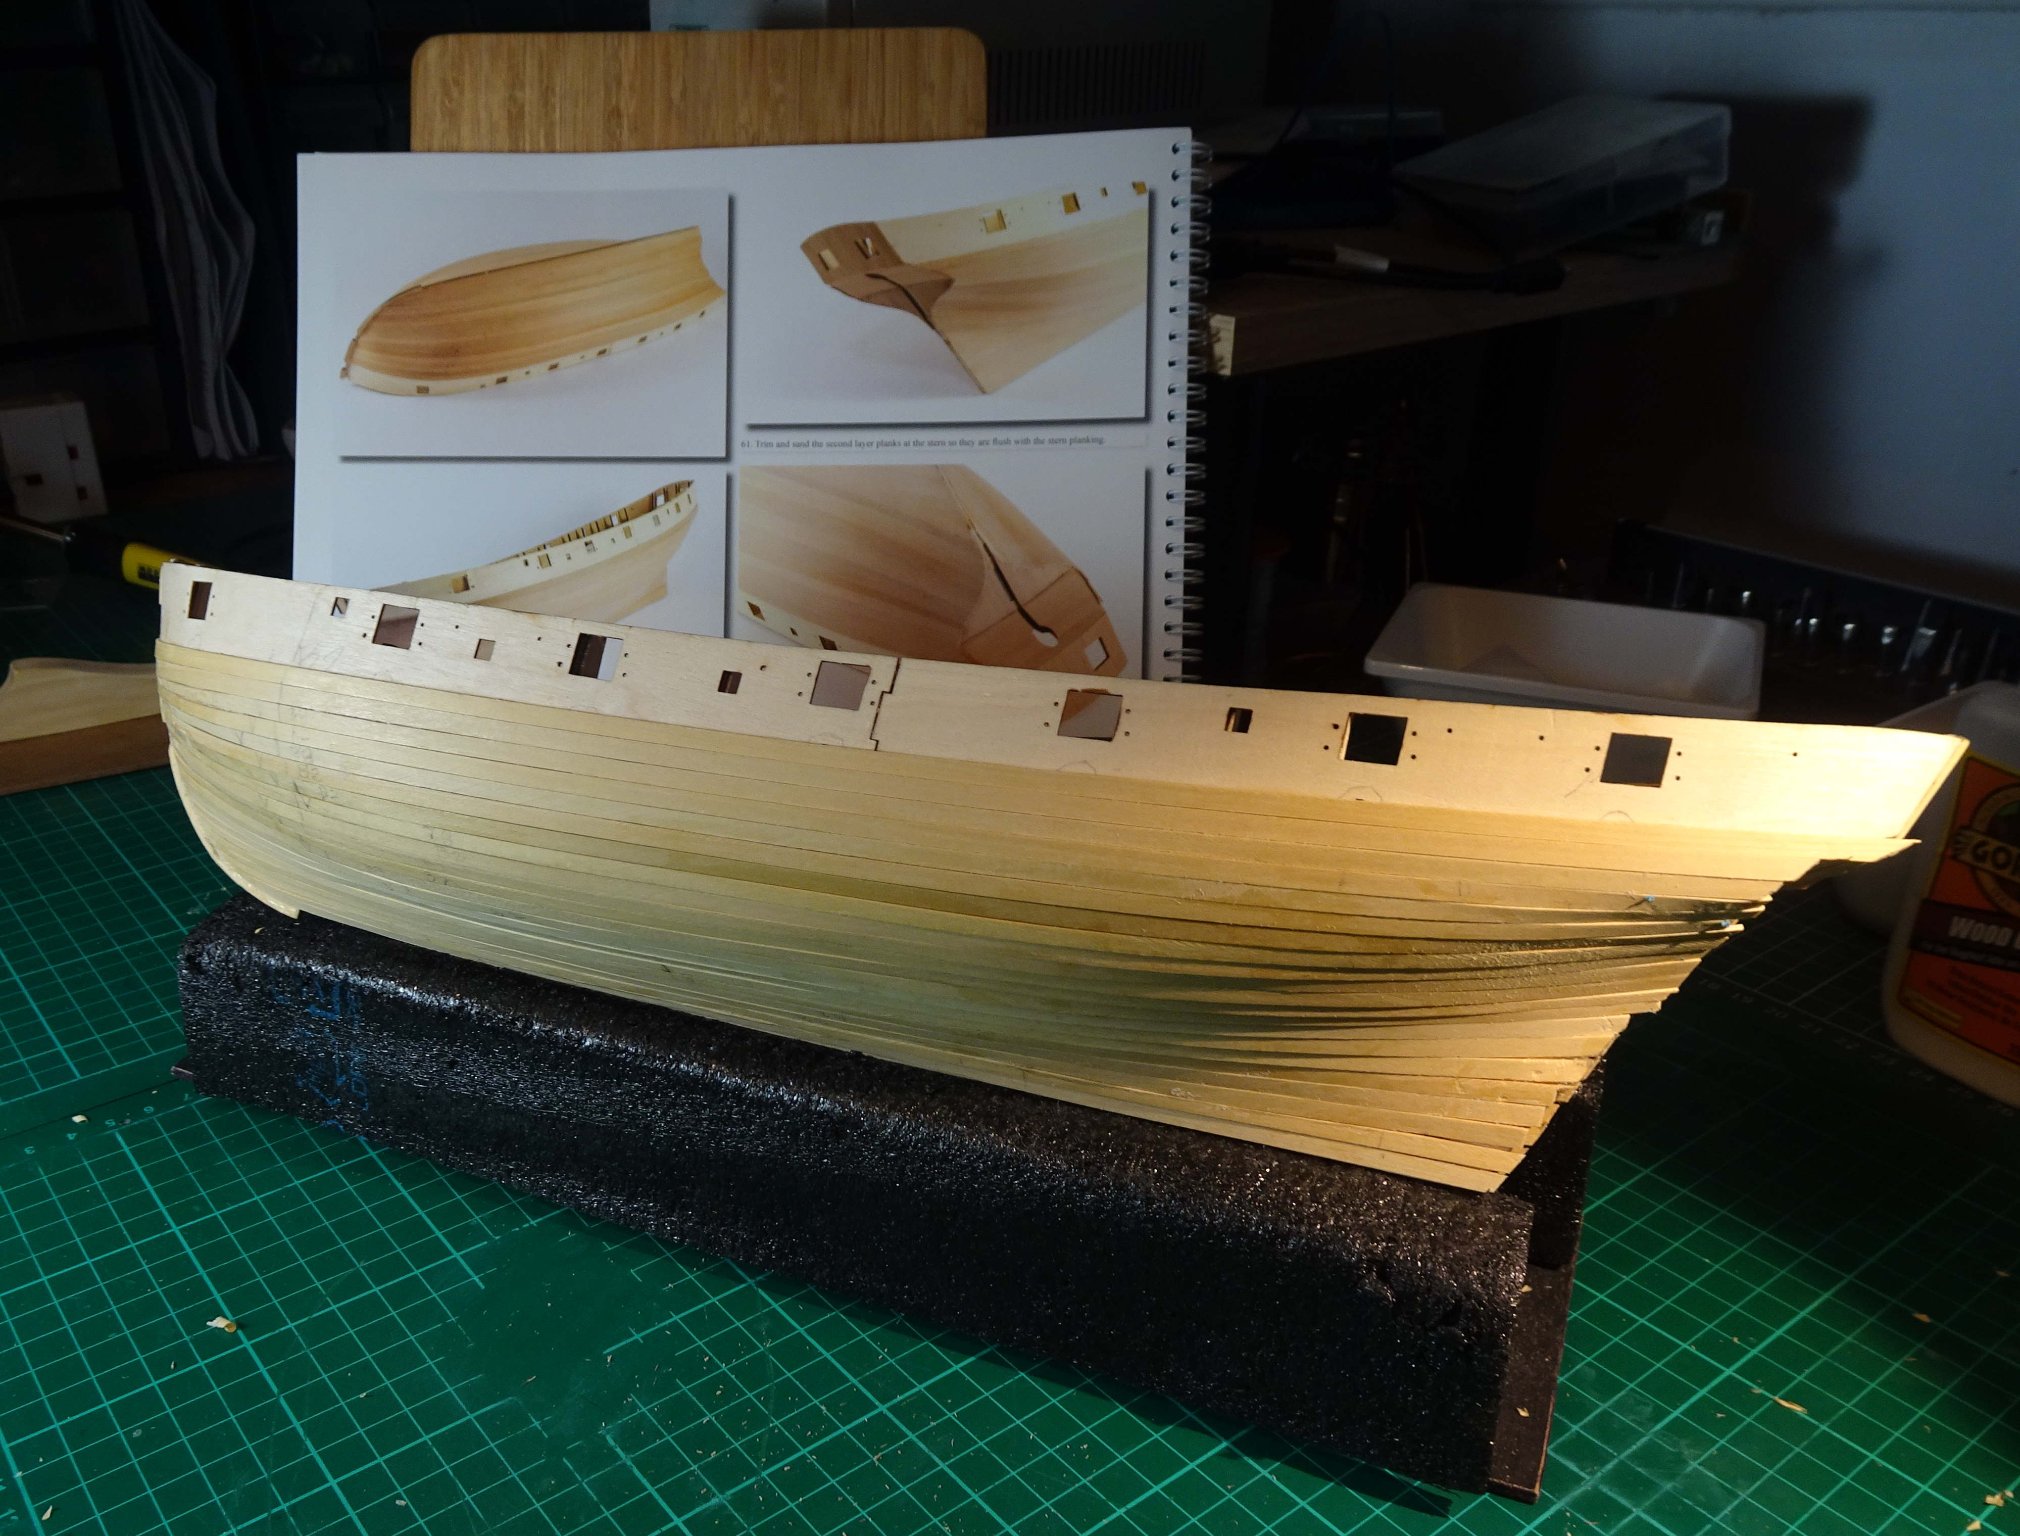
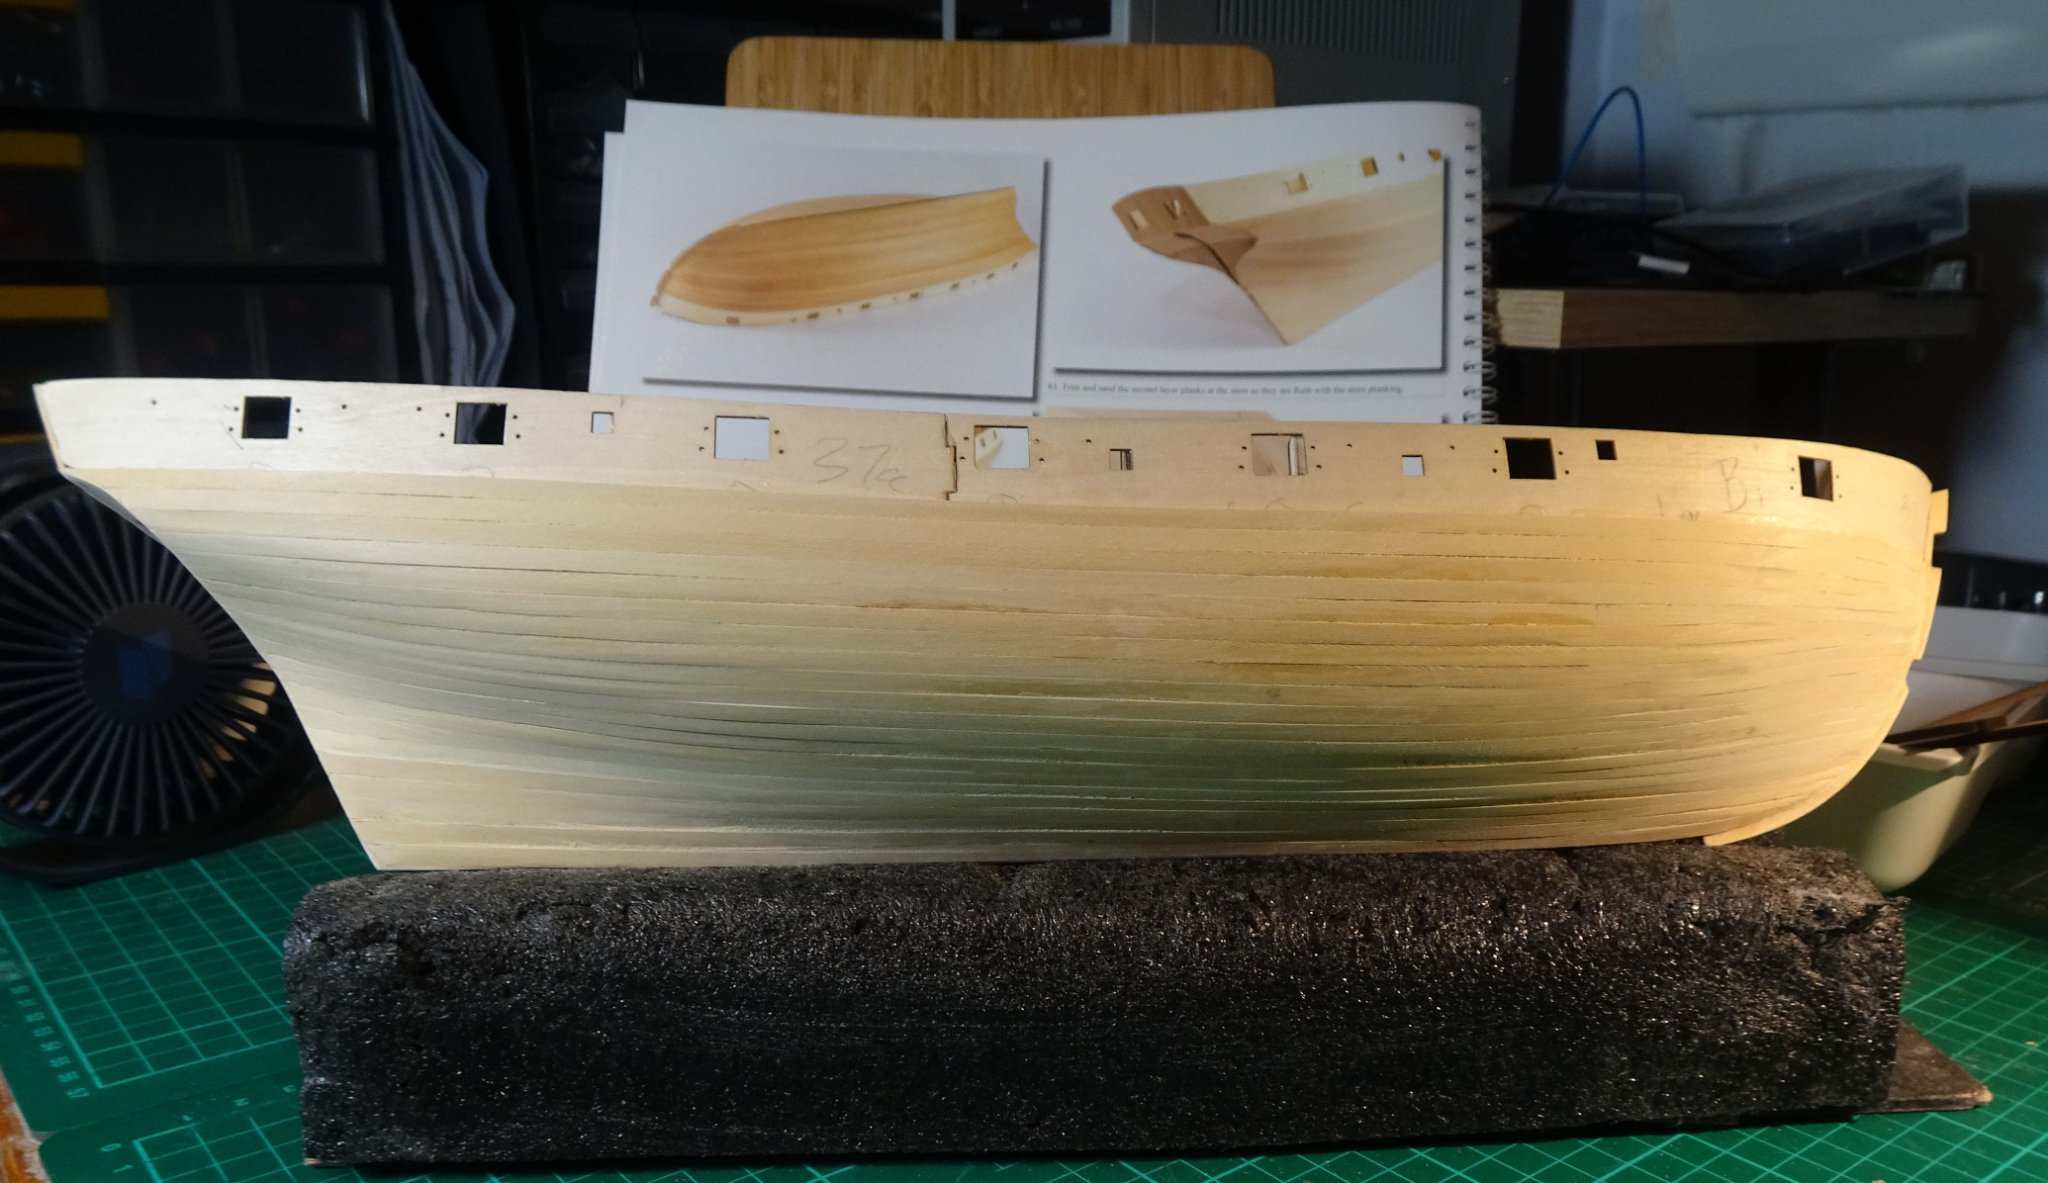
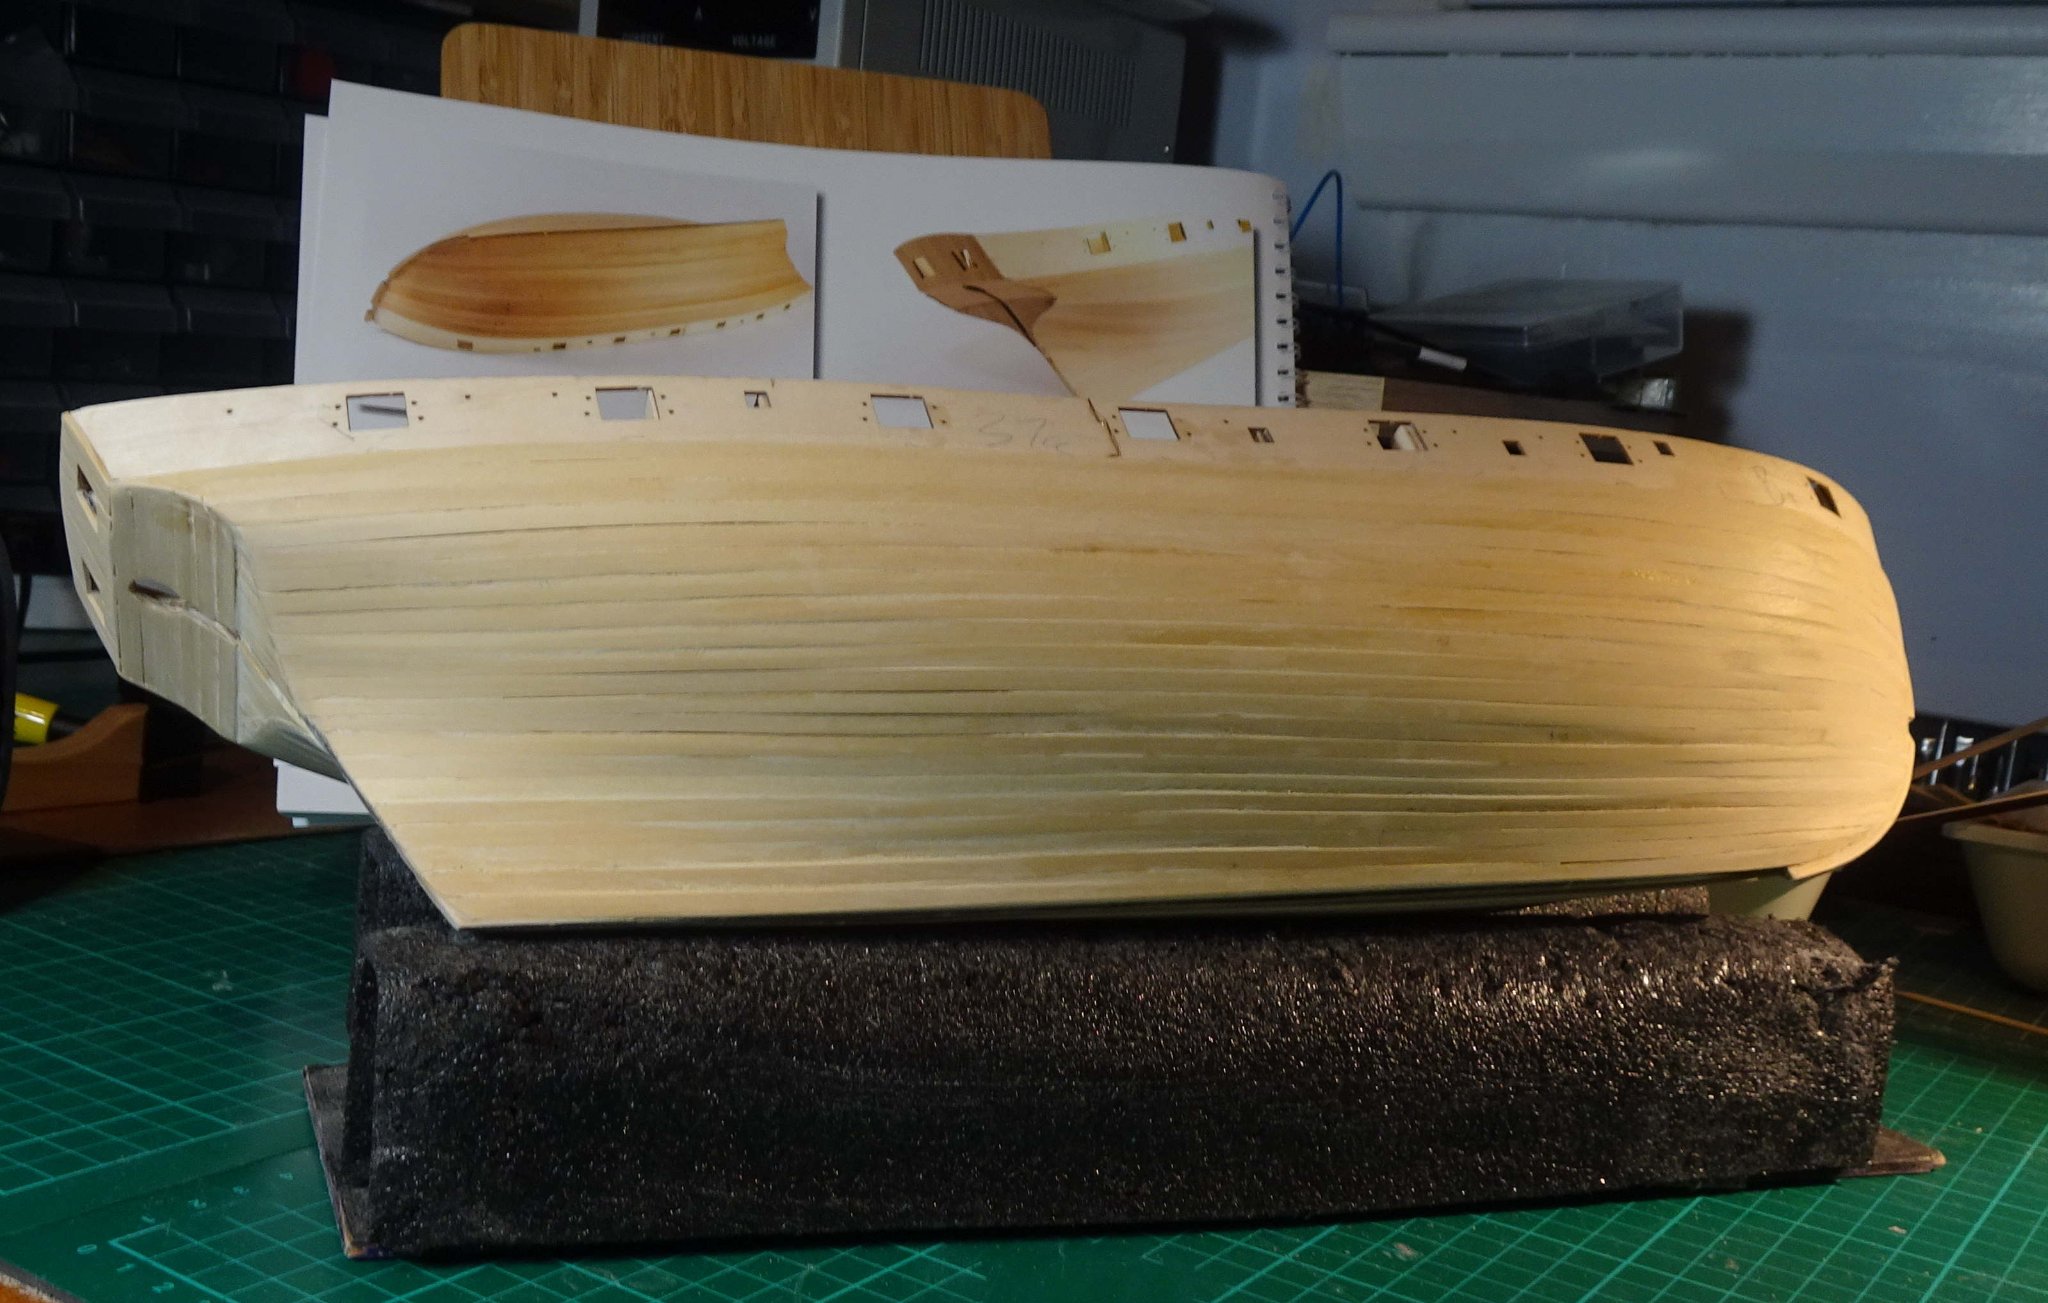
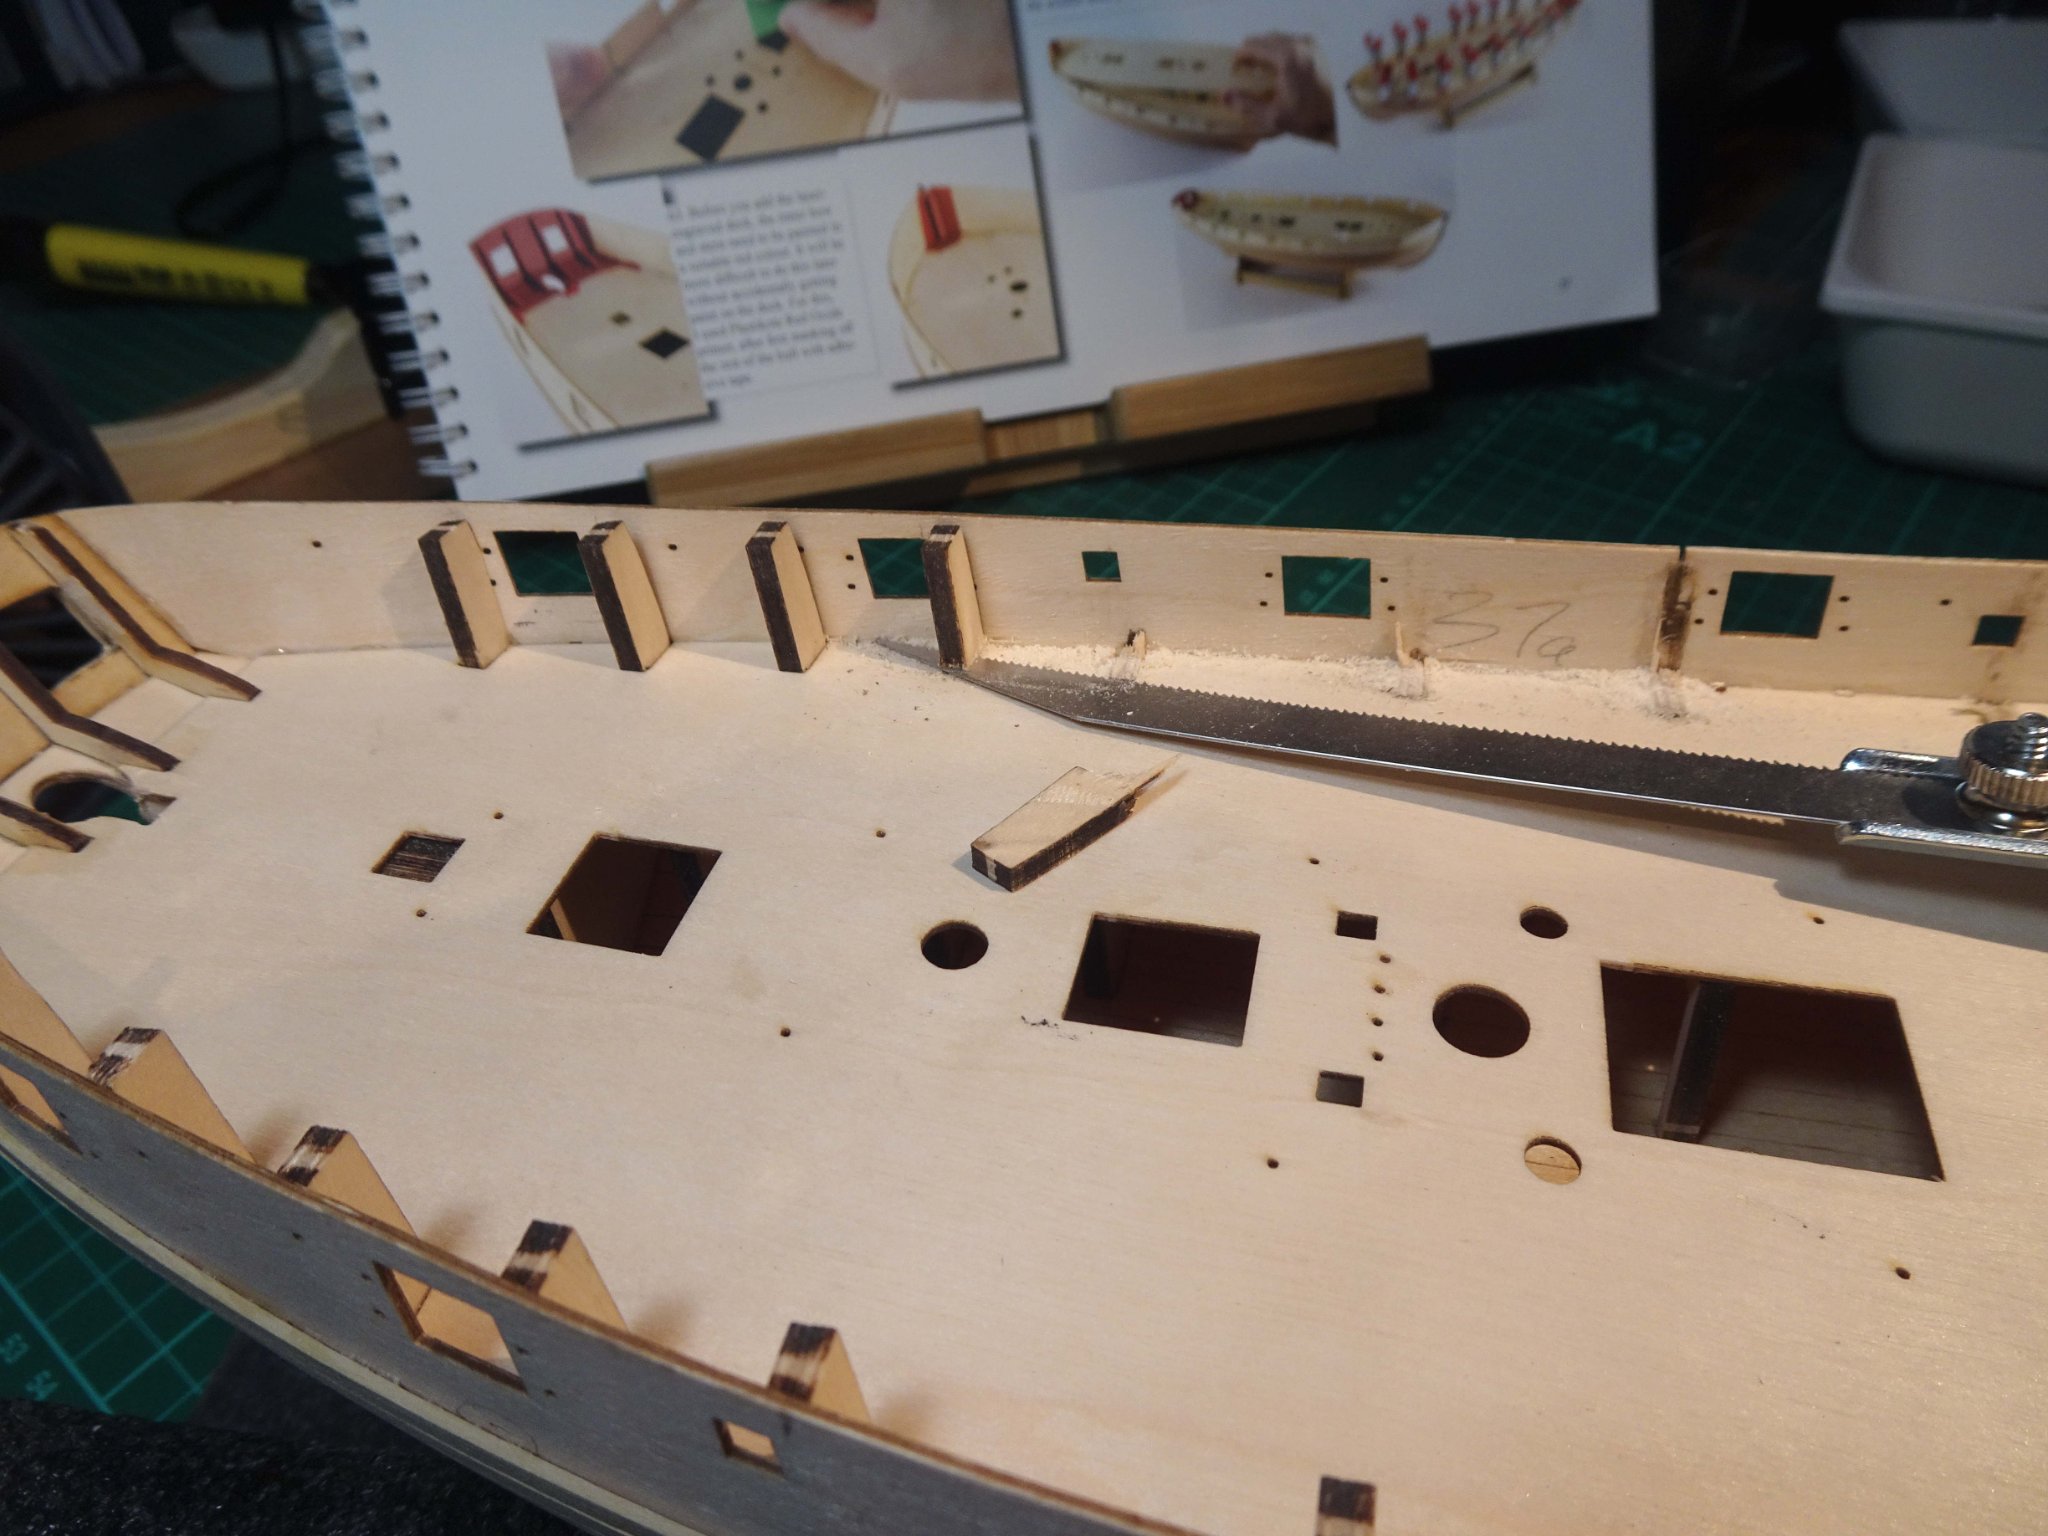
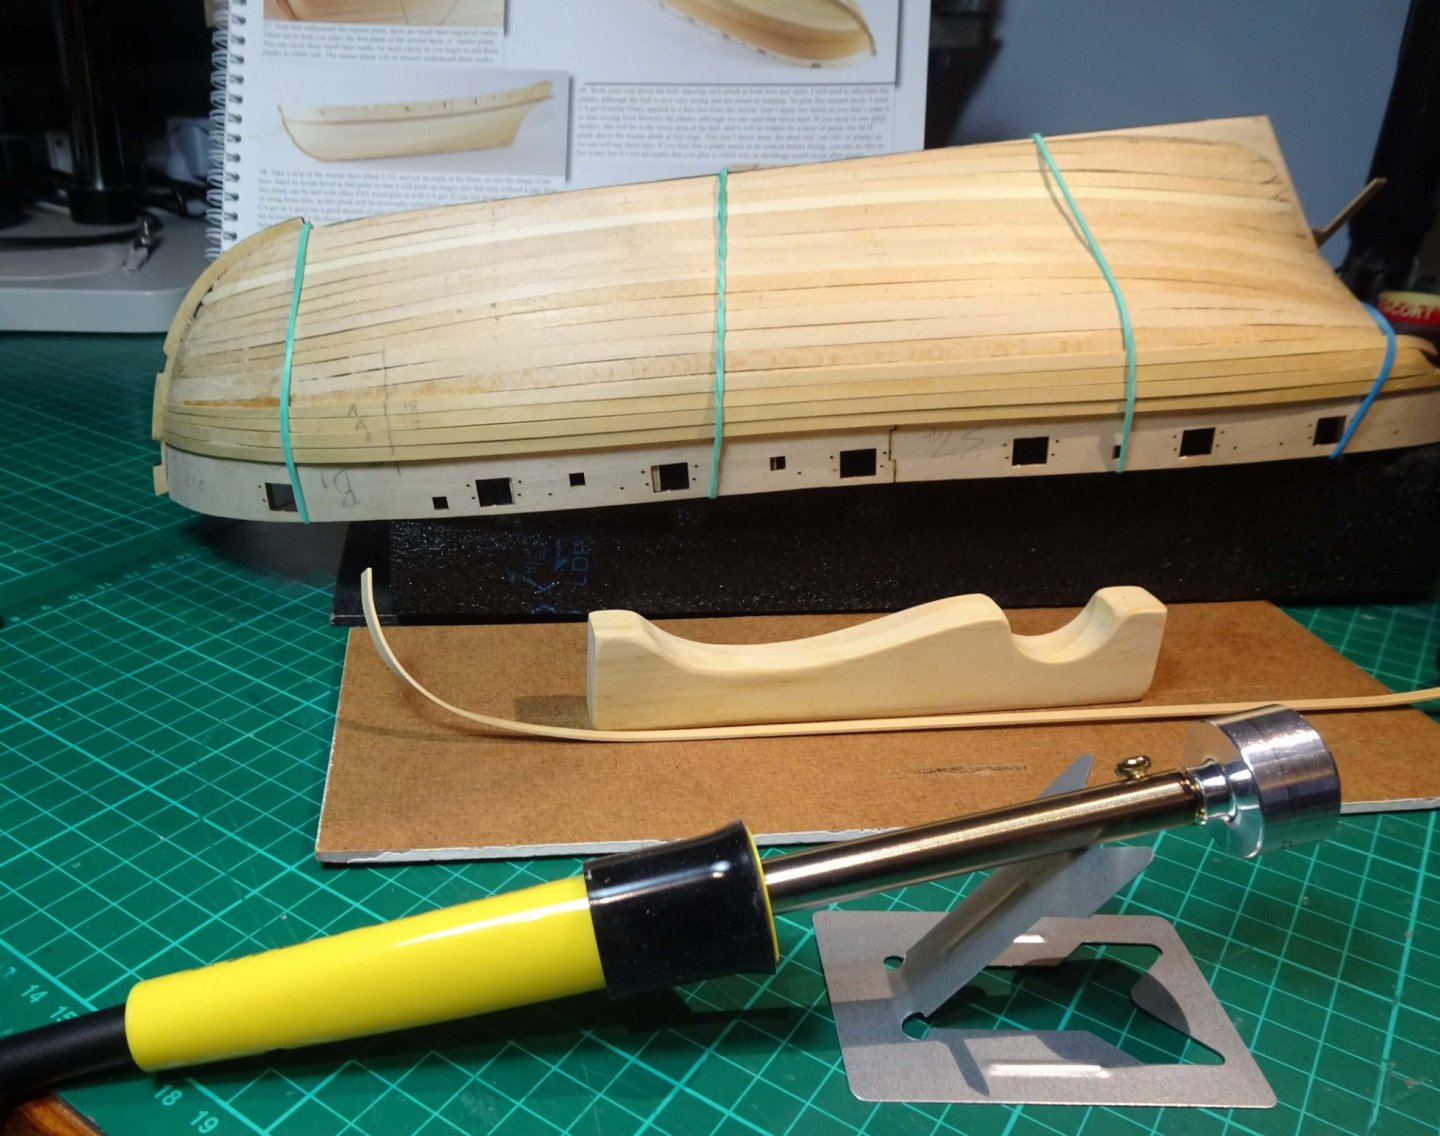
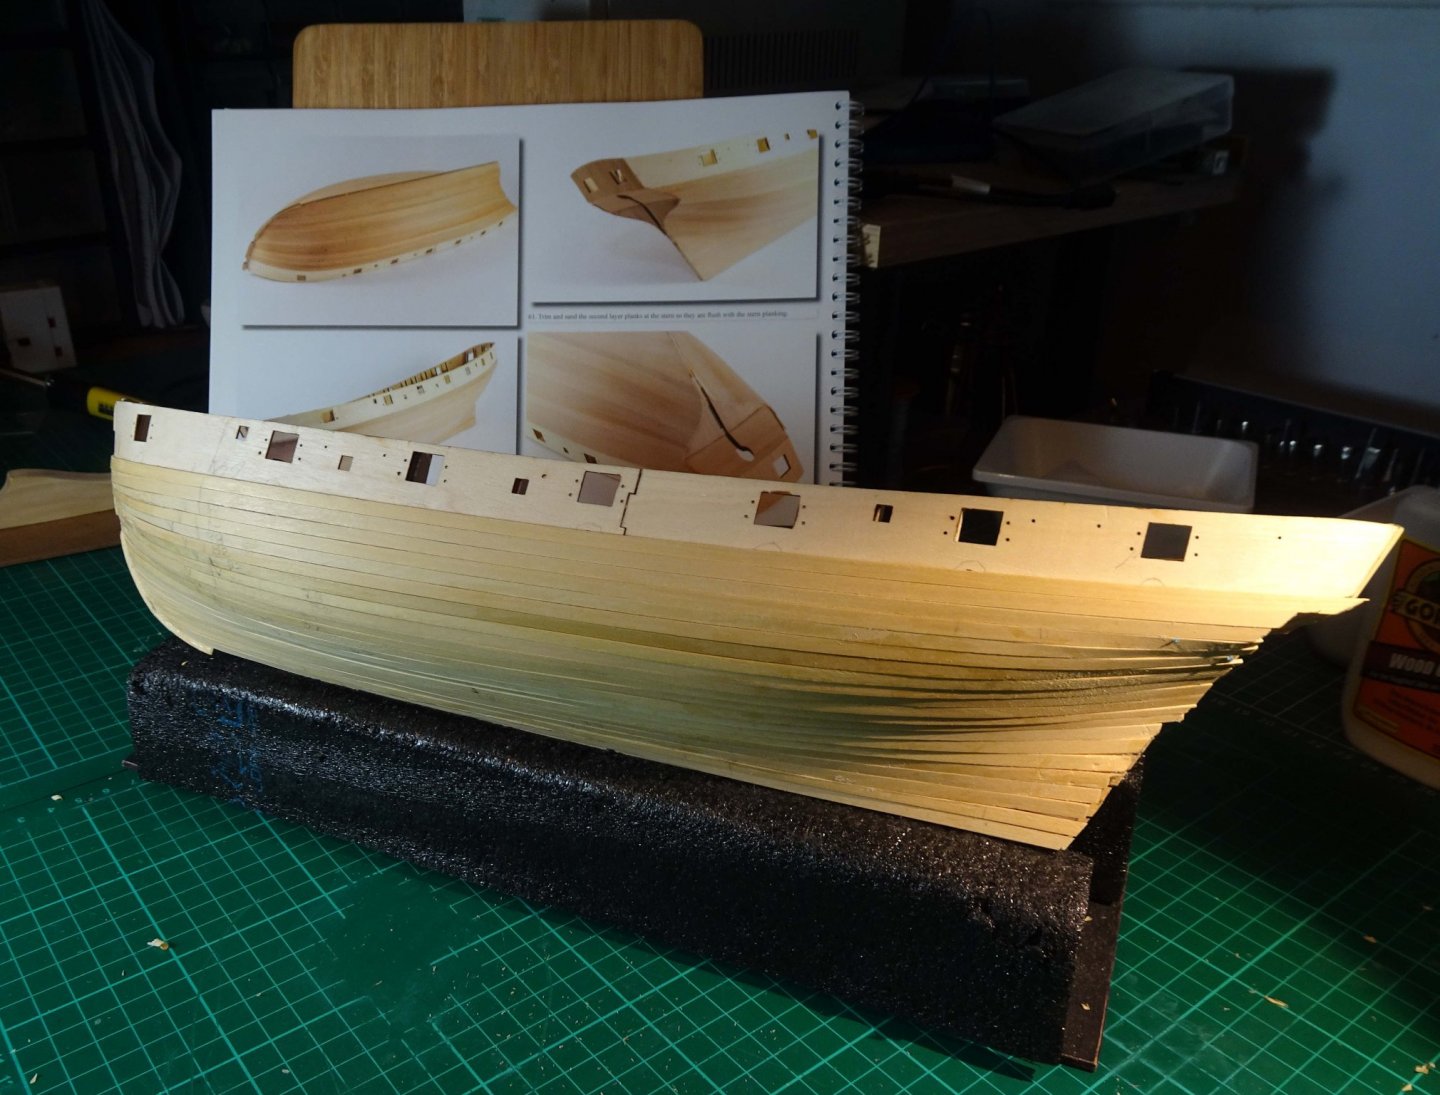
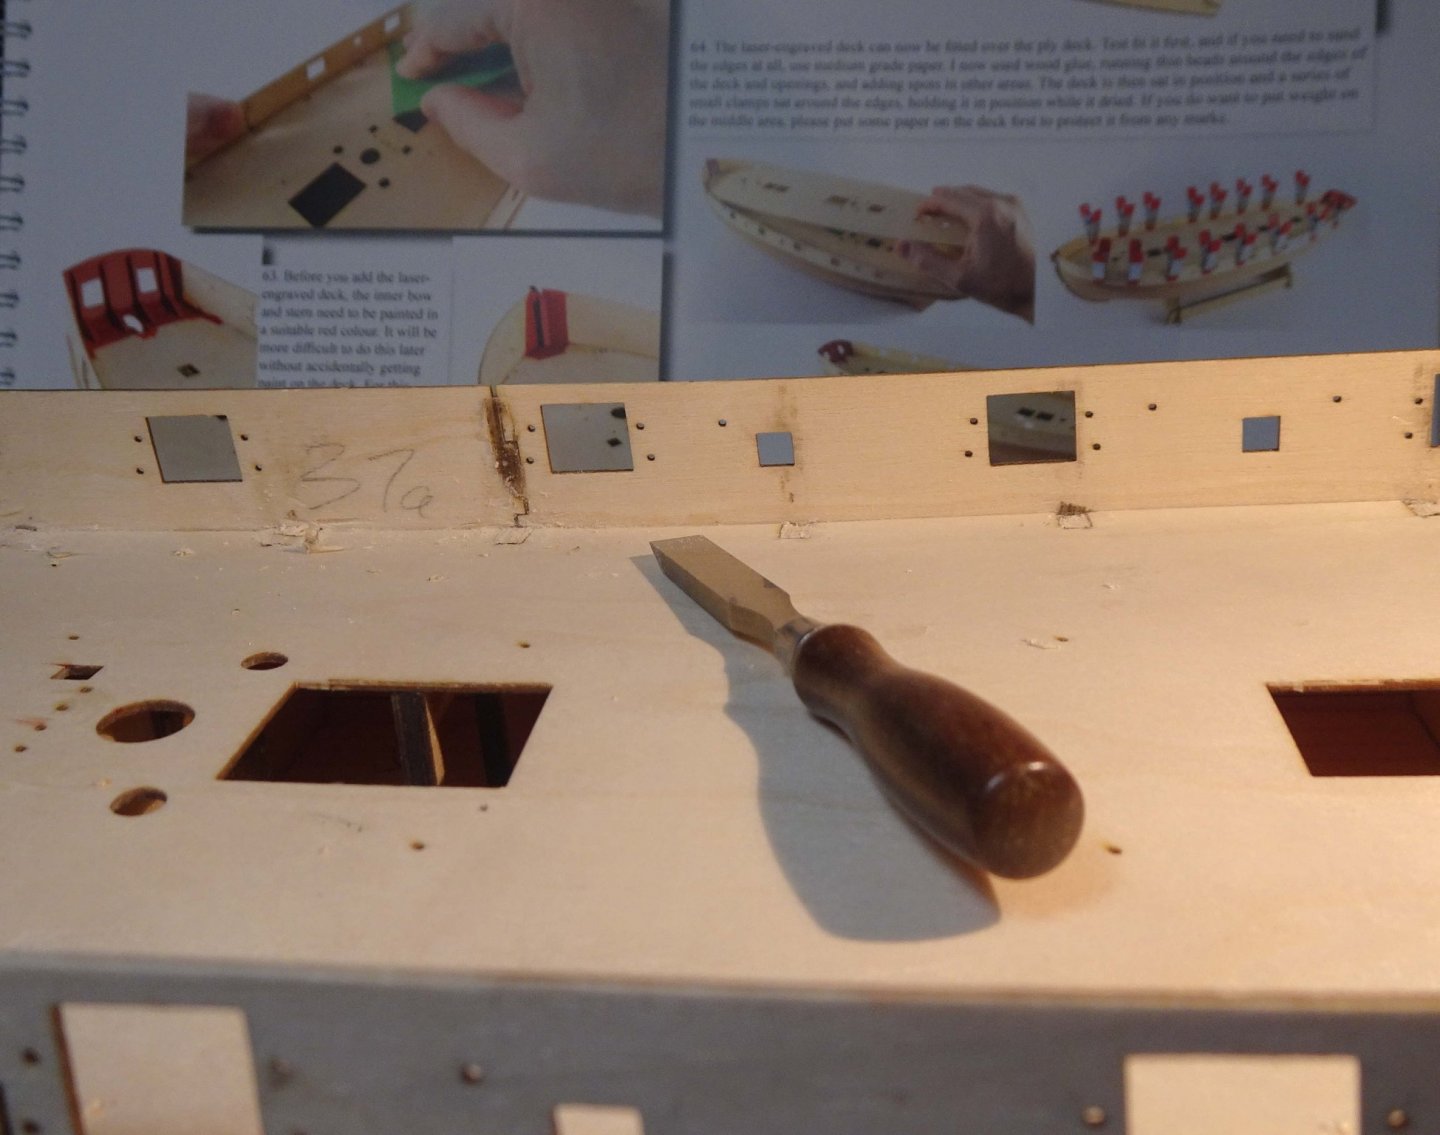
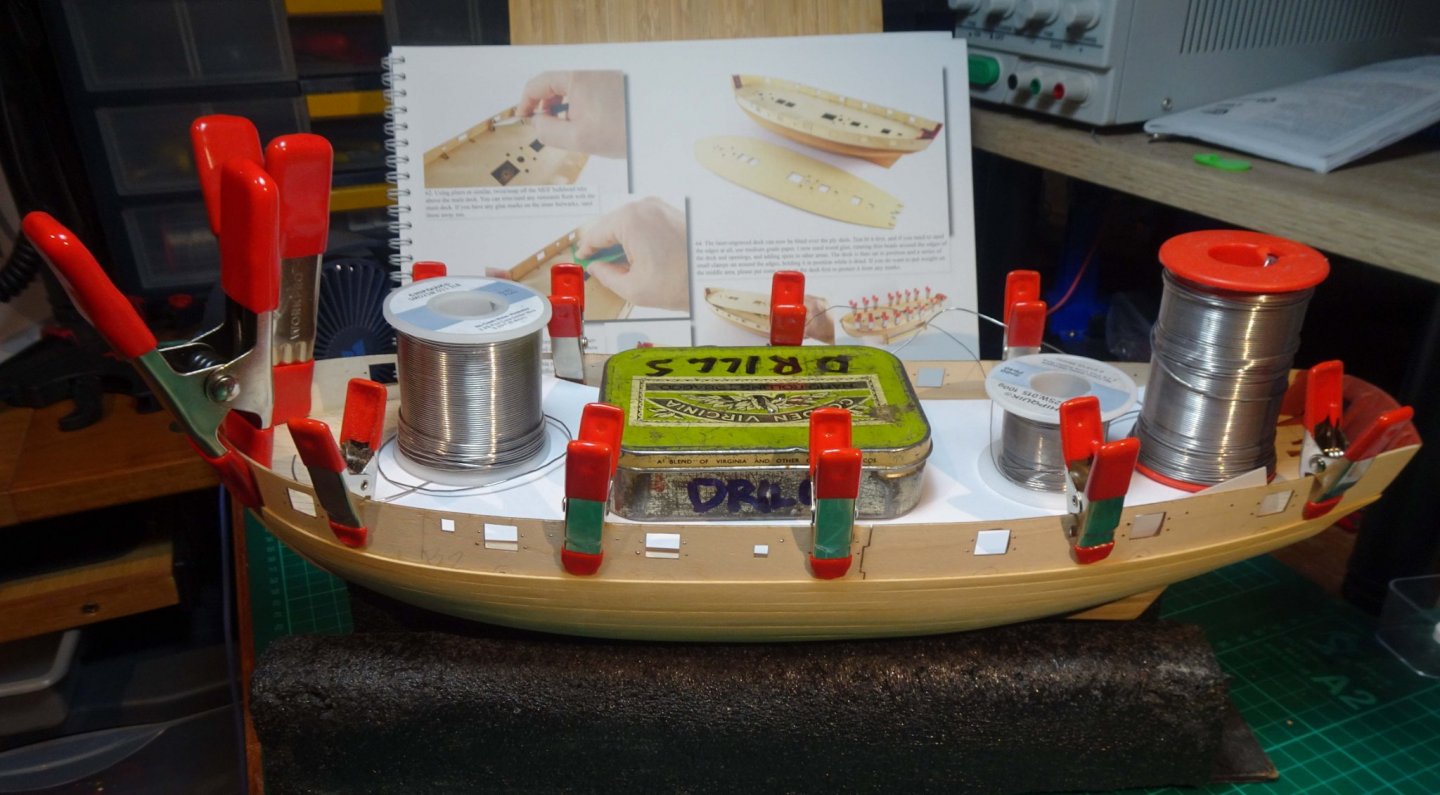
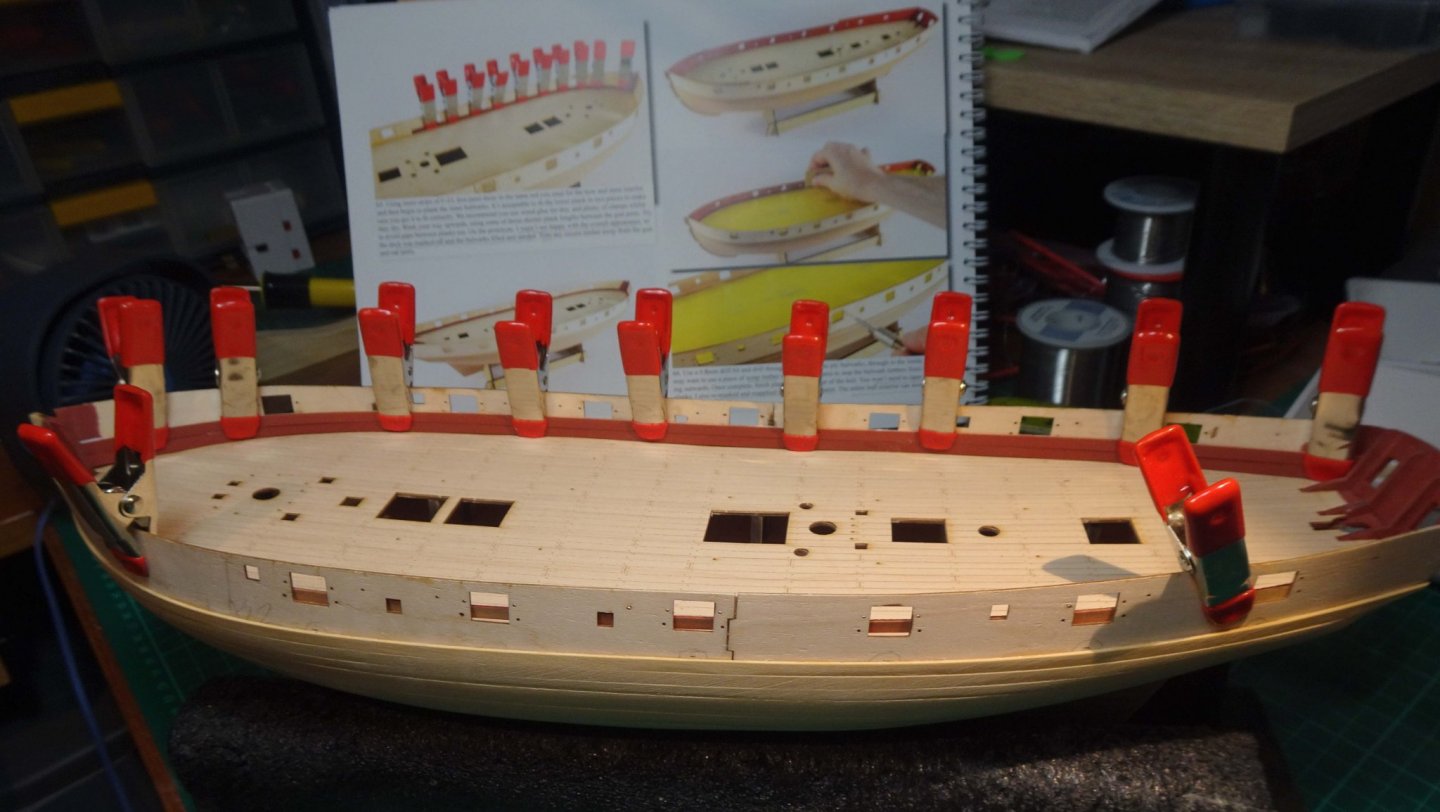
Hi all, Well it's been a couple of weeks since my last update, mostly concentrating on hull planking and playing with new toys. Below - I eventually got the first layer of hull planking to a vaguely acceptable profile and then planked the stern area. A bit more sanding still required. Test fitting a 2nd layer plank to see what final sanding was still required for the first layer. Below- 4x second layer planks glued. And a new toy making it's first appearance. I think I have managed to use the hot iron to create curves in two planes, plus a twist at the bow and stern ends of the plank...but don't quote me on that 😉 2nd layer planking all on. Now for the tidying up of it and sanding. The final planking is starting to look a bit more shipshape...from a distance. Cutting through the base of the bulkhead tabs prior to twisting them off. Even a 2mm deep cut is enough to encourage the tab to snap off at deck level rather than half way up. I have a couple of Zona razor saws...one came with some extra blades which included a pseudo flush cutter. Make sure the knurled locknut is topside to let the saw lie as flat as possible. I also used one of my small Veritas chisels to get the tabs flush with the deck. Laser engraved deck fitted and glued in position. It pretty much dropped straight in to position with only some light persuasion at the stern end with a 1/8" screwdriver blade to find it's proper rest position. Inner bulwark planks being fitted. I used continuous planks rather than two halves...it seemed to work fine. I had pre-painted the planks in the shed the evening before. I've fitted two full length planks each side. For the 3rd layer I will use short lengths of plank (which will leave all the hole positions revealed) then revert back to a full length plank for the 4th and final plank. Then trim out the holes. I've noticed at the bow and stern the bulwarks 'swoop' upwards which means that 4x plank widths will not be enough. Have I fitted the bulwarks incorrectly at the ship's ends?.... and how do I remedy this? ....I can always put in some 'stealers'...or sand down the bulwarks' height...hmm. Ah well, that's it for this fortnight....most of the time has been spent on hull planking...glad it's finished. If only the rigging wasn't blocking the light at the end of the tunnel the outlook would be quite sunny 😉 But I chose Flirt to improve my skills so I can't complain. See you all soon, Richard


-
The submarine looks different, interesting and you have done a fine job on the build. It is now added to my Wishlist 😉 Regards, Richard
-
Welcome Vladislav. Looking forward to seeing your steam cutter being built. Regards, Richard
-
The amazing details just keep coming...wonderful stuff. luggers the size of Muirneag carried around 70 nets, each about 600 square yards I had read somewhere previously that the nets extended for about two miles. But '70 nets' has made me focus on what that means to the men onboard who would have to clear the nets of fish ('redding') when they were hauled in. Can you imagine the effort and hours it would take to hand pick the herring out of the nets as they arrived on deck? The crew deserved every penny they got. Richard
- 261 replies
-
- 4
-
-
- muirneag
- vanguard models
- (and 2 more)
-
A nice balance of three different lifestyles! The birds, the fishing boats and the convoy, all waiting. Another good 'un 🙂 Richard
-
Arnie approves. He'll be back to have another look soon. Richard
-
Earlier today I had been wandering through a website which had hundreds of pics of old (mostly) UK fishing vessels (...I've bookmarked it on another computer so will edit the link in to here tomorrow) I'll add the link here as a separate post since I doubt if 'edits' generate notifications. ... http://www.trawlerpictures.net/gallery/category/473-a-look-back-in-time/page__view_style__large The bulk of the pics seem to be from around the 1960s but there are still quite a few older ones. Most of the trawlers have wheelhouses. The pics give a good feel for the life these families led. There is a Gallery section where the pics are sorted by topic ... http://www.trawlerpictures.net/gallery/ including 'Models'. In the Forum section there is a thread on 'Books about fishing from around the world'... http://www.trawlerpictures.net/topic/115-books-about-fishing-from-around-the-world/ Richard
- 222 replies
-
- 3
-
-
- First Build
- Lady Isabella
- (and 2 more)
-
Erik, I think the $855 one must have been a scammer...chancer. But $65 seems similar to the going rate in the UK, from what I've seen. My copy, IIRC, was £30 + £4 pp 'in good condition' with a (tattered) dust jacket...delivery in about a week. It will make a pleasant change from reading Kindle books....I'm looking forward to reading it Richard
- 222 replies
-
- 1
-
-
- First Build
- Lady Isabella
- (and 2 more)
-
Erik, Two good links you have provided there. - so much info therein. Earlier today I had been wandering through a website which had hundreds of pics of old (mostly) UK fishing vessels (...I've bookmarked it on another computer so will edit the link in to here tomorrow) and I saw a pic of a very sleek looking Zulu...so I clicked on the Comment below it which said the pic appears in 'Edgar March - Sailing Drifters'...I then read up on that book, tracked down a copy and bought it. ...delivery in a week or so. A few minutes after all that I saw that B.E. made reference to that book in one of his posts 😉 So looking in to my crystal ball I suspect there is a Zulu build somewhere in my future. Regards, Richard
- 222 replies
-
- 1
-
-
- First Build
- Lady Isabella
- (and 2 more)
-
Erik, Your hull's livery is looking very attractive and very sharp. And thanks for sharing the 'lettering' research. Next task before I varnish, I want to put registration numbers on the side of the hull. That way I can varnish over them and protect and unify the finish. You (and B.E.) got me thinking 😉 .... my Fifie may be getting some late lettering additions during the winter months. Regards, Richard Edit: A list of current Fishing Boat Registration Letters ... https://www.findafishingboat.com/article/fishing-boat-registration-letters Seems the Resistration is not only marked on the vessel but also carved.
- 222 replies
-
- 1
-
-
- First Build
- Lady Isabella
- (and 2 more)
-
Reducing mast circumference without a lathe
Rik Thistle replied to Charlie pal's topic in Masting, rigging and sails
I use a small finger plane to take it down in an octagon shape and then sand. In spite of owning a small Proxxon wood lathe I did what you did Justin on my Fifie's masts, and it worked a treat. I didn't expect it to be so quick and effective but ...well, I learn something every day. I think for longer masts I may still use my lathe, but using a miniature plane and sanding proved quick and convenient on my last build. Richard -
glue for planking
Rik Thistle replied to BOB S.'s topic in Building, Framing, Planking and plating a ships hull and deck
DAP Rapid Fuse Adhesive. Thanks for the heads up. Doesn't seem it is easily available in the UK ...well, not without £15 delivery charge on the £17 bottle...gulp.... https://www.amazon.co.uk/DAP-00157-Adhesive-Building-Material/dp/B01DA6X1OC I notice some Amazon Customer Reviews warning to wear gloves since it is extra super sticky...which all CA glues tend to be anyway. I've added it to my Wishlist and will watch for it becoming a free delivery Prime item 😉 Richard -
glue for planking
Rik Thistle replied to BOB S.'s topic in Building, Framing, Planking and plating a ships hull and deck
Hi Bob, White wood glue - Polyvinyl Acetate (PVA eg Titebond) is absolutely fine for deck and hull planking and takes a few minutes to 'grab' giving plenty time for adjustments. It sets hard in about 24 hrs. Some members occasionally use Super Glue (aka Cyanoacrylate, CA) for quick setting (10 secs?) joints on difficult hull planking, say. Super Glue Gel takes a little longer (30 secs?) to set so gives a little adjustment time. But CA does stick your fingers together! Contact Adhesive is used for sticking soles on shoes...it has a rubbery texture. I wouldn't use it for model ships. Here's a very good thread on glues ... https://modelshipworld.com/topic/1894-glue-recommendations/?tab=comments#comment-43667 regards, Richard -
B.E., Looking good. Bet you're so glad the reef points are all done now 🙂 But they really do add to the look of the sails....once you've seen sails with reef points you can't unsee them on other boats. And I like the 'recent acquisition'...I've had one on my Amazon Wishlist for a while but haven't pulled the trigger yet. I hadn't thought of it as a 'sail holder' but it seems ideal for that...as no doubt many other uses. Hmm. Regards, Richard
- 261 replies
-
- 4
-
-
- muirneag
- vanguard models
- (and 2 more)
-
Interesting contrast in the architecture in the backgrounds of the two pics. They have some splendid buildings. Richard
-
Dust extractor - compact and quiet?
Rik Thistle replied to Rik Thistle's topic in Modeling tools and Workshop Equipment
Hi all, Bill Penz's blog is a bit of an eye opener ... https://billpentz.blogspot.com/ Apparently it is the extremely fine dust that we cannot see that is the real problem. Richard -
...the raid by the CMB'S BY Capt Agar You got me reading up on that. Commodore Augustus Willington Shelton Agar VC, DSO, RN and Sir Paul Henry Dukes KBE sure lived life to the full. I don't know if they make them like that anymore. Richard
-
Jim, That sounds like a very interesting and enjoyable visit. I've never been to Russia but have had a very liquid 'lunch ' with some Russian pilots and engineers at the Farnborough Airshow...they were great guys and had some some amazing stories to tell - nothing sensitive, just Vodka talk. I've found that almost all nationalities get on with each other...it's just respective Governments that muddy the waters. I wonder what fishing boats were historically used in Arkhangelsk? OK, off on another Google search....;-) Regards, Richard Edit: Those cod fishing boats look quite spectacular...https://www.romanovempire.org/media/cod-fish-fishing-boats-port-of-arkhangelsk-archangel-on-white-sea-northern-9ef98b
-
'The thing I like about the model Tanks.... ' That is quite a tank... if you photoshopped that in to a Russian landscape I wouldn't doubt it was real. Be careful though....you might get a Russian knock on the door asking for their tank back! And please keep the paintings coming .... they are as enjoyable as the builds. Regards, Richard
-
268 14mm knotted lines Yup, I feel for you 😉 The sails look great though. Regards, Richard
- 261 replies
-
- 3
-
-
- muirneag
- vanguard models
- (and 2 more)
-
Hi John, Your Bluenose build is looking very good. Bluenose has now appeared on my to-do list....I like it's shape and there is plenty of info about. Your first post analysing the 3x kits available is very useful. As a relatve newcomer myself I am still find interesting and useful tools to buy 🙂. The small plane you bought is the same one I bought. And I've also discovered razor saws....very useful and they make a straight 0.008" wide cut eg ... https://www.amazon.co.uk/gp/product/B01DPUGL7W/ref=ppx_yo_dt_b_search_asin_title?ie=UTF8&psc=1 Best regards, Richard
-
Hi Capt Nemo, I was reading up on Bluenose builds in general and found yours...it's very good. I'm pretty much new to this hobby myself and you are asking/thinking all the questions I ask. Yes, 'contact adhesive'... https://www.amazon.co.uk/Evo-Stik-Impact-Adhesive-347908/dp/B0001P03S8 ....good for kinda fixing many things but leaves an ugly edge/watermark. Normally you spead the adhesive on both surfaces and then let it dry for a few minutes before bringing (contacting) the two surfaces together. Once together, that's it....no real scope for 'adjustment'. Wood glue is much better... you get minutes to adjust the surfaces when joined .... https://www.amazon.co.uk/Titebond-5004-Premium-Wood-Glue/dp/B0000223UR/ref=sr_1_4?dchild=1&keywords=titebond+wood+glue&qid=1606307056&s=diy&sr=1-4 There are also SuperGlue gels ... https://www.amazon.co.uk/gp/product/B01KVQKG9C/ref=ppx_yo_dt_b_asin_title_o04_s00?ie=UTF8&psc=1 .... for those parts that need a bit of extra gluing strength and a quick'ish bond. But are a pain if you get your fingers glued! I do like the shape of Bluenose...it's very elegant, and probably very functional. All the best, Richard
- 14 replies
-
- 1
-
-
- bluenose ii
- artesania latina
- (and 1 more)