HOLIDAY DONATION DRIVE - SUPPORT MSW - DO YOUR PART TO KEEP THIS GREAT FORUM GOING! (Only 20 donations so far - C'mon guys!)
×


NAZGÛL
-
Posts
1,365 -
Joined
-
Last visited
Content Type
Profiles
Forums
Gallery
Events
Everything posted by NAZGÛL
-
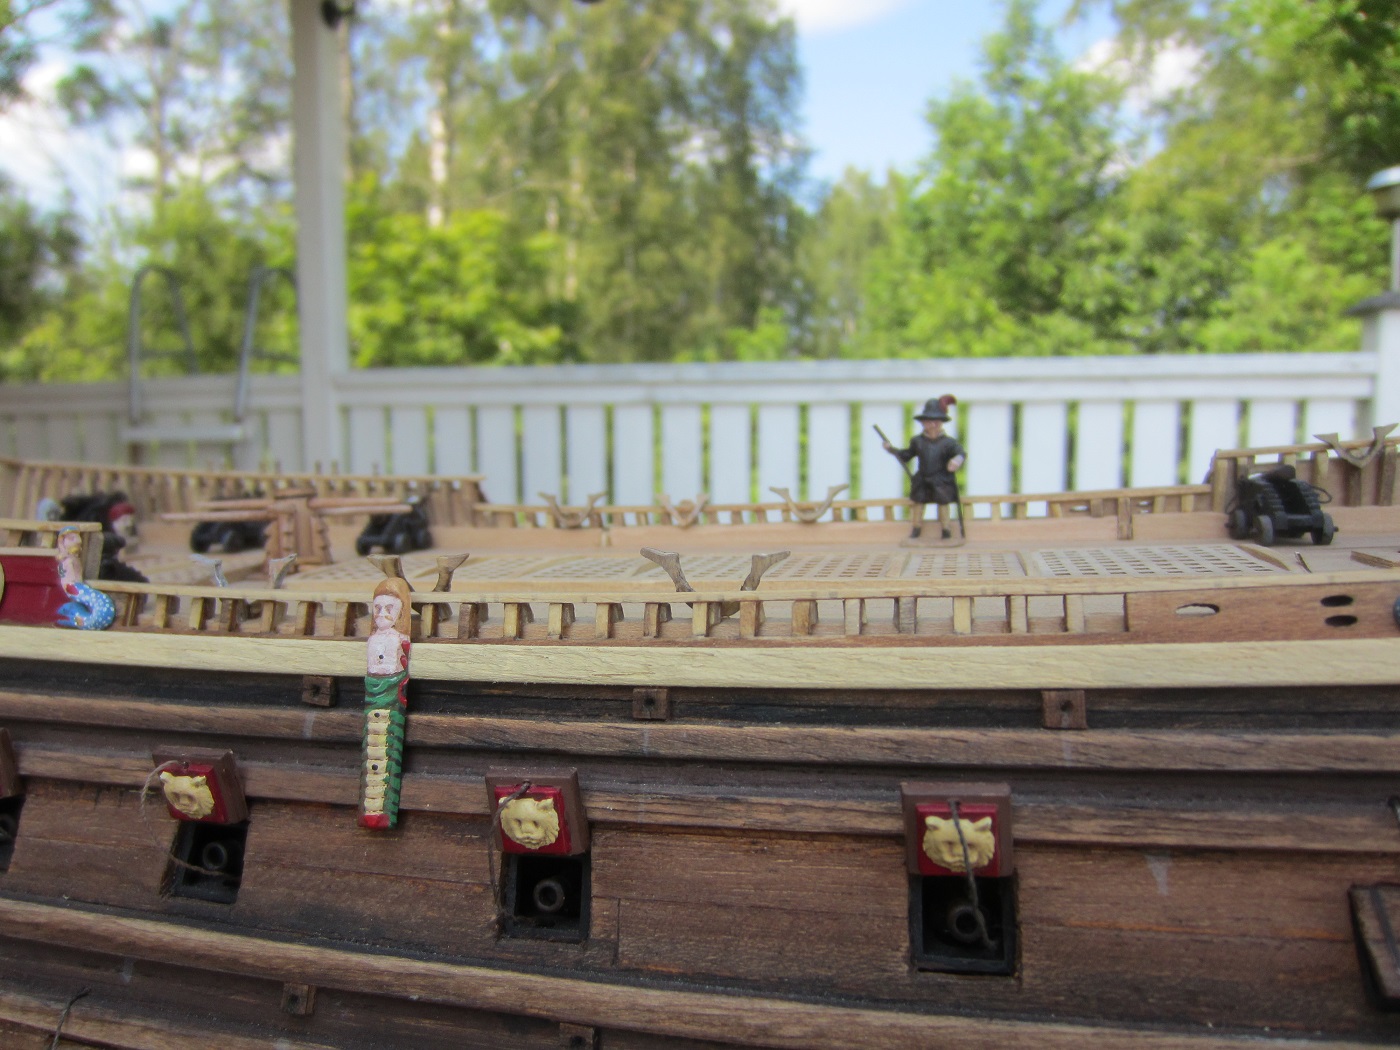
 Hey everyone! I have done some work on the cleats and rigging details to start the actual rigging. It was harder than expected to get them thinned down, and not breaking them. Having this done means I can now start with the rigging. /Matti
-
Great, very nice Karl! Thing is that I'm pretty sure there will be new information about the rigging in the upcoming Vasa II book so the best source for information isn't available just yet. At the same time, I guess there has to be some degree of choice or guessing when building a kit as the original rigging didn't survive. I've read the deadeyes where not red, it's an old guess from the 60:ies, and they repainted the ones on the 1:10, but seems to have left some of them red. They where untreated or may have been lightly tarred. /Matti
-
Nice progress Pops, I like the look you made! /Matti
-
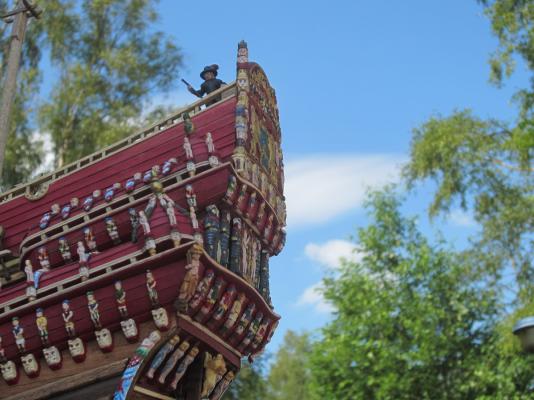
Nice idea and those carvings and details are great! /Matti
-
Thanks Frank! I think all other Vasas here are nice and a big inspiration to follow. To see other solutions, methods and aesthetic decisions. /Matti
-
Nice channels! Matti
-
Batavia by *Hans* - FINISHED
NAZGÛL replied to *Hans*'s topic in - Build logs for subjects built 1501 - 1750
Looking great Hans! /Matti -
Wow, it looks great! We are at the same stage. Good , I can now cheat and look at you.
-
Sorry for the confusion Pete. I was looking looking back at the build. I will not do more work on the gunports. /Matti
-
Nice planking Frank, looking forward to see more! /Matti
-
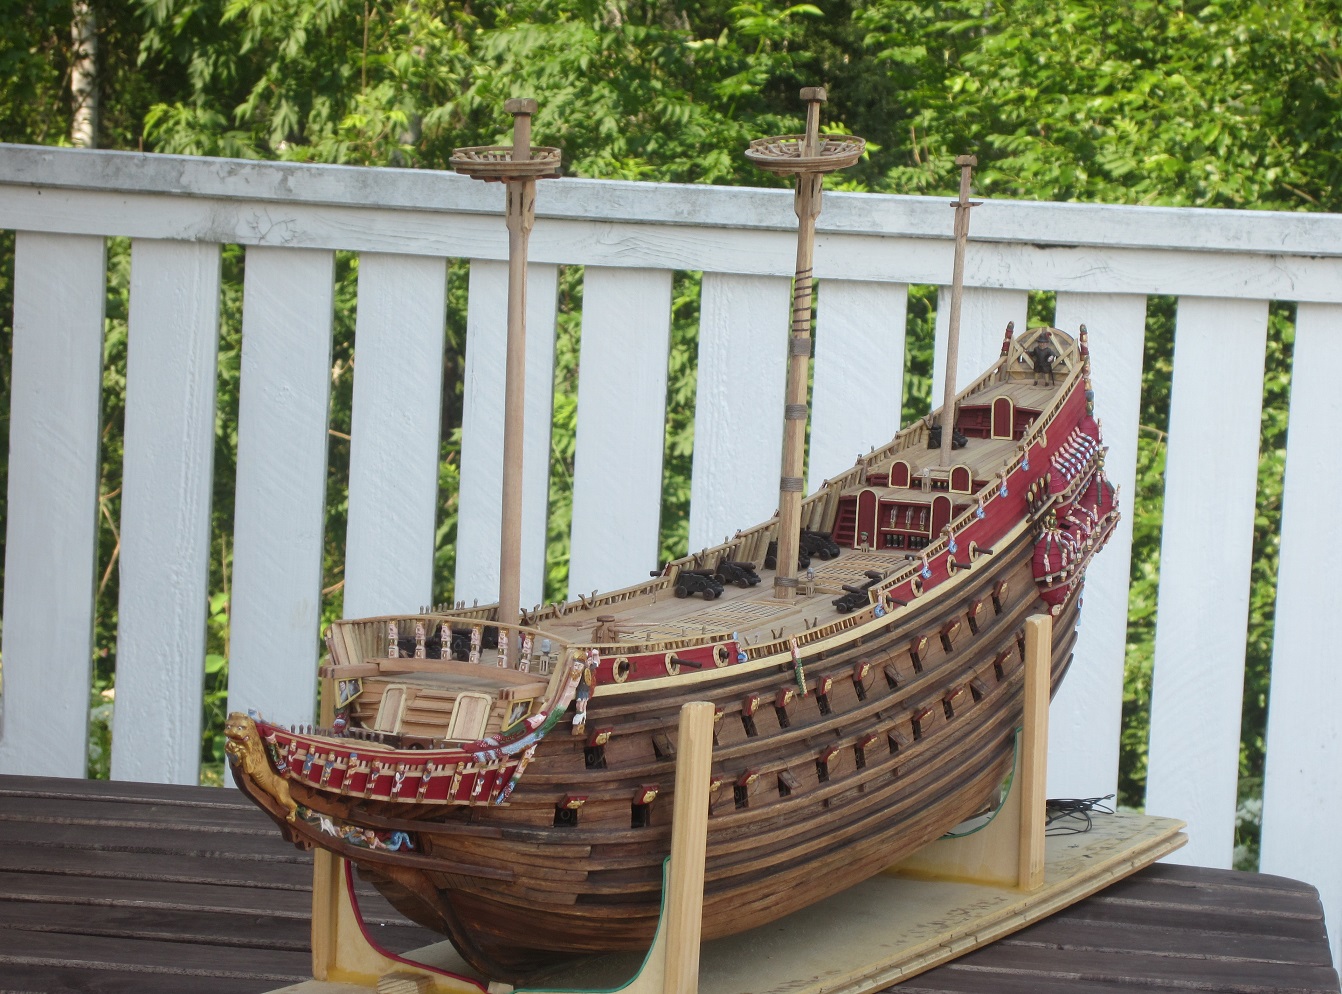
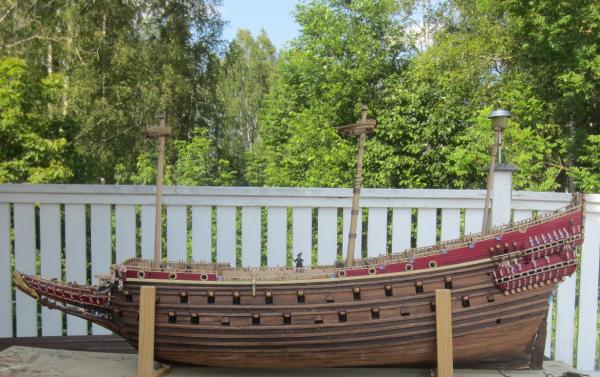
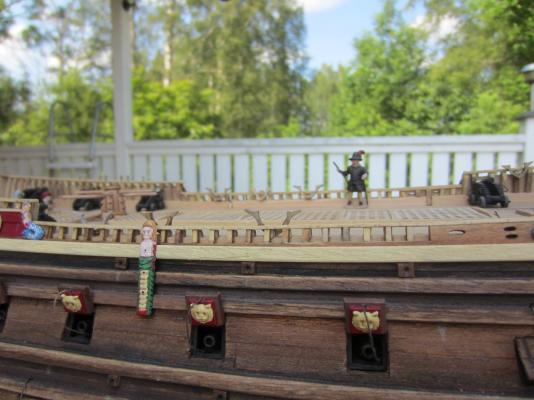
I found the open gunports to be the hardest part of the build but it is well worth it. Yes you have cut out a few frames to give space for gunports. It was no problem. For me the biggest challenge was to get the gunports in the right places. If you want them uneven like the original has, it's a bigger challenge. I used the 1:10 model and the museum plans when mapping them. The upper level has smaller gunports, so that's also something to consider. Billings has all hatches the same size so don't make the lower gunports too big. I think it's best to use pins and rubberbands and nail the plank on the frame while it dries. It gives a perfect fit. I dilluted the colors some so it don't destroy the details. Not to much though. I put them on paper at a table. You can then get support for the brush hand while painting. The other hand can hold the sculpture and magnifier. /Matti
-
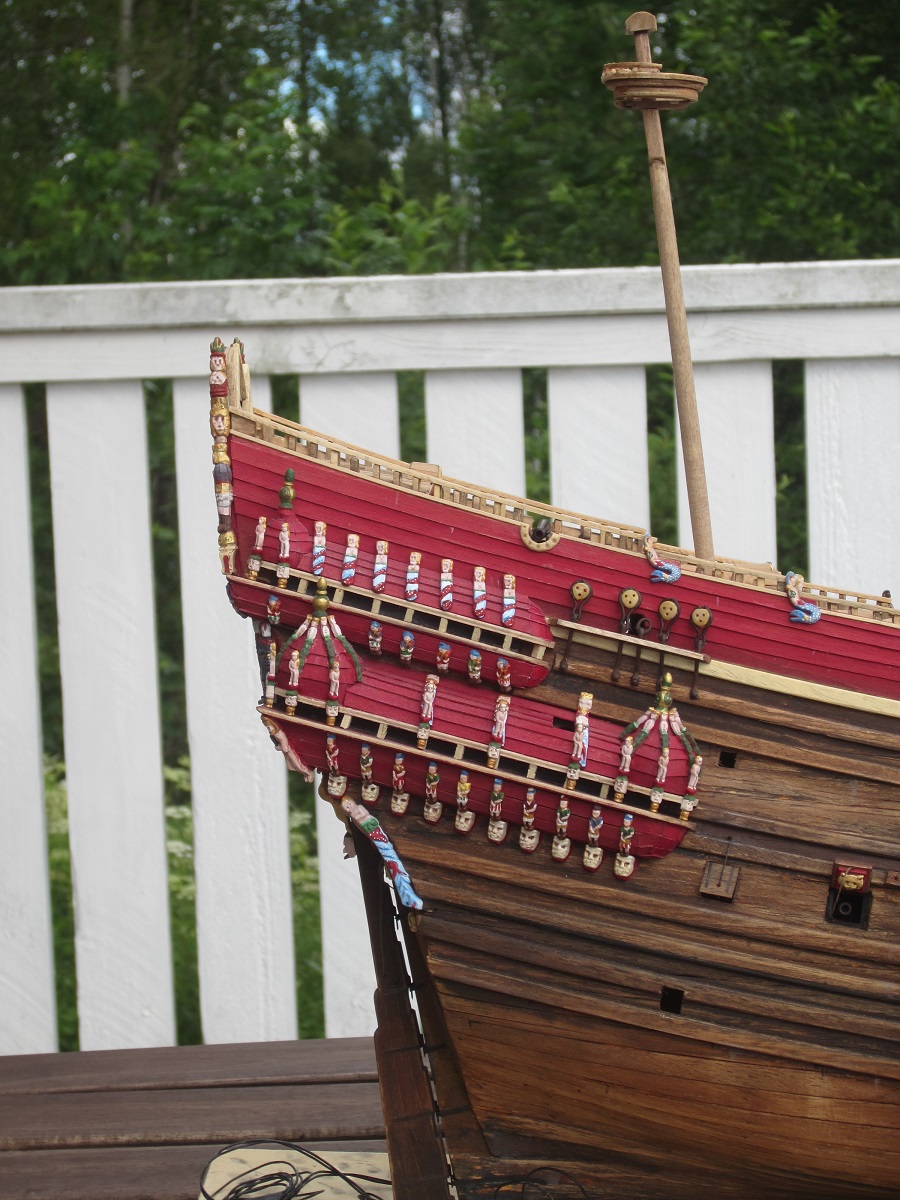
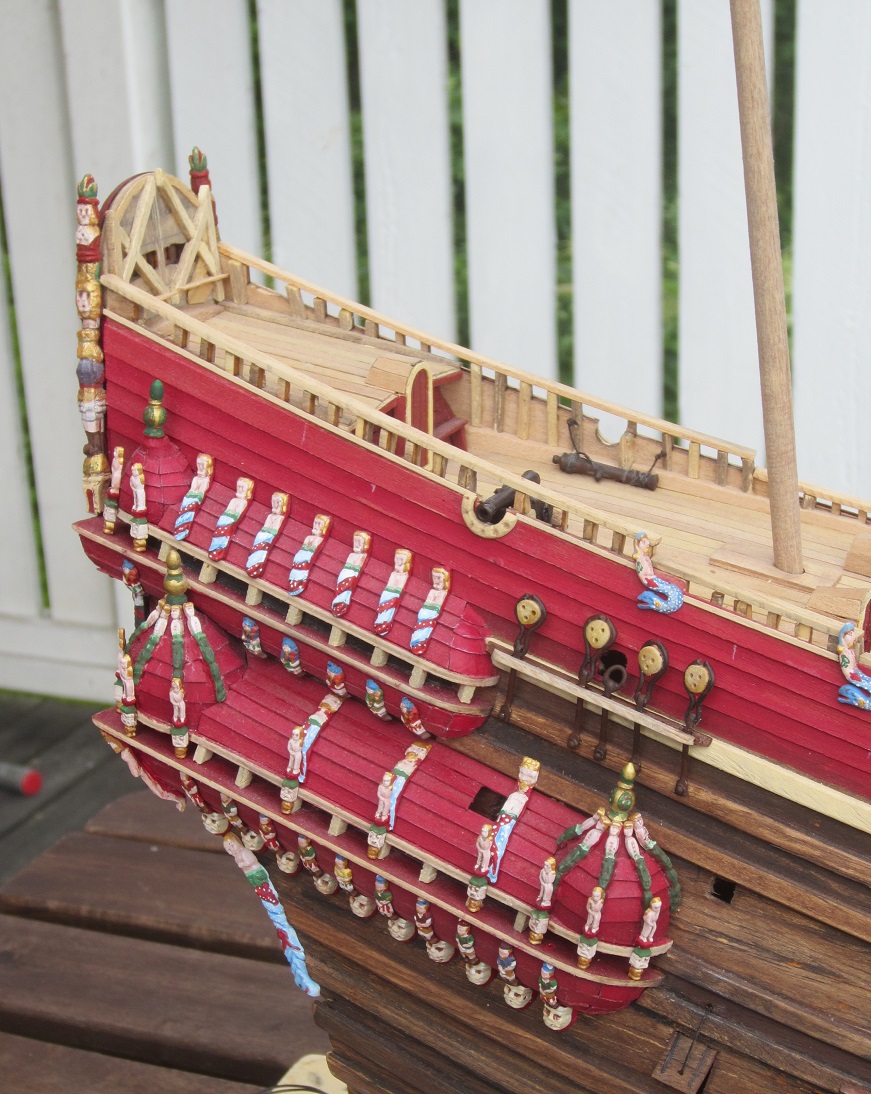
Wow, thanks guys, really! Popeye, I could't make this if Billings model didn't have a good overall shape and the plastic figures. It makes it easy to tweak it right and make a nice representation. My build has problem areas because of my lack of experience, but I try to see them as lessons learned. Tom, patience is a good thing when doing a Vasa build, especially if you do it polychrome and add the missing sculptures. The only red is the area around the lion heads. I used brown and black/dark grey, and black inside. I'm not sure if my way to make open gunports is the best though (integrate the frames from the kit). /Matti
-
Cheers guys! Mobbsie, they weren't painted but may have been tarred. I like the untreated look. Thanks for the suggestion though! /Matti
-
Thank you very much mate! /Matti
-
Thanks buddy! /Matti
-
Hey all, fastened the first channel. I bolted the chainplates. I do think the construction will hold up later on, it would not be fun if it didn't... Pretty tricky work and I hope I'll get better at doing them as I move along. I can definately feel how new I am in this game during these stages. /Matti


-
Way to go Karl! The profile pic really show how nice your paint job is! I haven't seen ropes around the foremast before, only the mainmast being made in many pieces. Your way looks nice. You are at a higher gear than me. /Matti
-
Nice! /Matti
-
Cheers mate, it has been midsummer and it's something we celebrate big time in Sweden, but I've done some progress. A lot of planning and research and a little build. I thought the rigging phase would be difficult and it seems I was right. friends that see the model say that she is almost finished, and I show pics of all the lines and ropes and they change their mind. /Matti /
-
Very nice! /Matti
-
Thanks, I will. It's just the standard framed showcase that many use. I like the simplicity of it. /Matti
-
Cheers mate, the whole rigging still feels hard to grasp, but I'll try to just do it one step at a time. Oh, I forgot. I ordered a showcase and it arrived. I was planning for building one, but figured I want to put that time and energy into the actual model. I will paint it though to get the look I want though. /Matti