NAZGÛL
-
Posts
1,365 -
Joined
-
Last visited
Content Type
Profiles
Forums
Gallery
Events
Everything posted by NAZGÛL
-
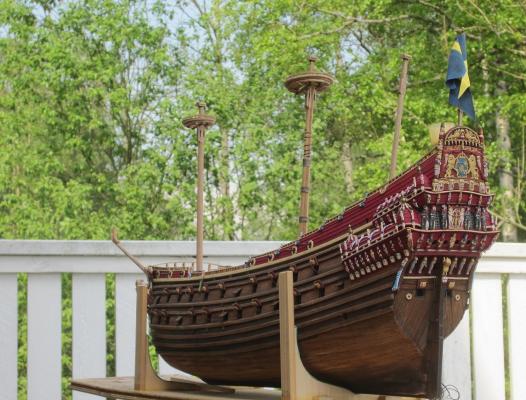
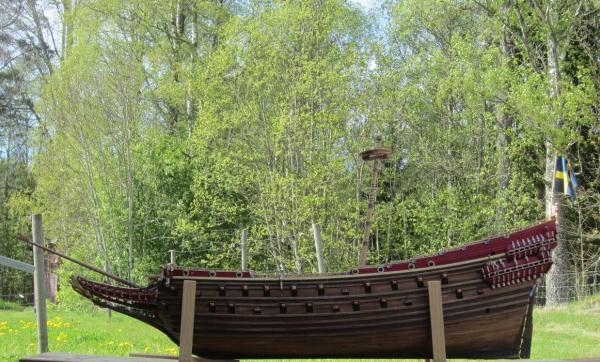
 Välkommen! It will be really interesting to see your model, and perhaps it will be a hybrid of the two kits. 1. When googling pictures of newly tarred boats they seem to differ some in shade. I looked at how Batavia and Götheborg looked when they where new. I have toned the colors down as I wanted to make the colors blend, look harmonic and in scale. When painting models (or paintings) I try to get natural colors; in this case I wanted it to look like dried blood, earth, old bone and so on. I use acrylic model paint. Mostly Vallejo. Since you're a swede, the cheap paint at Panduro hobby works well also but they have less variaty of colors though. I'm used to mix my colors to get control and acrylics are perfect for it. I stoped using oil paints long ago as I prefer this look and also how easy and fast it is to work with. A major plus on a big paint job like a polychrome Vasa. All parts are painted in shades and weathered so a short drying time is great. I found the hull to be the most complicated part of the paint job to get right. I used a mixture of stain (bets) to get the nuanse I wanted. Then acrylics. Pastel powder. A coat of flat acrylic varnish to seal the powder once in a while. Also acrylic washes. Gentle sanding was done between the coats. 2. I use the same acrylics as above. No primer is needed imo, you want as few coats as possible to keep the details. (The brass parts is another story though as you need to sand or steel wool it and then use a good primer on it, if you want to paint them with acrylics.) 3. I try to avoid varnish to get the look I want. I only used it to make the pastel powder stick and to hide glossy CA glue seams. I use satin flat dilluted acrylic varnish. /Matti
 -
Cheers Mike! Doing them feels a bit like making the cannons as there are many details to get right. /Matti
-
Nice progress! /Matti
-
Very nice pics! /Matti
-
Thanks mate! Sorry for missing out on your reply, life's really hectic at the moment. I haven't had much time for the model but I glued the masts and made som details for the mizzen top. /Matti
-
Congratulations Buck! It must feel great. Looking forward to see your progress with the models. PS: Spectacular view! /Matti
- 515 replies
-
- 1
-

-
- artesania latina
- whaleboat
- (and 1 more)
-
Gorgeous work! Good to hear you found a nice job. /Matti
-
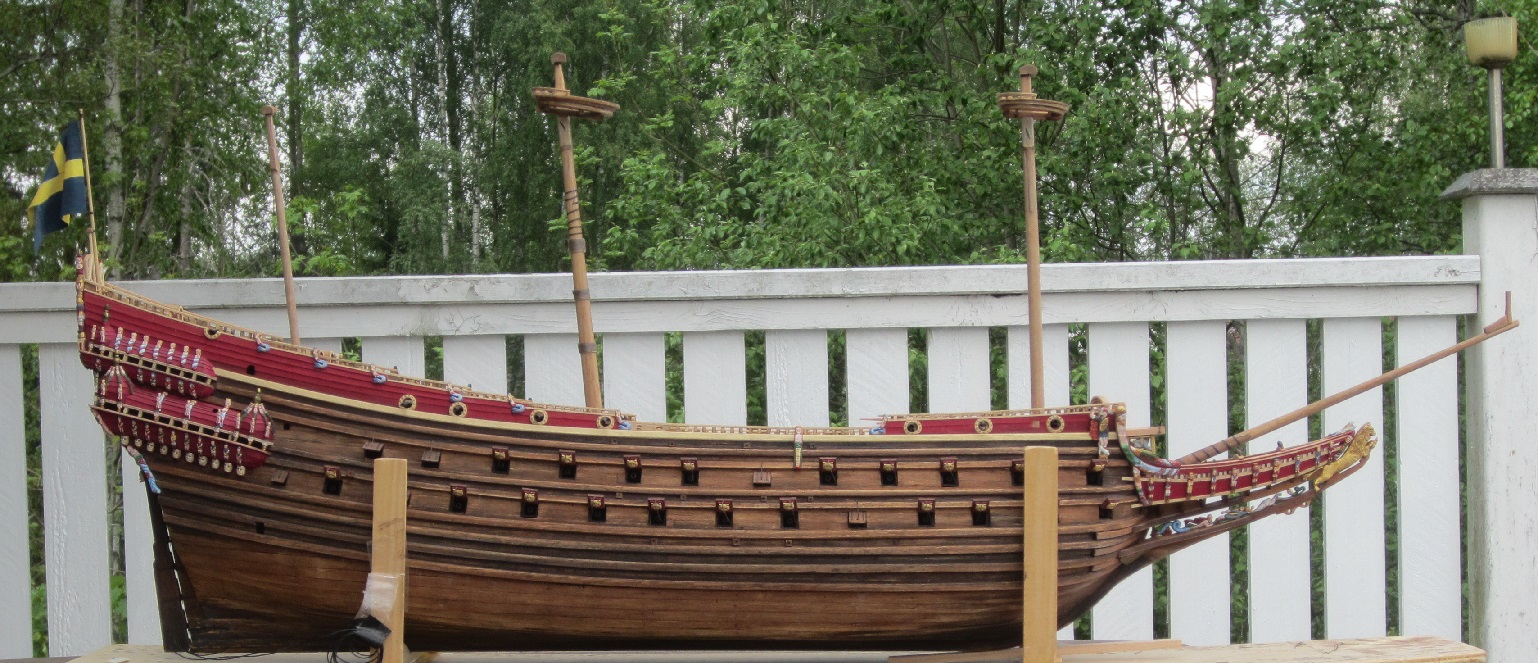
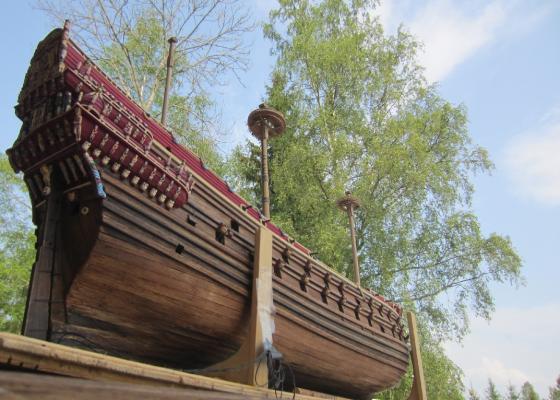
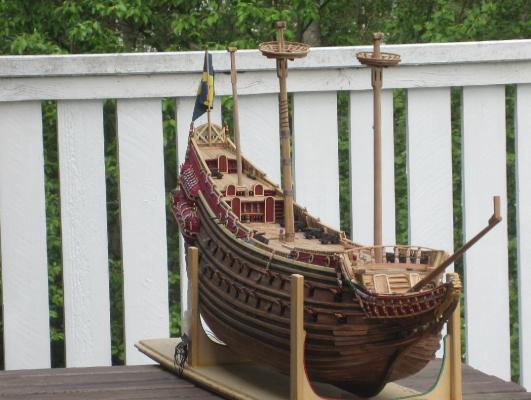
Still hectic at my job but I've done some work on the model. The main mast is now mounted and I also made two more tops. The details on the smaleest one is much reworked to fit and get more in scale. I also noticecd the problem Karl mentioned in his Vasa thread about the squared hole being to small so I widened it a little and will also rework the mizzen mast a little to make it work. /Matti


-
I like how you made the doors look. Great progress Vivian! /Matti
-
Nice work Karl. Just wait till you get to the smallest tops. They need even more adjusting to look right. In BB:s defense they would be really hard and complicated to construct like the originals at this scale. /Matti
-
From what I've read safety wasn't very important at that time. /Matti
-
Hey JesseLee, look at post 1130 and 1136. If you have more questions let me know. Cheers! /Matti
-
Thanks Lawrence, yeah this weekend was beautiful. We had some wood that needed to be cut so I didn't get a lot done with the ship. I finished one more top, the work was faster once I'd figured out how to do it. /Matti
-
Thanks Popeye and Alistair! I like these kits as it's easy to tweak and scratch it the way you want. Thanks for the likes everyone! /Matti
-
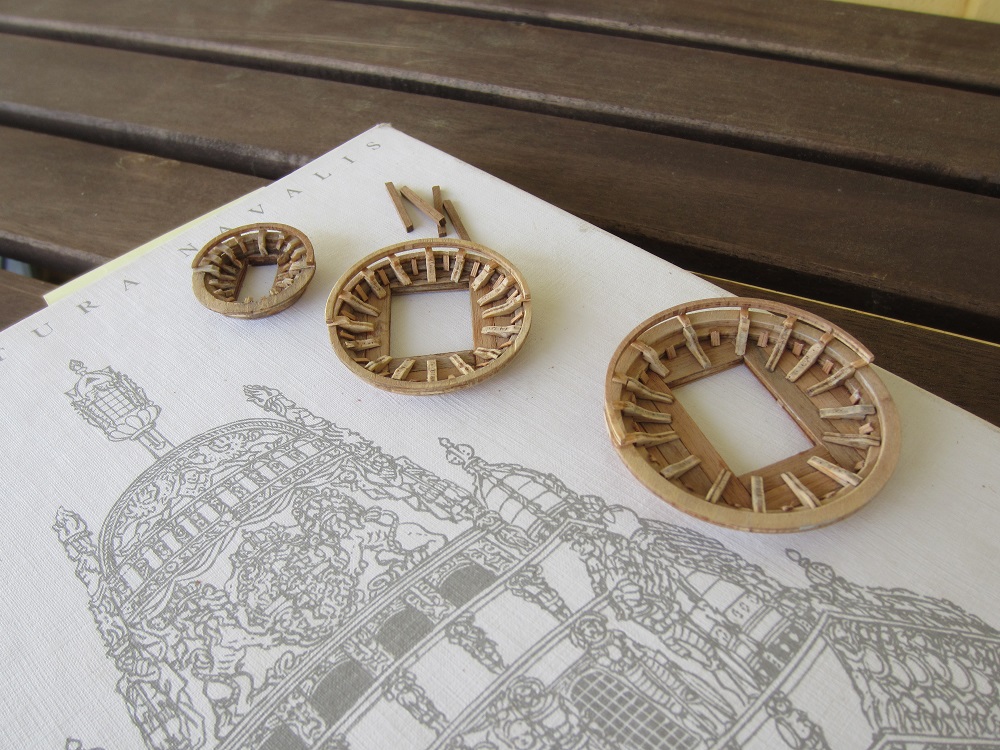
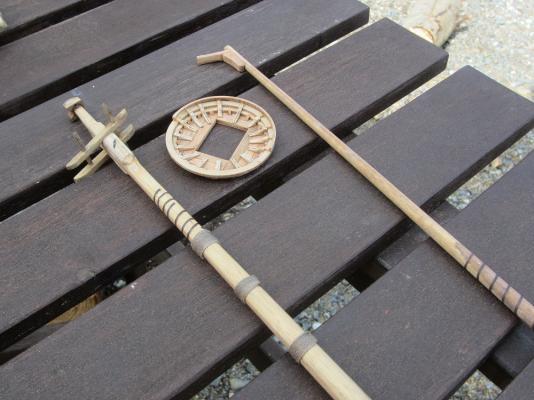
Thanks everyone for the kind comments and likes! Nigel, yeah the parts are lasercut from the kit, reshaped. I got my hands on spare sheets for the kit earlier and doubled the number of the parts holding the rings. The small squared parts are scratched. Karl, I'm sure your will look fine. Ponto, I agree about finding the right angle, I 've redone the angles a couple of times before it felt right. /Matti
-
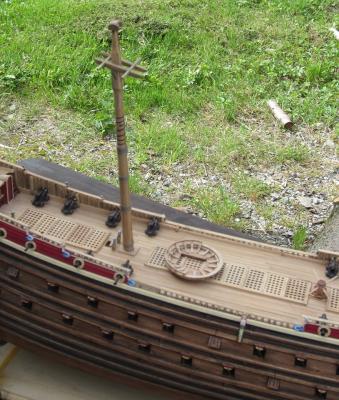
Here is where I'm at with the masts: First I scratched the front parts for the bowsprit. Then I started with the first märs and it's is almost finished. As I will add skanskläder later on the sides of it will not be visiable. Therefore I focused on the top and bottom sides. I don't have the skills to scratch the whole thing and decided to use the main round part is from the kit.First thing I did was to weather and add planks to its top and bottom to make it look more realistic. I only used two of the kits rings to get it closer to the original proportionwise, otherwise it would far to tall. As I have some spareparts from earlier I could double the number of parts that hold the rings. I had to remake the taller ones. Also added short scratched details. All parts where painted with washes before and after assembly and also some drybrushing. All in all this is made up from 66 parts and I will add a couple of details more and skanskläder and even if it's beyond the kit verion, it's still simplified compaired to the original, so indeed they are quite complicated constructions. /Matti
-
Nice mods you're doing Popeye! Looking forward to see the progress. /Matti
- 165 replies
-
- 1
-
-
- united states
- revell
- (and 1 more)
-
You're right Keith. I see if I get a chance to take pics, we had rain for many days, but the sun is back now. /Matti
-
Very cleanwork on the cannons, well done! /Matti
-
Thanks guys! Nigel, if tops are what I think -märsen in swedish- then I just plan to tweak and add details to the kit ones. Thanks for the likes everyone! /Matti
-
Ouch that's a lot of hours and sweat but it will be so worth it when you are done. /Matti