

.jpg.2c2c29e54623bd7b752bc2cdab599665.jpg)
Danstream
-
Posts
566 -
Joined
-
Last visited
Content Type
Profiles
Forums
Gallery
Events
Posts posted by Danstream
-
-
-
Hi all, thanks for your kind messages. They are of help for me! Yes, I am vaccinated with two shots, I did not take a third one. Symtoms are not too bad and not related to breathing functions, just sweating and strong headhaches, but according to the experience of other people, they should disappear in few days.
In the boredom of being confined in a room, I will keep reading this site with even more interest. 🙂
Cheers,
Dan
- NavyShooter, Canute, Old Collingwood and 6 others
-
 8
8
-
 1
1
-
Took Covid while in a business trip, I am now confined in a hotel room for seven days. This is very annoying. This means there will be no progress for a while.
On 5/2/2022 at 6:52 PM, popeye the sailor said:that looks very nice.........spraying is the only way to get a smooth coat
")
Thanks Denis, the airbrush is a very nice tool and you can get very smooth finish once you get some experience. Some consider it not very practical, indeed you need a lot of operations for preparing it and for cleaning it afterwards, but it is a hobby and I think that the whole activity of building models is mostly entirely not practical 🙂
Cheers,
Dan
- mtaylor, king derelict, Egilman and 5 others
-
8
-
Another paper marvel. After the streamlined surfaces of a Spitfire, no doubt that the quality of this will be equally impressive.
Dan
- Jack12477, ccoyle, Edwardkenway and 9 others
-
12
-
@mikegr, I don't know the Green Stuff World, hence I cannot comment. I read that they are acrylics (like the Vallejo ones). If you already have them, you can try them on a scrap plastic and try also their adhesion by a pull test with masking tape. The range of offered tints is also an important criterion.
Good luck,
Dan
- lmagna, popeye the sailor, Egilman and 3 others
-
6
-
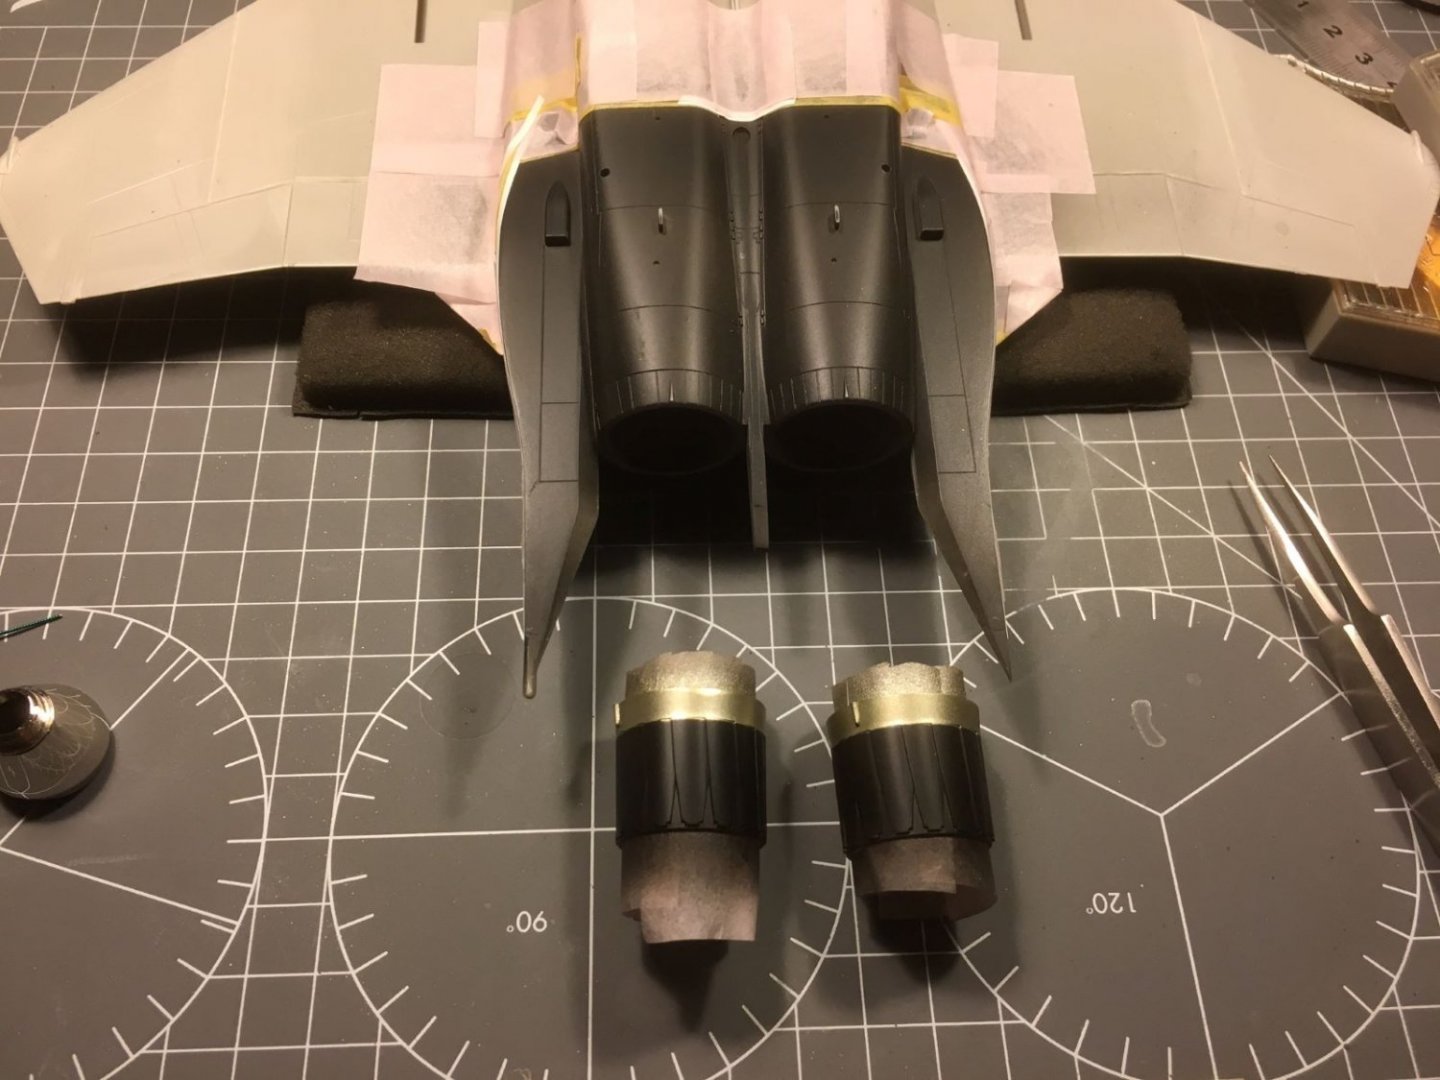
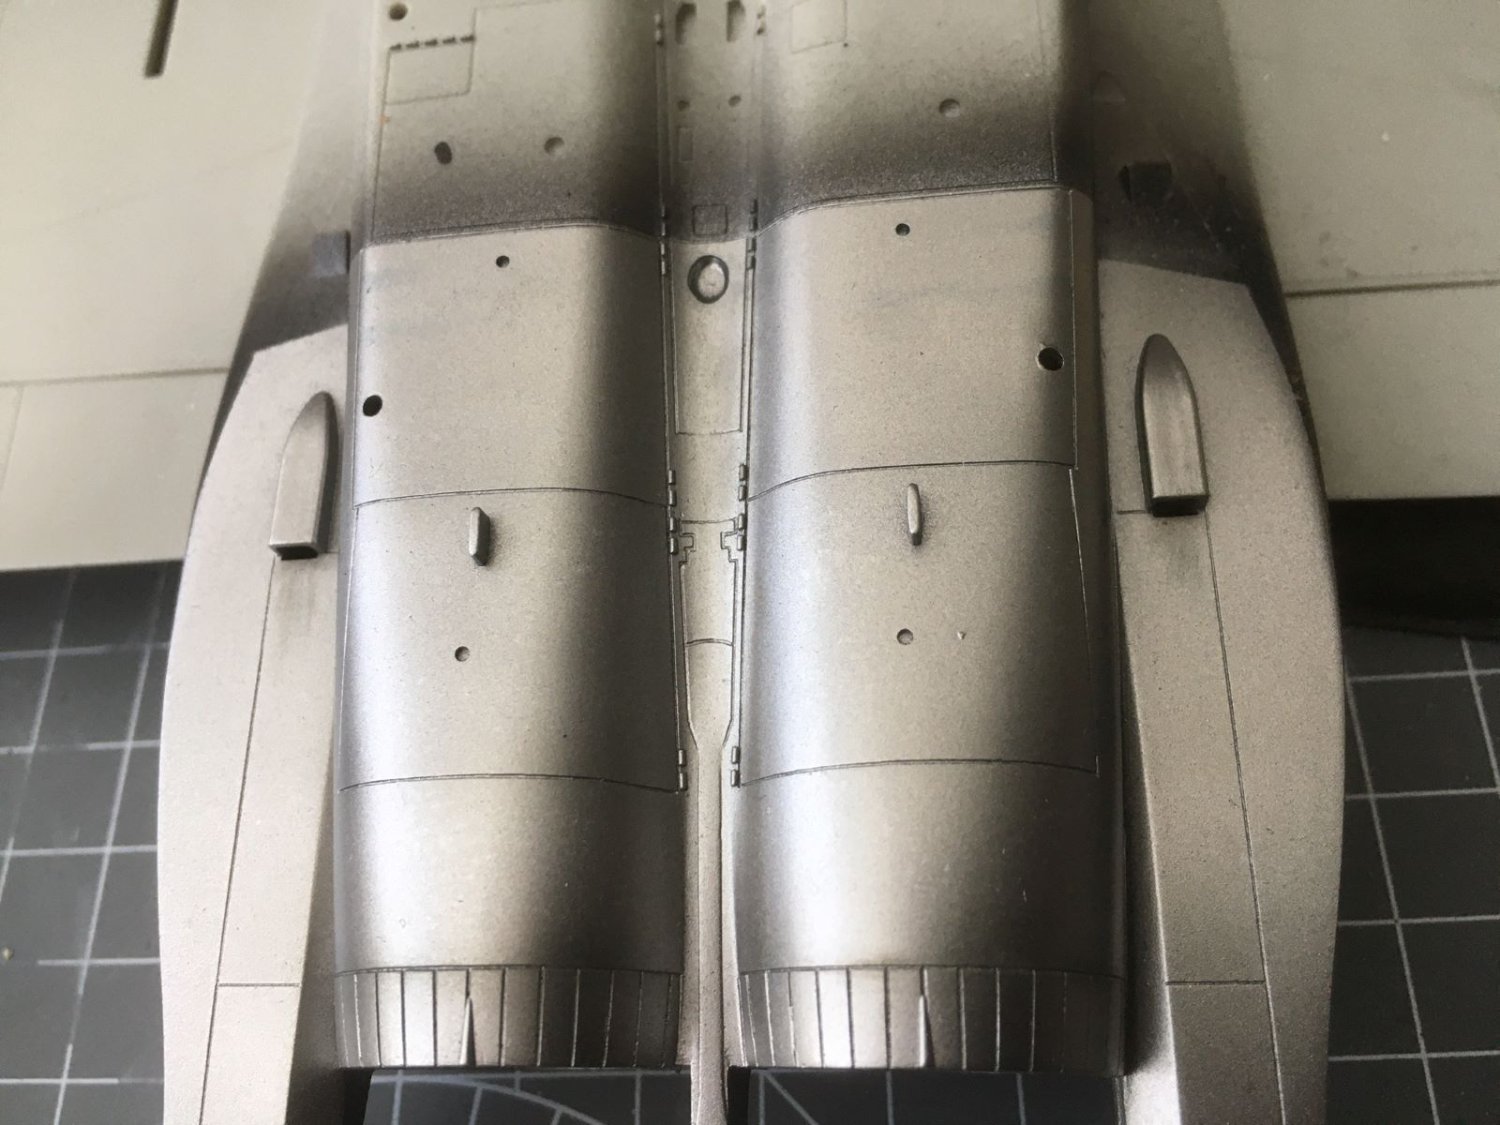
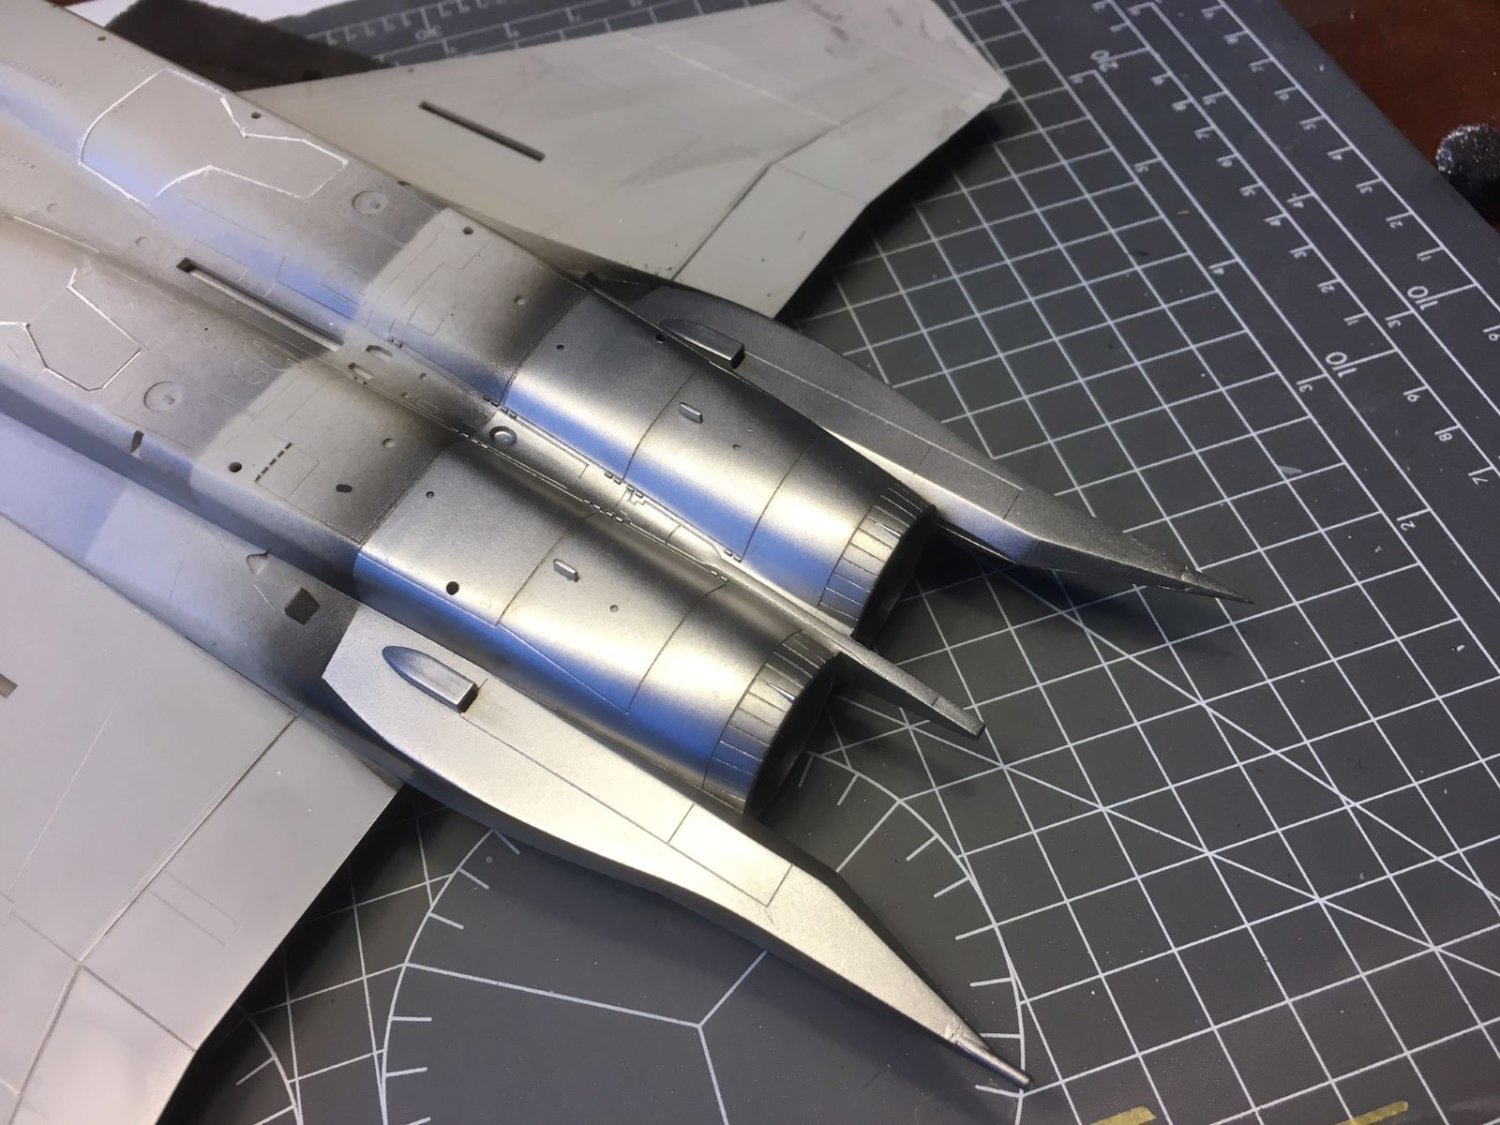
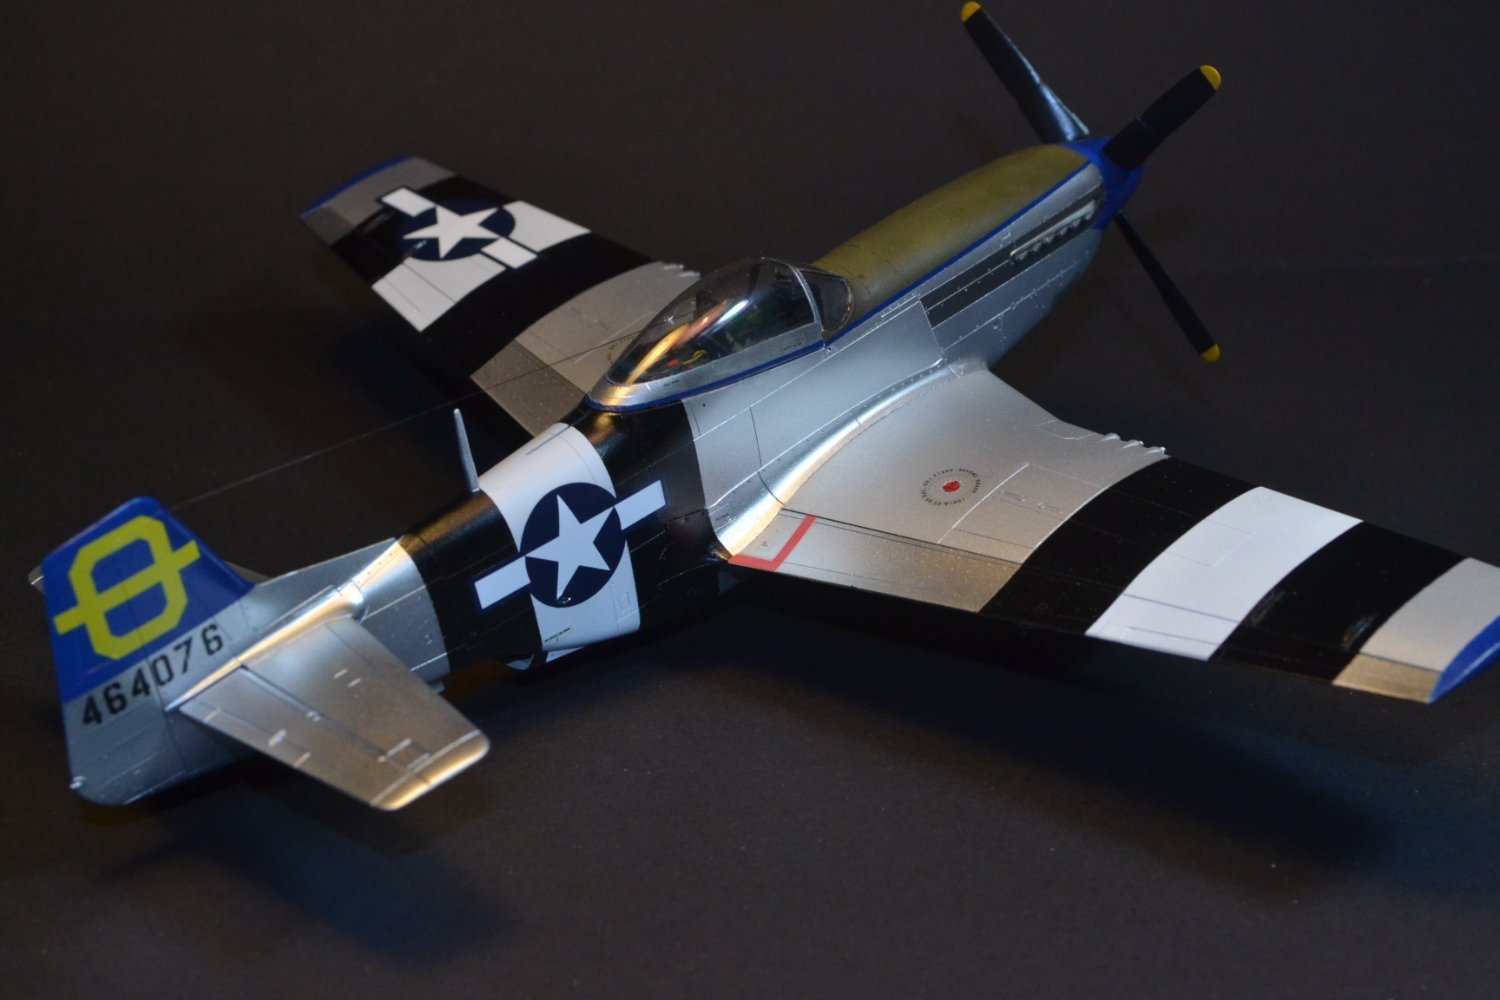
As a small addition to my metallic panels, I added strakes of a slightly darker aluminium and bluish metal so to break the uniformity. I also added some dark pigments at the junction of the panels.
Finally, I sprayed a coat of Tamiya transparent with a drop of Tamiya 'Smoke' to act as a filter and make the metallic color more realistic.
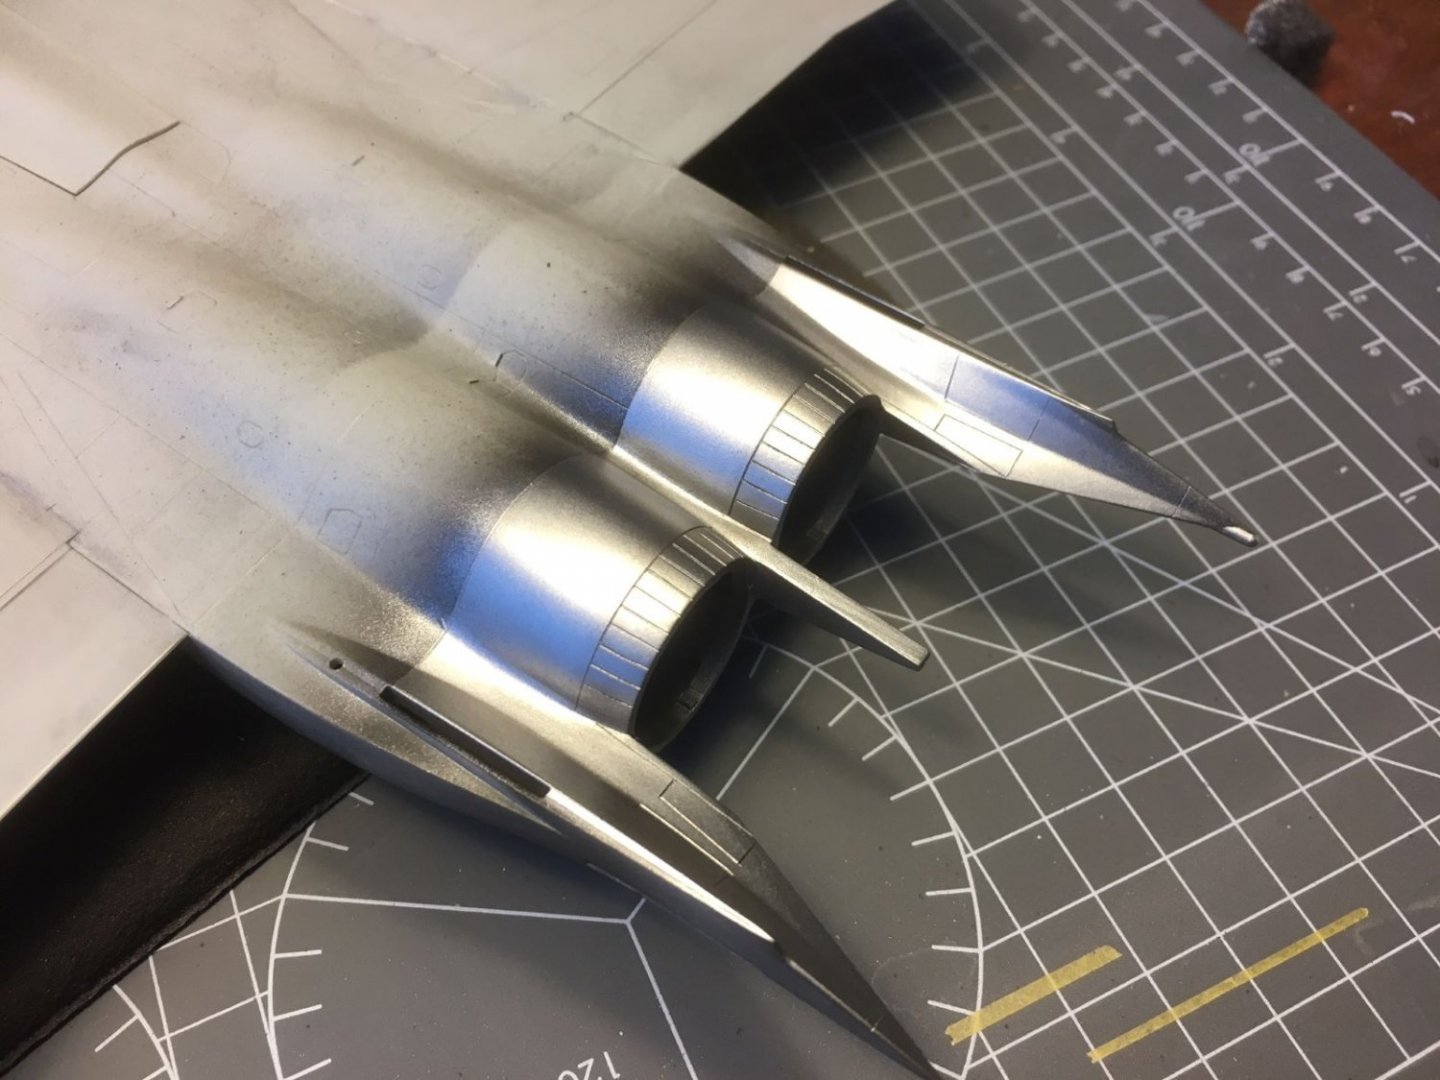

The transparent layer should also help to protect the metallic finish from the adhesive of the masking tape that I will have to apply and keep for long time when spraying the camouflage on the rest of the airframe. In addition, I sprayed a darker tone to the petals of jet exhausts to increase the contrast with the rest. Now the final effect is like in the following:

I will decide later if I will apply more weathering effects after completing the rest of the airframe.
Best regards,
Dan
-
@mikegr, I tried the Tamiya metallic colors (silver, flat aluminium, etc.), but I always found that they have a too coarse pigment grains that remains noteacible after application, perhaps with the exception of their Titanium Silver. I never tried the Italeri ones.
Dan
-
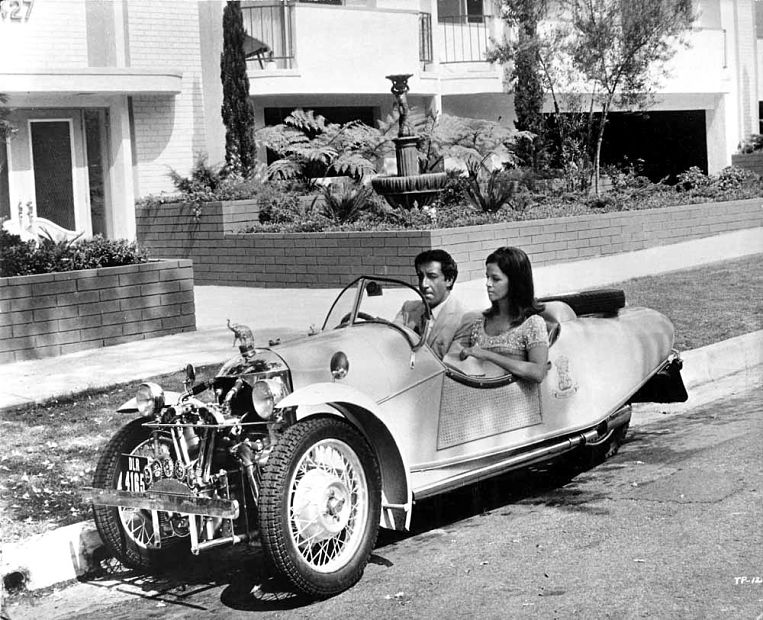
I found it, it was the movie 'The party', I remember as a teenager falling from my chair for laughing when I watched it 😂
- GrandpaPhil, Edwardkenway, Jack12477 and 9 others
-
10
-
2
-
-
It is going to be a great, imposing model. You are in the home stretch now, keep going. You have a very detailed interior.
Waiting for the final,
Cheers,
Dan
-
-
Just read about the accident. Great that it was recoverable, after so much work it would have been a blow. Keep going, the farm and the latest addition look great.
Cheers,
Dan
- Canute, mtaylor, Edwardkenway and 2 others
-
5
-
8 hours ago, Canute said:
The ModelAir line is airbrush ready. The regular line can be airbrushed, but needs thinning, since it is meant to brush on your model.
Just in case you want to get them, the Vallejo paints we are talking about here, are not from the lines quoted above. They are from their specific metallic paint line (called 'Metal Color'), the bottles can be seen in one of my pictures.
- popeye the sailor, Egilman, FriedClams and 4 others
-
6
-
1
-
3 hours ago, king derelict said:
I will get some of those paints and hope I can do as well
Thank you Alan for your comment. Indeed, I like these paints. They are acrylic paints with an amazingly fine pigments. There are other good products around which are lacquer or enamel based, but I never tried them and I am satisfied with these acrylics. These are some examples of how they perform when used as NMF:

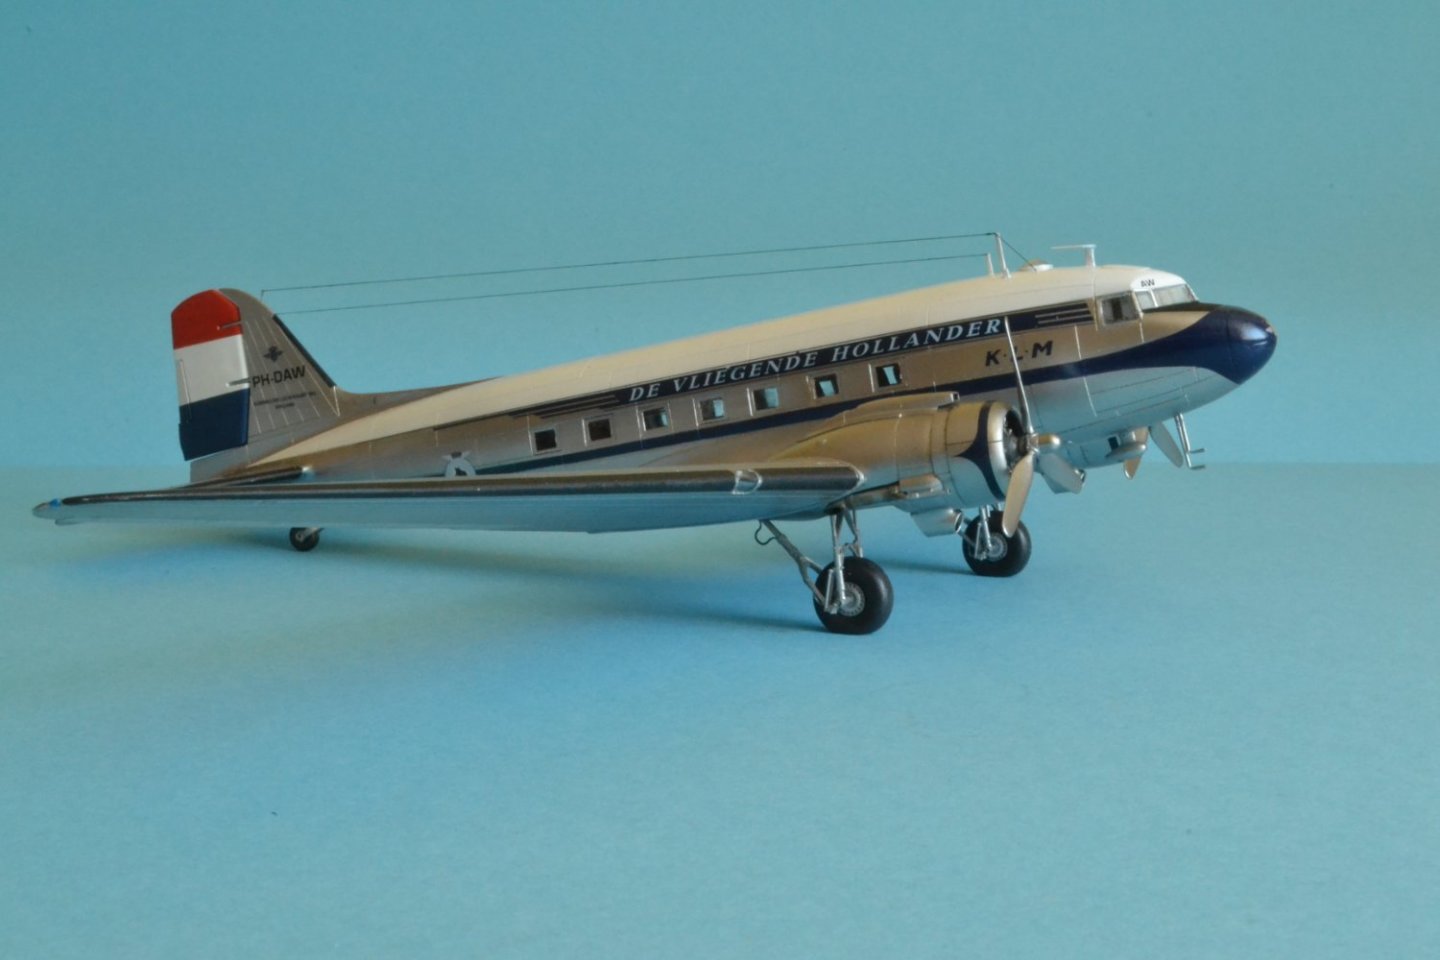
Their good points are that they do not smell much, they dry quickly and they are quite resistant to masking tape once well cured. I usually apply them on a black (Tamiya) coat, but you can change the color to get different nuances of the same paint. They need to be applied in very thin layers, therefore any imperfection of the substrate will show up.
As I said, I do not use their specific Vallejo black base paint, but perhaps it is a good idea to get their Vallejo airbrush thinner. Although they are ready to be used out of the bottle, sometimes I add few drops of their thinner. The thinner is also useful to clean the airbrush or to prime the airbrush before loading the paint.
Good luck,
Dan
-
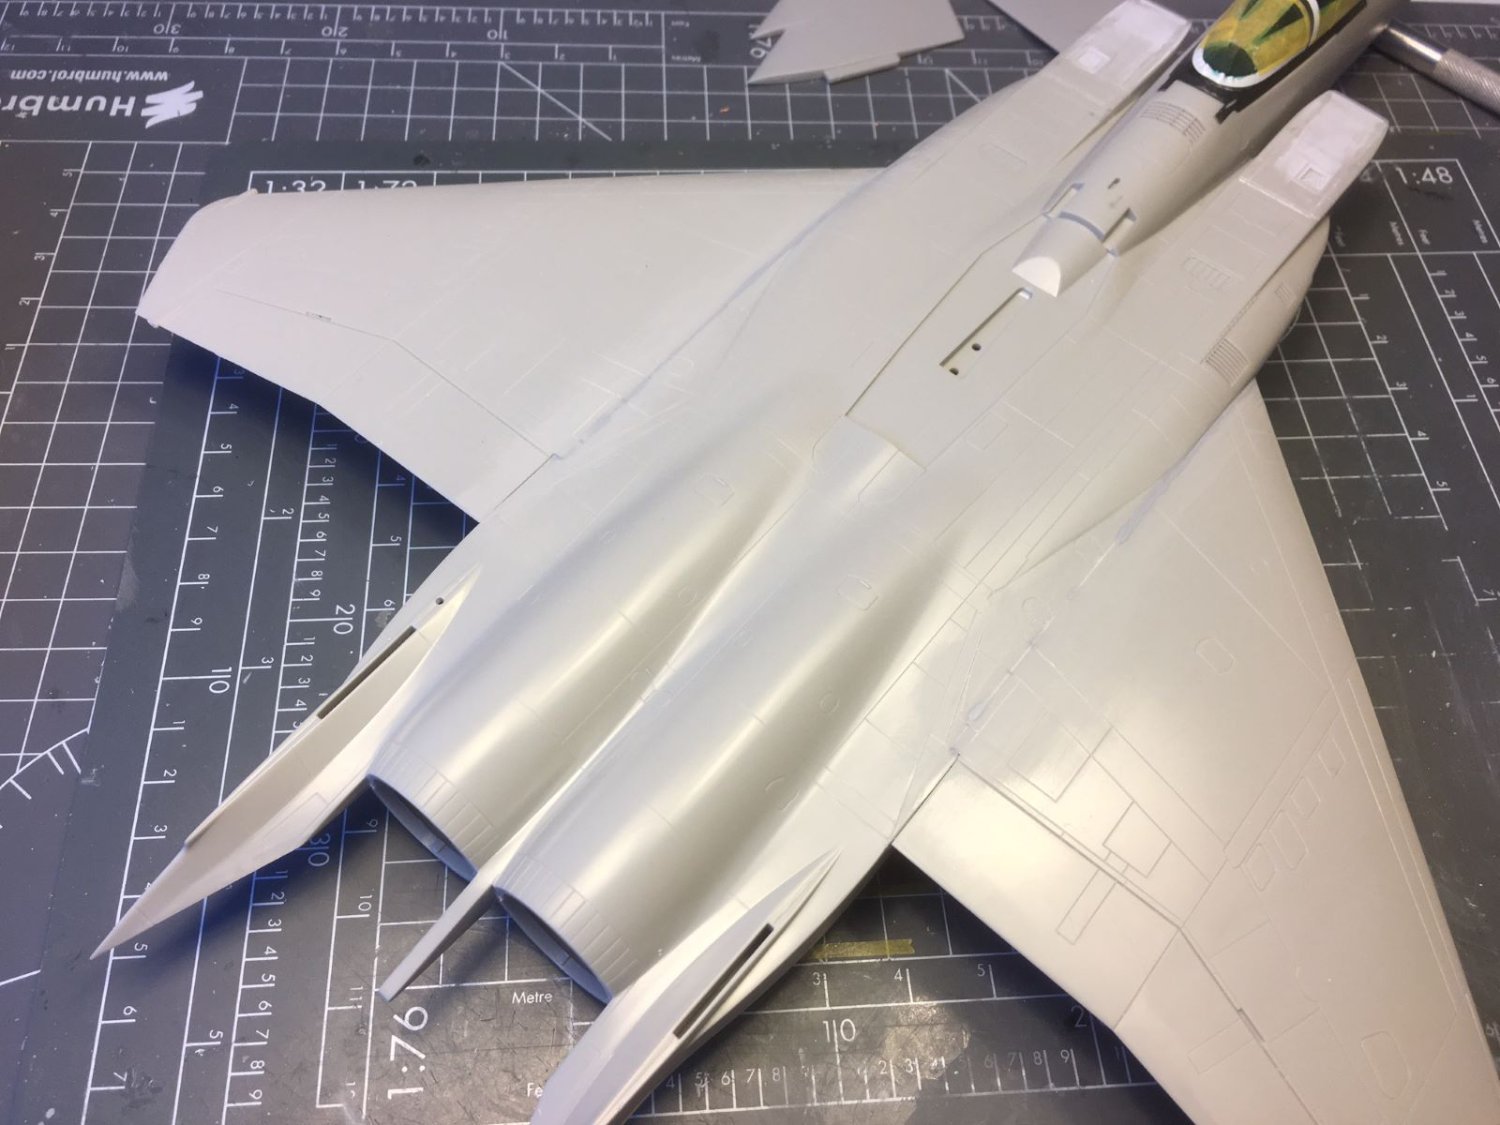
Hi all,
in the last days, I worked on the seams between wings and body. It involved scraping the proud steps, filling, sanding and scribing the lost panel lines. This took quite some time at my usual glacial pace. At any rate, it was done:

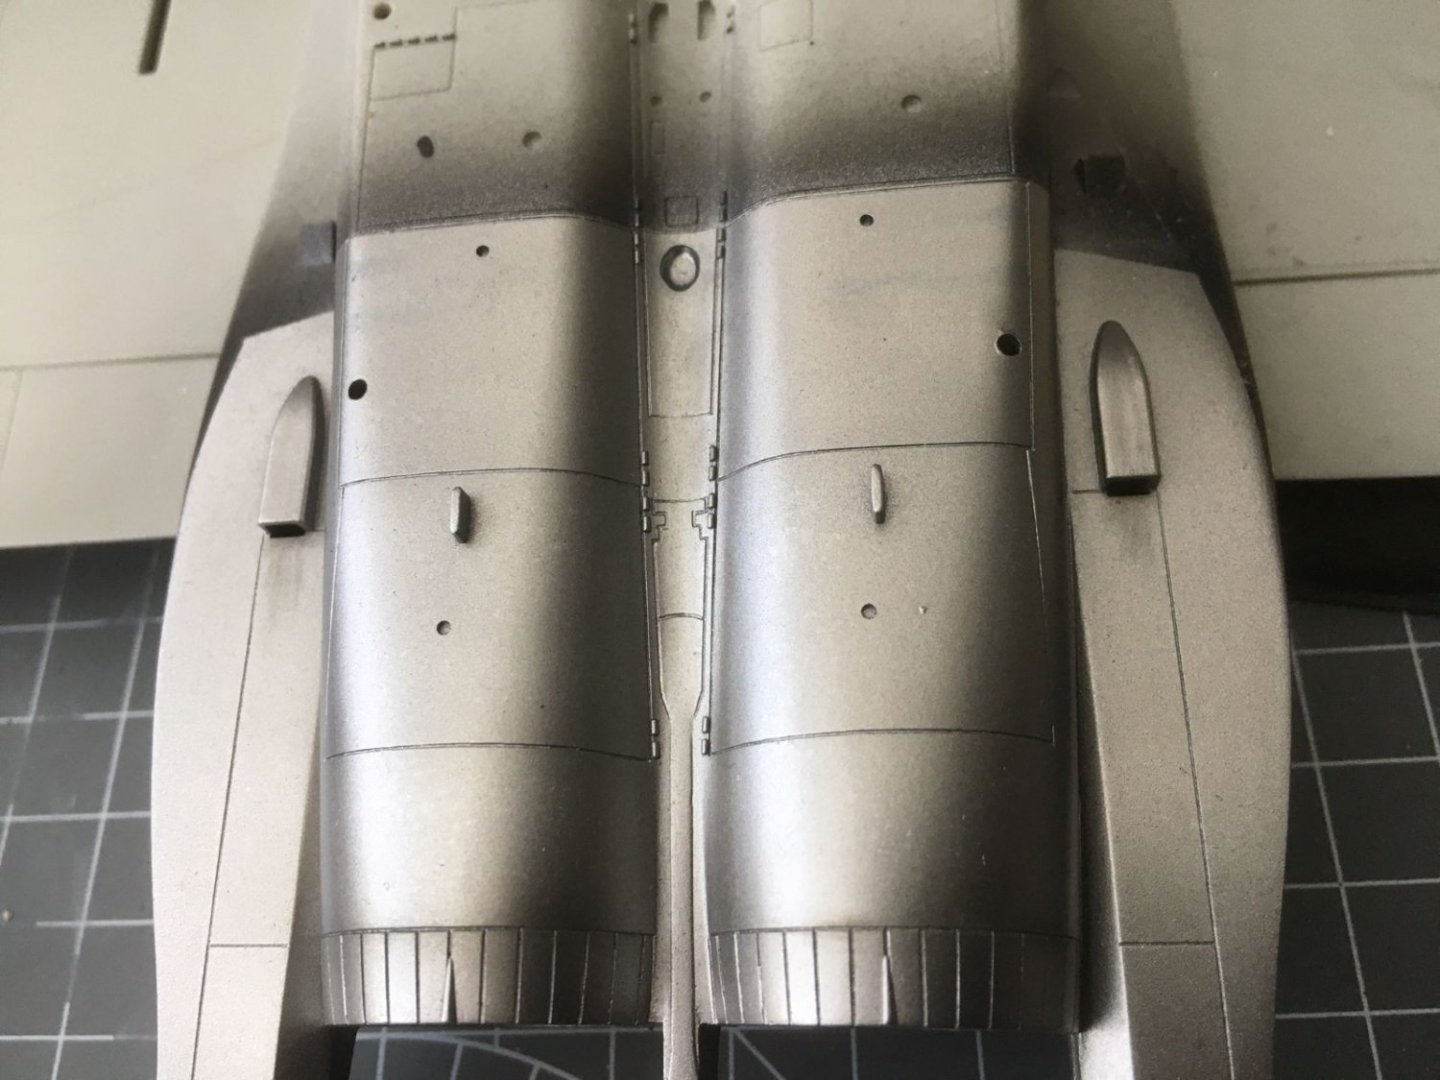
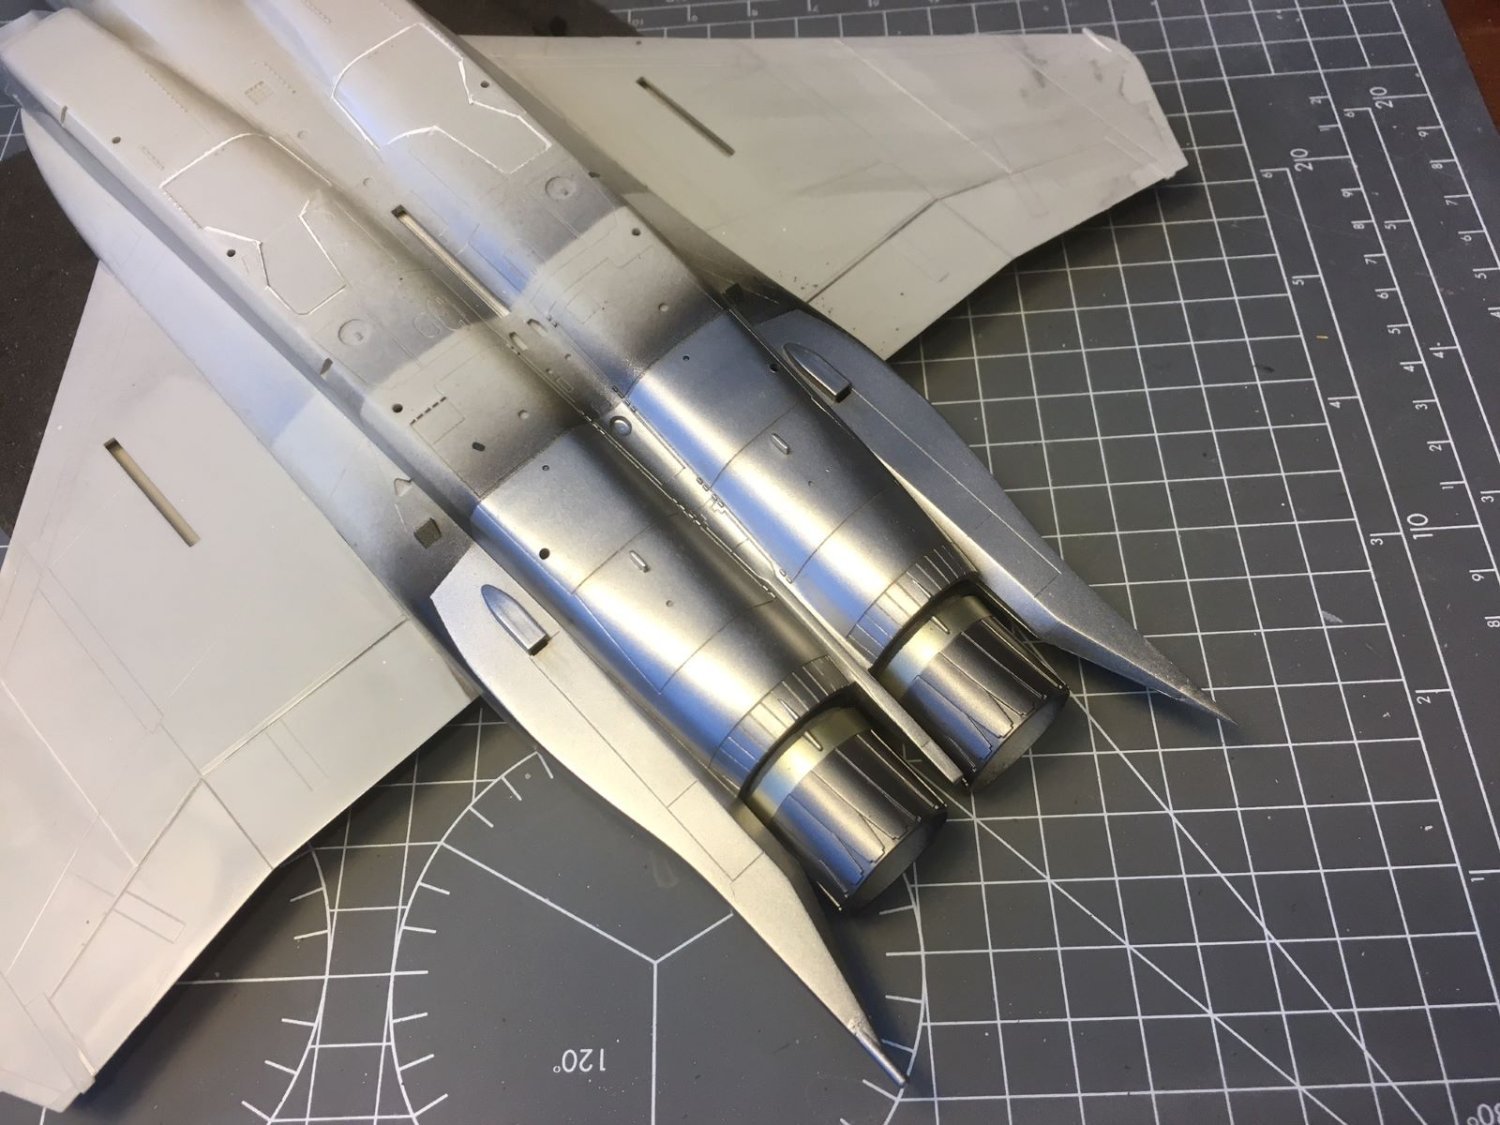
Painting could now commence. I had to decide about the sequence of spraying the various paints because of the metallic finish of the panels that enclose the jet pipes. Finally, I decided to start with these panels that later on will have to be masked. I started with a black layer which I made mixing flat and gloss Tamiya black paints, followed by a light wet sanding. This should give a sort of satin finish which should be transferred also to the metallic paint. Meanwhile, I also painted the wheel wells with a satin white.
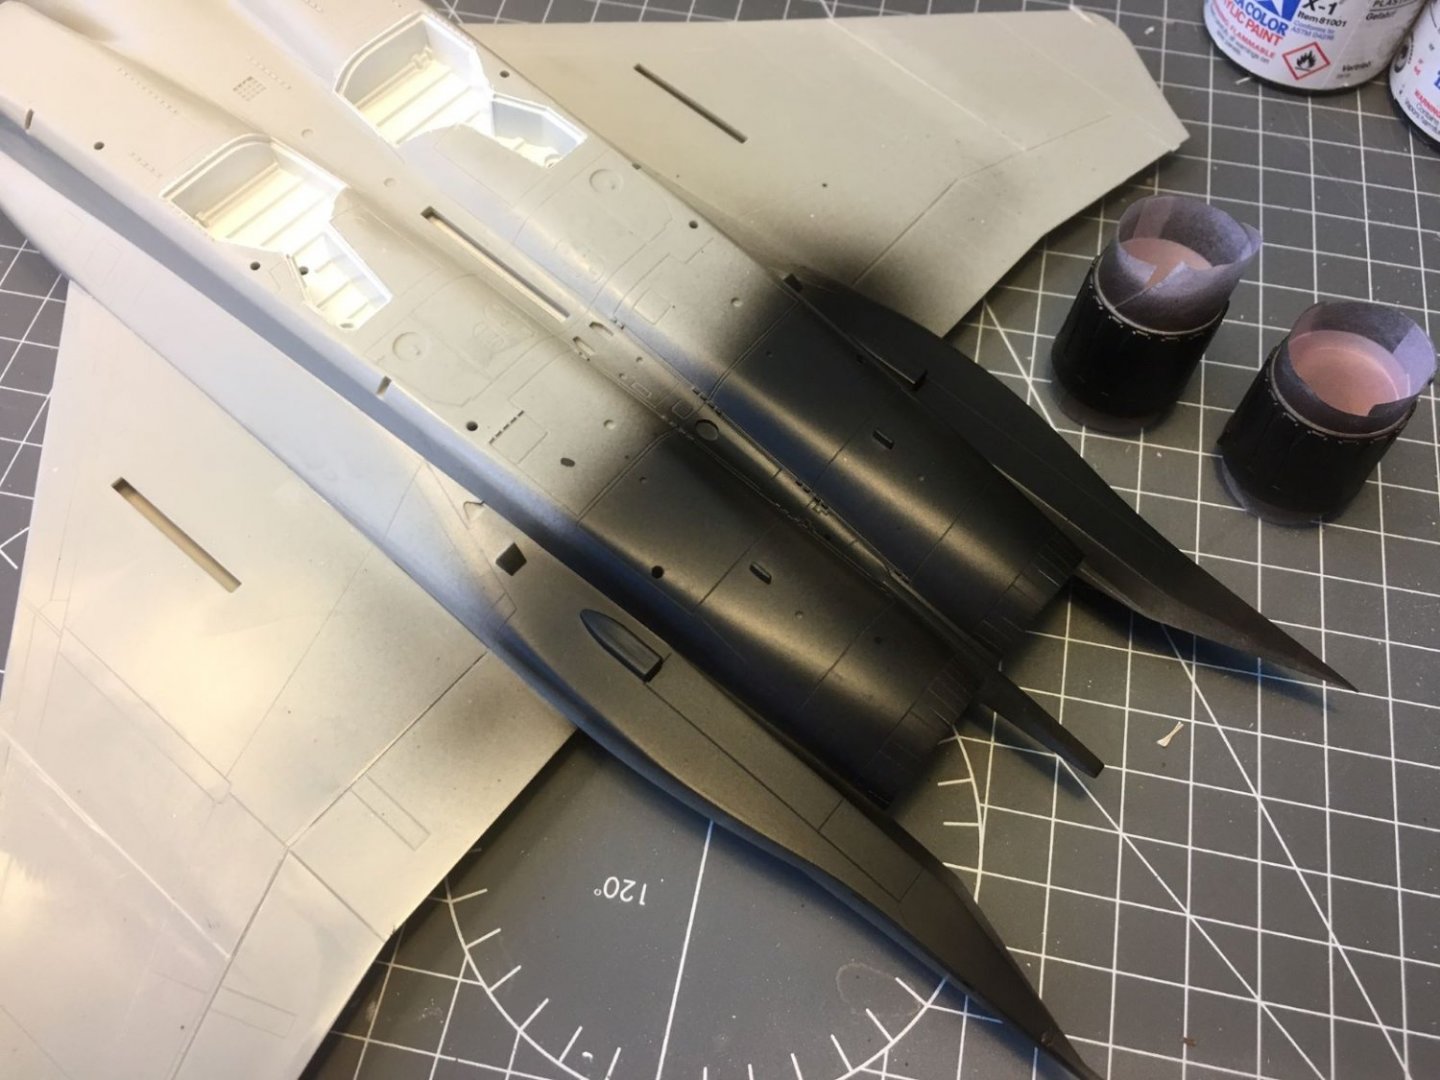
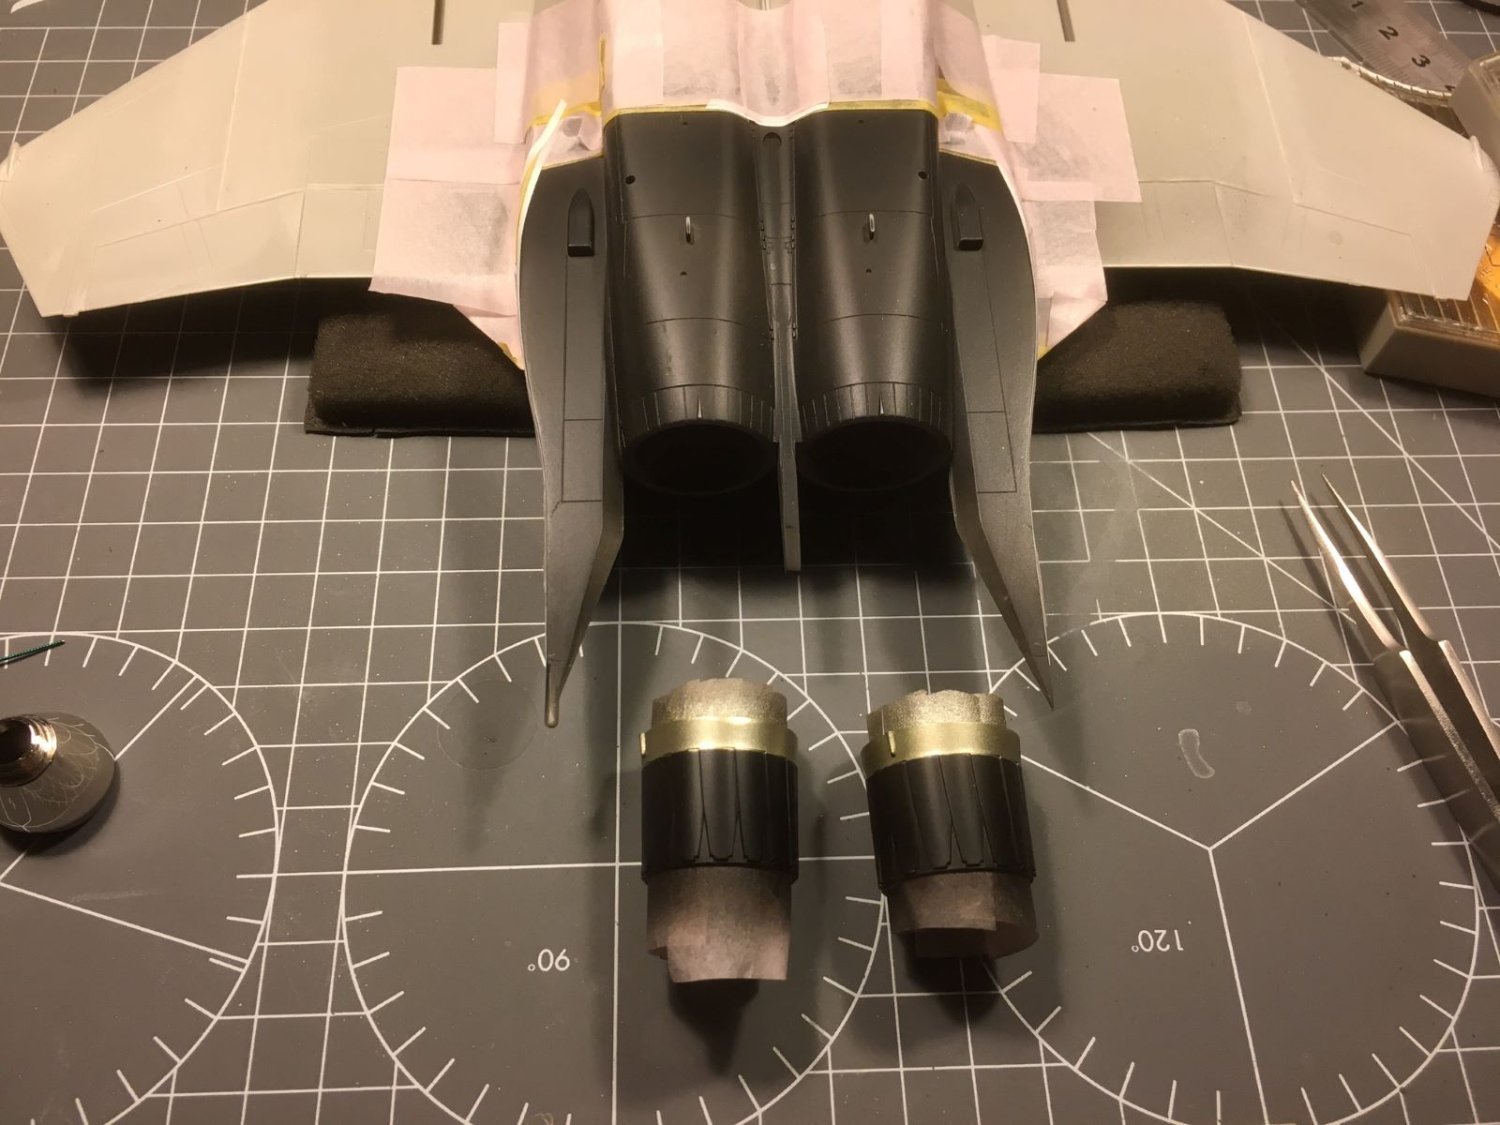
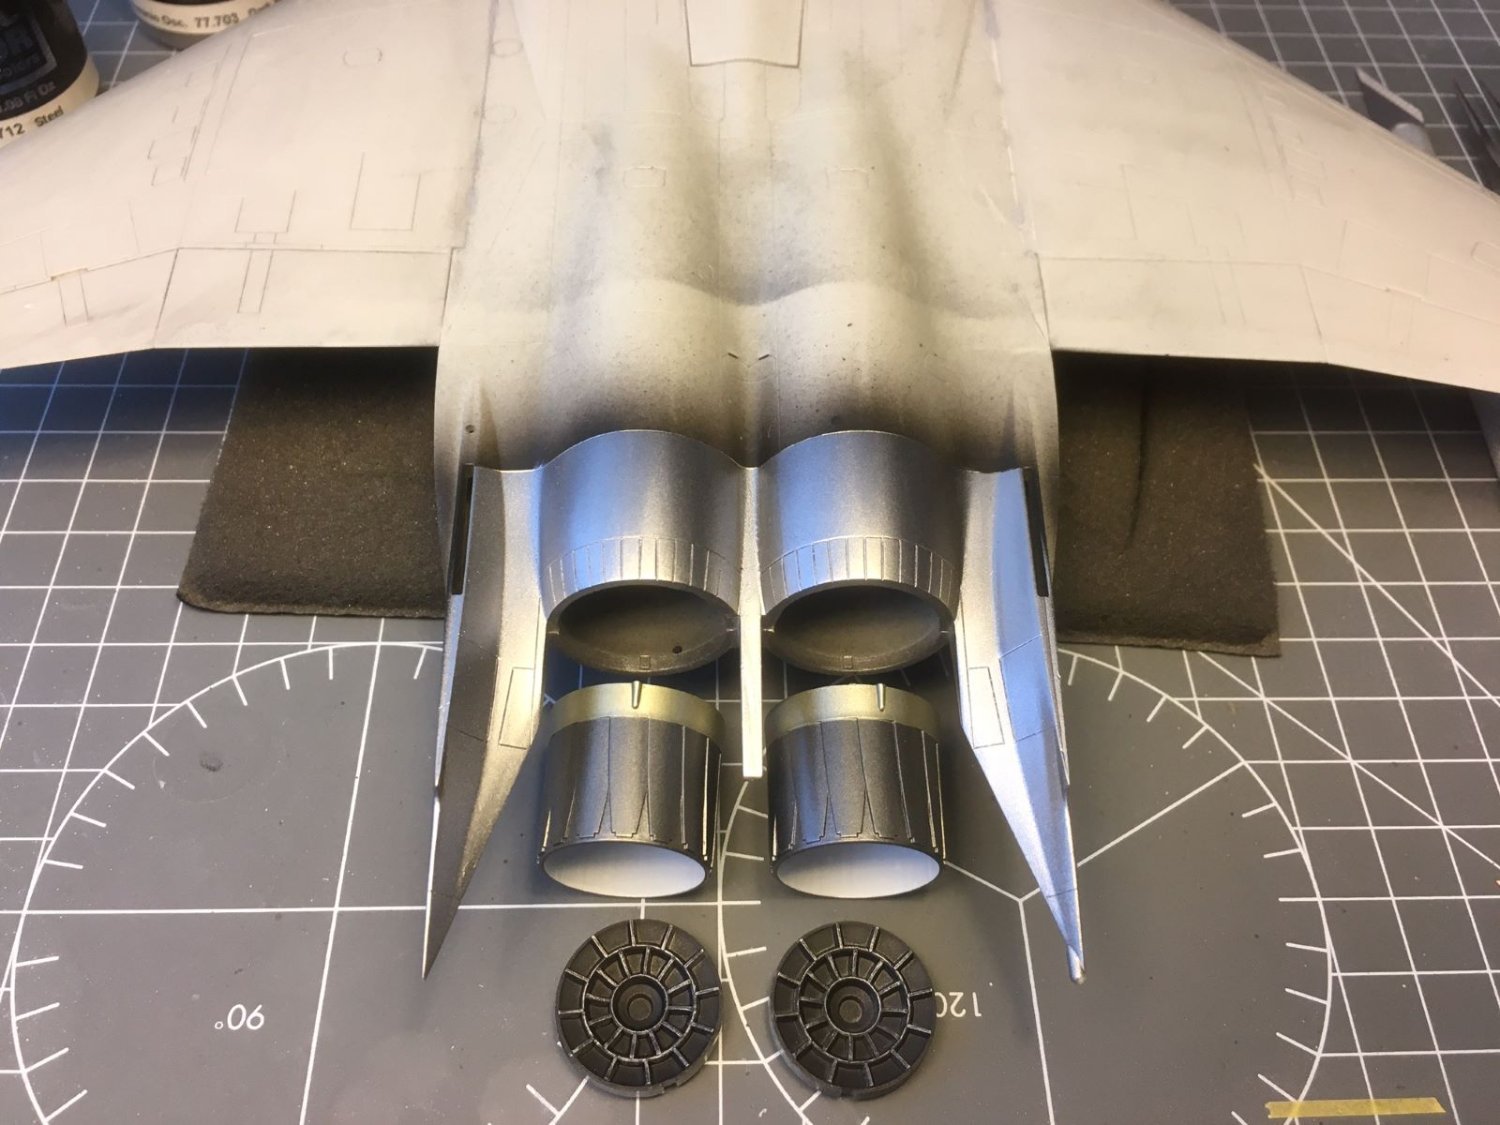
I prepared the jet nozzles as well. Seen the limitations of the kit (and my added errors) I thought it was not worthwhile to procure aftermarket items for those and I used the simplified parts coming with the kit. I delimitated with tape the metallic areas to be sprayed to avoid that later on I will have to paint the camouflage over the metallic paint.
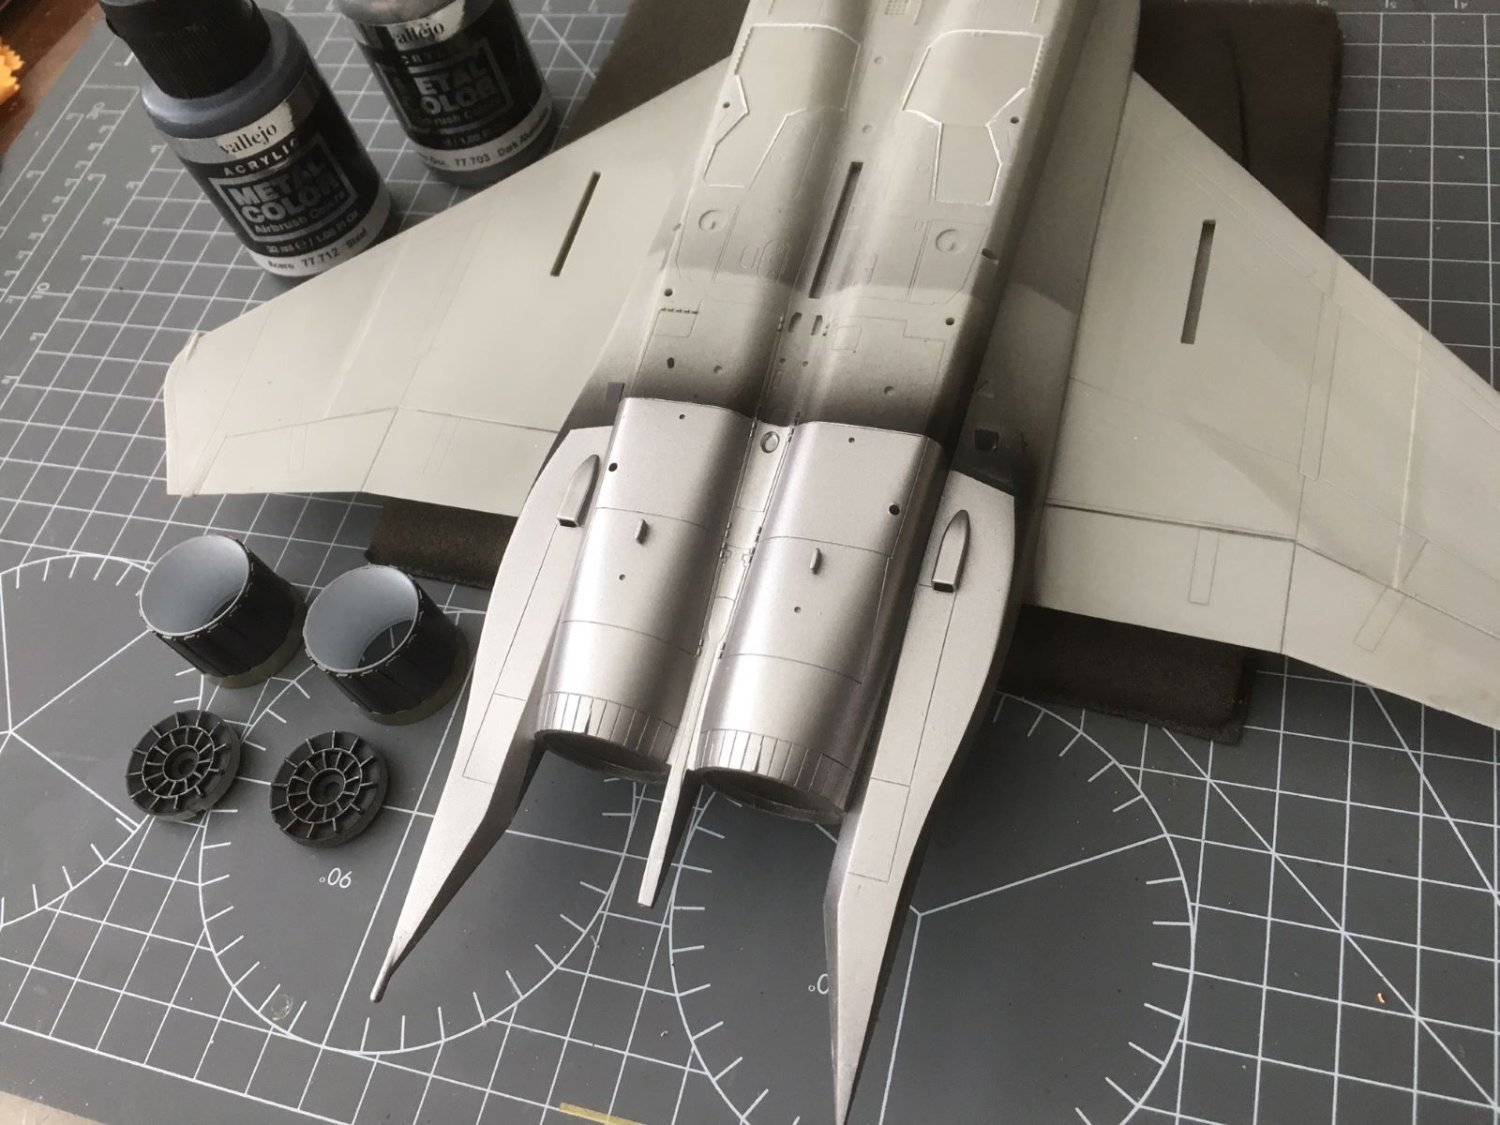
In pictures found on the web, I could note several variations for the finish of the metallic panels which probably are the result of different degree of wear and aging. For NMF, I like to use Vallejo metallic acrylic paints and they come with a selection of shades from which I picked the one called 'dark aluminium' which seems to suit the color found on pictures for not excessively aged planes.

These acrylics, spray quite well, provided that you use mist layers and avoid to let the paint pool on the surface. For the nozzle petals, I used a darker tone called 'steel'. The goldish band was a mix of 'dark aluminium' and 'gold'.

Now, I will let the parts to rest for a while before applying some sort of weathering and a final transparent protective layer.
That's all for now,
best regards,
Dan
-
I am getting curioser and curioser about your work ...
Cheers,
Dan
- lmagna, mtaylor, popeye the sailor and 6 others
-
9
-
Going on with this build, masking commenced:

and finished:
Wings on:

The large gross wing area of the F-15 is now clearly noticeable. Unfortunately, the upper surfaces of the wing parts do not line flush with the upper fuselage, leaving a step along the junction (its shadow can be seen along the junction on the left hand of the posted picture). Some work is therefore required.
Cheers, Dan
-
14 hours ago, Egilman said:
The compression ratio for this engine is 5.35 to 1... (compare that you your average automobile engine with a compression ration more along the lines of 9-1)
Interesting comparison giving a feeling for the numbers. However, compression inside a cylinder processes a fixed amount of gases at the time, compression along a jet compressor processes a continuous flow of gases. The two processes involve different degree of difficulties the latter one having quite a high degree of technological and design difficulties 🙂
-
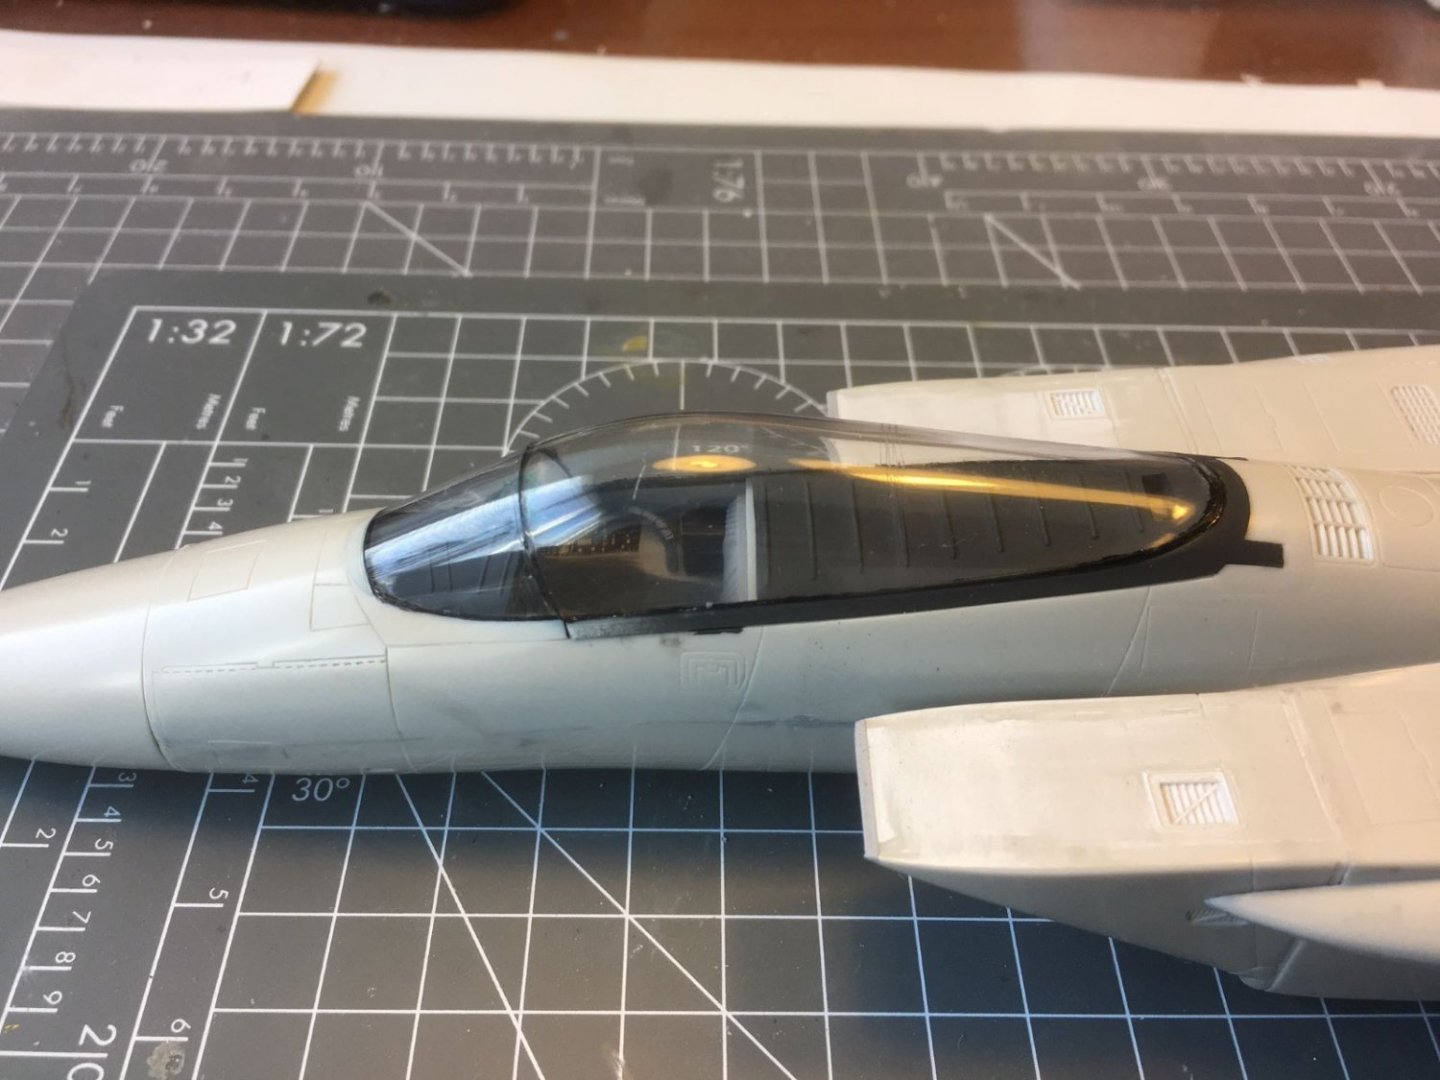
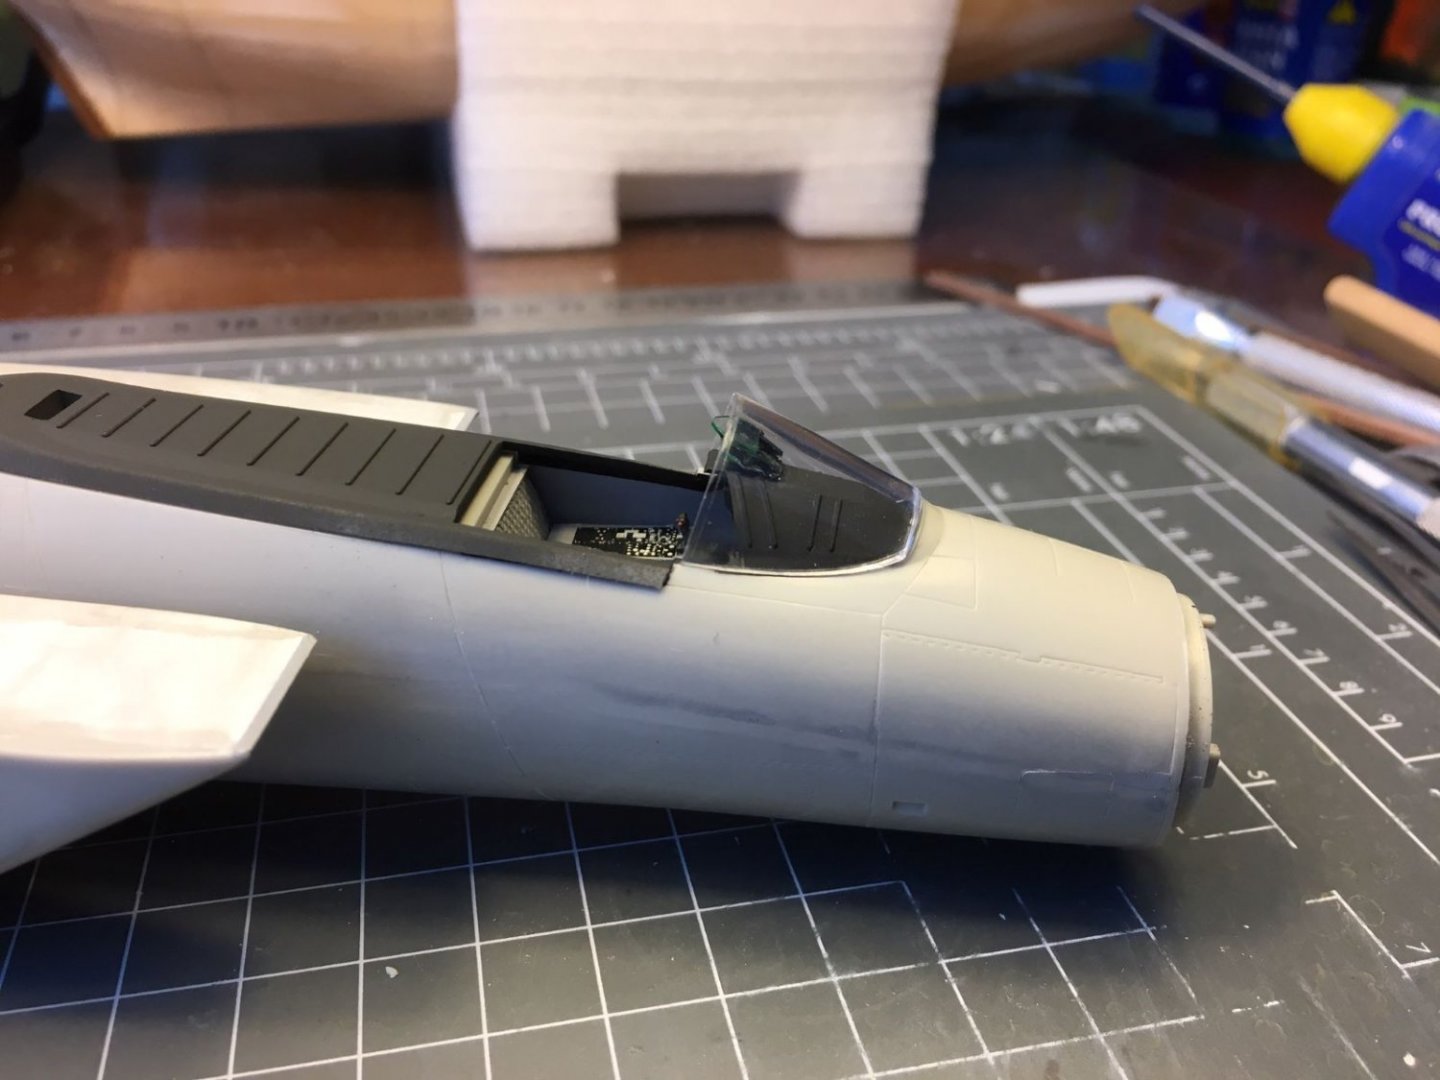
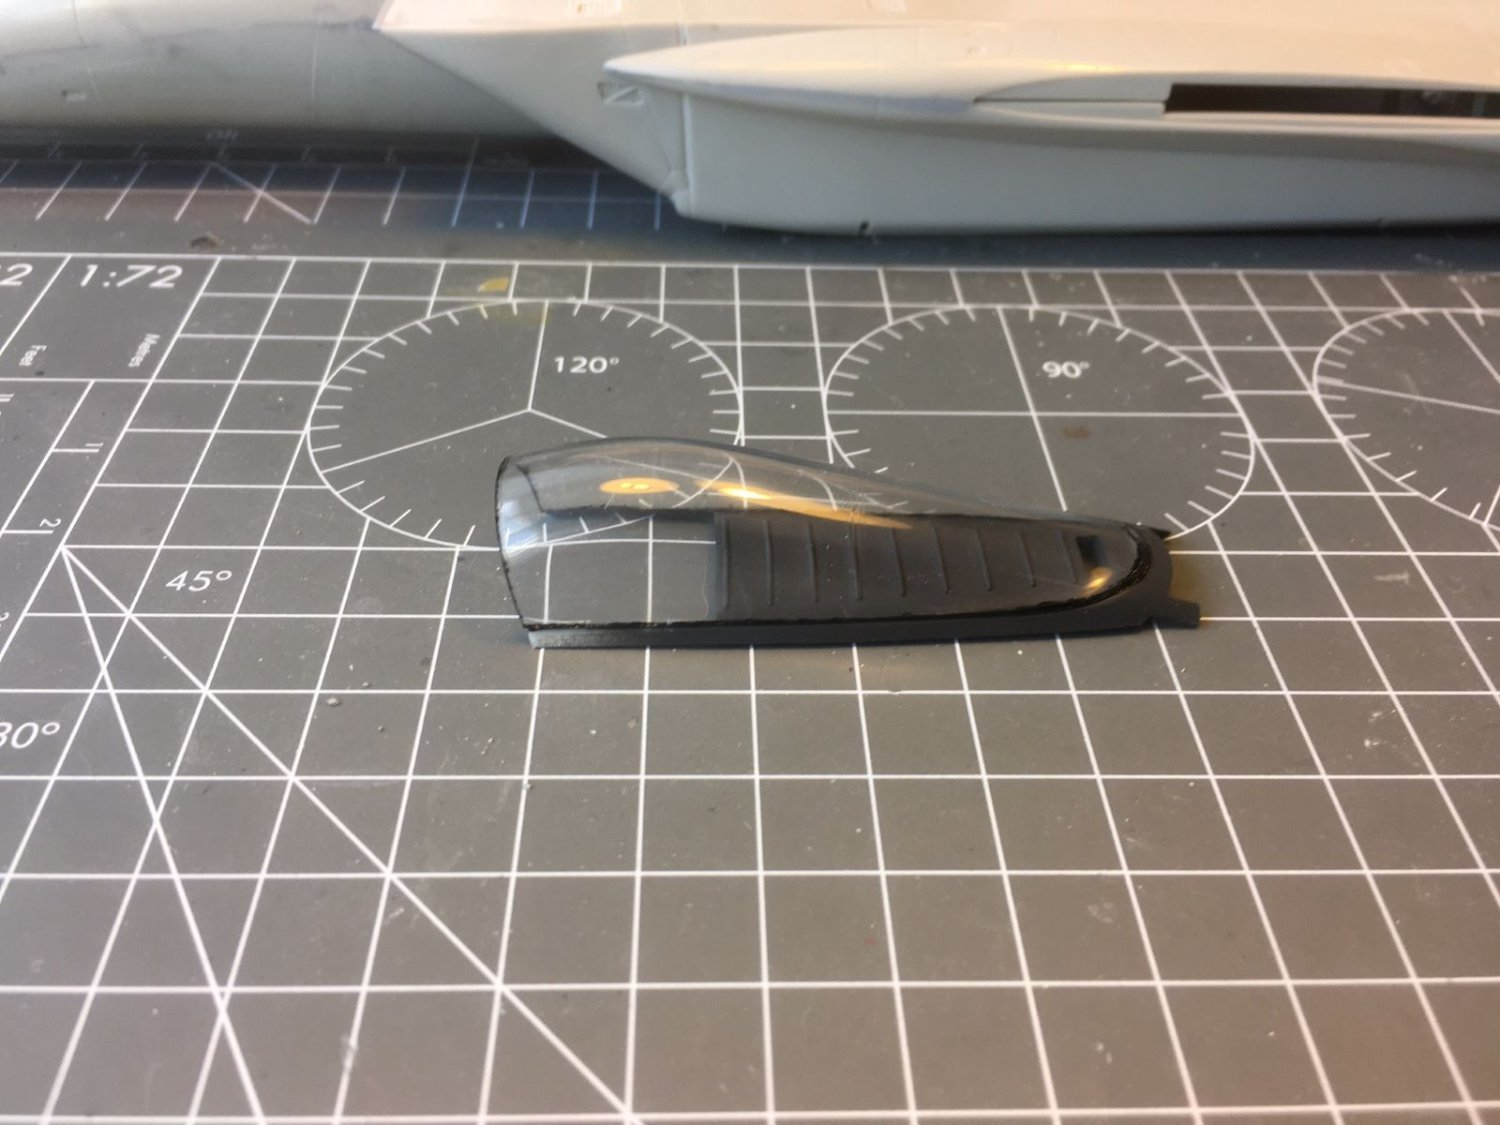
Just a small addendum, I polished the large canopy, painted its edges black and then I glued it to its frame. Quite delicate an operation which fortunately went without issues.

I glued also the windscreen piece to the fuselage and this is how it looks with the complete canopy posed in place. Masking will follow.
Best regards,
Dan
-
Hi Denis, thank you for your note. Your finished F-15 looks as an impressive model. I will be glad if mine will look the same. I think I will display mine like yours, all retracted and closed canopy. Yes, I have the possibility to display the nose cone open, but the radar is pretty basic, so there is little to be seen in there and I prefer to see the unbroken lines of the the fuselage.
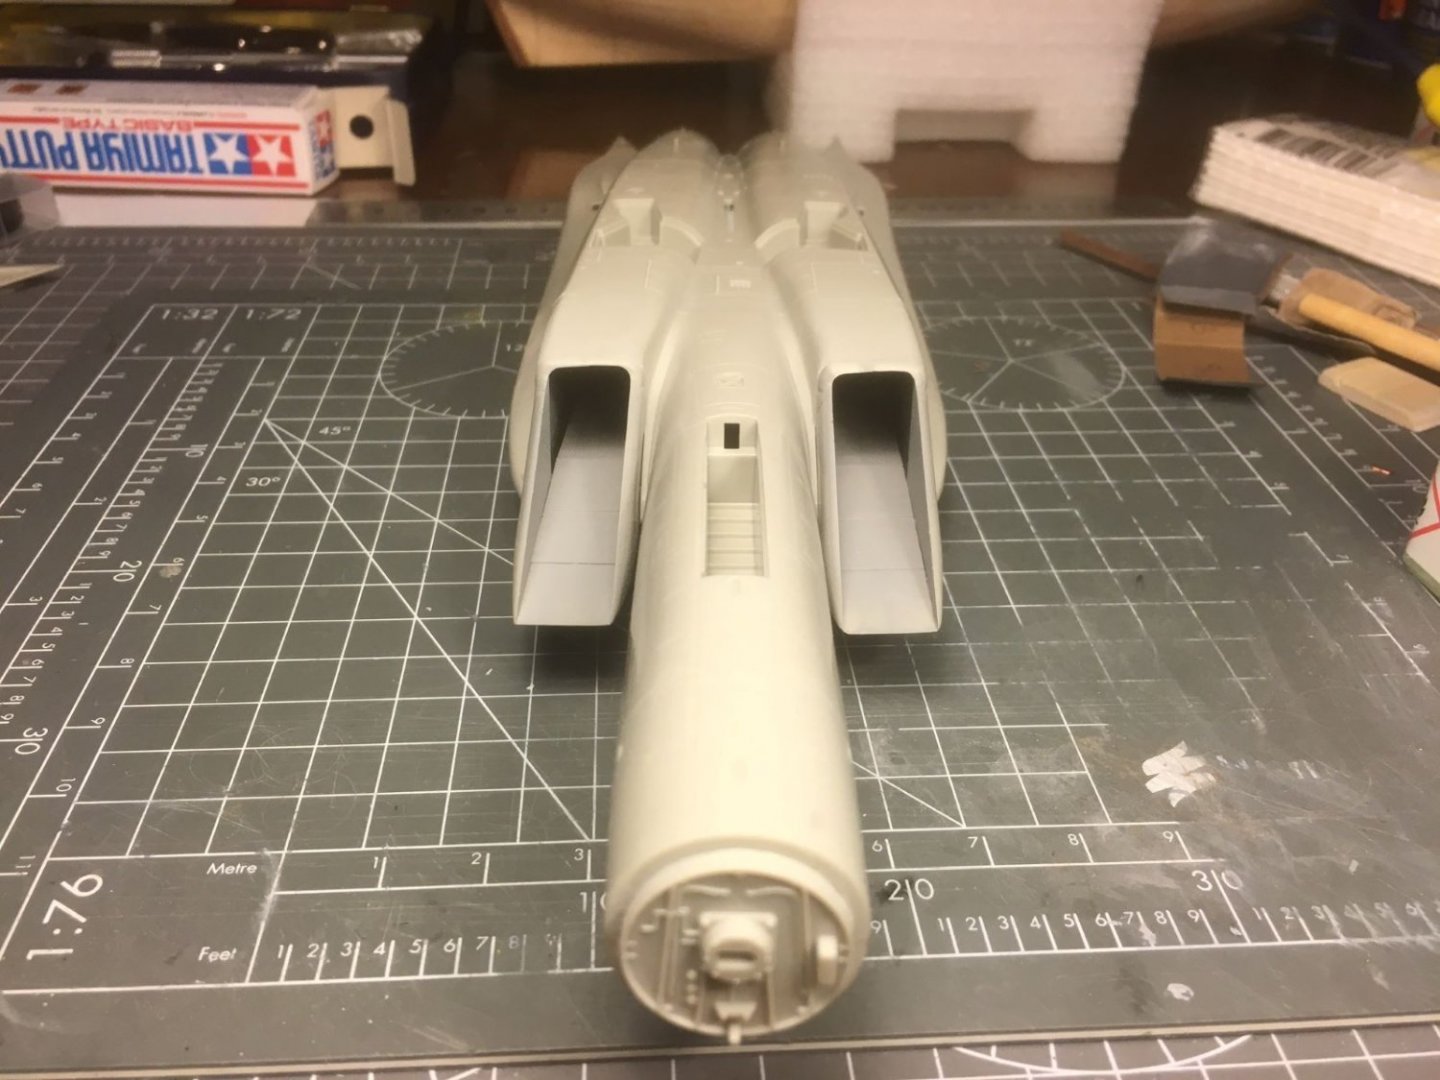
About the air intakes, a sore subject for me, it is not that the tops can be exchanged but rather the entire assemblies. If you see some of the pictures of my log, I prepared these assemblies just to swap them at the last moment while gluing them. Beside the top grilles, at least in the model, they look pretty the same. In fact, as you know, on the real aircraft, these intakes can slide and rotate up and down changing the angle of the attack with the air, so no position keys are present in their lateral surfaces. "if a part can be assembled in an incorrect position, sooner or later someone will do it" 😵, next time I will pencil big R and L signs on these parts, as I was used to do in the past. For the moment, I am trying not to look at them and just go on ignoring them.
King regards,
Dan
-
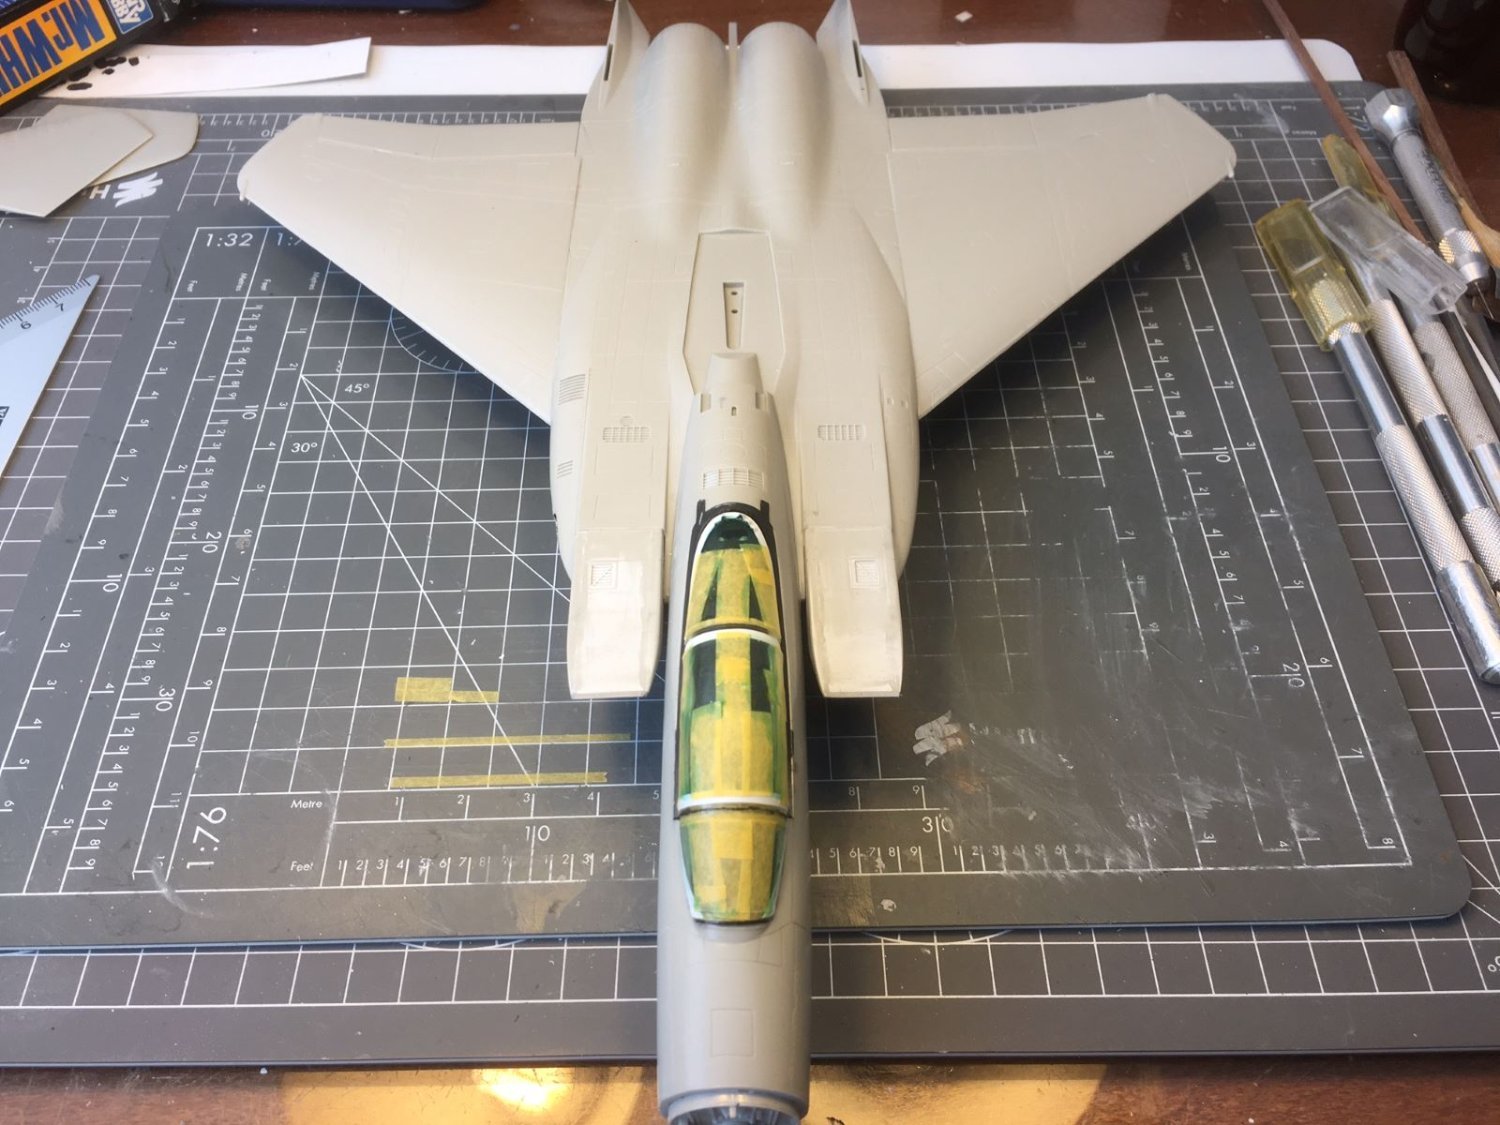
After a break, I am back with my build with some small progress.
The large air intakes were finally glued in place, with some gaps to be addressed. Anyway, the first look is quite impressive.
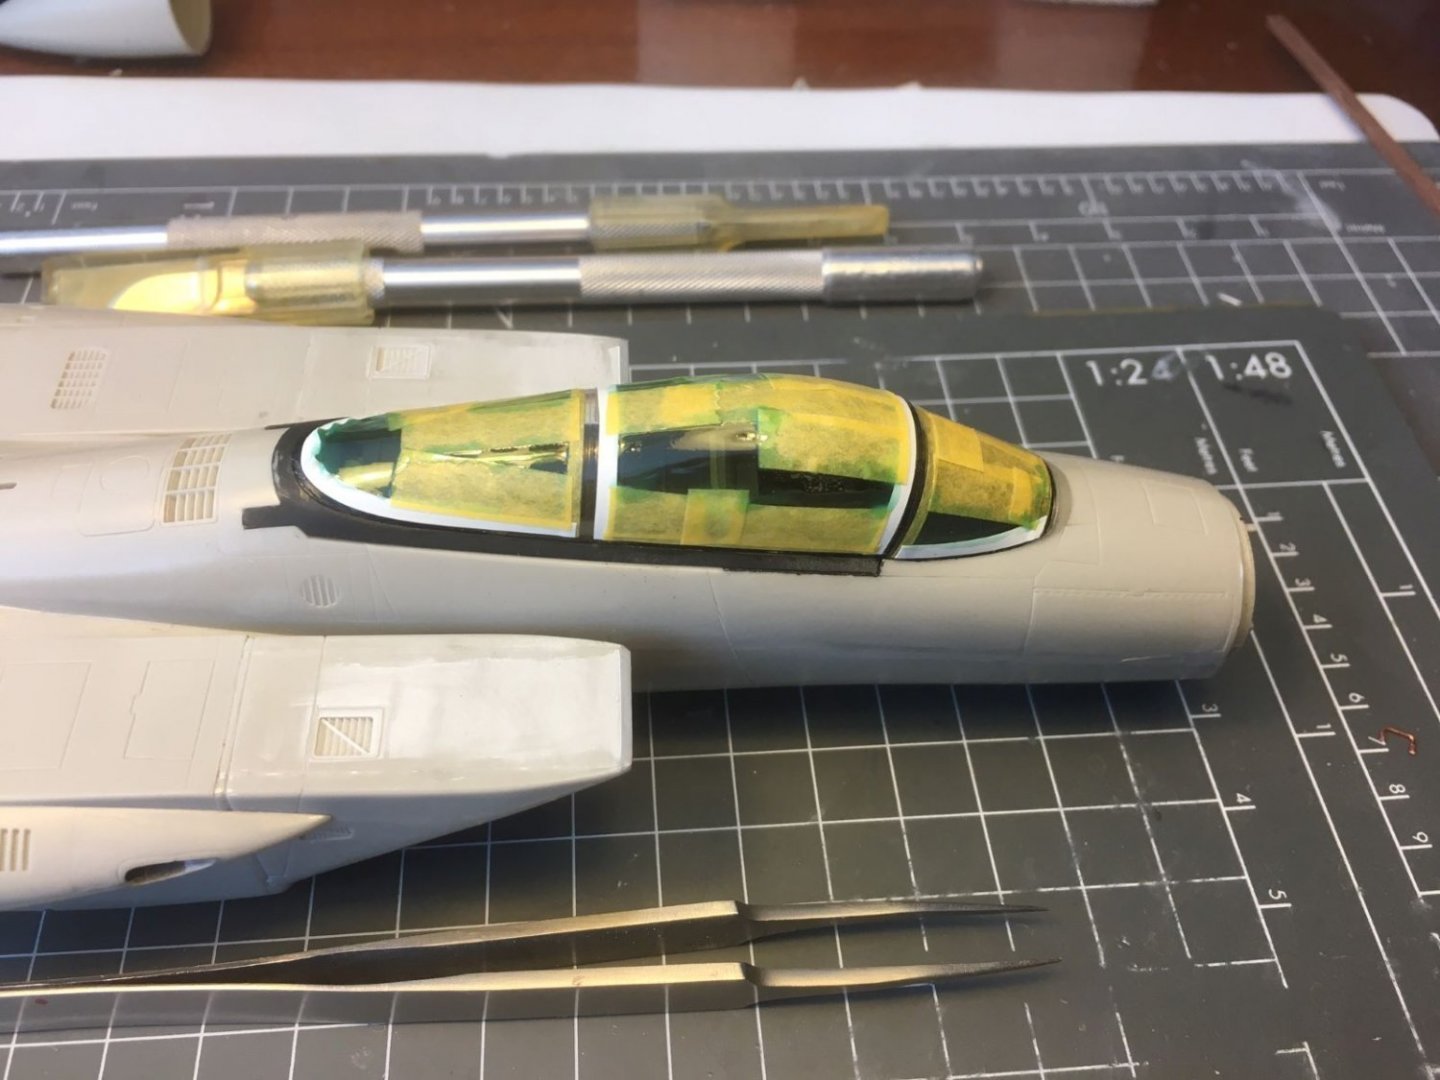
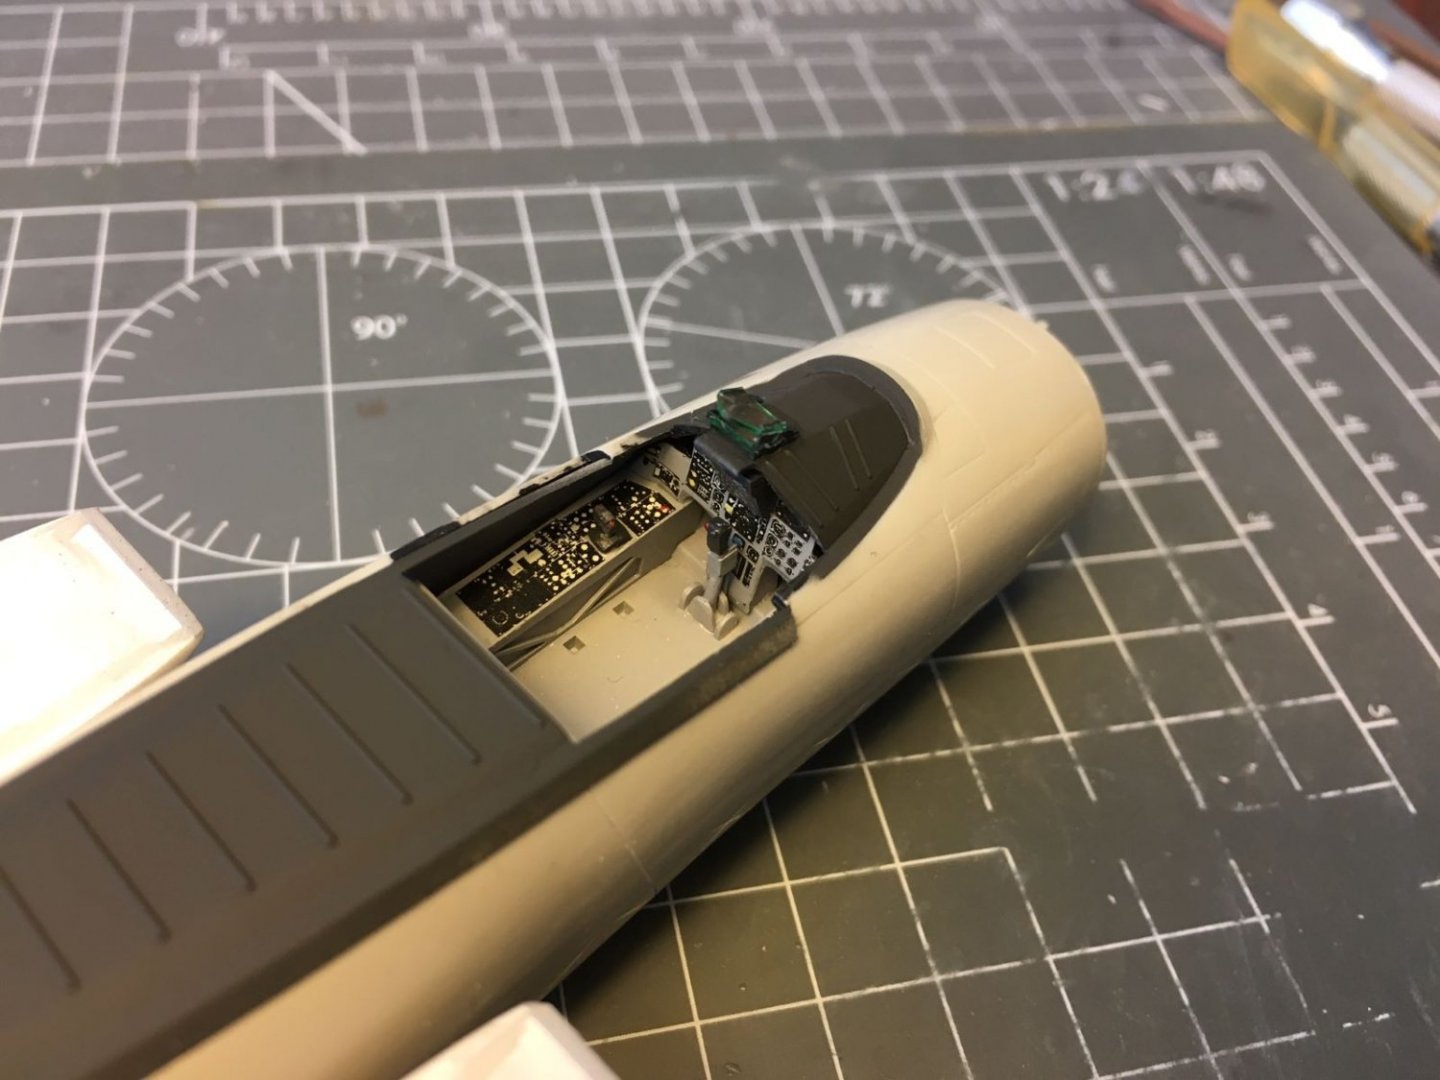
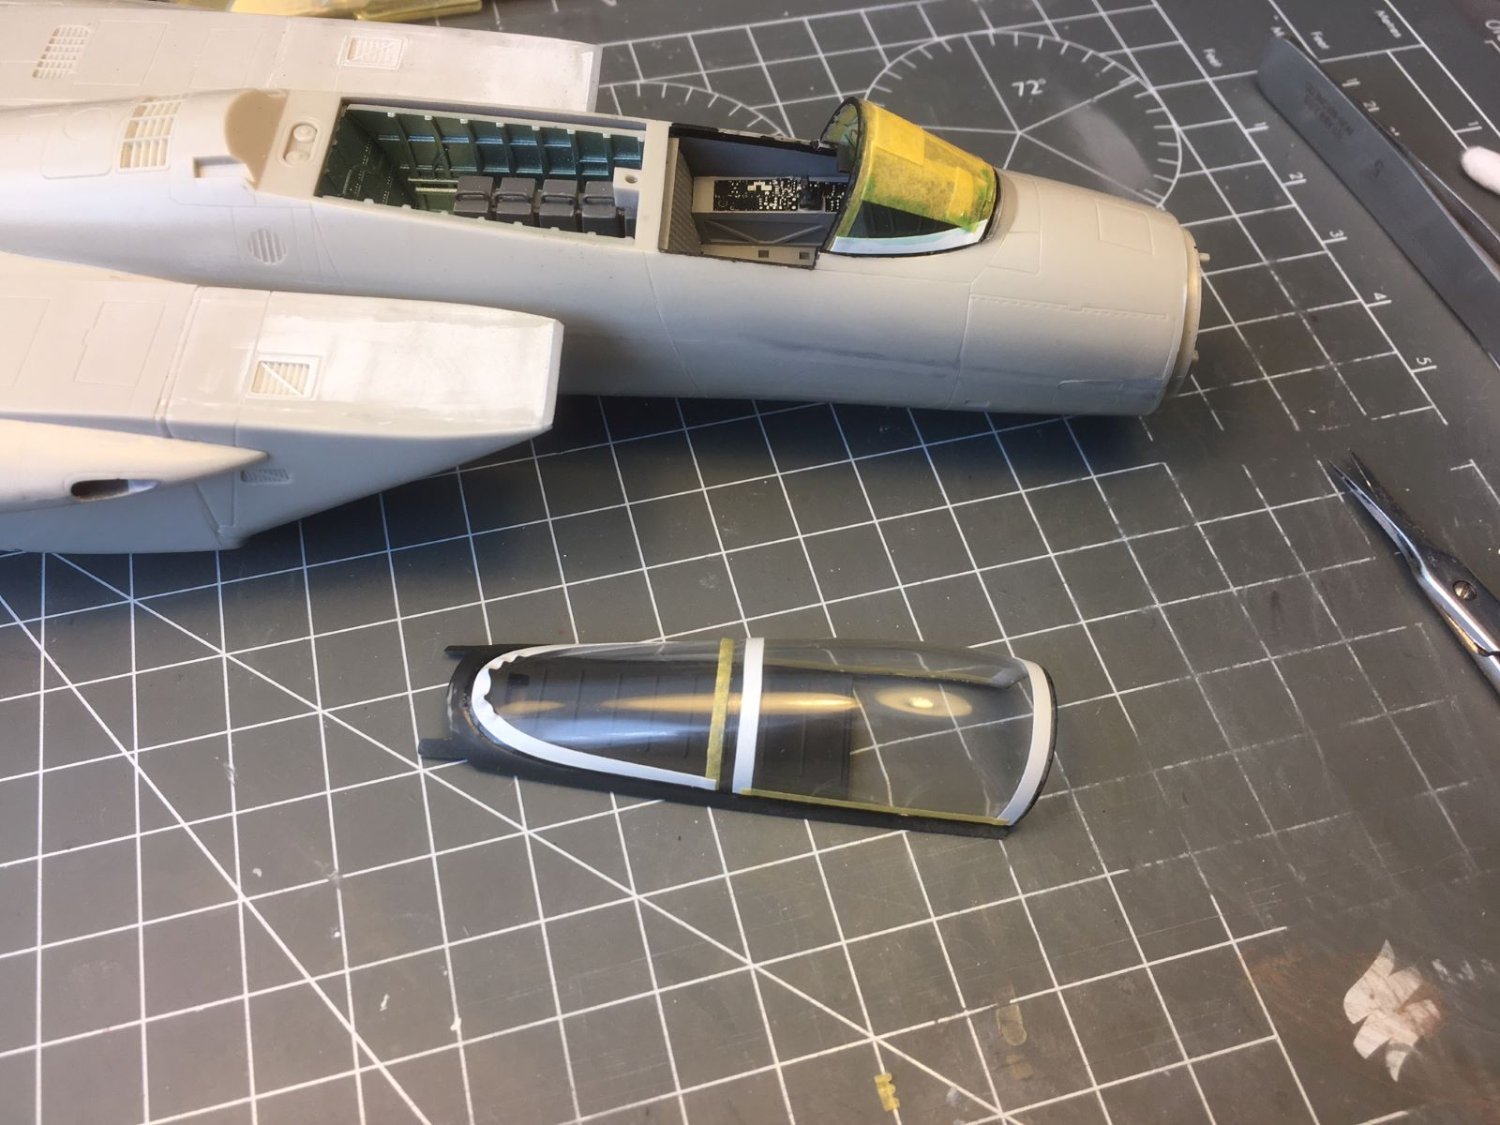
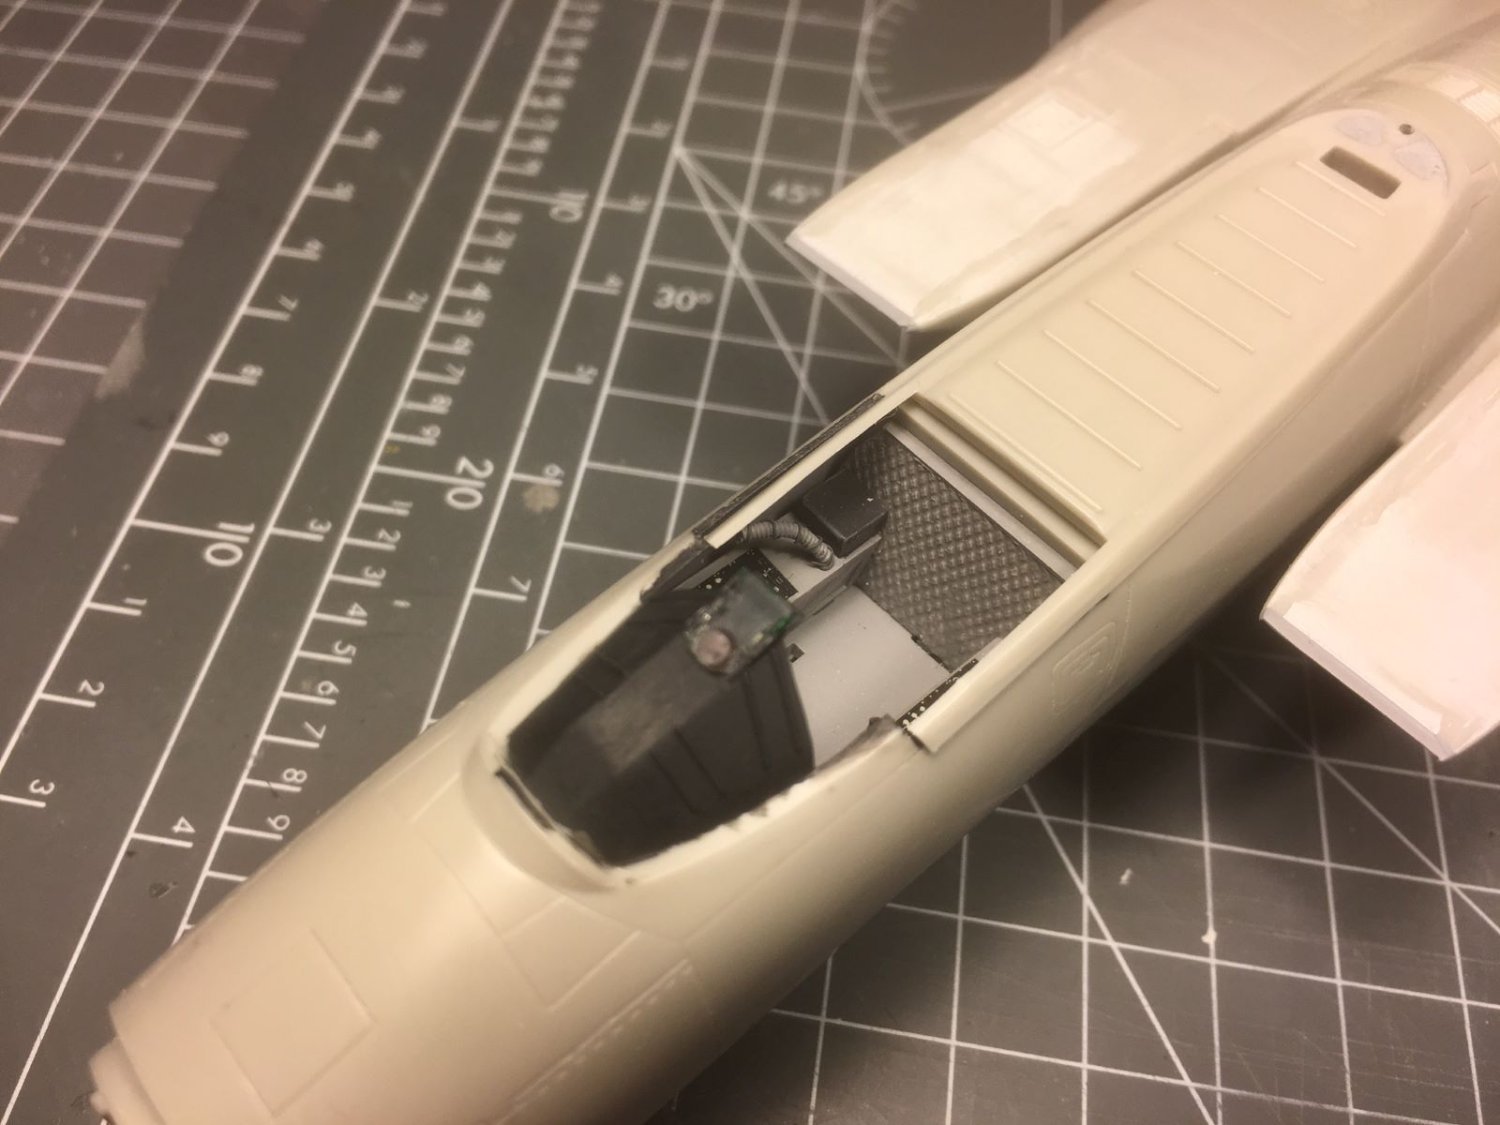
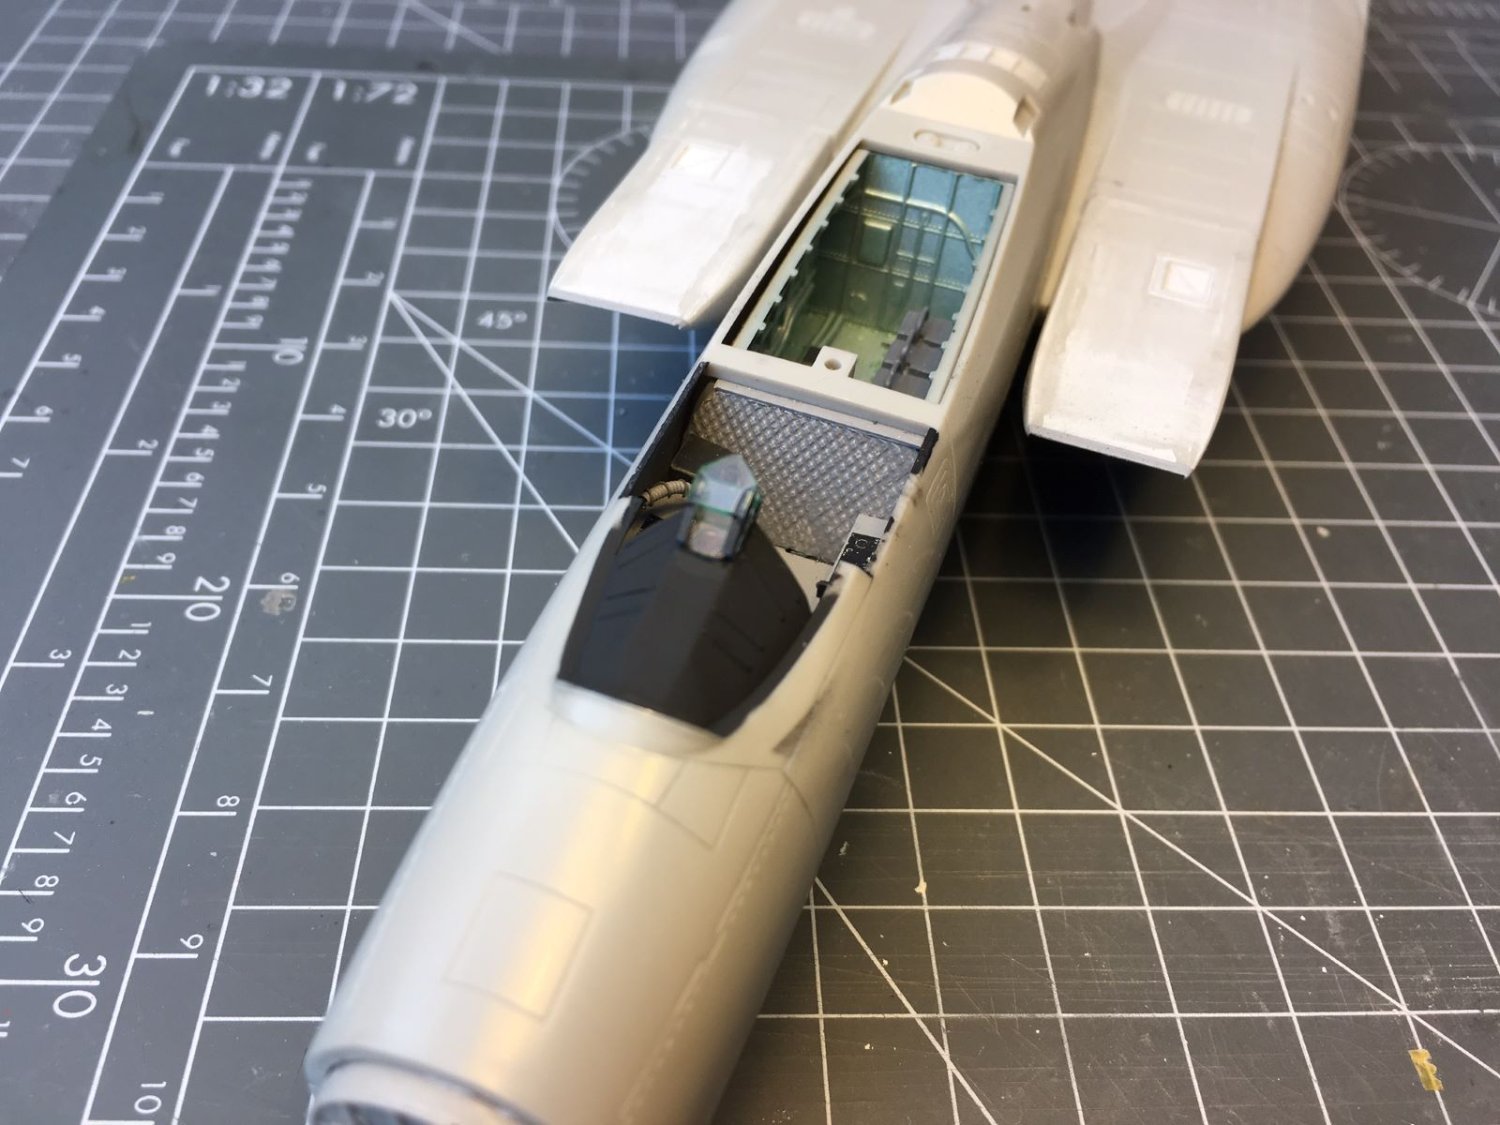
Then I worked on the HUD which is composed by two transparent parts. The frame that holds the transparent plates is a bit simplified, but it looks the part. The lenses of the optics are rendered with a circular imprint on the coaming which I filled with Tamiya Clear Red paint. The picture shows the first transparent part. To mute the reflections of the plastic edges, I painted the edges with Tamiya Clear Green.

Here you can see the first big booboo I made in the assembly: The air intakes are swapped, right with left, and the grilles molded on top are now on the outer sides instead of being on the sides closer to the fuselage. I hate when that happens and my first reaction was to bin the model. After cooling down, I decided to give it another chance anyway and to ignore the sore mishap. Next picture shows the completed HUD with its edges treated as above. I also sprayed a final coat of black on the coaming.
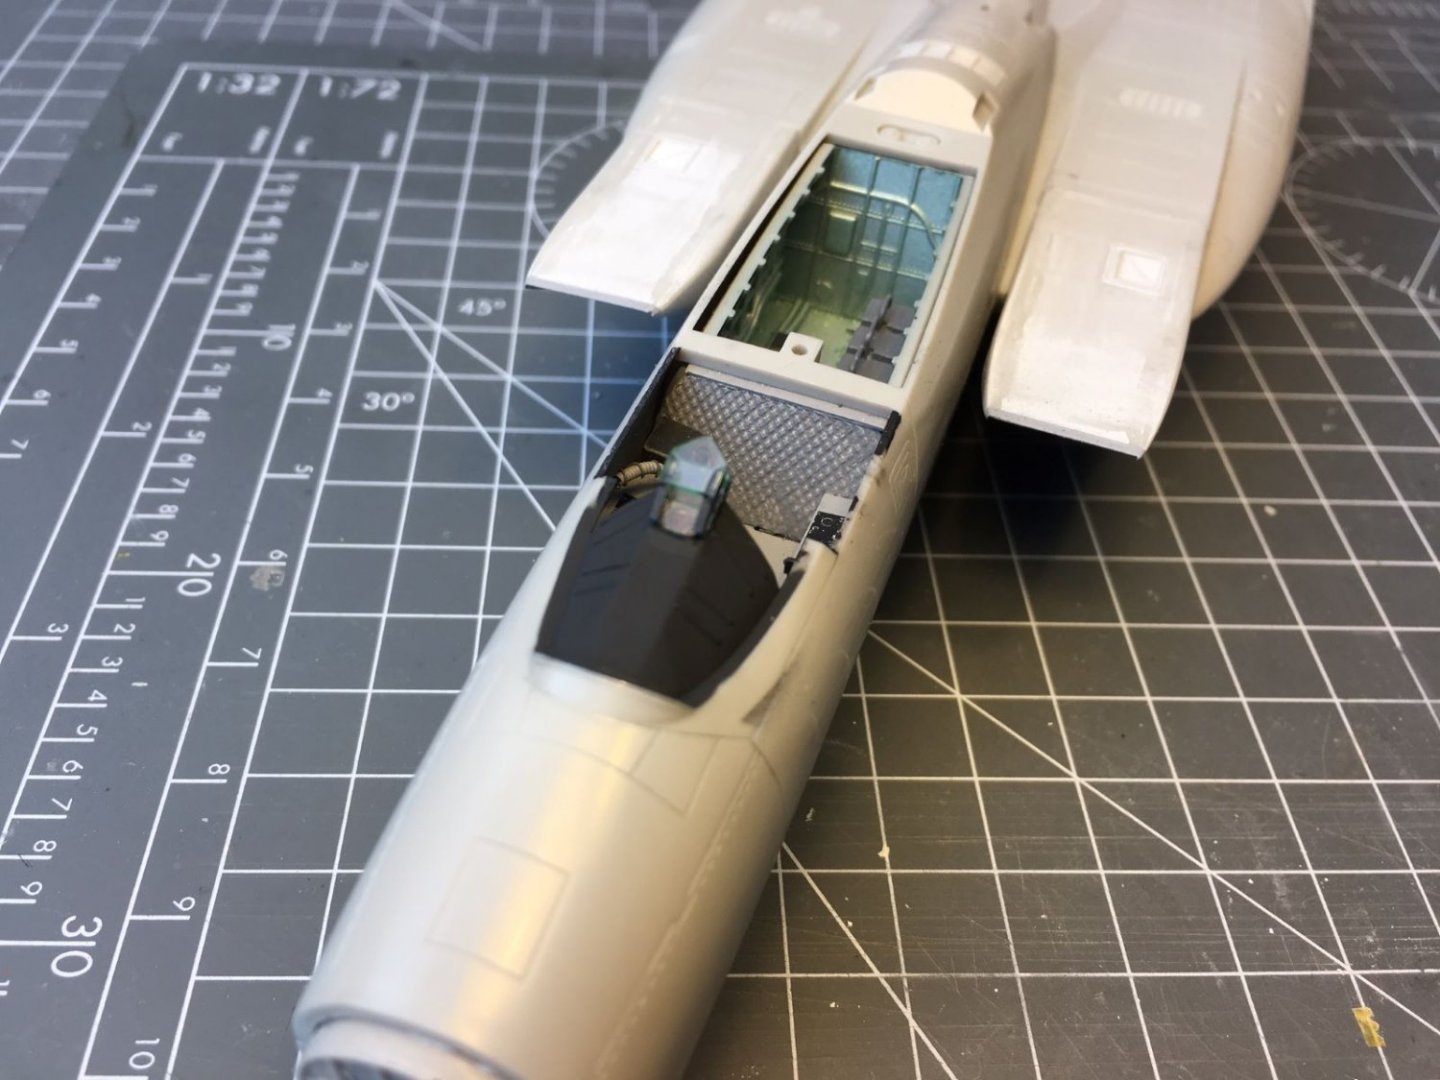
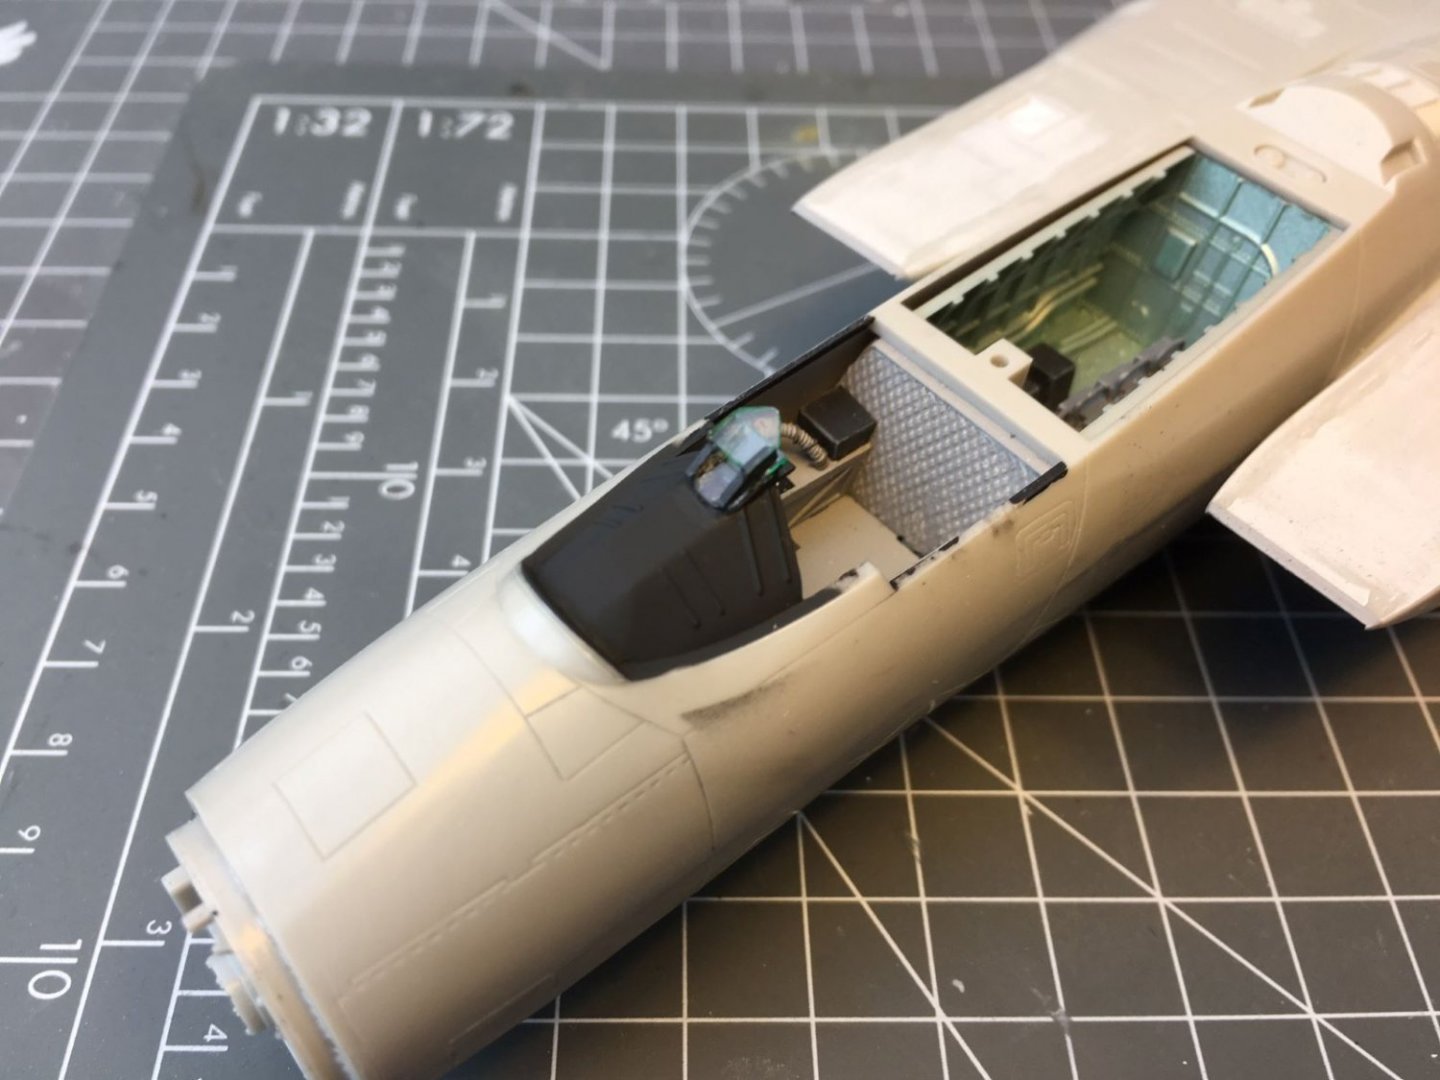
A view of the cockpit with the canopy frame in place. If I leave the canopy closed, the avionics bay will be totally invisible. I will decide about how to pose the canopy later.
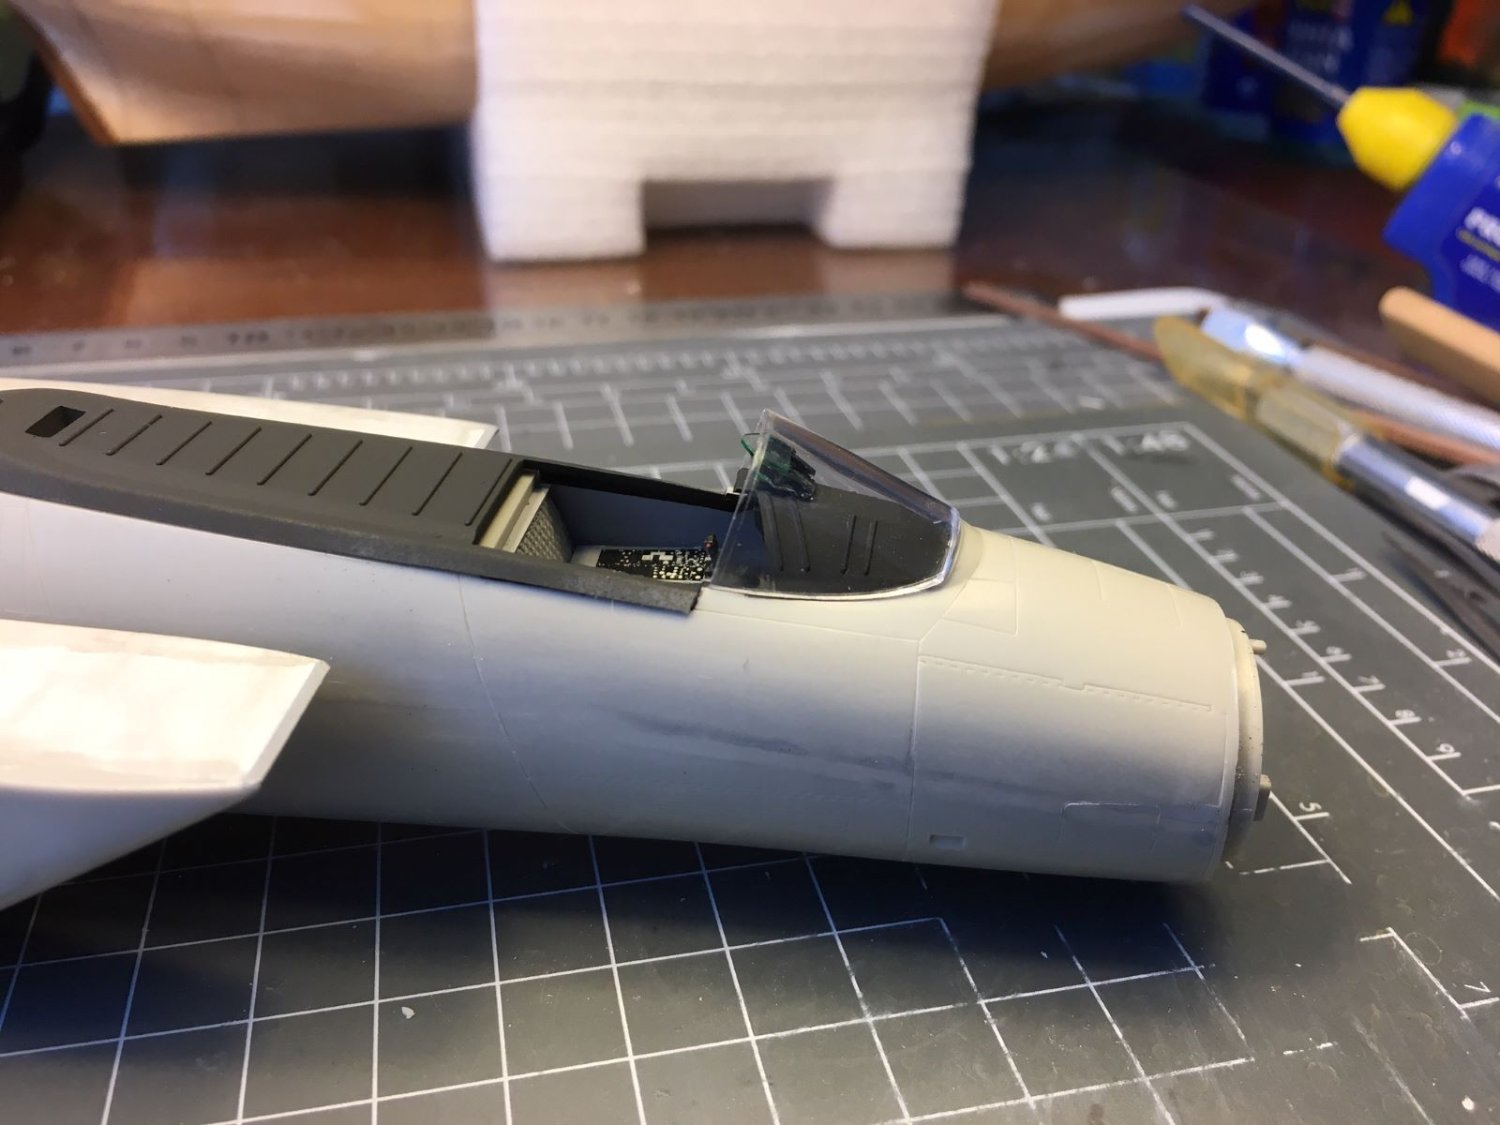
Finally, a picture with the windscreen transparent tested in place:
That's all for now, thanks for watching,
Dan
- FriedClams, Jack12477, Canute and 8 others
-
11
-
As Egilman said. Remaining with styrene, although less frequently, I use also Revell Contacta Professional. Its slightly more viscous with lower capillarity, and it might be used conveniently for larger areas.
Dan.
- Egilman, popeye the sailor, Canute and 3 others
-
6
-
Chilly? As long as it is sunny and dry, weather is fine, ideal for doing things outdoor 🙂
- Edwardkenway, FriedClams, mtaylor and 5 others
-
8
-
Hi Javlin,
it seems that you have tamed this build. From the latest pictures posted by you, your F-86 looks pretty good. NMF and decals/stencils are also very good. I cannot distinguish any blemish on the metallic finish. Unfortunately, I was late in suggesting a sheen steel finish for the machine gun panel. Now, with decals placed close to it, probably it would be very risky to try to correct it. But even with the present finish, it looks as a good model, so I do not recommend any correction for it.
Waiting to see the conclusion, best regards,
Dan
PS: didn't this type have an anti-glare panel in front of the windscreen?


McDonnell Douglas F-15 A/C by Danstream - FINISHED - Tamiya - 1:48
in Non-ship/categorised builds
Posted · Edited by Danstream
Hi,
back home on Friday, fully recovered. Spending 8 days with yourself in a room was a meditative experience. Now back to business, paint had the chance to fully cure, hence I could mask the metallic panels.
Then, I sprayed the rest with light coats of Gunze semi-gloss black. I did not aim at a full deep coverage, preferring a very light layer instead.
Admittedly, despite its age, the surface details of this model are very nicely done.
All black, it looks very spiffy and cool, like a bat-plane, practically.
After addressing few blemishes of the filled joints, white, random mottles and wiggles were applied to obtain a background texture for the grey paint.
Next, I will carefully wet sand everything with micro-mesh pads to obtain a smooth-shiny surface ready to receive the first grey tone.
Best regards,
Dan