

.jpg.2c2c29e54623bd7b752bc2cdab599665.jpg)
Danstream
-
Posts
566 -
Joined
-
Last visited
Content Type
Profiles
Forums
Gallery
Events
Posts posted by Danstream
-
-
Hi Mark, you must refer to the defection of one MiG 25 which took place in 1976. The MiG 25 was an interceptor capable of Mach 3+. But, indeed, no great sophistication was found from a close inspection of it, just massive power and an airframe made mainly of a nickel steel alloy that could perform at the high temperatures of Mach 3+ flight. No high performing titanium or the like. Clearly, it was a one-point design being designed to accomplish just a single type of mission (although it was also used as a reconnaissance aircraft), but it did the task it was designed for.
Let me say that the point you mentioned about the rivets is a bit too simple, if I may say so. Surely the protruding rivets were used where they could be tolerated from aerodynamic point of view being most of the airframe welded. Surely, it required a massive trust to reach 3.2 Mach, but looking at its configuration (huge intakes, vast wing surface, high weight), I guess that the rivets where not the main reason for the need of that. At any rate, the pragmatic unsophisticated and often spartan approach is one of the interesting factors for me about these Russian planes.
- mtaylor, Jack12477, FriedClams and 6 others
-
 9
9
-
You should indicate which pictures are of the model and which are of the real things because in many cases this is not evident to me 🤔
Dan
- Old Collingwood, Edwardkenway, lmagna and 9 others
-
7
-
 4
4
-
 1
1
-
-
8 hours ago, Javlin said:
the early MIGs well just looked fugly and when you laid the paint at first still fugly but you know what the decals and your enhancements have changed that opinion to just ugly😄
Indeed, this is my first model of a Soviet aircraft and I had never been greatly attracted by them before because I thought they looked 'different'. However, lately I had the occasion to read more about these early jets and I was pushed to try one. Now, I am very intrigued by their being 'different', by their look and by their engineering. Surely this will not be my last one. Thanks for your appreciation of my work! 😉
8 hours ago, king derelict said:Looks great. The panel lines are so neat; a skill level to aim for
Thanks Alan, happy that you like it. The result of the panel lines depends a lot on how good is the model. In this case, the finesse of the starting pieces was not bad, but, because of extensive filling and sanding I had to scribe again the lost details (I did not do all of them, though because it is such a boring work). Here is where you need same more skills. Otherwise, the process is not difficult and capillarity and chemistry do most of the job for you. 🙂
Thanks also for all the likes!
-
Hi all,
thanks for the comments and the likes. After a long interval, I am now finishing a bunch of small items.
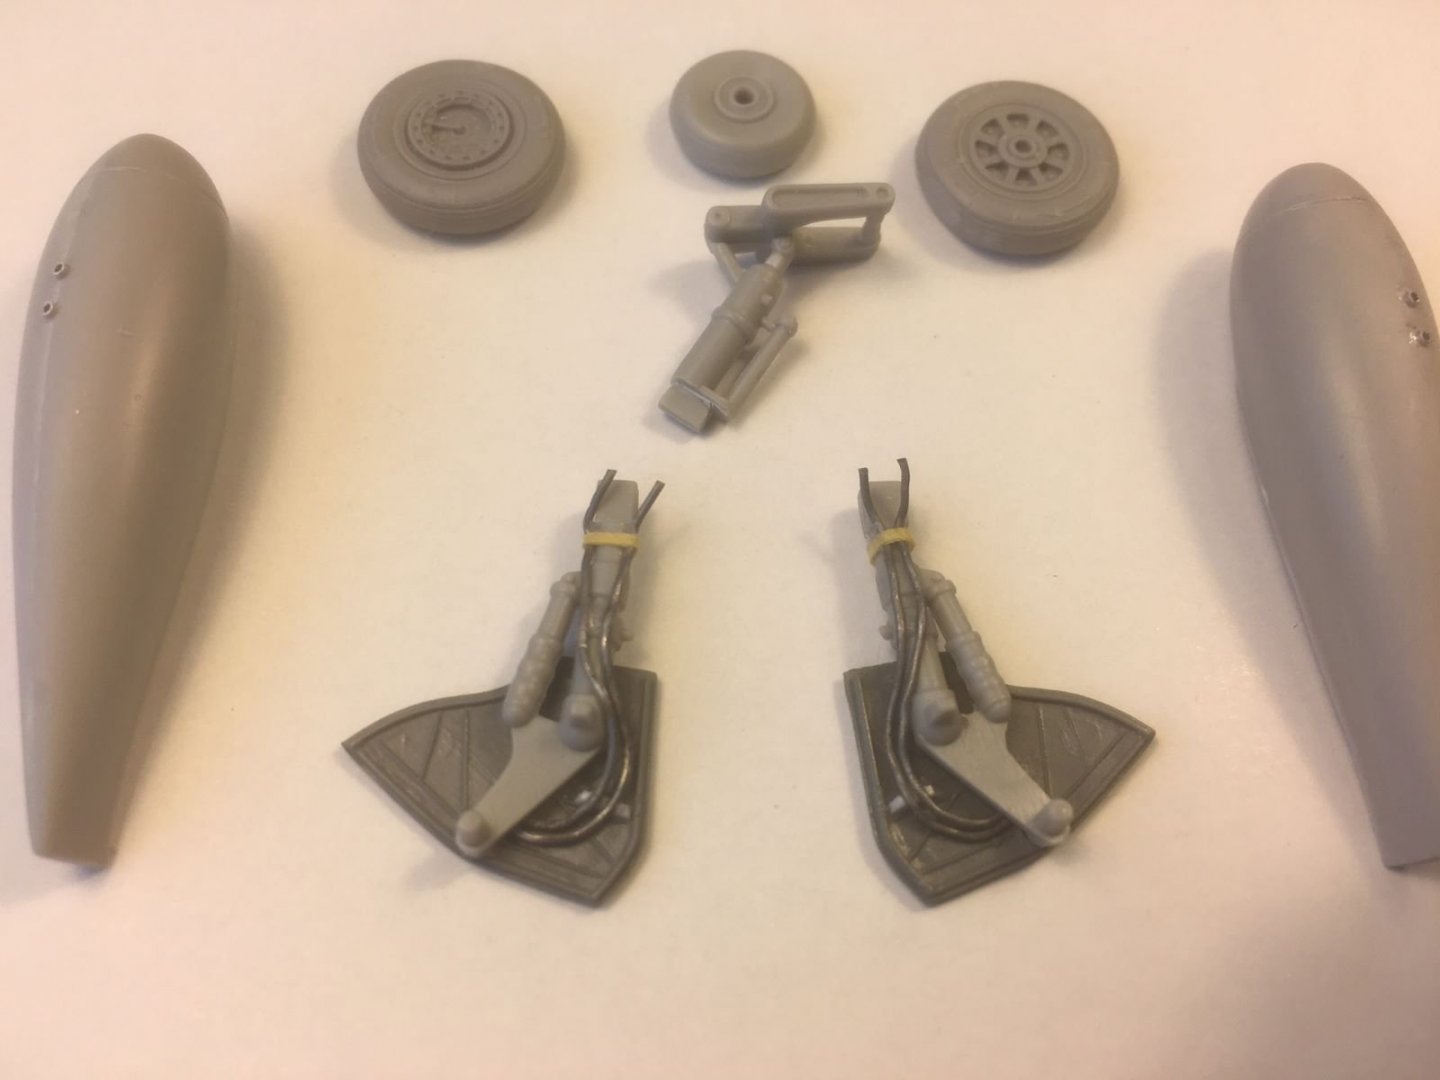
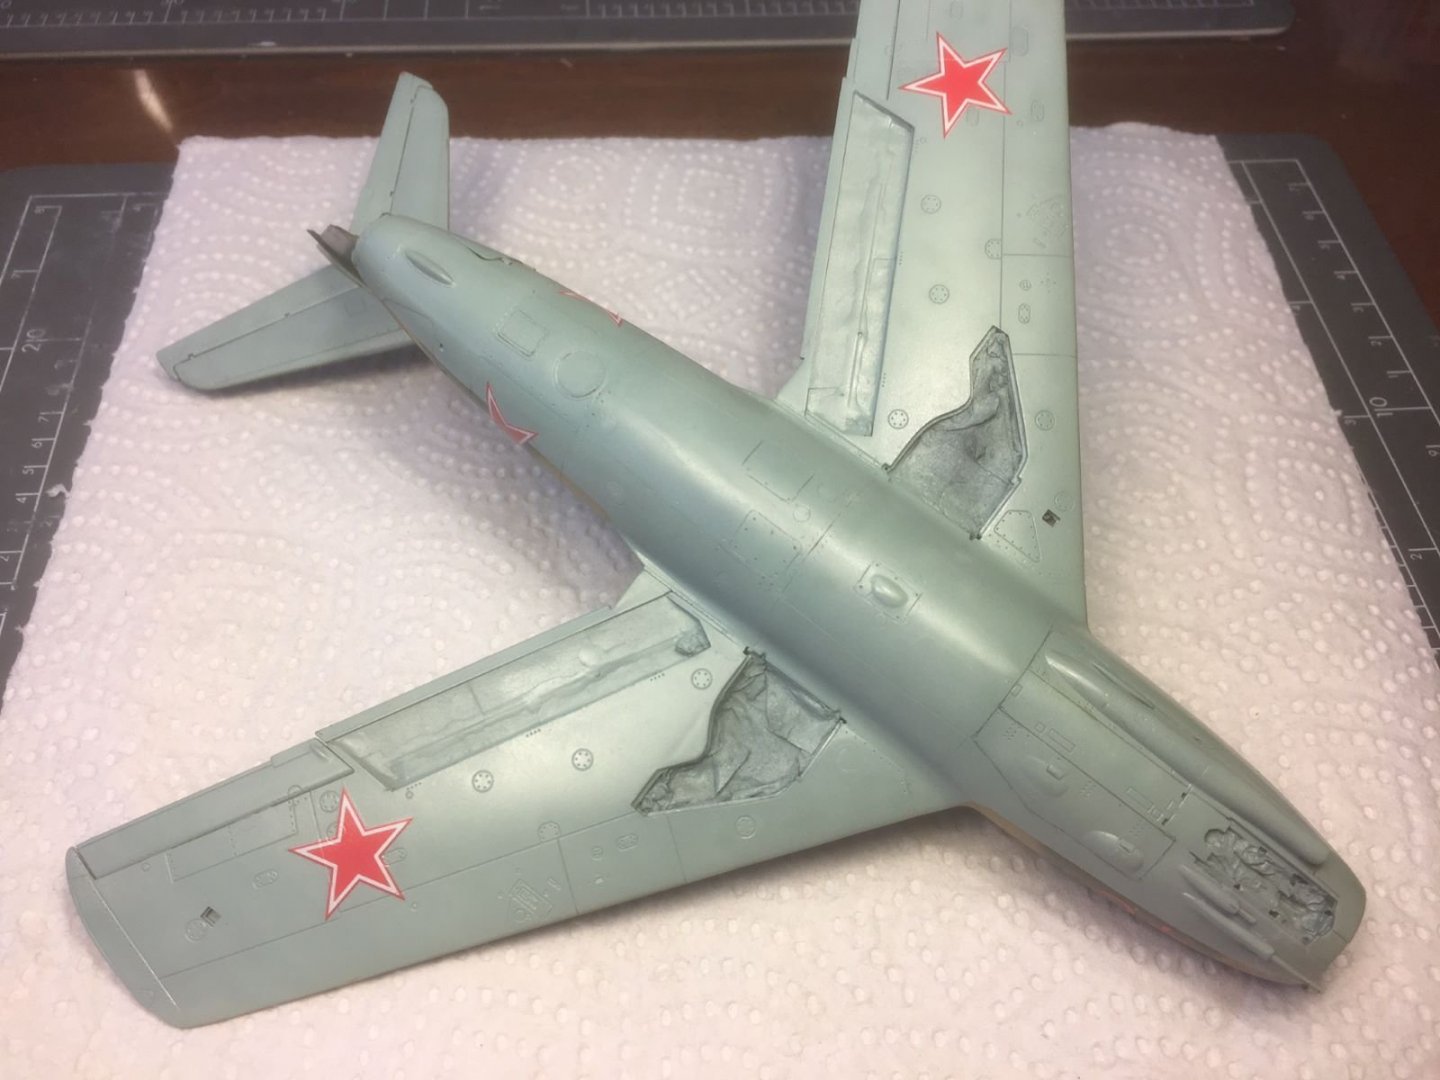
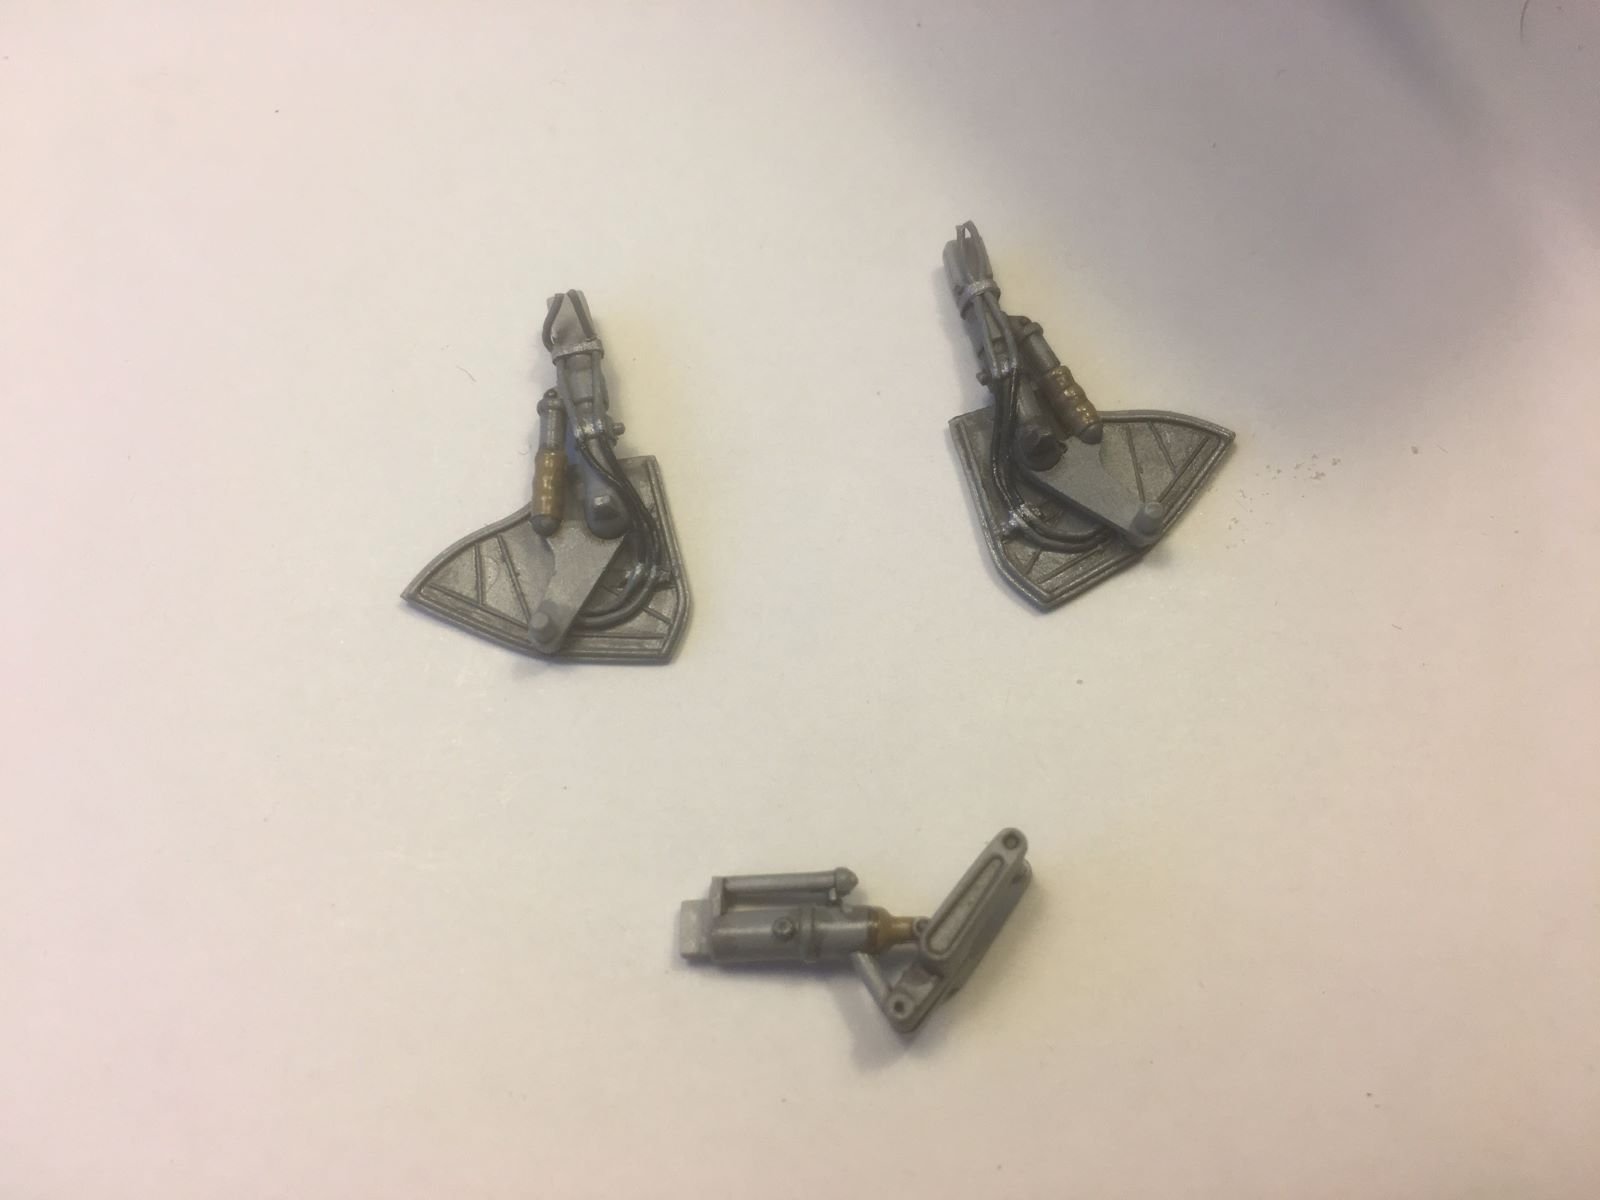
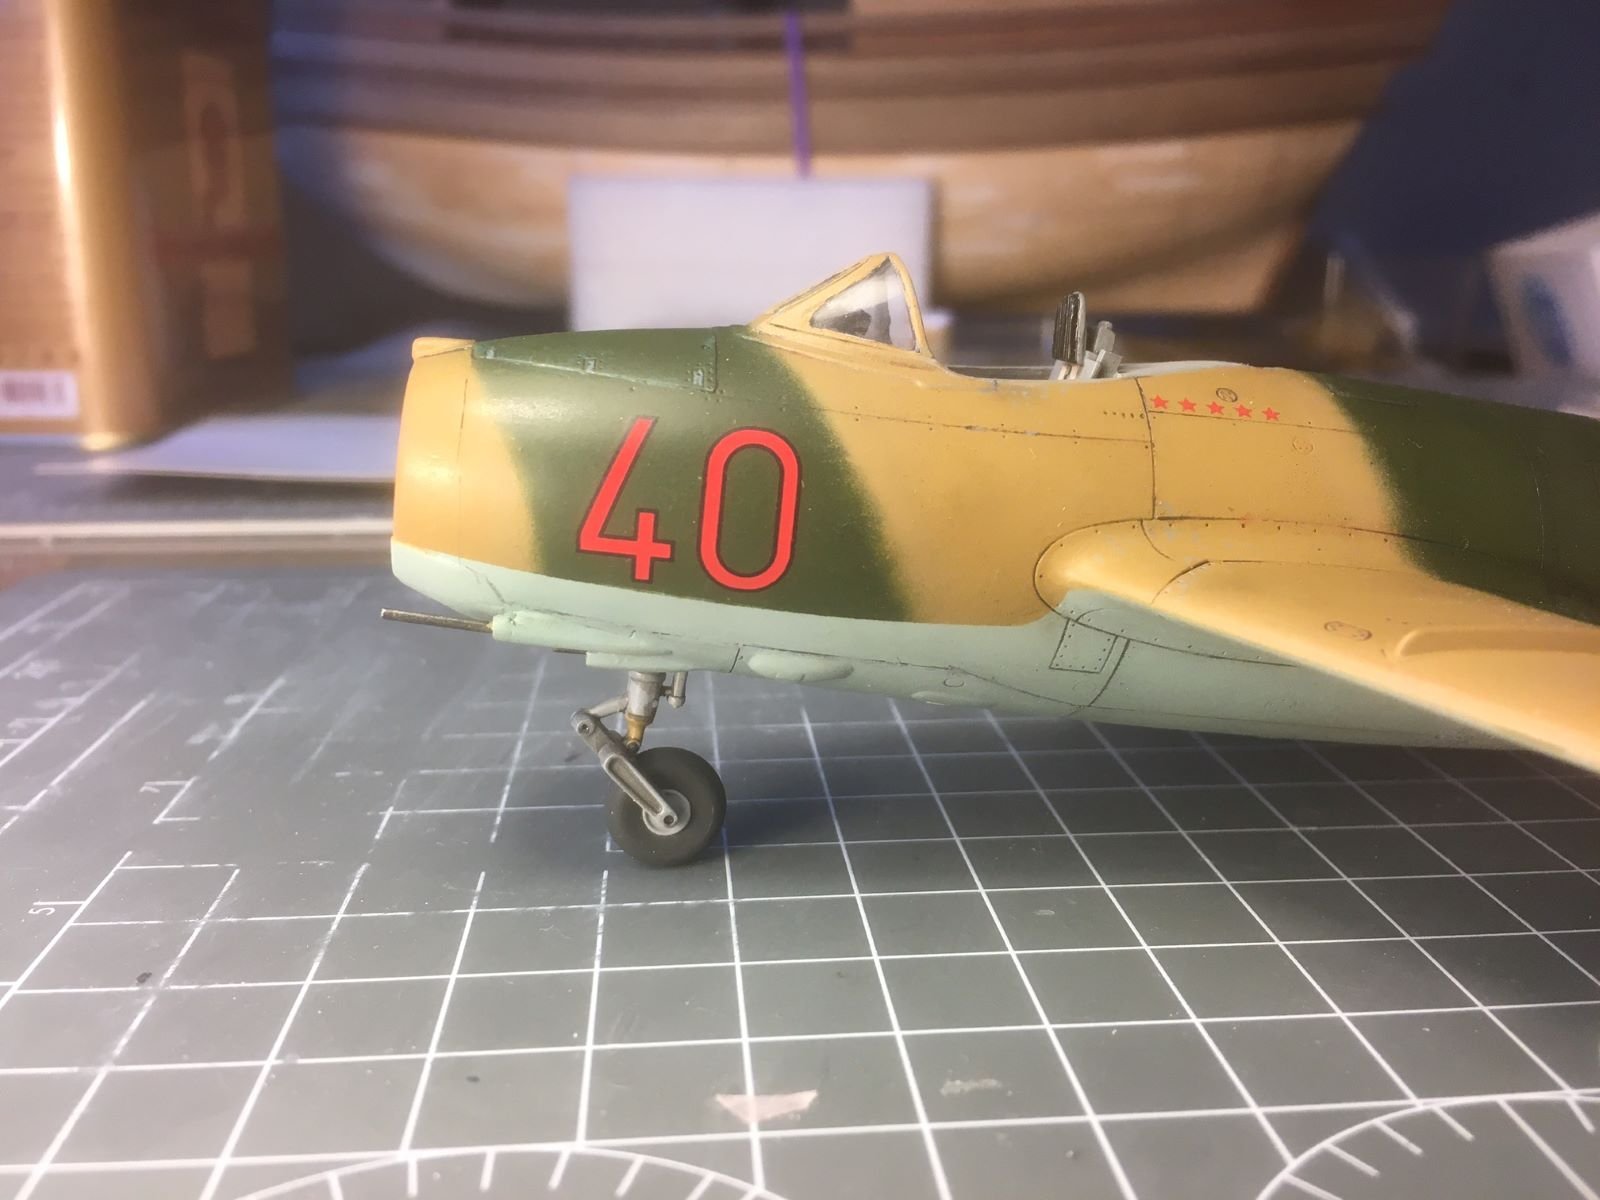
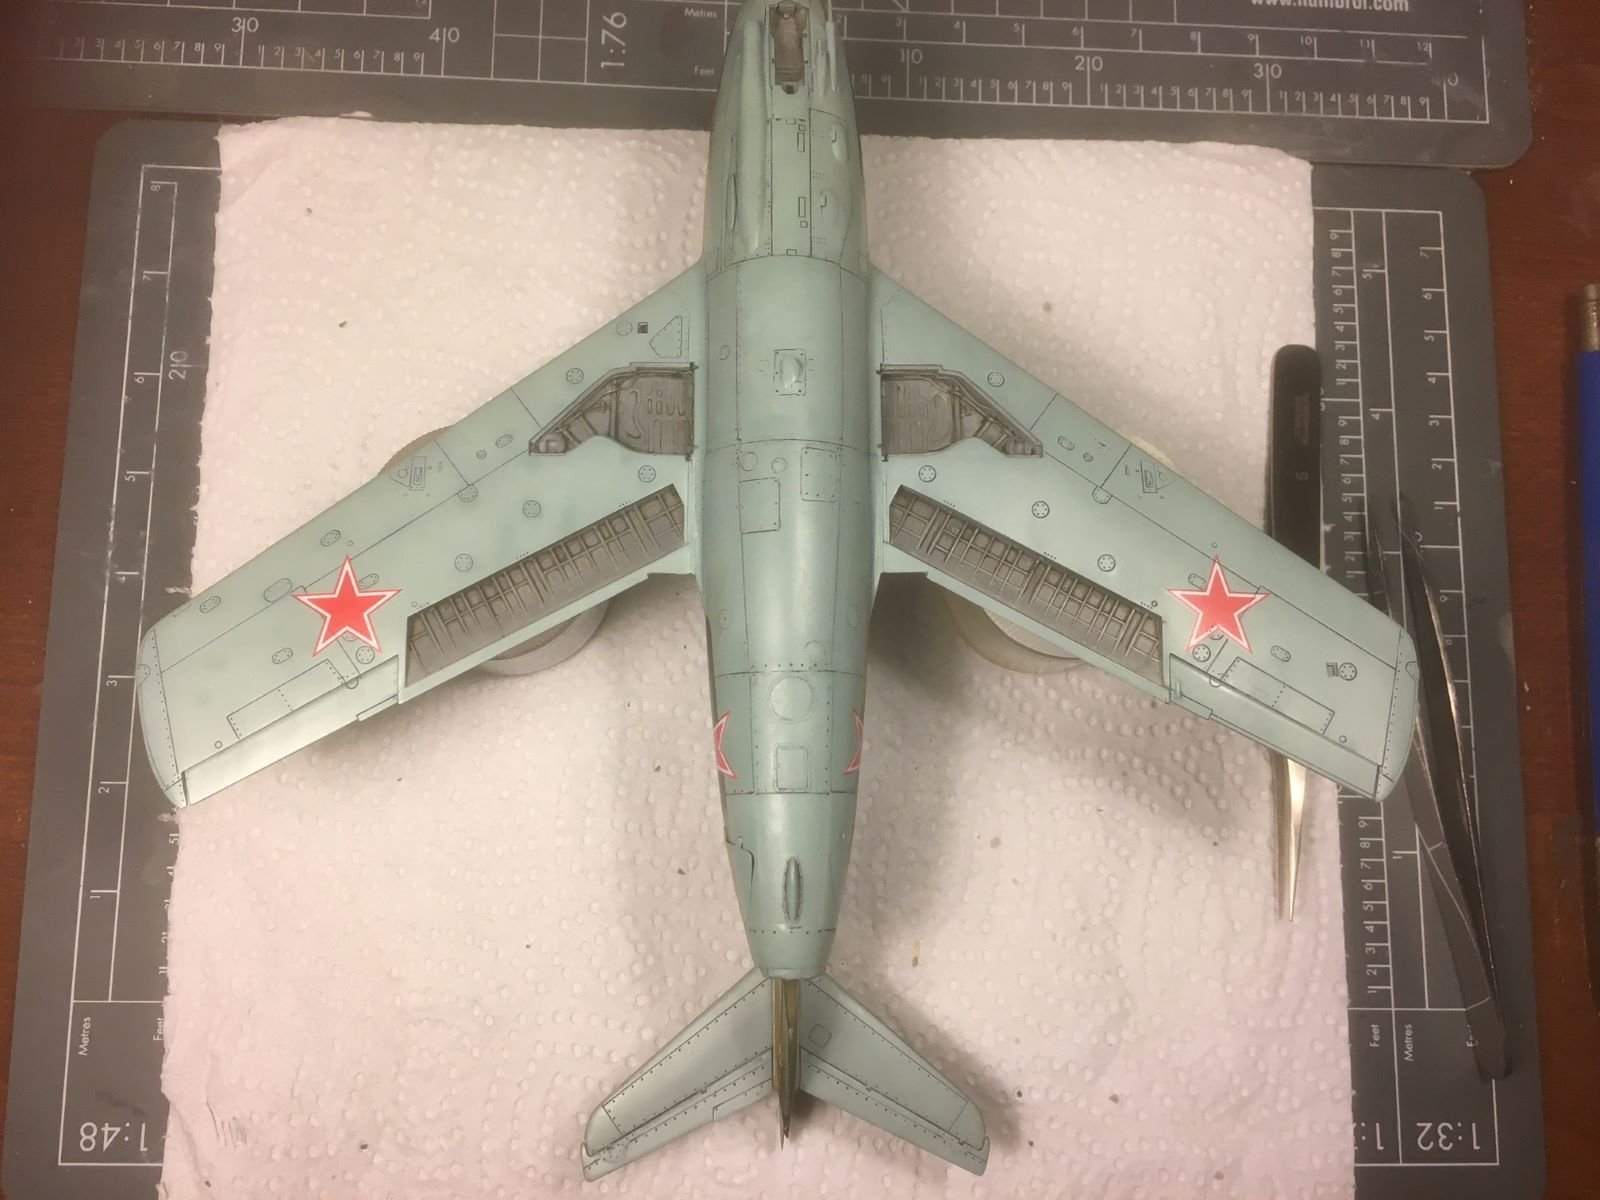
I cleaned up the landing gears and added the piping of the breaks, as seen in walkaround pictures, to busy them up. Prepared the aux tanks and wheels. I replaced the main wheel with Eduard's resin parts which are nicer. Then sprayed the landing gears, painted details, brushed floor polish and completed them with Tamiya panel liner (black and brown). As said before, the idea is to get the feel of the real thing.

To break the more tedious works, I also started to add small stains and scratches using watercolor pencils.
This is the underside with stains and the main landing gear legs finally glued in place. A light coat of matt clear will remove the remaining shine.
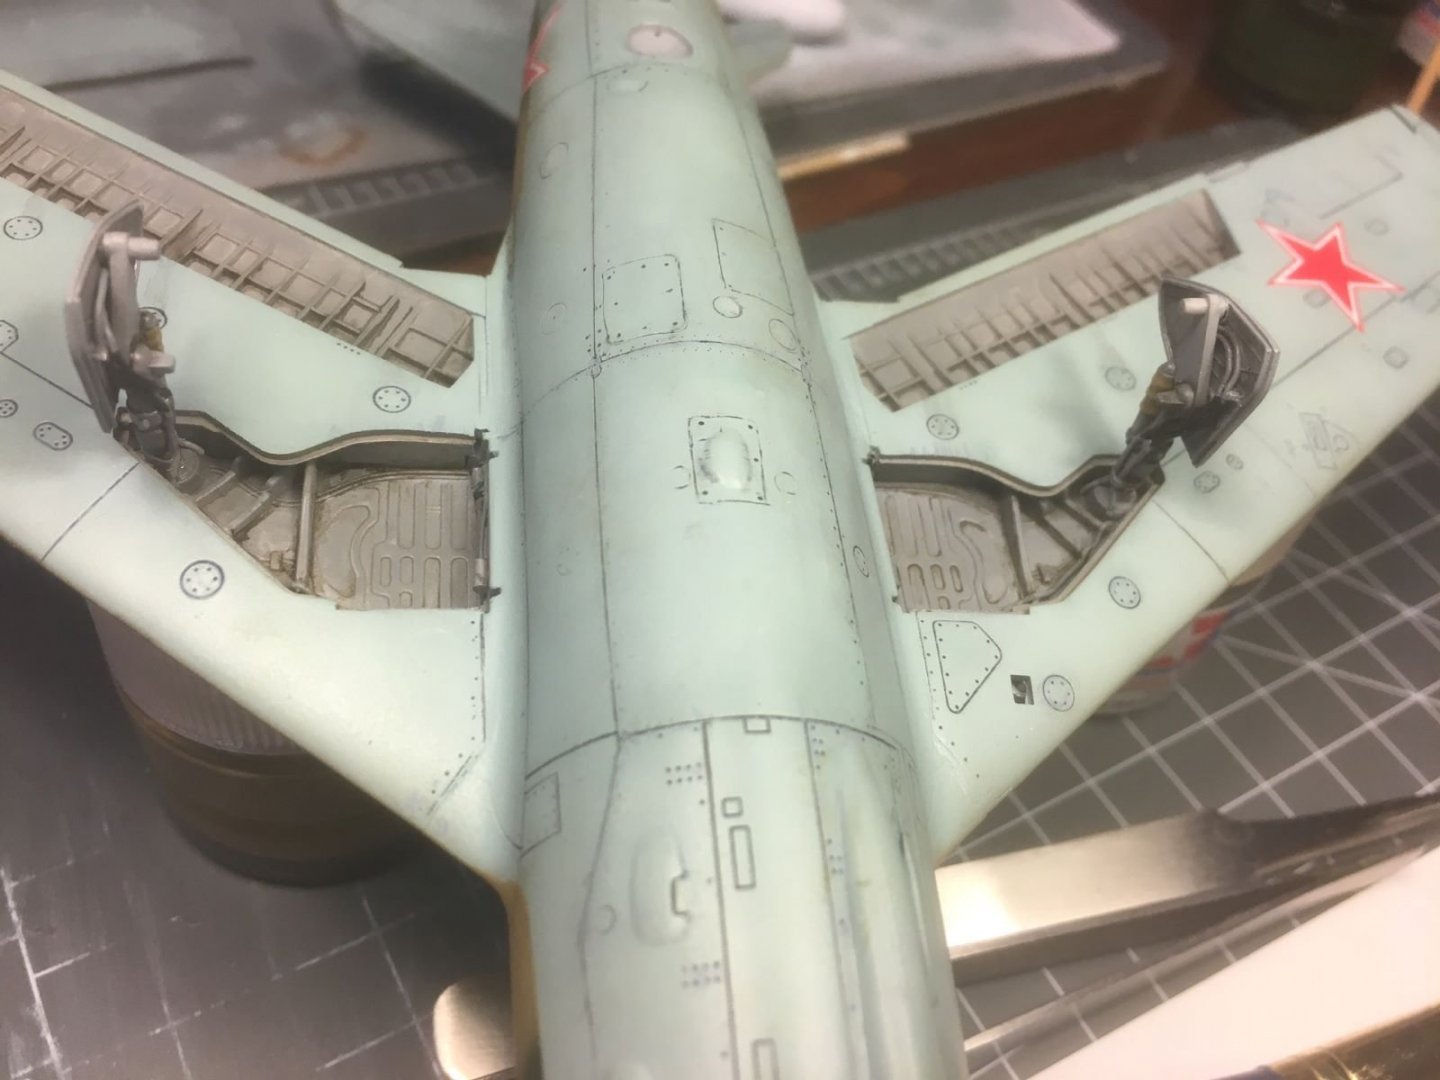
The split flaps are dry tested in place:
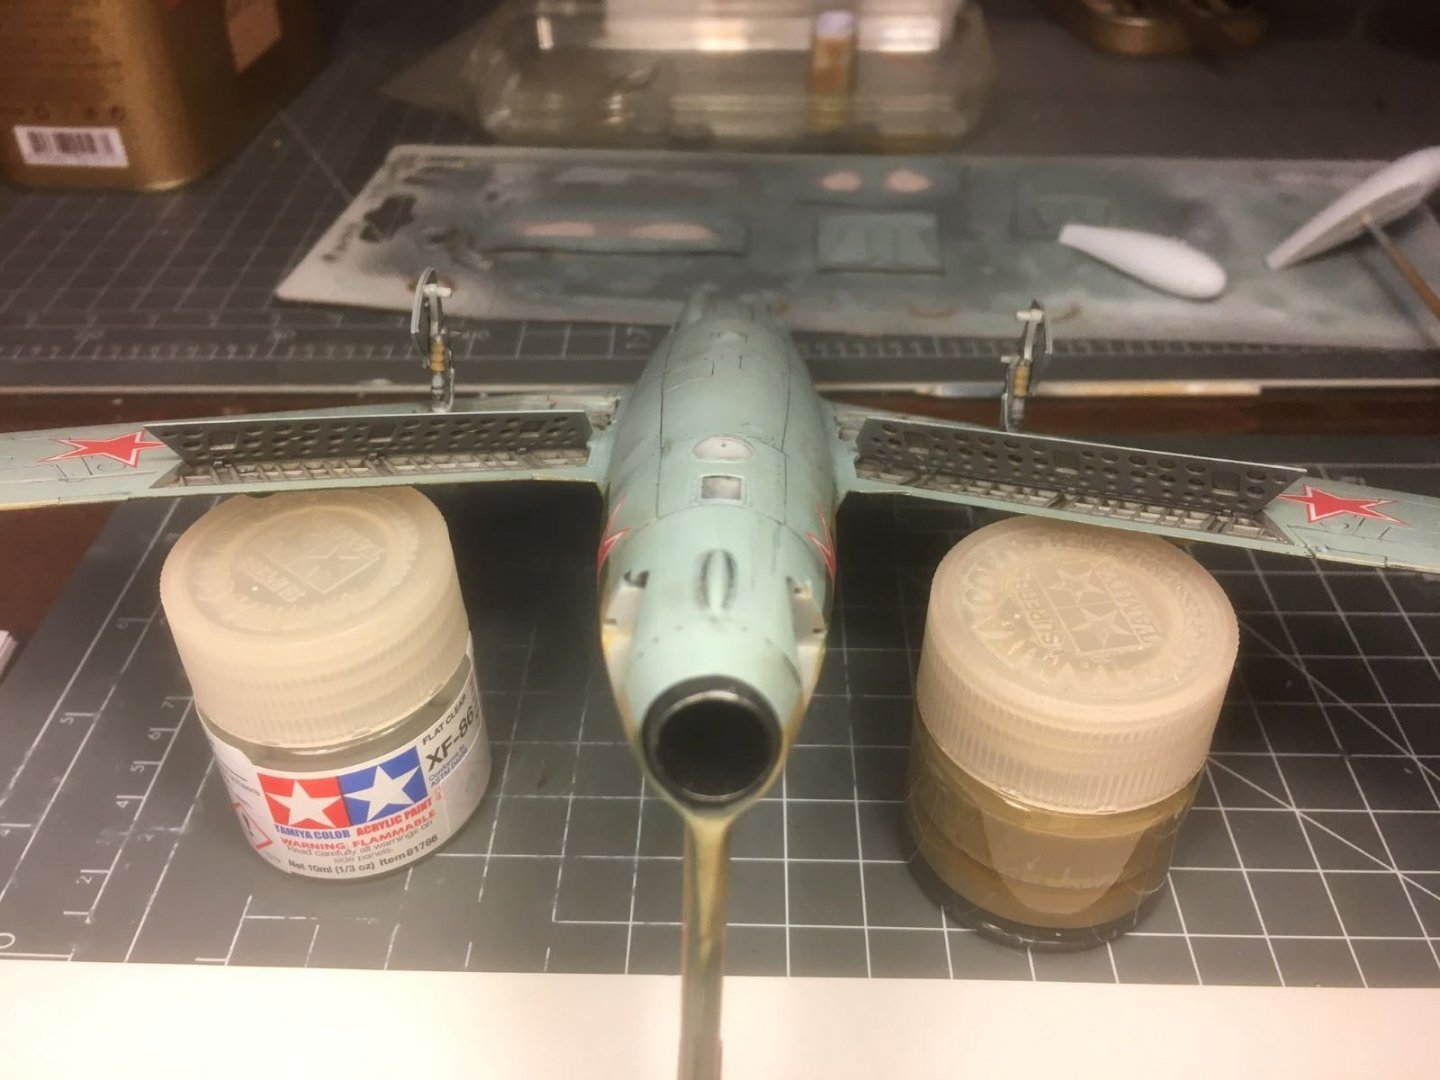
Also the nose landing gear is now in its place:

That is all for now, comments, suggestion, critiques are as always welcome.
Dan.
-
Fuselage turned out fantastic.
- Egilman, Edwardkenway, mtaylor and 6 others
-
9
-
Nice cockpit in such a small scale!
Dan.
-
Nice model of this iconic spacecraft and mission. Very rarely seen.
Dan.
- Egilman, mtaylor, popeye the sailor and 3 others
-
6
-
-
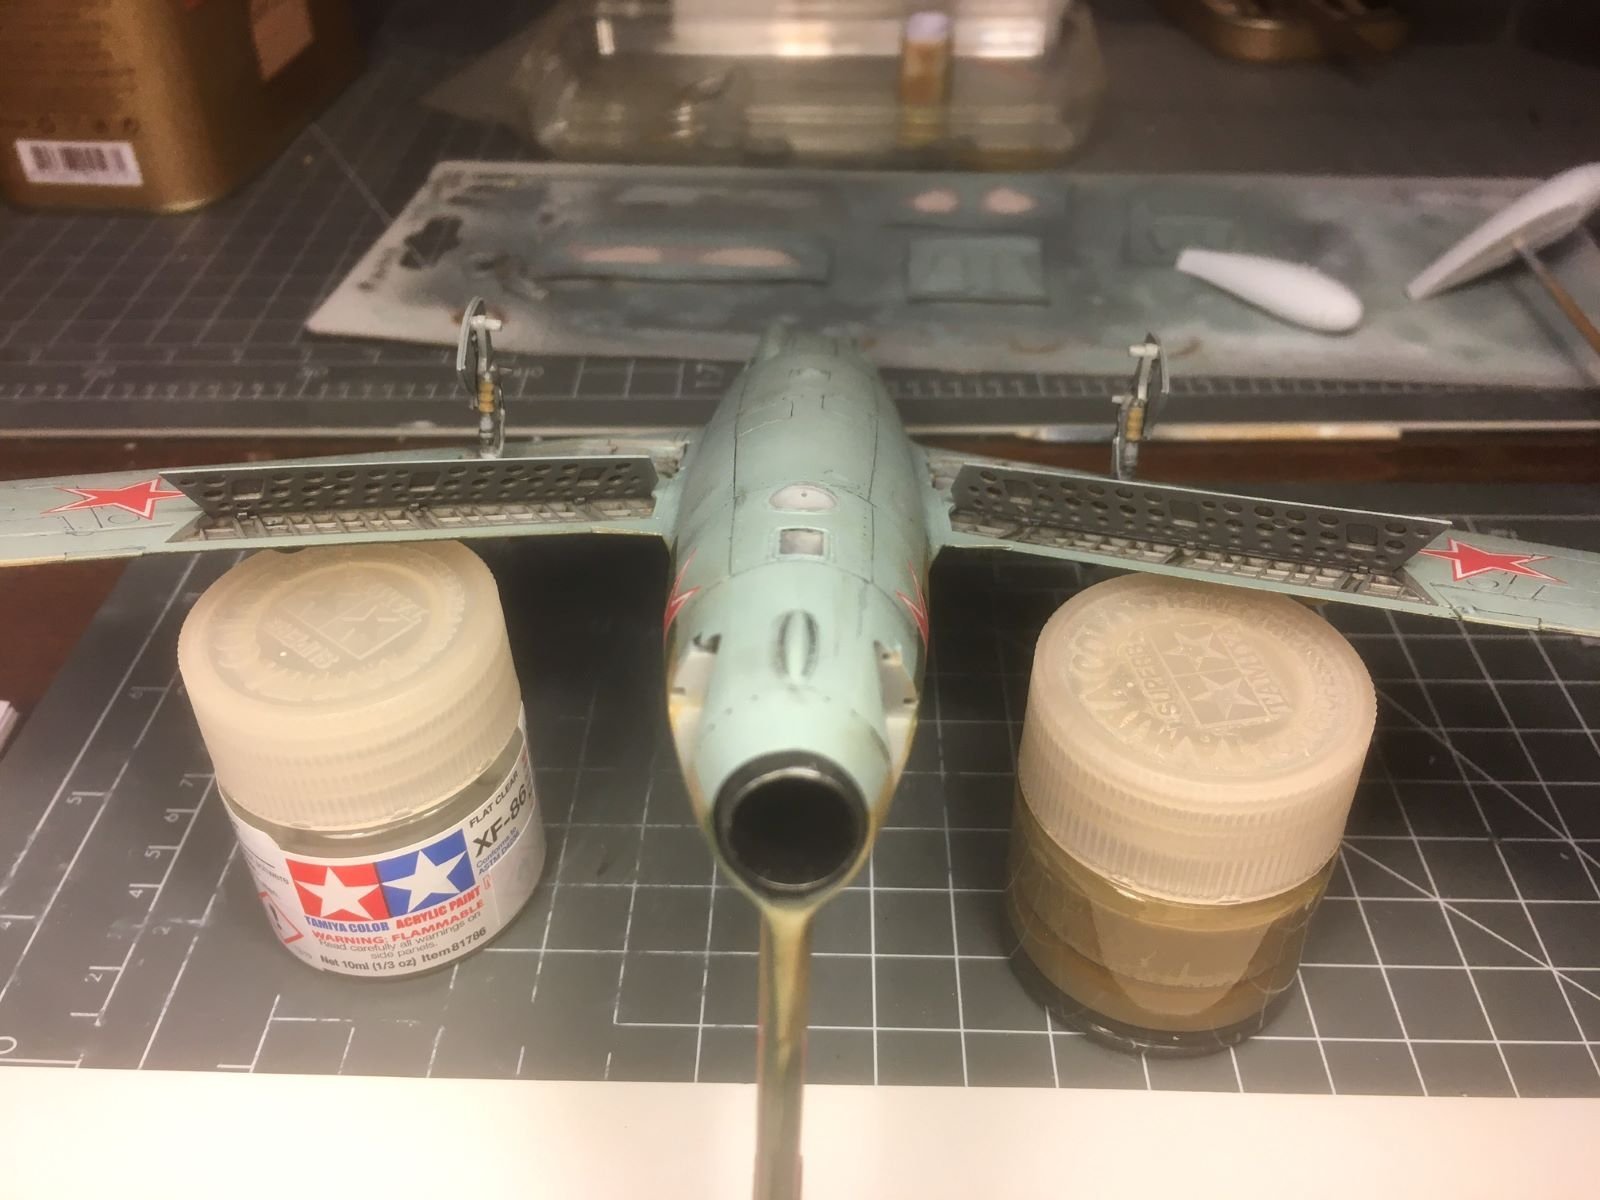
Hi,
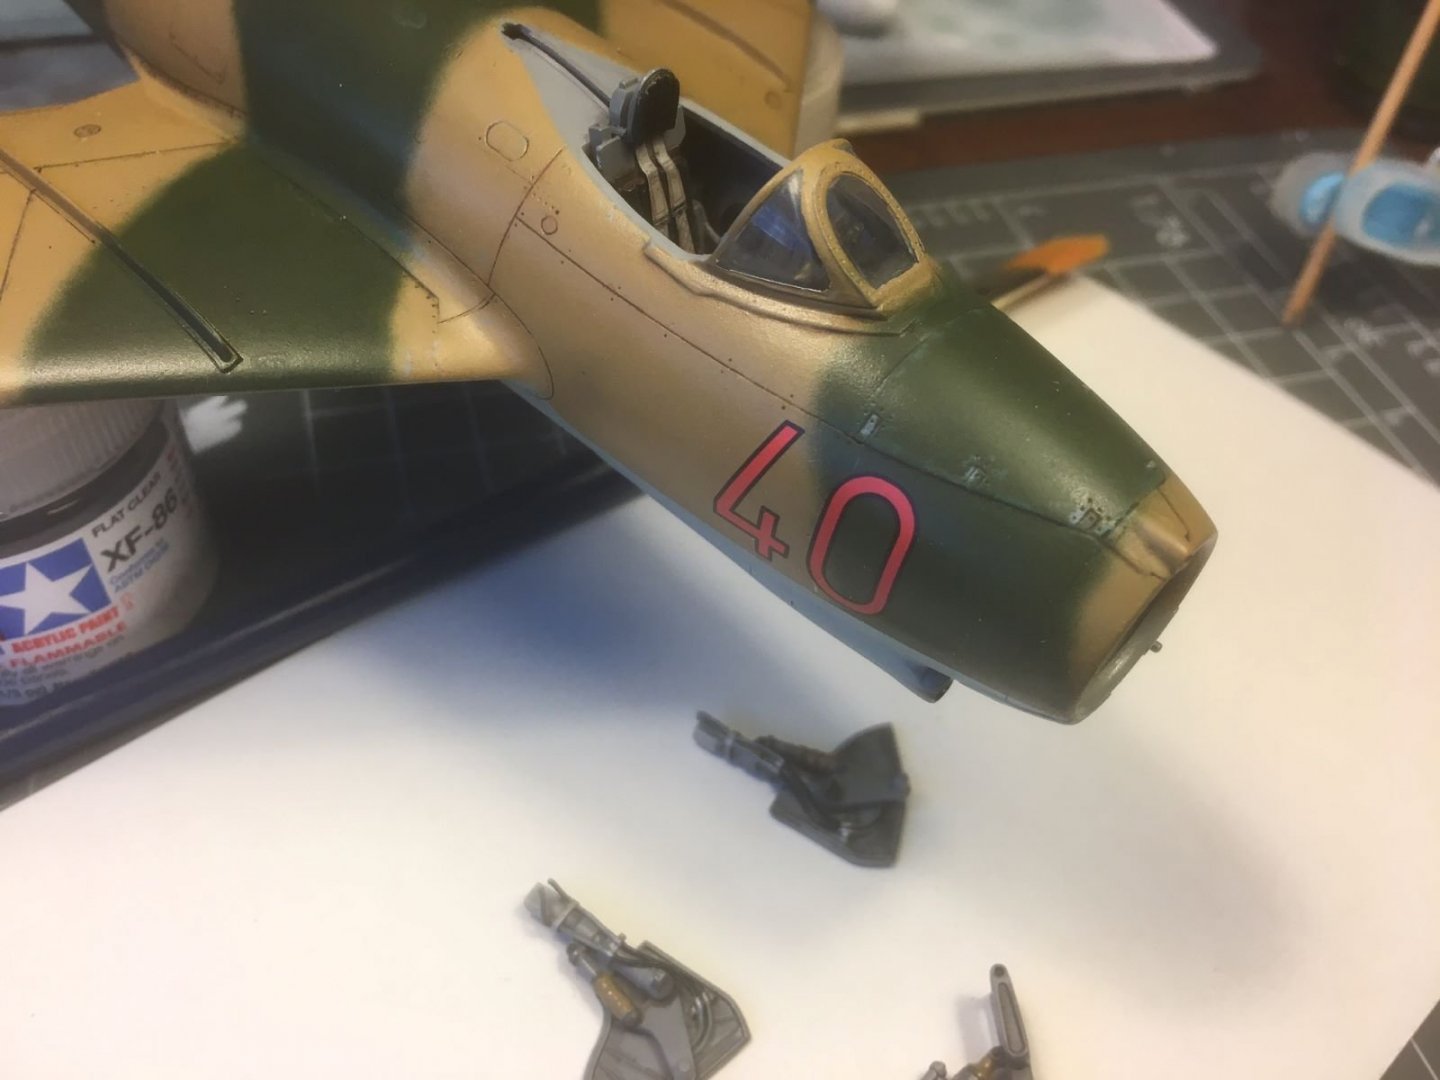
I bought the Tamiya flat clear XF-86 and sprayed it on the entire model. Fortunately, it seems that the red of the decals did not fade further:
The Tamiya flat clear gives a finish which is not completely dead matt, but leaves a satin shine. Although additional matt effect can be added to it, I like this finish which is like an 'egg shell' type of matt finish.
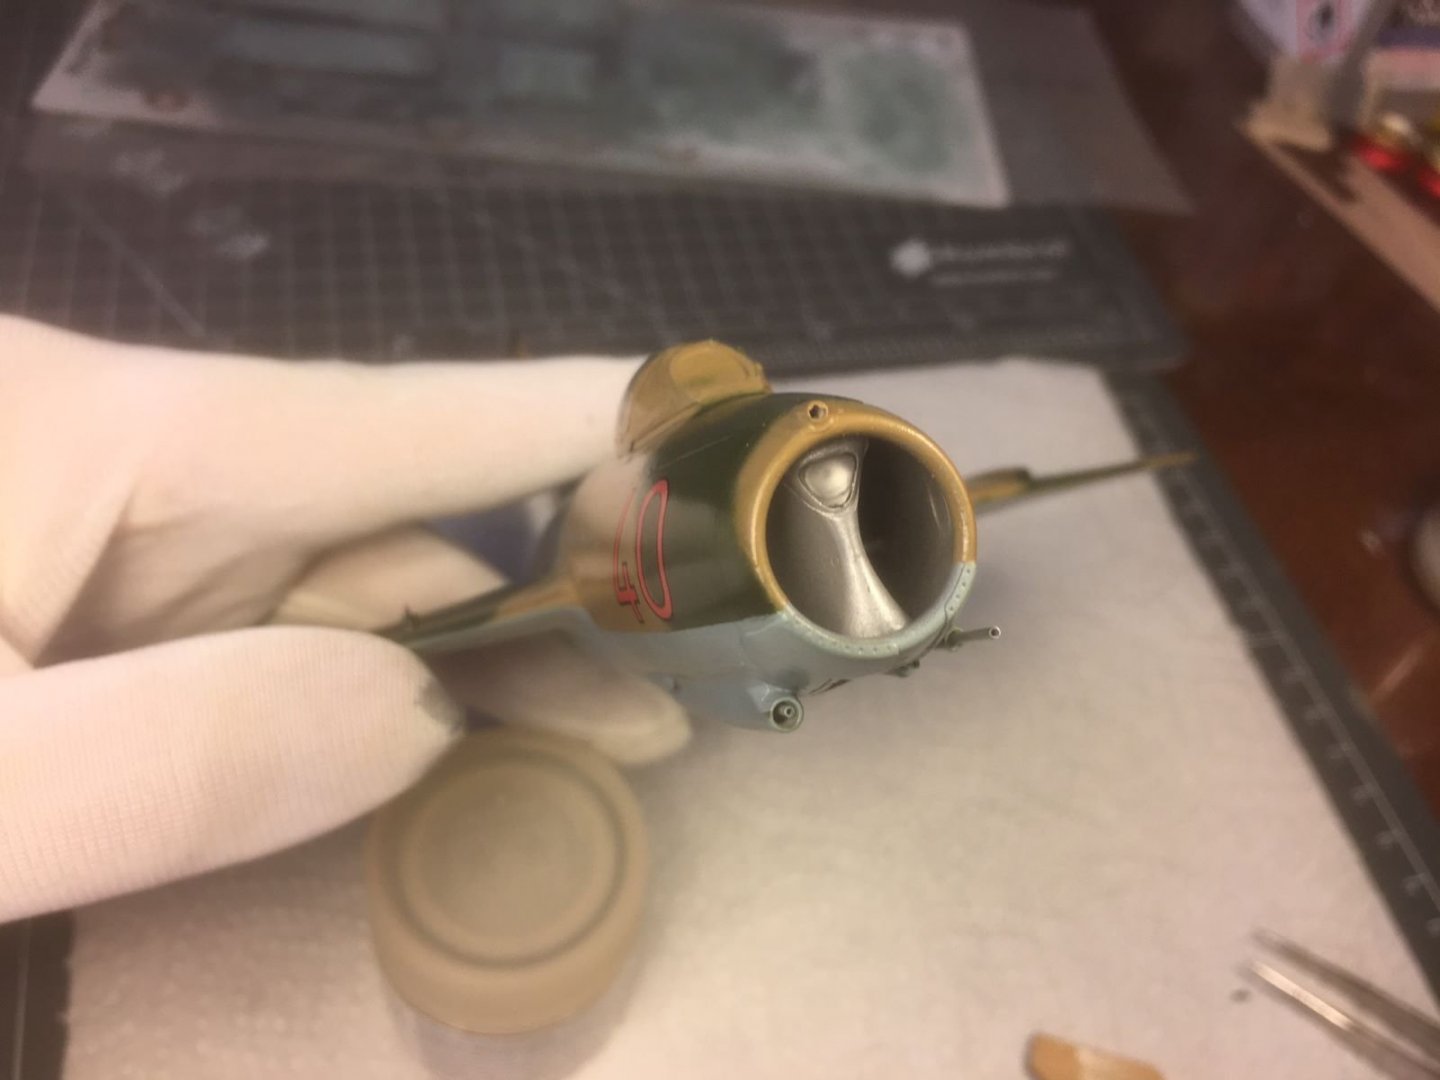
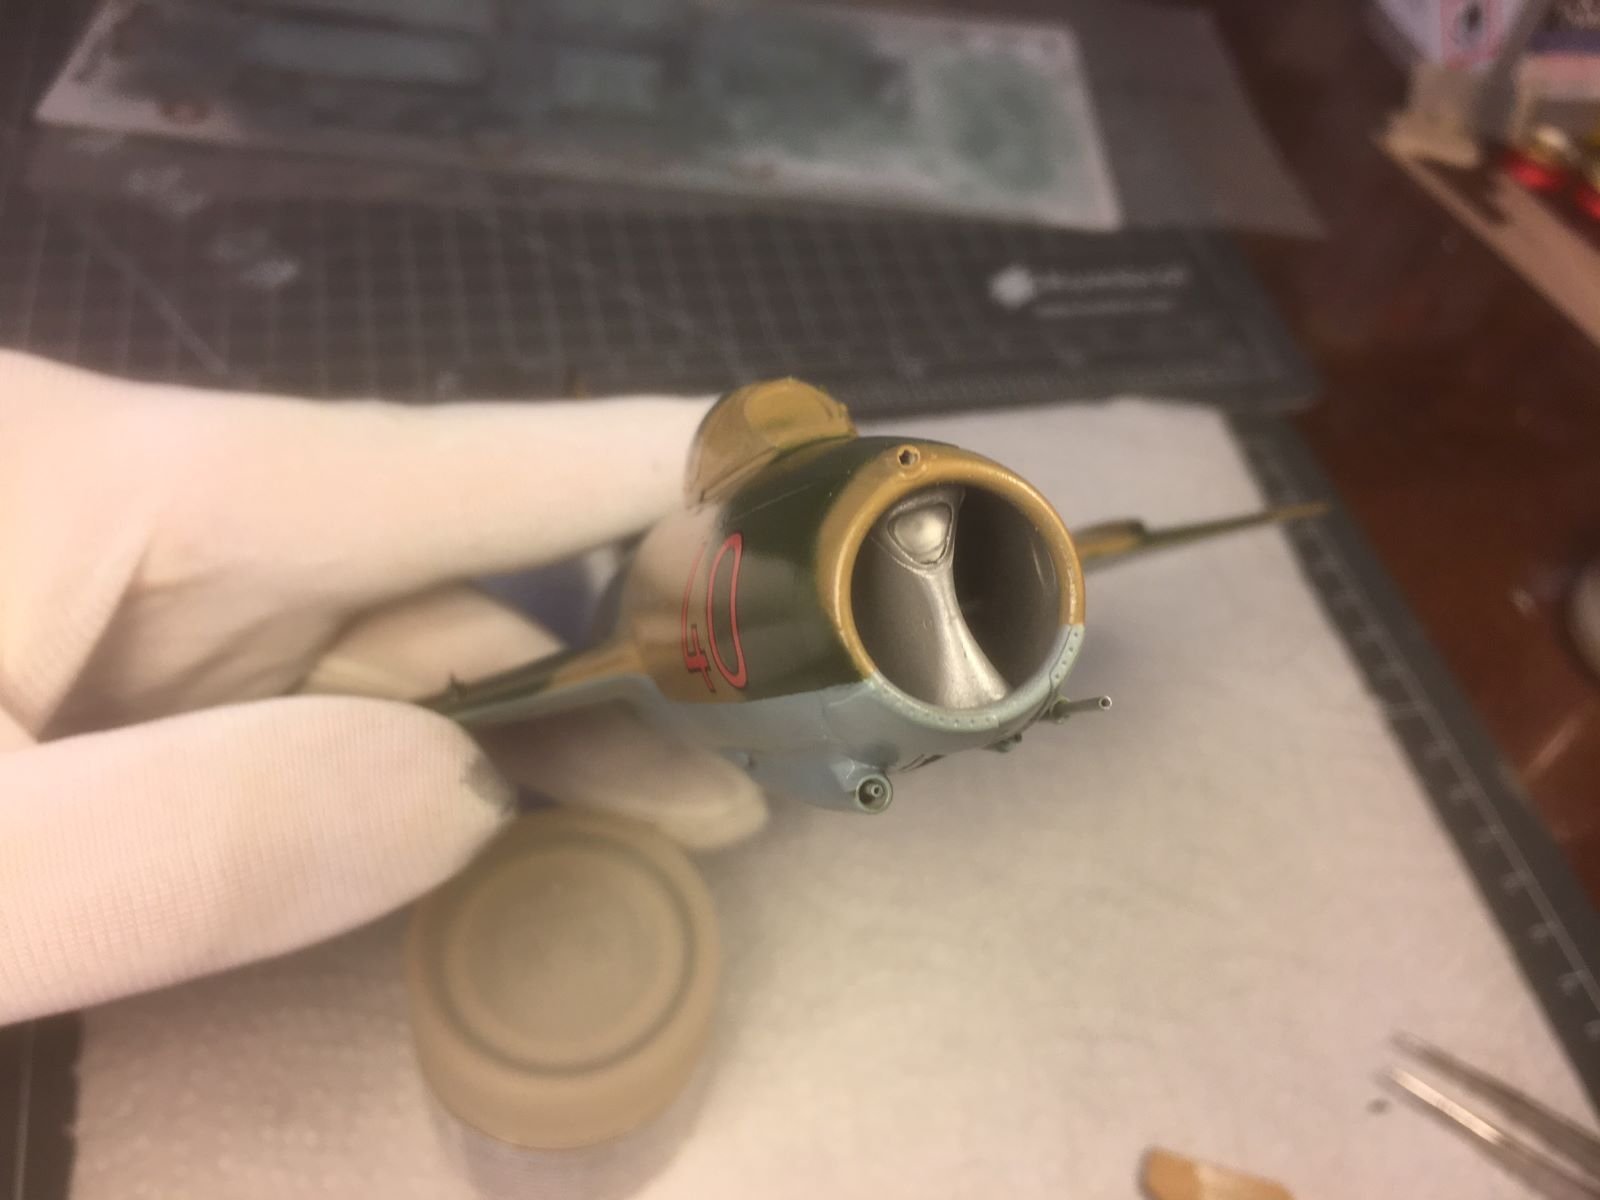
Finally, after long, I can start removing the masked areas. This is one of the most awaited step of aircraft modelling. Starting with the jet pipe:
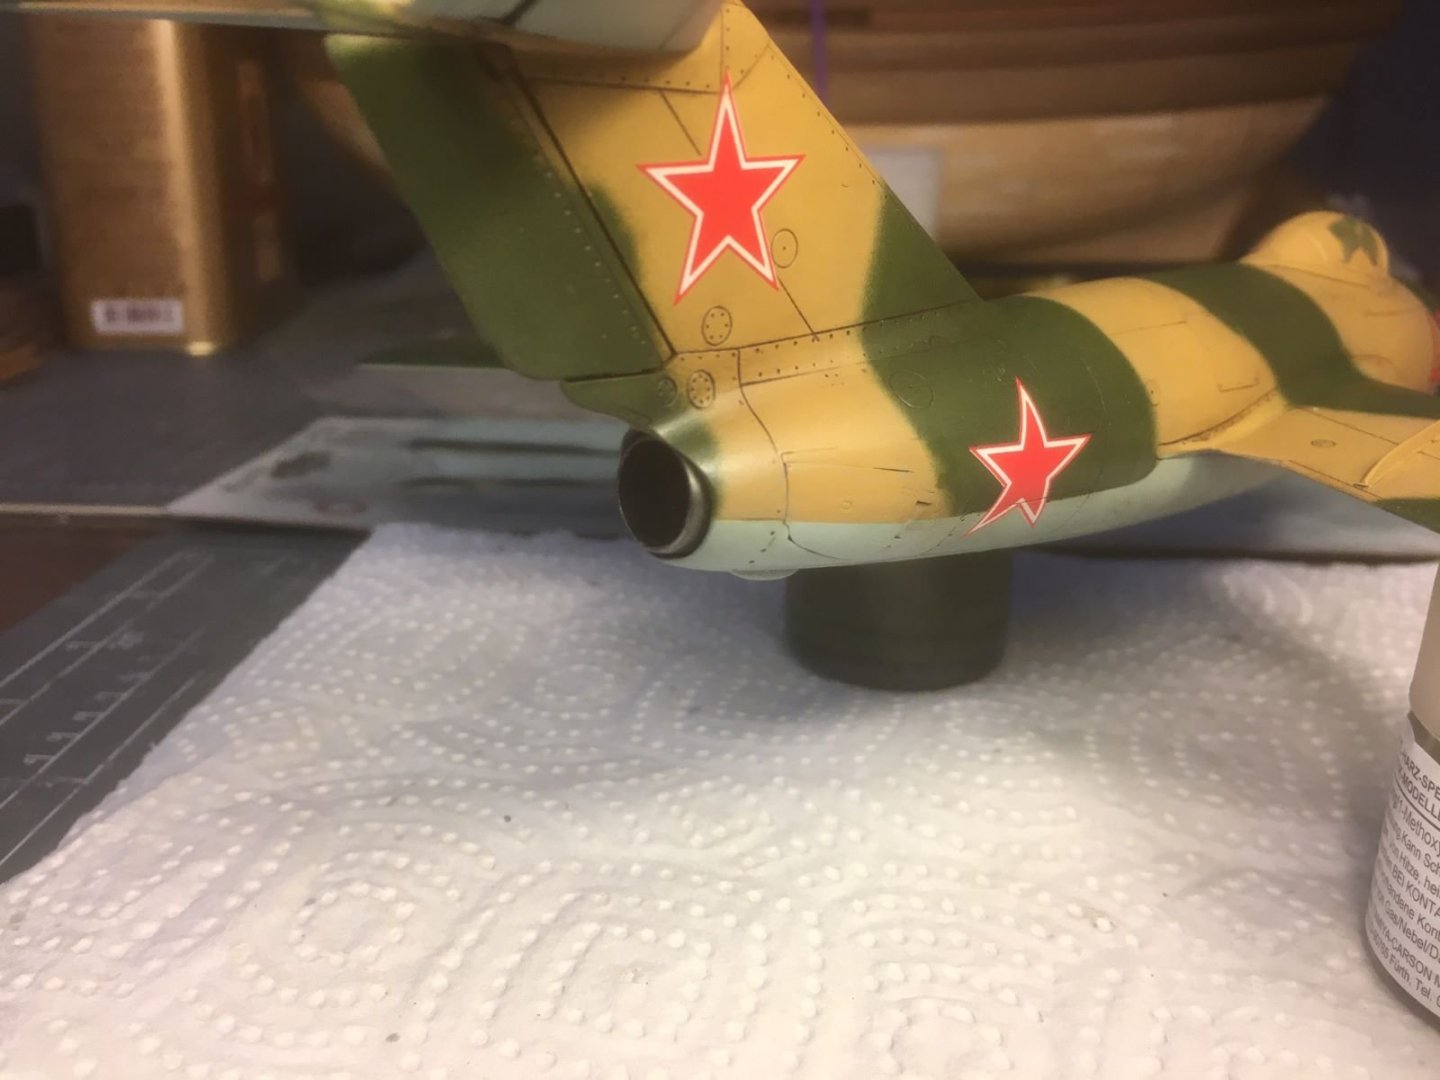
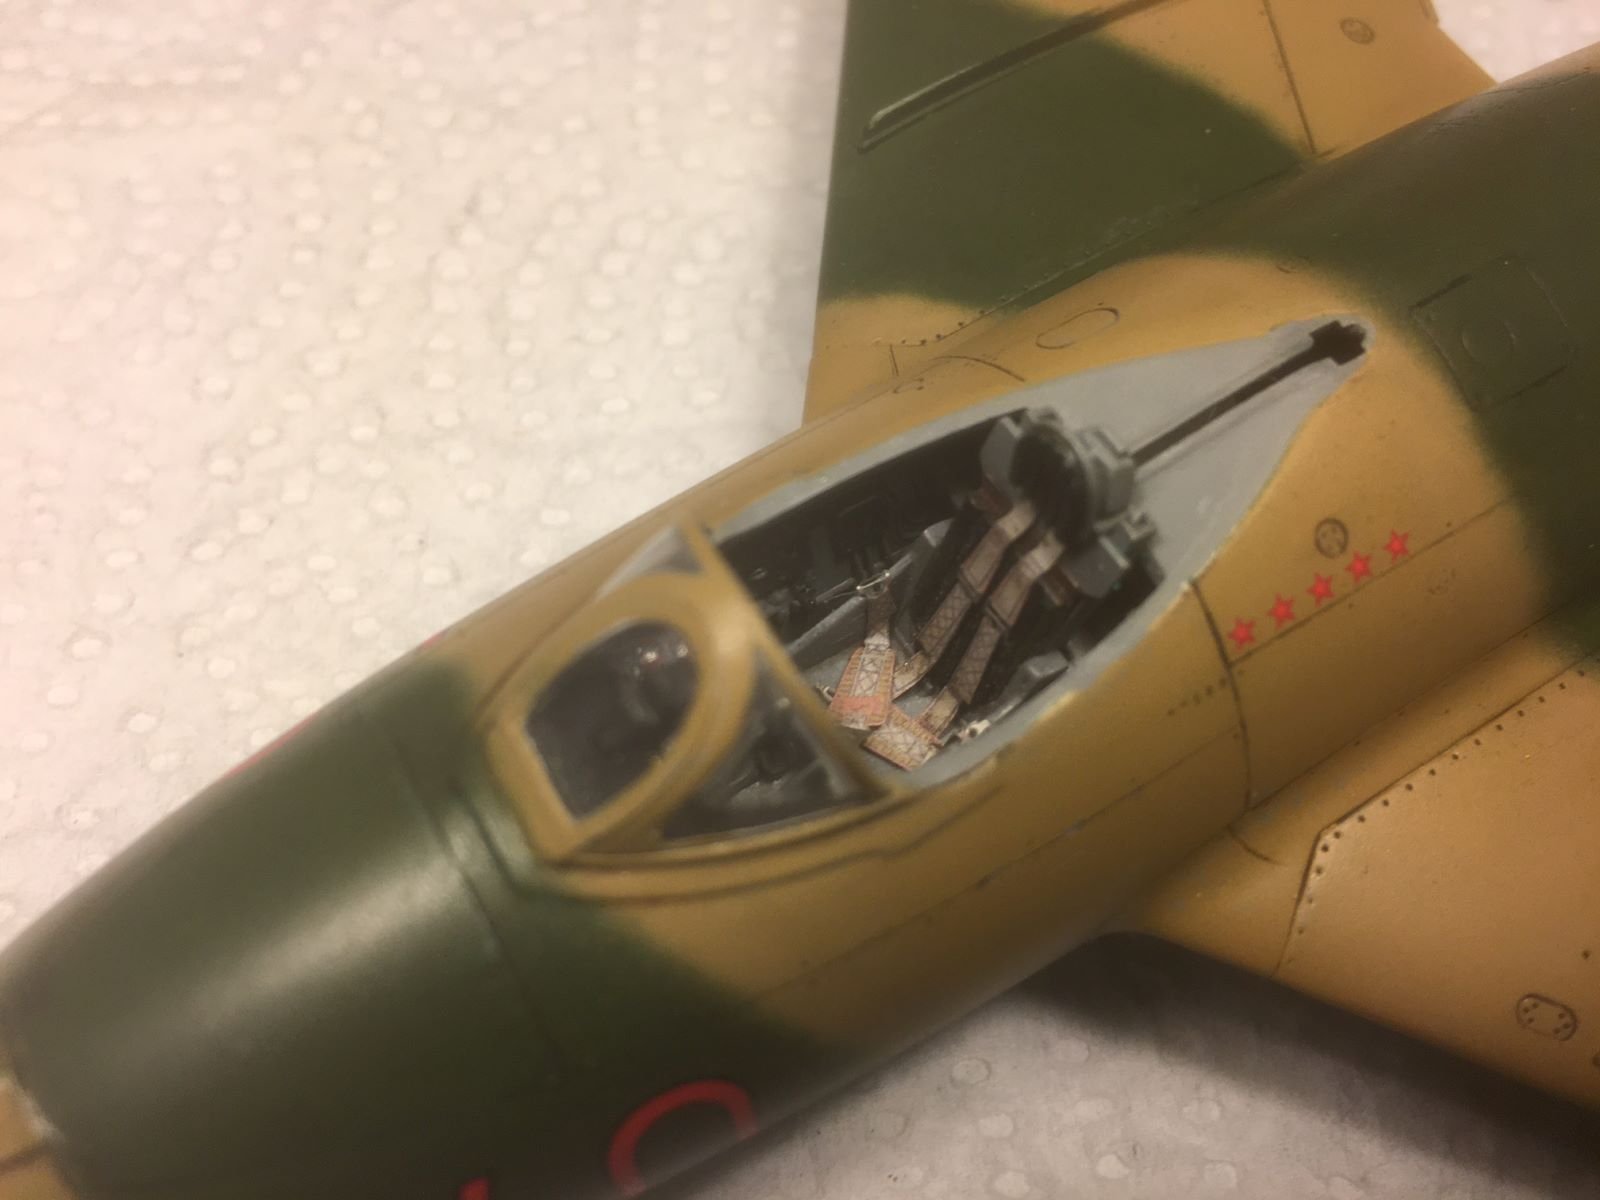
Removal of the brakes:
The canopy, which was kept in place by drops of masking fluid, was pulled out and the cockpit could be seen again:
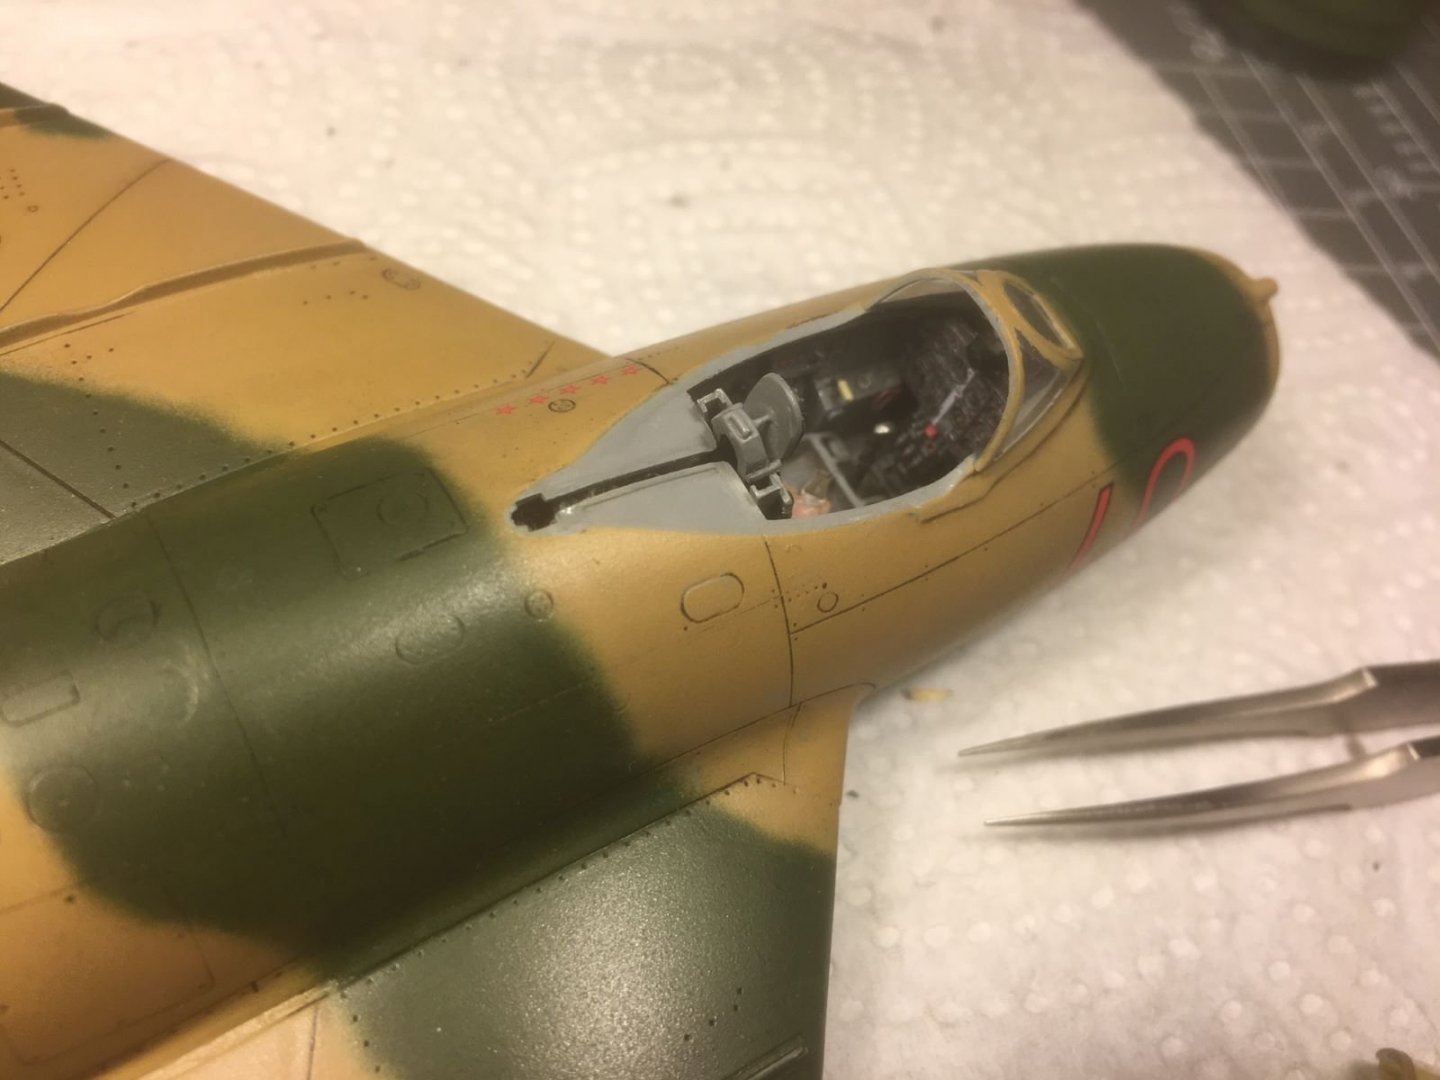
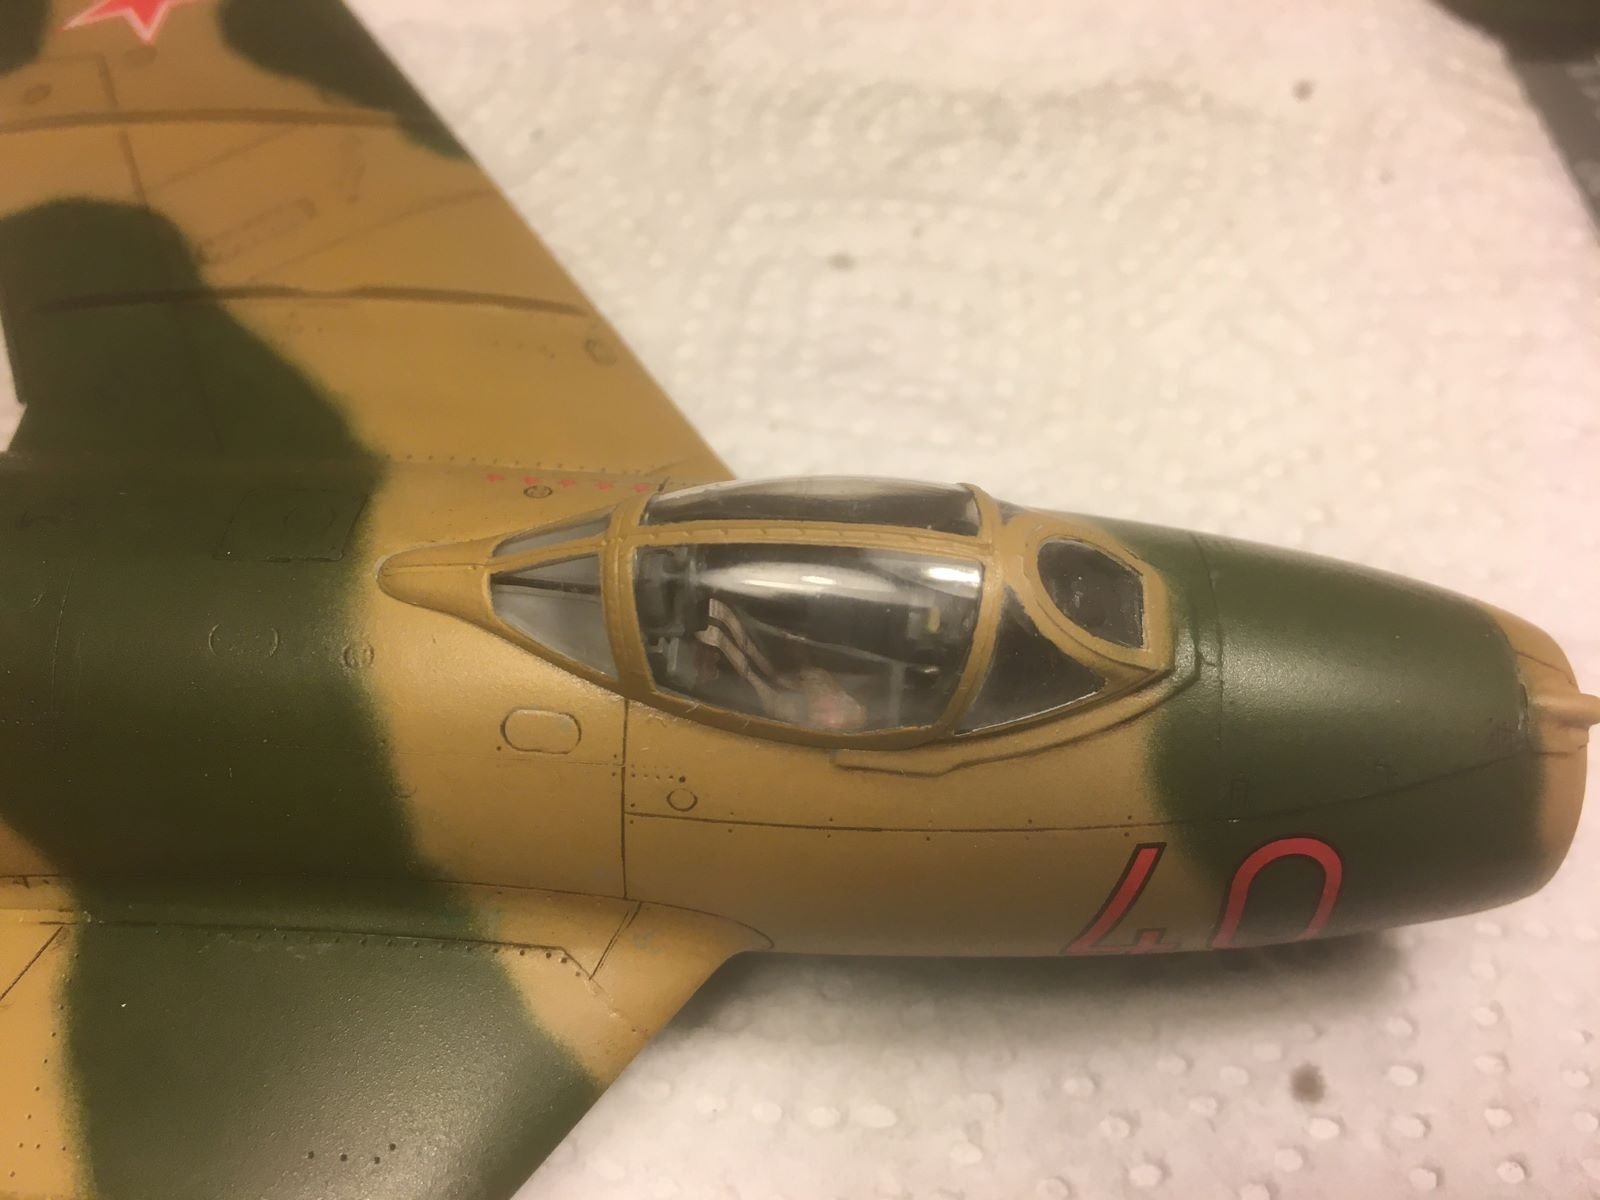
The masking of the windshield piece was removed:

The masking of the canopy was removed and the canopy posed in place (shall I glue it closed or open?):


That's all for now, refining weathering and touching up of the paint will follow.
Thanks for following,
Dan.
-
Nice finish, 👍
- popeye the sailor, mtaylor, Egilman and 1 other
-
4
-
Hi all,
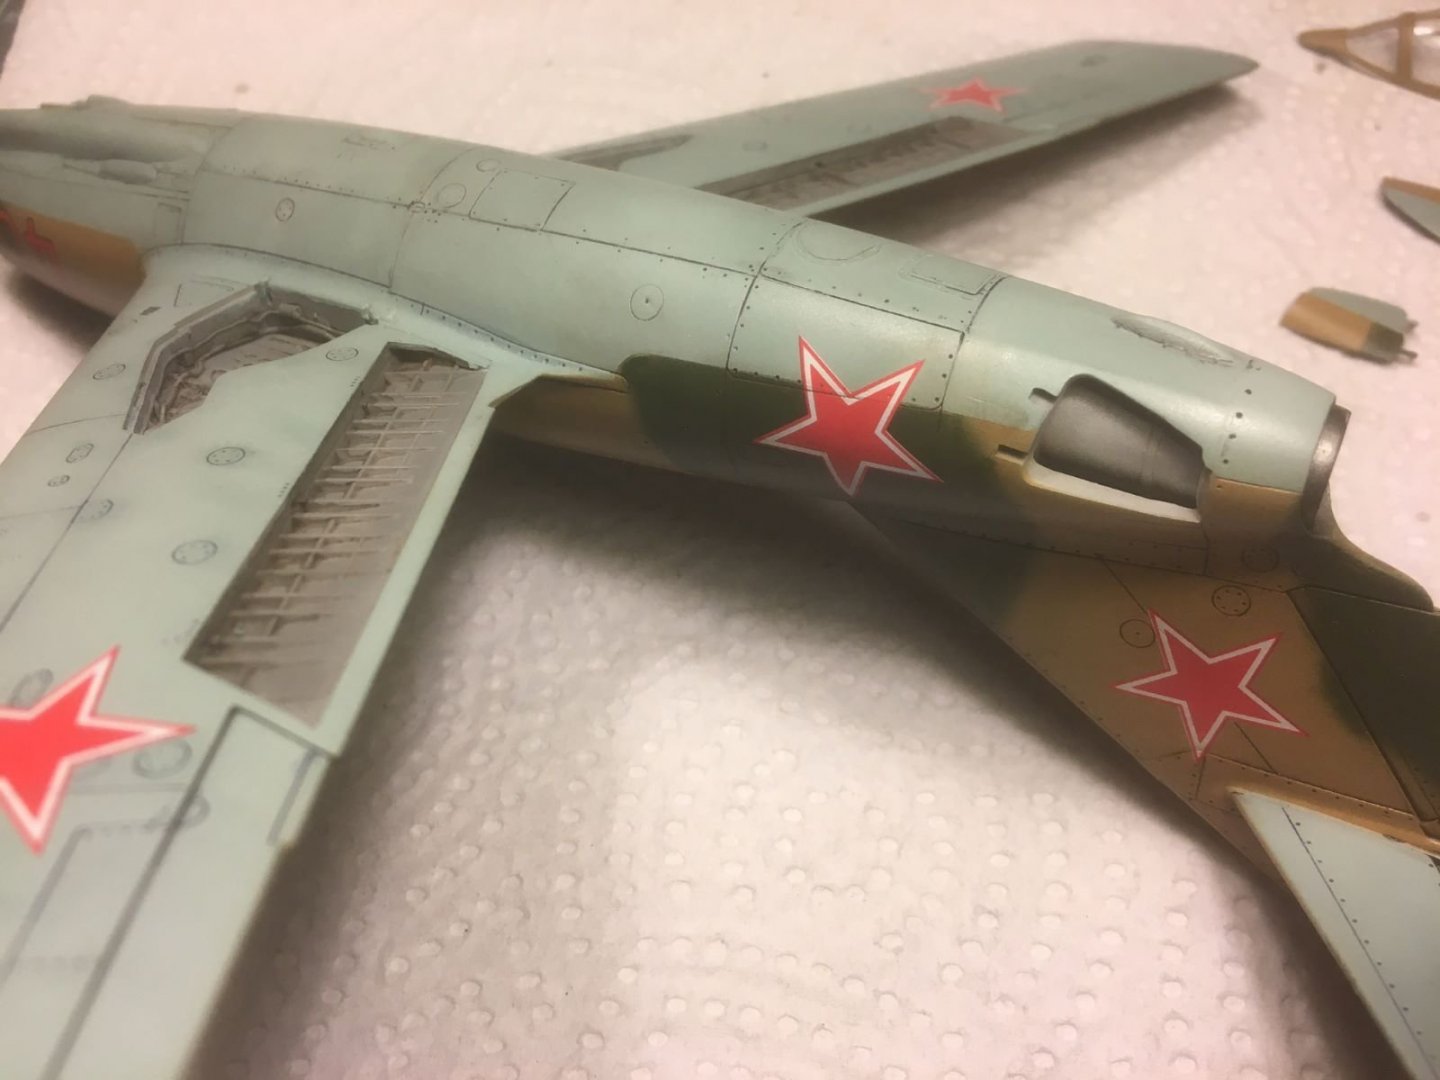
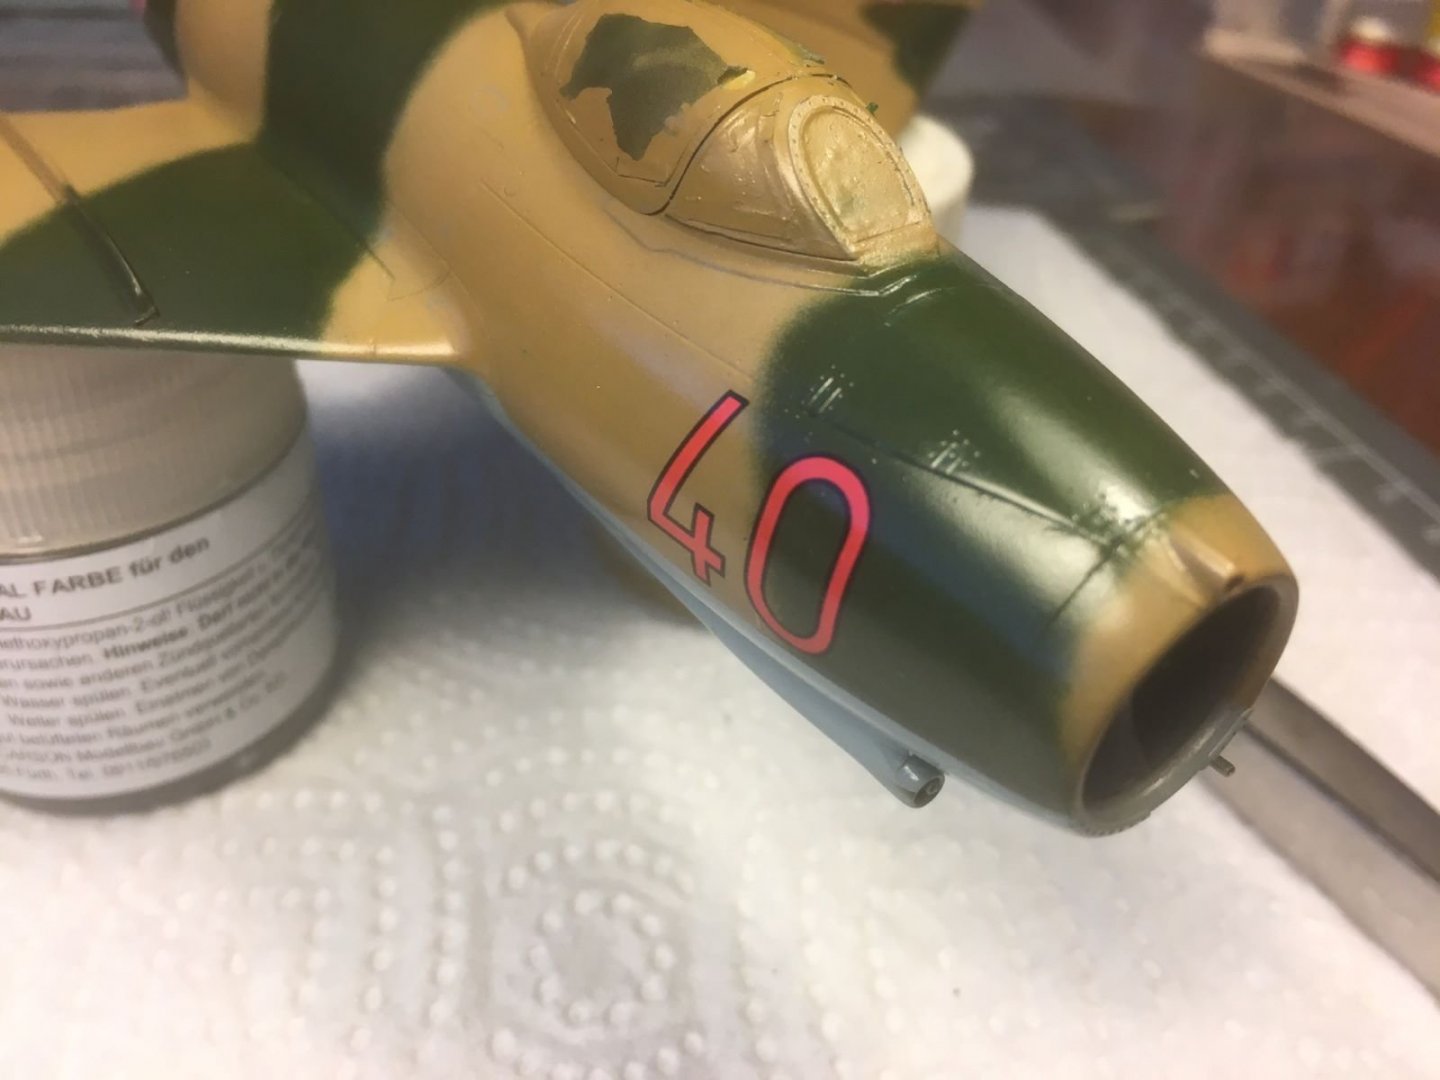
after the gloss paint, I tried to bring up the surface details with art oil colors. The underside was treated with Payne's grey which has a shade of blue in it:
For the upper surface, I used Burnt umber which is a very dark brown. This is a picture taken after brushing the color. This is when you hope that chemistry really works as promised:
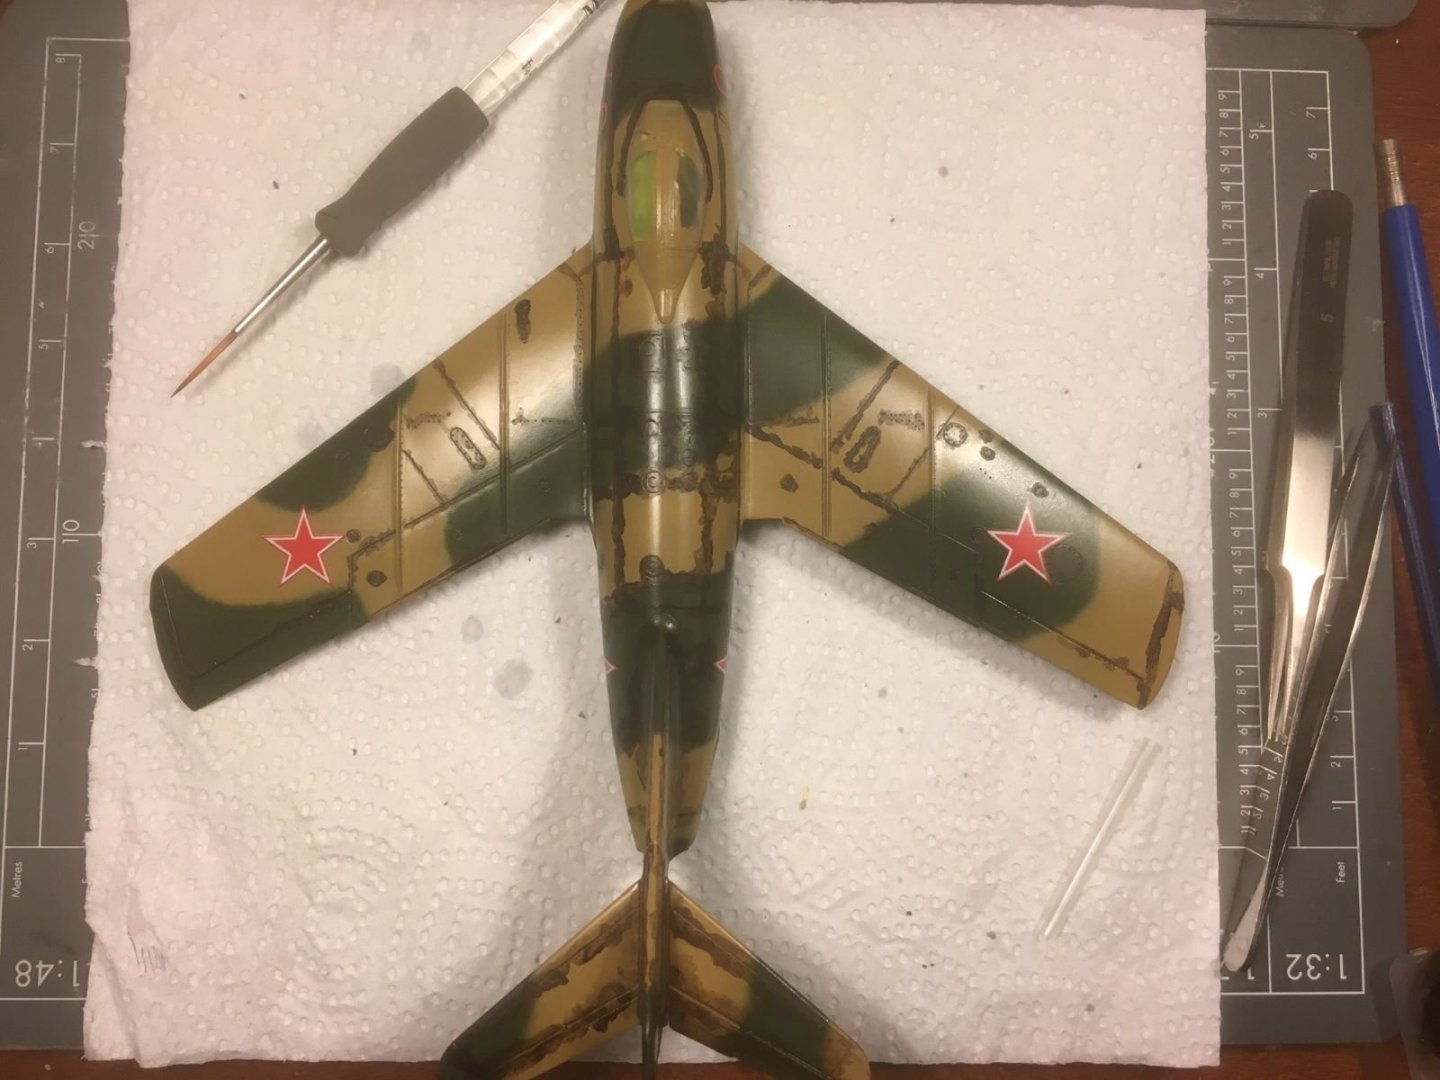
After cleaning the oil color:
I realized that I run out of flat clear paint, so I am driving now to the LHS to buy some.
See you soon,
Dan.
-
Actually, I meant masking the canopy without removing it ...
-
Dear OC, I read this morning the threads of your post. As a first suggestion, I would try to remove the variable 'canopy' from the solution of the problem.
8 hours ago, lmagna said:Except for clear parts like canopies and such. They always seem to come out better if dipped and allowed to drip dry slowly.
I agree with the above, please consider that eye is extremely demanding when it comes to transparent parts. One speck of dust or an overrun of paint will stick out like sore thumb. I understood you removed the masking, but the Hawk canopy is quite easy to mask if you do not mask the arching 'frame' in its center. Consider that that arching thing is not painted on the real aircraft, so a difference in finish with the rest of the airframe will not be a problem (see, f.i., https://commons.wikimedia.org/wiki/File:BAE_Hawk_Mk.51_(HW-341)_Tour_de_Sky_2014-08-10_03.JPG ) because it is actually like that.
Therefore, you can re-mask the canopy using thin stripes of tape (say, 1 mm wide, cut from a regular masking tape) to contour the real frames that are quite regularly shaped. The thin tape will be flexible enough to follow the gently curved parts. Then, the exceeding lengths can be trimmed away with a sharp new blade. Once the contour is done, you can fill in the rest by a mosaic of tape pieces and/or liquid mask (there are tutorial about this on the web).
Once the canopy is out of the problem, you can consider which paint is best to use for the rest. Future/Pledge might be an option, but I never used it as a final gloss coat because the original product is not available here in Holland (there is a similar one which I use when I need a quick intermediate protective layer). I use instead Tamiya X-22 Clear, 50% thinned with leveling thinner sprayed with a large nozzle (0.4 mm) at low pressure (+/- 17 psi) in several passes. Anyway, whatever product you will use, without the canopy in the way, probably it will be OK. Just protect the wet paint from falling dust (if you spray in a boot this will not be a problem). Please consider to make some trials on old plastic or a plastic spoon.
Sometimes, building an aircraft model might be a continuous crisis management, it happens constantly to me, but this is also the fun of it 🙂.
Good luck,
Dan.
- popeye the sailor, mtaylor, lmagna and 3 others
-
6
-
2 hours ago, Old Collingwood said:
Thank you kindly for explaining that to me, I have the Vallejo acrylic flow improver (put a few drops into my airbrush bowl with the paint and mix with a brush) do you recomend Tamiya's X1 Gloss Acrylic for spraying with?
Would I recommend? I am afraid I never used the Vallejo acrylics (I used only their metallic line), therefore it is difficult for me to formulate a recommendation between Vallejo and Tamiya paint systems. I simply put forward my experience with Tamiya which, as I said, worked well for me. If you suspect that Vallejo paints might give you problems, similarly to what you already experienced with the primer, then, yes, try to switch to Tamiya. Perhaps a trial with the Vallejo paint that you plan to use could give you preliminary indications about the results to be expected before committing it to the model.
Best regards,
Dan.
-
Dear OC, I am sorry to hear the problems you had with your airbrush. However, the last result of your Hawk black primed looks very good. It is indeed very important to have a clean airbrush nozzle to be sure of getting consistent results. I usually spray Tamiya acryilics, but lately I also tried Mr Color paints and I was impressed by their quality. At any rate, remaining with Tamiya, to obtain an uniform shiny finish with their gloss paints, if I may, I have the following suggestions which worked for me:
- use a thinner ratio of 50%-50%
- add a flow improver/retarder
- use a low pressure of about +/- 20 psi
- start with a mist coverage, once reasonably dry, apply more solid wet layers with smooth adjacent passes. Do not insist within the same pass
- make trials on other plastic or cards.
In addition: you n. 1 enemy is dust; try to remove dust from the model and spray below a cardboard/plate that acts as a particle stopping ceiling. If you have not foreseen a stick fixed into the jet pipe for handling the model, plan in advance how to handle the model, for example holding it by a wing which is then sprayed in a later session when you can touch the other wing.
good luck,
Dan.
-
Great choice of a very graceful biplane. I will be following also this one.
Dan.
- Edwardkenway, Egilman, lmagna and 5 others
-
8
-
It is an impressive model, masterly assembled. I second the others, it is indeed difficult to guess it is made of paper. This time, you needed not so long to complete it. Years ago, a colleague who worked with Dornier in Friedricshafen gave me a paper model of a Do. X, but I never considered building it. Perhaps I should change my mind.
Congratulations,
Dan.
- ccoyle, Old Collingwood, Egilman and 5 others
-
8
-
Fantastic, the last picture with your glasses is simply mind blowing.
Greetings,
Dan.
-
Thanks Mark for your comment. I hope you are right. However, I preferred a full, glowing red ... My fear is that the final flat coat will discolor the red stars even more. Let's wait and see.
- Egilman, Canute, popeye the sailor and 5 others
-
8
-
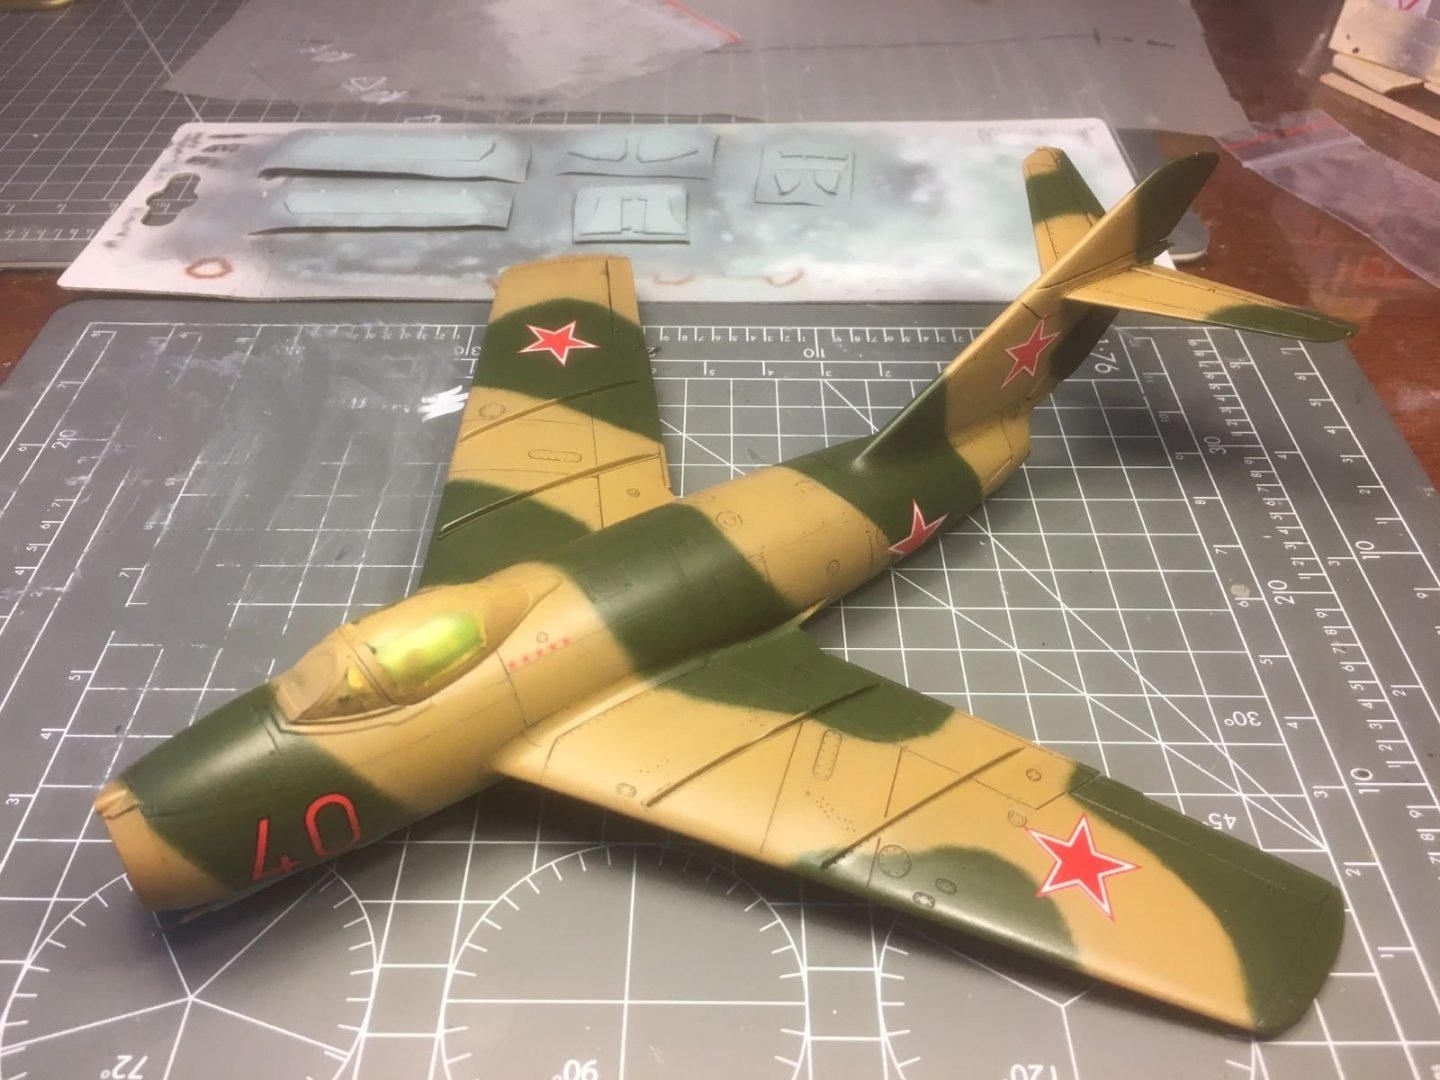
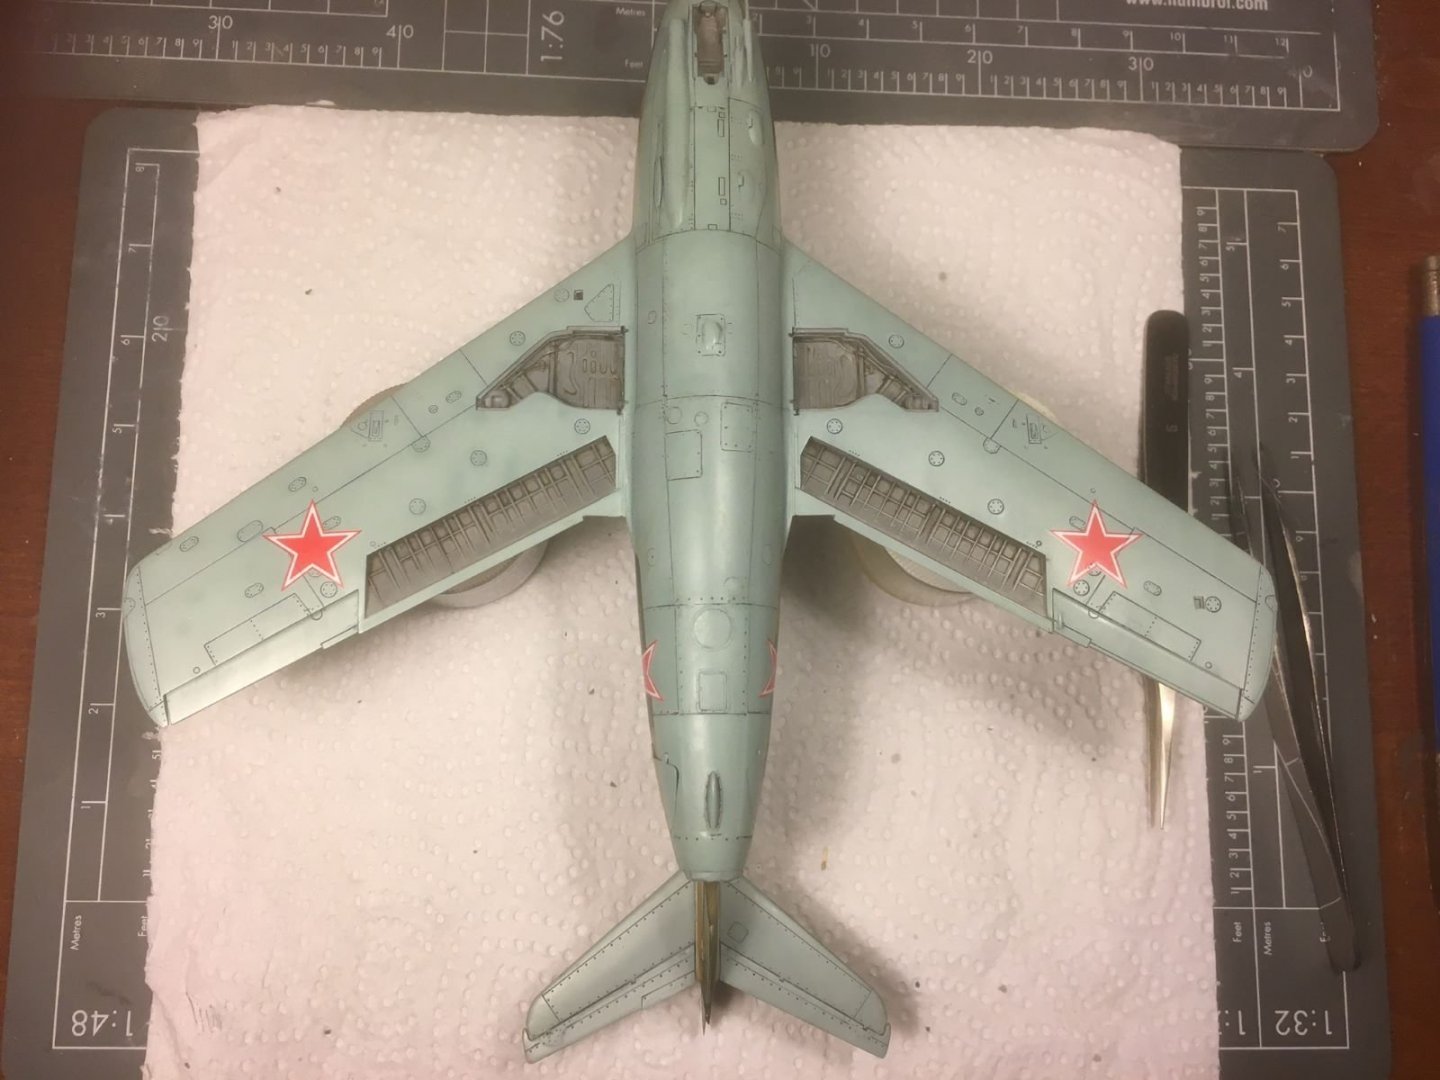
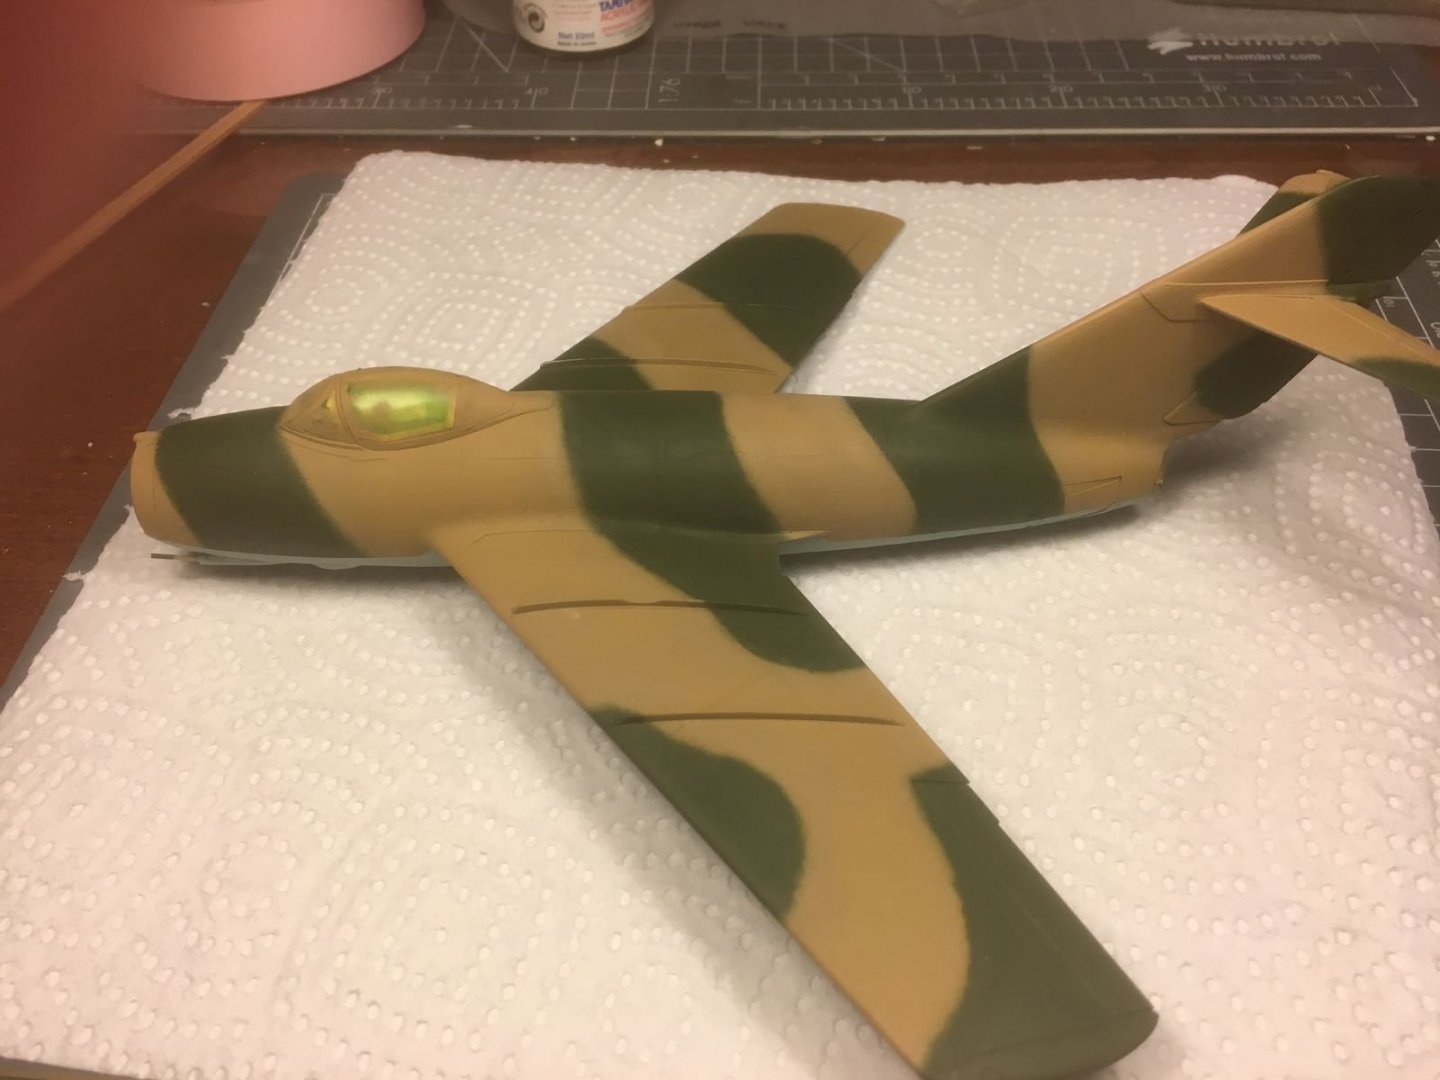
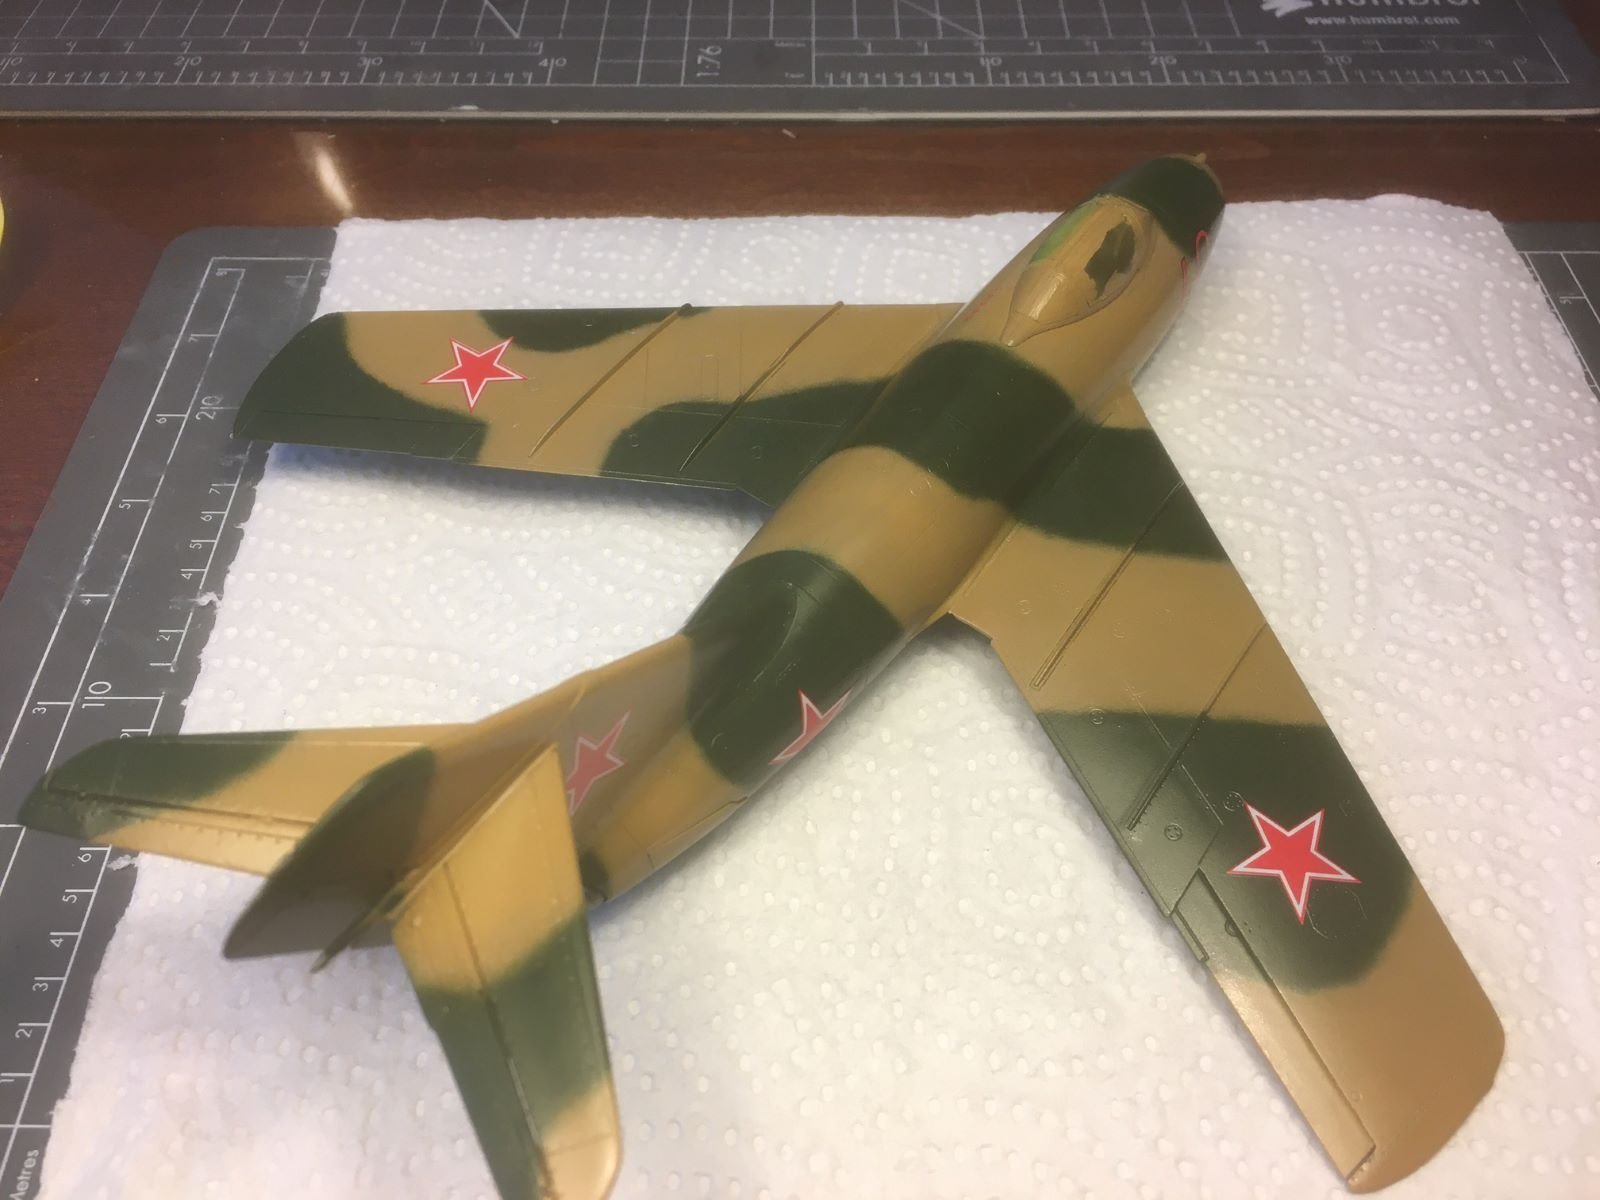
Dear all,went on with the finish of the camouflage and brushed on a layer of floor polish to obtain a smooth surface in preparation for the decals. The floor polish is very quick to be applied, can be brushed, it is very thin, self-leveling and compatible with the Tamiya paints. Actually I brushed two layers on the location of the decals.

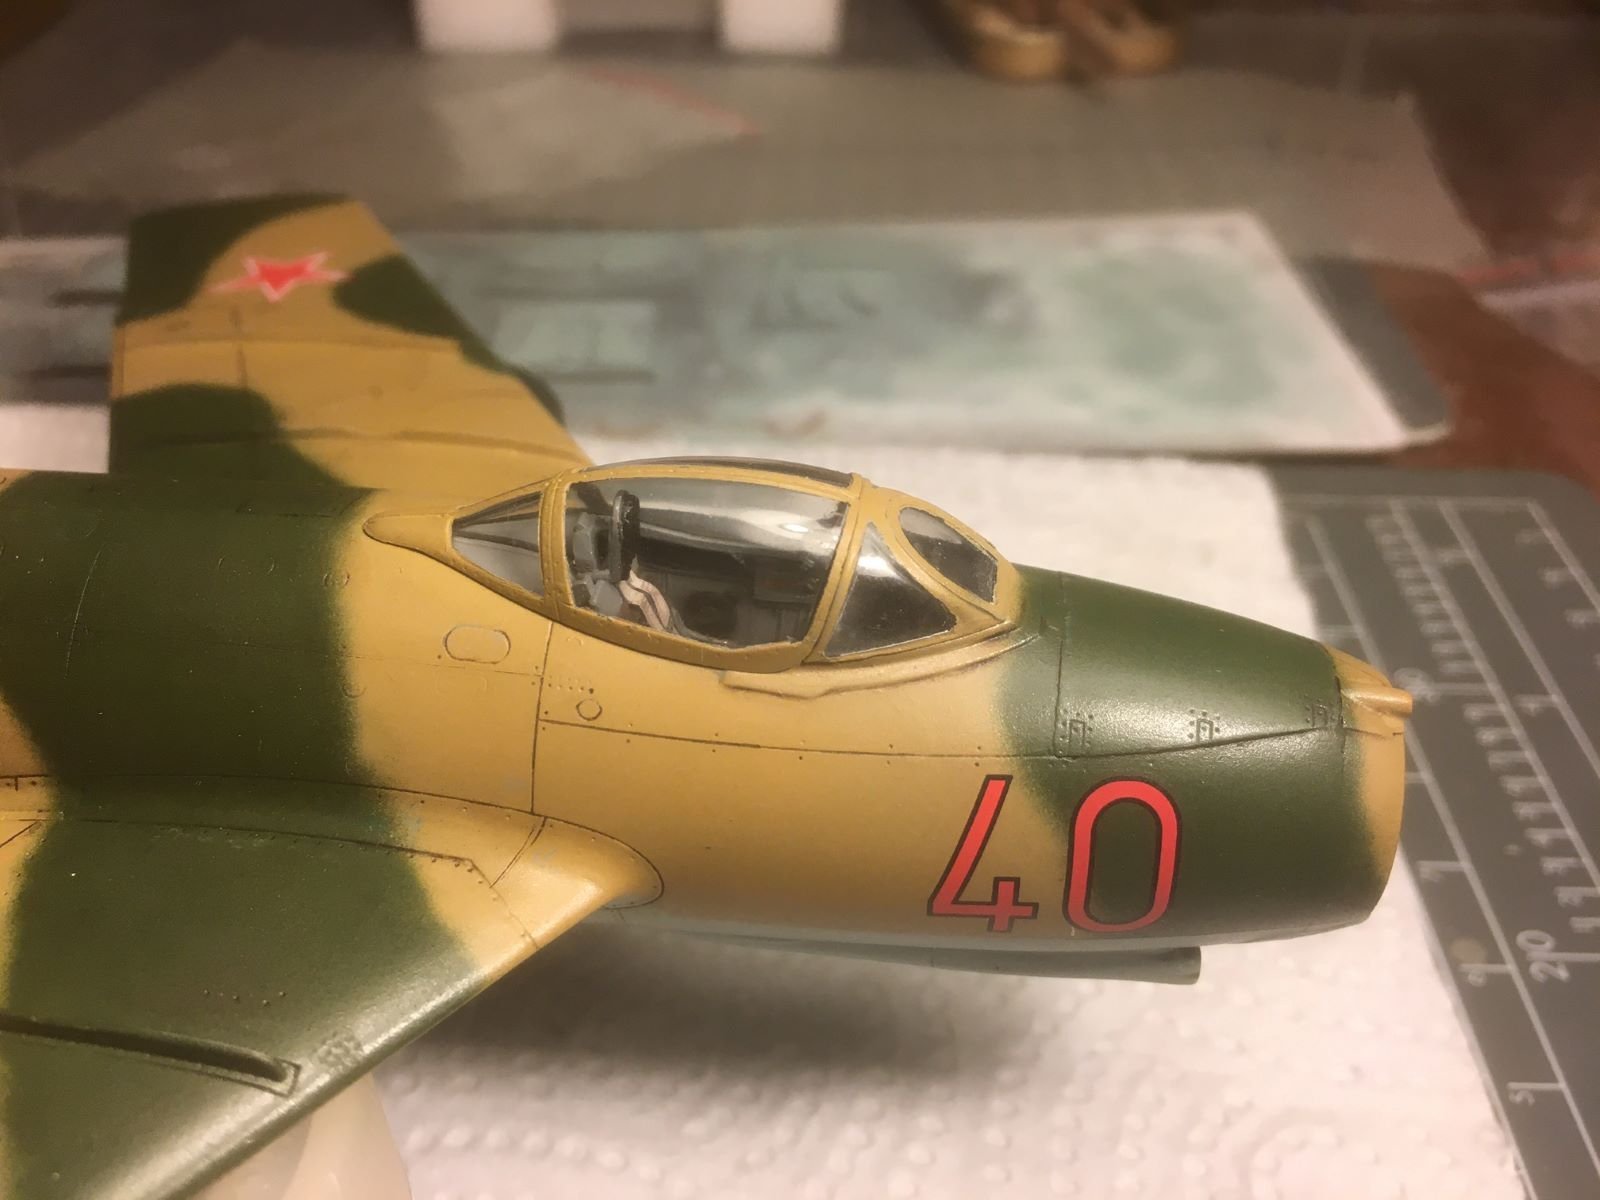
It was followed by a very light wet sanding which removed any remaining roughness. Then the decals were applied and a layer of Tamiya gloss X-22 sealed the paint and the decals. This version of MiG-15 is decorated with just few decals.

The decals are sufficiently thin, with little carrier visible and conformed well to the surface.
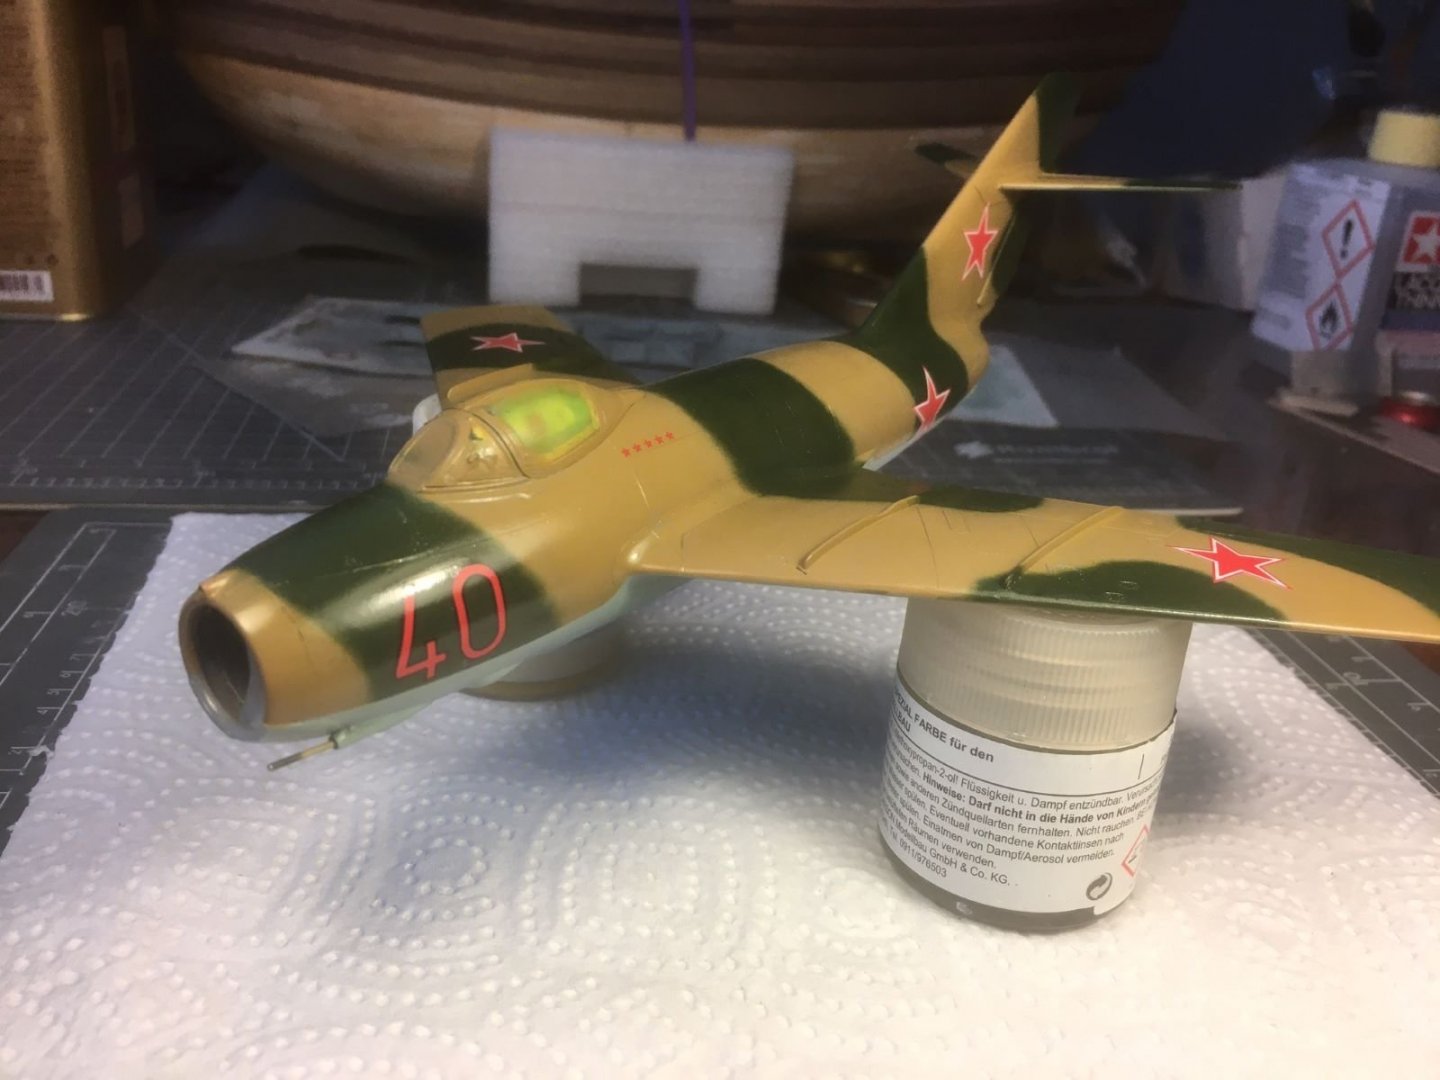
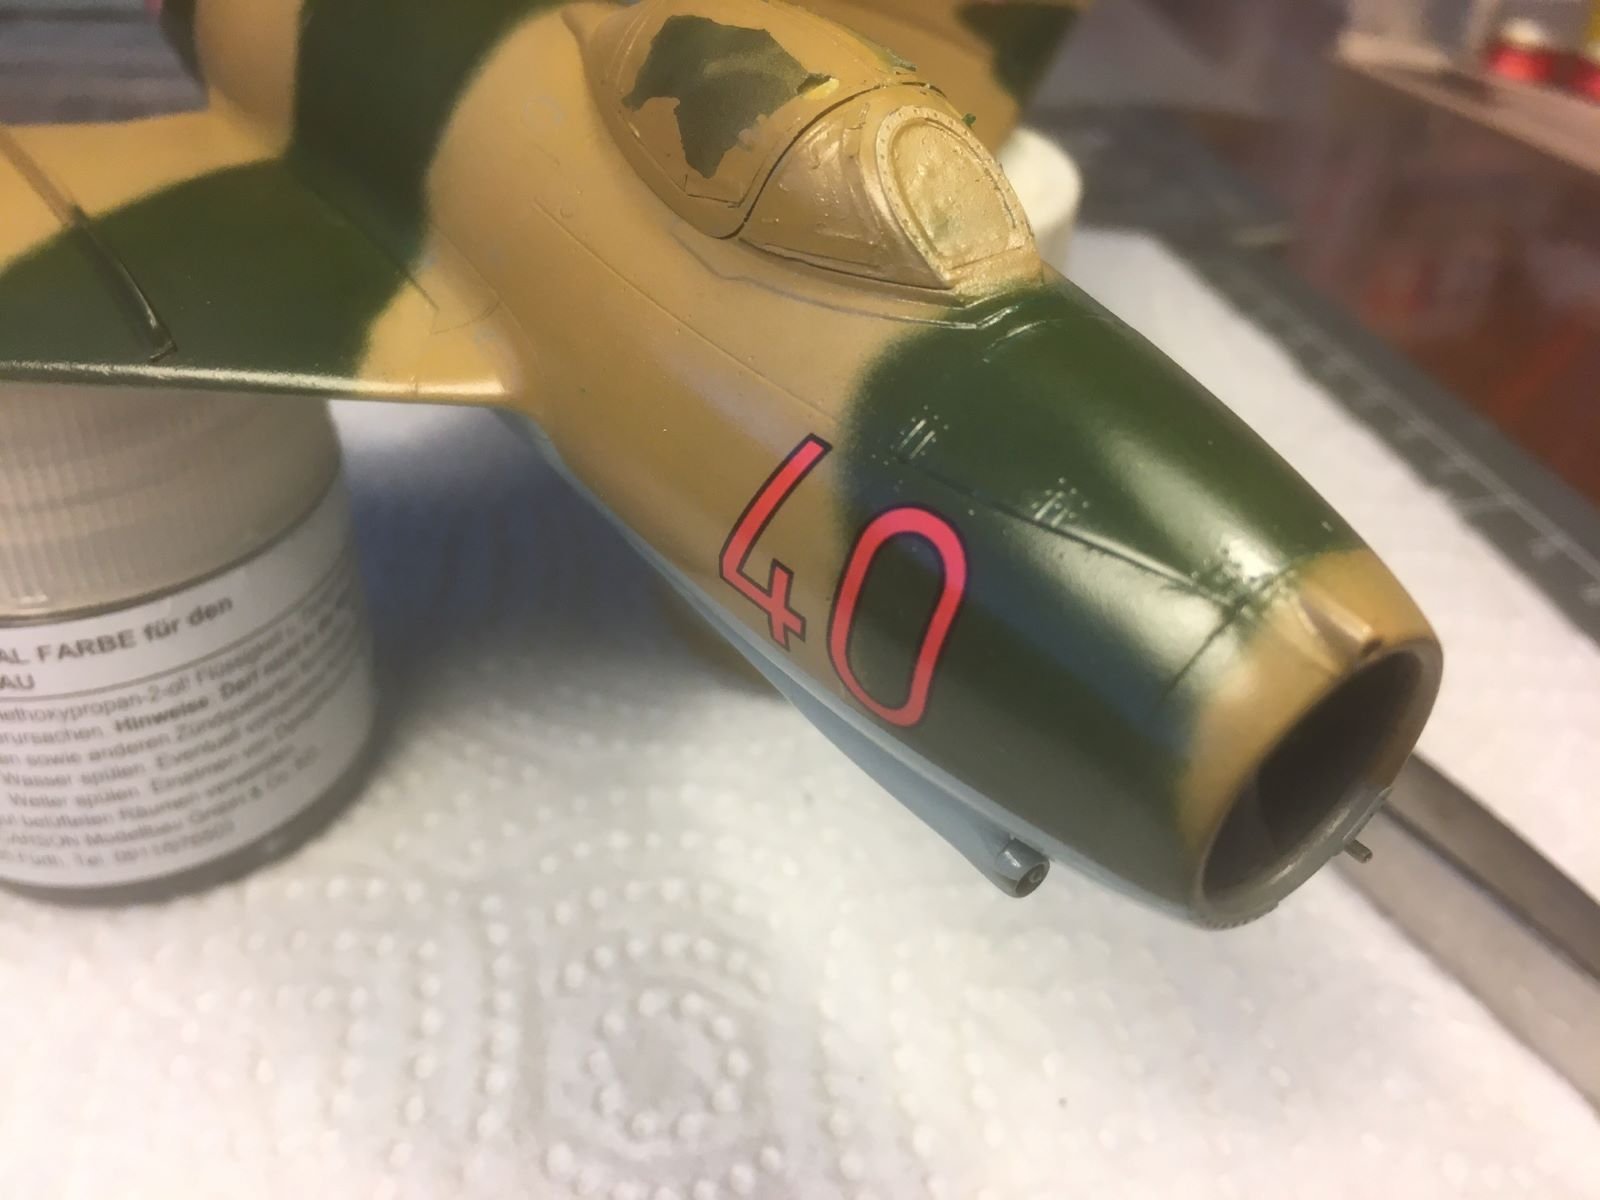
However, in my opinion, they have a shortcoming in the saturation of their colors. The red tone, which is the predominant one for this aircraft, does not look as a full saturated red, and appears slightly discolored, almost pinkish:
I think this is a shame for an aircraft of the Soviet Red Star 🙃. Unfortunately, I will have to live with that. Now the gloss paint needs to cure well for a couple of days before I can start working with oil washes for highlighting panels and details.
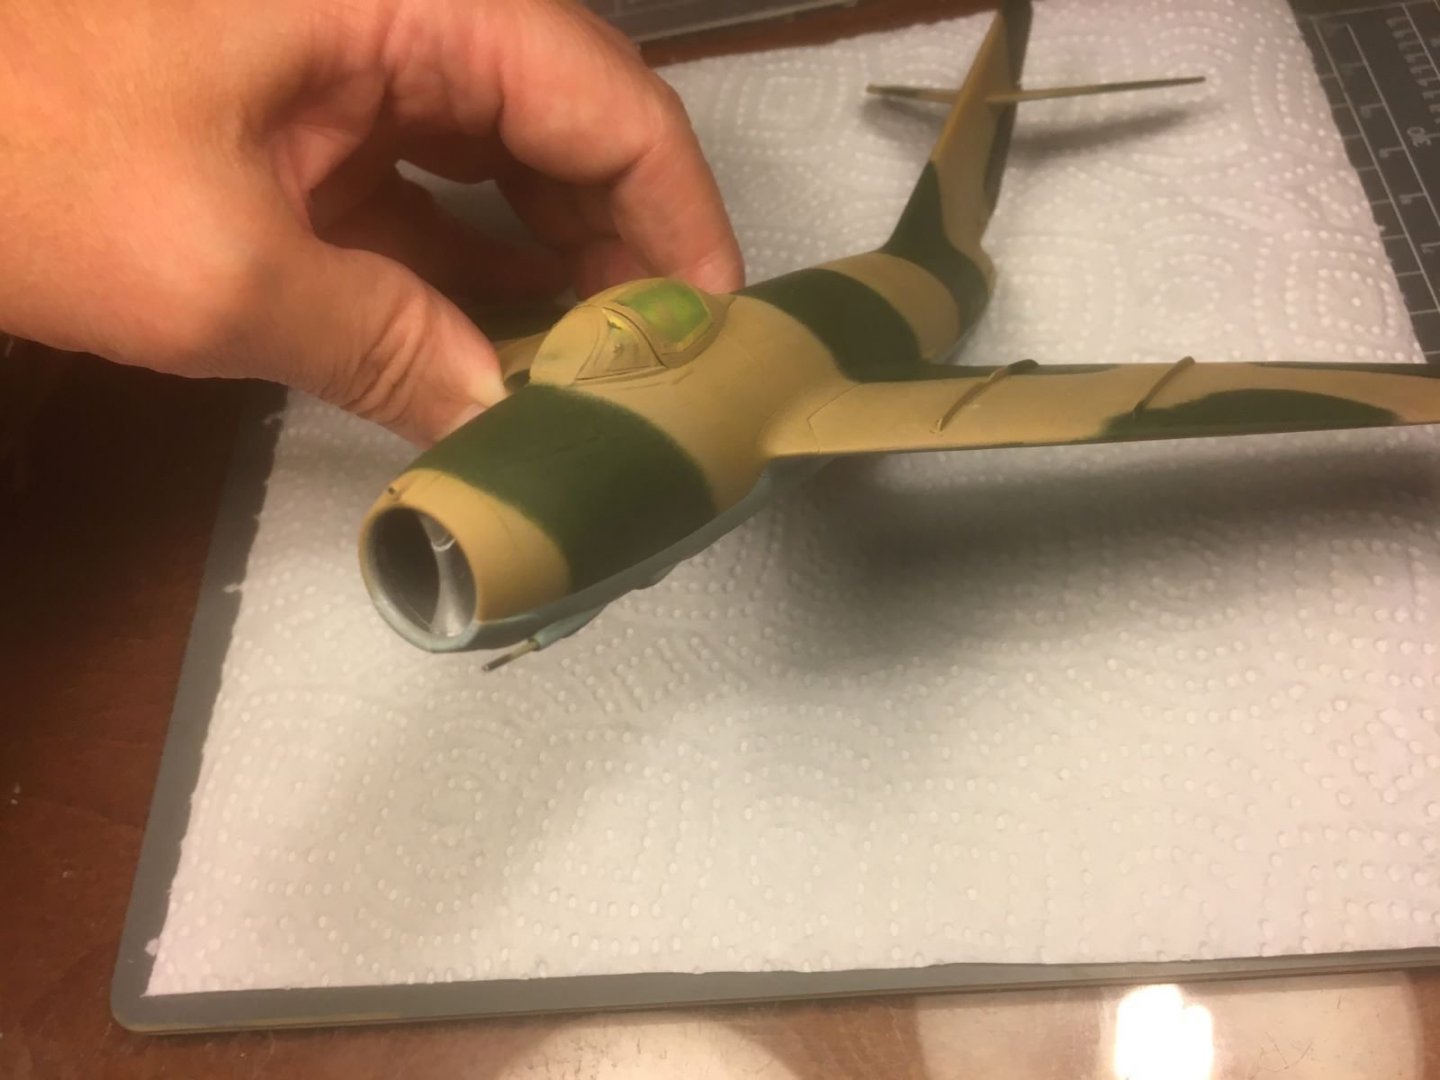
Meantime, I removed the first mask from the landing light in the sect of the air intake.
Now, I will have also to start working on the remaining parts like the landing gears, the drop tanks, etc.
This is all for now, thanks for following,
best regards,
Dan.
-
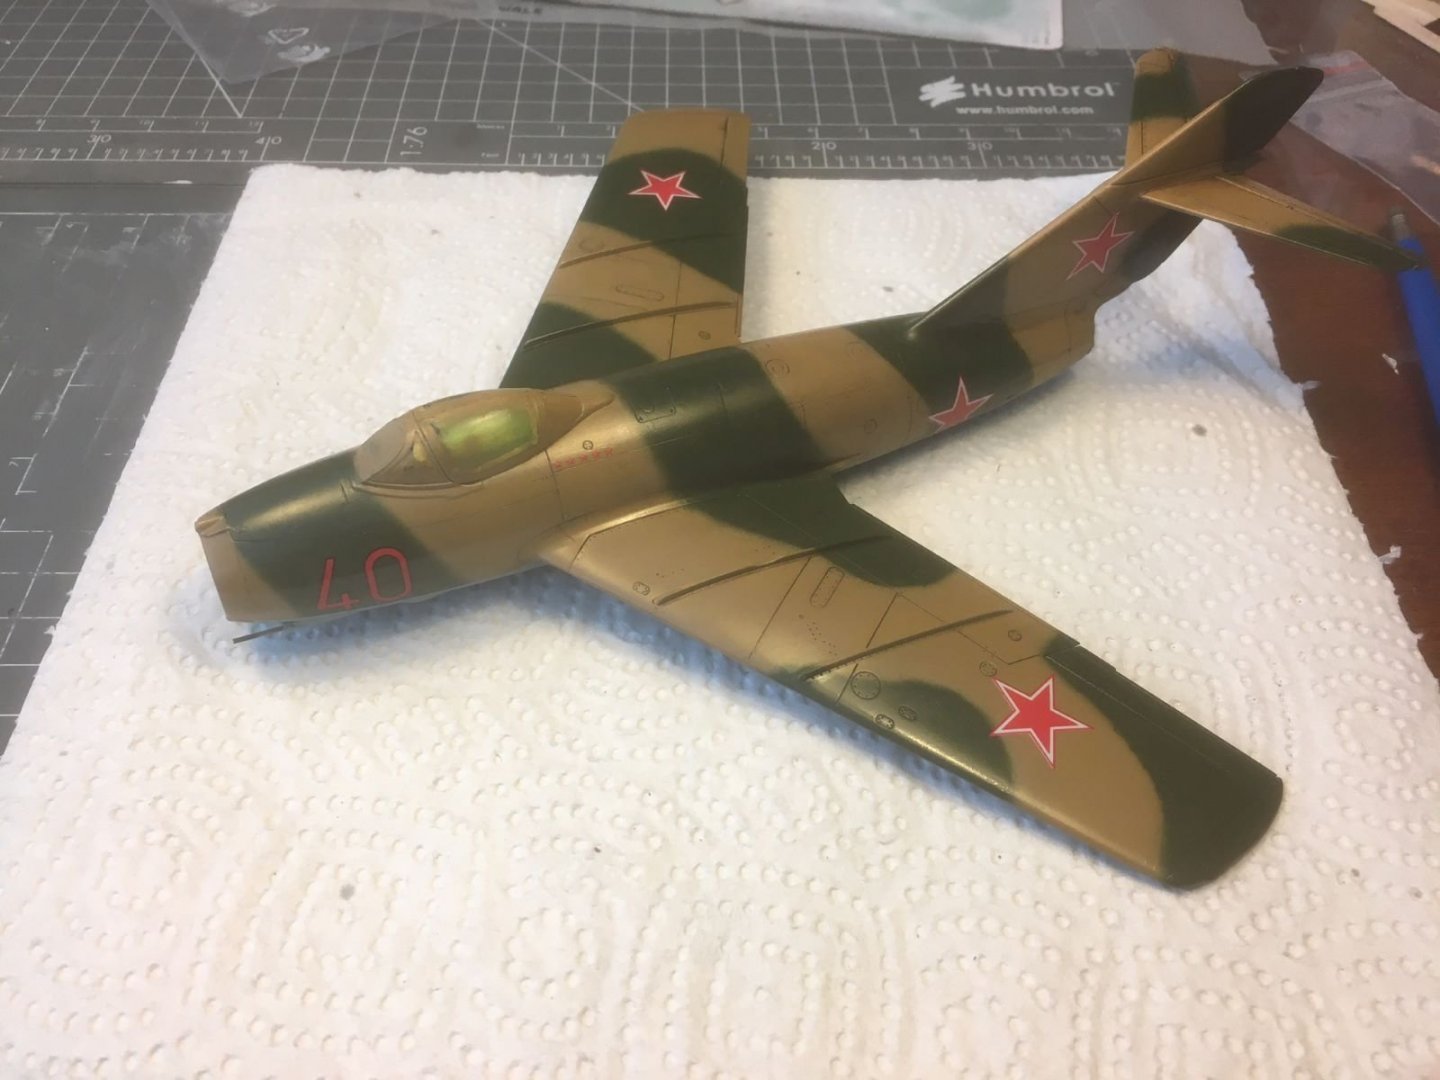
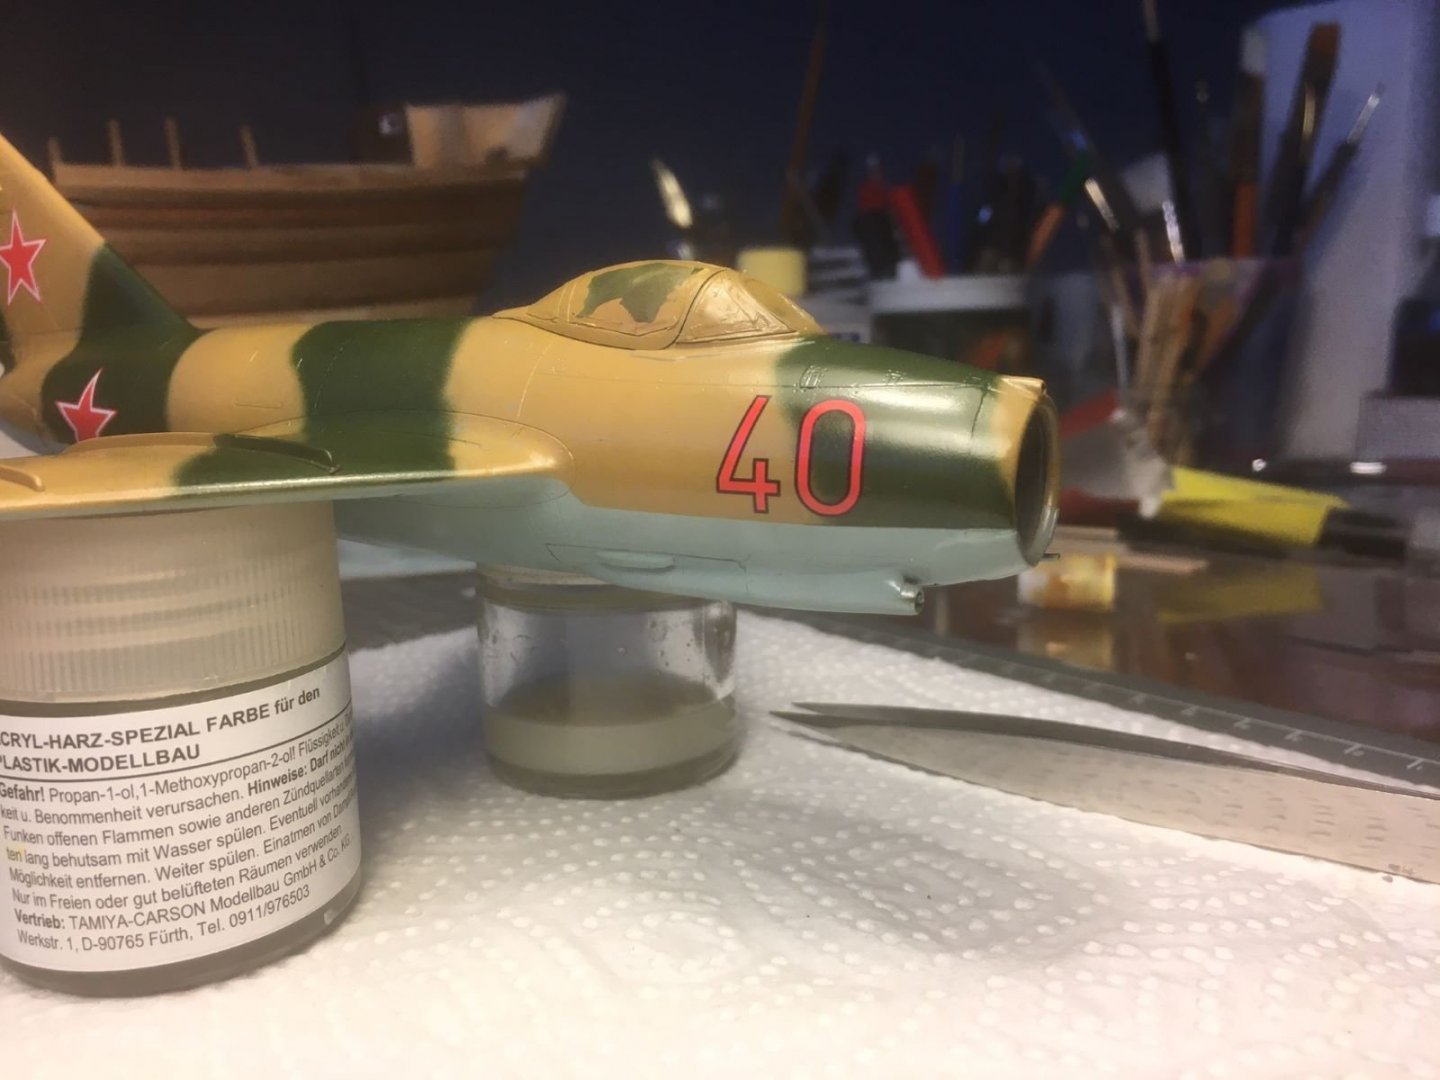
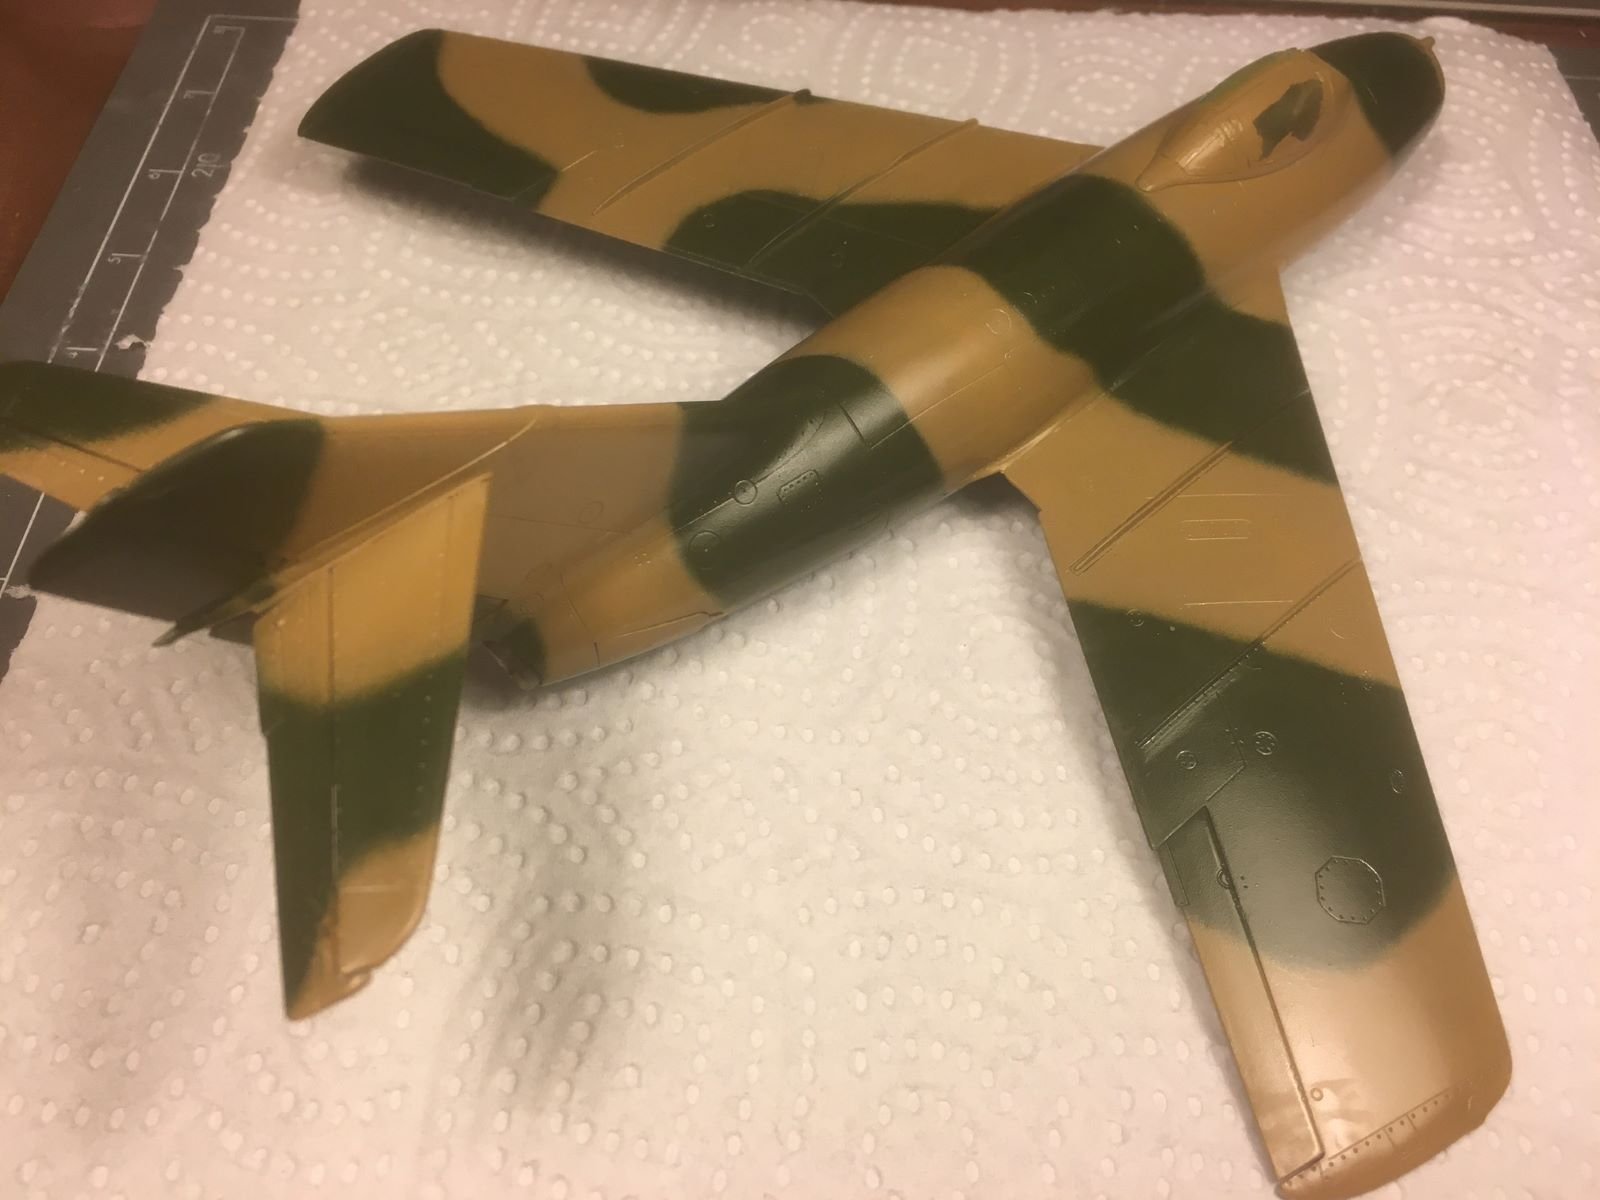
Hi all, little progress, I am just fixing paint defects. Eventually I modified the camo stripe which I did not like.
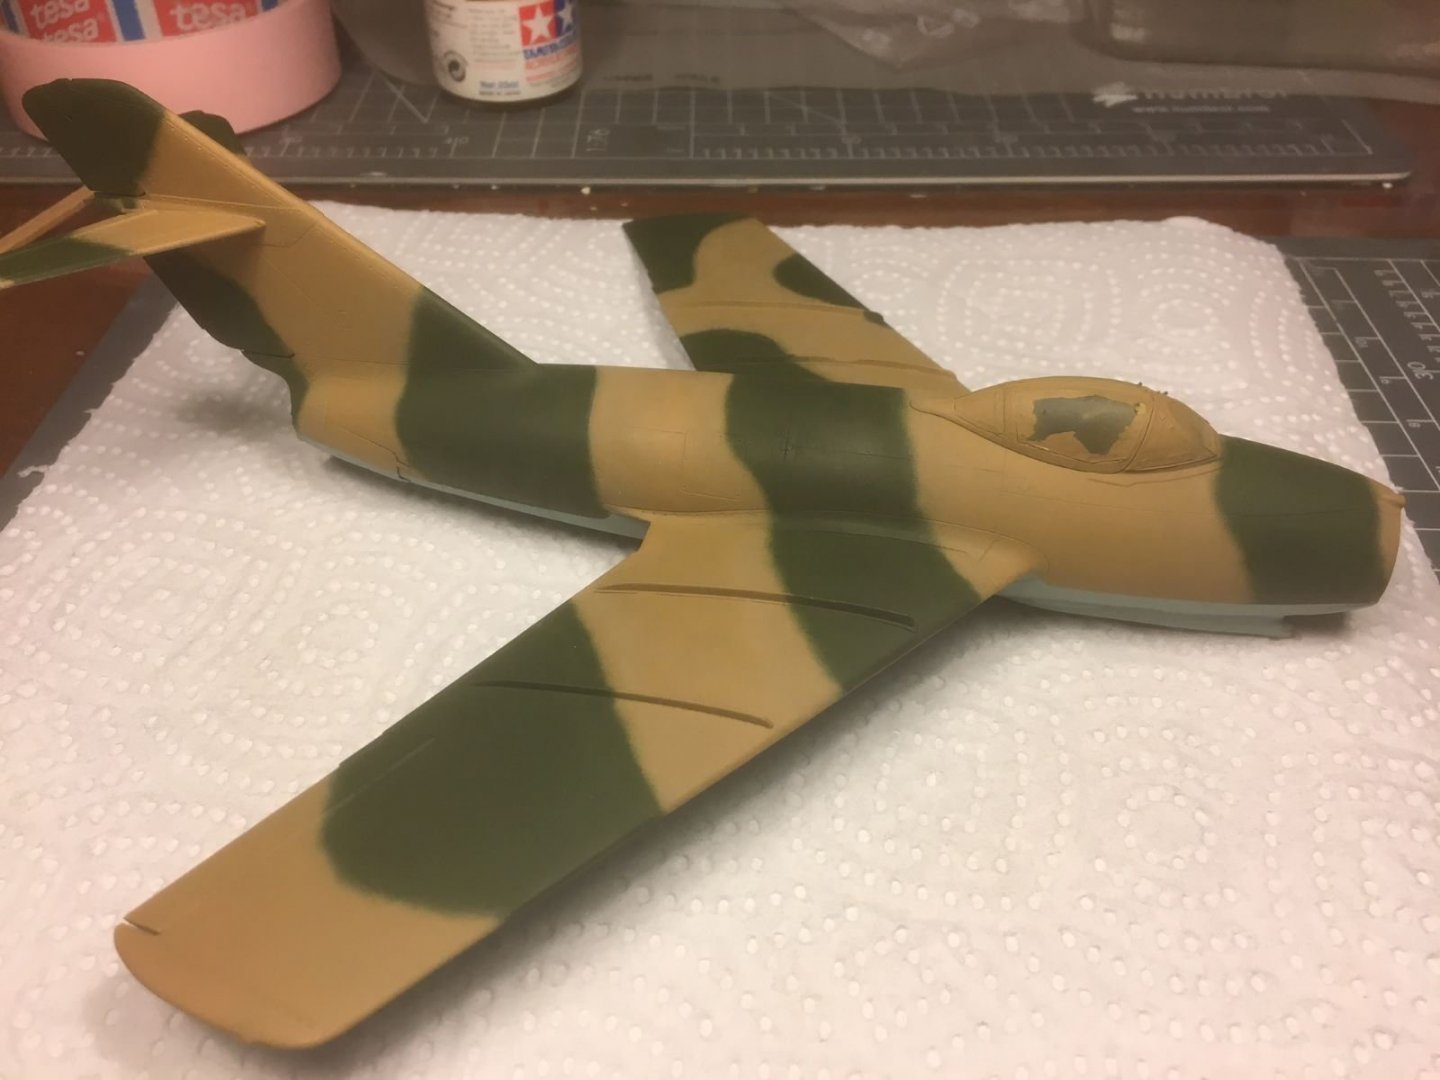
Next, I will spray a coat of gloss clear paint.
Best regards,
Dan
-
Very nice work on the cockpit and other details. I built the Airfix kit years ago, but it was not as good as this one.
Best regards,
Dan.
- mtaylor, popeye the sailor, Canute and 1 other
-
4
-
Hi, if you want to bring up the details of the cylinders, you might try to touch the fins with a fine brush loaded with Tamiya black liner. Capillarity should pull the ink into the slots between the fins. If you do not have that product at hand, you might try black aquarelle out of the tube diluted with water. Adding a drop of dish soap to the water, will break the surface tension of the water and the color will run better into the slots.
Good progress with your big Corsair.
Best regards,
Dan.


_Tour_de_Sky_2014-08-10_03.JPG)
MIG 15 by Danstream - Trumpeter 1:48 - Finished
in Non-ship/categorised builds
Posted · Edited by Danstream
Text typos and misplaced pictures
Dear all,
I started to 'furnish' the model with the last bits and for me, this means progressing at a more glacial pace than my usual with very small progress at every step. Here, I rebuilt the arched frame that is located inside the canopy and which was provided as an obvious solid piece in the kit.
This is how it looks once painted and glued inside the canopy. I find that this is a little improvement which is easy to implement.
Then, it was the turn of the landing gears and wheels which were treated with panel liner to let their nice details to pop out:
Followed by doors and other little details:
Landing gears are not completed yet (oleo jacks still missing), but the MiG can finally stands on its own legs now:
Well, the model is an hopeless tail sitter and its final equilibrium will be decided by fraction of grams of the addition of the last details, despite the amount of lead that I added in the gun compartment (and the omission of the jet engine).
A detail of the Eduard's cannon muzzle which is a nice addition. All the muzzles were brushed with graphite powder to give a bit of shine to their metallic paint:
Another riddle: the main antenna mast doesn't have any pin to get securely fixed to the smooth and curved fuselage skin (it is supposed to get positioned below the oval panel pictured just below the canopy edge) . A simple butt glued join with such a small contact area is clearly not adequate and I will have to find a better way to glue it.
That is all for now,
thanks for watching and kind regards,
Dan.