

.jpg.2c2c29e54623bd7b752bc2cdab599665.jpg)
Danstream
-
Posts
561 -
Joined
-
Last visited
Content Type
Profiles
Forums
Gallery
Events
Posts posted by Danstream
-
-
Hey, Chris, you made me smile with the "convey the idea" mission!! 😄
Thanks for your nice line.
Cheers,
DAn.
-
Dear all,
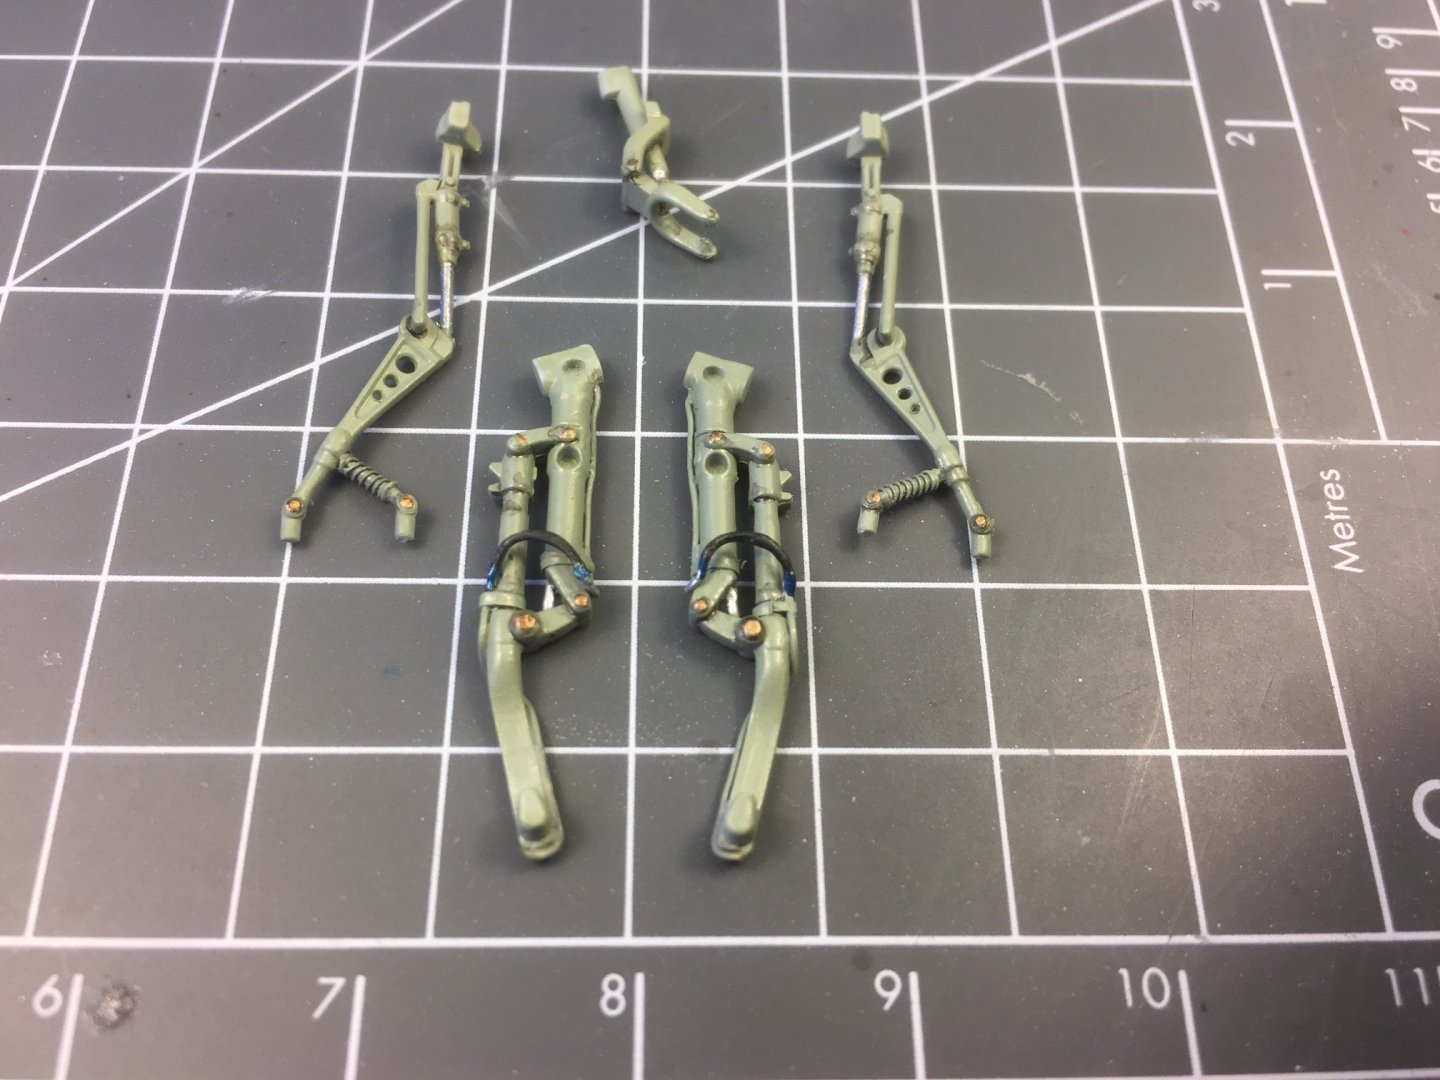
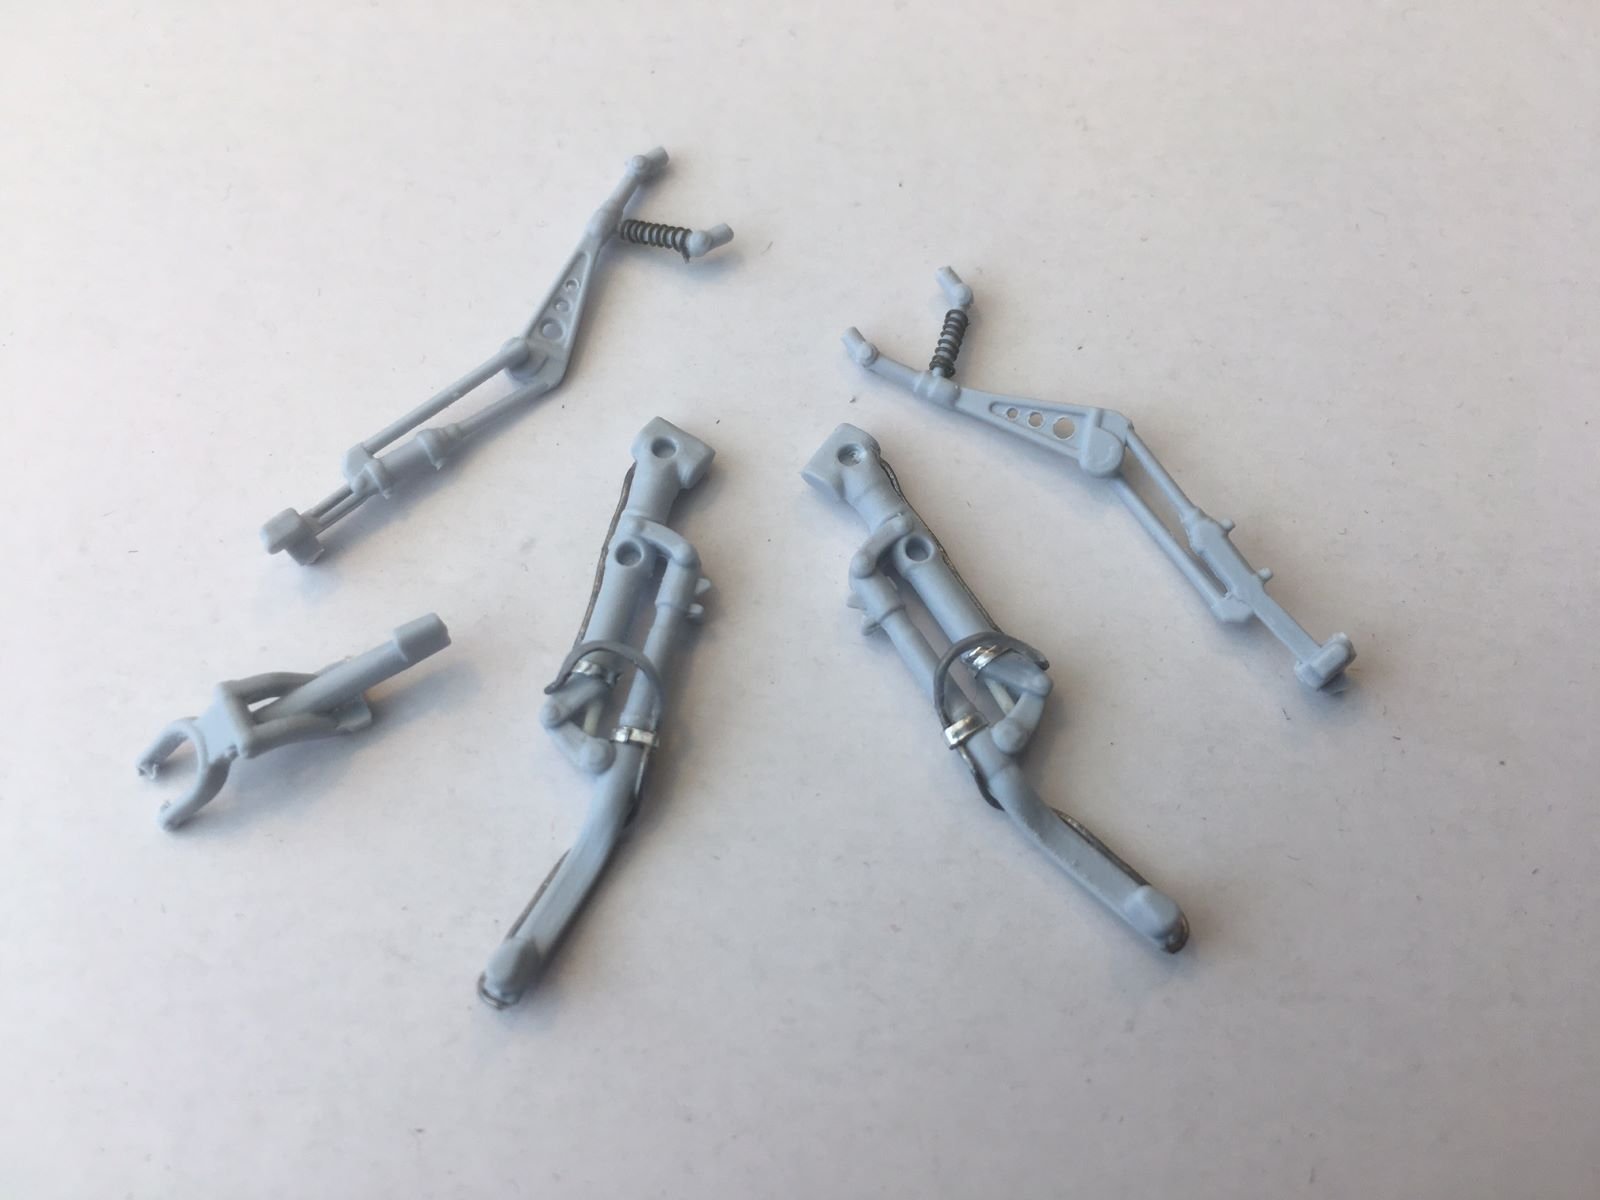
profiting of few days off for Easter break, I went on with the small bits, i.e. landing gear, wheels, doors, etc. The Sea Fury was equipped with seemingly complicated landing grear legs, probably dictated by the heavy loads they experienced in the naval usage. At this relatively small scale, not all the details can be added and again, like I did for the other parts of this build, I tried to replicate something that conveyed the idea of this complicated gear, rather than attempting an exact replica. Once liberated from some moulding marks (not many to be honest) you have a fair replica of the basic shape. I tried to enhance it by adding the main oleo struts, tubing and springs obtaining this:

Tubing and springs were made of lead wires. Then some colors, a coat of floor polish and some touches of Tamiya black liner to accent few details. Now they are ready to be installed:
That's all for now, waiting for the airframe being ready.
Best regards,
Dan.
-
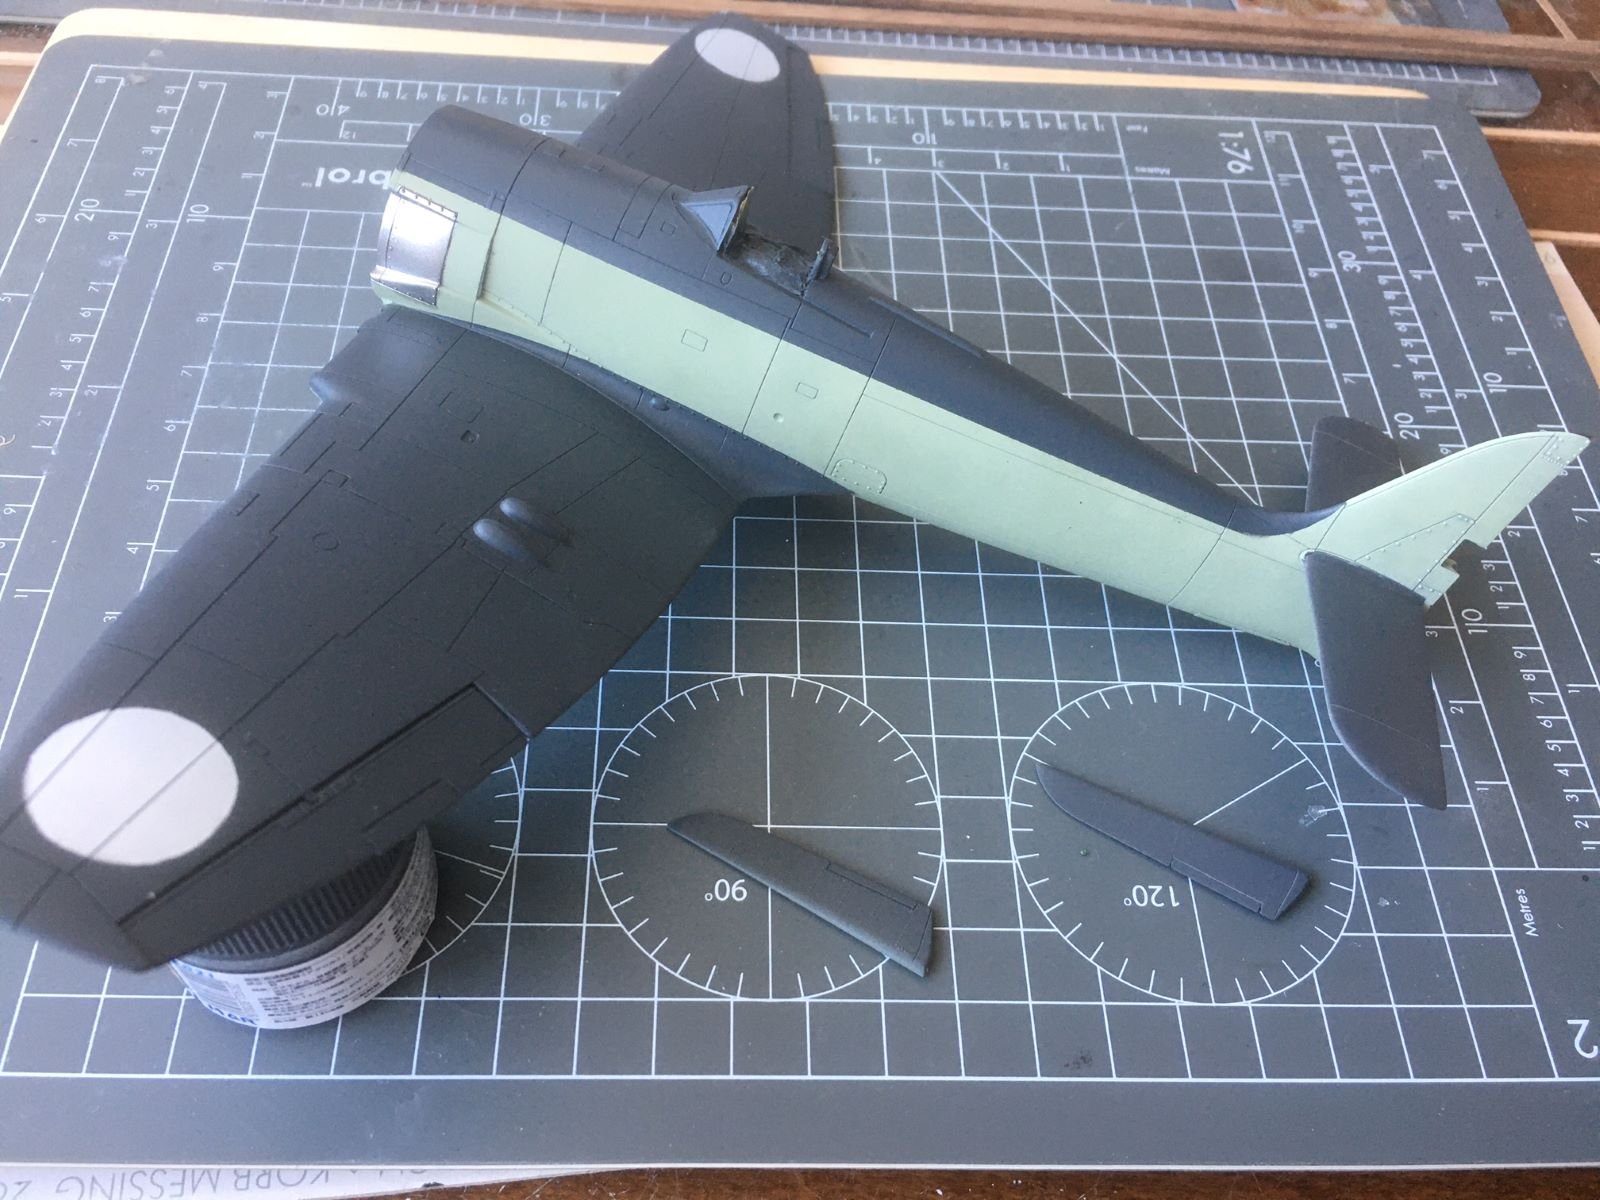
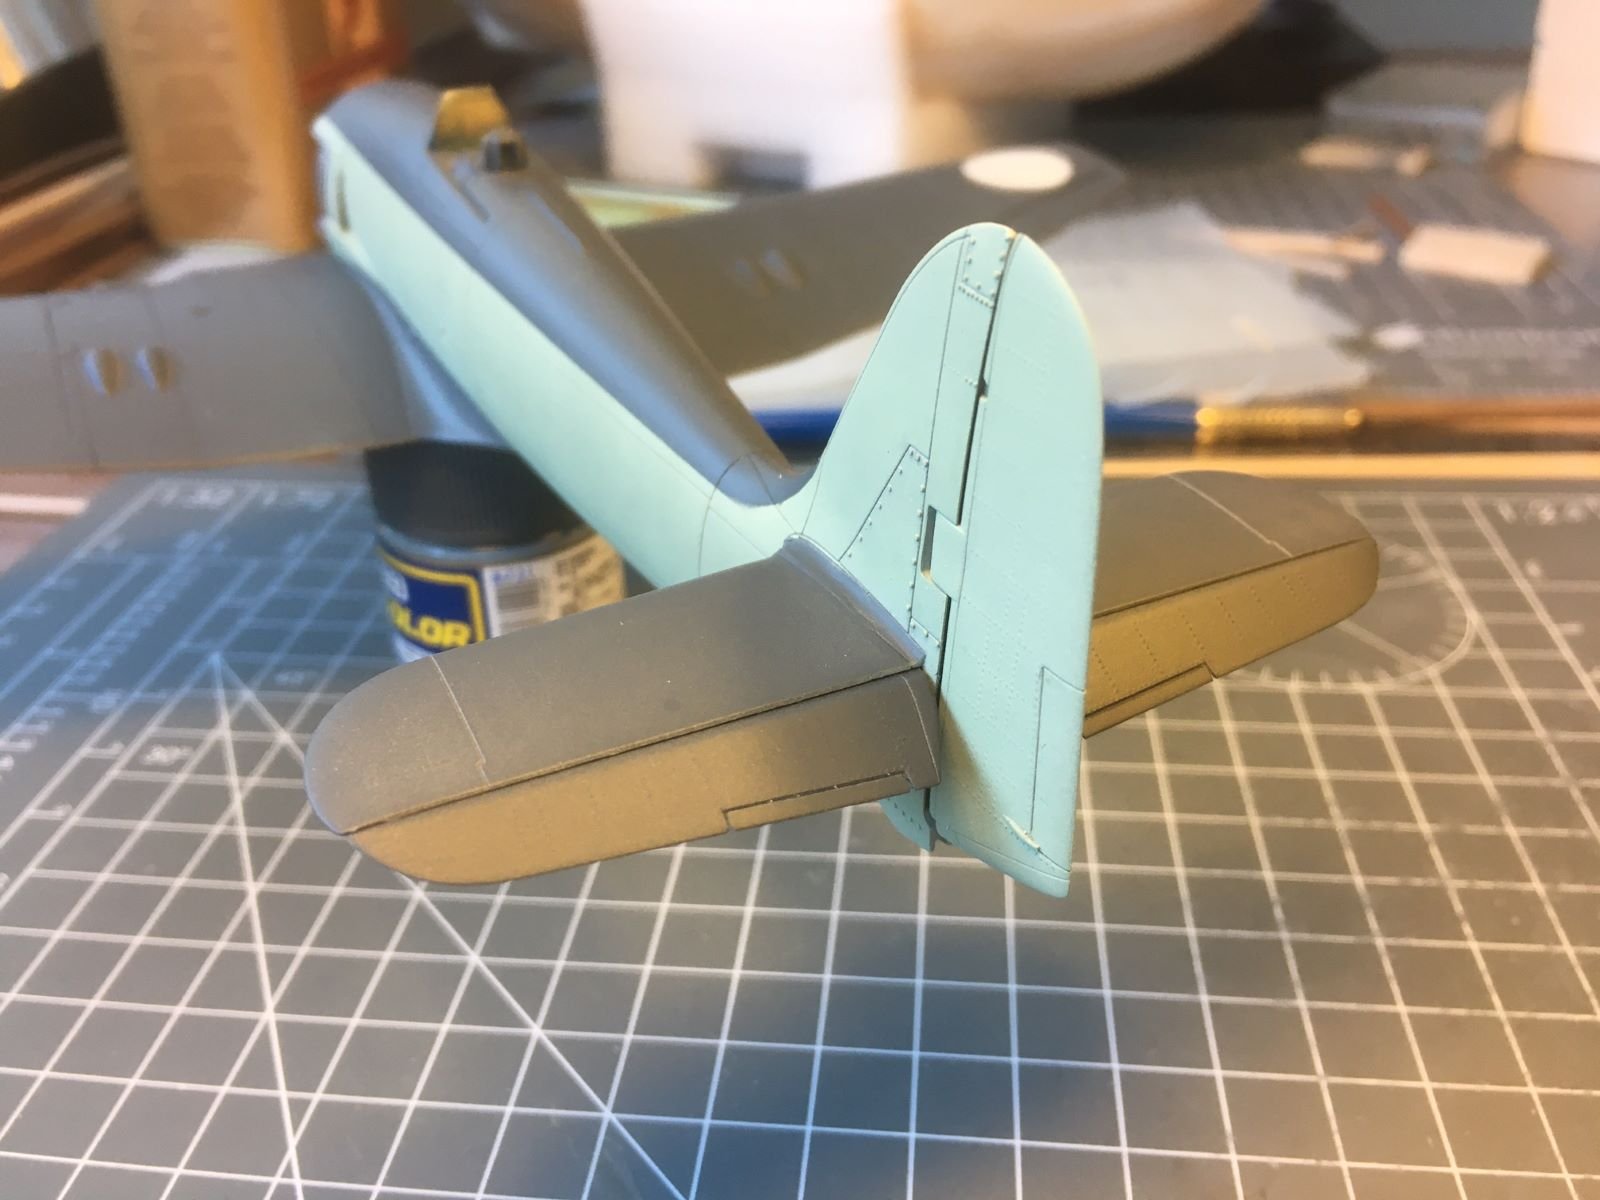
Dear all,
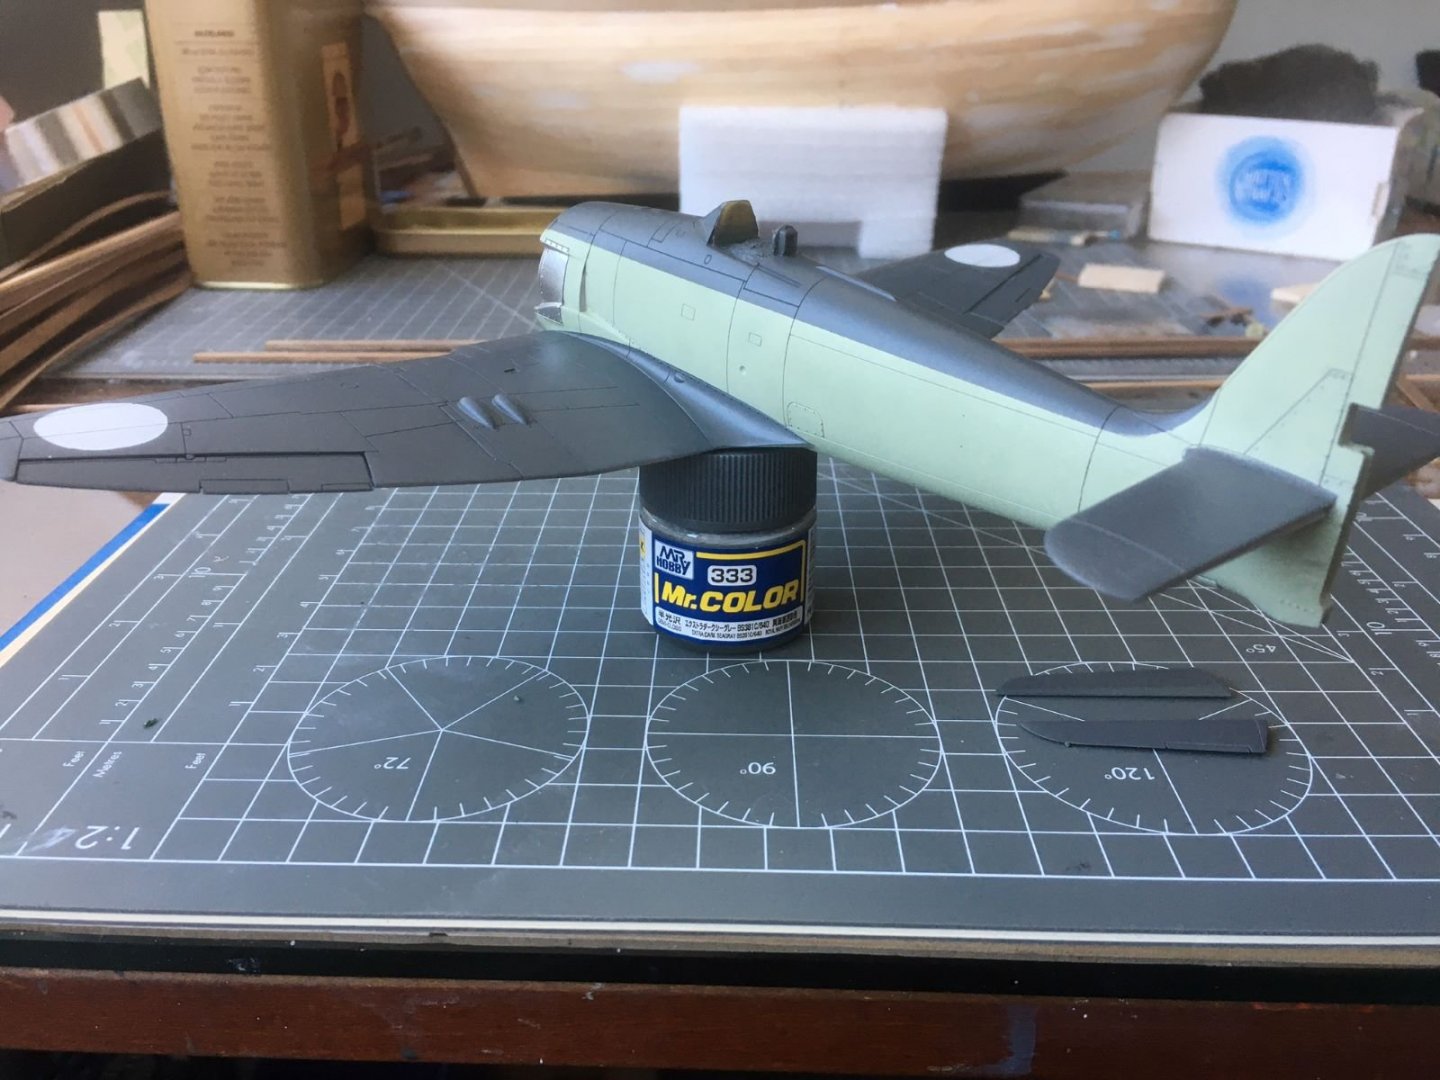
today I finished the camouflage. The paint that I used, Gunze Mr. Color 333, was great in rendering the Extra Dark Sea Grey. Not knowing how transparent the decals would be, to be on the safe side, I left two white circles on the spots where the roundels will be placed.
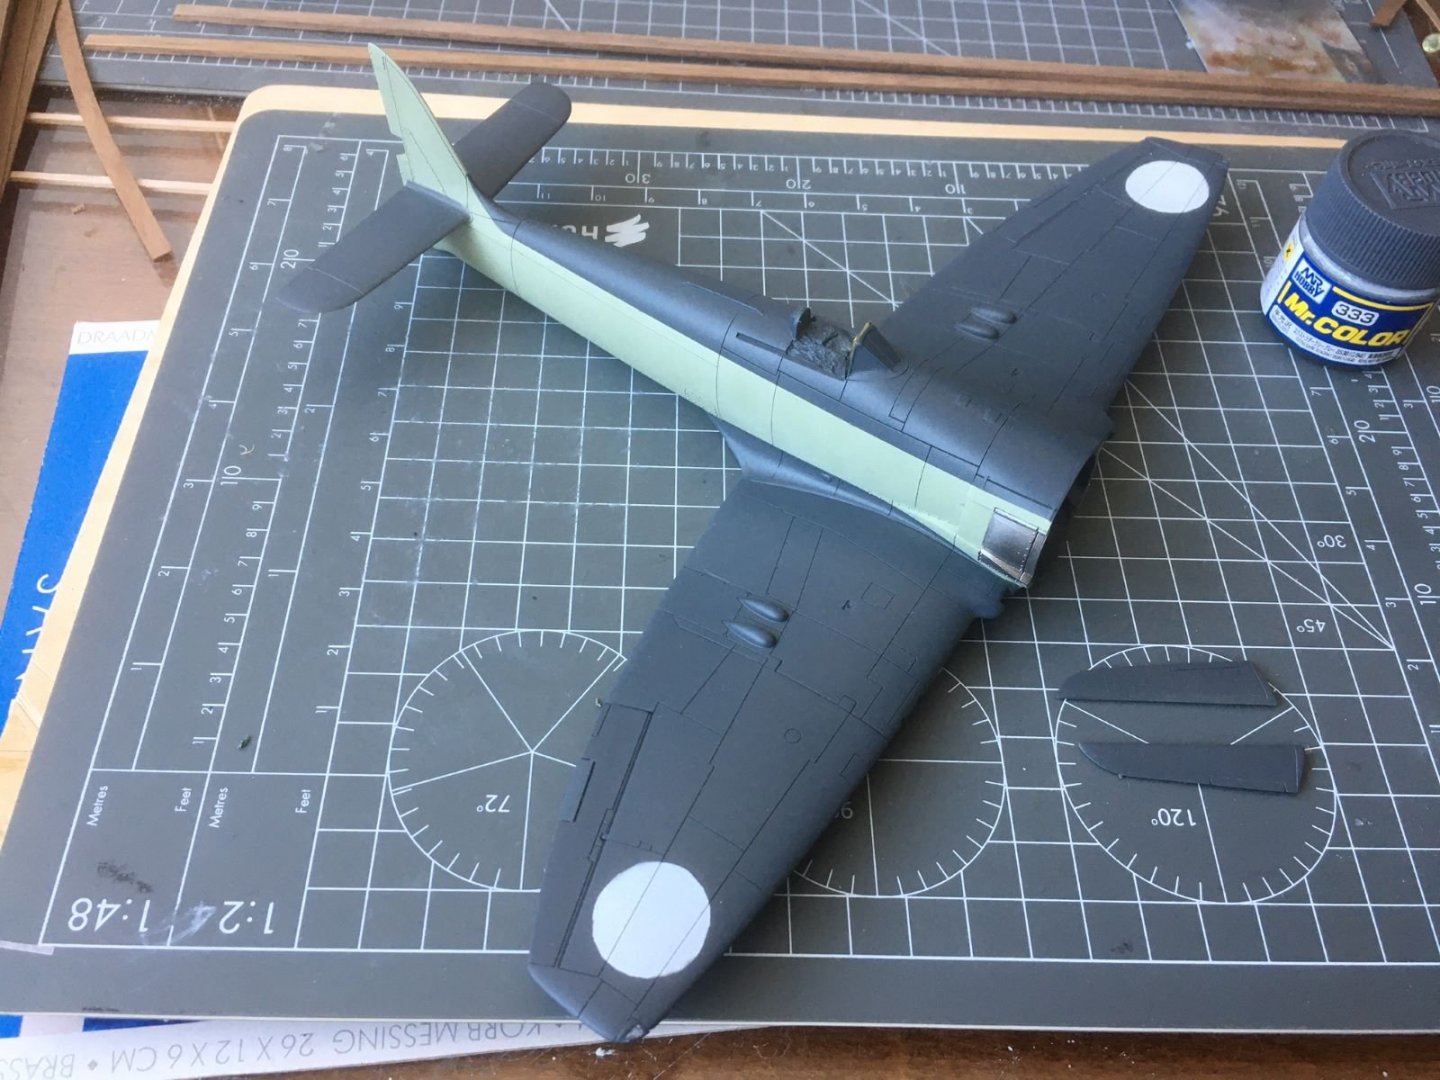

I also glued in place the surfaces of the empennages slightly posed:

Now, everything is ready for a coat of clear.
Best regards,
Dan.
- Edwardkenway, Egilman, yvesvidal and 10 others
-
 13
13
-
Dear all,
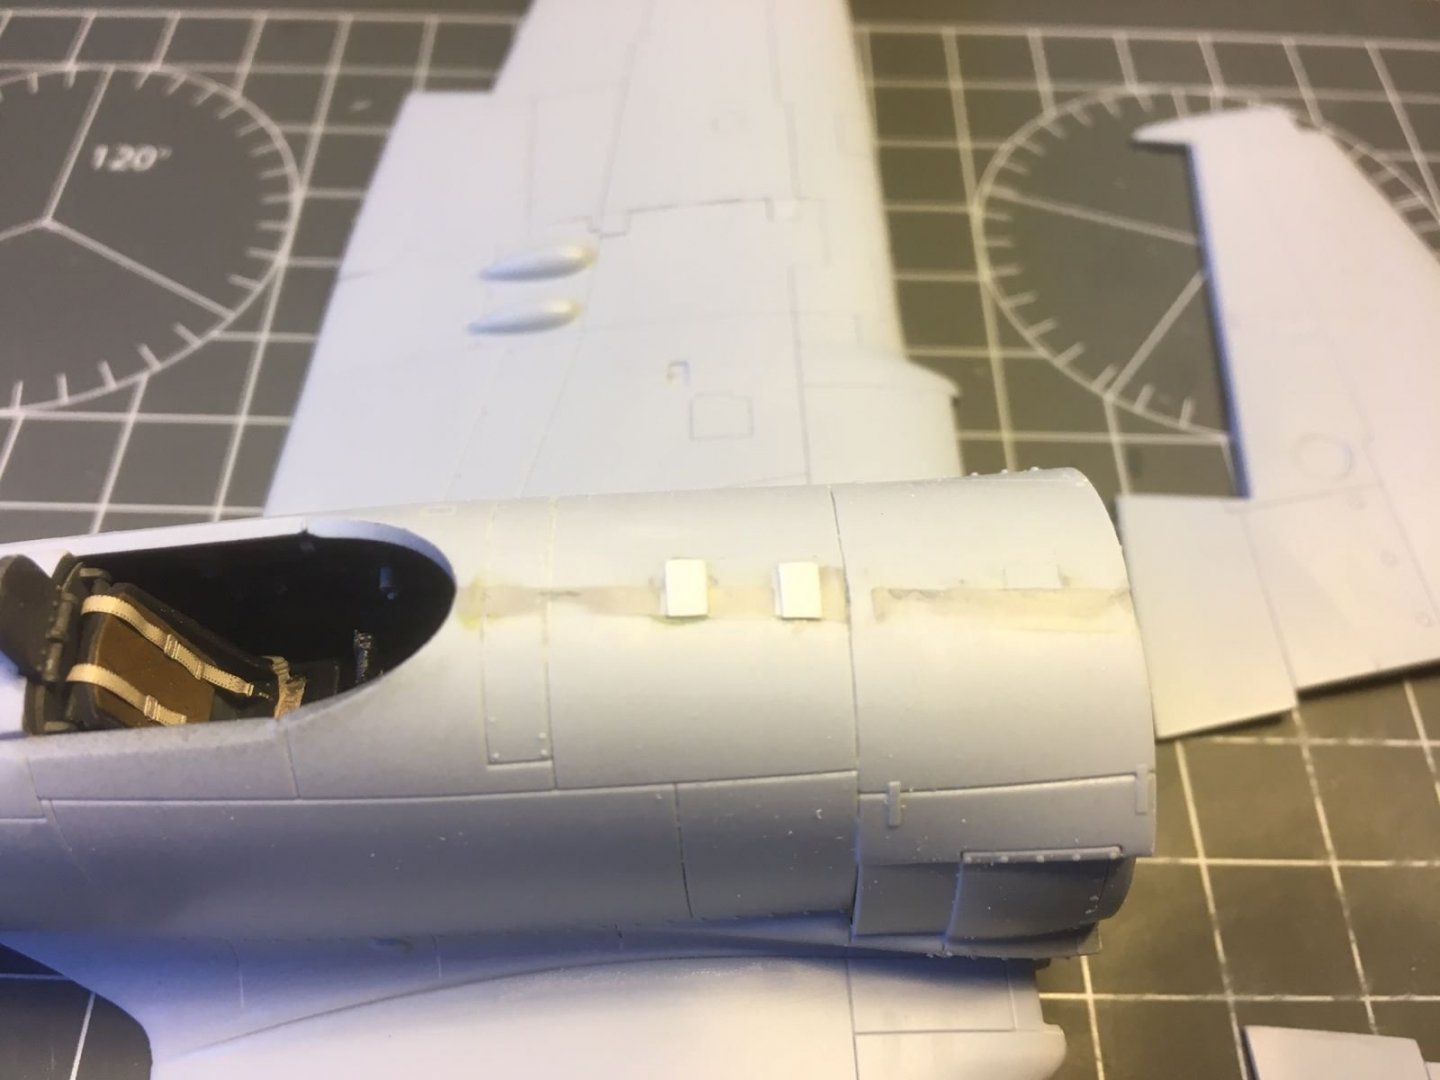
I went on with gluing the windscreen piece in place and painting the metallic exhausts shrouds, but I did not take pictures of these steps. Then I started to mask the fuselage to prepare it for the application of the Extra Dark Sea Grey color.
For the EDSG I chosed the Gunze 333 which is specific for this color without the need of concocting any mixture. This is the first time I use these Gunze paints and I was positively impressed by their quality. After removing the masking tape I got this:
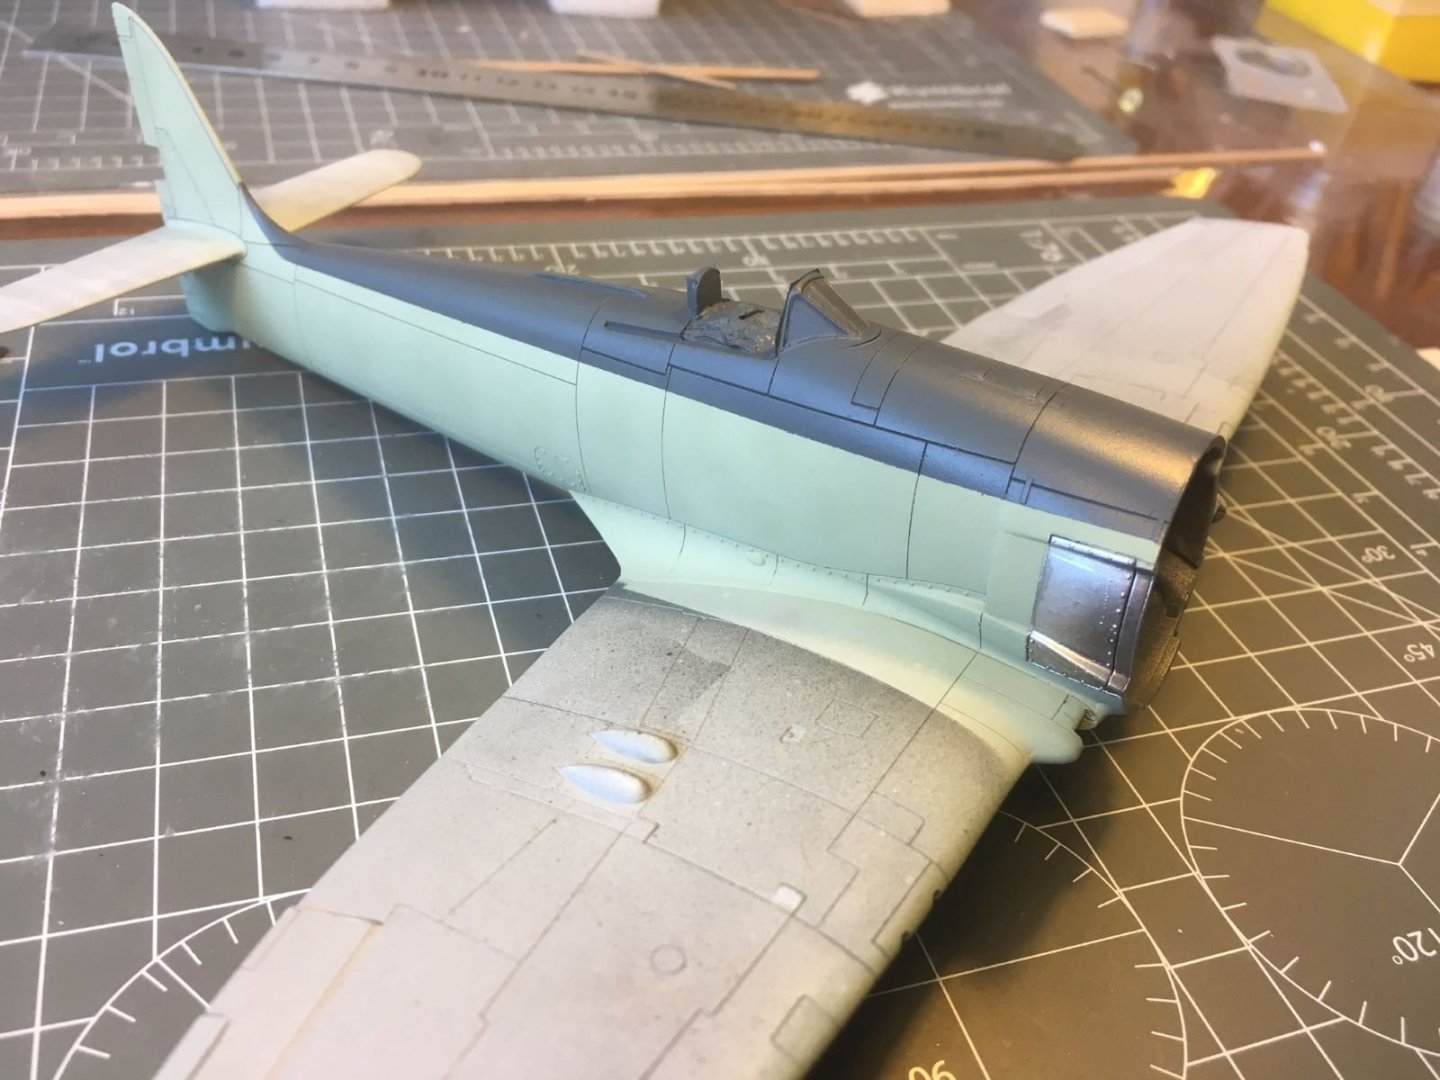

To easy the masking, I sprayed the fuselage alone first. This is a dry check to show how the assembly of the exhaust stacks will look like:
resiz.thumb.JPG.fbf48b53419e4f4fbd38960dacf70089.JPG)
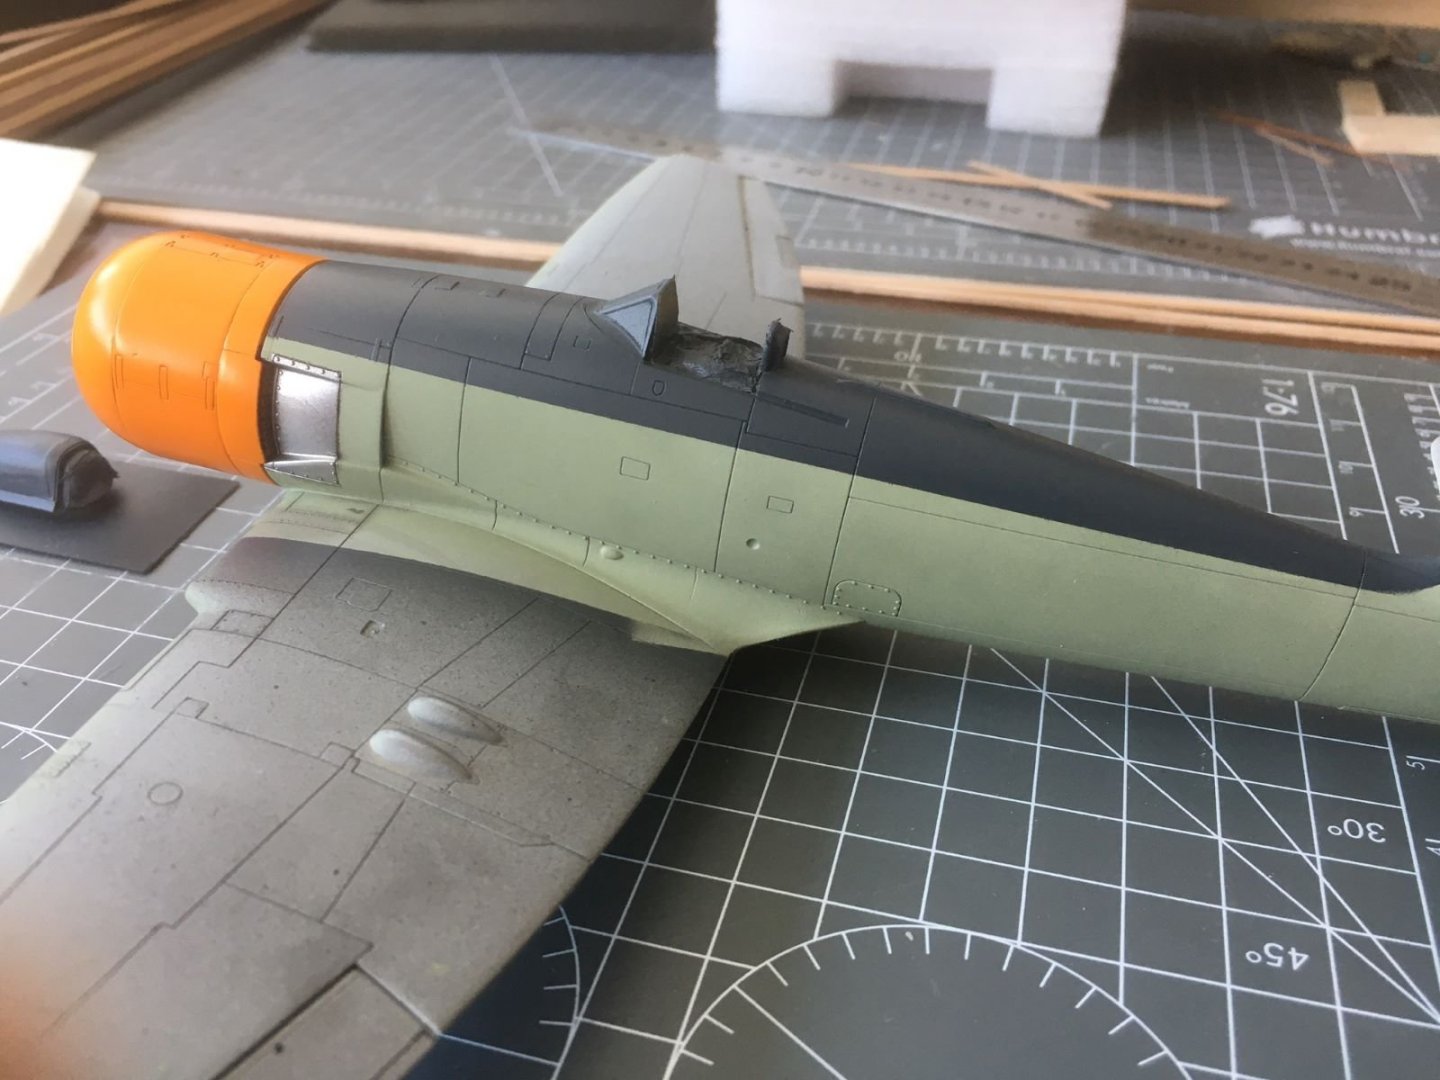
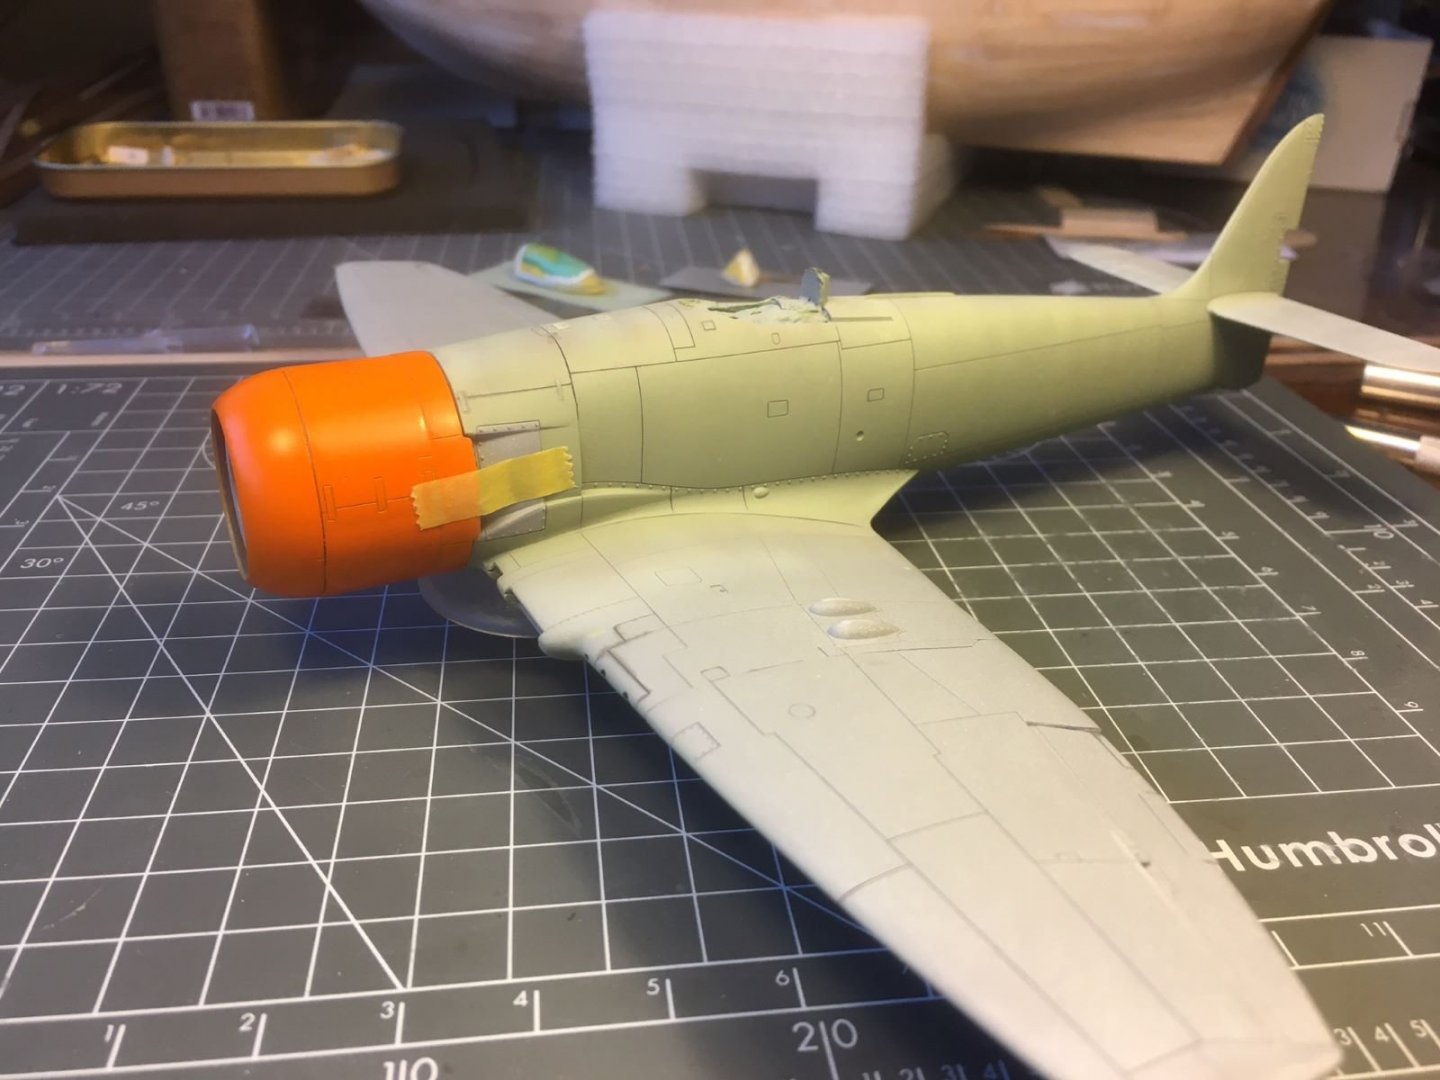
Finally, some pictures with the cowling just dry fitted to check the chromatic contrast:
That's all for now, next upper wings and horizontal surfaces will be painted.
Best regards,
Dan.
-
Hi all,
a small update on my Sea Fury build. After several additional coats of color, I stop here and declare it finished. The photos of the actual plane show a quite uniform finish, but I would like to leave some variation be visible to justify all the work done with the pre-shading. The theory of the complementary colors worked partially, but next time I will get back to traditional dark gray preshading. This is how the underside looks now:
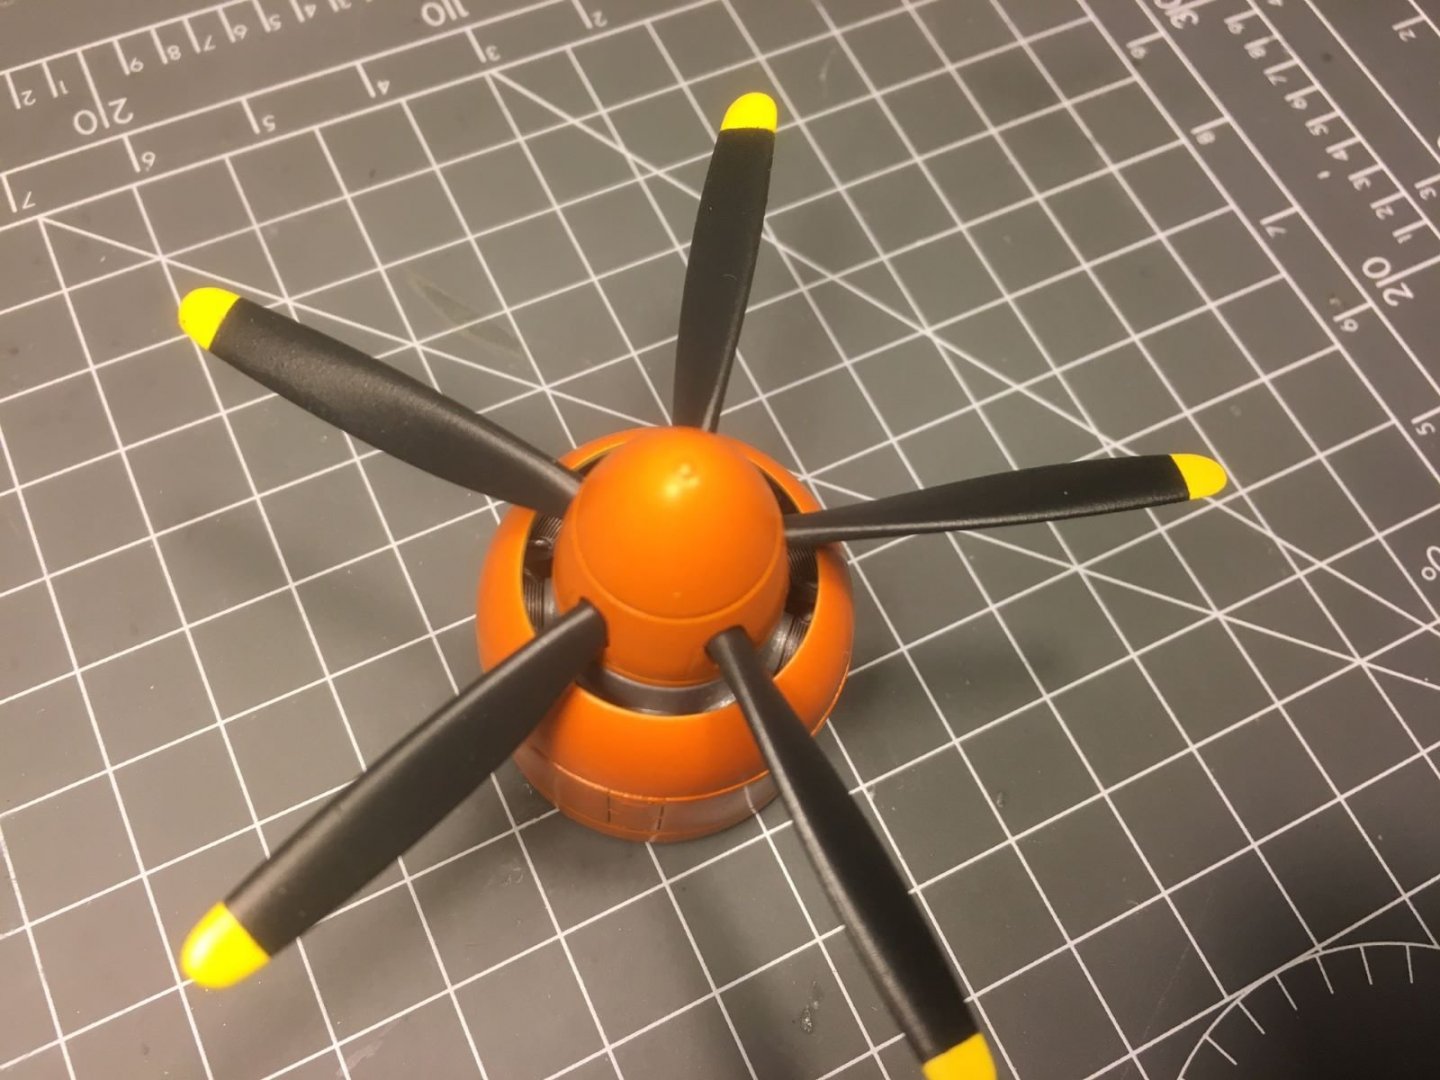
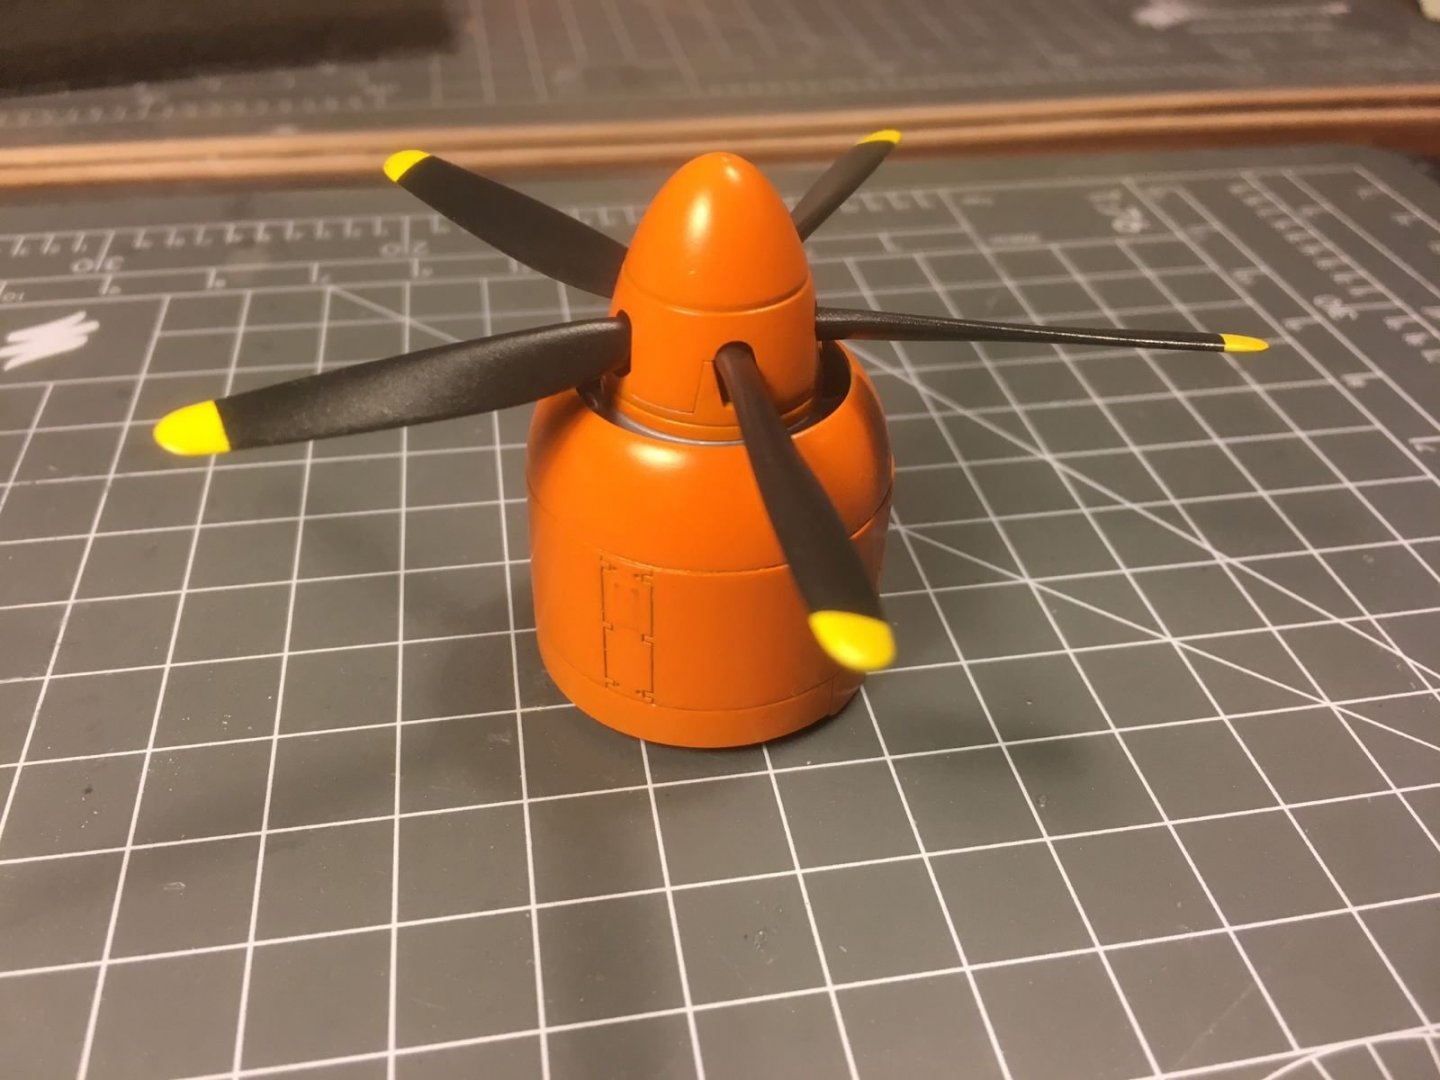
I completed also the orange color on the cowling together with the propeller:
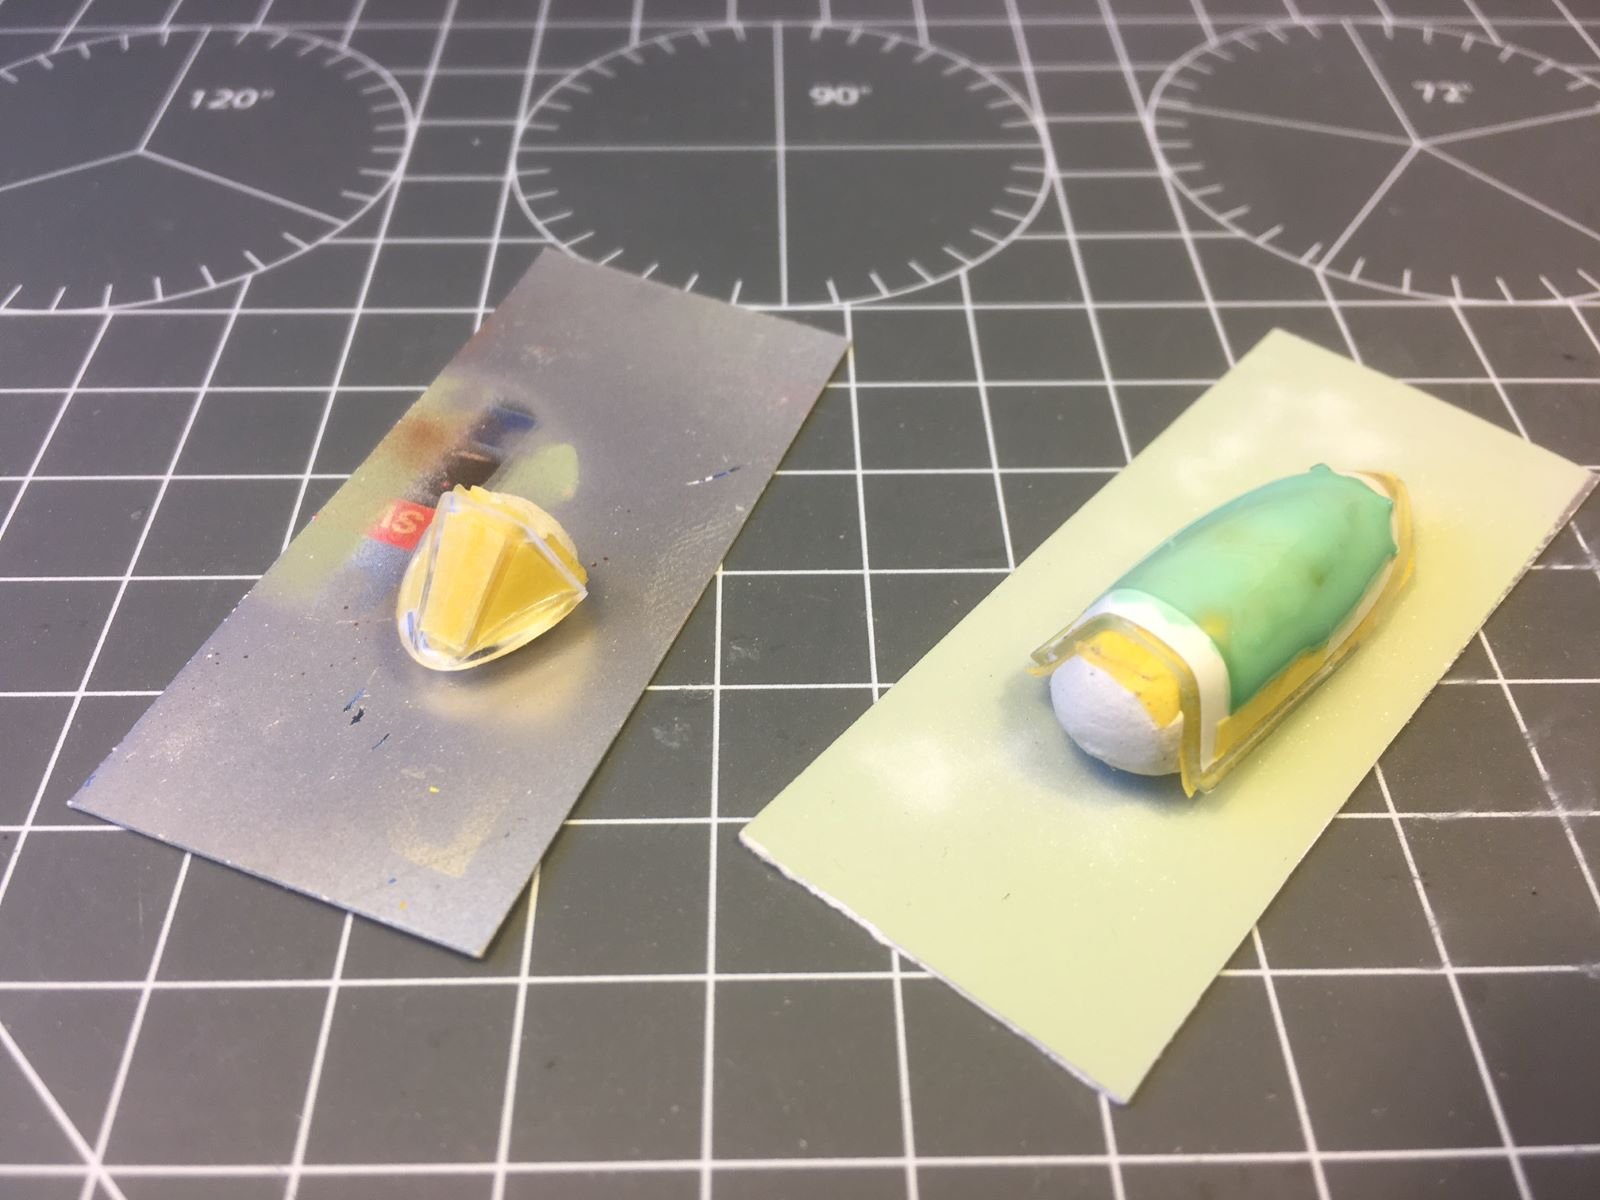
The clear parts have been prepared and masked waiting for being painted, black first followed by camouflage color:

A final view of the fuselage with the cowling posed on it:
That is all for now, I hope you like it, comments or critiques are welcome.
Best regards,
Dan.
-
Thanks for posting your videos! It happens that I am exactly at the same stage with my build of the Mayflower (I am gluing the first wales) so your last video is extremely useful to me. Let me also prise your skills and great workmanship which make your post a pleasure to follow.
Kind regards,
Dan.
-
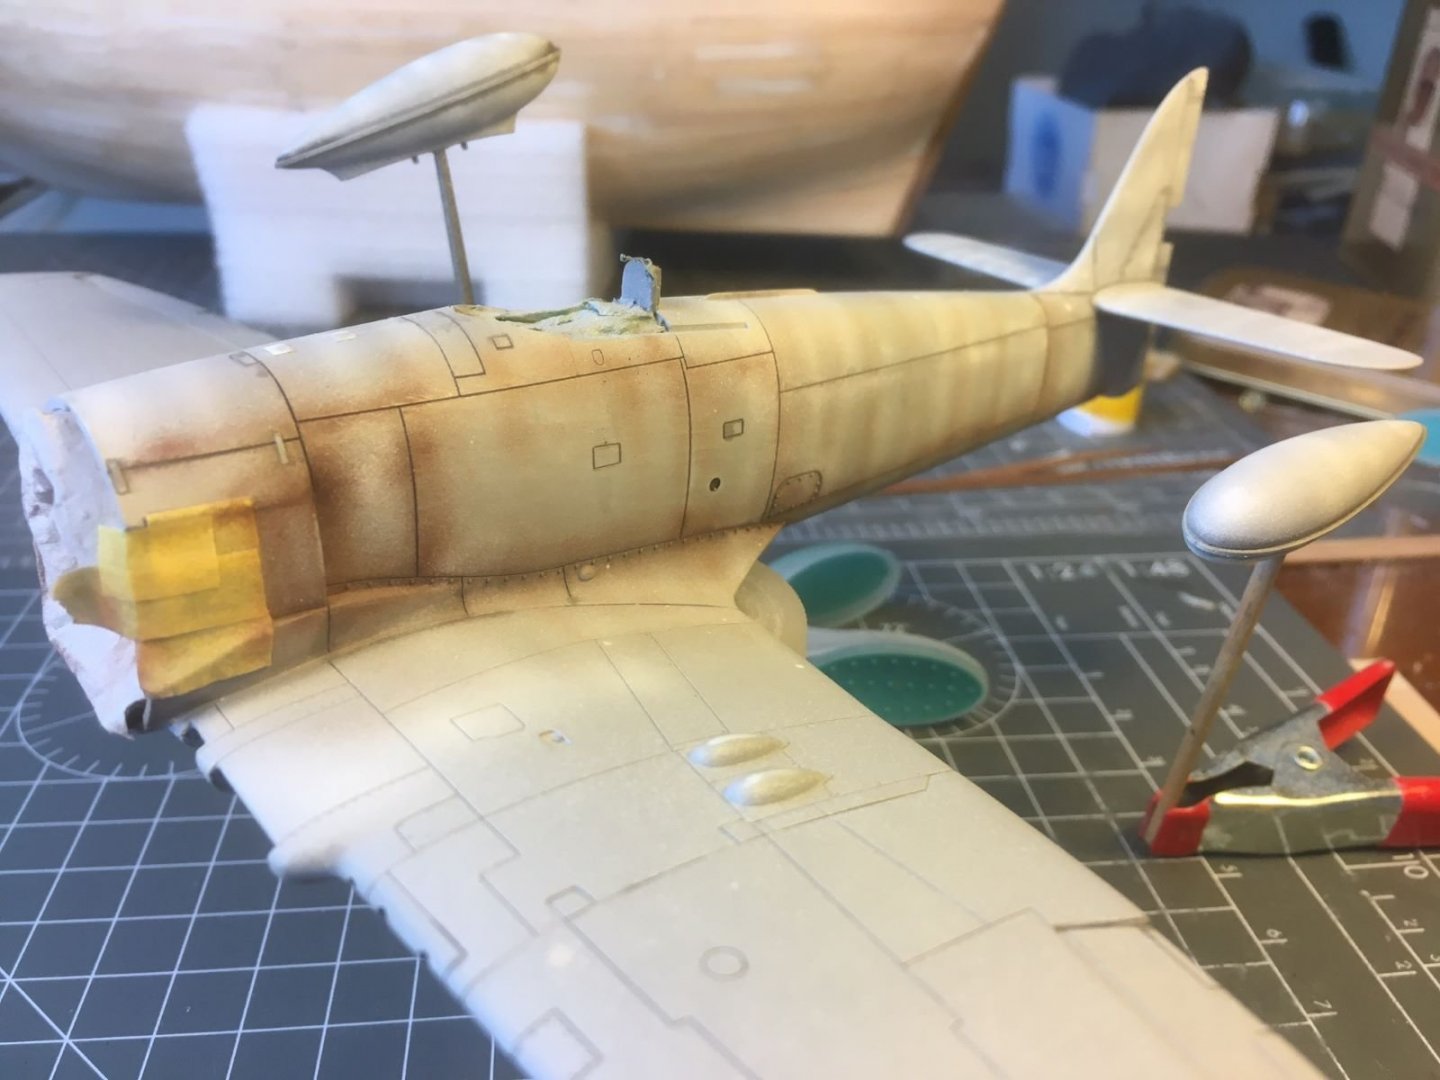
Hi all,
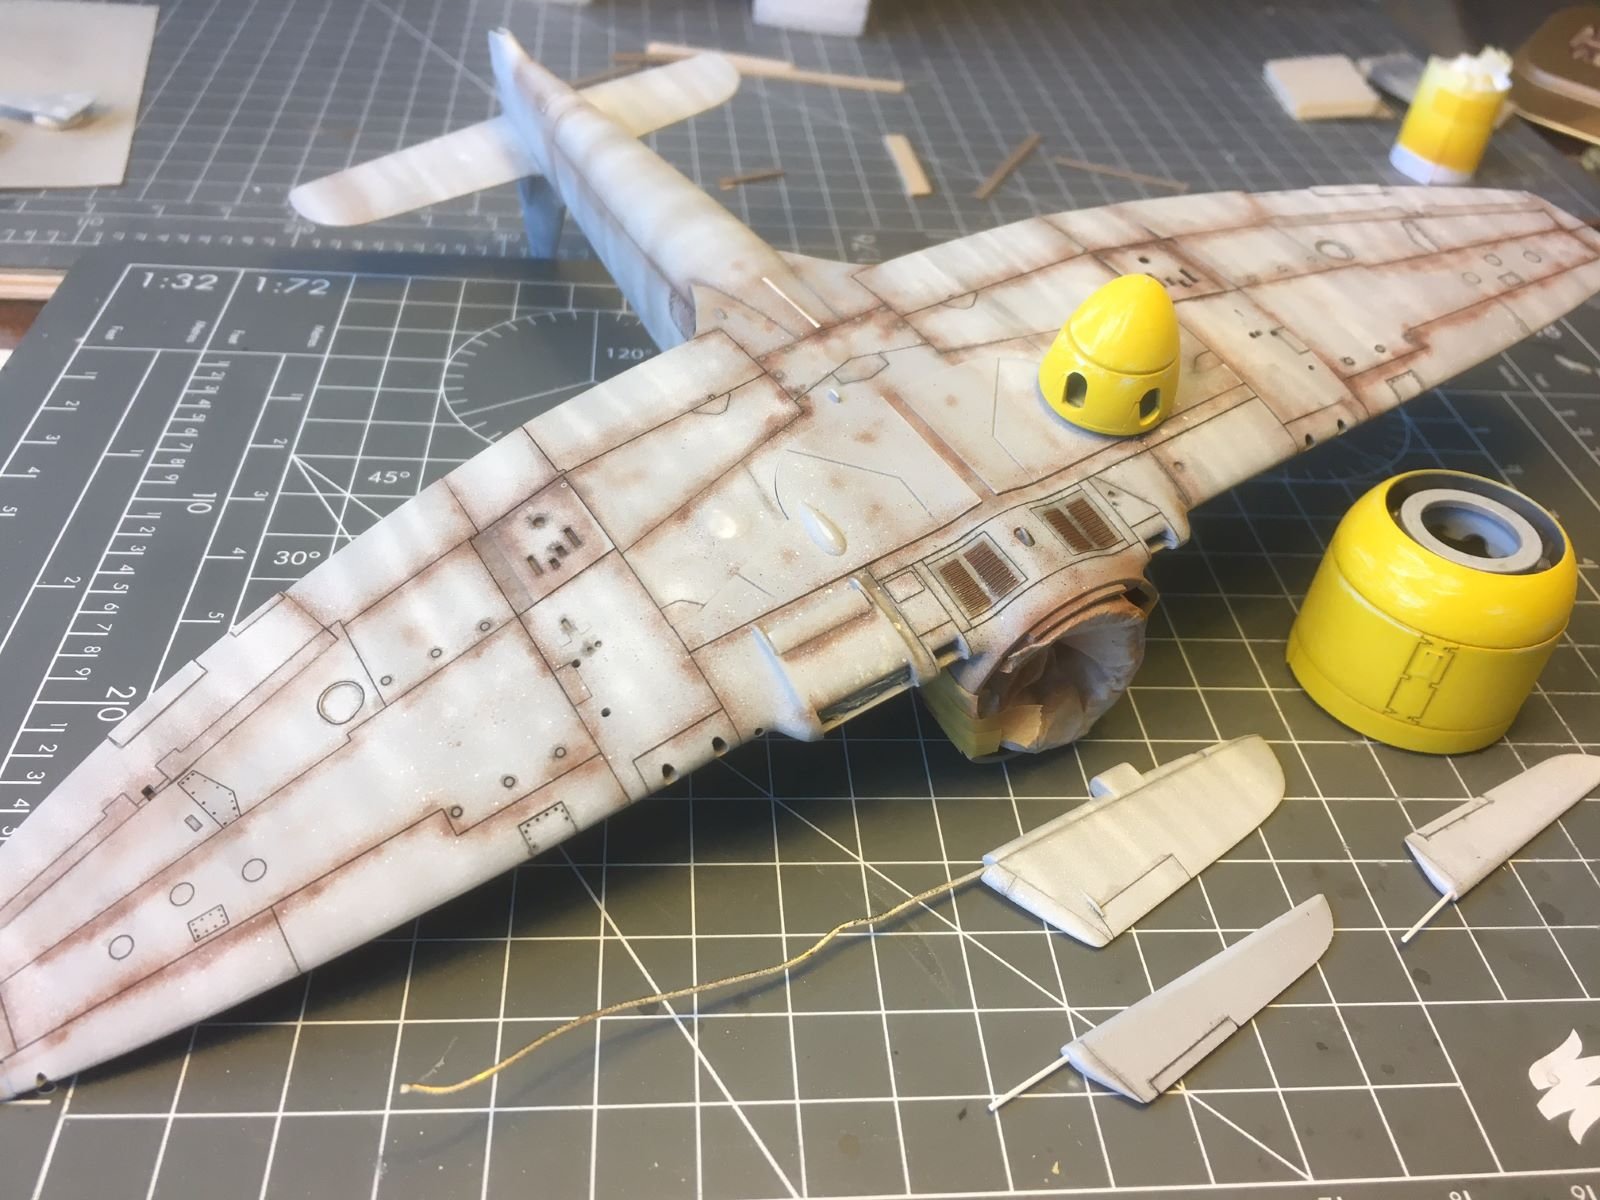
just some intermediate results on my build. I apologise for my extremely slow pace, many things keep me away from the workbench. At any rate, I started to lay down some layers of Sky paint made of a mix of Tamiya XF-21 (4/5) with white XF-2 (1/5). First steps:

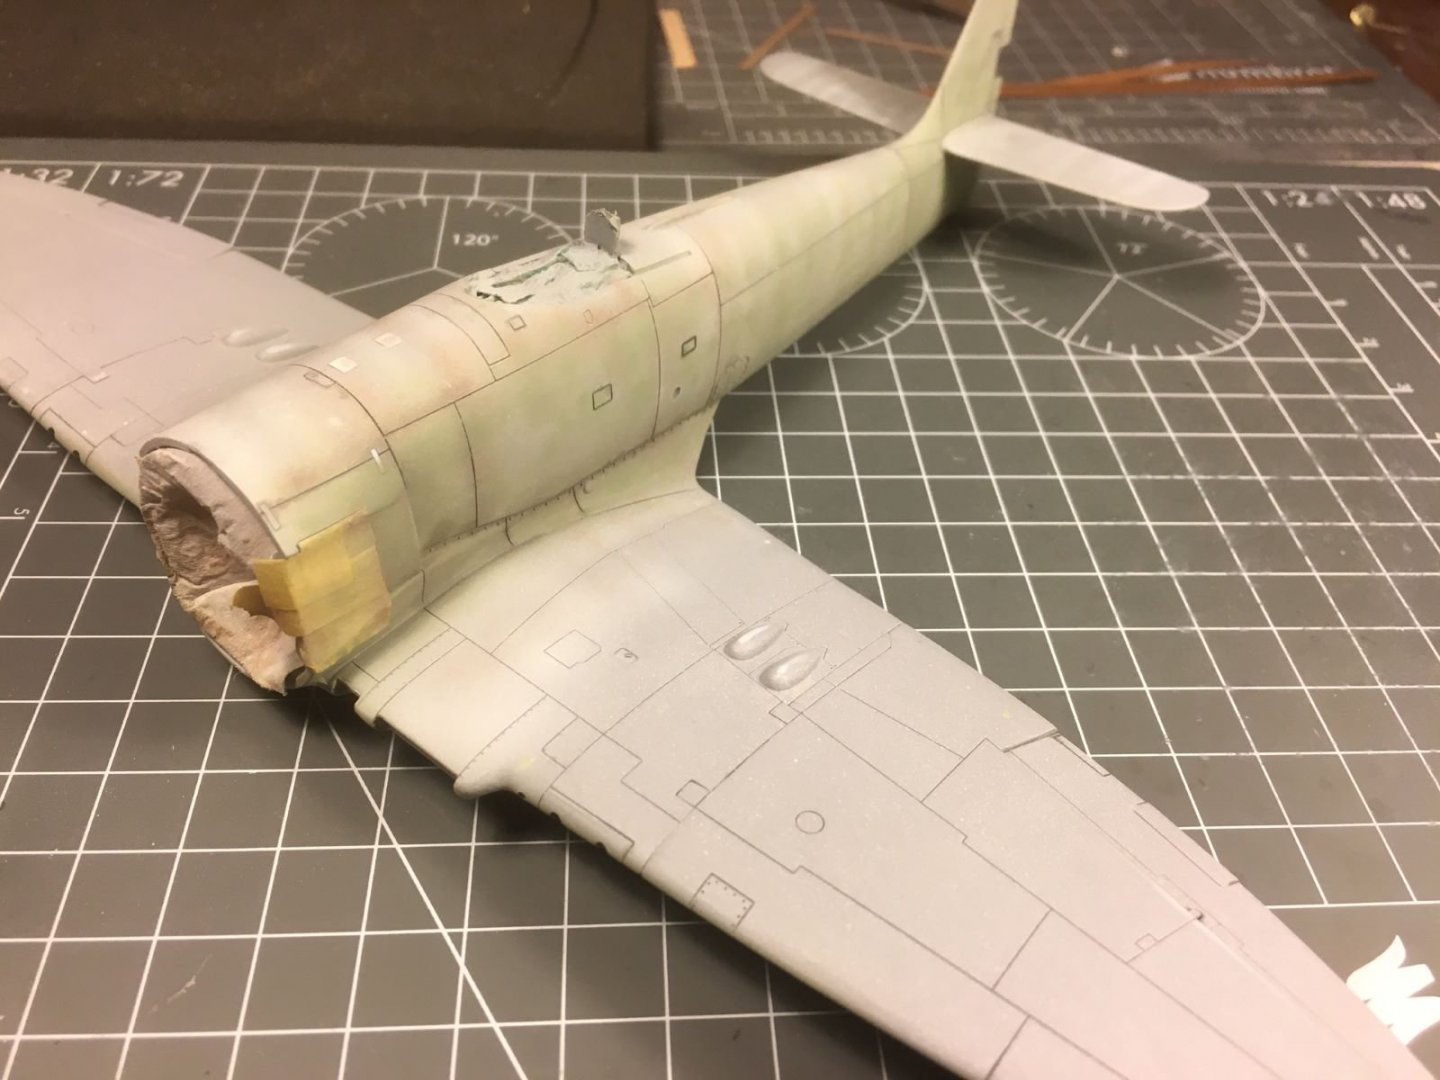
Clearly, the look is too worn out and I continued with the above mix:

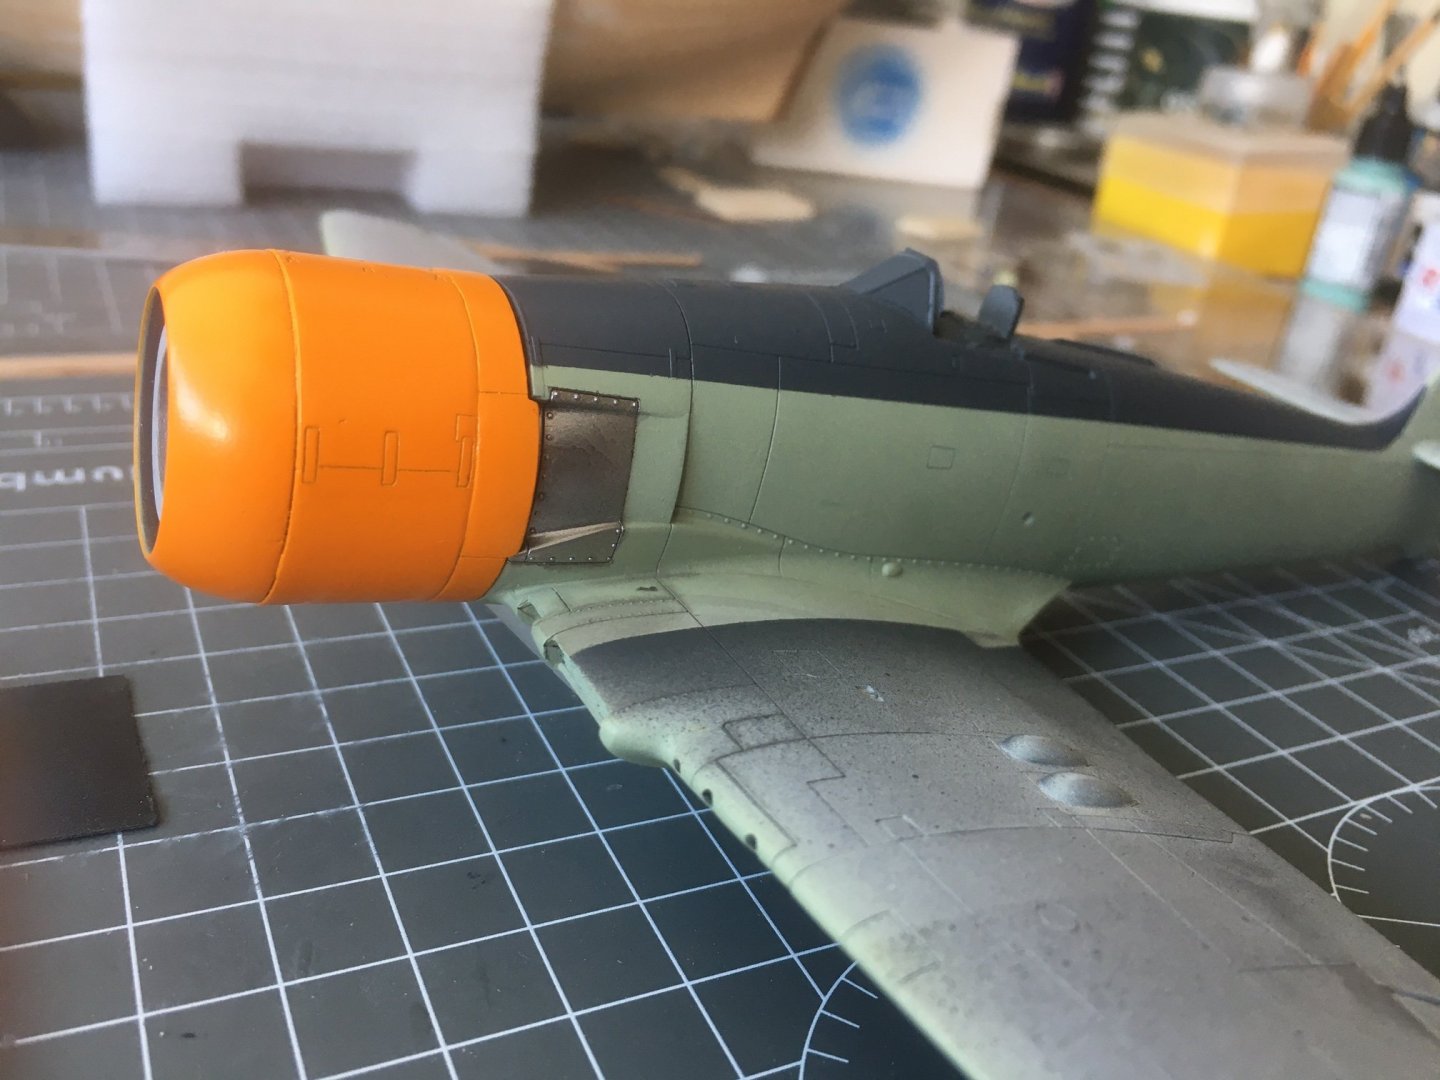
Being this plane a display plane, I would like to proceed further to smooth out the preshading work and in a sense vanifying it, but at least I have shown how I like to give in general depth and variations to what could be otherwise a flat finish. I sprayed also the engine cowling and the other orange parts with the Tamiya orange X-6:

The orange was applied in thin layers and at least one other coat seems to be needed.
That is all for now, if you have comments and suggestions, please let me know them.
Best regards,
Dan.
- popeye the sailor, Canute, mtaylor and 7 others
-
10
-
I am not much in car modelling, but your build turned out so nice and realistic!
Well done,
Regards,
Dan
- Canute, Egilman, Edwardkenway and 5 others
-
8
-
What I see is that you are putting all the strakes so far perfectly parallel and with no tapering. I think you should have started to taper from the second one. There are good tutorials on this site showing that (see the first pinned post by @Chuck).
Good luck,
Dan.
- Jim Rogers, allanyed and mtaylor
-
3
-
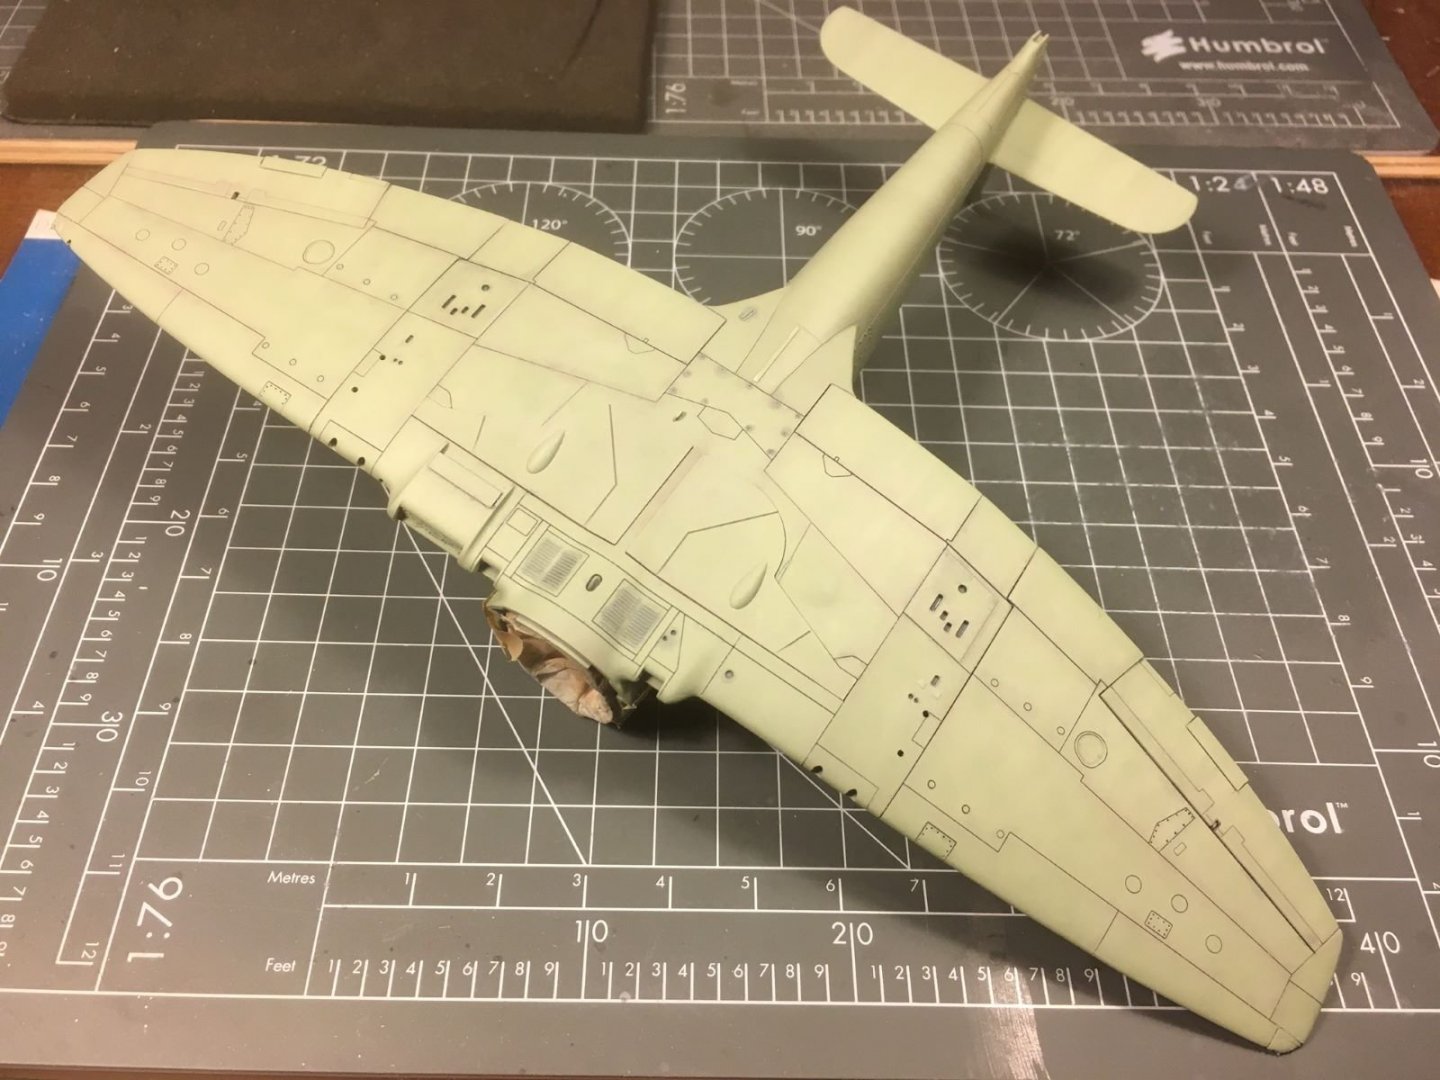
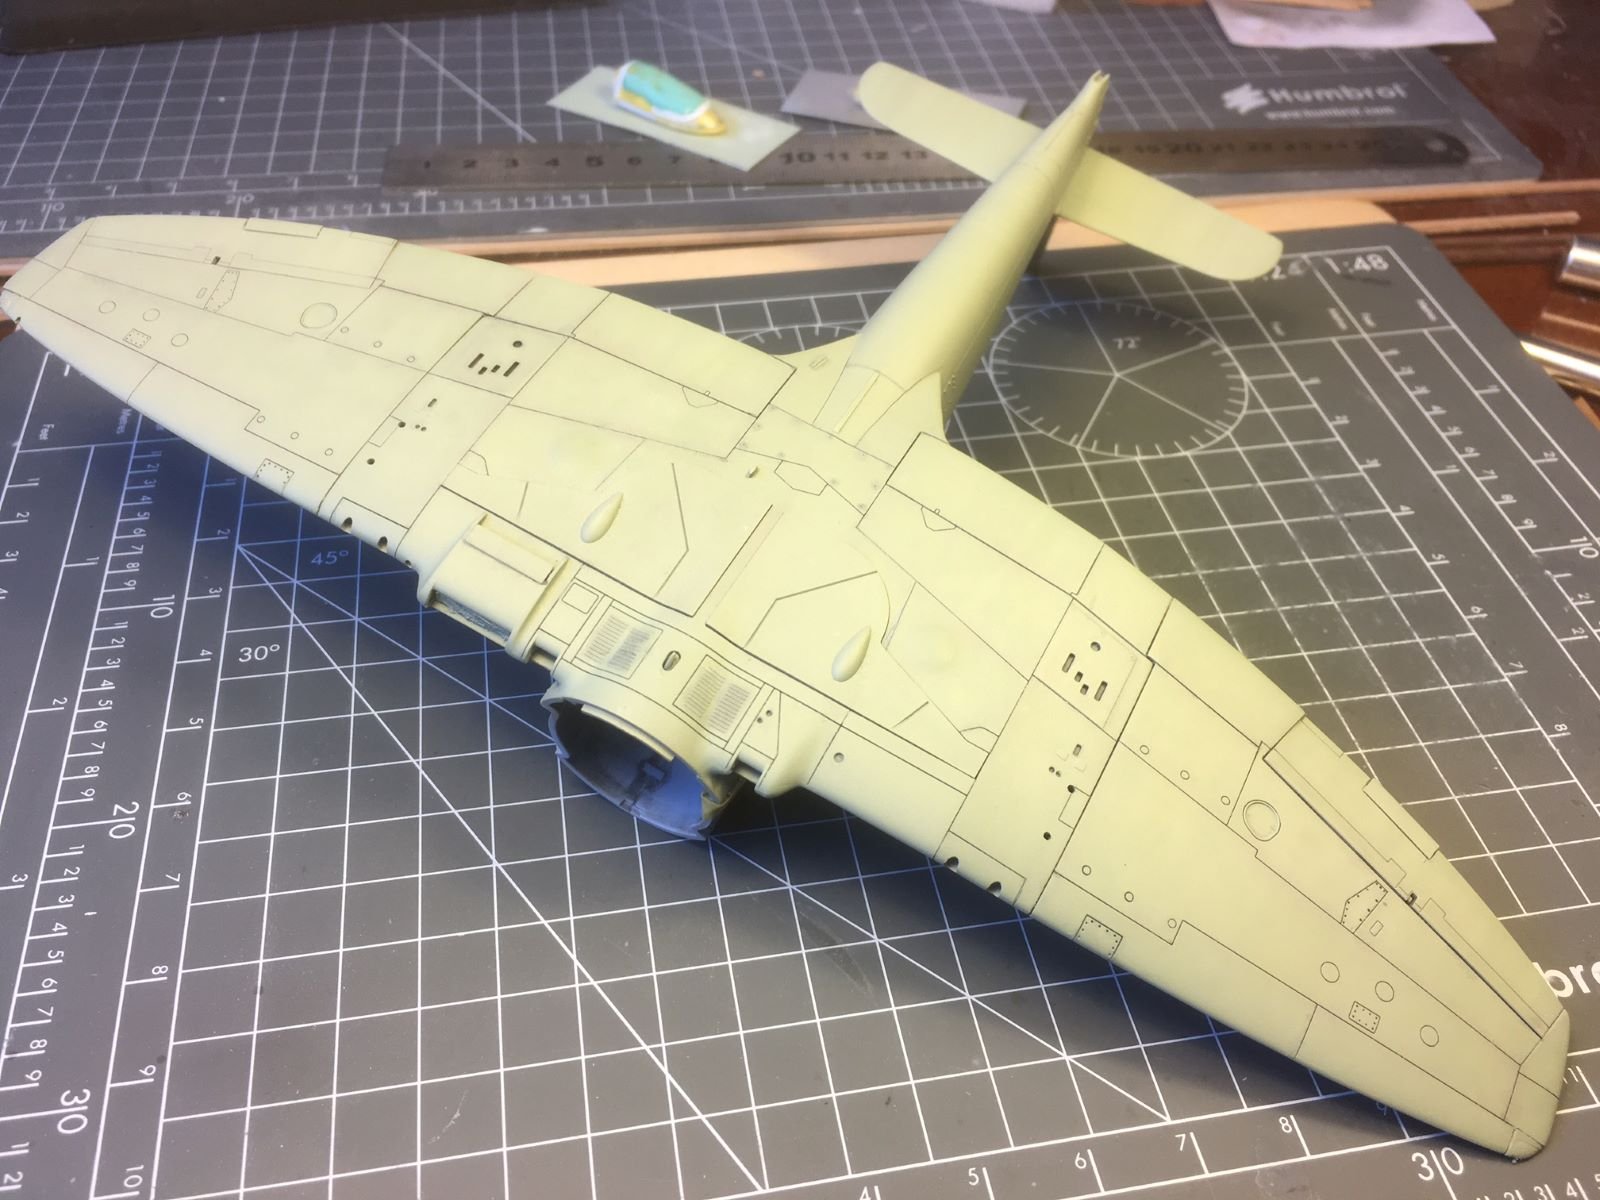
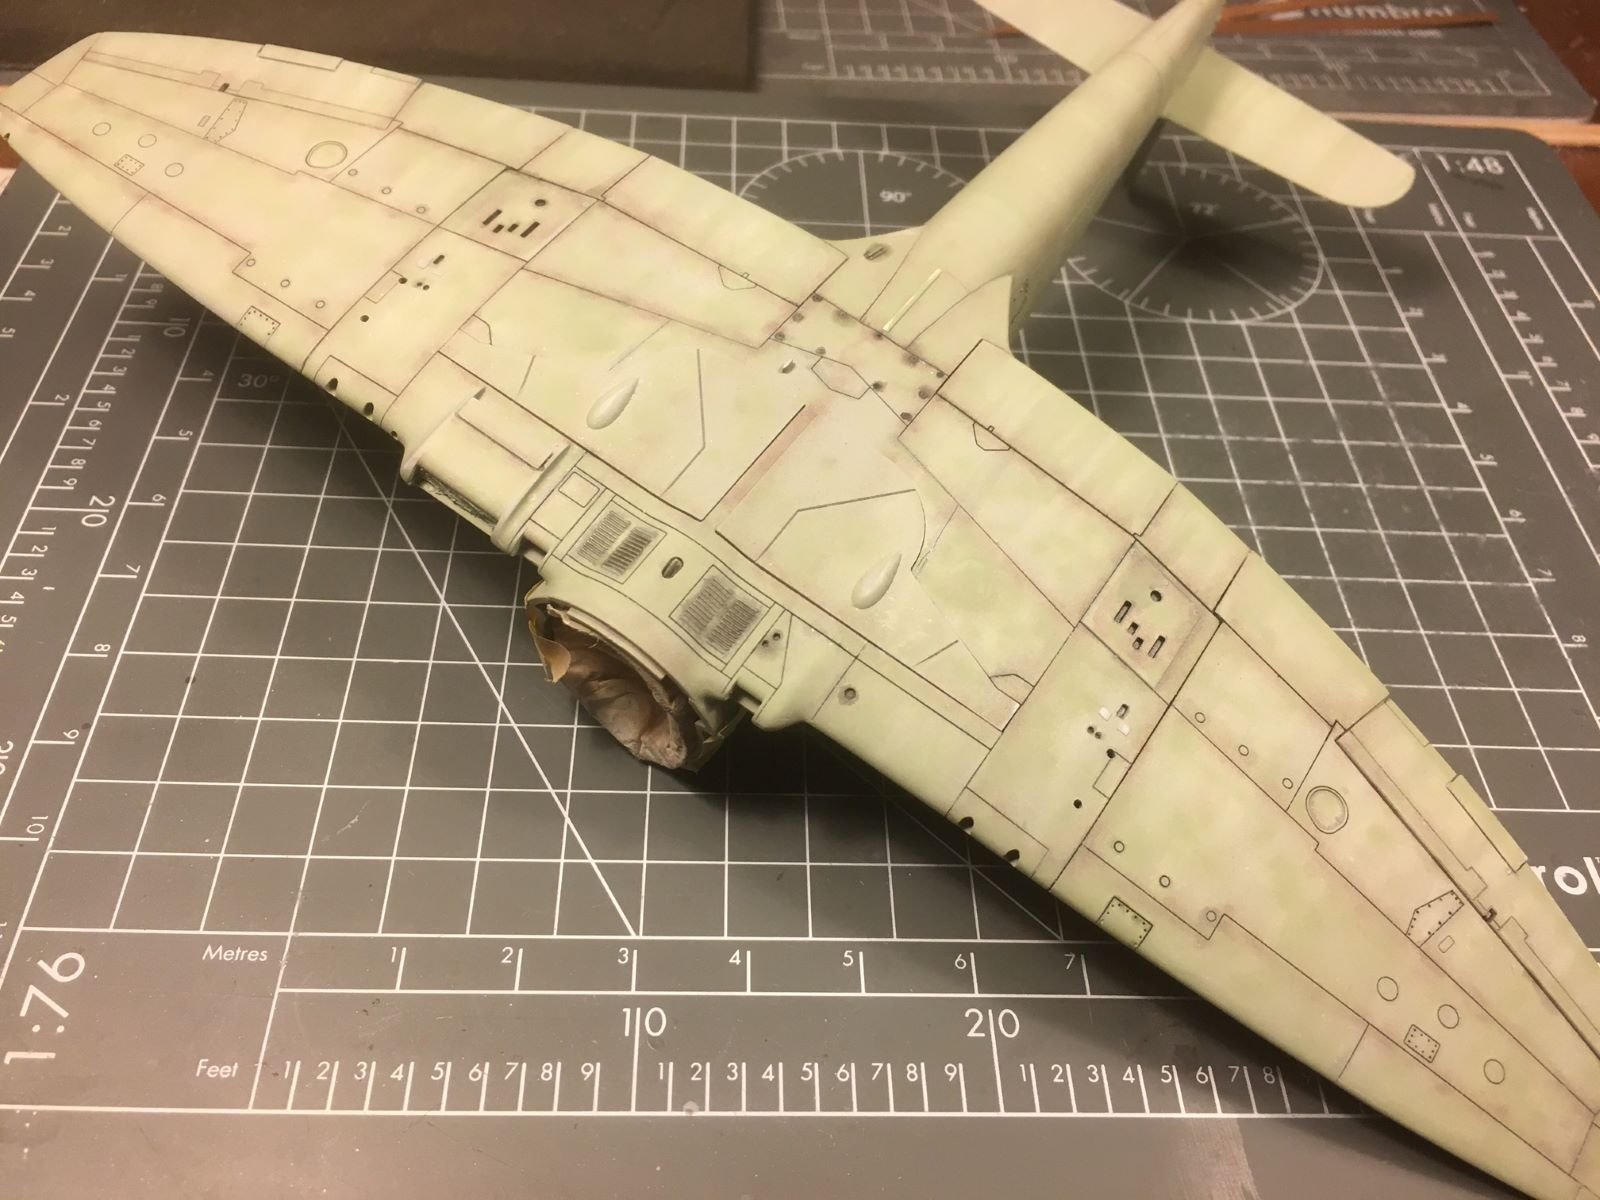
Dear all,
I am back at the workbench with my Hawker Seafury. In the last post, I finished applying the primer to the model. In preparation of the Navy livery, I wanted to give some pre-shadow texture to the surfaces that will be painted with Sky color. At the same time, having selected a display airplane, the effect should be rather subtile. I decided to go with a red brown which has a value lower than black and, being kind of complementary to the greenish Sky color, should result in a shadowy effect, in theory. Let's see what it will be in practice. After the pre-shadowing, I added also some white random mottling. After that, I wet sadanded everything getting an extremely smooth surface and some additional variation of the colors.

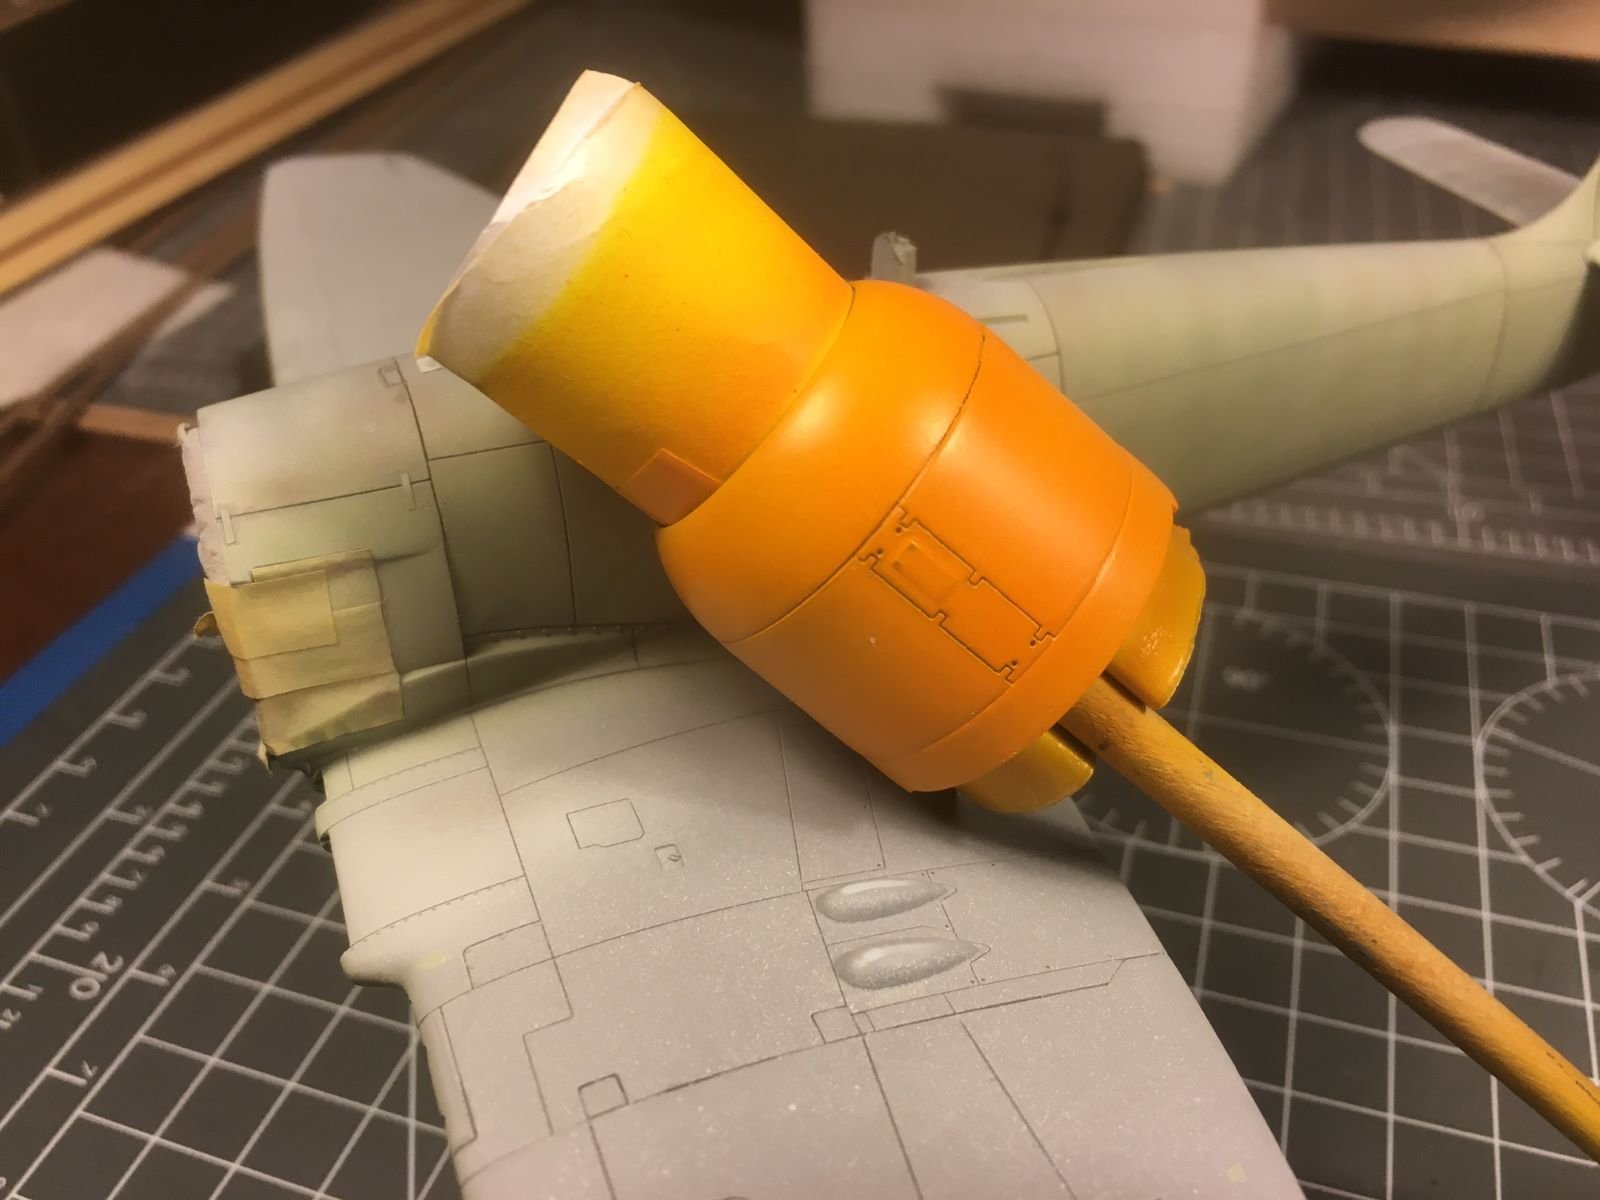
I ended with applying the Tamiya panel line along the panel junctions. The engine cowling and the spinner got instead a layer of yellow and they were also wet sanded in preparation for the orange.
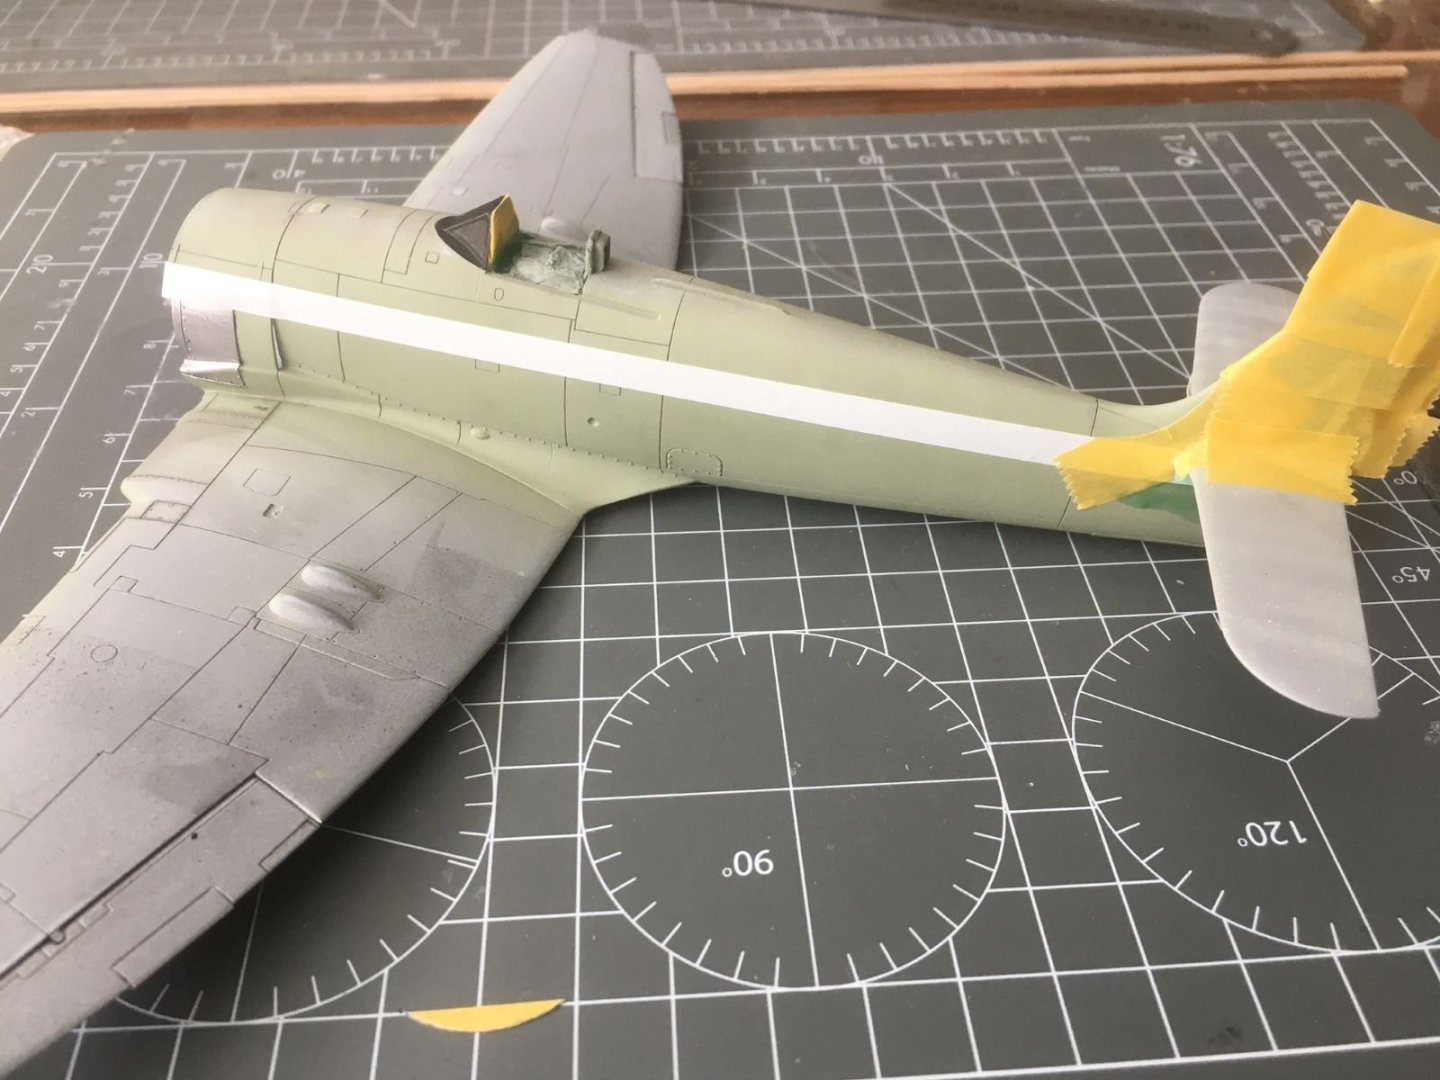
This is how the sides of the fuselage look now;
The portions on the side that are covered by tape are the areas of the steel shrouds in the vicinity of the exhausts. The model is now ready to receive the Sky paint on its undersurfaces and on the sides. Mind that, being the subject airplane supposedly well maintained, most of the texture should almost disappear. I am curious to see the final result.
That is all for now,
Best regards,
Dan.
-
-
That looks impressive. About your question about panel lines, I think that for a covering made of soft wood, pencil or ink drafted lines are the most realistic option. Anyway, she is impressive.
Best regards,
Dan.
-
Thank you guys, actually it is not me who climbs on the roof, but I called a company to do that. Fortunately, we are now blessed with a very nice weather that in few days has melted the snow making it possible to work outside. I will have to refurbish the inner side of the rooms which have been marred by the leaks. Actually, it is thanks to my wife who was the first one to realise the problem while I was at work and moved away models and materials form the area were the water was dripping. And thanks for your messages of sympathy anyway 🙂 👍.
Cheers,
Dan.
-
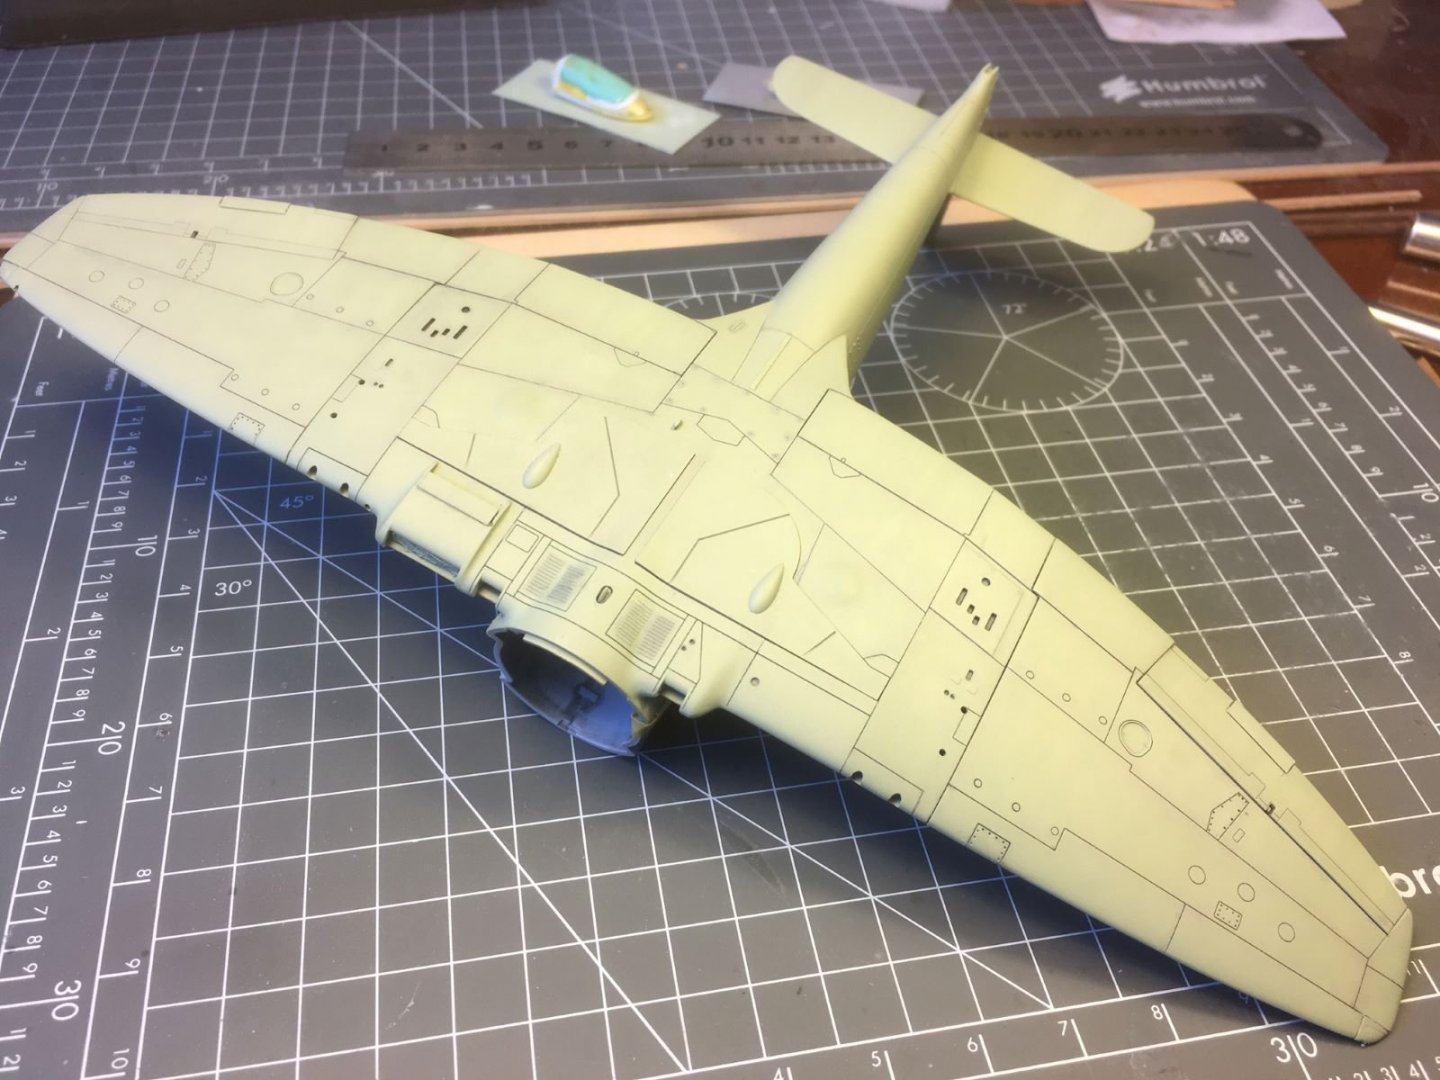
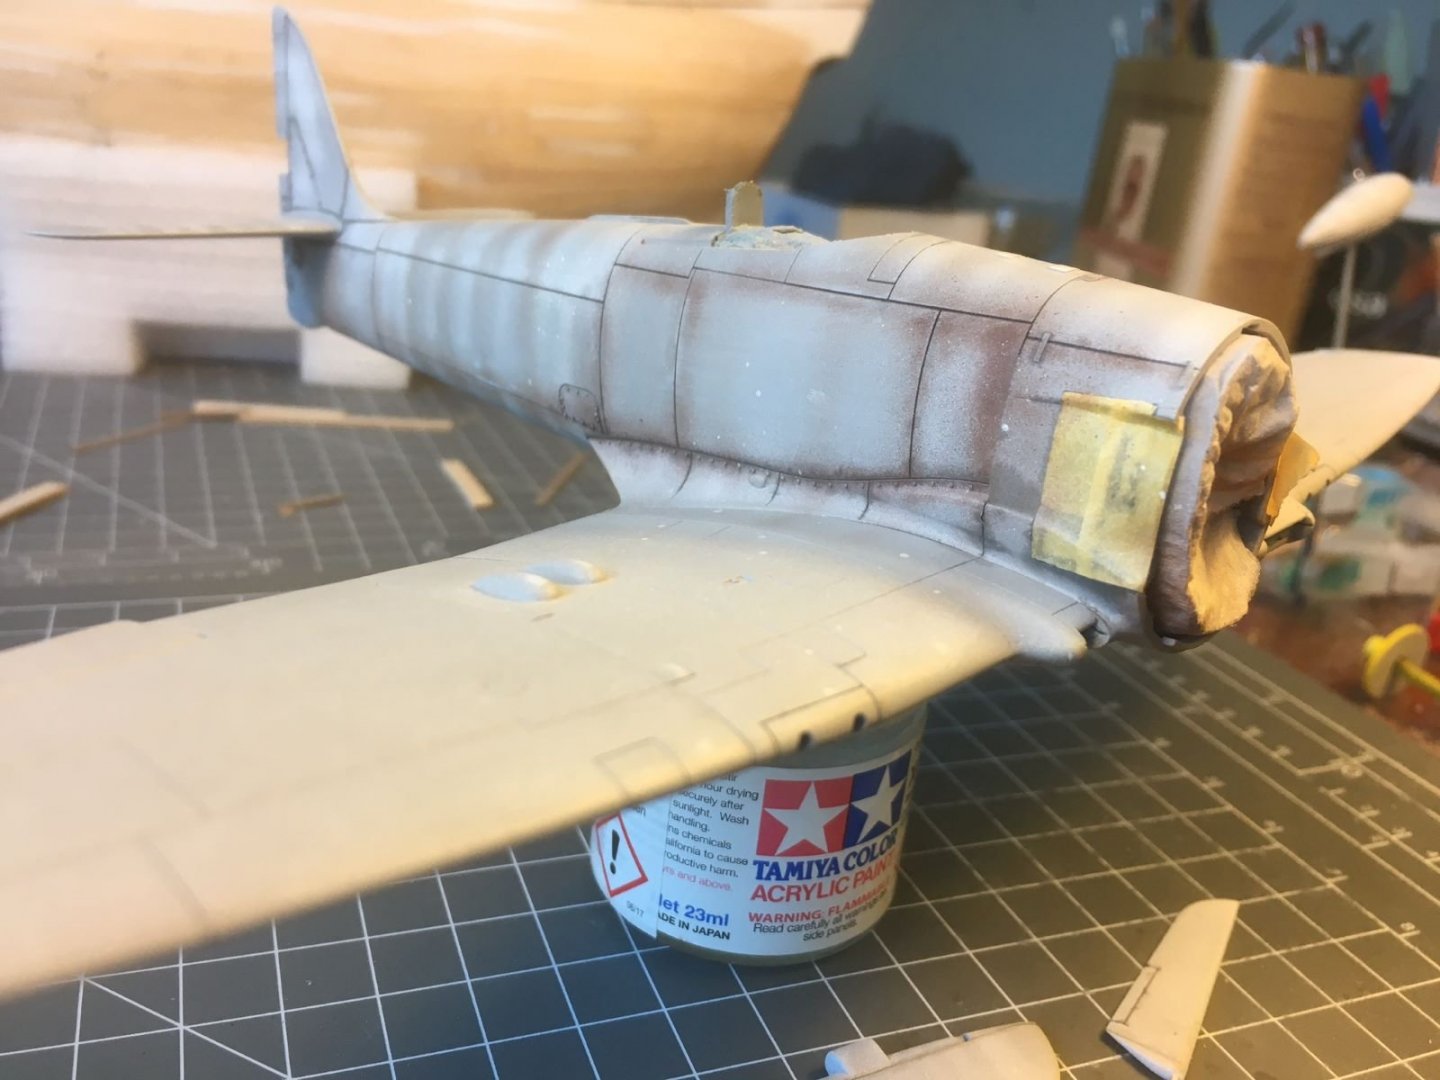
Hi, I am going slowly on this, I work in the rooms under the roof of my house where I found several leaks after the snow that we had over here. Hence, no big progress to show. Nevertheless, this is what I have done so far. I sprayed the entire model with Mr Surfacer 1000 as a primer. Usually, I do not use primers, but, in this case, I used it for muting a bit the prominents surface details.
resiz.thumb.JPG.d33c87945edf9876232fab4bd6e00e05.JPG)
With its levelling thinner, the primer provided a nice and smooth surface, but probably it did not fill much the panel lines. In a normal application, this is a very good thing for a primer. I also sprayed a primer on the engine cowling and spinner. This time, being the cowling to be painted with an orange color, I used a white primer which provides a good backround color for the orange. I used the white Tamiya primer in a spray can which also provided a very nice smooth finish.
Afterwords, I used the brown Tamiya accent liner to highlight the junctions of the panels.
I had to stop for now, I will show more as soon as I have finished with the repair of the roof.
Best regards,
Dan.
-
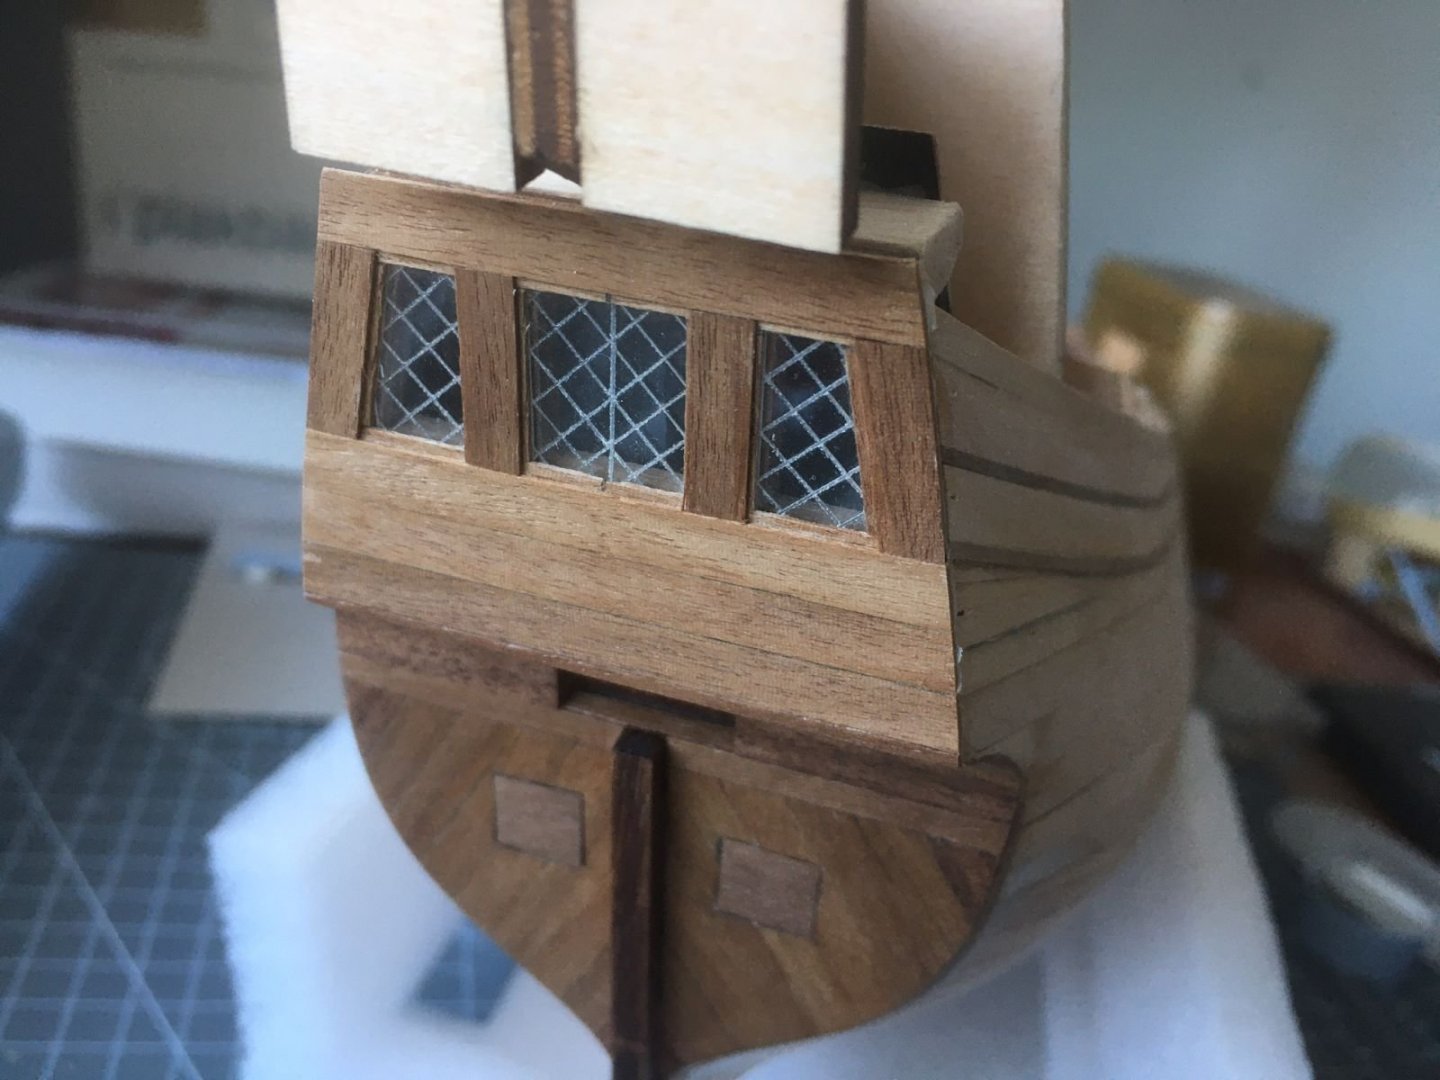
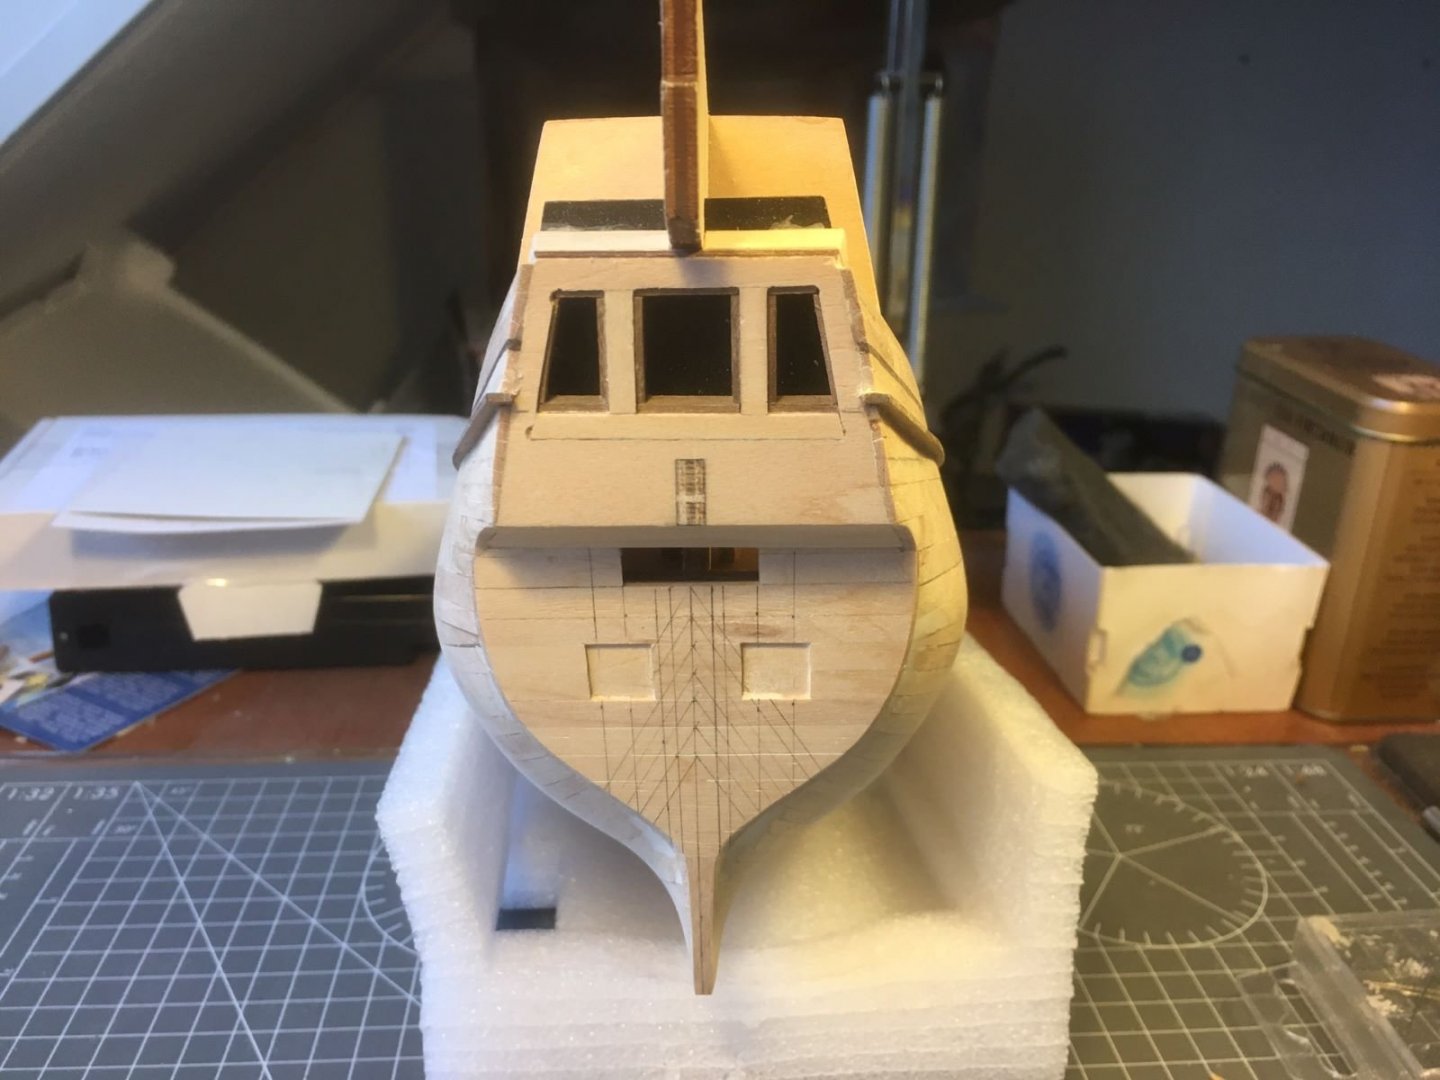
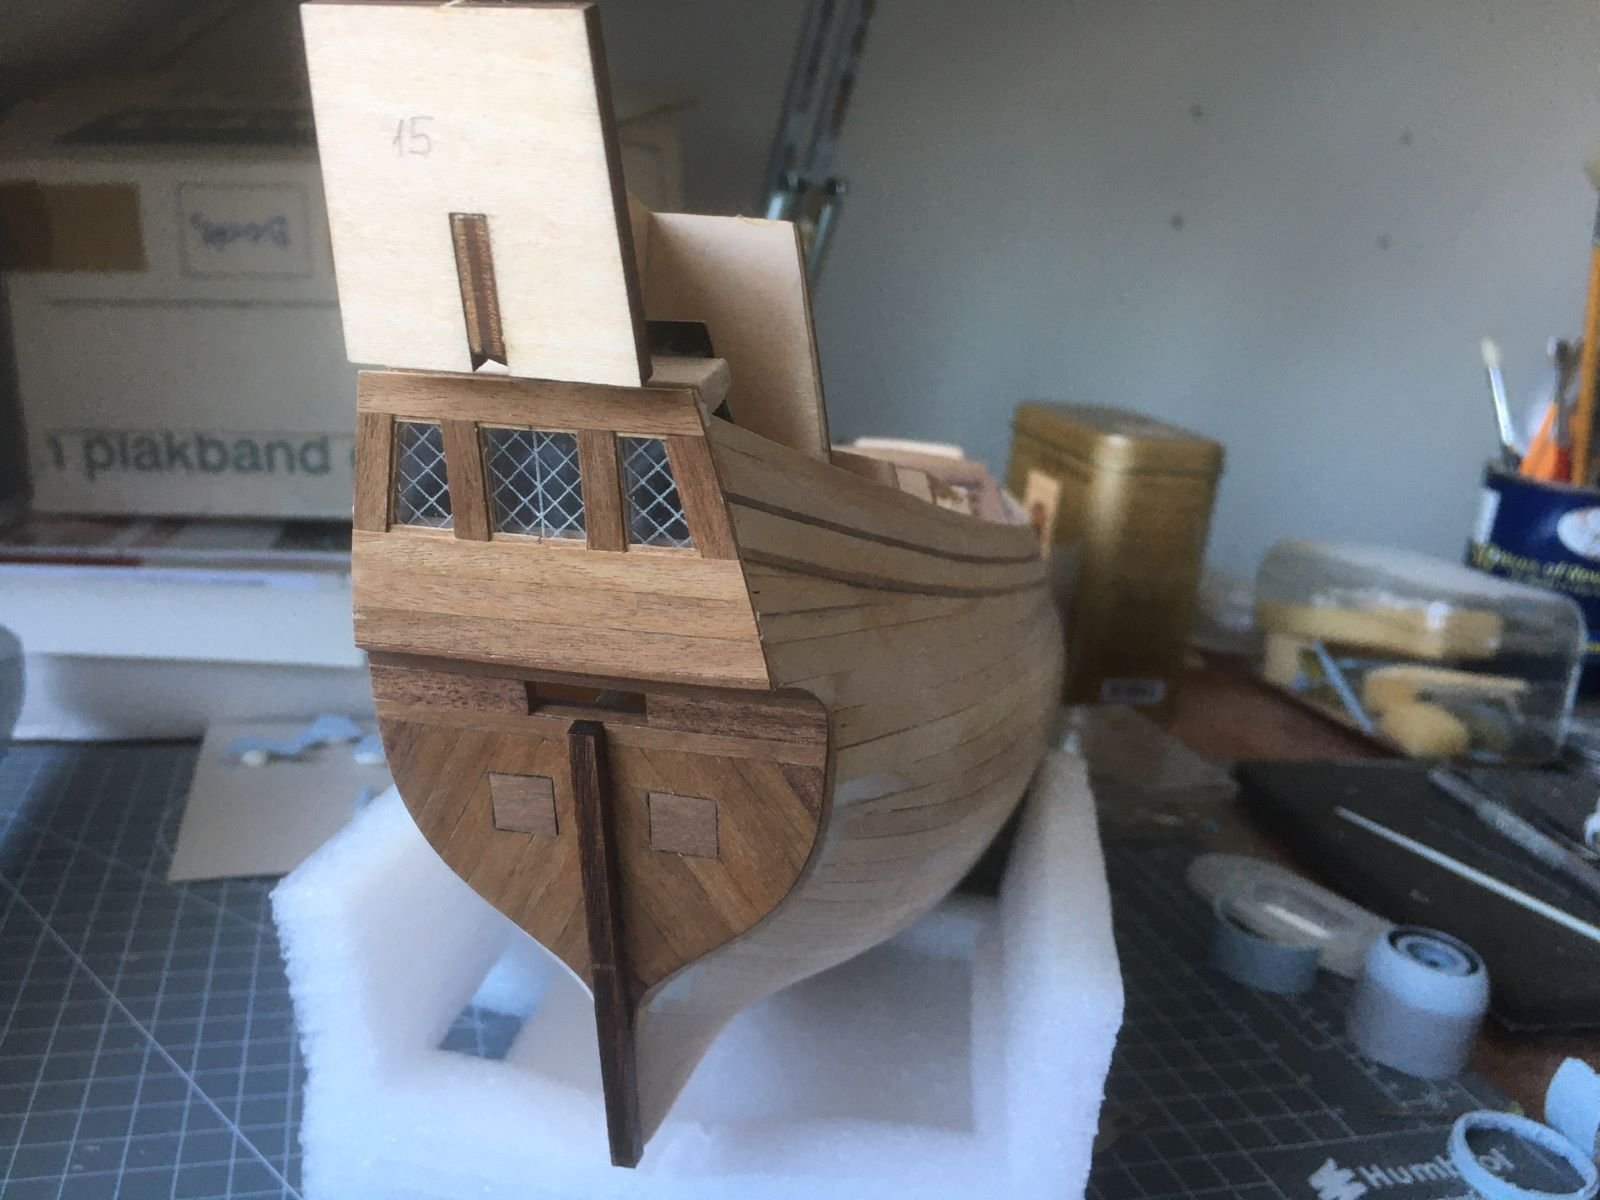
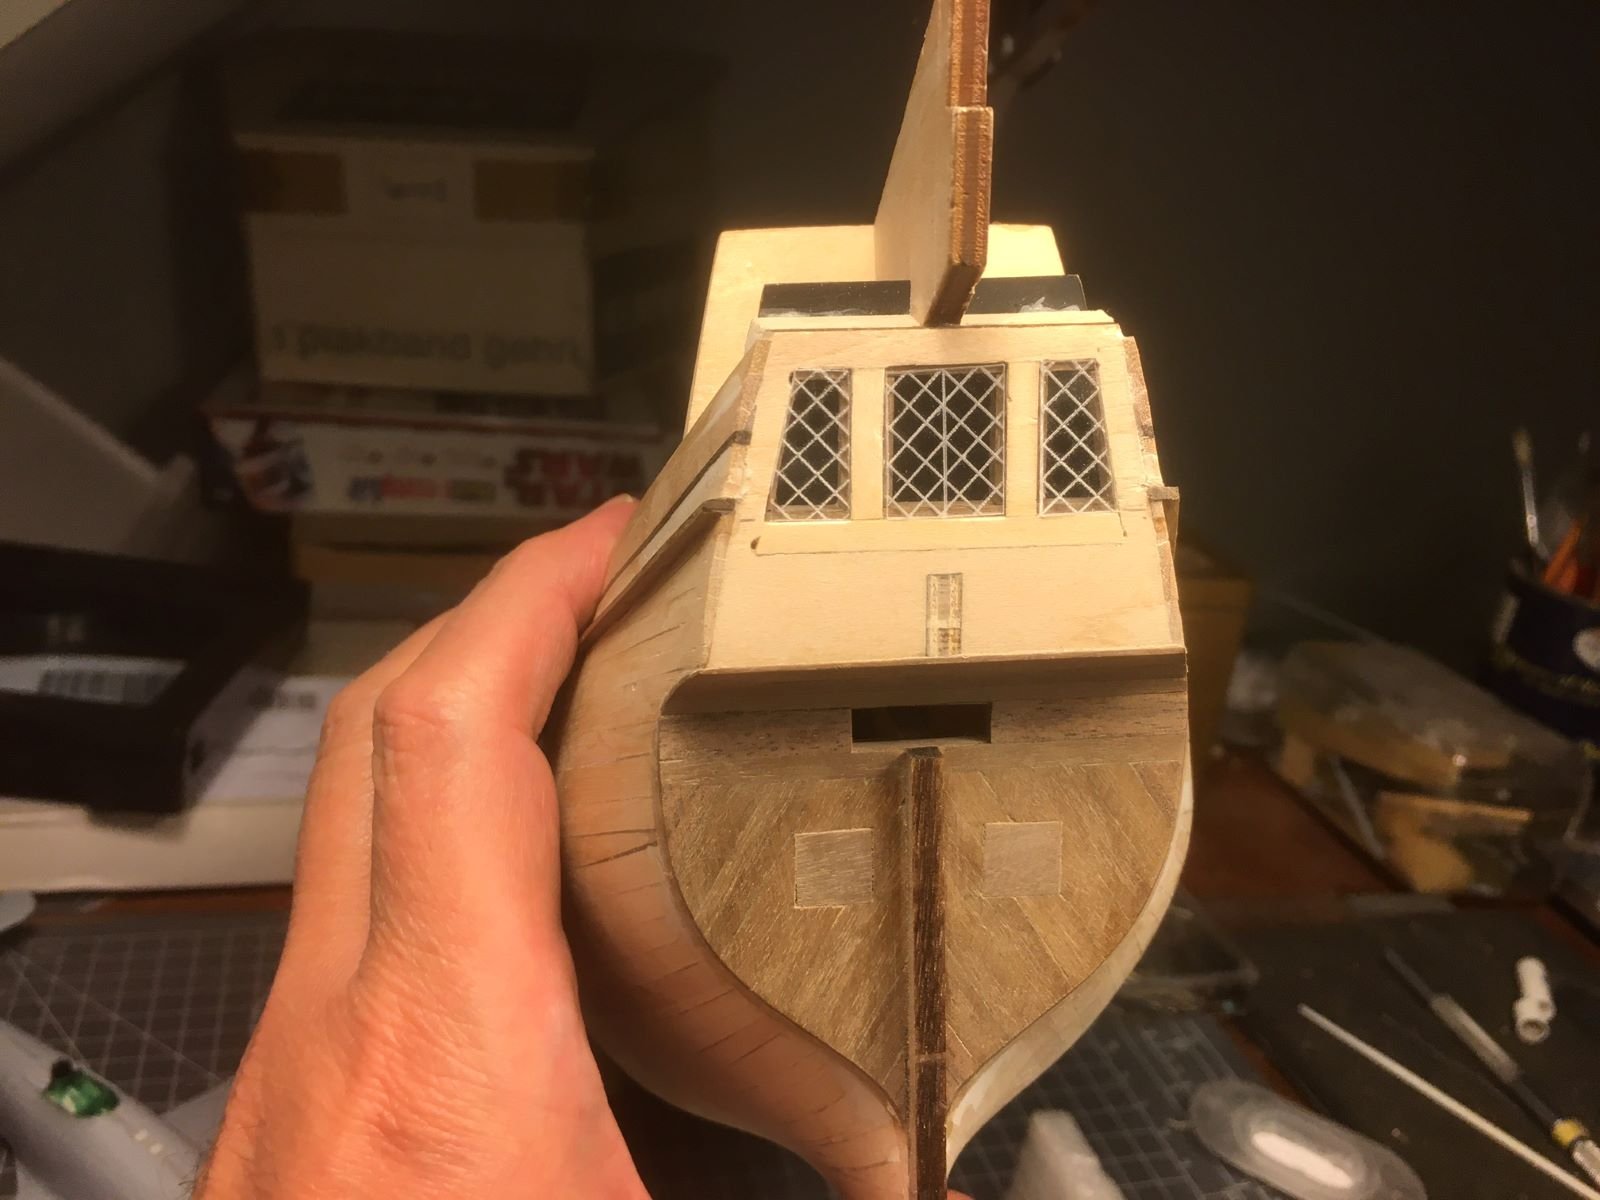
I have completed the windows framing and planking:

I removed the small wales along the hull because they were not fully symmetric on the two sides and with the windows frames finished, this was too evident. I am learning through my mistakes, but it is ok. Now, I would like to join that wales with an horizontal element placed just below the windows.
Best regards,
Dan.
- yvesvidal, Baker, GrandpaPhil and 2 others
-
5
-
Welcome Robin, wish you good luck with your projects!
Dan.
- Keith Black and mtaylor
-
2
-
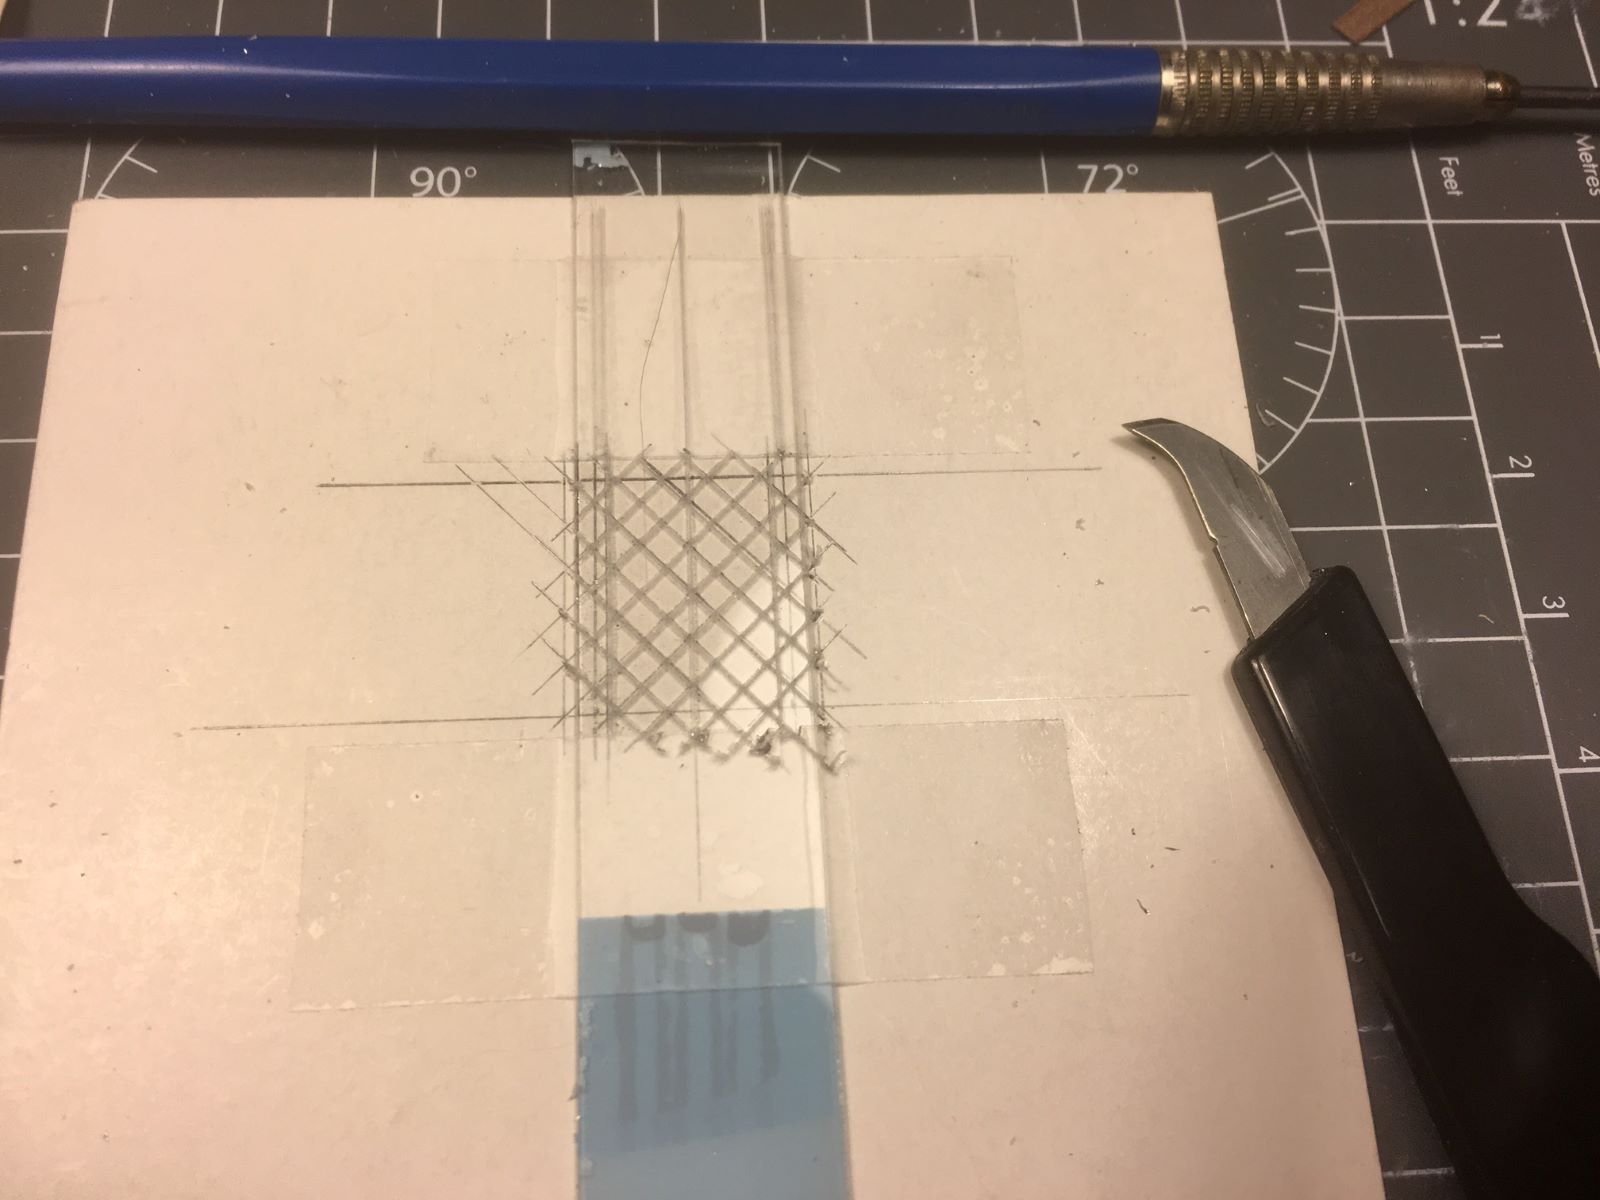
In the past days, I tried few methods for making the glazing of the windows on the transom. I picked some transparent styrene sheets 0.5 mm thick from my plastic assortment. With my trusty old drawing tools (some pieces date back more than 35 years), I traced some grids until I found the right size that looked good in the small scale of the model and was at the same time reasonably doable.
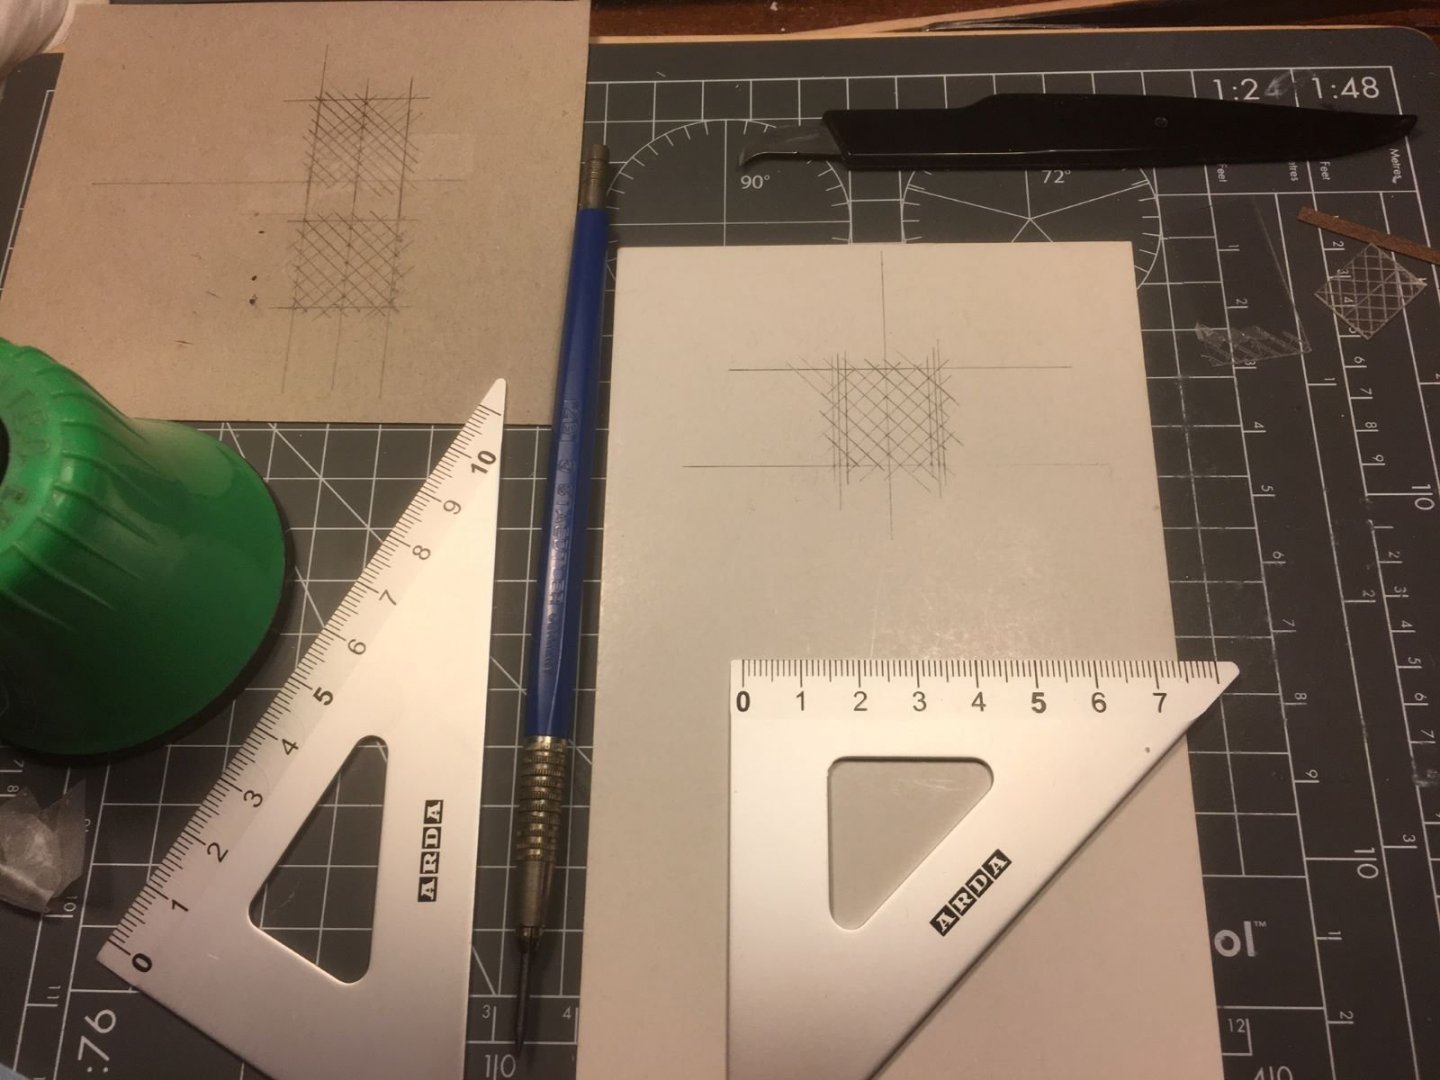
Once found the good size, I taped the transparent sheet over the grid and scribed the lines on it with the Trumpeter tool in the picture.

Once done, I tried few methods to accent the lines, but eventually I found that the scribed grooves alone looked good enough for me in this scale.
Now I have to complete the planking and see how to frame the windows. I was happy that at the end the making of the glazing was not that difficult.
That's all for now,
kind regards,
Dan.
-
Nice and clean build, Denis. Very carefully done. 🤩
Definetively I like the blue finish.
Kind regards,
Dan.
-
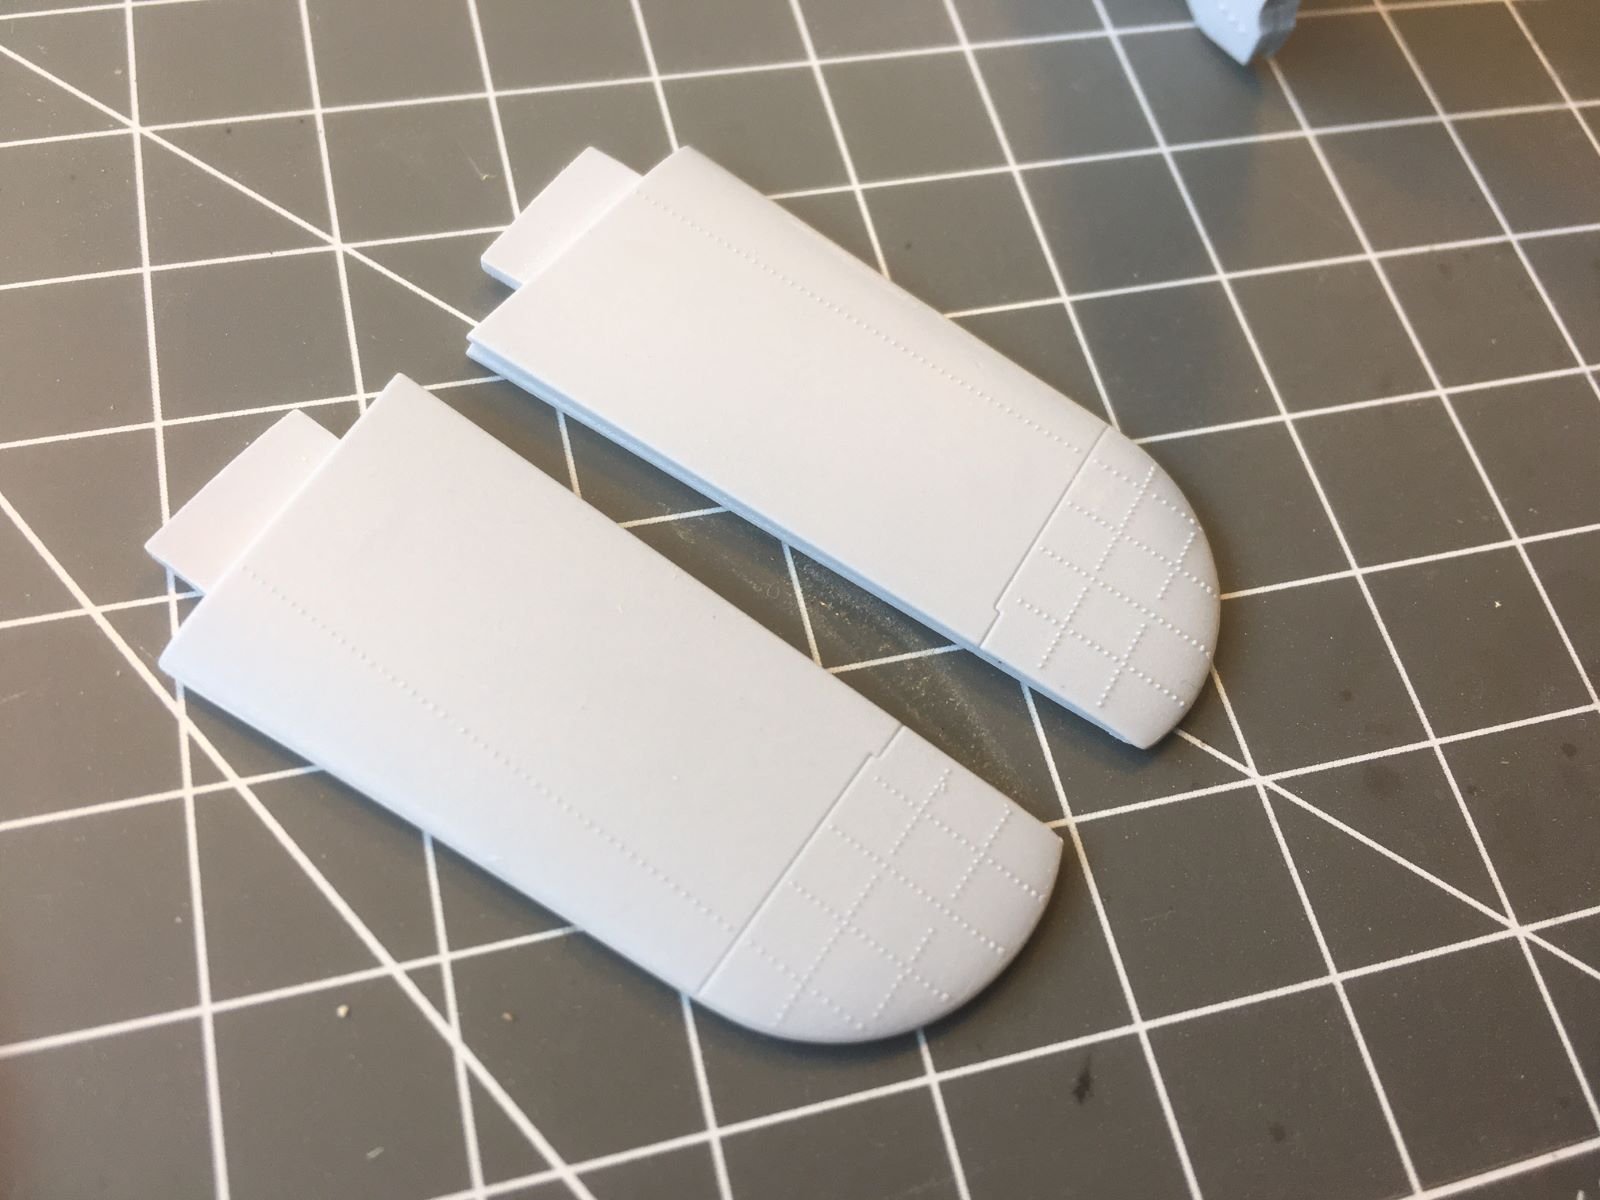
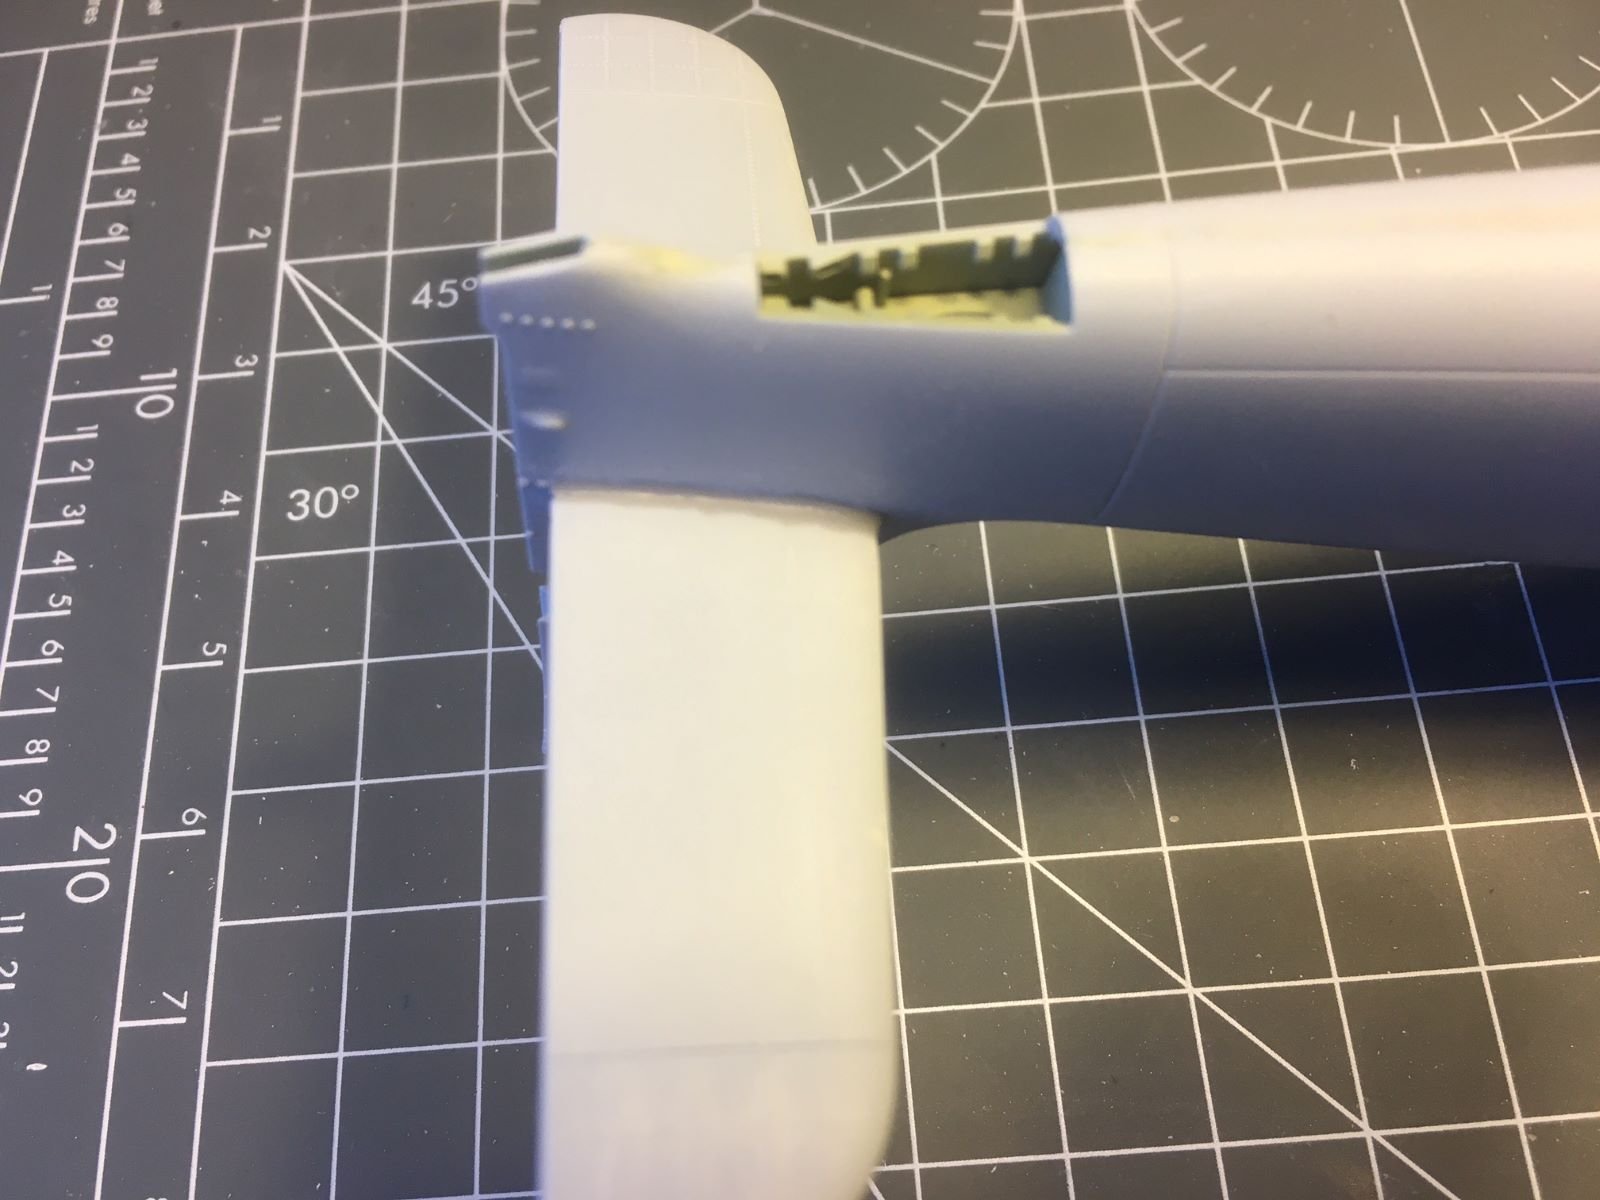
Dear all, assemblying of the main parts continues. These are the horizontal stabilizer surfaces where the riveting details are a bit heavy handed, recalling Airfix design from an older era. I sanded down these exagerated details.

The upper half wing panes are glued omitting any glue along the joint where the wing folds. This is made possible by the the nice way Airfix engineered the wing parts.
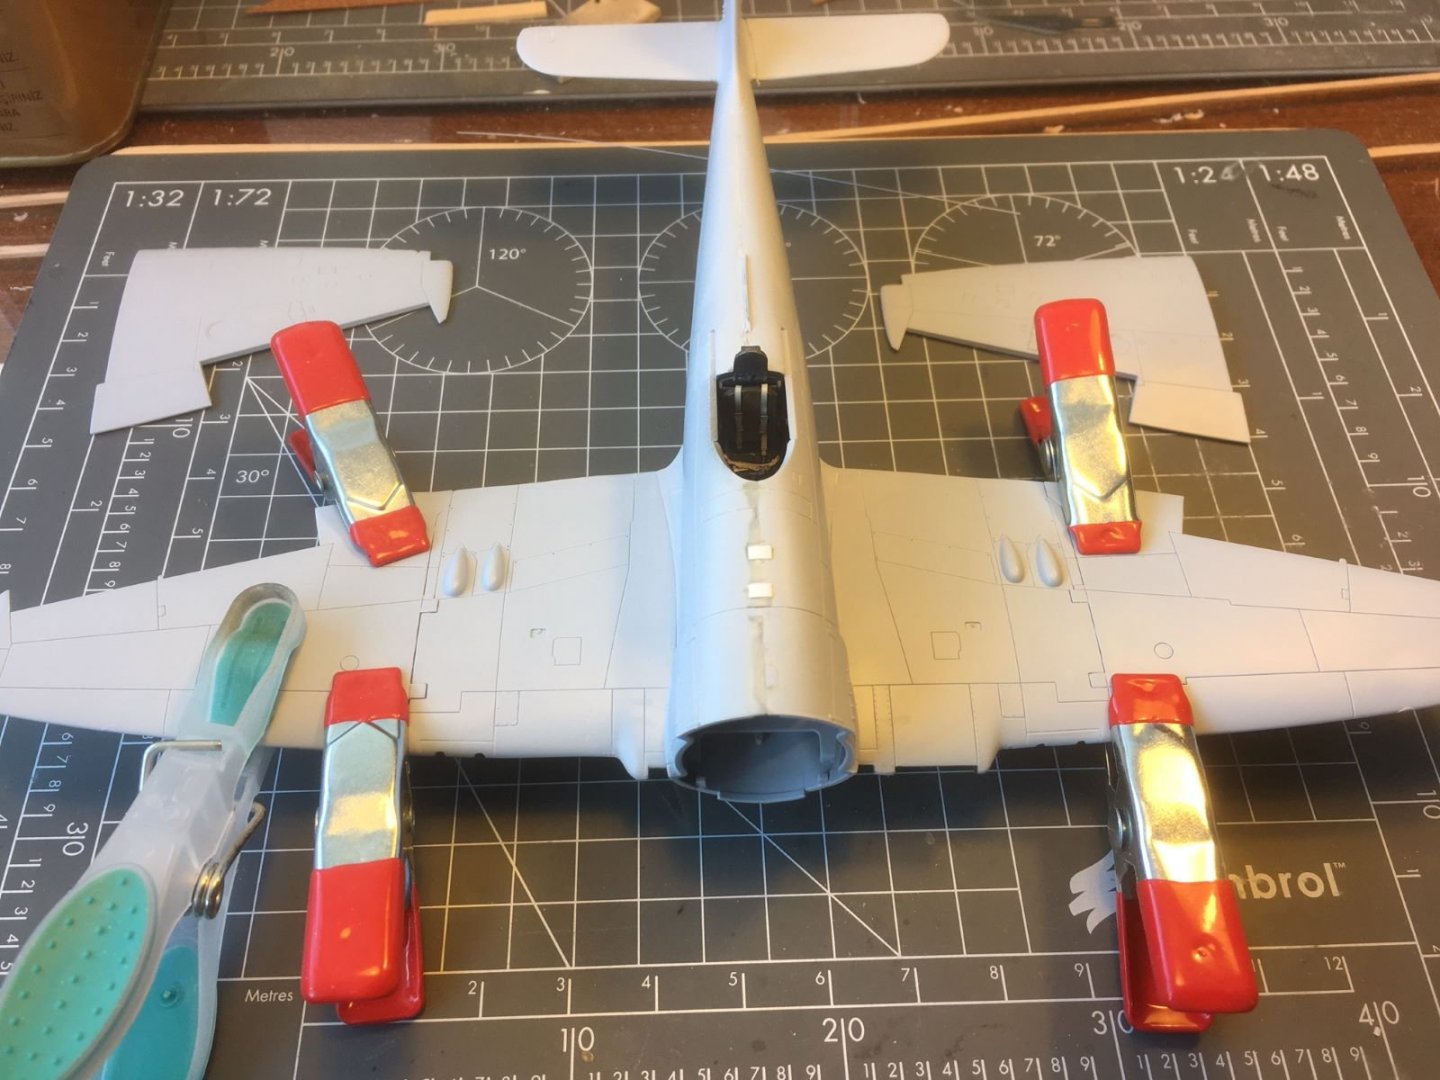
In fact, the wing panes can be glued to an internal support part:
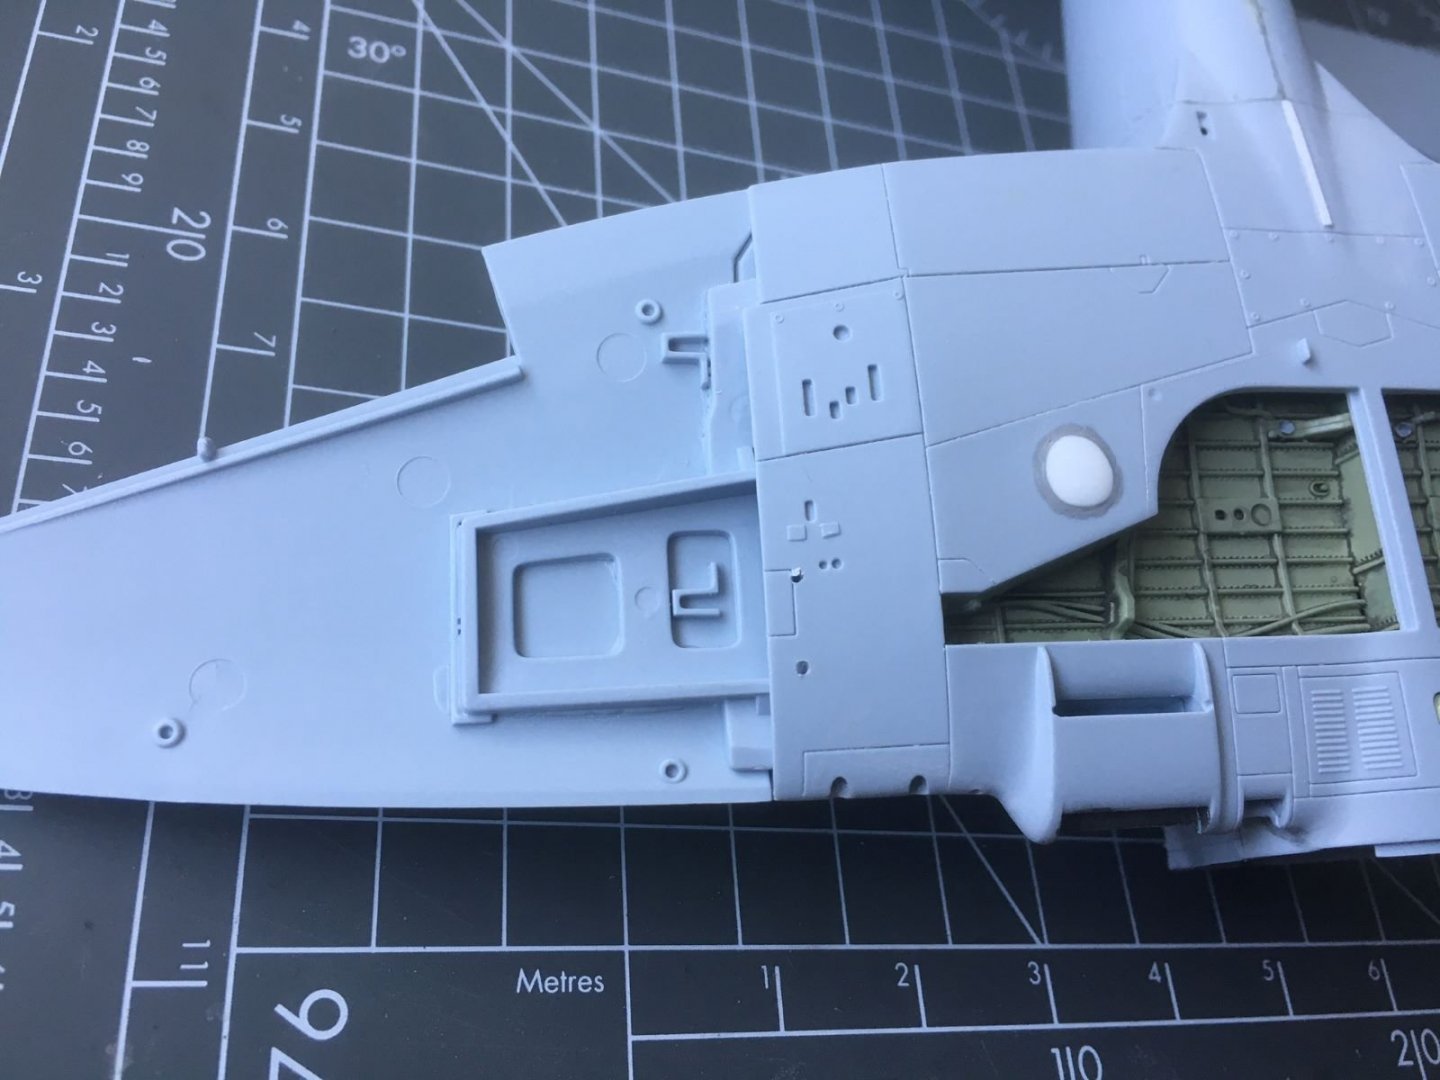
As it can be seen, the surface details are nice, but a bit overdone. I will try to tone them down when I will paint the model. For now, I restored and rescribed some of the details that were obliterated during the sanding and finishing of the joints:
Stabilizers needed filling of gaps with sprue wires and some Mr. Surfacer 500:

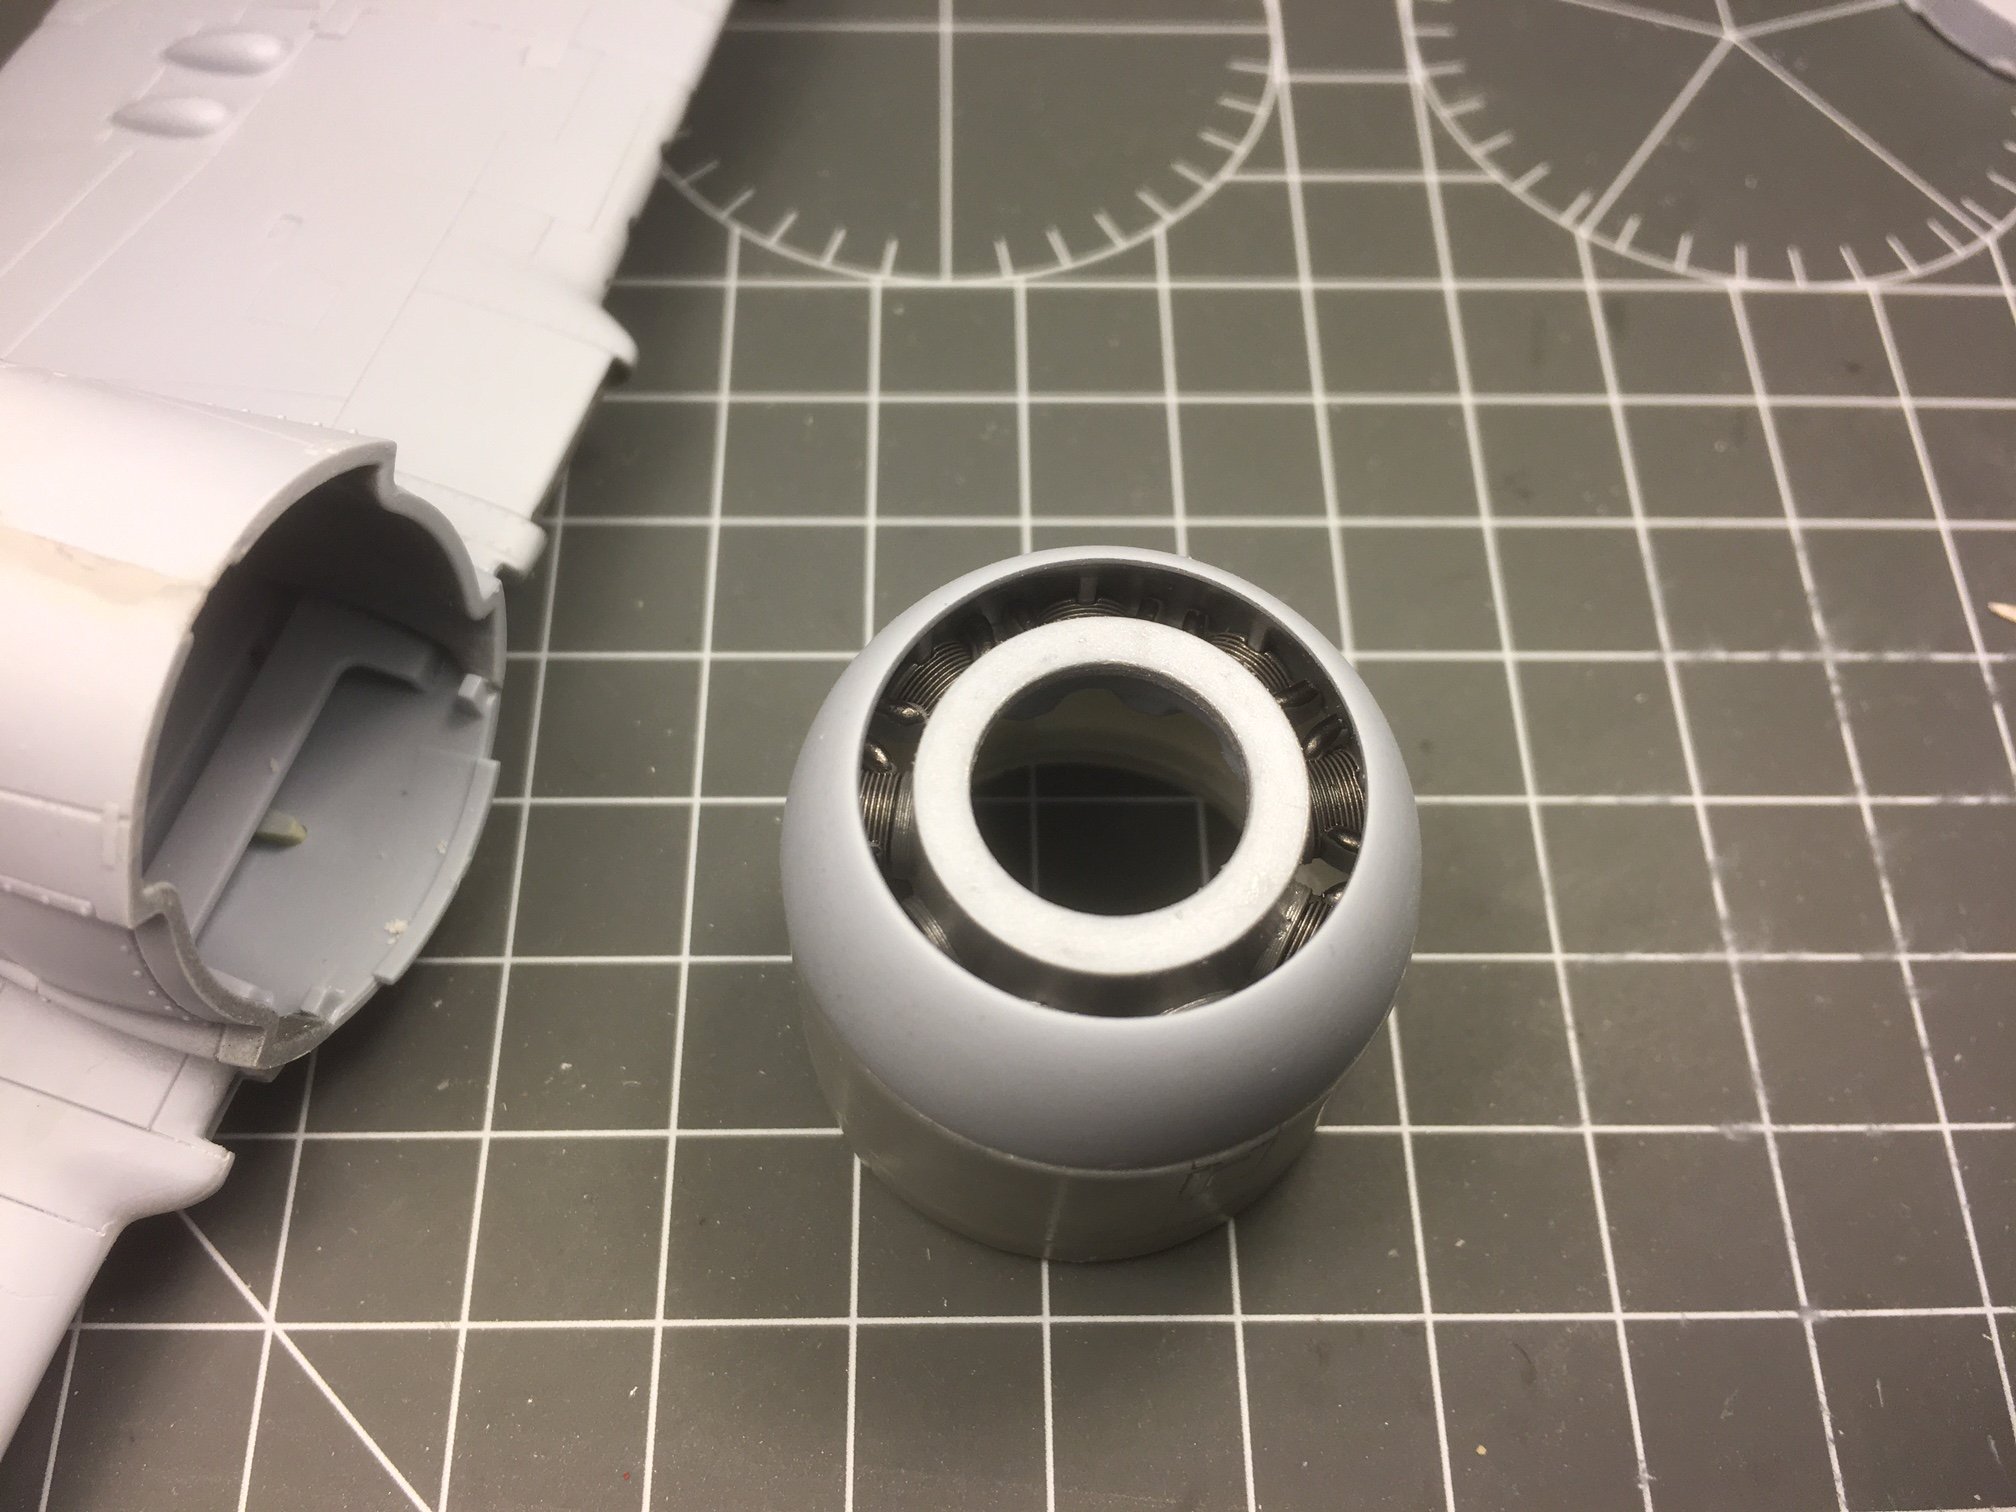
I started also with the cowling and the engine. The mighty 2500 hp Bristol Centaurus did not get any additional detailing because very little will be seen from the gap left by the carefully faired cowling and the large spinner.
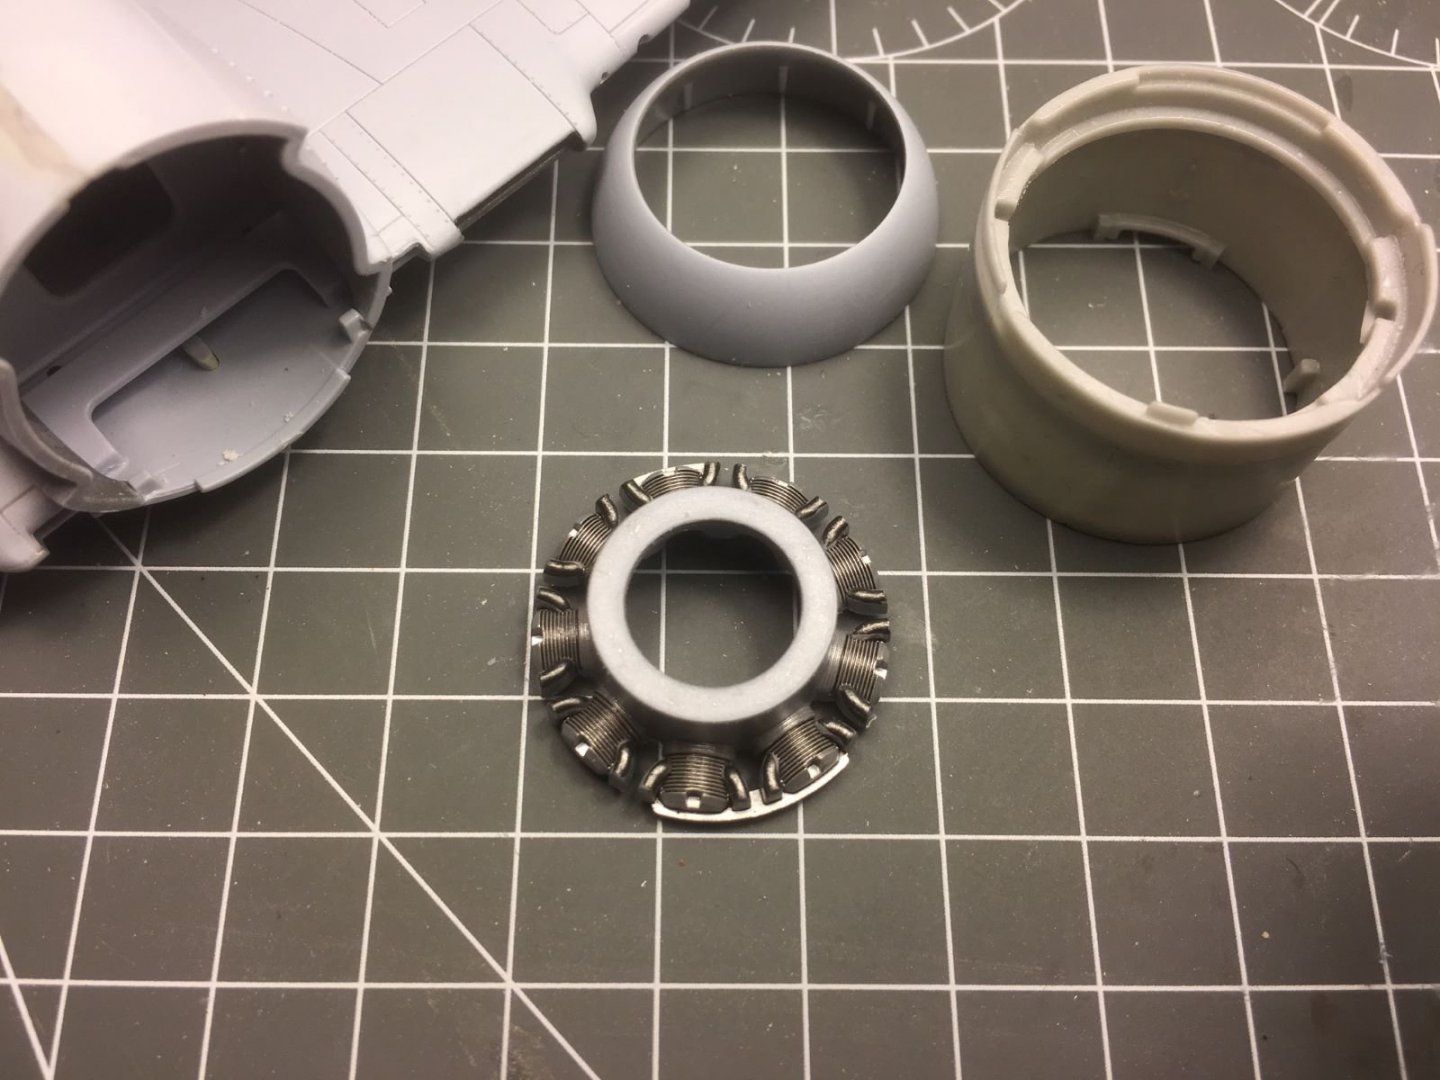
It just got painted with Vellejo matt aluminium followed by Tamiya panel liner to pick up the details of the finned cylinders. Once inside its fairing, not much will be seen:

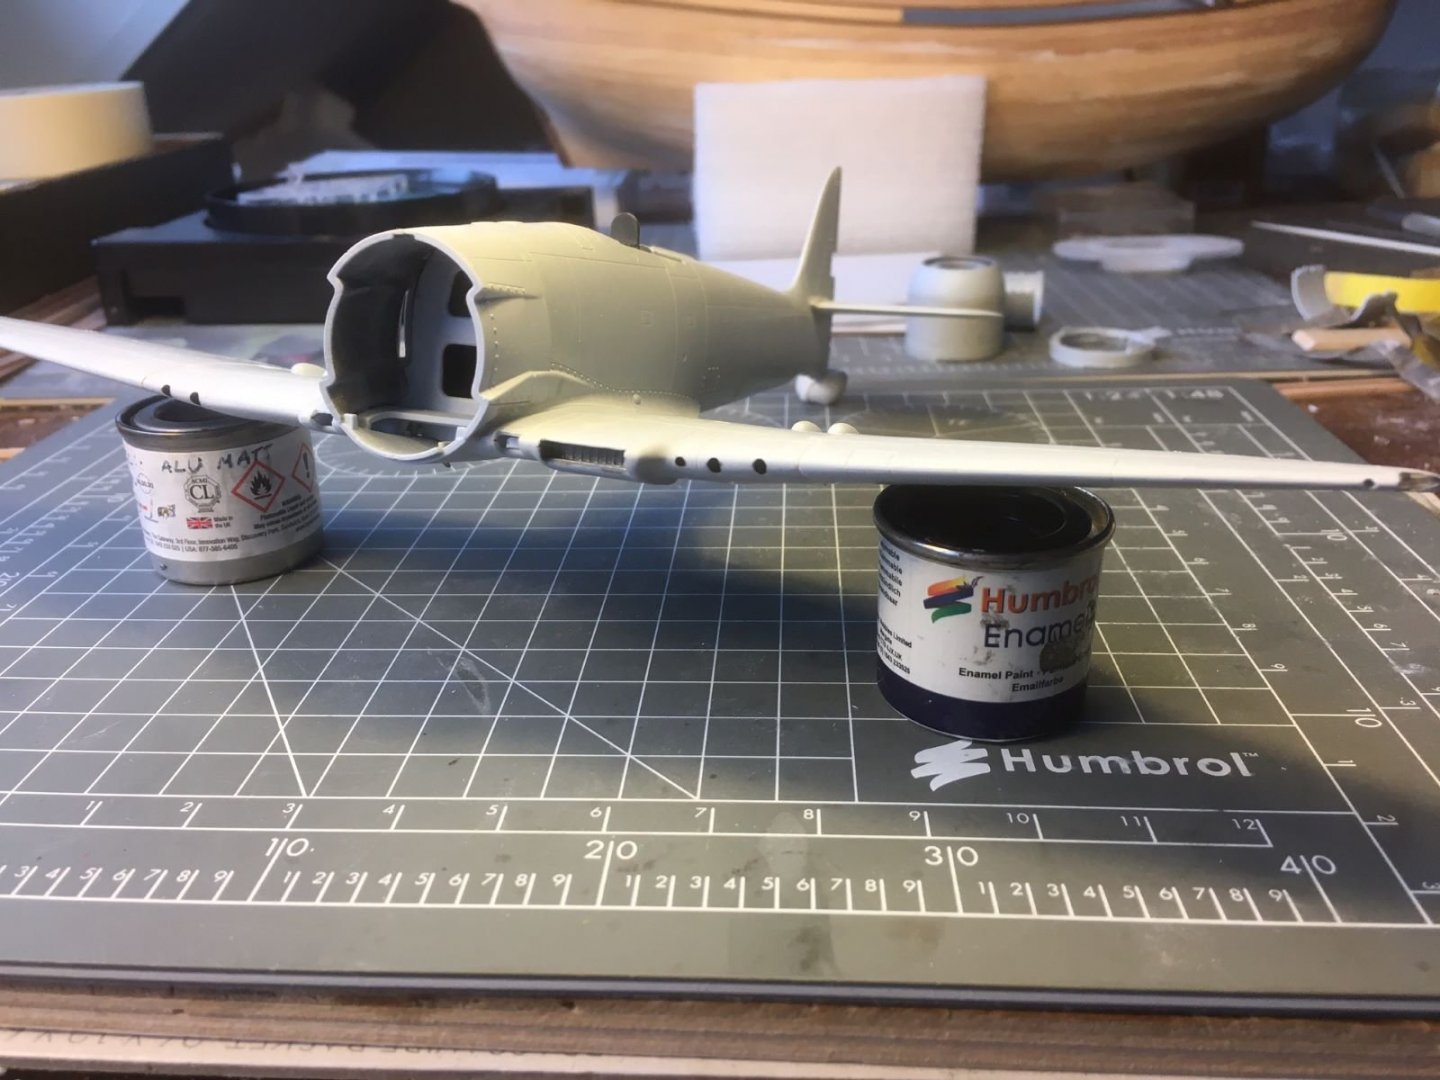
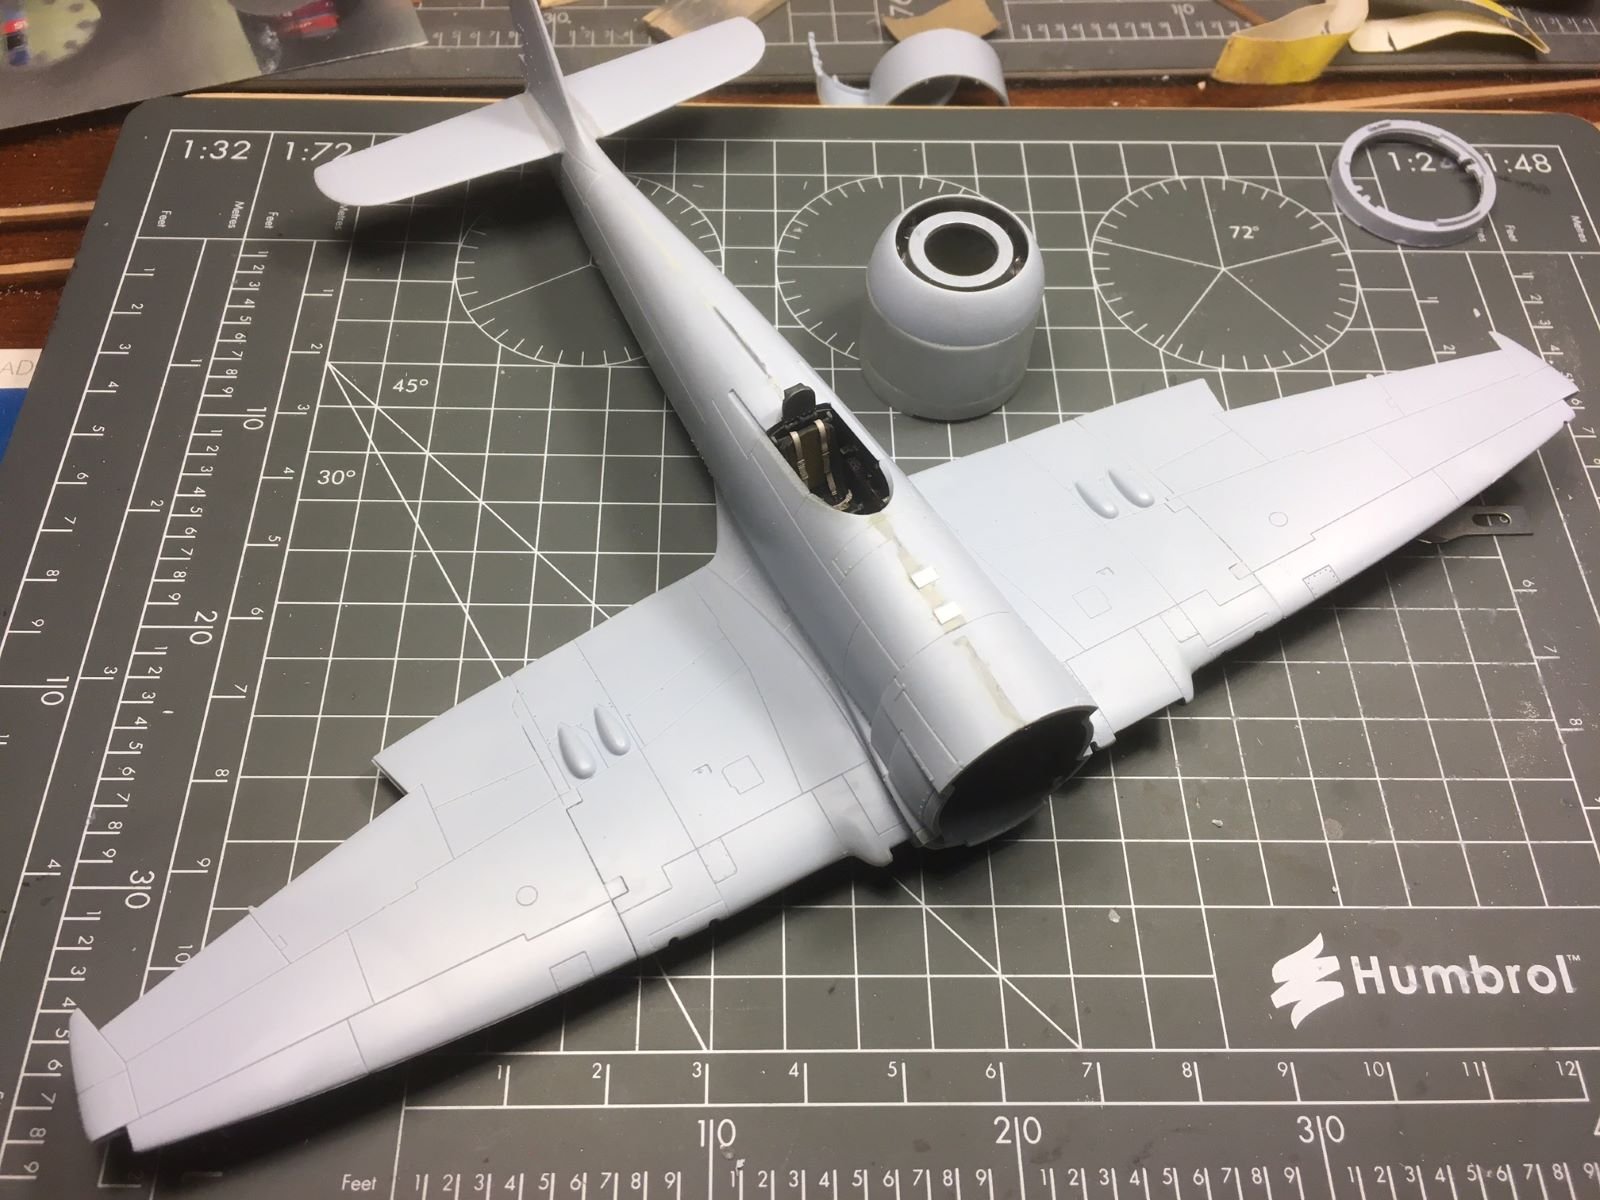
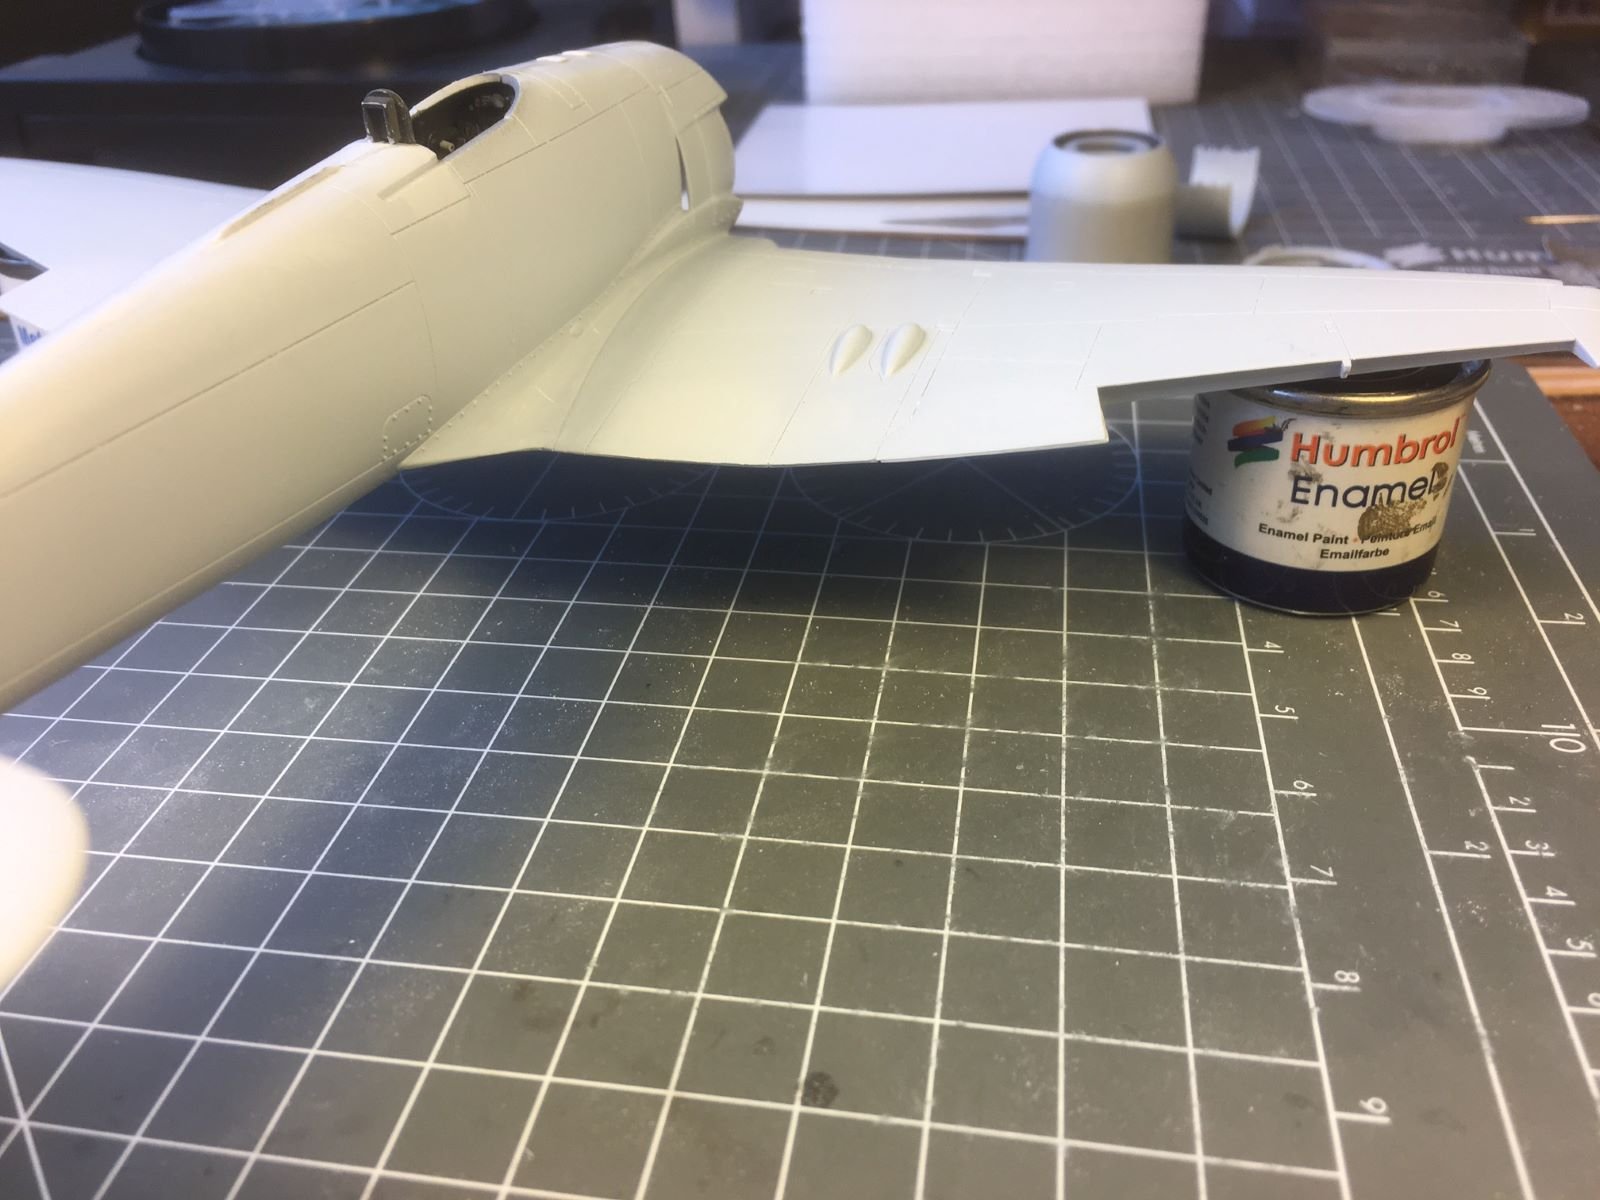
The main airframe is now completed showing the compact shape of the plane. The fuselage is almost etirely behind the envelope of the engine with the exception of the cockpit bubble which sits on top of a small 'hump'. The quasi-elliptical wing planform can also be noted now. The wing design was derived from the previous Hawker Tempest and was kept to make the plane more appealing to the RAF evaluators, who allegedly 'would not have bought anything that did not have an elliptical planform'.

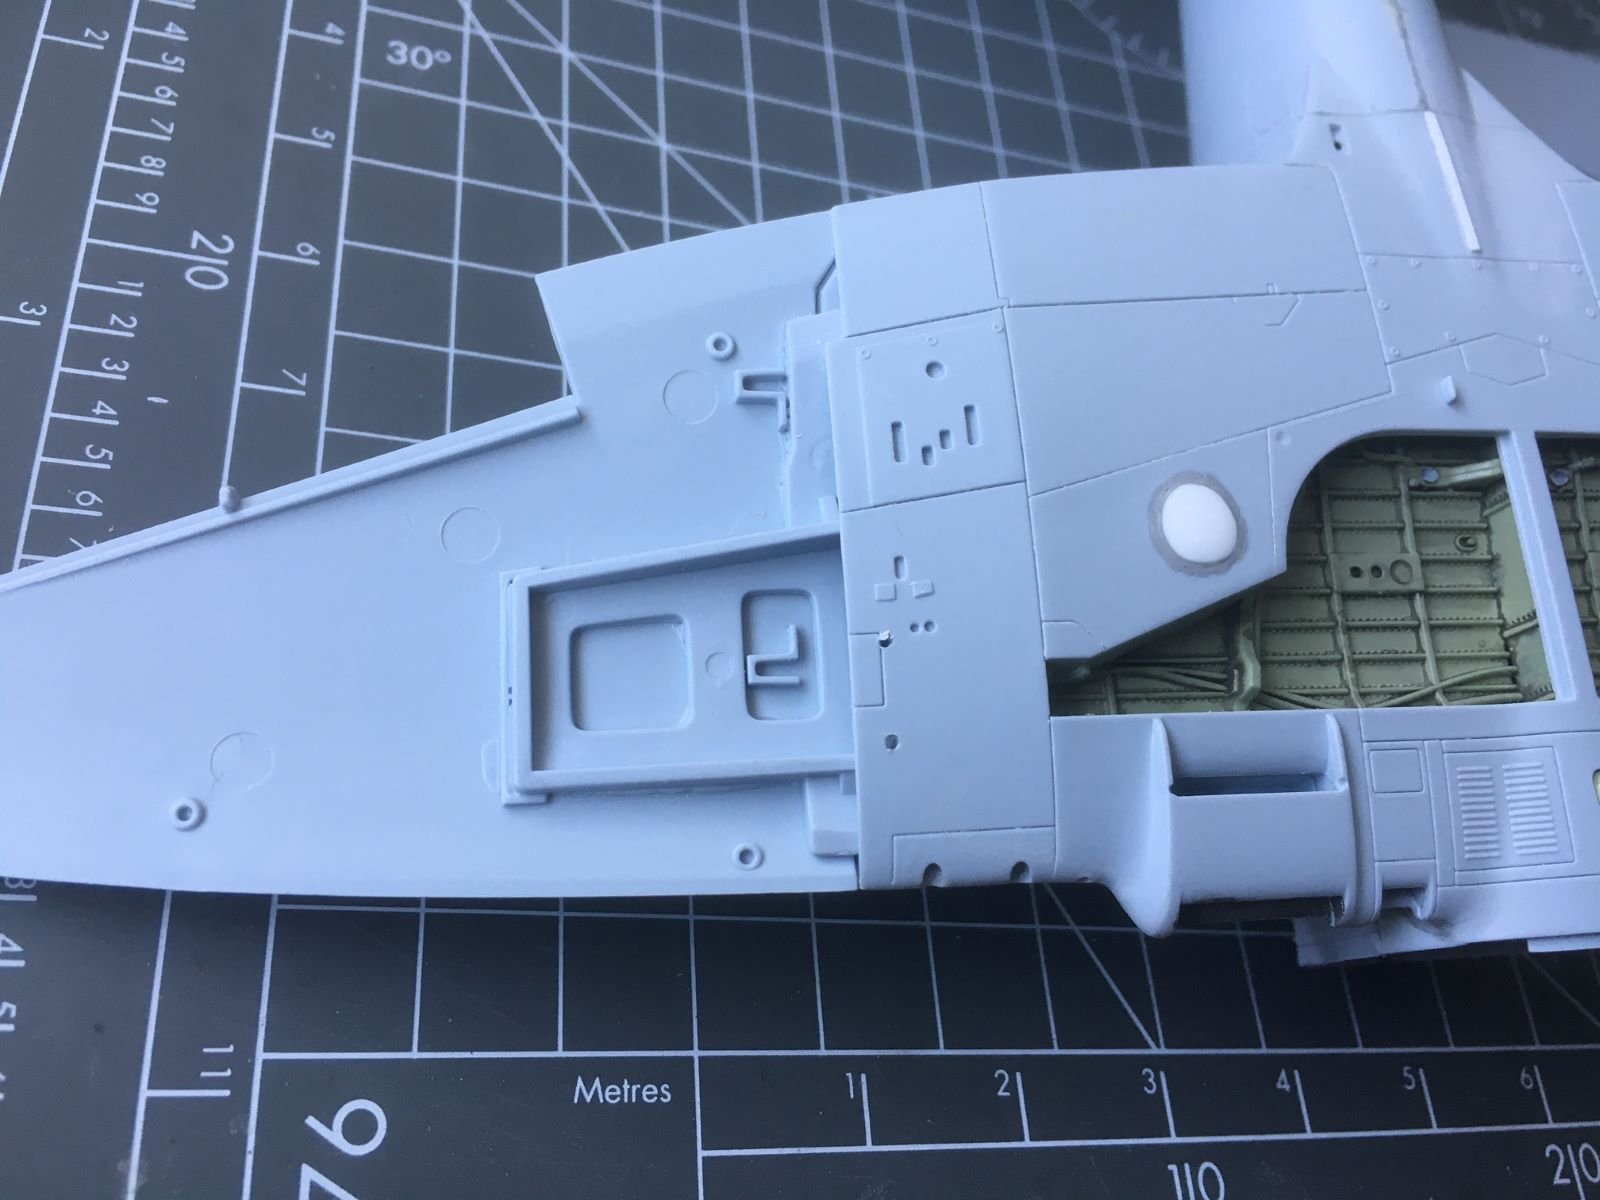
Finally, I have addressed the fairing of the leading edge with its various openings, added the nav lights and thinned as much as possible the trailing edge which otherwise looks quite too thick (although, I see now from the picture that I still need to do some finishing on it).

Next steps will be the preparation for priming and painting.
Best regards,
Dan.
-
@Snug Harbor Johnny thank you for your input! Your suggestion looks quite labour intensive, but I will give it a consideration. The method illustrated by @Backer seems slightly more practical. I will do some tests and let you know.
Thanks and best regards,
Dan.
-
Outstanding workmanship! I will be following your build.
Best regards,
Dan.
-
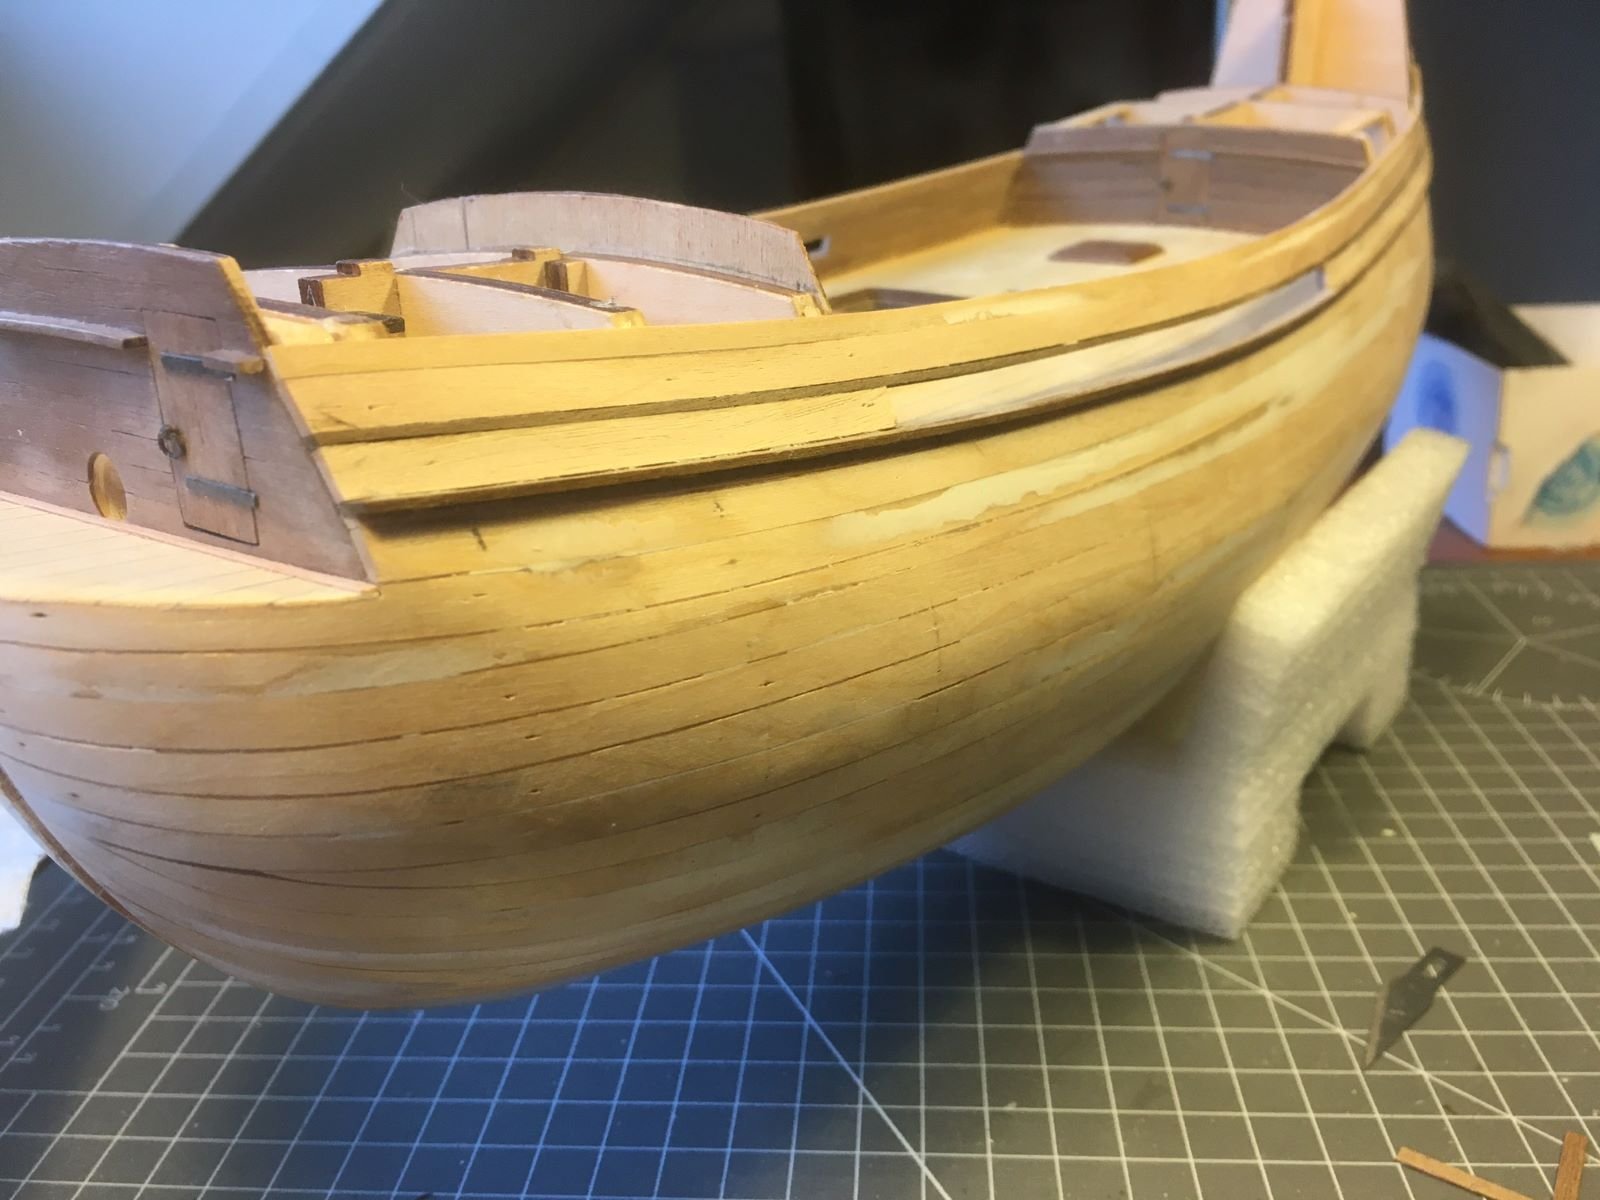
Hi all,
I went up with the bulwark and removed the portion of the strakes that was not glued to reveal the opening between the strakes of the bulwark:

Then, I lined the inner wall with walnut strips:
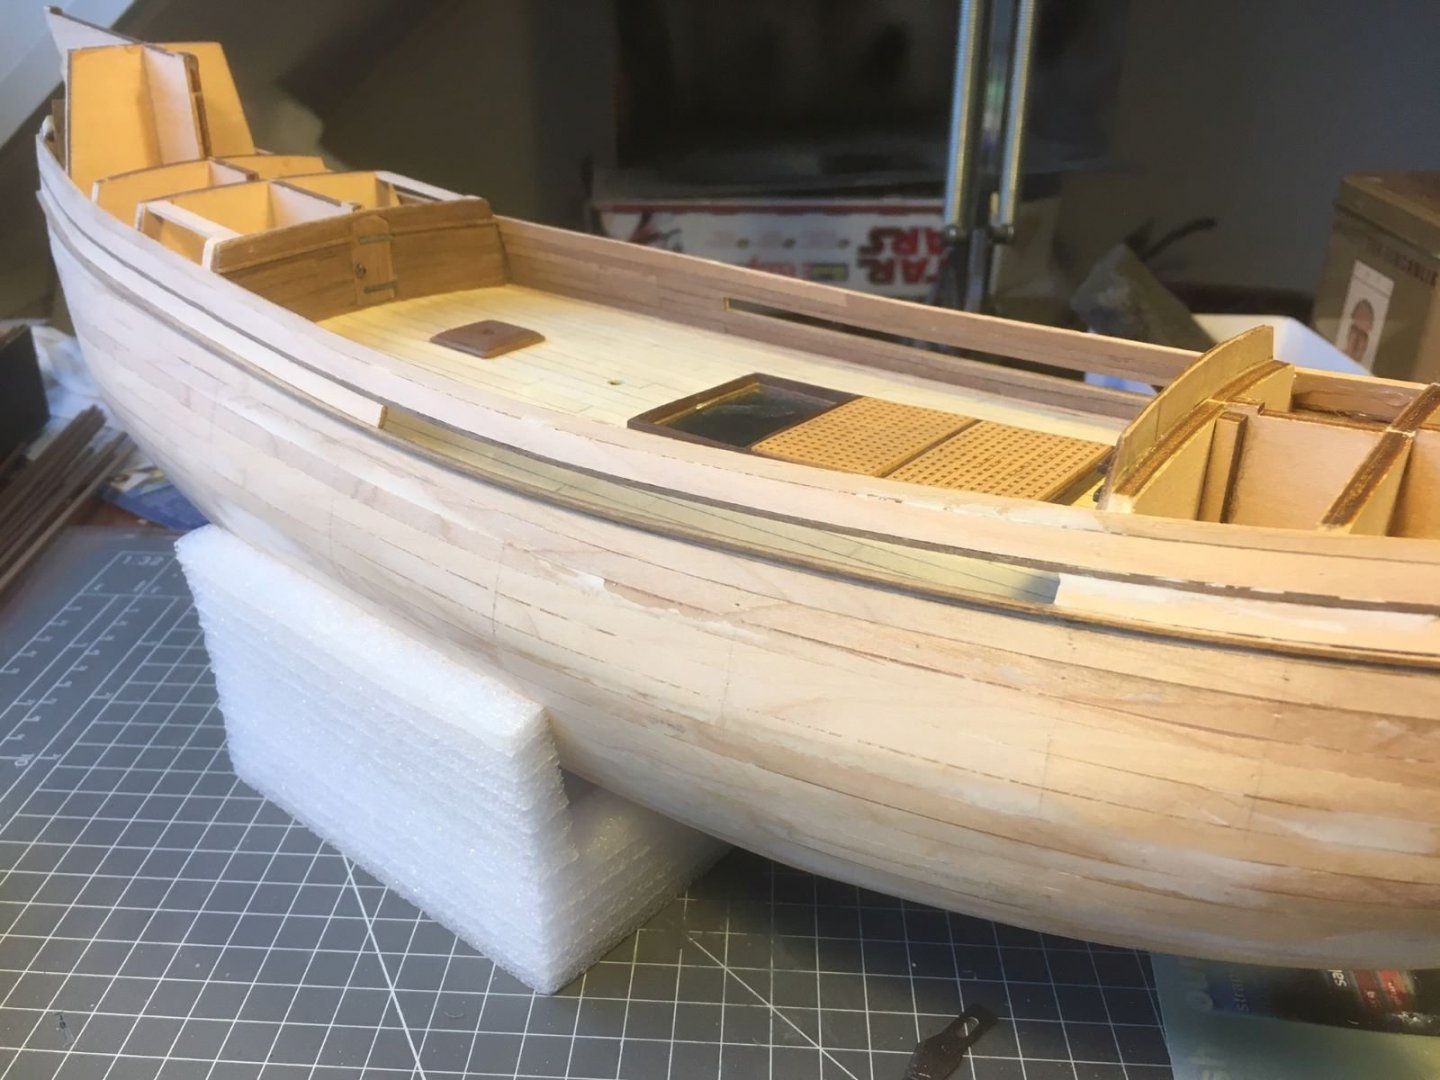
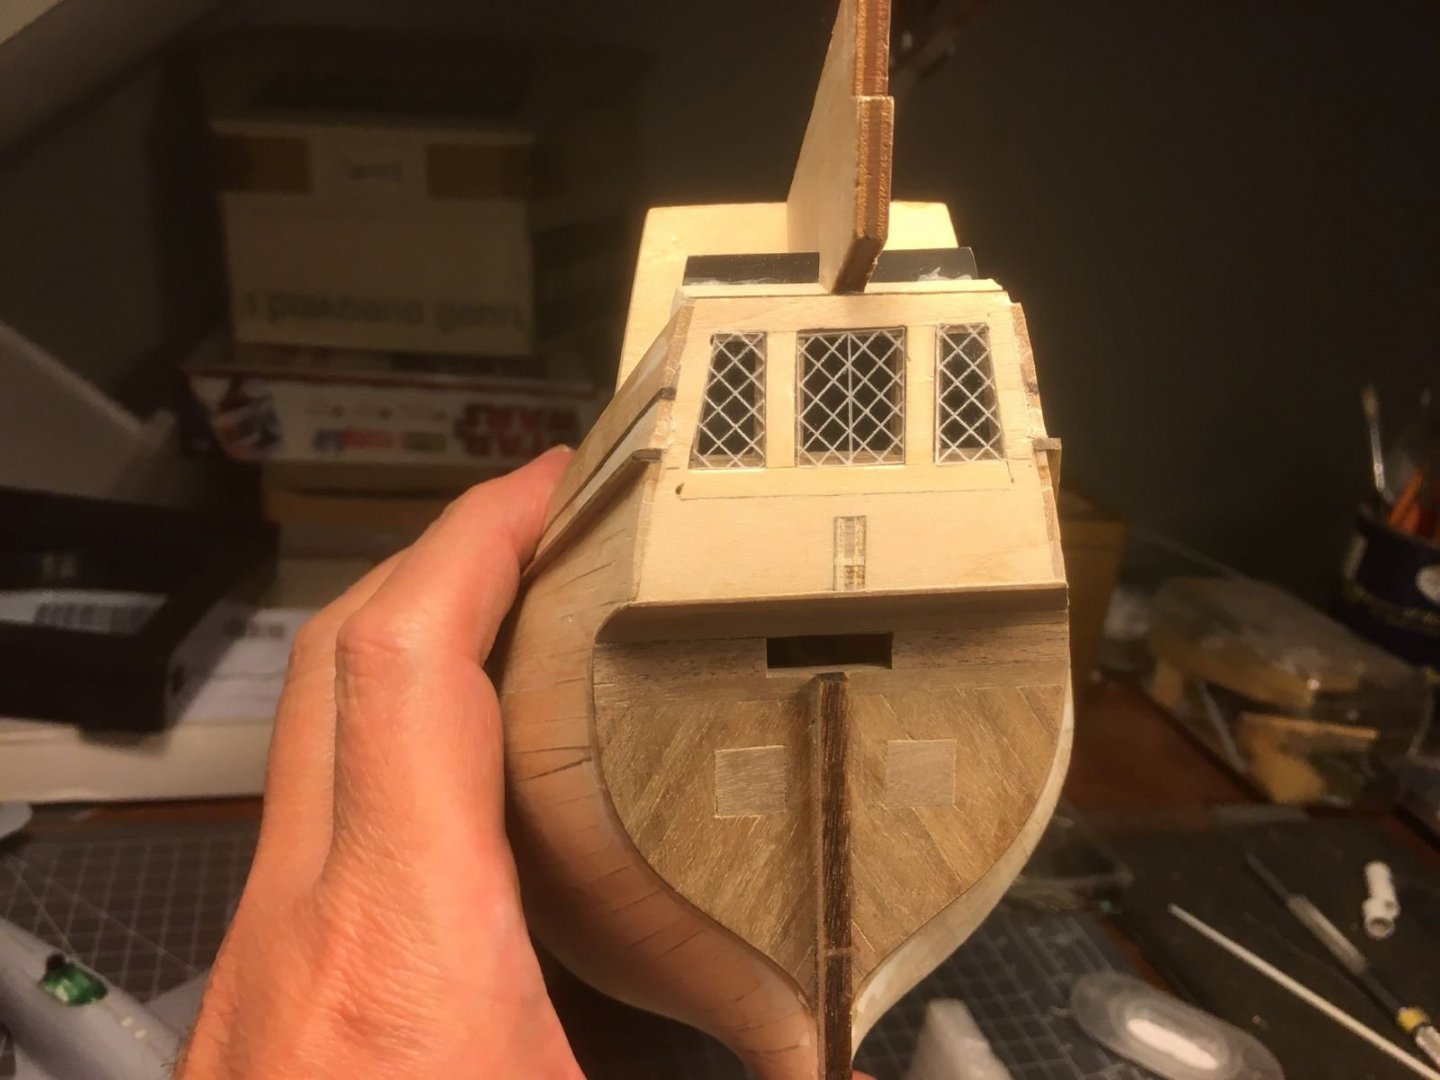
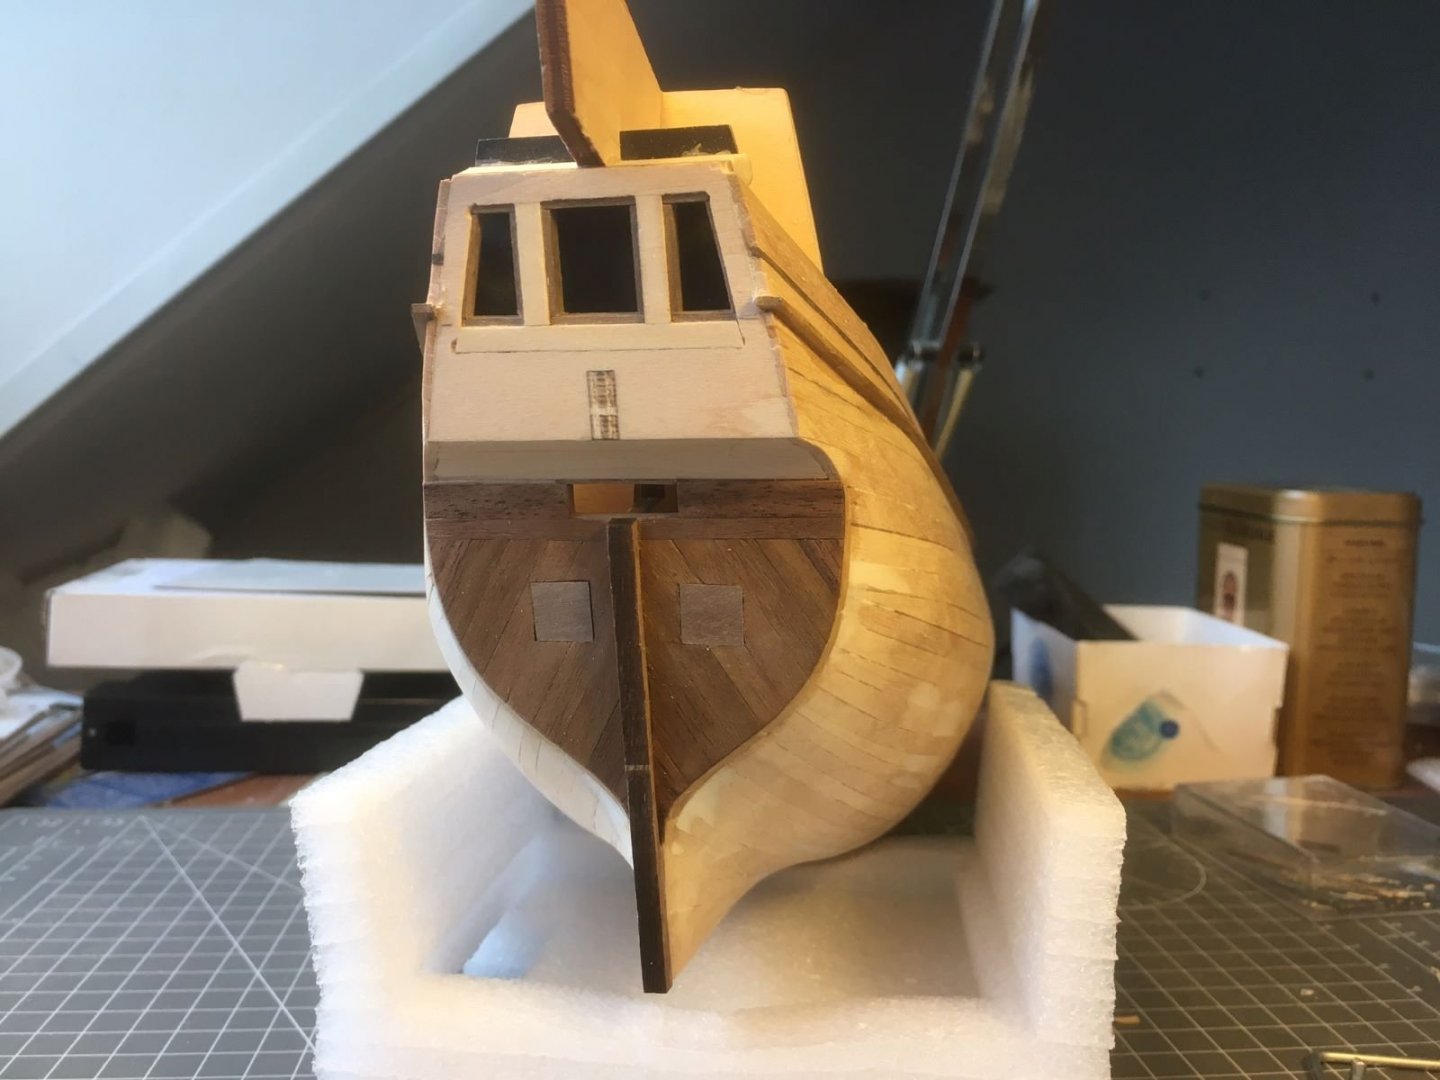
I think the result is not too bad. At this point, before starting with the second planking, I need to finish the transom, because I want that the planking of the hull covers the thickness of the planking strips of the tramsom. I gave the final shaping of the dead wood of the hull and traced the lines for the planking:
I chosed to lay down the planking with an angle of 30 deg which is easily found with my drawing triangles and resembles what seen on my reference books for the ships of that period. After gluing the stern post, I started gluing the strips:

Here with the lids of stern chaser cannons provisionally in place:
I need now to complete the glazing of the windows, which is something that I delayed until now, because I need to find out a good method to replicate the lead framing. That's all for now, any comment or suggestion is welcome.
Best regards,
Dan.
- BLACK VIKING, GrandpaPhil, Lapinas and 1 other
-
4
-
If you search: "mayflower ship model shipways manual", you should find the pdf.
-
Hi all, thanks for the likes! Few answers to some of you.
On 1/16/2021 at 9:50 PM, ccoyle said:Your work thus far suggests that this project will have a fantastic end result.
Thanks Chris for the confidence, I hope to to fall now in a state of performance anxiety 😀
@popeye the sailor: cutting these small tubes is very easy. On a cutting mat I press gently the a #2 blade (the larger one) of a X-acto knive and keeping it perpendicular to the tube I let the tube roll under the blade moving the blade back and forth. Typically, within 4-5 strokes, the tube gets cleanly severed. You might need to press the tip of a steel needle inside the hole to clean up the remaing possible burrs.
Kind regards,
Dan.
- Canute, Edwardkenway, Egilman and 4 others
-
7


resiz.JPG.bfa93ad5719971f00cdd0dbb67ce32bd.JPG)


resiz.JPG.e405167328bb7f3023de73363ffeff7b.JPG)


Hawker Sea Fury by Danstream - FINISHED - Airfix 1:48
in Non-ship/categorised builds
Posted · Edited by Danstream
Typos, oil streaks
Hi all,
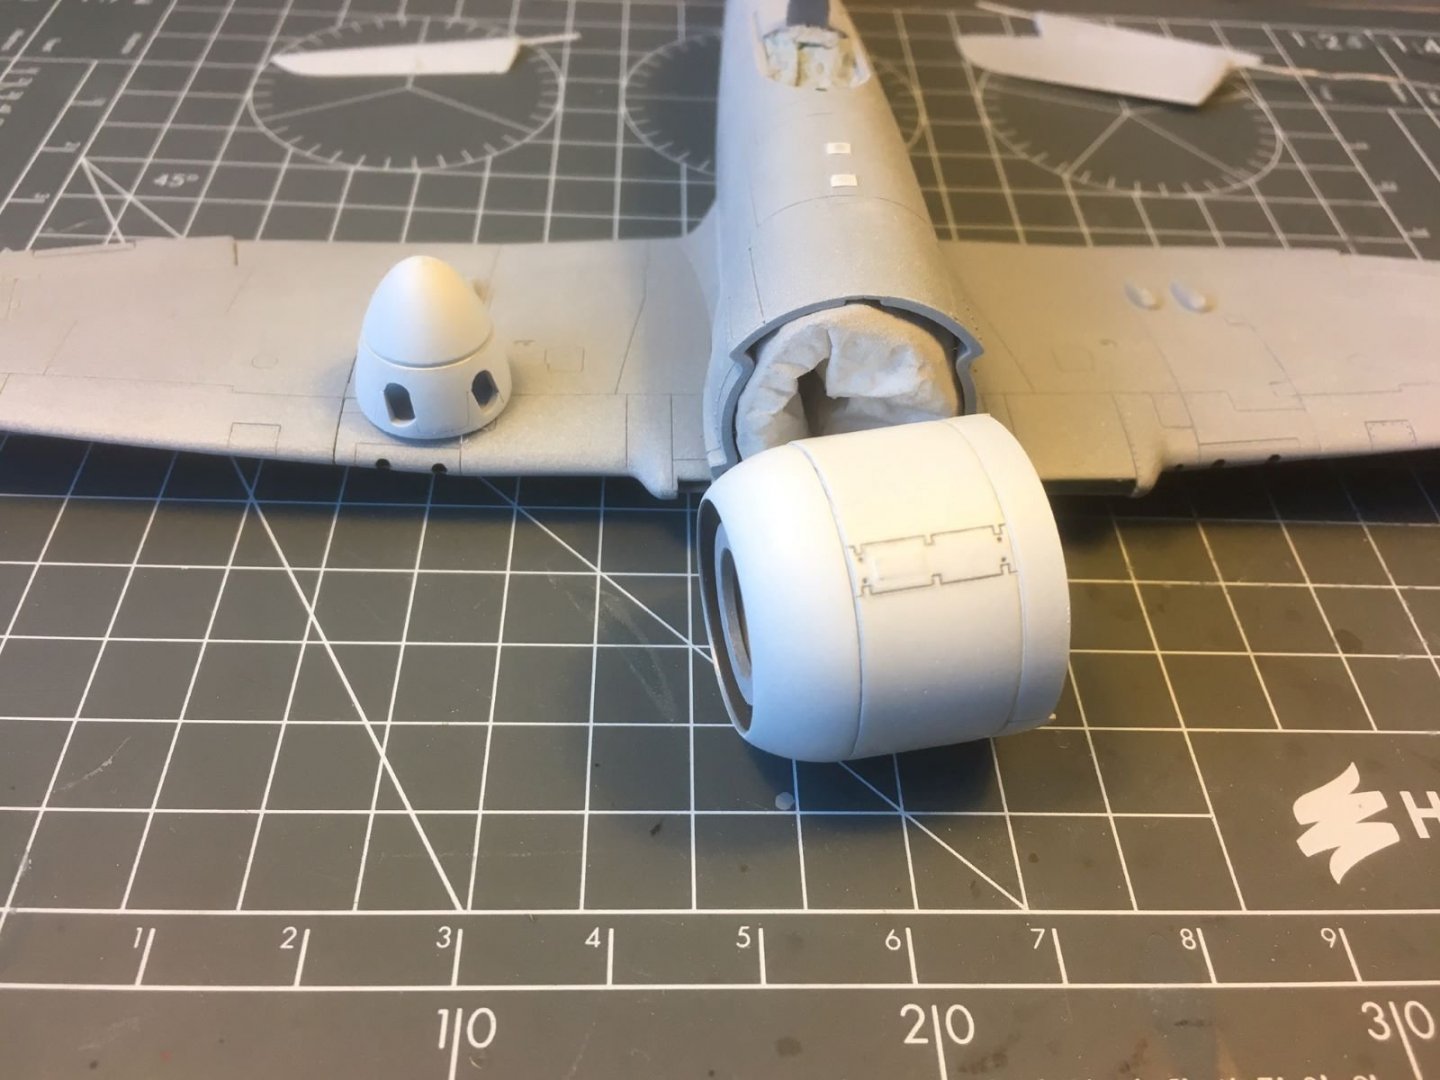
thanks to few days off work and to the covid restrictions, I went on with my build and sprayed a light coat of Tamiya X-22 gloss clear on the entire model. Finally I reopened the wheel bays after long time. You can also see few oil streaks that I have added to add some 'real life' effects.
At the same time, I also finished the landing gear with its wheels:
The landing gear was then glued into its place. I must say that Airfix did a nice job in reproducing these items and the overall impression is quite convincing.
Finally, on its legs. One of the big milestones of a model build. (As a side note, you see that my cutting mat is discolored on its right hand side. This was the result of tipping over my glue bottle puoring the glue dangerously close to my model. Until when I find another suitable backdrop, we have to bear with a marred mat).
The tyres of the wheels were treated with white powder obtained by grinding a pastel pencil. The model is now getting all the small bits and decals will follow. I have used almost all the kit parts and the box is almost empty now. That means that the end is close and I need to pay a lot of attention now because for me it is quite easy to spoil a build at this stage (see the glue story above).
Best regards,
Dan.