


ERS Rich
-
Posts
600 -
Joined
-
Last visited
Content Type
Profiles
Forums
Gallery
Events
Posts posted by ERS Rich
-
-
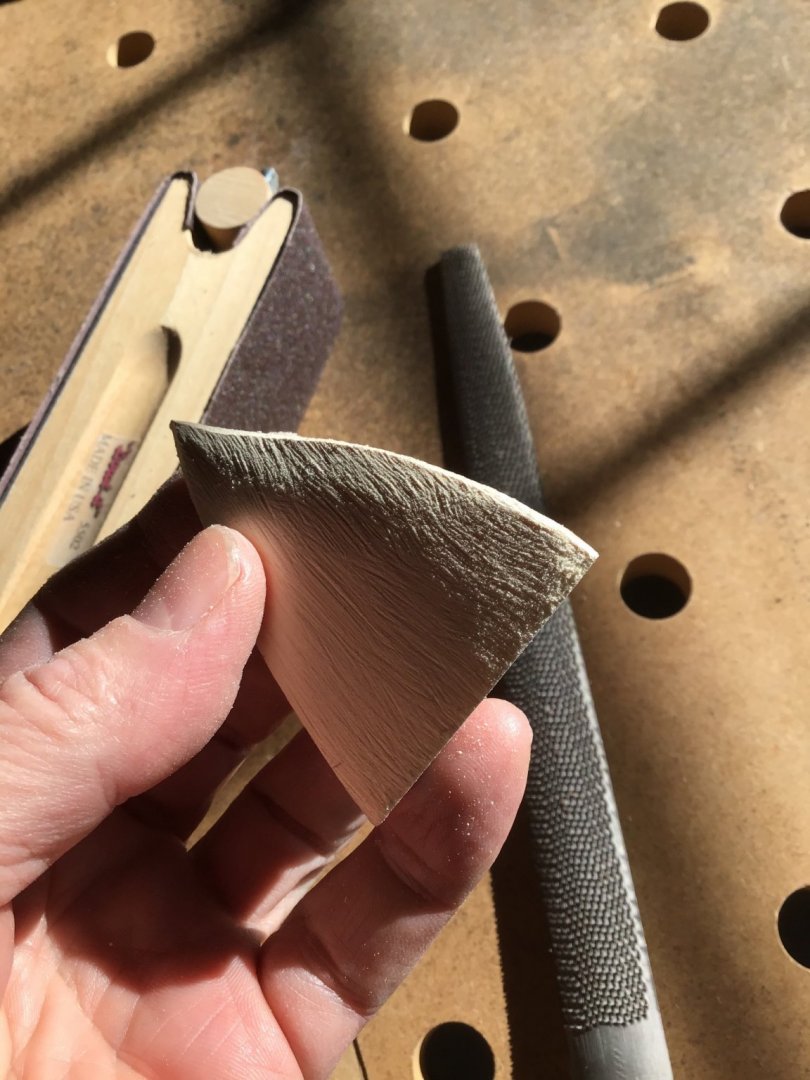
Notes on this work
Bevels: Aim to leave the brown laser residue on one edge, to retain the shape of the frame.
Shaping blocks. Remove large flat chips of waste with the chisel, leaving small flat faces (facets). Next is the powerful rasp, excellent for smoothing the facets, removing large amounts of wood vs the file, and shaping along lines. Leave the file for final smoothing. I abandoned the sandpaper.

- J11, Duanelaker, WalrusGuy and 3 others
-
 6
6
-
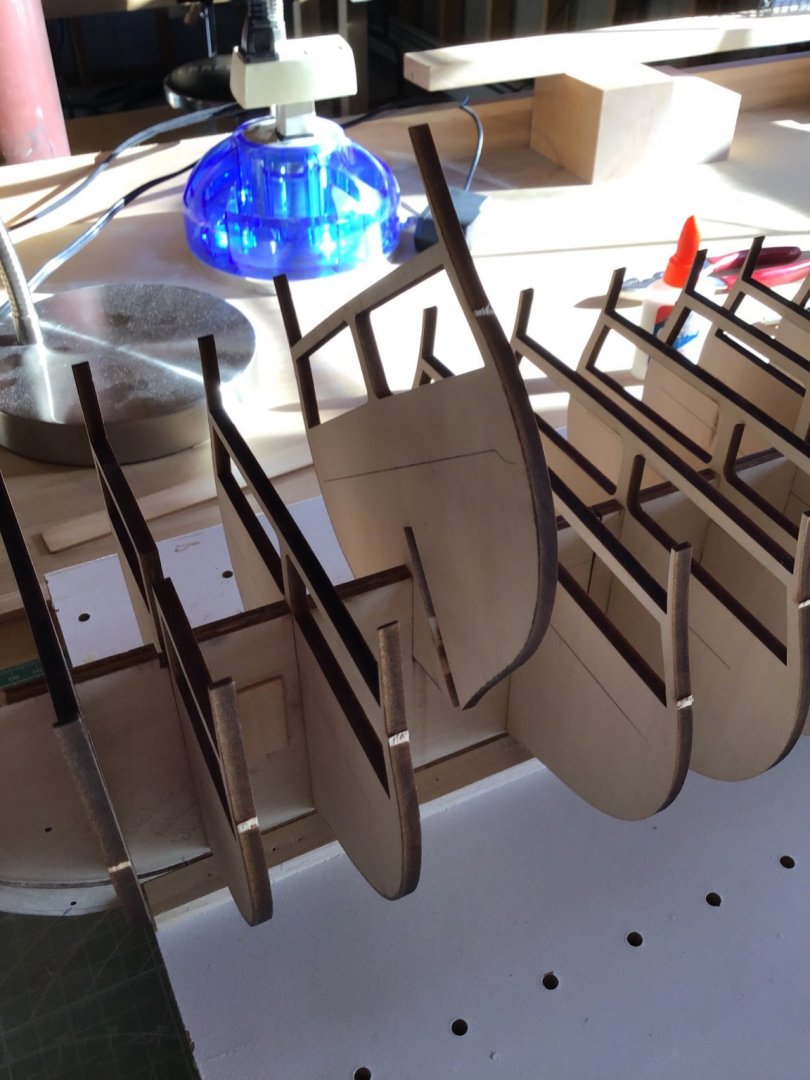
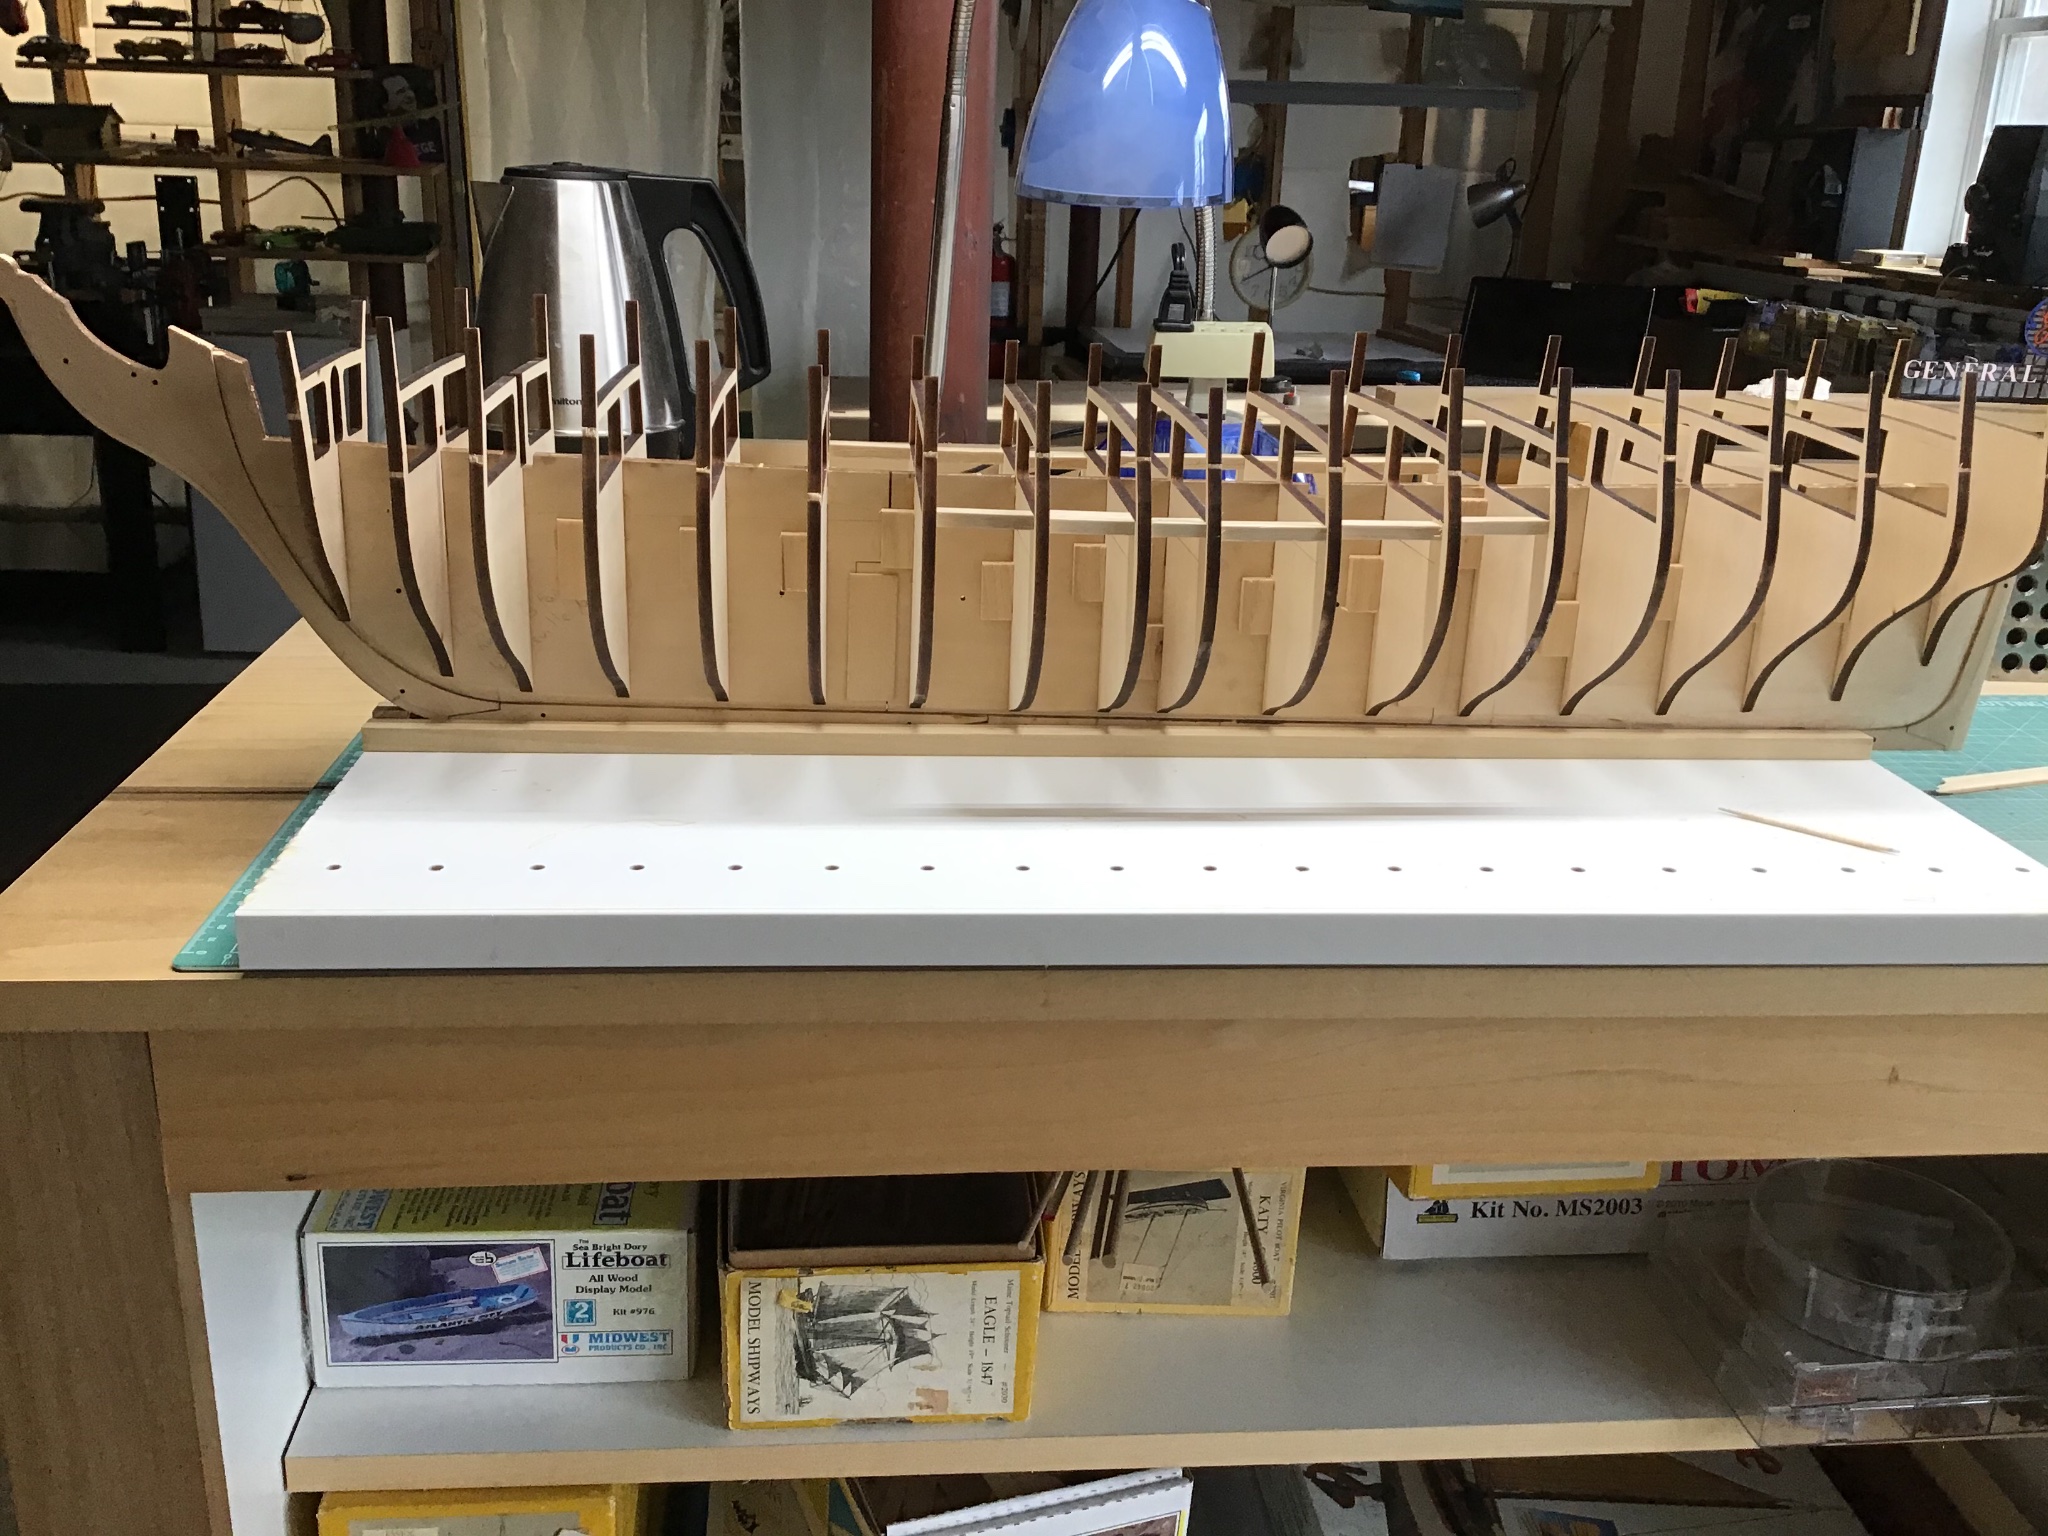
Shaping the Bow Filler Block and Fairing the Bulkheads
Friday already!
At this time work progressing on multiple related fronts: beveling the frames (to get the lines for the blocking), testing different ways to shape the blocks, and templating and making the bow gundeck framing. Also inventory/segregating the stock lumber in the kit.
Using sanding blocks by Dowl-It to shape the bevels. The rounded blocks give tight control. Quick work.
Shaping the blocks with chisel, rasp (most effective), file, and Flexifiles. Using contour templates to measure progress. Pin nailed temporary blocks to the block to allow holding in the vise. Nails did get in the way so removed them. Getting through the first piece is time consuming, the remaining three should go faster.
First time shaping multiple blocks, so deciding on and establishing my methodology, for future reuse.
Same with making the bow framing. Initial thought was to use a single template to mark the lumber, but the pencil line would increase the size of the part, so going with double sided tape to attach individual templates.
Goal is to have all blocks installed by Monday.
Have a good weekend!
-Rich


- GuntherMT, GrandpaPhil, Moab and 2 others
-
5
-
Bow and Stern Block Prep
Busy this week on the bow and stern blocking.
Some unexpected results, while making the bevel cut template for outboard transom frames, led to checking the Byrnes and Micromark table saws, the jointer, and the Incra fence on the sawstop for square. Adjustments were needed.
Also sharpened the 1” bench and fishtail chisels on the Tormec, so ready for carving.
First off squared the rough blocking, with the jointer and table saw; and cut the necessary bow and stern filler blocks to finish size.
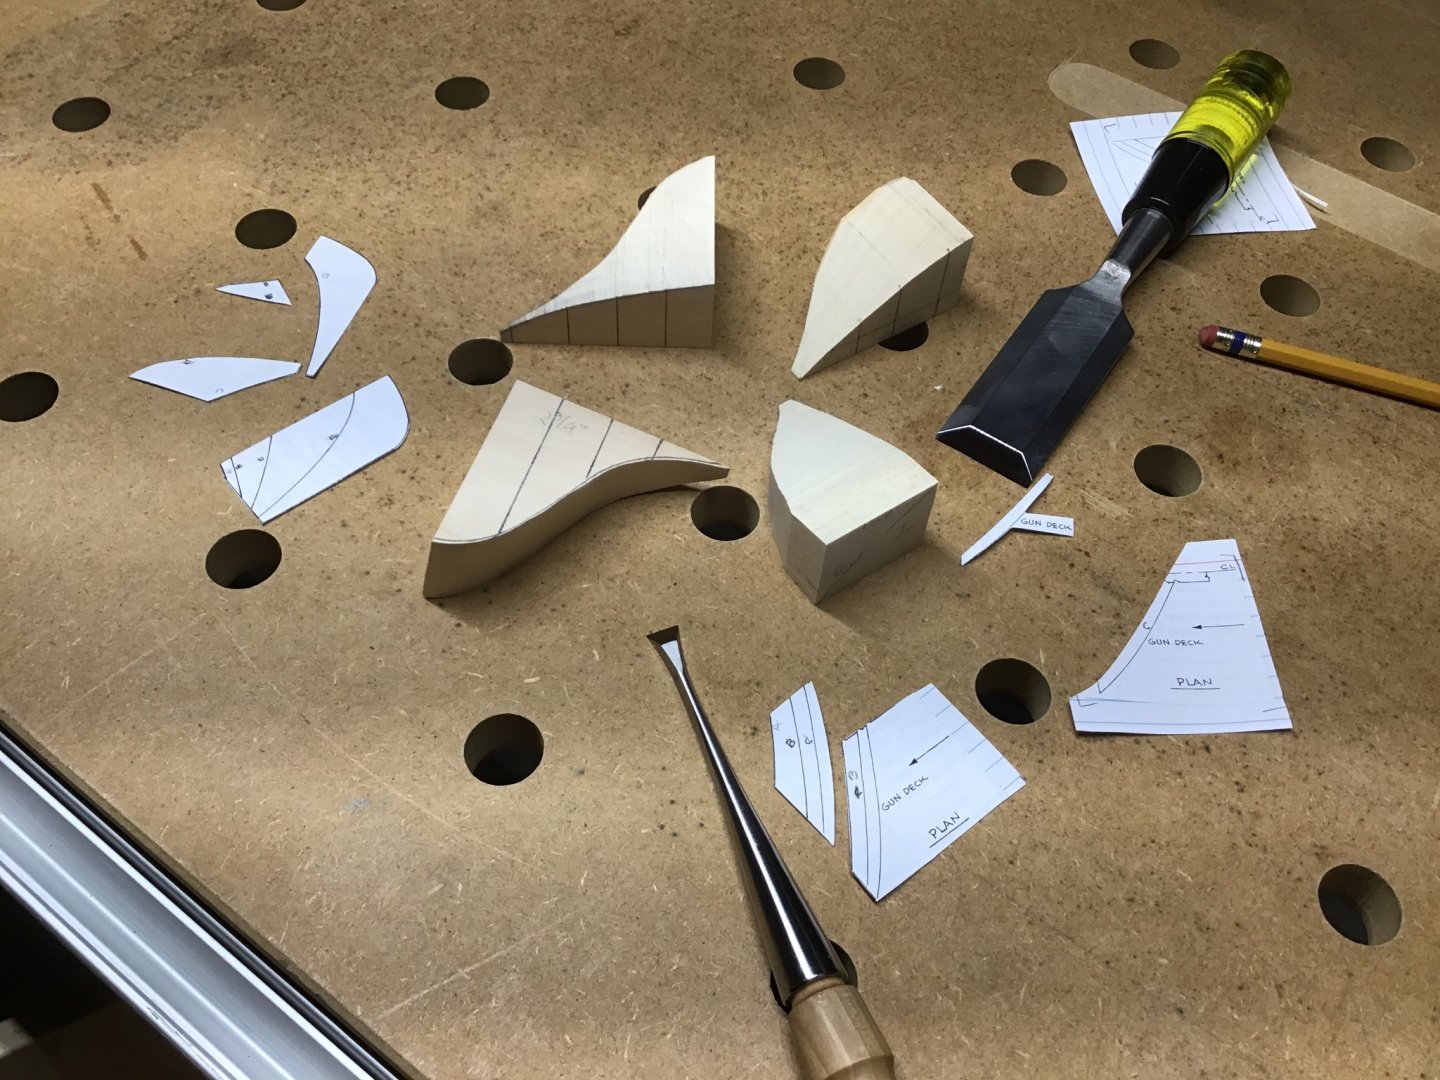
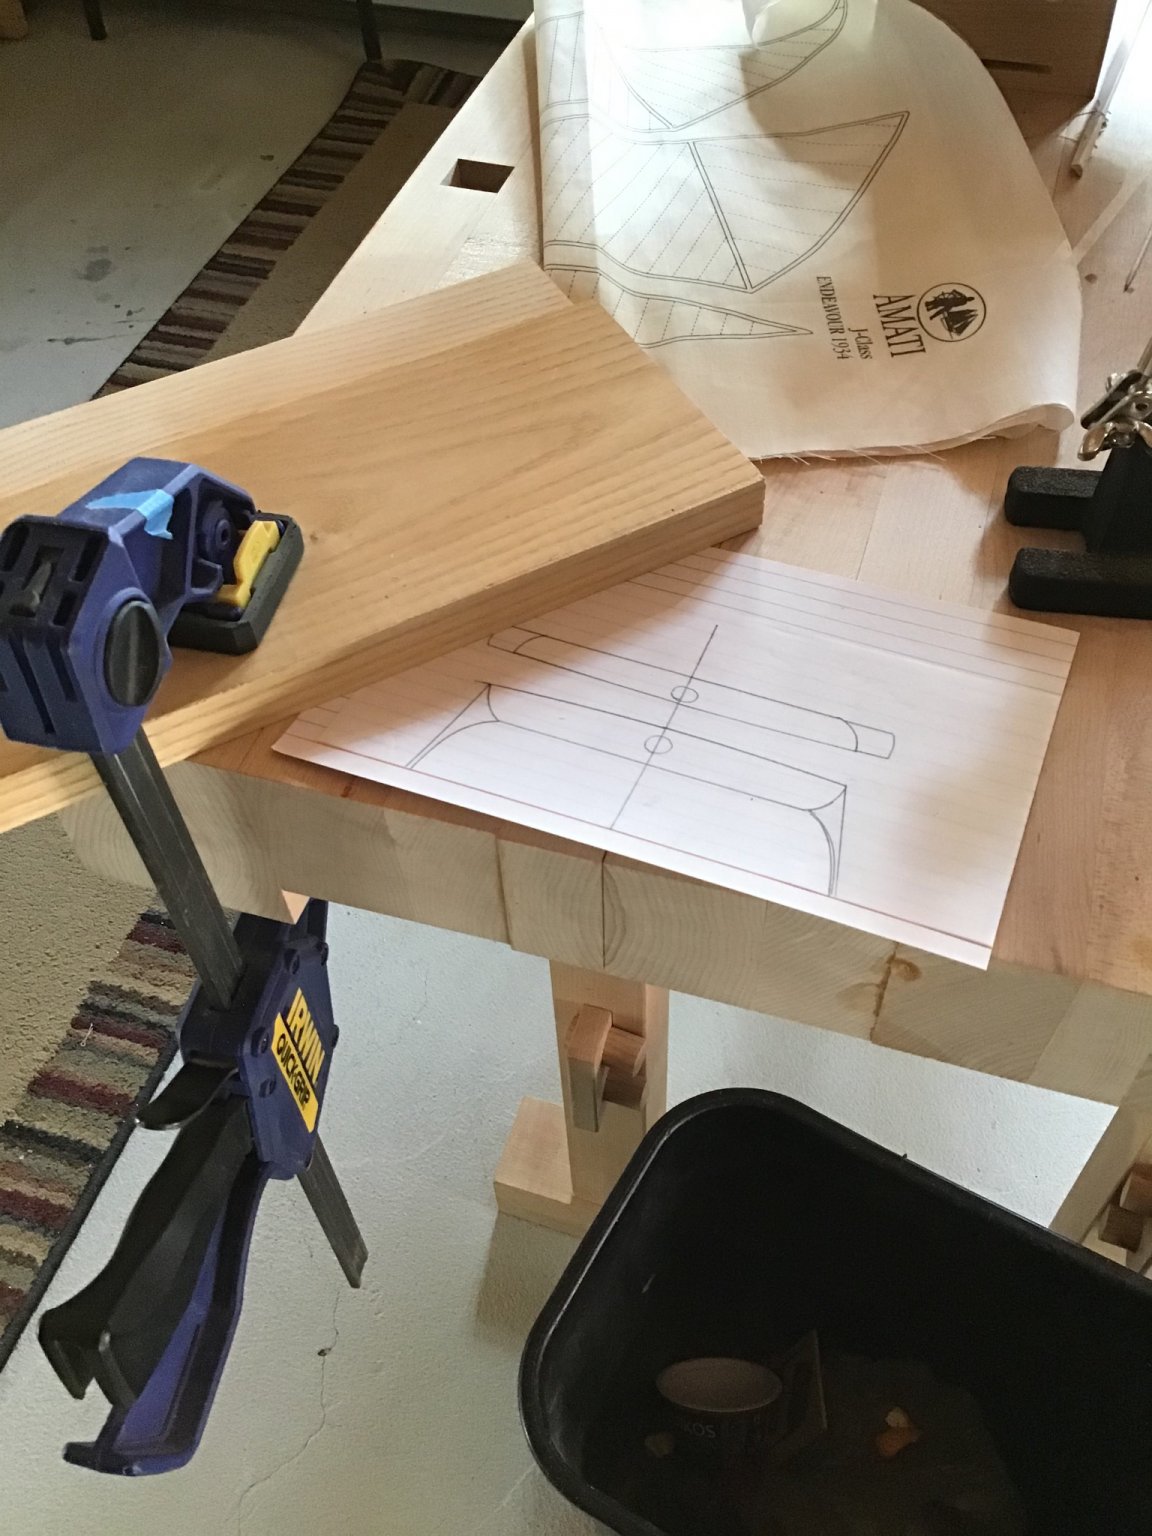
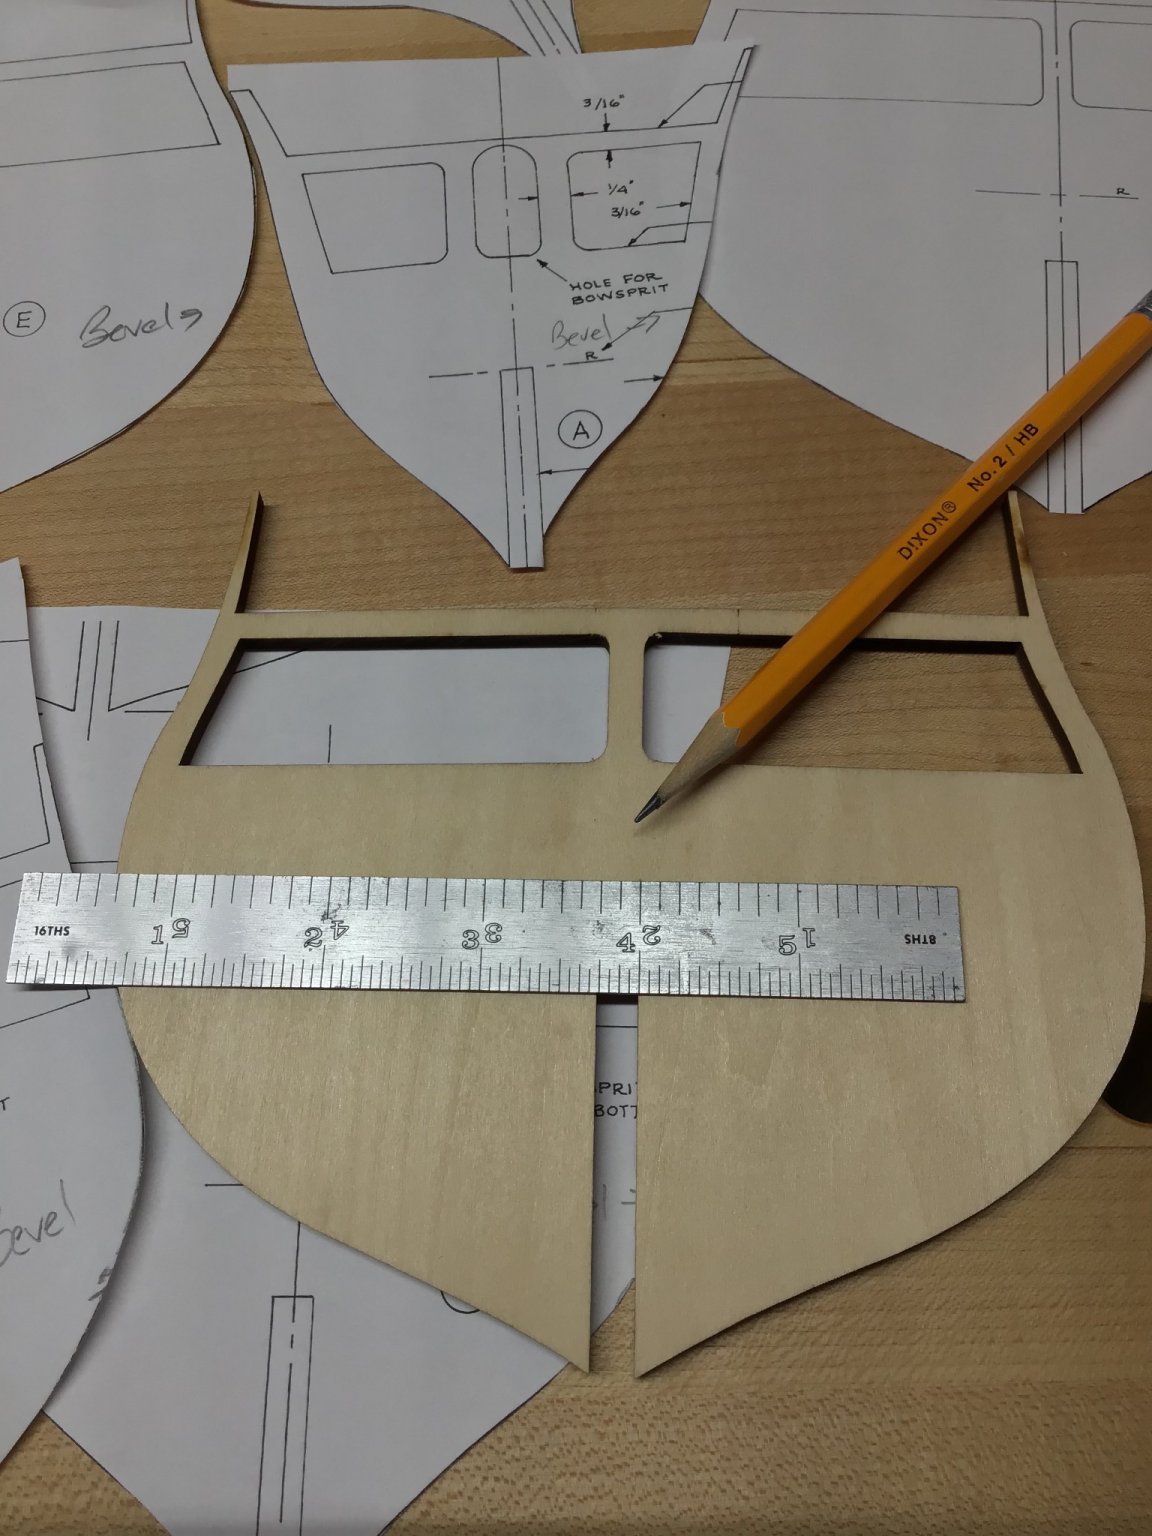
Templates were made by photocopying the plans. A glue stick was used to fix them to index cards.
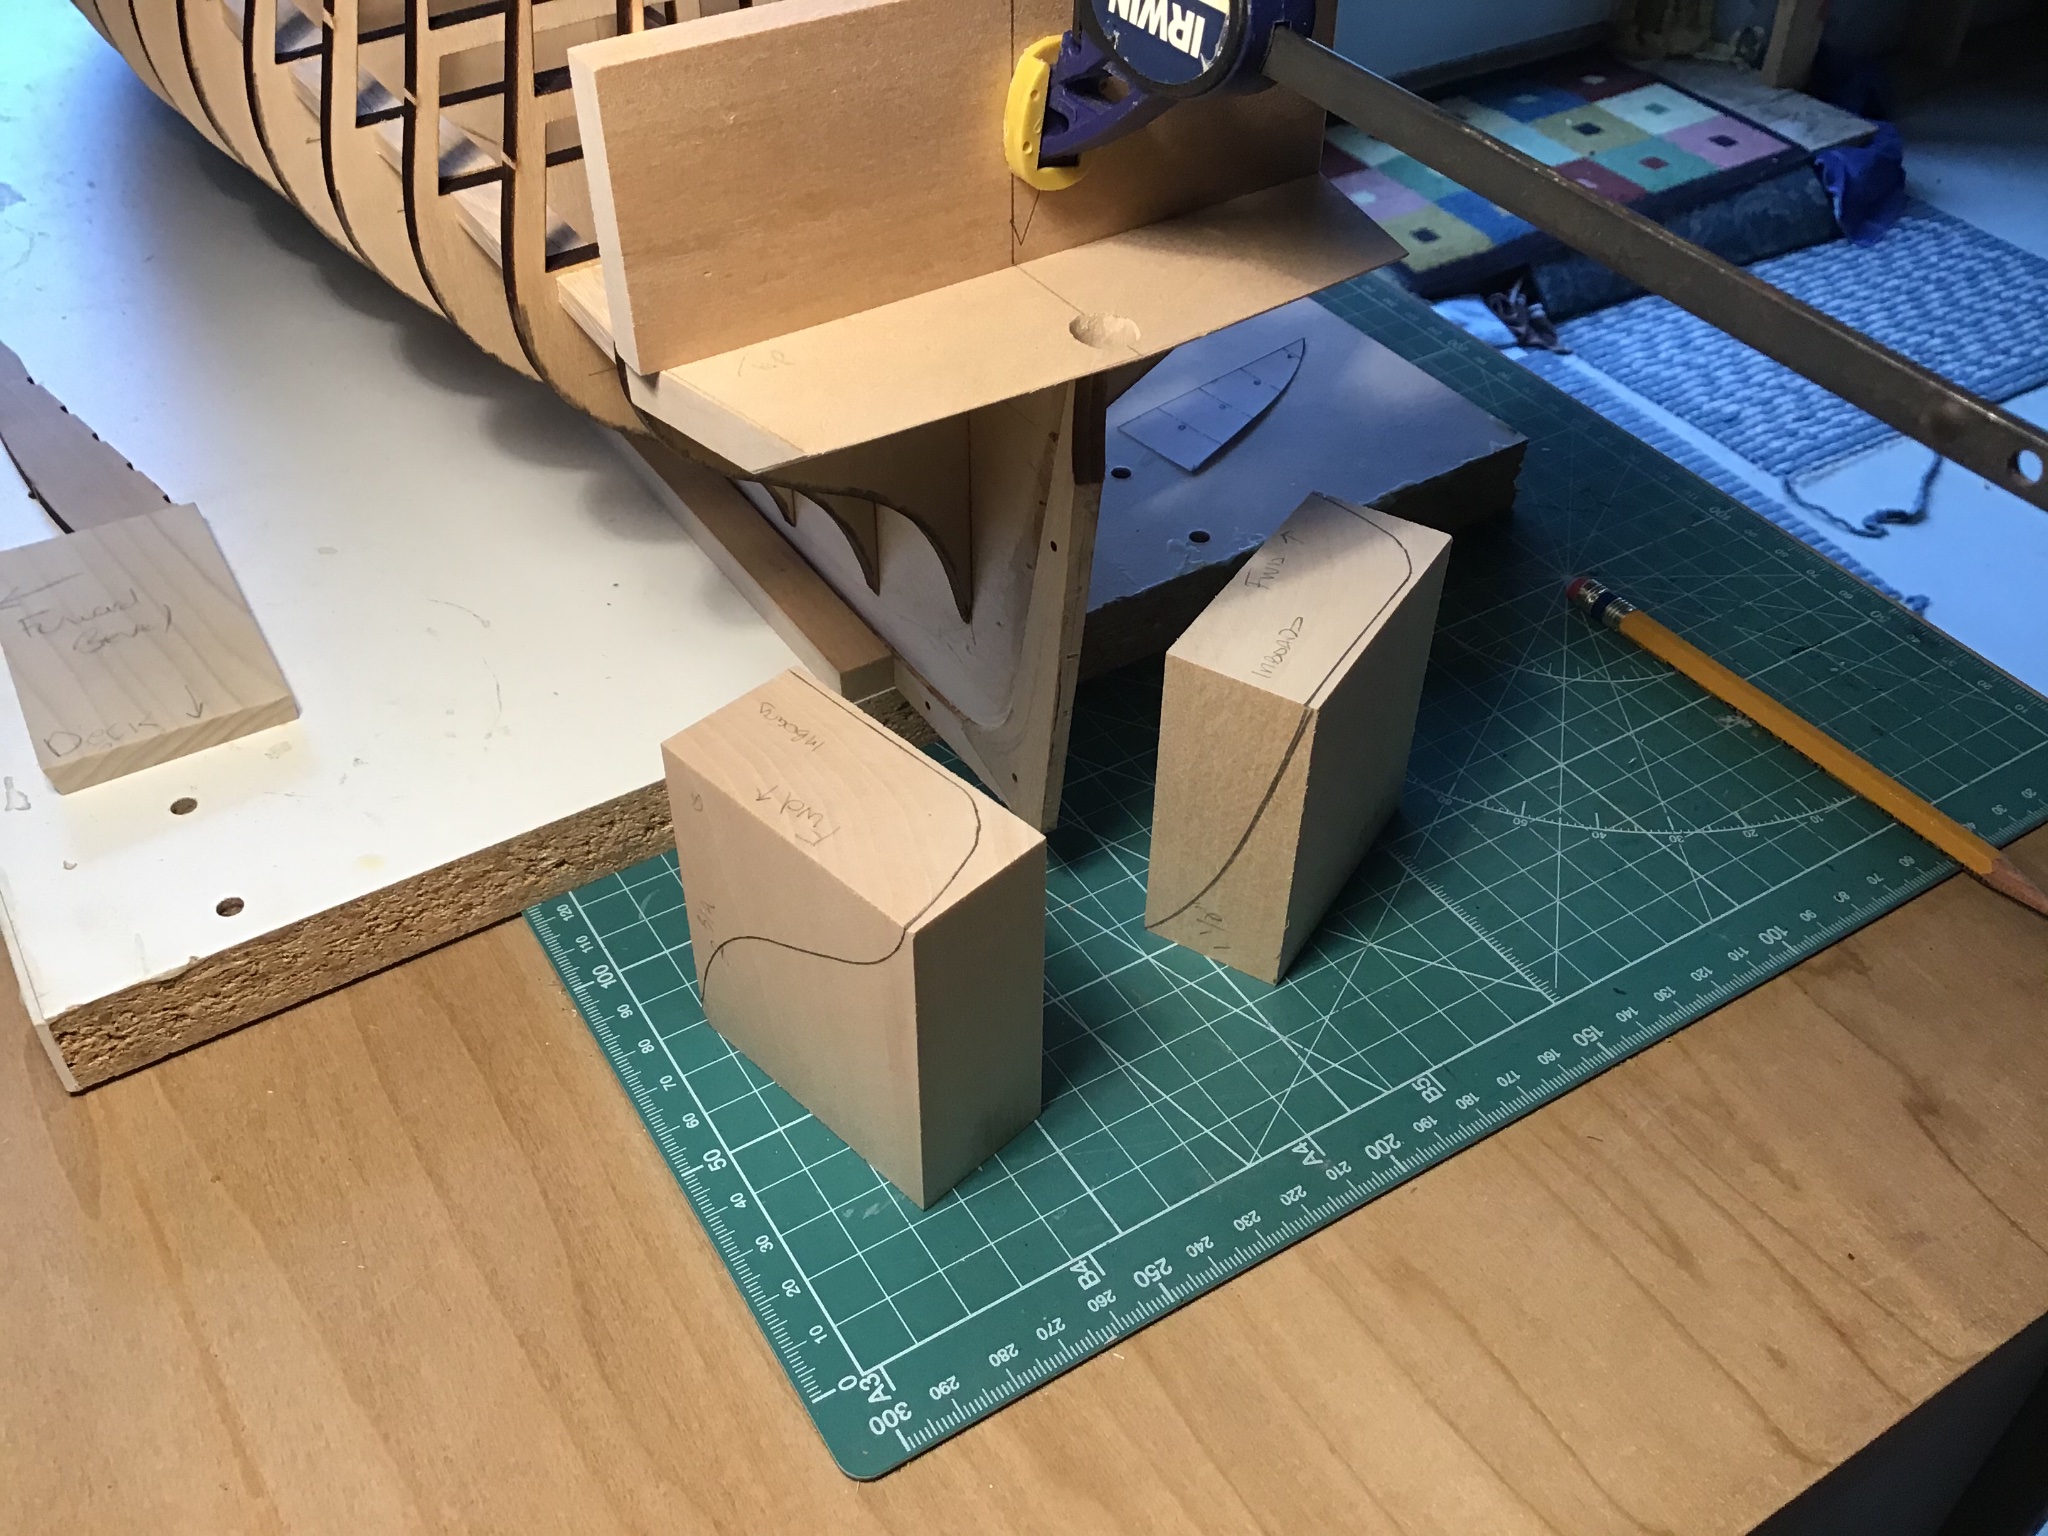
Blocks were marked up with the templates.
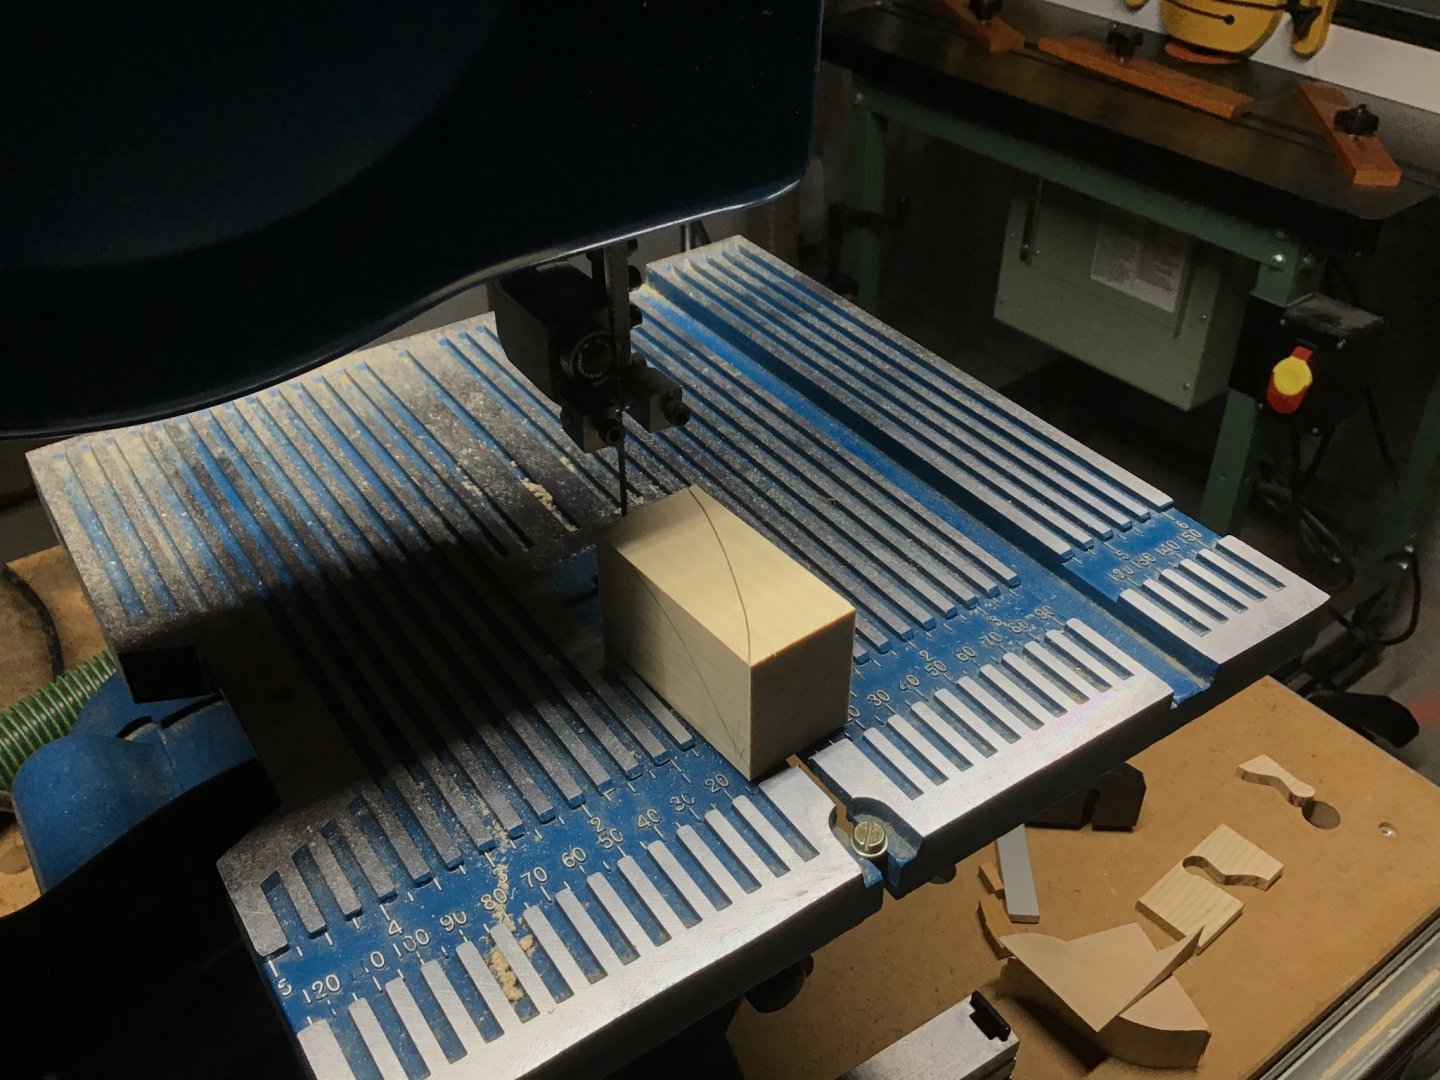
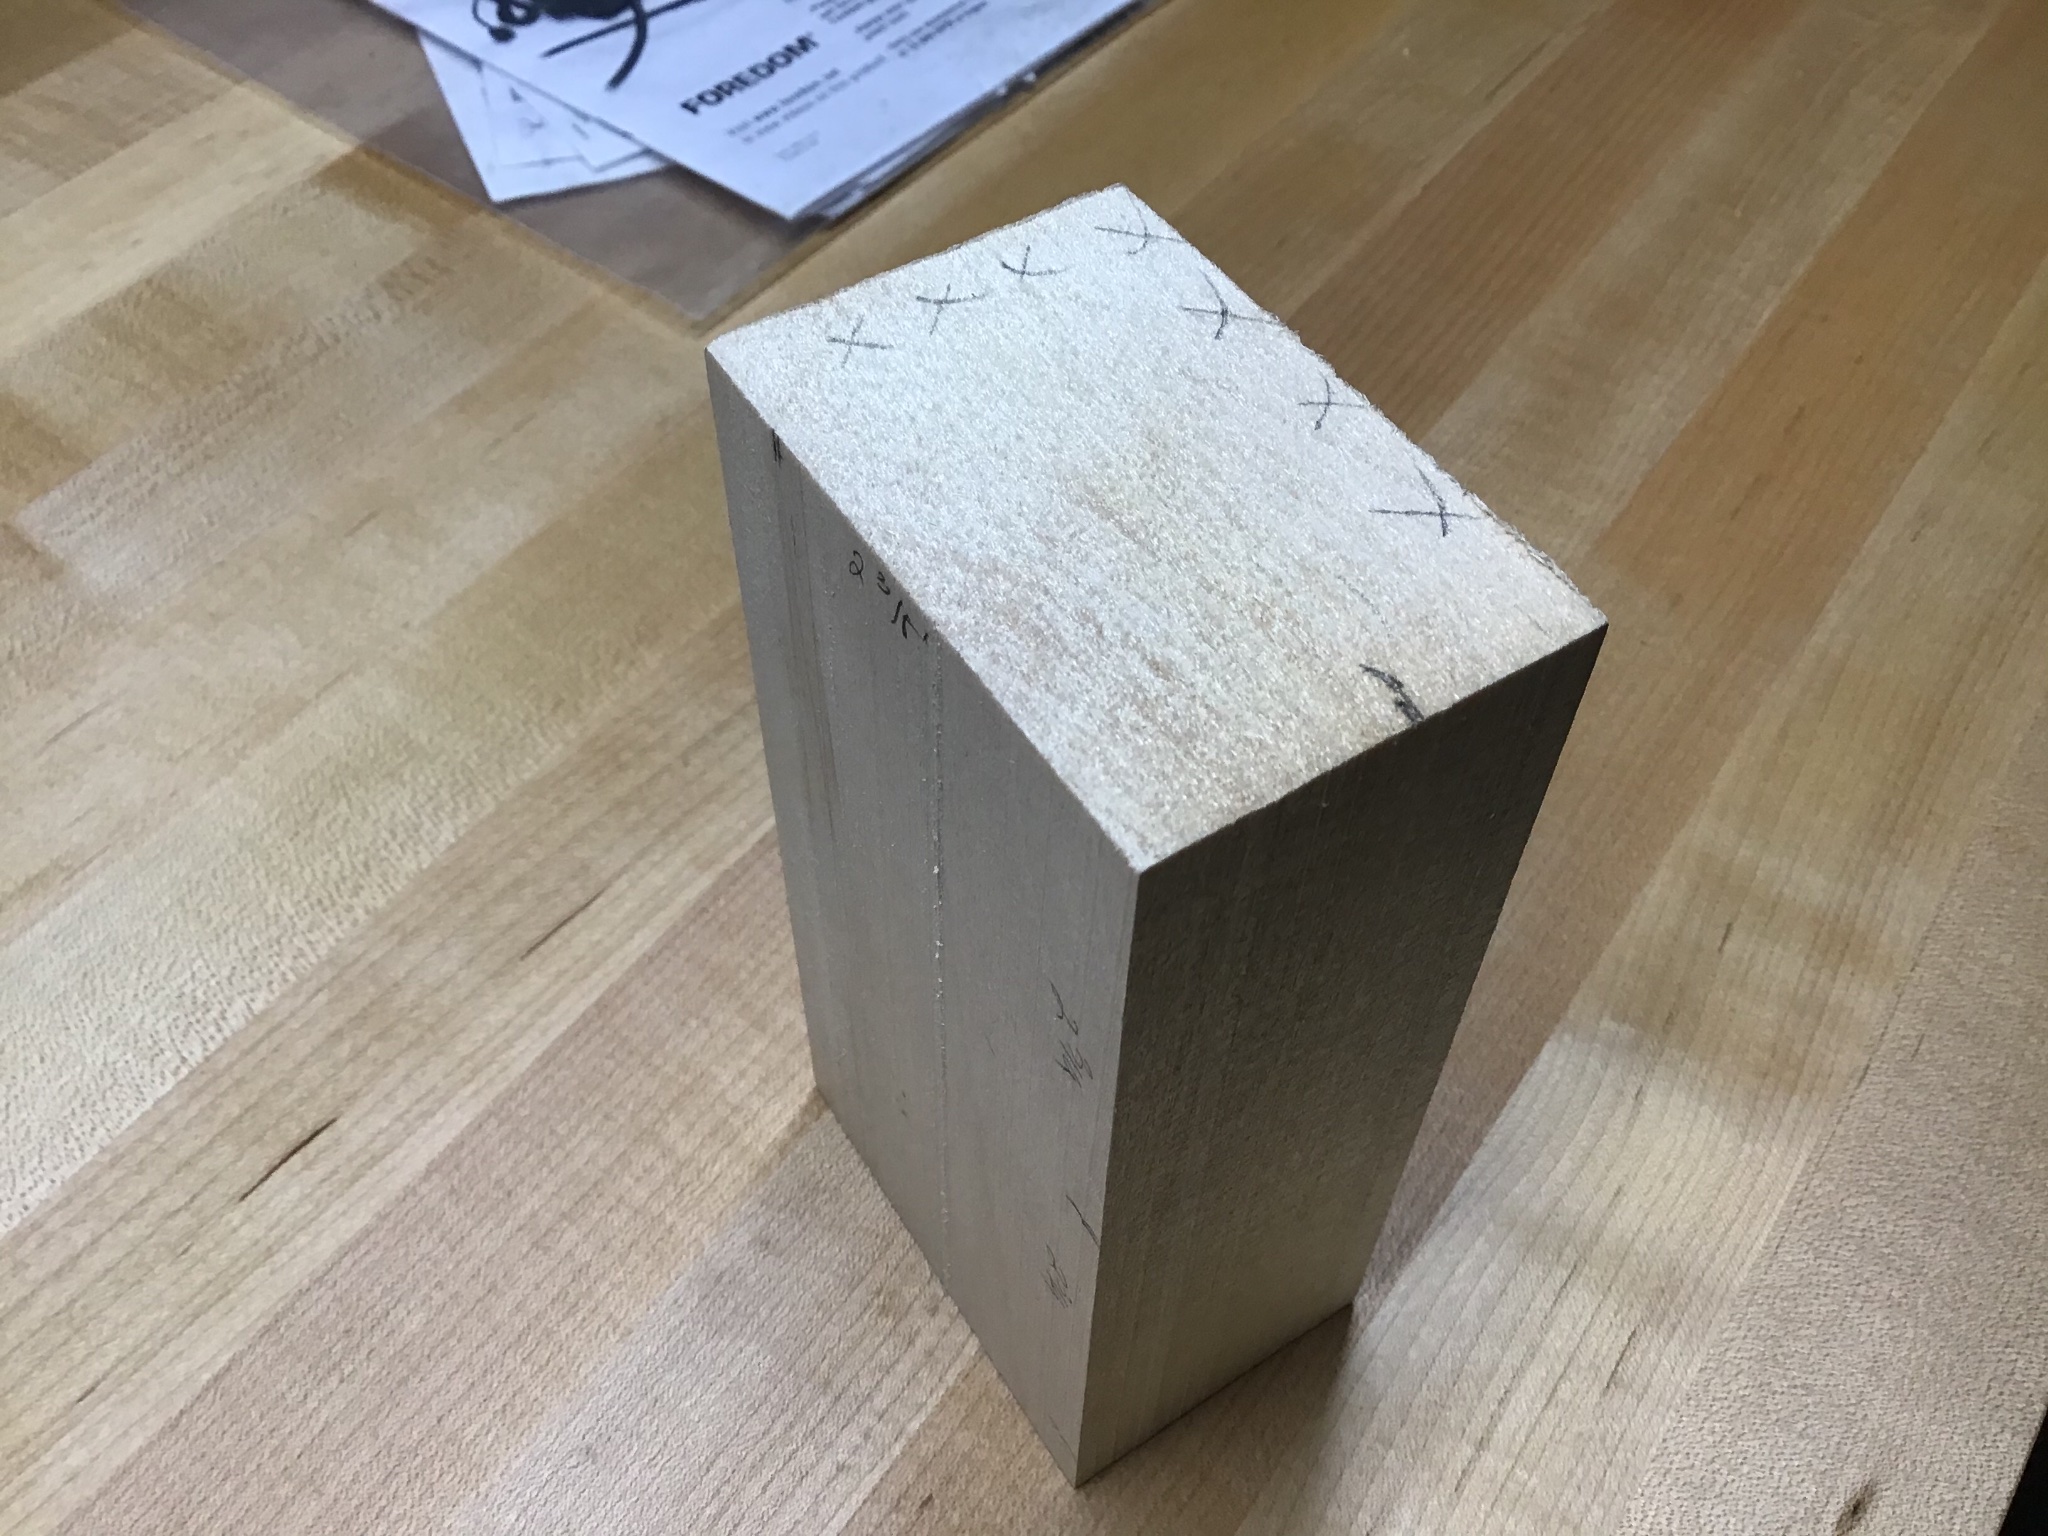
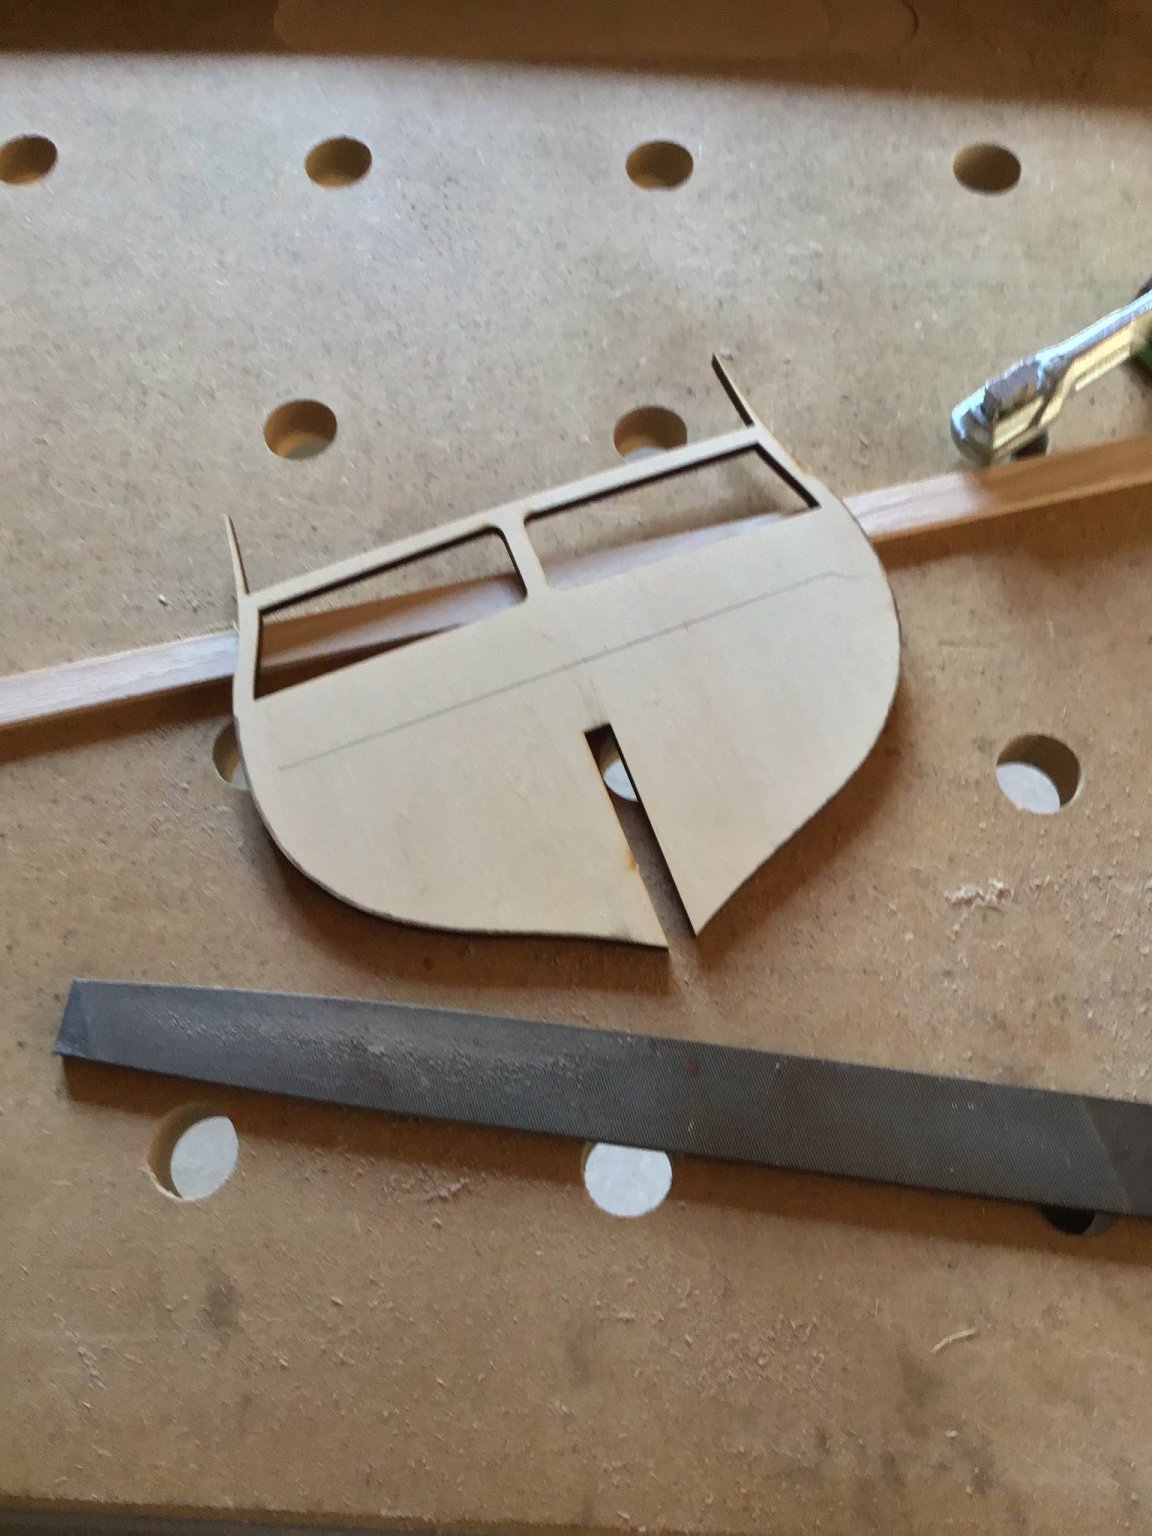
Blocks were then cut on the bandsaw. Since there are two cuts, piece was taped back together before the second cut.
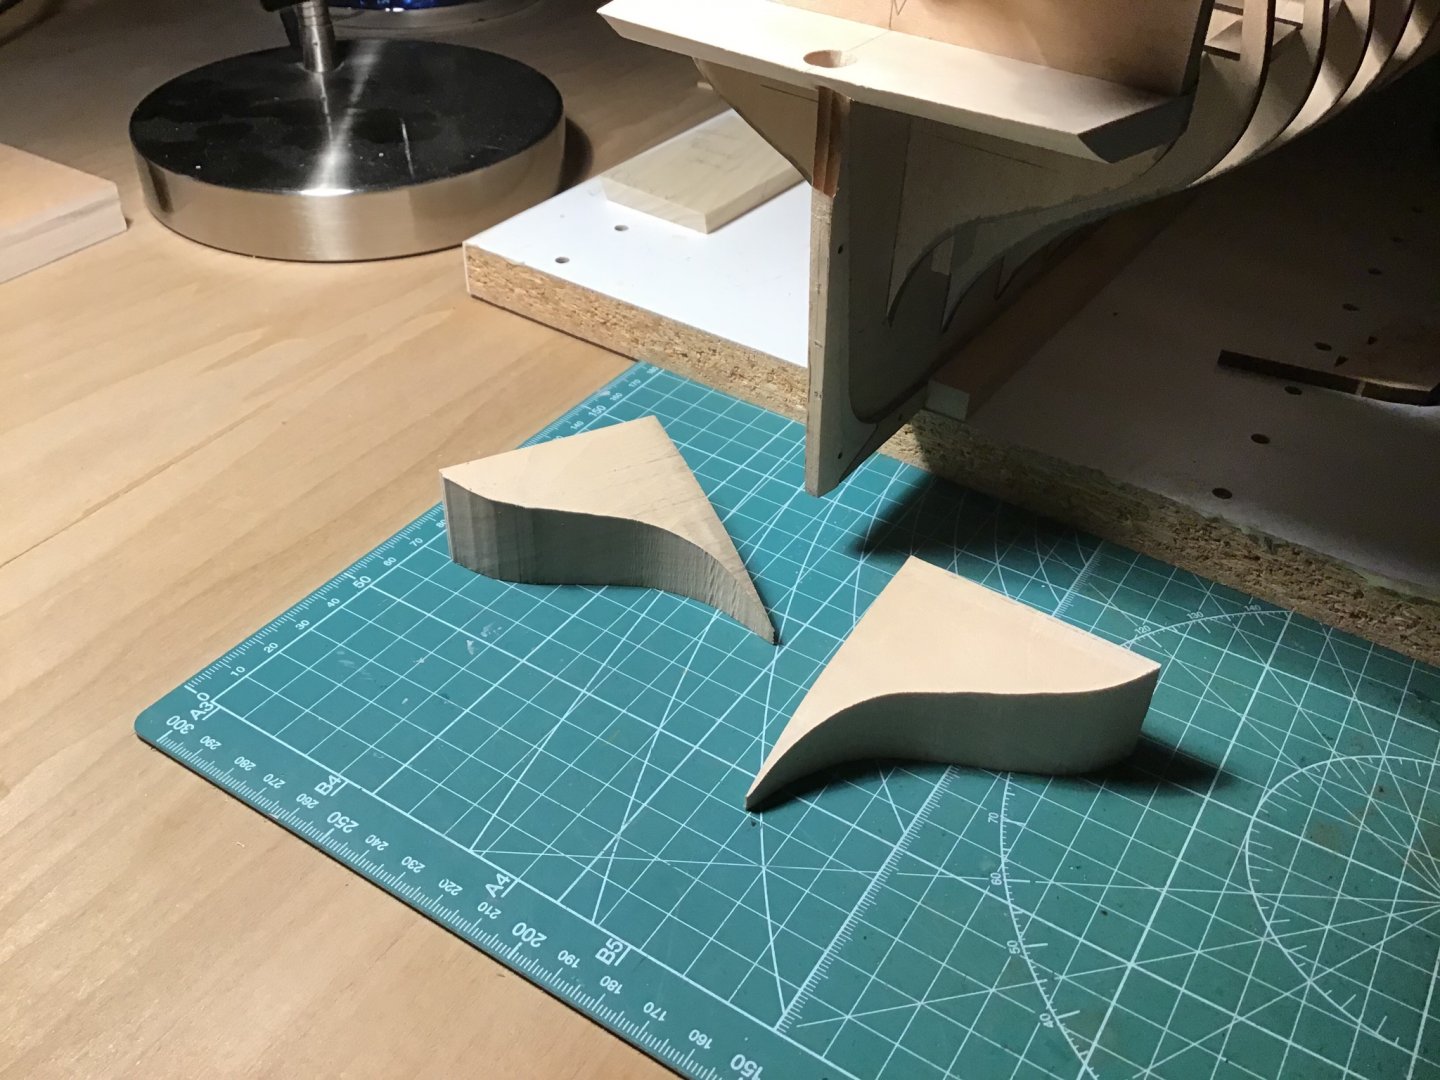
Finally marked the blocks with contour intervals to prepare for carving.
Next: carving/filing/sanding bow and stern filler blocks to final shape, using the contour templates.


-
Nice looking fantail! Happy New Year!
-Rich
-
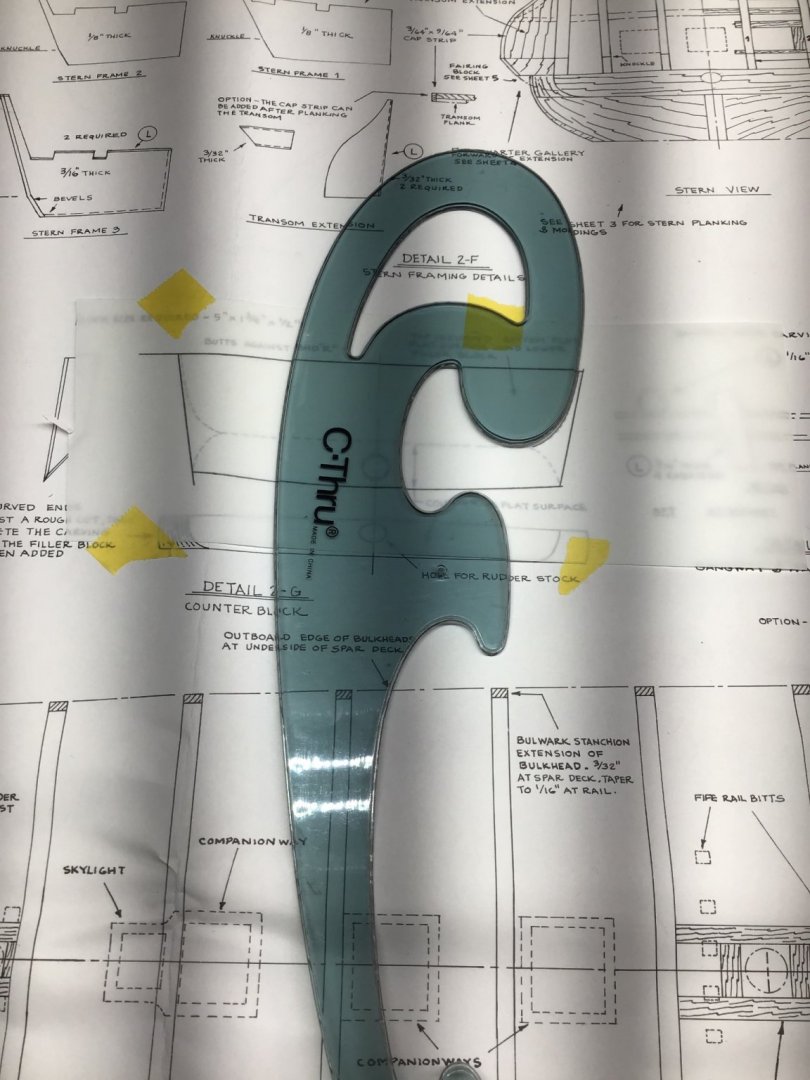
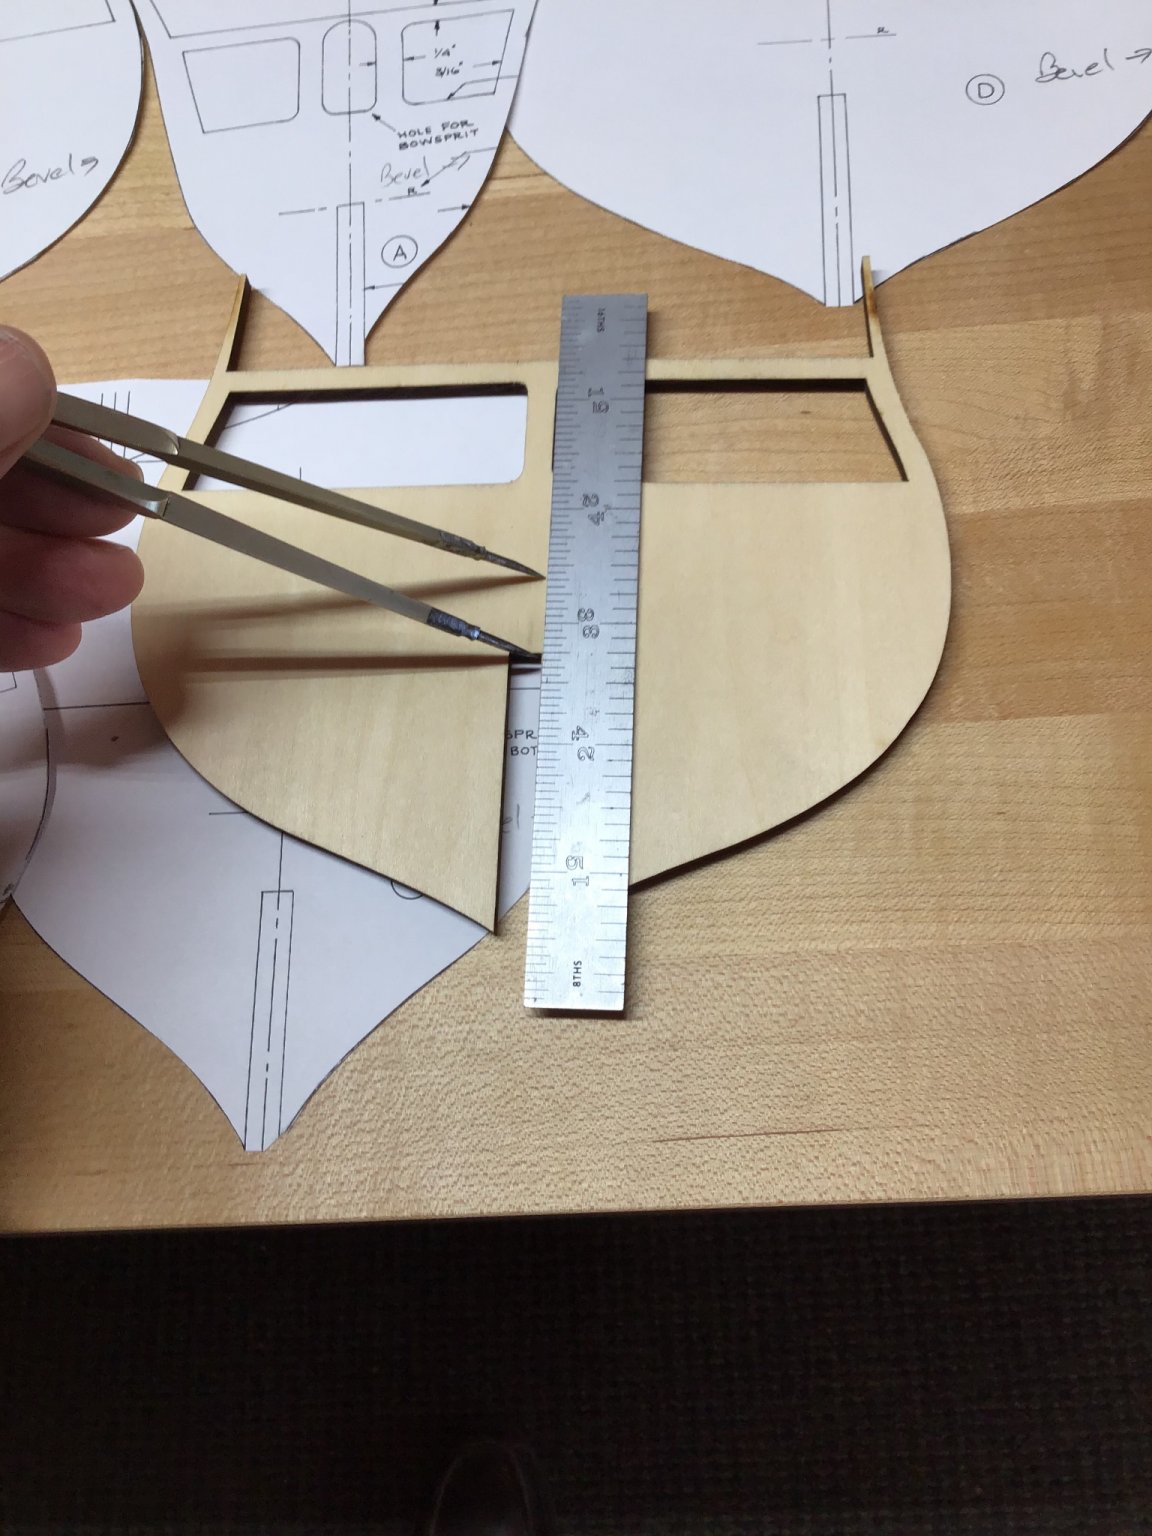
Transom Frame Prep
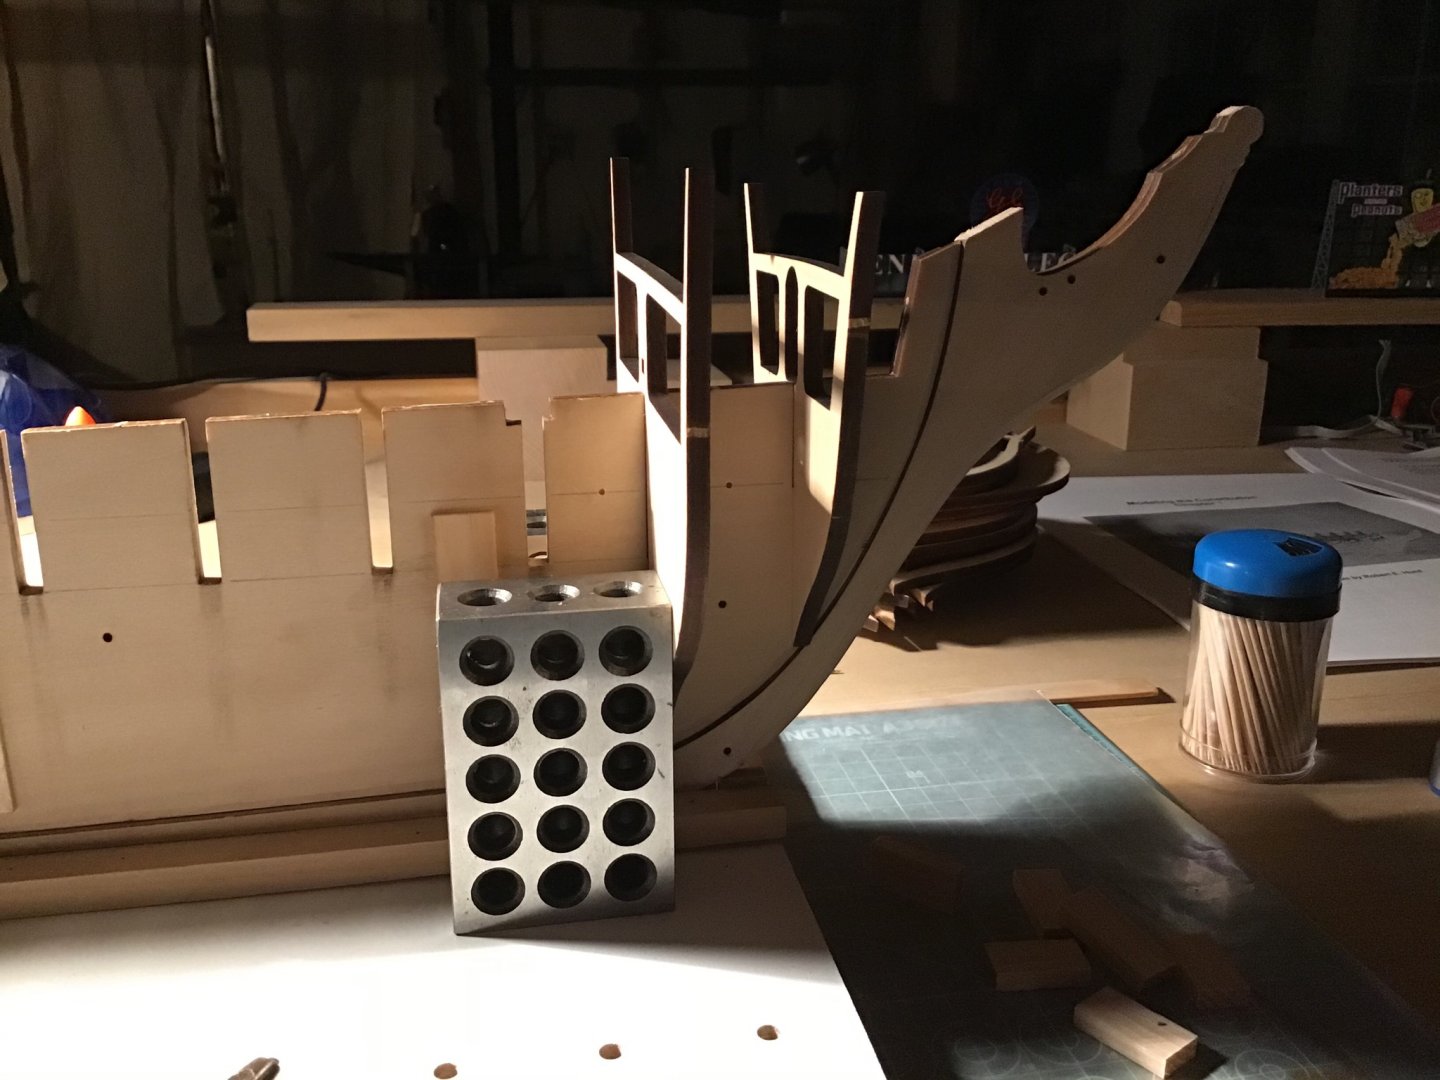
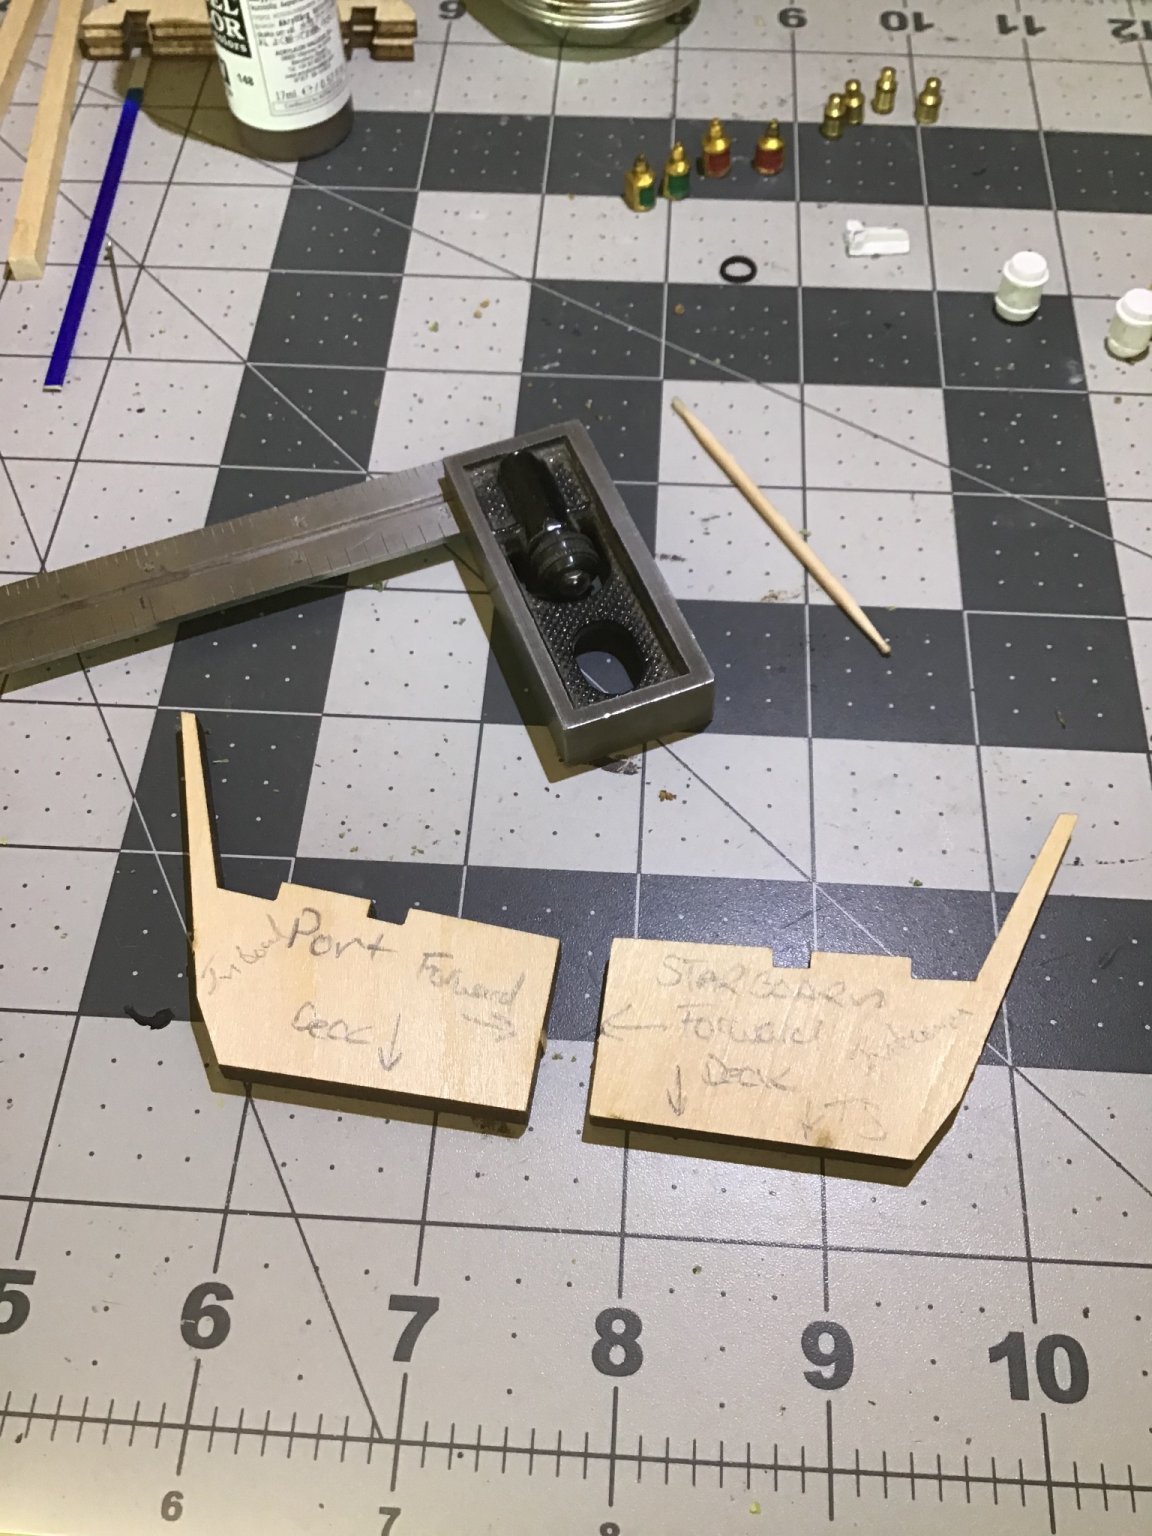
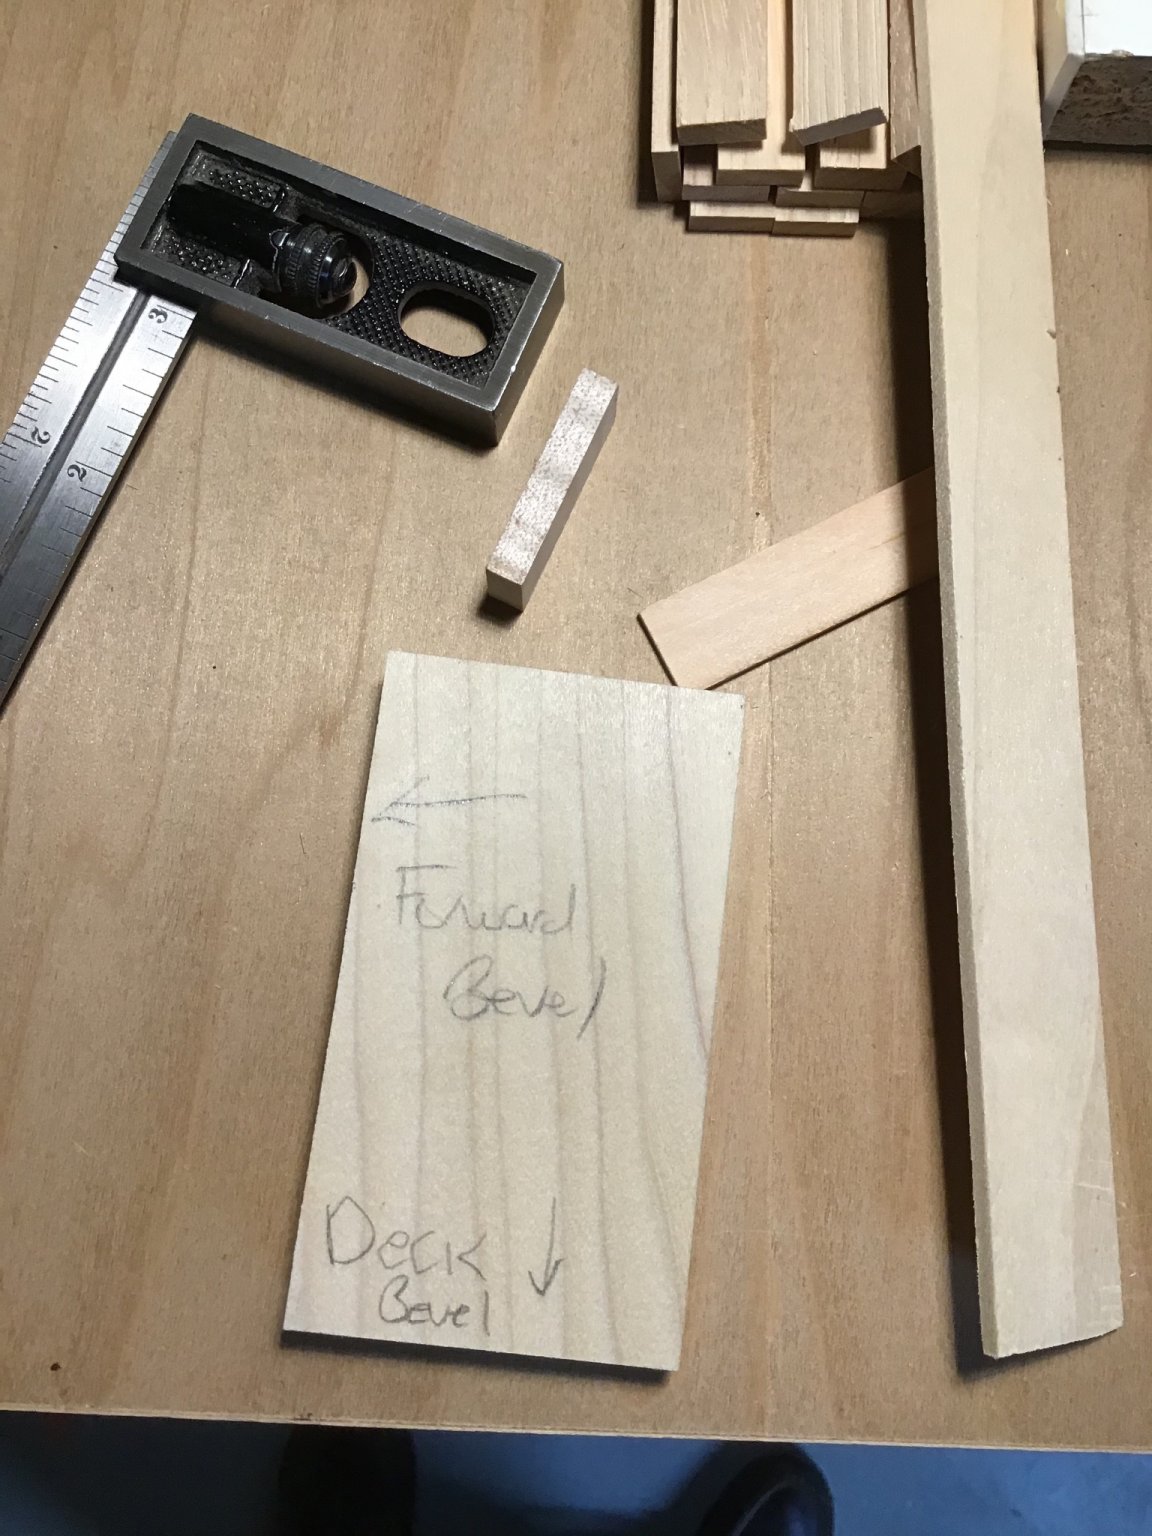
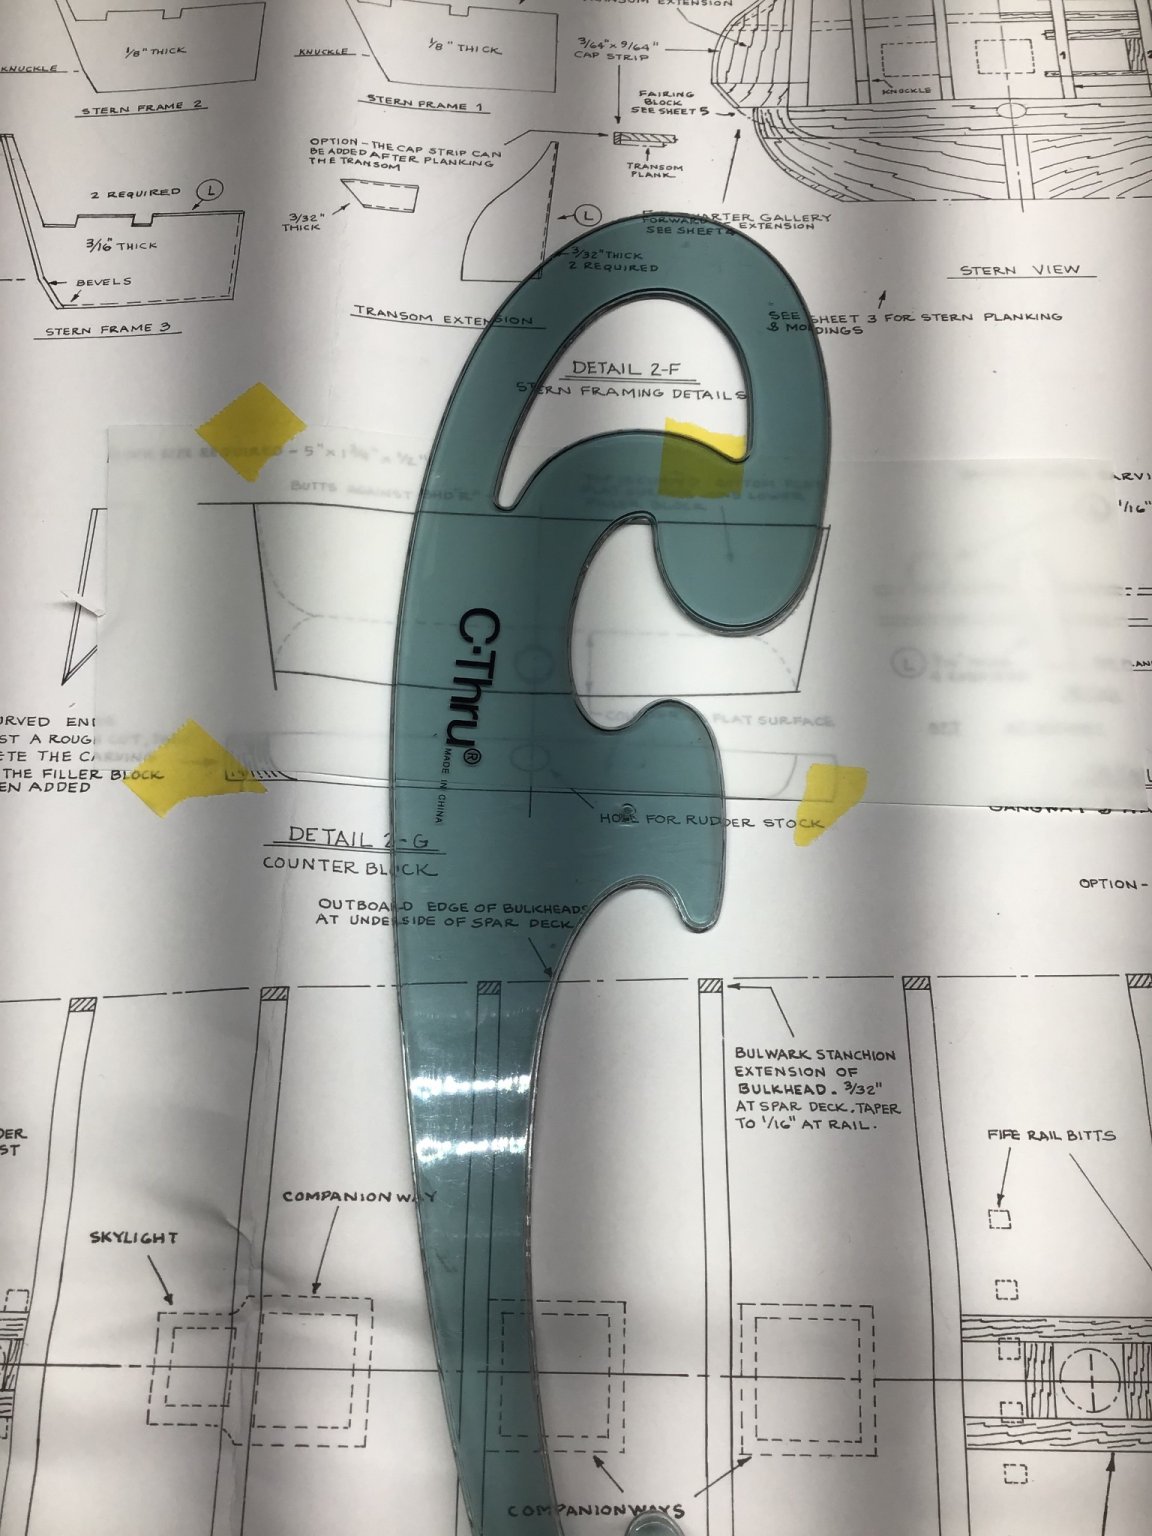
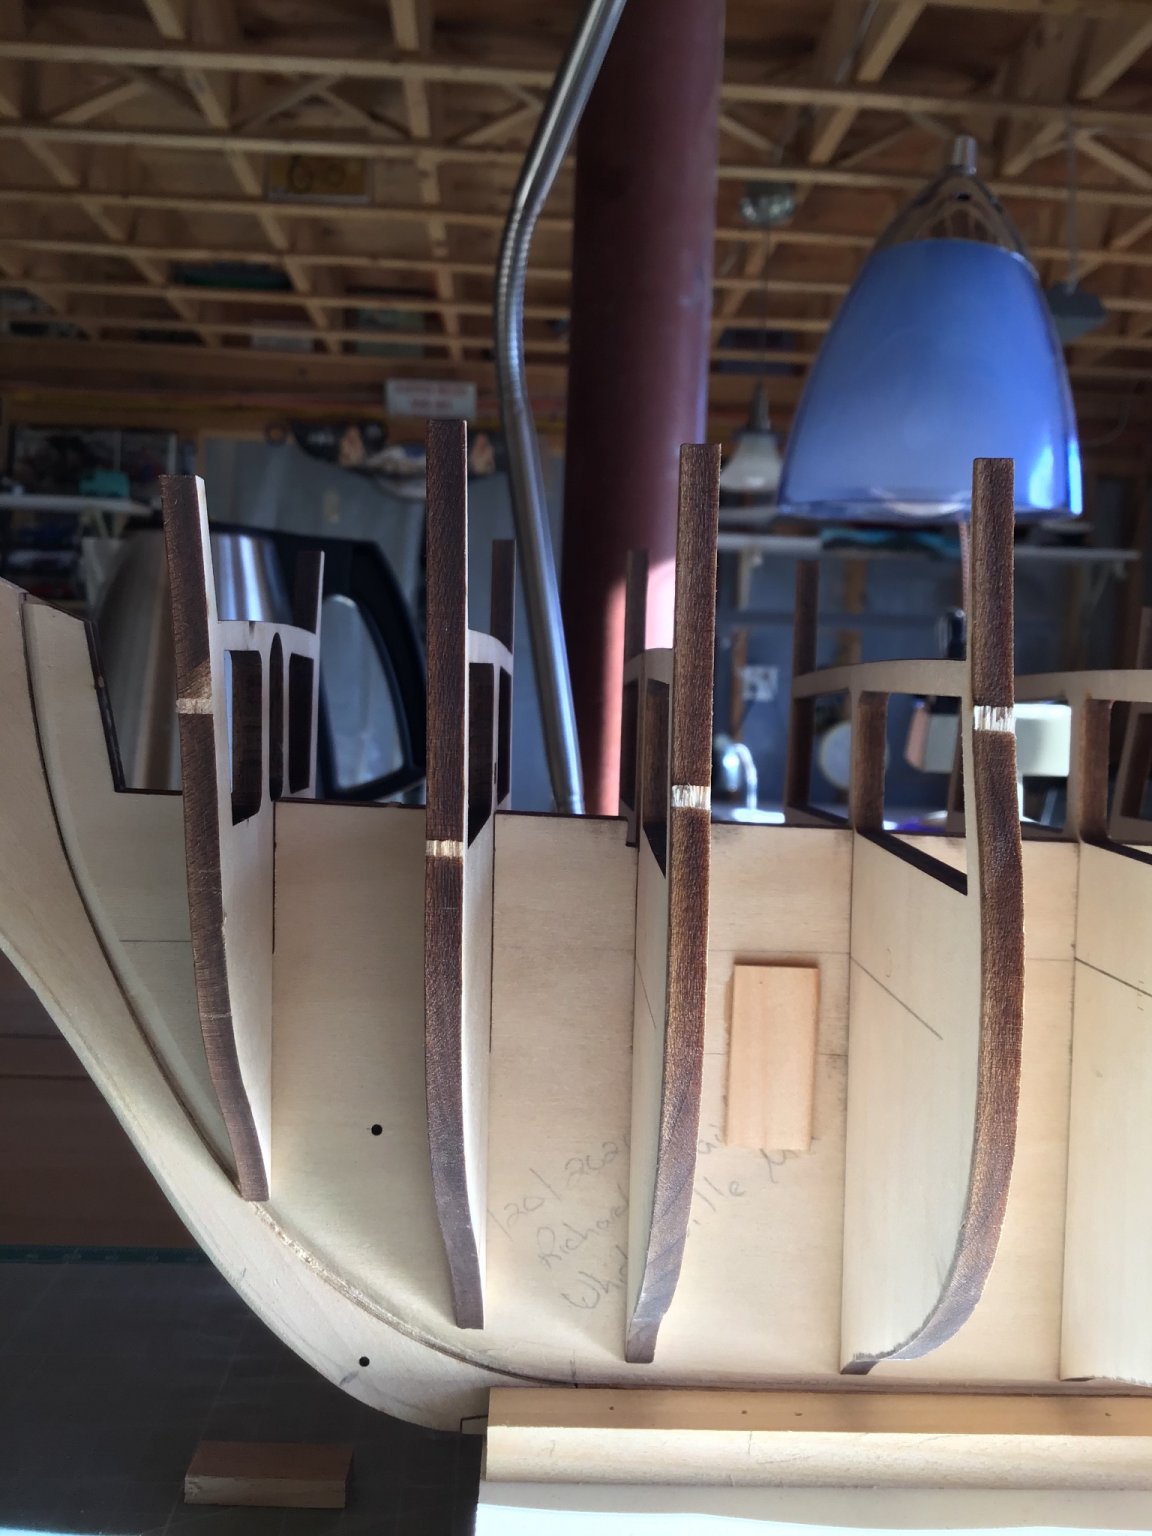
An upcoming, interesting, challenge is processing the outboard port and starboard Transom frames. Each frame has a bevel on the deck and forward side.
First off the parts are marked: Inboard, Port/Starboard, deck edge and forward edge.
The issue is how to form the bevels given frames can’t be changed dimensionally and they are unique. Failure means much wasted time making a replacement.
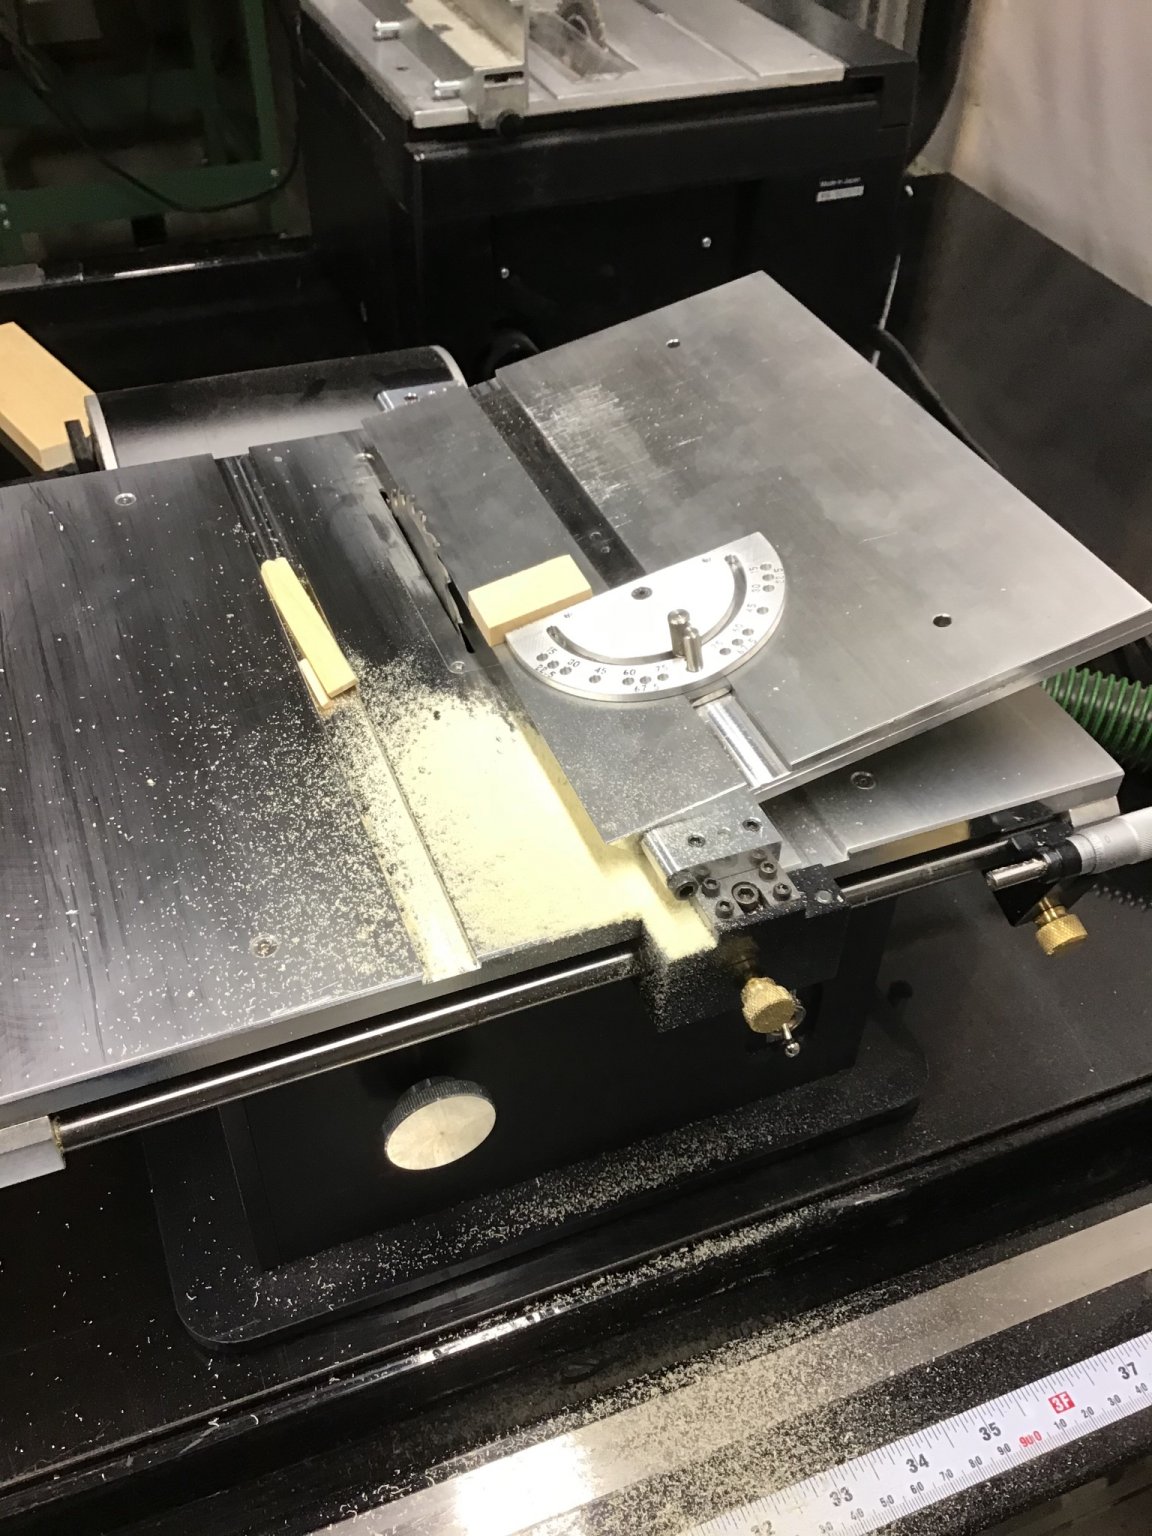
The first thought is cutting the frame bevels with the Byrnes saw and tilt table. But the cut would have to be perfect - a little risky.
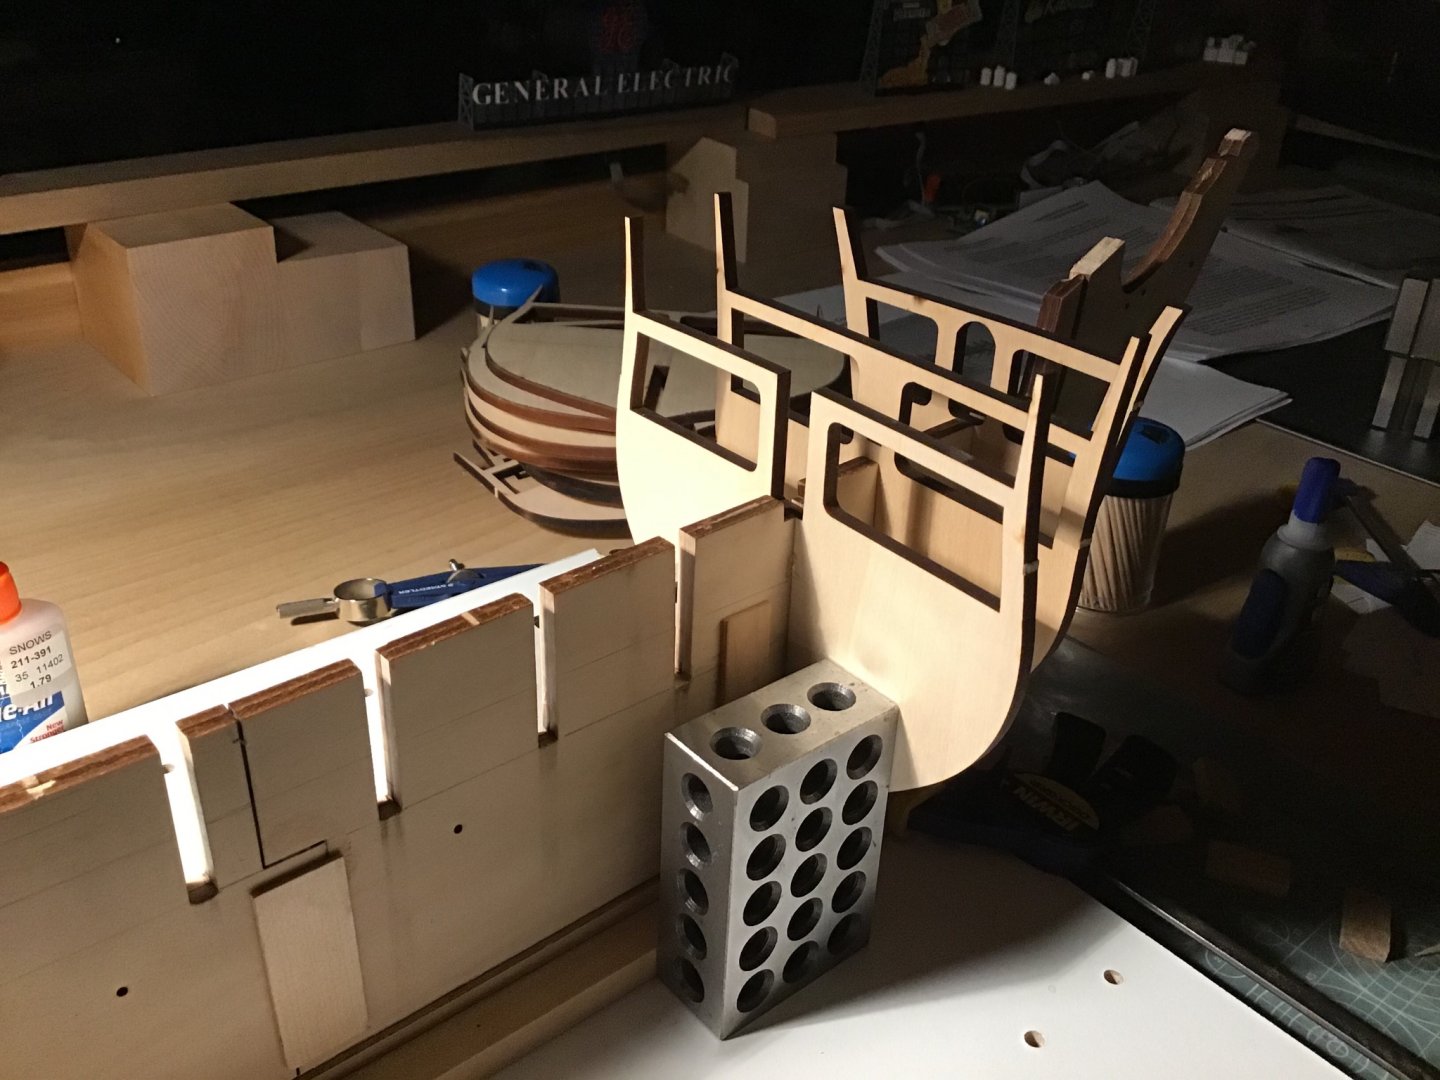
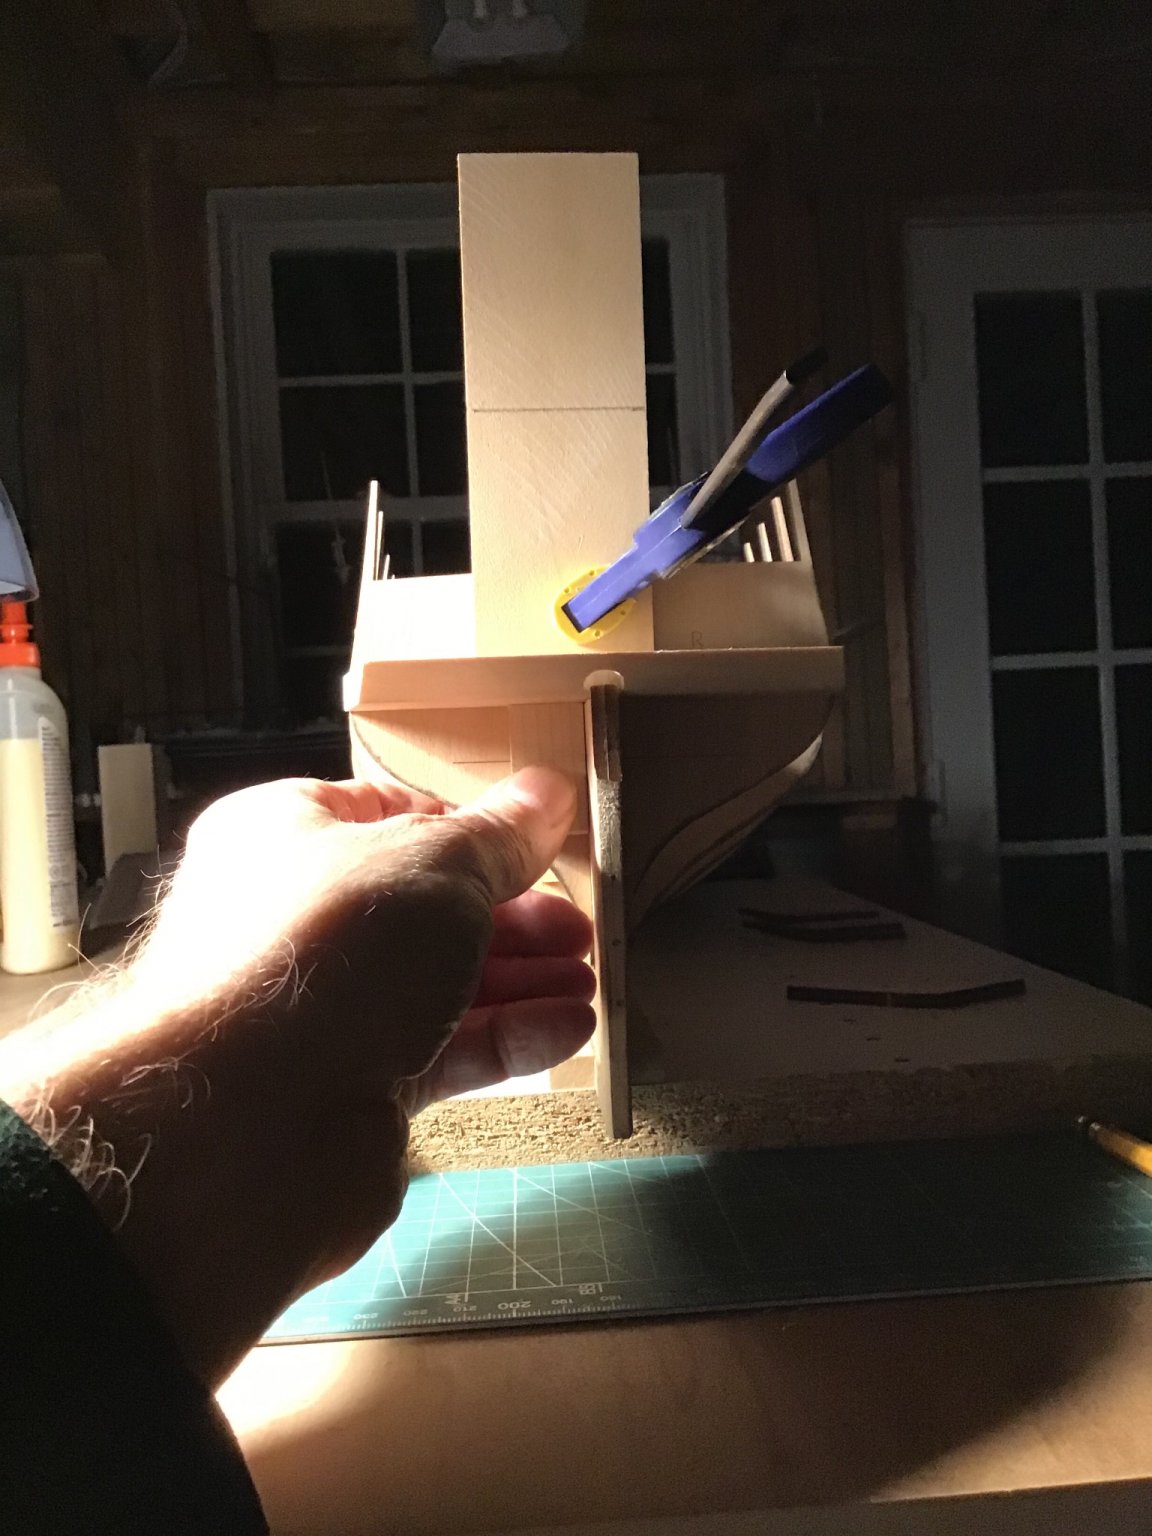
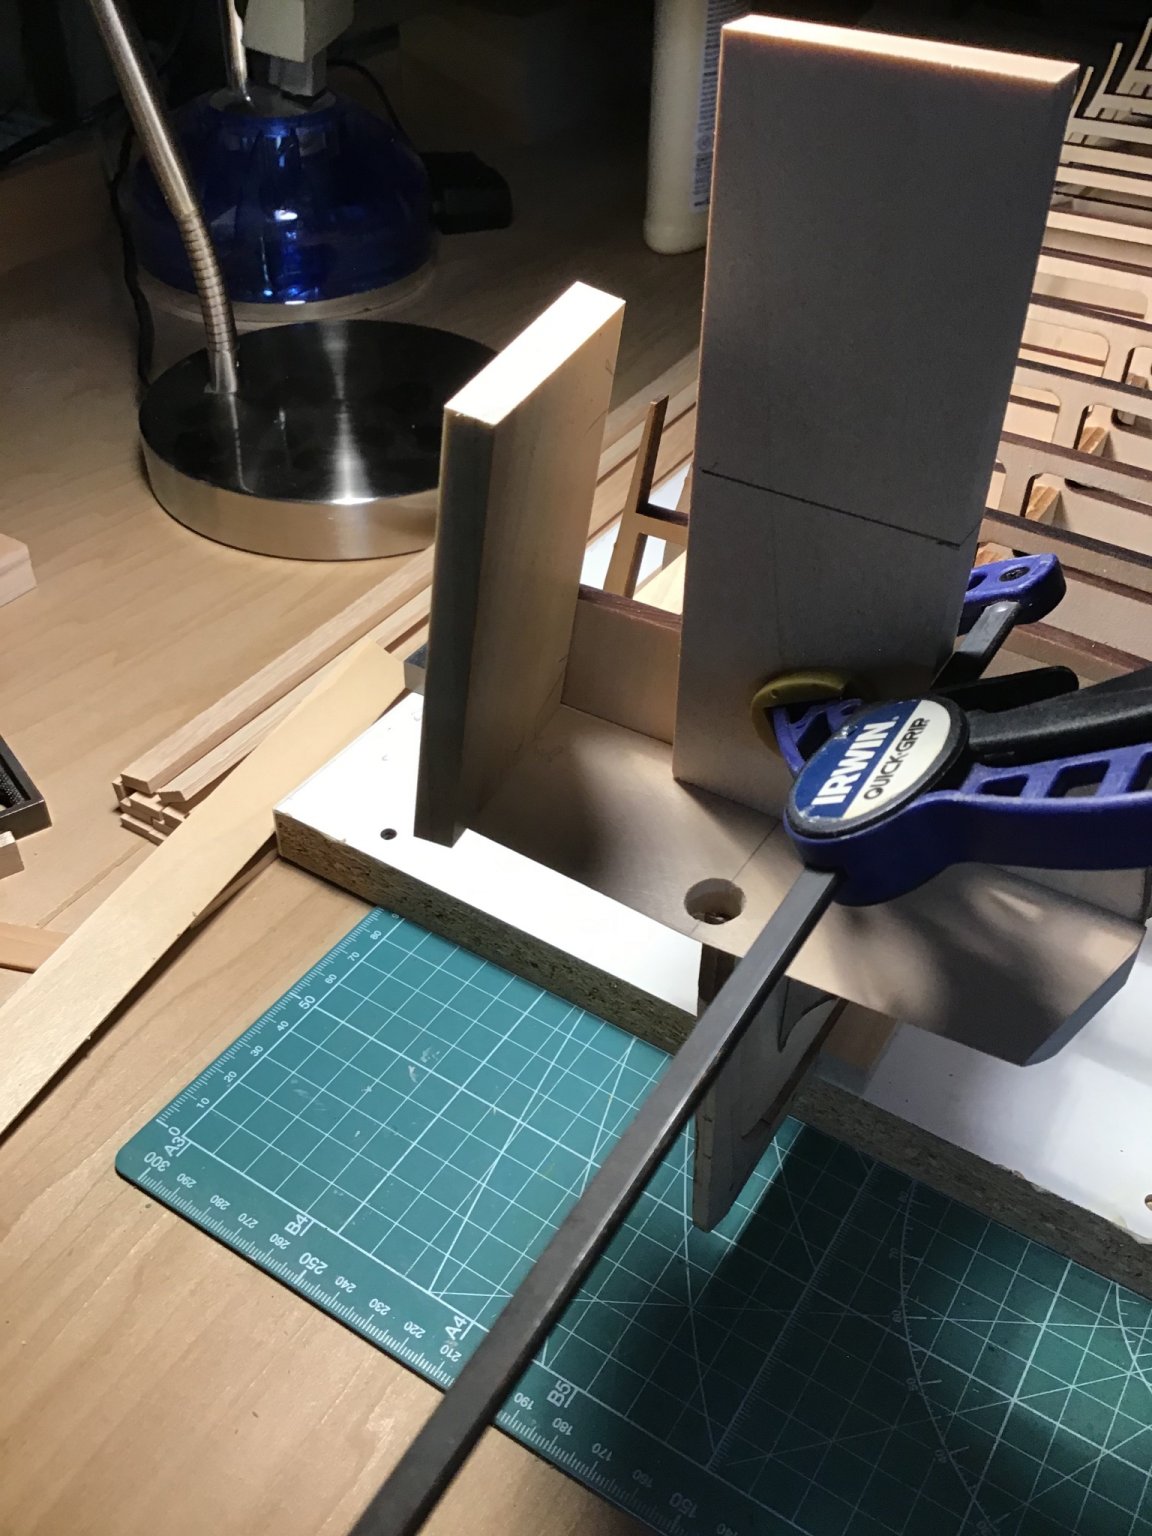
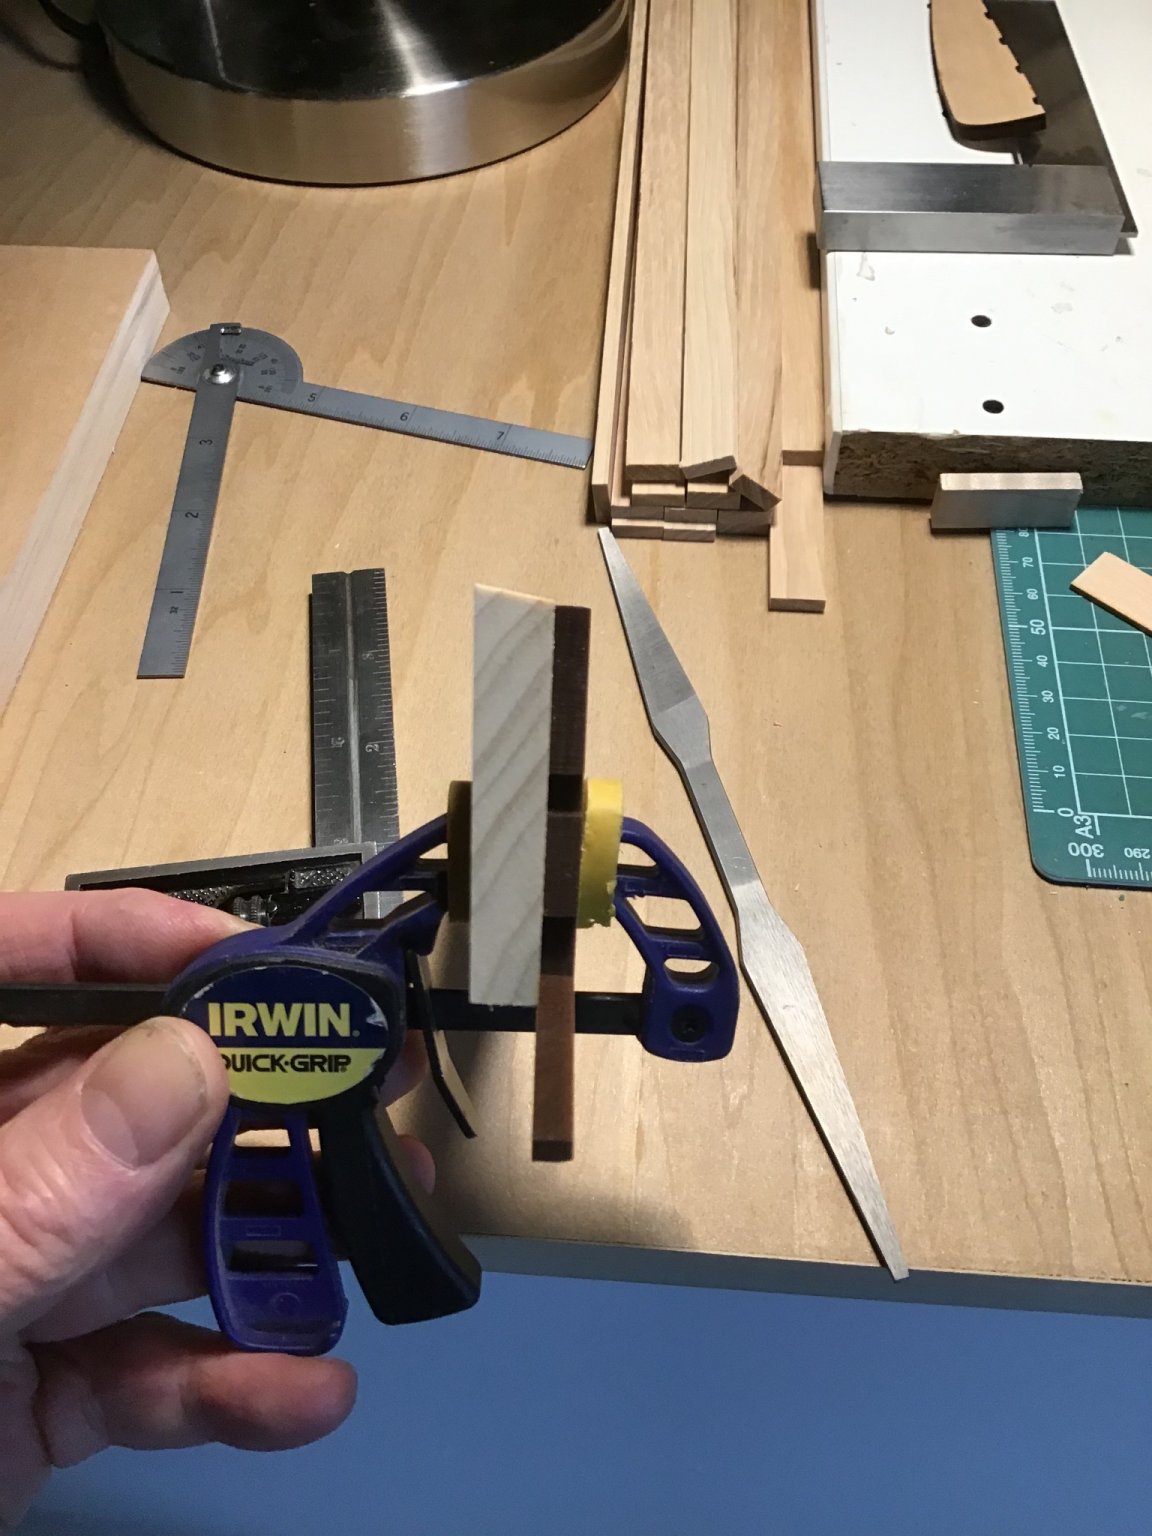
Doing by hand is necessary. So decided to use the table saw to make a form beveled on two sides.
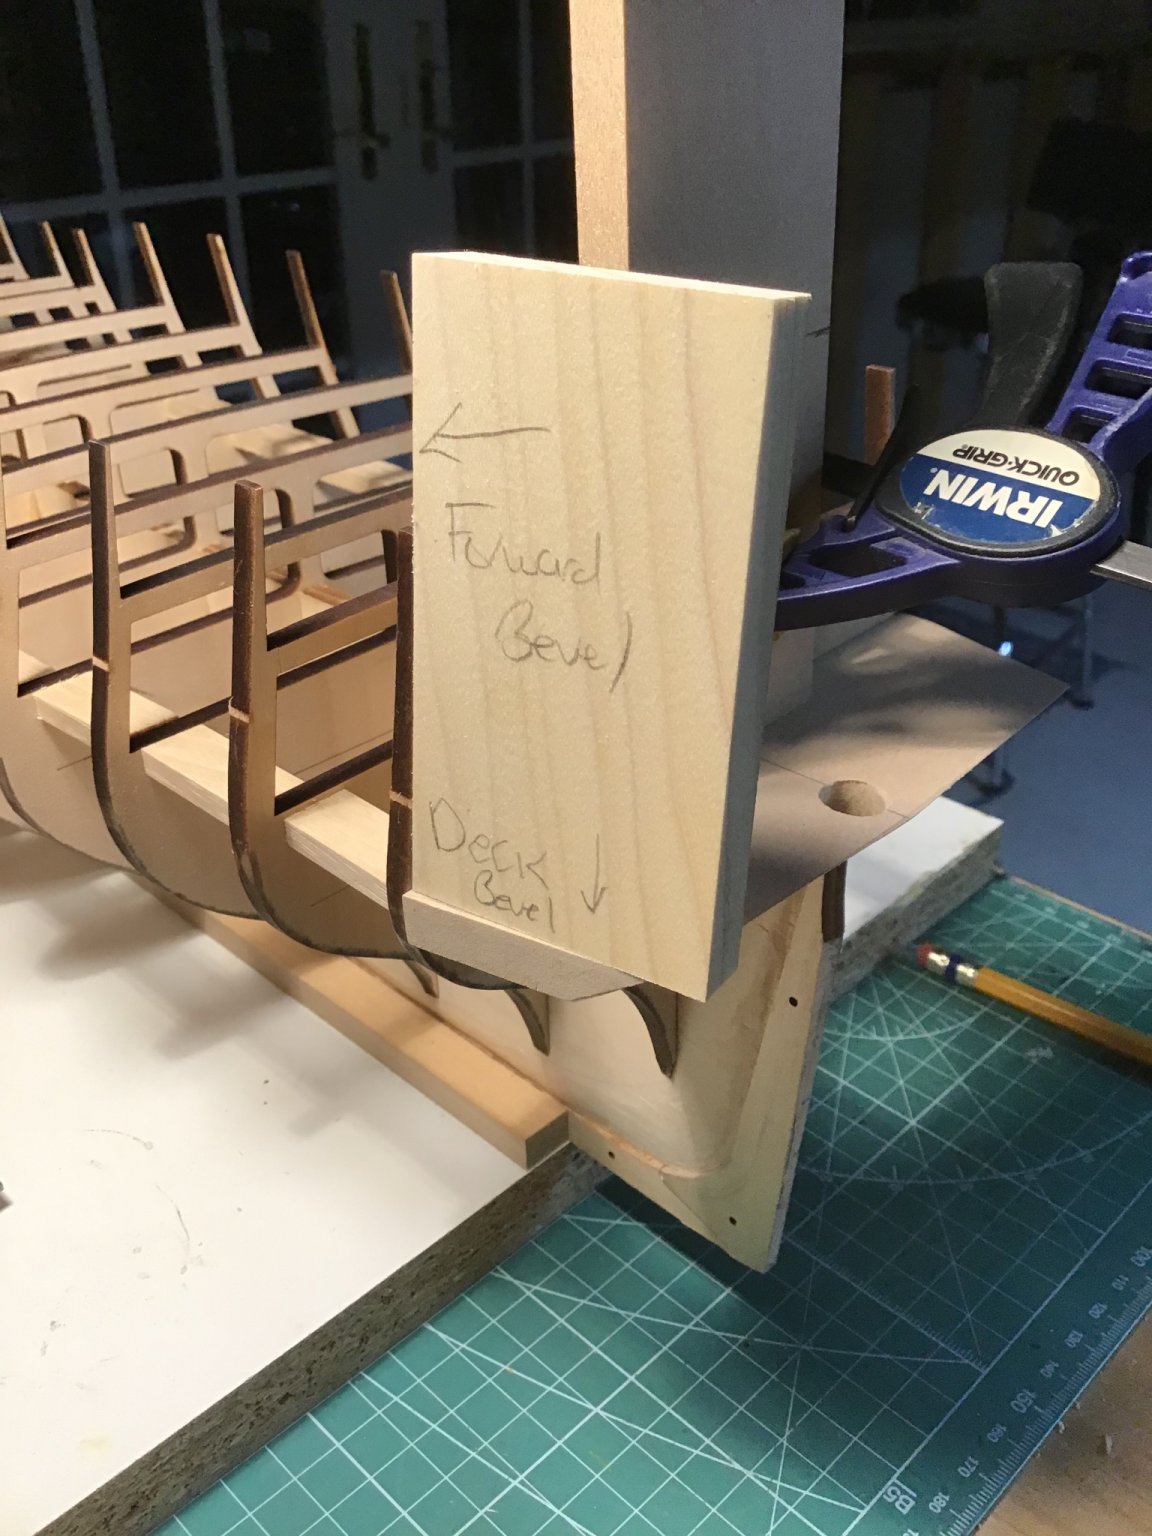
Temporarily place the counter block and align with blocks.
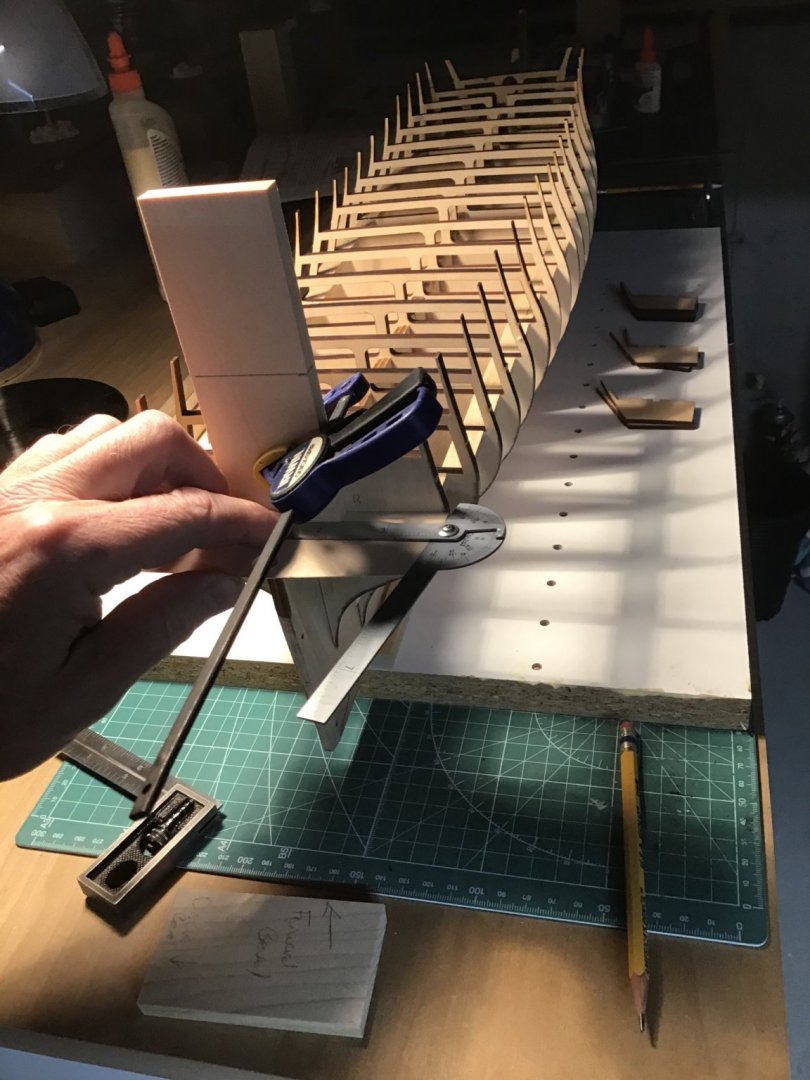
Step 1: Measure the deck bevel angle with a protractor.
Step 2: Align the tilt table and make a cut on scrap. Check the fit on the model. Adjust the tilt table as necessary. Make the cut on the form block. Check the fit.
Step 3: Measure the frame bevel. Repeat Step 2.
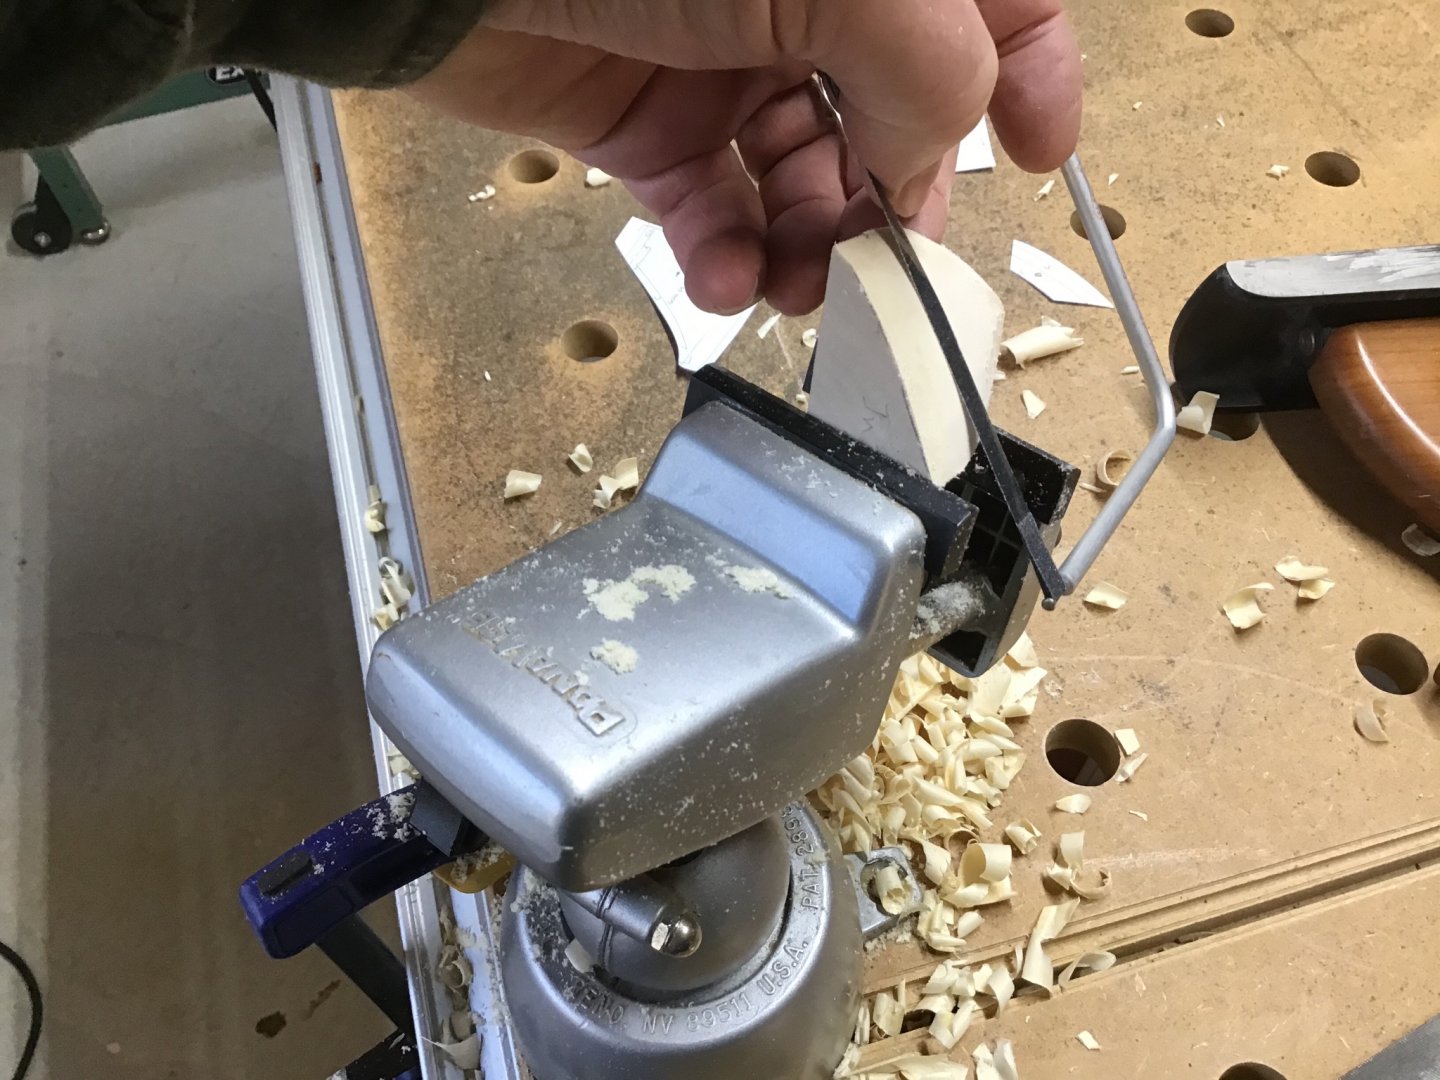
Step 4: Clamp the frame to the form block and create the bevels on the frames with a file.


- GrandpaPhil, GuntherMT, J11 and 1 other
-
4
-
-
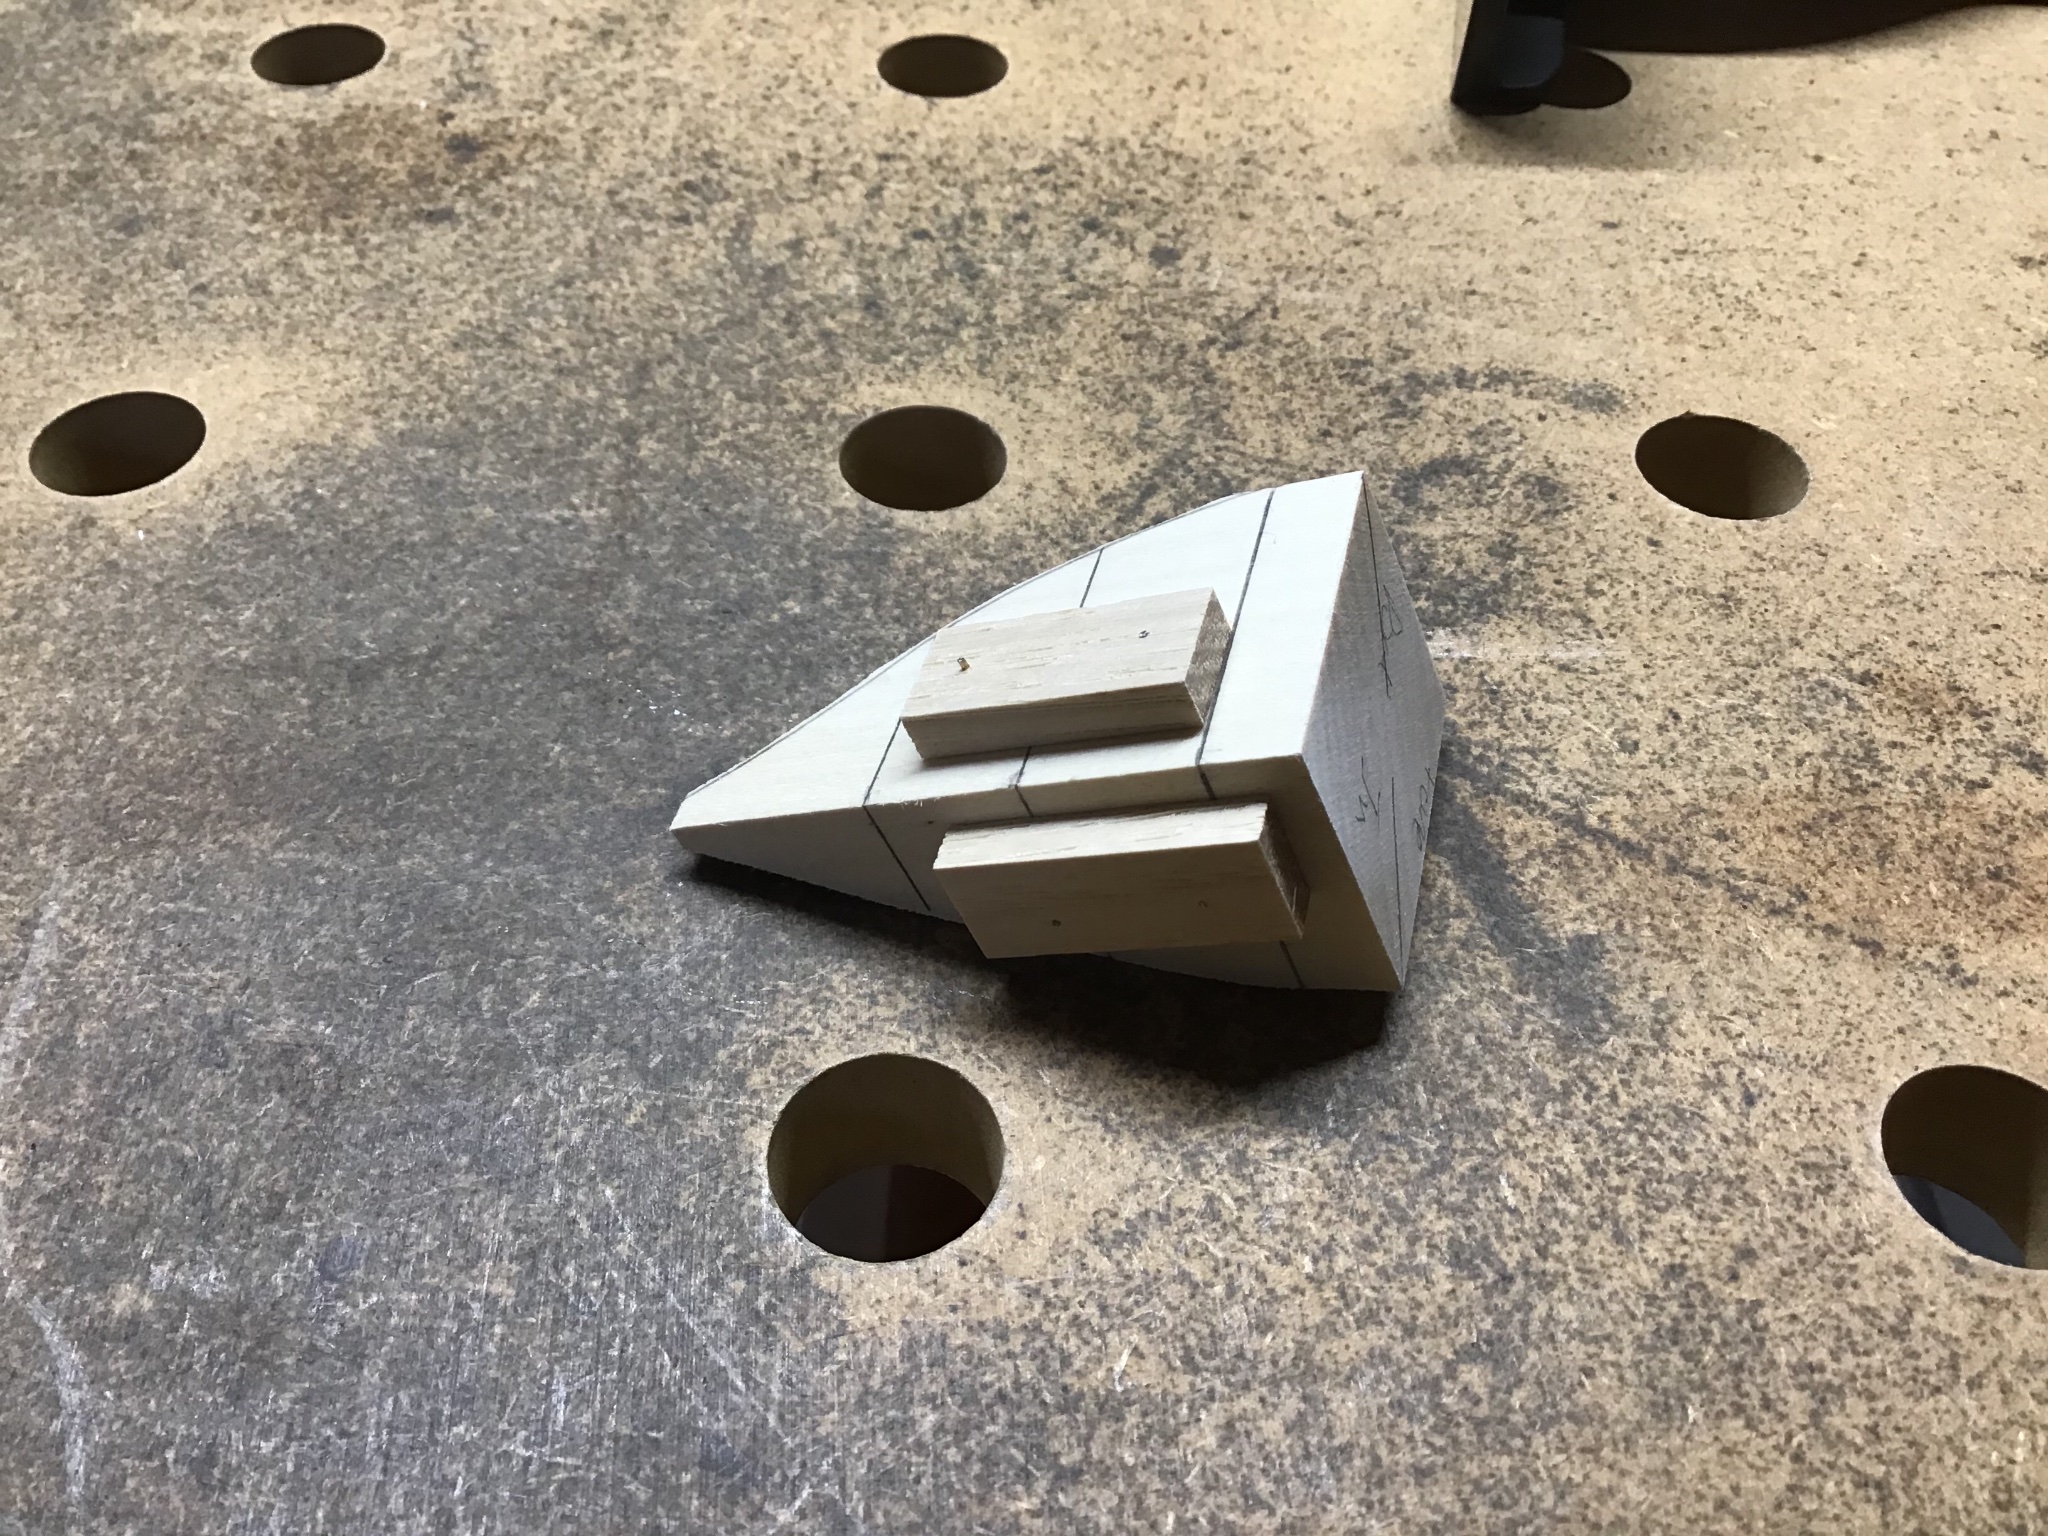
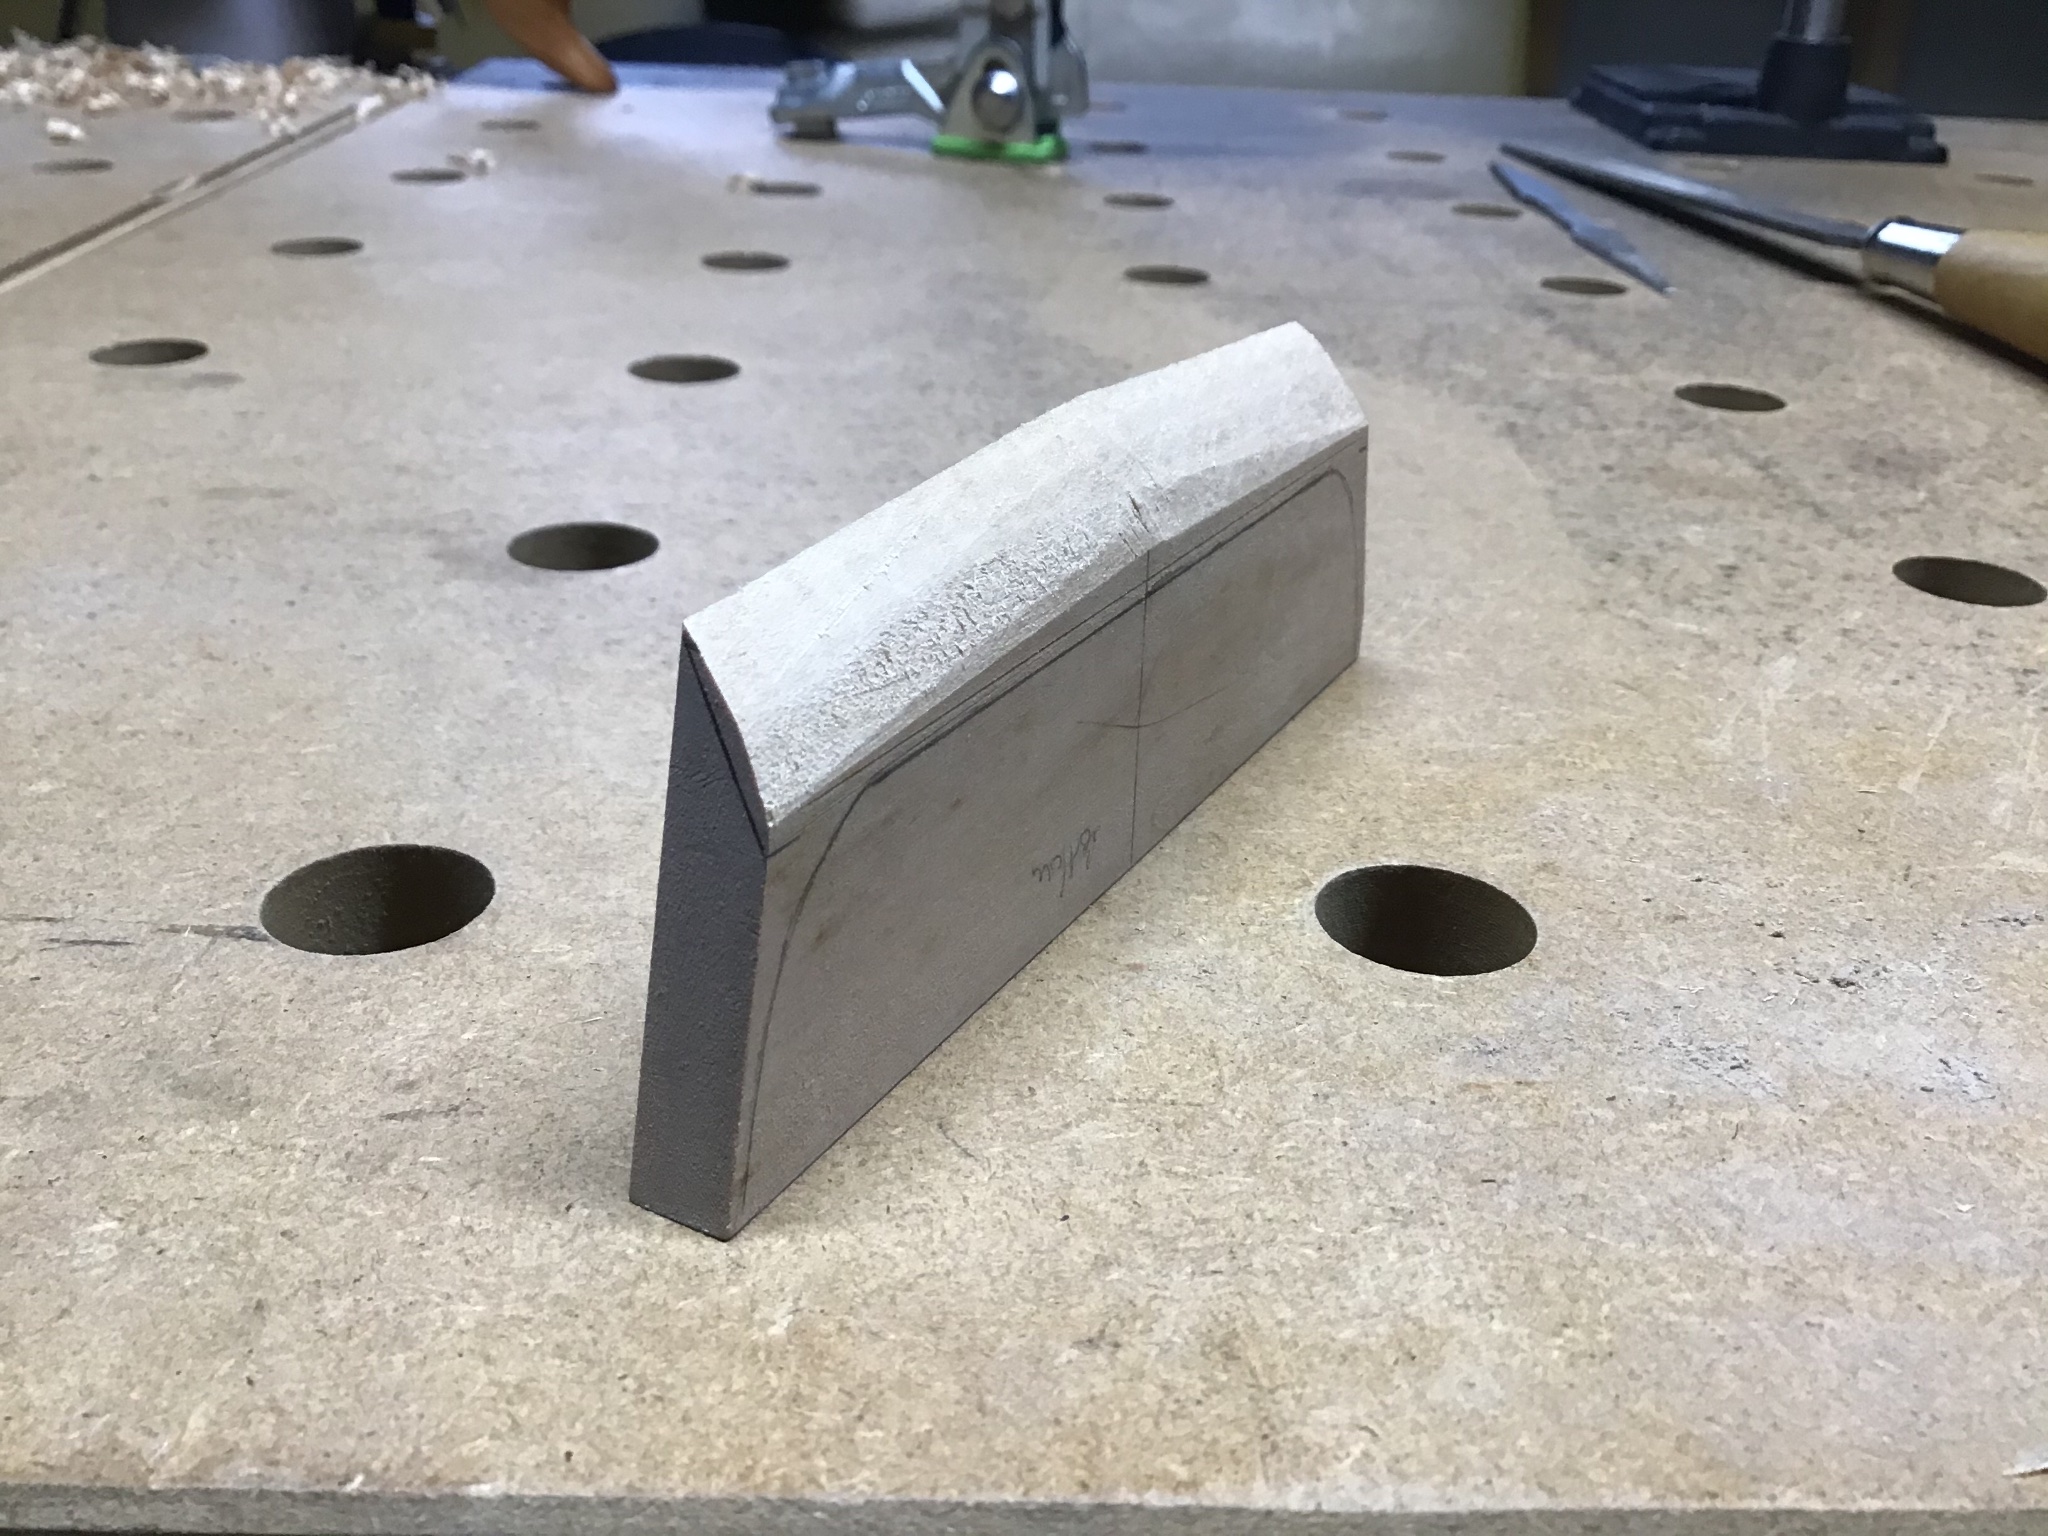
Completing Counter Block
Happy New Year!
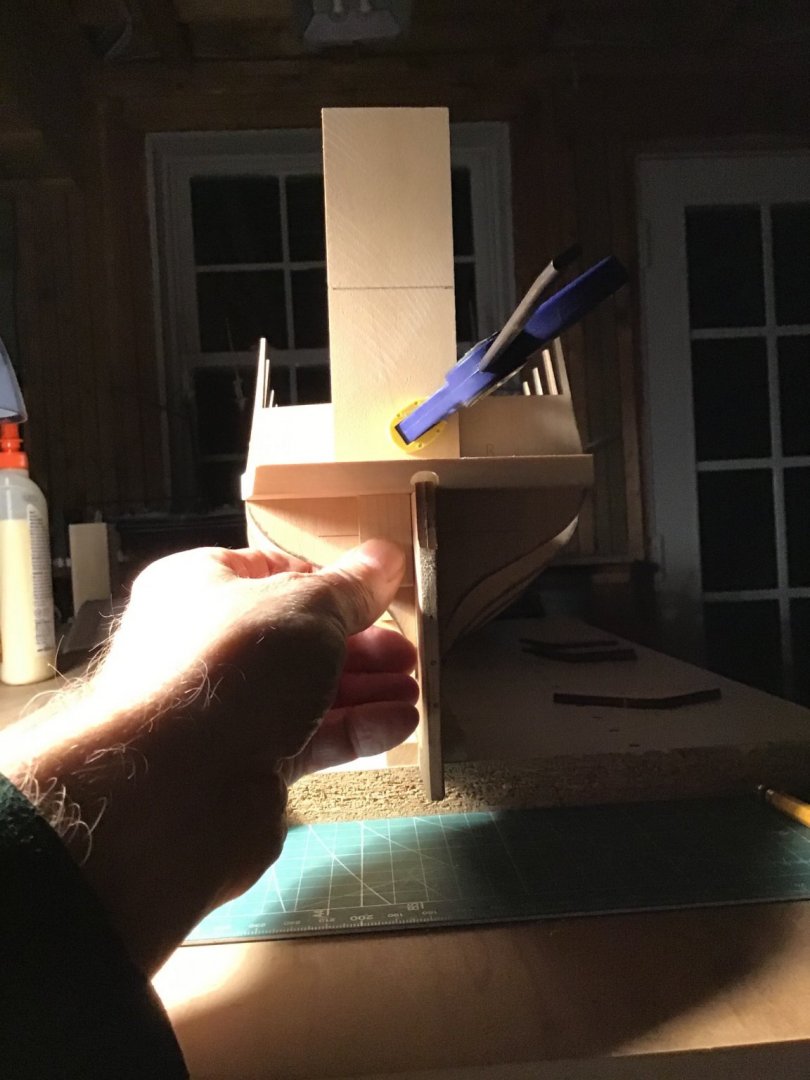
Finished up the counter today.
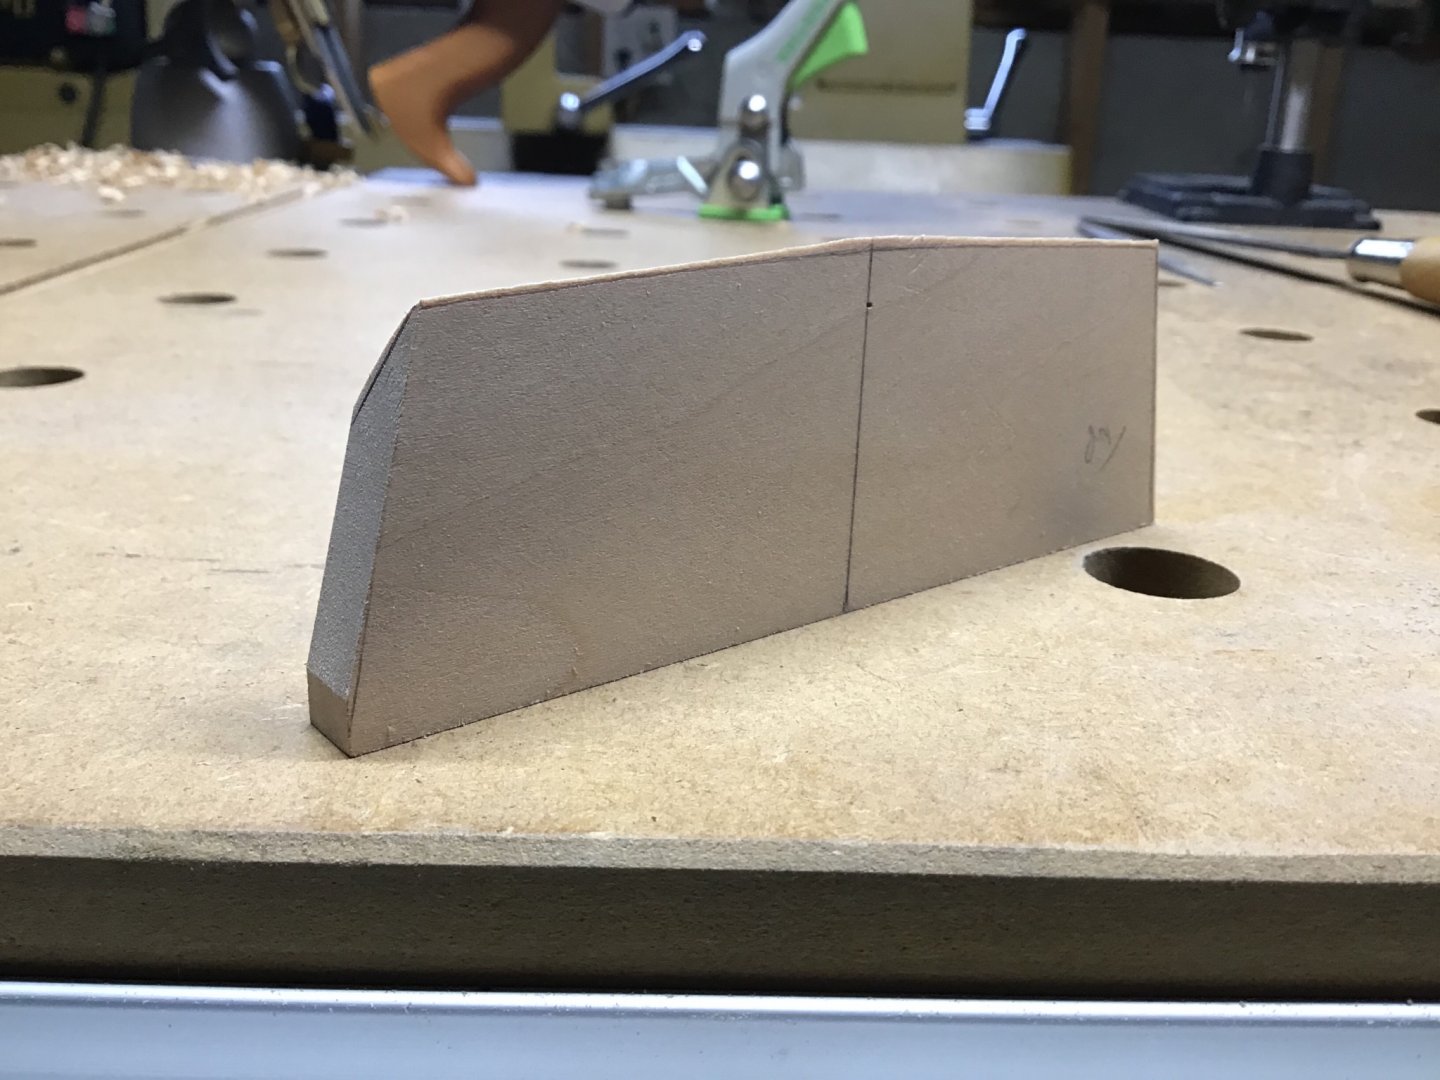
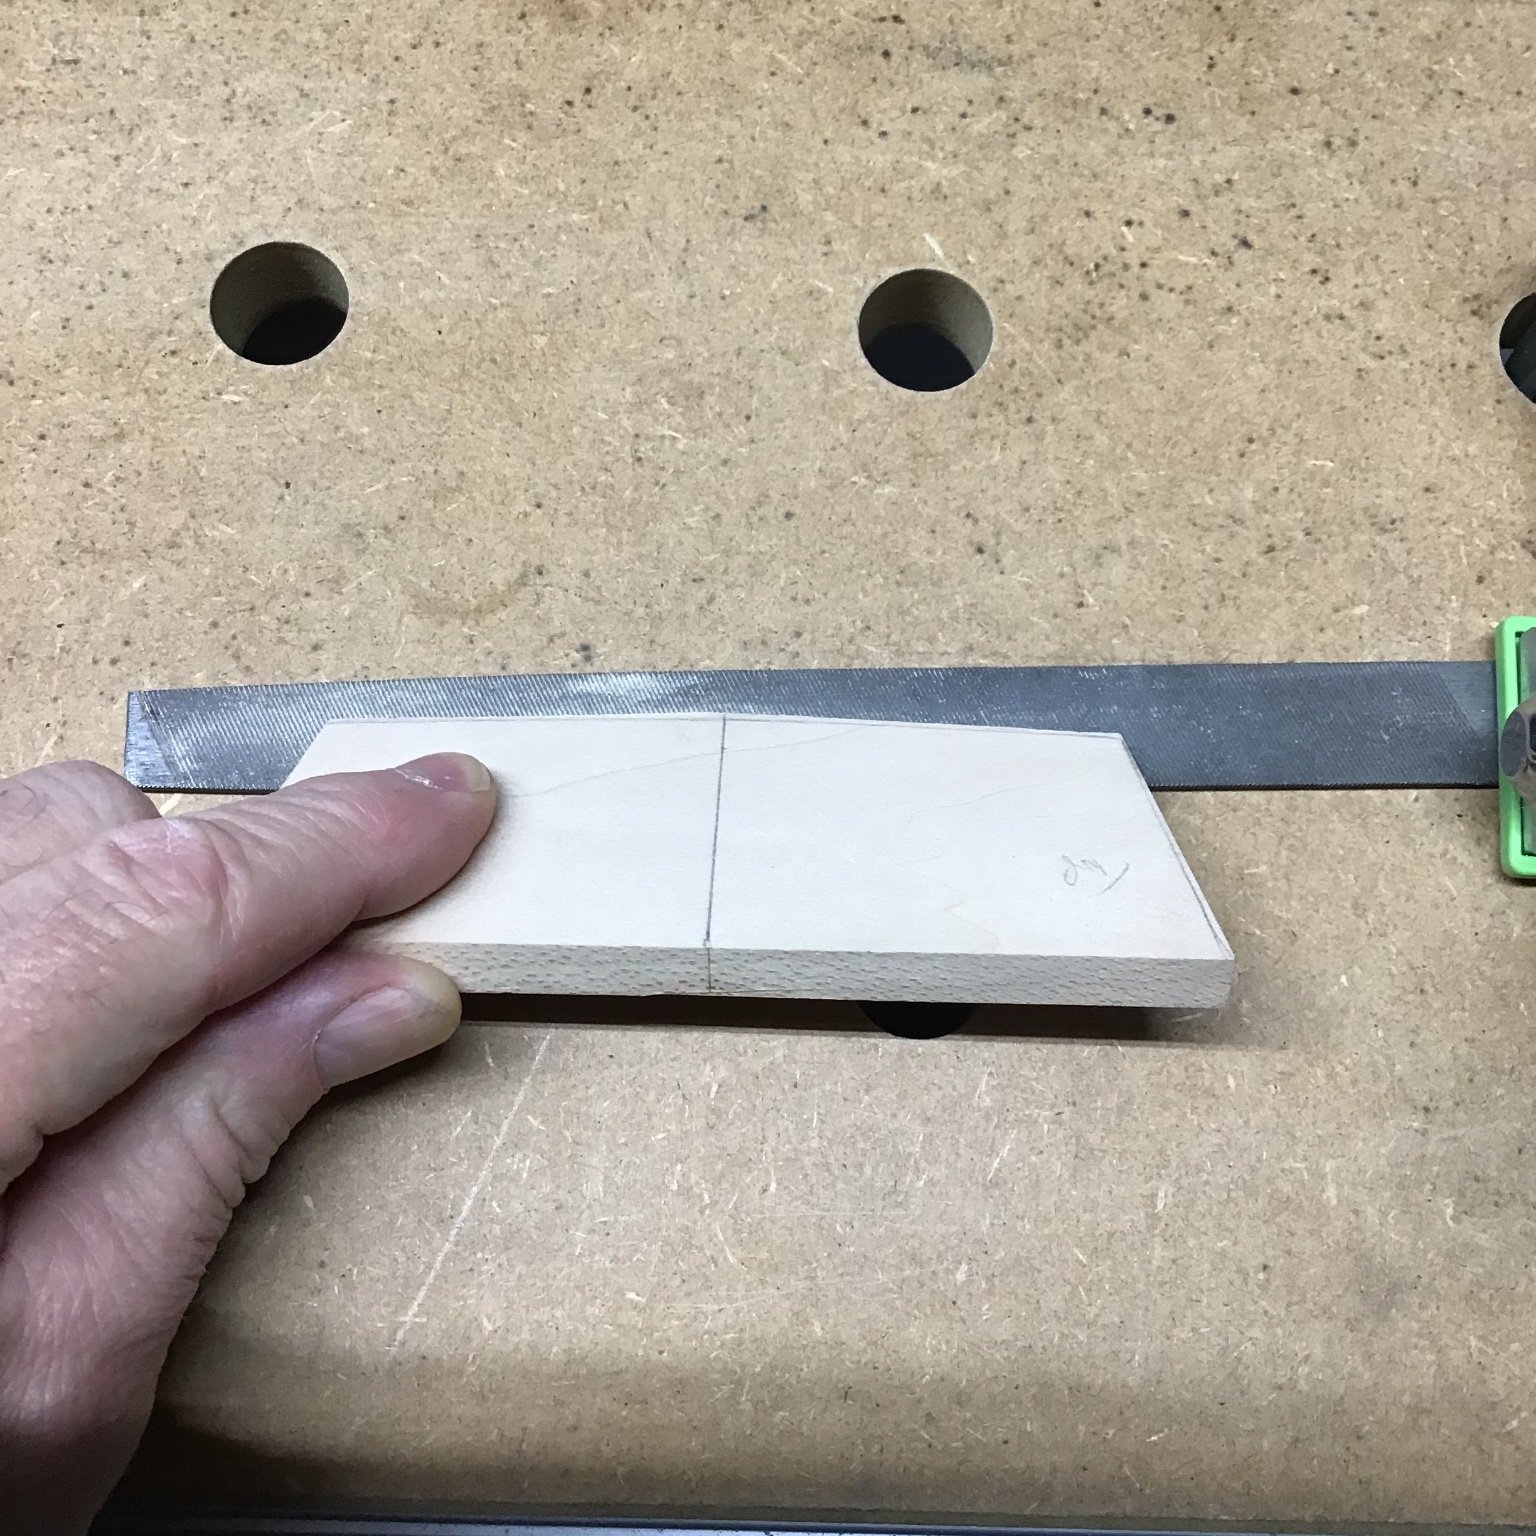
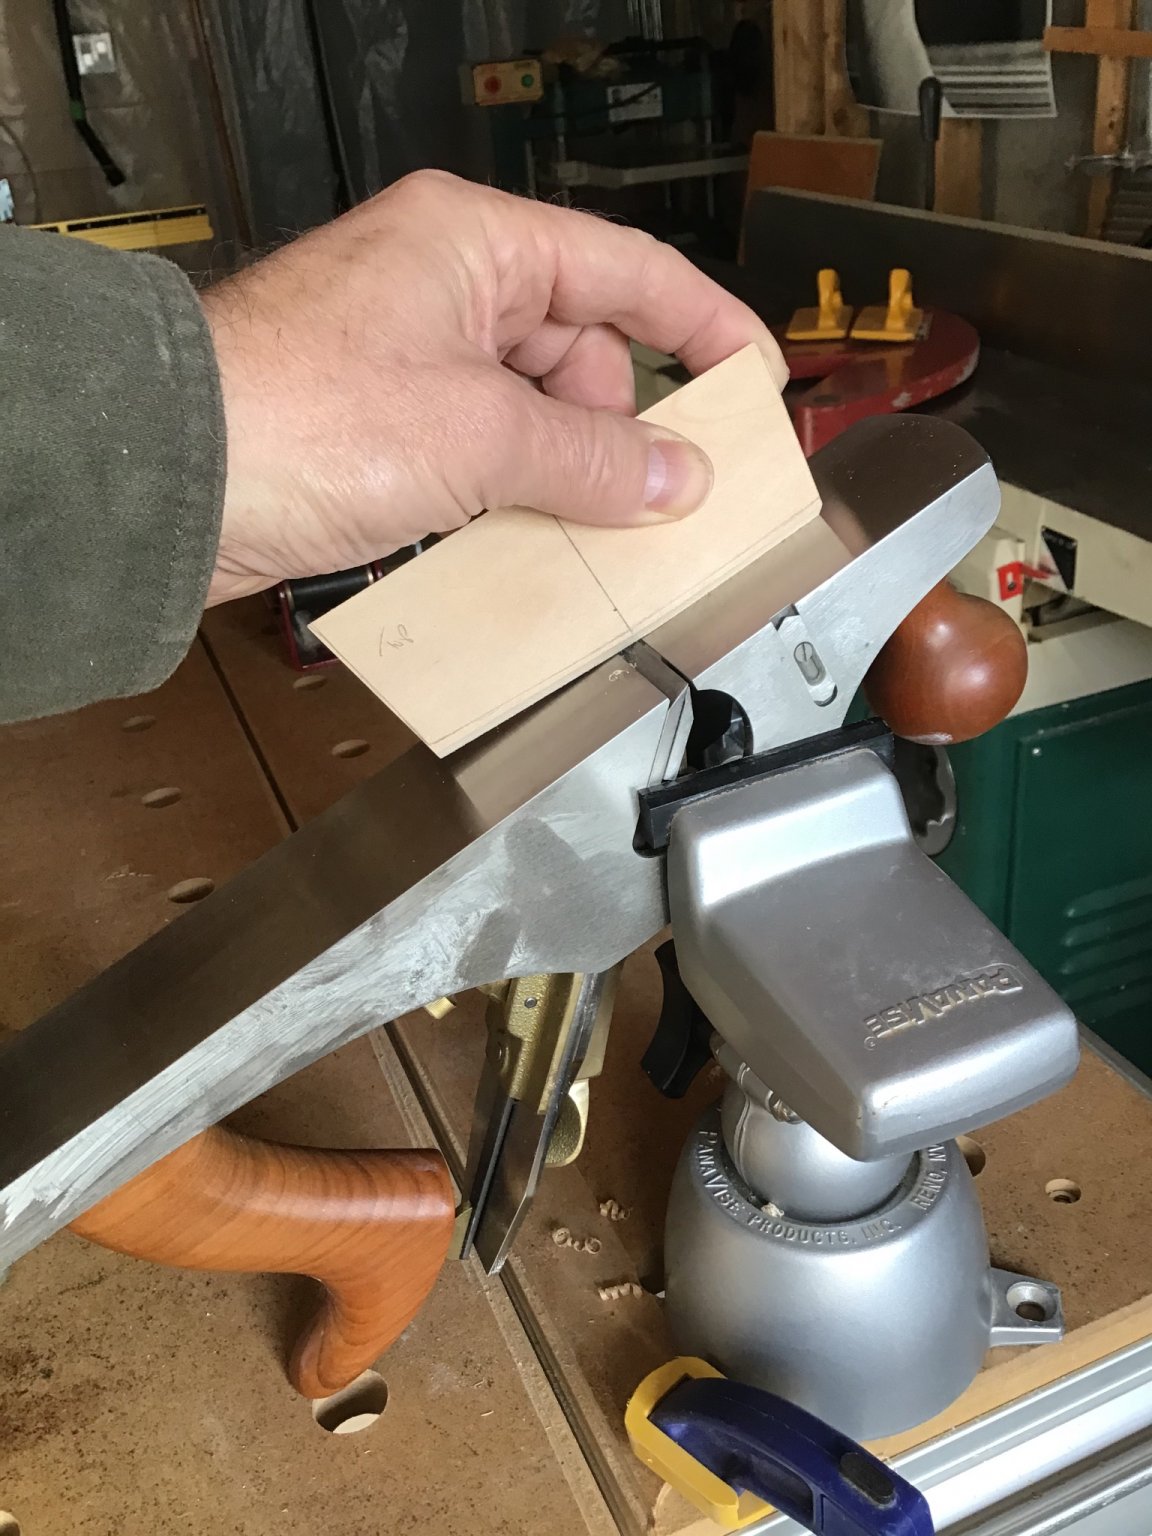
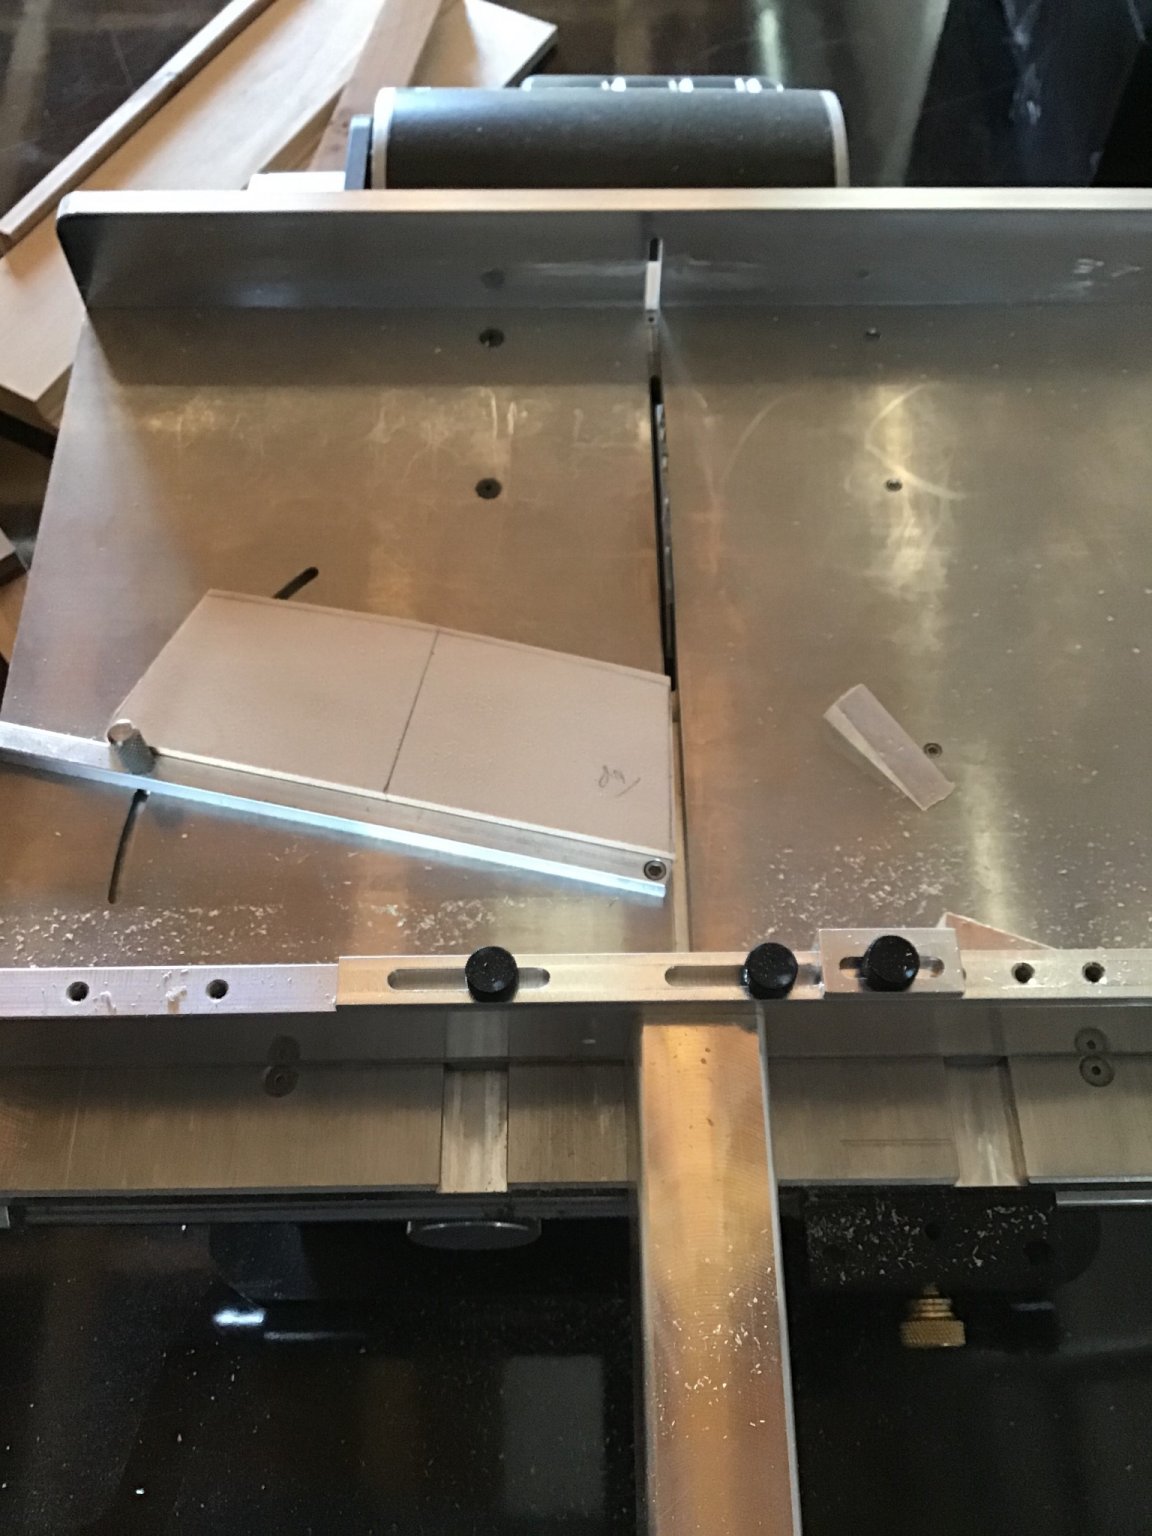
Continued shaping the counter block. Made a couple of blanks, just in case, however, one was enough.
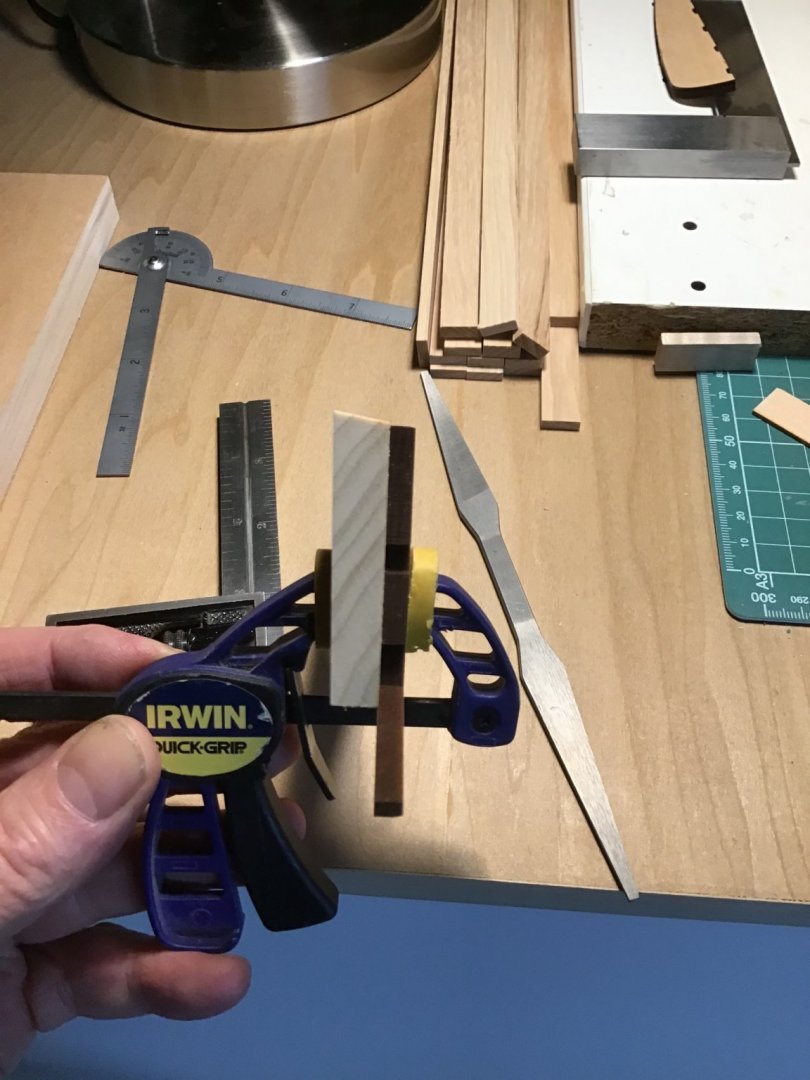
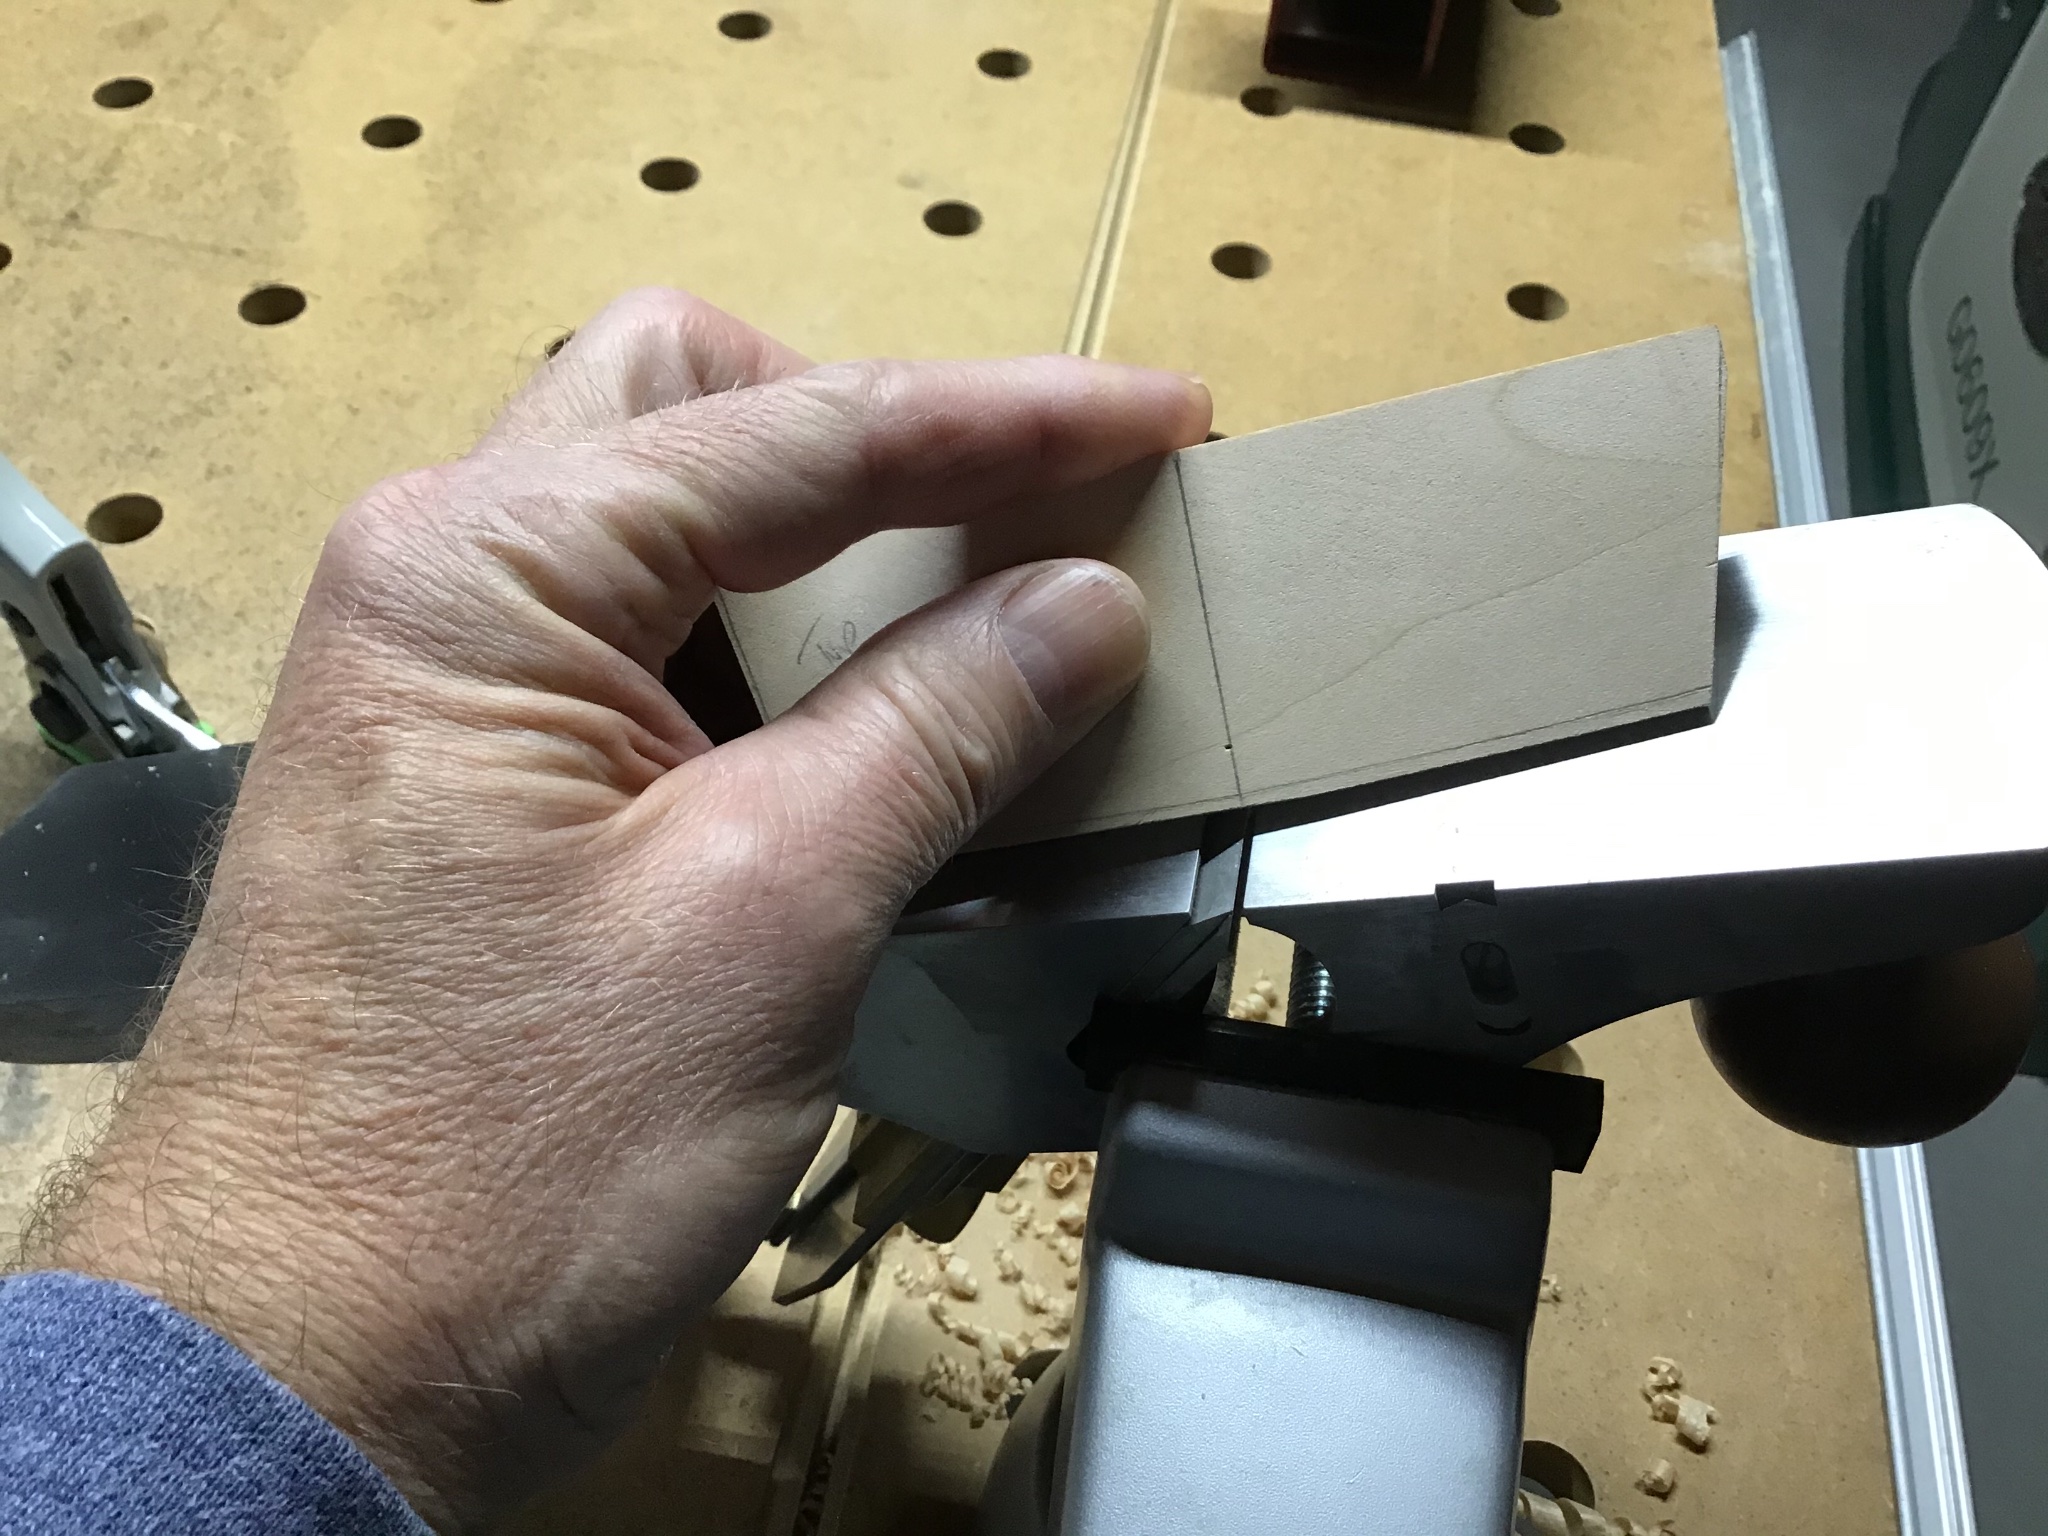
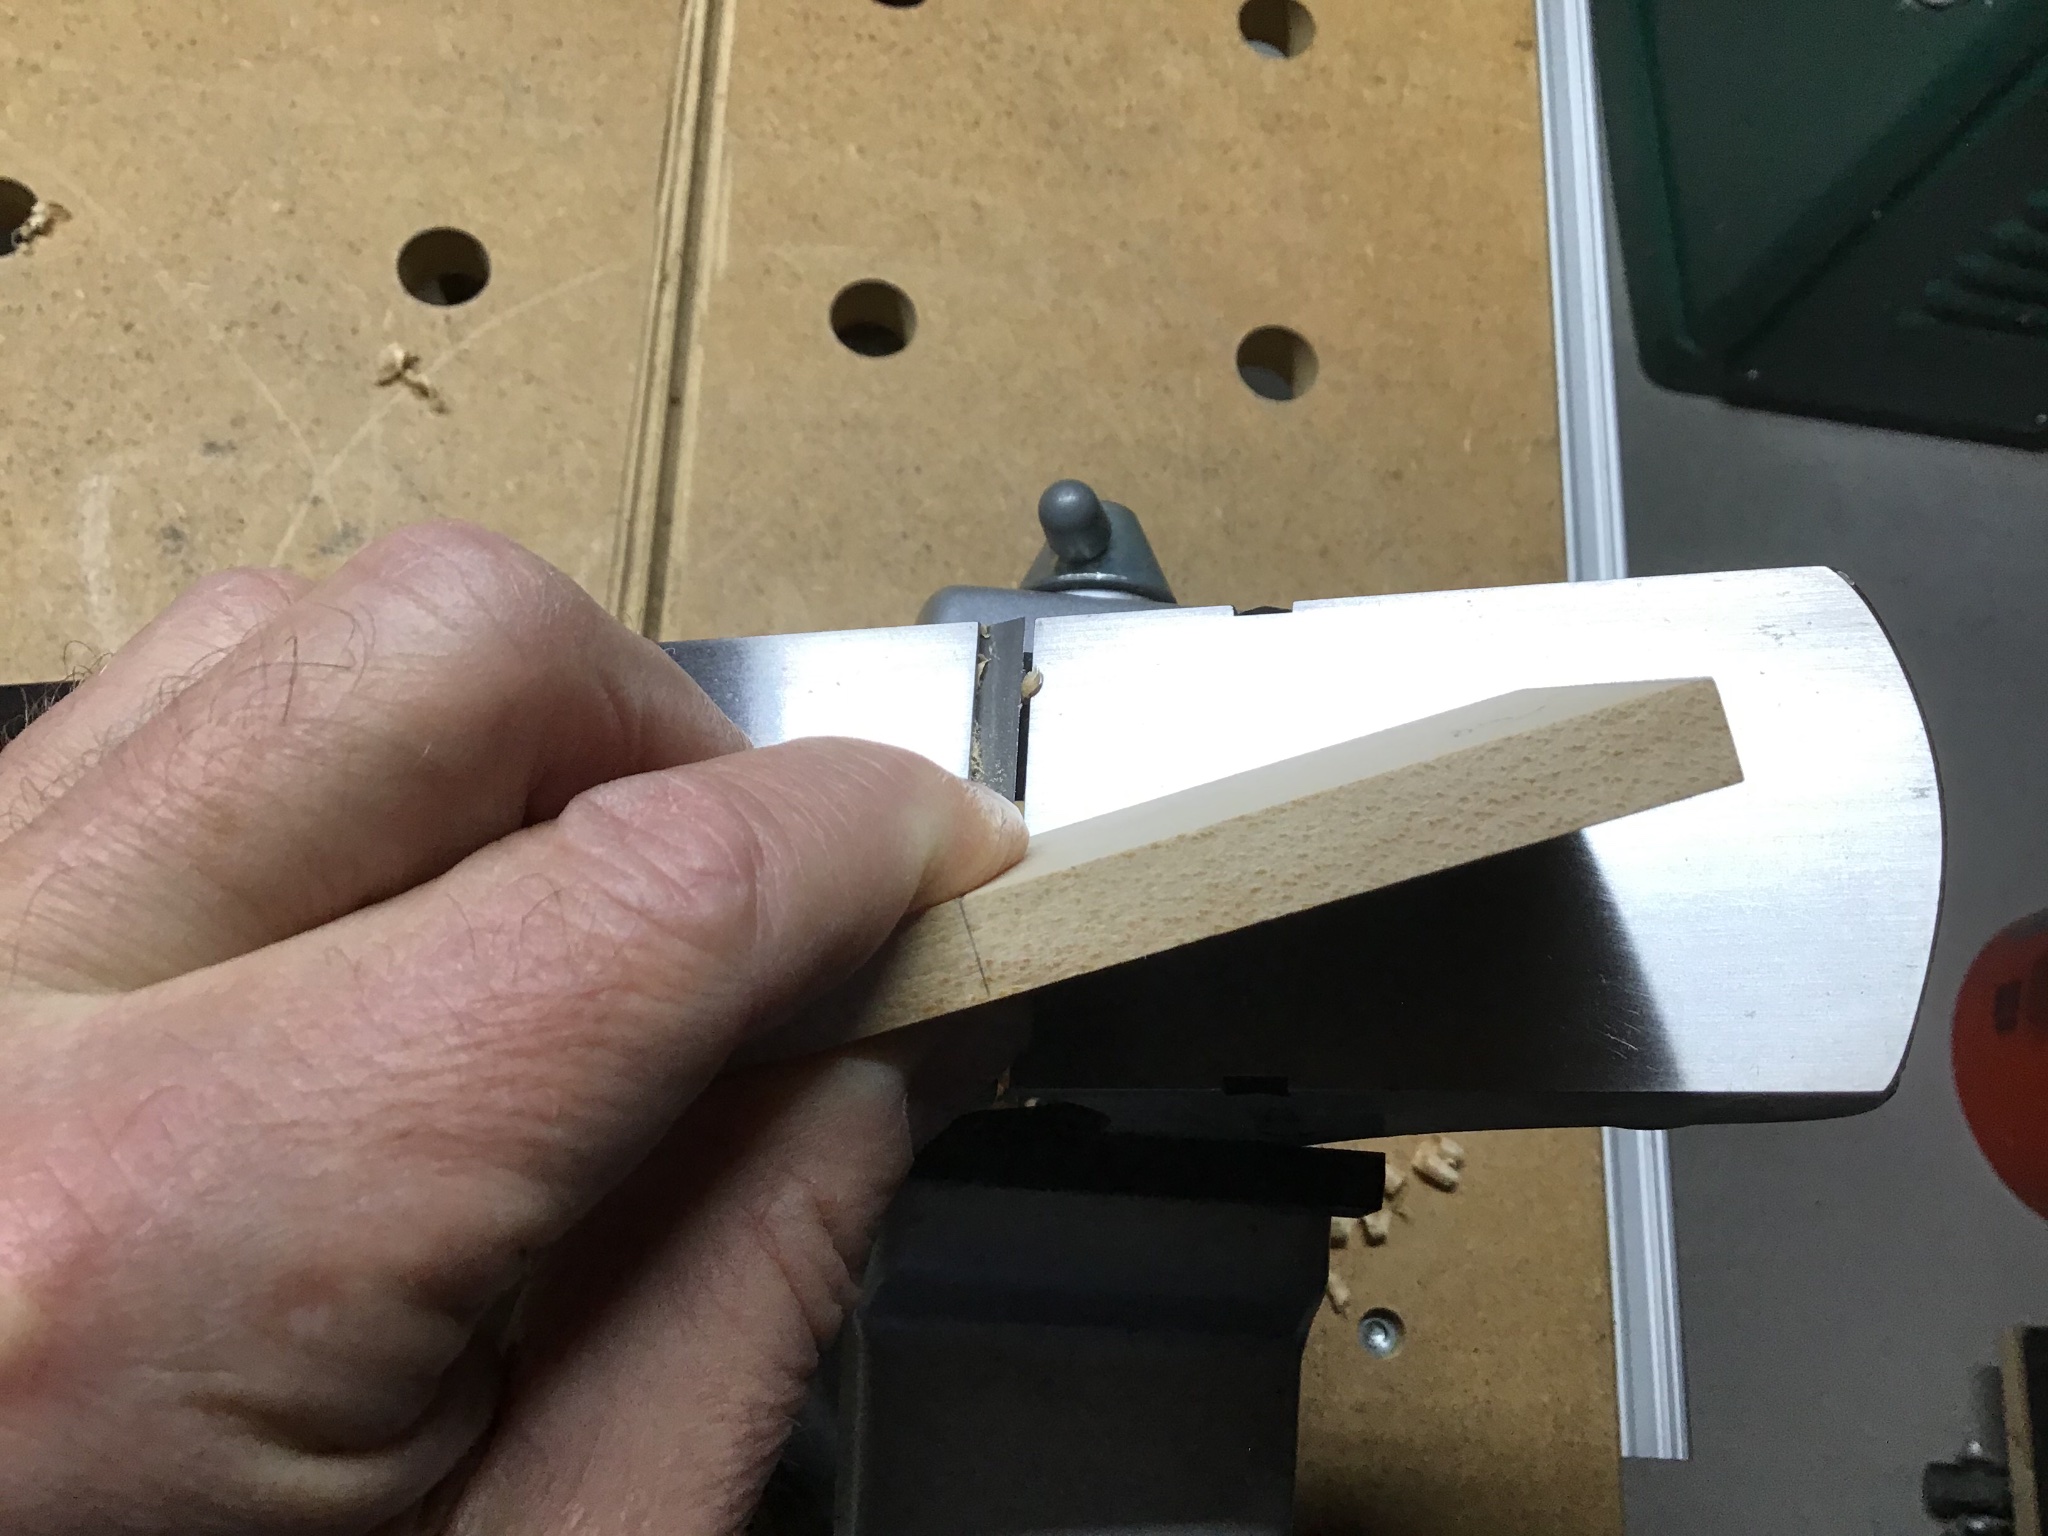
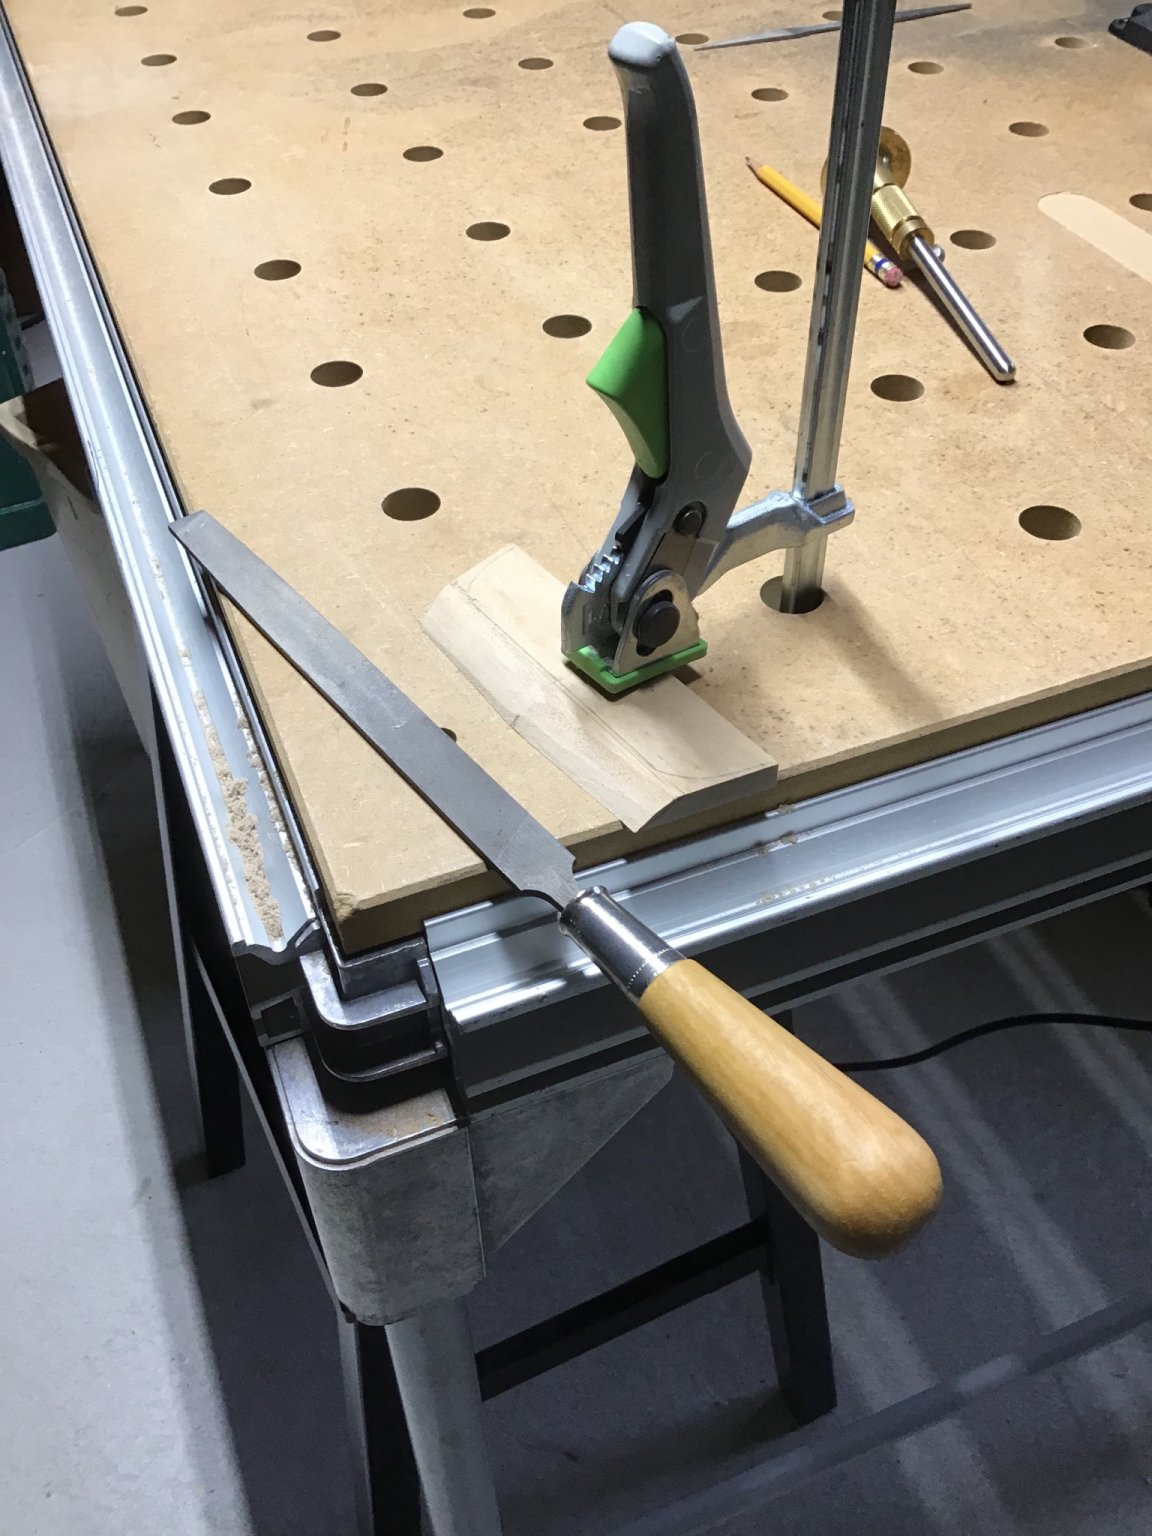
Step 1: Shaped aft bevel, with hand plane setup in vise (see post above) and flat file.
Removed most of the bevel with the hand plane. Notice the piece is moved through the plane at an angle, shear cut. Had some tear out near the lines. So proceeded with the file to flatten the facets and flatten the bevel.
Love using the flat file for this work, it’s easy to stay in the lines and flatten the surface.
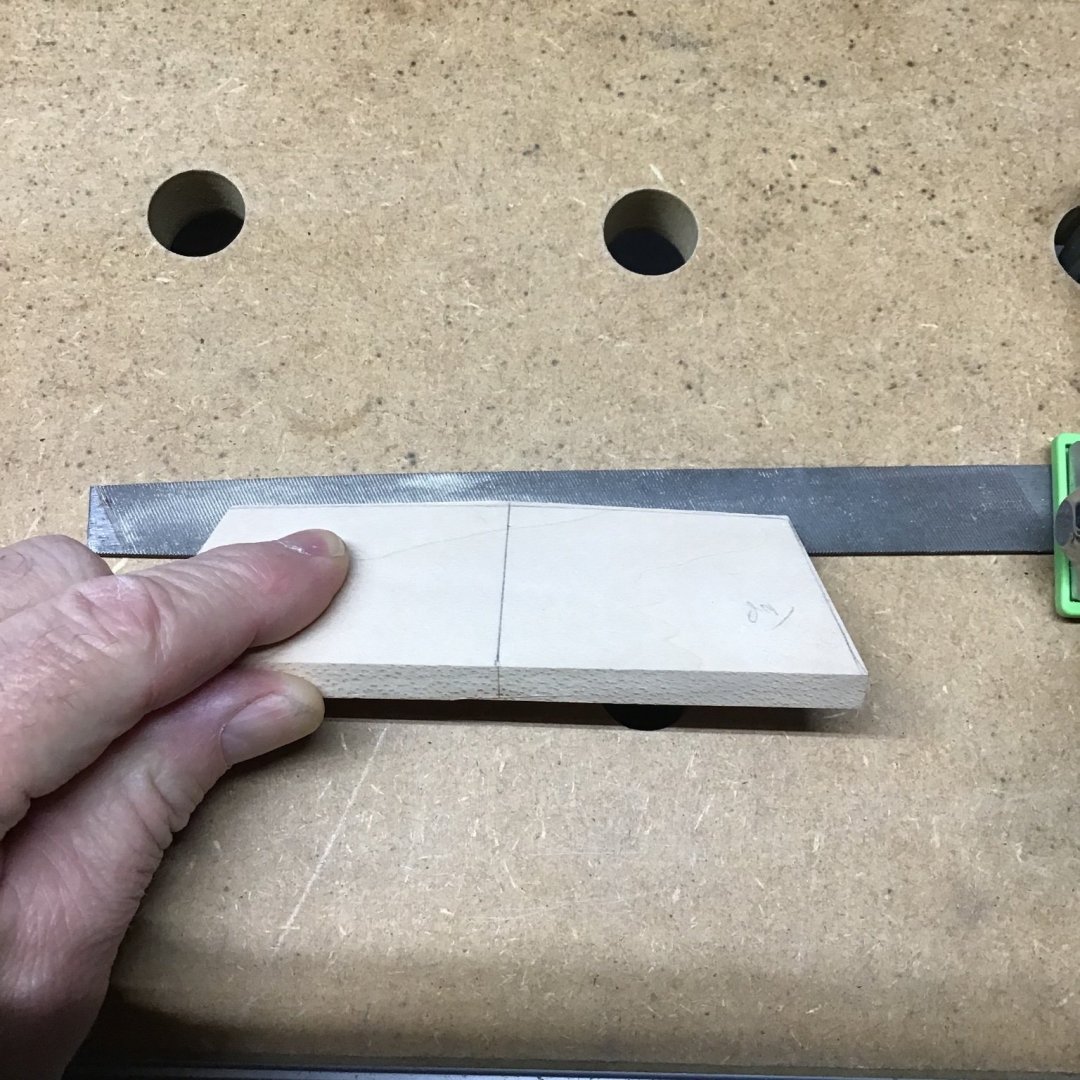
Along the way clamped piece to the table and moved the file, clamped file to table and moved the piece.
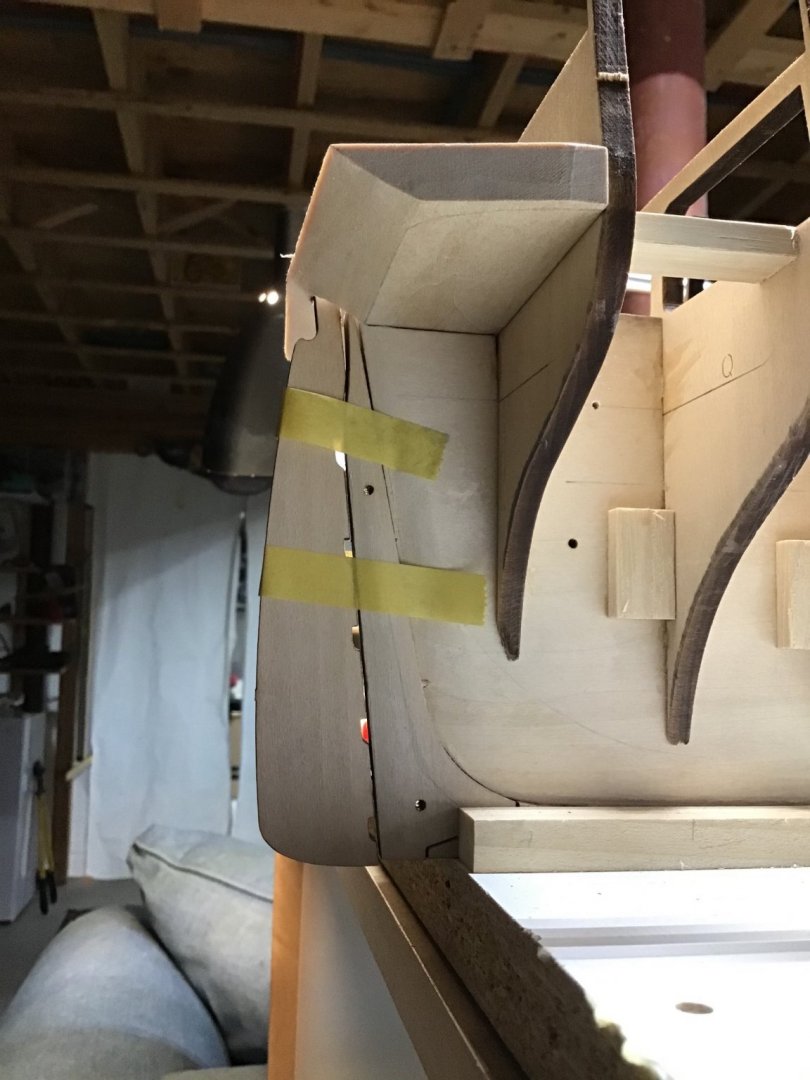
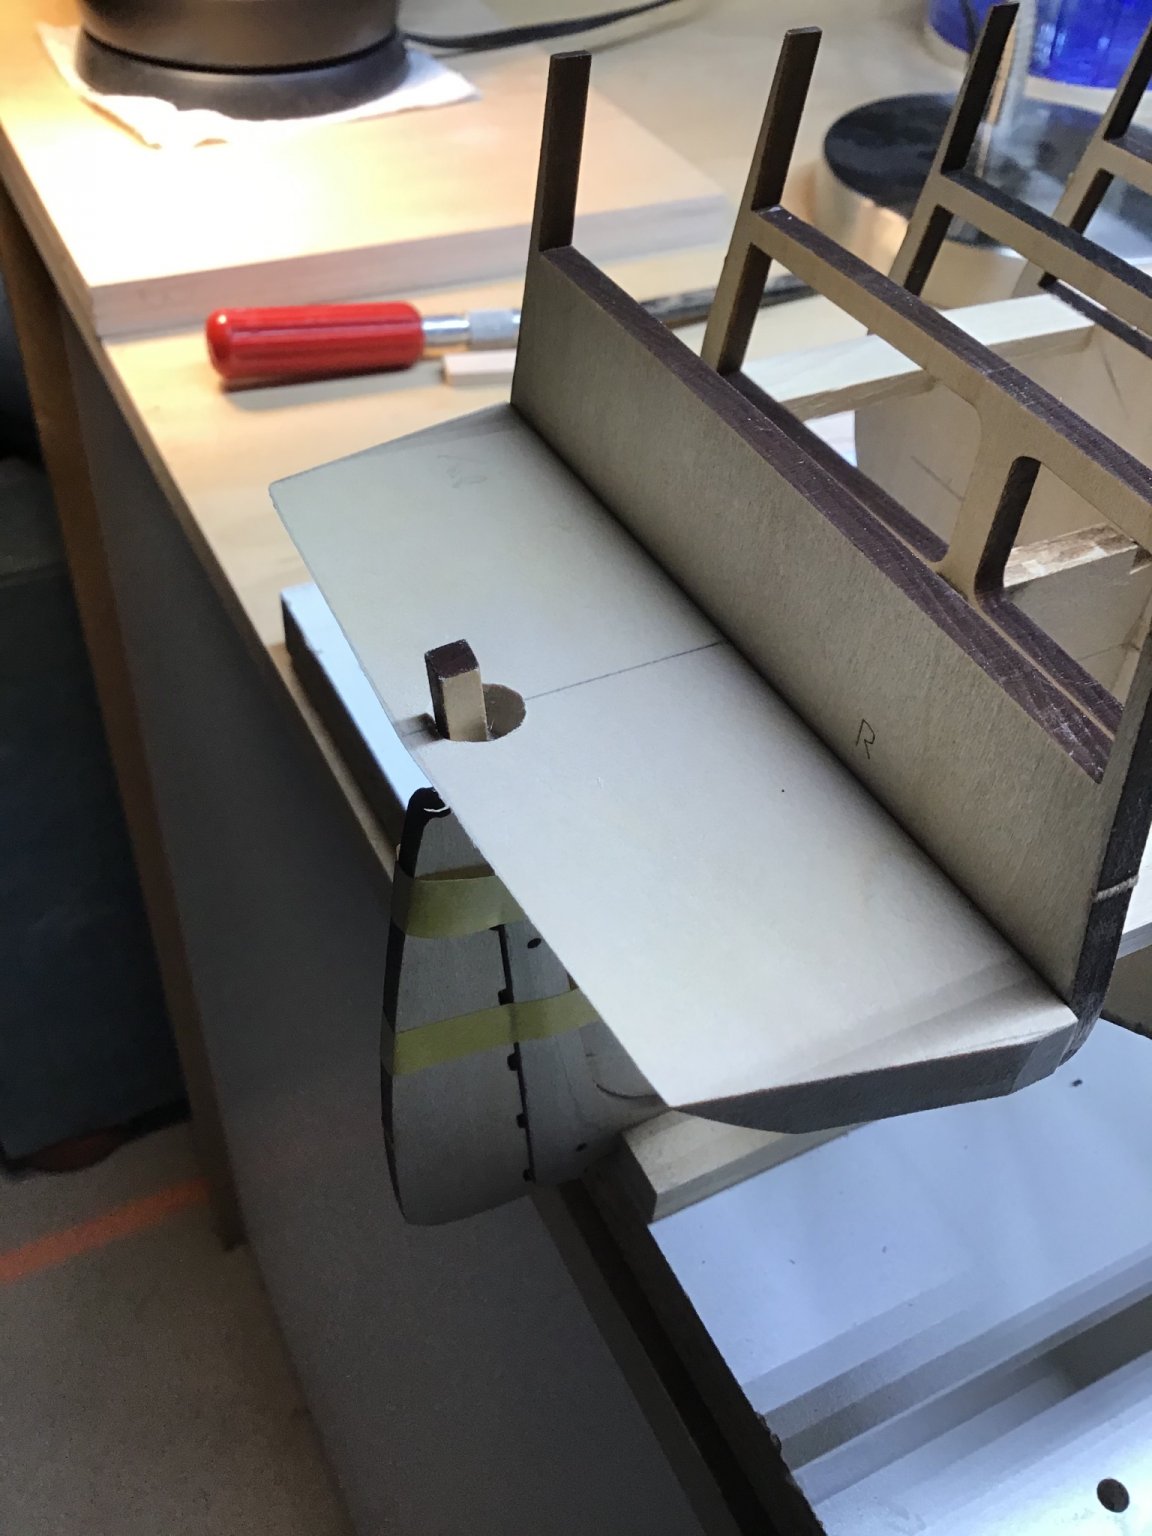
Step 2: Placed counter blank on frame, centered, above stern post. Tapped with mini hammer to get a location mark for the through hole. Hand drilled a pilot hole and finished with a round file. Spent an hour or so filing and checking the fit with the rudder taped in place and the transom frame.
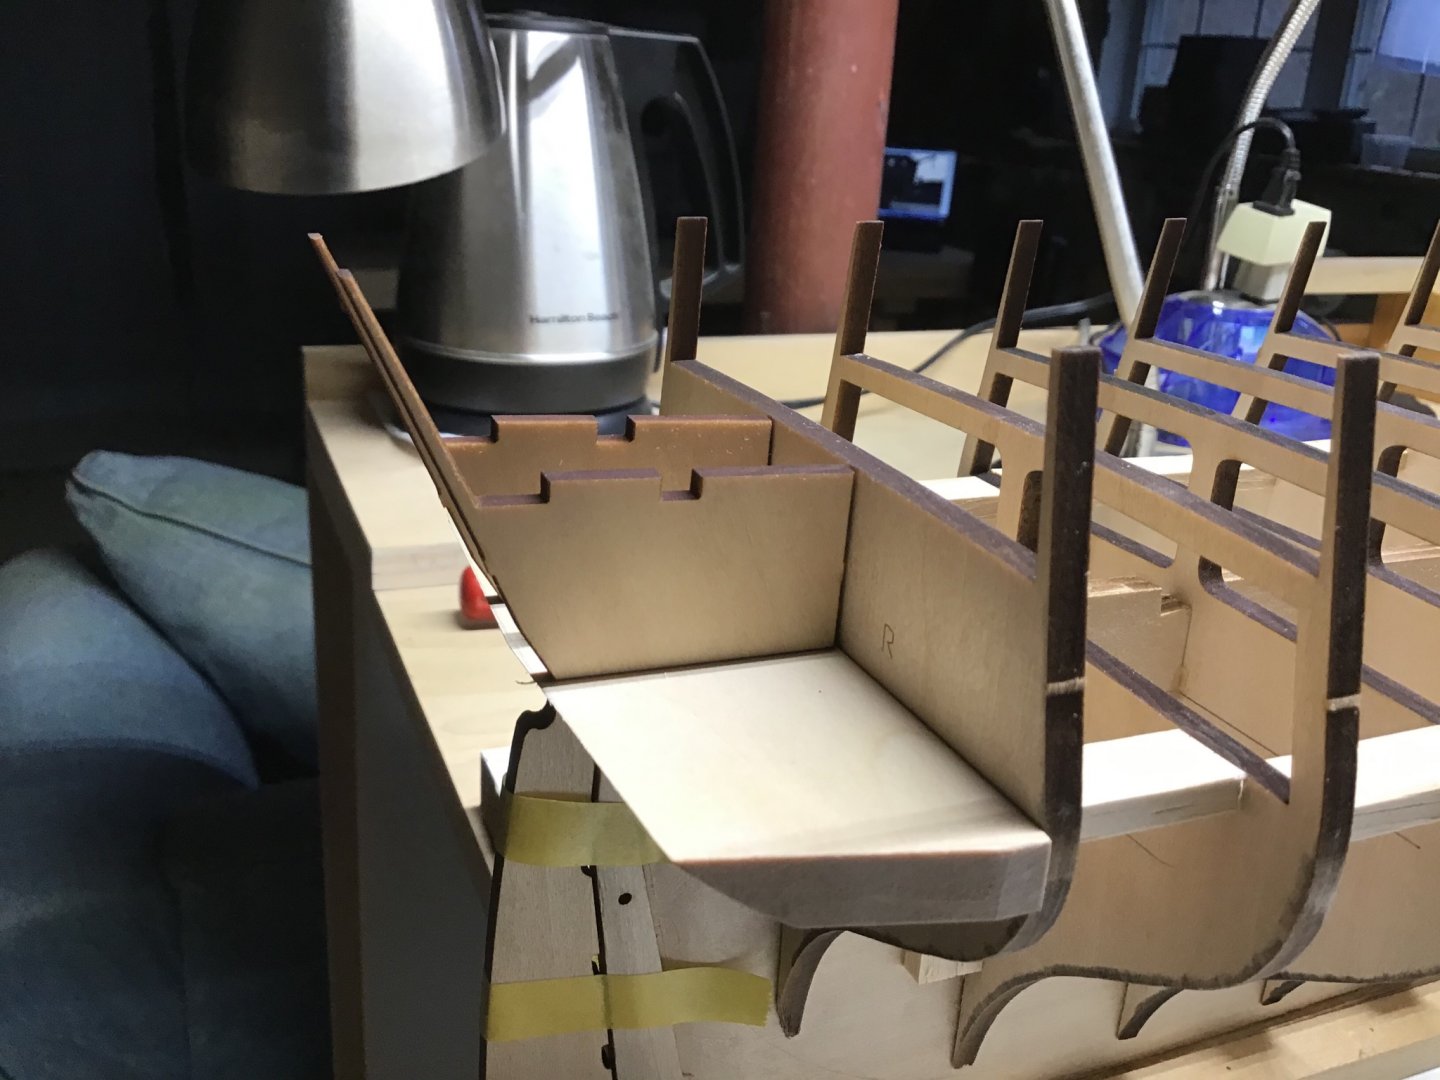
Step 3: Checked the result with Transom frames. The top of the frame is just about flush with bulkhead R (may add a wood shaving under the transom block to raise it a bit.
Left the outboard ends of the transom oversized and will fit to stern filler blocks later.
Next is the stern and bow filler blocks.


- Duanelaker, JeffT, GuntherMT and 6 others
-
9
-
Hello, happy new year!
“Out of the box”, to me, means building with the kit supplied plans, and parts. And with the Anatomy of the Ship book, and my own photographs.
A couple of things.....
My last few projects included a couple of vintage kits, purchased on eBay, Eagle and Katy, that required gathering fittings, extra work etc. so enjoying that this kit is complete.
And to set the expectation. I want to respect the Constitution experts, who know the ins and outs of this ship, of which I am not.
My general interests are sharing techniques and creating an accurate representation of the ship that pleases the viewer.
This project is the next step in my learning curve: 3 masts, ship rigged. And a lot of guns too!
-Rich
-
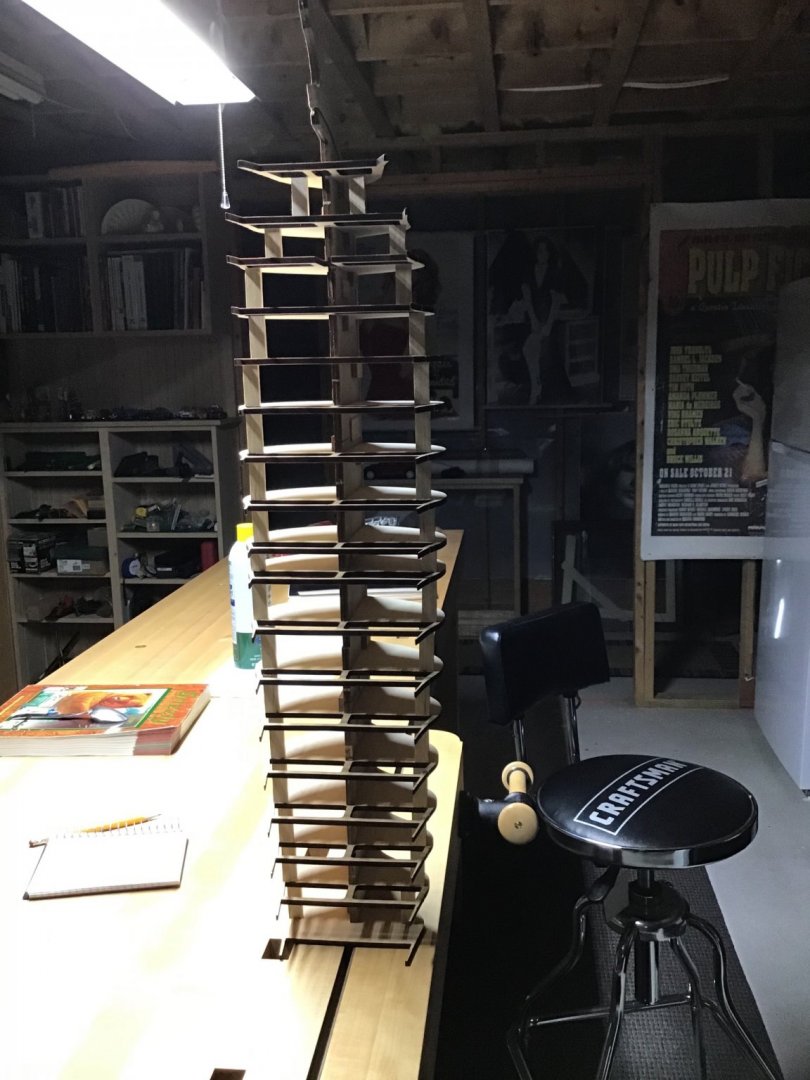
It would have been so much easier to build this vertically? Next time.....
- JeffT, Duanelaker, J11 and 4 others
-
7
-
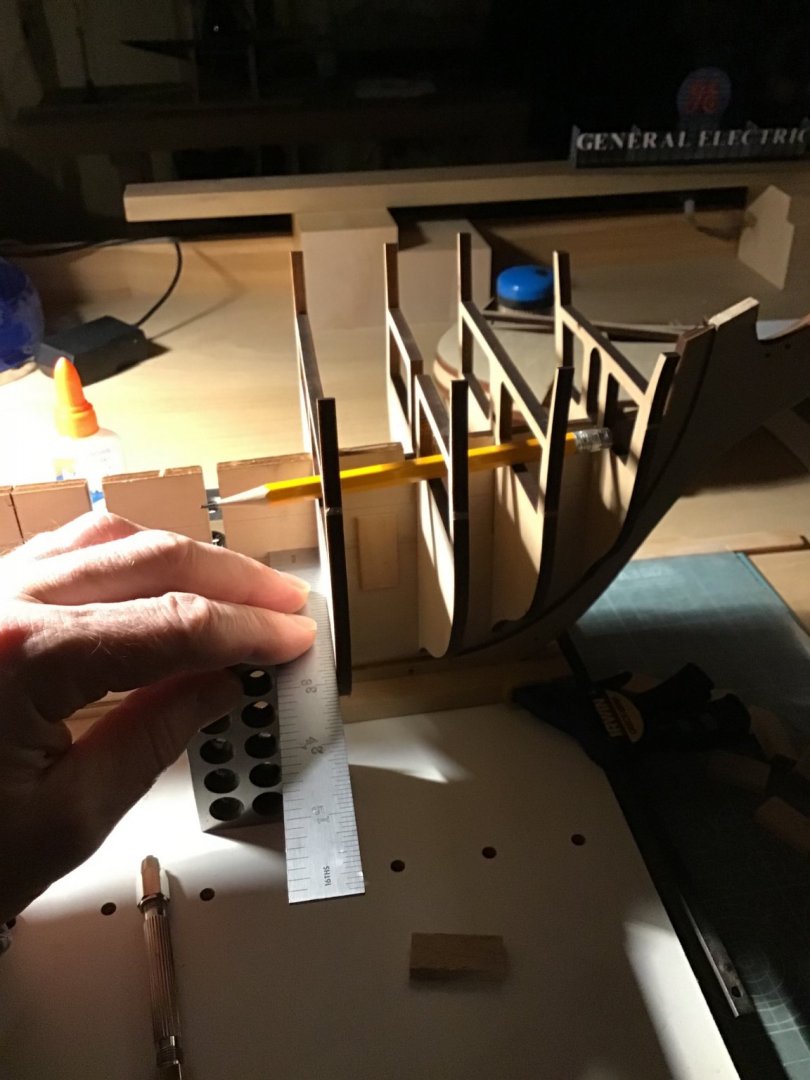
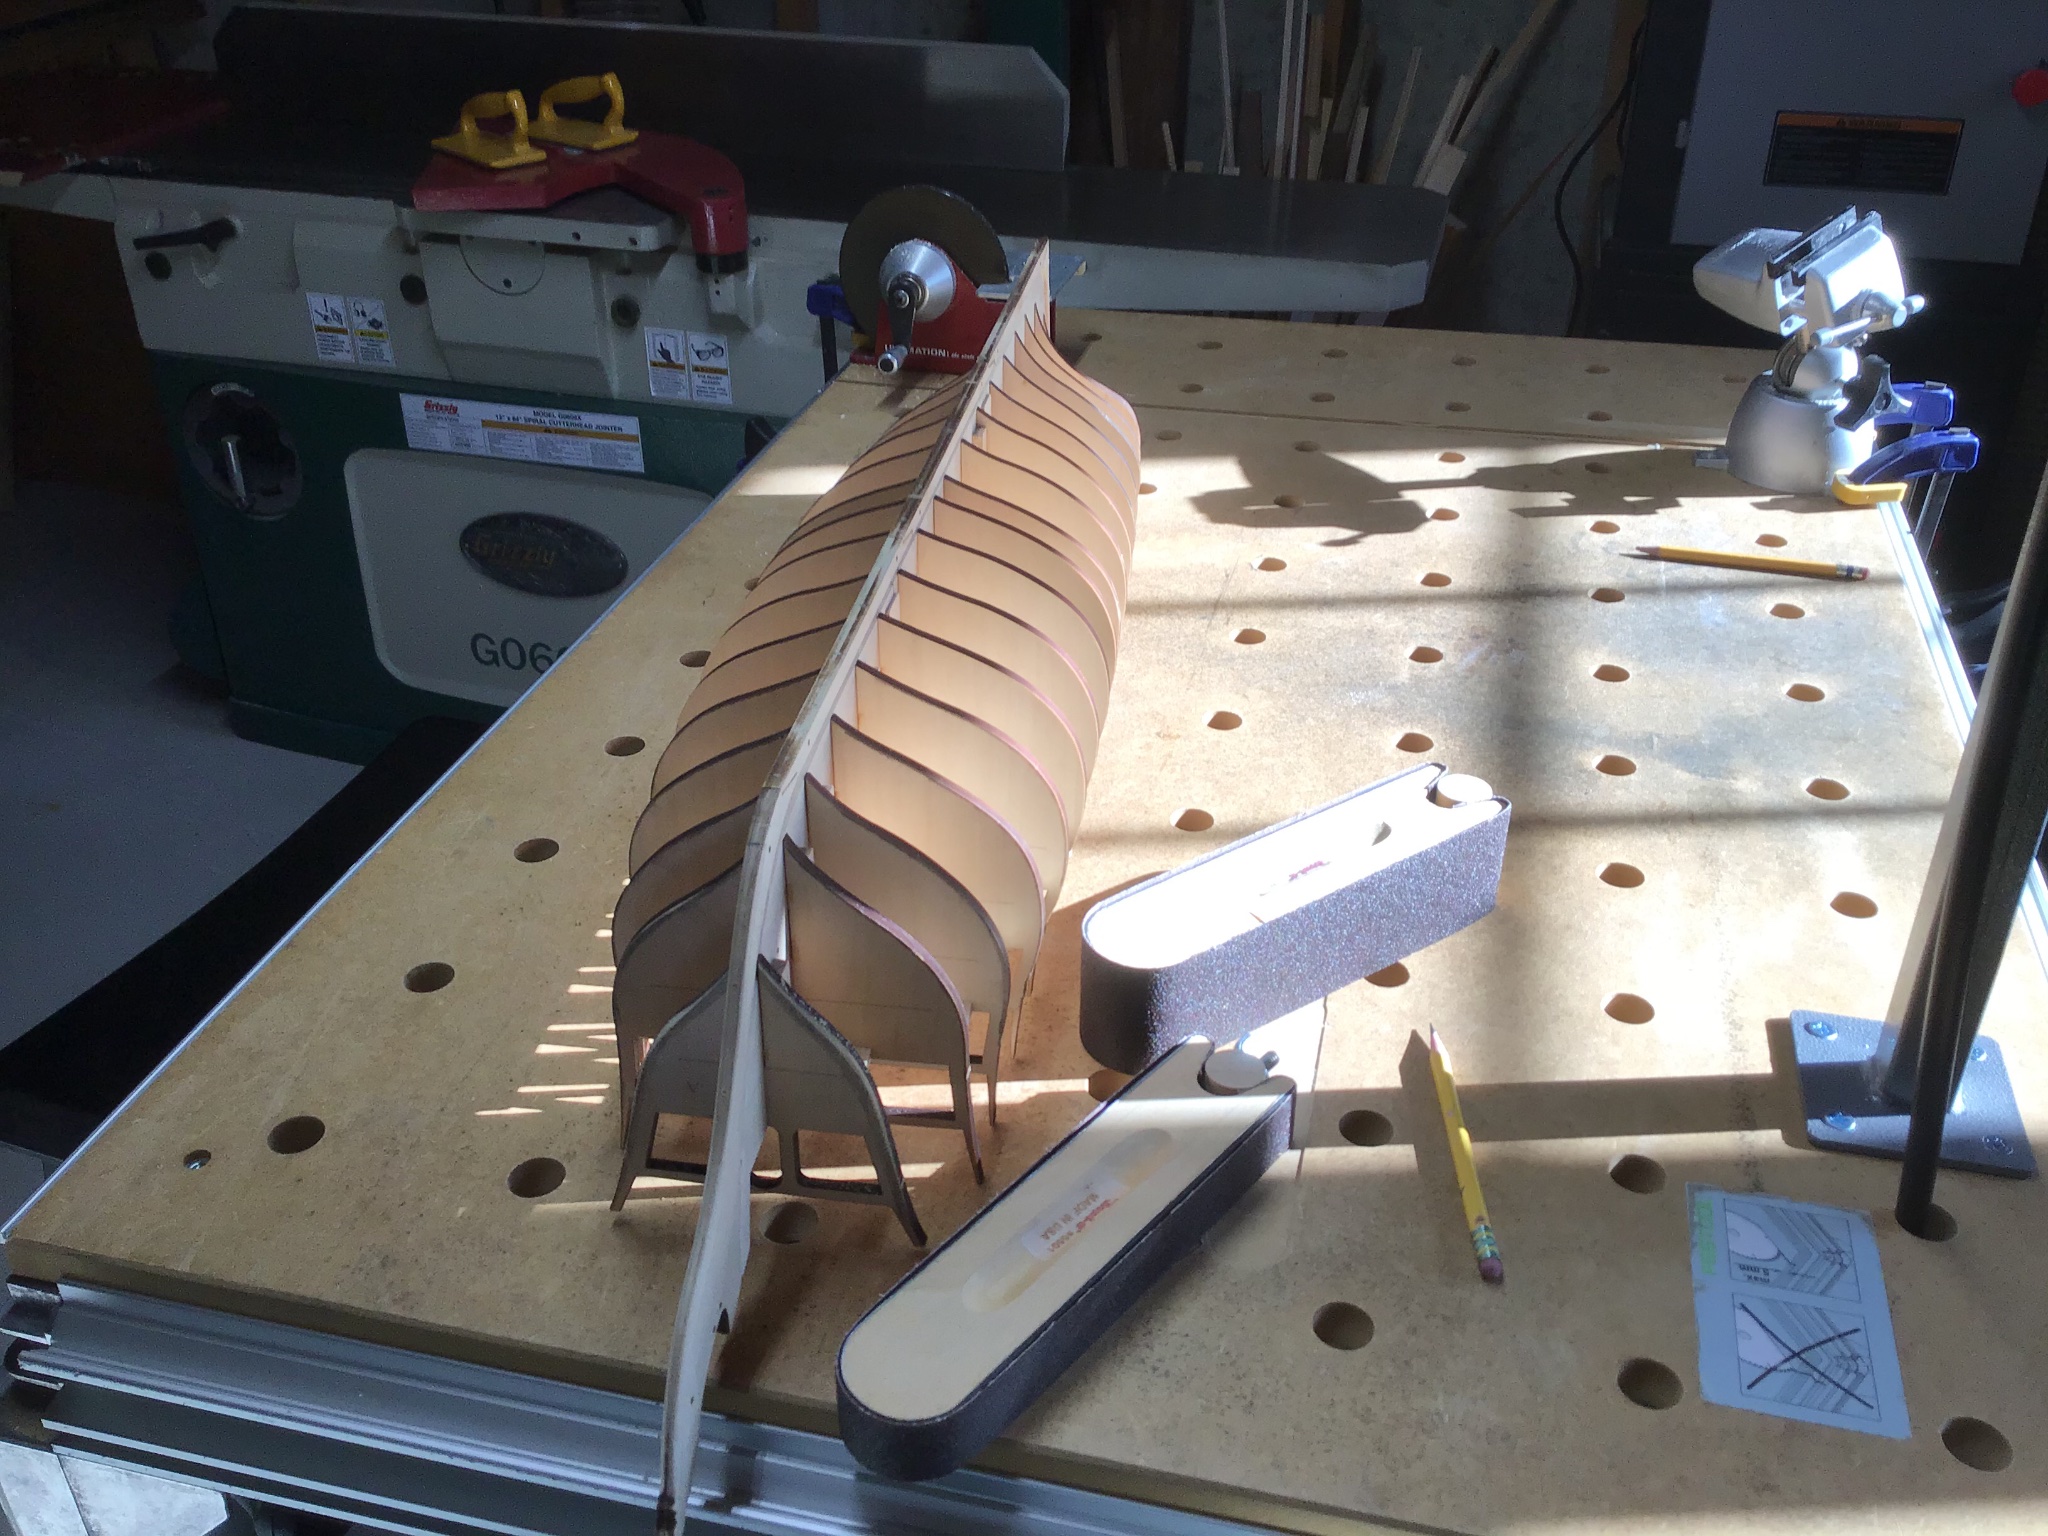
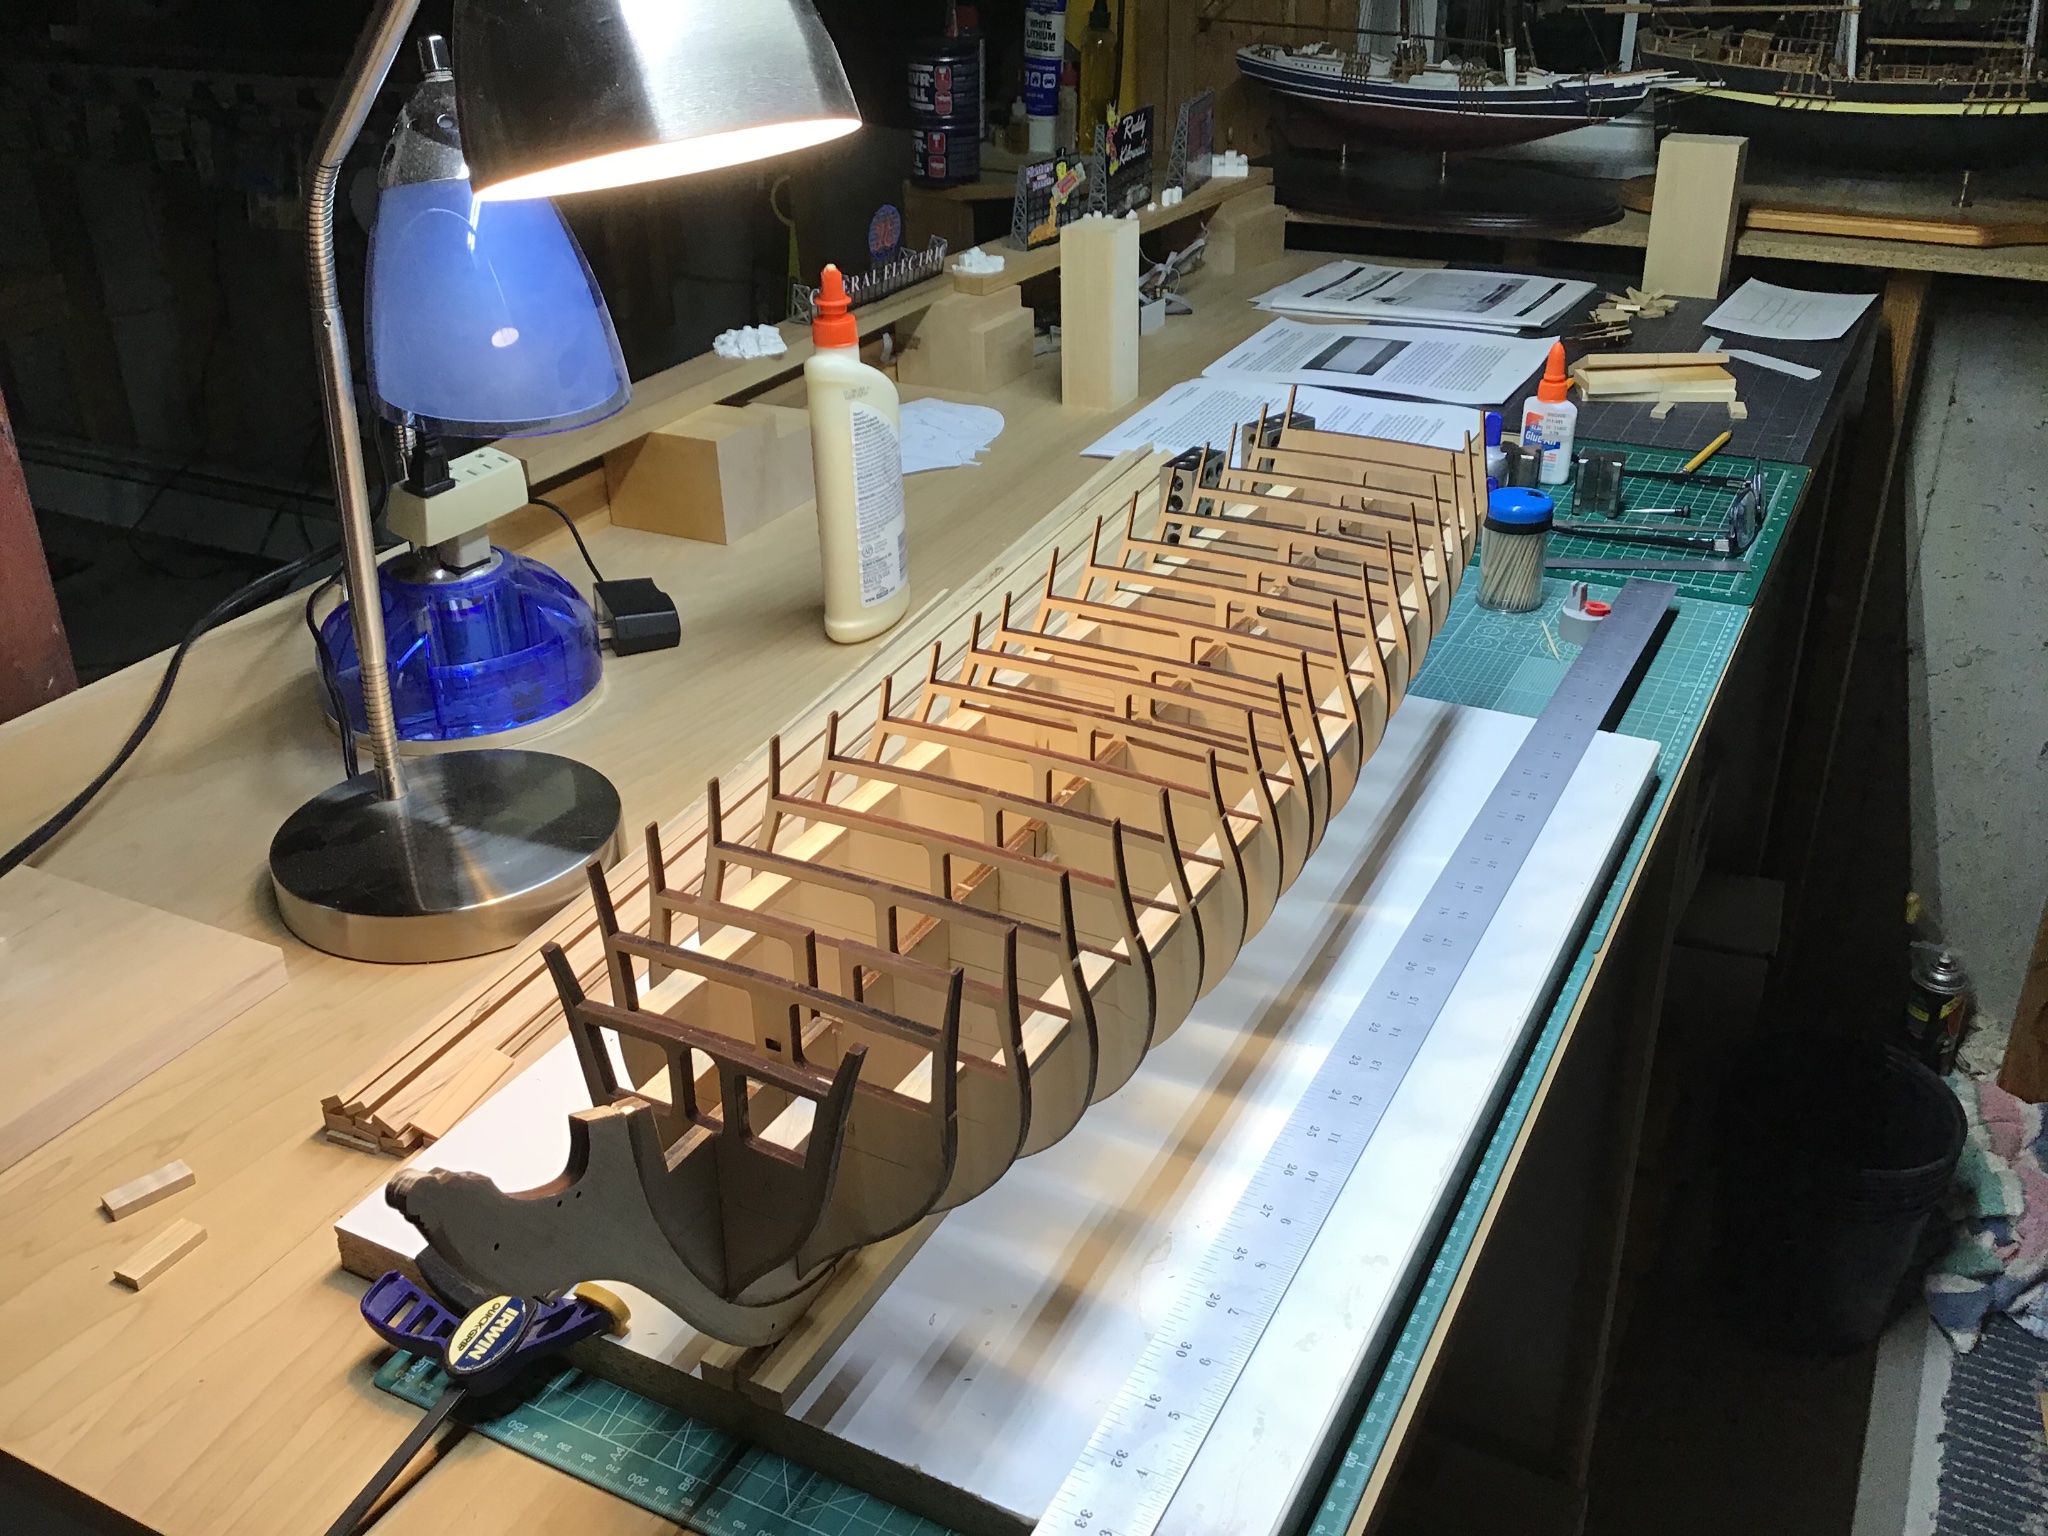
Bulkhead Glueup
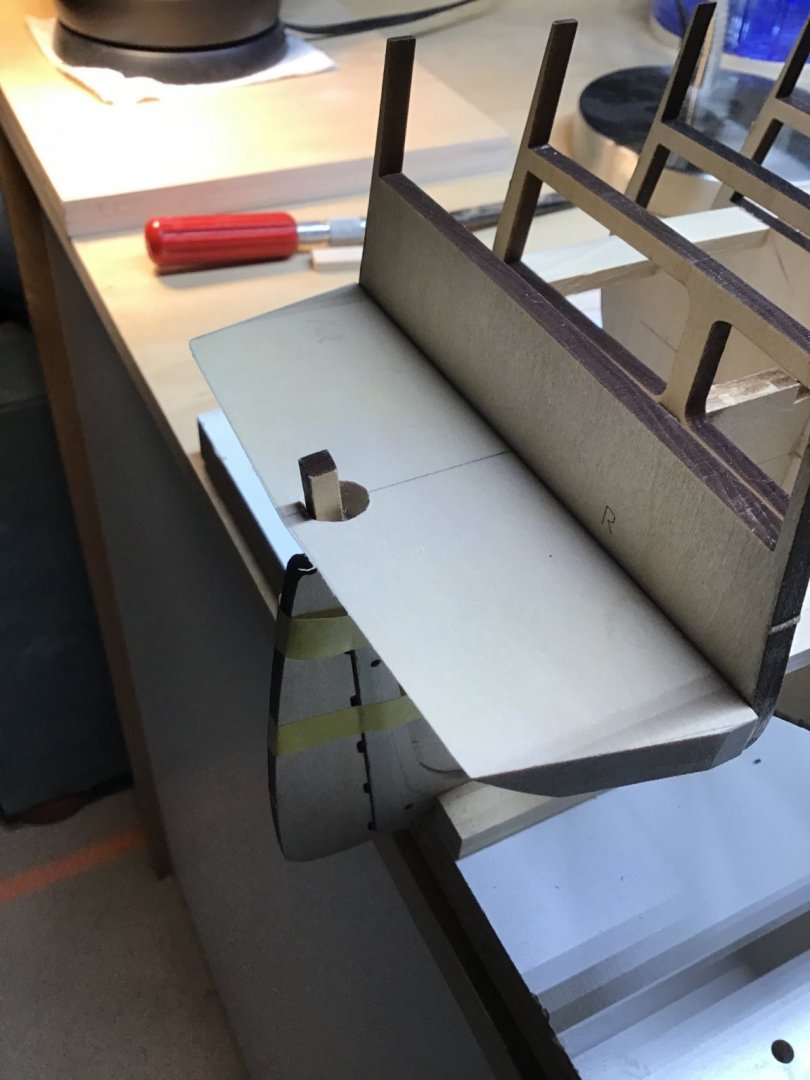
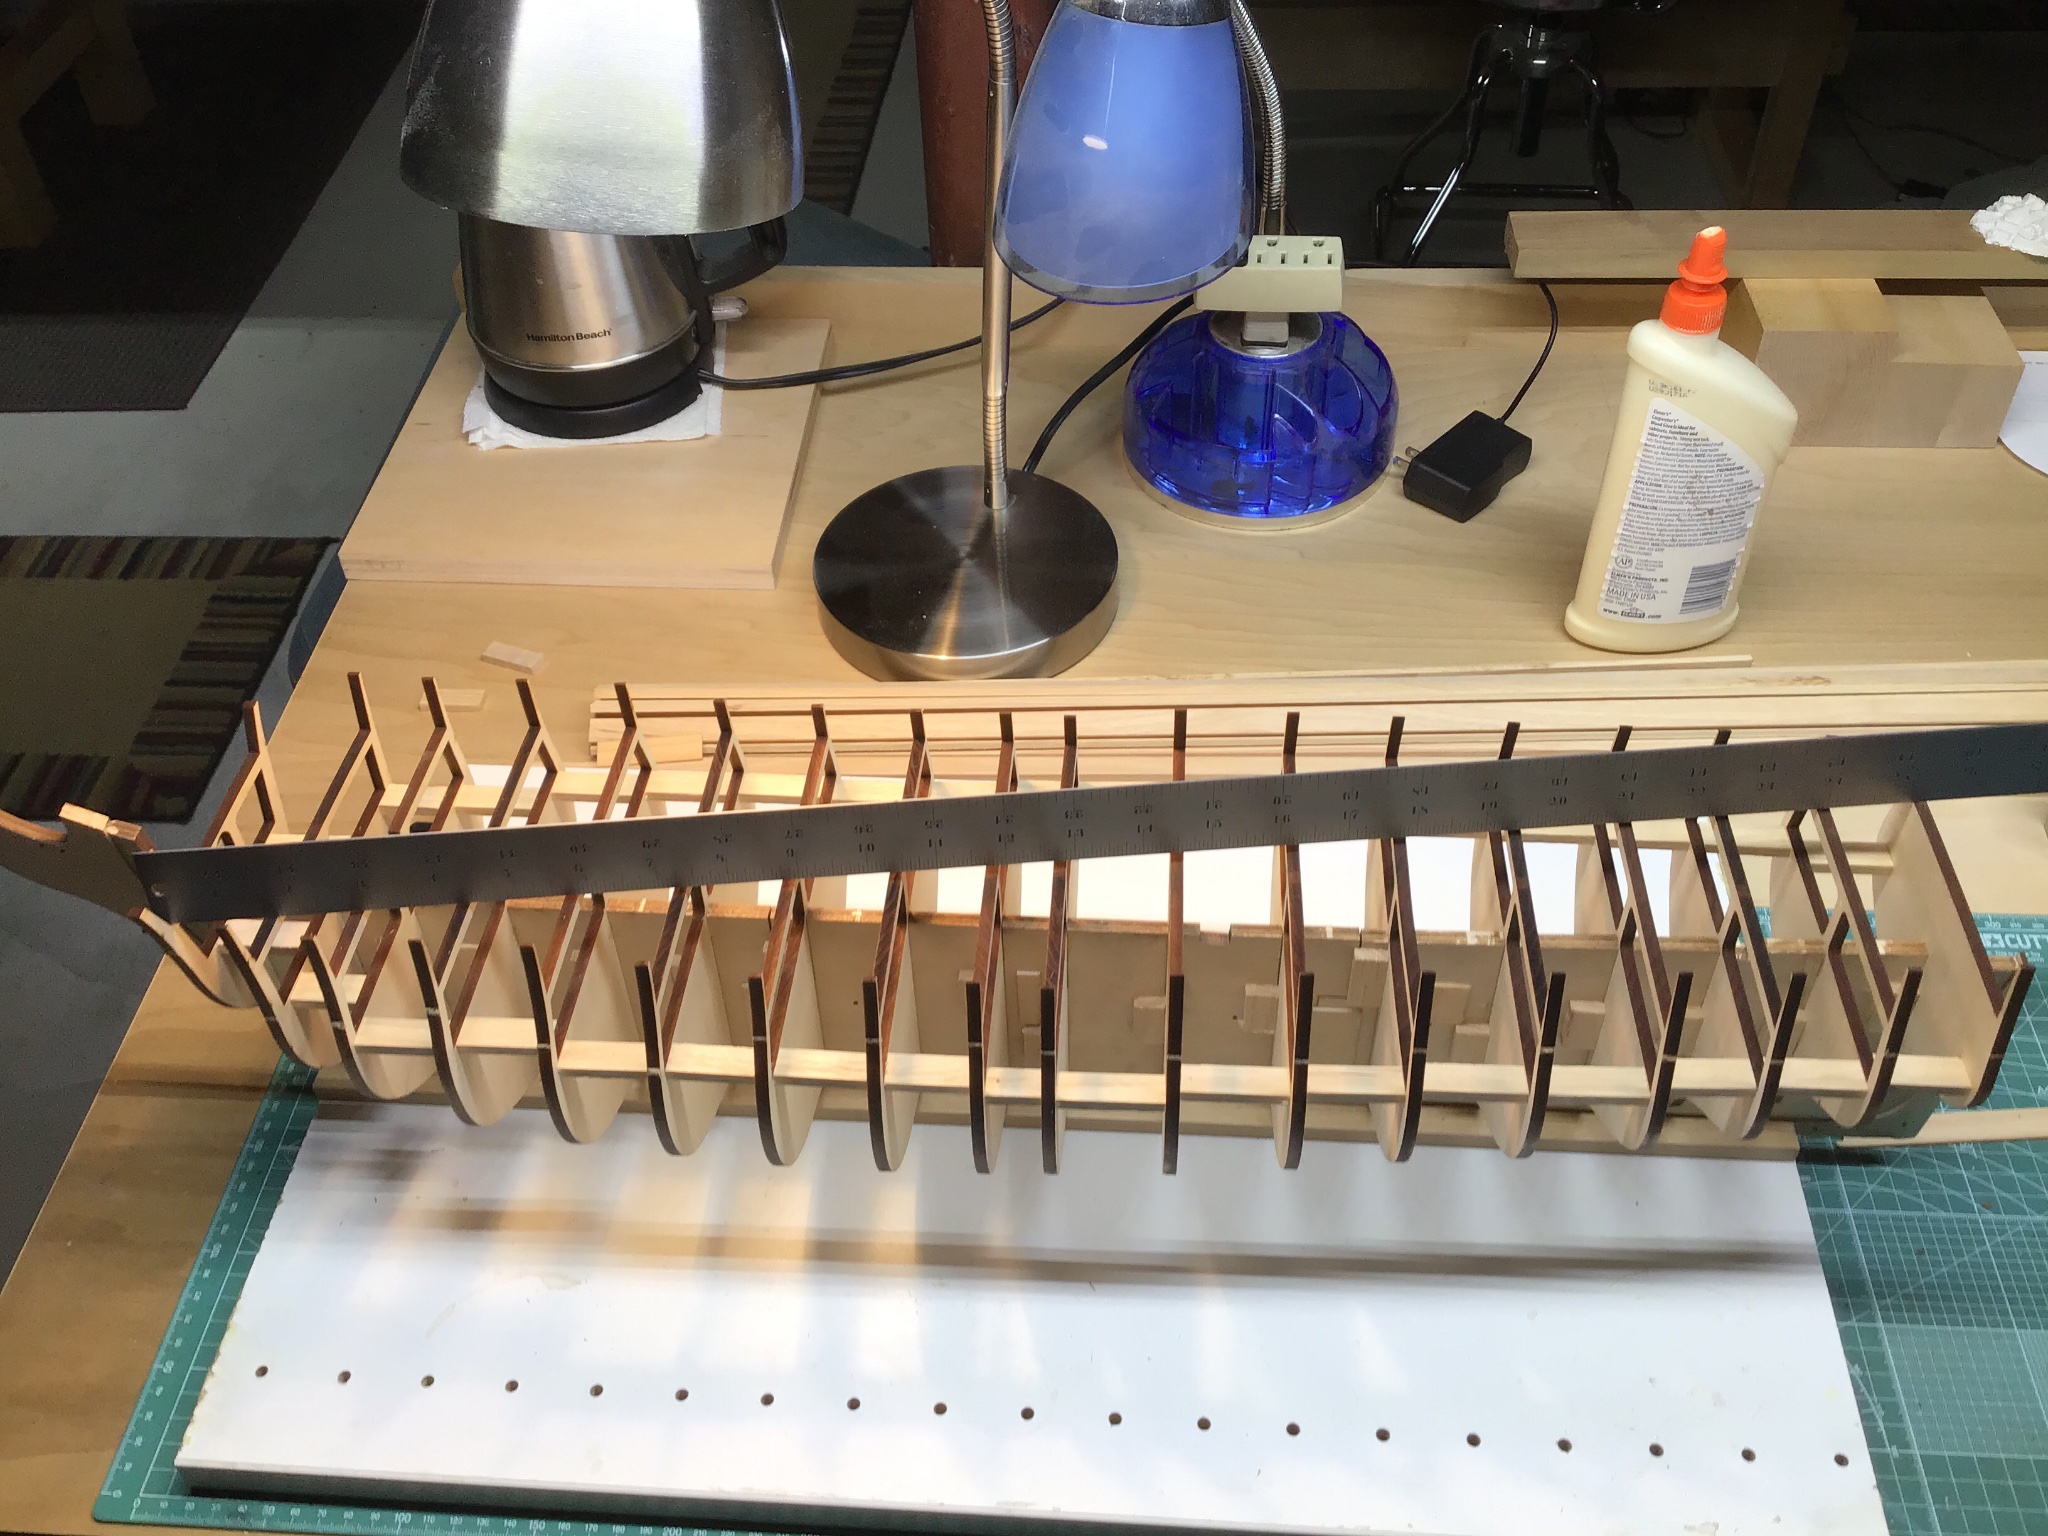
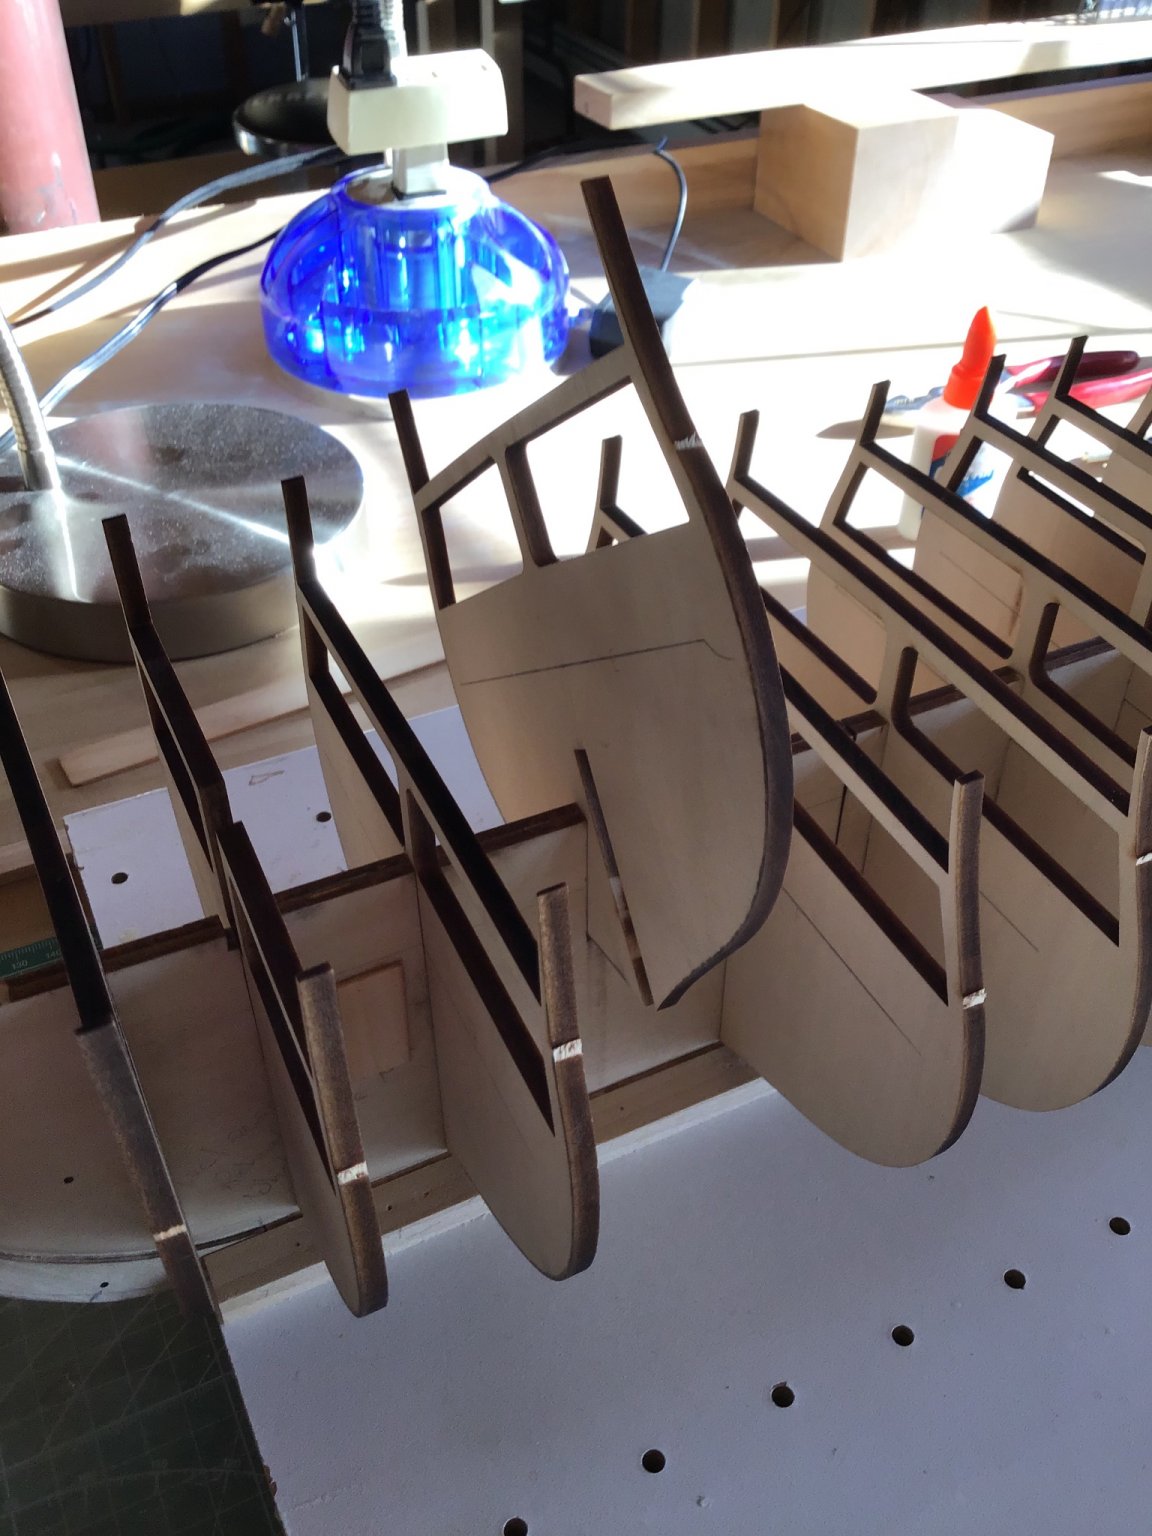
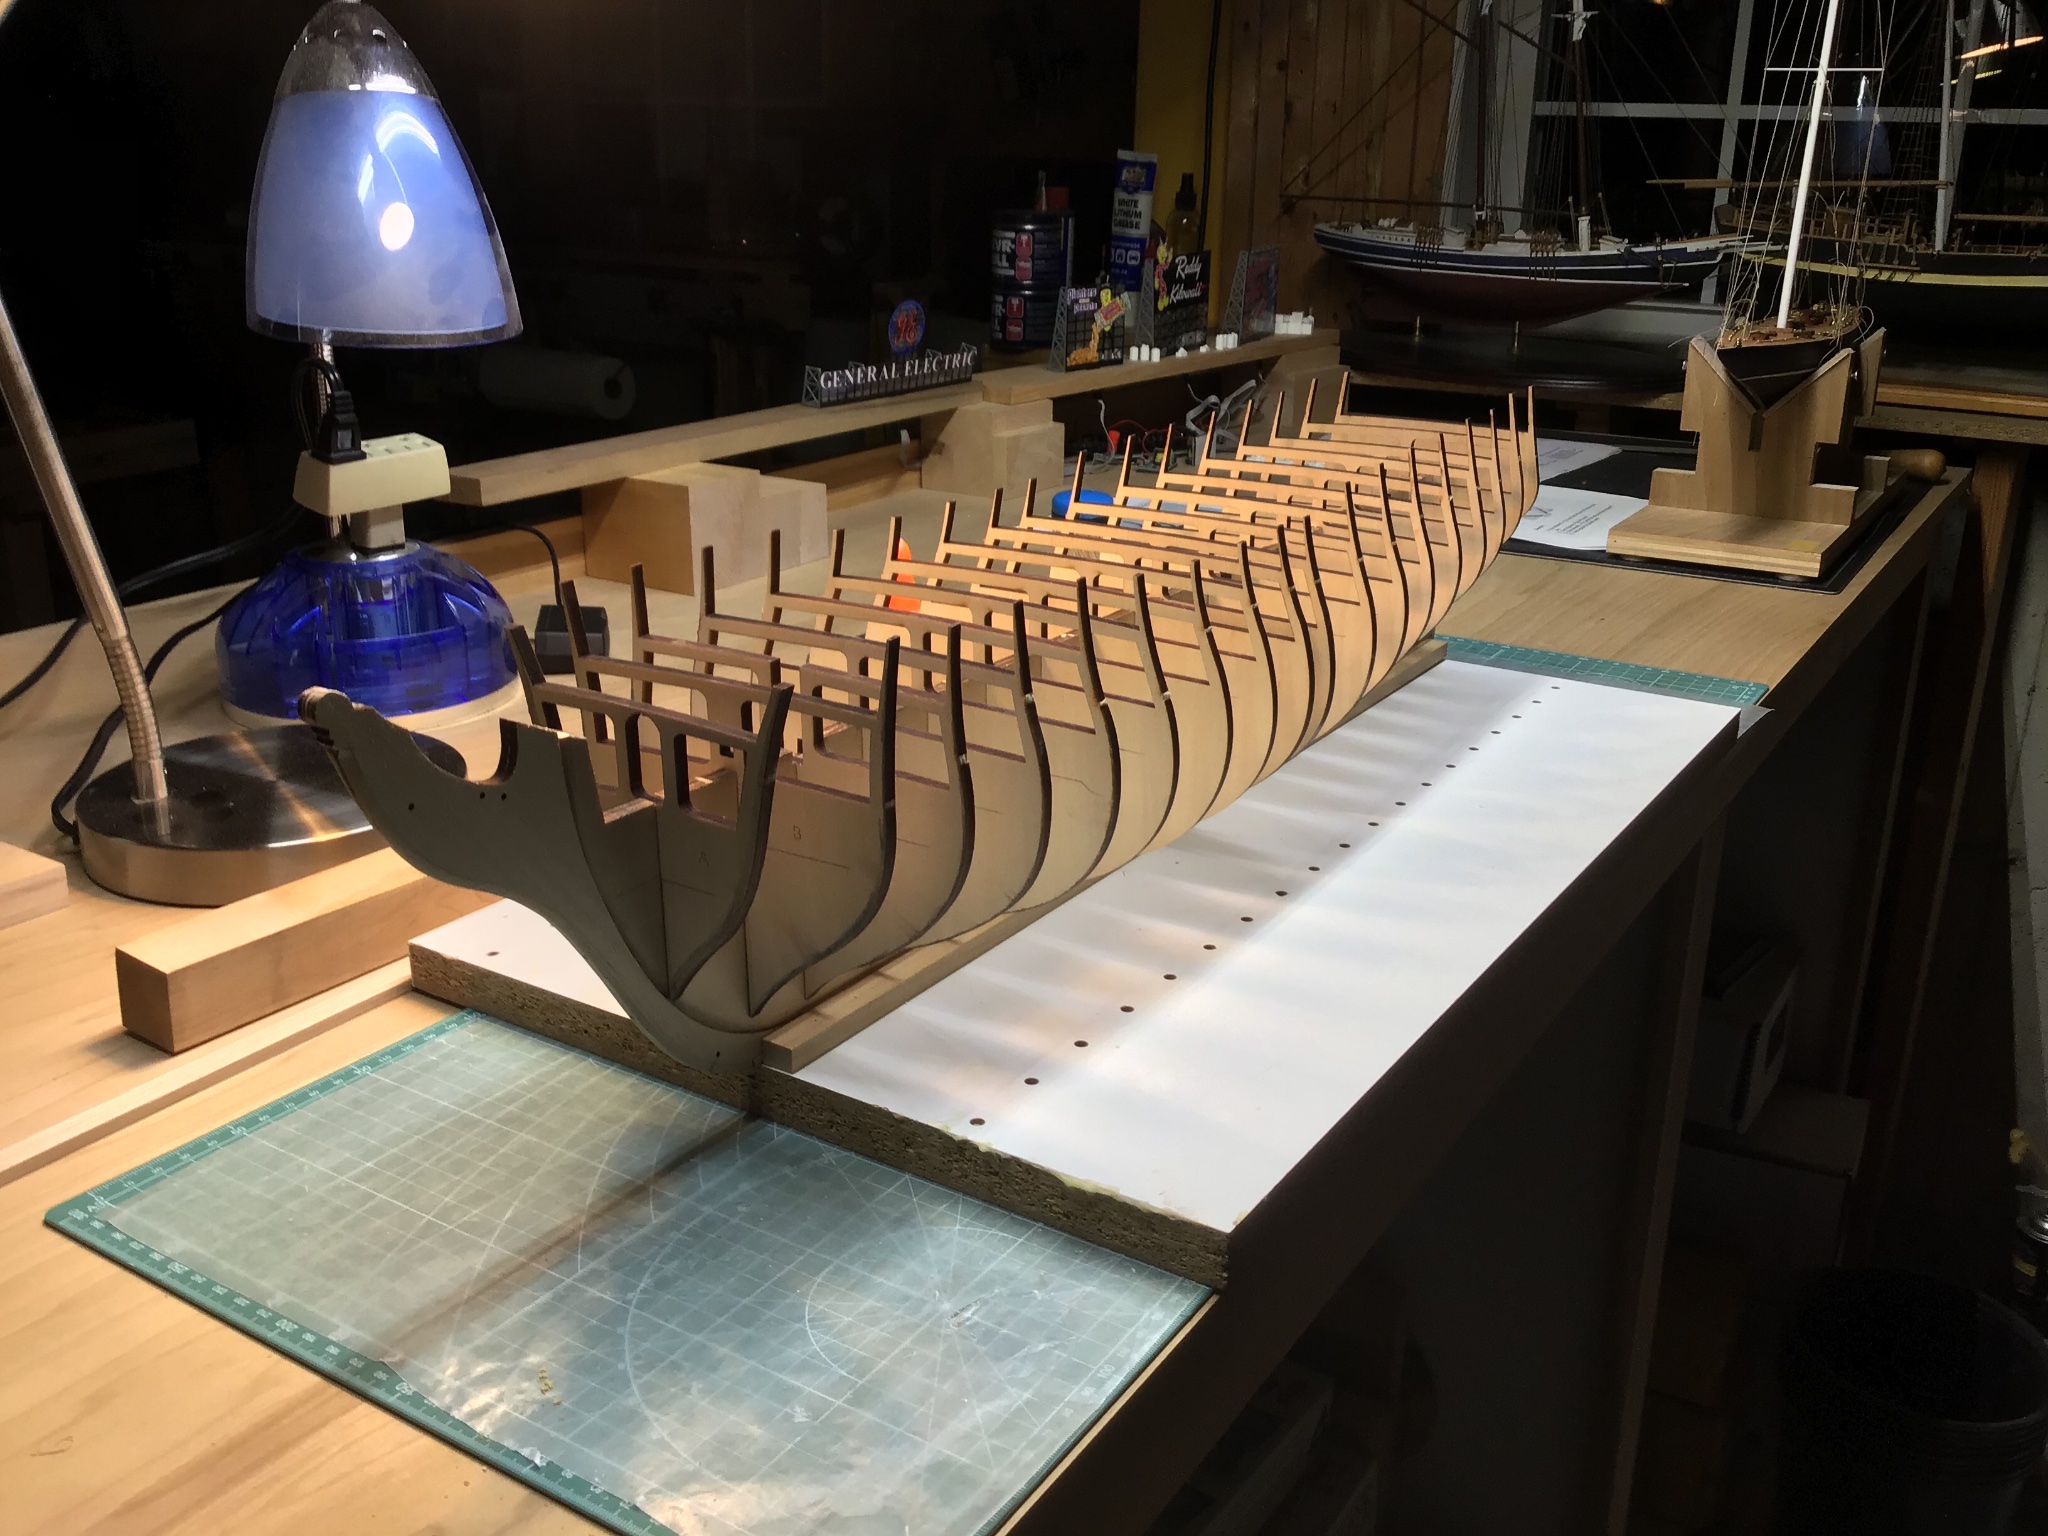
Step 1: Installed bulkhead A, aligning vertically the centerboard and bulkhead reference marks. Used machinist blocks to square bulkhead to centerboard. Checked square with a machinist rule. Checked vertical alignment with pencil lines across the bulkhead tops. Tacked with small dabs of CA. Installed all bulkheads.
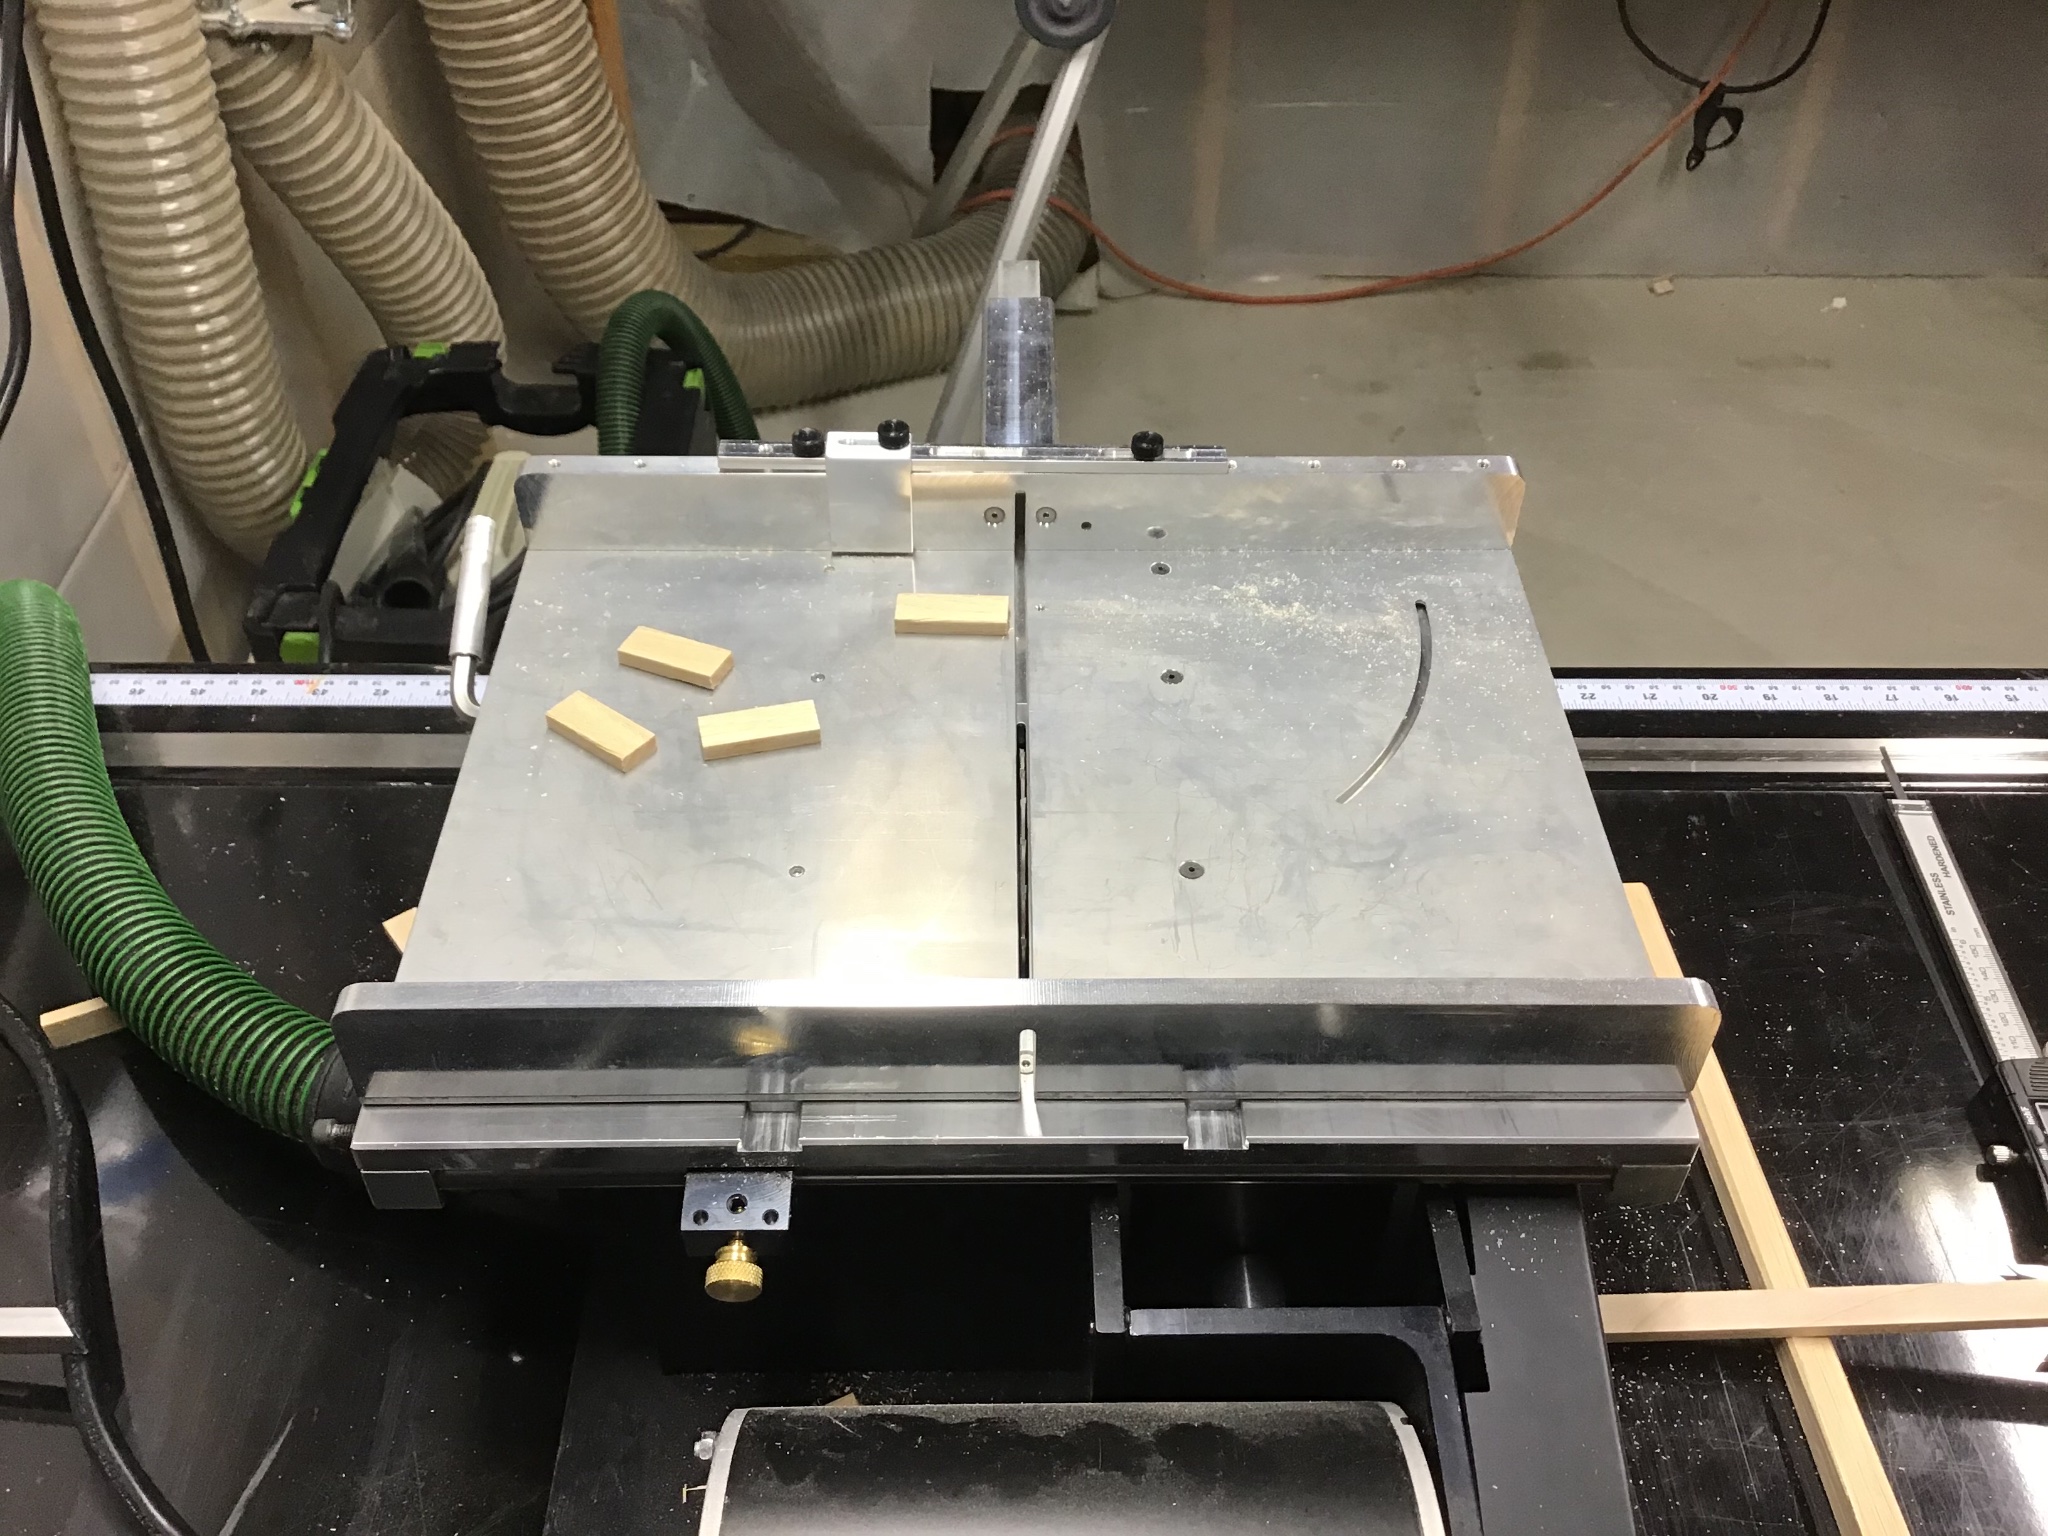
Step 2: Setup Byrnes saw with sliding table to cut the blocks. Blocks are hickory.
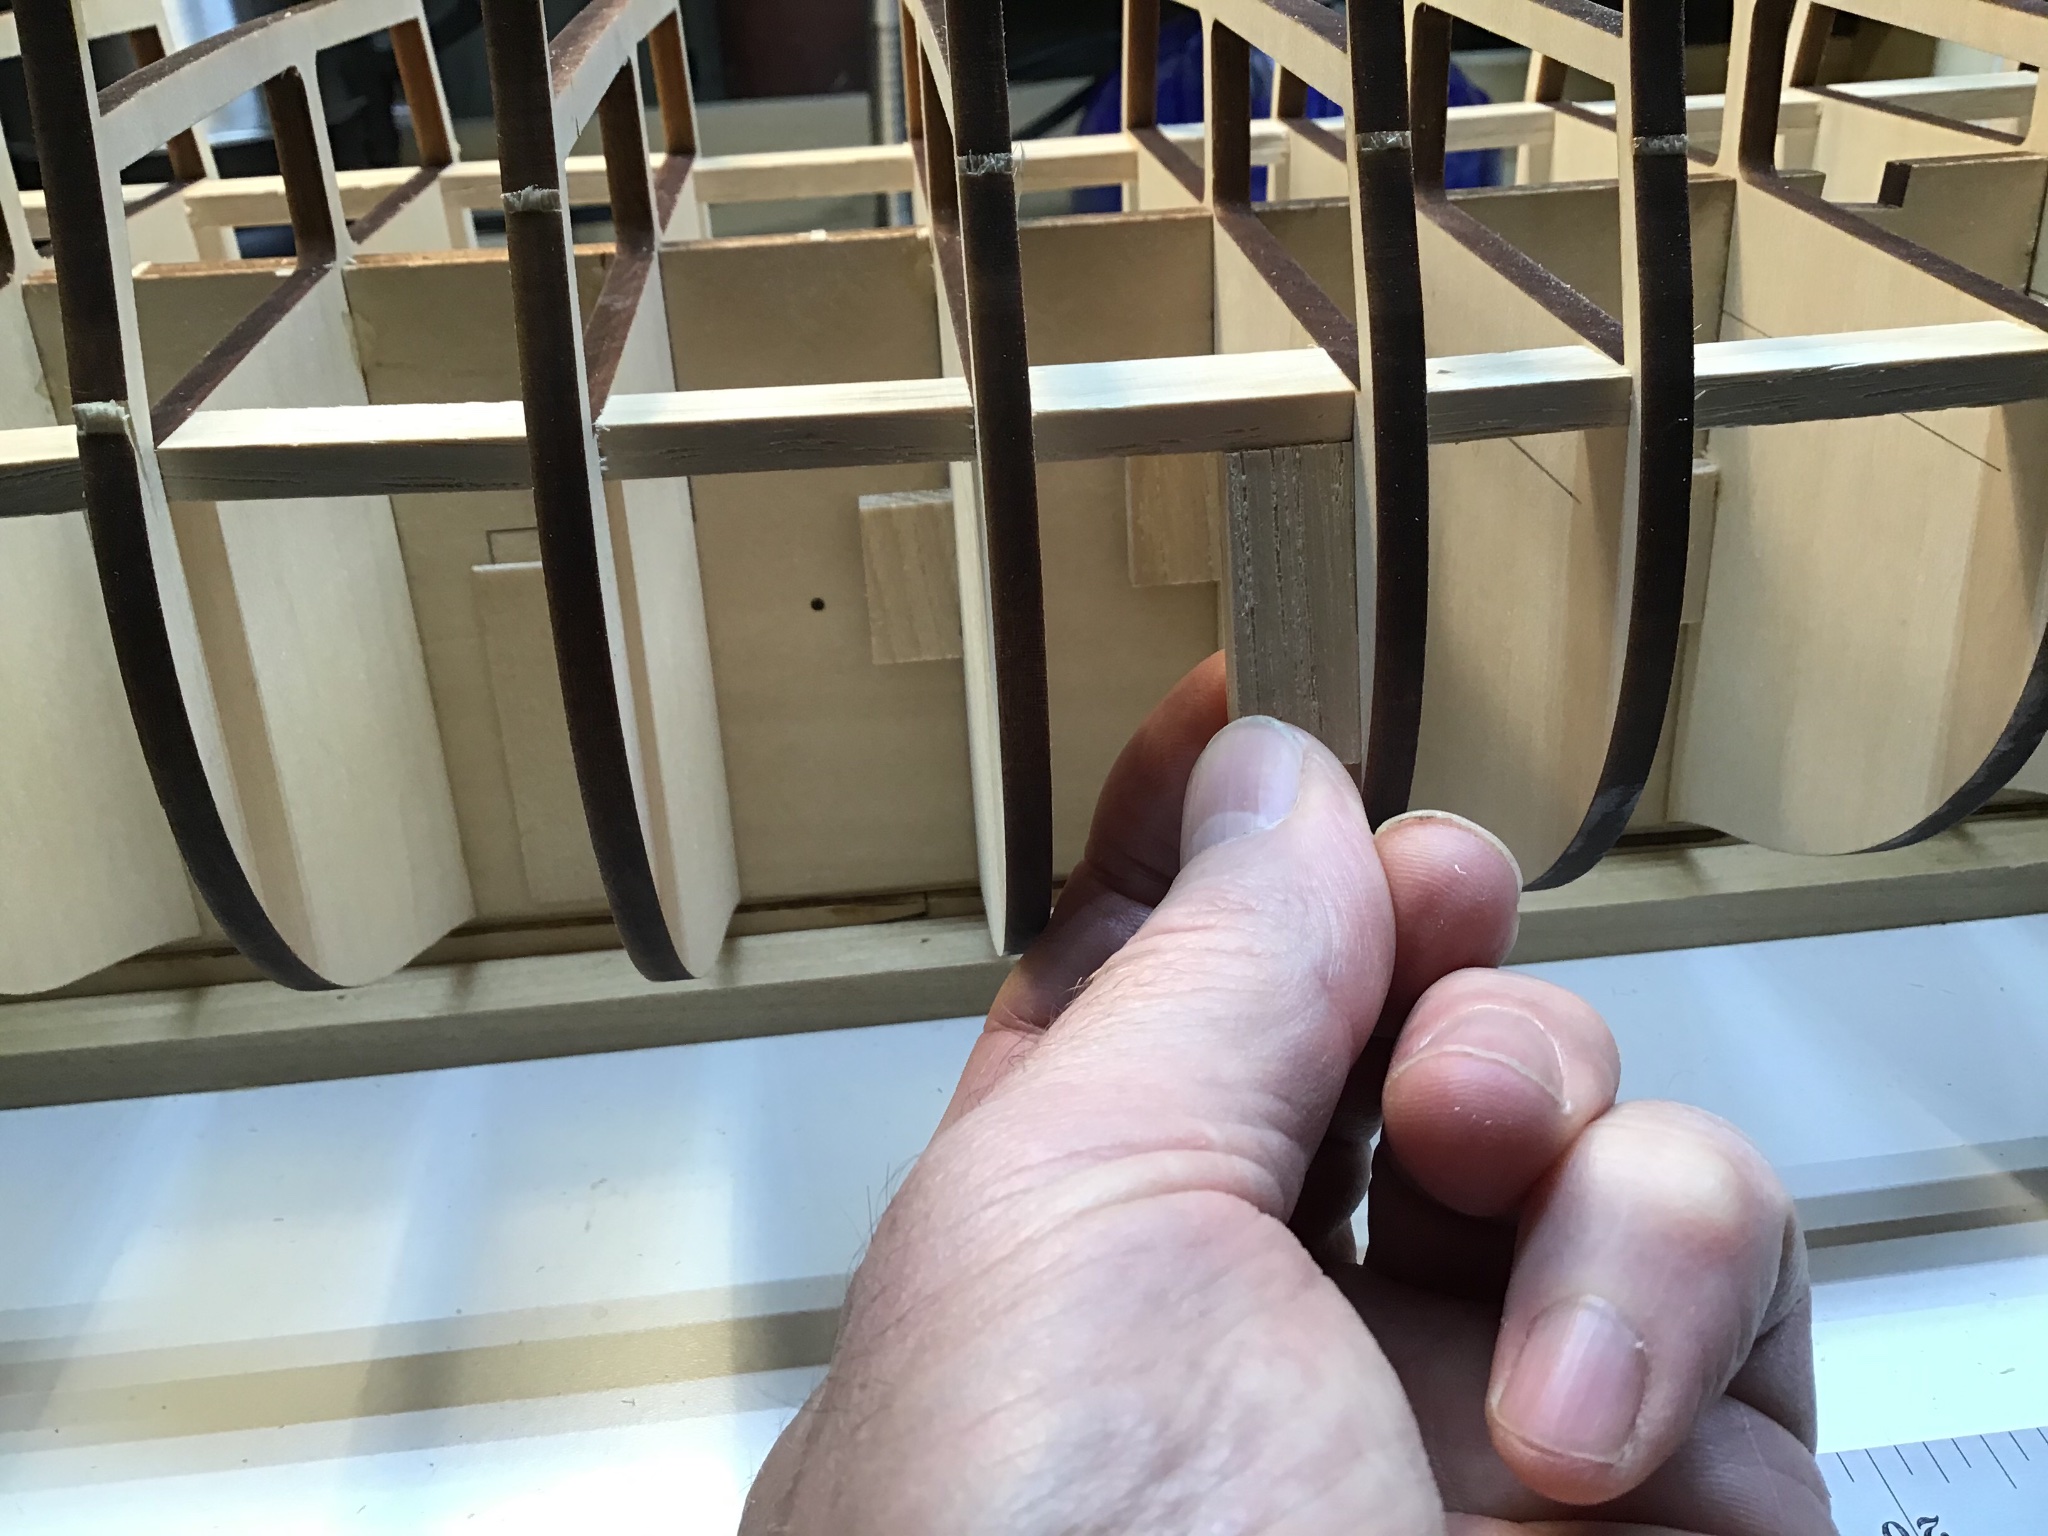
Installed blocks in opposing corners at each bulkhead/centerboard joint.
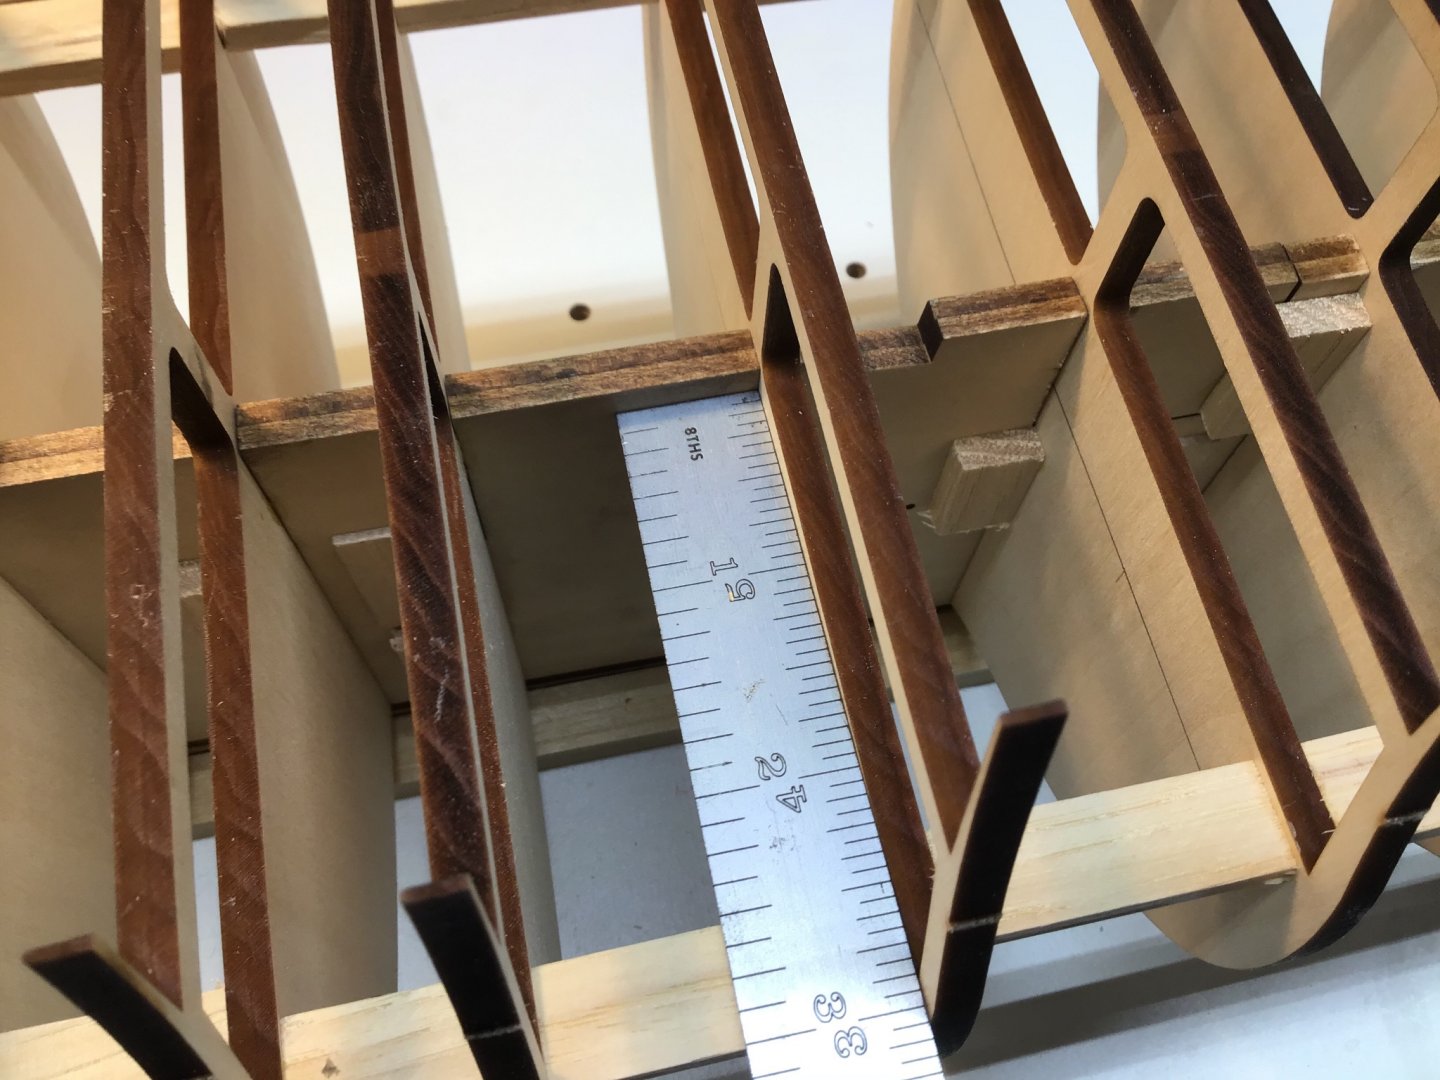
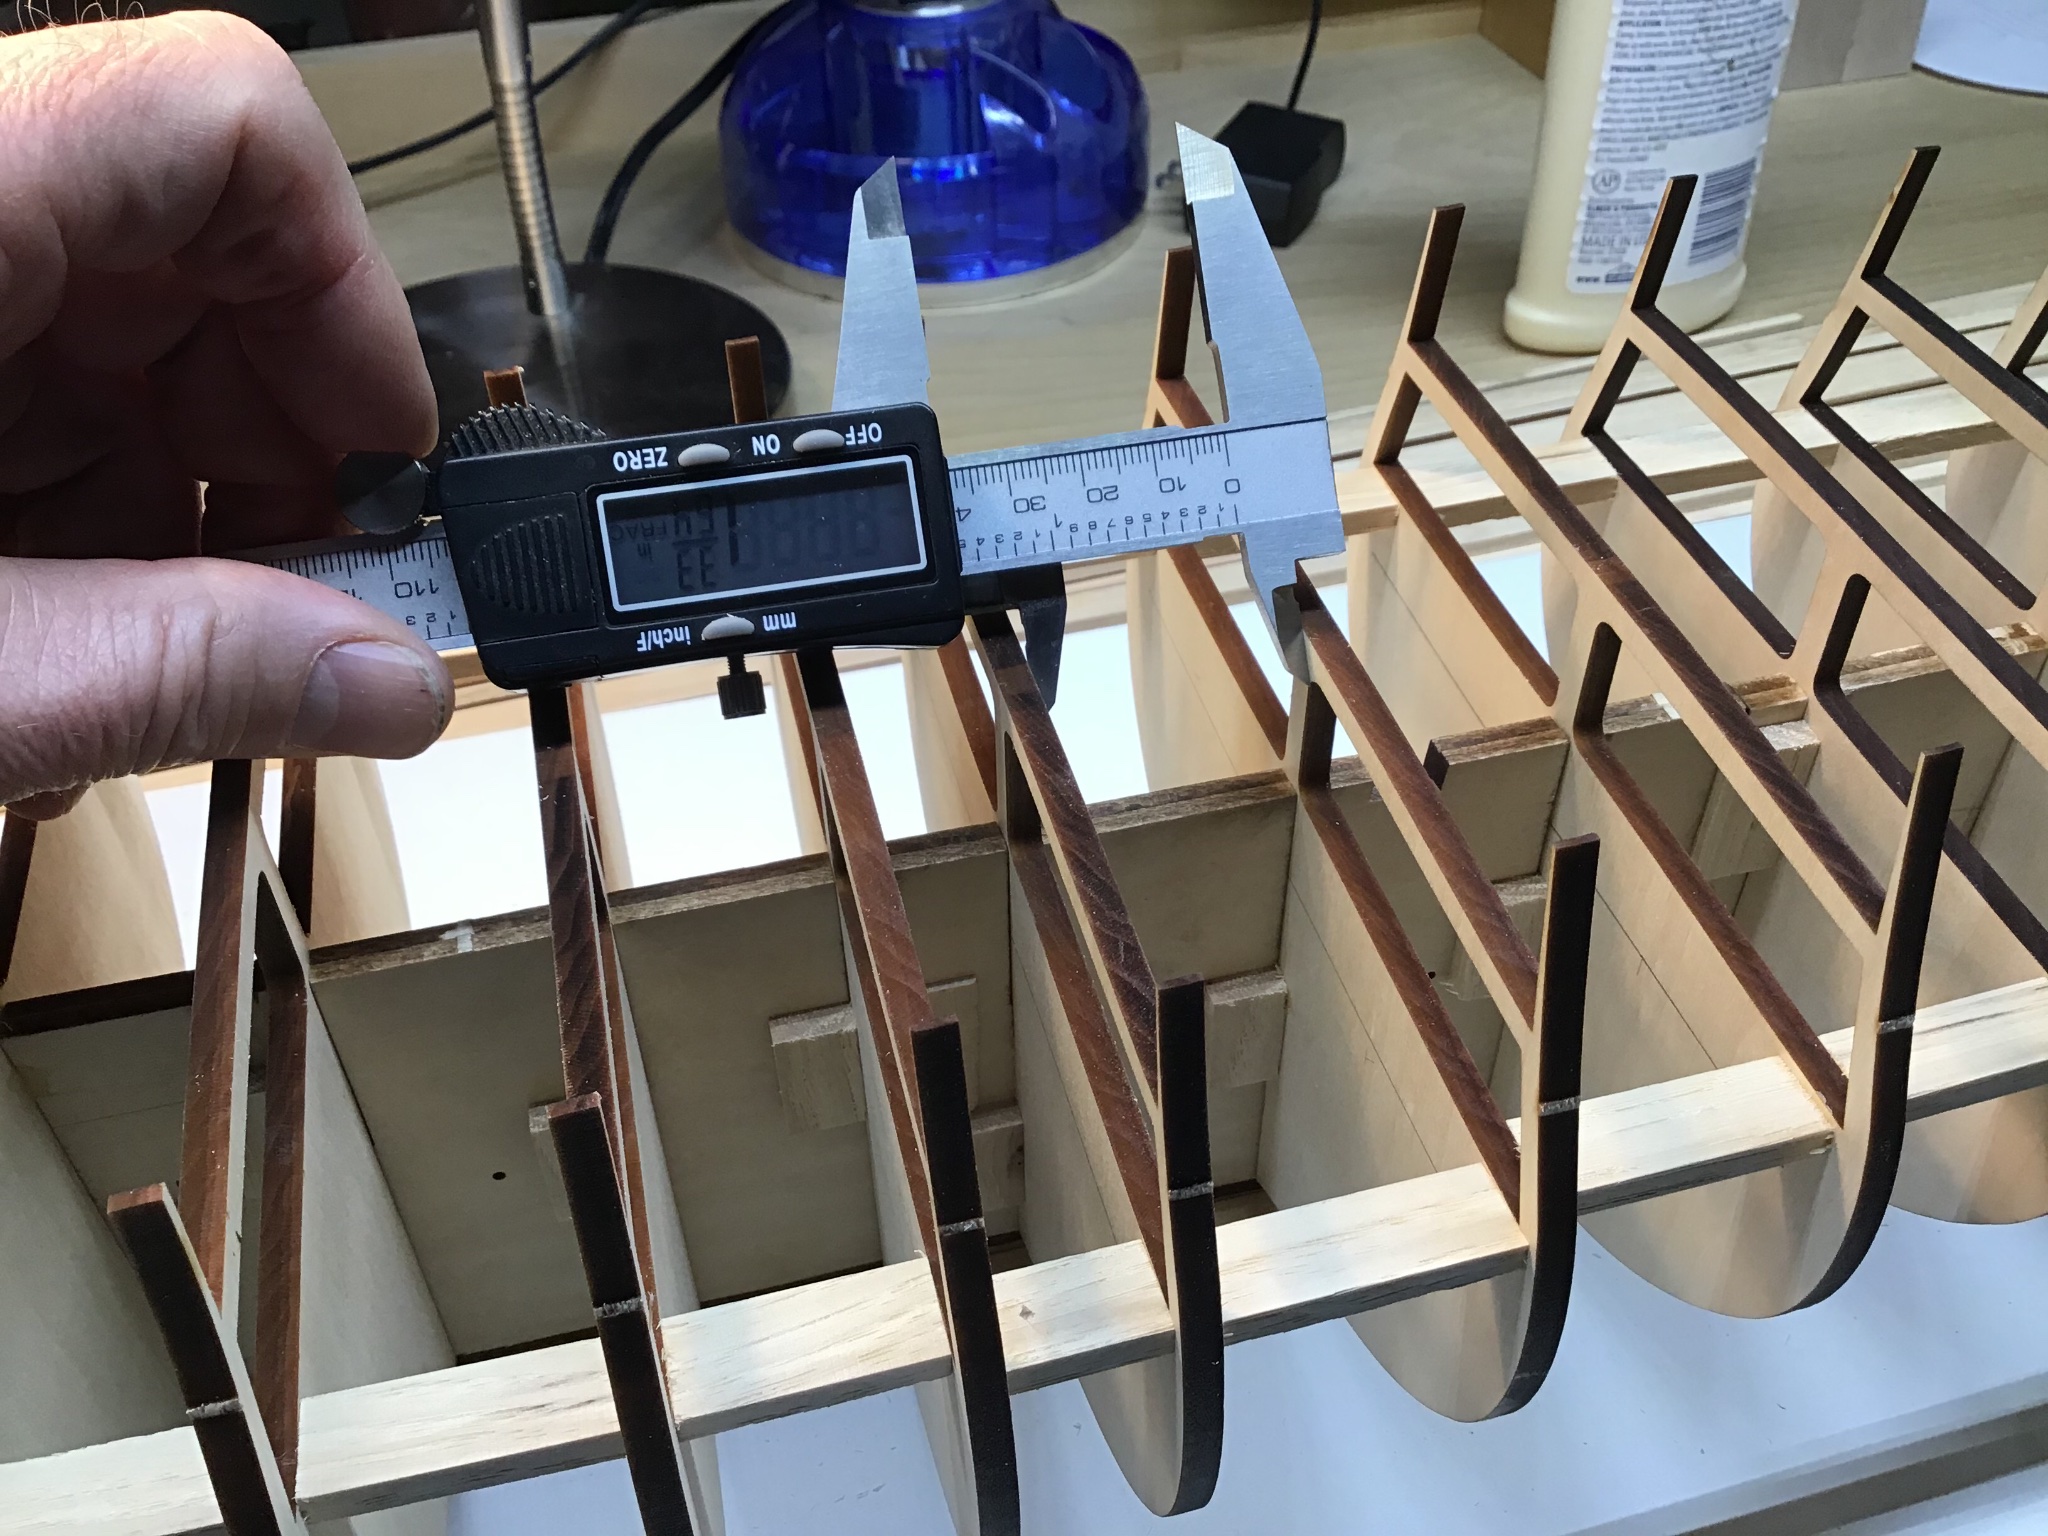
Step 3: Installed outboard blocks. Block length determined with vernier caliper measurement of distance between bulkheads at centerboard. Checked square with a block.
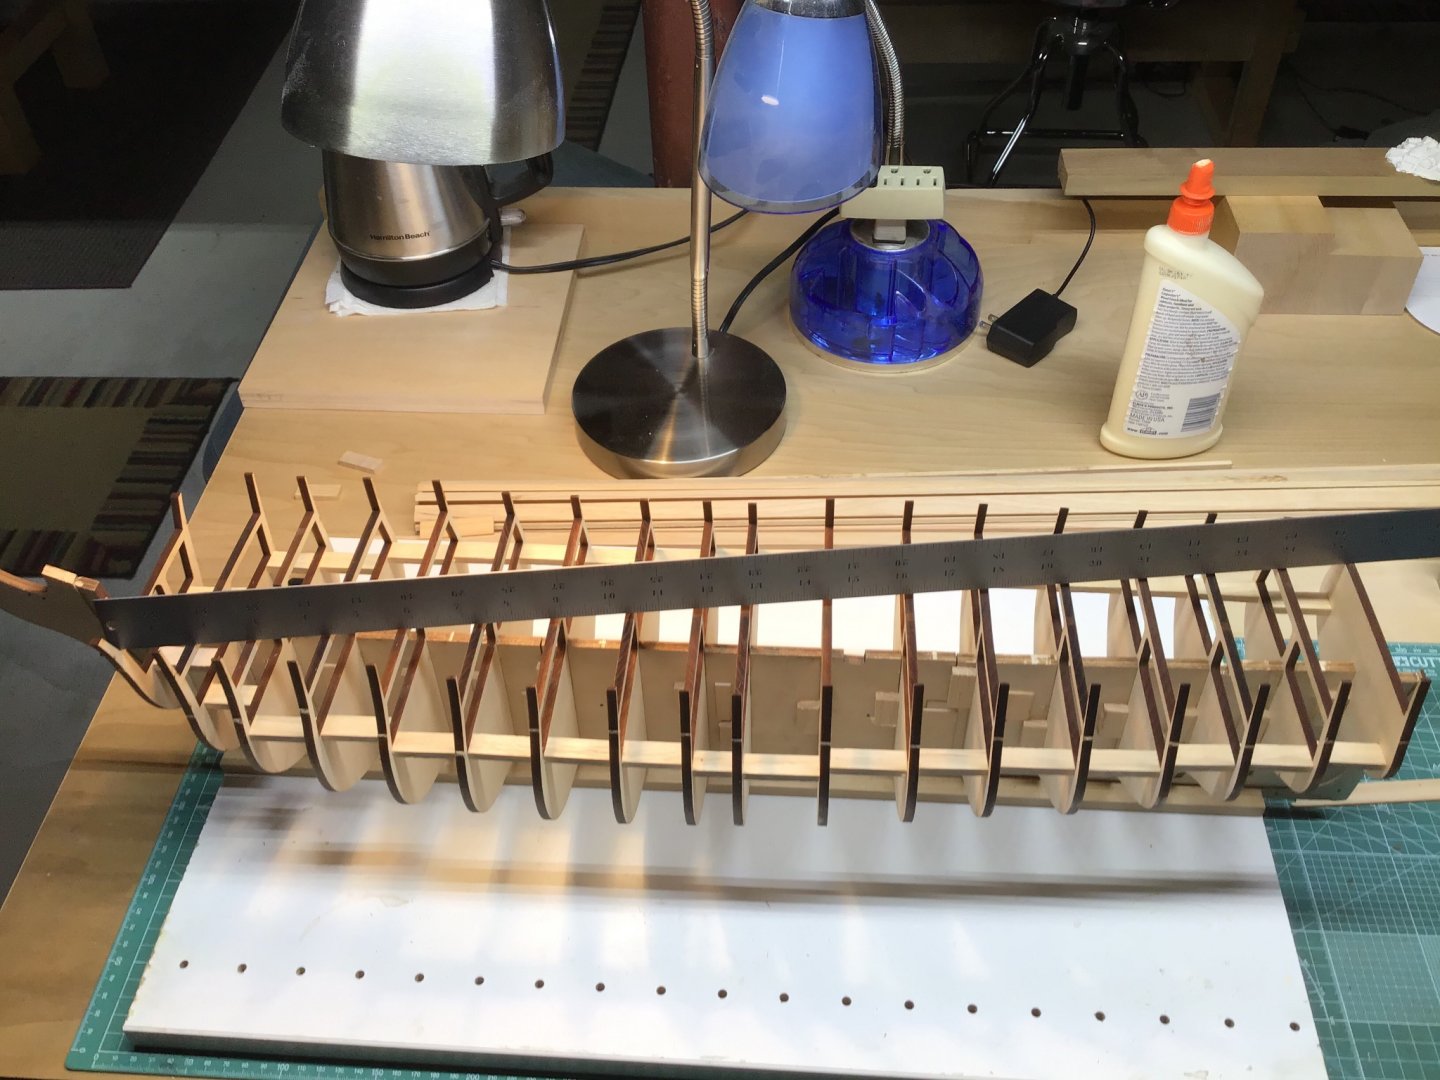
Step 4: Checked results. Diagonal measurements between first and last bulkheads are equivalent (25 1/2”). This surprised me a little bit, expected to be out a little bit.
Looking back, probably could have skipped Step 1 above. Since it all worked out I’m a happy camper....
Also pulled off a thin bulkhead top beam by pulling up to remove the bulkhead from the centerboard, end grain....
Next are the Counter and Bow/Stern filler blocks.


- Rach10199, CiscoH, GrandpaPhil and 4 others
-
7
-
Hello,
Quite a bit of good work, thanks for posting and hope your hand is better soon. Having started out with the same craftsman combo belt/disk sander wanted to share two other ways to shape planks: hand plane and manually operated disk sander by Ultimation.
Happy New Year!
-Rich


- Keithbrad80 and gieb8688
-
2
-
Hello,
This is normal, as wood moves, and changes shape, and always will, with changes in humidity and temperature. The wood fiber is like a sponge, absorbing moisture in the air.
Consider first adding blocks in the corners where the bulkheads meet the centerboard, then blocks at the outer edge of the bulkhead. Size blocks using the dimension between each bulkhead at the centerboard. This process will straighten a bowed centerboard.
Best of luck with your “Flying Fish”.
-Rich

- Canute, Duanelaker, mtaylor and 2 others
-
5
-
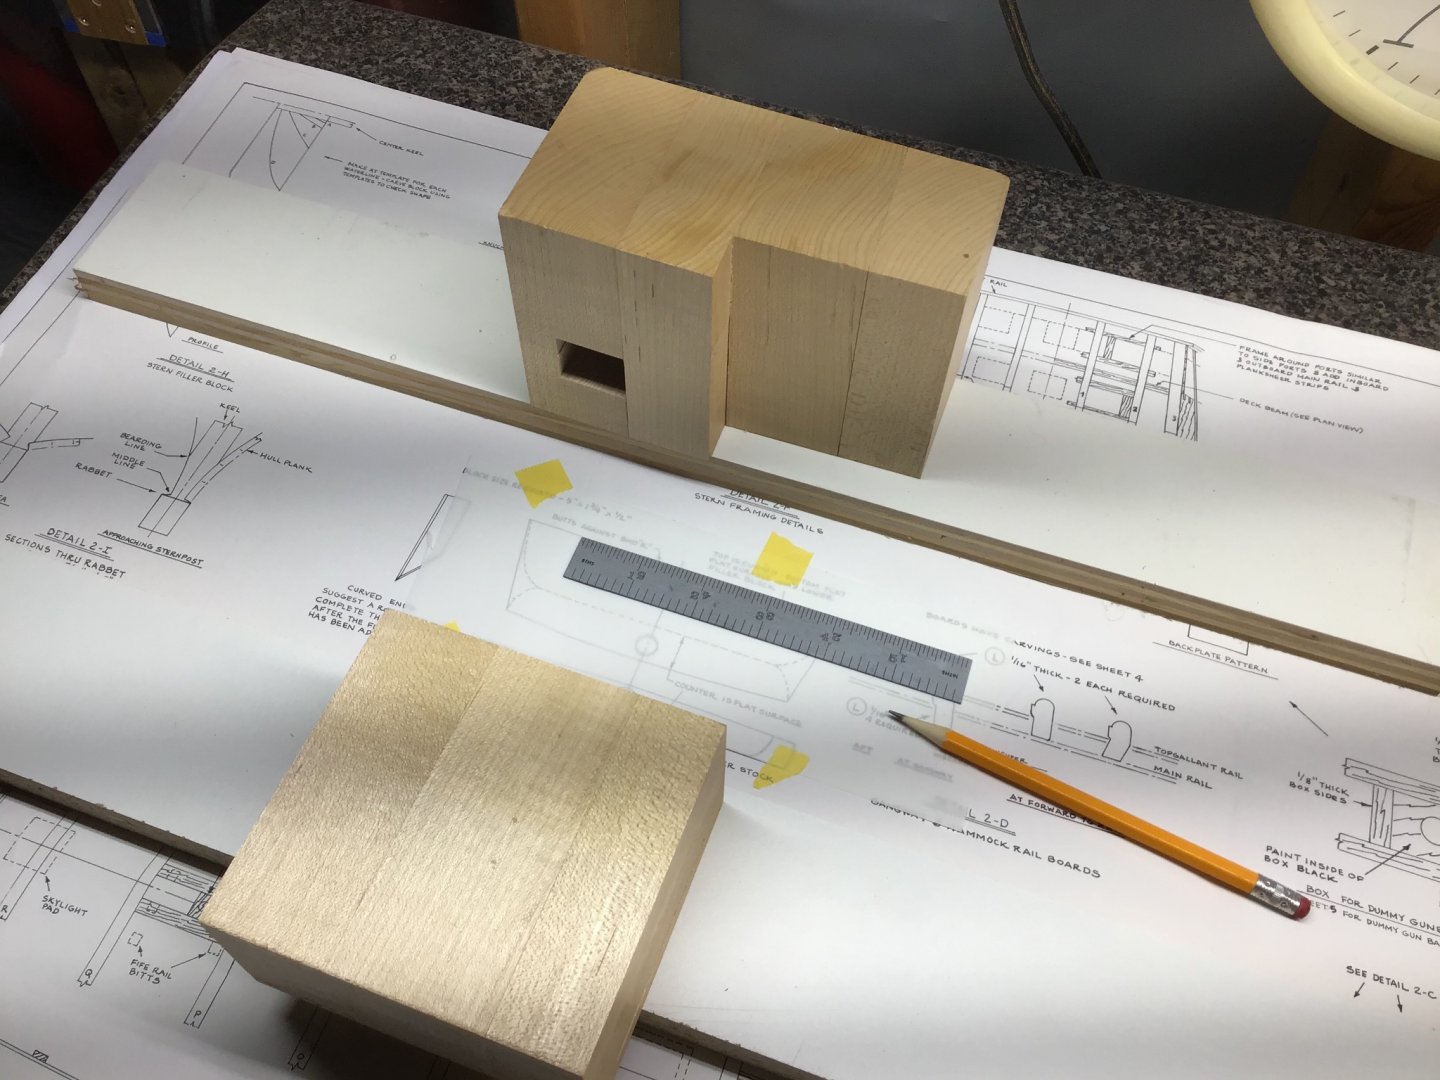
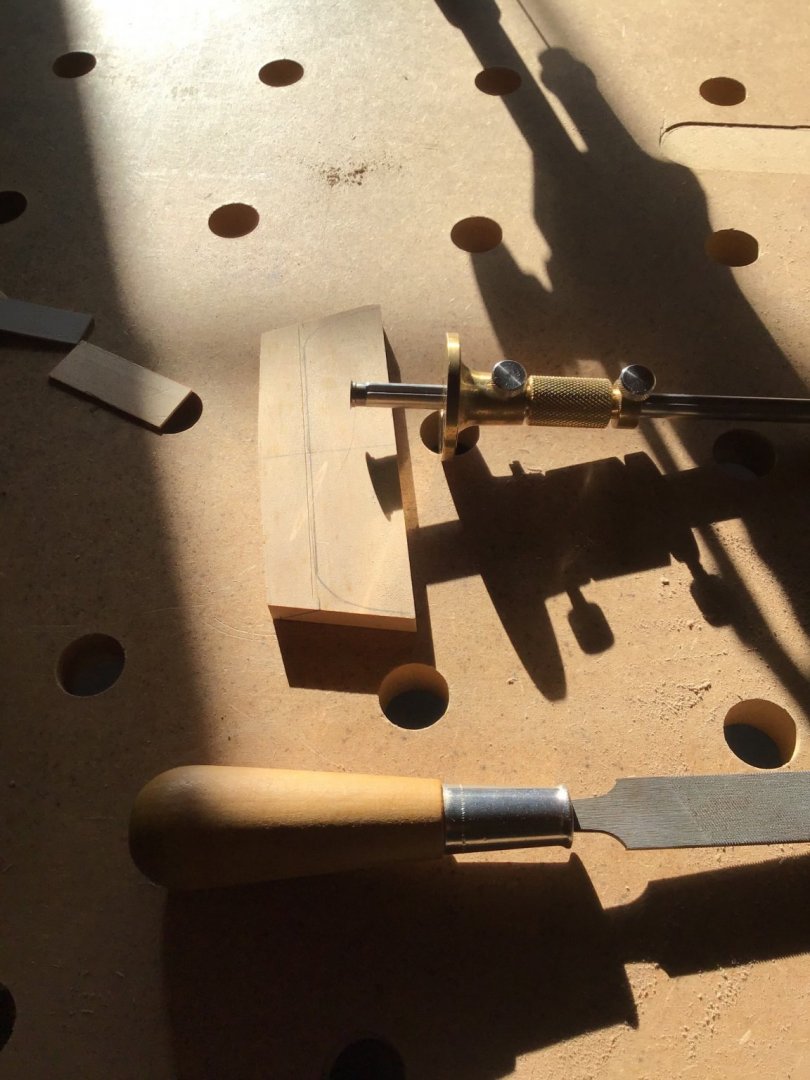
Shaping the Counter Block
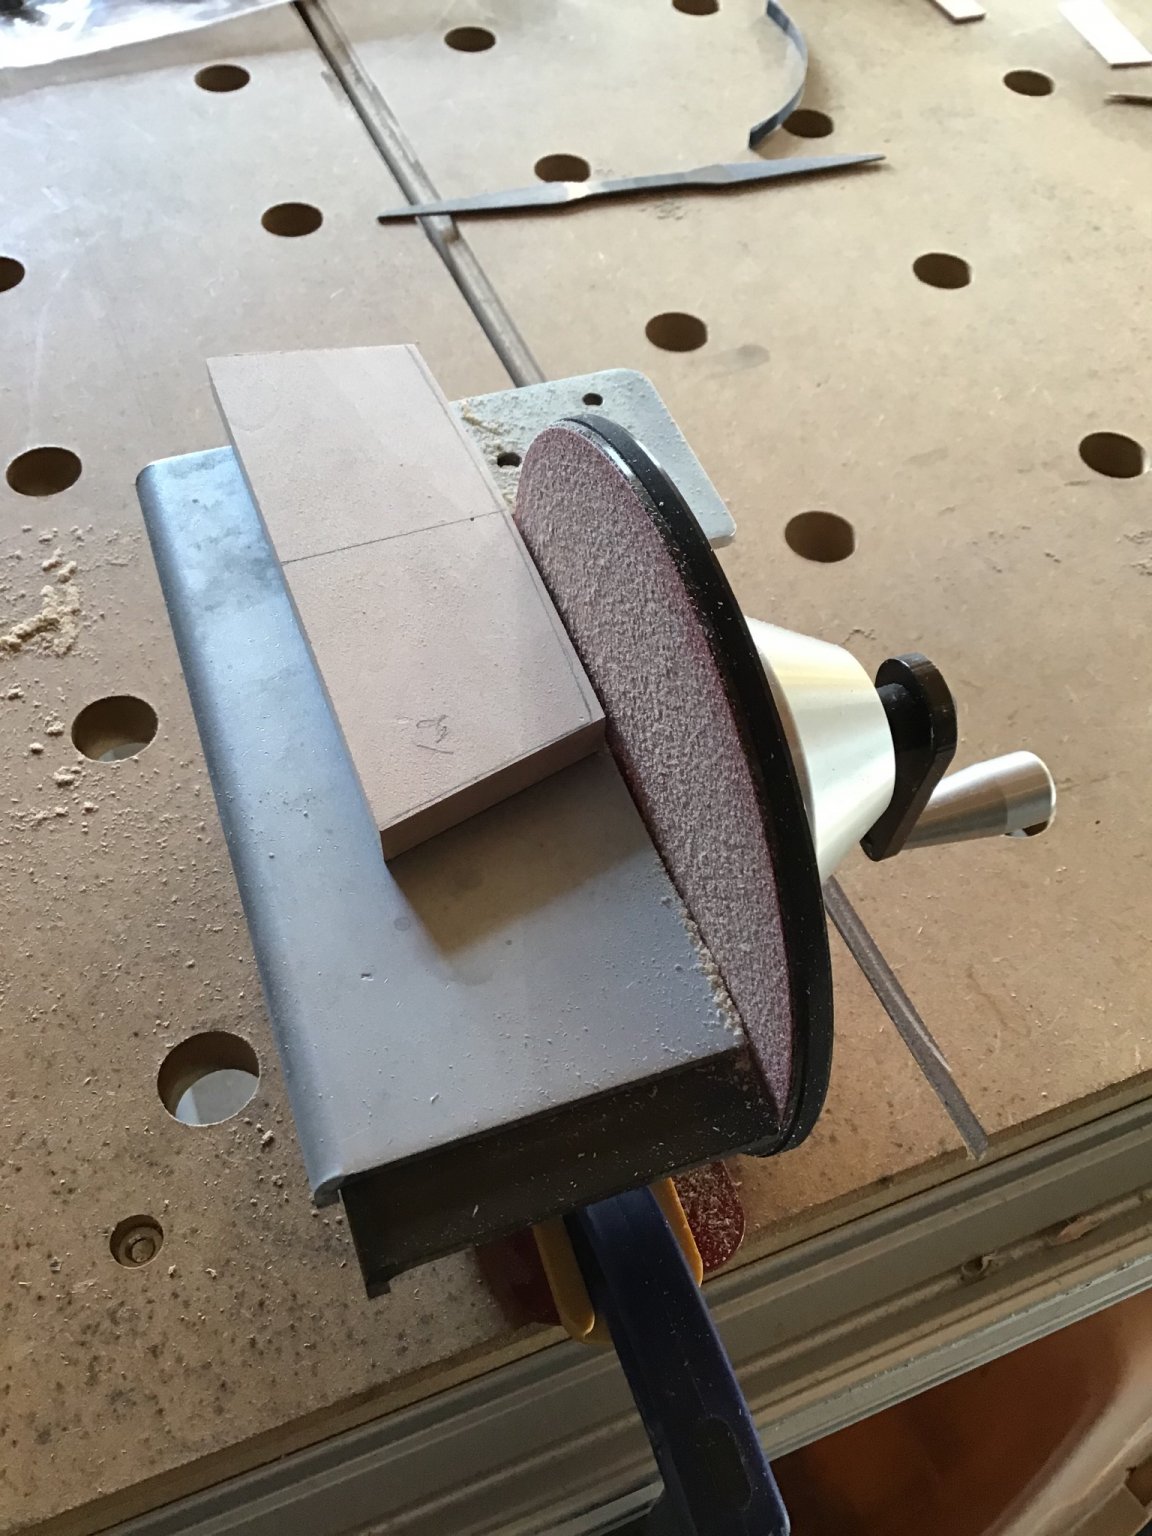
Woodworking is all about measuring, marking, and removing the waste. Counter templates created from the plan with Vellum, Straight Rule, and French curves. Glue tracing to card stock, compress on bench with woodblock and clamps.
Given counterblock provided in kit needs to be reduced in thickness to 11/32”, hard to do with a machine safely, created a new block with the table saw, by setting fence to 11/32” and re-sawing a 3/4” board. Then cut to rough dimensions with Byrnes saw and sawstop with Incra sliding table.
Mark lines with a pencil and marking gauge, shape with jackplane mounted in vise, and Ultimation disk sander.


- J11, JeffT, Duanelaker and 2 others
-
5
-
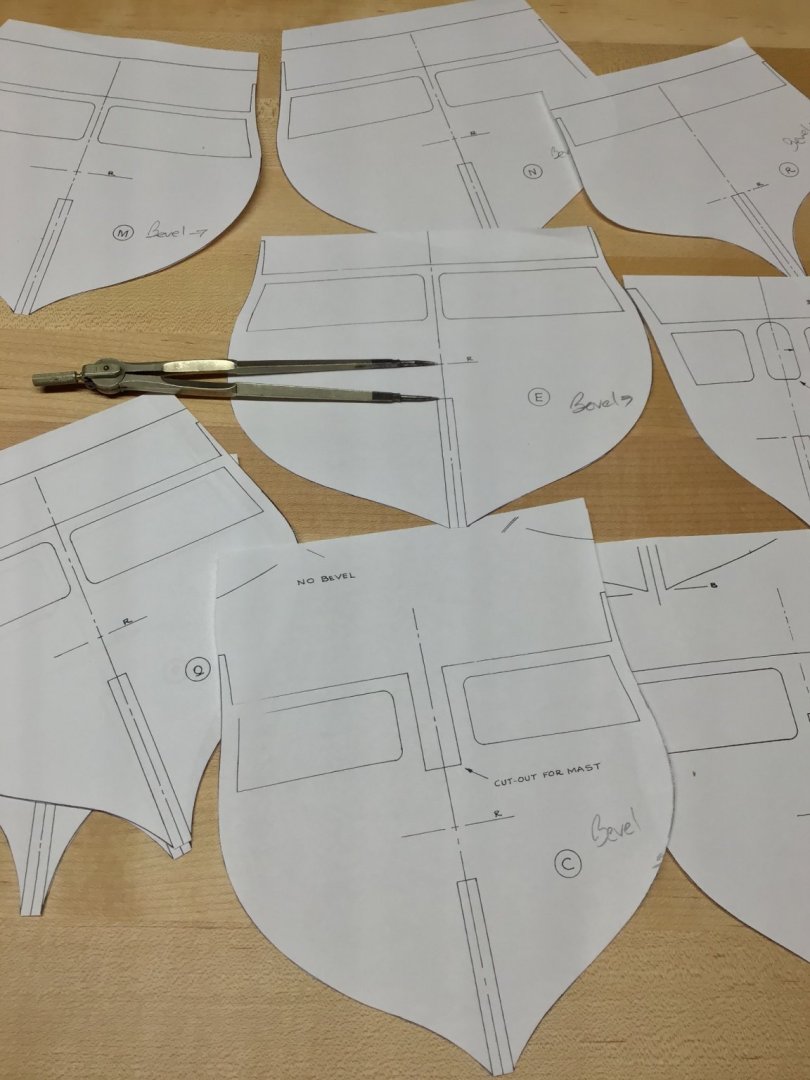
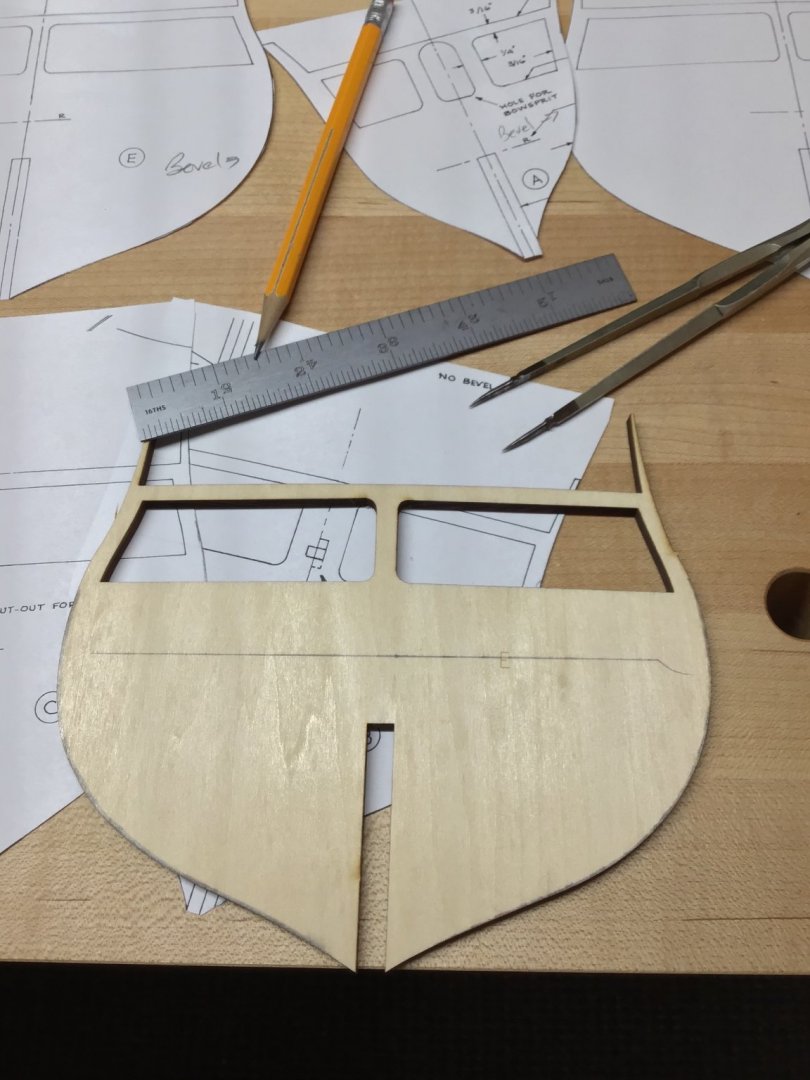
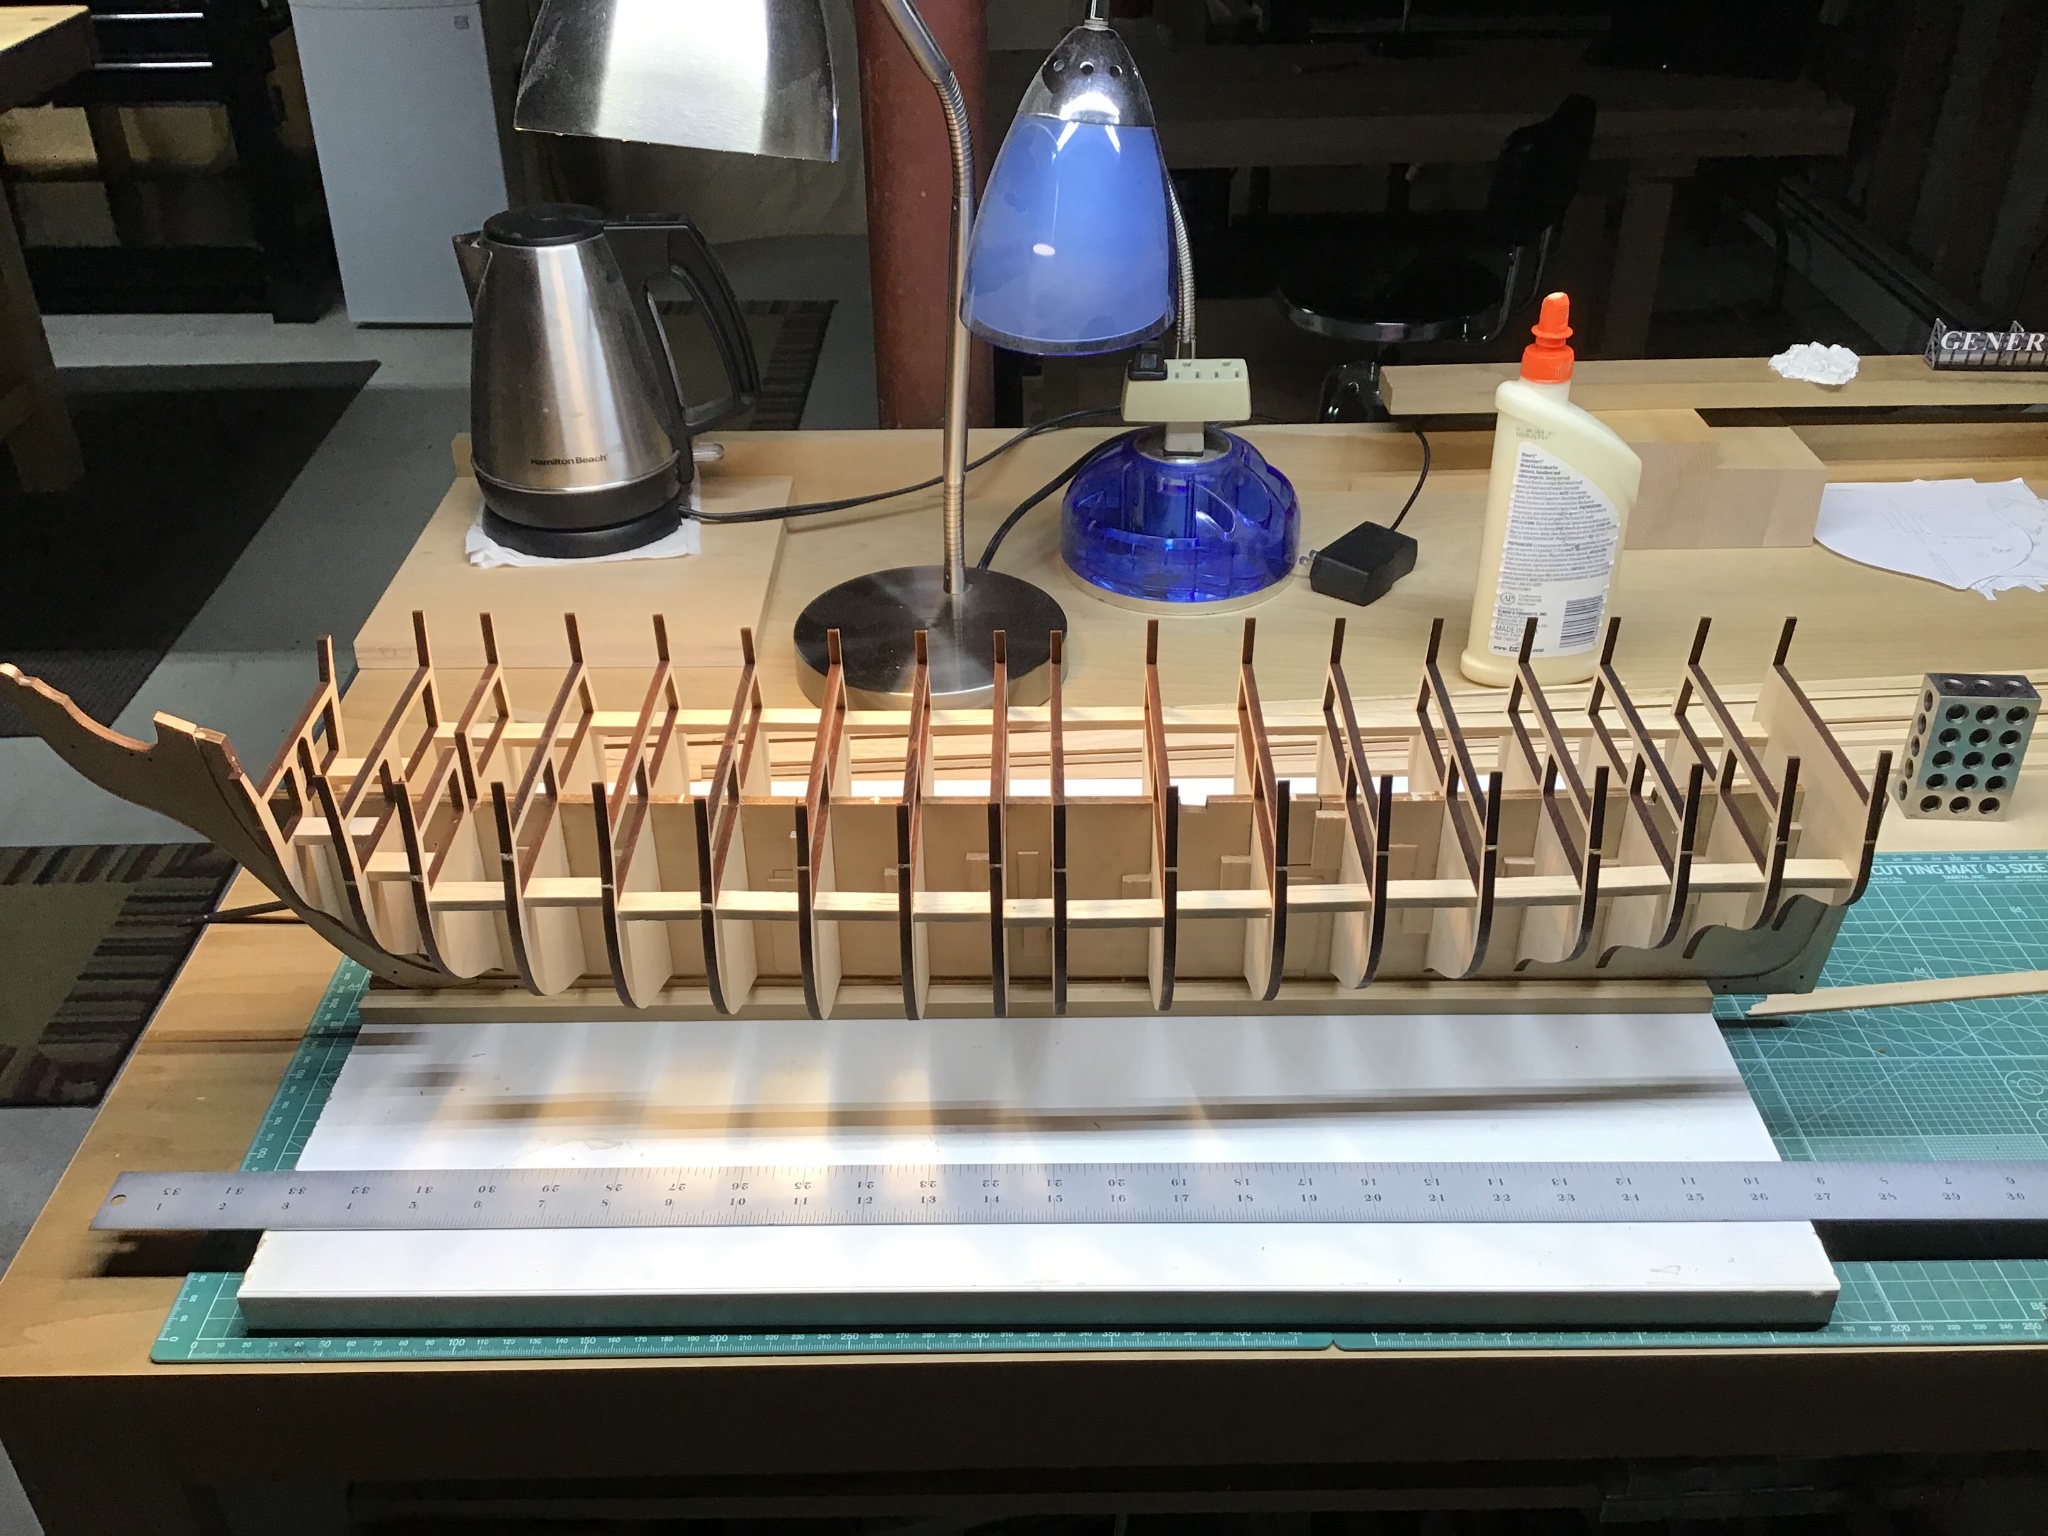
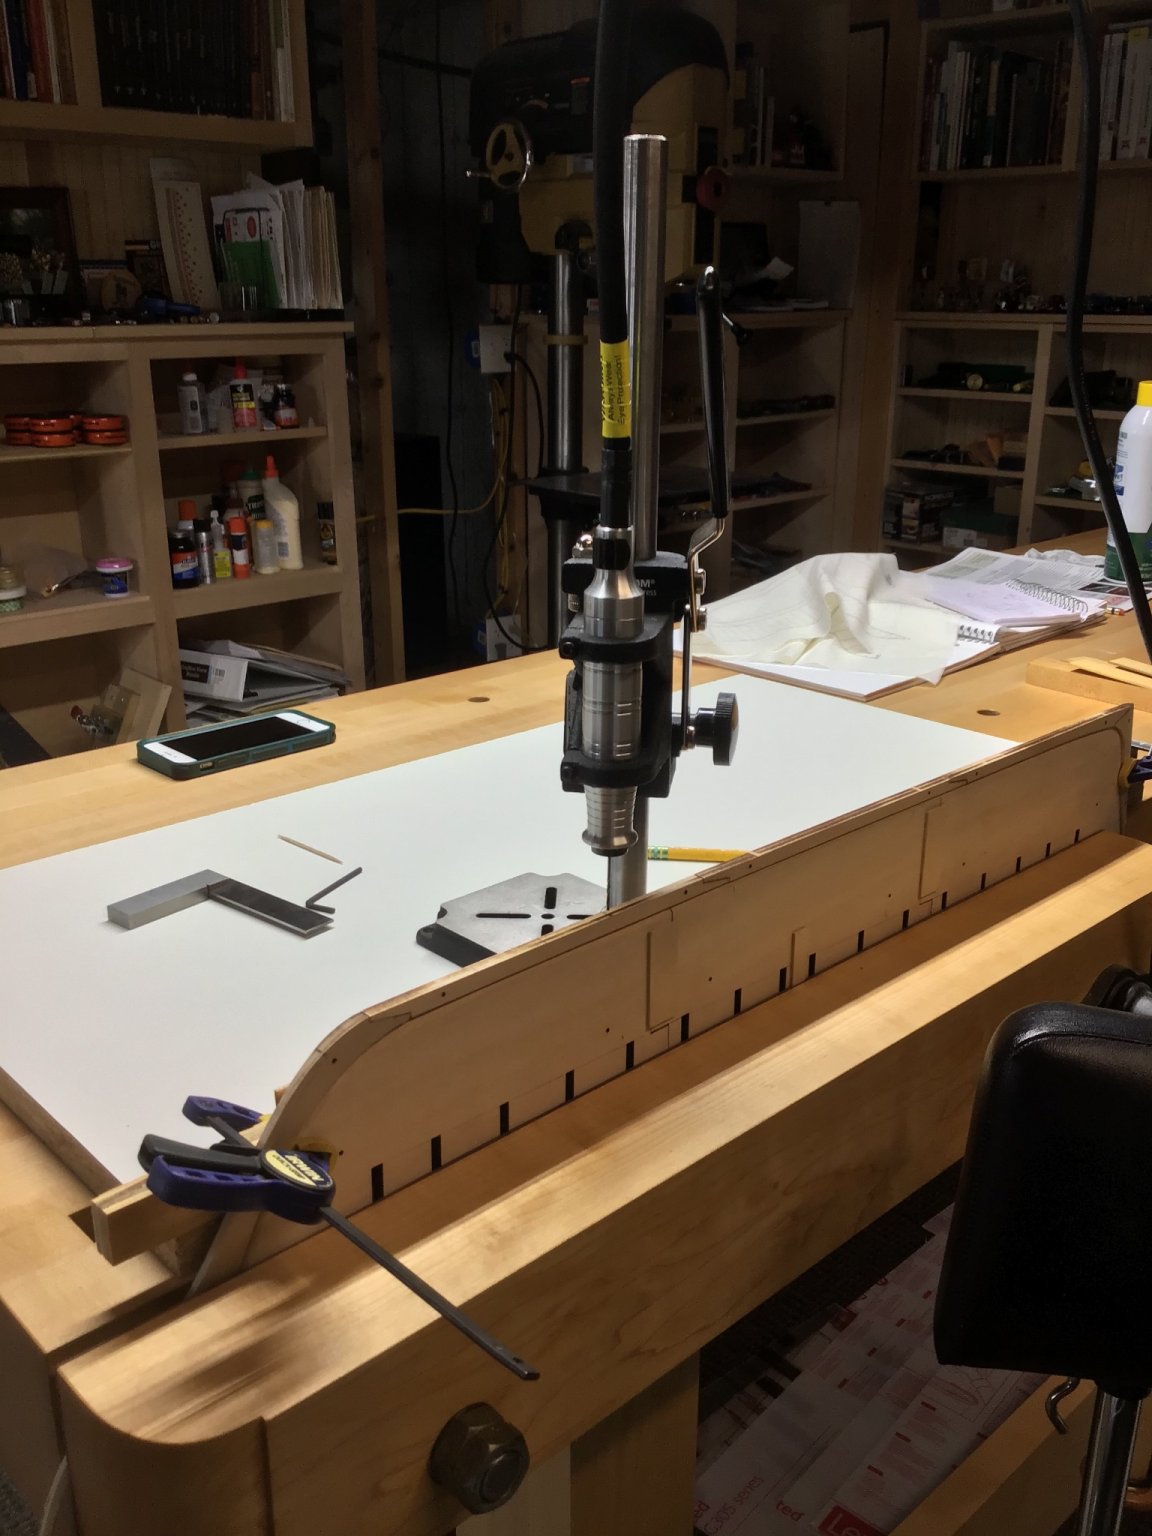
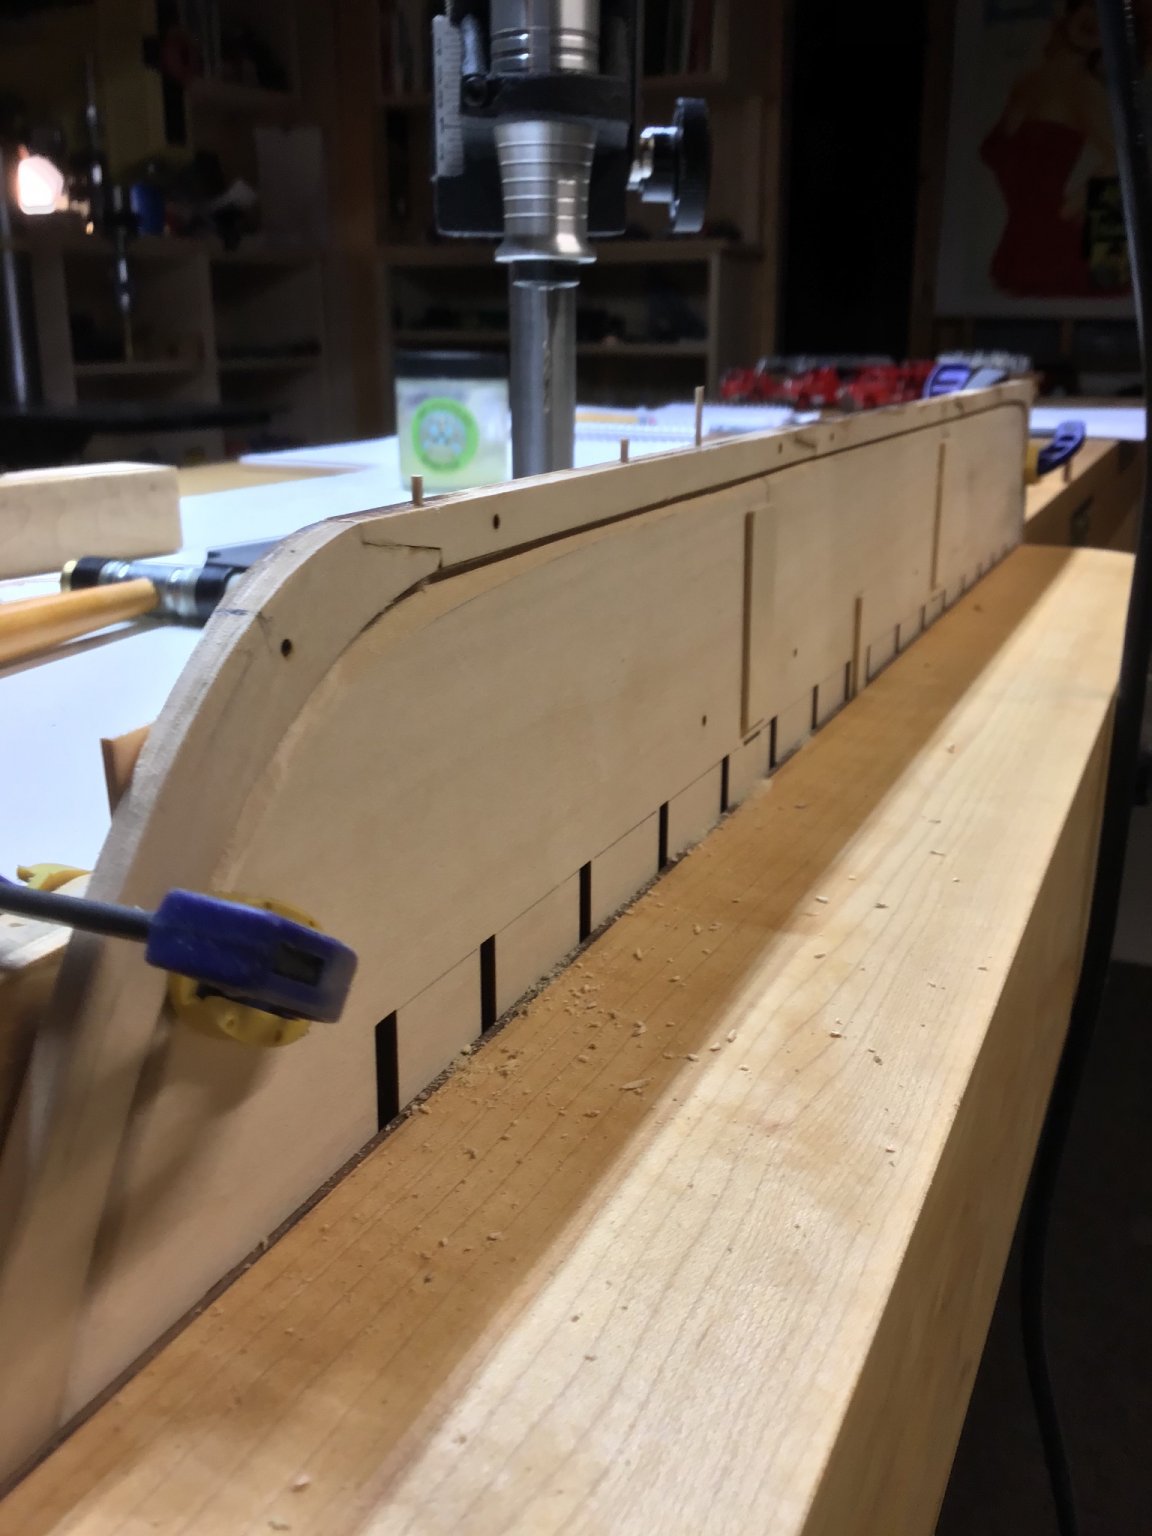
Bulkhead Marking and Glueup Prep
Photocopy bulkheads on plans. Plan shows bevel lines on bulkheads A-E and M-R. Cutout bevel line on one side of bulkhead template and outside on the other side. Use template and a pencil to shade areas on bulkhead edges that will be beveled. I’m going to bevel after the bulkheads are glued up.
Measure and mark the bulkhead horizontal lines. Use dividers to measure height of reference line off top corner of notch. Place straight edge along bulkhead notch and impress a dot into the bulkhead the correct height. Rotate steel rule 90 degrees and reference the dot and the notch corner. Draw horizontal reference line.
Use flat file to remove laser residue in both bulkhead and center board notches. I like an easy fit. Spent a couple of hours on this. Work the centerboard notches so bulkheads slide in easy. I did snap a couple of centerboard tabs, one between bulkheads C and D, while filing because of the grain direction. Glued the tabs and reinforced with a wood strip.
Mount the centerboard on a board, here melamine board with runners attached with pin nails.
Check that reference lines on the centerboard and bulkheads align.
Ready for glue up.


- Duanelaker, J11, uncarina and 4 others
-
7
-
-
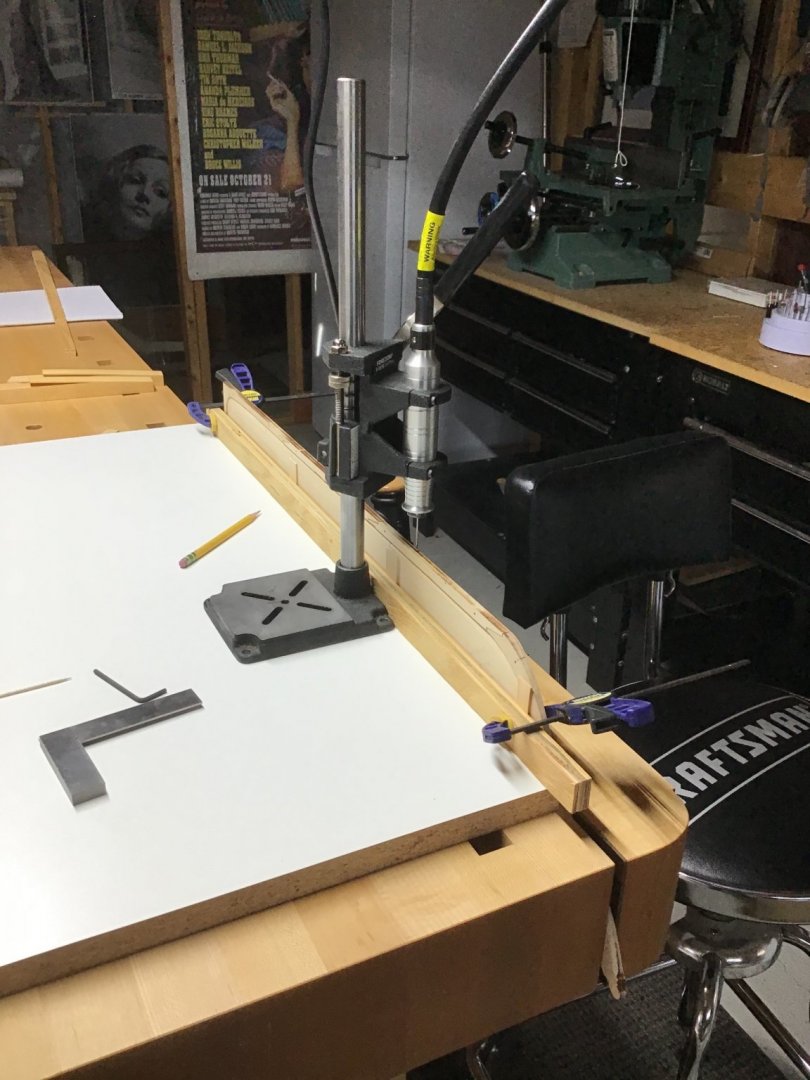
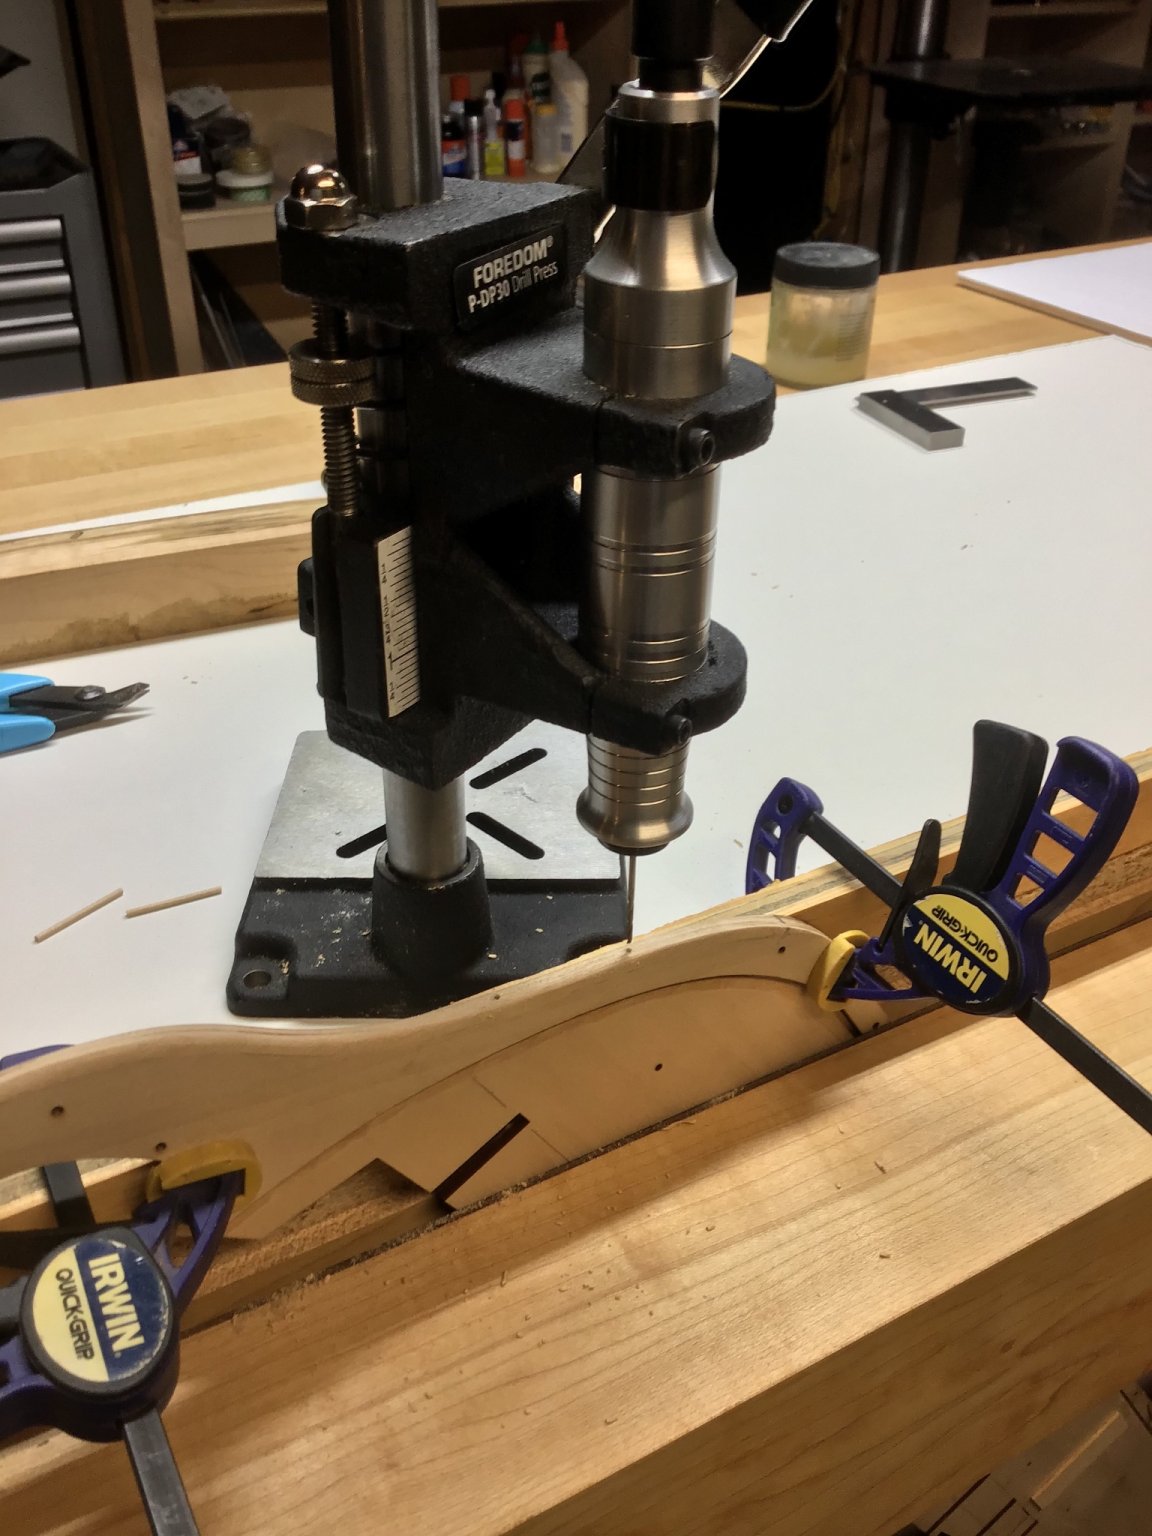
Doweling the Stem, Sternpost, and Keel to Centerboard
Marked bearding line with templates made from plan. Cut rabbet with fishtail chisel and finished with wood file. Elmers and clamps to attach Stem, Keel, and Sternpost.
Dowel Stem, Keel, and Sternpost for strength.
Dowel setup: Foredom hand piece in Foredom drill press. Centerboard in shoulder vice. 1/16” bit. 1/16” dowels by Bluejacket. Roll dowels under hardwood piece to compress fibers.
Tap in dowels with mini hammer, using brass end.


- Duanelaker, ccoyle, GrandpaPhil and 1 other
-
4
-
Introduction
This is the Model Shipways Kit No. 2040, 5/32” scale.
Kit purchased new about 2005. Notably, after starting (15 years later!), noticed Plan Sheet 5 missing, contacted Model Shipways and they immediately sent a replacement at no charge.
Building out of the box - meaning using kit supplied plans and materials, and adding additional hardwood wood if necessary.
Update 7/18/20: See this post (currently pending) for upgraded parts and sources.
This kit is not for the novice. You should come to this game with at least 1 ship model under your belt, preferably several. And you need an understanding of the nature of wood and how to shape it using chisels, files, and a hand plane. These tools need not be expensive, however they must be sharp. I recommend a 1/4” fish tale chisel from Lie-Nielson located in Maine.
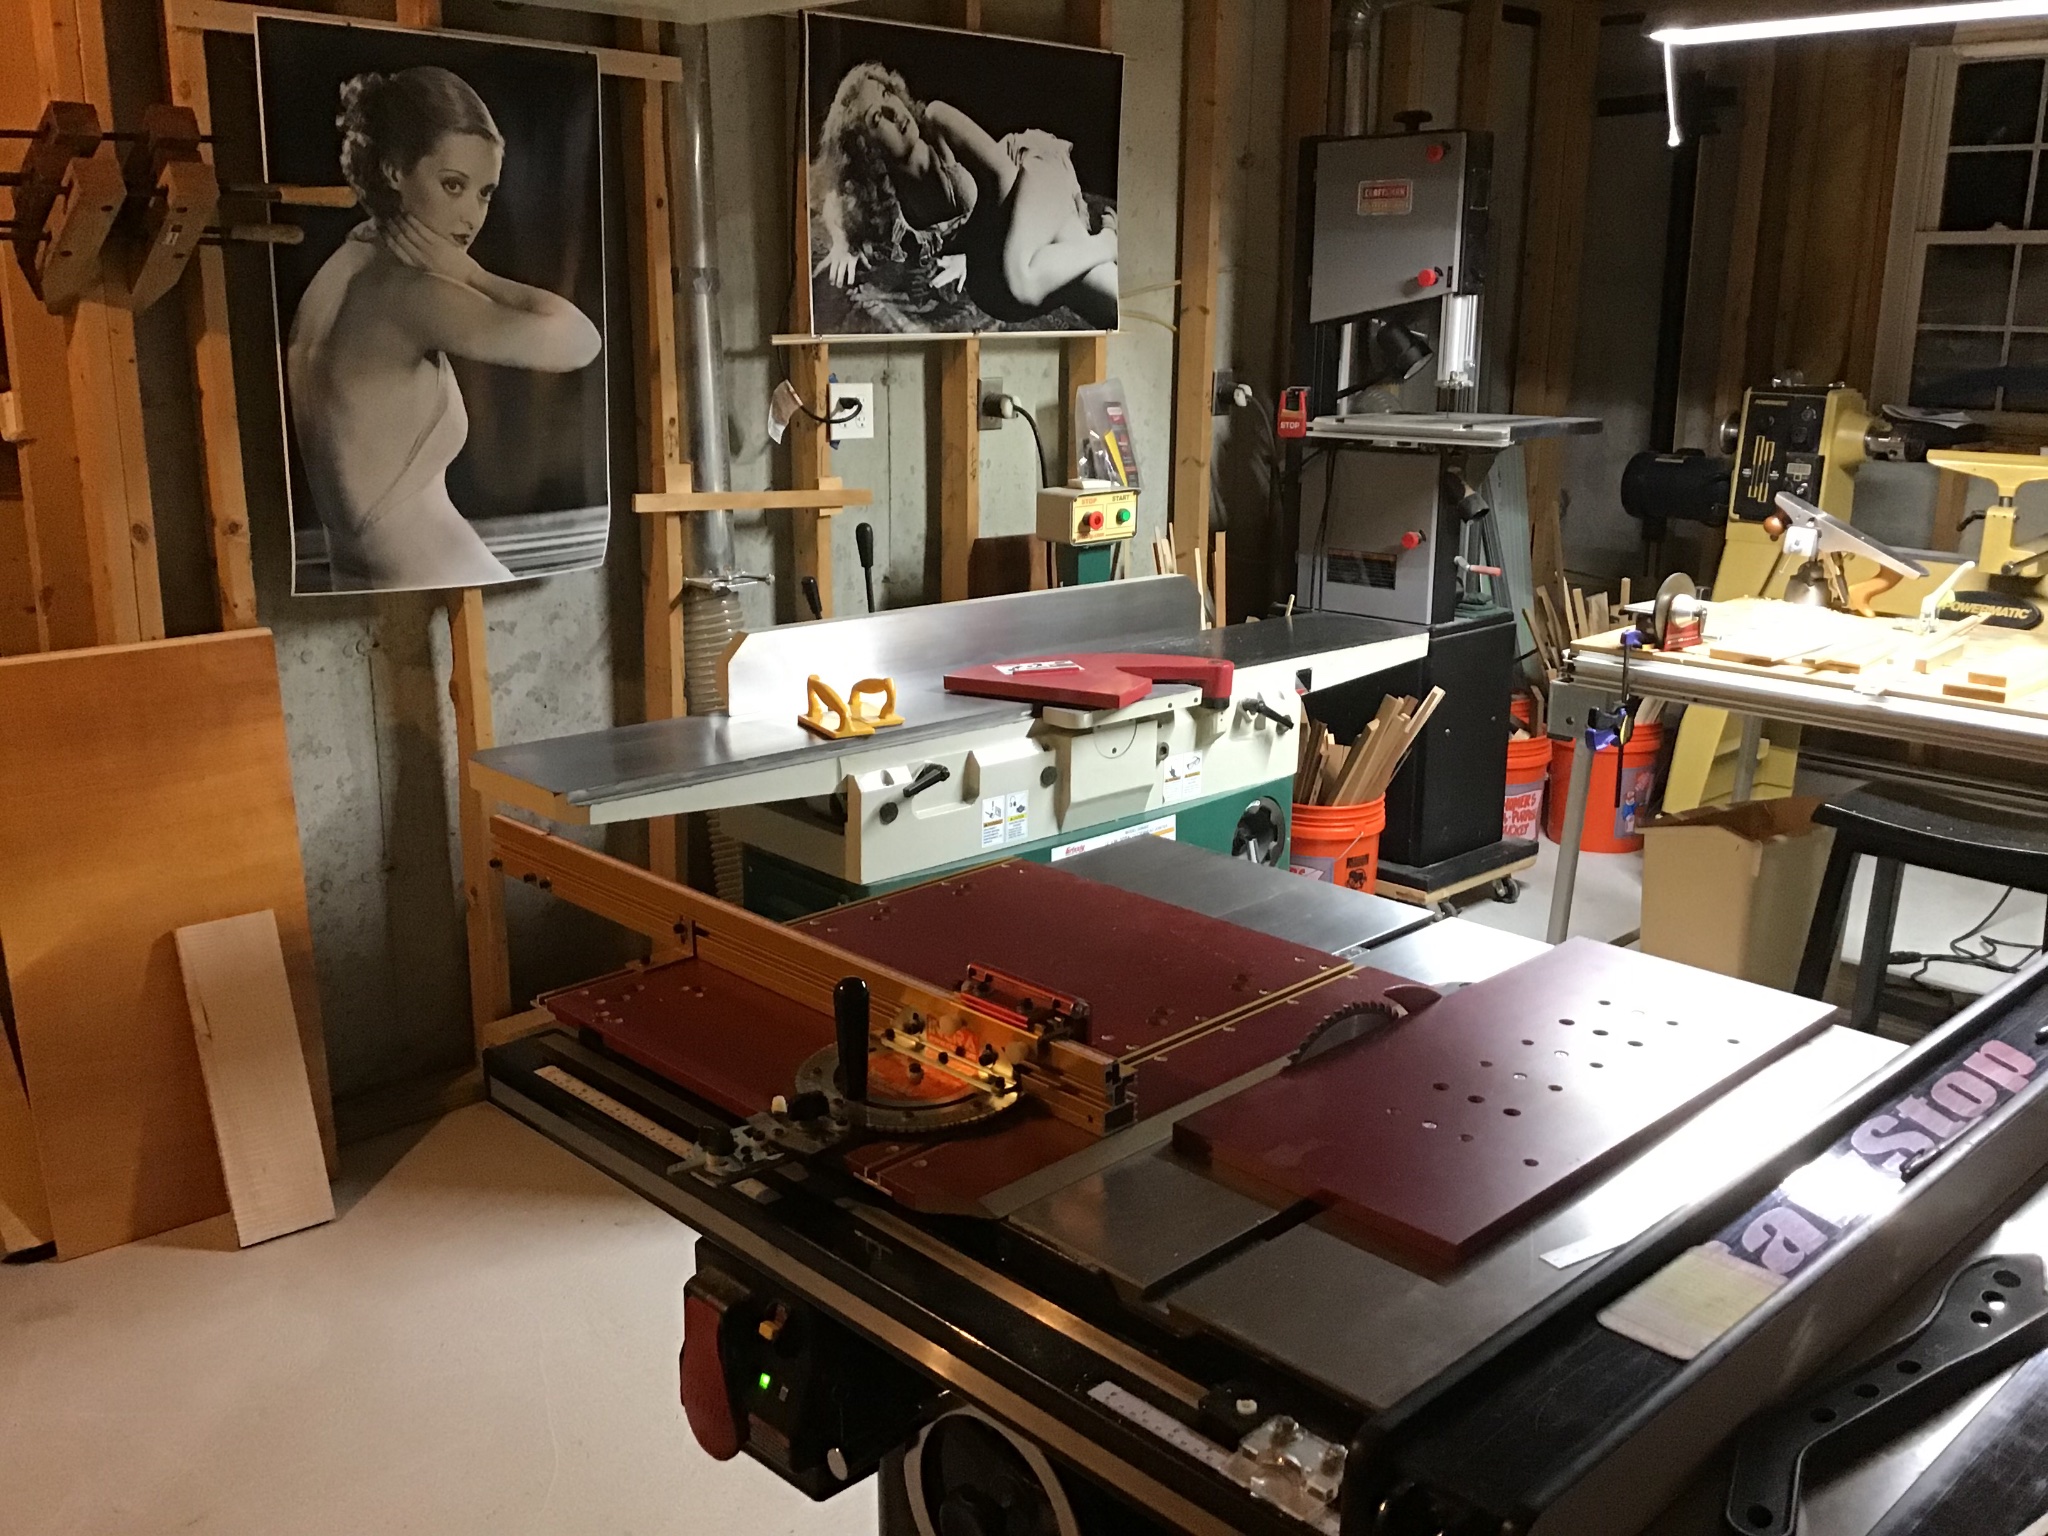
Power tools are used, they save time, essential to me for this project as there are hundreds of cuts. Not necessary though.
I’ve built many kits and expect this to be some old hat but also I’m stretching into new areas like building stern galleries. So welcome aboard, I’m glad you are here.
USS Constitution References:
- my own photographs of the ship
- Anatomy of the Ship: USS Constitution
- College of Model Shipbuilding: USS Constitution Practicum
General References:
- David Antscherl’s: HMS Swan Class Sloops - for construction techniques
- Mastini: Ship Modeling Simplified
- George F. Campbell, M.R.I.N.A.: The Neophyte Ship Modelers Jackstay (Inexpensive and Essential)
Table of Contents (incomplete, much more in the log)
Part 1: Hull- Doweling the Stem, Sternpost, and Keel to Centerboard
- Bulkhead Marking and Glueup Prep
- Shaping the Counter Block
- Bulkhead Glueup
- Completing the Counterblock
- Transom Frame Prep
- Bow and Stern Block Prep
- Shaping the Bow Filler Block and Fairing the Bulkheads
- Shaping the Filler Blocks (continued)
- Shaping the Filler Blocks (continued), Starting Bow Framing
- Bow Framing (continued)
- Bow Framing Completion
- Transom Frame Installation
- Making and Installing the Waterway
- Tools
- Inner Planksheer/Bulwarks and Bowsprit Prep
- Framing and Cutting Out the Gunports
- Cutting Out the Gunports (continued)
- Gunport Cleanup and Bulwark Prep
- Bulwark Completion
- Leveling the Bulwarks
- Lower Gunport Upper Sills
- Lower Gunport Framing and Planking
- Smoothing the Planking
- Gunports and Upper Hull Planking Completion
- Mast Partners/Tenons and Deck Framing
- Coamings and Hatch Framing
- Planking the Wales - Planking Without Pins or Clamps
- Tapering a Plank
- Planking Starboard Wale
- Belt A Installation - Starboard Side
- Forming the Forward Planks
- Belt B Installation - Starboard Side
- Belt C Installation - Starboard Side
- Belt D Installation - Starboard Side
- Belt B - Port Side, Marking the Belt Width
- Dealing with Butt Joint Gaps
- Using Proportional Dividers
- Plank Glue Up
- Completion of Port Side Planking
- USS Constitution Pictures - June 2020
Part 2: Fitting Out
- Installing Eyebolts for Carronade Tackle
- Installing Large Inboard Bulkhead Cleats
- Installing Small Inboard Bulkhead Cleats
- Fitting the Cathead
- Painting the Bulkwarks
- Cleaning Up the Dust
- Finish and Installing Deck Grates
- Deck Plank Stock Preparation
- Planking the Deck - Part 1
- Planking the Deck - Part 2
- Planking the Deck - Part 3
- Planking the Deck - Part 4
- Evening Deck Finish Color


New to PE, need suggestion about tools to fold
in Modeling tools and Workshop Equipment
Posted
After trying a plastic folding product, and steel rule and razor blade, finally purchased Small Shop hold and fold and the set of rods for forming circles. Small shop hold and fold worked the best for me. Hold and fold produced precise right angles. Small shop may cost more but will save time and frustration. The old adage “a cheap tool is an expensive tool” certainly applies in this situation.
-Rich