


ERS Rich
-
Posts
689 -
Joined
-
Last visited
Content Type
Profiles
Forums
Gallery
Events
Posts posted by ERS Rich
-
-
-
2 hours ago, Bill Morrison said:
Thank you! I looked over that site and watched/read several of the sample practicums. They seem interesting and helpful.
Hi Bill,
Highly recommend the Armed Virginia Sloop practicum and the Model Shipways kit. Liked the larger scale and the practicum is particularly detailed about both standing and running rigging.
-
-
Welcome! Greetings from Massachusetts. Glad you are here. Cheers!
- thibaultron, Keith Black and mtaylor
-
 3
3
-
Beautiful job, so crisp and clean. Will bookmark for future reference. Looking forward to more. Thanks
-
1 hour ago, Bill Morrison said:
Excellent job so far! Very impressive! I do have one question; what is the practicum that you reference and what is its source?
Bill
Hi Bill,Thanks for the kind words.
The references are listed in the Introduction, the first post. Followed the College of Model Shipbuilding Guide until about Chapter 4. Then jumped to Chapter 6 to complete the lower hull planking.
And I’ve added some techniques I’ve thought of or learned as a cabinet maker.
Your question gives me a chance to explain what’s ahead.
Going forward, following a sequence I’ve developed over several projects, the general roadmap is:
- fit out inner bulwarks
- paint inner bulwarks
- plank the deck/install deck furniture
- fit out outer hull: stern galleries, head
- paint outer hull
- main rail/upper bulwarks
- masts/bowsprit
- rigging
Nothing wrong with the sequence in the practicum, just want to do it in such a way that all parts are installed in an area before painting that area.- JeffT and Boatsinc2000
-
2
-
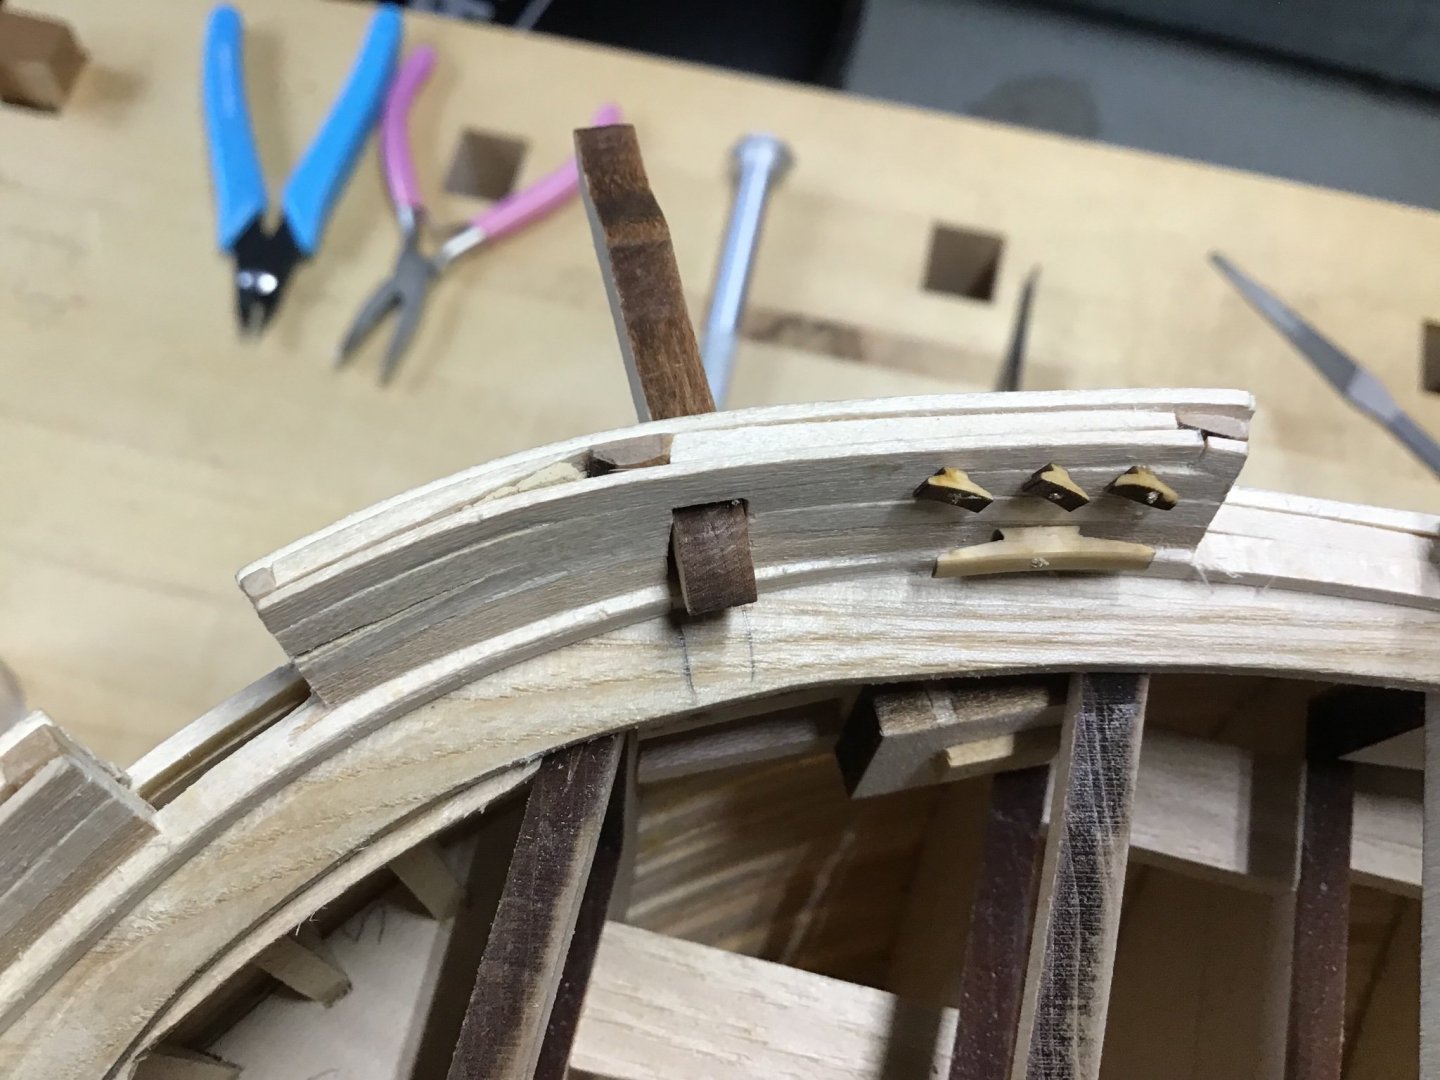
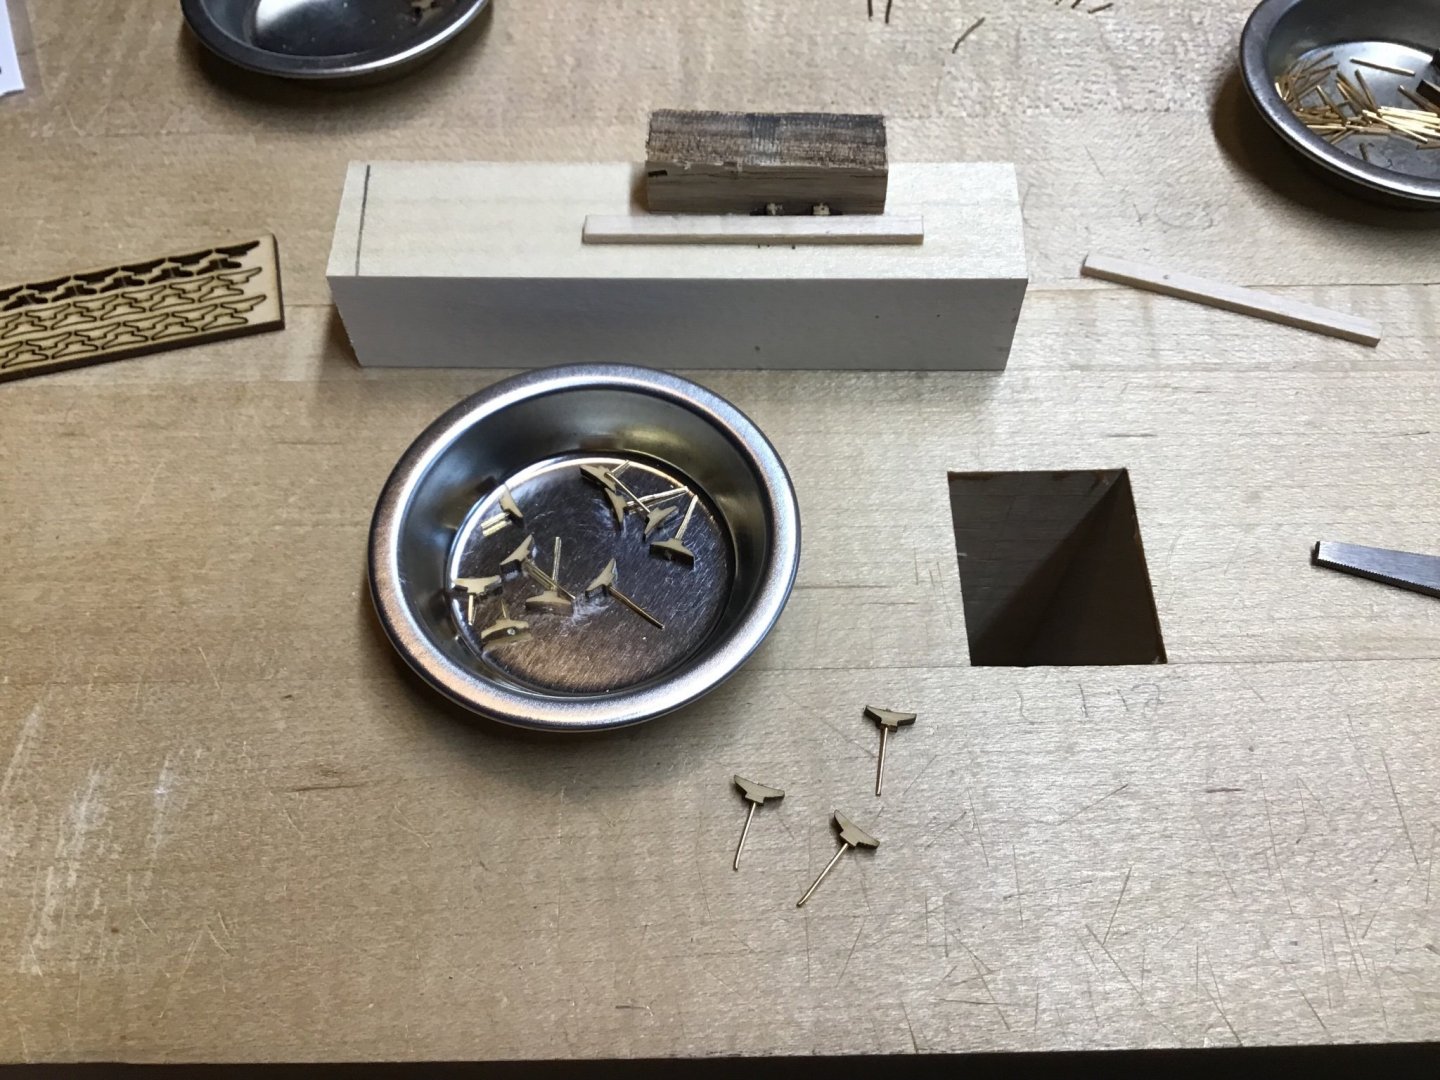
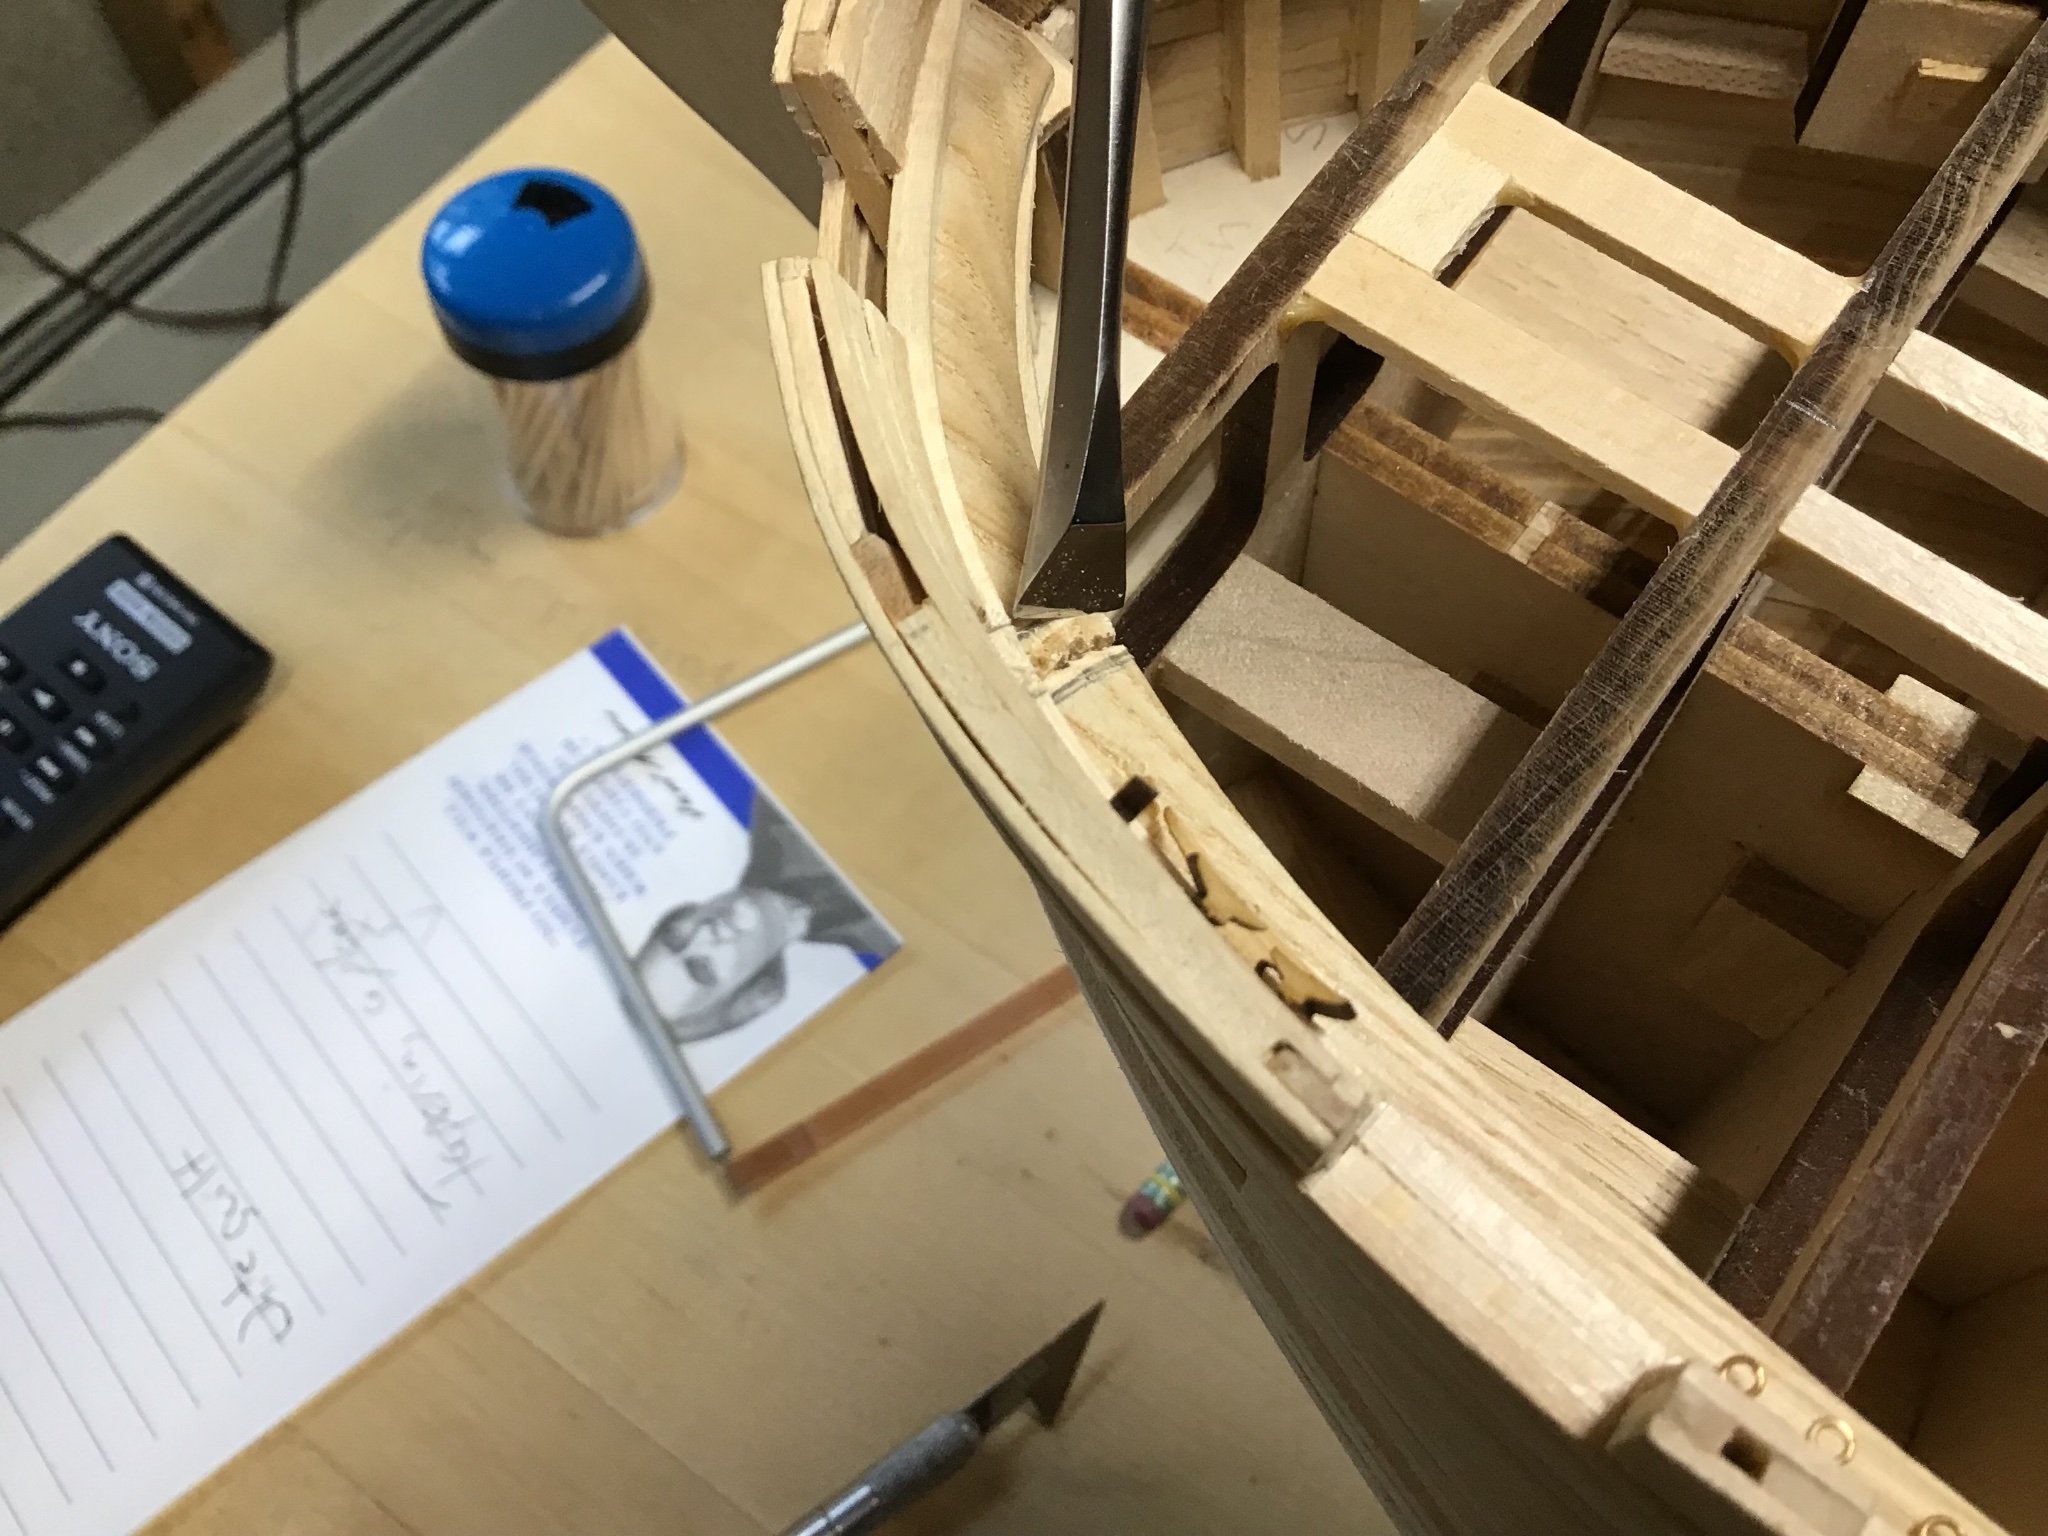
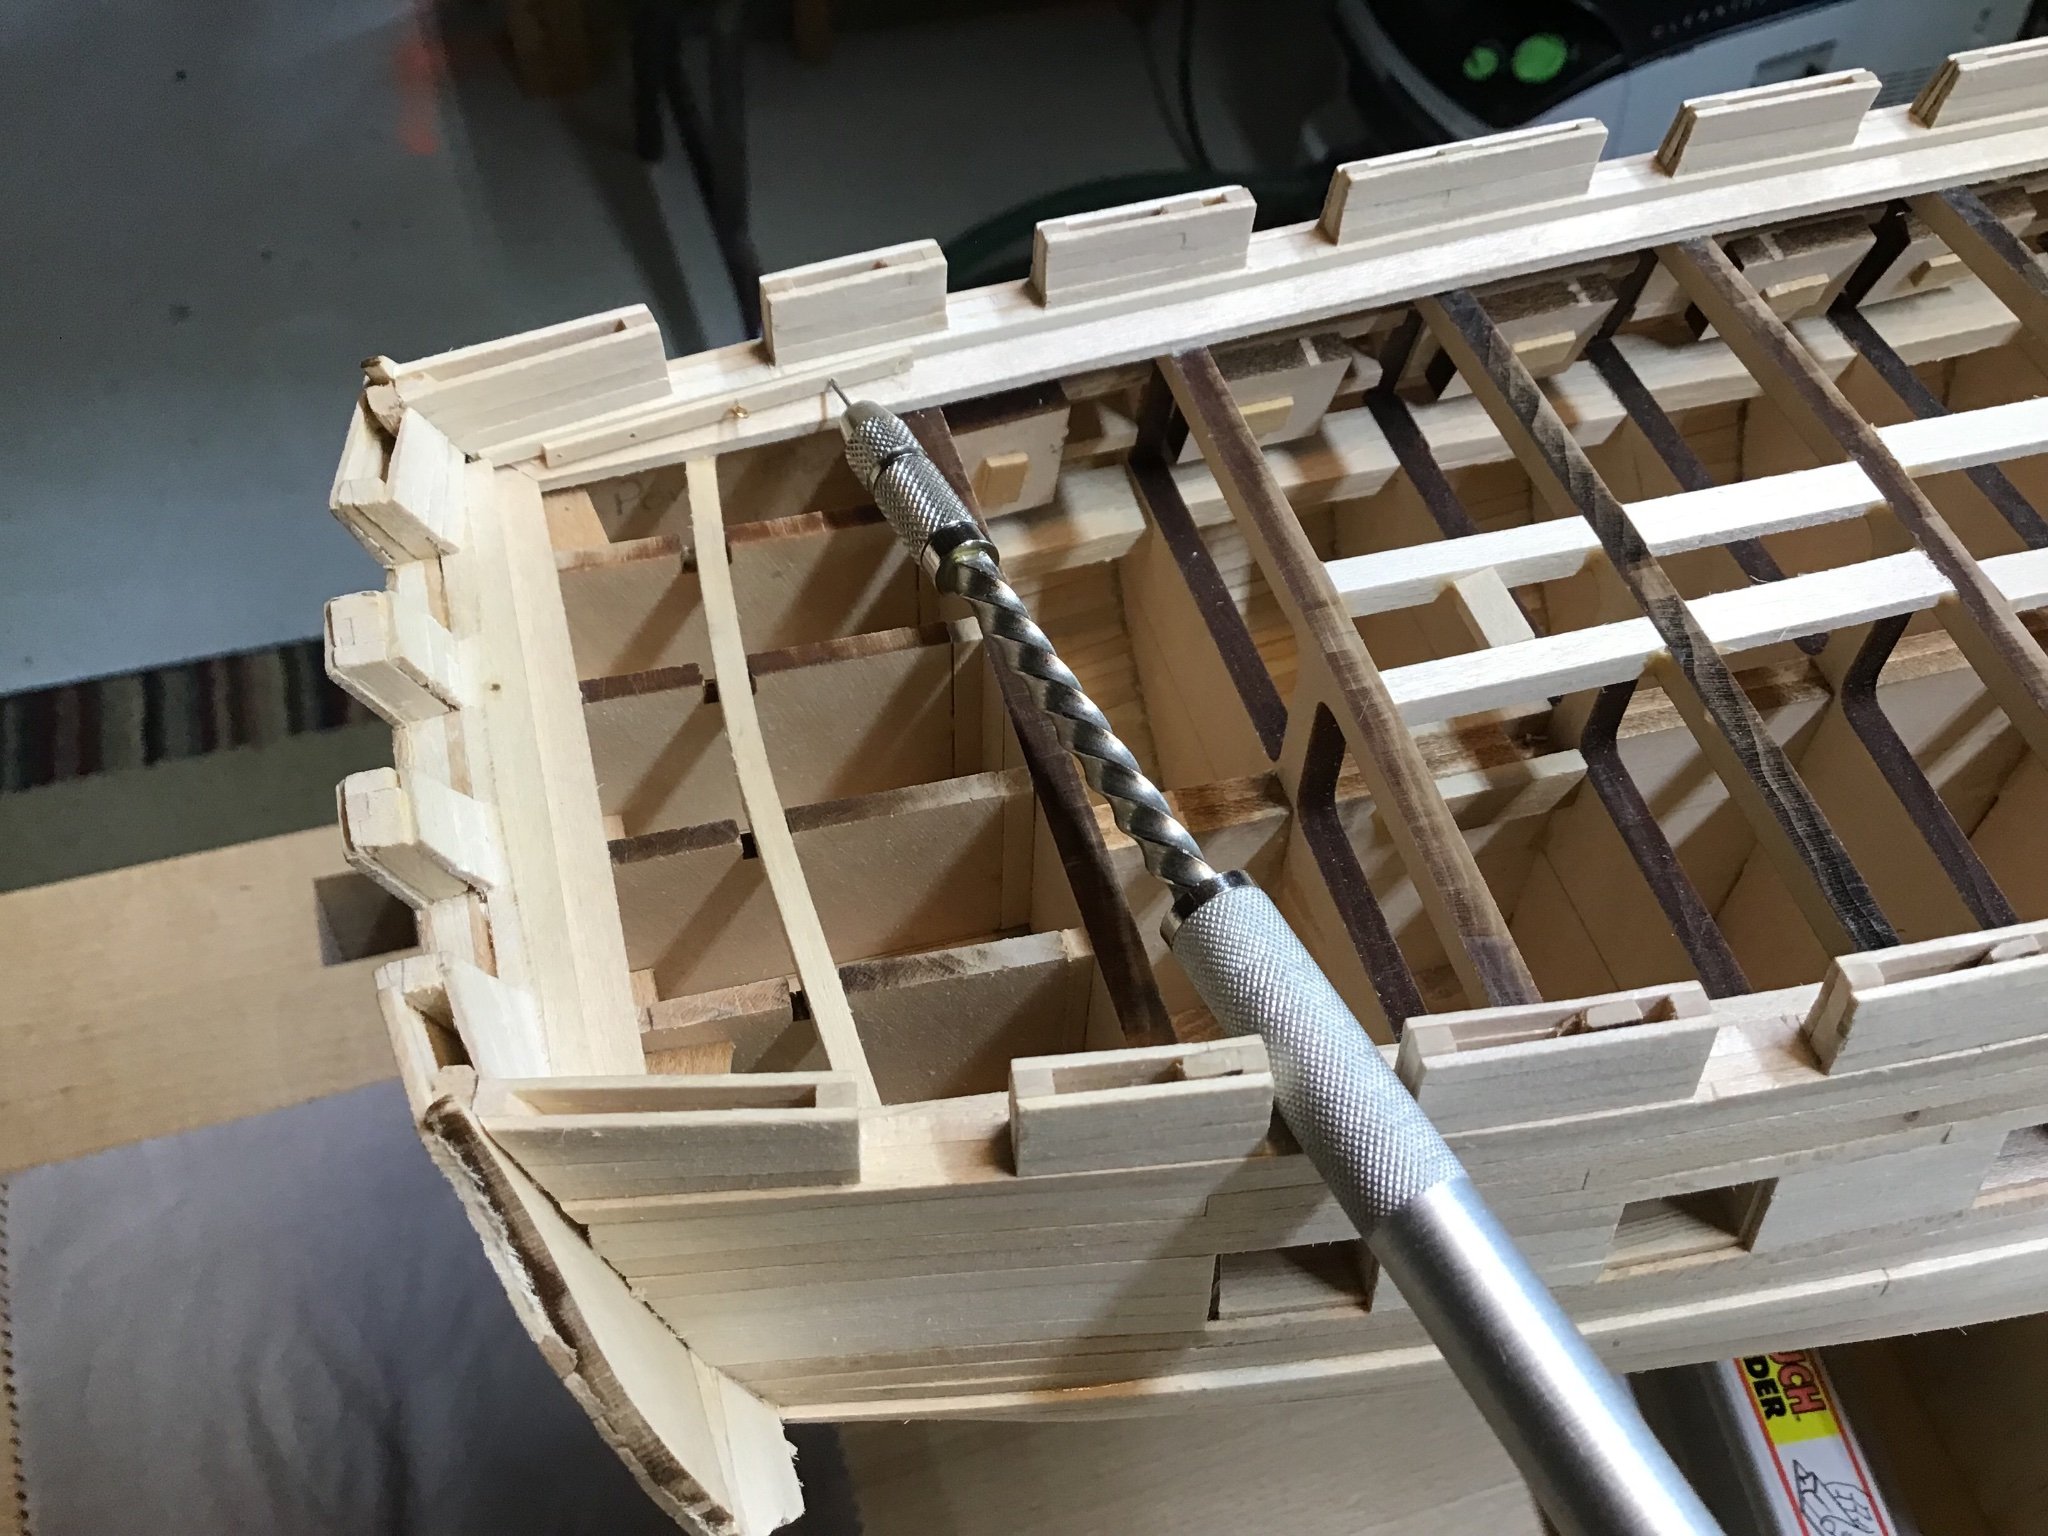
Fitting the Cathead
For this task the waterway needs to be cut and the rough bulkhead penetration needs to be finished.
First make a pencil mark on the waterway on each side of the cathead. Picture 1.
Next drill relief holes in the waste and saw to connect the holes. Pictures 2 and 3.
Also use the saw to cut along the top of the pencil line to establish the final edge.
Now it’s a matter of carefully removing the waste. The challenge is not to beat up the edges, we want crisp corners. Picture 5 shows the opening.
Tools used are Tamiya Fine Craft Saws, Fishtail file, and the pattern file. Once fitted, the lower edge of the top board on the outboard side was careful filed to establish the final angle of the cathead.
You know you are there when the outboard face of the cathead is vertical and the inboard end is just past the inboard edge of the waterway. Pictures 6 and 7.


-
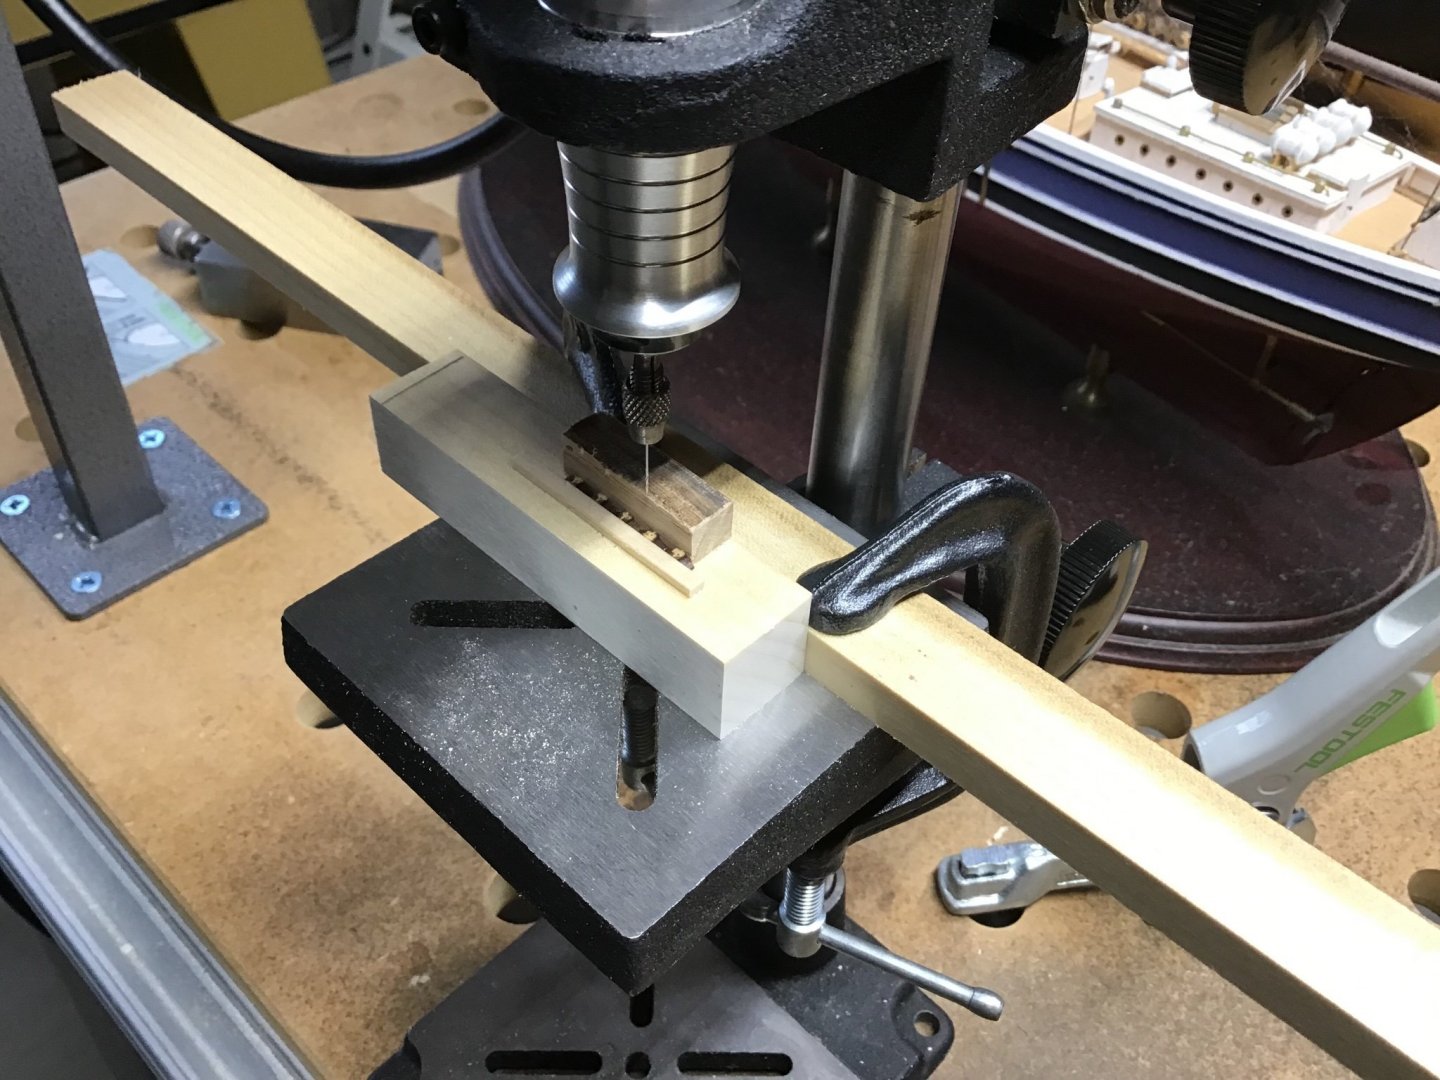
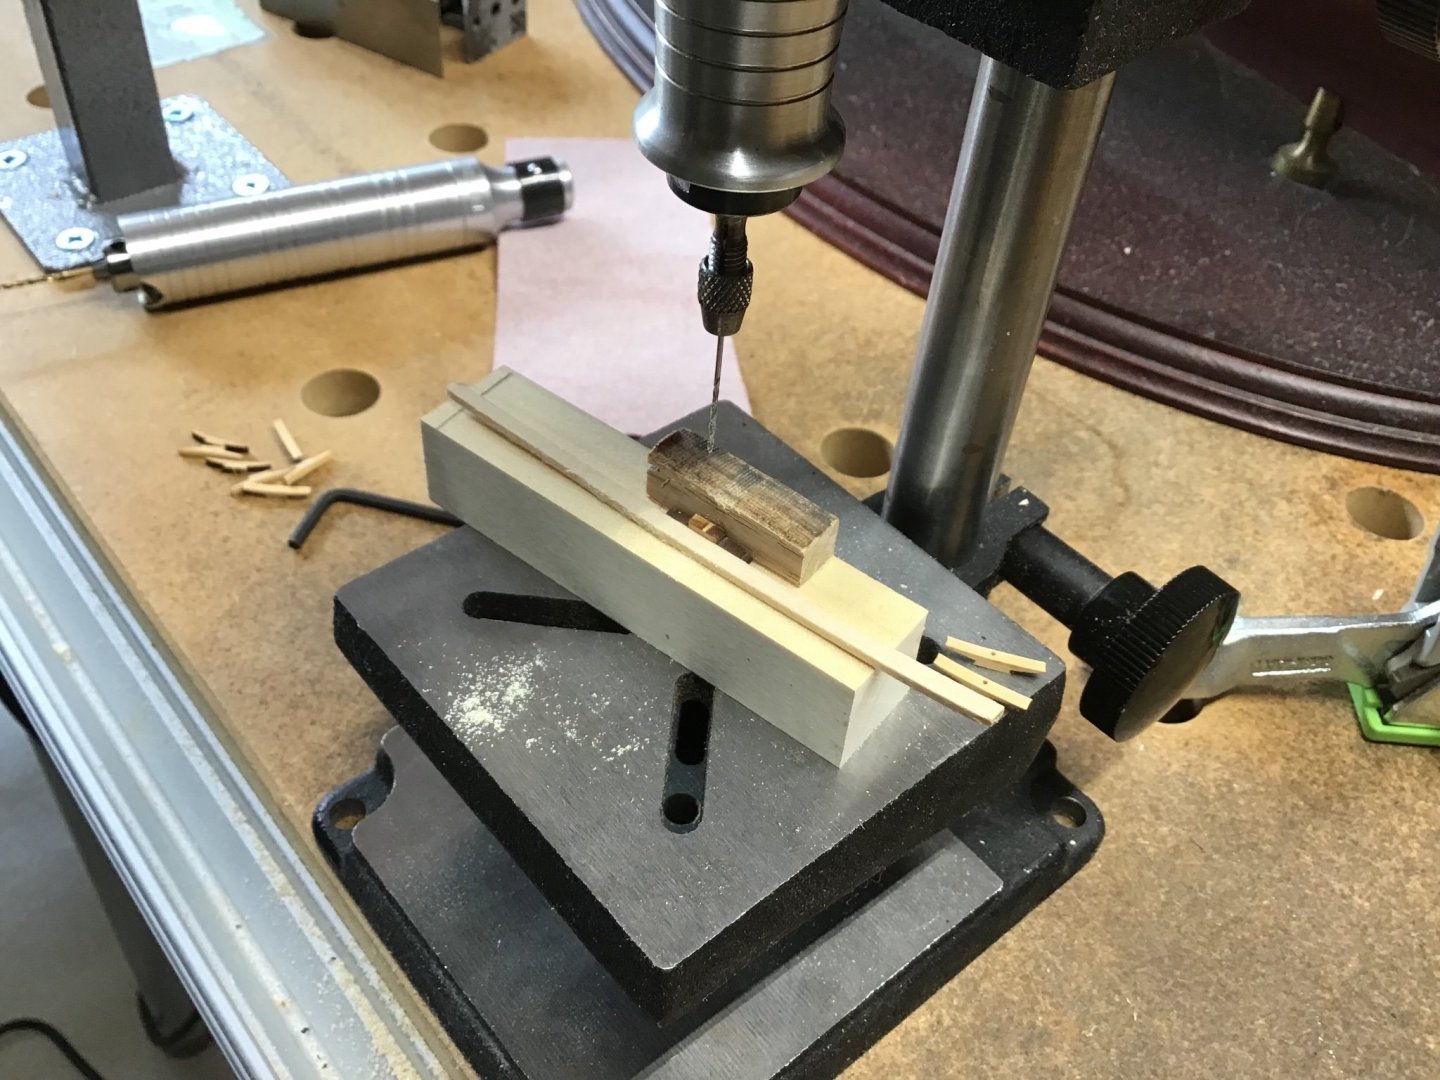
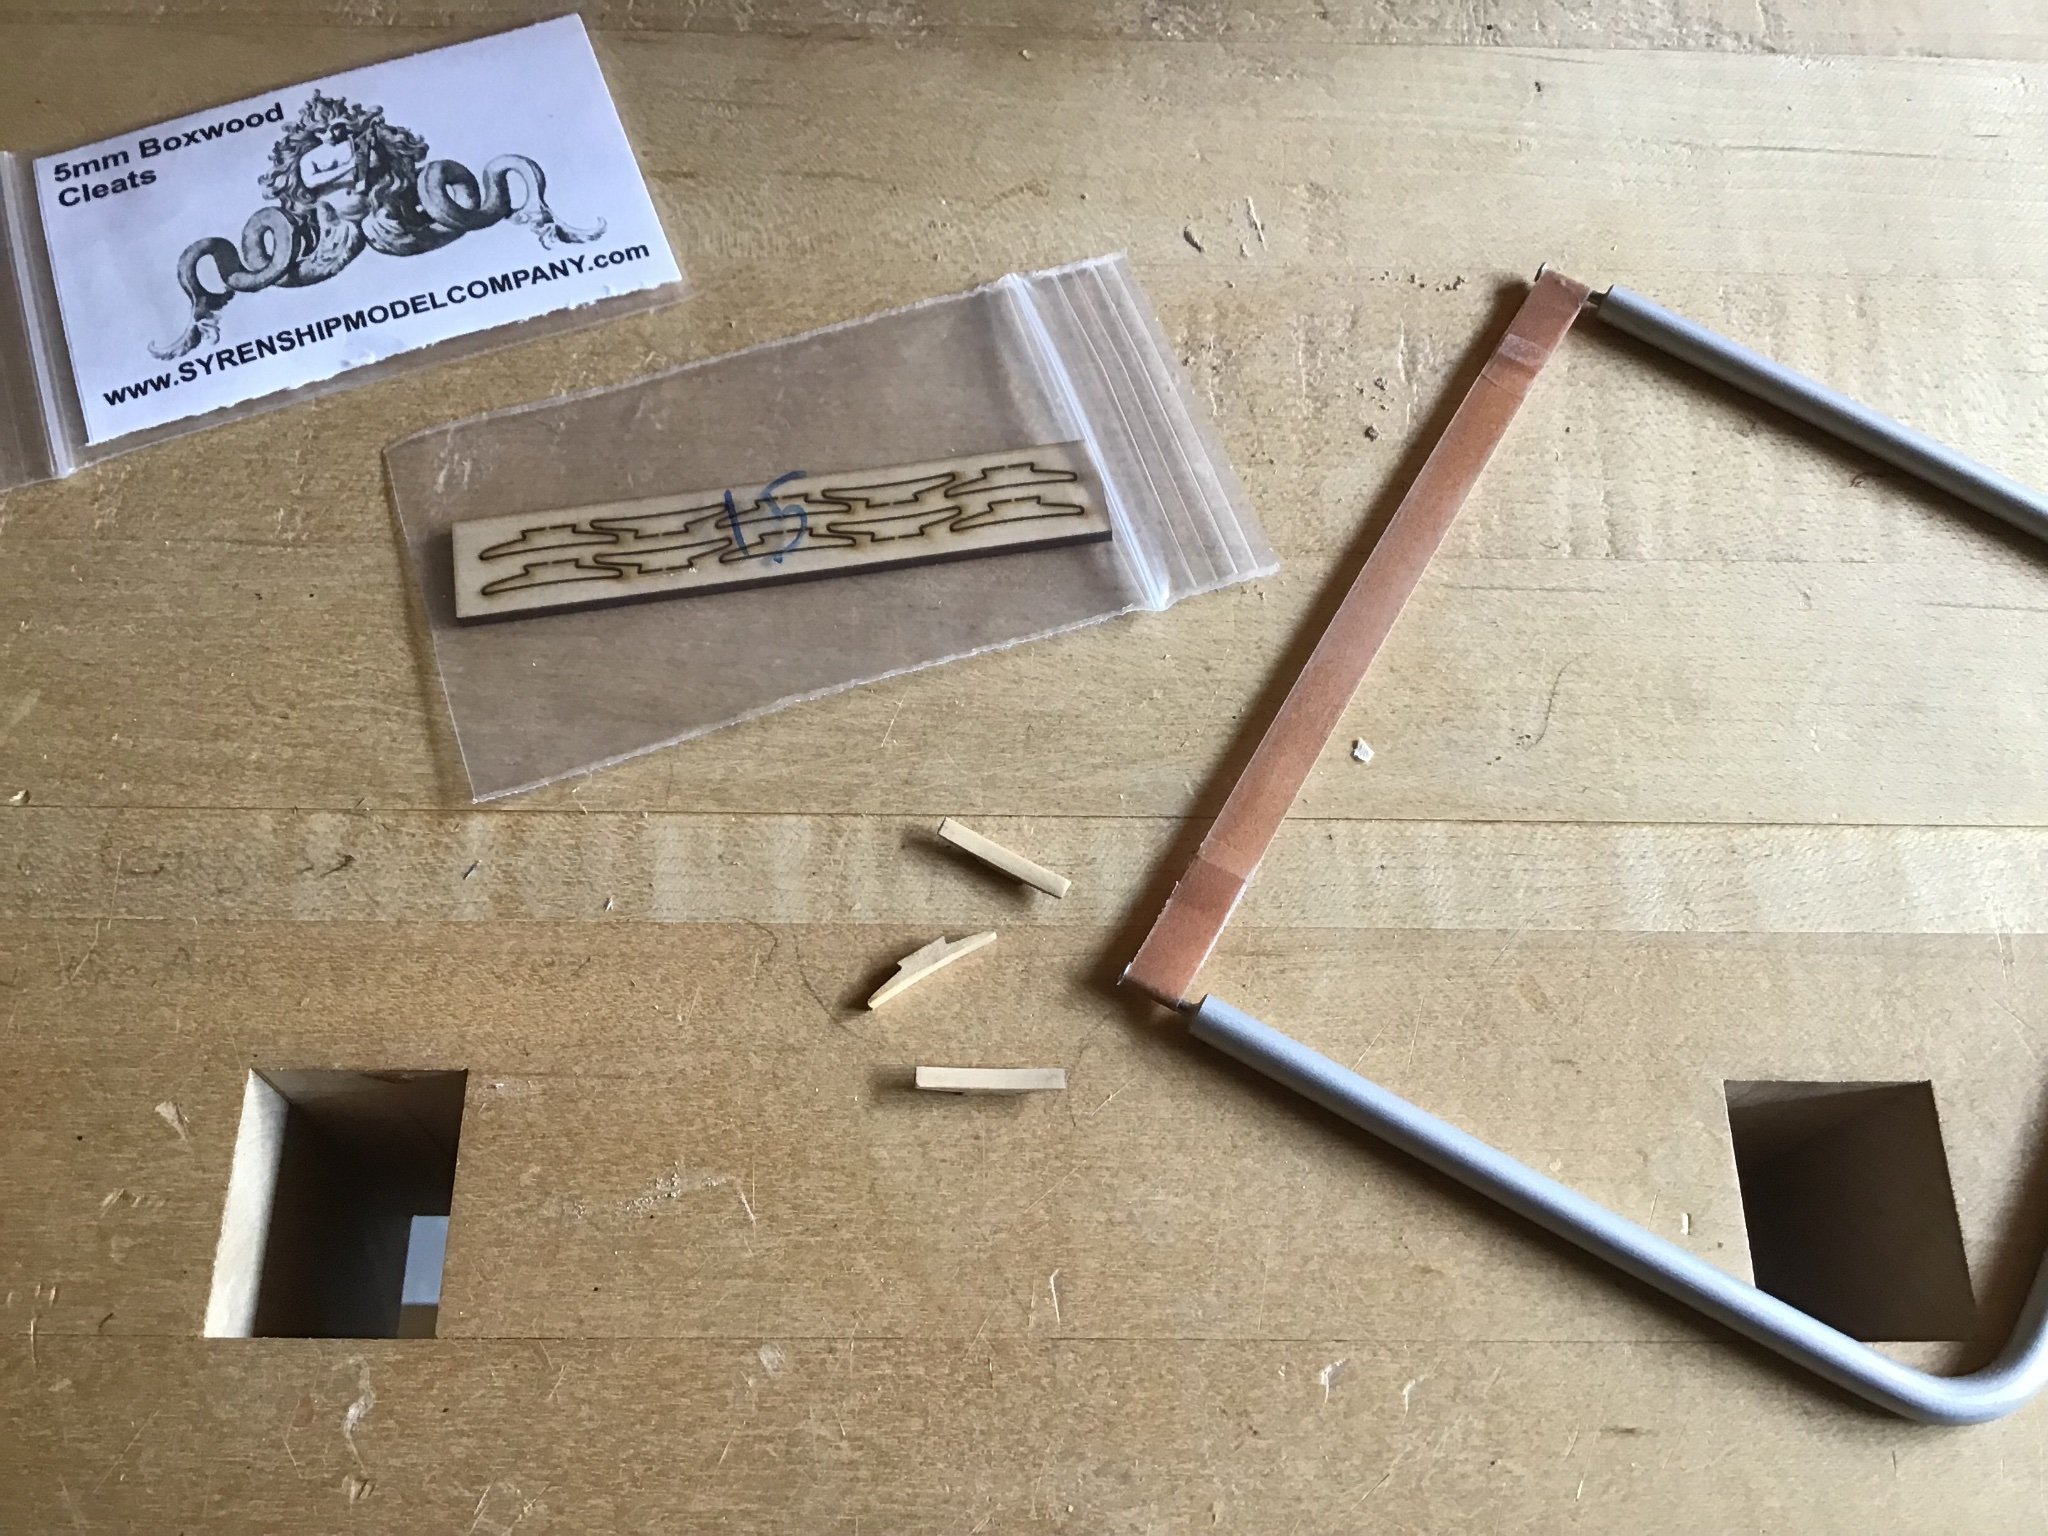
Installing Small Inboard Bulkhead Cleats
Rather than making cleats, upgraded with cleats from the Syren Ship Model Company.
The process is the same as the large cleats - with the addition of a jig to hold the small cleats.
The first picture shows the jig, holding 5 cleats, bottoms up.
Next we need to flatten the bottom so the drill bit does not wander across the surface. Picture 2 shows the bottoms being flattened with the Lie-Nielson pattern file.
Picture 3 shows holes being drilled with the Foredom drill press with a 1/64” bit.
Again eyebolt tails are inserted and glued in the holes. Picture 4.
Last picture shows a cleat installed - it’s to the right of the large cleat.


- Boatsinc2000 and CiscoH
-
2
-
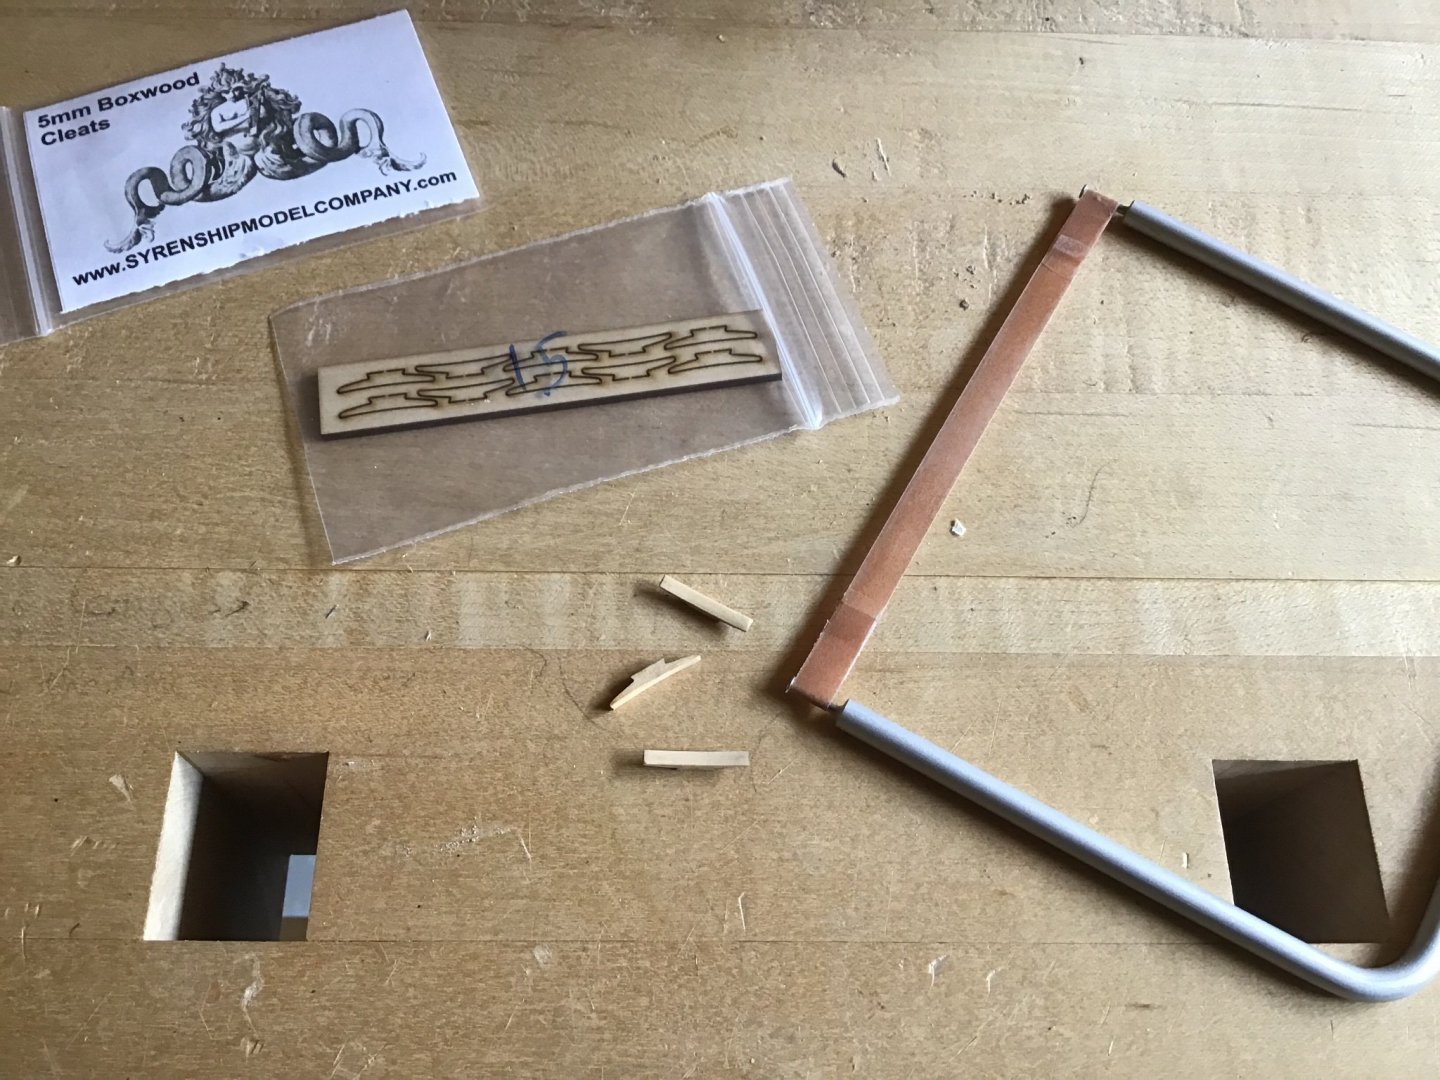
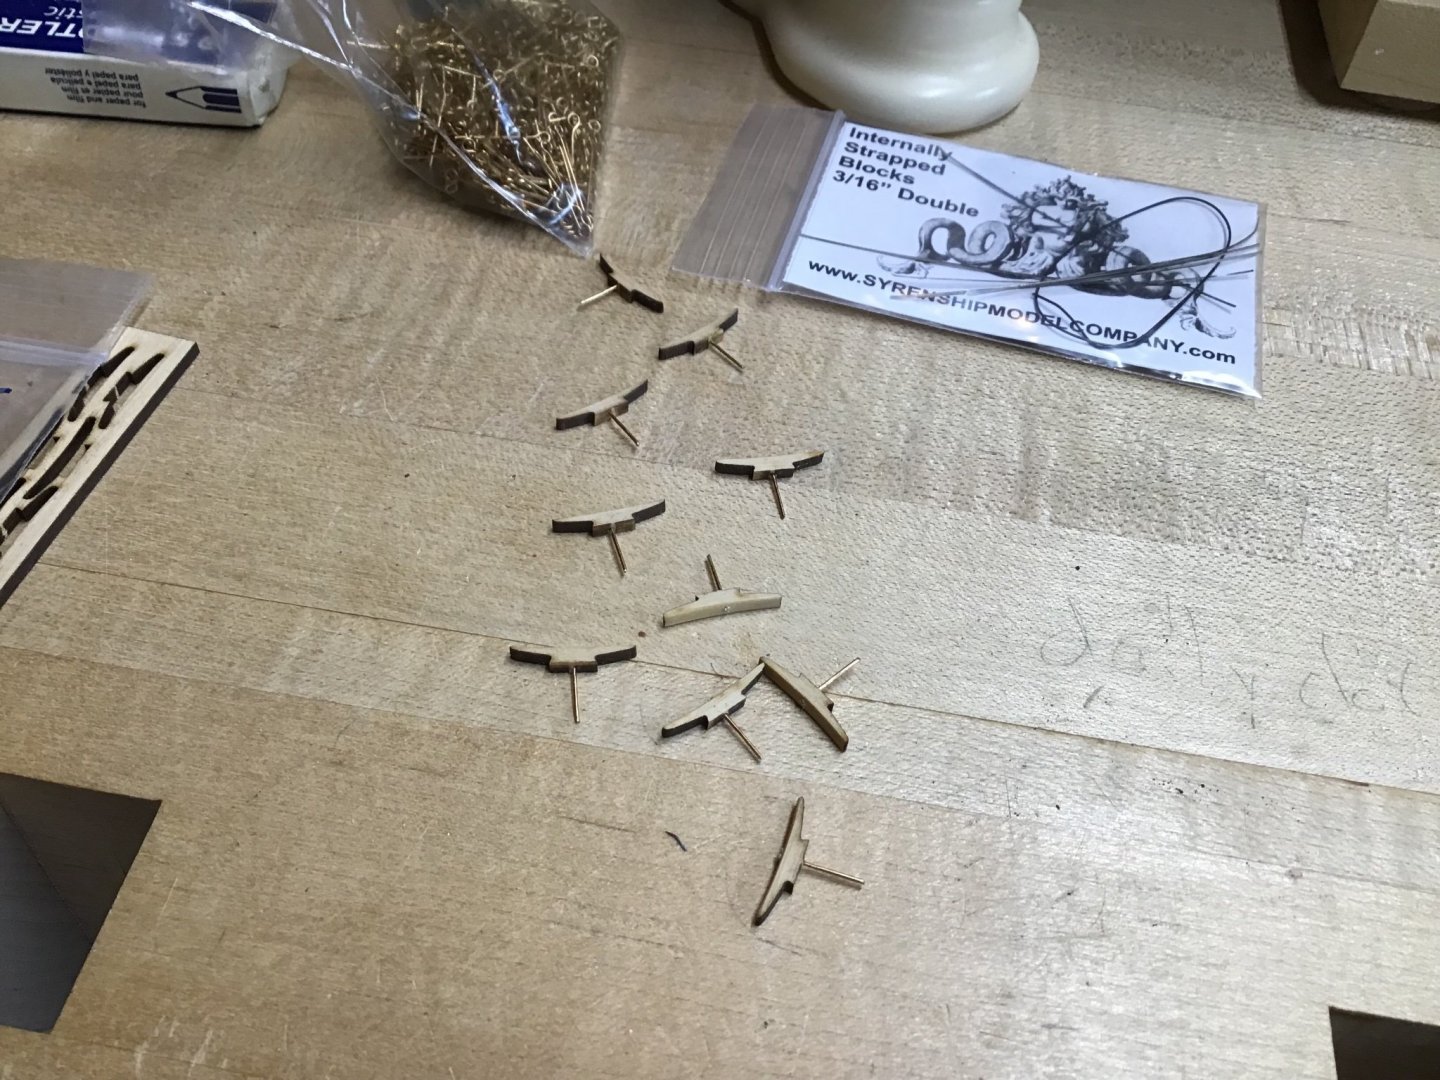
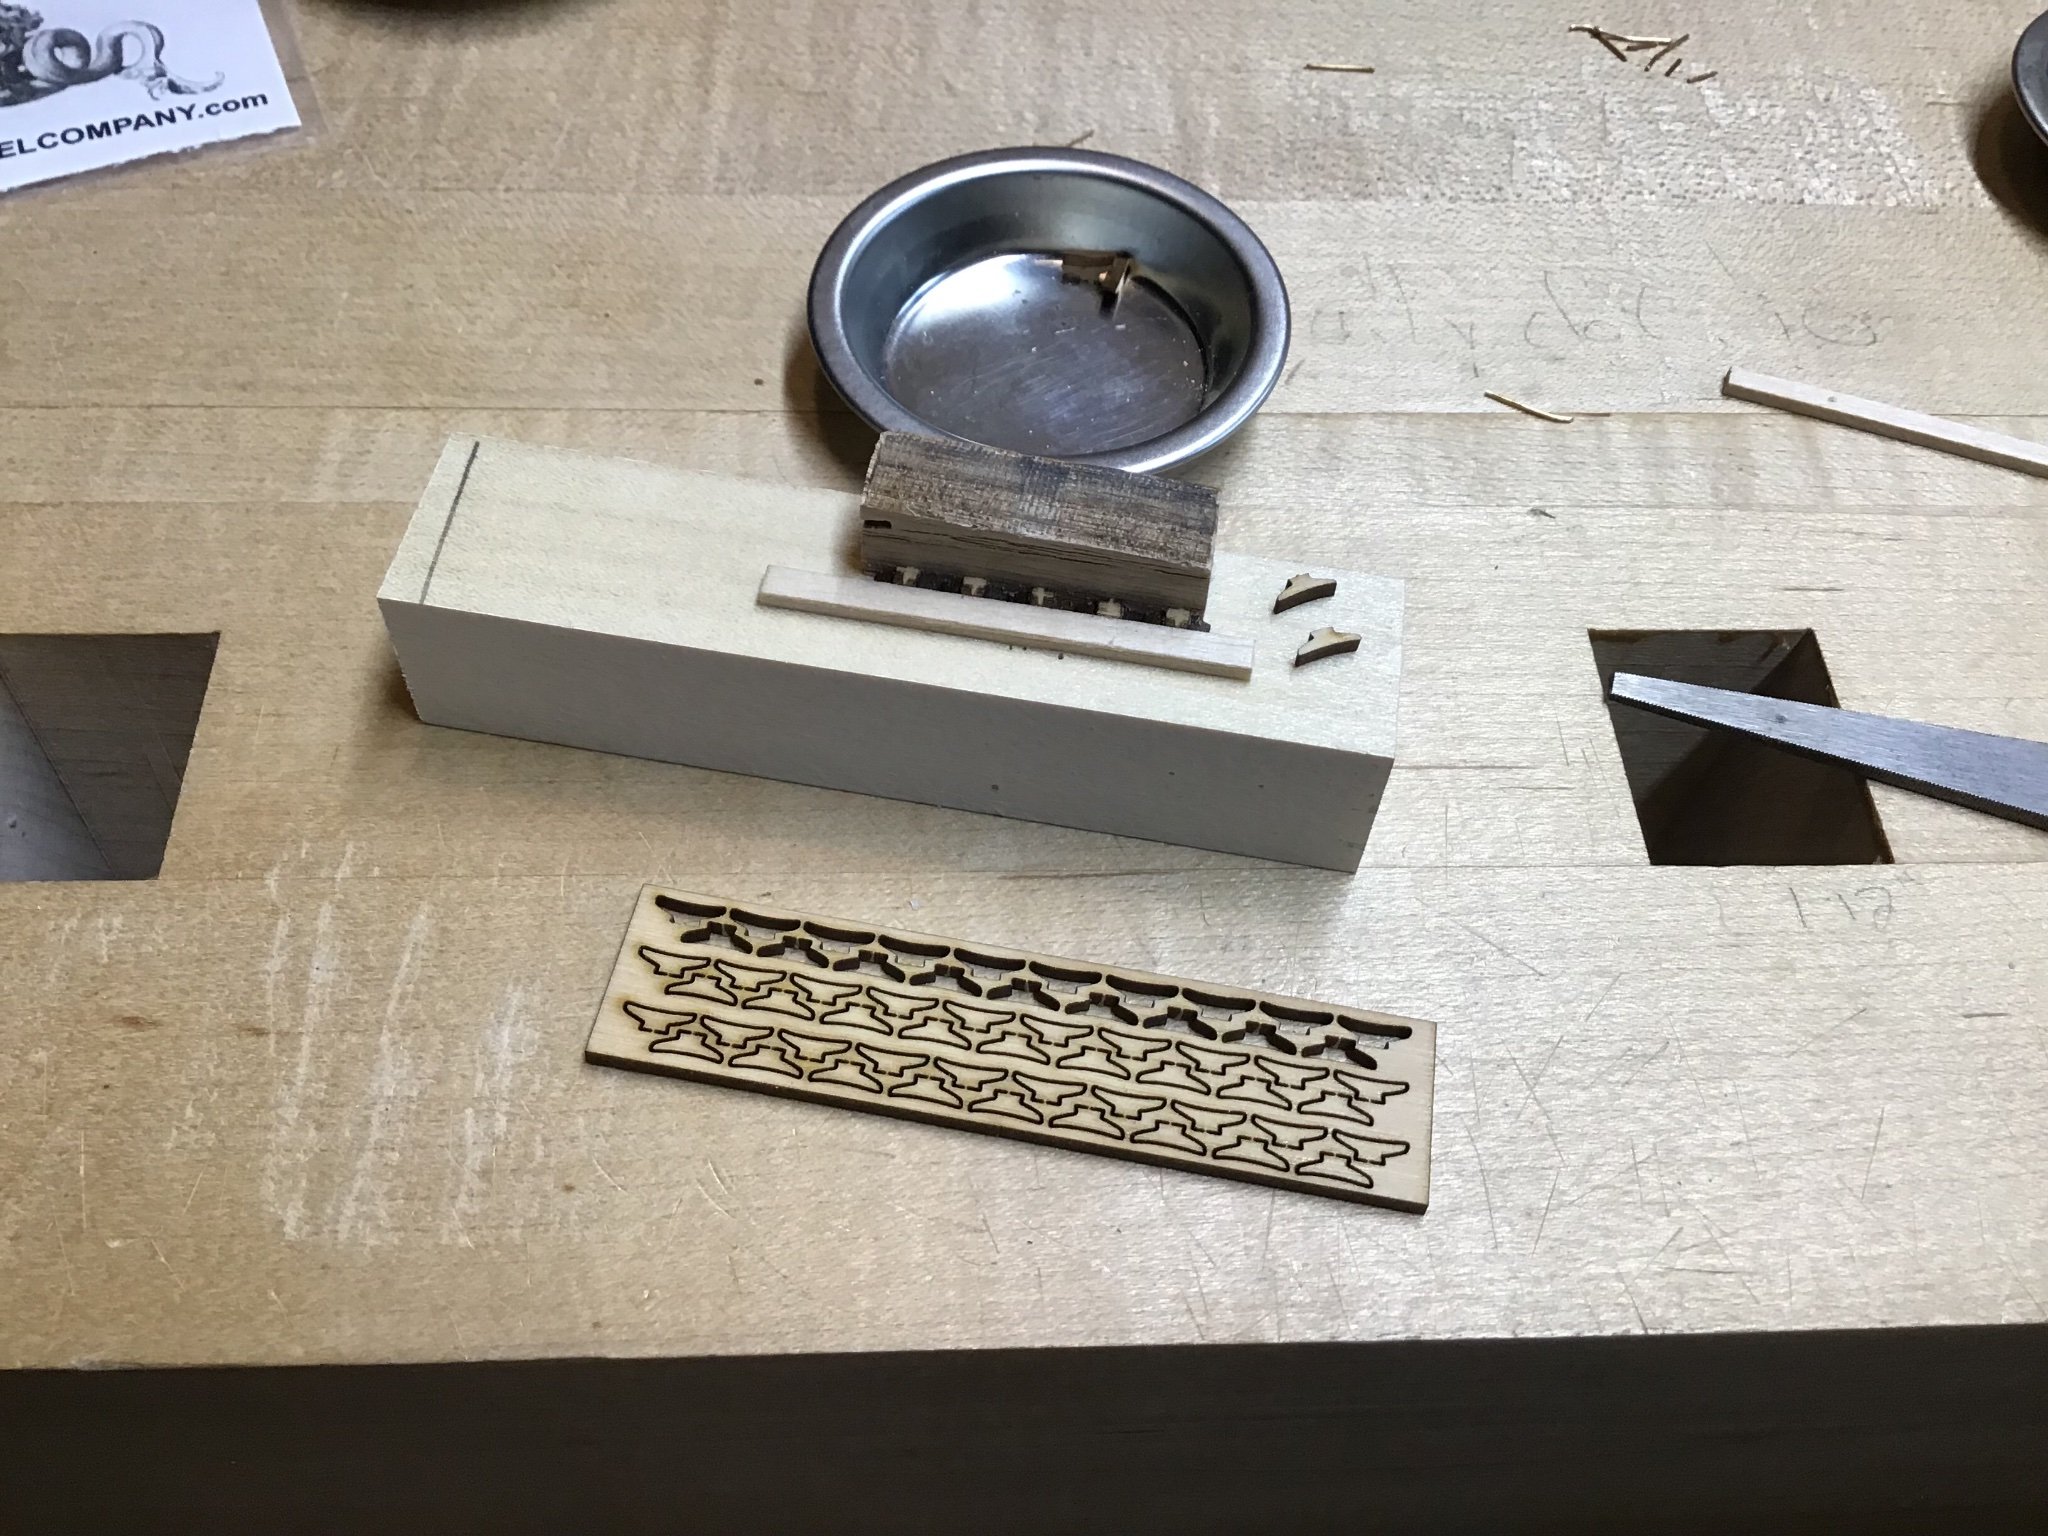
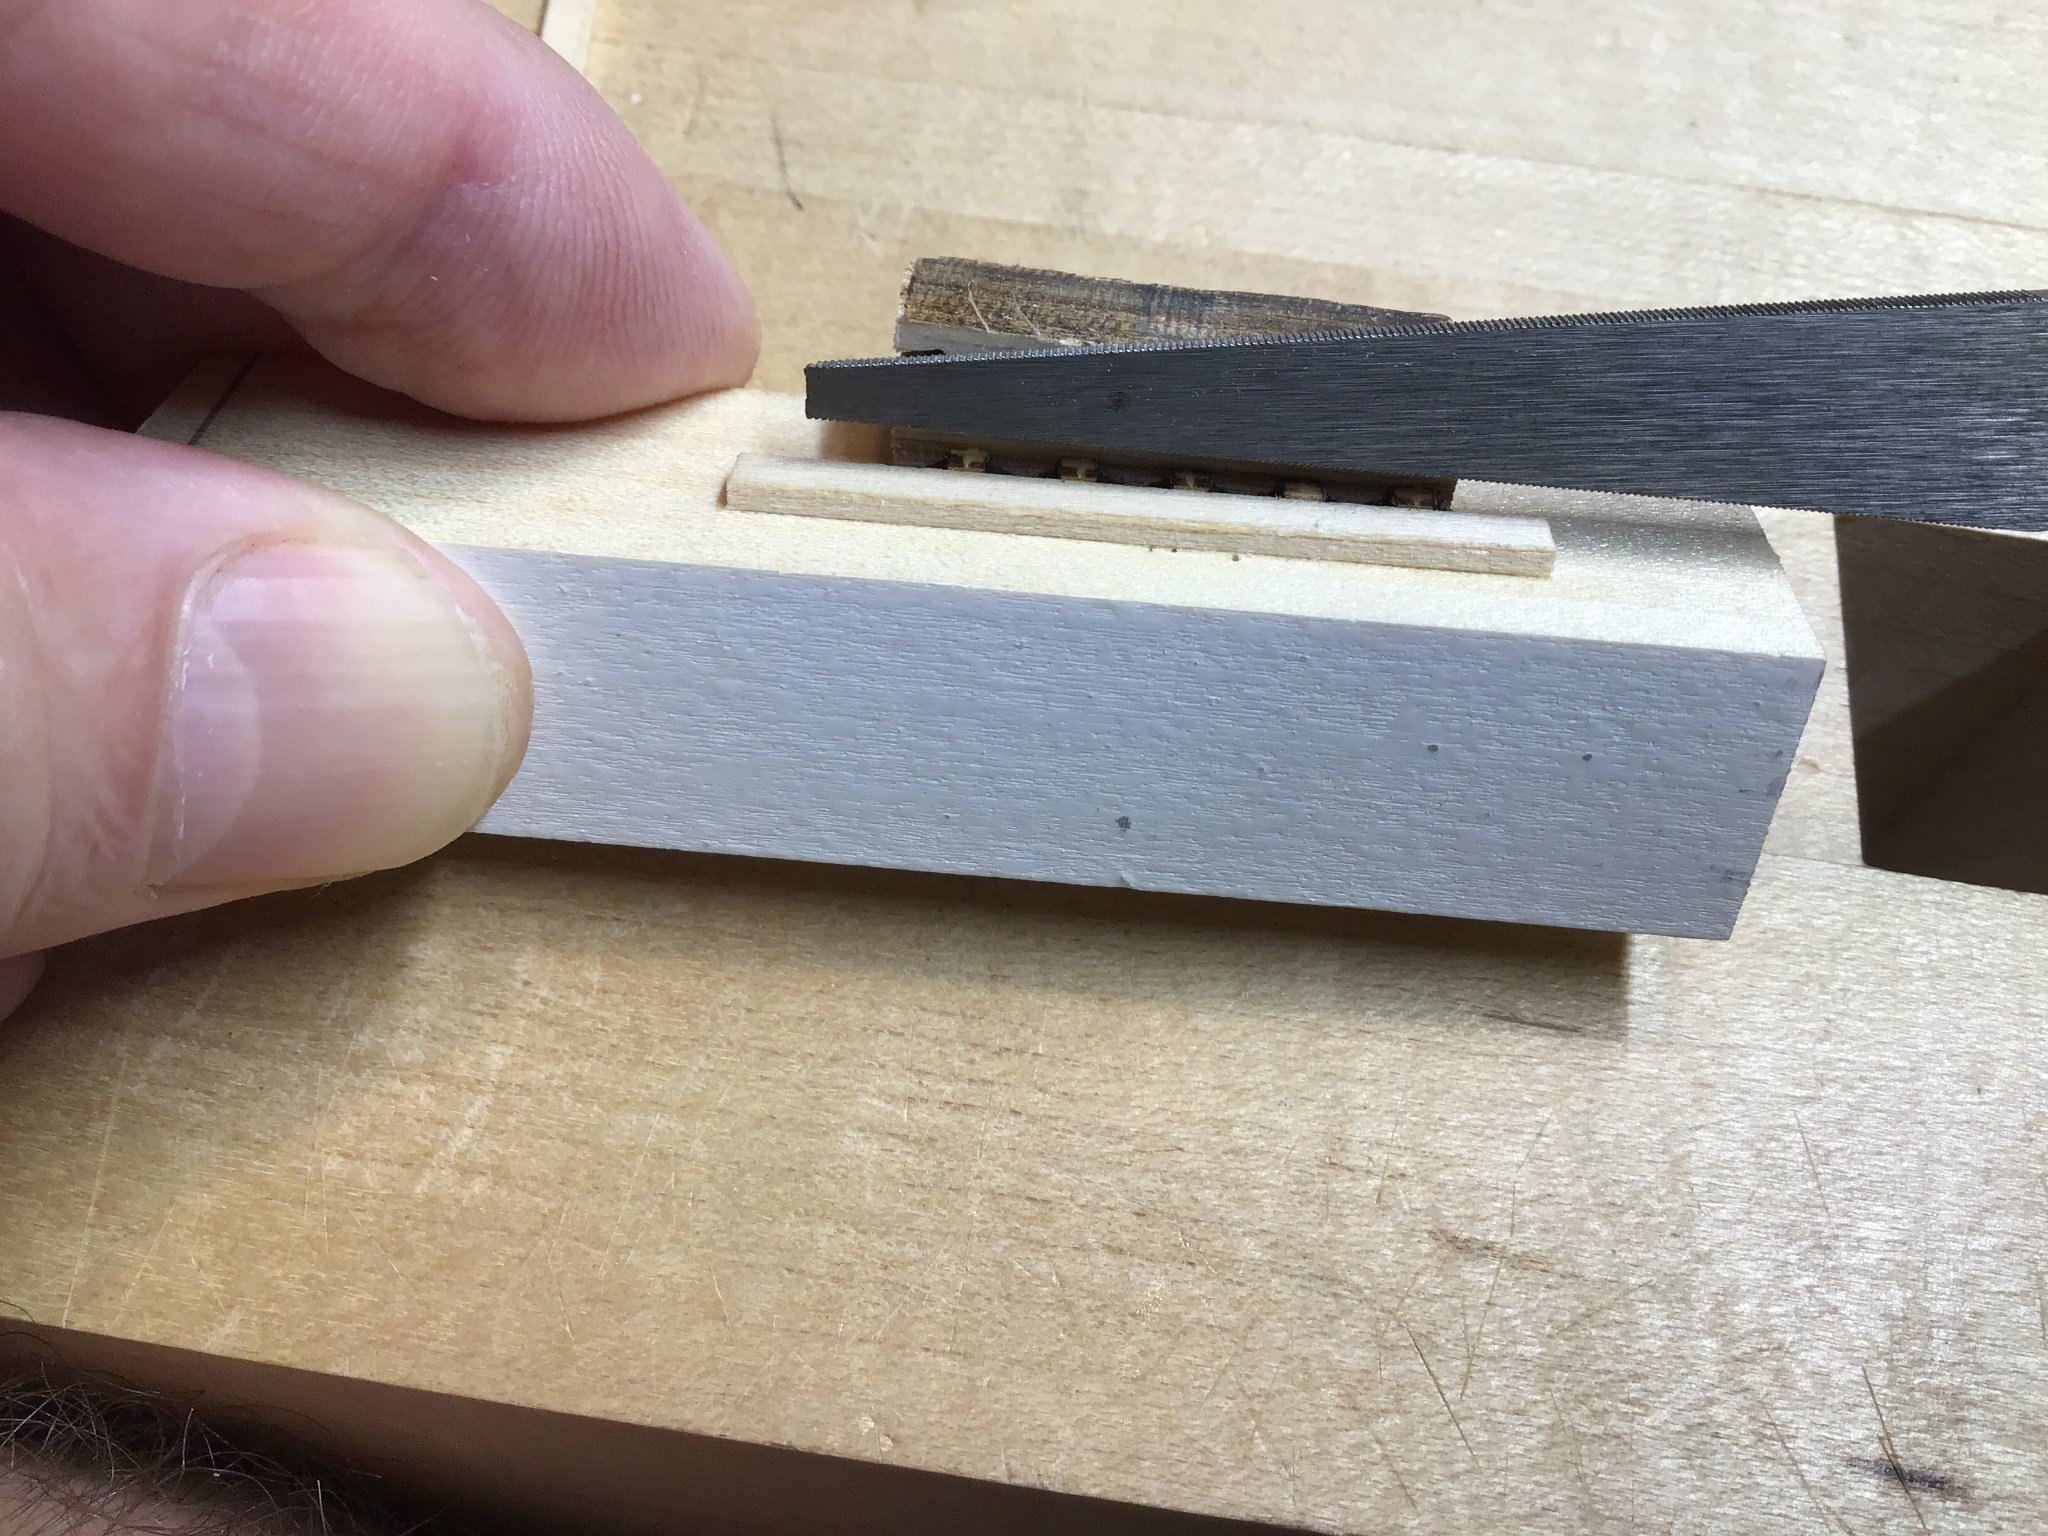
Installing Large Inboard Bulkhead Cleats
Upgraded with Syren Ship Model Company cleats, rather than fabricating.
Removed cleats from billet and rounded over with a flexi file. Picture 1.
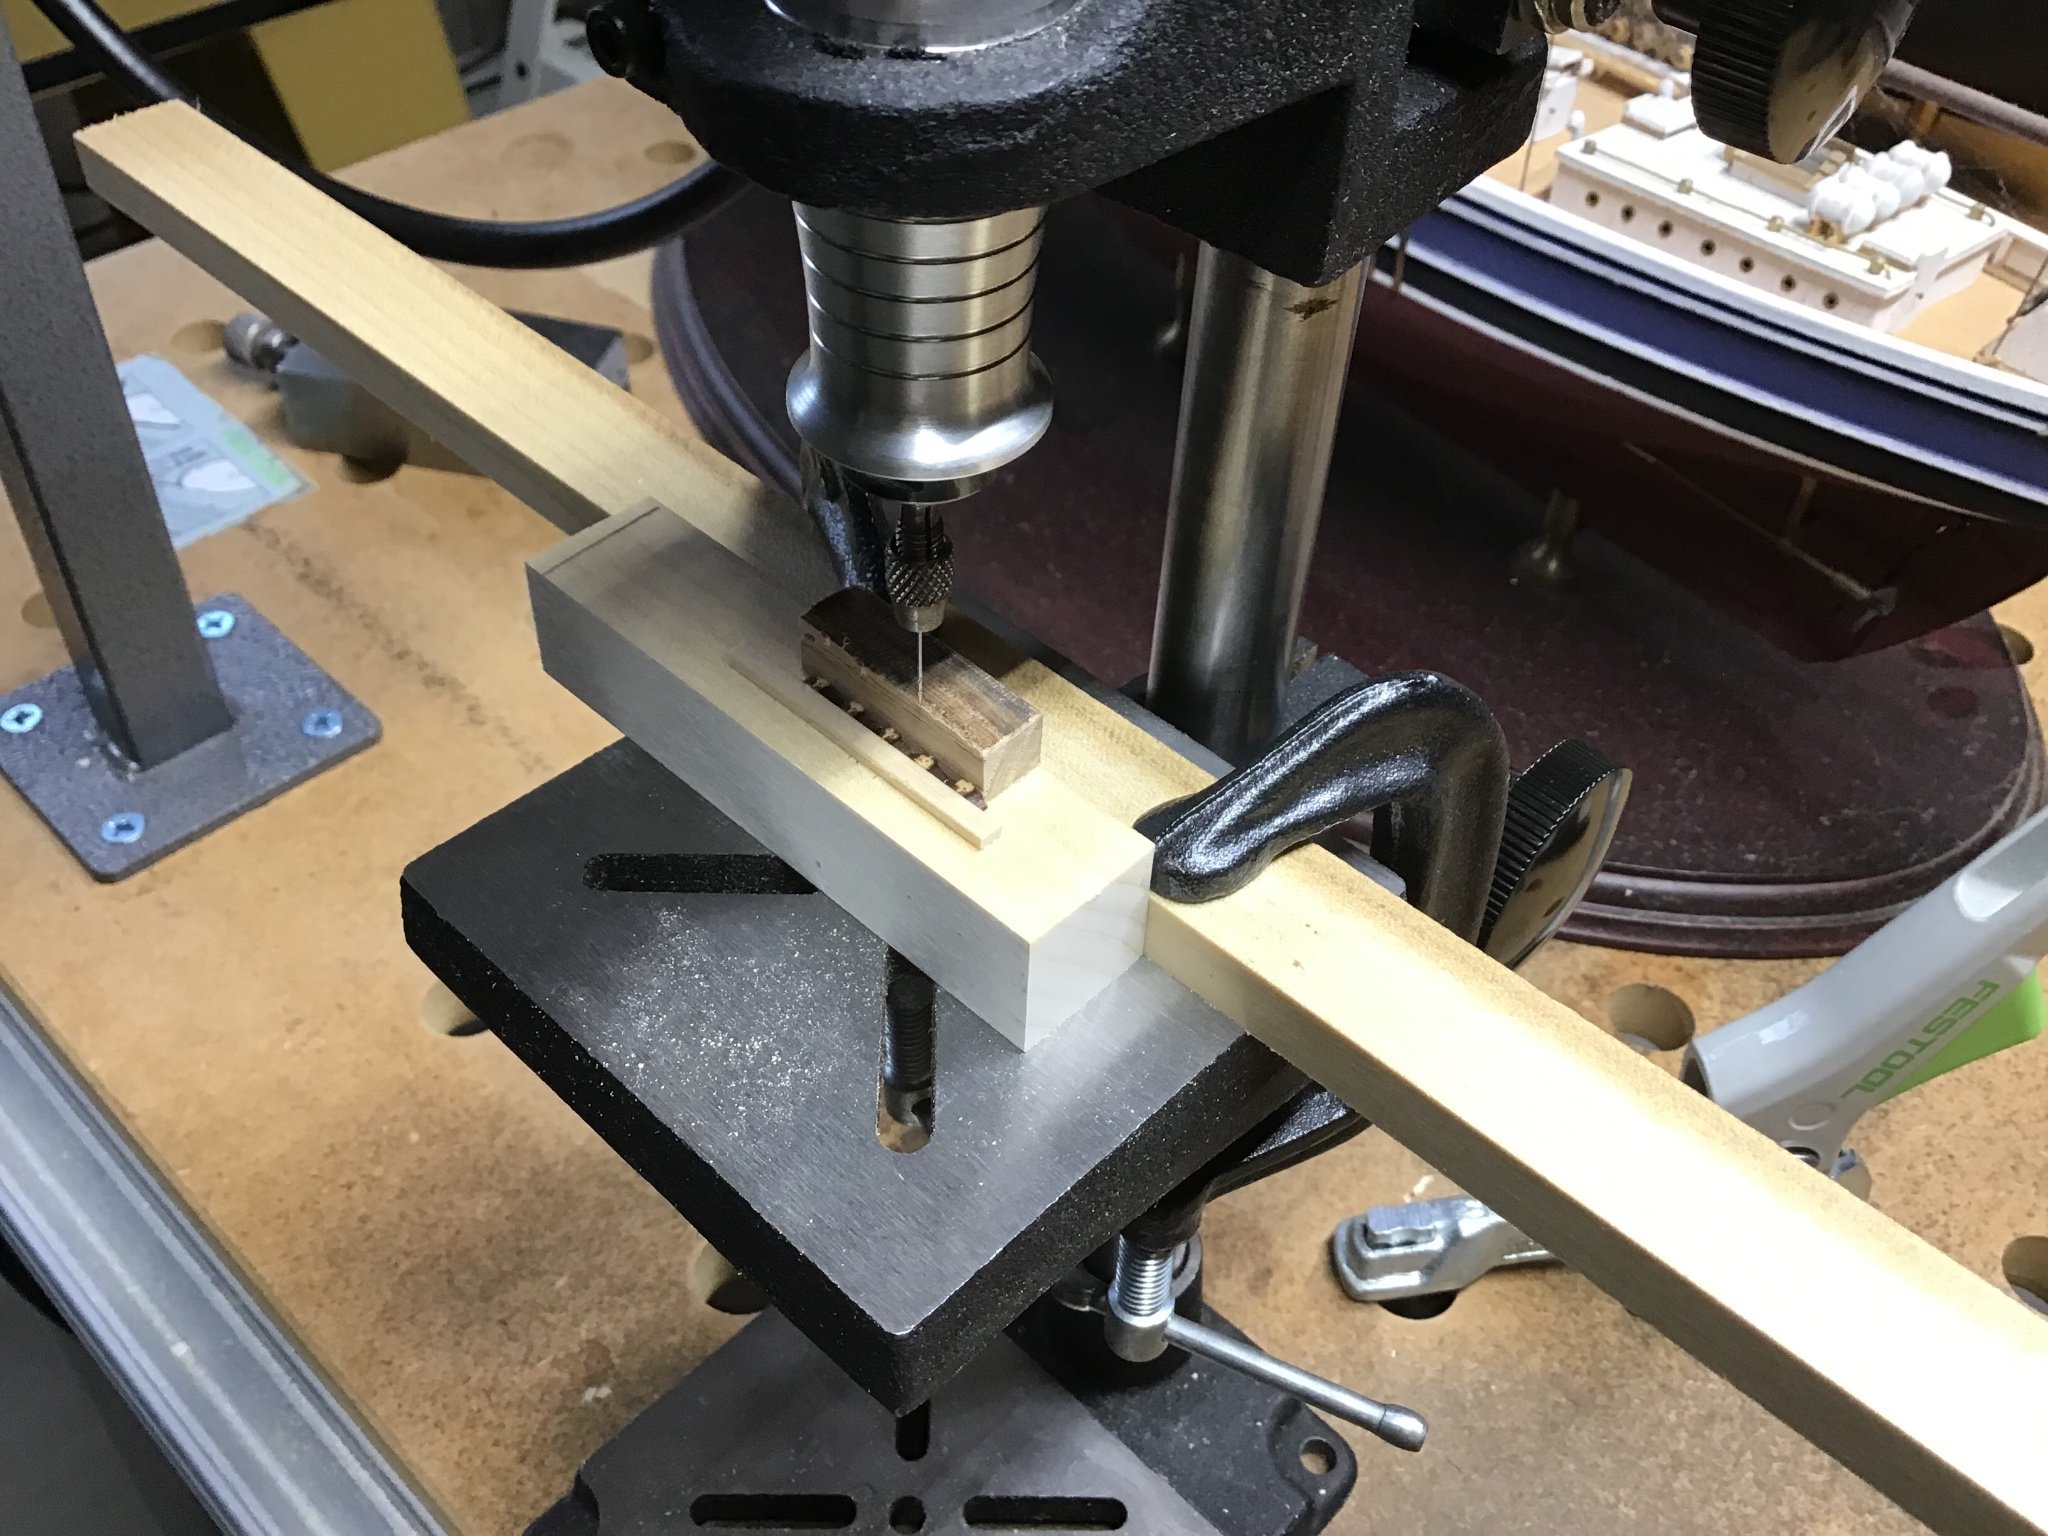
Next made a jig and drilled a hole with Foredom drill press. Picture 2.
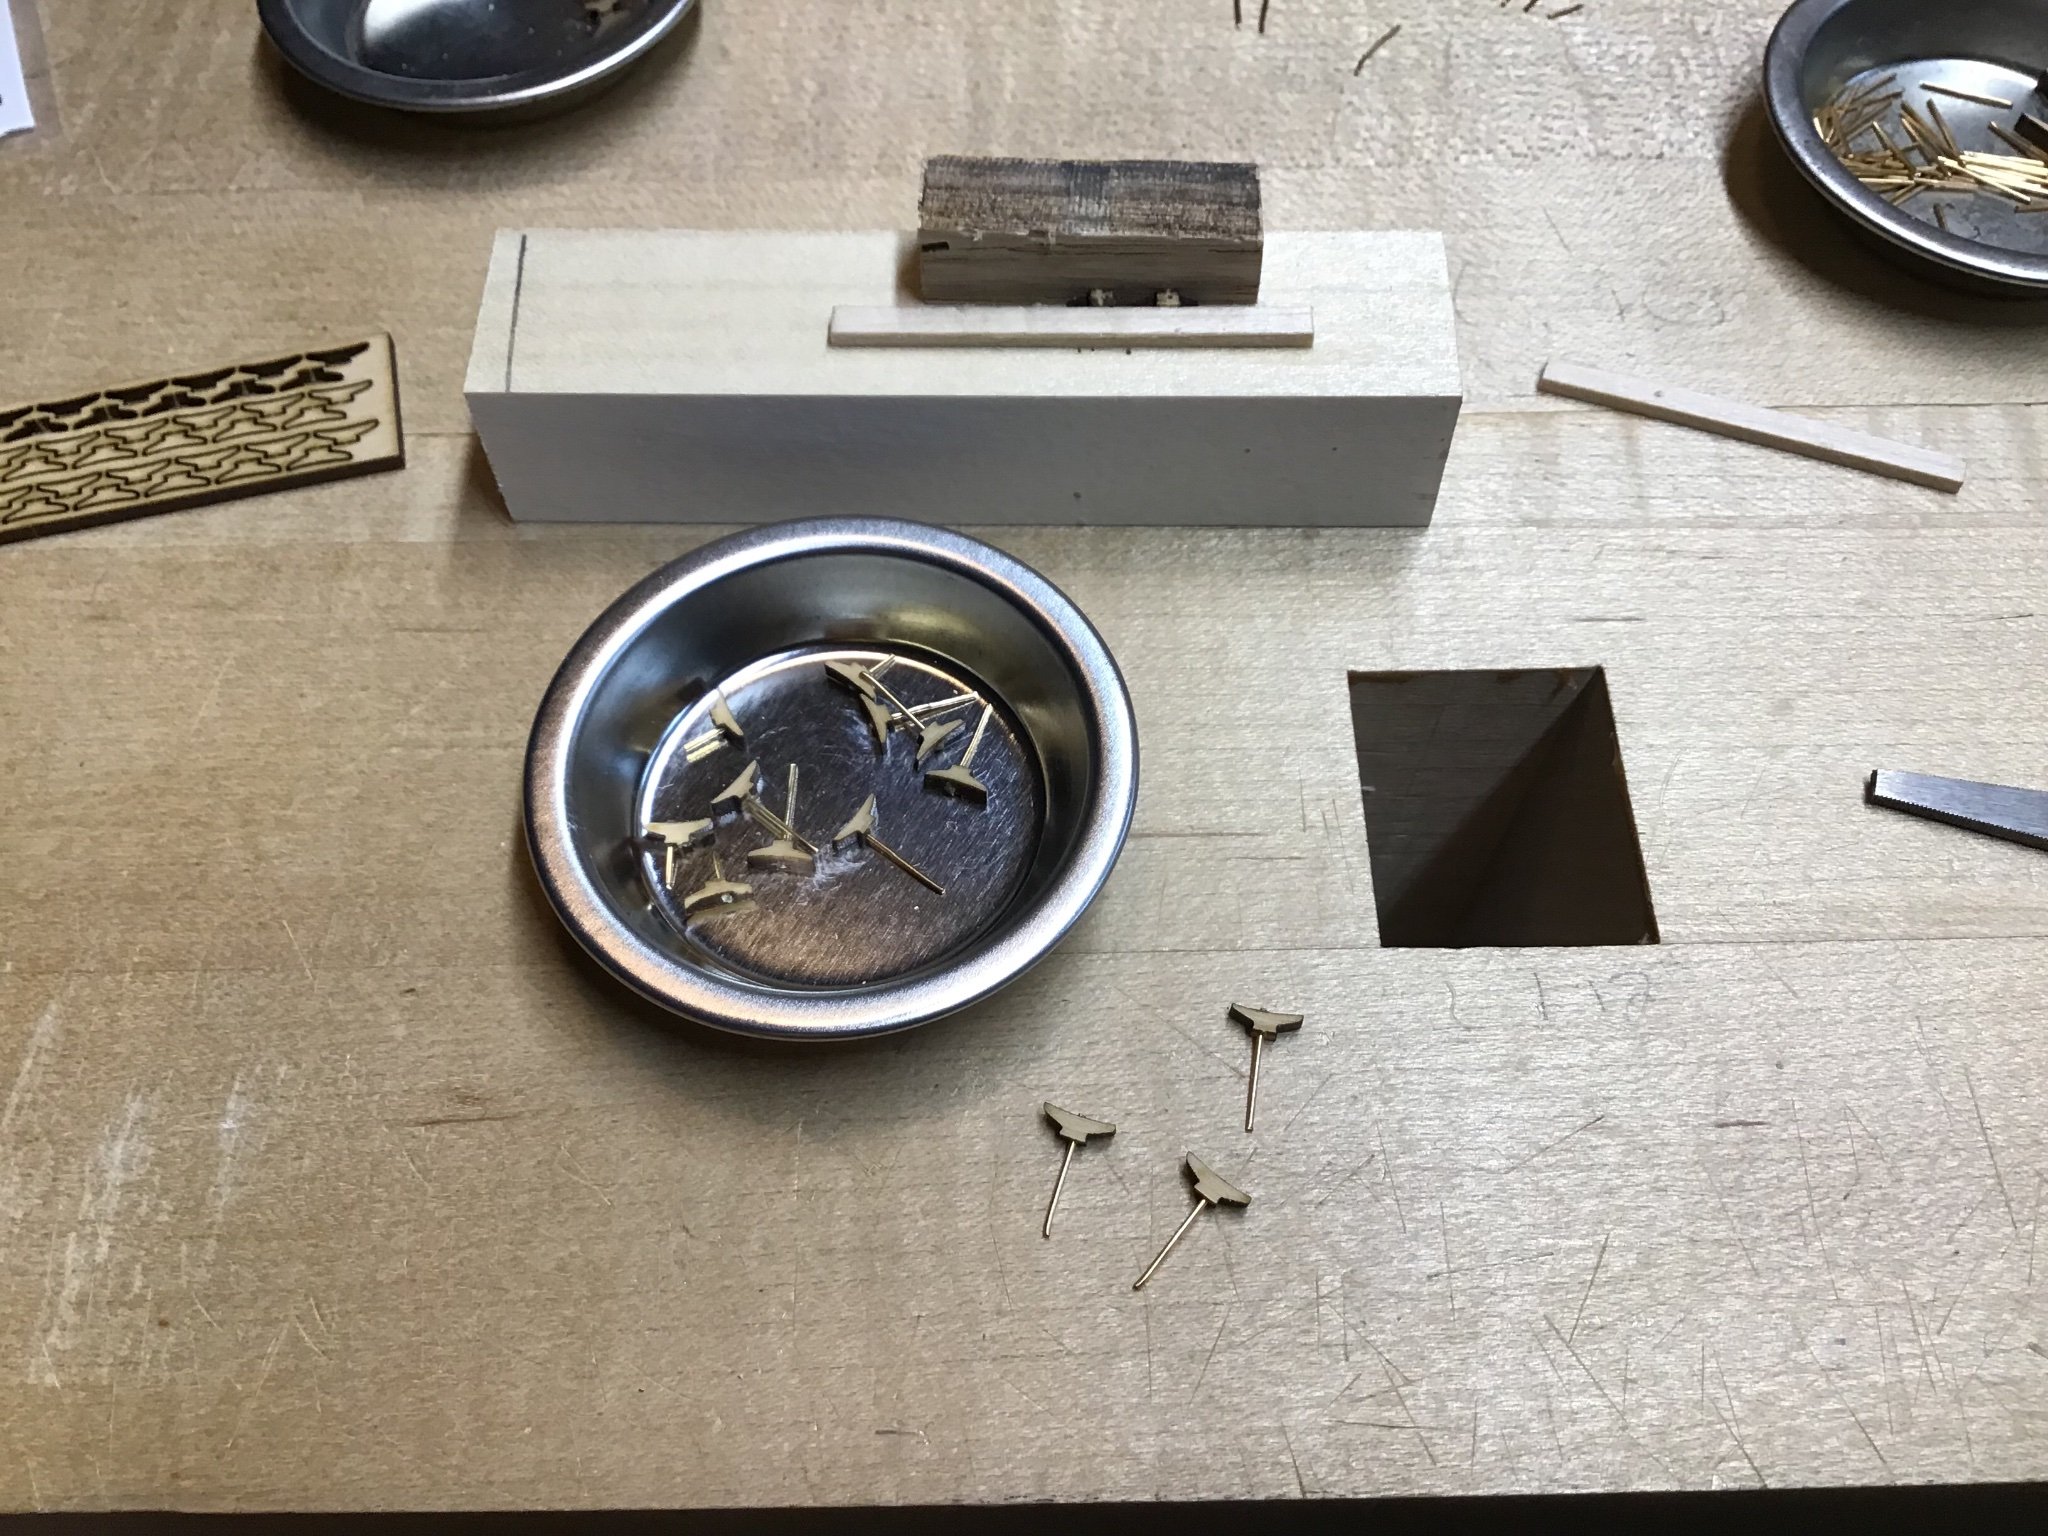
Picture 3 shows cleats with left over eyebolt tails, see last post, glued in holes.
Again used the board with a hole drilled in it to size the pin and cutoff with flush cutter. Picture 4.
Picture 5 shows a cleat installed in a hole drilled in the second board above the sill.

- JeffT, Chuck, Bill Morrison and 2 others
-
5
-
-
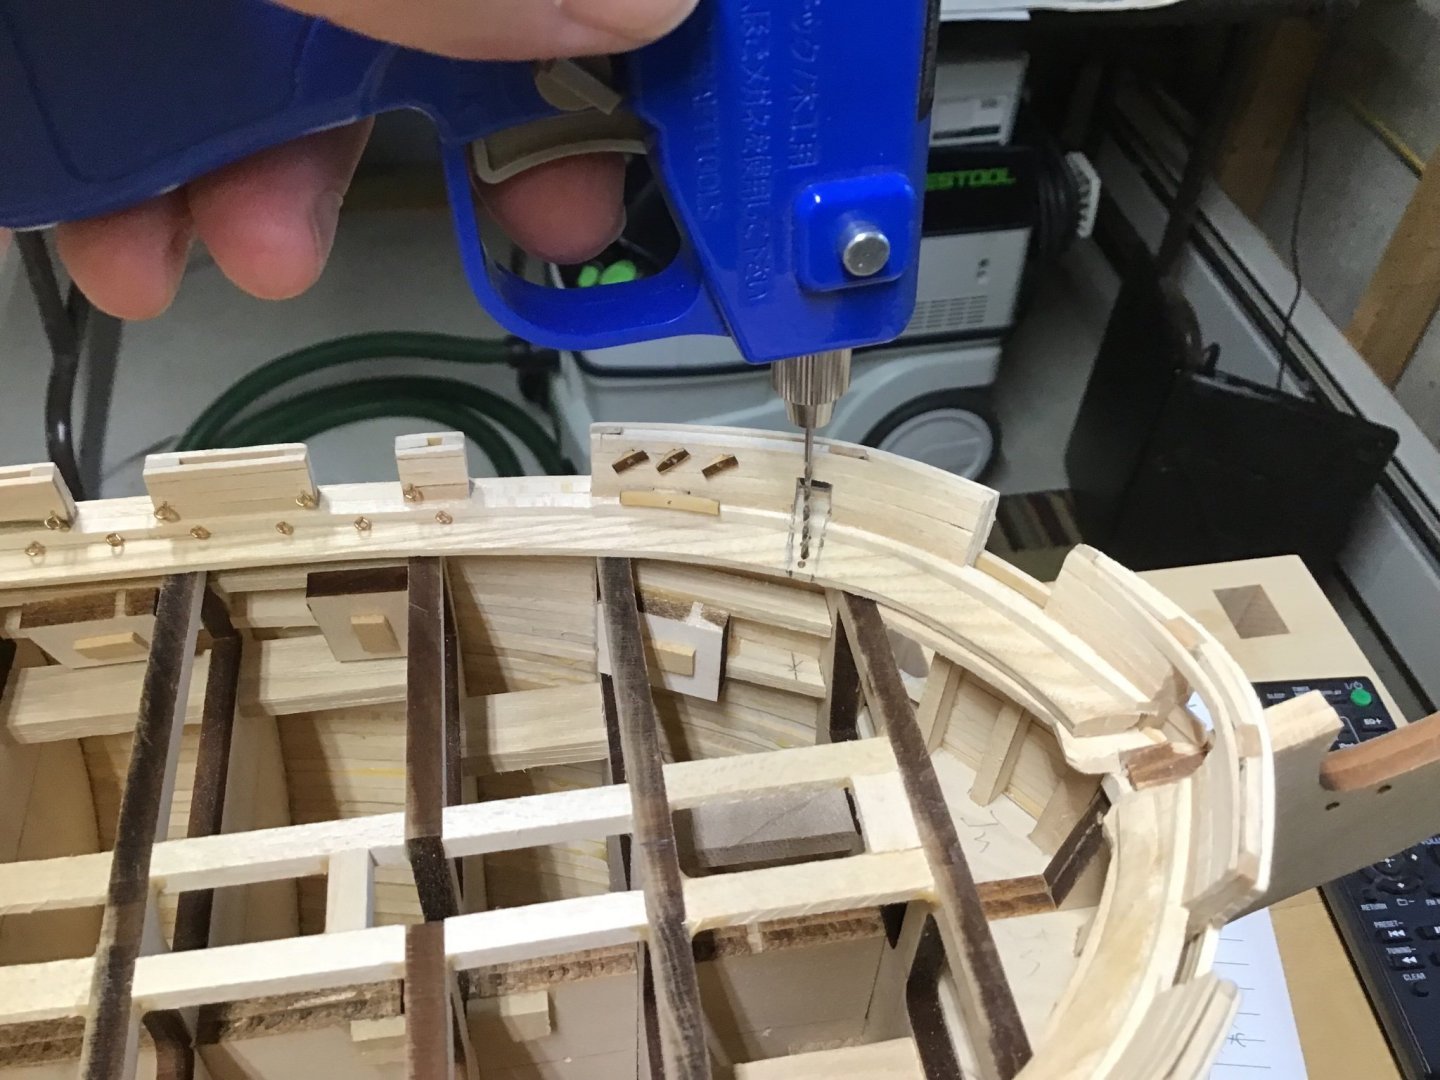
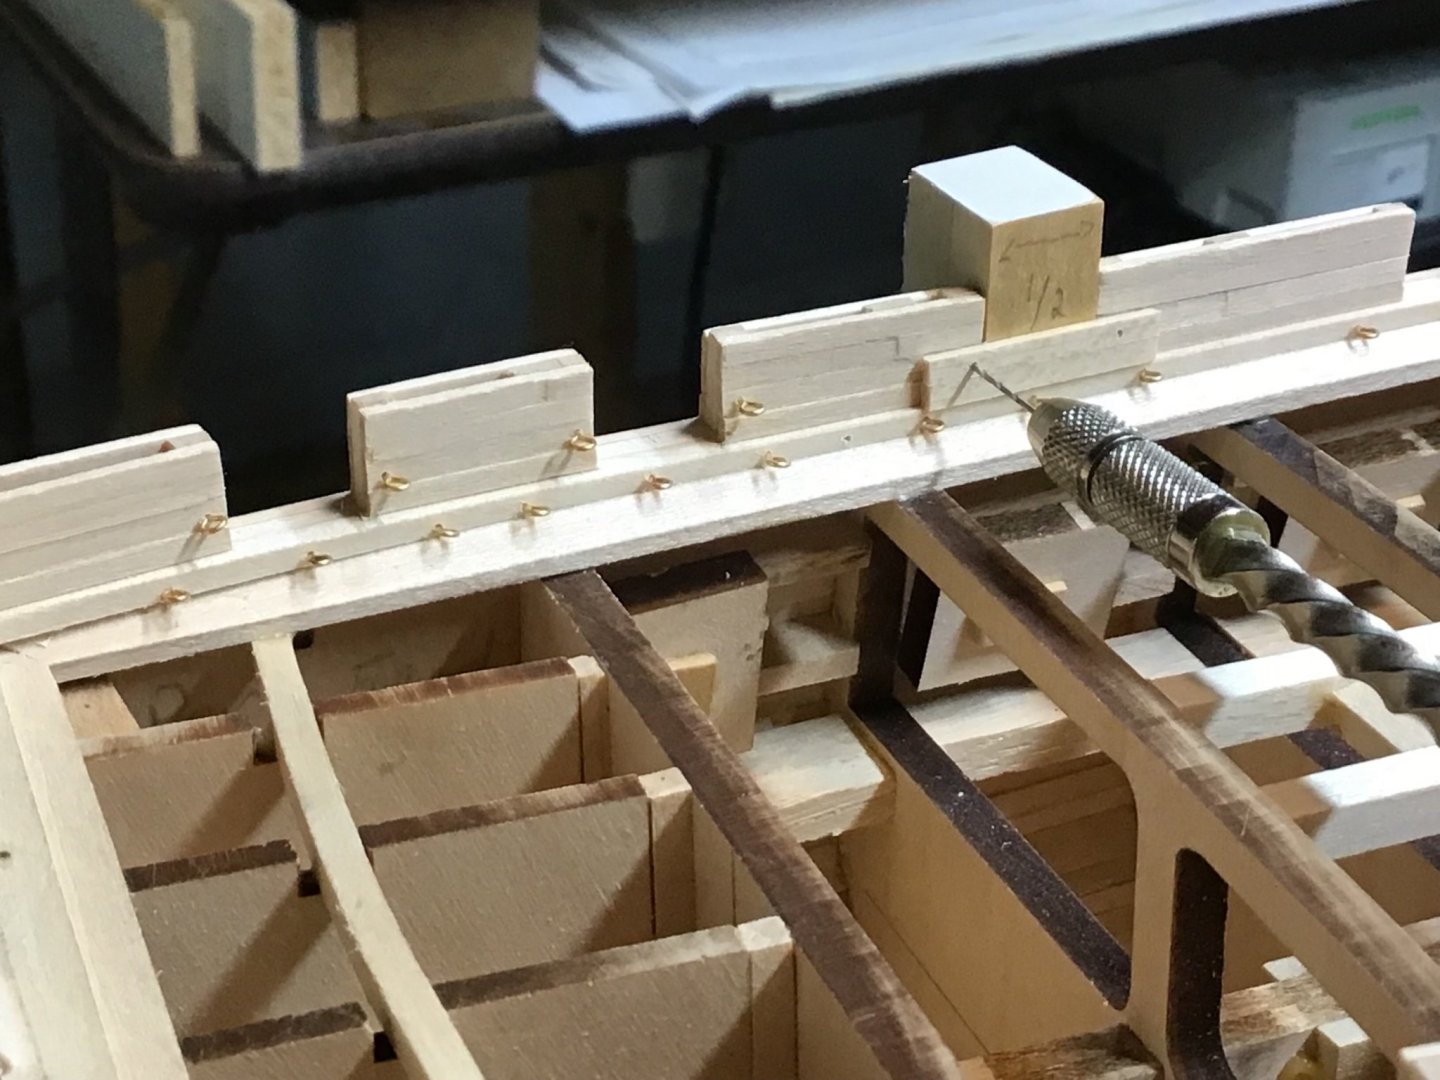
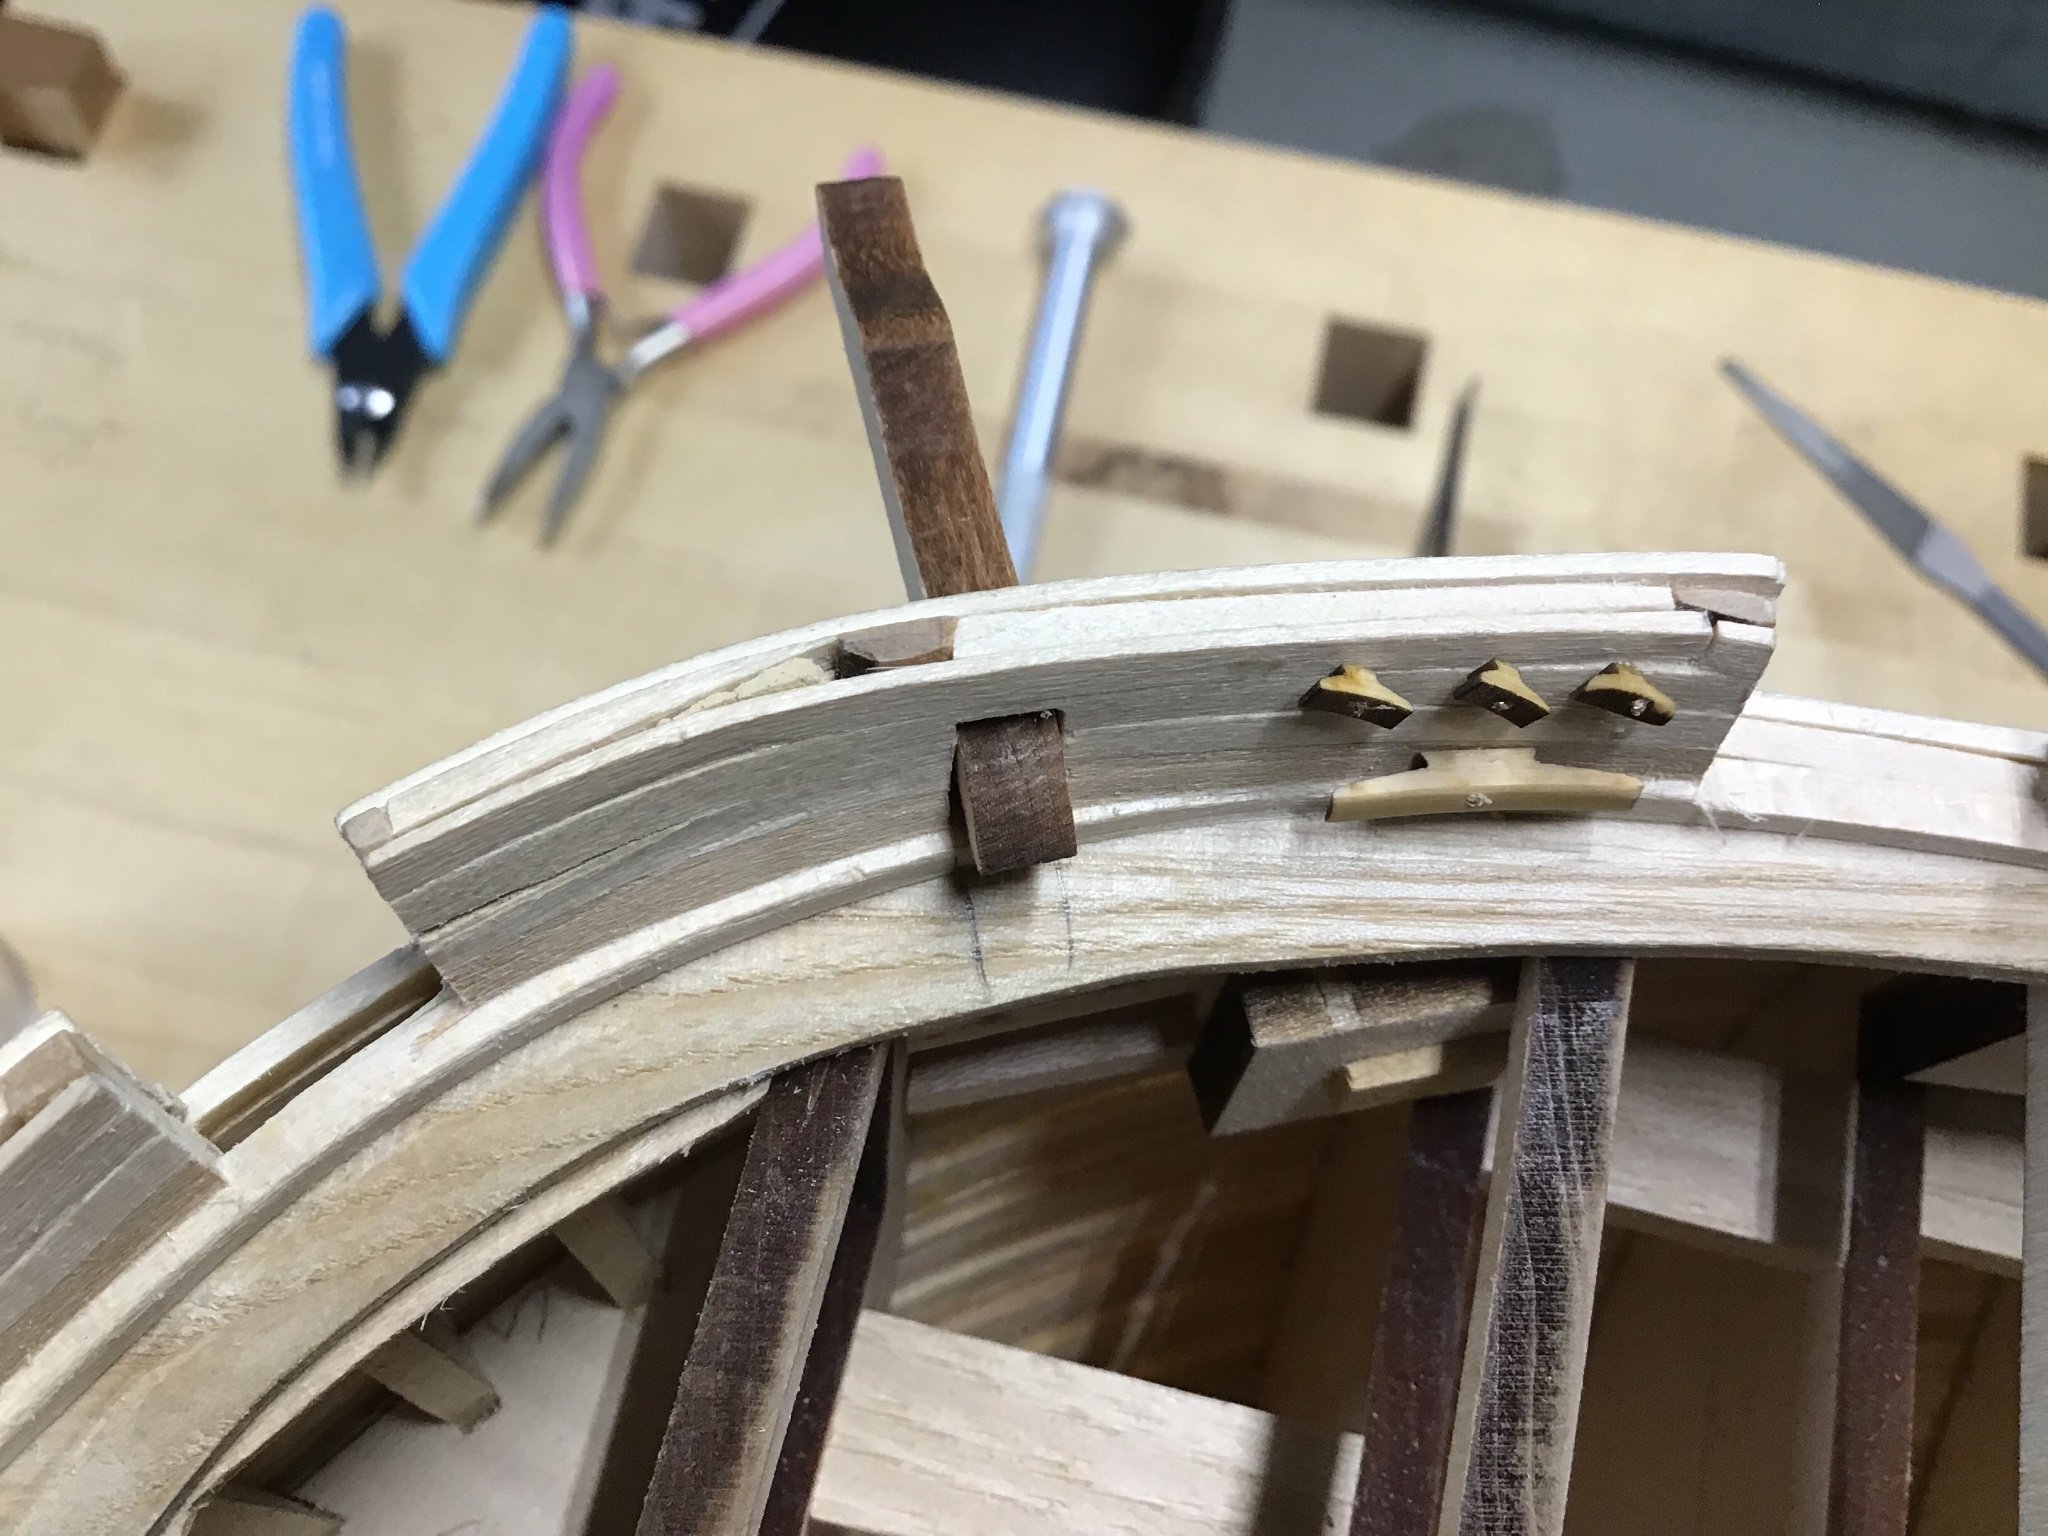
Installing Eyebolts for Carronade Tackle - Bulkhead
There are two eyebolts on either side of the gunport, located in the middle of the second plank above the sill.
Another drill guide template was made using a 1/2” wide block with two planks glued to the front.
The picture shows the drill guide in use and some of the eyebolts already installed.
- Boatsinc2000 and JeffT
-
2
-
24 minutes ago, Laggard said:
I will likely spend more time sanding than I will assembling. Lol
Hi,
When removing wood in bulk, the tool sequence is rasp, files, then sandpaper. Sanding is a finishing step and is not meant for bulk wood removal. So if one finds they are spending a lot of time sanding it’s time to think about either a rasp or file. A file can provide a finish that often does not need sanding. Files offer finer control as well. Hope this helps.
Looking forward to seeing your results!
Here is a rasp in action….

-
On 5/30/2021 at 12:07 PM, FrankWouts said:
Also for the forming of the stem at first I use a little motor tool which you can see in the pictures. As I’m getring lame enough using only muscle and sandpaper..
Not sure if it’s too late…when removing wood the tool sequence is rasp, file, sandpaper (if needed). Half round rasp and files will get you into the curves. Rasp and files can be both full size and miniature. Here is rasp in action. Files often provide such a smooth finish, that sandpaper is not needed.
Really good looking ship, looking forward to seeing more.

- Ryland Craze and FrankWouts
-
2
-
My first few projects were disasters! Always available to answer a question if you need a hand. Cheers!
- mtaylor, Laggard and Ryland Craze
-
2
-
 1
1
-
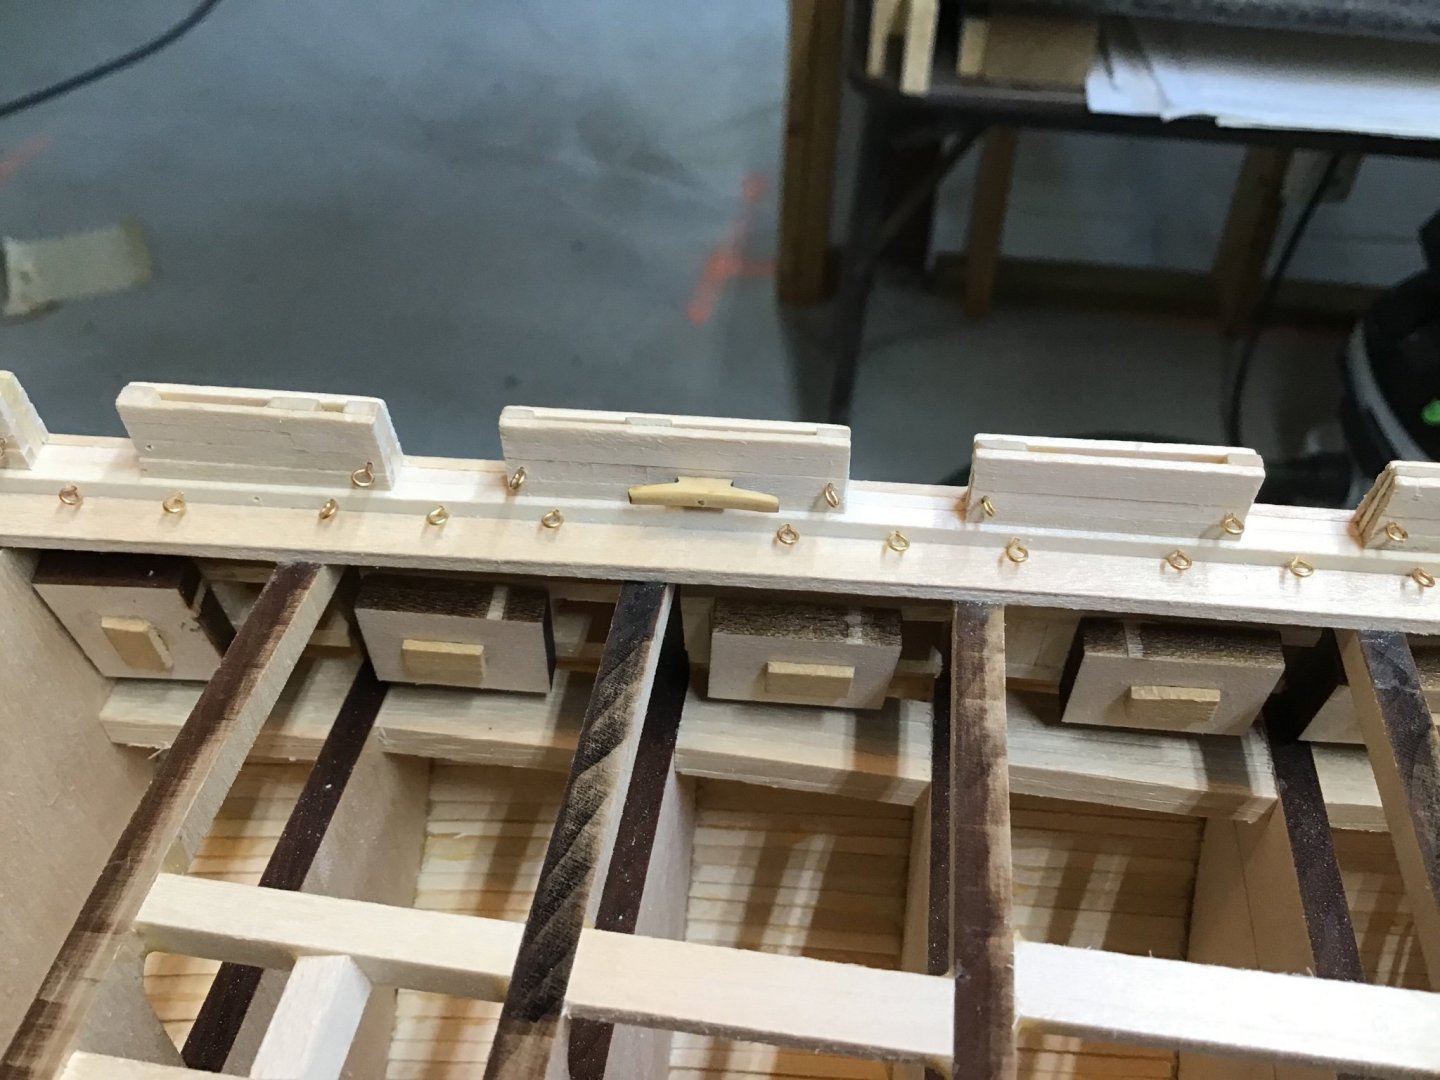
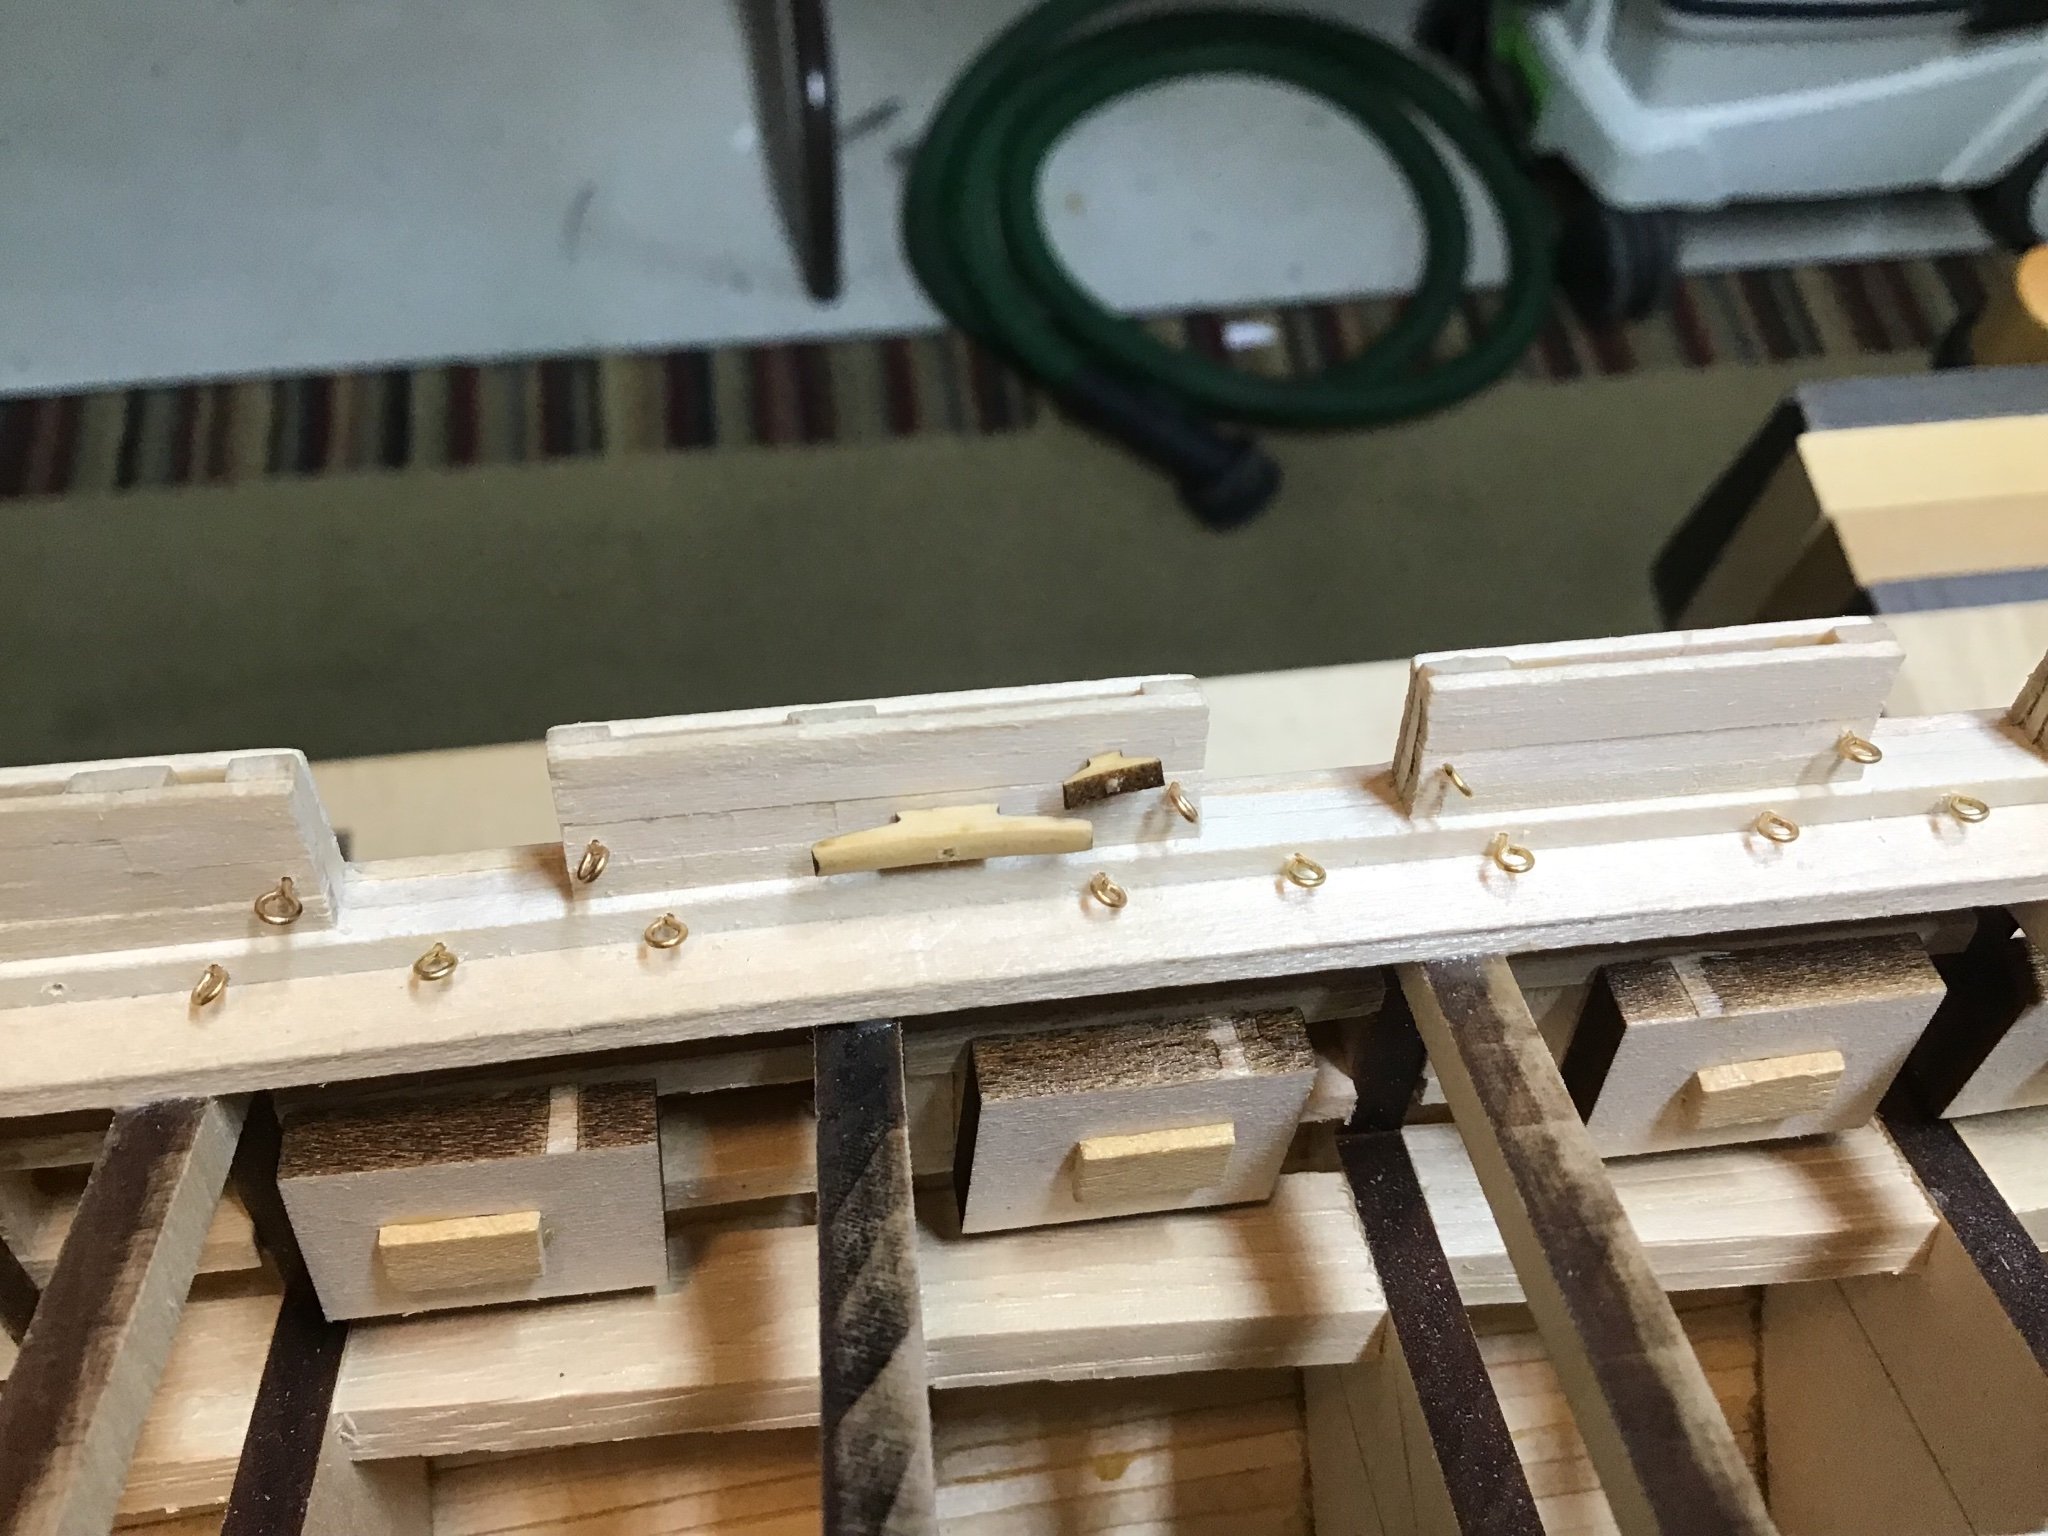
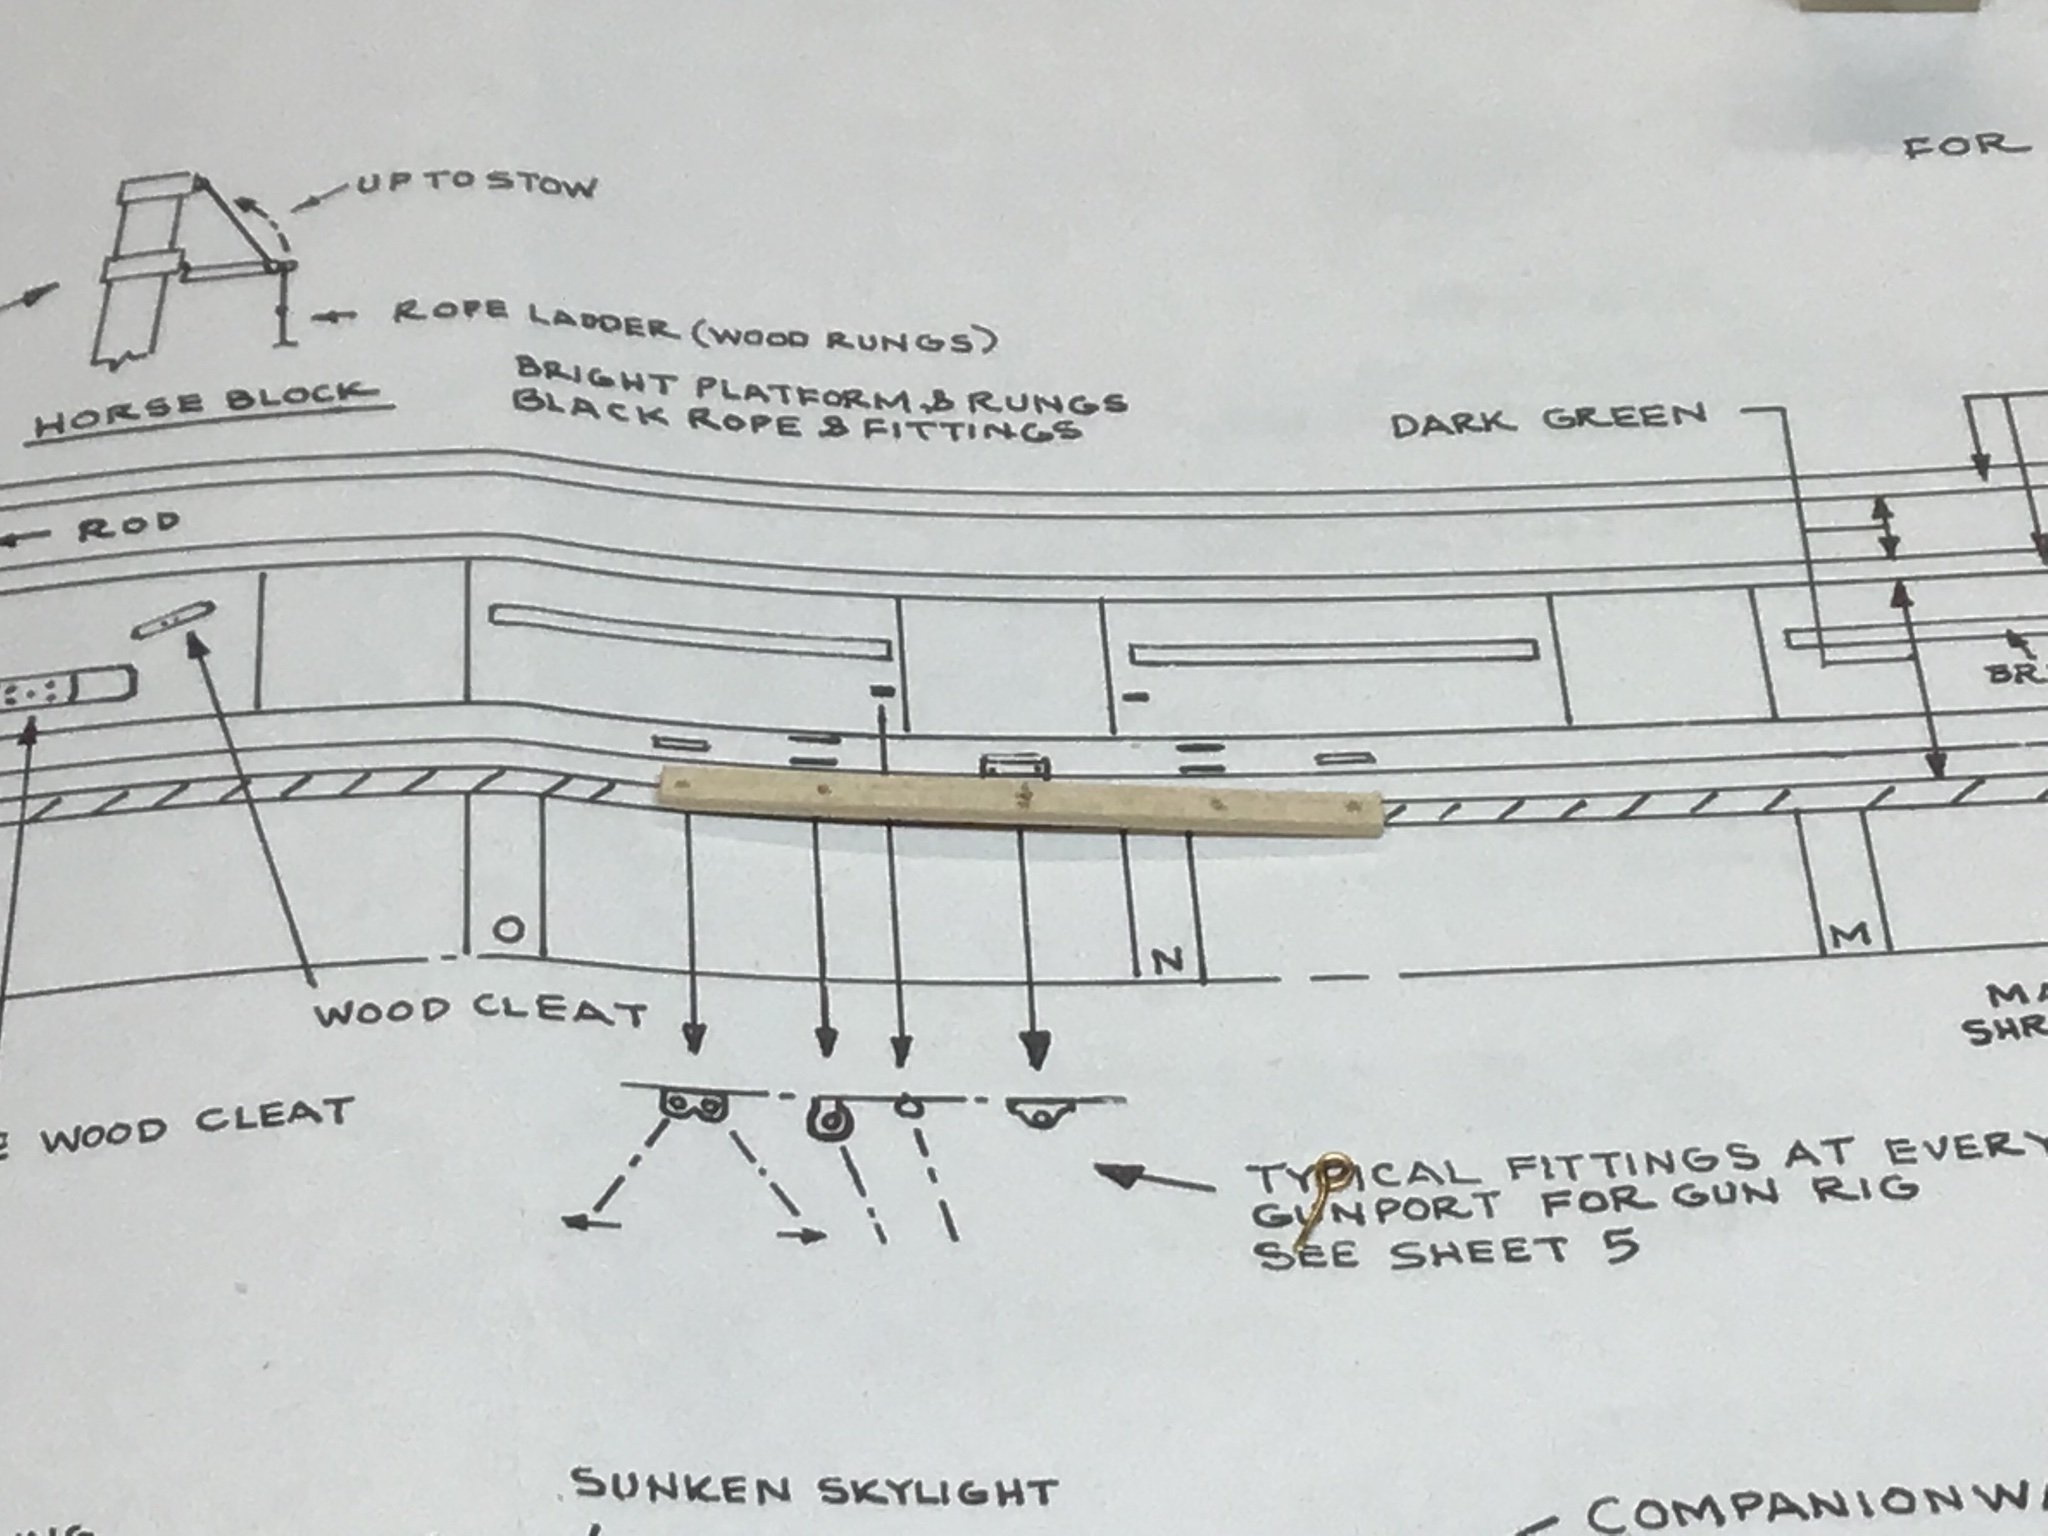
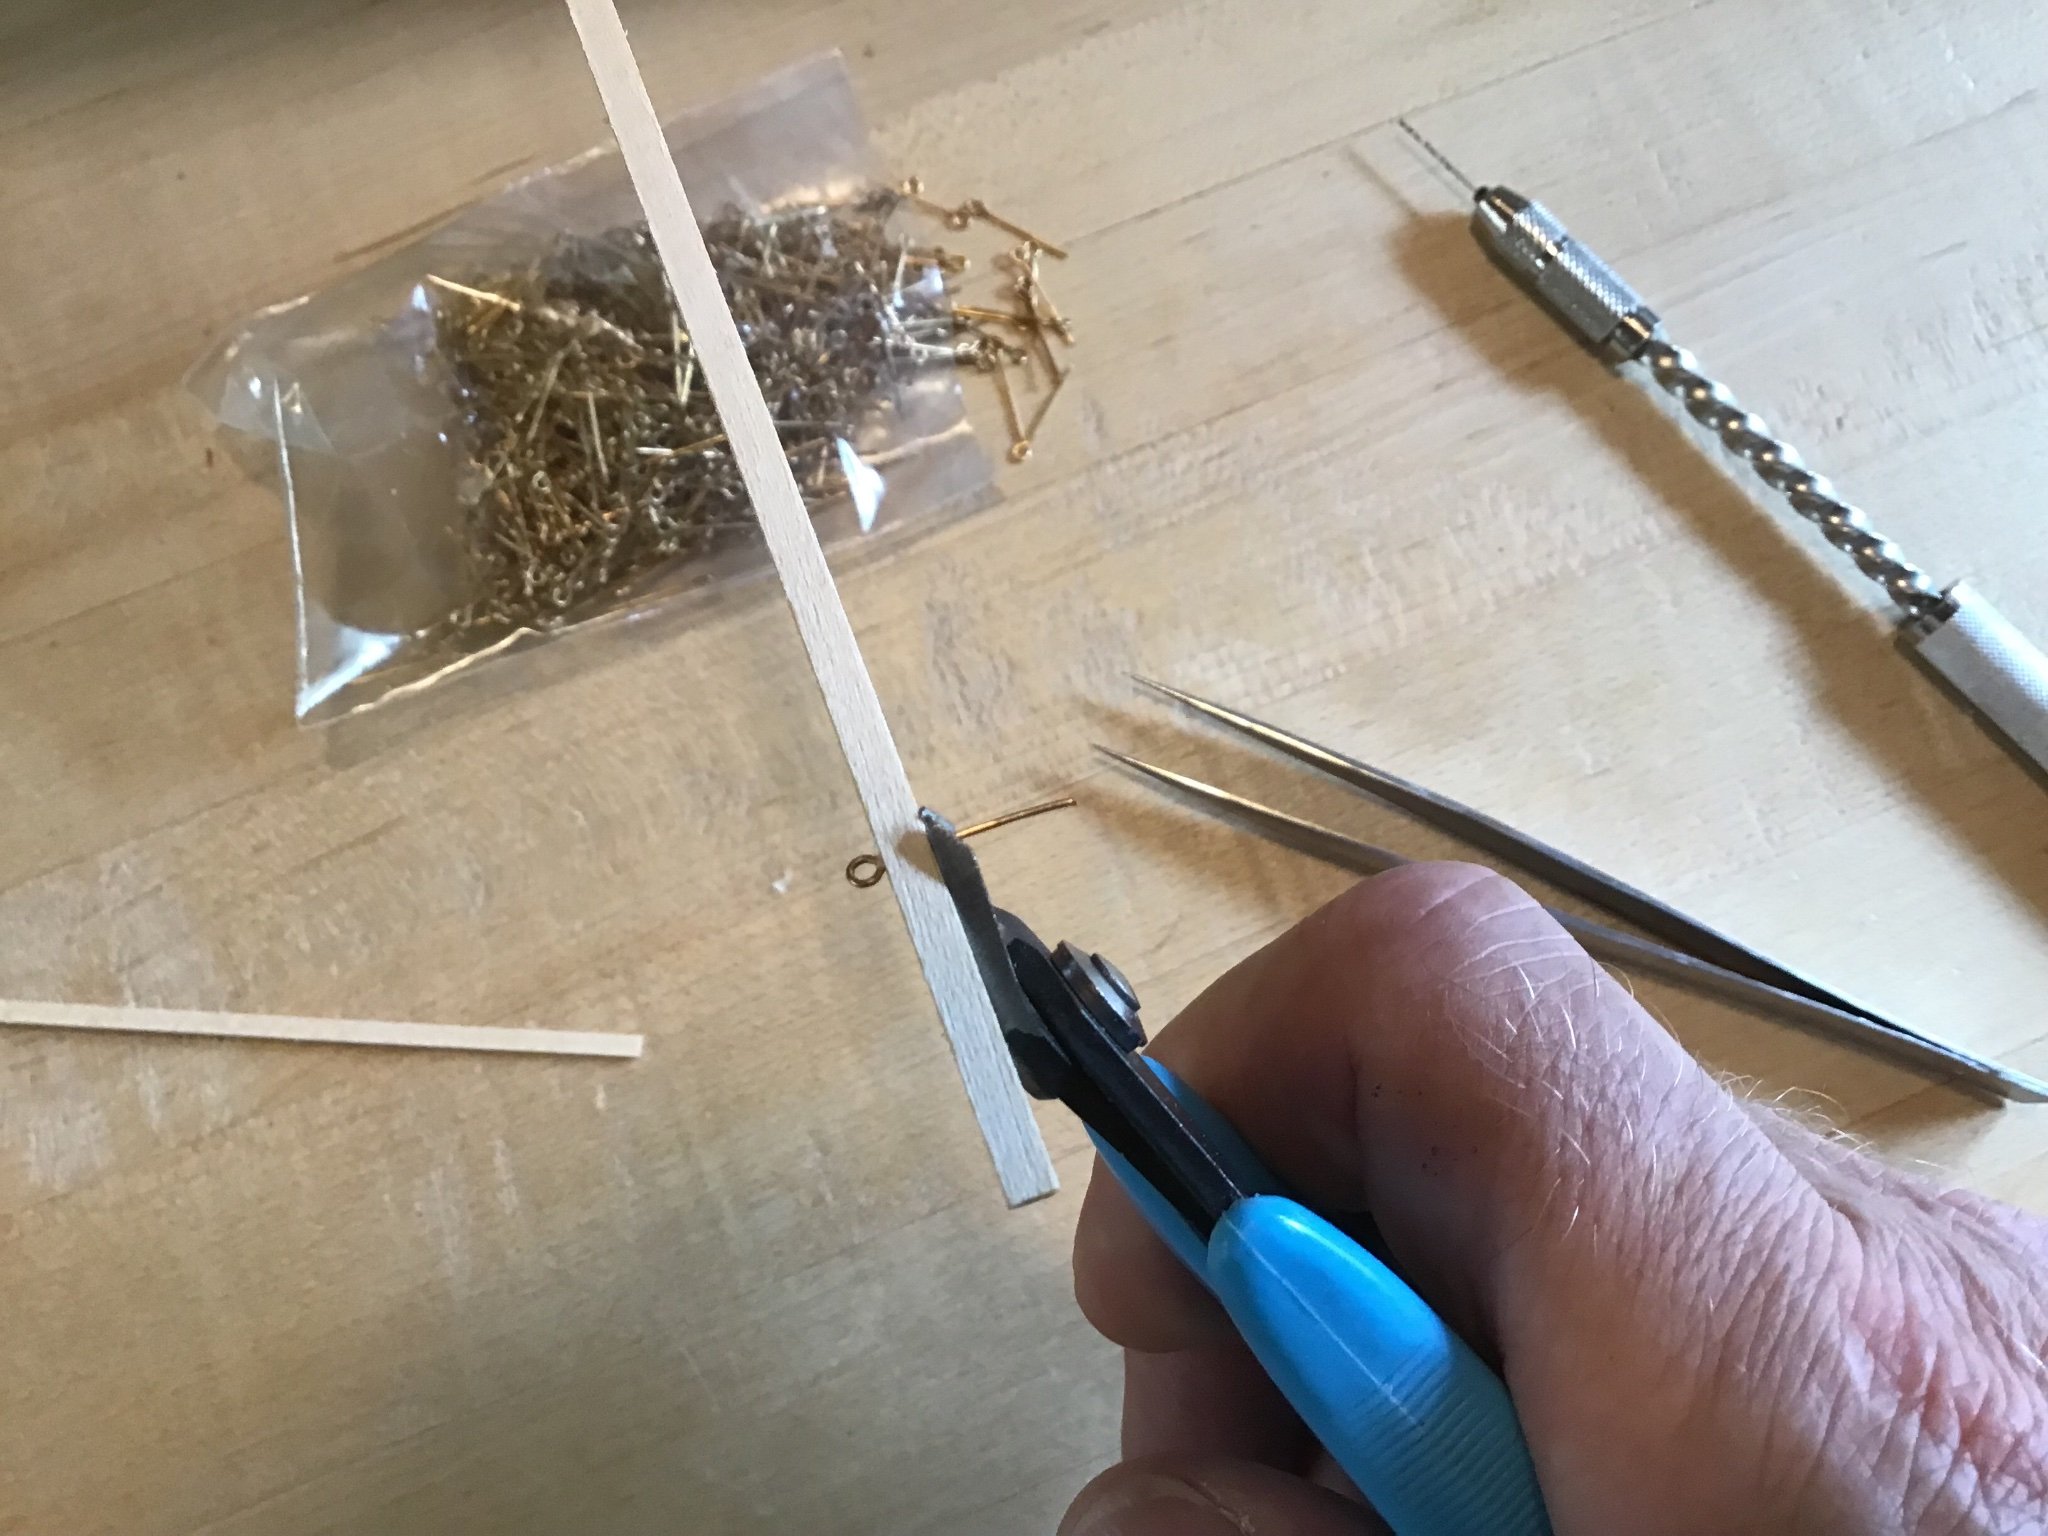
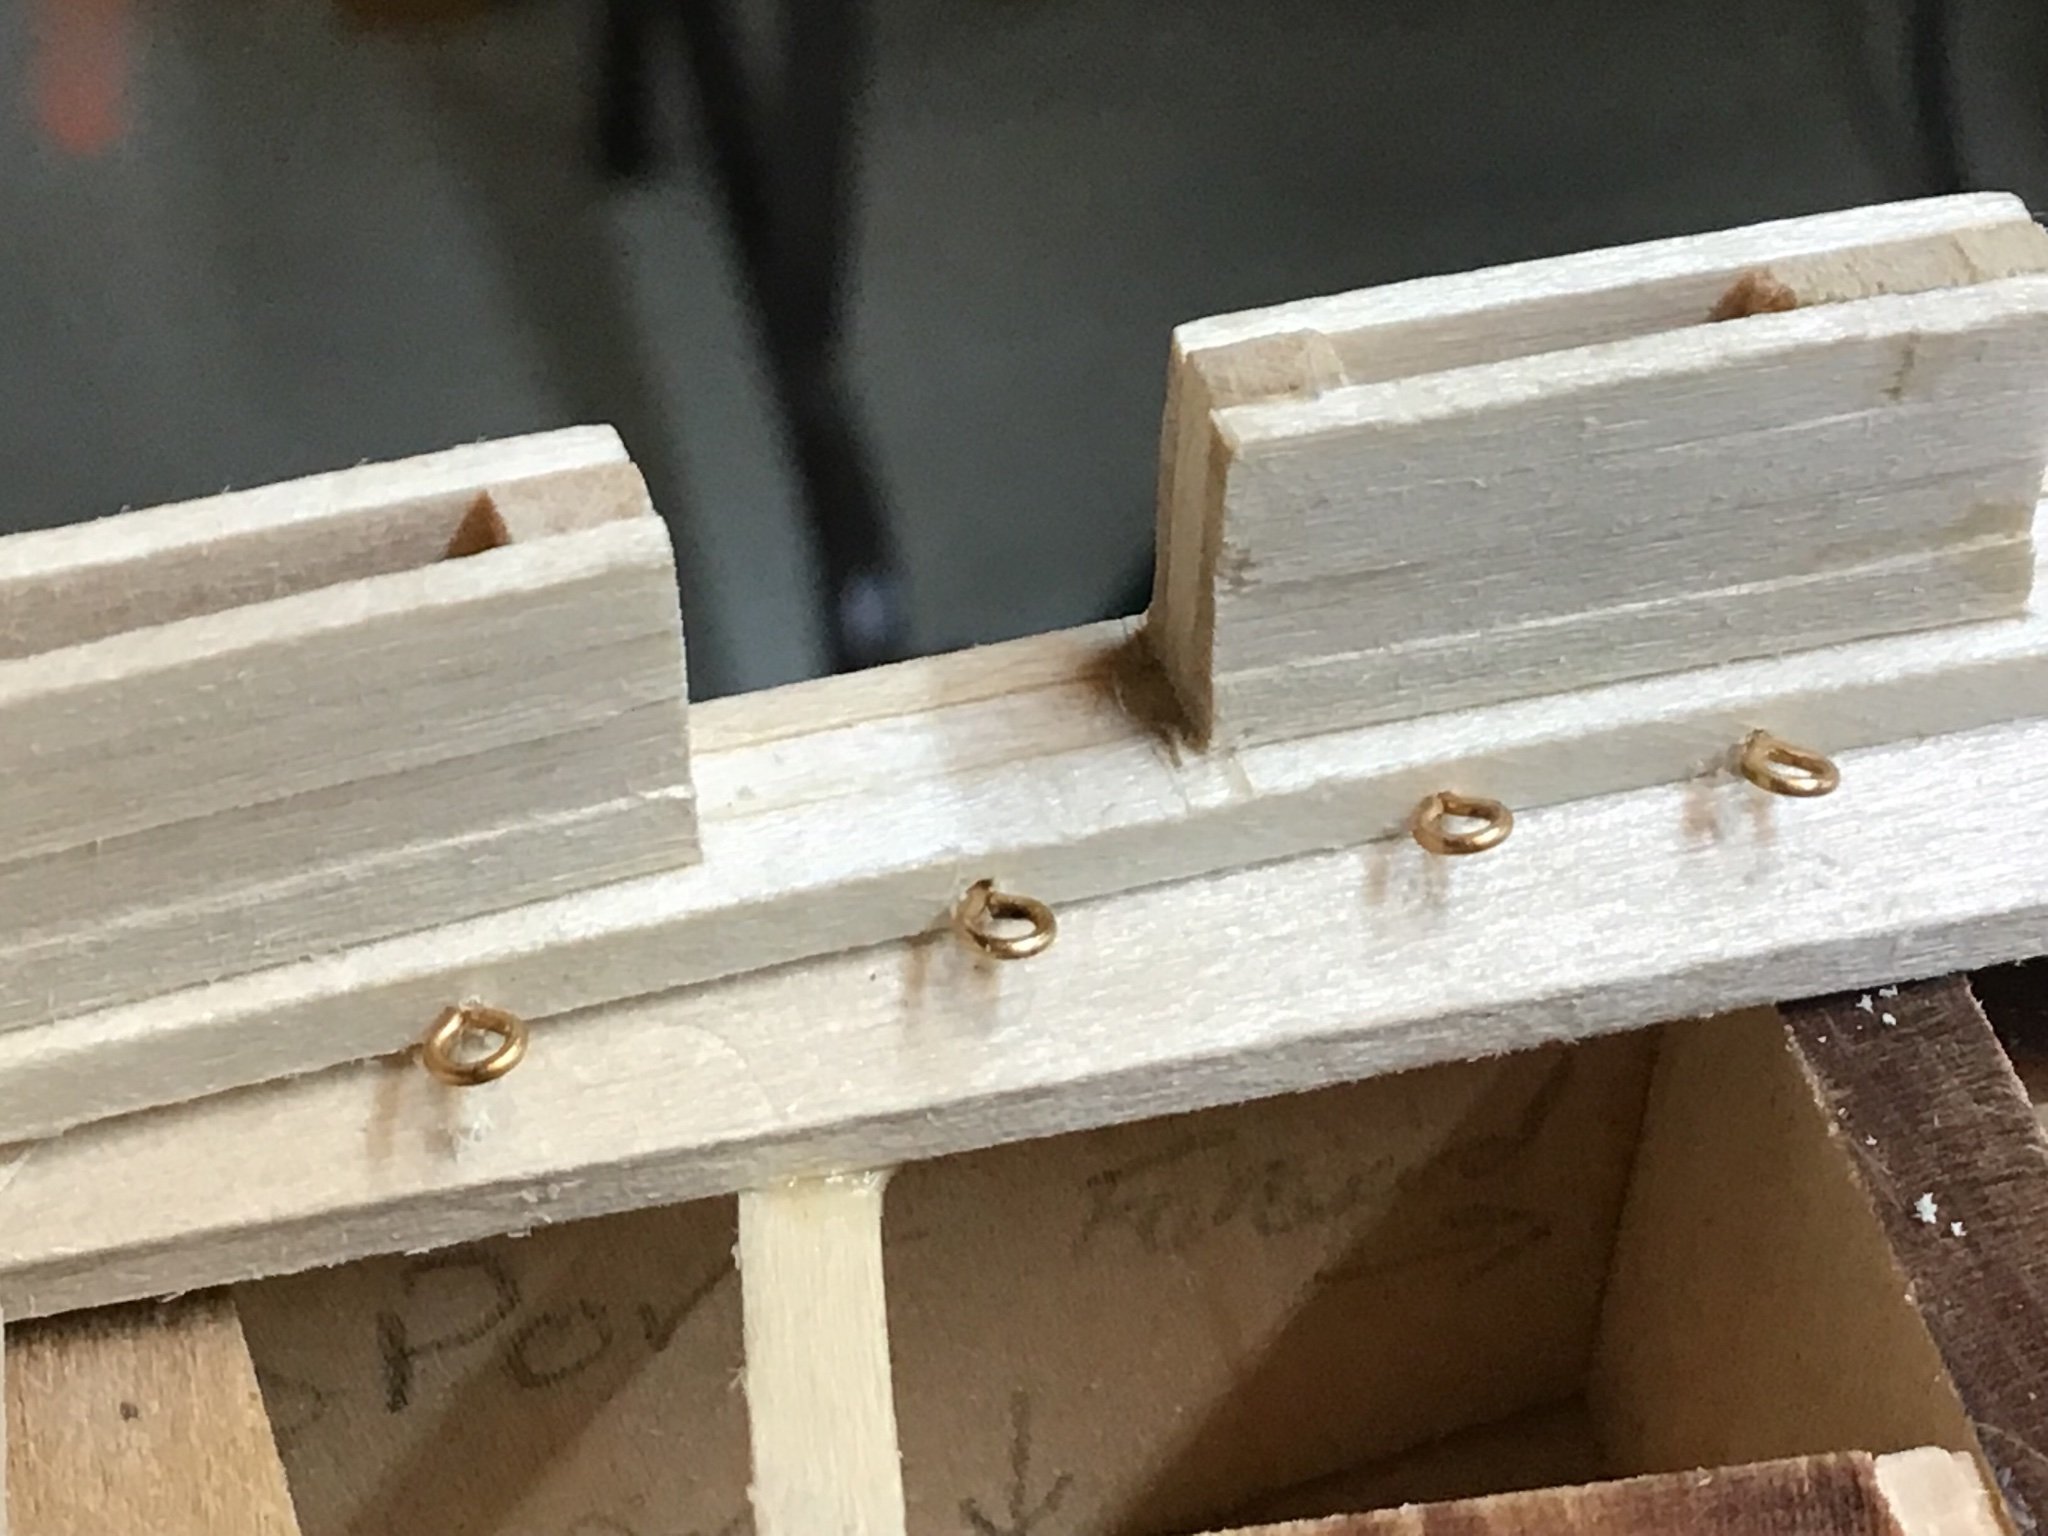
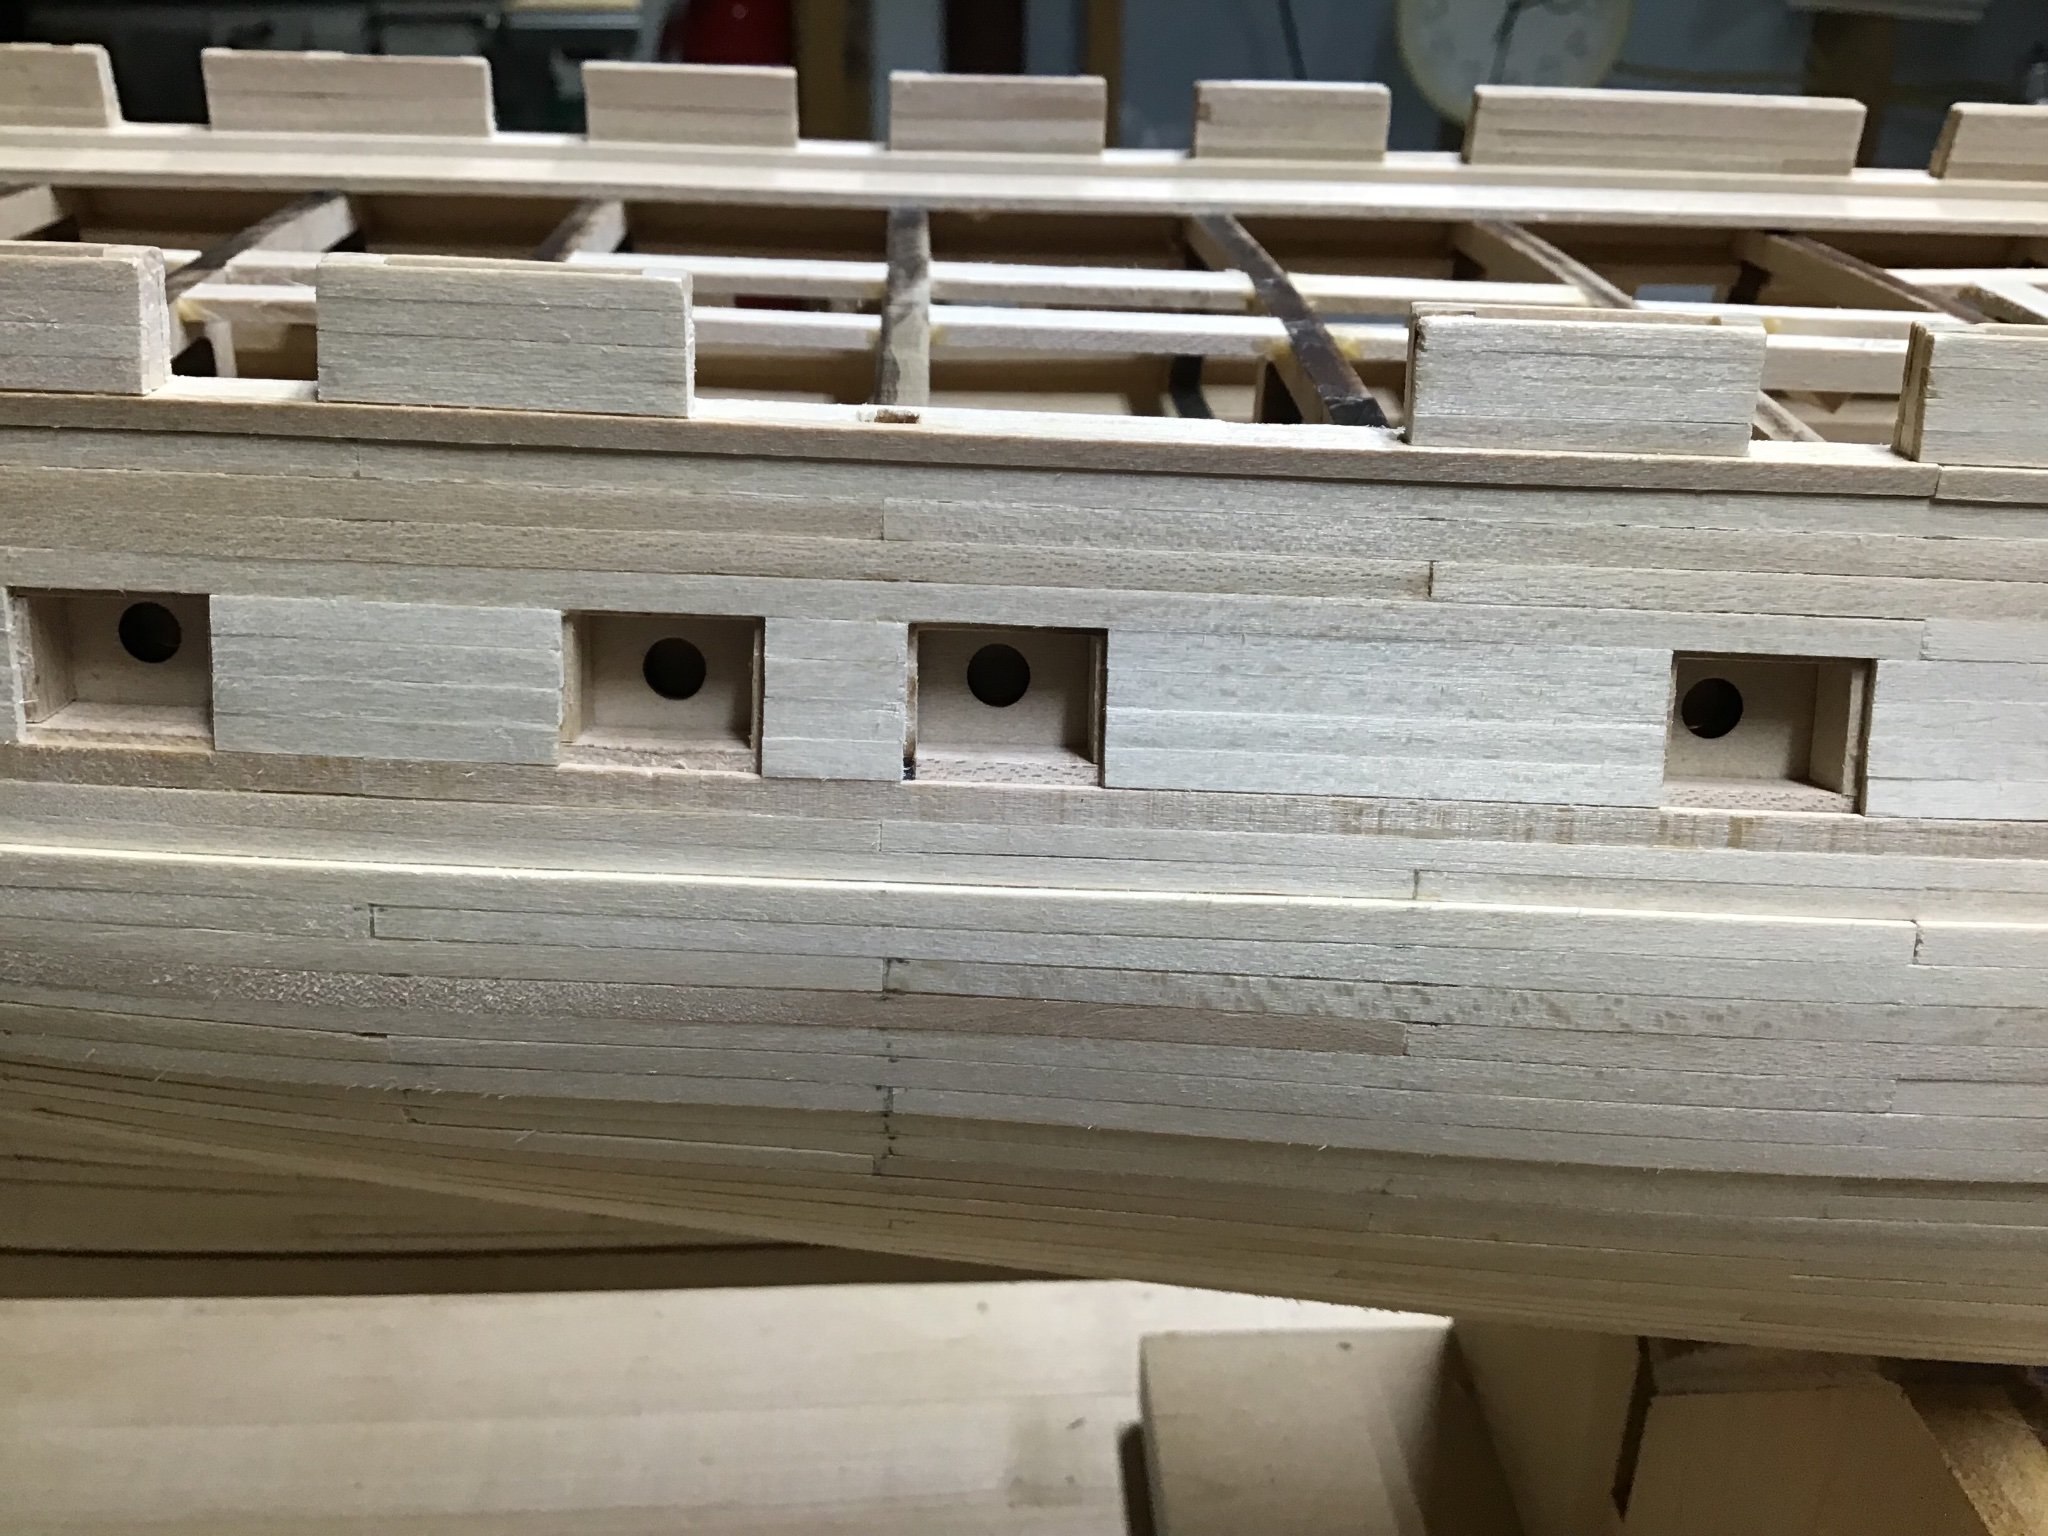
Installing Eyebolts for Carronade Tackle - Sill
About 100 eyebolts need to be installed, in the first board above the waterway, for the carronades and associated tackle to attach to.
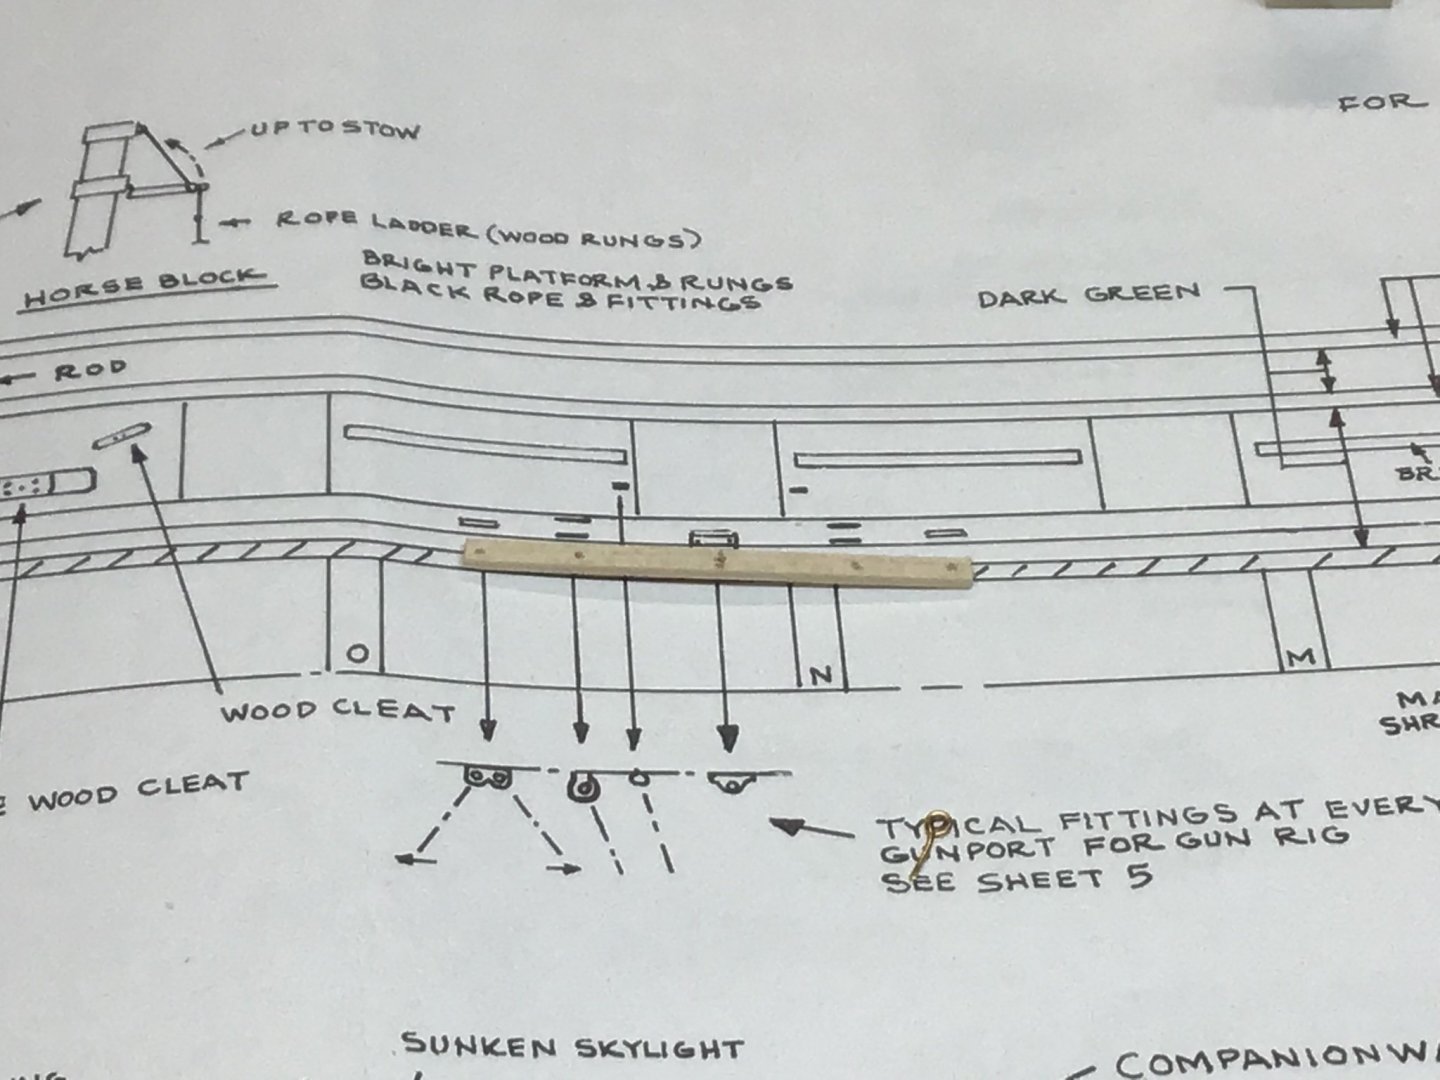
First made a template drill guide with a board and using the plan. Marked the board at bolt locations on the plan and drilled holes in the board. Picture 1.
Next drilled a hole in the sill centered on the gunport. Located the template board on the sill with an eyebolt and used the board as a guide to drill the remaining holes on either side of the gunport. Picture 2.
Cut the eyebolts to length using a board with a width corresponding to the length of the bolt desired. Picture 3.
Last, picture 4 shows the first set of eyebolts installed.


- Boatsinc2000, Avi, Der Alte Rentner and 1 other
-
4
-
Hi,
I like your Jolly Boat.
Seems to me you are on the learning curve and made it to the end with some ups and downs along the way. The important thing is you made it through to the end!
Next time will be even better as you incorporate the lessons learned.
Keep in mind a stained exterior is more difficult and less forgiving to execute than a painted finish. So you did it the more difficult way, on your first try, and the result looks pretty good!
About the stain, try using a nylon brush, I like the cheap brush sets from Walmart. Sounds like the surface was “flooded” with stain. Try applying the stain with a brush, like paint. Keep the surface wet but less than “flooded”, it’s ok to apply just enough stain to keep a wet edge but sparingly so the stain soaks into the wood and dries fairly quickly, without the need to wipe off the excess.
Regarding CA, less is more, just a few dots to hold the piece, carpenters glue for the remainder of the seam. This way if the piece needs to be repositioned, it’s possible to pry the piece off, as just a few dots need to give way. Try a gel as well. Has a bit more “open” time before it sets.
A master furniture maker once told me, on seeing my frustration in class that, if everyone could do the work perfectly the first time, it would be meaningless....
Looking forward to the next project!
Cheers!
-
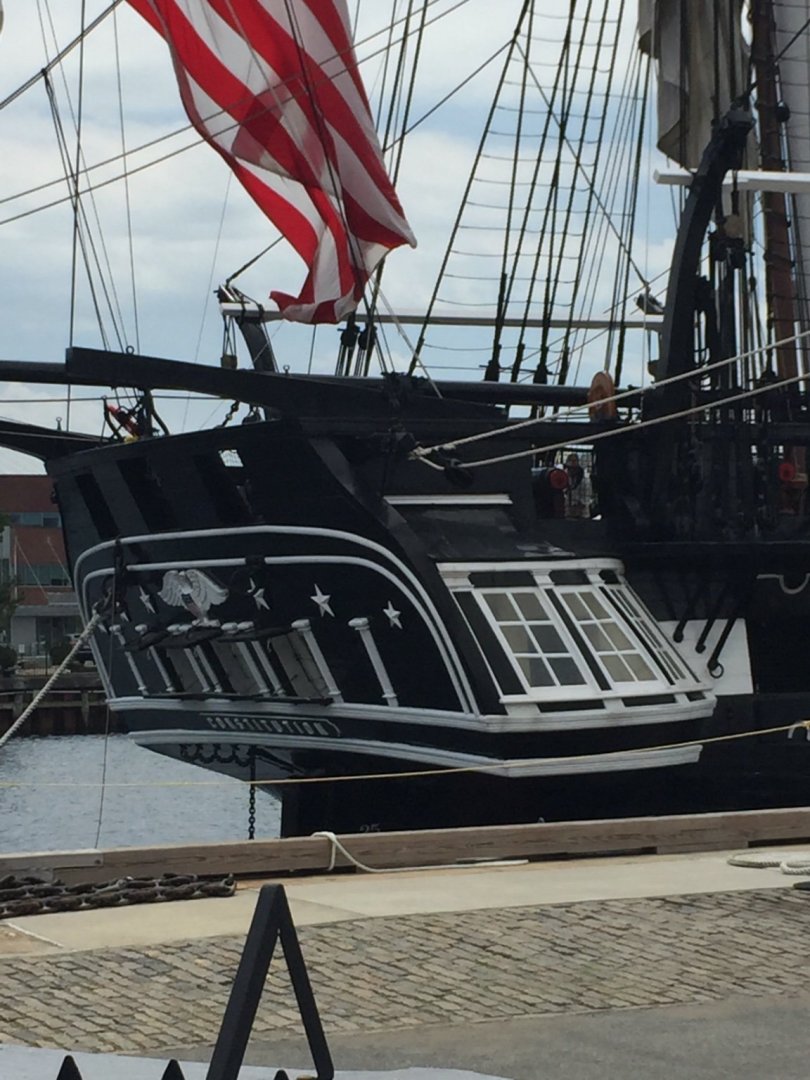
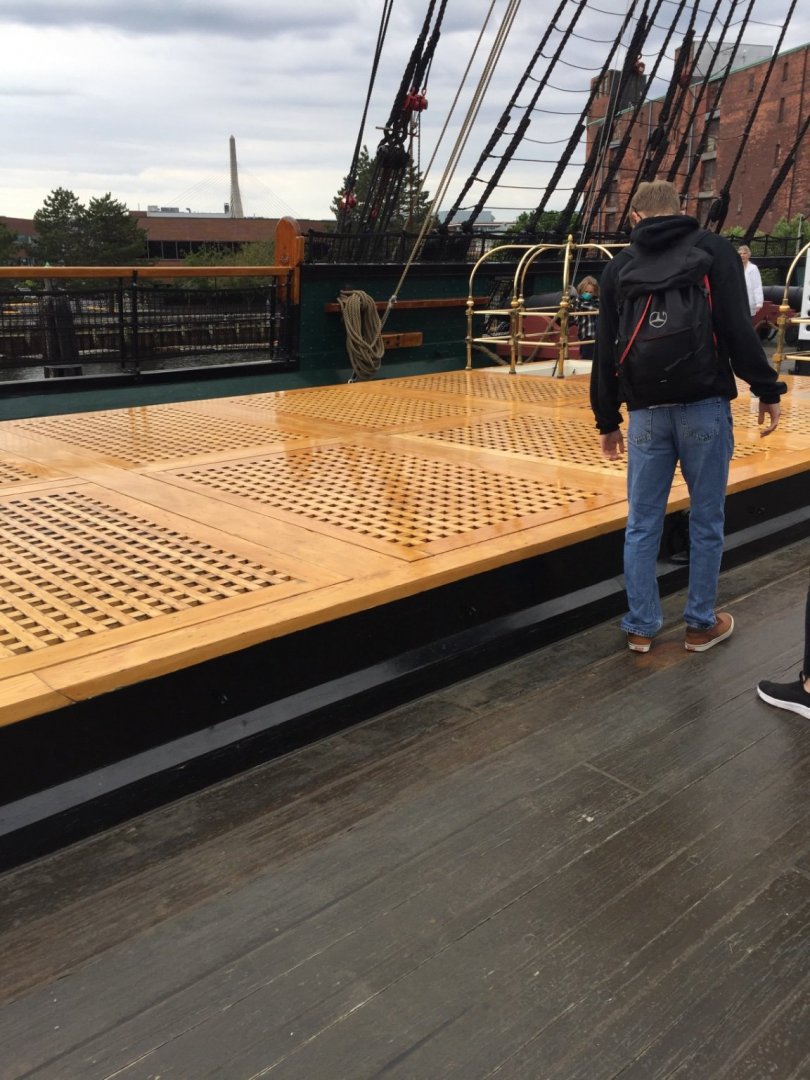
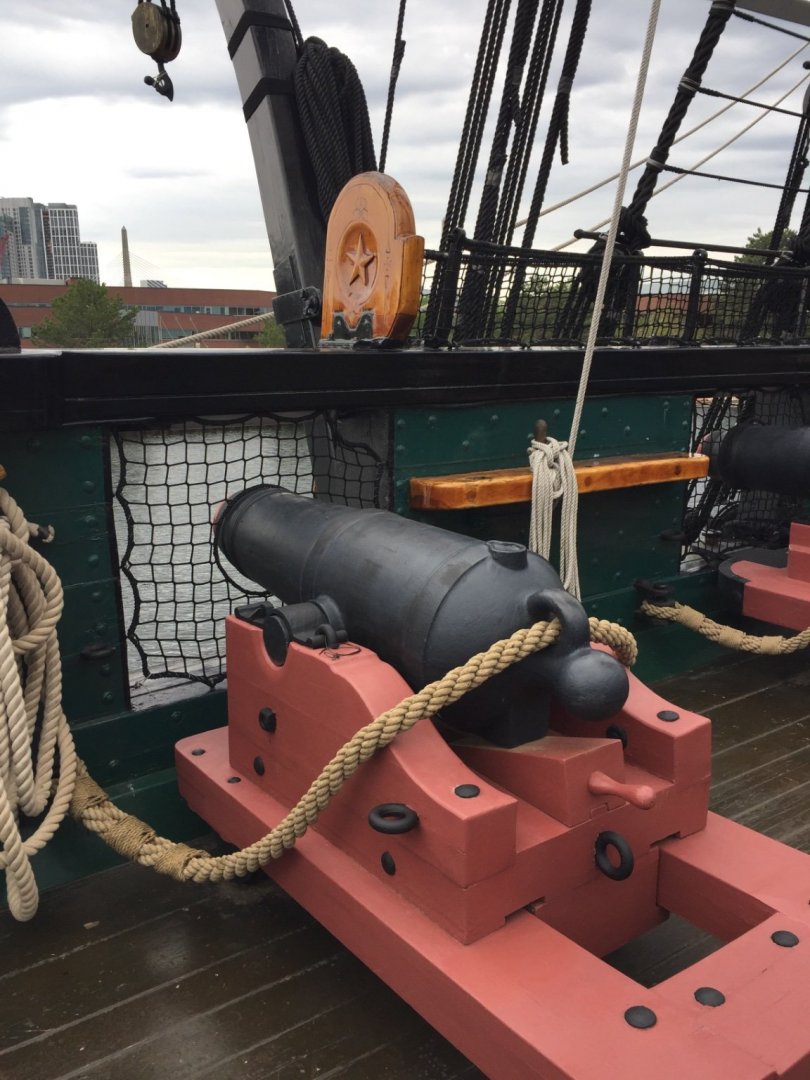
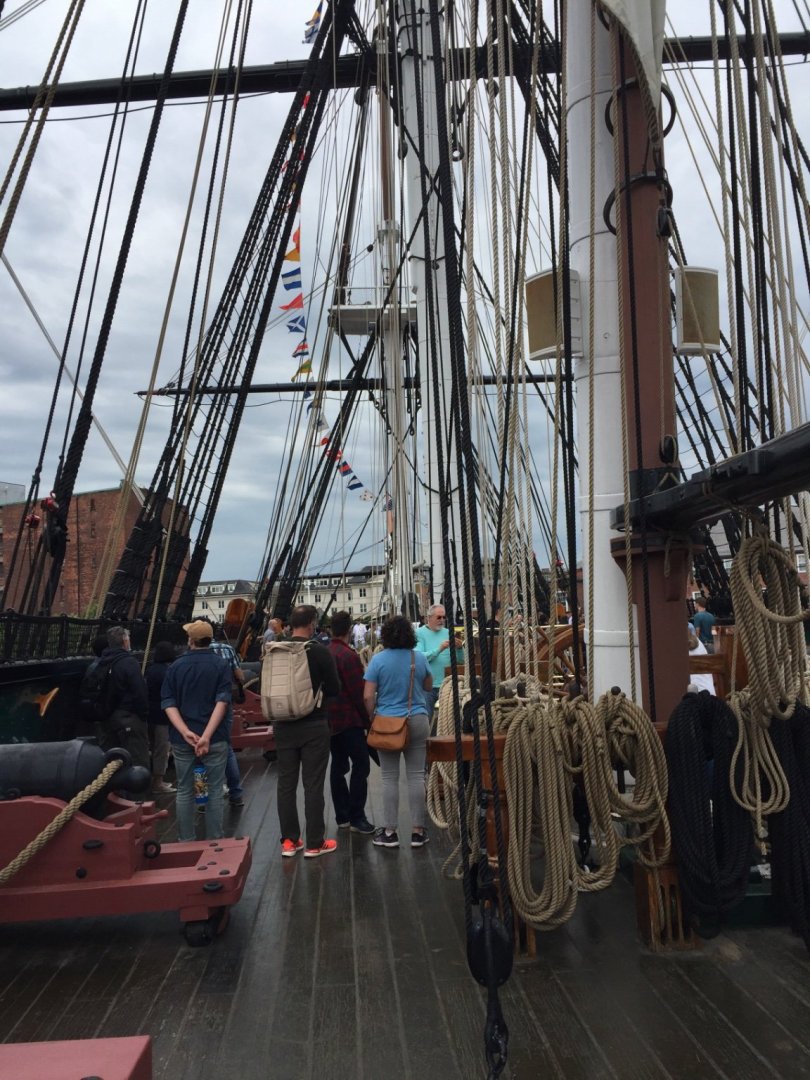
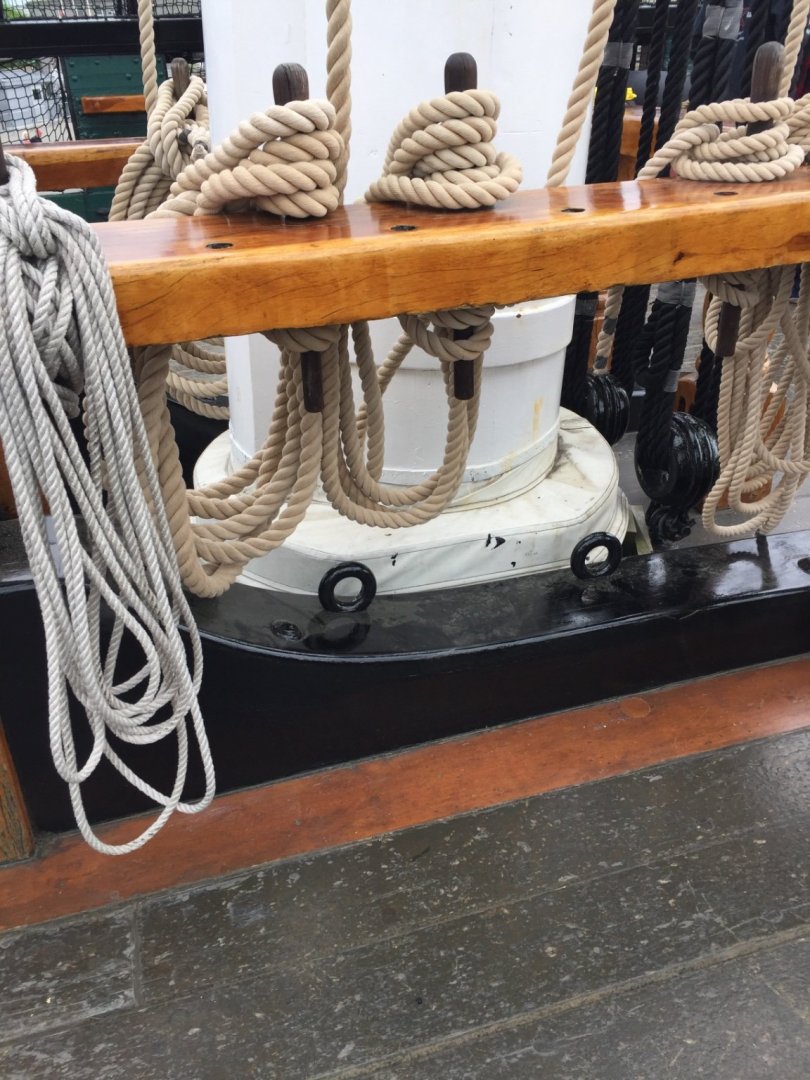
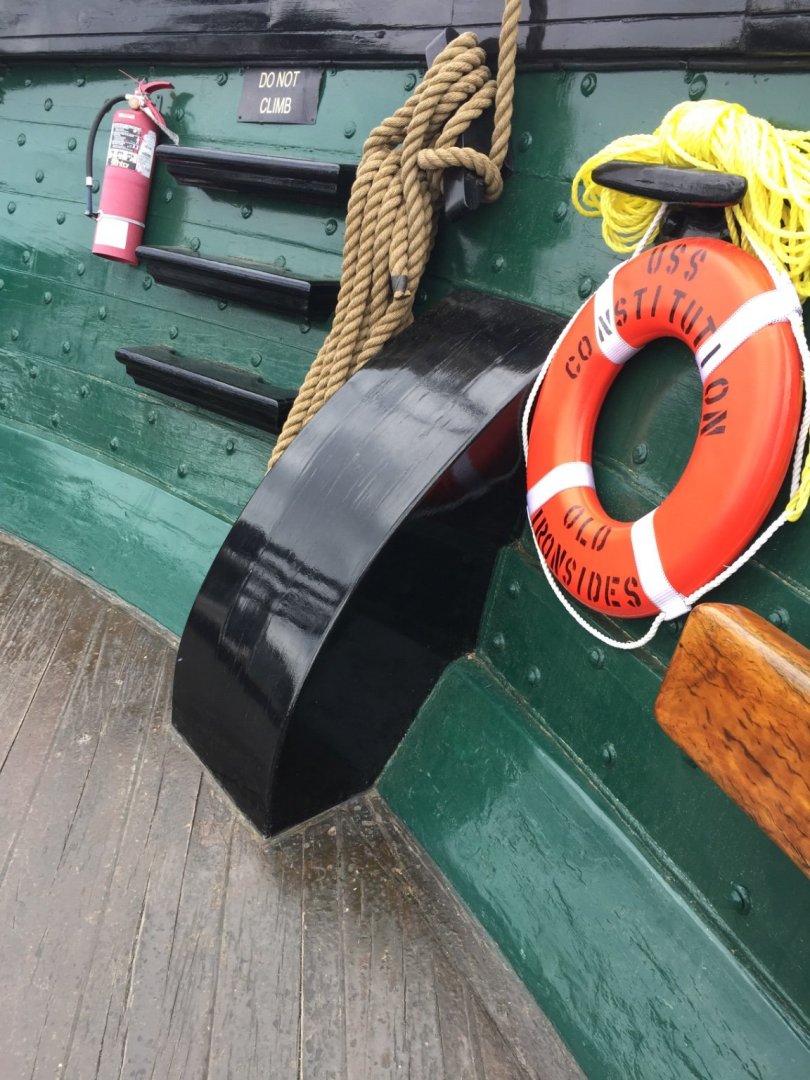
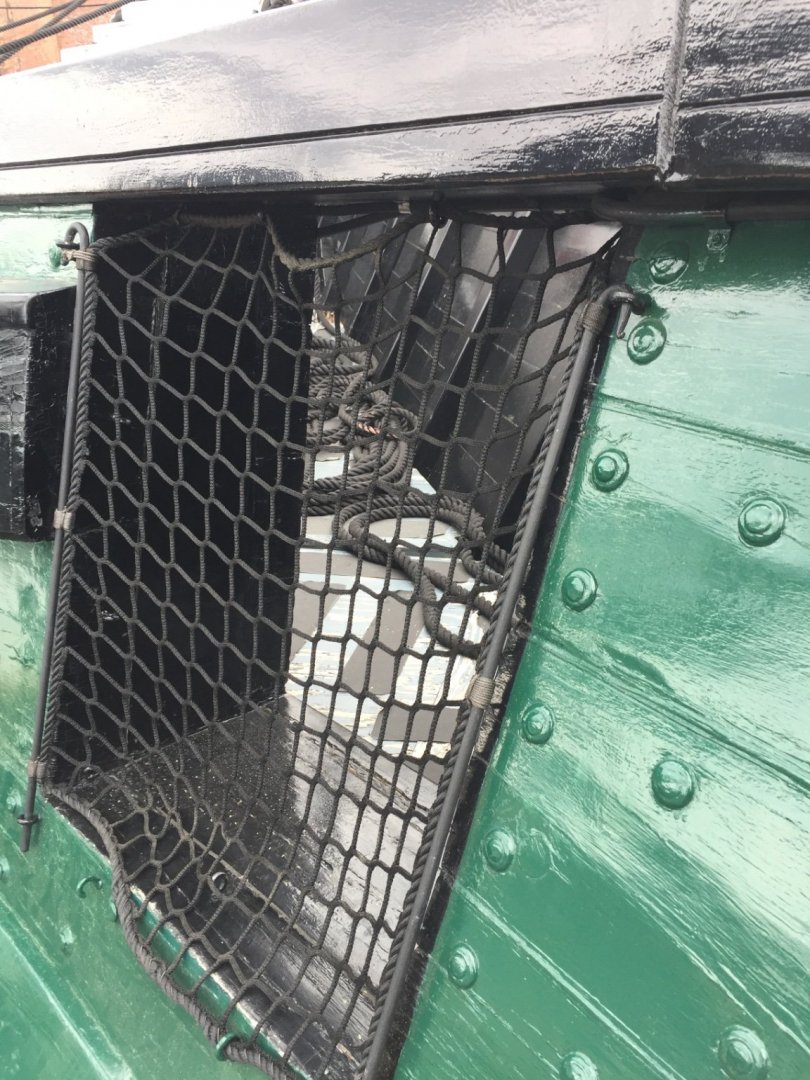
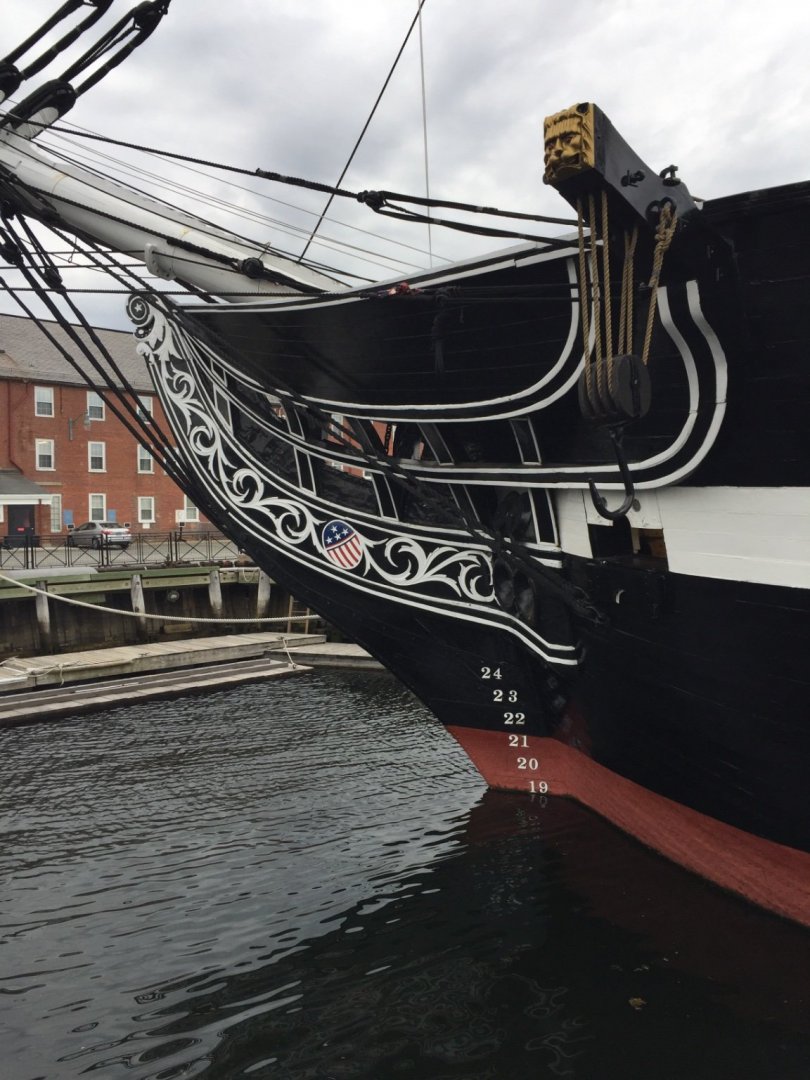
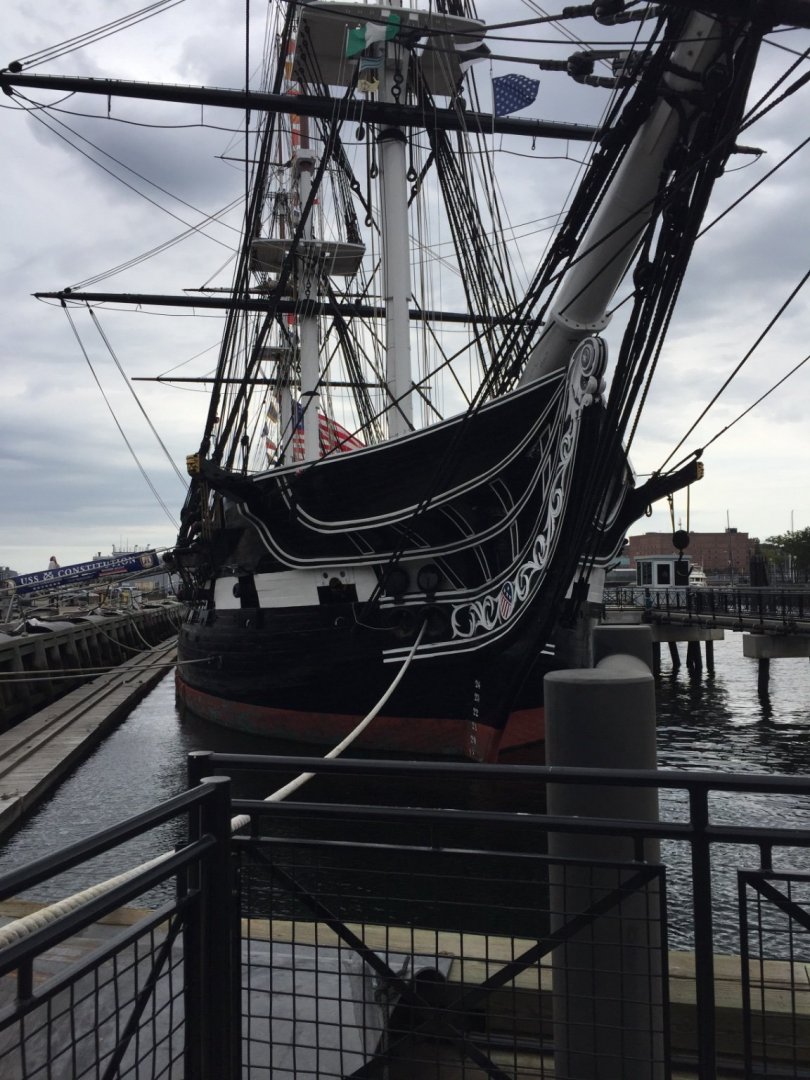
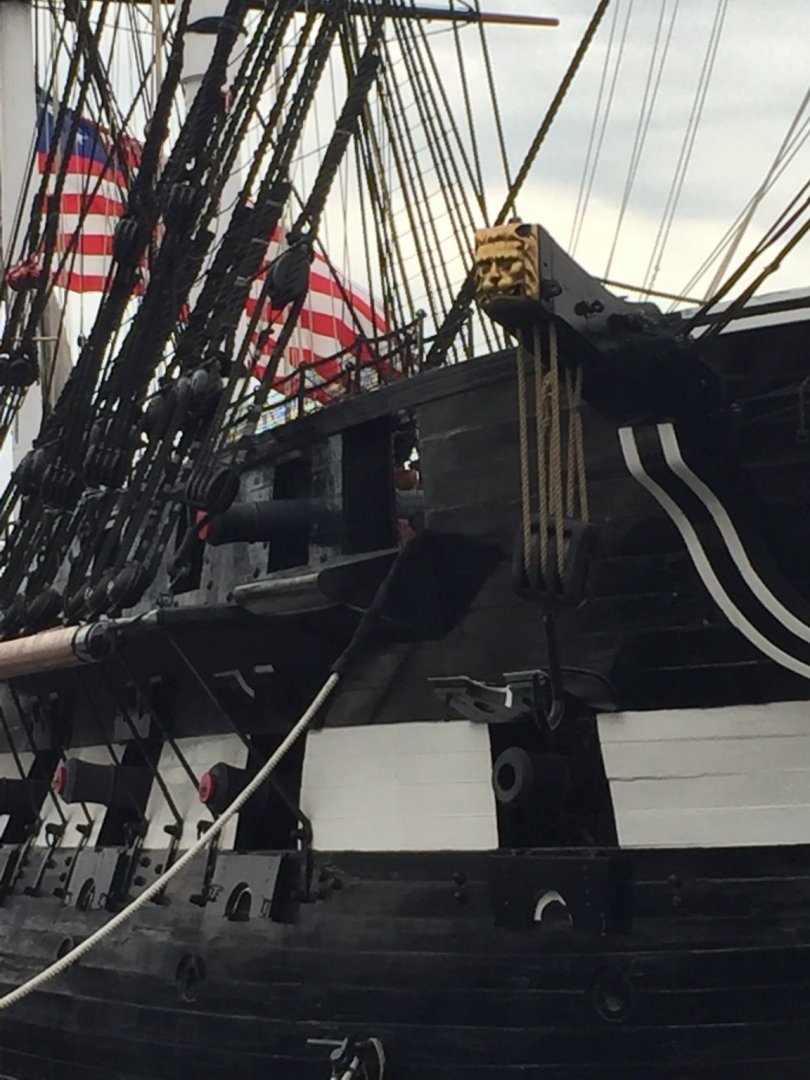
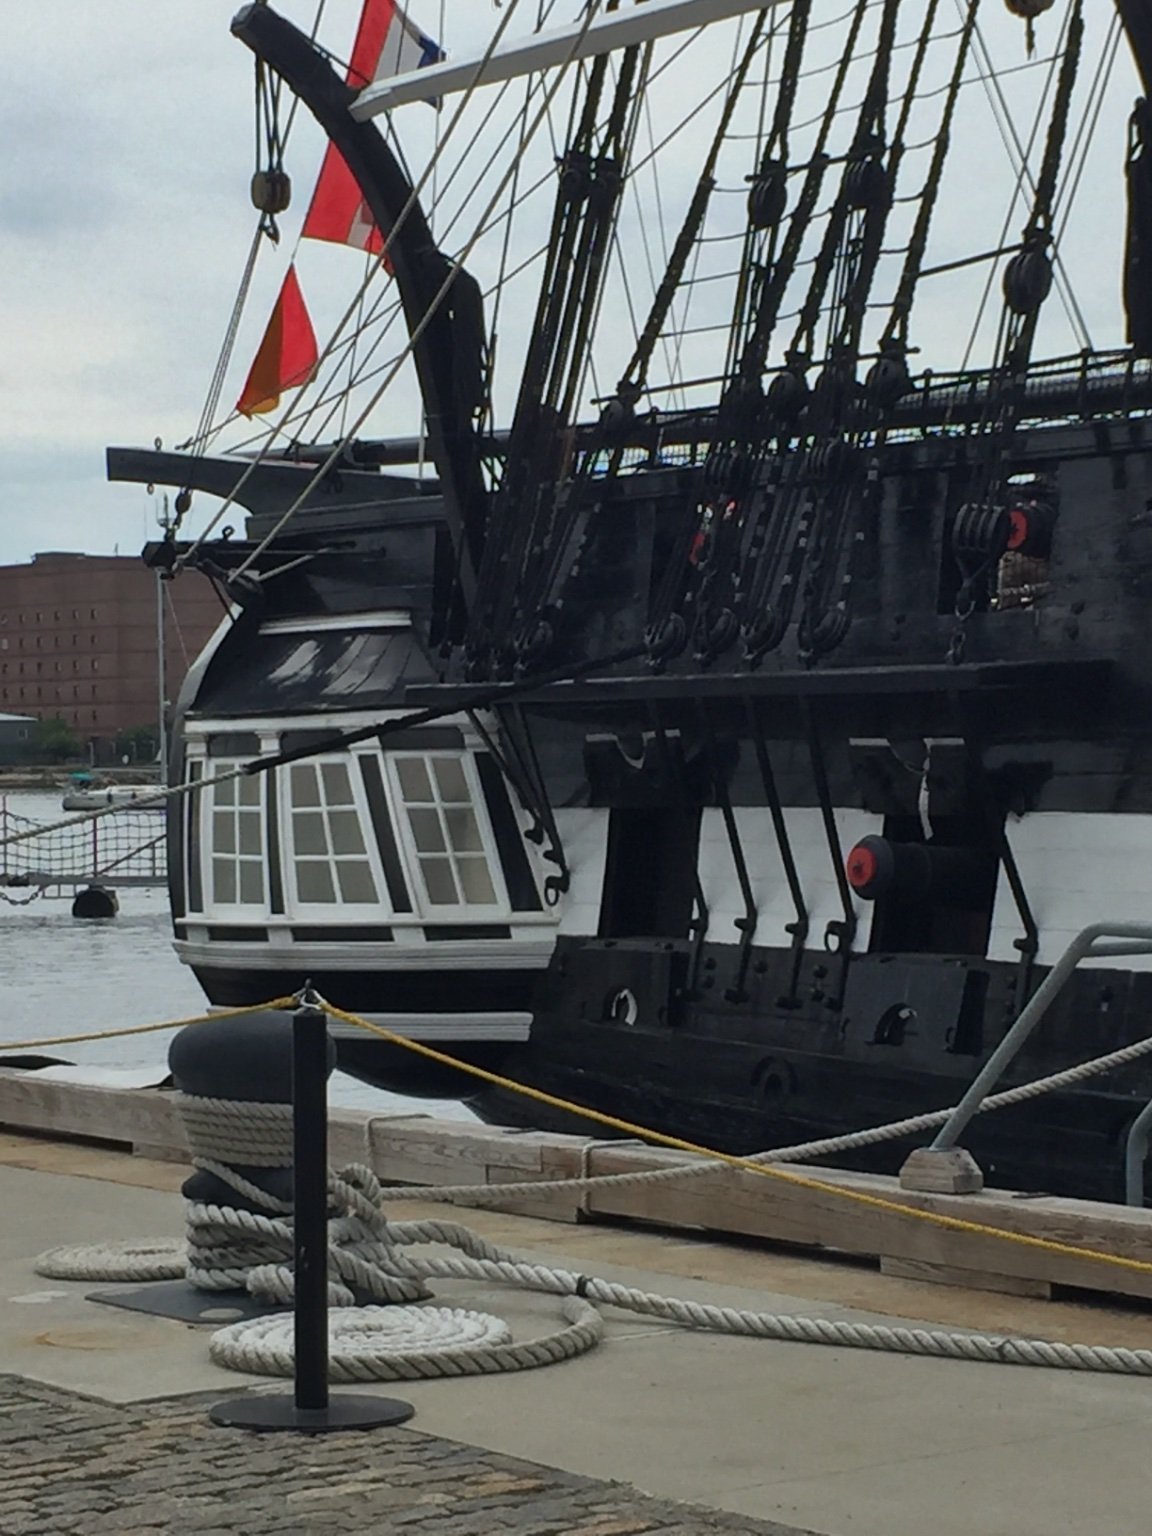
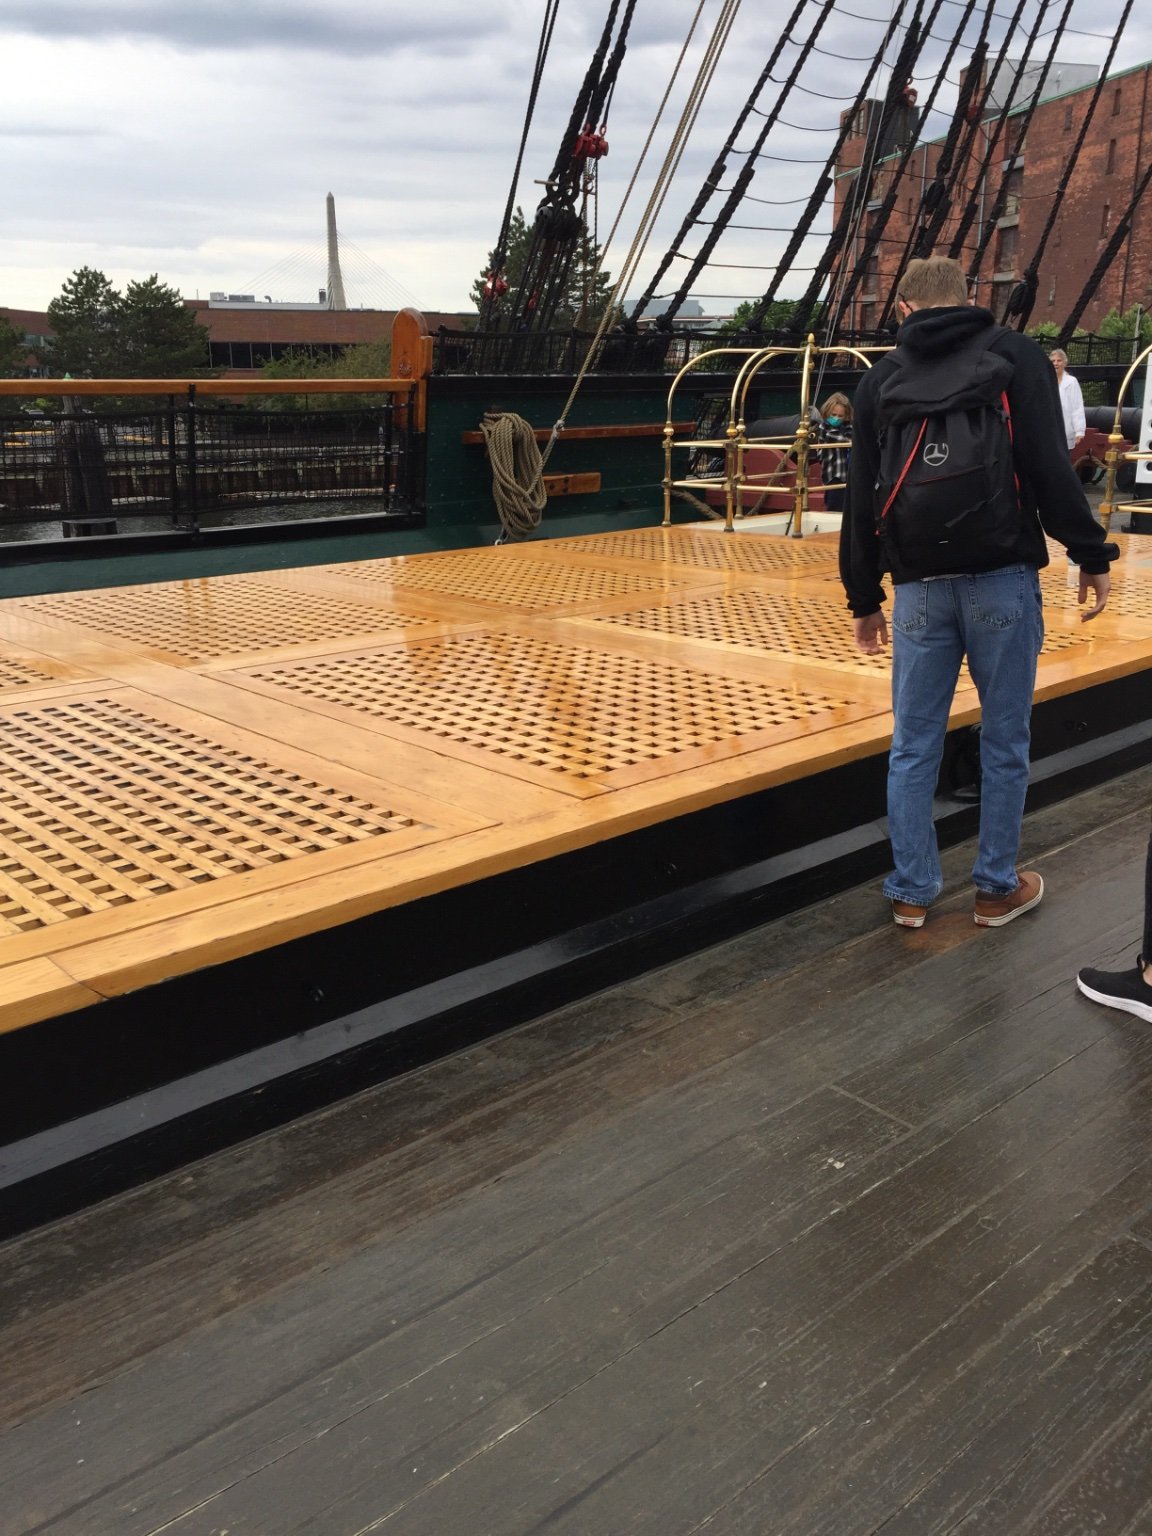
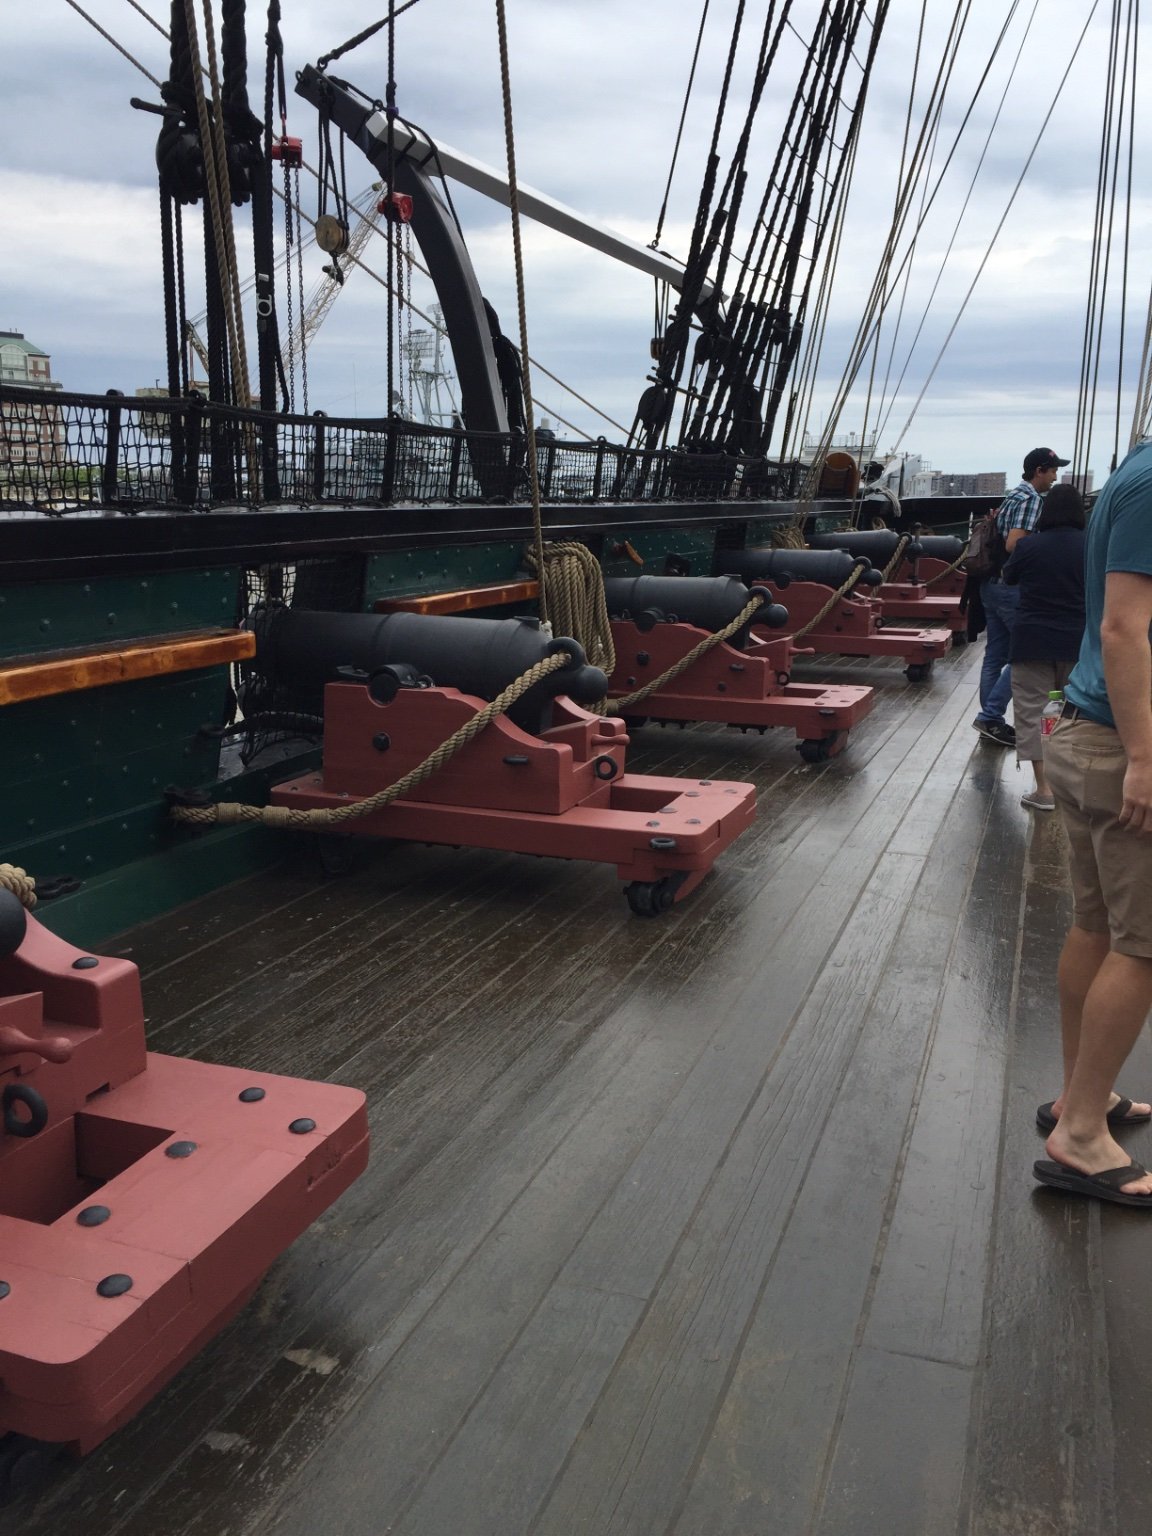
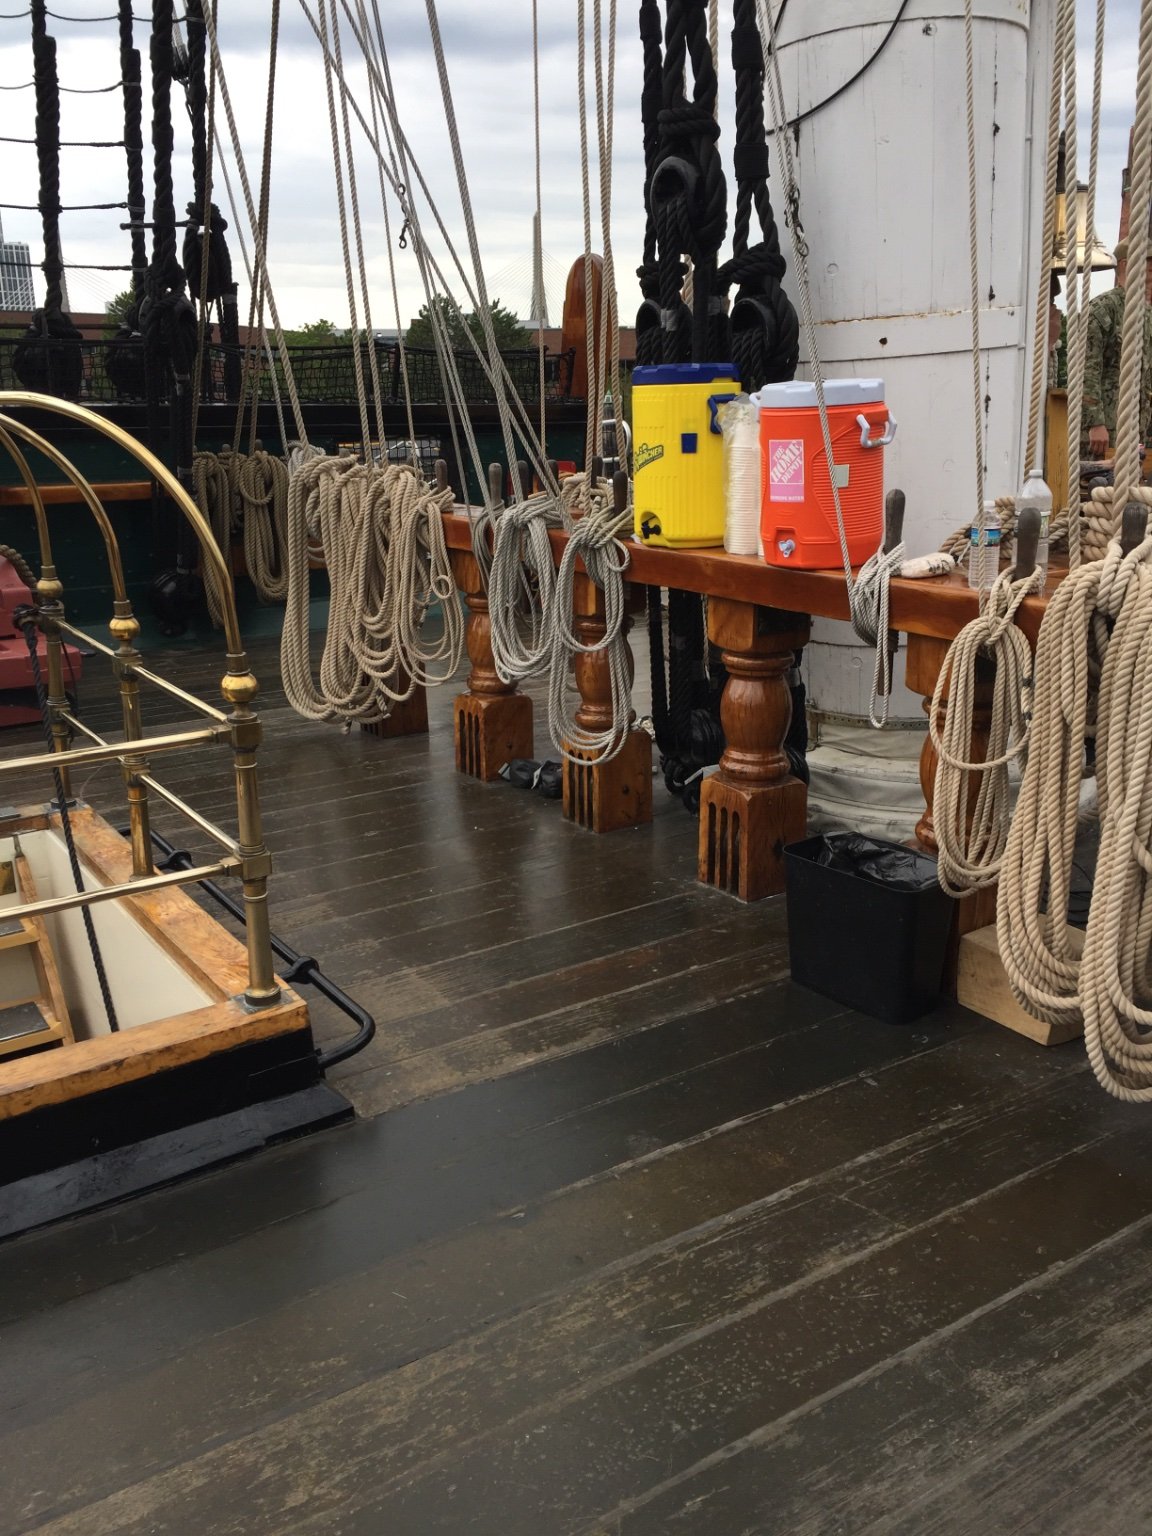
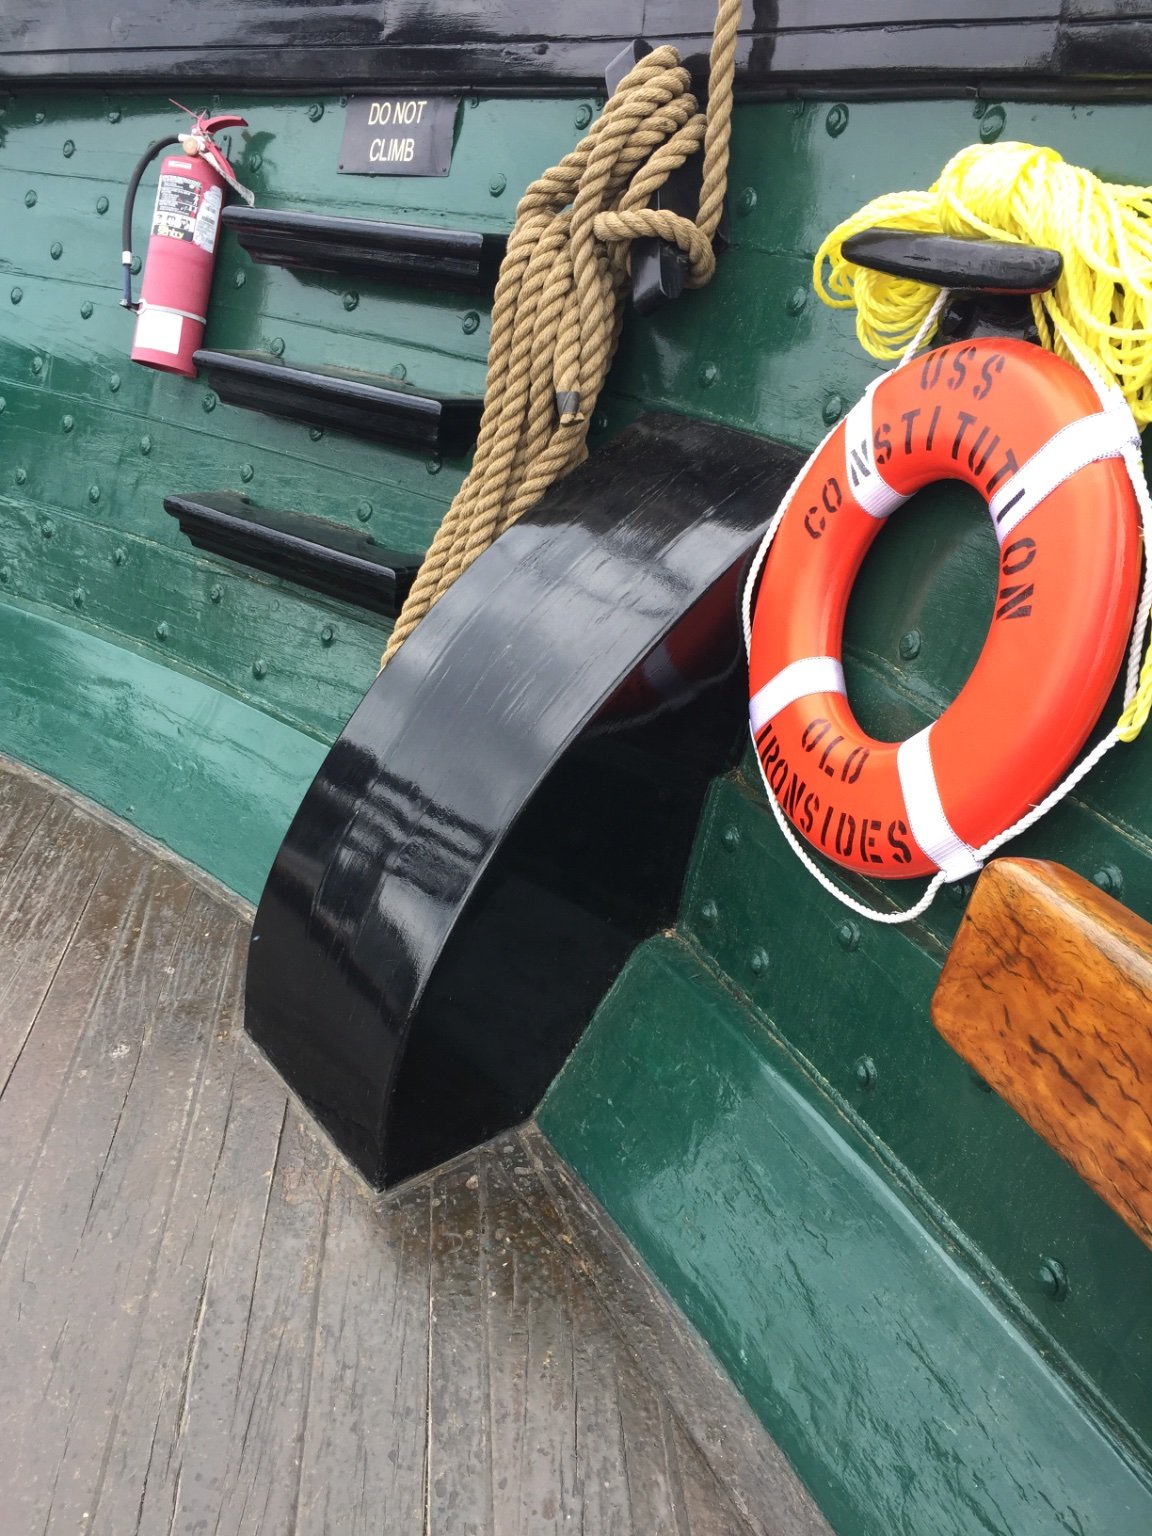
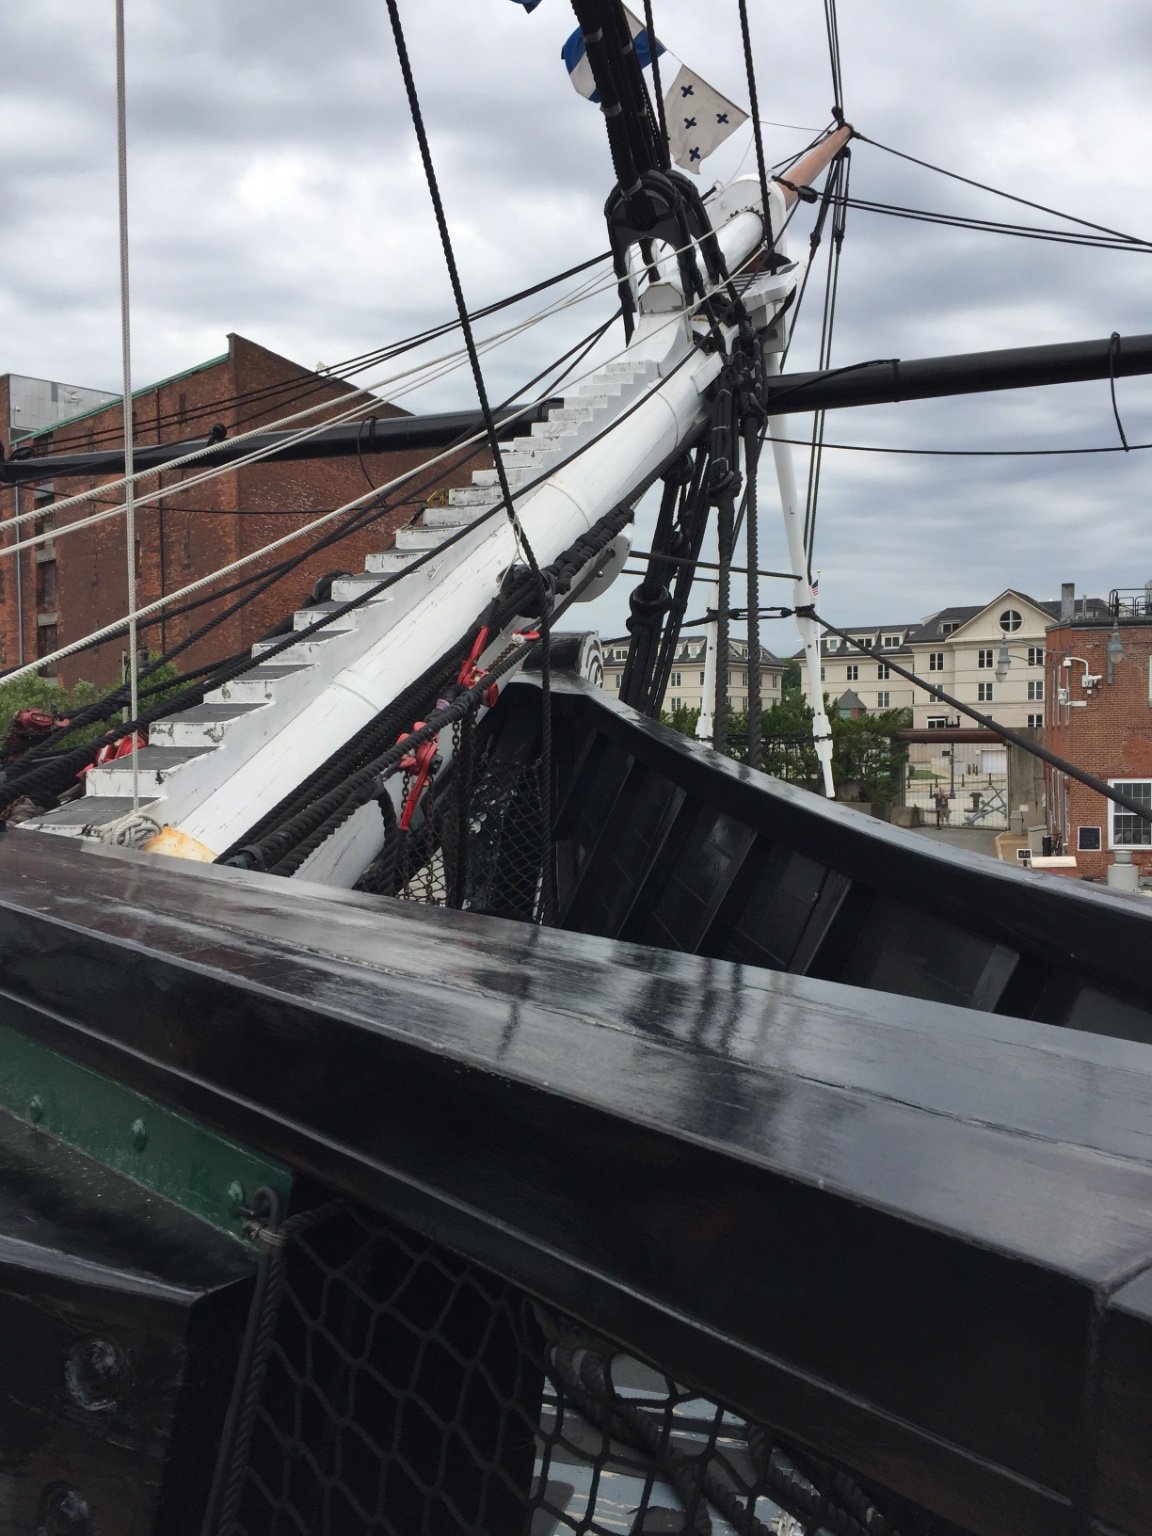
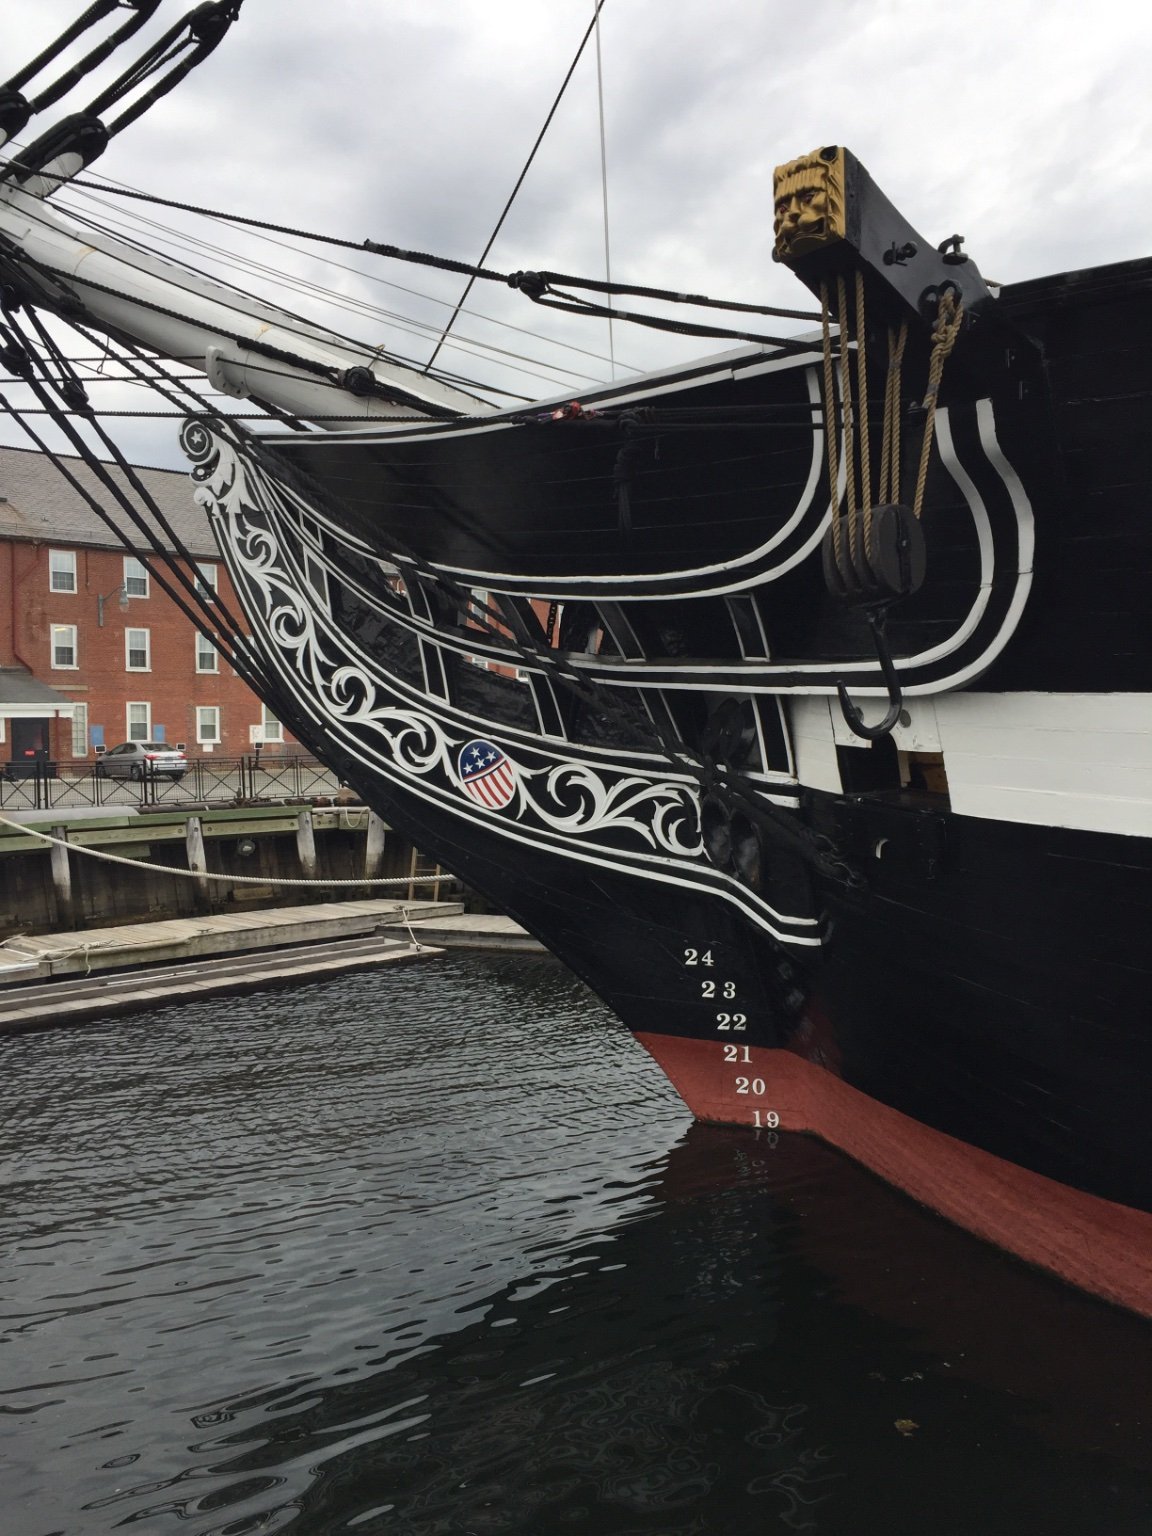
USS Constitution Pictures
Pictures taken a couple of weeks ago. She cruised Boston Harbor that day, aboard were First Responders and Healthcare Workers chosen by lottery.


- Der Alte Rentner, BenD, GrandpaPhil and 3 others
-
6
-
4 hours ago, JSGerson said:
Right now I'm thinking of holding off painting and coppering until after I install the the stem ornamentations and quarter galleries or maybe not, I haven't decided. I do want to paint the upper hull before I work on the gun deck interior. First I have to touch up the spar deck hull walls a bit better.
Yes, arrived at the same conclusion regarding the Practicum.Decided that before painting the hull, to install all the hull components: channels, stern decorations, steps, cleats, bulwark hardware for the cannon blocks. And last, the galleries. The idea is to avoid glueing parts on painted surfaces.
Happy Independence Day!
-
56 minutes ago, JSGerson said:
Beautifully done.
Thanks JS.
I’m slightly dyslexic and have had a hard time following the parts of the practicum with dimensions in the text, and comparing to the plans.You may be ahead, skipped some parts of the practicum and jumped ahead in the practicum to finish the hull planking first. Plan to checkout how you did the stern galleries for tips. And I may wait to see how you do the head. 😎
First thought was to finish the entire hull less the deck (to avoid masking the deck), then paint the hull and bulwarks, then install the deck.
Today I’m thinking install the deck planks, finish the entire hull, then mask and paint.
The missing bulwark is bugging me, of course it will turn up once the new piece is installed….
Cheers -
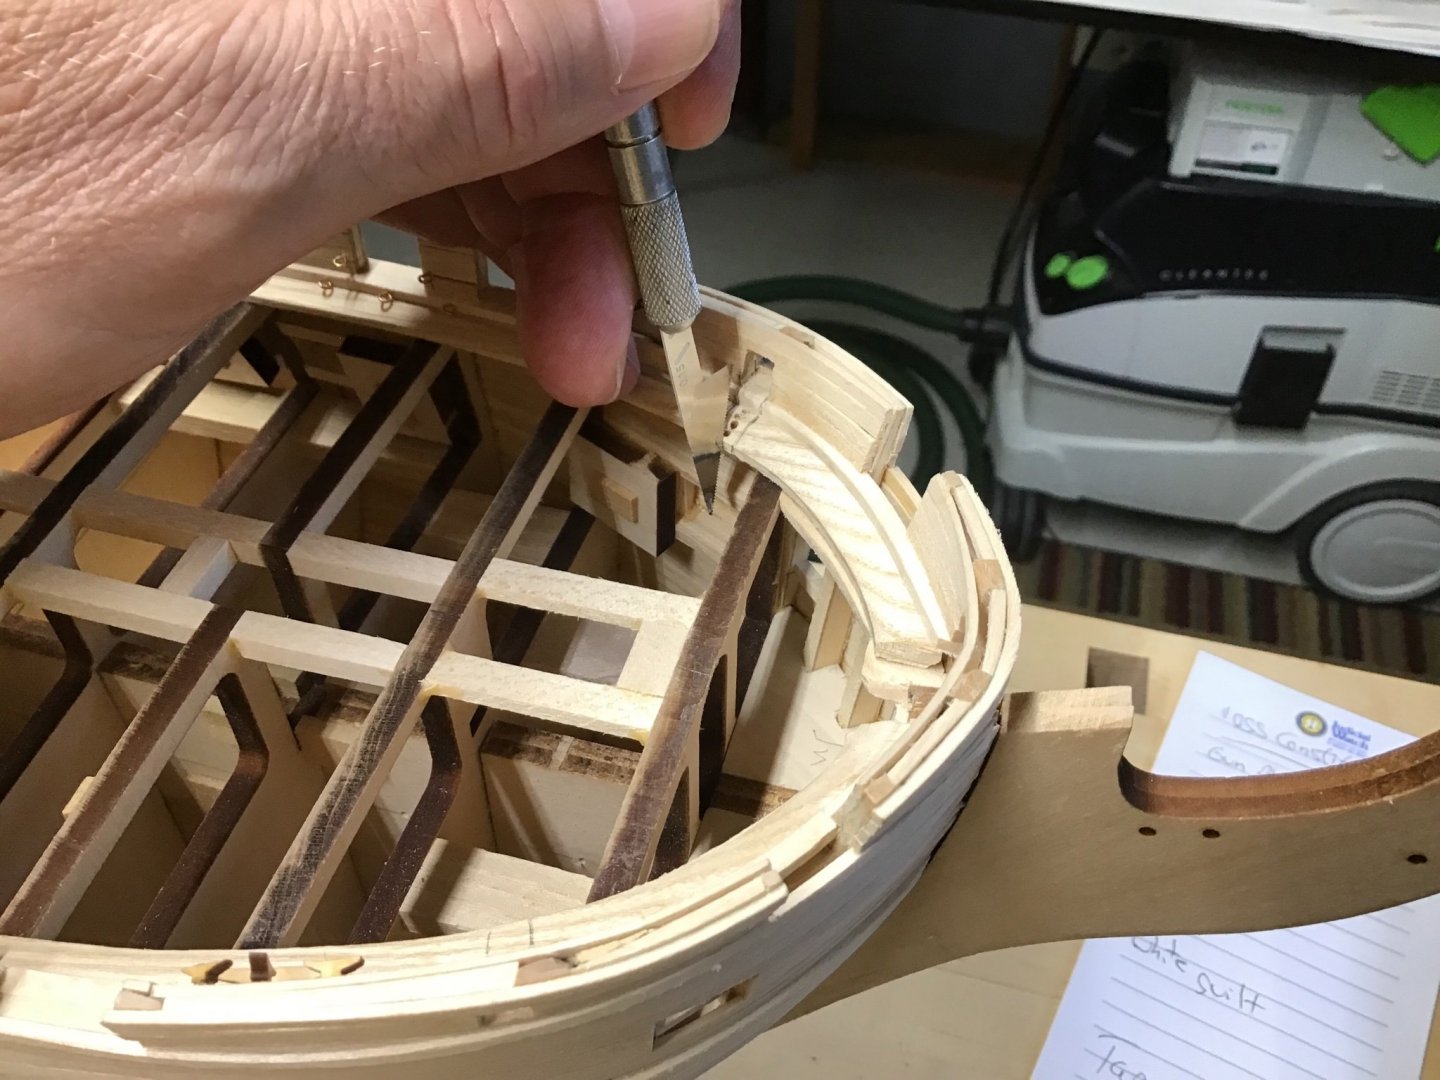
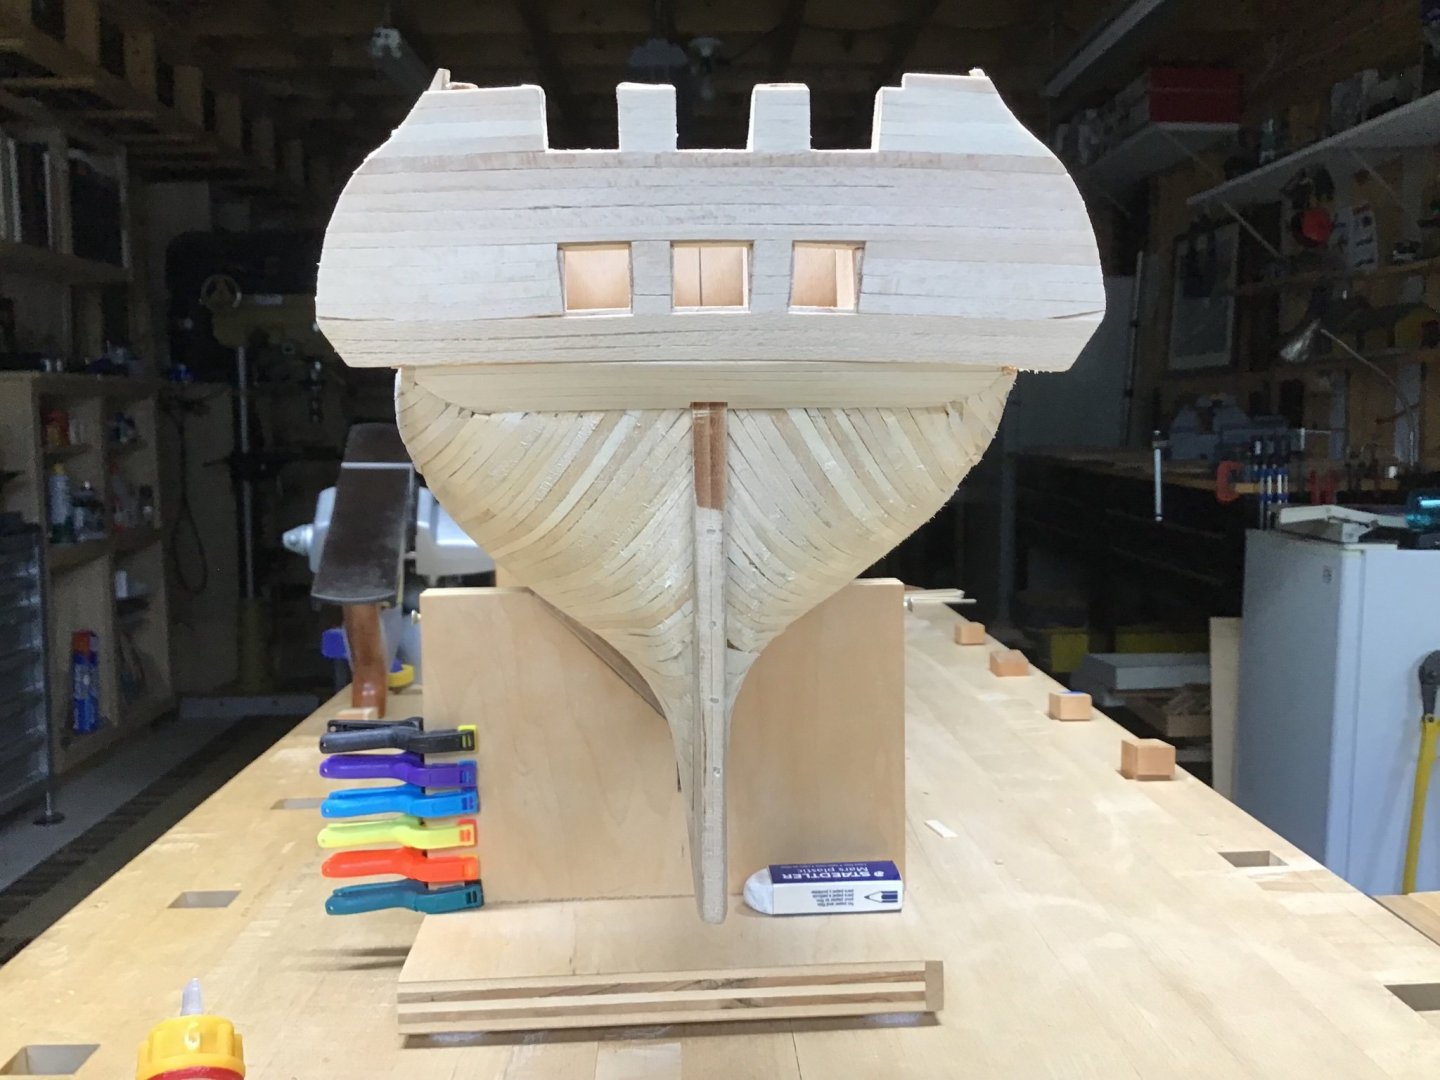
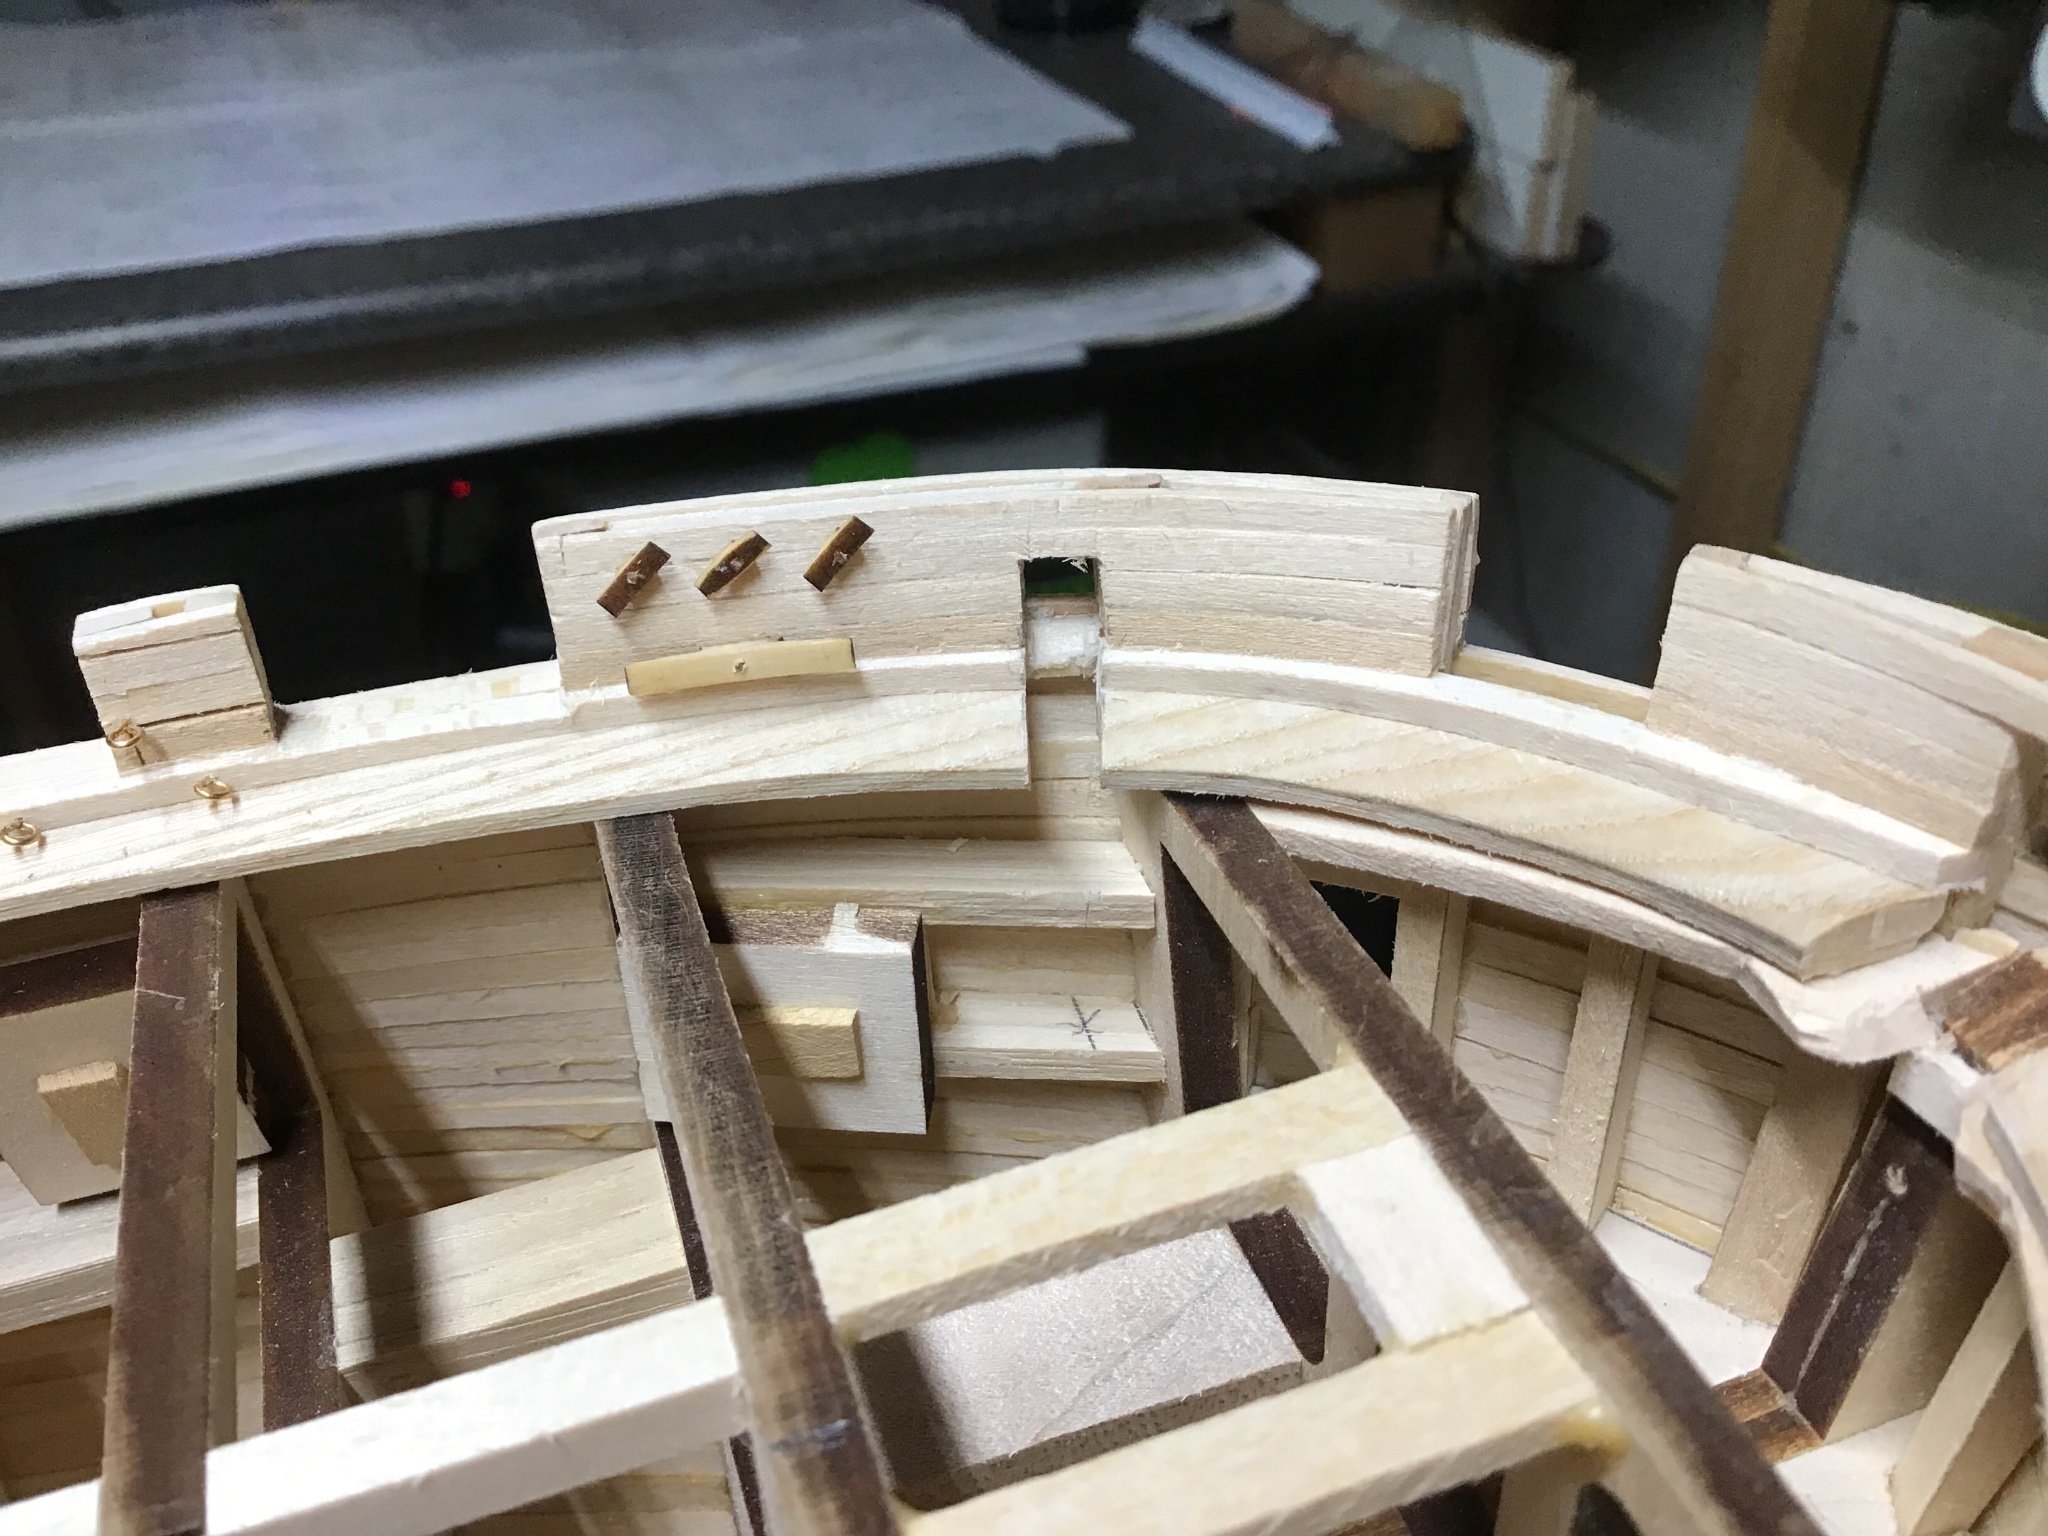
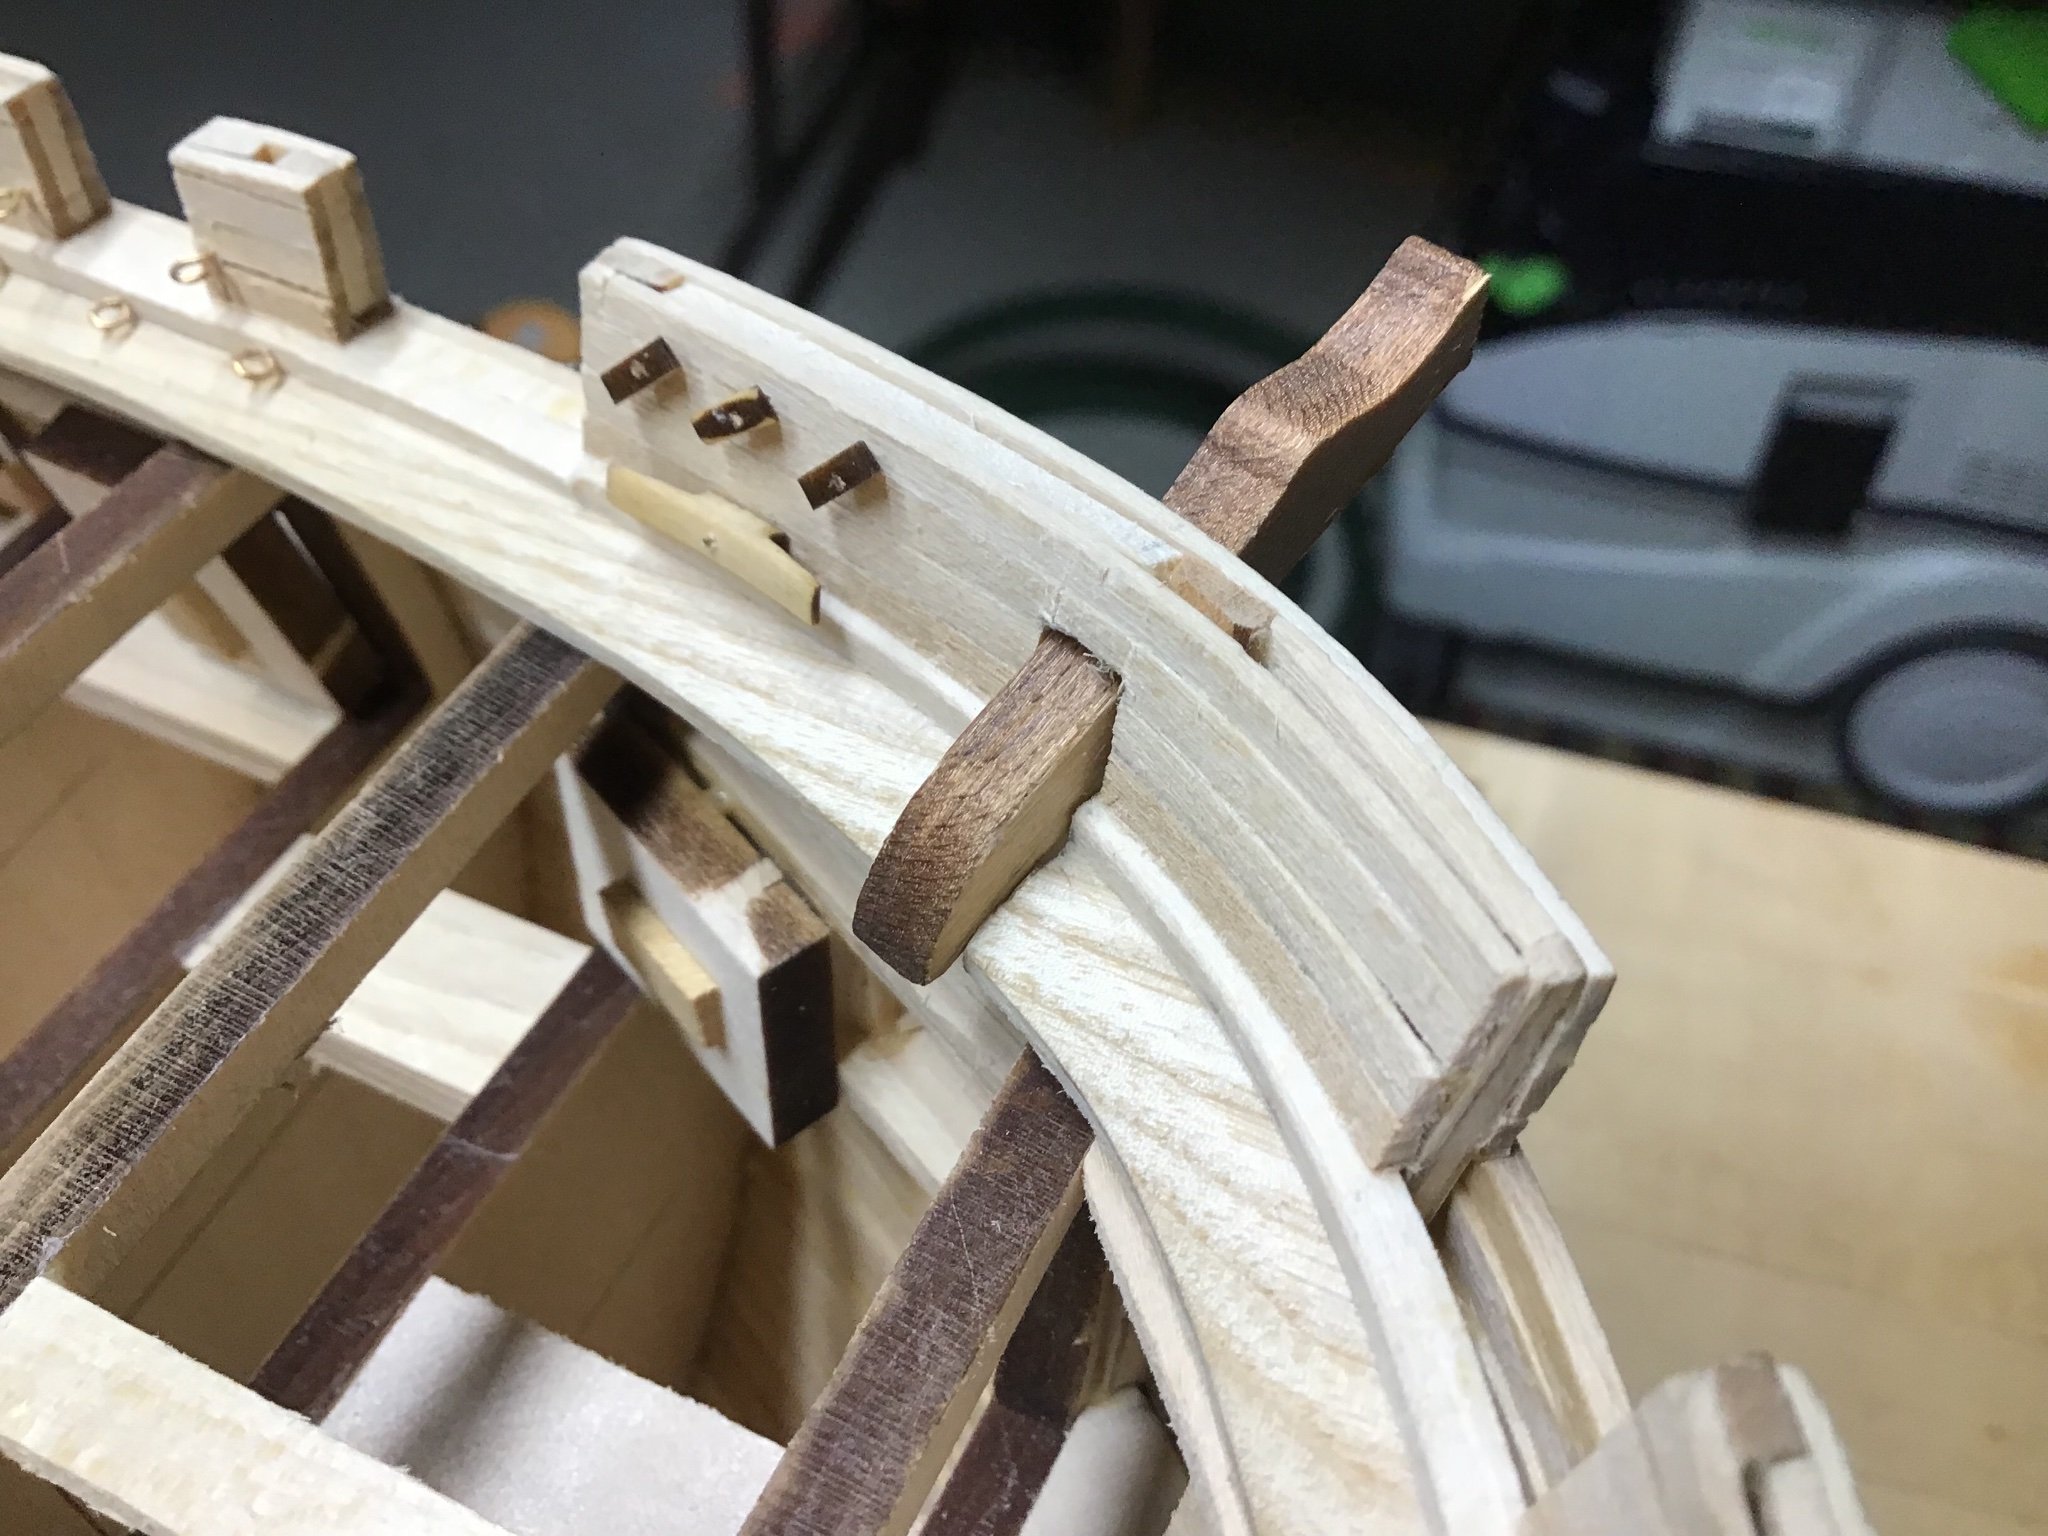
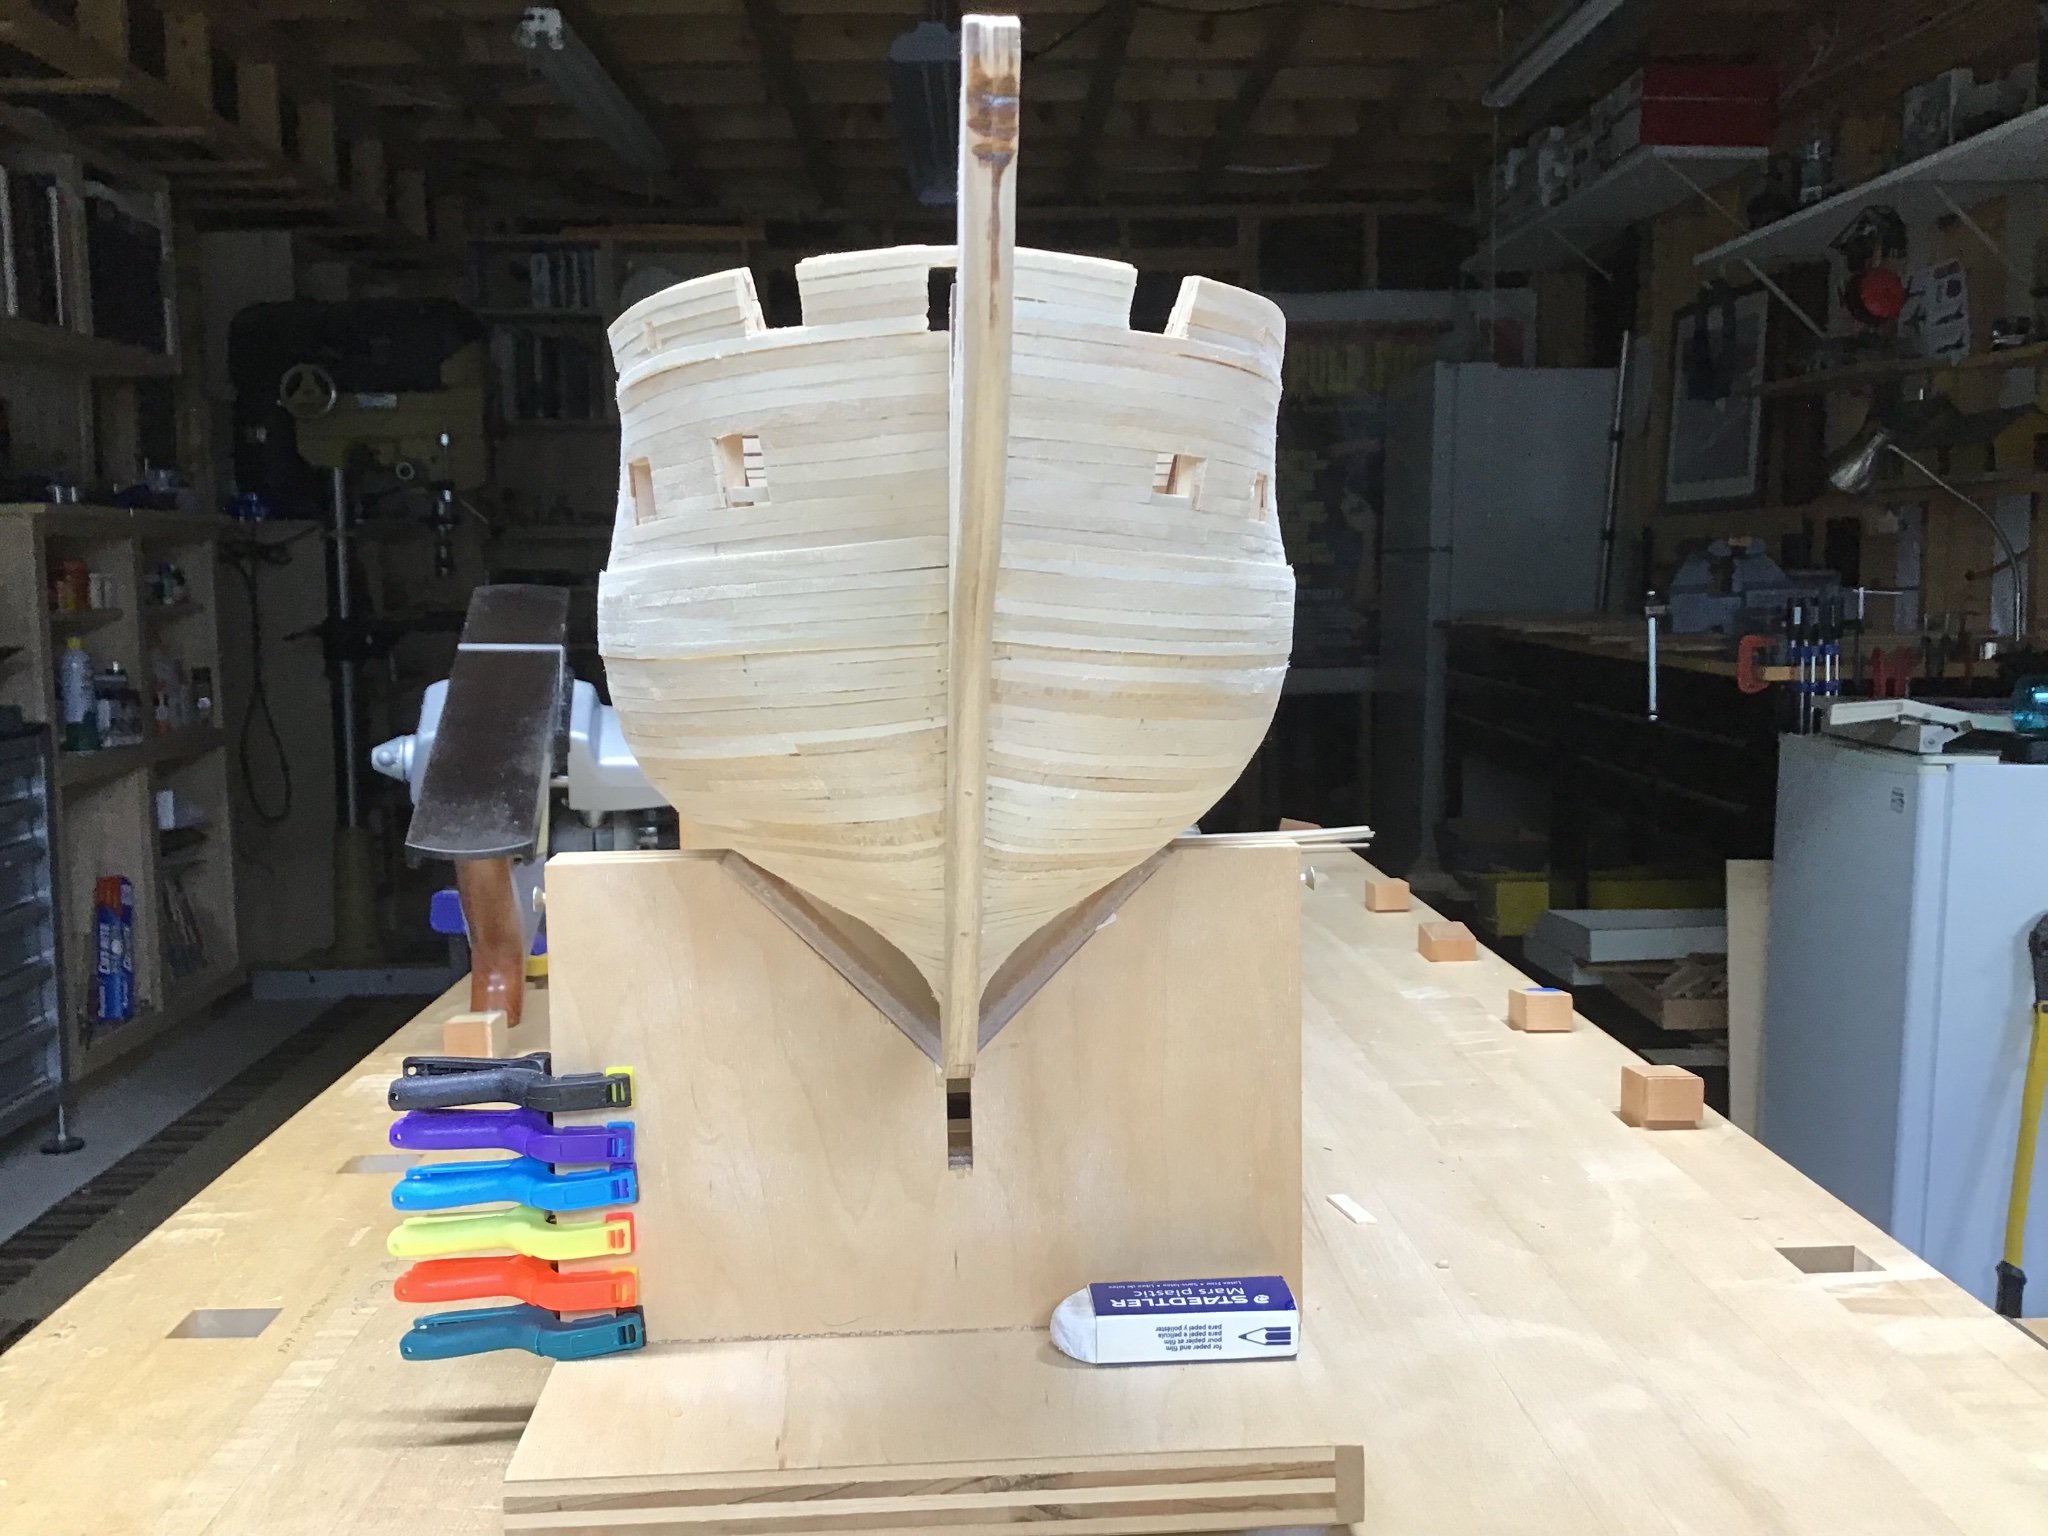
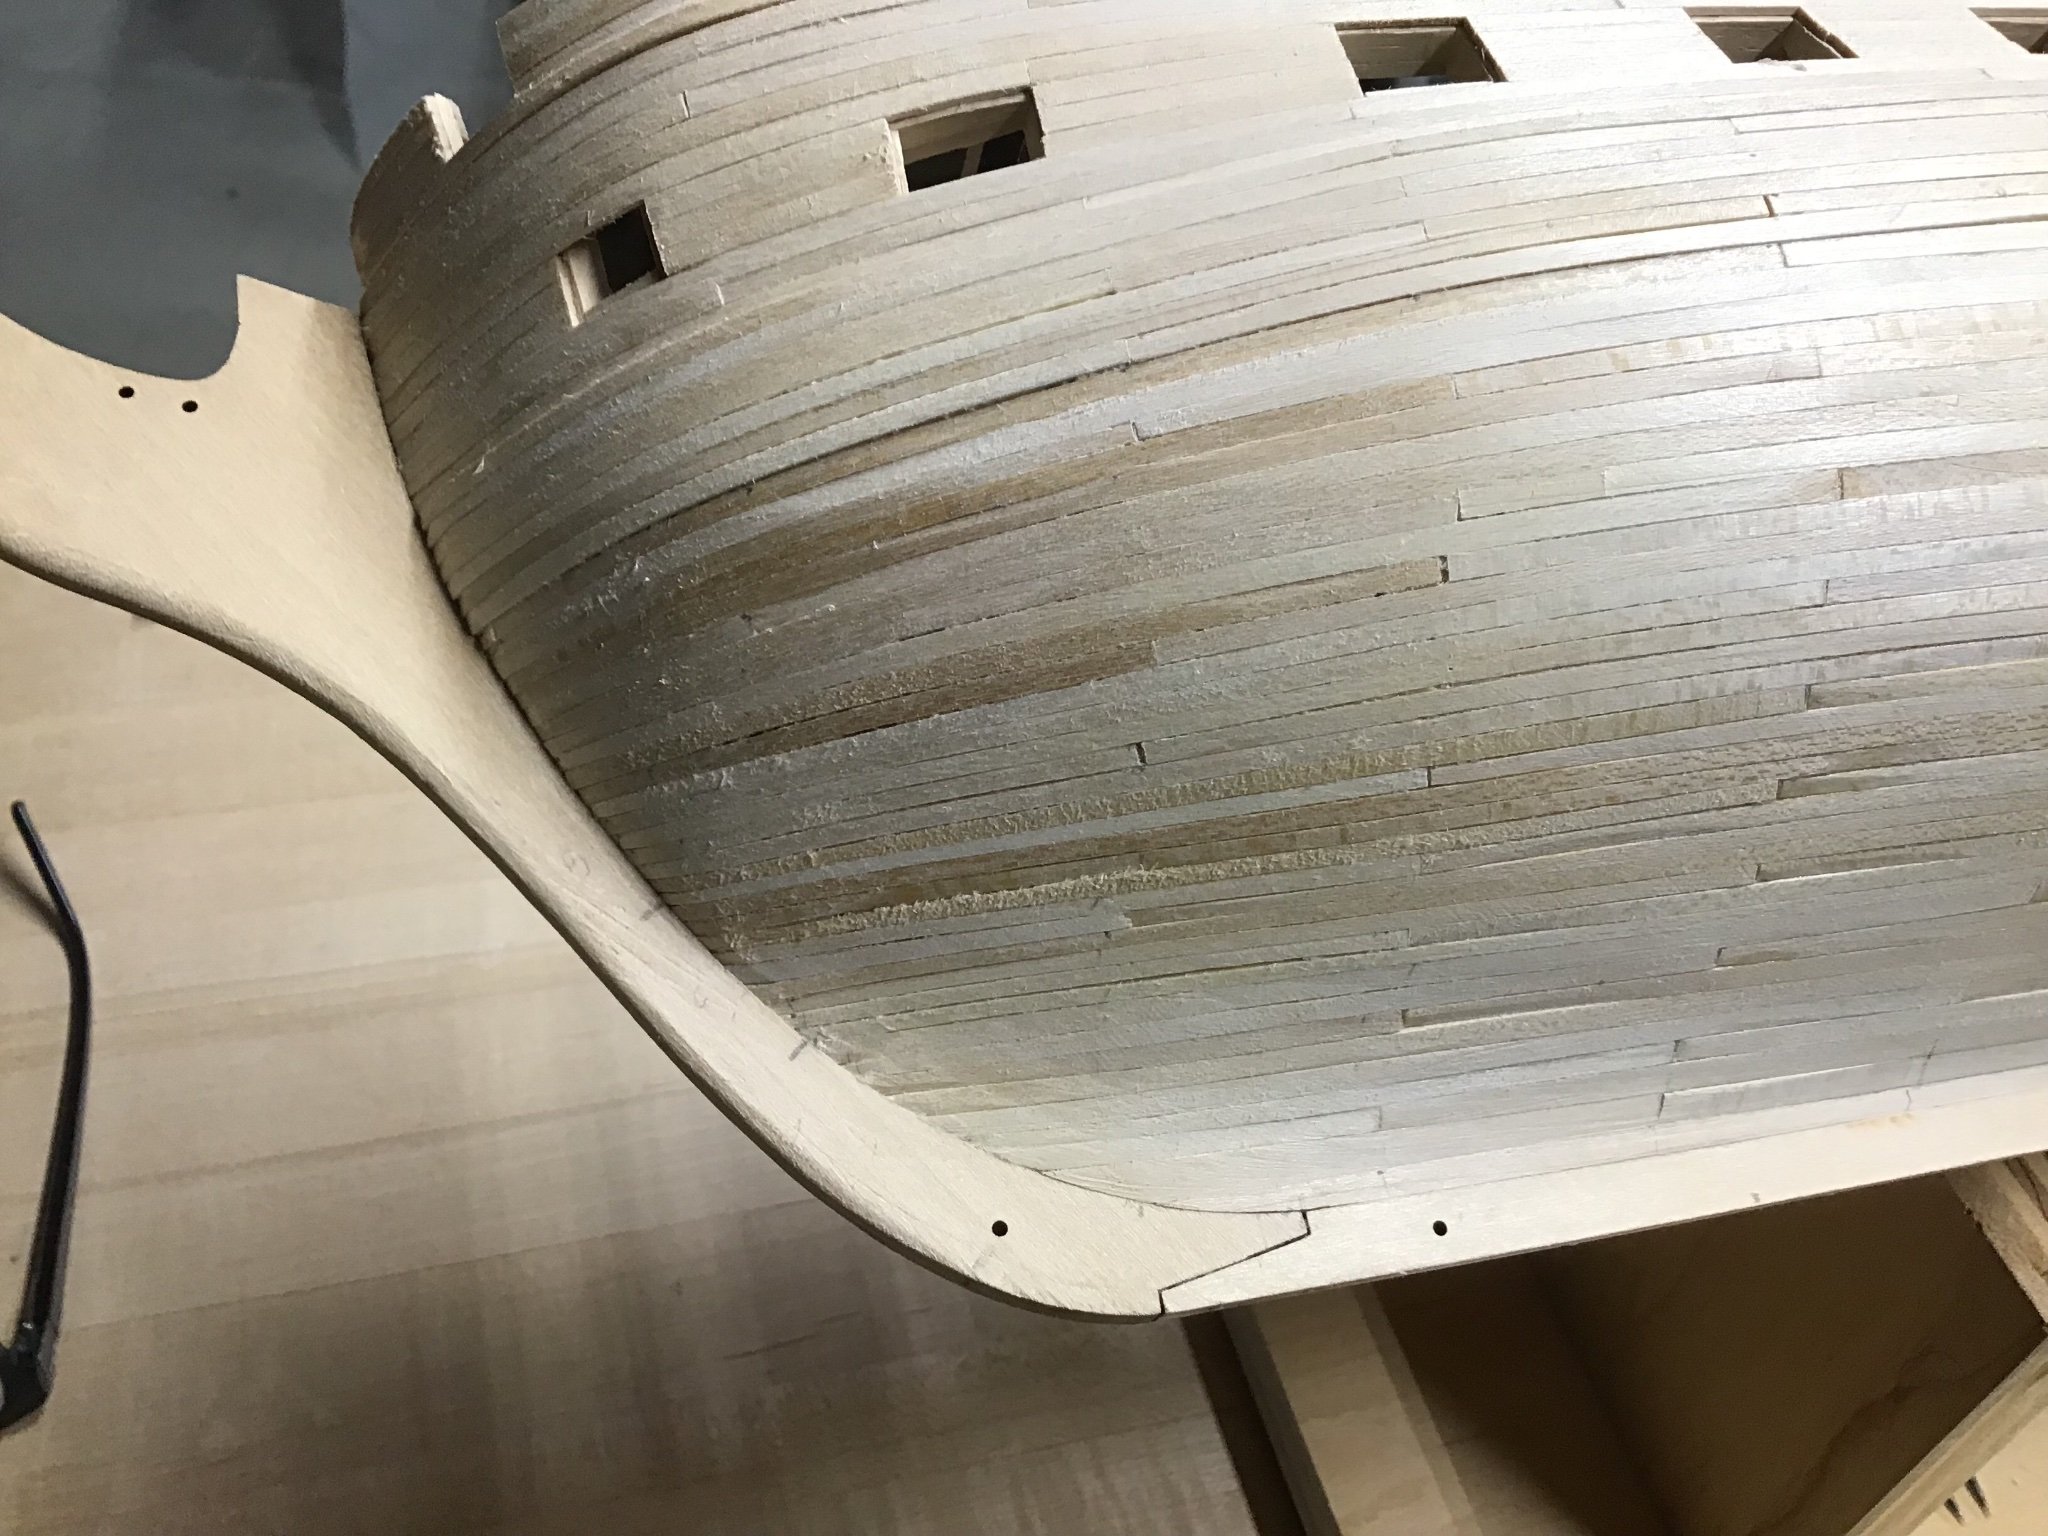
A Couple of Problems
Found a few problems while regrouping and thinking of the next steps.
Notice in the picture below a section of the bulkhead is missing. It snapped off sometime in the last few weeks during planking. Funny it’s a big piece, searched the shop floor and can’t find it. No big deal just a rebuild.
More significant is the fifth gunport from the stern between bulkheads M and N. It’s out of position on both sides. Tight up against bulkhead N. The problem is it will interfere with a chain plate.
Major surgery to relocate it into the correct position. I’ll leave it and deal with it later. See if the cannon interferes, and if it does, close the port lids.
Such is life….

-
On 6/21/2021 at 1:16 AM, Avi said:
Wow what a build! I love the details. I’m doing a bluejacket Connie right now, so looking at how others are building different models. I love your detailed techniques.
she’s coming along beautifully!
Hi Avi, thank you. Trying to keep it simple. Cheers! -
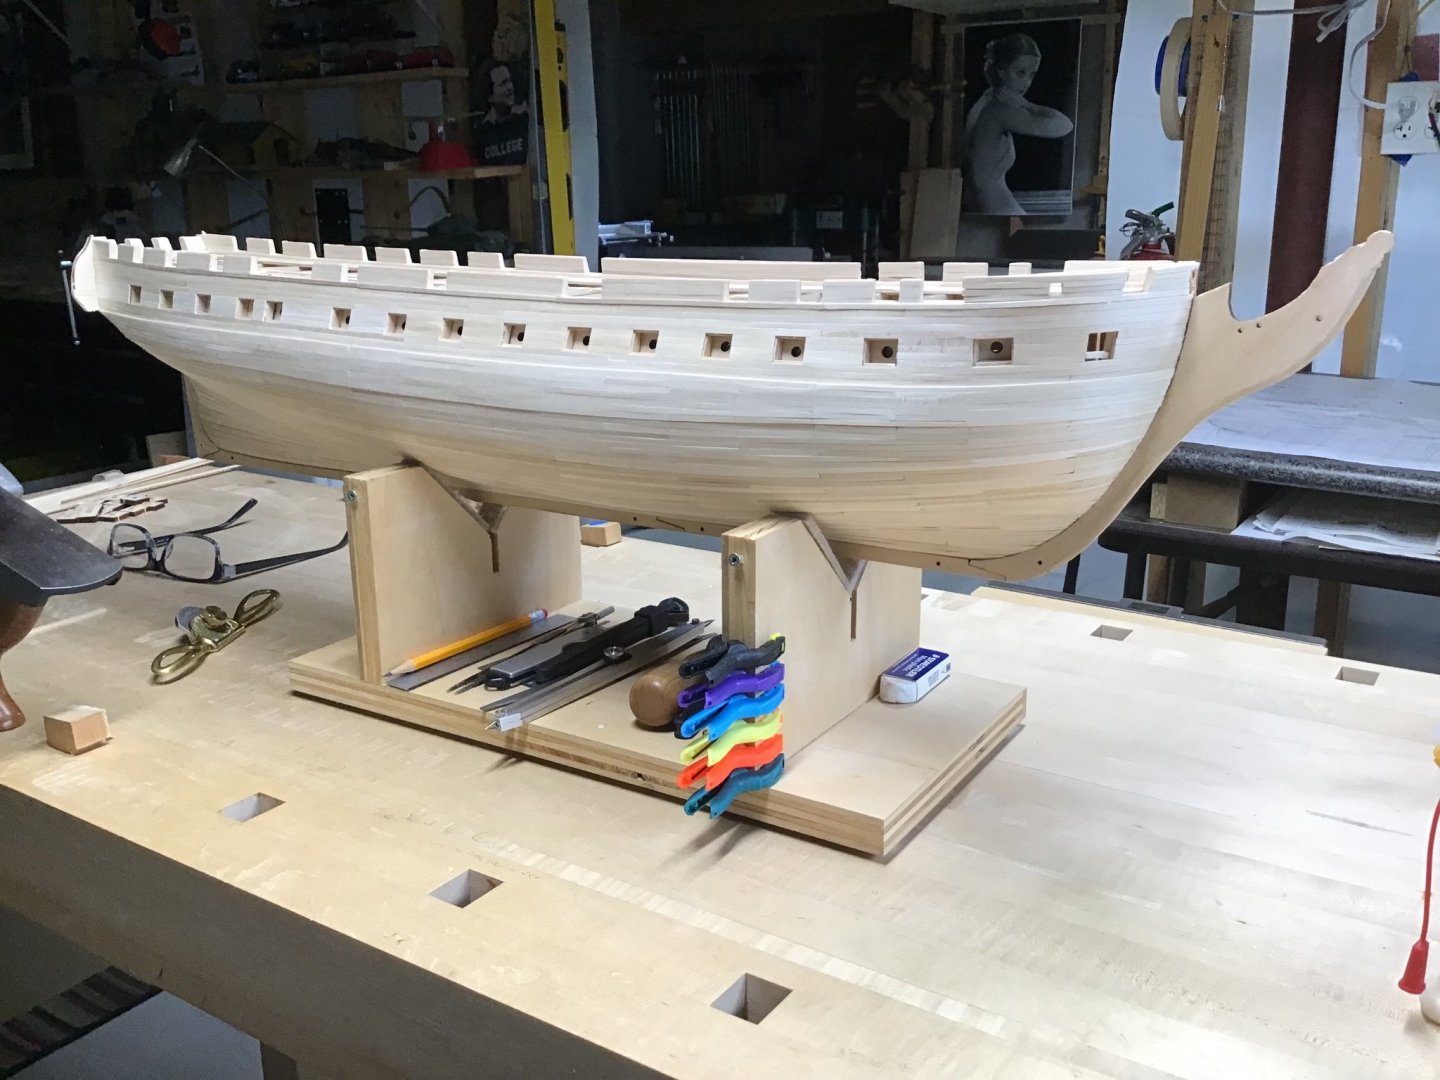
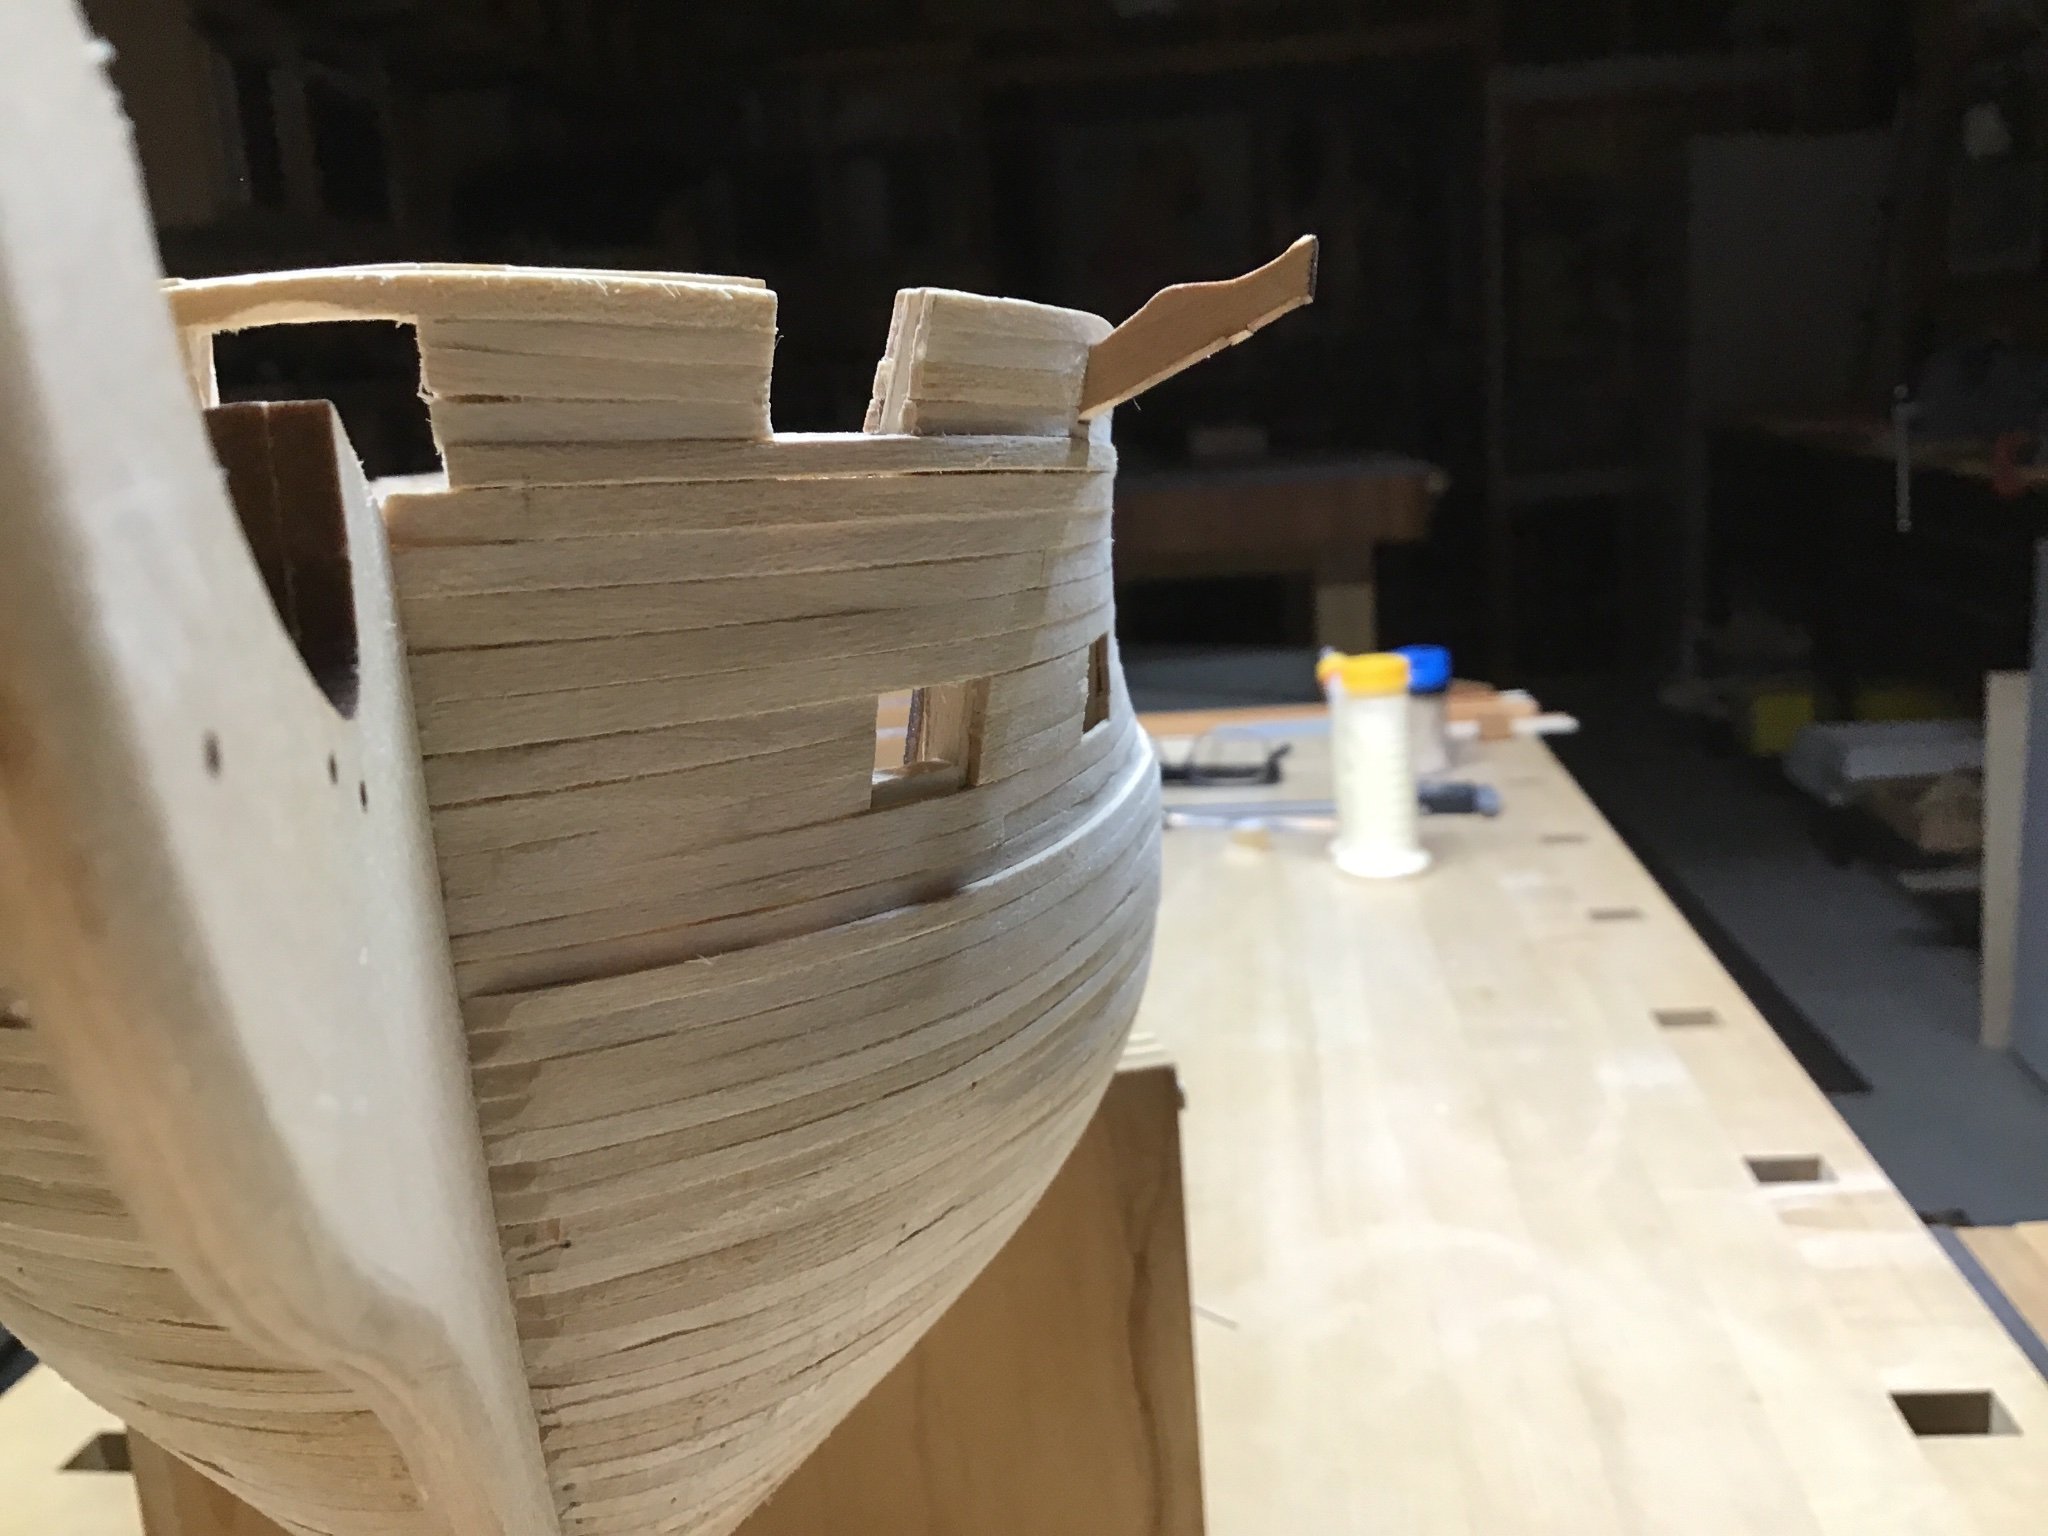
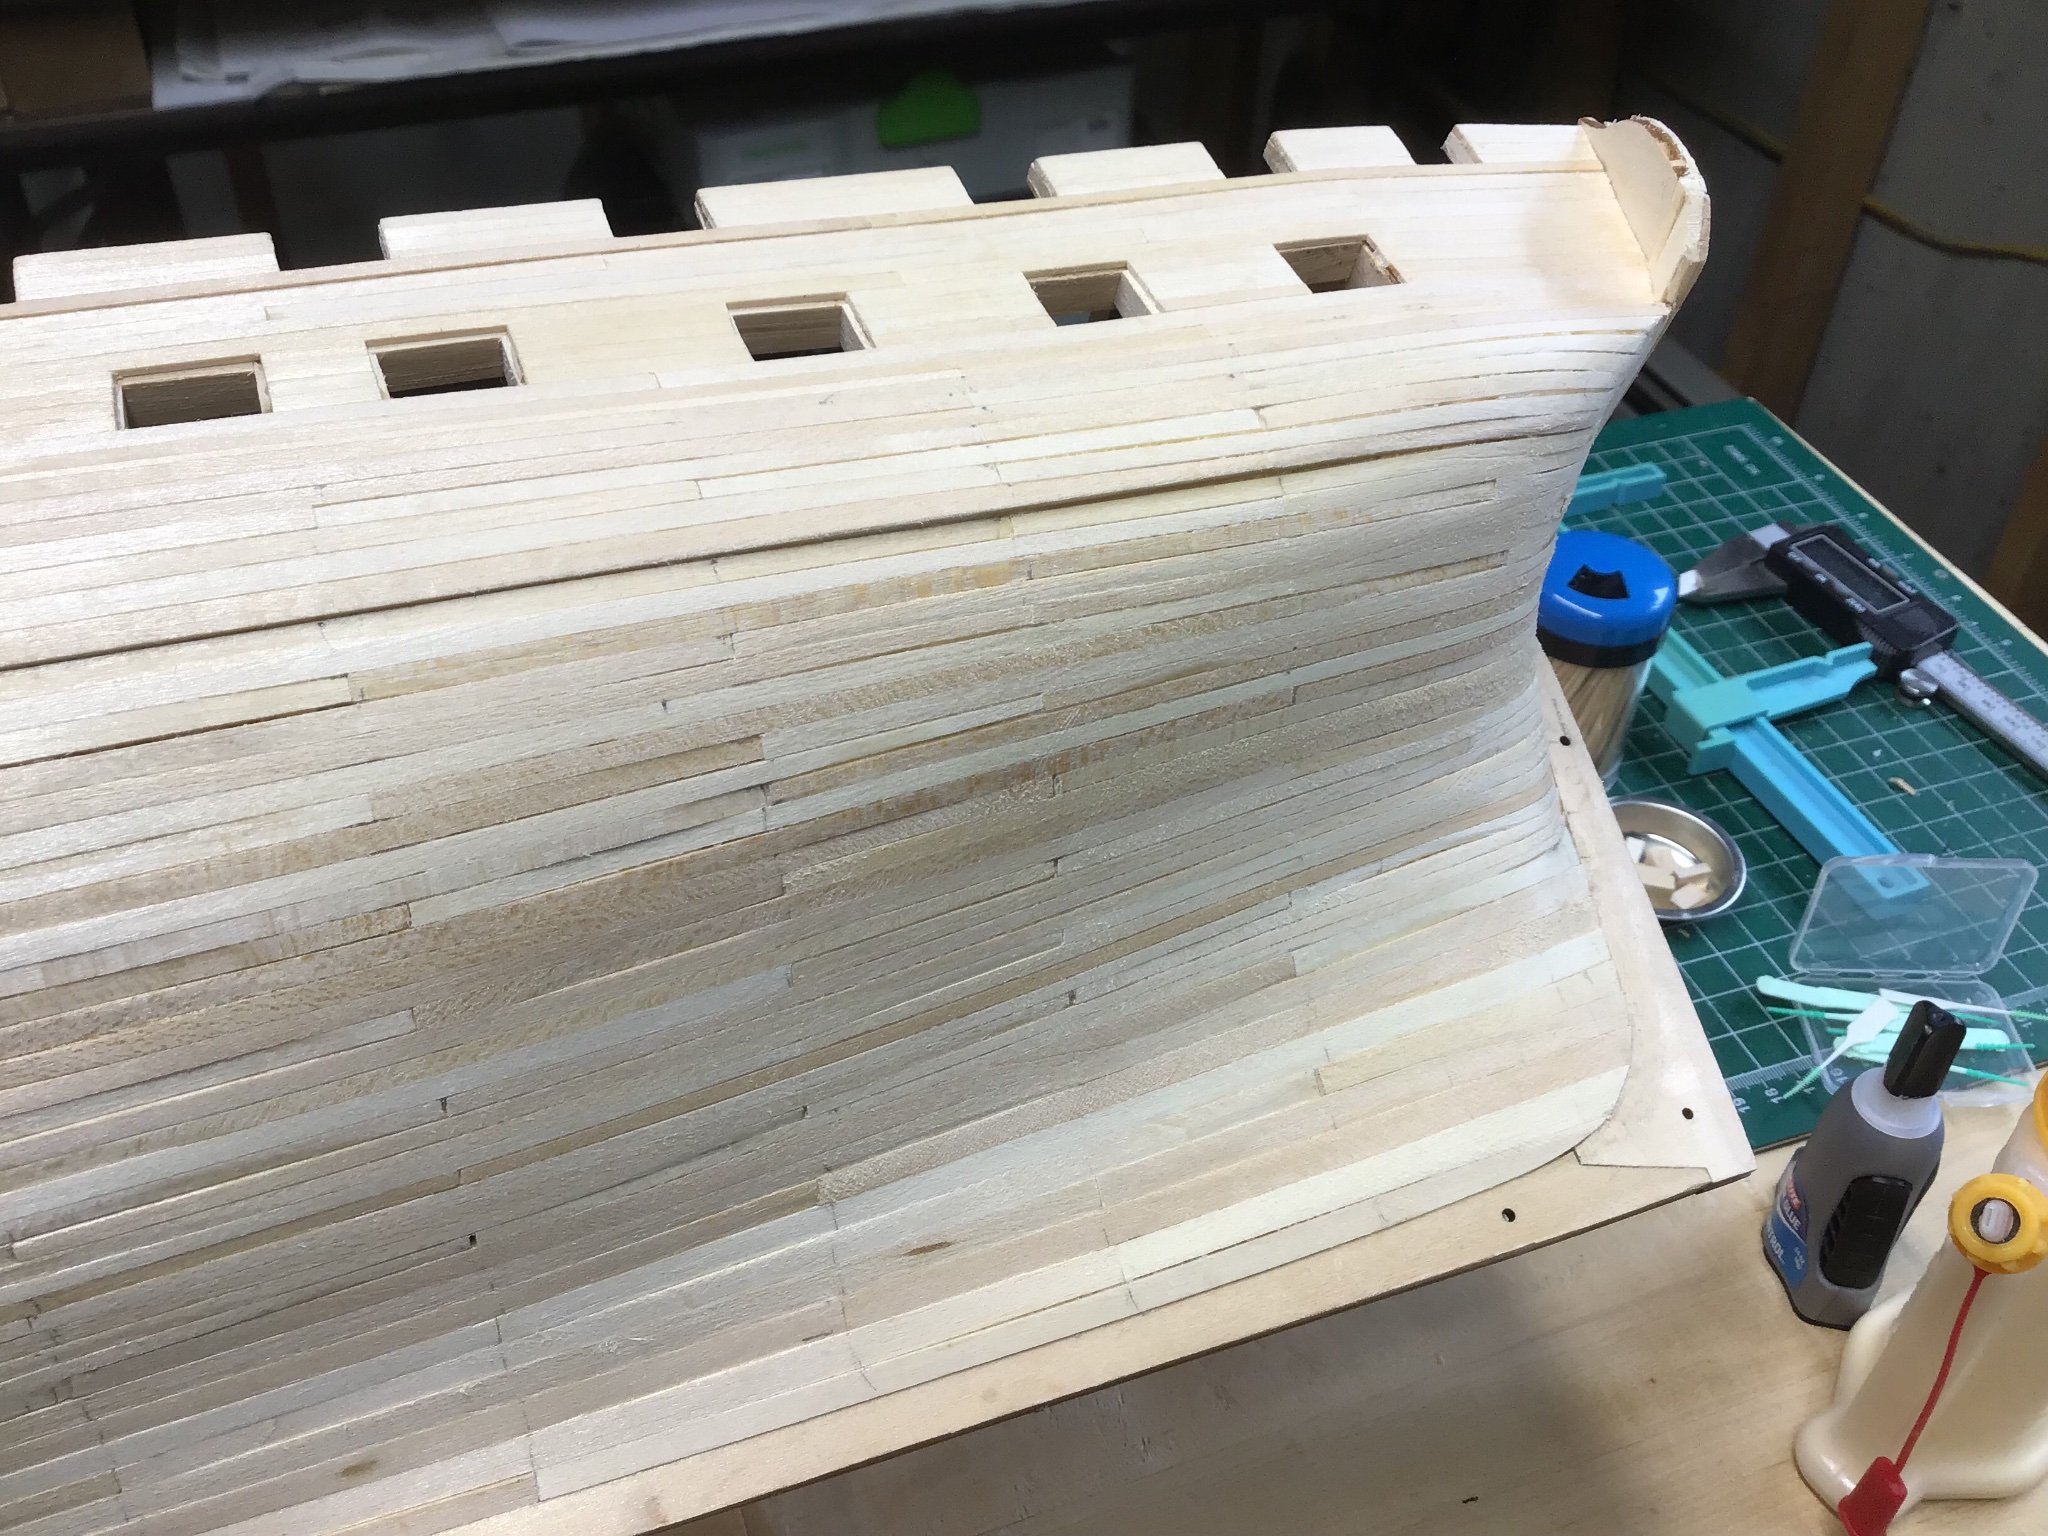
Completion of Port Side Planking
Finished up the port side planking. And made a few passes with the tools shown in the first picture to level the planking.
When leveling the planks, keep in mind the woodworking concept of Coarse, Medium, and Fine. Chris Schwartz, a master furniture maker, discusses the concept in his woodworking training material, available on his website or YouTube. It’s a consistent time saving approach.
Start with coarse tools: the flat and half round files to remove large amounts of material. The half round file gets you into the stem and stern curves. Files will give a fairly smooth finish alone. Medium follows with 150 grit sand paper. Fine is last, 220 grit. Always use a sanding block or dowel.
The leveling operation easily takes several hours. So I like to spend an hour or so, take break, and so forth. If you’ve done a good job installing the planks, nice and tight, not much gap filling will be needed. I have a few problem areas that I’ll fill with carpenters glue or plastic wood.
Also each plank needs to be glued to it’s neighbor, other wise a plank will flex, making it difficult to file or sand.Overall I’m happy with the result, learned a lot, and found my weakness was paying attention to the tapering at the stern, to get a gentle sweep up into the counter. And I learned how to to understand and follow the planking plan, with 9 planks in each belt.
Happy Independence day!


- CiscoH, chris watton and JeffT
-
3
-
My comments were meant to be, and are entirely complimentary.
The controversy over “time”, and the semantics of “building” or “assembling” is baffling.
The time saving aspects of the design are a benefit not a knock. Saving some time on some tasks is not the same as saying this is a cheap low quality kit - obviously it isn’t.
The chief benefit of this kit is one can achieve a fantastic result with a reasonable skill set, in a reasonable amount of time. To paraphrase someone else, it makes the complex accessible.
As a mechanical engineer I understand the work required to create this kit is truly monumental.
I wish all the best to Mr. Watton and his team. And I plan to treat myself with this kit.
-
Hello,
Have enjoyed looking through this log several times. Thank you!
The design and construction reminds me of fine furniture. That is the core is a less expensive wood, popular in furniture, MDF in this case; with a veneer of expensive wood. It’s a smart technique that’s been used for centuries.
Another advantage of this kit is less time is spent on the tedious shipbuilding tasks, like say cutting and fitting of small bits of wood associated with hull and bulwark construction.
More time can be spent on say the rigging, and adding additional detail - if that’s necessary, because as others have said what the kit offers out of the box is exceptional.
Another thought is the design goes easy on the builder - for example the breakaway bulkhead on the stern that protects the bulkhead ears. This means the builder is setup for success.
Time is priceless. What normally takes many months for the skilled builder or even years for a newcomer, can be accomplished in weeks.
This design solves the biggest problem with model shipbuilding - most people give up before finishing the ship.
This fine, unique kit may seem expensive, but in my opinion the time savings, quality, and ultimately the satisfaction, make the kit well worth the price. Tremendous value.
Congratulations on your ingenious design Mr. Watton. You certainly have made a significant and remarkable contribution to the craft.
- AJClark, mtaylor, jpalmer1970 and 5 others
-
8


USS Constitution by ERS Rich - Model Shipways - 5/32
in - Kit build logs for subjects built from 1751 - 1800
Posted · Edited by ERS Rich
Painting the Bulwarks
Hit the bulwarks with a light coat of rattle can shellac. Brushed the surface with a stiff bristle brush to remove the fuzzies.
Color coat is Tamiya Dark Green XF-26, with Tamiya Paint Retarder, applied with a Paasch Talon airbrush @25 psi.