DocBlake
-
Posts
1,811 -
Joined
-
Last visited
Content Type
Profiles
Forums
Gallery
Events
Everything posted by DocBlake
-
 Joe: Read ahead a bit and the practicum will explain each of the terms. There is also a cross section drawing through the bulwarks showing the location and sizes of the bulwark planking, the waterways, the spirketing plank, the black starke, the wale and the hull planking! The scuppers are holes through the bulwark that allow water that has found it's way on deck to drain overboard. The scuppers on the AVS are through the waterways, and exit the bulwark through the black strake.
 -
Chuck: I've used Trans-Tint in the past. It generally works well. The only drawbacks are : 1) It is water or alcohol soluble, so application on wood can raise the grain, especially with soft woods like pine or basswood. 2) It's a concentrate, so you add a drop at a time until you get the shade you wand. That makes it impossible to exactly duplicate a batch after you use it up (varying size of each drop, etc.) so mix up enough beforehand to finish the job!
-
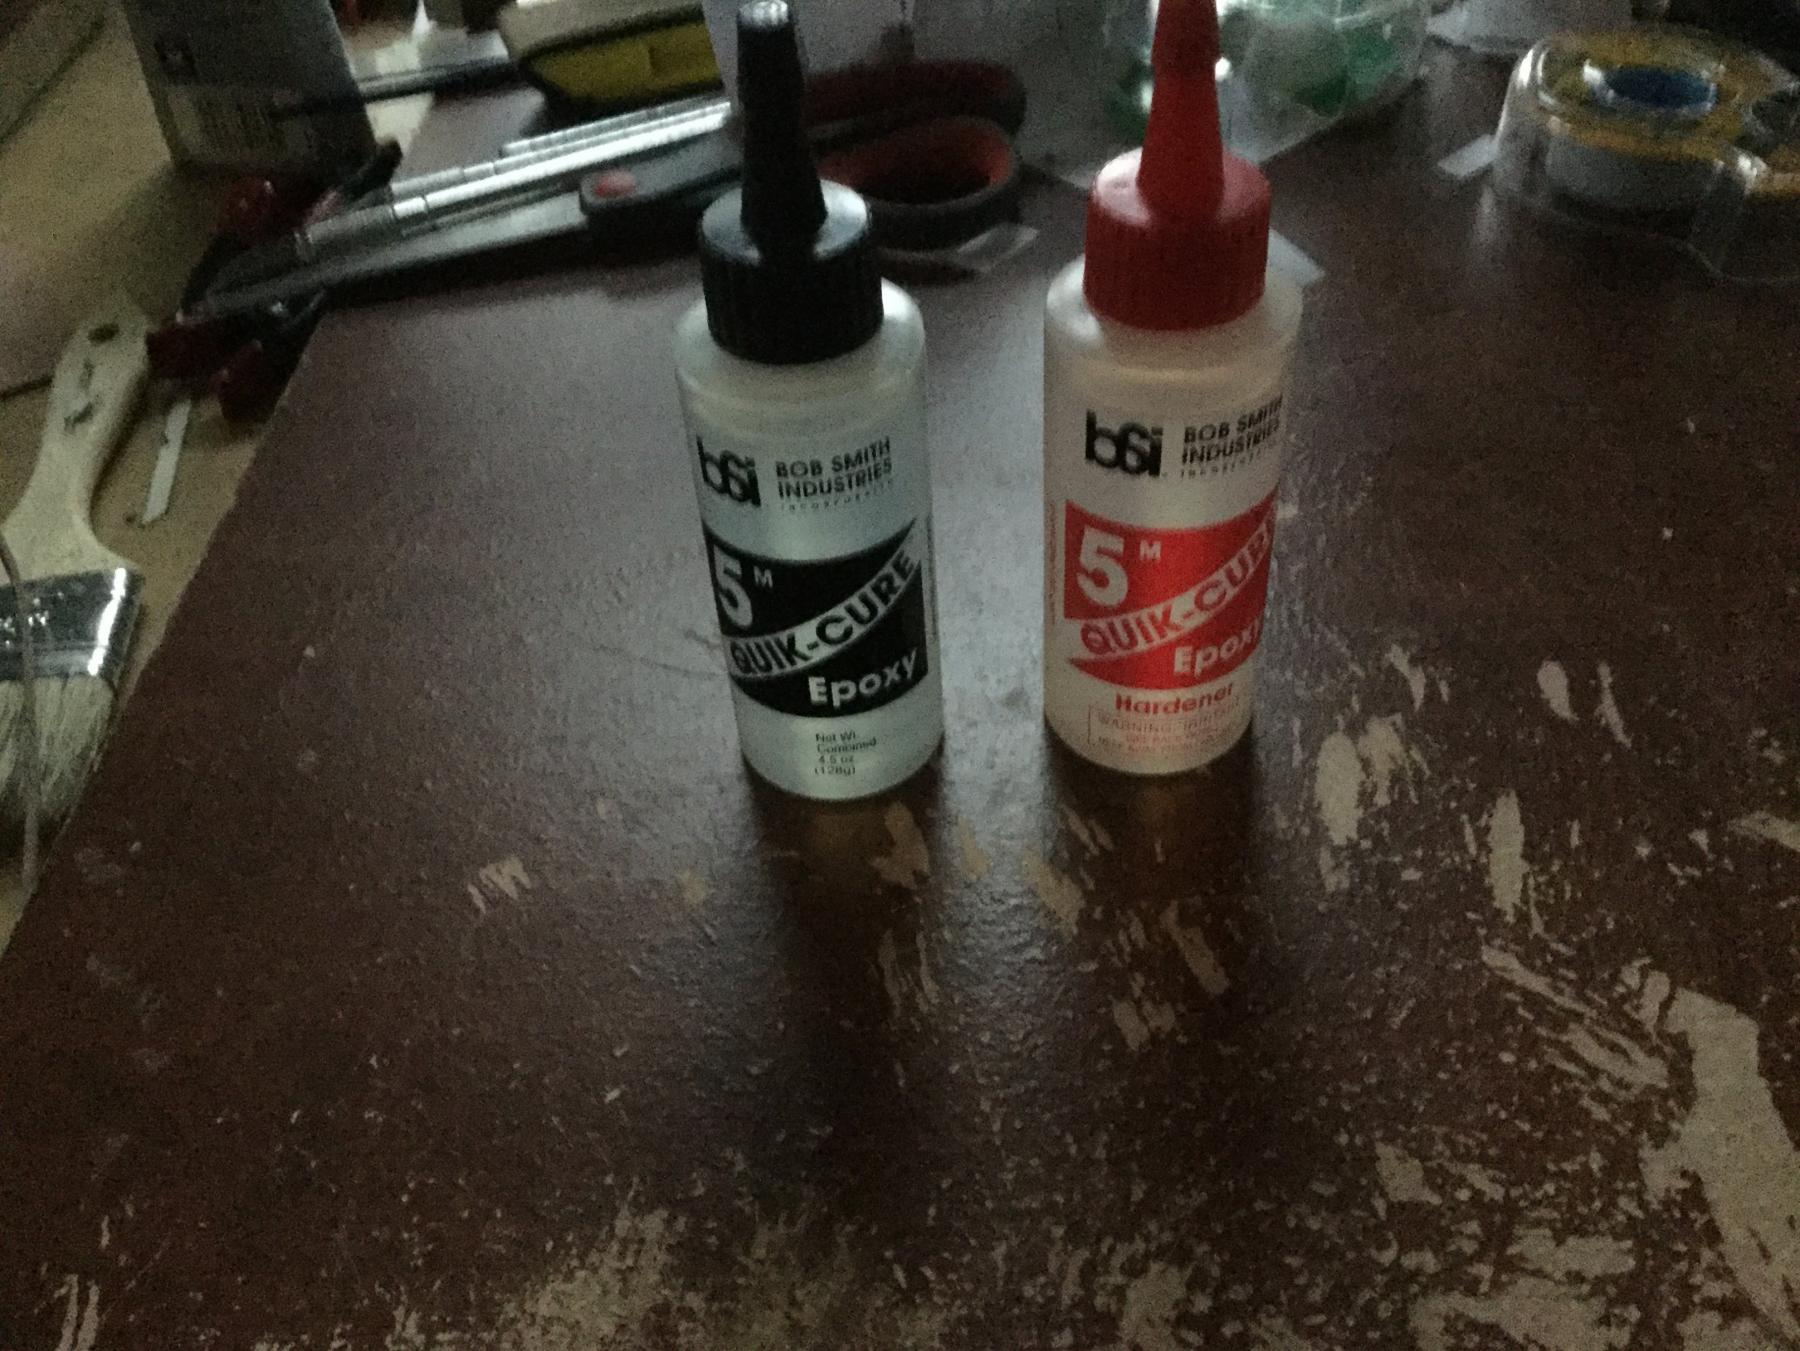
Joe: I didn't pin the knightheads and timberheads. I used 5 minute epoxy. The next step is adding planking that defines the wales. Once installed, the planking "locks" the knightheads and timberheads in their mortises, and there is no danger of knocking them loose. I use 5 minute epoxy that comes in two separate bottles, so mixing it is easy, even in small batches. I bought it at Michael's or Hobby Lobby. Most 5 minute epoxy comes in a syringe that dispenses resin and hardener at the same time - messy, and inaccurate. Get the separate bottles! I use the epoxy for tons of things on my models!
-
Hi Don! I'd cut the subdeck now. Fitting those parts is critical, especially the centering and setting the rake of the masts. It's much easier to do now, so even if you have to redo or make adjustments, the final planking will cover over any "modifications" you had to make!
- 653 replies
-
- 7
-

-
- trabakul
- marisstella
- (and 1 more)
-
I've used Fiebing black leather dye on pear. If you topcoat it with poly, there is no risk of it "wearing off". Like any pigment, it my be subject to degradation by UV light, but that holds true for multiple stains, dyes and tints. It looks great on pear...mimicking ebony!
-
Very nice work!
-
Joe: Don't worry about the fit of the notches at the bow, or even the fact that one broke off. This will all be covered by the waterways and decking and will not show at all on the finished model. As to the scuttle location: It's your call! The AVS is a fictitious vessel. Dr. Feldman drew the plans with the scuttle on the port side, but you're the captain of your ship, and a scuttle on the starboard side is absolutely appropriate.
-
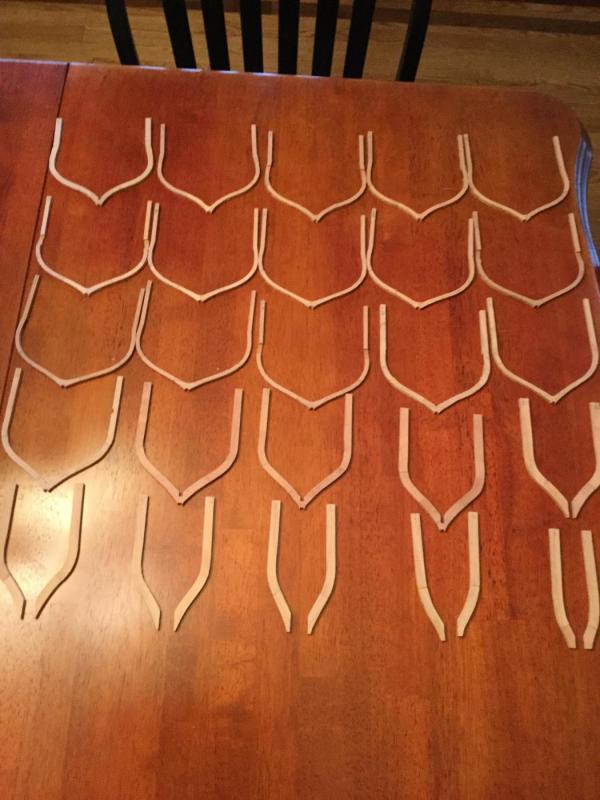
I've completed the first 25 frames. This is by far my least favorite part of the build. The frames are made up of as many as 14 parts per frame. each one has to be cut from the billet, have the tabs that held it in place trimmed off with a #11 blade and have the edges sanded smooth. The parts are then glued together on a template drawing. Very time-consuming and tedious work - but necessary! Only 12 more frames to go!
-
Like a zero-clearance insert for the table top! Thanks, Don! One advantage to the thicker planking (1/32") is a lot more leeway when finish sanding the hull. Unless you use a belt sander, very little chance of sanding through a plank!
-
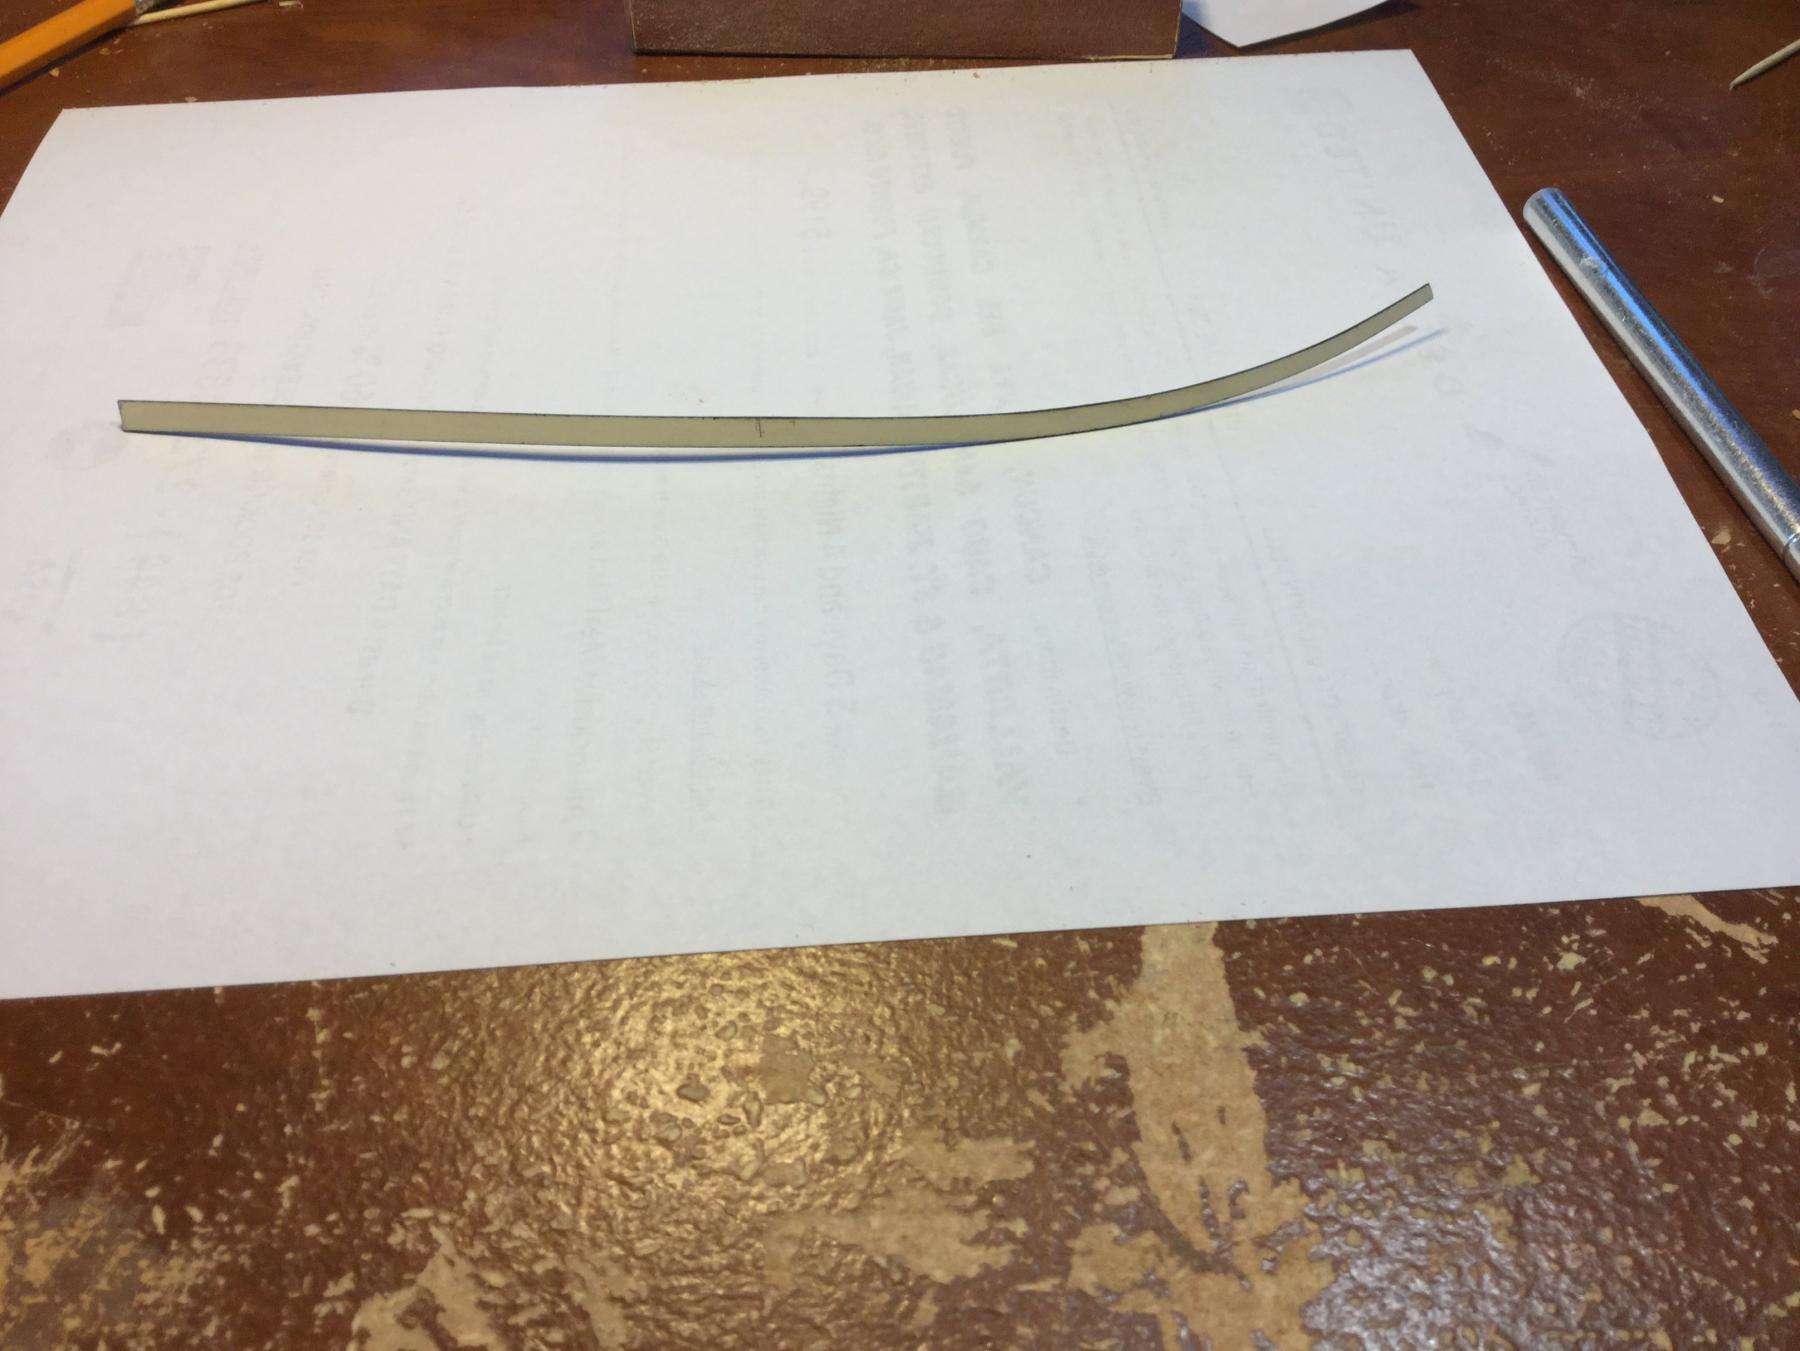
Planking is going slowly, because the 1/32" thick planks are much tougher to fit than the veneer second planking in most kits. I found cutting veneer thickness planking on the Byrnes saw difficult because when ripping, the veneer would slip under the fence, due to it's thinness. I will have to figure out a mod so I can use the saw for that purpose. To fit the planks I had two options: Spiling, or tapering/heat bending. In think the taper and bend technique is easier, but it is slow! Here is the most forward plank in the 4th strake below the wale, ready for installation.

-
Joe: Your transom is looking very nice! I use a #11 blade and a sanding block to taper planks.
-
Looks great, Don. I believe you were using a riffle file!
- 653 replies
-
- 6
-
-
- trabakul
- marisstella
- (and 1 more)
-
Thanks for the kind words, Lou! This is a really fun build, and I love working with the bigger scales. I, too, used to curse at the gray dust that fouled up holly planking from the pencil or charcoal to simulate caulking. I have switched to acrylic flat black paint! I used to gang the planks together with office clips and paint the edges of 5 or 7 planks at once. Any slop on the face of the plank scrapes off with an X-Acto blade. I now use an acrylic paint pen. You can buy them at Michael's or Hobby Lobby.
-
Nice work on the planks. Teak has the same problem a lot of exotics do: oil and resin that might affect gluing. For rosewood, I sand pretty roughly the gluing surface and then wipe it down with a solvent - usually acetone. Here's a useful link: http://www.wood-database.com/wood-articles/gluing-oily-tropical-hardwoods/
-
Joe: I soaked the first layer of planking for the bending. To glue the planks to the bulkhead I used a dab of Weldbond and a dab of CA glue (they play well together!) at each bulkhead. The moistened plank activated the CA for an immediate bond while the Weldbond sets up. No clamping! Try it on some scrap and see!
-
Thanks, guys. Don: I first cut the taper and cut the plank to rough length, leaving it a bit long. Then comes the edge bending, and once the plank fits flat, I trim it to final length. A little cumbersome, but it works. My planks are 1/32" thick, so they don't edge-bend on their own very well as they would if they were typical veneer thickness.
-
Here's a link to the Feldman CD. It is very useful for both the AVS and Fair American. http://www.seaways.com/CAFCD.html
-
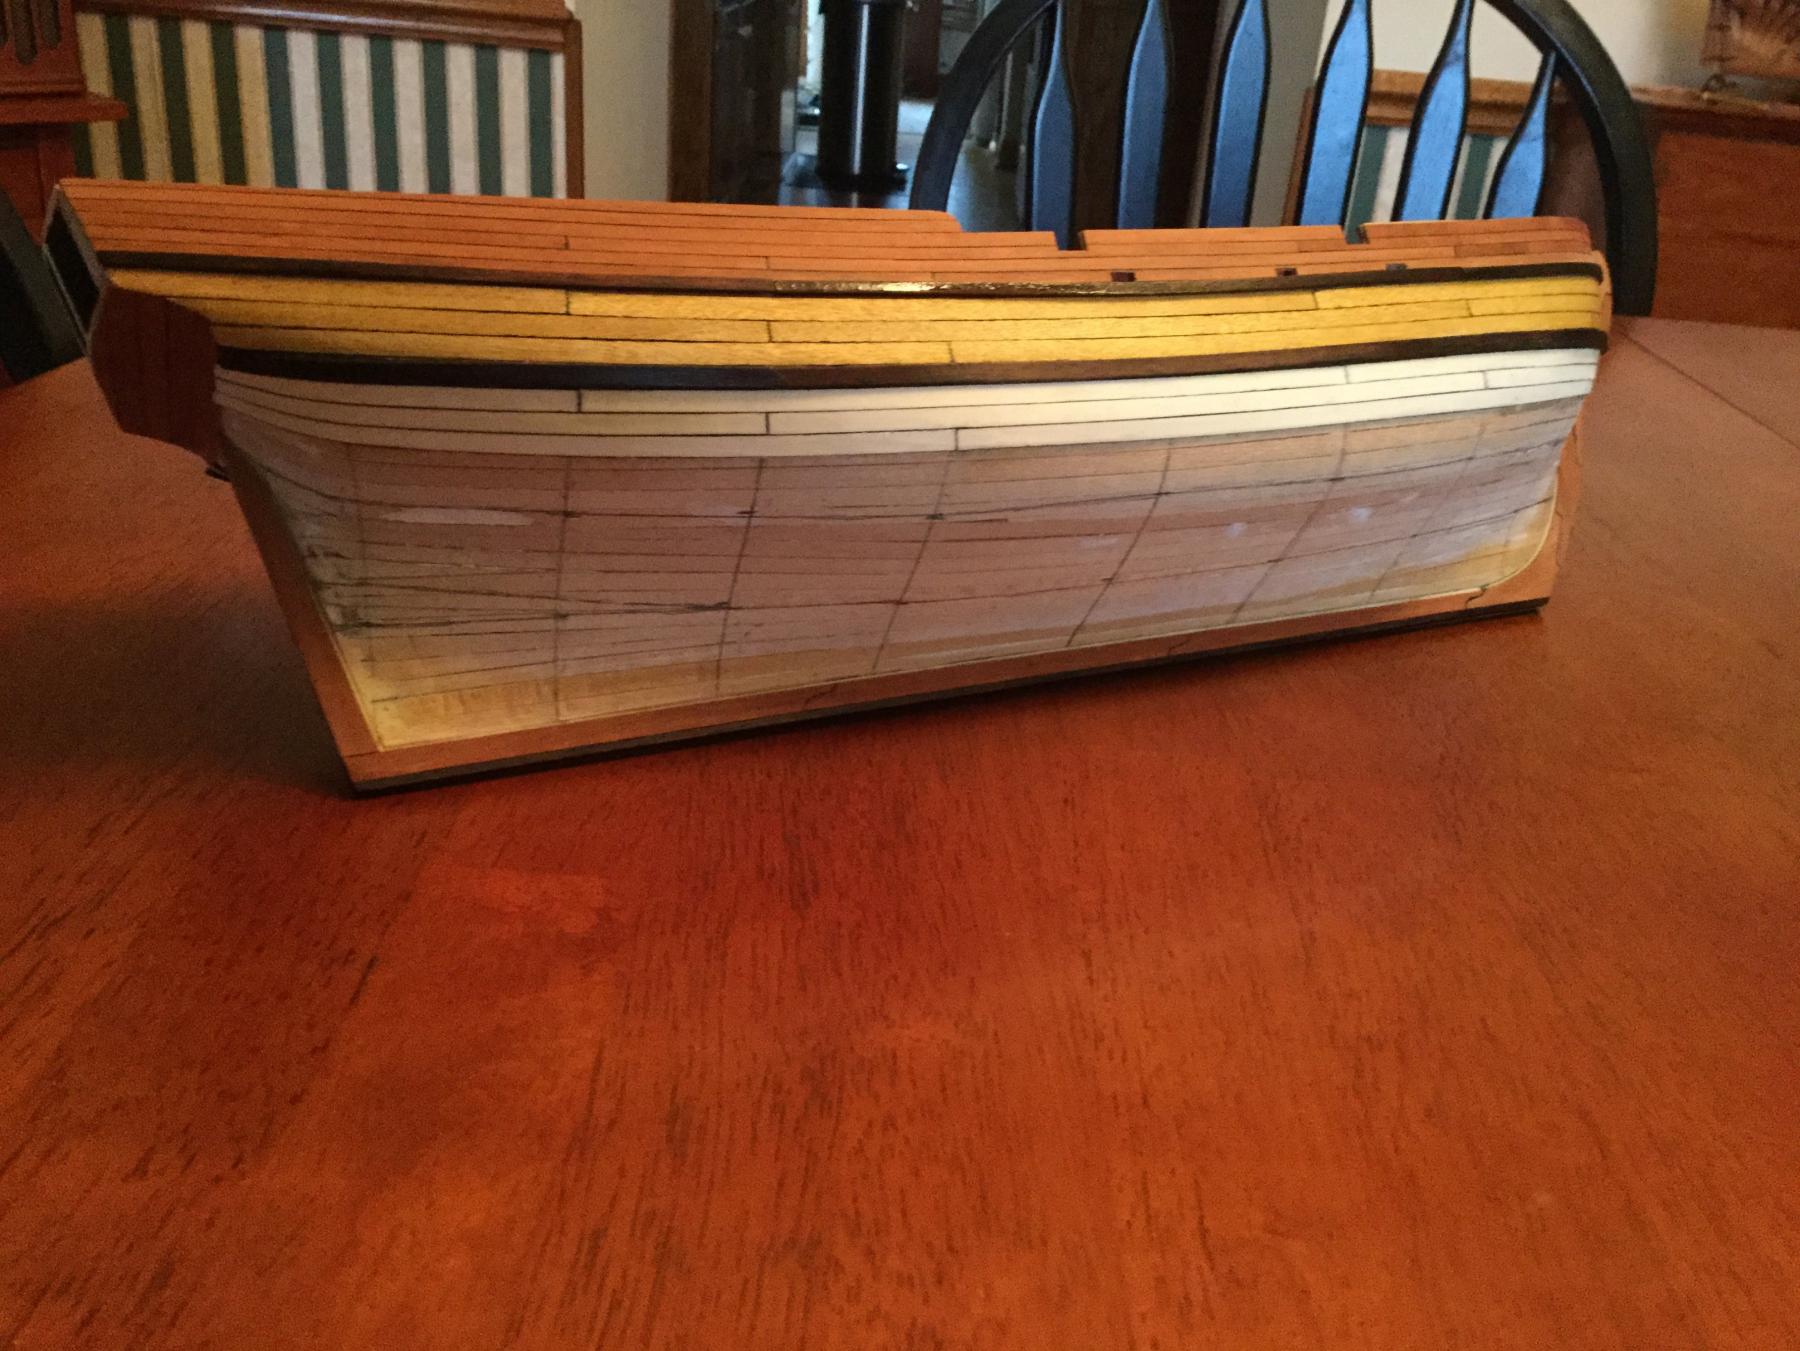
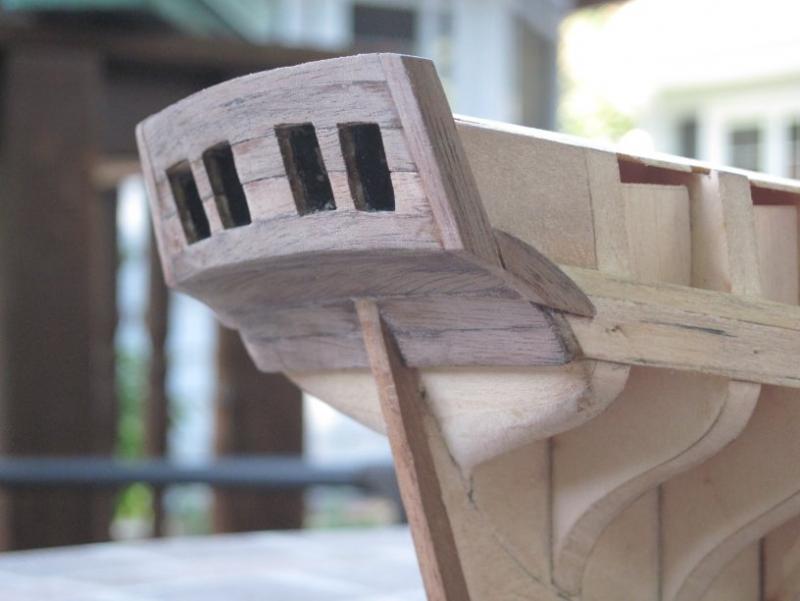
Joe: Take a look at the photos of the stern I posted on page 3 of this log. There is definitely an arc to the frames that form the transom and counter. Here's a look at the transom after final planking.
-
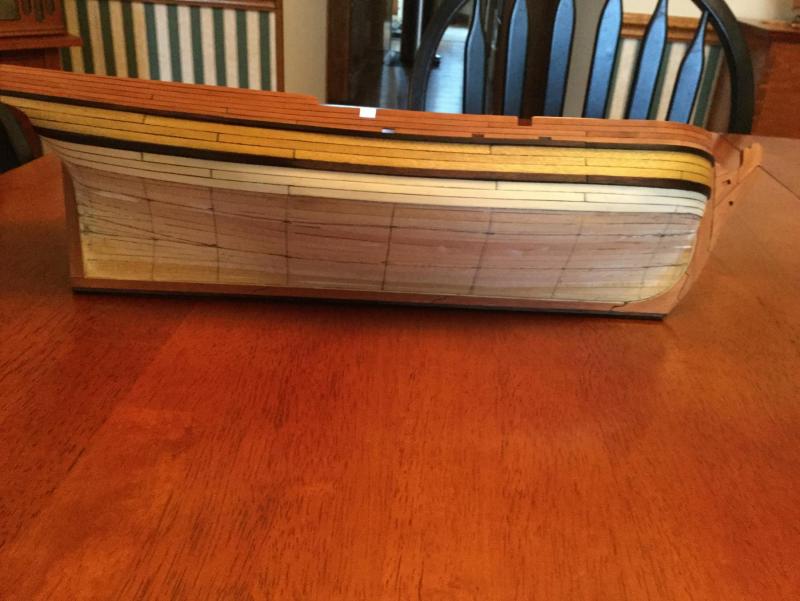
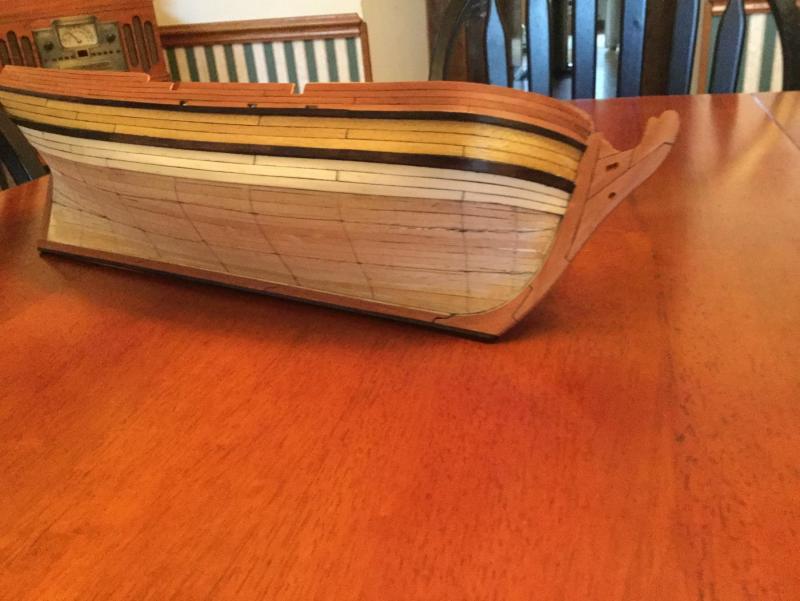
Thanks, Bill! I completed the first 3 strakes of planking below the wale using holly. I am planning treeenails, but not at the location of every single frame that would appear on a set of plans. Too busy looking. I'll add the treenails to the locations of the bulkheads only. Stylized, but still giving the effect I'm looking for. The toughest part of the planking is about done. To this point the upper hull planking, wales, and first three strakes below the wales have had to be applied to the extreme bluff bow - almost semi-circular in plan view. Below this point, the hull starts to approximate a more conventional bow shape, like the AVS. To this point the planks at the bow require significant edge-bending downward to fit flat. I did that with a clothing iron. Much less of that coming up, although tapering will be necessary for nearly every strake at the bow.

-
If you plan to stay with this hobby, you DO need a Byrnes saw! It will allow you to mill your own timbers, and free you forever from basswood parts! Crown Timberyard does a nice job supplying lumber, but at a cost, and they don't necessarily stock what you're looking for. Today I picked up a piece of katalox (AKA Mexican ebony) to use for wales and black strakes. It would be hard to find a scale timber supplier who could provide that!
-
Sometimes a guy needs a little peer-pressure, Brian!
-
I've never used that kind of plank bender. Joe. The really thin veneers don't really require anything more than a little soaking in water if you need them to turn sharply (lake the stern of the AVS). The first planking of the hull uses much thicker stock in general, but is softer wood and bends easily with soaking. For my second planking on "Independence" which is 1/32" thick, I'm using heat: just an old clothes iron. It works great!