HOLIDAY DONATION DRIVE - SUPPORT MSW - DO YOUR PART TO KEEP THIS GREAT FORUM GOING! (Only 24 donations so far out of 49,000 members - C'mon guys!)
×


DocBlake
-
Posts
1,811 -
Joined
-
Last visited
Content Type
Profiles
Forums
Gallery
Events
Everything posted by DocBlake
-
 Hey Ken ! After the excellent job you've done on your Rattlesnake, your Independence should be awesome! I will follow that build closely.
 -
Nice job on the hawse holes, Elijah. It's always tough drilling big holes in your model! Once you drill the mast holes, if they're perfect you're good to go. If they aren't, and your angle is off, or masts aren't lining up in the midline plane, all is not lost! You can enlarge the hole slightly, and glue in little scraps off wood (wedges) to force the mast to sit in the proper position. Your kit should provide you with a wooden ring (deck collar) that sits on the deck and circles the mast to cover up the hole you drilled, so no one will see the wedges you used. That's the way it was actually done with real masts!
- 701 replies
-
- 5
-

-
- phantom
- model shipways
- (and 1 more)
-
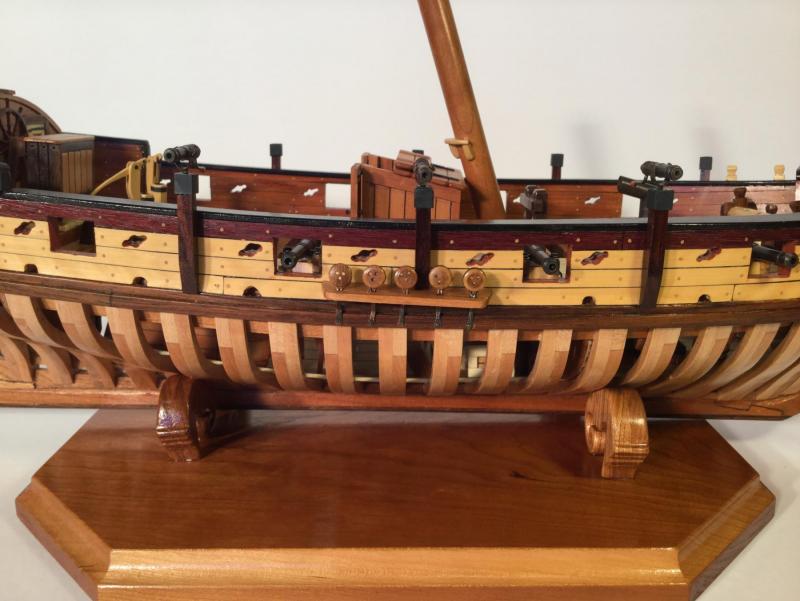
Thanks! Ken: The gun ports are precut into the bulwark formers, as are the scuppers. That part is one continuous strip of thin plywood. The gun port scale gave me some second thoughts. because given the kit's nominal 1/35 scale, the bulwark and gun port sills would be very low - possibly to low to actually place a 3 pounder cannon on the main deck. At the scale I'm building her, (5/16" = 1 foot), The bulwark is a hair under 2 feet high, and the gun port sills are 1foot above the deck. It turns out these are the same dimensions for the gun ports on the Halifax according to Hahn's plans, so I'm OK!
-
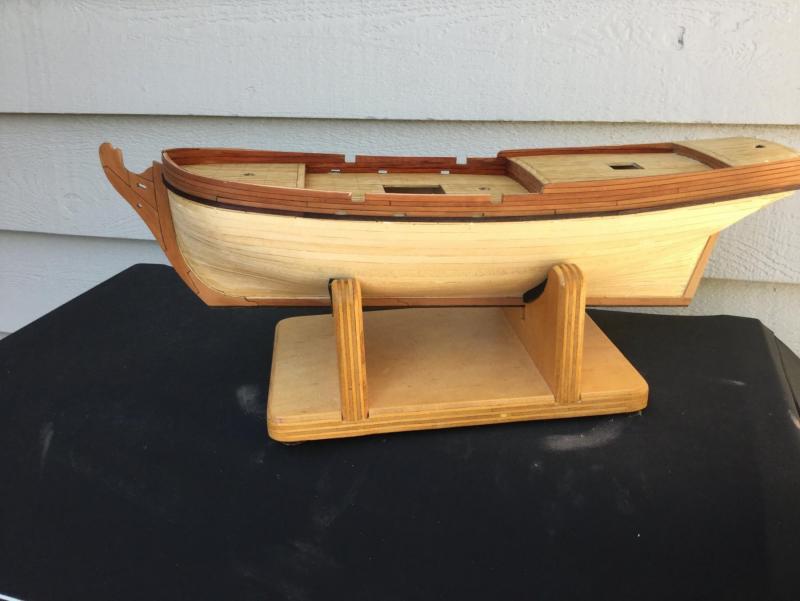
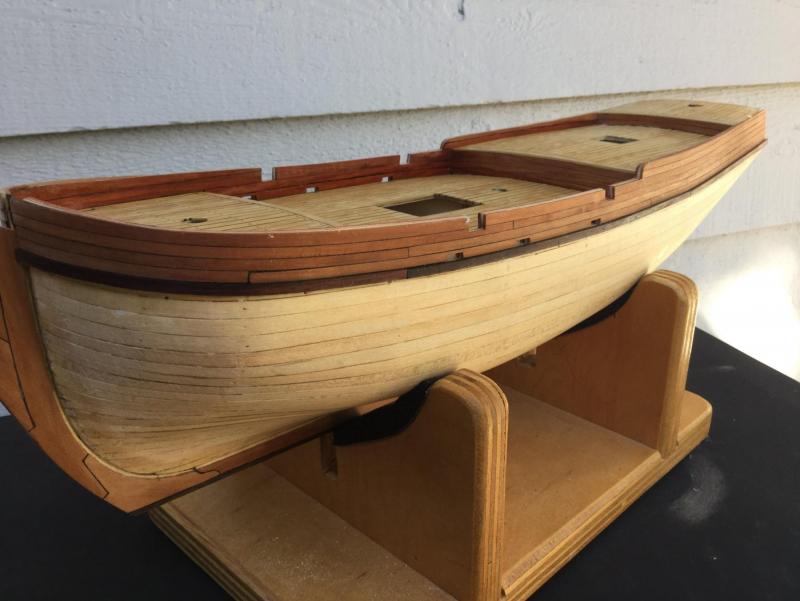
I'm back at work on "Independence after taking some time to finish my POF Armed Virginia Sloop. I started planking the hull by installing the upper wales. They are 3mm wide and made of rosewood. The bulwark planking is 3mm wide Swiss pear, 1/32" thick. Below the upper wale will come 3 strakes of yellowheart, each 5mm wide (7-1/2 scale inches). Then comes a 5mm wide main wale, and the lower hull planking, also 5mm wide.
-
Thanks for all the kind words and the "likes". I am going to go back and work on Independence. I also have 3 other Lauck Street kits: Halifax, Kingfisher and Fair American. I'm thinking of starting Fair American at the same time as I work on the Independence! All this is working up to a scratch build of "Hannah" in 1/24 scale.
- 306 replies
-
- 10
-
-
- armed virginia sloop
- Patrick Henry
- (and 2 more)
-
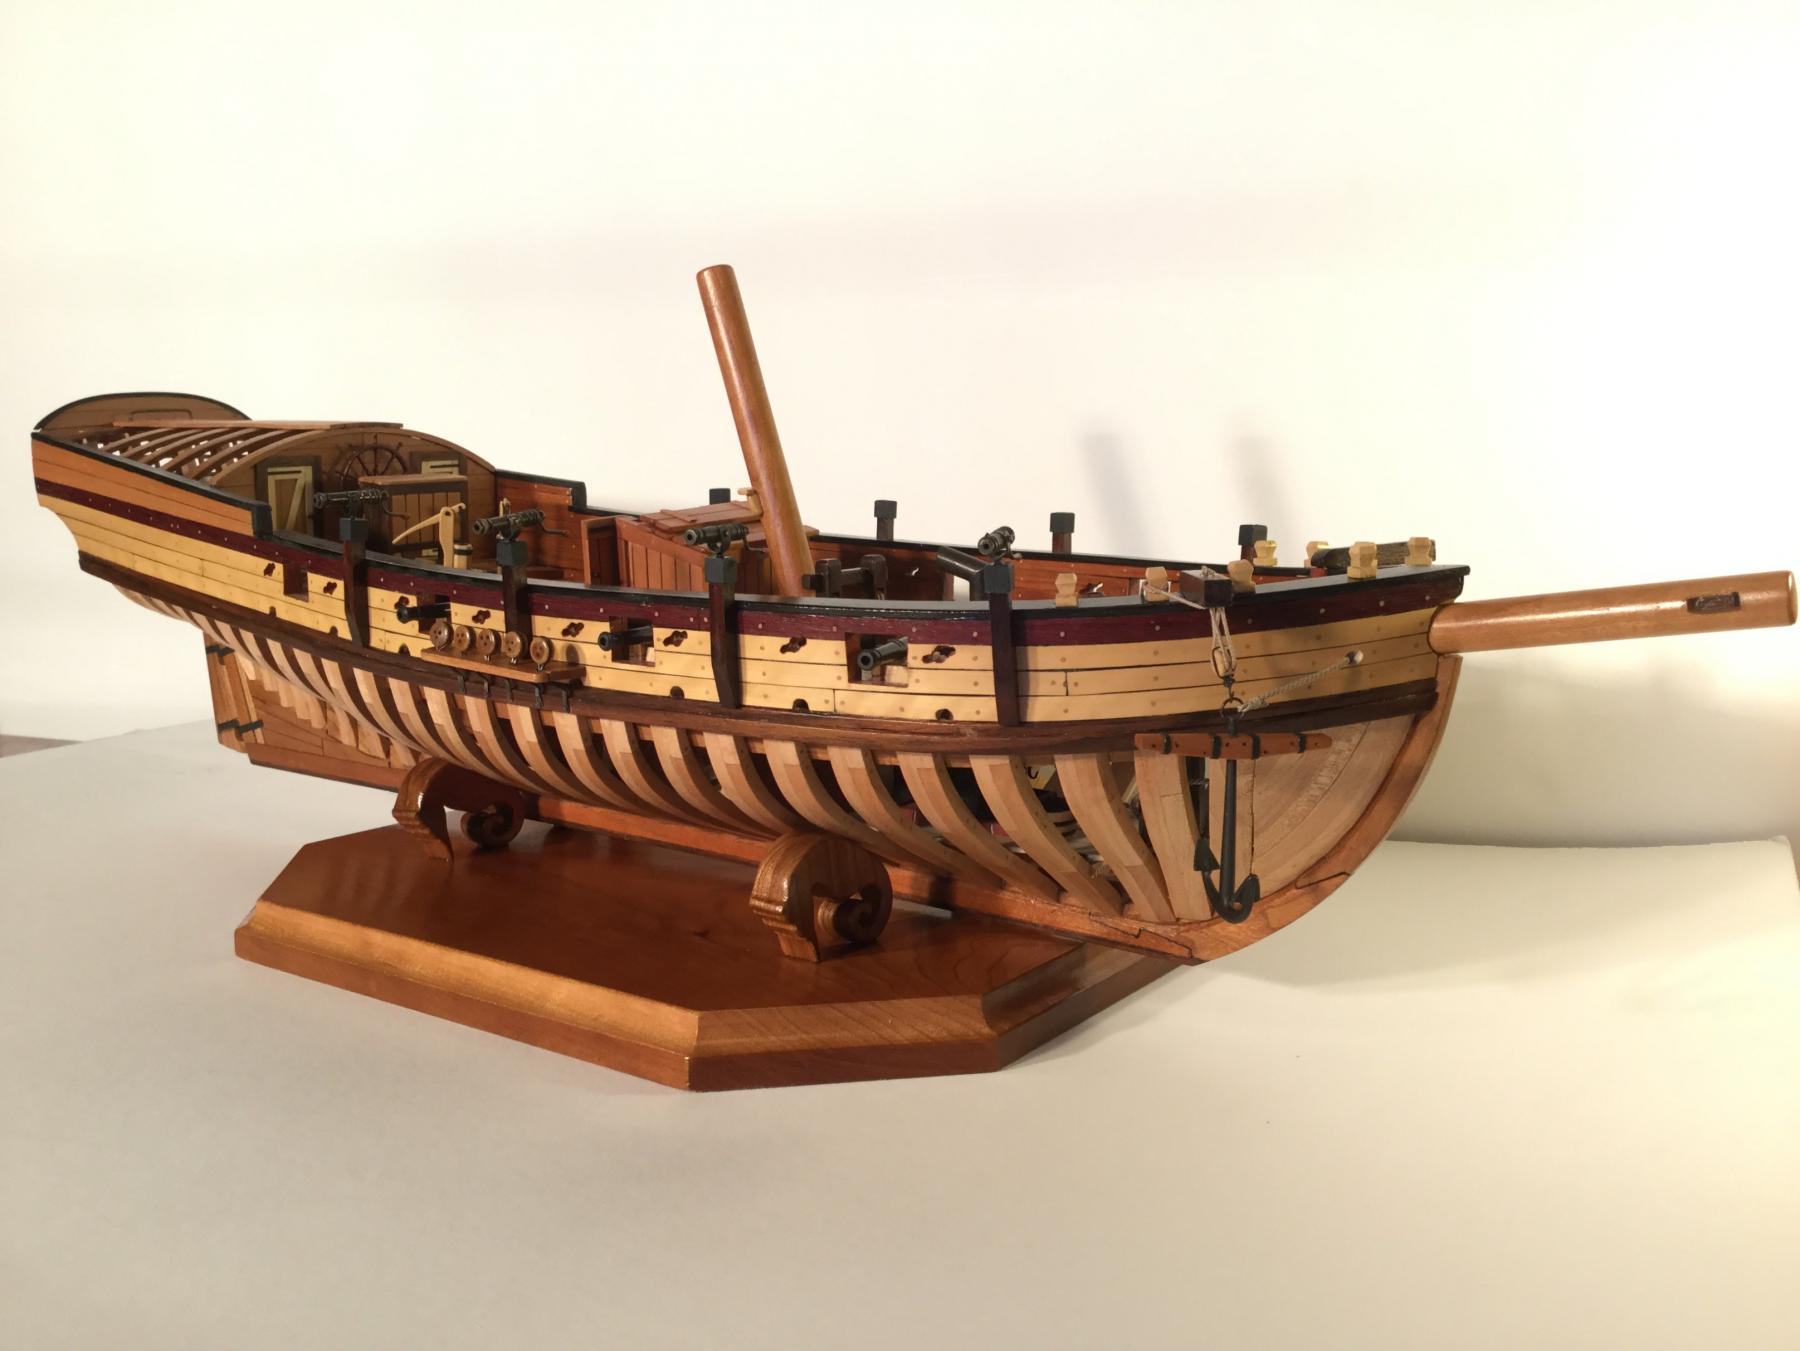
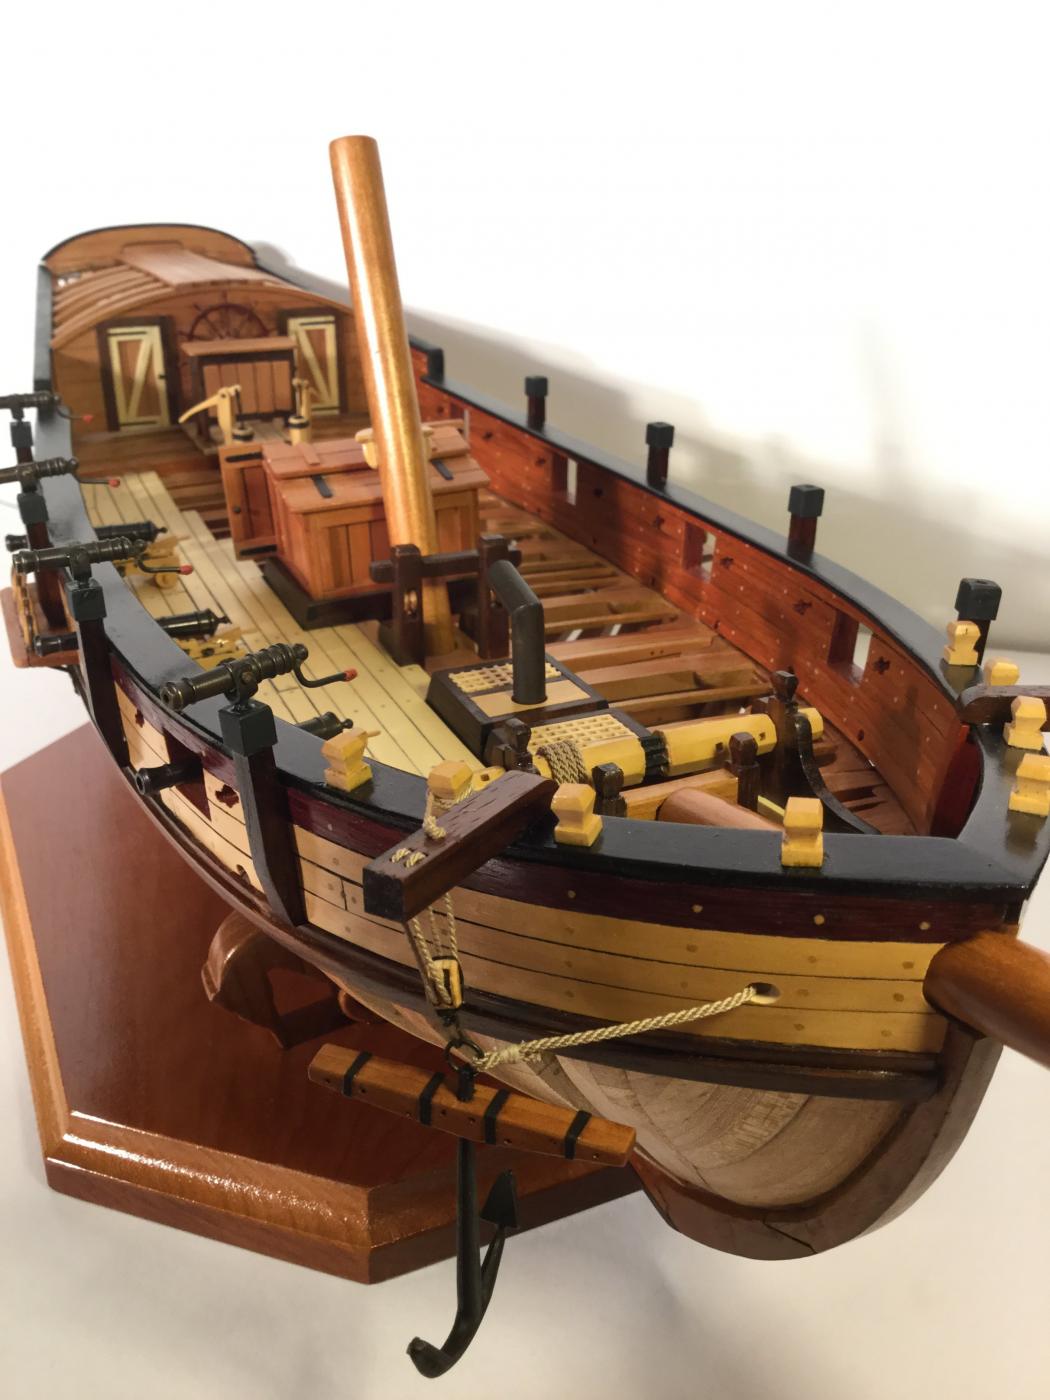
FINISHED!! 14 months to the day, and my AVS is finally done. It was great fun, and makes a pretty attractive model, I think. Bob Hunt is still producing this kit, but is using laser cutting to fashion the parts. If anyone is looking for a challenge and a lot of enjoyment.I heartily recommend this kit! It's available at the Lauck Street Shipyards website: https://lauckstreetshipyard.com/avskit.htm


- 306 replies
-
- 17
-
-
- armed virginia sloop
- Patrick Henry
- (and 2 more)
-
Hi Ken! I have a great hardwood supplier that I use for wood to make furniture. Great prices on cherry, walnut, mahogany and maple. They also stock exotics, so I buy blood wood, holly and rosewood there. Your local Woodcraft or Rockler store should stock purpleheart, yellowheart, boodwood and maybe even rosewood. I've not found holly there, however. The place I shop is called Kettle Moraine Hardwoods: www.kmhardwoods.com
- 306 replies
-
- 3
-
-
- armed virginia sloop
- Patrick Henry
- (and 2 more)
-
Nice work, Elijah, The cleats are impressive! So small!
- 701 replies
-
- 5
-
-
- phantom
- model shipways
- (and 1 more)
-
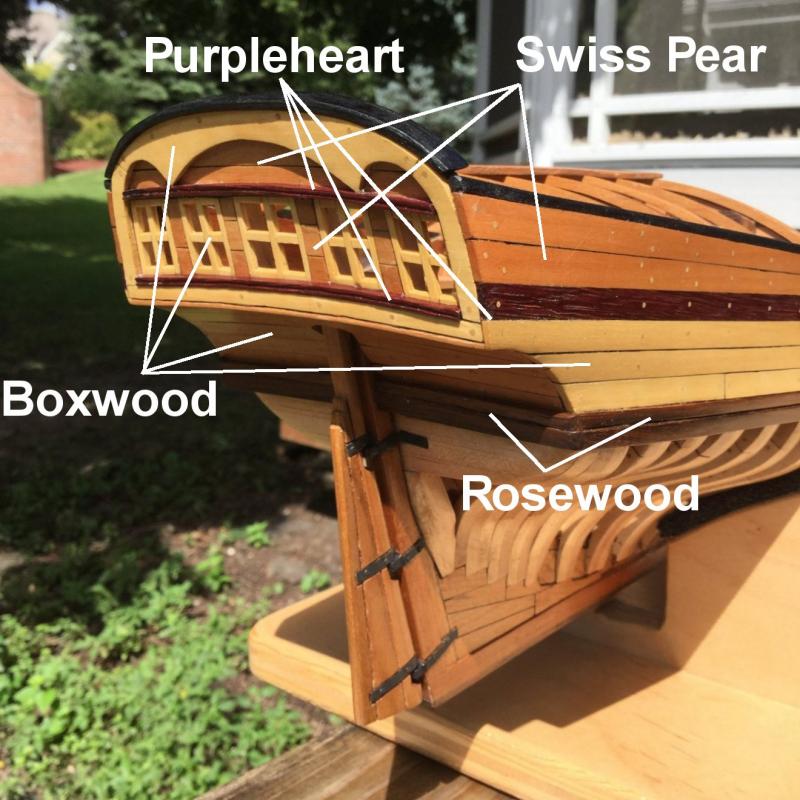
Thanks, guys, for the comments and the "likes"! Martin: The seahorses are provided with the kit as two halves that you glue together and sand smooth. The cherry is my own wood. Rosewood is beautiful. I used it for gun mounts, the wales and black strakes and hatch coamings. It tends to be oily, so you need to wipe it down with an acetone soaked paper towel before gluing or finishing. It takes a finish beautifully. Ken: The photo shows the various species I used on the hull. Yes, the inner bulwarks are redheart. Mine oxidized or UV'd a bit to a reddish brown - not the bright red like your Rattlesnake. Next time I may use blood wood again, as I did on my MS AVS.
- 306 replies
-
- 14
-
-
- armed virginia sloop
- Patrick Henry
- (and 2 more)
-
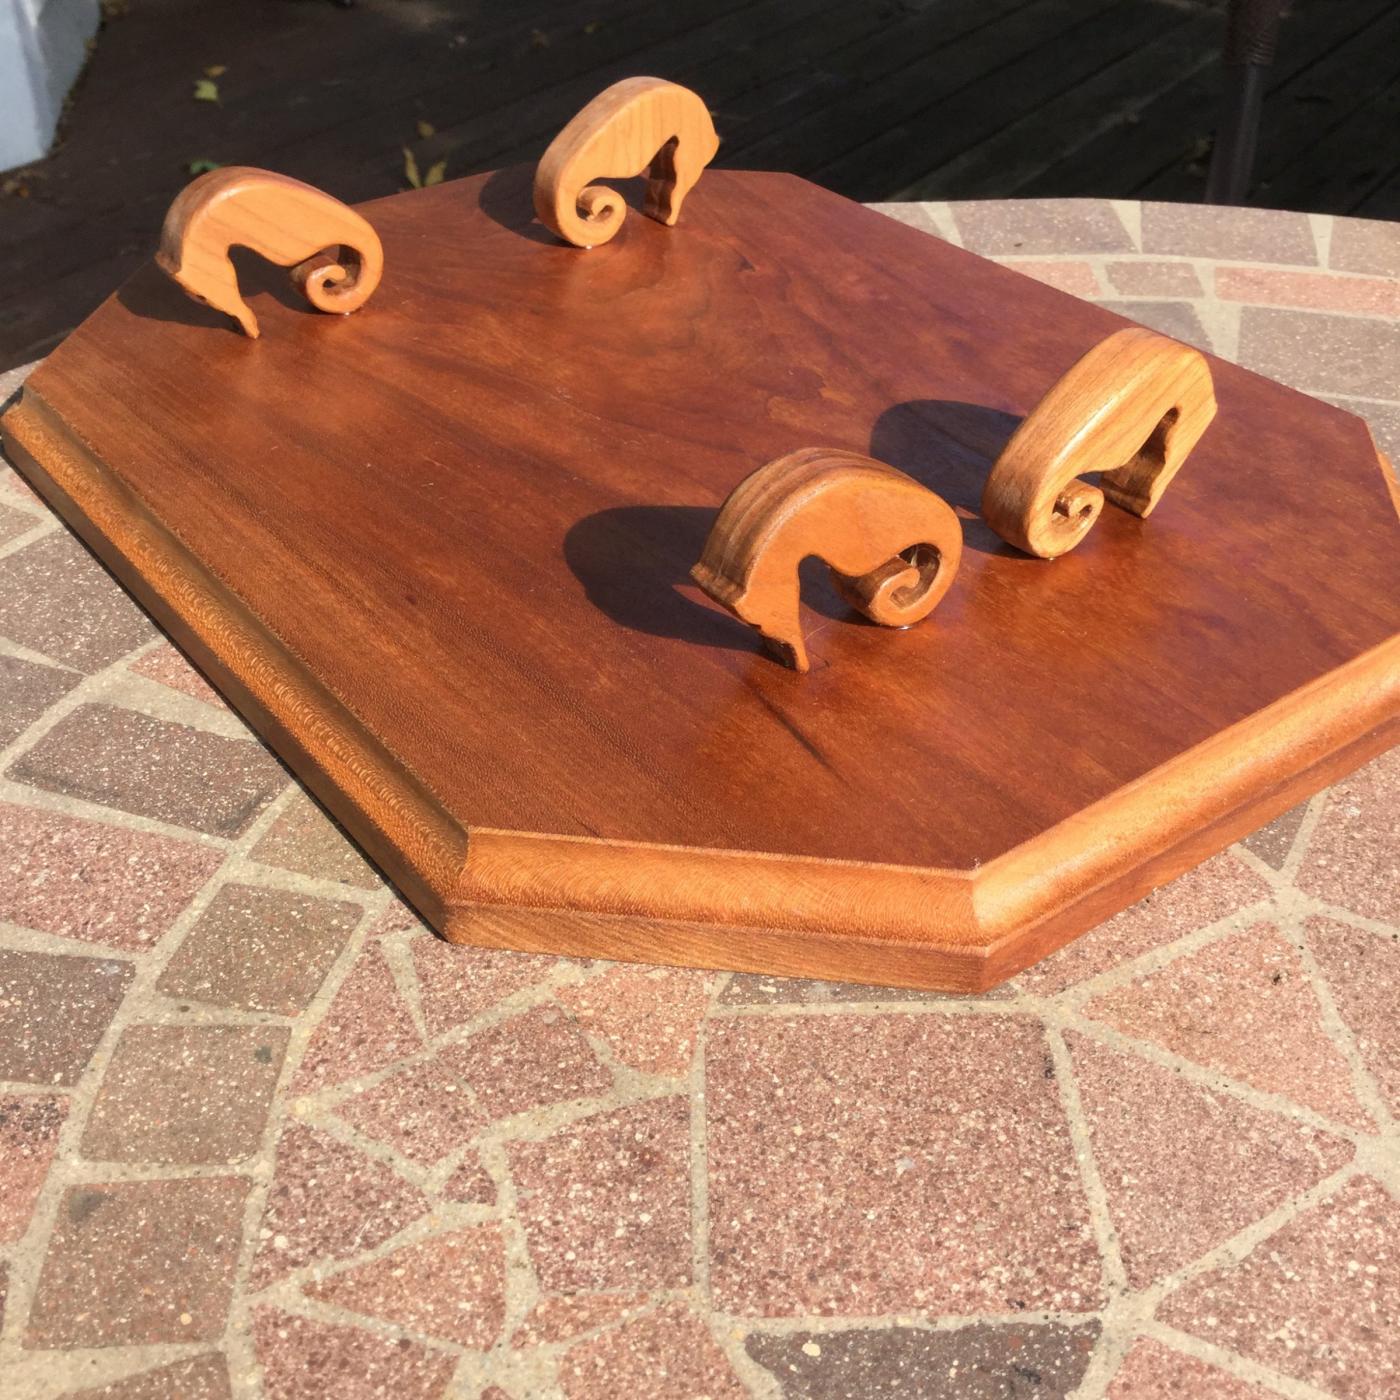
I sanded the seahorses and rounded their edges. I used pins and epoxy to fix them to the base and gave the base a coat of poly. All that's left is to mount the guns, cannons and anchor.

- 306 replies
-
- 11
-
-
- armed virginia sloop
- Patrick Henry
- (and 2 more)
-
Ken: Lovely work on this model. Very impressive. I started the Mamoli version, using Bob Hunt's practicum and the Hobby Mill wood package, but stalled when I ran into big transom problems. They may not be fixable. I do have the MS version also, and your build may inspire me to stoke that version up instead! Keep up the great work!
- 481 replies
-
- 3
-
-
- rattlesnake
- model shipways
- (and 1 more)
-
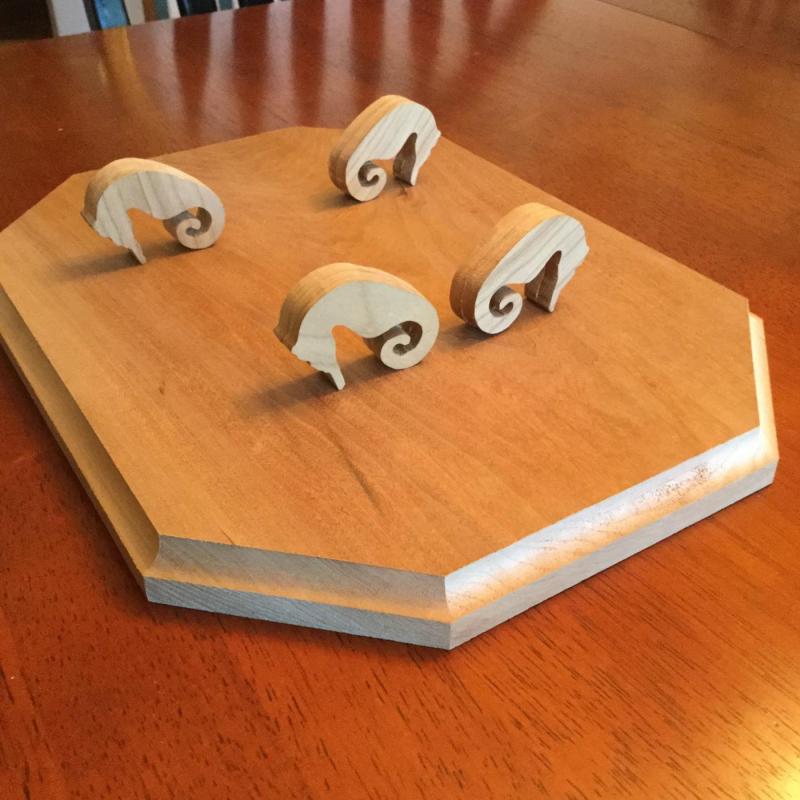
The model is nearly done. I had a nice wide piece of cherry to use for the display base. The four seahorses support the model on their backs! They need to be sanded and glued in place. I routed a simple cove along the edge of the base to dress it up a bit. I think that's all it needs - a simple cove versus an ogee or other more complicated shape. Agree?
- 306 replies
-
- 12
-
-
- armed virginia sloop
- Patrick Henry
- (and 2 more)
-
Nice job, Don. I really like this kit! Your mods and detailing are first rate.
-
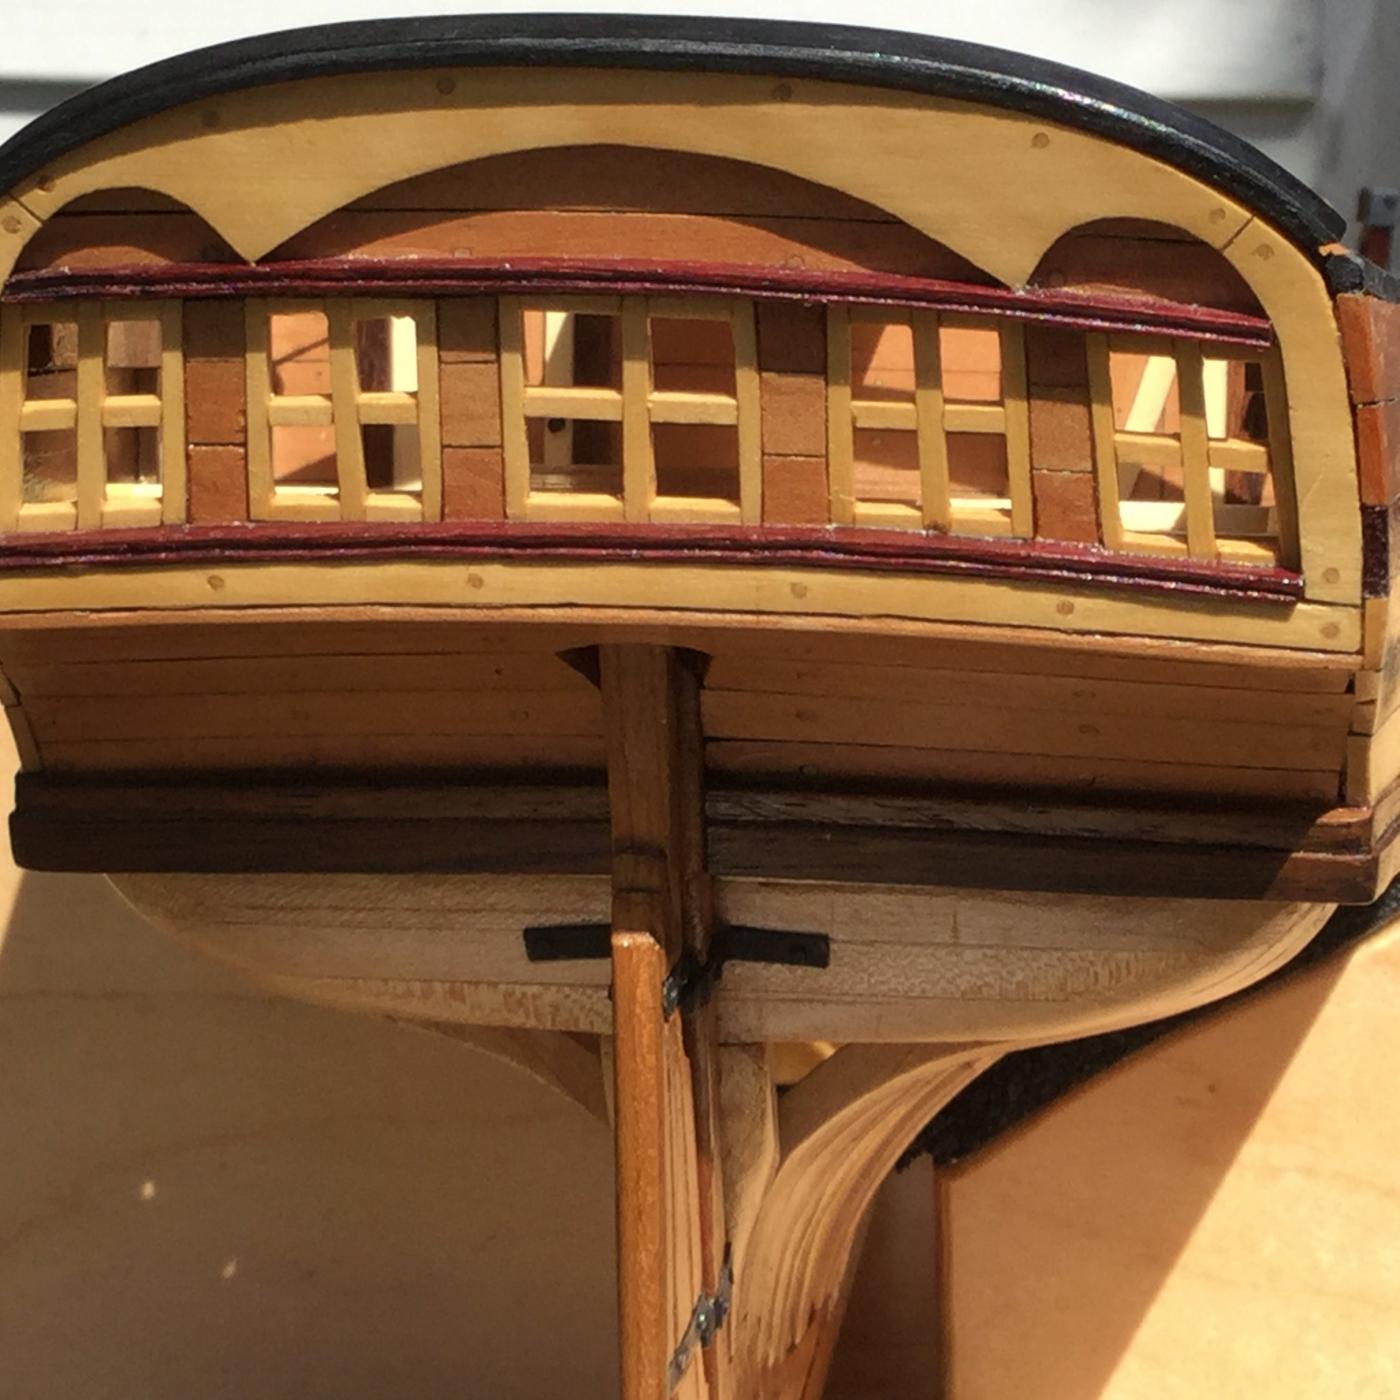
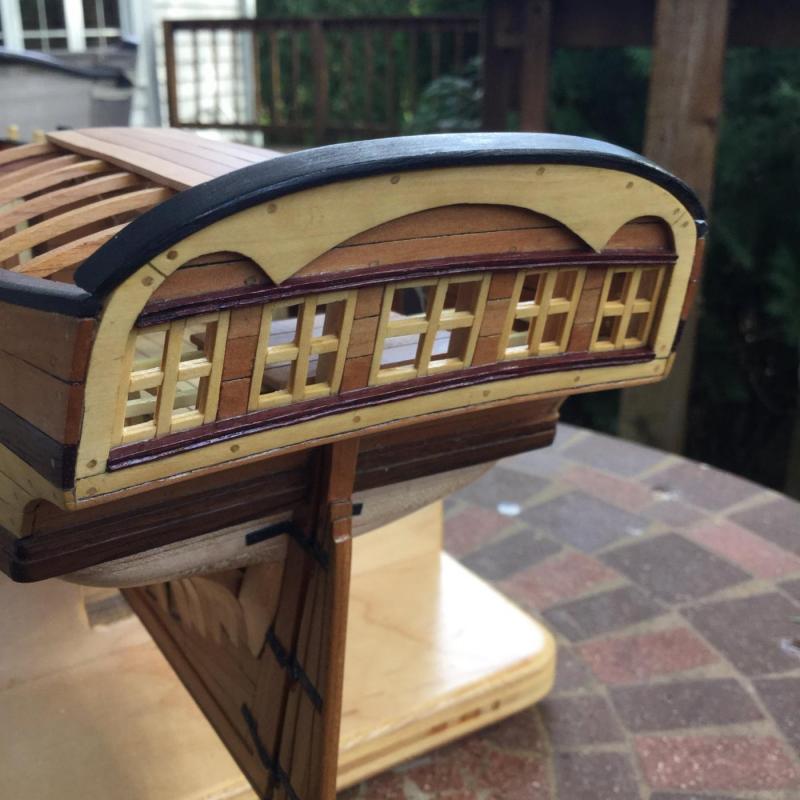
I finished the stern lights, glued them in place and gave them a coat of poly. Only the catheads and rigging the anchor to complete!


- 306 replies
-
- 14
-
-
- armed virginia sloop
- Patrick Henry
- (and 2 more)
-
Great job, Don. I really like the lines of this boat!
-
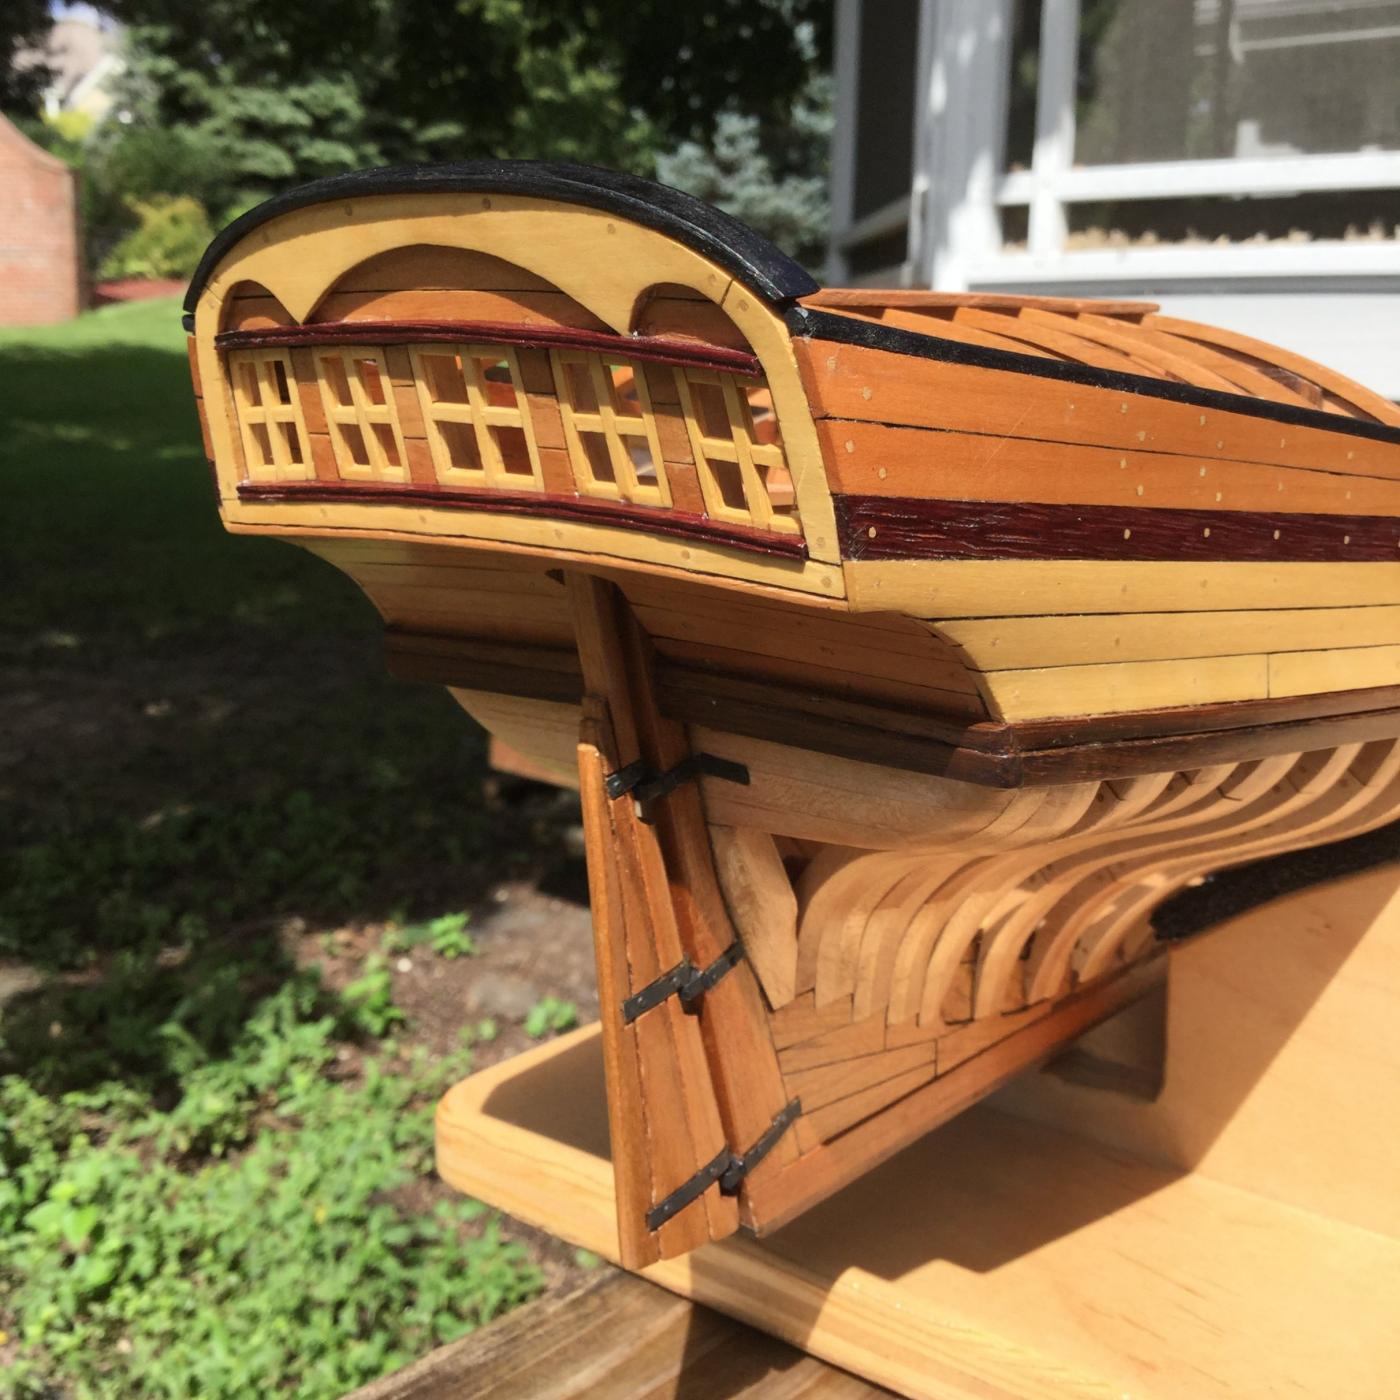
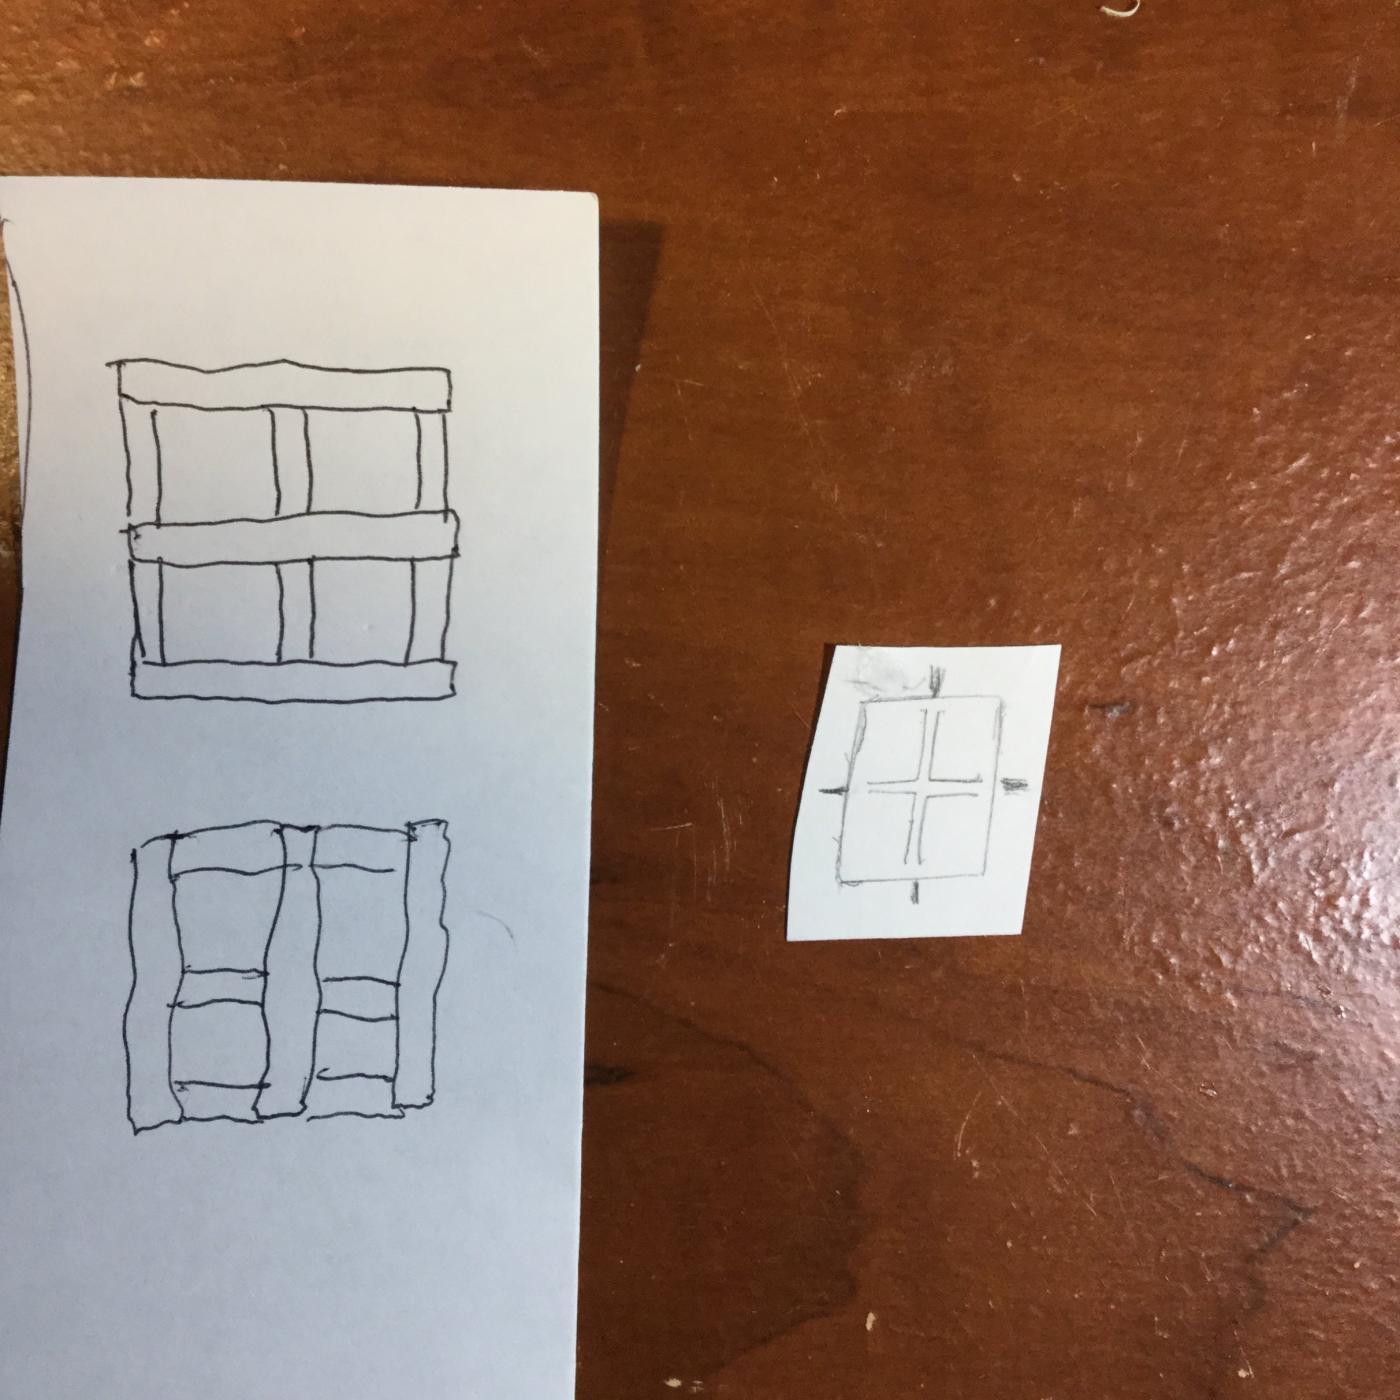
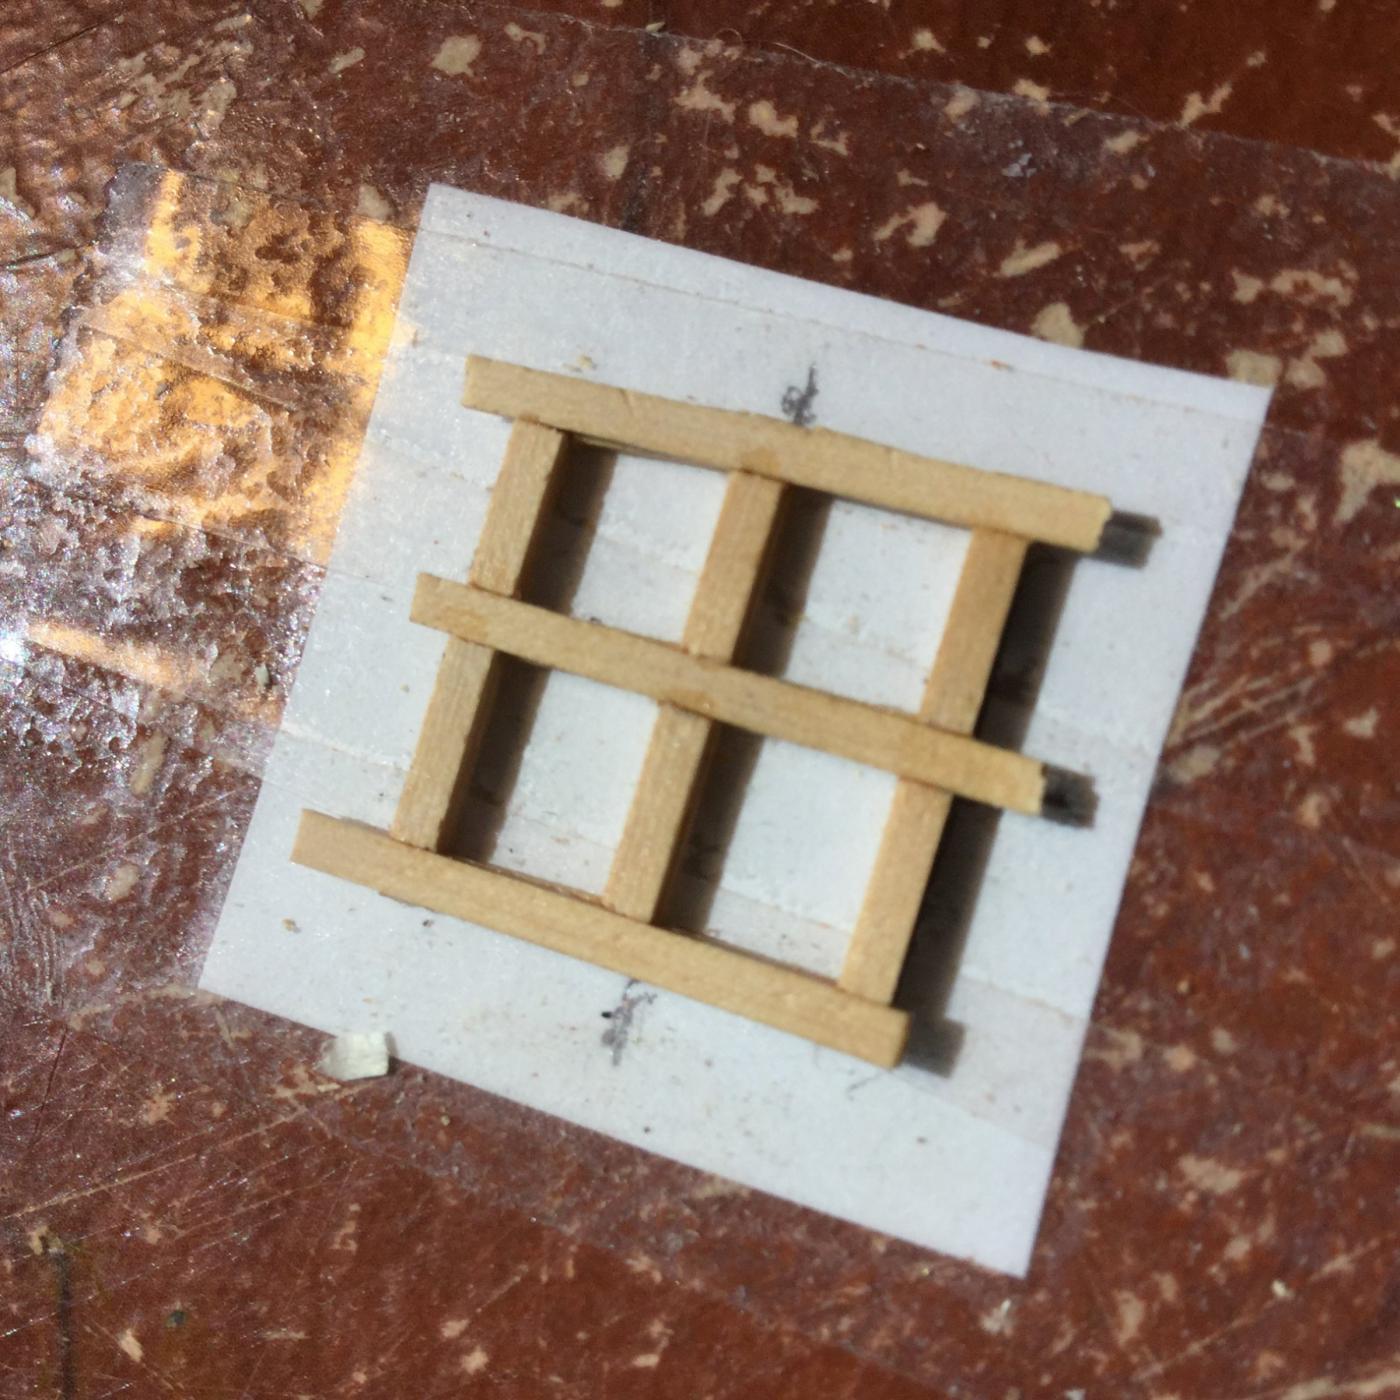
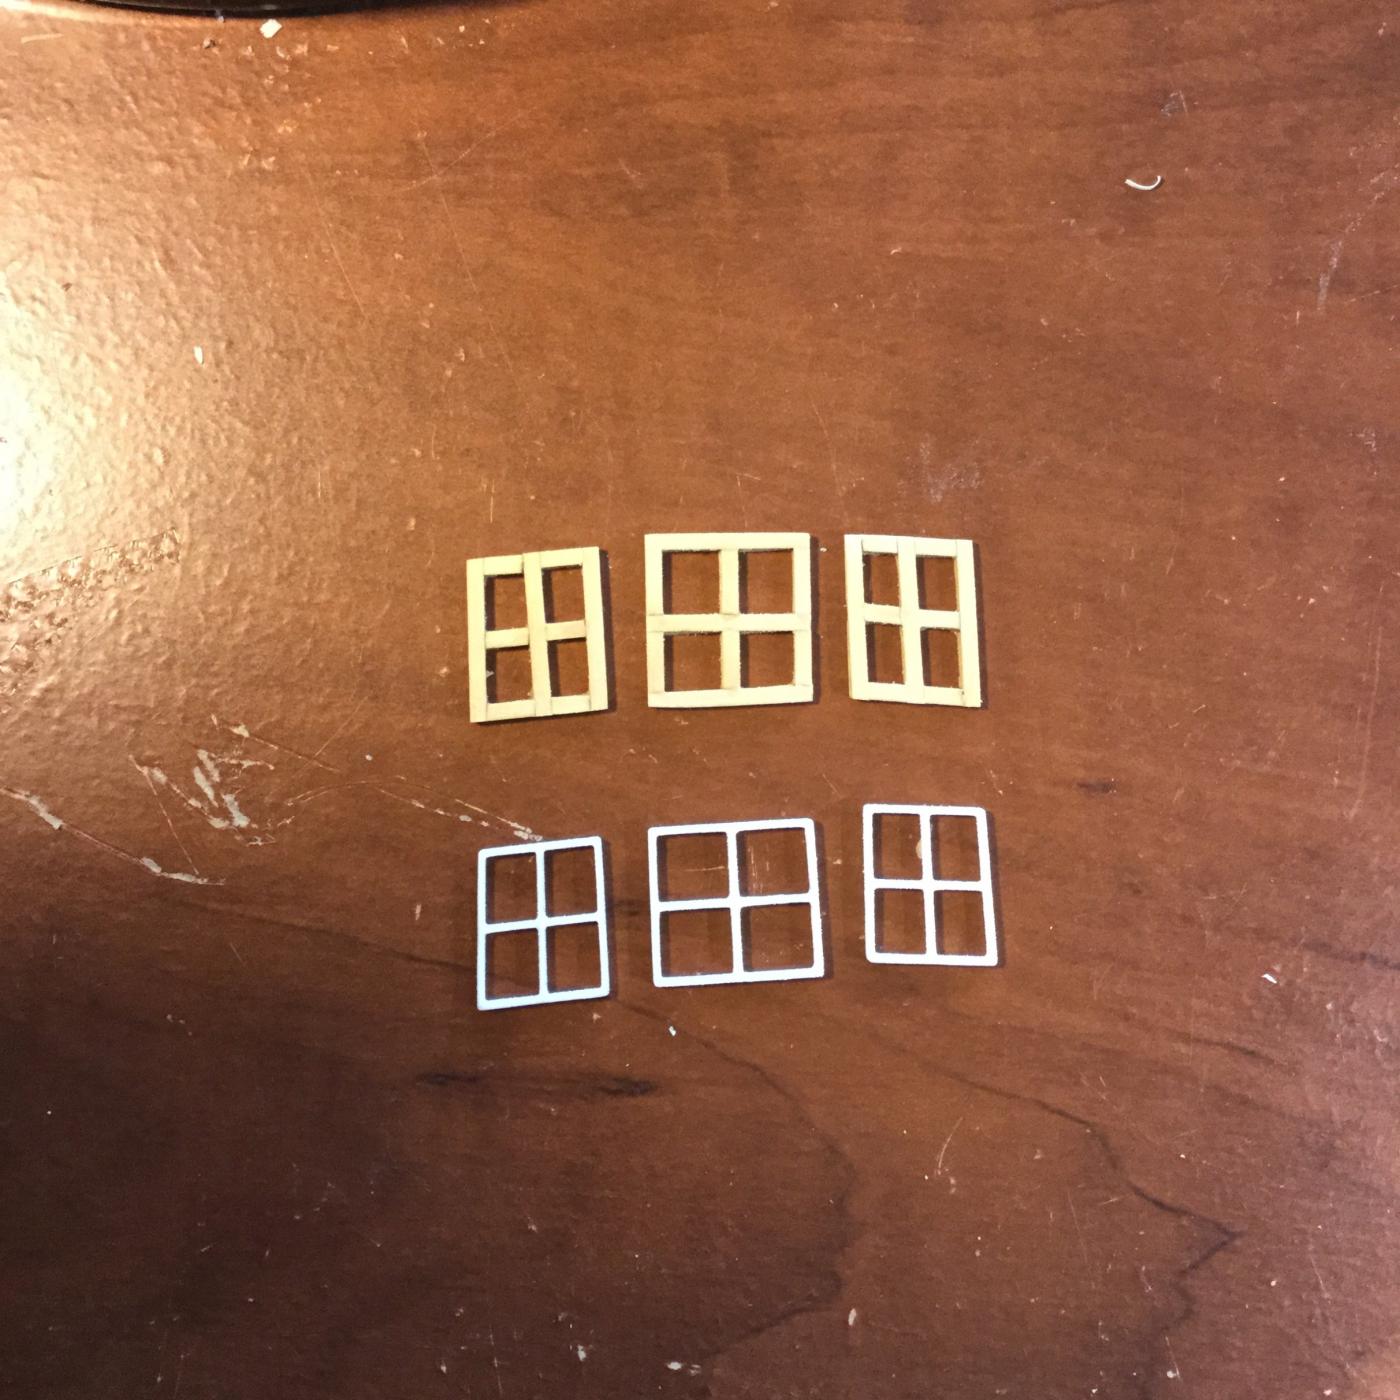
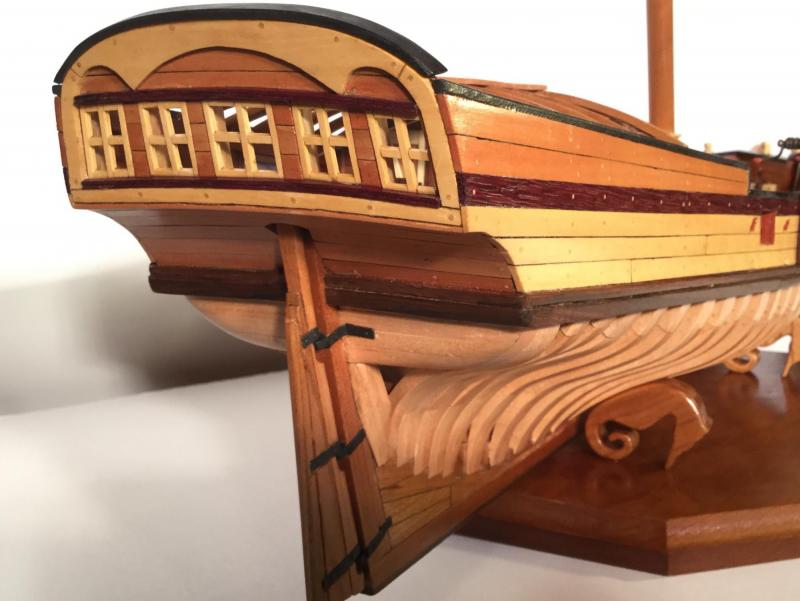
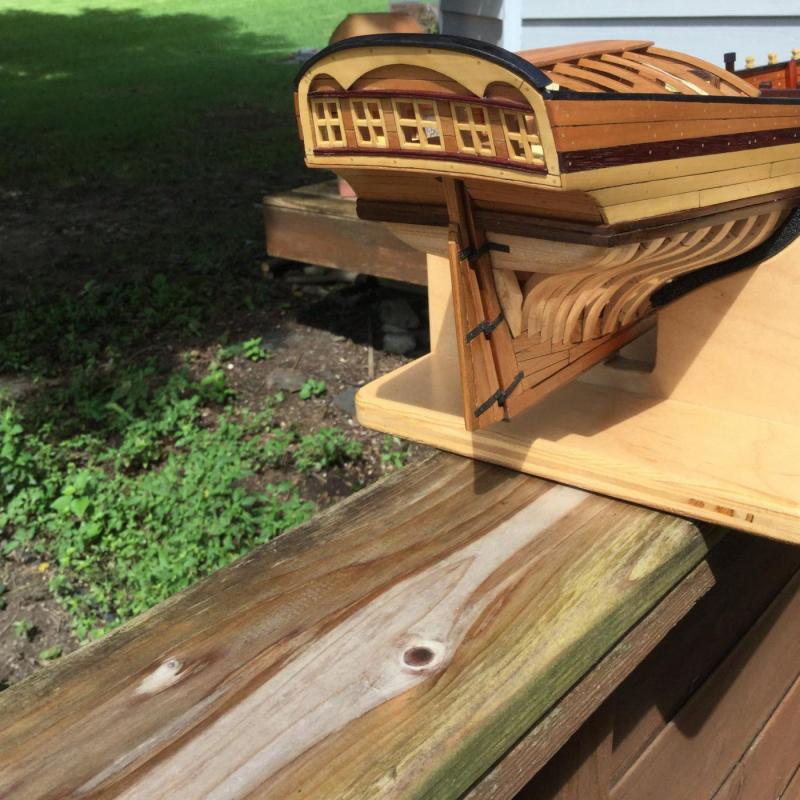
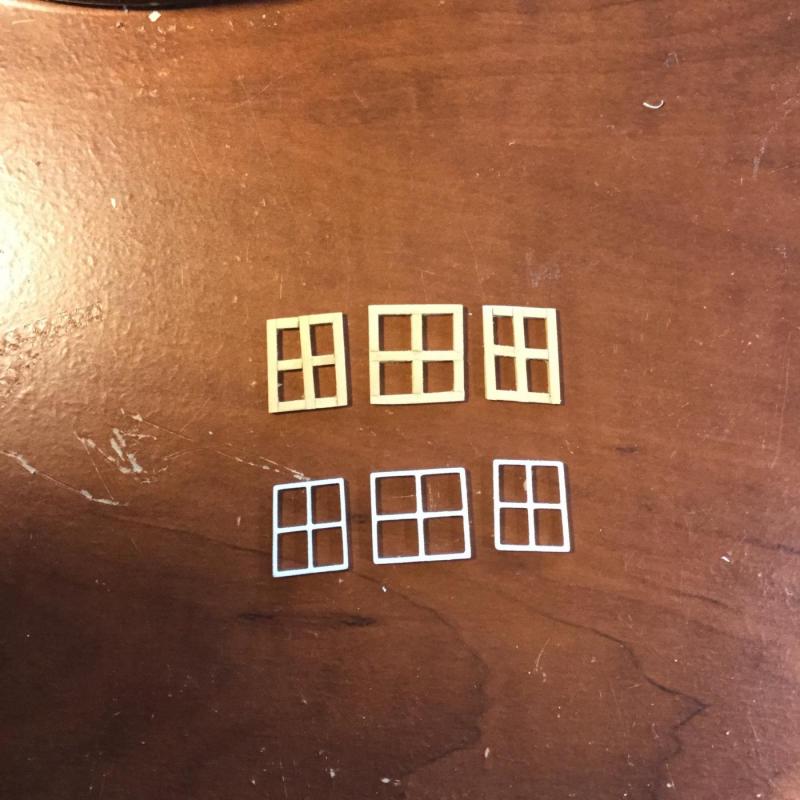
I started working on the stern lights in the great cabin. The kit includes five 3-D printed lights that look fine, but I wanted mine made of wood. My first decision was, "what color?" The kit-supplied lights are white, so I made up a mockup out of holly. Because my mockup was a little beefier than the kit parts, the white holly seemed way too much. I settled on boxwood. The first step was to cut a few strips of 1/32" thick boxwood to 1/16" in width. I then traced the outline of the kit lights on a piece of paper and covered the drawing with double sided tape. The frames are made in two layers. I laid out the first layer on the double sided tape and used CA to glue the second layer to the first. It's important that the second layer have spans that cover each butt joint of the first layer. If not, the frames fall apart. The crude drawing in the photo is the layout for the 2 layers that make up the frames. There are 18 parts per frame! They need to be cleaned up and fitted to their place on the stern, but overall I'm happy with the result. It was actually easier than I thought it would be! Two more to go.


- 306 replies
-
- 11
-
-
- armed virginia sloop
- Patrick Henry
- (and 2 more)
-
Nice, Don. I love the cherry. also. This looks like a nice little kit in a great, large scale.
- 62 replies
-
- 1
-
-
- batelina
- marisstella
- (and 1 more)
-
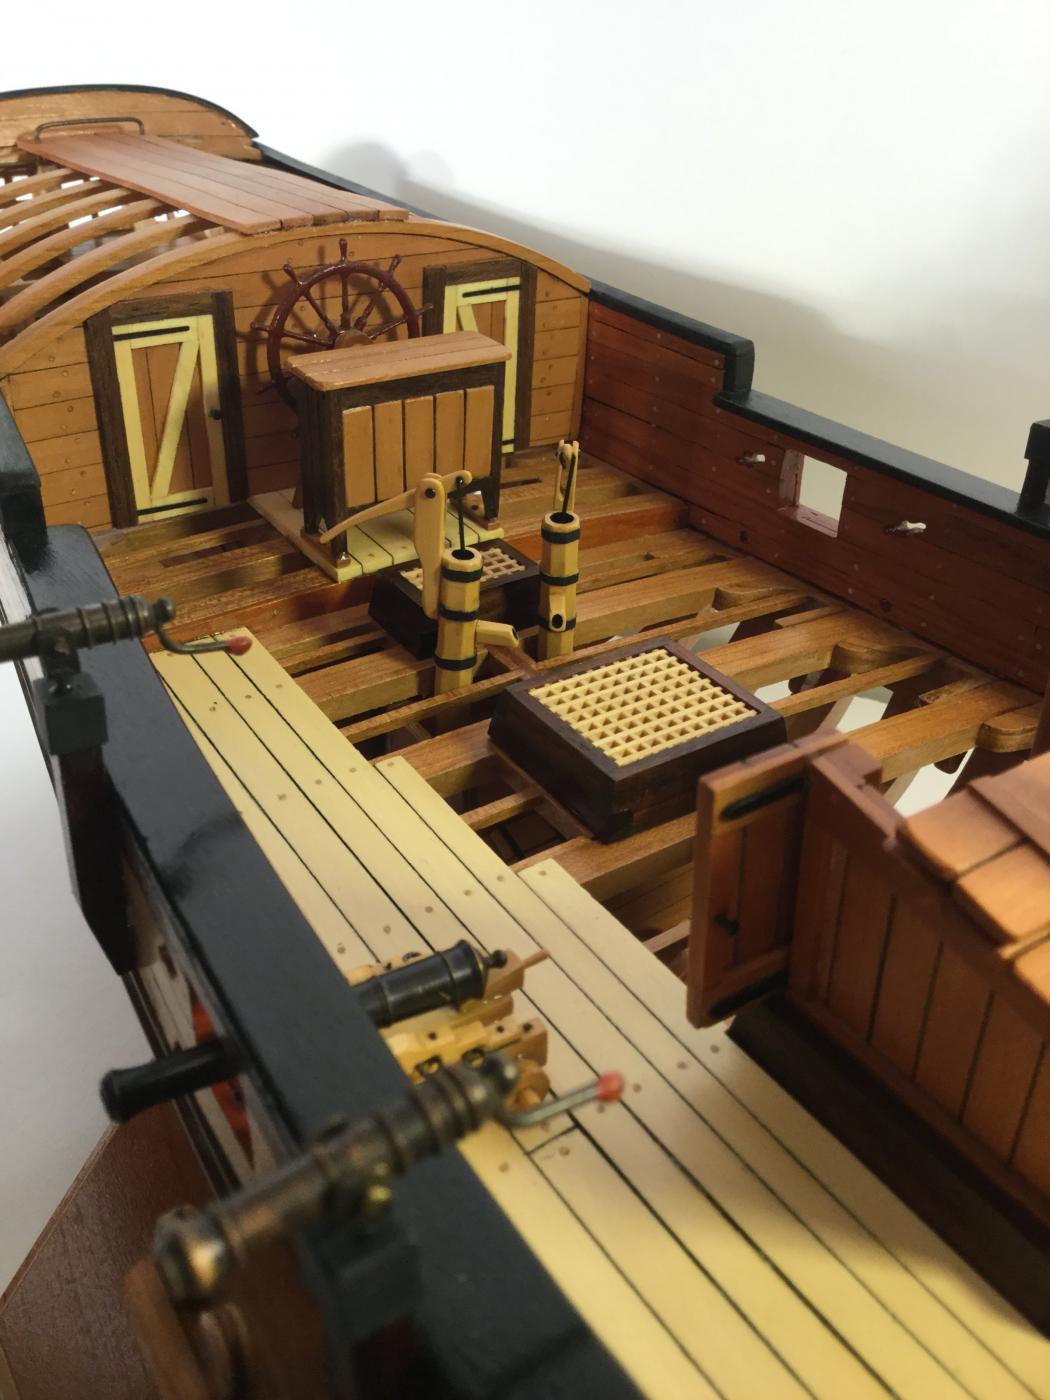
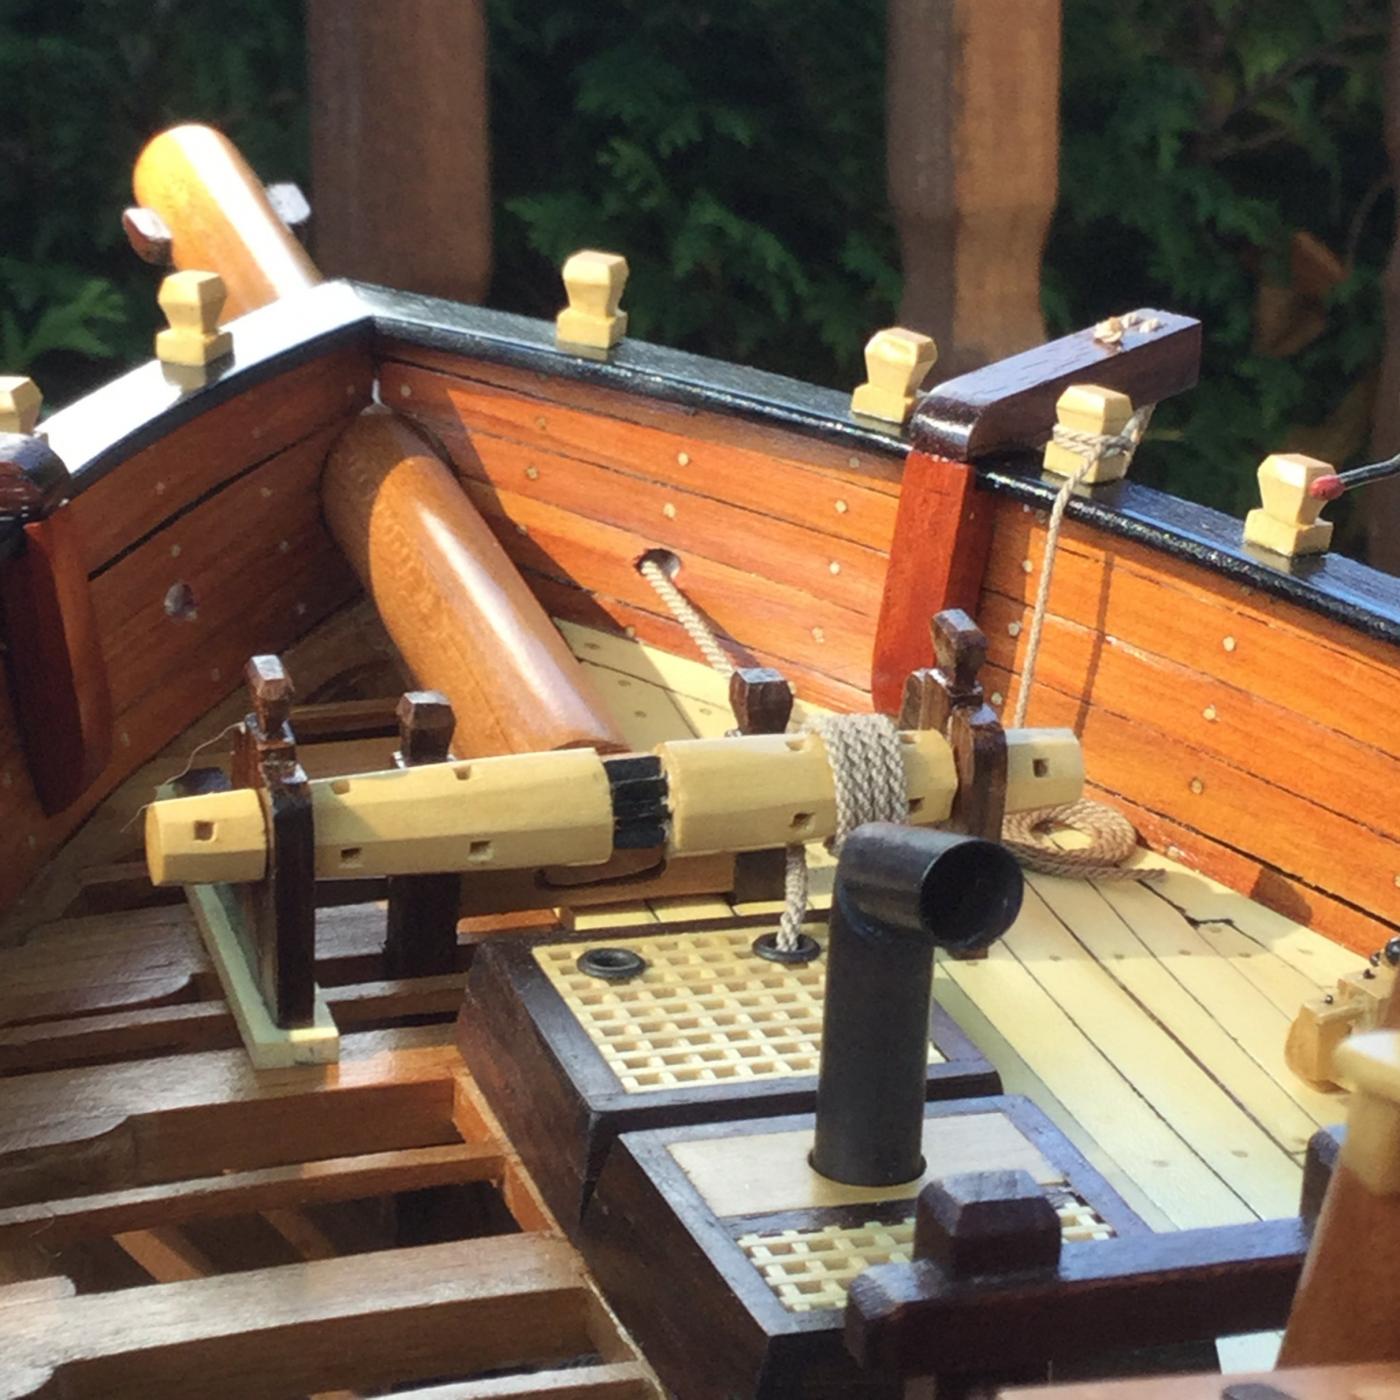
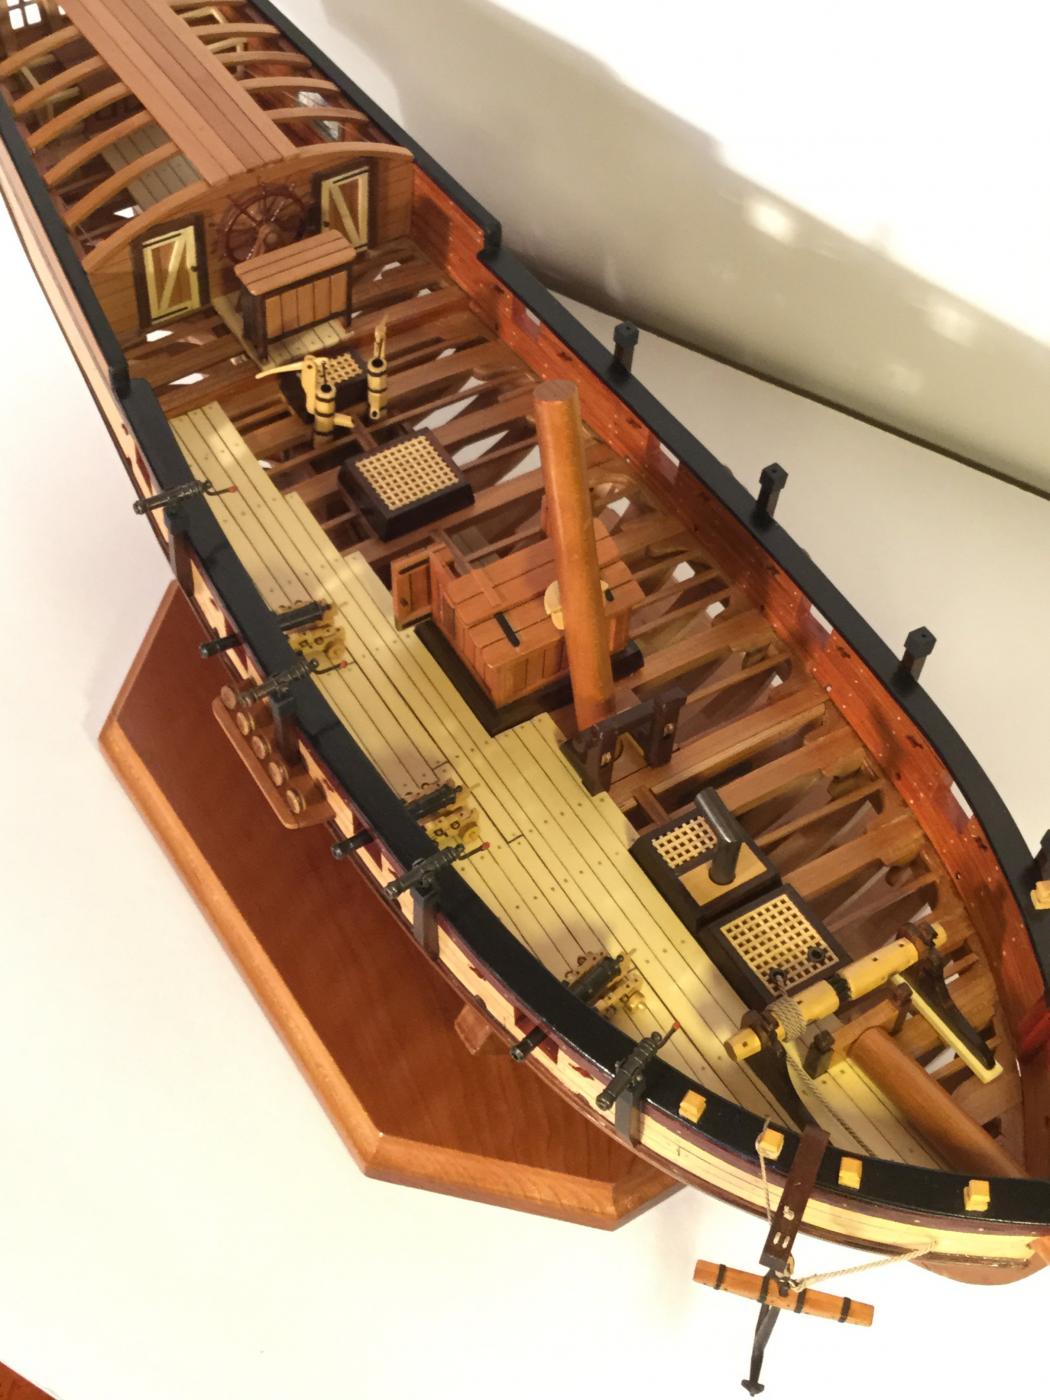
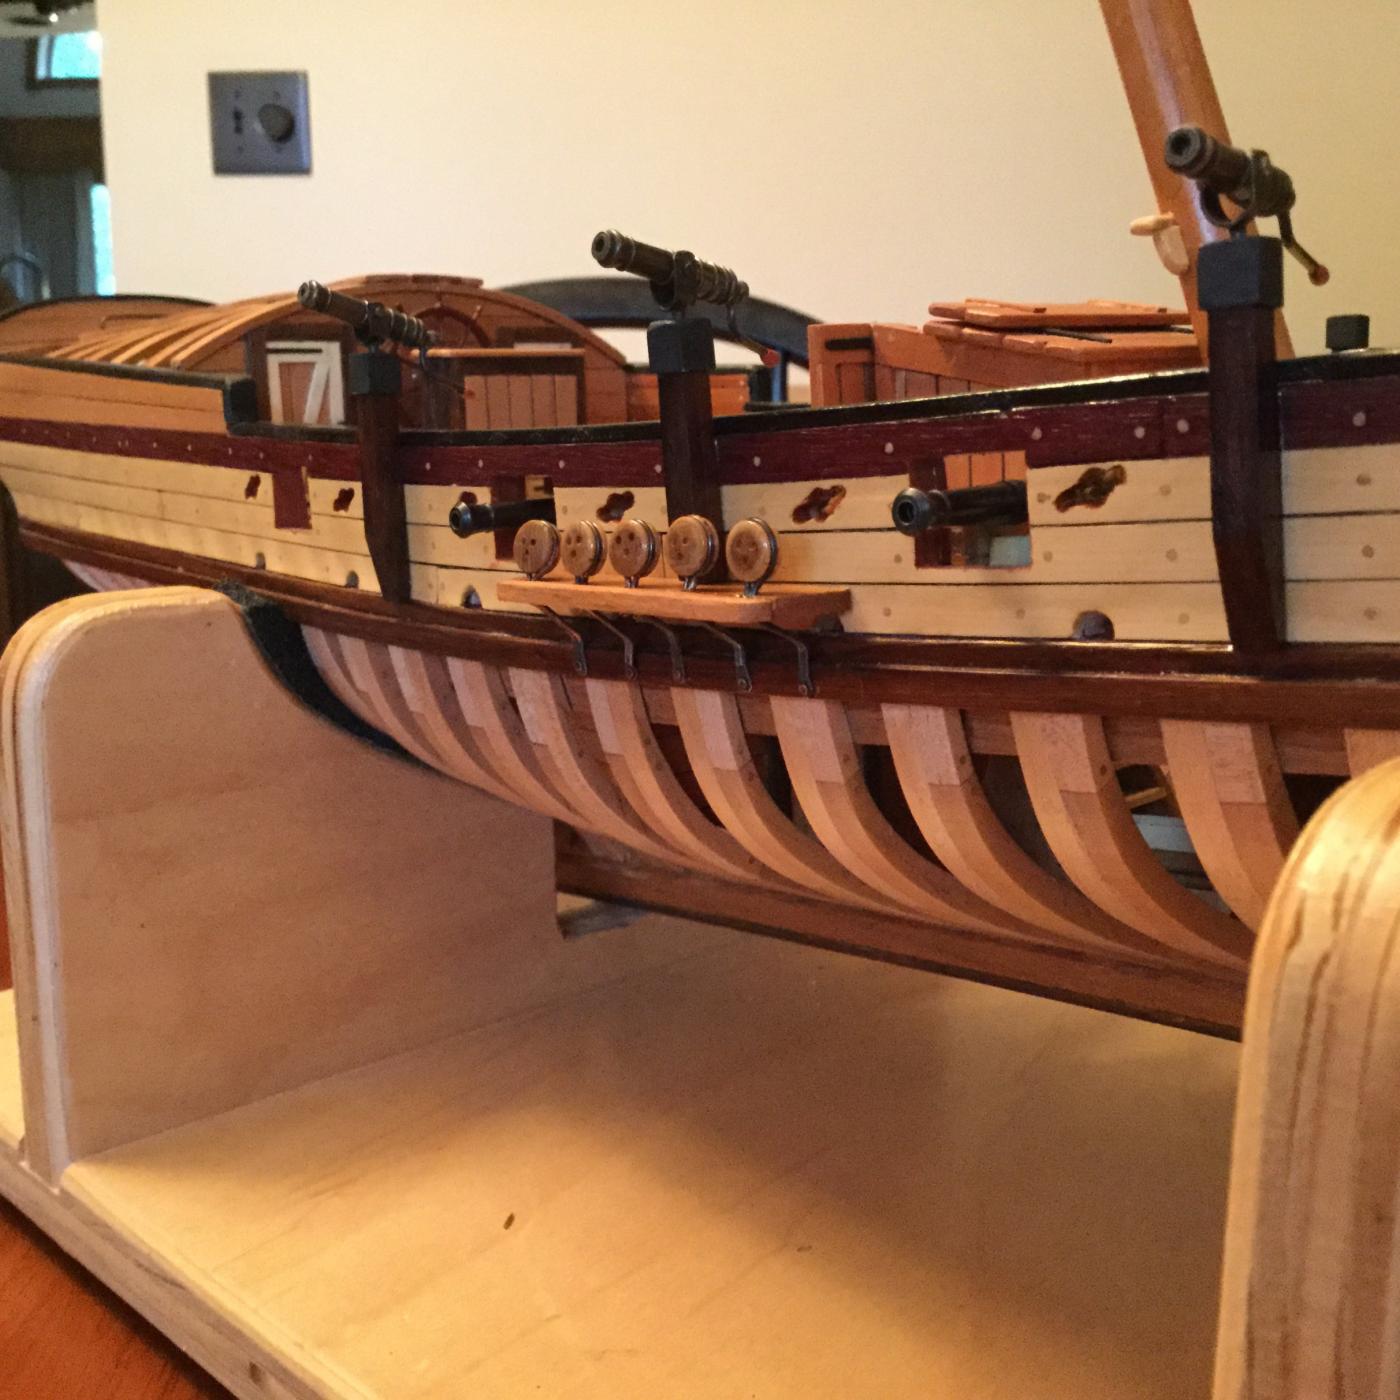
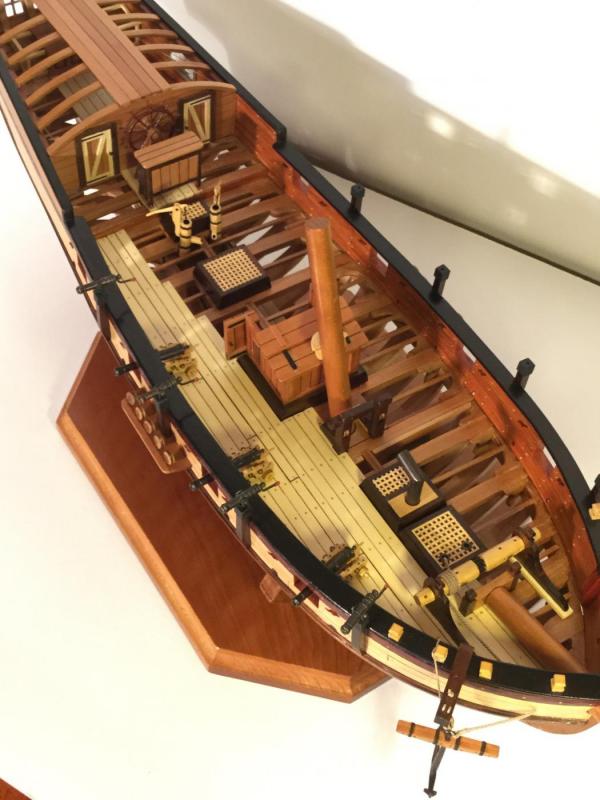
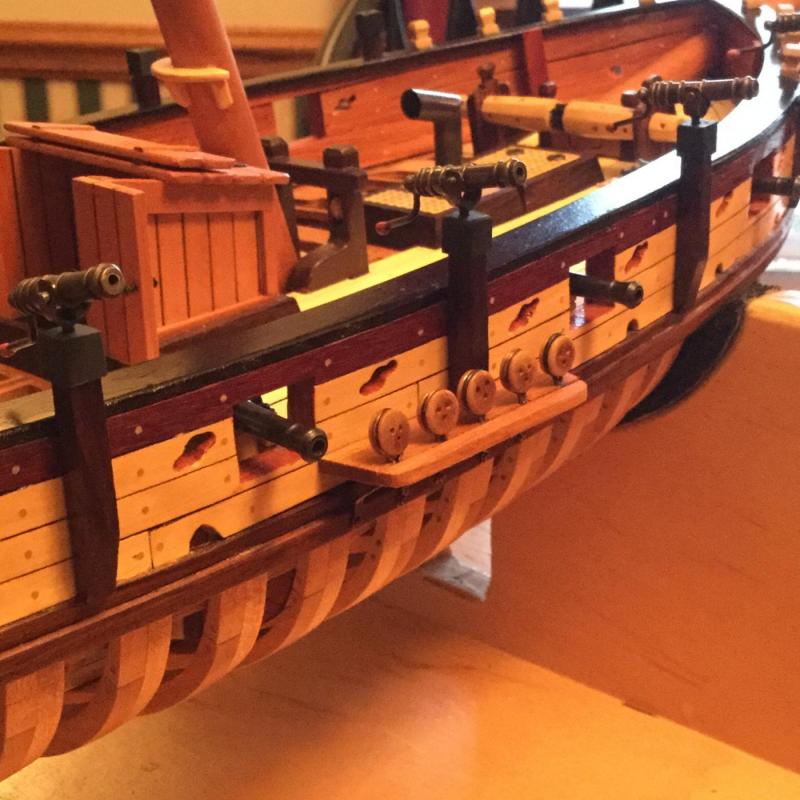
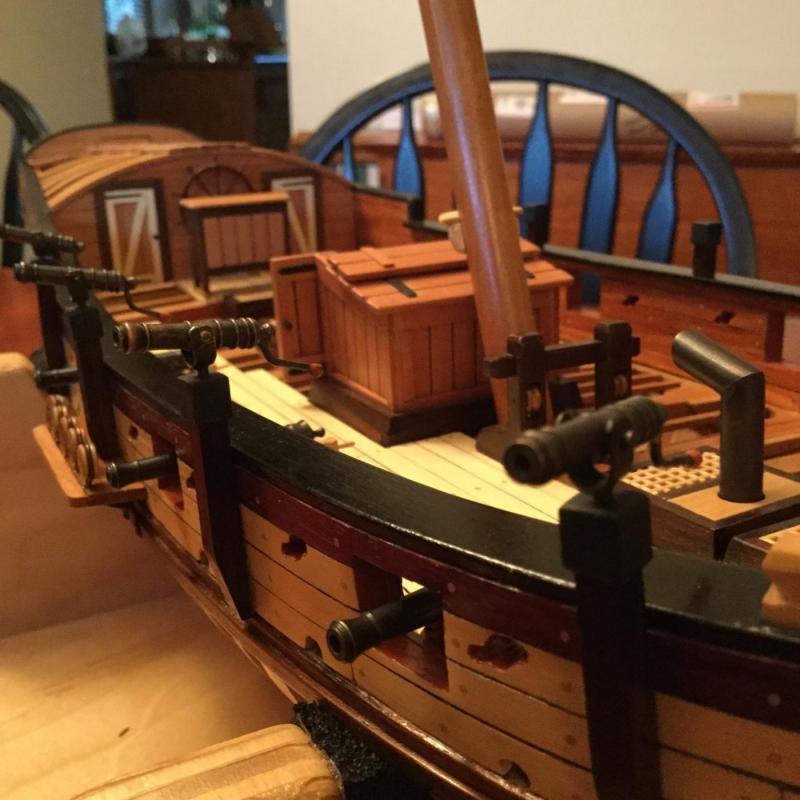
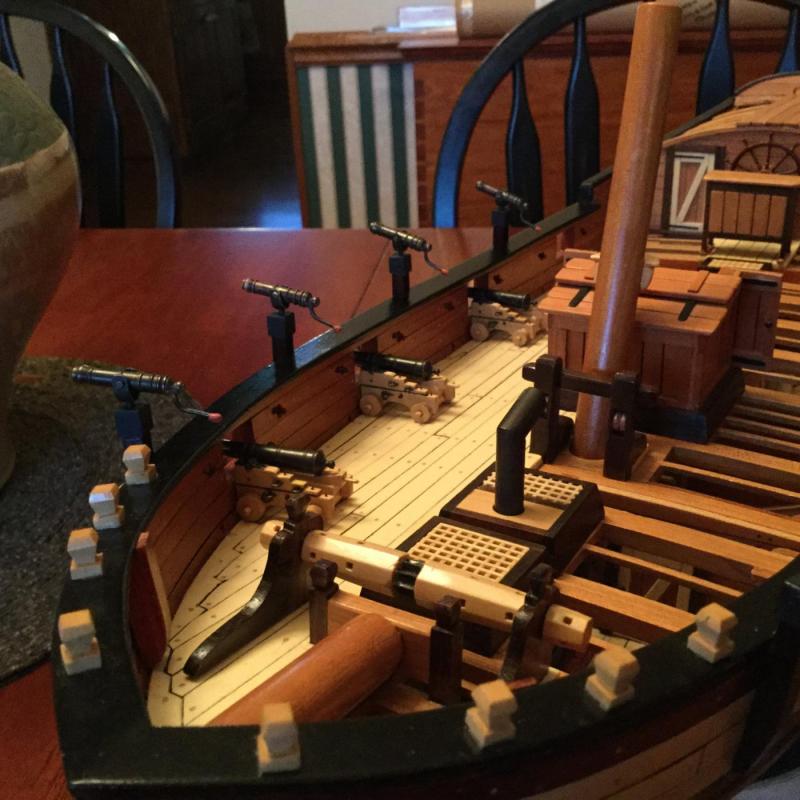
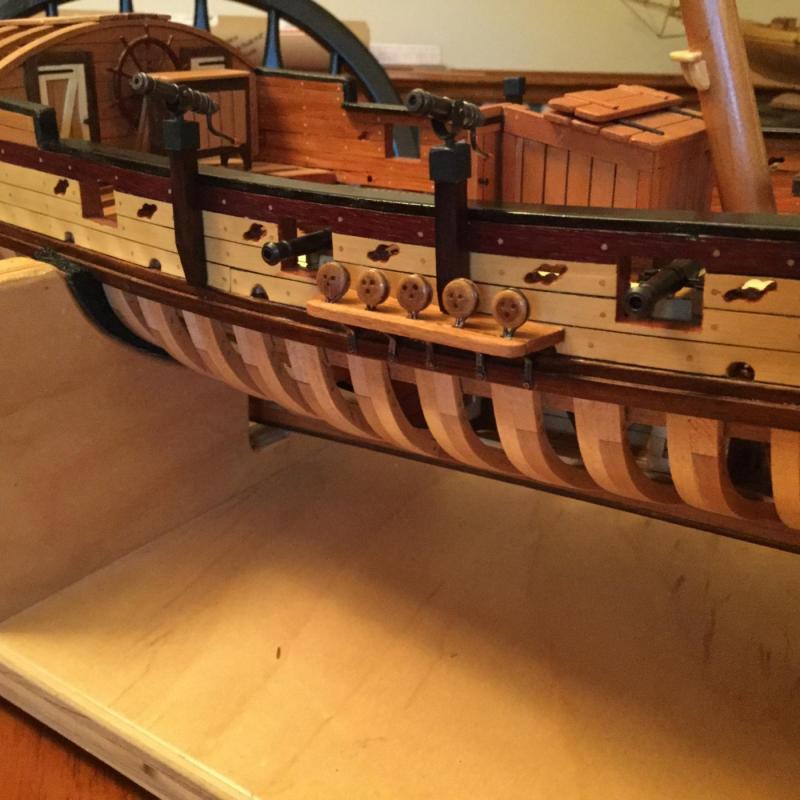
Busy day in the shipyard! I installed all the deadeyes and chainplates and covered the from edge of the channels with some cherry to finish them off. I also glued the gun supports to the hull and assembled the swivel guns. They were mounted (temporarily) on the starboard gun mounts. There are just a few tasks left: The horizontal portion of the catheads, finishing and rigging the anchors, and making the great cabin lights. Almost done! The ship will be mounted on the backs of some cherry seahorses fixed to a cherry base. I still need to rout a profile on the base and glue the seahorses in place. # or 4 coats of wiping varnish and it'll be done.

- 306 replies
-
- 20
-
-
- armed virginia sloop
- Patrick Henry
- (and 2 more)
-
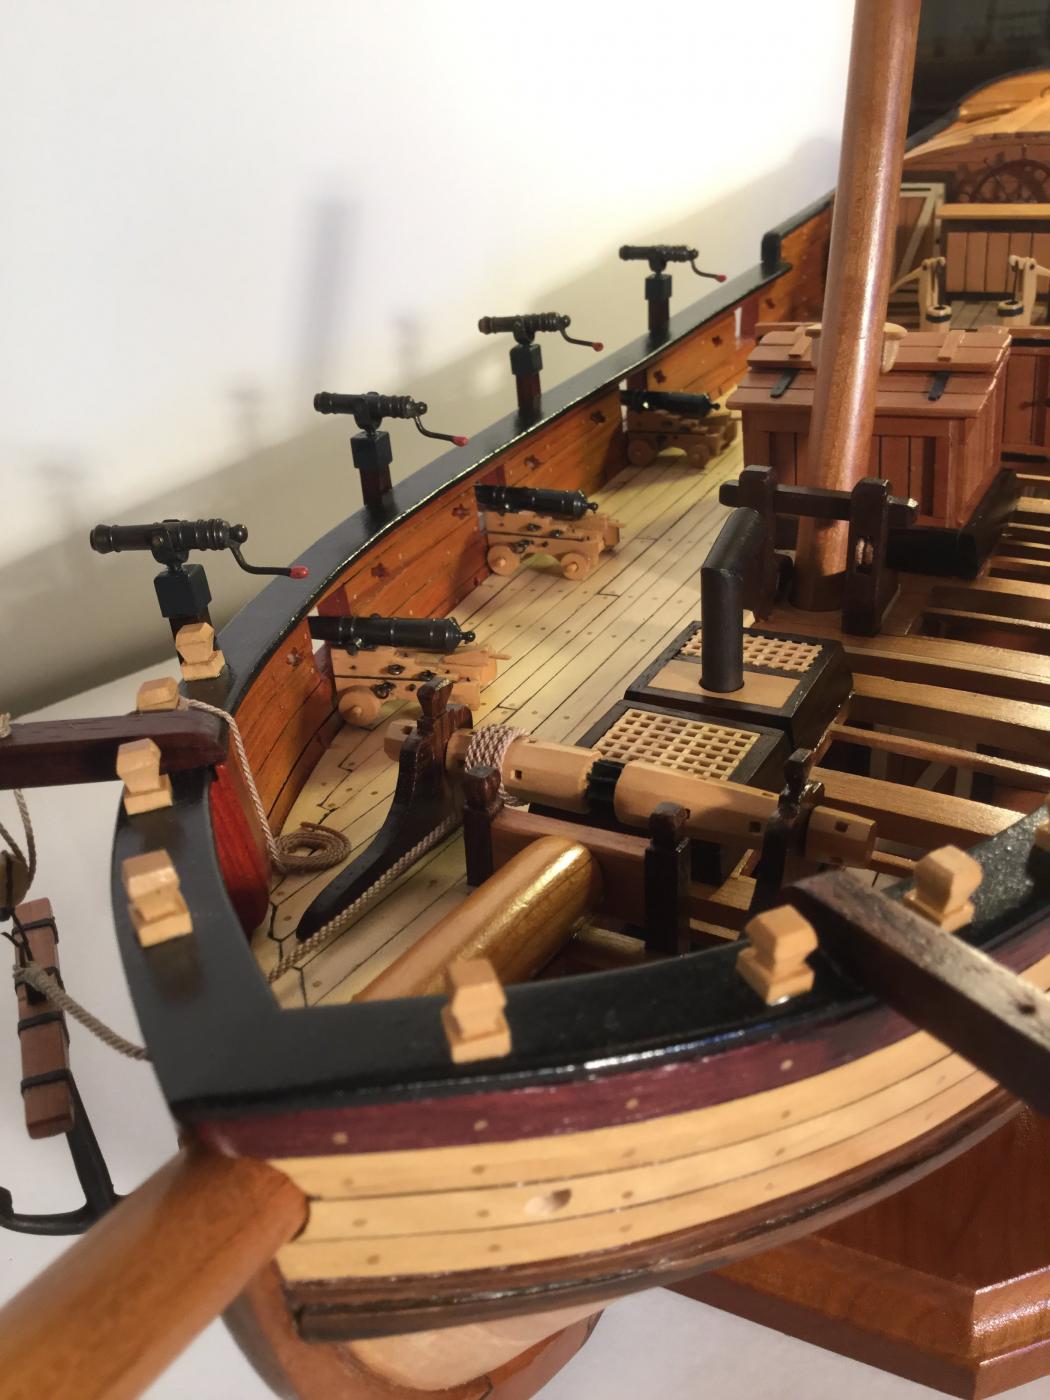
The finished appearance of the swivel guns.
- 306 replies
-
- 11
-
-
- armed virginia sloop
- Patrick Henry
- (and 2 more)
-
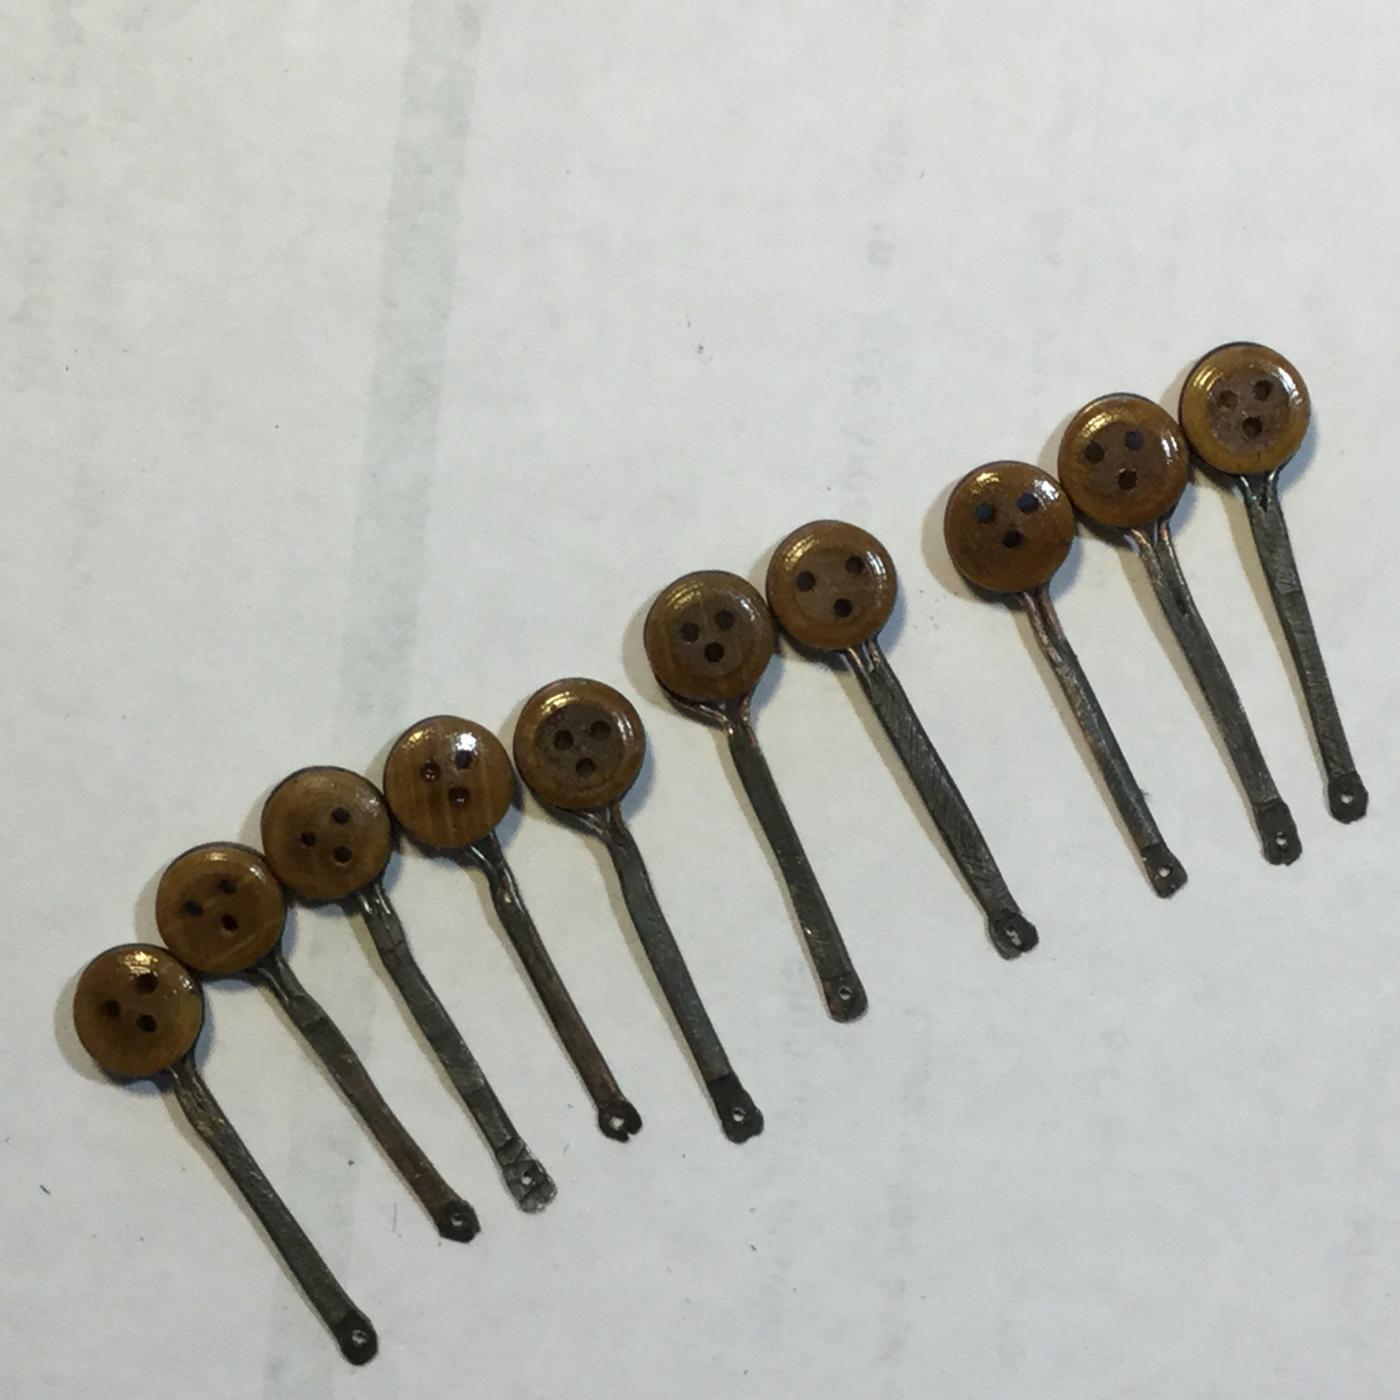
I've become a big fan of Jax Pewter Black for brass blackening. No "flaking off" of the blackened surface. I apply it with a brush and rinse immediately.
-
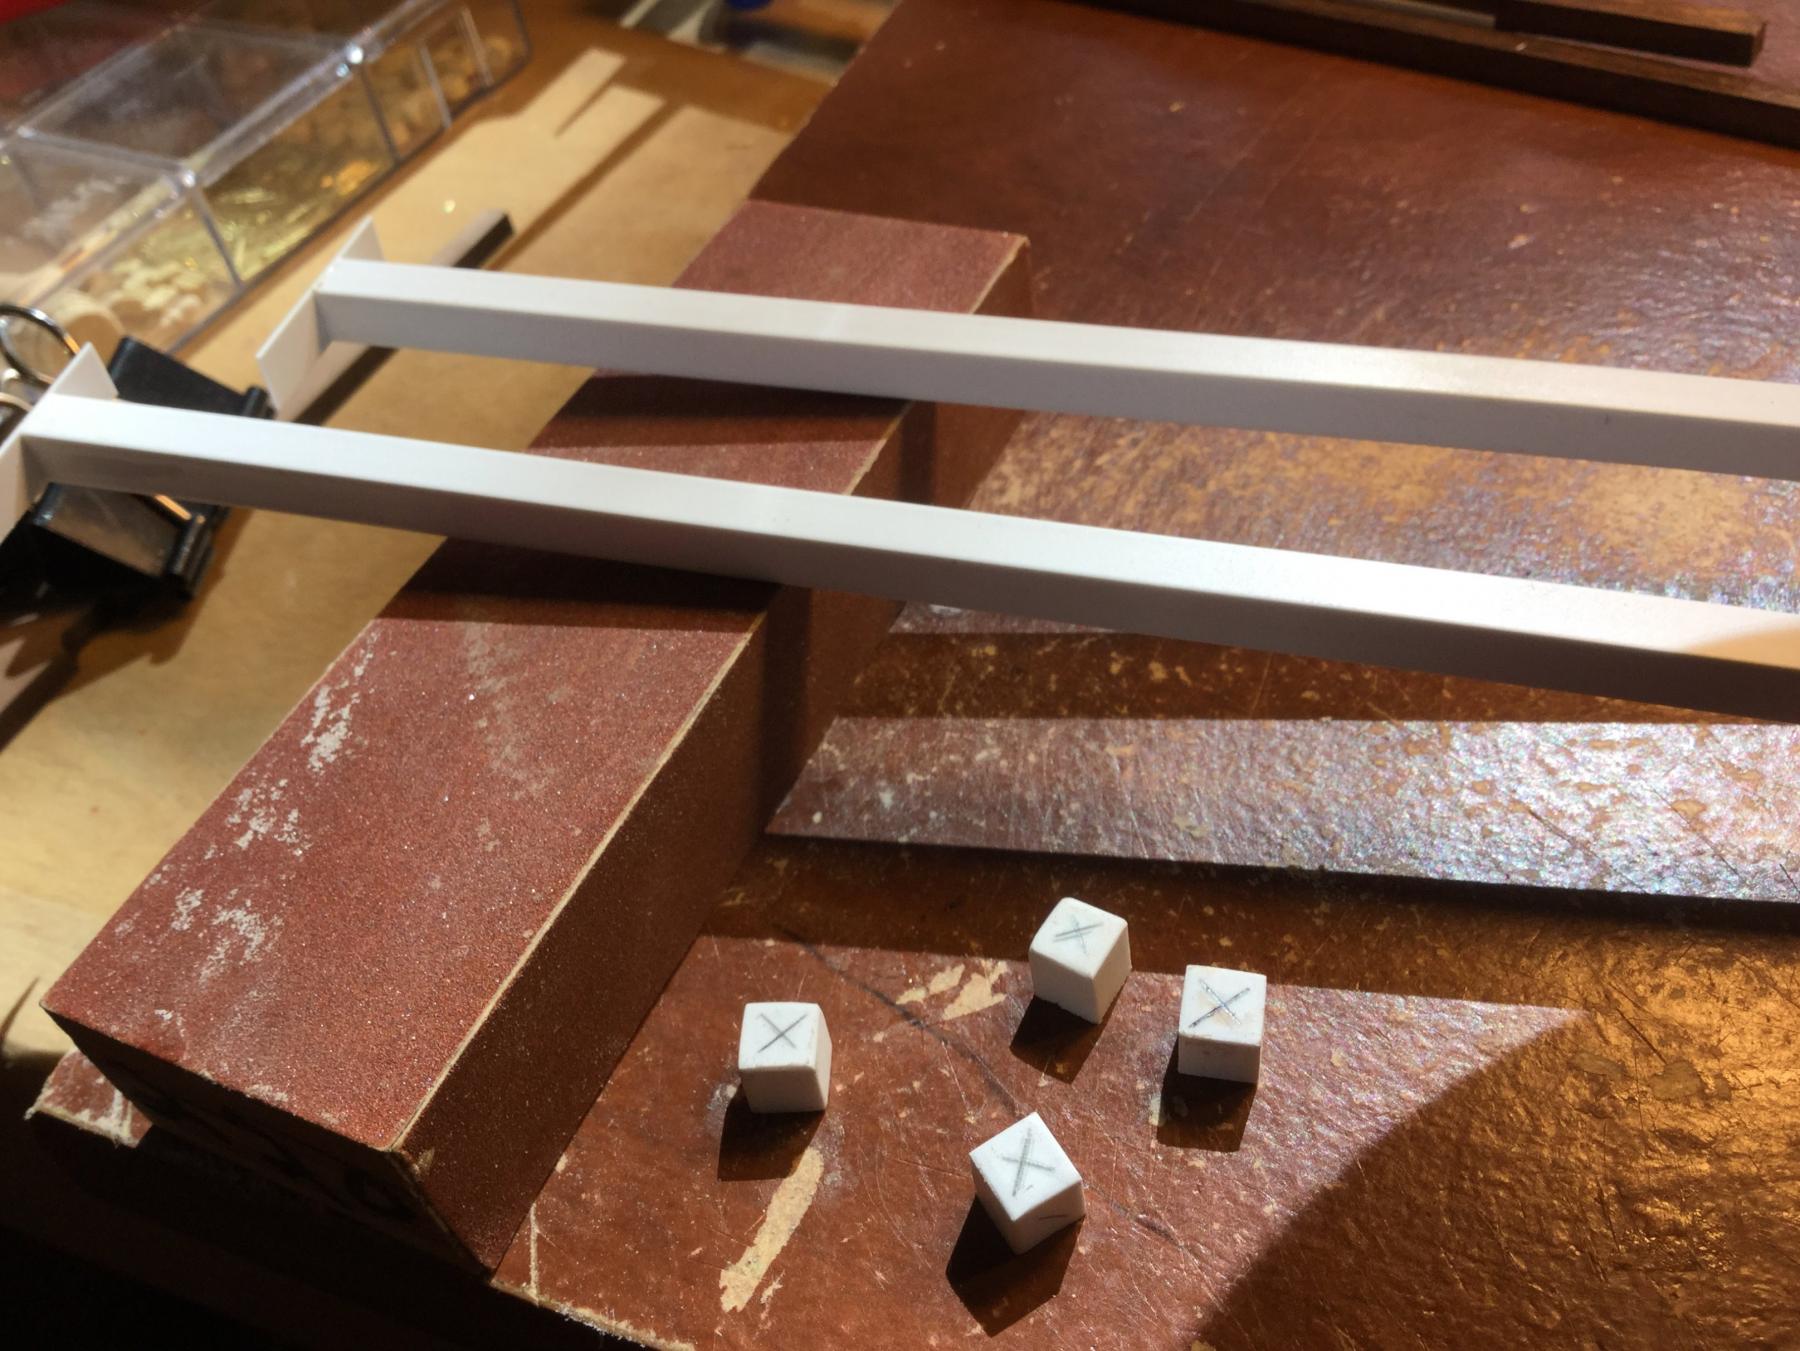
I cut out 8 rosewood gun supports. For the metal caps I used a 1/4" square styrene tube and glued strip styrene to each end. I trimmed the styrene and cut of the caps. I drilled a pilot hole in each. They were then painted gunmetal color and glued to the gun supports. I enlarged the pilot holes to 1/16" diameter and fixed 4 yokes in place. The trunnions will be threaded through the yokes and guns and fixed with a drop of CA. The 4 starboard supports will have guns, the 4 port supports will be gunless.


- 306 replies
-
- 11
-
-
- armed virginia sloop
- Patrick Henry
- (and 2 more)
-
Great progress. The rudder looks great, and your mast angles look spot on!
- 114 replies
-
- 1
-
-
- swift
- artesania latina
- (and 2 more)
-
Thanks, John! The fence problem was a huge one with the stock fence. Even 1/32" stock wanted to "slip under" the fence. I'll install the aluminum strip.
-
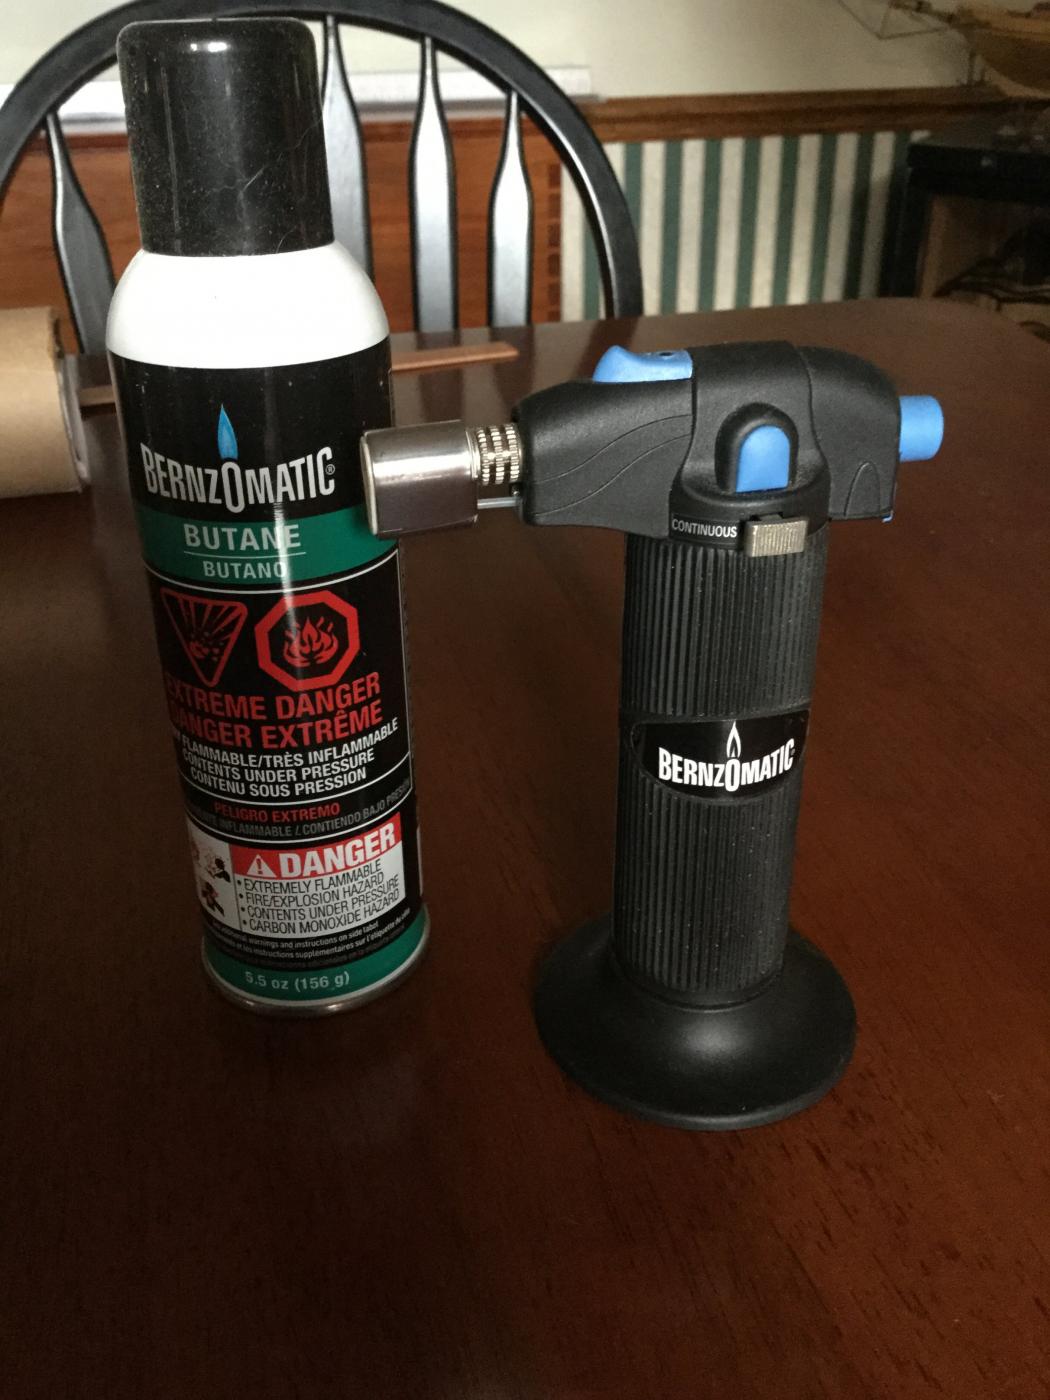
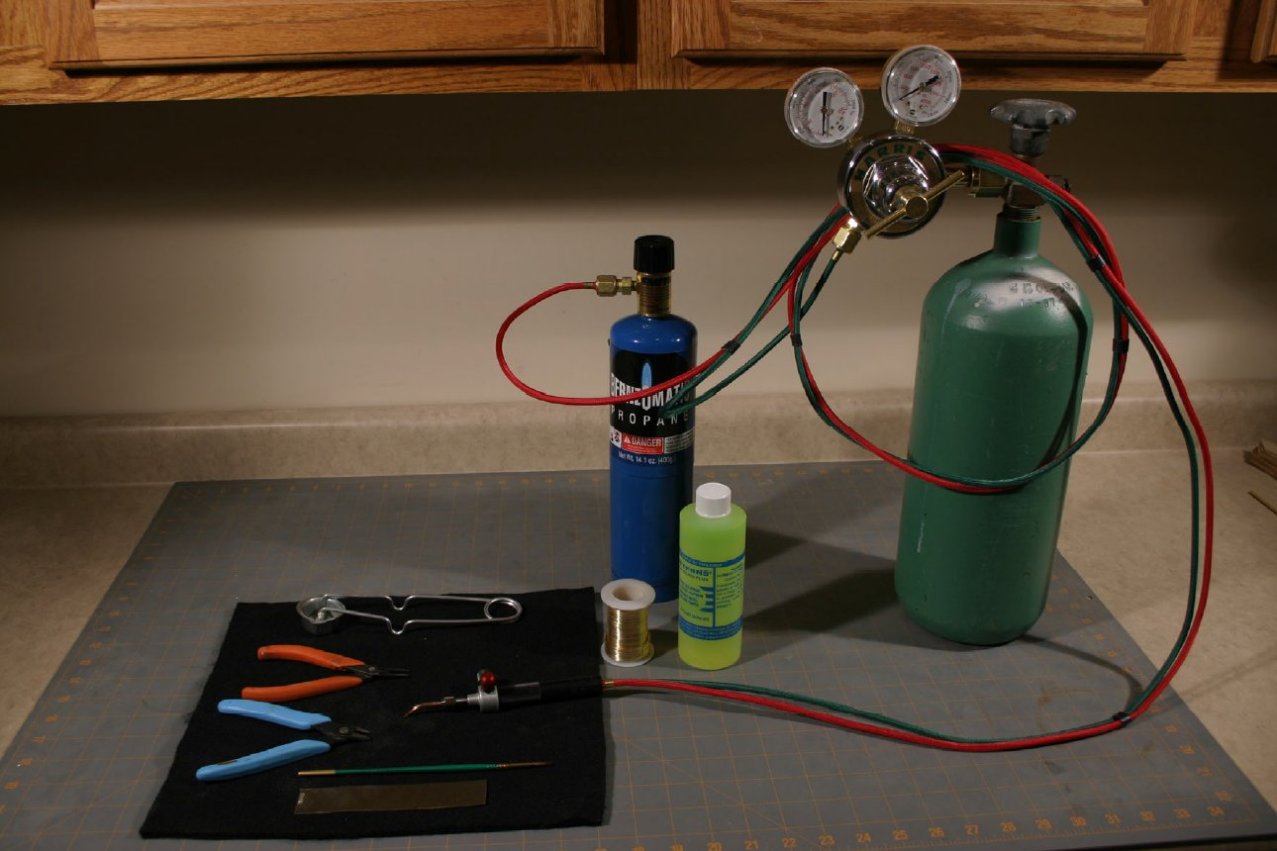
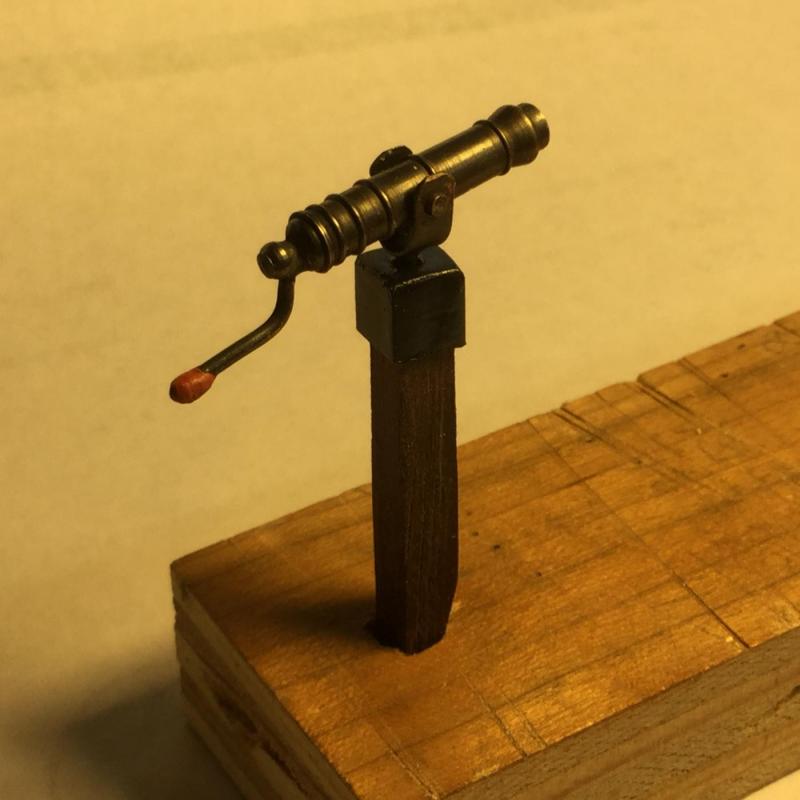
Ken: The hand torch is really like a glorified butane lighter. It works great with conventional solder, which melts at 450 degrees F., but it's hard to get the temperature high enough to melt silver solder, which flows at 1500 degrees F. I had to train the flame on the joint for 2 minutes to get the silver solder to flow. If you use propane and oxygen together, the flame is much higher in temperature than butane alone. You need a regulator to mix the two gasses. Ever wonder why they sell oxygen containers near the propane torches at big box stores? The photos show the hand torch I used, and the setup Bob Hunt uses for silver soldering from his practicum series.


- 306 replies
-
- 8
-
-
- armed virginia sloop
- Patrick Henry
- (and 2 more)