DocBlake
-
Posts
1,811 -
Joined
-
Last visited
Content Type
Profiles
Forums
Gallery
Events
Everything posted by DocBlake
-
 I think dropped planks and stealers actually add interest to a planked hull...especially if well done, as yours look to be, Don. I agree. No paint!
- 653 replies
-
- 8
-

-
- trabakul
- marisstella
- (and 1 more)
-
The garboard strake is important, and I think you've got it nailed, Elijah. Often it's allowed to "creep up" the bow, causing trouble in the planking down the line.
- 701 replies
-
- 4
-
-
- phantom
- model shipways
- (and 1 more)
-
Nice job on the planking, Brian. I love the pear!
-
Nice work on the planking, Don! I use the same technique (weld bond and CA glues)) for my planking. The CA is a "liquid clamp" which holds while the Weldbond cures.
- 653 replies
-
- 8
-
-
- trabakul
- marisstella
- (and 1 more)
-
I think it looks great, Brian!
-
Hi Mike! I have a Byrnes saw which I use to do most of the finish work on the planks I use. I also have a full-sized woodworking shop for furniture building. I typically will use my band saw or full size table saw to break down planks into billets, and then use my planer or thickness sander to finish them. The Byrnes saw is the final step. I have the advantage of some great local suppliers of rough hardwoods,including exotics at very reasonable prices. You can get manageable billets at WoodCraft or Rockler stares in your area. Take a trip there and see what they stock...typically everything in 1/8, 1/2, and 1/4" thicknesses, and widths of 2 to6 inches (easy to cut on a Byrnes saw). I'm at the Mystic Seaport Wooden Boat Show now, but I'll send photos of the rosewood when I get home on the weekend.
-
I've worked with black wood and it would look good. If you're looking for a little more character consider Bolivian rosewood. You can find pieces nearly black with strands of dark, dark brown and purplish grain running through them. I've used rosewood for the wales, black strikes and hatch coamings on my last several projects. A little warmer than "black-black". I'd consider yellow heart for the Morgan's ochre. I was aboard her today and that thought struck me before reading this thread!

-
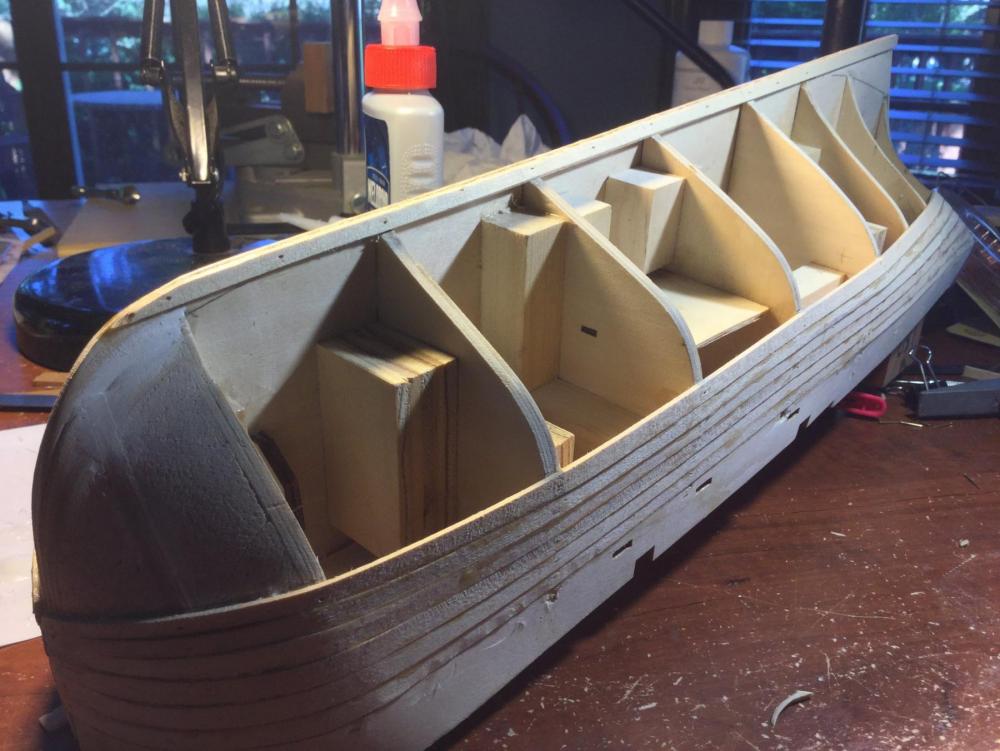
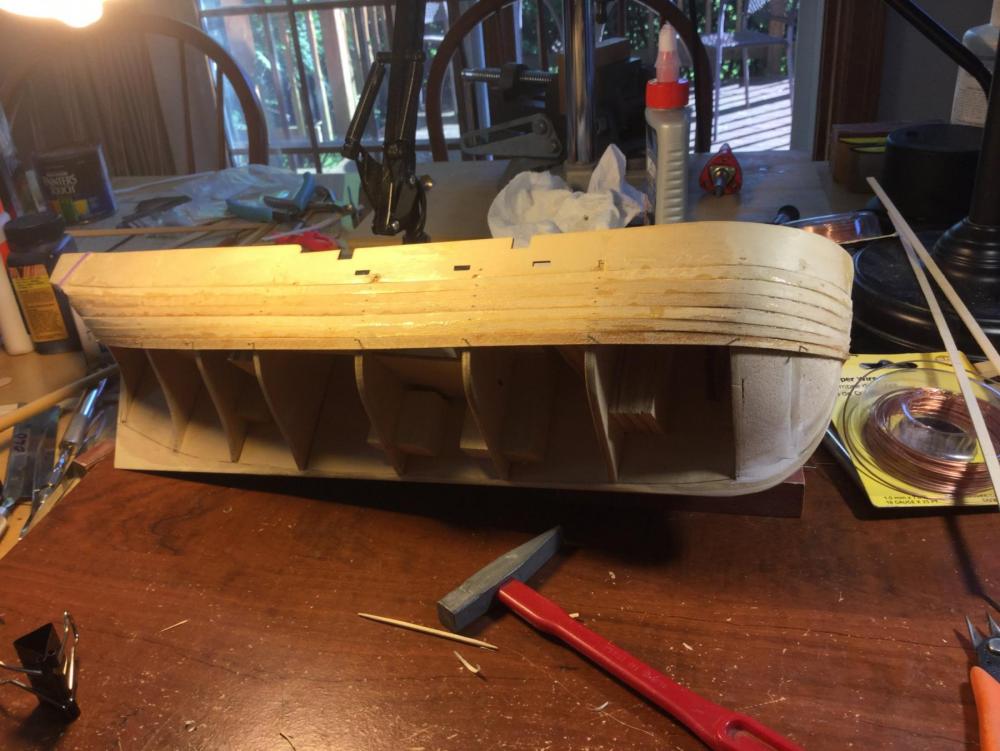
I agree with Brian. Sand the first layer of planking smooth. Use filler for obvious low points or wide gaps. All you want is a nice smooth base for the second layer of planking!
-
John: Here's a shot of the garboard strake on "Independence. I realize the hull shapes are different, but you can see that the garboard ends in a point at the bow. This is the exception that proves the rule: "no plank should end in a sharp point"!
-
John: I think your doing a fine job with the first planking. I do agree with Mark about the plank next to the garboard strake. That curve at the forward end needs to be shaved down. It's creating a "bottleneck" effect that will interfere with the remaining strakes to be fitted
-
6 strakes on each side. I cut a rabbet from the bearding line to the keel (where the keel will go). Now I need to fit the garboard strakes. A very weird shape due to the hull cross section, so I need to think about this a bit!
-
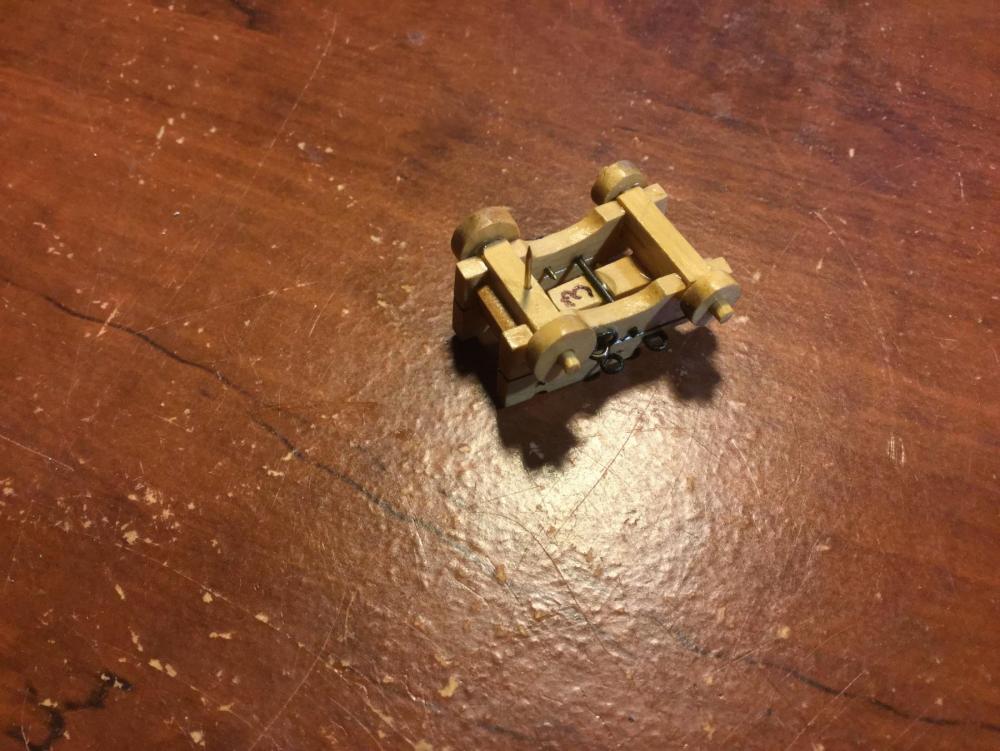
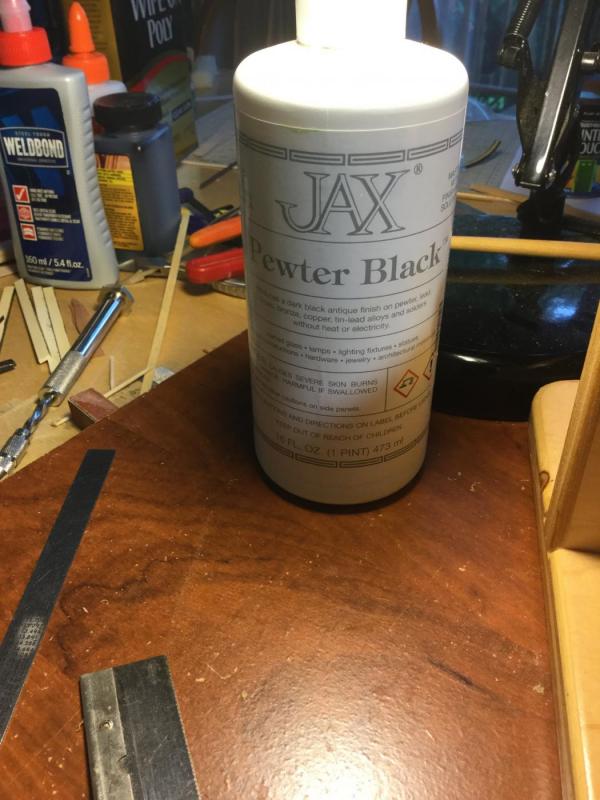
Thanks for all the comments and "likes" guys! I'm working on the chainplates right now, making them out of 20 gauge copper wire. The blackening with Pewter Black is slower with the copper than it is with brass. I'm having to go back 2 or three times to get the effect I want. The Jax product is pretty cheap ($22 for 16 ounces, as opposed to about $7 for 3 ounces of Birchwood-Casey) so I'm not worried about going broke! I haven't purchased the cleaning solution, but I'll order some today and see how it affects the blackening of the copper. John: I just drilled a hole through the front axle and used one of the famous "yellow nails" as the pin. Use the pin to pierce the deck and drill another hole in the deck ( #71 drill). Epoxy the pin in place before mounting the cannon. Put a little epoxy on the tip of the pin and slide it into the hole you drilled on the deck. It will hold the carriage in place and be invisible
- 306 replies
-
- 10
-
-
- armed virginia sloop
- Patrick Henry
- (and 2 more)
-
Looking good! I replaced the knees at the stern on my model also. The ones in the kit were so flimsy!
- 114 replies
-
- 2
-
-
- swift
- artesania latina
- (and 2 more)
-
Great job, Don! It looks like you've got things faired out well so the planking is going to look awesome.
- 653 replies
-
- 5
-
-
- trabakul
- marisstella
- (and 1 more)
-
I read about it in your build log, Brian! Which of the JAX metal cleaning solutions do you use? There are several.
- 306 replies
-
- 3
-
-
- armed virginia sloop
- Patrick Henry
- (and 2 more)
-
Thanks, guys! Don: Go for it! It's a fun build, and you can work on other things at the same time as I've done. I remade the trunnions (they were too short) and blacken them with my new favorite blackening agent for brass: Jax Pewter Black. The stuff is amazing! Just paint it on with a brush and when black enough, wipe with a rag or paper towel. No "crusting" and I didn't do any acid washing or acetone rinsing like with Blacken-It. It also blackens solder. You should try it! Each gun carriage was given a pin sticking down from the front axle to fix them in place and holes were drilled in the deck. The only things left on the guns are fastening the cap squares.

- 306 replies
-
- 13
-
-
- armed virginia sloop
- Patrick Henry
- (and 2 more)
-
Excellent job on this model. Really first rate. I'll be visiting the "Morgan" during the Wooden Boat Show in Mystic, CT next week. The kit is on my shelf, also. I plan to take hundreds of pictures to use when I begin my build.
- 245 replies
-
- 2
-
-
- model shipways
- Finished
- (and 1 more)
-
John: I agree with Mark, but the problem could be the angle of the photo. Can you post a side view? In any case, don't lose any sleep over the first planking - it's just there to provide a base. Keep up the good work!
-
I think the hull looks great! There are always a few low spots to fill, but looking at your work I don't see too many! Keep going!
-
Nice start to the planking. It should turn out well.
- 701 replies
-
- 4
-
-
- phantom
- model shipways
- (and 1 more)
-
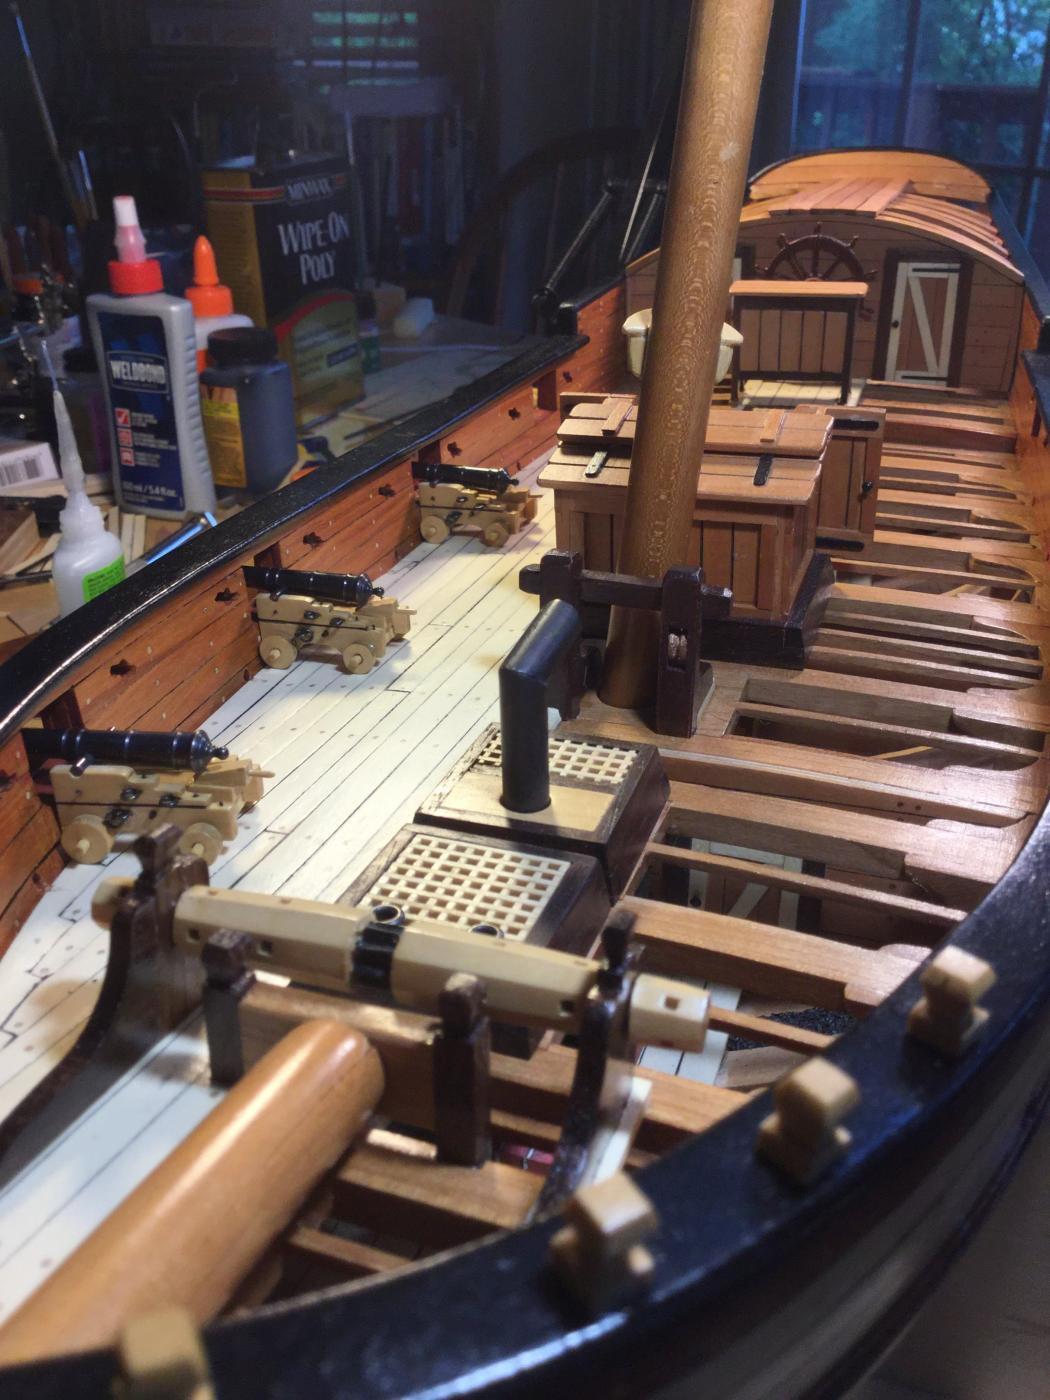
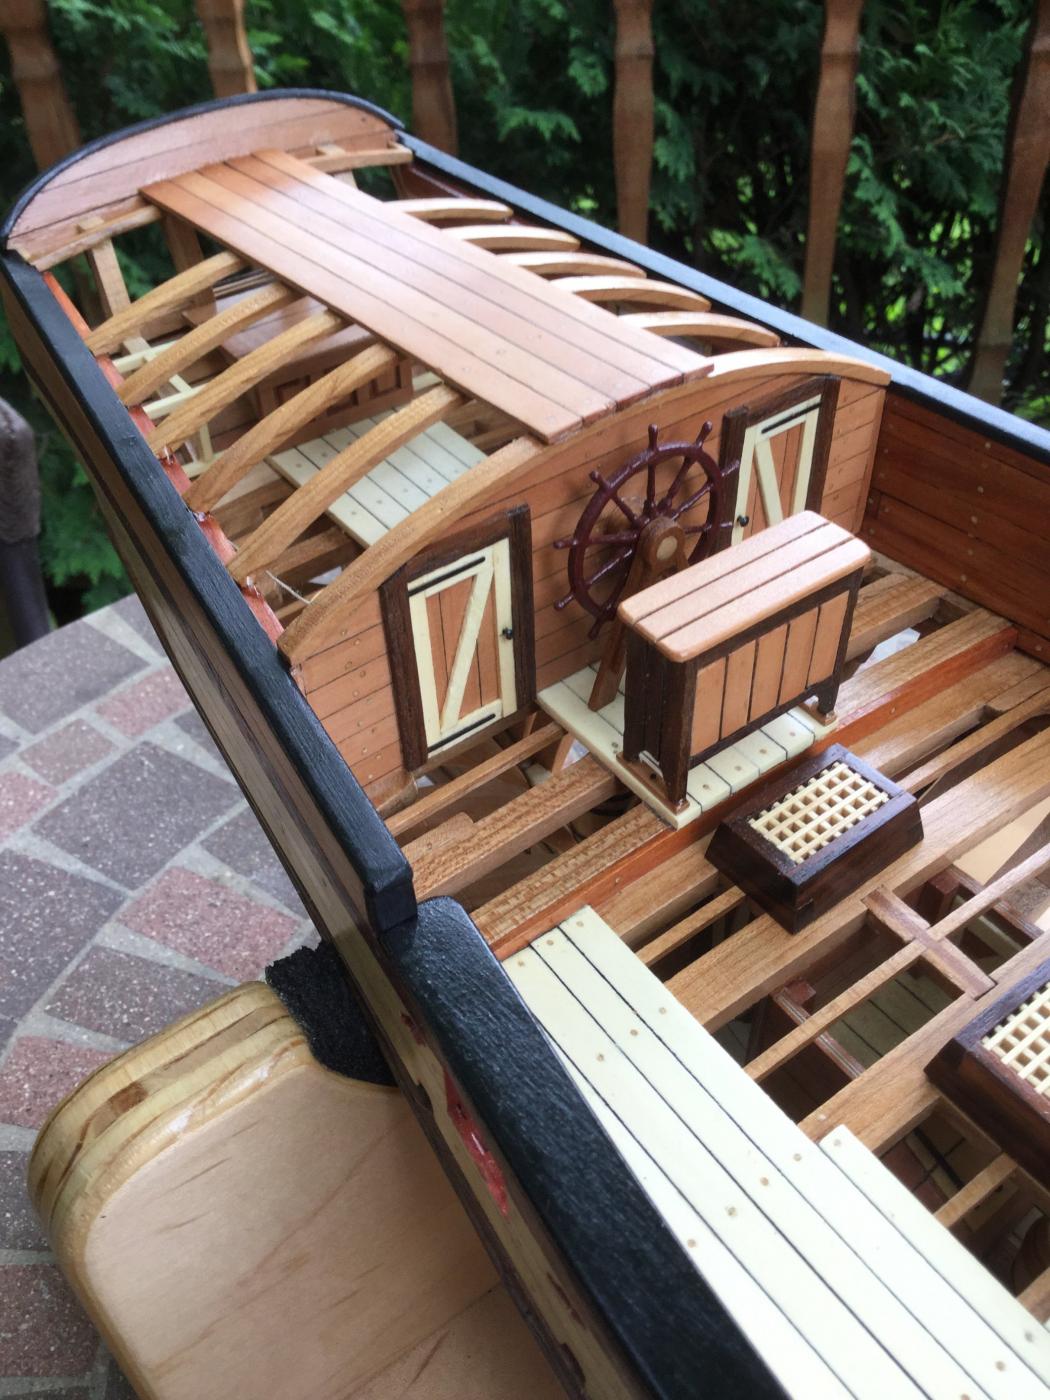
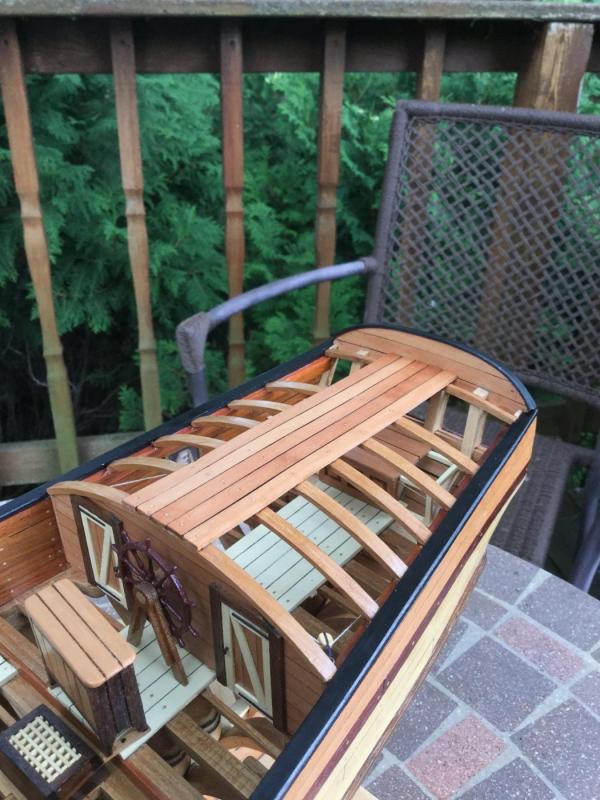
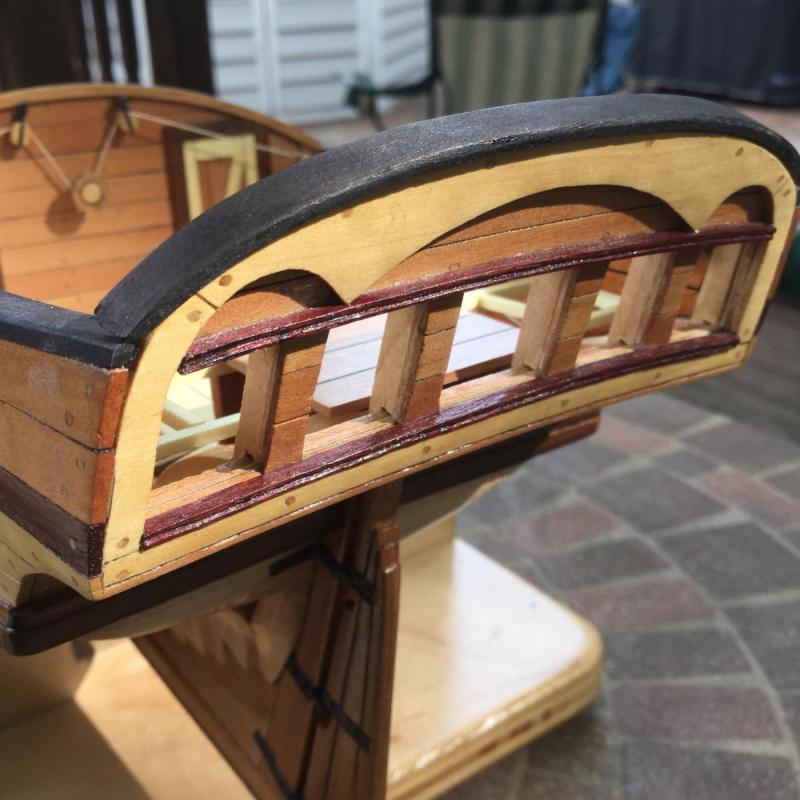
Thanks for the "likes" guys! I glued the great cabin roof beams in place, then glued and treenailed the roof planking (I used swiss pear). There is one coat of poly on the beams, planking, taffrail and cap rails. Getting closer to the end!

- 306 replies
-
- 15
-
-
- armed virginia sloop
- Patrick Henry
- (and 2 more)
-
After drilling the appropriate size hole, most put a tiny drop of CA glue on the eyebolt shank and insert it into the hole. If you are at all concerned that that's not strong enough (lots of rigging tension) you could use a tiny bit of 2 part epoxy. The CA should be fine, though.
-
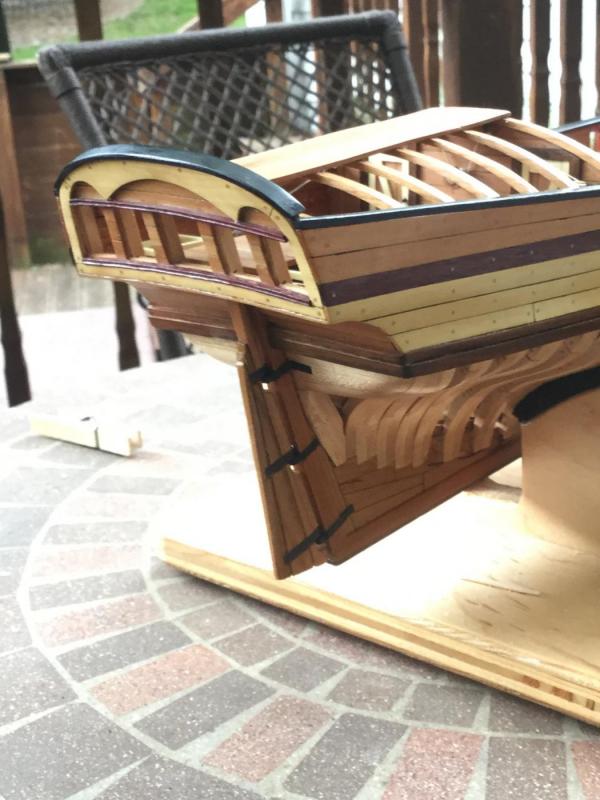
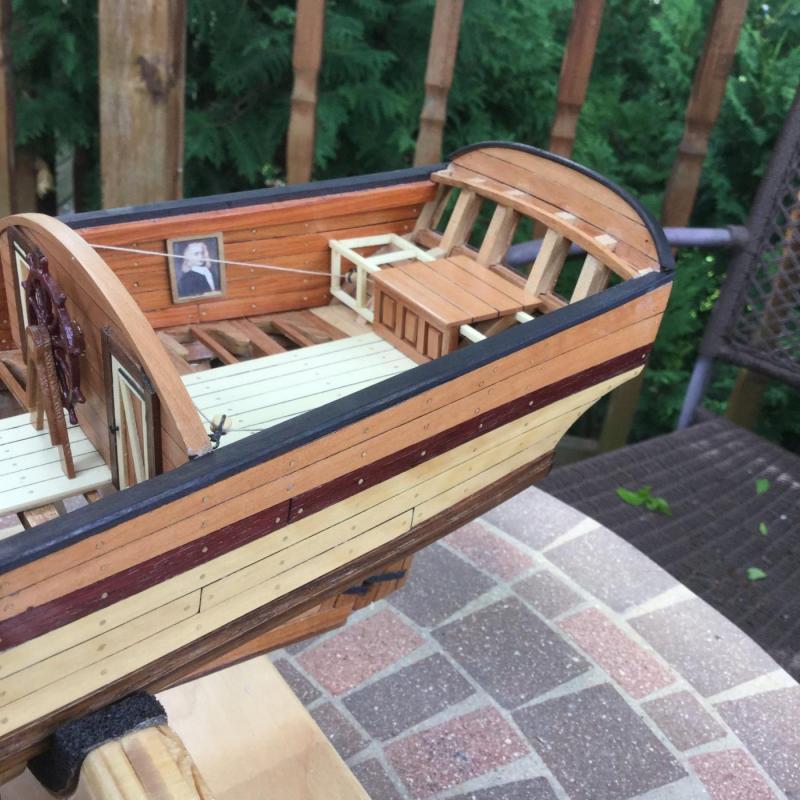
Slow going with the summer heating up. I did fit the cap rails at the stern of the ship. The kit doesn't include a taffrail so I made my own and installed it. It gives a finished look to the transom. The taffrail and cap rails are stained with Fiebing's leather dye. No poly yet. There are five roof beams for the great cabin to install, as well as 5 planks of cabin roofing in the midline, I'm planning to use swiss pear rather than holly decking stock, because technically, the roof is a roof, not a poop deck. Once those things are installed, there are just the stern lights to fabricate and the aft of the model is complete. I'd like to make my own stern lights out of holly. The kit has some nice 3-D printed windows provided, but I want to do it myself. I'm just not sure how, right now!
- 306 replies
-
- 9
-
-
- armed virginia sloop
- Patrick Henry
- (and 2 more)