DocBlake
-
Posts
1,811 -
Joined
-
Last visited
Content Type
Profiles
Forums
Gallery
Events
Everything posted by DocBlake
-
 Looks great, Brian. I like your idea to use the pear.
 -
It looks good, John. I'd leave the photos. I agree they may help others later. Keep up the good work!
-
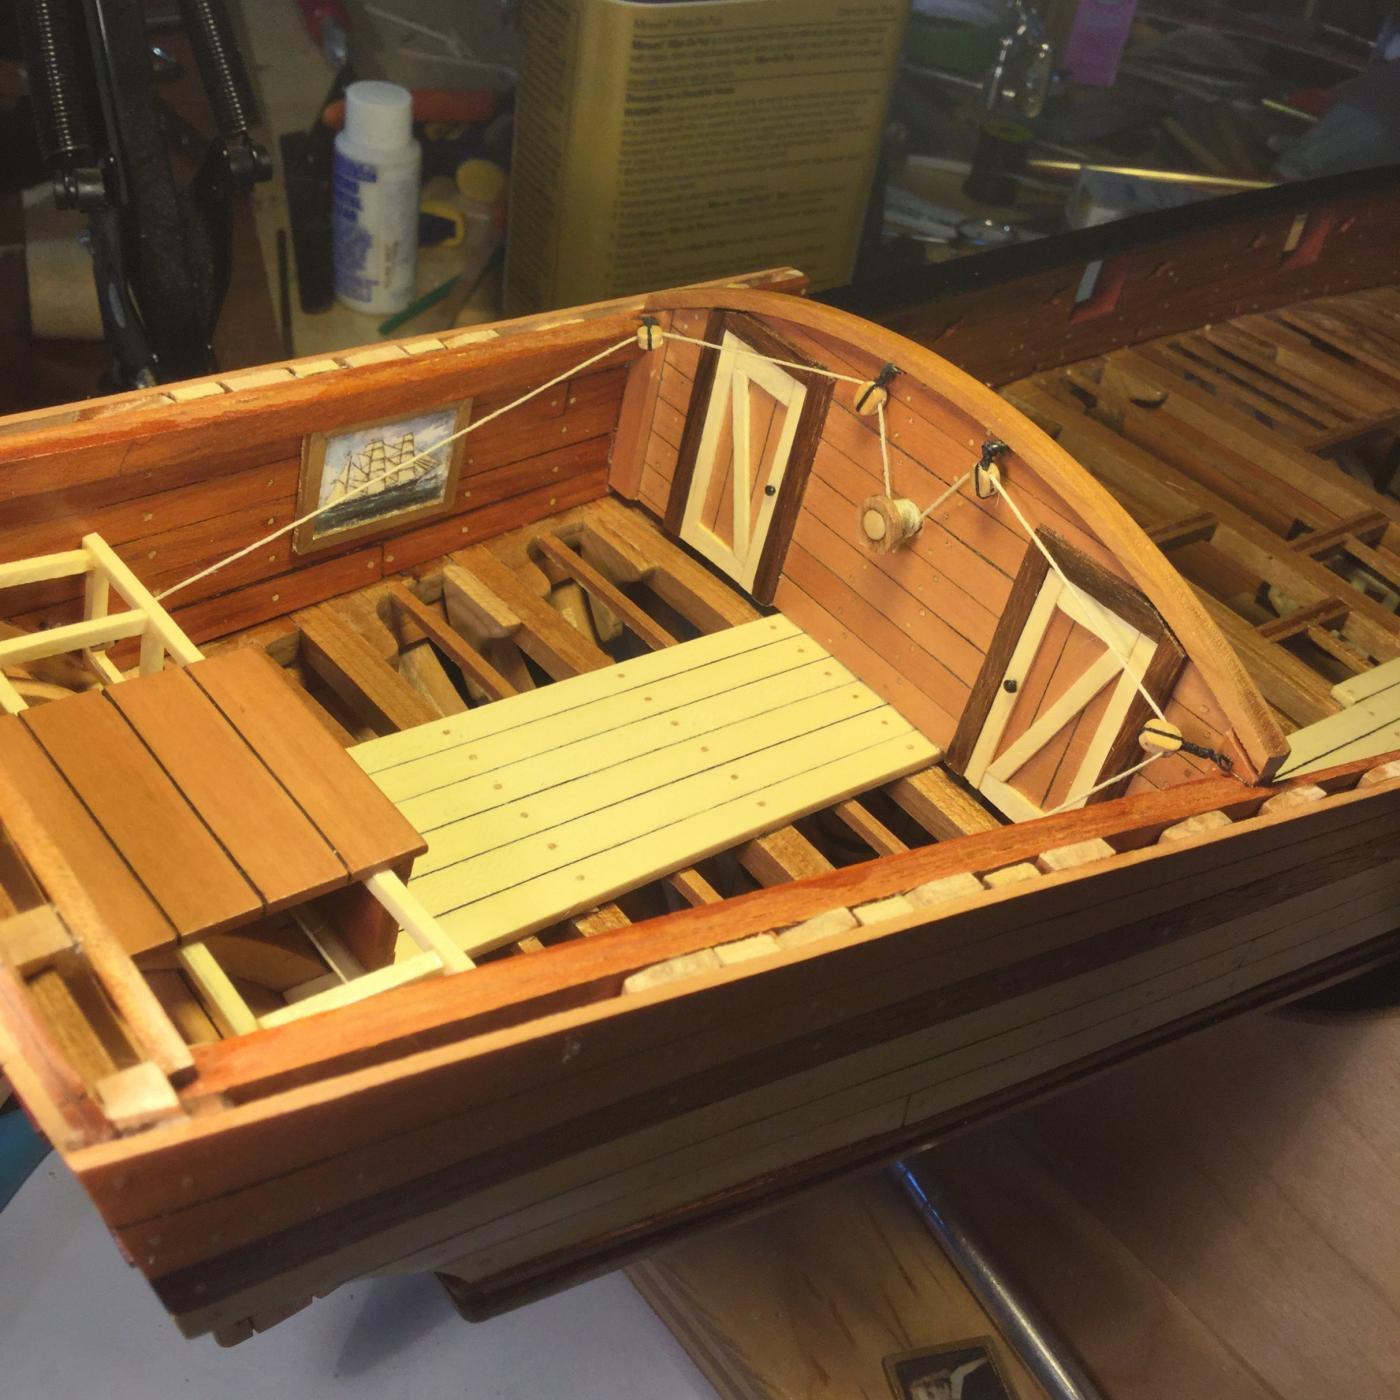
Thanks, everyone! Brian: The painting is a .jpg that I reduced to the proper size, then printed out. I glued it to a piece of 1/64" thick plywood, cut out 4 pieces of wood for the frame, then glued them around the painting. Trim the plywood flush and paint with gold paint and you're done. It was kind of fun. There is a portrait of Capt. William Kidd, the "pirate", hanging on the opposite wall of the great cabin.
- 306 replies
-
- 7
-

-
- armed virginia sloop
- Patrick Henry
- (and 2 more)
-
Excellent work, Elijah. Keep it up!. Your planking is going to be great.
- 701 replies
-
- 2
-
-
- phantom
- model shipways
- (and 1 more)
-
Yeah, Brian, that's a problem. It seems that the Sharpie pigment never truly "dries" and the poly is the perfect solvent. My solution to that problem is to use a water-based polyurethane for the first coat to "seal" the black color. It will not dissolve the Sharpie's pigment. MinWax makes a water-based product.
-
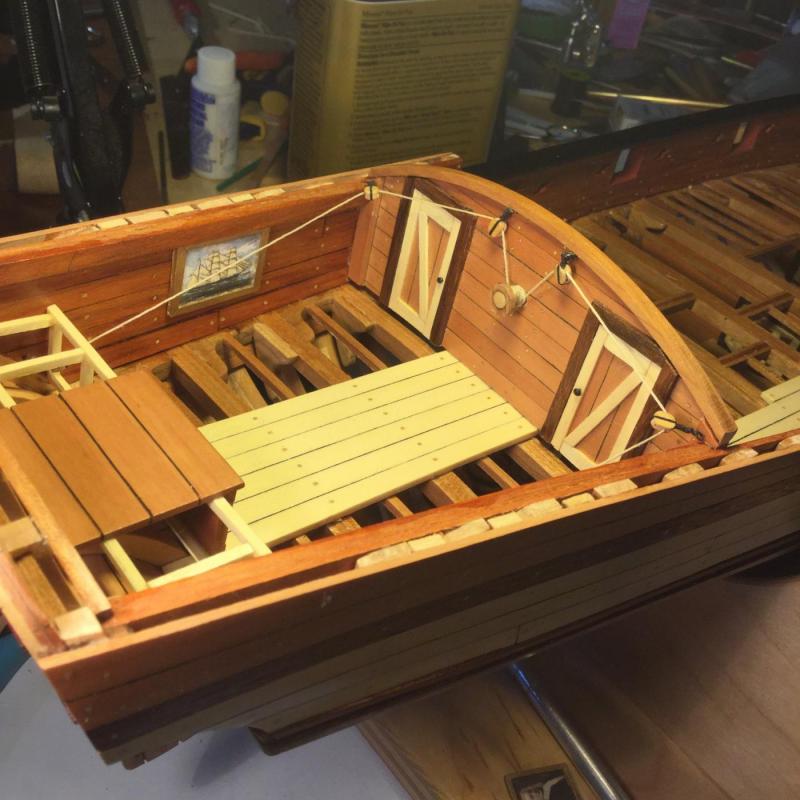
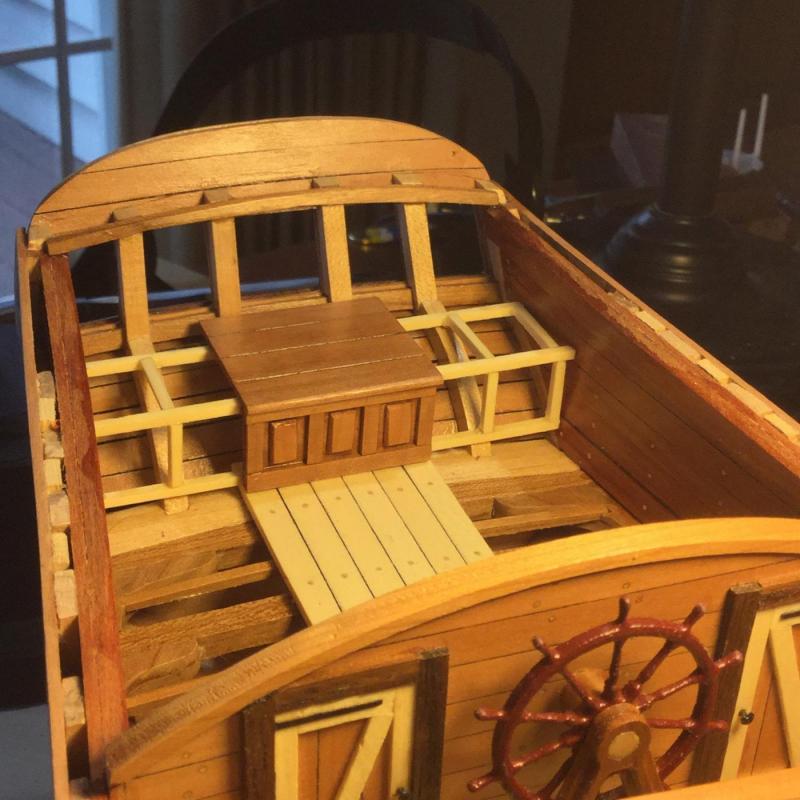
I installed the ship's wheel and the framing for the window seat. Then I rigged the tiller to the wheel. The walls of the great cabin looked a little drab so I added some art work!
- 306 replies
-
- 10
-
-
- armed virginia sloop
- Patrick Henry
- (and 2 more)
-
David and Don: I've joined you two in having my model work pre-empted by outdoor tasks and my consulting business! I see a light at the end of the tunnel, though! Hope it's the same for you both.
- 117 replies
-
- 3
-
-
- constitution
- model shipways
- (and 1 more)
-
Thanks, Grant. You've set a high bar with your Bomb vessel! I think I need a little more prep work before I tackle it!
- 456 replies
-
- 3
-
-
- finished
- bomb ketch
- (and 2 more)
-
Hi Grant! I have a question. I planked the inner bulwarks on my AVS with redheart, as you have done. After a couple of months the scarlet color has faded to a brown with reddish overtones. I's been protected with 3 coats of poly. Are you noticing a color change in the redheart you used? I know it's supposed to happen, but I didn't think it would be this quick!
- 456 replies
-
- 2
-
-
- finished
- bomb ketch
- (and 2 more)
-
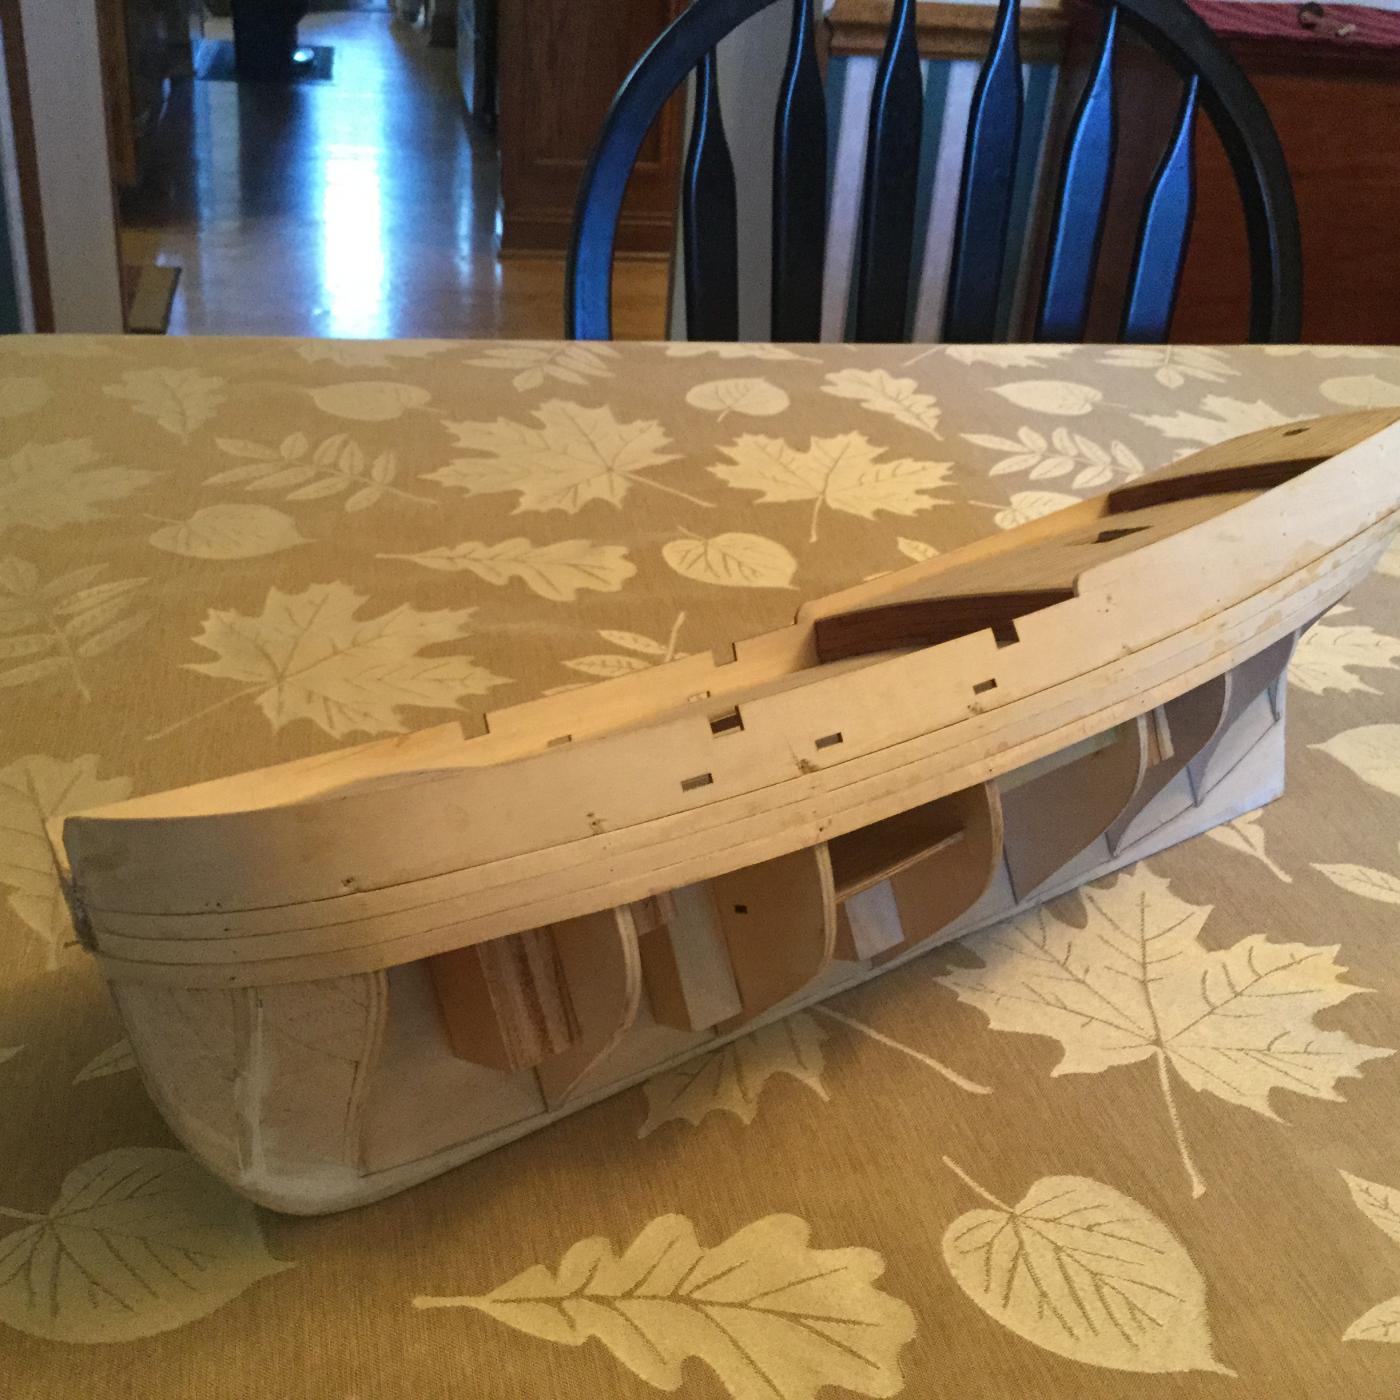
I installed the bulwark formers (plywood), bending them at the bow with a clothes iron. The scuppers bottoms need to line up with the top of the decking, The shear needs to rise gracefully toward the bow, and the top of the bulwark formers need to line up with the top of the poop deck planking. Lots of fiddly stuff, so I opted for one hour epoxy to glue the parts in place, along with the famous "little yellow nails". I got a nice flow for the shear line. I added the first 3 planks on each side to begin the first hull planking. These were full width. I'll now start tapering the next planks, fore and aft.

-
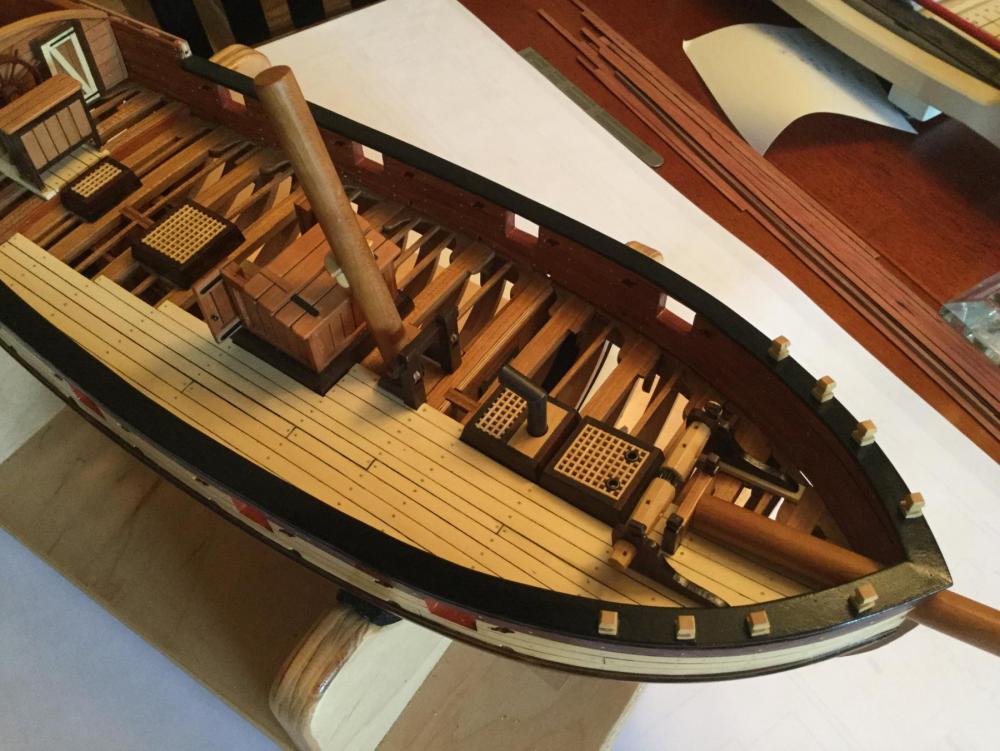
I'm getting serious about finishing the model now. Although I'm retired, I have a consulting business that's been taking a lot of my time. I'm turning my attention to completing the great cabin. The window seat at the stern is built "admiralty style" also - completely frames, but only some of the planking and raised panel front paneling installed. I've completed the tiller and seized 4 of the 10 blocks required to their eyebolts. Next I install the rudder-to-wheel rigging and start laying the roof beams.
- 306 replies
-
- 13
-
-
- armed virginia sloop
- Patrick Henry
- (and 2 more)
-
Your hull looks great. It should provide a great base for the planking. It's worth the effort!
- 653 replies
-
- 5
-
-
- trabakul
- marisstella
- (and 1 more)
-
Duh...It pays to read the posts! Lee Valley Tools! Sorry Brian.
-
Nice job, Brian. Your keel looks great! I like those clamps too. Where did you get them?
-
Brig Eagle by robnbill - 1:48
DocBlake replied to robnbill's topic in - Build logs for subjects built 1801 - 1850
Hope all goes well with your hand. I'm getting some arthritis in both my hands and it's got me concerned about the future. Handling fine work is likely to become increasingly difficult. -
Thanks, Don,Brian! Don...I'm getting close. Here's what's left: catheads, swivel guns and supports, channels, transom lights, great cabin roof beams and planking and rigging the steering. Not that much, really.
- 306 replies
-
- 5
-
-
- armed virginia sloop
- Patrick Henry
- (and 2 more)
-
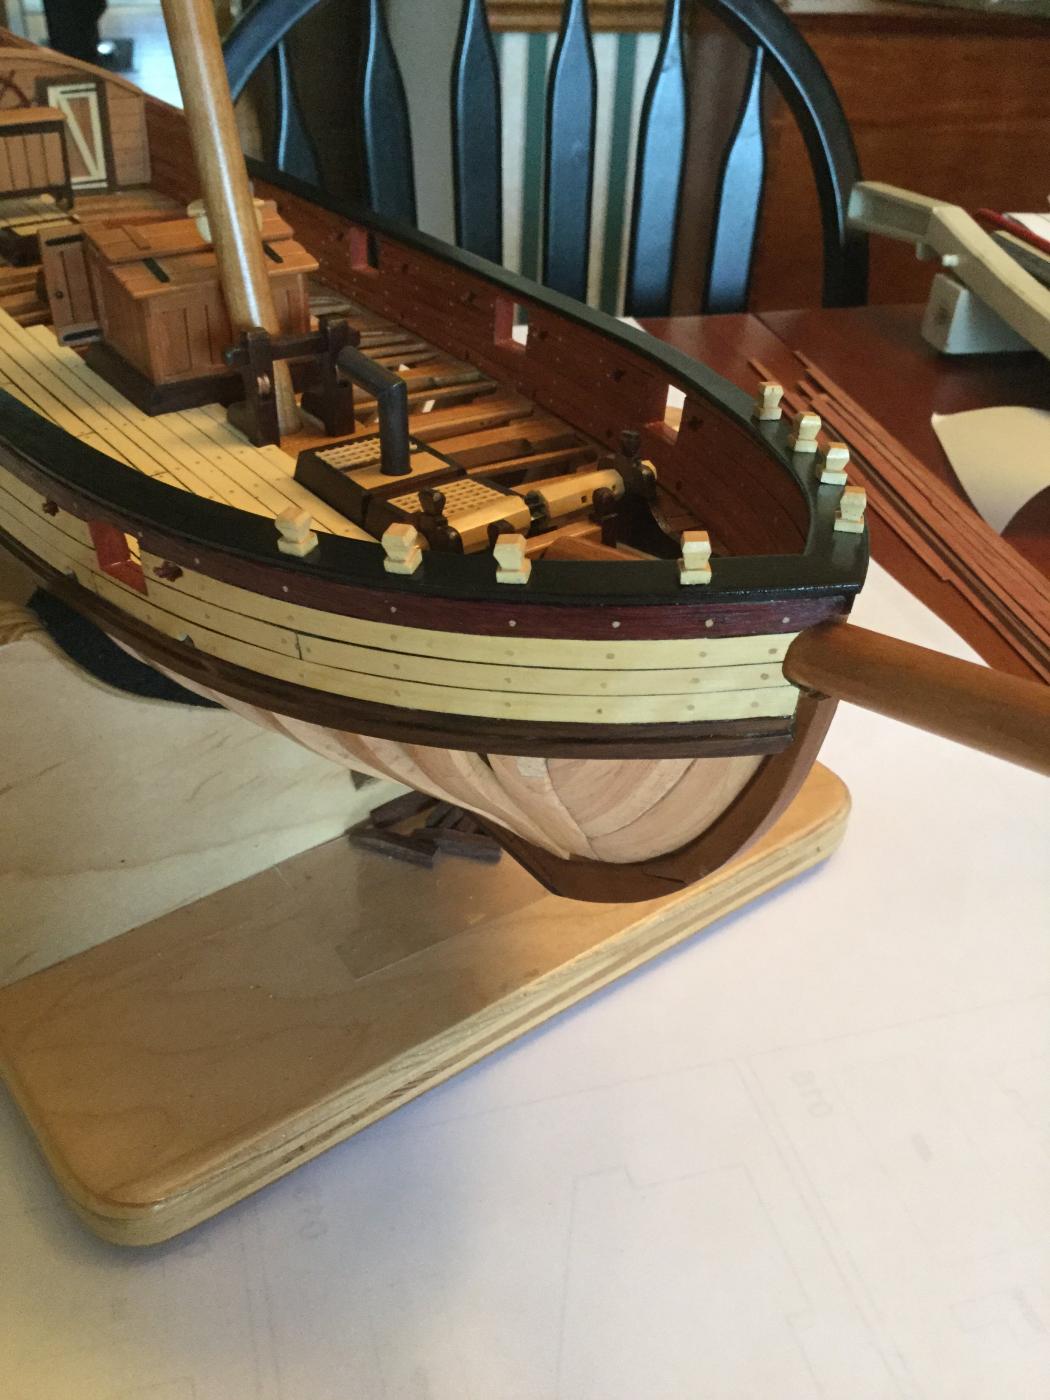
The timberheads were pinned and epoxied in place.

- 306 replies
-
- 10
-
-
- armed virginia sloop
- Patrick Henry
- (and 2 more)
-
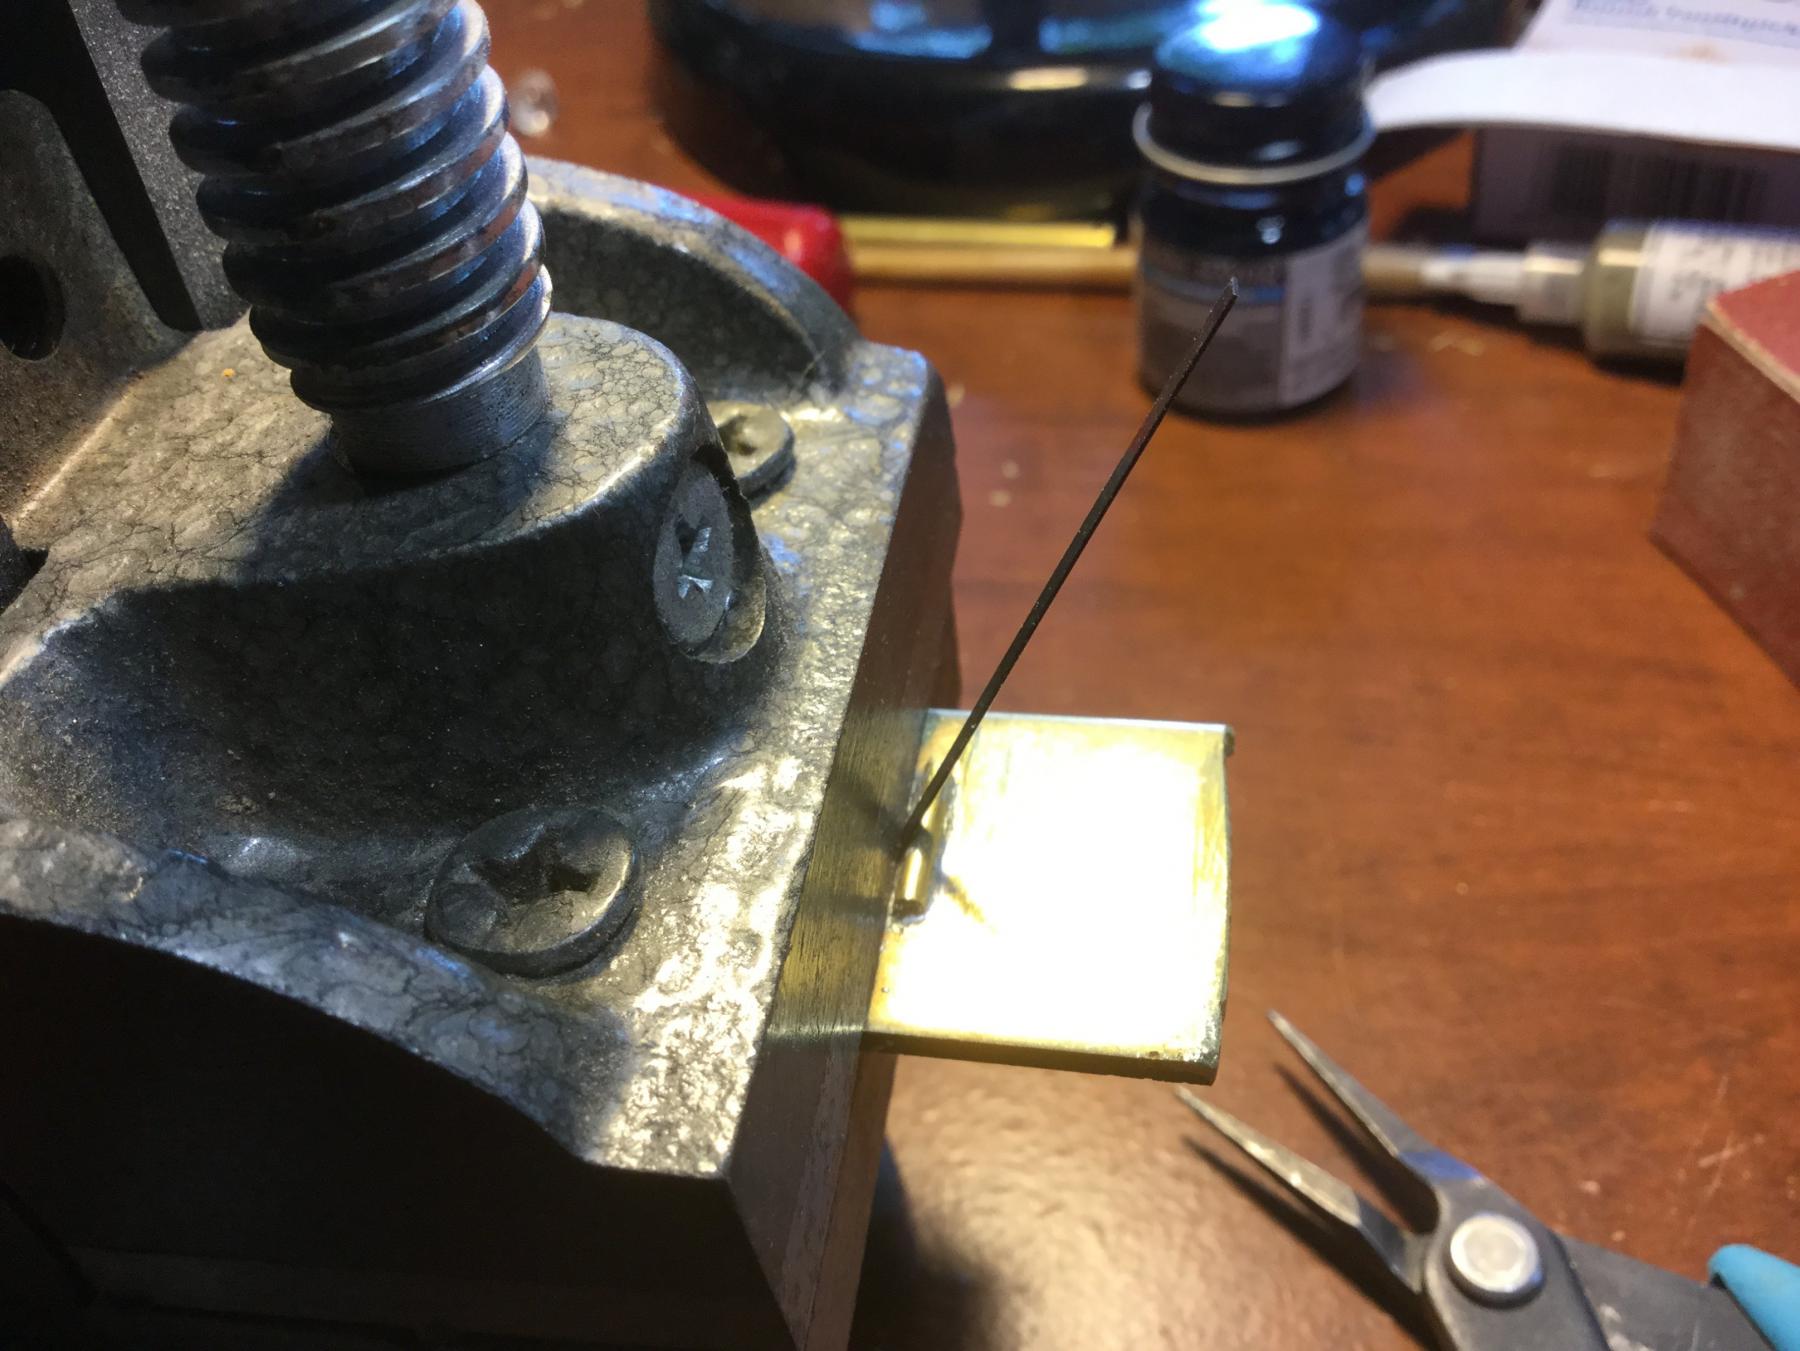
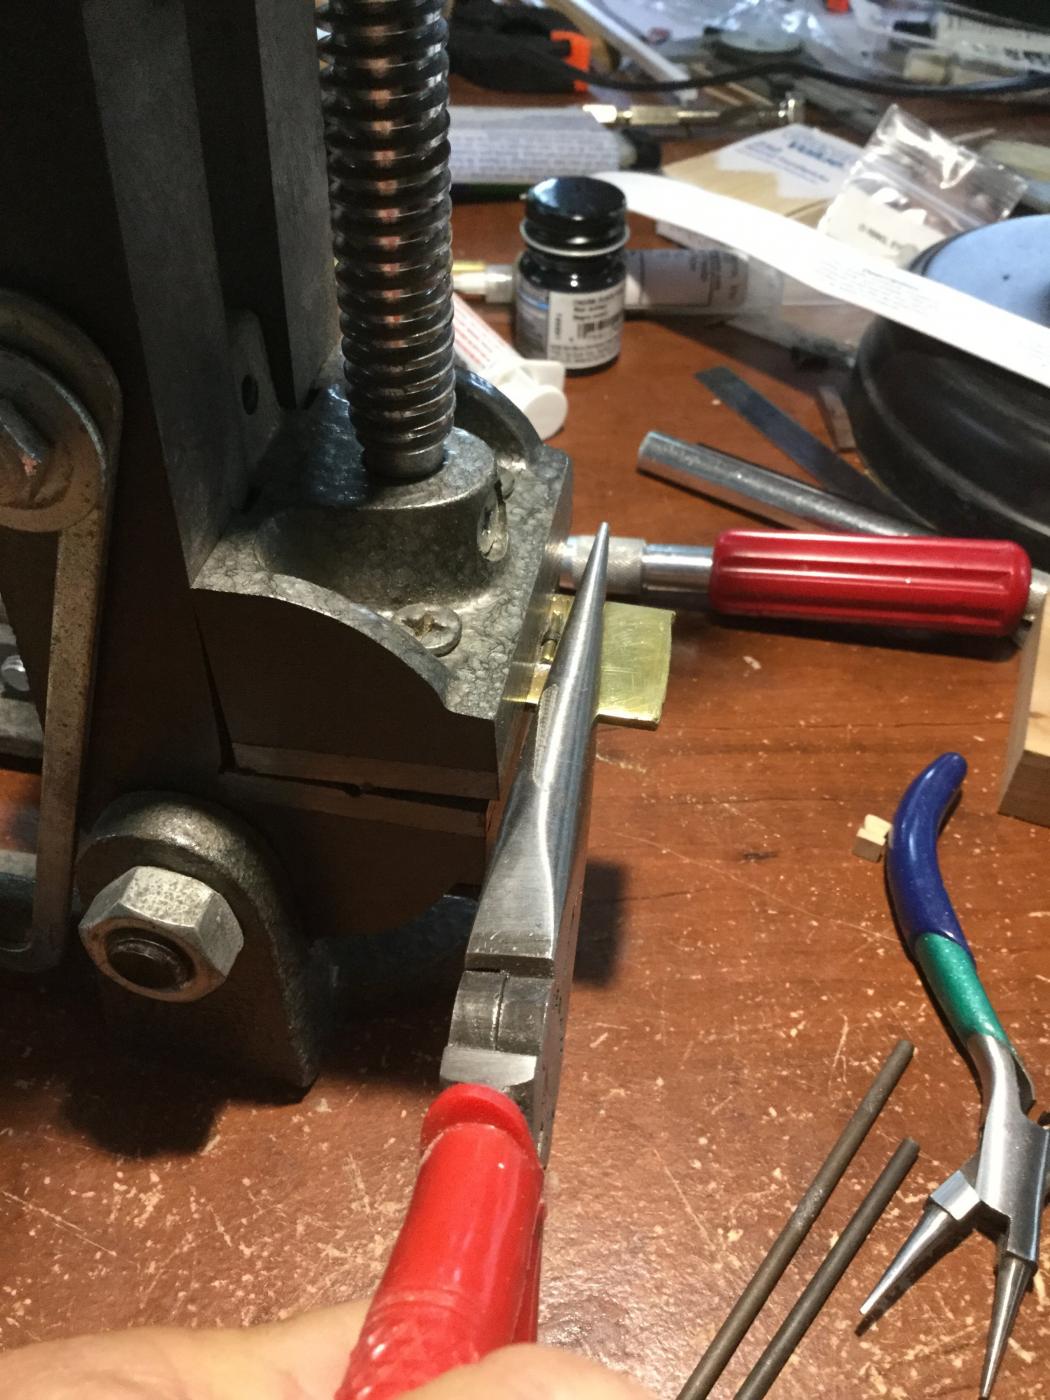
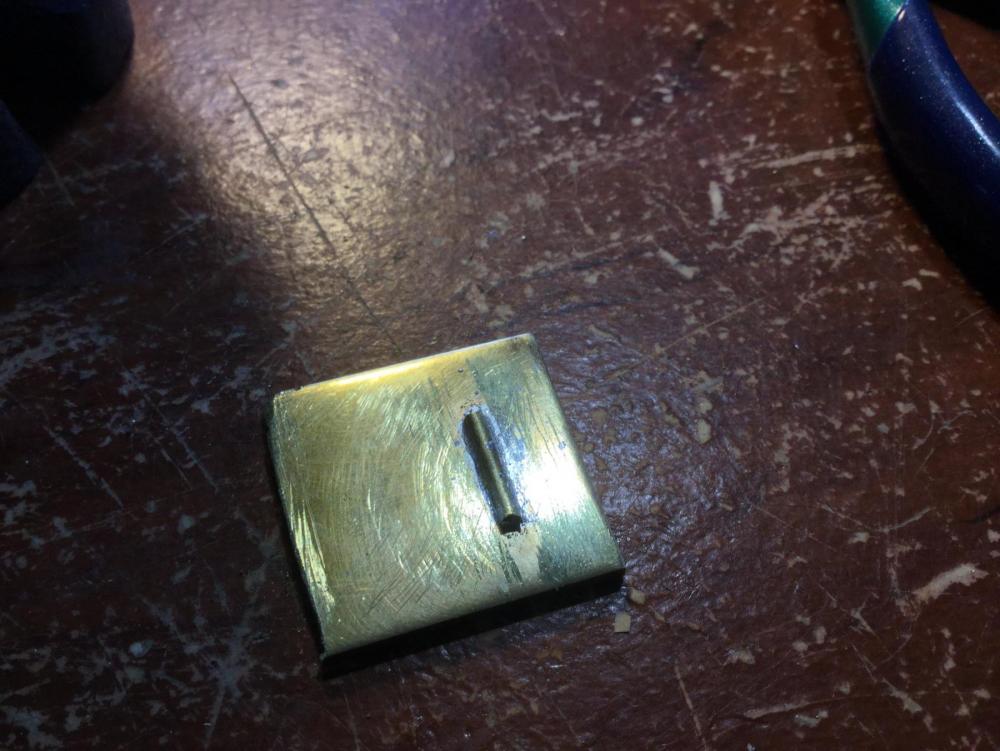
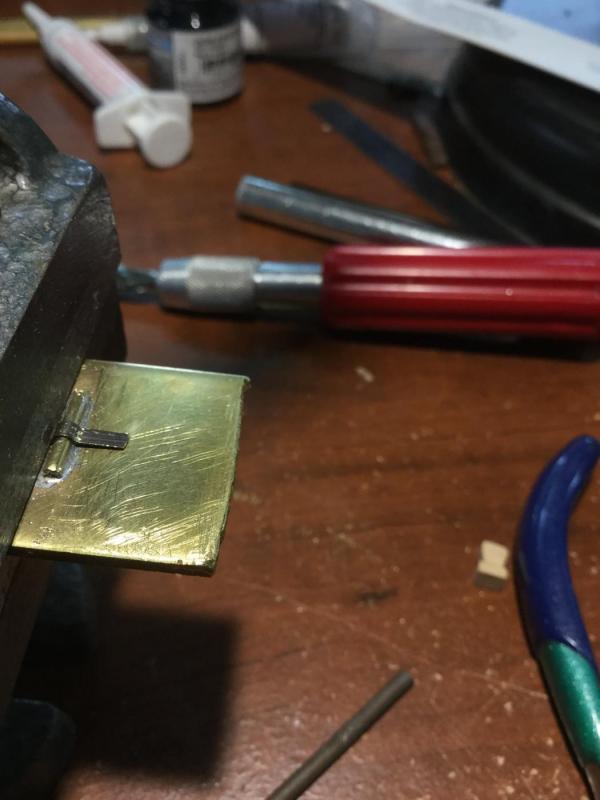
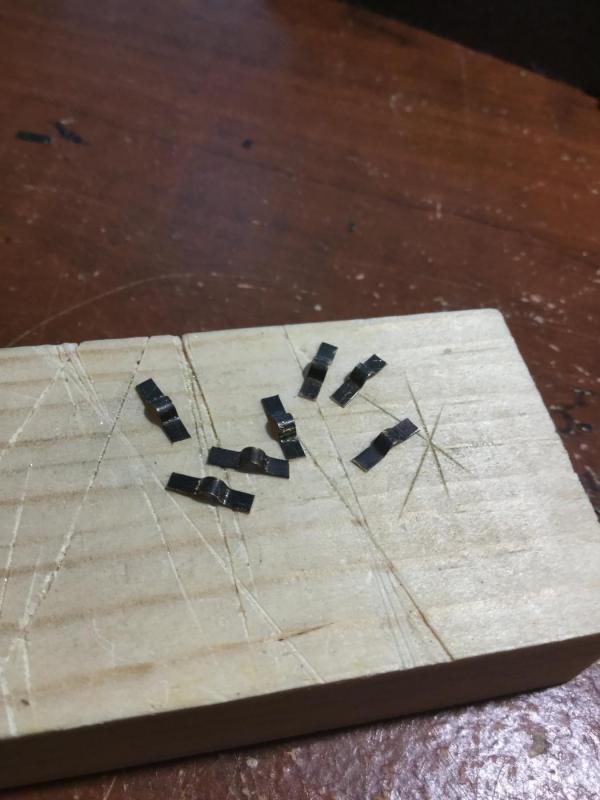
Thanks, John. I've been working on fiddly things. I finished the gun carriages, but I had to order 5/64" brass rod to make new trunnions. The supplied ones were too short. next up was the cap squares...an annoying bit of work I have been putting off!. I decided I wanted them made of blackened brass, so here is how I made them (a tip of the hat to John Earl at "modelboatyard.com" for his idea). I took a length of 5/64" brass rod and filed it flat, creating a half-round. I then soldered this to a piece of brass bar stock 3/32" thick. This was my "mold". I then inserted the brass bar and a strip of blackened brass in the jaws of a machinist's vice and clamped down. Bend the strip over the brass half-round with a needle nosed pliers. Release from the vice and trim to size. The squares need to have holes drilled for the bolts and have the blackening touched up before mounting on the carriages.


- 306 replies
-
- 10
-
-
- armed virginia sloop
- Patrick Henry
- (and 2 more)
-
Glad to see you back at it, John! Nice job on the bulwarks, and your gunport liners look to be spot on. Keep it up!
-
The poly really makes the wood come alive. Nice job. Although I switched out a lot of the wood for my Swift build, I used the stock hull planking. It really is quite nice after a couple of coats of poly!
- 114 replies
-
- 2
-
-
- swift
- artesania latina
- (and 2 more)
-
Brig Eagle by robnbill - 1:48
DocBlake replied to robnbill's topic in - Build logs for subjects built 1801 - 1850
Awesome progress. You continue to impress, Bill. I'm thinking of adding a milling machine to my tool arsenal. What make and model and accessories do you recommend? -
Great progress, Brian. That is a well designed hull! It almost has as many bulkheads as a real ship has frames . The AL "Independence" I'm working on has a grand total of 9! This will be fun to follow.
-
Hi Brian! I got the guns from Cornwall Model Boats. They were the closest to the proper size. Dr. Feldman 's book says a 1/2 pounder swivel was just over 30" in length, including the cascabel. That's about 1-1/32". The guns are 1" long, so pretty close. As for the brackets, I may just epoxy the trunnions in place to avoid the problem of stuff falling apart. How did you make the cool little red knobs on the end of the yokes?
- 306 replies
-
- 4
-
-
- armed virginia sloop
- Patrick Henry
- (and 2 more)
-
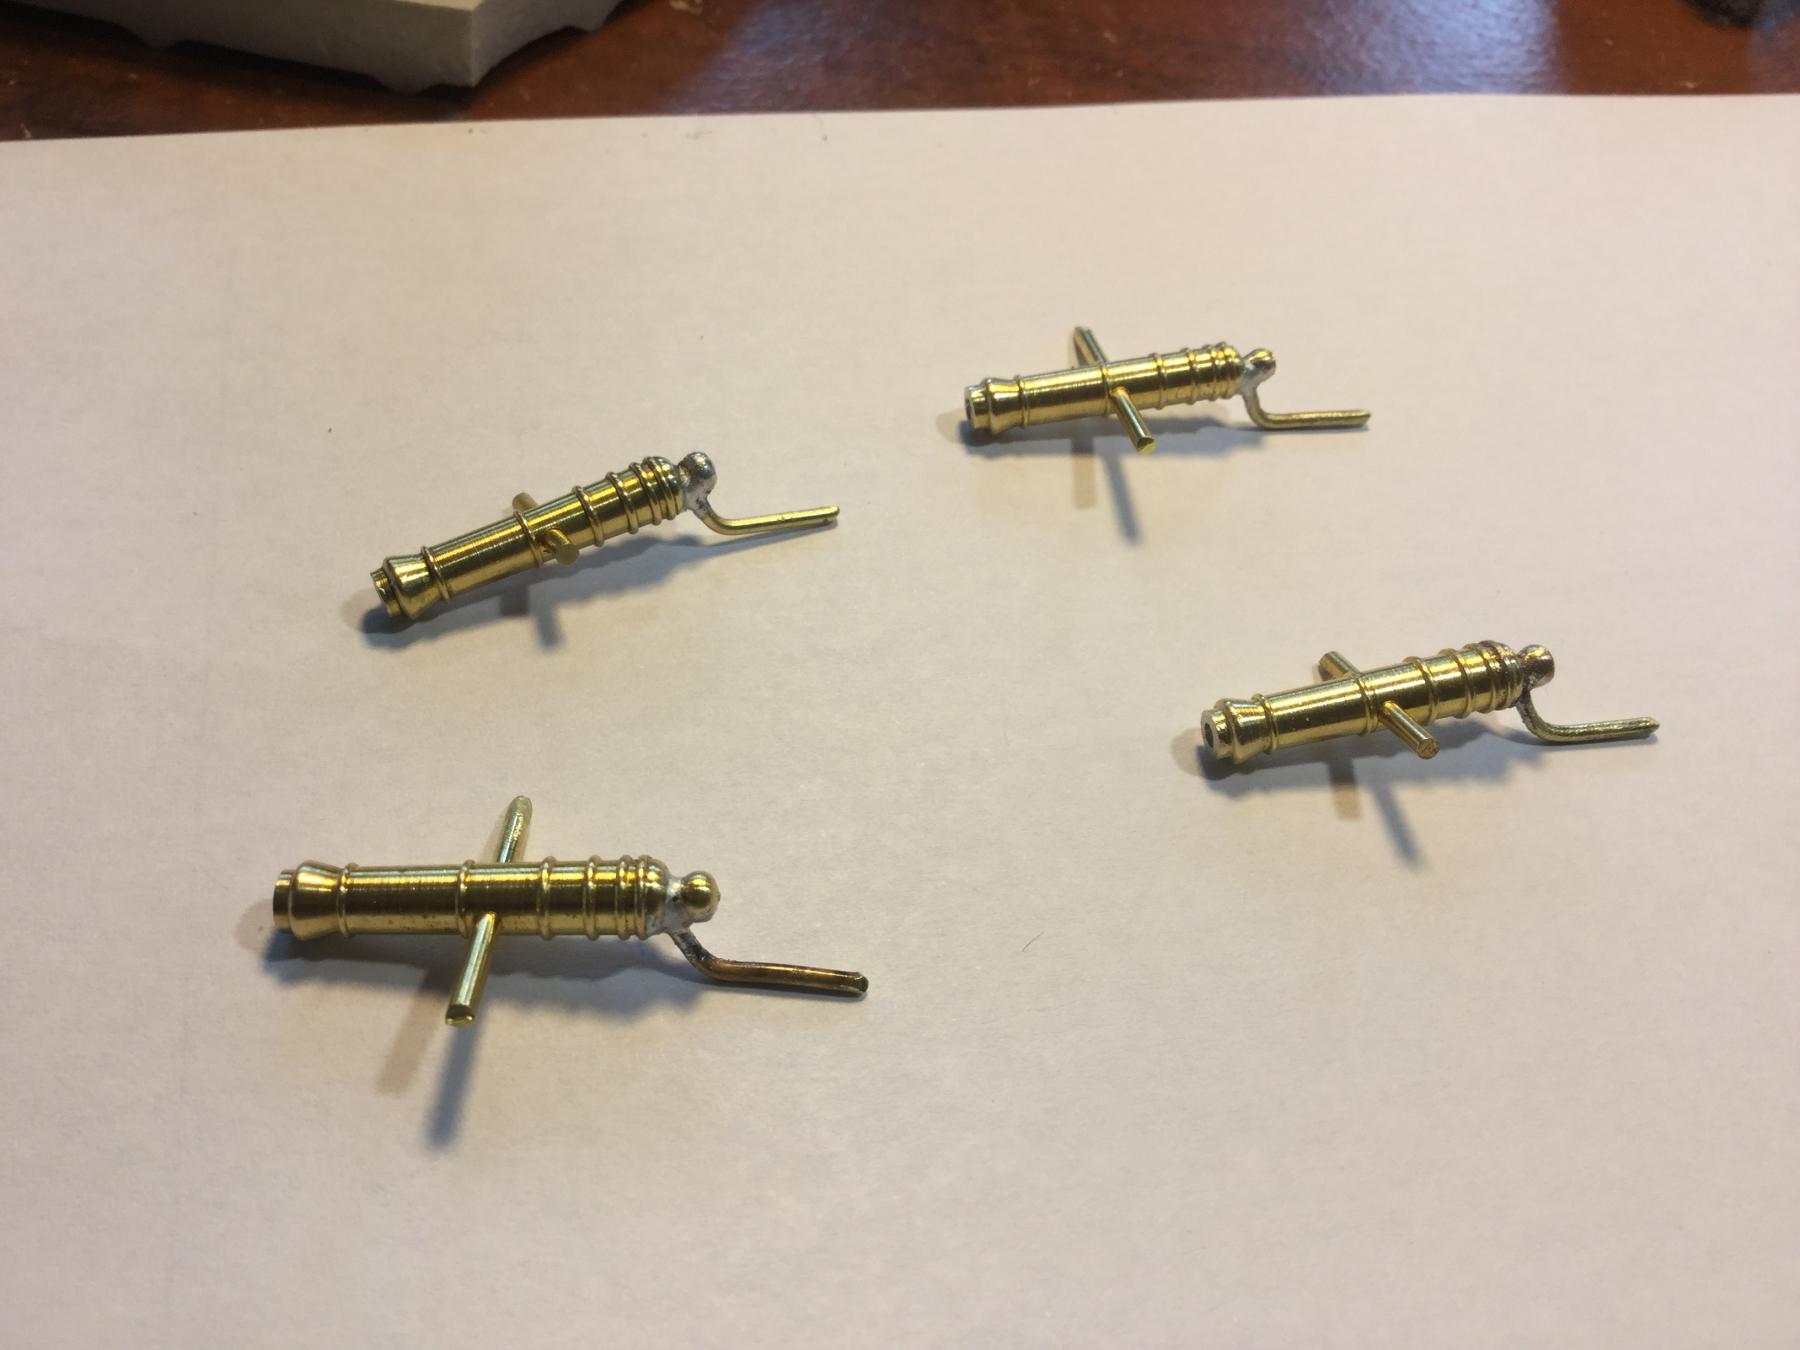
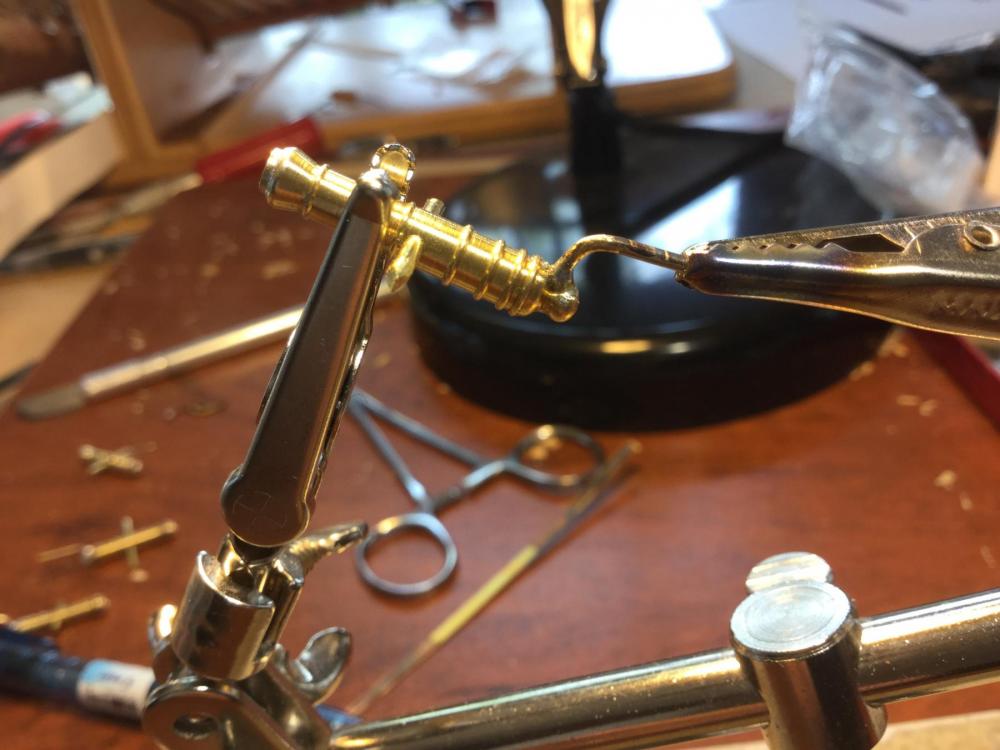
I soldered the handles to the swivel guns. The "helping hands" worked great to hold the parts together. I used paste solder and a micro torch. They need to be cleaned up and blackened. I'm working on the mounting brackets now.

- 306 replies
-
- 10
-
-
- armed virginia sloop
- Patrick Henry
- (and 2 more)
-
Nice job on the belaying pins, Ken! Most toothpicks are birch. The fact that you could turn them so crisply without any fuzziness suggests the wood will be more than strong enough to handle the rigging.
- 481 replies
-
- 3
-
-
- rattlesnake
- model shipways
- (and 1 more)