

S.Coleman
-
Posts
1,146 -
Joined
-
Last visited
Content Type
Profiles
Forums
Gallery
Events
Everything posted by S.Coleman
-
 Interesting deck planking with the different tones. It looks quite good actually. Well I like it for sure. Good work. Thanks for sharing.
 -
As I look over your build, I'm thinking that this is a guy who knows what he's doing. Outstanding craftsmanship! Clearly you have put a lot of thought and planning into this and executing the work with a high degree of quality. Great work keep it up!
- 803 replies
-
- 2
-

-
- colonial cutter
- modellers shipyard
- (and 1 more)
-
Congratulations! She looks 100%. Well done it's something to be very proud of for sure.
-
By the way, that keel came up real nice. Greatpeice of craftsmanship going on there. A real nice fit. Good work
- 803 replies
-
- 2
-
-
- colonial cutter
- modellers shipyard
- (and 1 more)
-
I agree with that. The handels should be on the actual spindle. In that picture the rope closest to us winds around from the underneath of the winch drum, while the other rope winds over the top of the drum. Just thinking, would winding that winch lower one anchor and raise the other?
- 803 replies
-
- 2
-
-
- colonial cutter
- modellers shipyard
- (and 1 more)
-
I never have any of my rudders move. No explanation for it but that's just my own preference. Your build is amazing. Big pat on the back for your work. I like how you are making your own false keel etc. I have the kit from Modelers shipyard the Perserverance, ( not started yet) maby I'll take a Leaf out of your book and make my own too. Keep up the great work.
- 803 replies
-
- 2
-
-
- colonial cutter
- modellers shipyard
- (and 1 more)
-
Seems to be coming along quite nice. Doing well with the planking. It takes pateience but it pays off. I would add the keel before the second layer of planks, but that's just my opinion. Like to have something I can butt the planks up to. Good job
- 803 replies
-
- 2
-
-
- colonial cutter
- modellers shipyard
- (and 1 more)
-
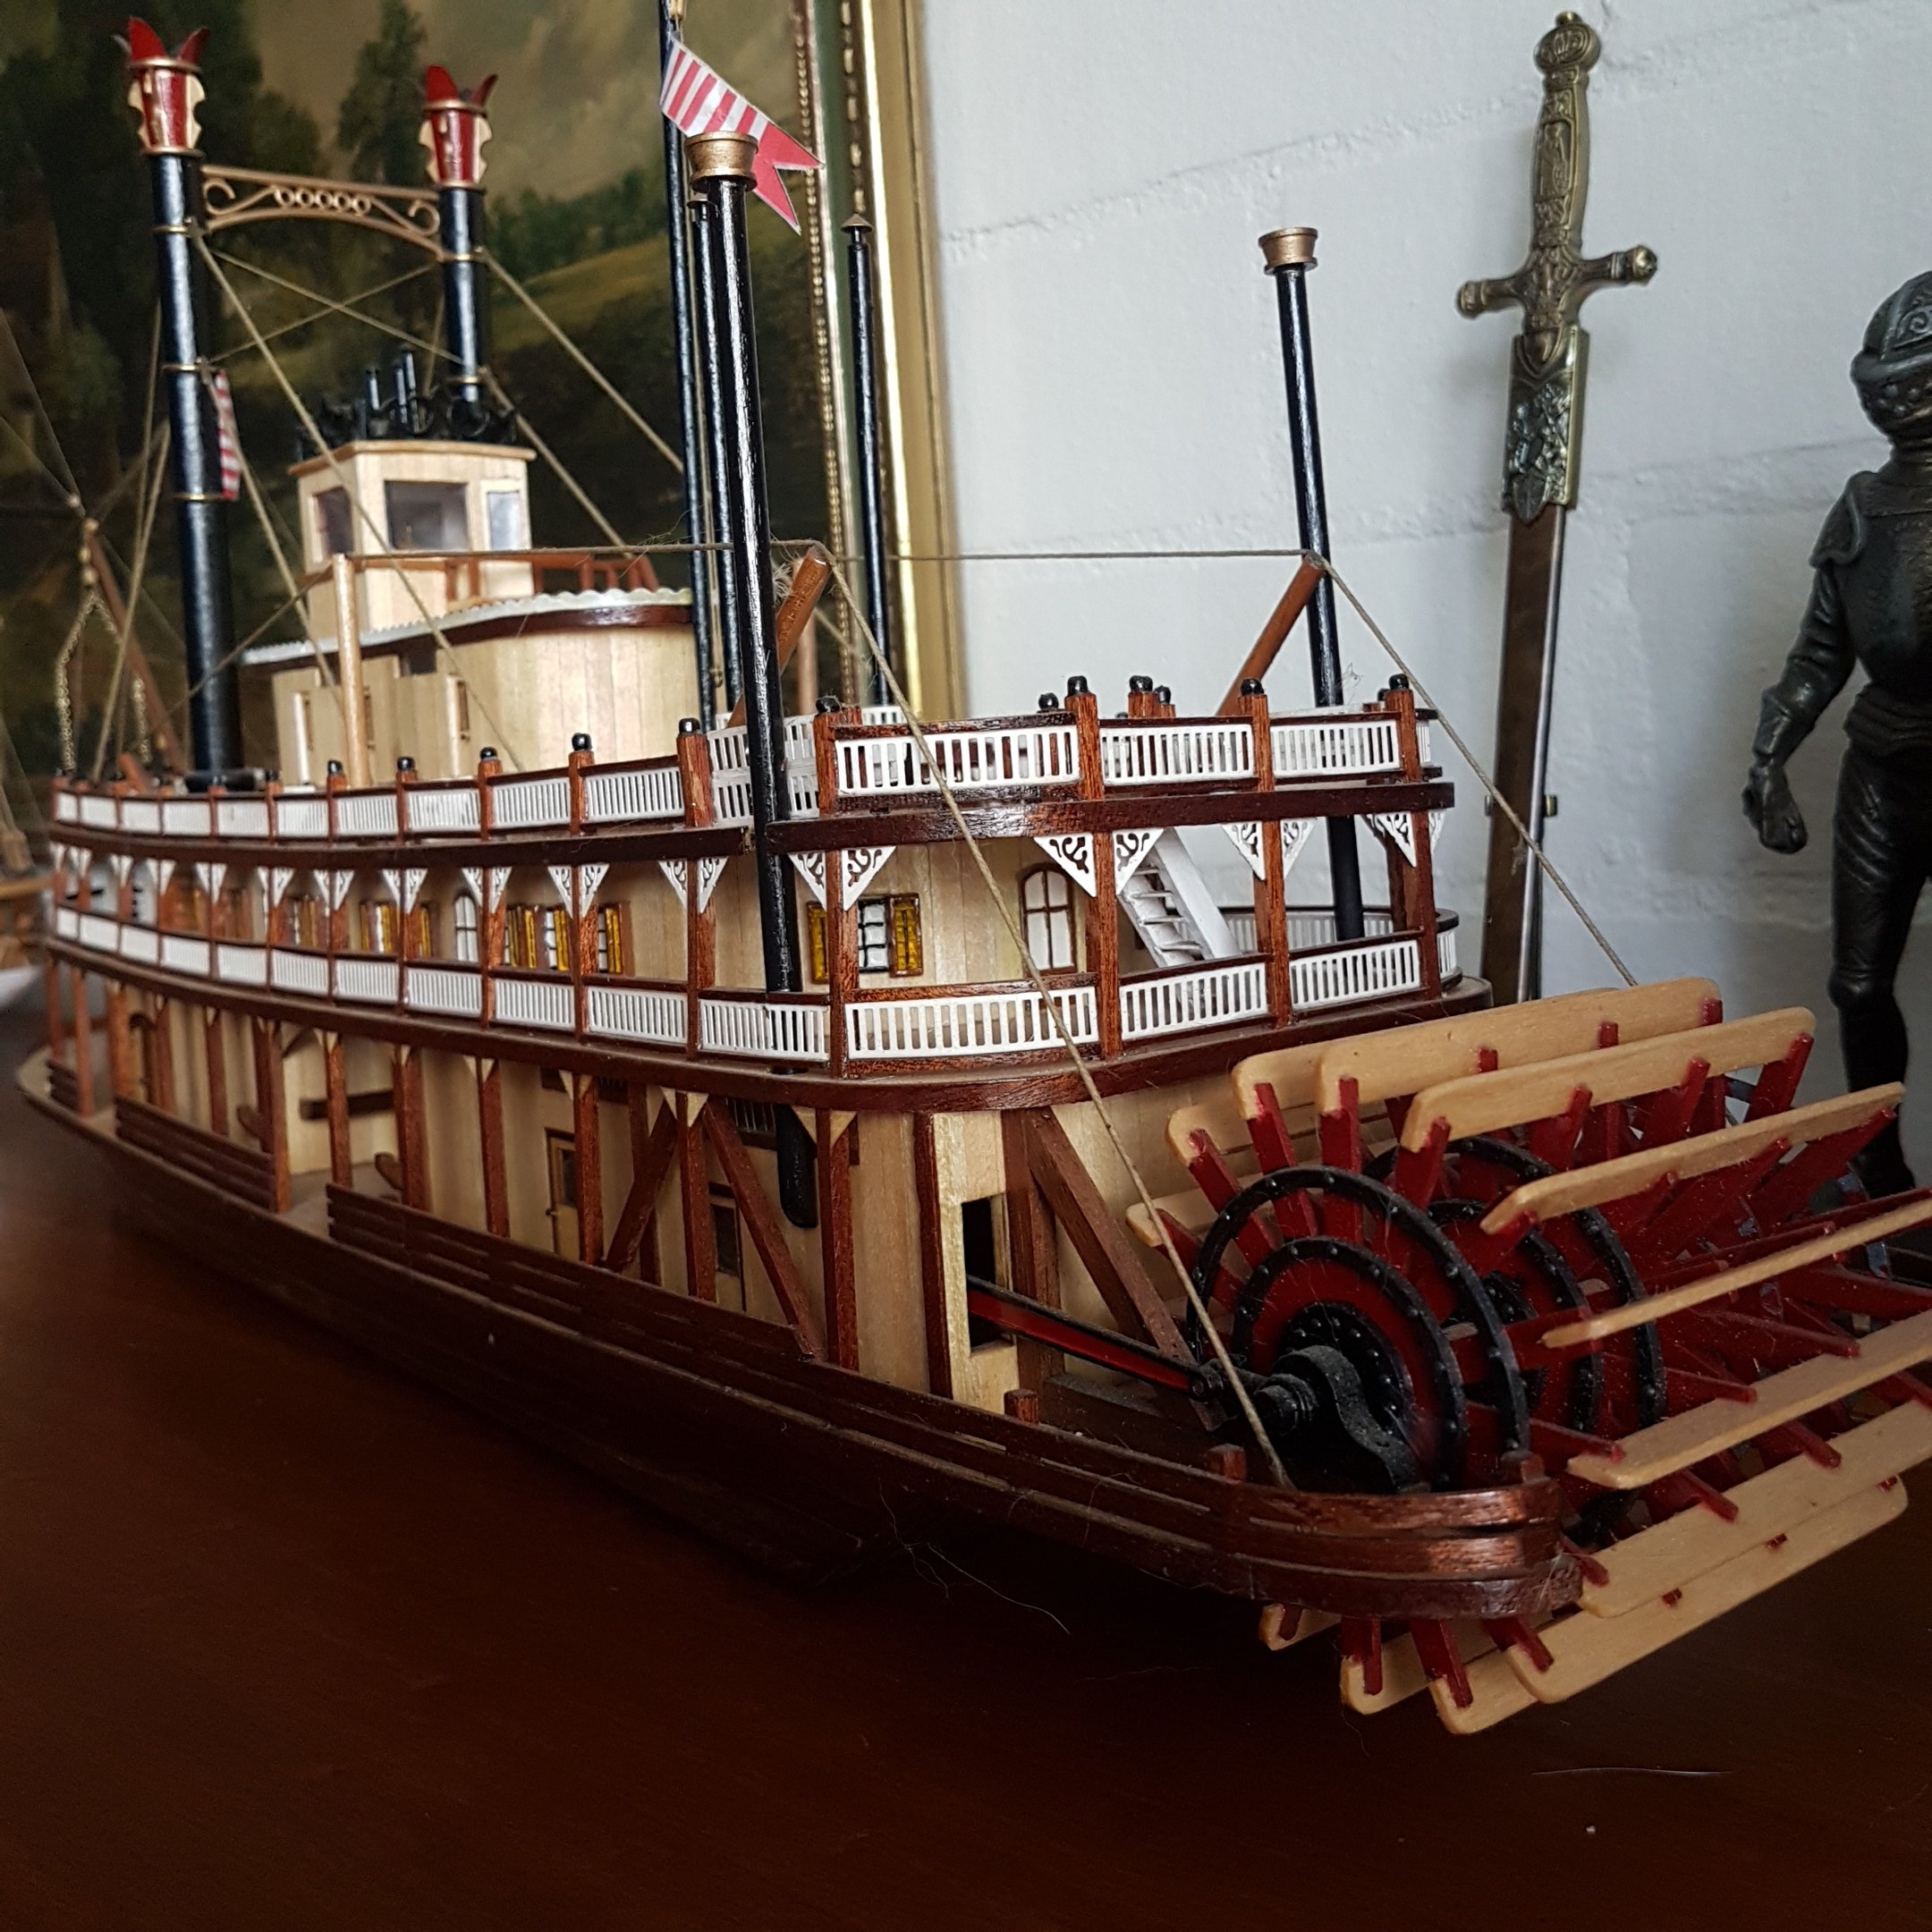
Paint for King of the Mississippi - moved by Moderator
S.Coleman replied to Eddie137's topic in Wood ship model kits
Hey there, I have already completed this model a while ago. You will need White, Black, Bright Red, Brown/ Tan, Light Blue,( but not much of it) and a little bit of yellow. I also used a tinny bit of gold to show brass fittings etc, All the paints mentioned are Humbrol MATT. Good luck -
It's coming along very good. Keep up the good work. This bout was one of my first as well. Wish I had kit bashed it like you are doing!
-
I use old clear candle wax for the rigging lines. I melt down the old candles into a mould to make a square block. It works pretty good. Like it has already been mentioned, run the line over the wax block and then again through your fingers a few times to get wax right into the thread.. Be careful as after waxing the lines try not to handle them too much as this can cause the fuzzies to return, good luck.
-
Announcing the Model Ship World Ship Kit Database Project
S.Coleman replied to SkerryAmp's topic in Wood ship model kits
Now that's neat thinking. What a great idea. Saves a lot of hassle. Good luck with all that info -
I came across the that in the plans too. I went ahead and planked the deck after the bulwarks and wished I hadn't.but it came out alright. Just abit more time consuming. I have tried and tried to get pics on this site but to no avail. Will keep trying as I have quite a few of this build.
-
Hello Ray. Off to a good start. Have a go at planking both sides at the same time, doing this will prevent the hull from warping or twisting. Looking good though.
-
Real nice woodworking going on here. Won't be too much trouble when it comes to the planking stage. Great job.
-
Those stairs are tricky but it seems like you have got it all under control! Looks great
-
I have used scrapers and chisel scalpels to remove glue stains as mtaylor has mentioned. Just be very careful not to use a lot of force when scraping. As Brian C has mentioned also, rip up and relay the planks as a last resort. I have also done this in the past. Hope this helps
-
I think I know the ones you are meaning, I had some supplied with my Rattlesnake. Mine were black as they came with the kit. If these are the same as what you are talking about, there is no hollow inside to them. I drilled carefully out the centers to make them hollow and after cleaning them up I painted them a light brown/ Tan colour with a black handle. ( I had kept the original handle)They seemed to come out alright. Hope that helps out some.
-
Sorry to hear about the misfortunes that have happened recently, Must be hard, but chin up we are here for support! I have just started the ratlines on this ship as I am currently building it now. Yours is looking great by the way. It's not a bad ship to build actualy
-
That's looks like a handy tool you got for that sanding. I think it is coming alone great. I must have to see if we can get a tool like that somewhere over here
-
Looks like there is a lot of tedious work in all those handrails! But it's coming along great. Looking very sharp.
-
Coming along real sharp! I found out about that slot problem too. Your hull is looking great.
-
Looking good there dragzz. Good luck with the no smoking.
-
I work in the mines in the northwest of Australia, here we are extremely safety conscious about everything! Even the toilet cleaner that the cleaners use to make our toilets clean has it's own MSDS and a JHA ( job hazard analisysts) has to be conducted before using. When I go on my break all of that safety jargon goes out the window and I never thought anything of it. Until I read this post. Now I will check my glues and adhesives when I get home. Safety and health is important at home as well as work! Thanks for bringing this up.
-
Sanders and rasps again?
S.Coleman replied to Nirvana's topic in Modeling tools and Workshop Equipment
The Dremel attachment looks pretty serious! How big is it? I wonder if we have anything like that here?