
HOLIDAY DONATION DRIVE - SUPPORT MSW - DO YOUR PART TO KEEP THIS GREAT FORUM GOING! (Only 13 donations so far - C'mon guys!)
×


Dan Vadas
-
Posts
3,261 -
Joined
-
Last visited
Content Type
Profiles
Forums
Gallery
Events
Everything posted by Dan Vadas
-
Ain't that the truth . No doubt the Bulkhead is in the wrong place - a typical problem in Kits. I'd just line the bulkhead with the same timber you are using for the decks, or perhaps a different one for contrast (don't forget to put a couple of doors in ). There wasn't a great deal of room in real ships in some places, so I wouldn't stress about it. As long as the gun will actually fit it's all good. If you haven't already, I suggest you make one gun now and try it for size - you may get a good surprise if it fits OK . I think it will . Danny
-
Thanks Kevin. Not in this lifetime I think . I've been busy making and fitting some of the smaller deck pieces. Here's the Aft Deck at the moment : I have no idea what this structure is (something to do with the Anchor Chains?). This part of it consists a lot of small discs - I'm so glad I bought those punches : Most of the fore deck fittings in place, apart from those on the edges of the deck. I'll fit those after the Railings go on : Speaking of Railings - I've made a start. A bit of paint touch-up will be done when they are all on : Danny

.thumb.JPG.cf50f9a5a32480709a70c1cc37441a89.JPG)
.thumb.JPG.1ed532e5e8b29d8ba1da95358f74a34b.JPG)
.thumb.JPG.d1879aea4734e237a6c0aa0645f3dbe7.JPG)
.thumb.JPG.b69cbf80fa1064d24b0be549eddf2d83.JPG)
- 295 replies
-
- 17
-

-
- amatsukaze
- halinski
- (and 2 more)
-
THESE ONES are a great price Jan. FREE postage too . They're worth buying by the box of 100. Danny
- 64 replies
-
- 3
-
-
- v108
- digital navy
- (and 2 more)
-
Another Card build to follow, Hi Jan . A few lessons learned already, lots more to come . A couple of suggestions, just from looking at the tools you are using : Buy a Swann-Morton Scalpel before you get into any tricky cutting. The blades are a lot sharper than Xacto, and a better shape as well. The tips of the Xacto blades are too pointed and snap off easily, whereas the scalpel blades have a rounded (top) end that is hard to break. You can buy them on-line from many sources such as Ebay. Diamond coated Needle Files work great on paper, much better than straight-cut files. They also work in any direction . Also available on Ebay. Danny
- 64 replies
-
- 4
-
-
- v108
- digital navy
- (and 2 more)
-
Wow she's a Biggie Kevin - makes my 1.3m Bismarck look tiny . I'll be following this build with a lot of interest. Danny
-
Thanks Carl and Pat. Yeah, I'm getting the hang of working with paper . I now have the confidence to tackle the Bismarck, which I'll start in about another week or so when I've finished Amatsukaze . Here are a couple of pics of the fitted Main Mast : There is another large Winch on the aft deck. This one has 25 parts, but is quite a bit bigger than the Windlass. A pic of the Supports under construction, and another of the rest of the parts : The winch finished and fitted to the deck : Danny
.thumb.JPG.d8dfffa04f8b6461d7ecf0f28665d027.JPG)
.thumb.JPG.342064c9ecdbef18b30643eaeeed962b.JPG)
.thumb.JPG.8f6c870f38aba6a6da41d514f4399a5c.JPG)
.thumb.JPG.5b8f750007ca96cea09eae6c8602d768.JPG)
.thumb.JPG.5fc90b2ad08f2c6a9e44af7ffdabb45f.JPG)
.thumb.JPG.b9302f2e7920ca62b0d140f63e28ac6e.JPG)
.thumb.JPG.25a7570dd0bc28e823f5962ef4c17bf8.JPG)
.thumb.JPG.b0e4c22752de842a28be86042675a07c.JPG)
- 295 replies
-
- 19
-
-
- amatsukaze
- halinski
- (and 2 more)
-
Sorry Carl, here it is - at the tip of my (blunted) Xacto knife : Danny
.thumb.JPG.b6bdf93f2c7ac8eeba75d27e3b0afeb8.JPG)
- 295 replies
-
- 16
-
-
- amatsukaze
- halinski
- (and 2 more)
-
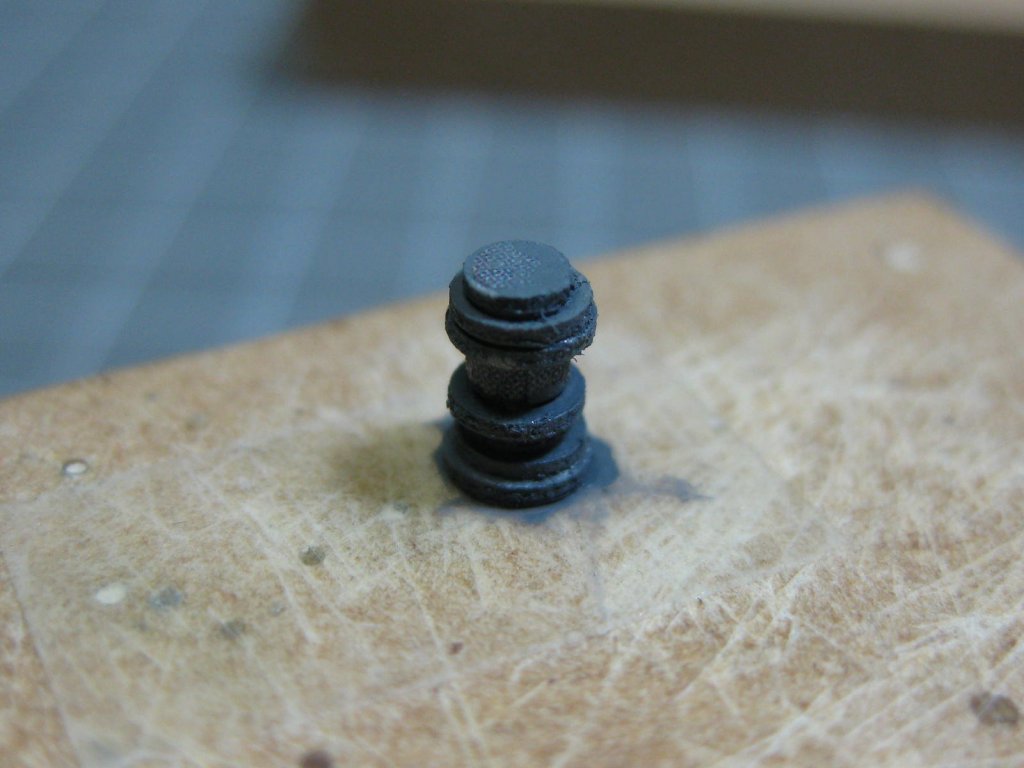
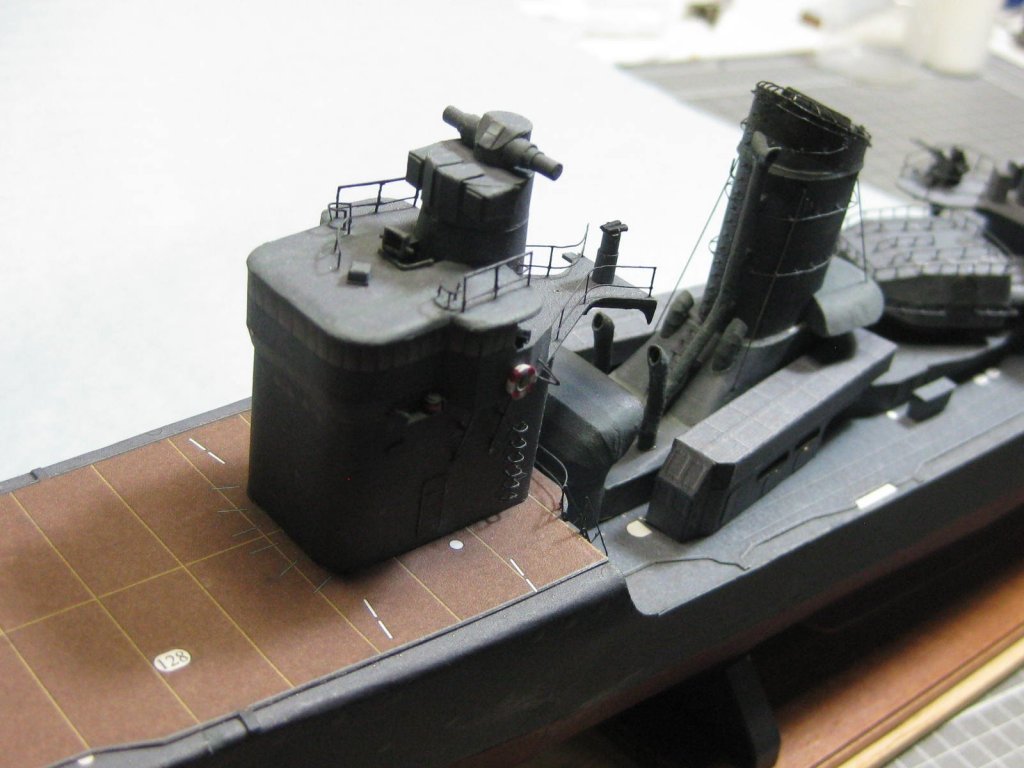
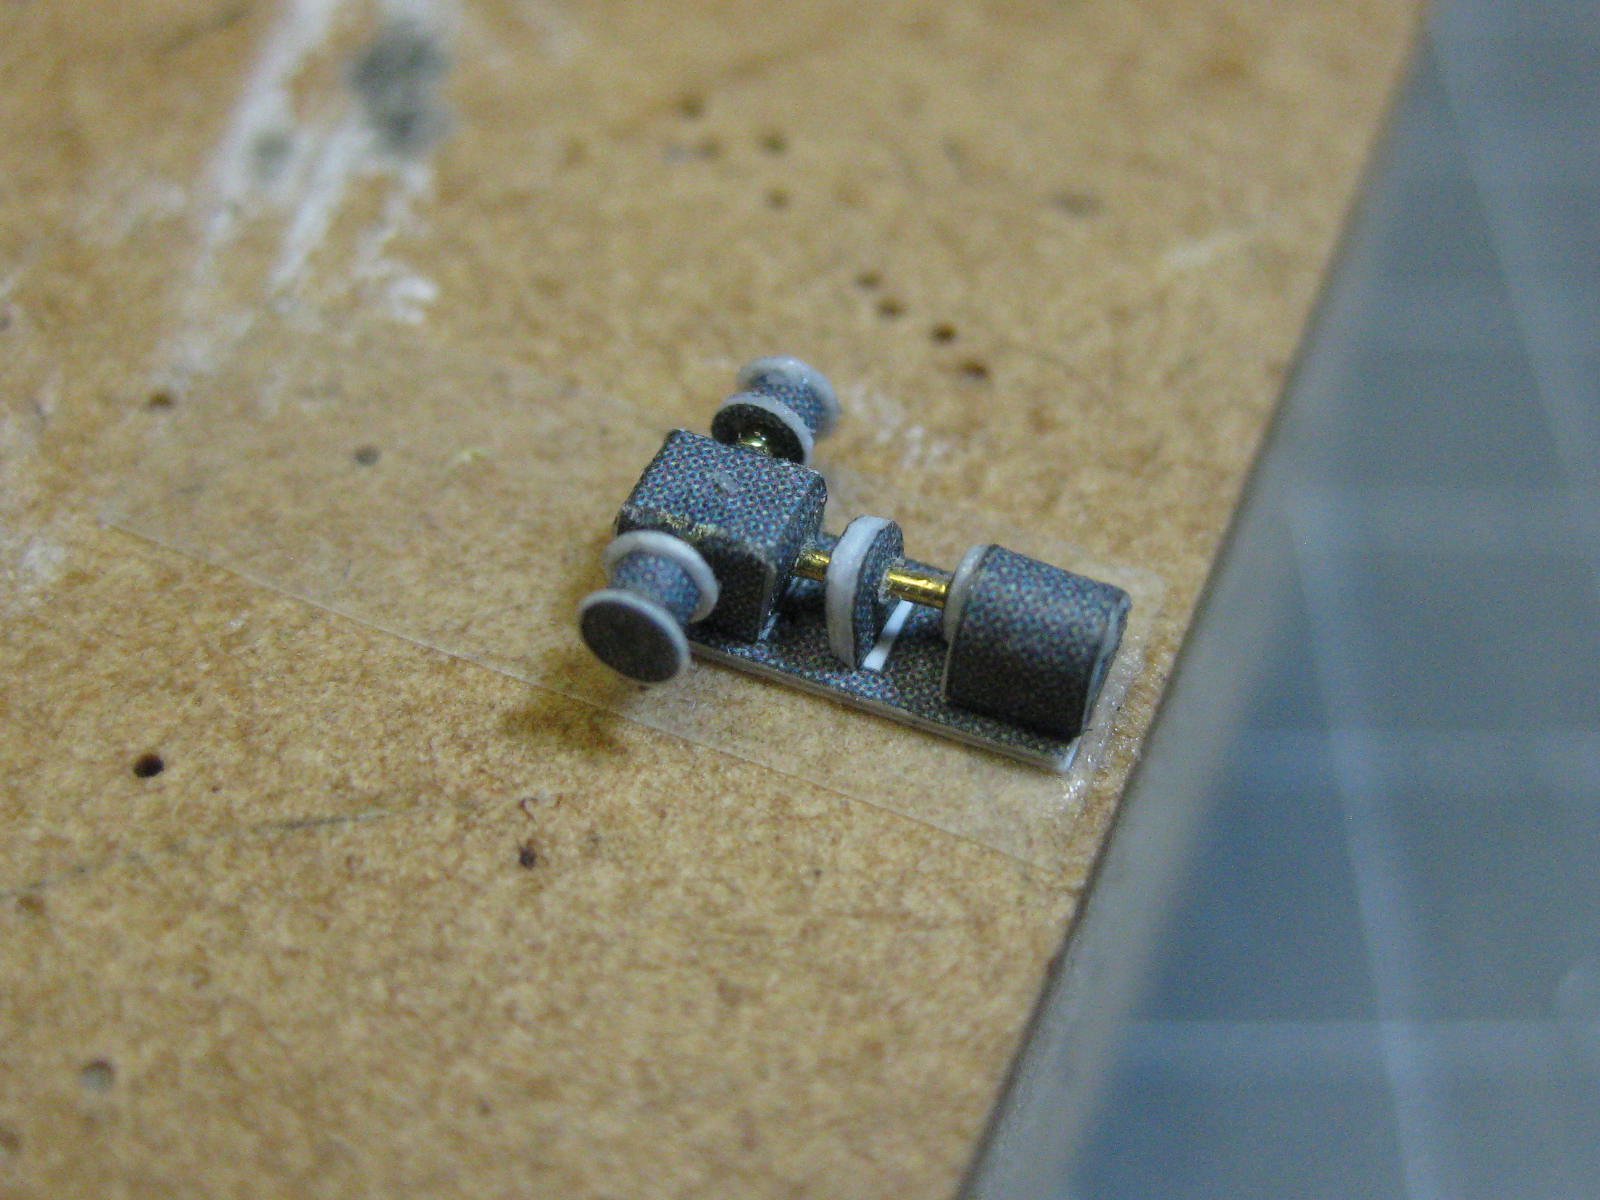
Thanks Slog, Greg and CDW . Here's one of the smallest assemblies I've had to make, a Windlass. There are 15 tiny parts in it and it's only 4mm long : I'm not sure what the function of these parts is, it seems to be some kind of covered entryway. I made the actual units some time ago, and now it's time to fit them : It's also time to fit the Bridge : The last major sub-assembly to fit is the aft superstructure : A couple of overall progress pics with the major assemblies fitted. I'm leaving the last three turrets until later as there are a lot of small parts to be made and fitted around them first : Danny
.thumb.JPG.5be9d4760eaafbc452bfdabbcef9574e.JPG)
.thumb.JPG.7318ac1bbe851db4258ed099d7180a8c.JPG)
.thumb.JPG.02caceeca8d80946e6f092f9107f0bb8.JPG)
.thumb.JPG.57a5b08346bc99fe1ef7e100a392fe93.JPG)
- 295 replies
-
- 22
-
-
- amatsukaze
- halinski
- (and 2 more)
-
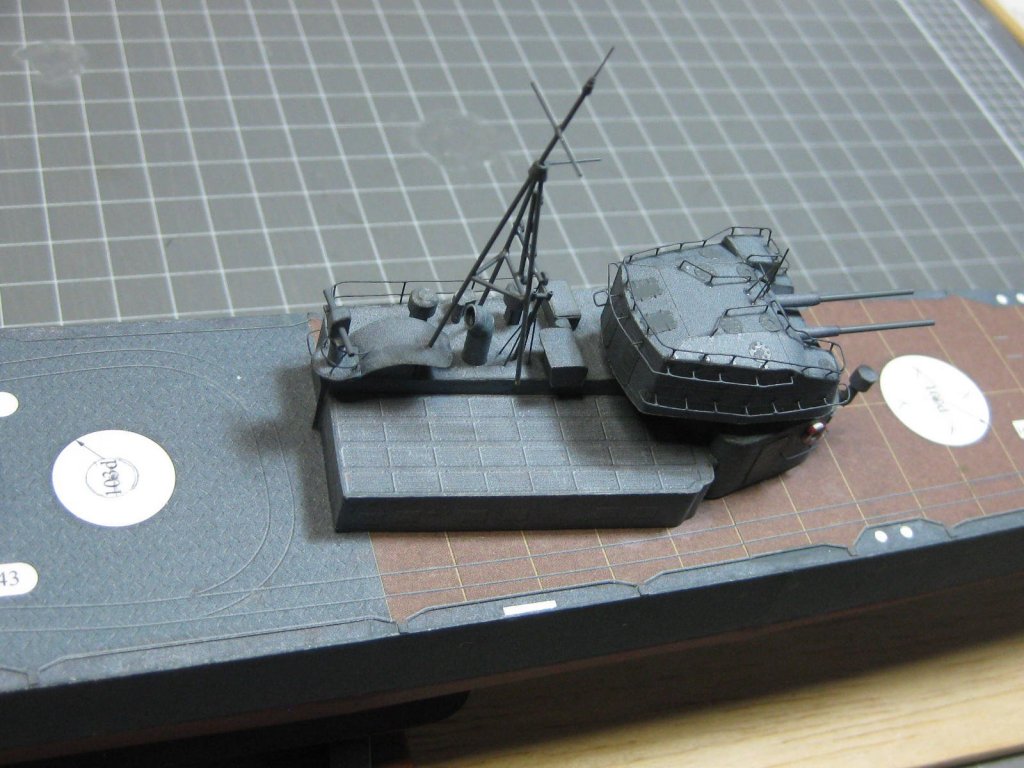
I've been putting off building the Main Mast until now, because I thought it would be one of the most difficult parts of the build. It turned out to be fairly easy . CA glue was used for all the metal joints. I taped the legs of the mast to a block of MDF for stability while I glued all the other parts to them This part (I don't know what it is, perhaps a "Crow's Nest"?) proved to be the hardest thing to make. There are 6 pieces to it, and it's a multi-angled shape : Now to spray paint the whole thing. Danny
.thumb.JPG.376765e752776e887a6f6475c7d6bc60.JPG)
.thumb.JPG.afd11320700027df8688ef4bb79fc110.JPG)
.thumb.JPG.f886f34b0ead3759ee441e8b262ee7dc.JPG)
.thumb.JPG.0f7ad4836b571aab7fab31663b7fe128.JPG)
.thumb.JPG.3cdc894eefa71b7fe5708548e6e6f8c9.JPG)
.thumb.JPG.4b4d783fe5cf5406b3ac031ba01d1f36.JPG)
- 295 replies
-
- 18
-
-
- amatsukaze
- halinski
- (and 2 more)
-
Here's a tip J - use a narrow chisel blade Xacto (you will have to grind one to width if you can) and CHOP the INSIDE of the frame out first. Then cut the outside using a steel rule for the straight edges. SHARP blades are vital, a Scalpel works far better than #11 Xacto blades. Use some scrap card for the new frames and paint them. You can buy a Swann-Morton scalpel and blades on Ebay. Danny
-
Thanks very much CDW, Pat, Carl and Jan. Jan, it's a little bit smaller than a Tic-Tac . If I had one I'd put it up against it, but I keep eating them - I can't stop at one . BTW - martanek is on the Paper Modellers site. He still has his Tac-Tacs (I'm sure they are plastic ). Danny
- 295 replies
-
- 6
-
-
- amatsukaze
- halinski
- (and 2 more)
-
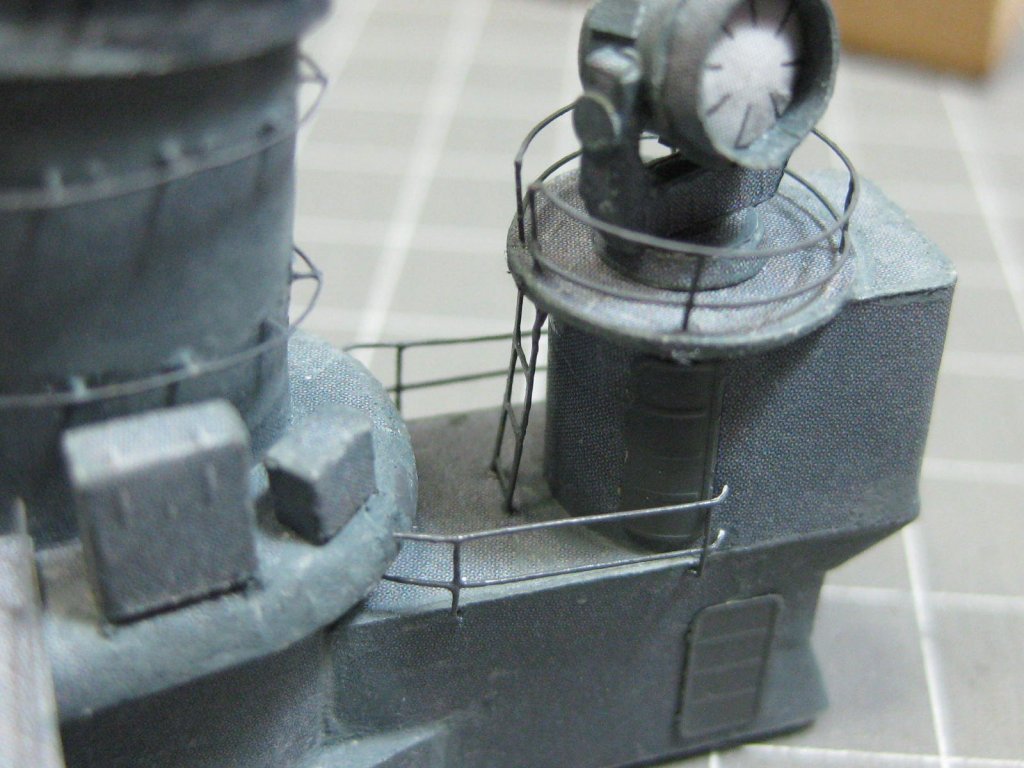
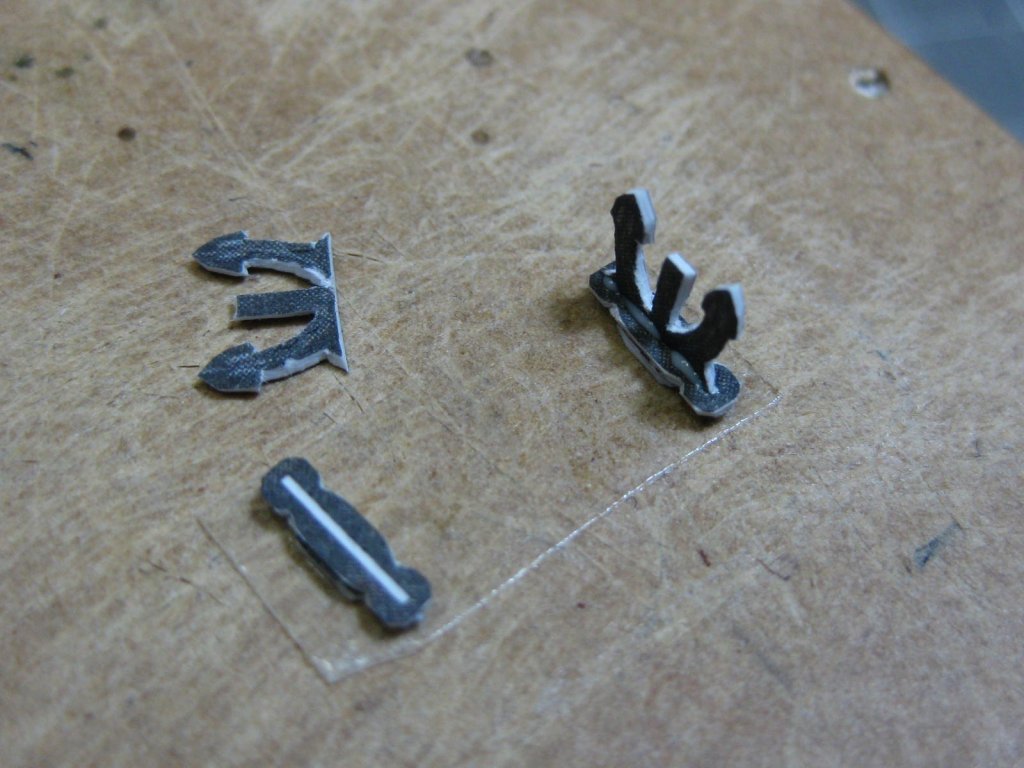
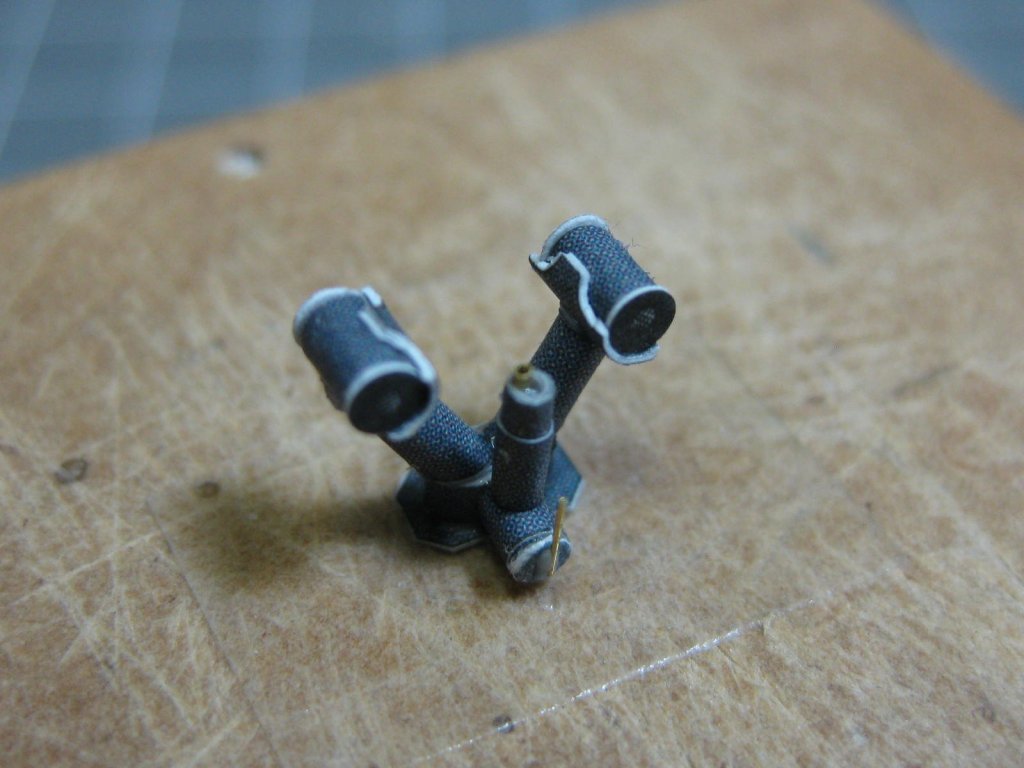
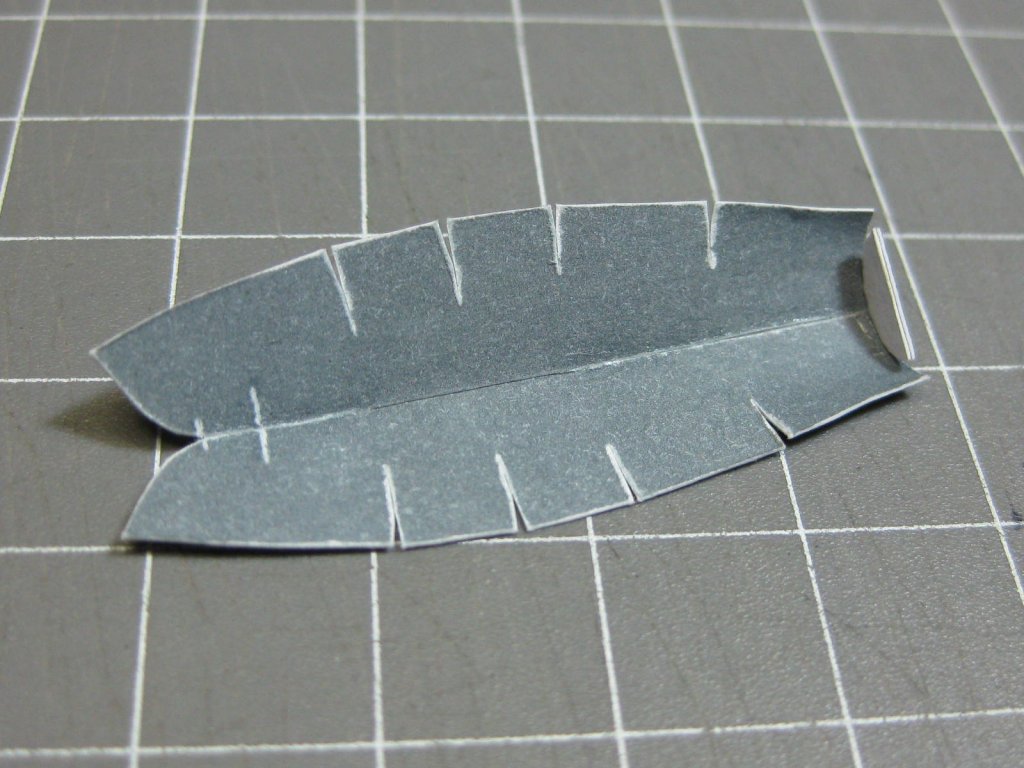
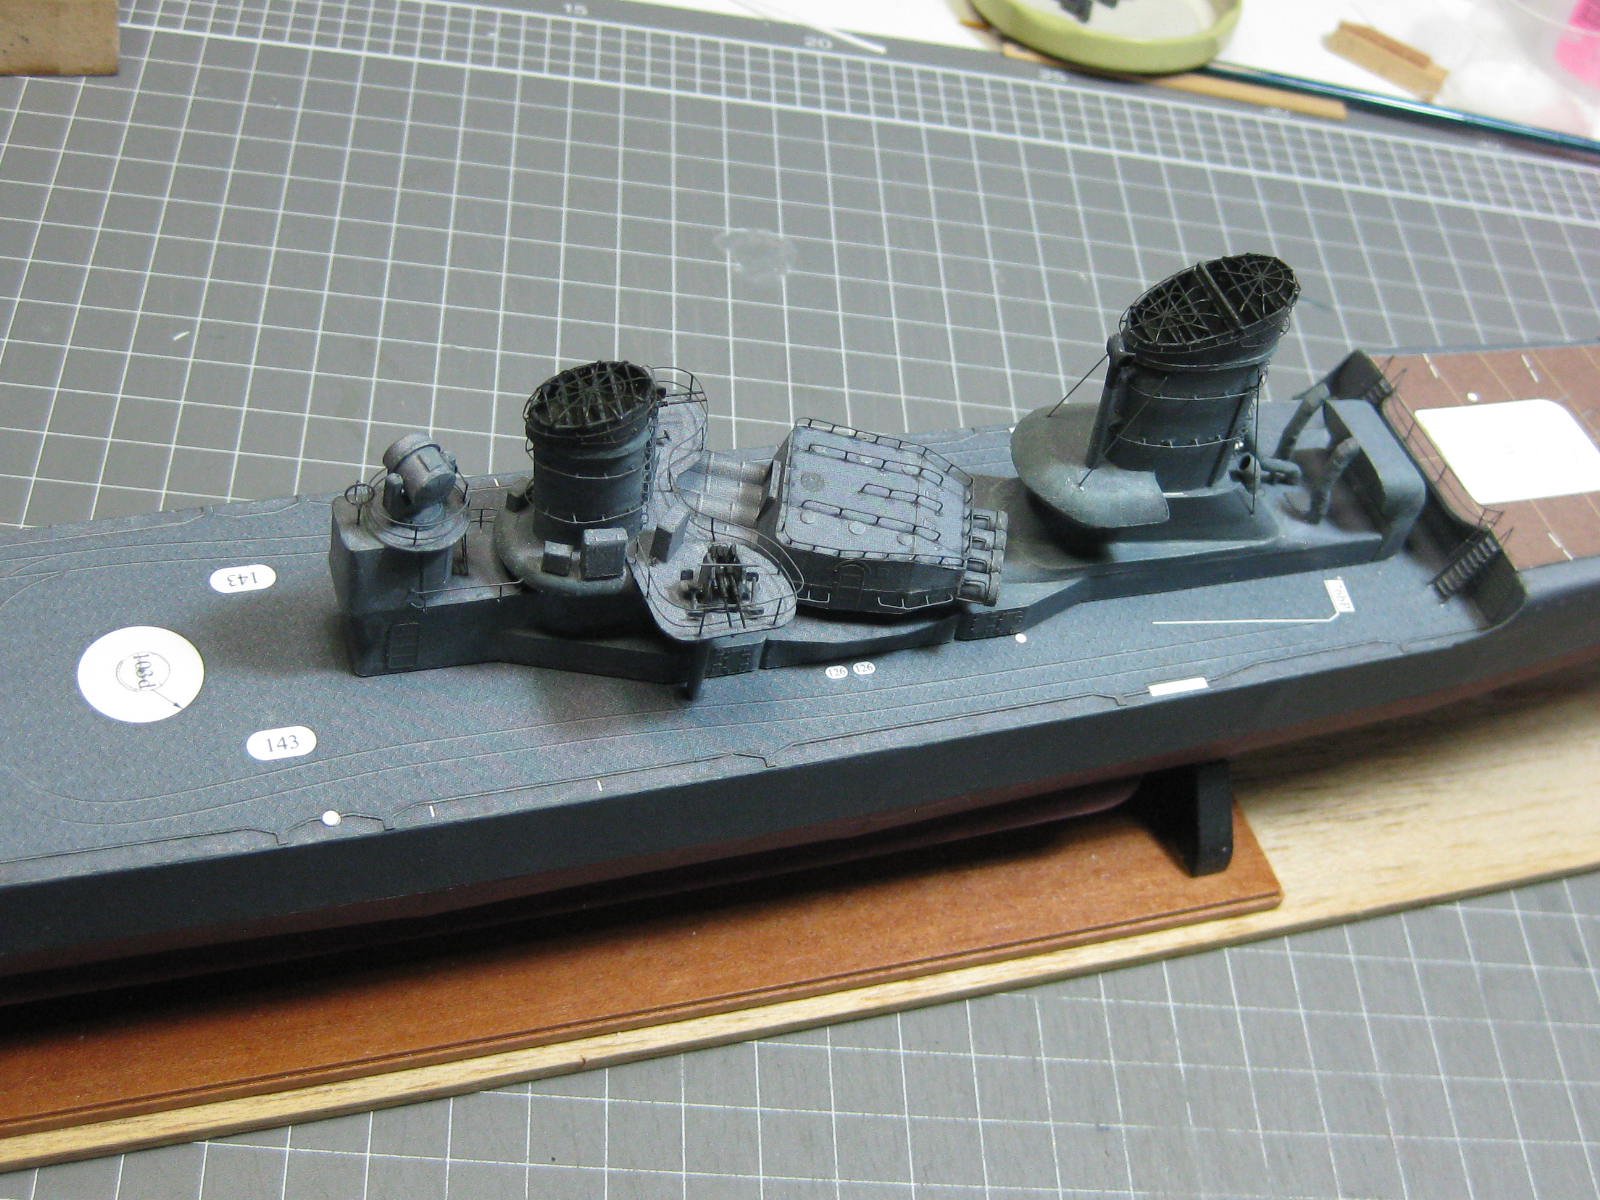
More progress. I've made and fitted the Anchors. These required quite a bit of delicate cutting : The Depth Charge Rack was fairly straight-forward apart from the two small cranes : The Searchlight took me a full day to make, mostly due to the Bracket - gluing it together could only be done one section at a time. The first pic is of the parts needed for it : I also fitted a ladder, the RDF antenna and three railings around the searchlight : The AA Guns and the forward Torpedo Tubes were fitted next : Last I fitted two inclined Ladders and the railing to the aft end of the foredeck. It would have been a lot easier if I had painted the ladders before fitting them : And here's a Progress pic of where I'm up to. The funnel assembly has been permanently fitted : Danny
.thumb.JPG.28920a8400da6af611978e31934c10db.JPG)


.thumb.JPG.65fd806aa654b43c69ef530c87d3143f.JPG)
.thumb.JPG.e78eb4fb20cf128d54964a75dcf92357.JPG)
.thumb.JPG.09a5941d8d1cf14218c560f85e9a2257.JPG)
.thumb.JPG.5d41e4d856db9ea9f789c5783dd7a8a0.JPG)
.thumb.JPG.dc431897146c4ec0d2f6f281790b97d0.JPG)
.thumb.JPG.865782d3266c07060d7bde8bd6a4084b.JPG)
.thumb.JPG.32f5c9769204828b0c6c5b813f47d0a8.JPG)
.thumb.JPG.7b58ad6a3dab25b65f545db39cb0b3a1.JPG)
.thumb.JPG.68a20c50f5852164f759cd4fbbe6e404.JPG)

- 295 replies
-
- 23
-
-
- amatsukaze
- halinski
- (and 2 more)
-
That's usually a problem Jan. I glue a bit of extra card each side of the frames to give some more gluing surface. I've seen others glue a strip of thin card onto the edge of each frame, but you would have to trim or sand the frames down the thickness of the extra card otherwise the skins won't fit properly - there's usually no margin for error. I'd also suggest gluing at least one extra piece longitudinally between the frames to avoid "squashing" the skins when fitting them. There is no need to glue the skins to the extra bracing, it's just a safety measure. Danny
-
Doh .... of course it is . I gotta say, they sure pack them onto a page. No real problem there Pav - the pics are too low a resolution to be of any use to someone copying them. Danny
-
Hard to say Ron - perhaps part of the Rudder? It's definitely part of the lower hull below the waterline. It might need folding but it's an odd shape. Can you put up a pic of the other Hull Skins? Good to see you took the advice on extra hull bracing . Danny
-
I'm glad you're going for the beams etc . I'd suggest either Swiss Pear (a light brown, slightly pinkish timber which is what I used for them) or Castello Boxwood which is a light yellowish colour and a bit harder than Pear. Either will give you nice crisp edges and is easy to work with sharp tools. Check out Crown Timberyard, one of MSW's sponsors on the main page, for the timber. Danny
-
Yep, that's the best way I found to do them too Ron . It's probably a bit late now, but I would have added at least one extra longitudinal brace from some extra card between each bulkhead to prevent any accidental "squashing" of the skins, especially where the bulkheads are a long way apart. Also, don't do the stern skin last if it's rounded (a bit hard to tell from the pics) - it's better to finish in the middle somewhere. A rounded stern can be a bit tricky to fit. You've probably already skinned half the hull by the time you read this post . Danny
-
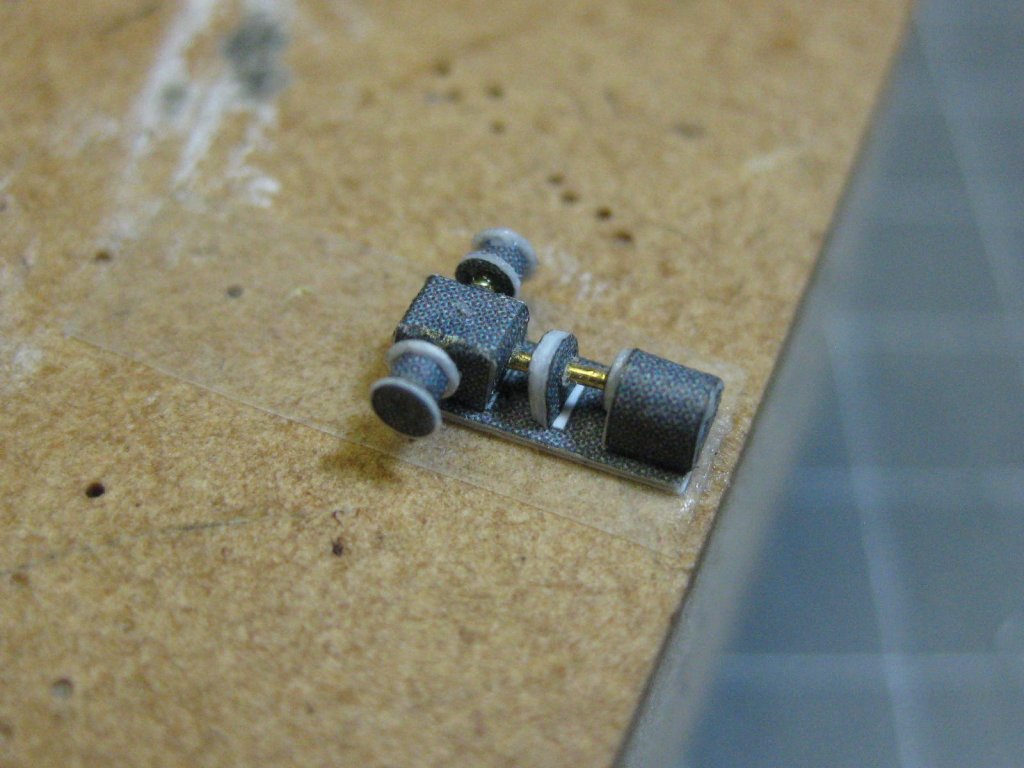
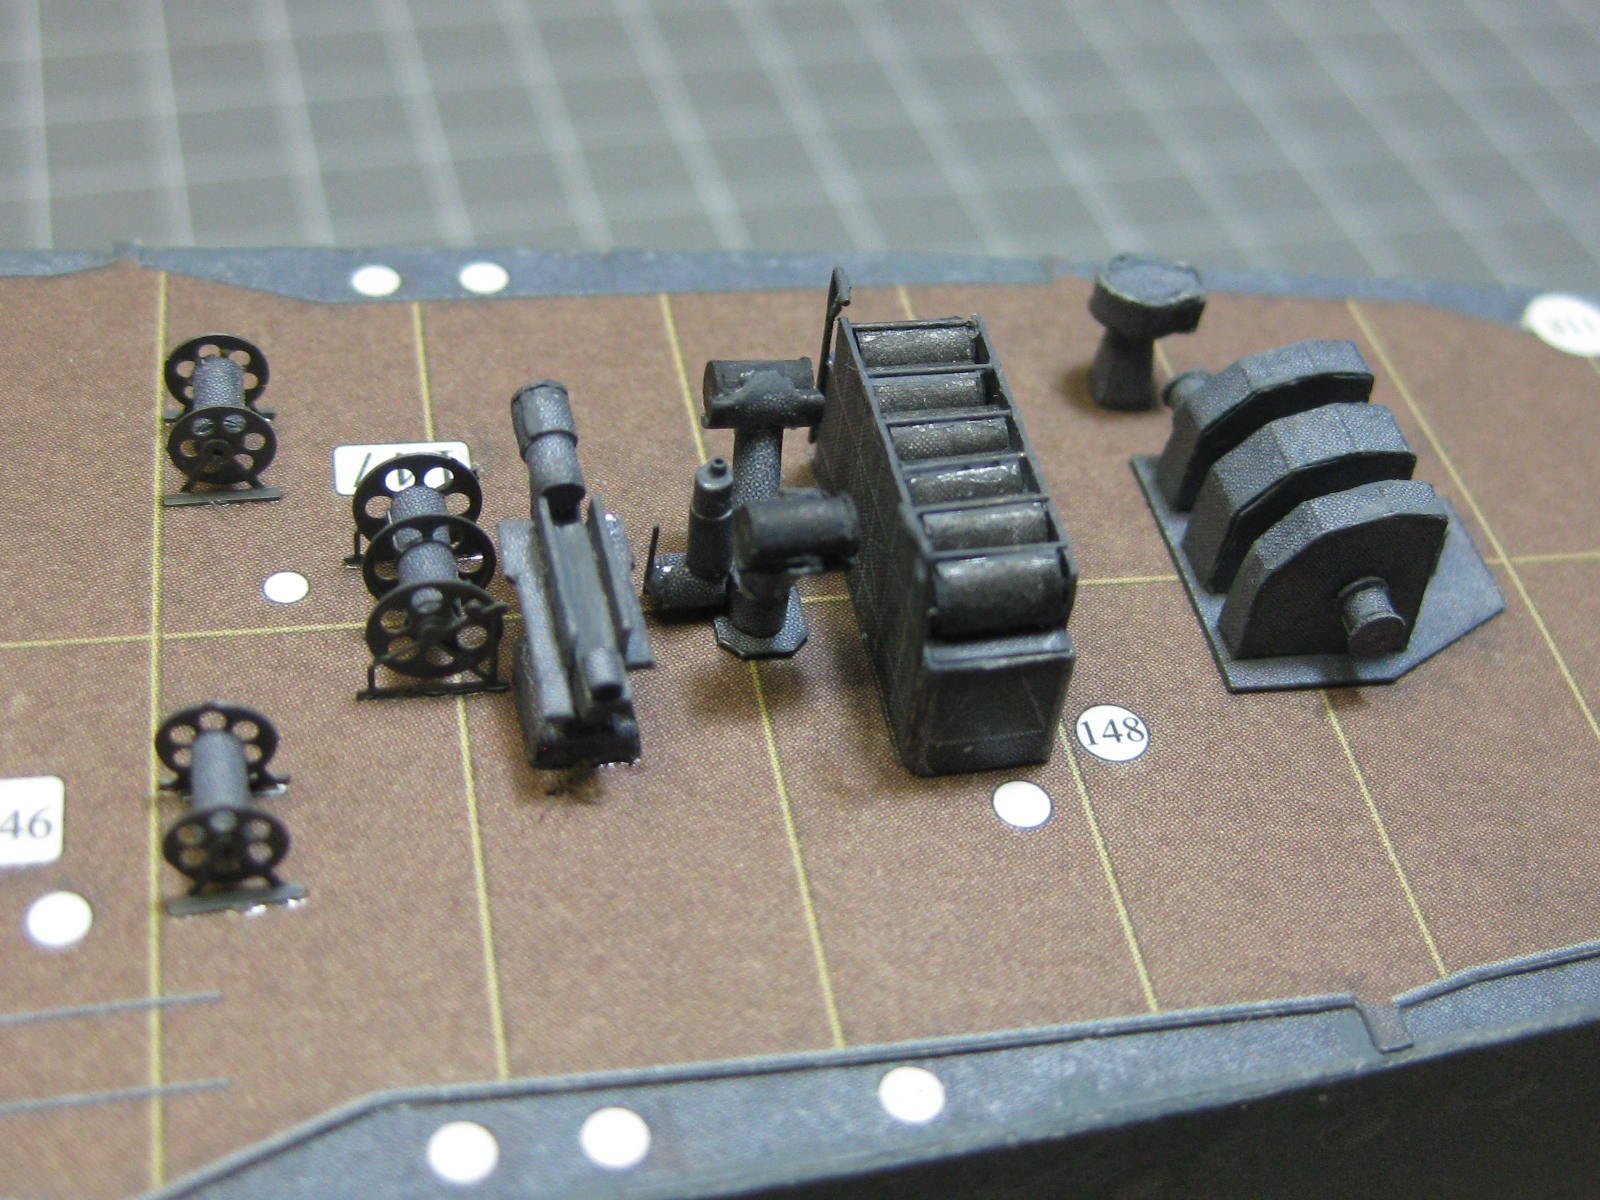
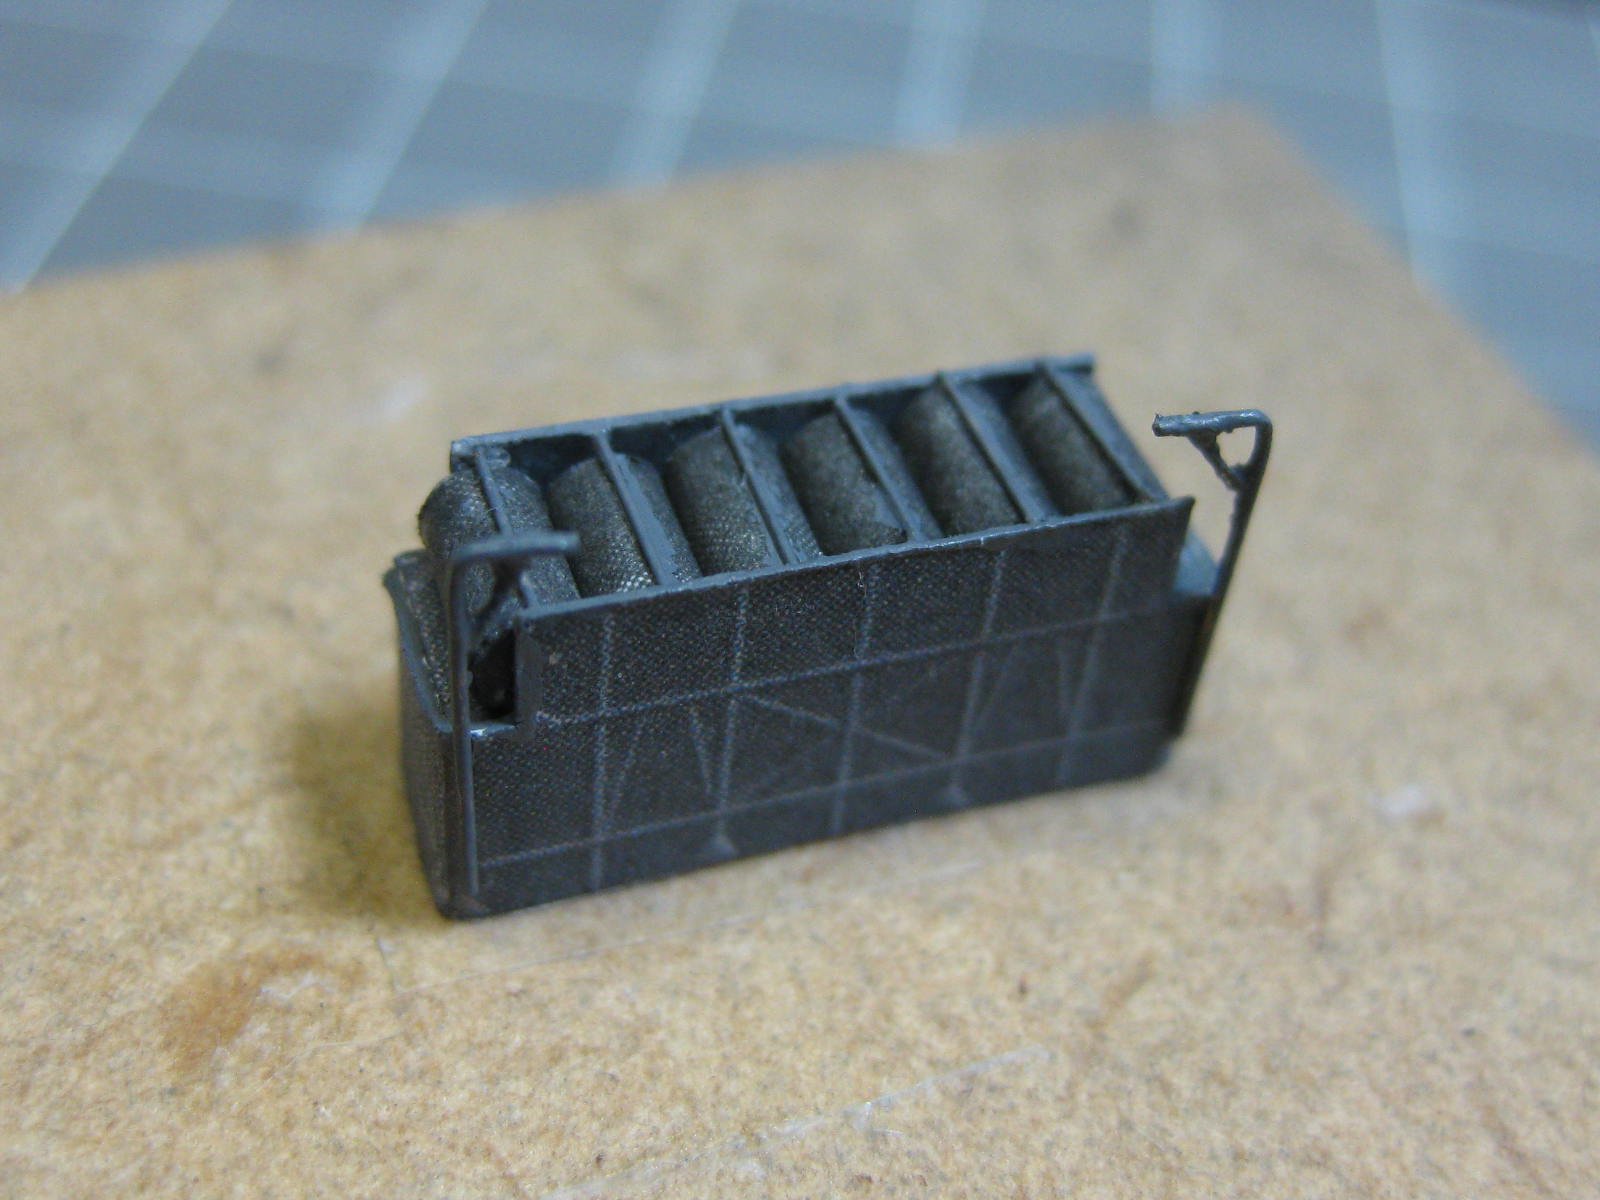
Thanks for the kind words Carl, Bob and Jan . The two Motor Launches were a little easier to make, mostly because they have "steel" hulls instead of "clinker" ones and could be touched-up. The design was also a bit easier to work with. Here's a series of pics that follow the construction : The launches completed : I've also made the Depth Charge Launcher. This had a few rather small pieces, the largest tubes (the depth charges) are only 1.6mm diameter : Danny
.thumb.JPG.6f1e608b565c2244492743d128052bdb.JPG)
.thumb.JPG.18bad65d585b0eec4034ed967d9de7a0.JPG)
.thumb.JPG.c7edc368293c8a15fbef4768ec3ad617.JPG)
.thumb.JPG.1e1085af53485ecb602ac4361c8b779d.JPG)
.thumb.JPG.ff0cad8e8d641cb243668a7ce0abb859.JPG)
.thumb.JPG.e5846d0e3643cacc308770a94b3dd9f9.JPG)
.thumb.JPG.70849a2ebb7f6b89eabc82b69ad0641e.JPG)
- 295 replies
-
- 19
-
-
- amatsukaze
- halinski
- (and 2 more)
-
It certainly will Jeff - courageous decision to replace that much, but it's already worth the effort if for no other reason than to give you the confidence to do something similar in the future if needed . You're well on the way to the Dark Side of Scratchbuilding . OK, here's a thought. Now that nothing scares you what about adding all the PROPER Deck Beams, Carlings and Ledges to the Upper Deck (at least on the unplanked side) to really make it something great. This will of course require a lot of Scratchbuilding of these pieces, but it's something to think about. There are plenty of Fully Framed build logs on this site that you could follow for the details - my HMS Vulture has all the beams etc if you care to check it out. Keep up the good work . Danny
-
Thanks John, Clare and Popeye. The Torpedo Turrets are painted and finished : There are two Ships Boats. These proved a little difficult to make, and I'm not 100% happy with them, but they'll have to do. Apart from one picture of a finished boat there were no instructions at all. I started by gluing the bow together, then adding the forward platform : Next I glued the keel together, and also added the transom : The flooring pushed the skins out to the correct shape : Then I glued the last of the cuts in the skins together, glued in the aft platform and thwarts, and finished by attaching the keel/rudder unit and the storage chocks : Danny
.thumb.JPG.78b8ddc3f842d4c0a62ab12399022288.JPG)
.thumb.JPG.455f2709f9a5e5a9478587d54da20701.JPG)
.thumb.JPG.a5b5624aebc21b928b72b2f4971f61a5.JPG)
.thumb.JPG.63112907e35707aed7c0c5be6ddce6fa.JPG)
- 295 replies
-
- 16
-
-
- amatsukaze
- halinski
- (and 2 more)
-
Well done Toni . You did better than me - I actually had to cut two of my head timbers in half to fit them in. Once glued back together the join became invisible . Danny
-
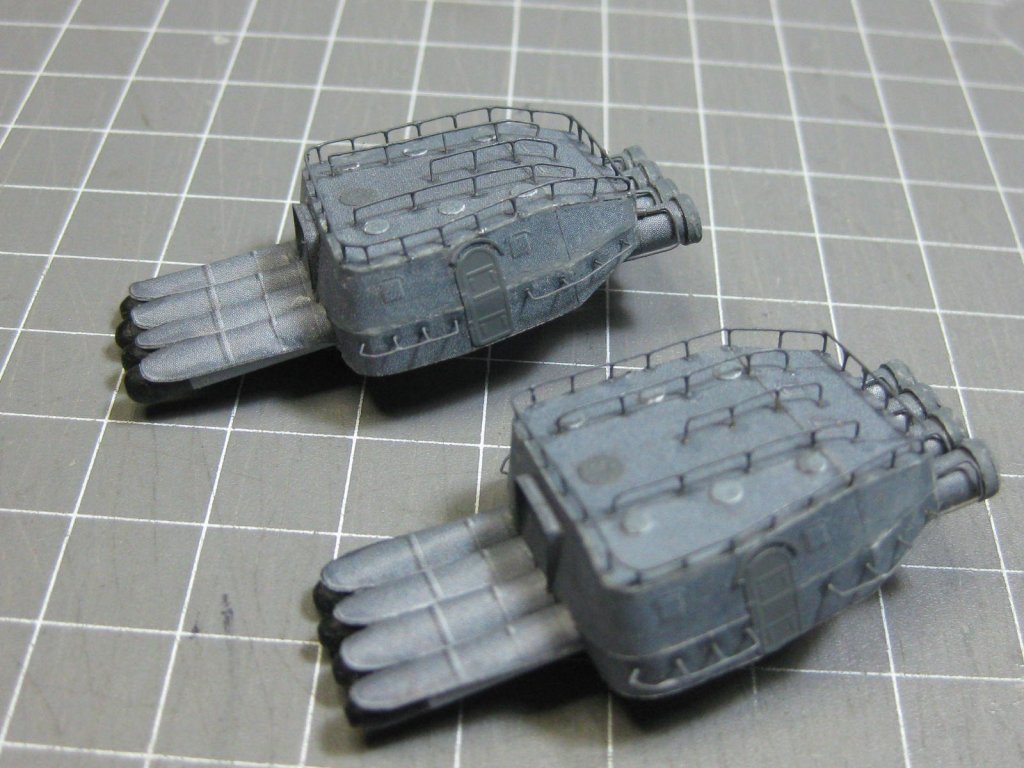
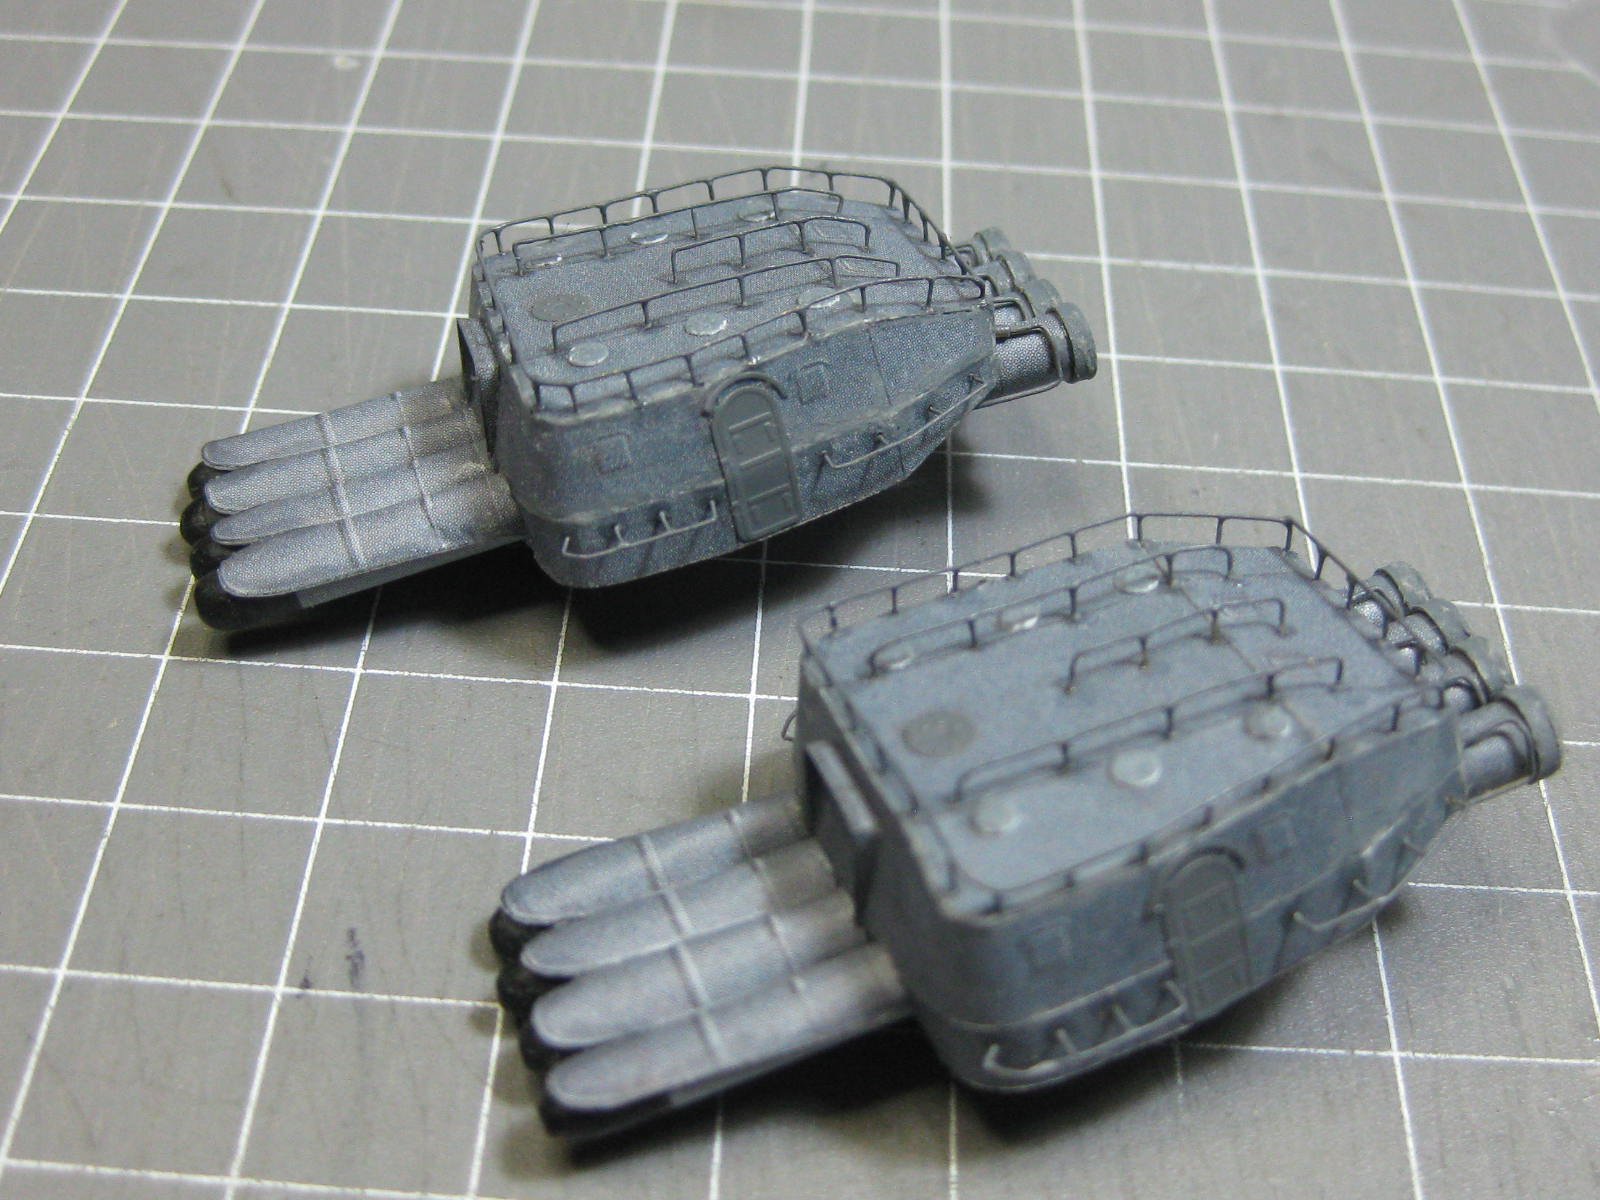
Apart from painting the rails the Torpedoes and their Turrets are finished. The torpedoes are rolled as a solid tube so the ends can be rounded. To make it easier to sand the round end I used a French Curve to cut the warhead end : The tail ends are a cone. I bought a Forming Tool from RP Toolz which did the job very well : I dipped the warhead ends in CA to stiffen the paper, and then filled and sanded them to shape : Although they can't be seen I fitted the fins to the torpedoes. This made them easier to slide into the tubes : The Air Pipes are made from 0.5mm tubing and 0.3mm wire : The finished Turrets ready for final painting. The Swivel Mounts were made in similar fashion to those on the Gun Turrets : Danny
.thumb.JPG.c7ef9c3da14f1216be2155a6aa684b73.JPG)
.thumb.JPG.2f0a390d99da9f5555fd3c4b50250bd7.JPG)
.thumb.JPG.6f5d7ff8891fe09fac5731a805125a76.JPG)
.thumb.JPG.6c49e4a1bb07c49e6cdbf5aac50f7c83.JPG)
.thumb.JPG.0d1b8f03b902c2bec856cc21b0916d83.JPG)
.thumb.JPG.e2fcef763ea20ccb632748a239bd83fb.JPG)
.thumb.JPG.53b4e4eb429150a4a1f730ae45c0b2e1.JPG)
.thumb.JPG.6c242dc955b1aad14078e5faebc8eca5.JPG)
.thumb.JPG.3a66857f2a9c7b3b2f84dbdf0d0aaaba.JPG)
.thumb.JPG.2d965bdbc1ef9fe10e6e64136e53ace4.JPG)
.thumb.JPG.bf43261f7cc1aea2df3849ffc6ac3778.JPG)
- 295 replies
-
- 21
-
-
- amatsukaze
- halinski
- (and 2 more)
-
Nice build Jim. Pity it's a Part-work, if someone made the full kit I think it would be a good seller. Lots of luck with issue #119, you've done really well getting all the rest . Danny
.JPG.8fc2713e8a3ca31da04dda9f827ec527.JPG)
.JPG.62354e0b6bf50fe352a2ea141e87e449.JPG)
.JPG.c88f6744ae4bb263700230cd899377ce.JPG)
.JPG.ea43378433973bcf69ff558432500ea4.JPG)

.JPG.6c7cf328d56a8aa6c9ba5039b6d89e1a.JPG)
.JPG.20320af39fe71058c870578a6cccacc4.JPG)
.JPG.0d88a8f8d90464e1e7f3ff7ca4563777.JPG)
.JPG.dbdfce2f307943f901423c43f7d6c17f.JPG)
.JPG.78e3ba21fa9be646d372f6827eacc092.JPG)
.JPG.9b3365cca2228a606407302a98380ef9.JPG)
.JPG.037b366c09b9da7d1b190892d11e31d6.JPG)
.JPG.26c5a3551005d296921fc69b4b9ea63f.JPG)
.JPG.dd69bb1e8ae3e584a2248a7872e0a1c1.JPG)
.JPG.9ade6fde597442f4928db314ea0ac8fe.JPG)
.JPG.be48a69a01a0c41e865ee70b1858f2bf.JPG)


.JPG.be396c1c31927271d93f52a7ba66d724.JPG)
.JPG.58419f69a813c7639c6a691434d5b530.JPG)
.JPG.06e5838362474a08f88c2b586e0b4390.JPG)
.JPG.8c651c8b90a7b5d486da7b735b585ccf.JPG)
.JPG.2033bd9970dcc5583a6b4a6f230a0d32.JPG)
.JPG.acc12ce10d129d520026f1fa0ac2cd77.JPG)
.JPG.e141baae9f33b0804be0fdd80f928c93.JPG)
.JPG.b04dbb85d091aa96d985c1f1d2c97113.JPG)
.JPG.94d24b3c15fa4663c820424e4b008420.JPG)

.JPG.aeea4db0dc585c8aebf1972b8e100fac.JPG)
.JPG.bf255d4560eda5588946889b61349426.JPG)
.JPG.a6488699c5ffdcae7e2cbdbc60822e66.JPG)
.JPG.42cb279e8462588864f6134282d7c12e.JPG)

.JPG.bf69c09df38d2ecf041b18e410f7a628.JPG)
.JPG.8d0b839e1d6b7edbfa0c0fb6406913ed.JPG)
.JPG.047a9ef6f7397229c59584095d0e2c85.JPG)
.JPG.ab25bf6c6ef666c09f9707c87b1184c1.JPG)
.JPG.0ef721bf4987011ec64ca220b7482bdd.JPG)


.JPG.553d23fb1742182d16660a5b17328c78.JPG)
.JPG.79af2e0f2065d746f685c8f43d1a1cd3.JPG)
.JPG.fd40ba09dc152470fa02d899751f593e.JPG)
.JPG.c8d3d08d2adf7ae3180a3e7db904d64d.JPG)
.JPG.c878c4788b8501f3e2903504b62ec763.JPG)
.JPG.fefbfa340b3b2d99d581a91b2a9411cb.JPG)
.JPG.6c9ac0979a63937b96c2896236945101.JPG)
.JPG.5d881f8f971aae64355ec9dfb6ede737.JPG)
.JPG.6151d73452a3a7be66a8f6842d8ed06b.JPG)
.JPG.7793469a5dc199065f287096f8db3f77.JPG)
.JPG.47fa36588711d5cb0bd40114640d8ea3.JPG)
.JPG.ffbe81753dfb65621ece611ca984d746.JPG)
.JPG.72303bf0d1424ce8ae6f731b5d937ed6.JPG)
.JPG.a4bc823b85fd886f8e5445d0b94cccf8.JPG)
.JPG.4d5ccb1310b57c13ced497dbc4cb7986.JPG)
.JPG.455943727305b4acbd2fce0b089a9999.JPG)
.JPG.399fbced41e73fee90b7713e4ed7b8b9.JPG)
.JPG.1a21a09b582f4a54261a14ef44cfead0.JPG)
.JPG.2a3228302d1976db31f66189ccd3436b.JPG)
.JPG.101f702b214090da980c40b9a1c77872.JPG)
.JPG.c94714561c50e3a87b8dbe7b7d173d39.JPG)
.JPG.68ec316fe96d8d5f7b0924b508b4893c.JPG)