


Thukydides
-
Posts
1,269 -
Joined
-
Last visited
Content Type
Profiles
Forums
Gallery
Events
Posts posted by Thukydides
-
-
2 hours ago, AJohnson said:
partially hides my naff buoys from view
For naff buoys they look pretty good to me. I don't know why you are trying to hide them. I had to zoom in pretty close before I could see any imperfections.
If I could make a minor suggestion on your rope coils, use less glue / varnish (whichever it is) on your rope. Potentially also try diluting it more and maybe add some flow aid. It will look less wet and fuzzy then.
- Ryland Craze, FriedClams, Dave_E and 4 others
-
 6
6
-
 1
1
-
51 minutes ago, TJM said:
I would also like to help, if there is anything I can do, but we would have to deal with shipping between Denmark and Canada, which may be a bother! But I would be happy to assist!
I appreciate the offer, but yes I suspect the shipping would be pretty steep.
-
11 minutes ago, TJM said:
It is looking great!
I am surprised at how styrdy my thin mdf parts actually are. But of course some sort of streghtening is needed to prevent mishaps.
Are you going to have the parts laser cut? I am asking because then you could use thin plywood bulwark patterns like on th Vanguard Models and similar kits, which will tie everything together. If you could faire the upper part of the hull and add these, I think you would be relatively safe?
BR
TJM
Unfortunately I do not have access to a laser cutter so it will be slowly and carefully with the scroll saw for me
") So I have to keep the framing a little more simple.
So I have to keep the framing a little more simple.
-
-
26 minutes ago, AON said:
Top timbers that thin will likely catch on something (shirt sleeve) and snap off
Yes that is my concern so my current plan is to reinforce them as I put them on. In some cases maybe by gluing a strip along the top temporarily. I think once all the framing is done (e,g. gun ports, support pieces etc..) it should be strong enough, but the problem is getting to that point without breaking things. That is another reason why I am wondering if I need to split the top timbers off of the bulkheads so I can build the lower structure and then add them as I build the supports for them.
I am not sure if I am expressing this very well, by support structure I am referring to the horizontal pieces I will be putting in-between the bulkheads holding them together as one unified piece.
EDIT: by temporary piece I mean somthing like this:
- mtbediz, mtaylor, jpalmer1970 and 1 other
-
4
-
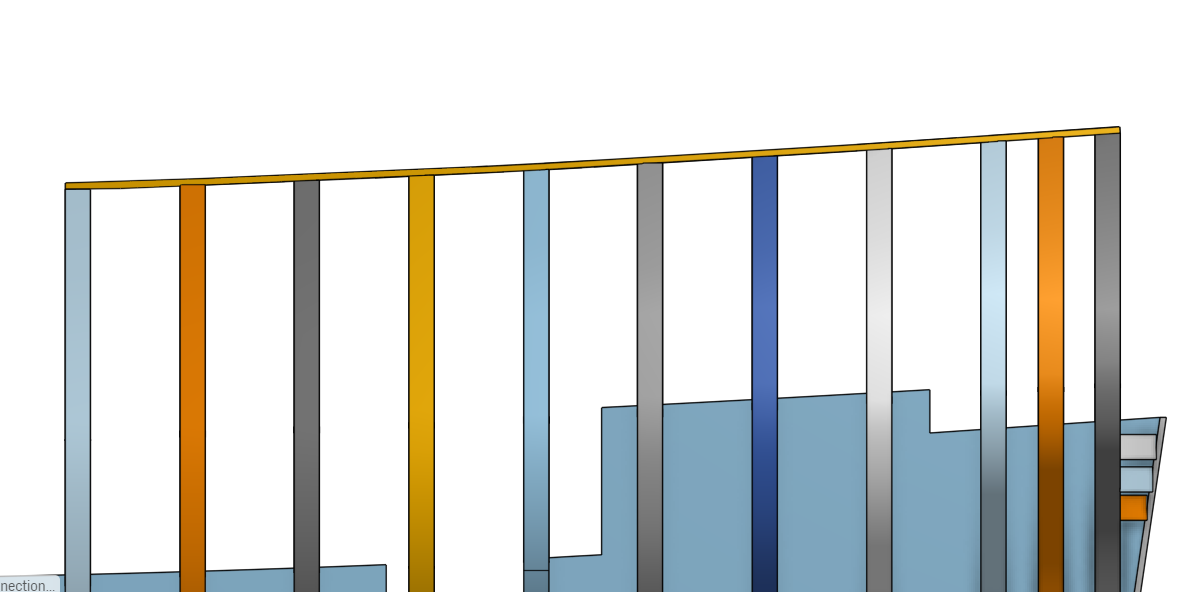
Log #5: Design Considerations
I have made a fair bit of progress on the design so for today we will take a break from the history of Perseus to look at my plans for the structure of the hull. You can see below the current status of the design. I have the first pass on the bulkheads complete and have started work on the stern. It helps that I am starting from already reconciled plans so I don't need to worry too much about making sure the hull is fair other than minor issues related to scanning error.
The design has taken significant inspiration from Chuck's Winchelsea build as well as a number of others.
There are a number of outstanding considerations that I have not yet decided on how I will deal with:
- As I have previously mentioned, I am still undecided as to how much of the lower deck I want to show and so am designing it as if I will show a lot, but I may just simplify this a bunch. The main consideration here is that I am planning on fully rigging this vessel so I have questions about how much I could realistically make at least somewhat visible. My current plan is to not do cutouts on the main deck thus allowing me to reduce the view of the lower deck to the areas right around the ladders. But I may change my mind so I have left the design as is for the moment.
- The upper parts of the frames are very thin. I likely need to split them off of the main bulkheads and cut them out of something stronger than aircraft ply. The thinnest are only a bit over 3/32 of an inch thick.
- In line with the question of the strength of the frames I need to consider how I am going to strengthen the structure and what order it will all go together.
Lots of problems to figure out yet before I start making sawdust.
-
-
You are a brave man to dive into sculpting. I don't know if you have ever come across Tom Mason on YouTube. I have found his videos very helpful.
- FriedClams, tmj, CiscoH and 4 others
-
7
-
9 minutes ago, TJM said:
I guess that is true, but I don't think it will be a problem. As long as you place the bulkheads so the the direction of the fairing works (offset towards the closest end, if that makes sense), you can faire the hull as you always would, faring until you just remove the char.
The problem is these plans have warped over time and so if you just copy the lines as is you will probably end up with a wiggly hull. With a kit these issues have already been worked out for you as the kit maker drafted the plans and made sure they are fair. The faring you do by sanding is just smoothing everything out. If the bulkheads are not the right size to begin with then you will have a hard time making it right.
-
4 minutes ago, TJM said:
But it is good to have a 3D option if I run into something I can't get to work in QCAD
I am no expert, but the main issue when working from historical plans is faring your hull. In 2d this is possible, but much harder. In 3d you can get it to show the loft to help with faring.
-
Another option if you don’t like fusion 360 is onshape. It is free to use and is in a browser so you can use it anywhere, even on your tablet. Downsides are it is not designed for ships (it has what you need, but you need to work round some limitations). Also if you want the free version your files are public. That being said if you just name your file a random collection of letters and numbers, no-one will be able to find it in any case.
-
21 minutes ago, TBlack said:
Daniel,
Did you decide on a scale?
Tom
Yes I am doing it in 1/64th scale. The reasons being:
- My OCD demands all of my ships be in the same scale for comparison.
- It is a nice compromise size. Some day I would like to do a ship of the line and any bigger than 1/64 and they become far too big. On the other hand it is still big enough that you can reasonably model everything without having to approximate.
- jpalmer1970, AJohnson, CiscoH and 6 others
-
9
-
16 minutes ago, AON said:
Curious: What CAD program are you using to create your 3D model?
Onshape.
It probably is not as good for ship designing as some others, but it is in a browser so I can use it from anywhere and it is free. Your files are available to the public (you have to pay if you want private files), but if you name them something unrelated to your project they are essentially private unless someone knows the name.
-
Congrats, you should be proud of her.
- mtaylor, Keith Black and PaddyO
-
3
-
Another wonderful model and as usual you present it very nicely.
-
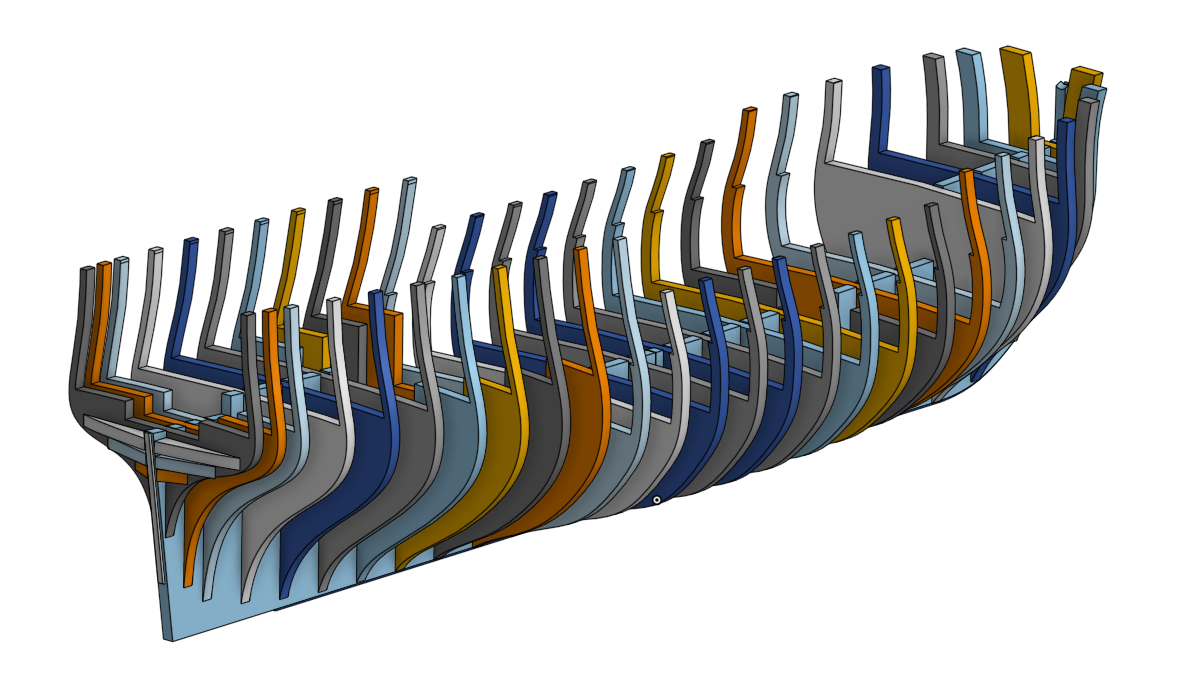
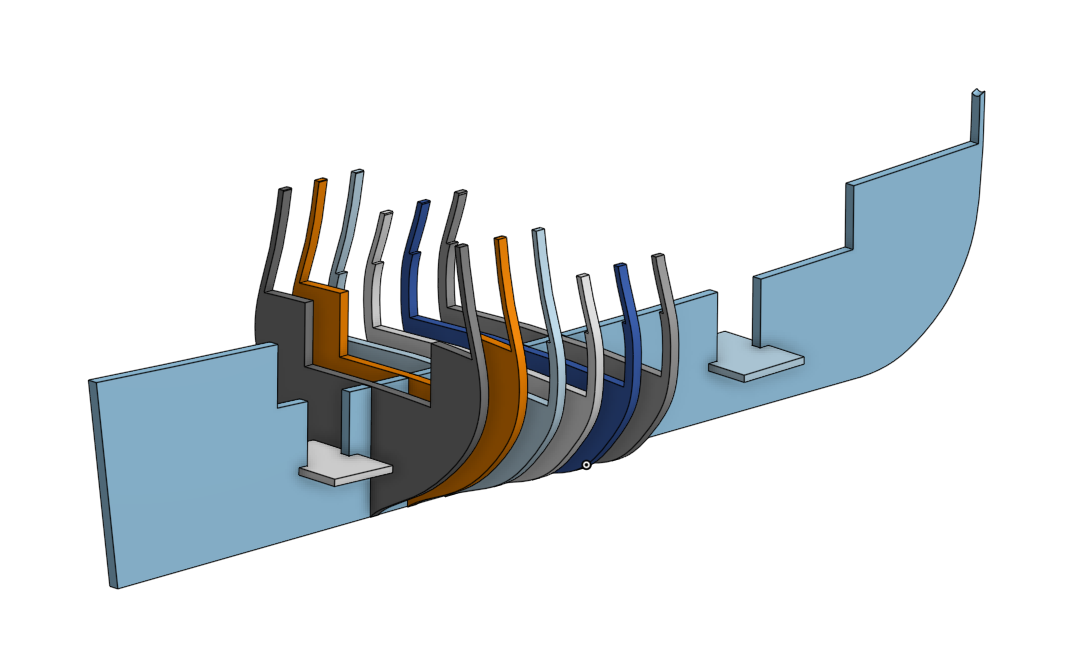
As it has been a couple weeks since I updated the log I figured I would give a minor update as to where things are at.
I am still documenting a bunch of the research and have started work on the structural designs for the bulkheads. I will talk a bit more about what I am trying to achieve in a later post, but for now I figured I would share the current state of affairs on the design side.
A few notes on this:
- This is very much a work in progress so if you see any problems feel free to point them out.
- I am unsure how much of the lower deck I want to show (I may do cutouts on the main deck or may not). So the current design reflects the maximum I might want to do.
- I am cheating a bit on the frames for the parts of the lower deck that are open. I made the frames a little thicker than they really should be to give more structural strength. This will not be possible to tell once the model is all put together.
- JacquesCousteau, jpalmer1970, TJM and 10 others
-
12
-
 1
1
-
-
-
Those look really good. Thanks for detailing the process. I will have to remember to come back to this whenever I get to making rings in a few years.
- Ryland Craze, Dave_E, robert952 and 1 other
-
4
-
16 hours ago, druxey said:
An alternative to gluing up separate strips is to paint the overlaps of the cloths using acrylic paint and a ruling pen.
So is this just a single sheet of silk span with more paint on certain parts?
-
Fantastic work, those have got to be some of the nicer sails I have seen on this forum. You almost make me wish I had put sails on alert :).
On the airbrush, I would imagine you should be able to run the wash through the airbrush and it would produce a more even coat. I suspect you were running too much through. That being said if the spray bottle does the job then why fix what isn't broken.
The wire is a good idea and it really doesn't stand out at all. I wanted to put wire in my flags, but was worried it would be too visible. Now I have the issue that the ensign is drooping a bit more than I would like so next time I will probably try the wire or just go full tinfoil on the ensign.
I do have one question which is not clear to me from your pictures. The reinforcing strip on the outside folded around the wire, is that a separate piece you glued on after cutting the sail to shape?
All in all great job.
-
Those sails look fantastic Andrew, I really like the method you came up with. They really do give a lot of visual interest to the sails.
- thibaultron, hollowneck, cotrecerf and 1 other
-
3
-
1
-
-
I have been digging around the forums and in my searches have found inconclusive answers to this question so I figured I would pose it to see if anyone is able to clarify this for me. This is what my general understanding of naming is:

My question is what would the joint in the below plan be called? They have the scarfs of hook and butt, but appear to be simply two scarfed strakes. Could this also be called hook and butt? For clarification these two strakes show the upper deck clamps for Sphinx 1775.

HM Armed Cutter Sherbourne 1763 by palmerit - Vanguard Models - 1:64 - First Build
in - Kit build logs for subjects built from 1751 - 1800
Posted
There are tonnes of logs showing how to do this. Read a whole bunch of them as there are many different ways to do things. Only thing I will mention as you get to rigging things is do as much off model as possible. It is much easier to do the work off model.
In terms of rope both syren and ropes of scale are great. Both are on the list of sponsors. I used the polyester ropes from ropes of scale myself. They take a bit of work to lie right, but I think the definition is worth it.