


Thukydides
-
Posts
1,363 -
Joined
-
Last visited
Content Type
Profiles
Forums
Gallery
Events
Everything posted by Thukydides
-
As Jacques said it is hard to recommend something without knowing your exact skill level. It all depends on how hard your first subject was and how successful you were with it. If you are keen on a warship here are some suggestions that are smaller and easier than a full frigate: Vanguard Models Sherbourne (small cutter) Vanguard Models Alert (large cutter) Vangard Models Flirt or Speedy (small brig) Especially as a new entrant to the hobby I find the VM kits are great. They are a little pricier than some other brands, but they have higher quality materials making building easier.
-
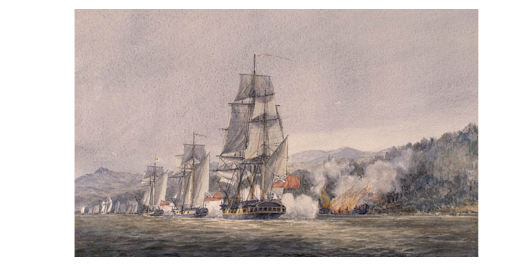
 I like the ideas you have. I was looking at contemporary depictions of Danish frigates and I found this one from the battle of Copenhagen in 1801 at the RMG (I have copied the relevant potion): https://www.rmg.co.uk/collections/objects/rmgc-object-12020 You can see the yellow band is actually a bit wider than you have it. It seems to me (a general observation on the many frigate paintings I have looked at) that when the switch from painted decorations to just black and yellow came they tended to make the yellow band wider. You might want to consider bringing the yellow band up to the next molding sand potentially make the molding black. Granted this is a bit later than when your ship launched. The ship in the painting appears to have built up quarterdeck bulwarks hence the large black band on the top. I agree with Ronald, less is more. If you are using the maple for below the waterline then I would also use it for the deck as they are both meant to be "whiteish".
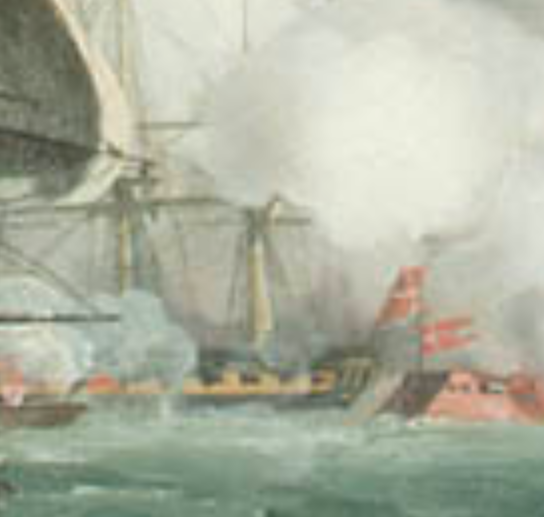
- 136 replies
-
- 2
-

-
- Christiania
- Vanguard Models
- (and 1 more)
-
Good luck. Cutters make great projects. There are a number of sherbourne build logs on MSW you should take a look at to help guide you through the process. You may find that Trial, Alert or Cheerful build logs might also be useful. Lots of collective wisdom to draw on to learn from everyone else’s mistakes.
-
Hi folks, another newbie from the UK
Thukydides replied to Graham_T's topic in New member Introductions
Welcome to MSW -
Good job, you will always feel much happier doing something over. If it was bothering you now it will bother you much more in a month. In my experience to produce a good result most tasks (particularly those related to rigging) need to be done at least twice to get them right.
- 422 replies
-
- 2
-
-
- Vanguard Models
- Sphinx
- (and 1 more)
-
I have no knowledge about ancient seafaring practices, but steel gives the ratios for blocks to rope for the late 18th century (https://maritime.org/doc/steel/part5.php#pg153).
-
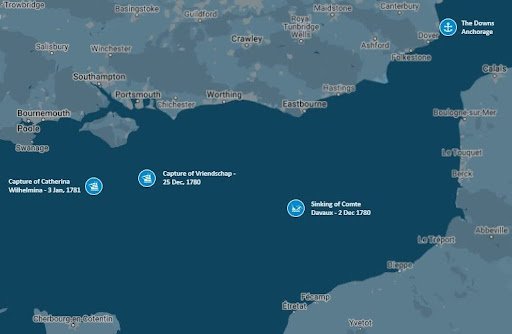
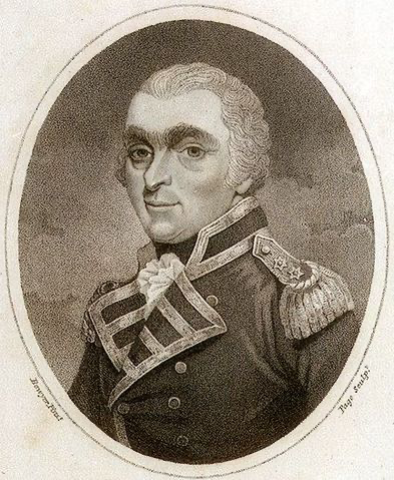
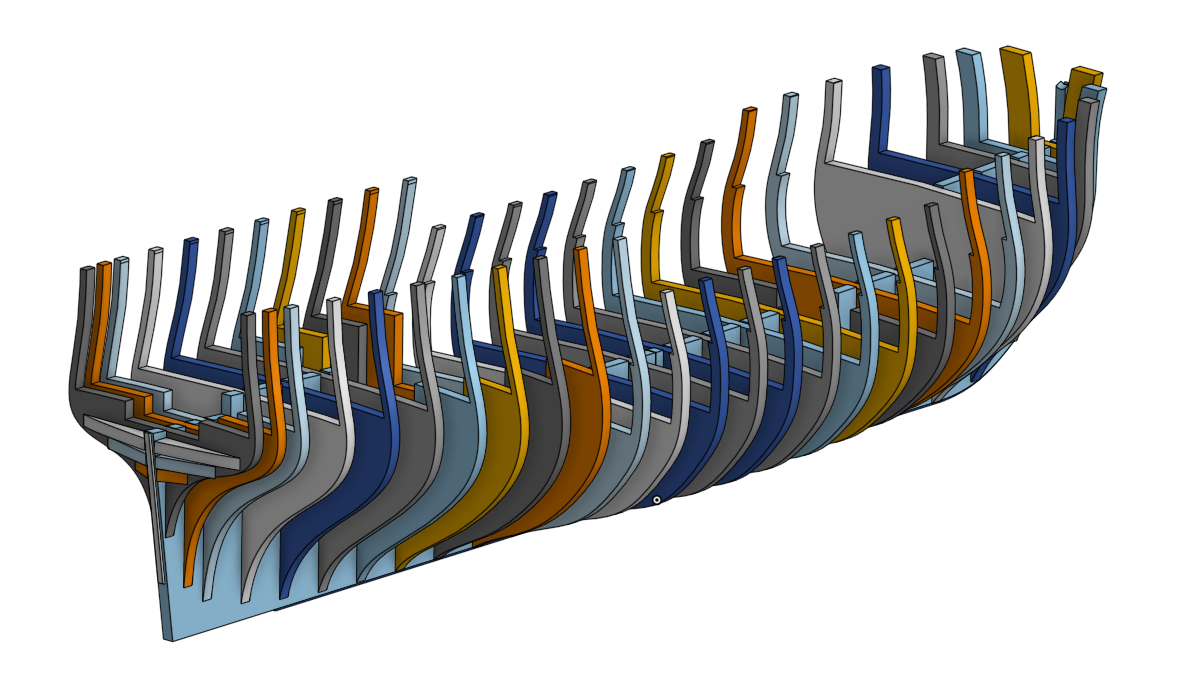
Log #6: Service History Part IV - James Richard Dacres James Richard Dacres National Maritime Museum, Greenwich, London. PAD3166. James Richard Dacres was born in February 1749 at Gibraltar, the eldest son of Richard Dacres. He joined the Navy 1762 as a Midshipman aboard the Active (28) and received his promotion to Lieutenant in 1769. His first command came in 1776 when he was given the schooner Carlton (12) on the strategically important Lake Champlain. Under command of Captain Thomas Pringle, the British force engaged Benedict Arnold’s American flotilla near Valcour Island. During the battle, Dacres was knocked unconscious and command of the Carlton fell to a midshipman named Edward Pellew. In the ensuing battle the American fleet was destroyed with only a few escaping. Defeat of the American Fleet off Crown Point in Lake Champlain Library and Archives Canada, Acc. No. 1970-188-498 Coverdale Collection of Canadiana. Despite being knocked unconscious during the battle, Dacres was singled out for praise for his role in the victory and was sent home with dispatches of the victory. There seems to have been some grumbling on the part of a number of officers who took part in the battle that the credit was unduly bestowed on Pringle and Dacres, but this grumbling does not seem to have impacted Dacres’ fortunes as he was given command of the sloop Sylph (18) shortly thereafter. On the 13th of September, 1780, Dacres was appointed post Captain and given command of Perseus. Where Elphinstone’s log entries exuded energy, Dacres appears to have been a man of less words. Most entries are to the point giving limited detail. After several months of repairs and fitting out, Perseus sailed from the Downs on the morning of the 30th of November 1780 in company with the schooner Racehorse (14) and the cutter Expedition (10). Sailing off Beachy, the three ships encountered a French privateer on the morning of December 1st. The French vessel, the Compté D’Aveaux a brig out of Boulogne, attempted to run, but during the engagement was holed below the waterline and began to sink. Around 40 French sailors were rescued, but the remainder perished along with an officer from the Racehorse who had gone over to take possession of the French ship. On December 20th, war was declared with the Dutch and shortly thereafter, on the afternoon of the 25th, Perseus encountered and made a prize of the Dutch snow Vriendschap sailing south of Portsmouth. It seems that the Dutch ship in question had not received word that war had been declared as she was bound for London carrying goods belonging to British merchants. Dacres' luck continued as on the 3rd of January he encountered a Dutch East Indiaman not far from where he had captured the snow. This proved to be a very valuable prize as she was loaded with silver and gold coins as well as other valuable goods. Map of Significant Events for Dacres’ Command of Perseus Map produced by me based on log entries from the Journal of HMS Perseus. The rest of Dacres' time in command of Perseus appears to have been somewhat uneventful. Much of his time was employed escorting convoys and with the exception of a storm which nearly grounded the ship on the sand bars in the Downs, there are no significant events to note. Perseus was paid off in March of 1782 and Dacres was given command of the Orpheus (32). Dacres went through a long period of unemployment after the peace of 1783, but in 1793 when war once again broke out with France, he resumed active service. He went on to have a successful career reaching the rank of Vice Admiral. He passed away on January 6, 1810 after falling off of a horse at the age of 60. On the design side of things I have simplified the design a bit to show less of the lower deck and to make the lower frames a little thicker. You can see below the current state of affairs. One thing I am wrestling through at the moment is the design of the various parts that make up the head. I am wondering if anyone has any contemporary documents or models you can think of which show the construction of the head broken into its various components. Examples I have already found: 18th Century Shipbuilding by Blaise Olliver (1737) Bellona Model (1760) https://www.rmg.co.uk/collections/objects/rmgc-object-66464 Egmont Model (1768) https://www.rmg.co.uk/collections/objects/rmgc-object-66105 EDIT: I just realized this is actually a model made in 1980 so not actually helpful even though it is a beautiful model.
-
Found another one, this one a french ship held by the science museum in London: https://collection.sciencemuseumgroup.org.uk/objects/co40907/model-of-120-gun-ship-the-french-1st-rate-ocean
- 27 replies
-
- 3
-
-

-
- capstan
- small boats
- (and 1 more)
-
I don’t know if the rigging is contemporary or not, but the Art Gallery of Ontario has a contemporary model showing the boats being lifted: https://ago.ca/collection/object/agoid.106264
- 27 replies
-
- 4
-
-
-
- capstan
- small boats
- (and 1 more)
-
I just use the liquitex one. i have never used another so cant say if it is any better than others. The reason I use it is that it helps the glue/varnish to flow into the rope so it is not on the surface. This means it still stiffens it (glue is in the core), but doesn’t show as much. Please note, you should test on scrap before trying anything new on a model as sometimes these additives have unexpected reactions with certain glues.
-
Just to add to this the muzzle extension is modeled on your carronade you have there. It is the thin extension right at the end. Older versions of carronades looked more like this: See below for a carronade plan dating from 1790, so just before your period. National Maritime Museum, Greenwich, London. ZAZ6989. This one appears to be secured to the inside of the bulwark. That being said there is no indication of an extended metal bracket like you showed. I think in these cases the bracket was attached to the bottom of the carriage. Another thing you might want to consider is that by this point the wheels were pretty common for the rear end of the carriage. As far as my research has found it was only the early versions of carronades (the trunnion ones) that had the simple wooden block to prop up the rear of the carriage.
-
There are tonnes of logs showing how to do this. Read a whole bunch of them as there are many different ways to do things. Only thing I will mention as you get to rigging things is do as much off model as possible. It is much easier to do the work off model. In terms of rope both syren and ropes of scale are great. Both are on the list of sponsors. I used the polyester ropes from ropes of scale myself. They take a bit of work to lie right, but I think the definition is worth it.
- 177 replies
-
- 1
-
-
- Sherbourne
- vanguard models
- (and 3 more)
-
For naff buoys they look pretty good to me. I don't know why you are trying to hide them. I had to zoom in pretty close before I could see any imperfections. If I could make a minor suggestion on your rope coils, use less glue / varnish (whichever it is) on your rope. Potentially also try diluting it more and maybe add some flow aid. It will look less wet and fuzzy then.
-
I appreciate the offer, but yes I suspect the shipping would be pretty steep.
-
Unfortunately I do not have access to a laser cutter so it will be slowly and carefully with the scroll saw for me So I have to keep the framing a little more simple.
-
That is some impressive work. Especially in such a short time.
-
Yes that is my concern so my current plan is to reinforce them as I put them on. In some cases maybe by gluing a strip along the top temporarily. I think once all the framing is done (e,g. gun ports, support pieces etc..) it should be strong enough, but the problem is getting to that point without breaking things. That is another reason why I am wondering if I need to split the top timbers off of the bulkheads so I can build the lower structure and then add them as I build the supports for them. I am not sure if I am expressing this very well, by support structure I am referring to the horizontal pieces I will be putting in-between the bulkheads holding them together as one unified piece. EDIT: by temporary piece I mean somthing like this:
-
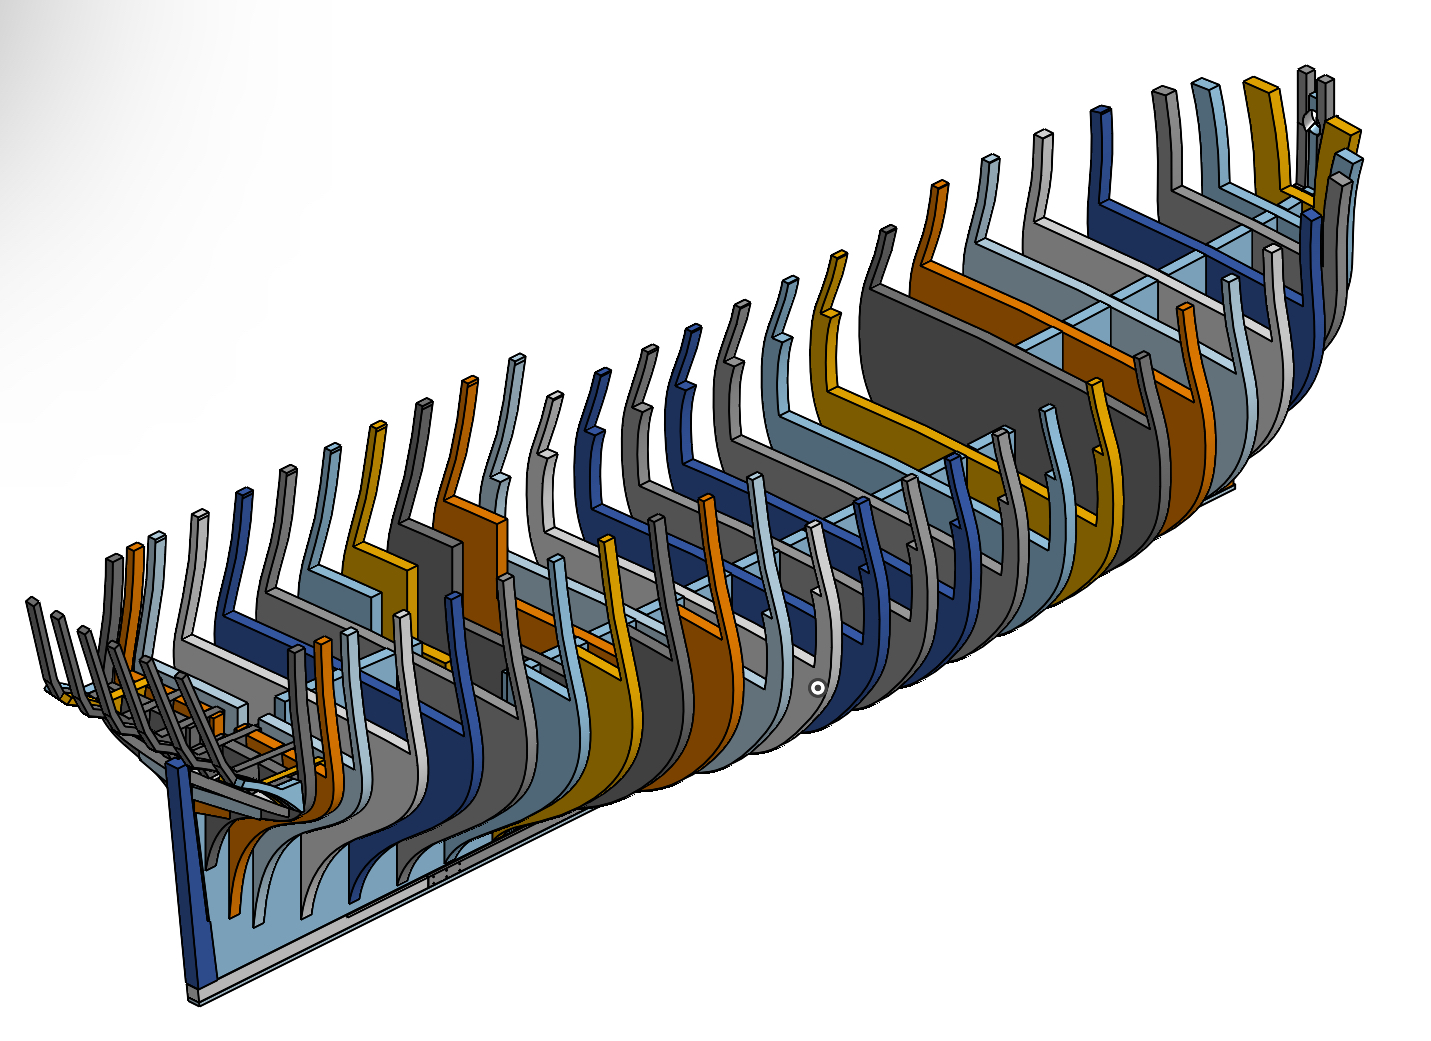
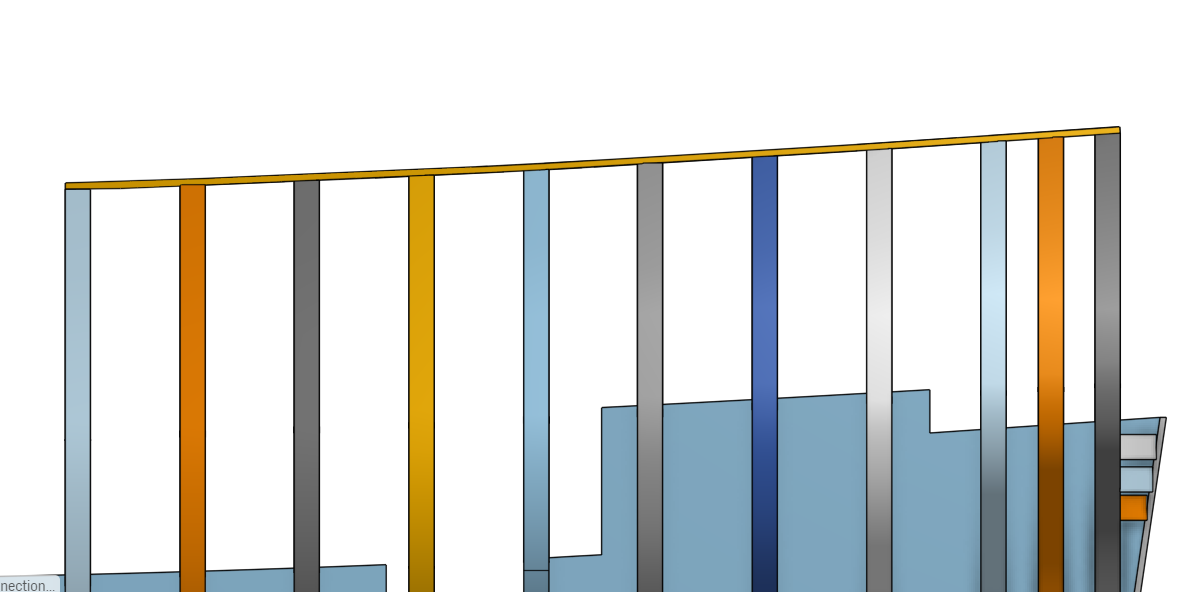
Log #5: Design Considerations I have made a fair bit of progress on the design so for today we will take a break from the history of Perseus to look at my plans for the structure of the hull. You can see below the current status of the design. I have the first pass on the bulkheads complete and have started work on the stern. It helps that I am starting from already reconciled plans so I don't need to worry too much about making sure the hull is fair other than minor issues related to scanning error. The design has taken significant inspiration from Chuck's Winchelsea build as well as a number of others. There are a number of outstanding considerations that I have not yet decided on how I will deal with: As I have previously mentioned, I am still undecided as to how much of the lower deck I want to show and so am designing it as if I will show a lot, but I may just simplify this a bunch. The main consideration here is that I am planning on fully rigging this vessel so I have questions about how much I could realistically make at least somewhat visible. My current plan is to not do cutouts on the main deck thus allowing me to reduce the view of the lower deck to the areas right around the ladders. But I may change my mind so I have left the design as is for the moment. The upper parts of the frames are very thin. I likely need to split them off of the main bulkheads and cut them out of something stronger than aircraft ply. The thinnest are only a bit over 3/32 of an inch thick. In line with the question of the strength of the frames I need to consider how I am going to strengthen the structure and what order it will all go together. Lots of problems to figure out yet before I start making sawdust.
-
Looking good. If you haven't glued the topgallant yet (I am not sure from the photos if it is dry fitted or glued), hold off a bit. It is easier to do the shrouds if you can slide them over the top.
- 34 replies
-
- 2
-
-
- Alert
- Vanguard Models
- (and 1 more)
-
Gunboat Philadelphia 1776 by tmj
Thukydides replied to tmj's topic in - Build logs for subjects built 1751 - 1800
You are a brave man to dive into sculpting. I don't know if you have ever come across Tom Mason on YouTube. I have found his videos very helpful. https://youtube.com/@tommasonsculptor?si=IKfrxS-Bd1BOS6Qf -
The problem is these plans have warped over time and so if you just copy the lines as is you will probably end up with a wiggly hull. With a kit these issues have already been worked out for you as the kit maker drafted the plans and made sure they are fair. The faring you do by sanding is just smoothing everything out. If the bulkheads are not the right size to begin with then you will have a hard time making it right.
-
I am no expert, but the main issue when working from historical plans is faring your hull. In 2d this is possible, but much harder. In 3d you can get it to show the loft to help with faring.
-
Another option if you don’t like fusion 360 is onshape. It is free to use and is in a browser so you can use it anywhere, even on your tablet. Downsides are it is not designed for ships (it has what you need, but you need to work round some limitations). Also if you want the free version your files are public. That being said if you just name your file a random collection of letters and numbers, no-one will be able to find it in any case.
-
Yes I am doing it in 1/64th scale. The reasons being: My OCD demands all of my ships be in the same scale for comparison. It is a nice compromise size. Some day I would like to do a ship of the line and any bigger than 1/64 and they become far too big. On the other hand it is still big enough that you can reasonably model everything without having to approximate.
-
Onshape. It probably is not as good for ship designing as some others, but it is in a browser so I can use it from anywhere and it is free. Your files are available to the public (you have to pay if you want private files), but if you name them something unrelated to your project they are essentially private unless someone knows the name.