Thukydides
-
Posts
1,369 -
Joined
-
Last visited
Content Type
Profiles
Forums
Gallery
Events
Everything posted by Thukydides
-
 Unfortunately I don’t have much wisdom to offer here, this is my first time using this small PE. I just used thin super glue and it didn’t work out as well as I would have liked. If you look closely you will see in a few of the joints there is indeed a bunch of excess glue. The main problem I found was getting it right the first time. If you have to redo the joint several times there is inevitably a buildup.
 -
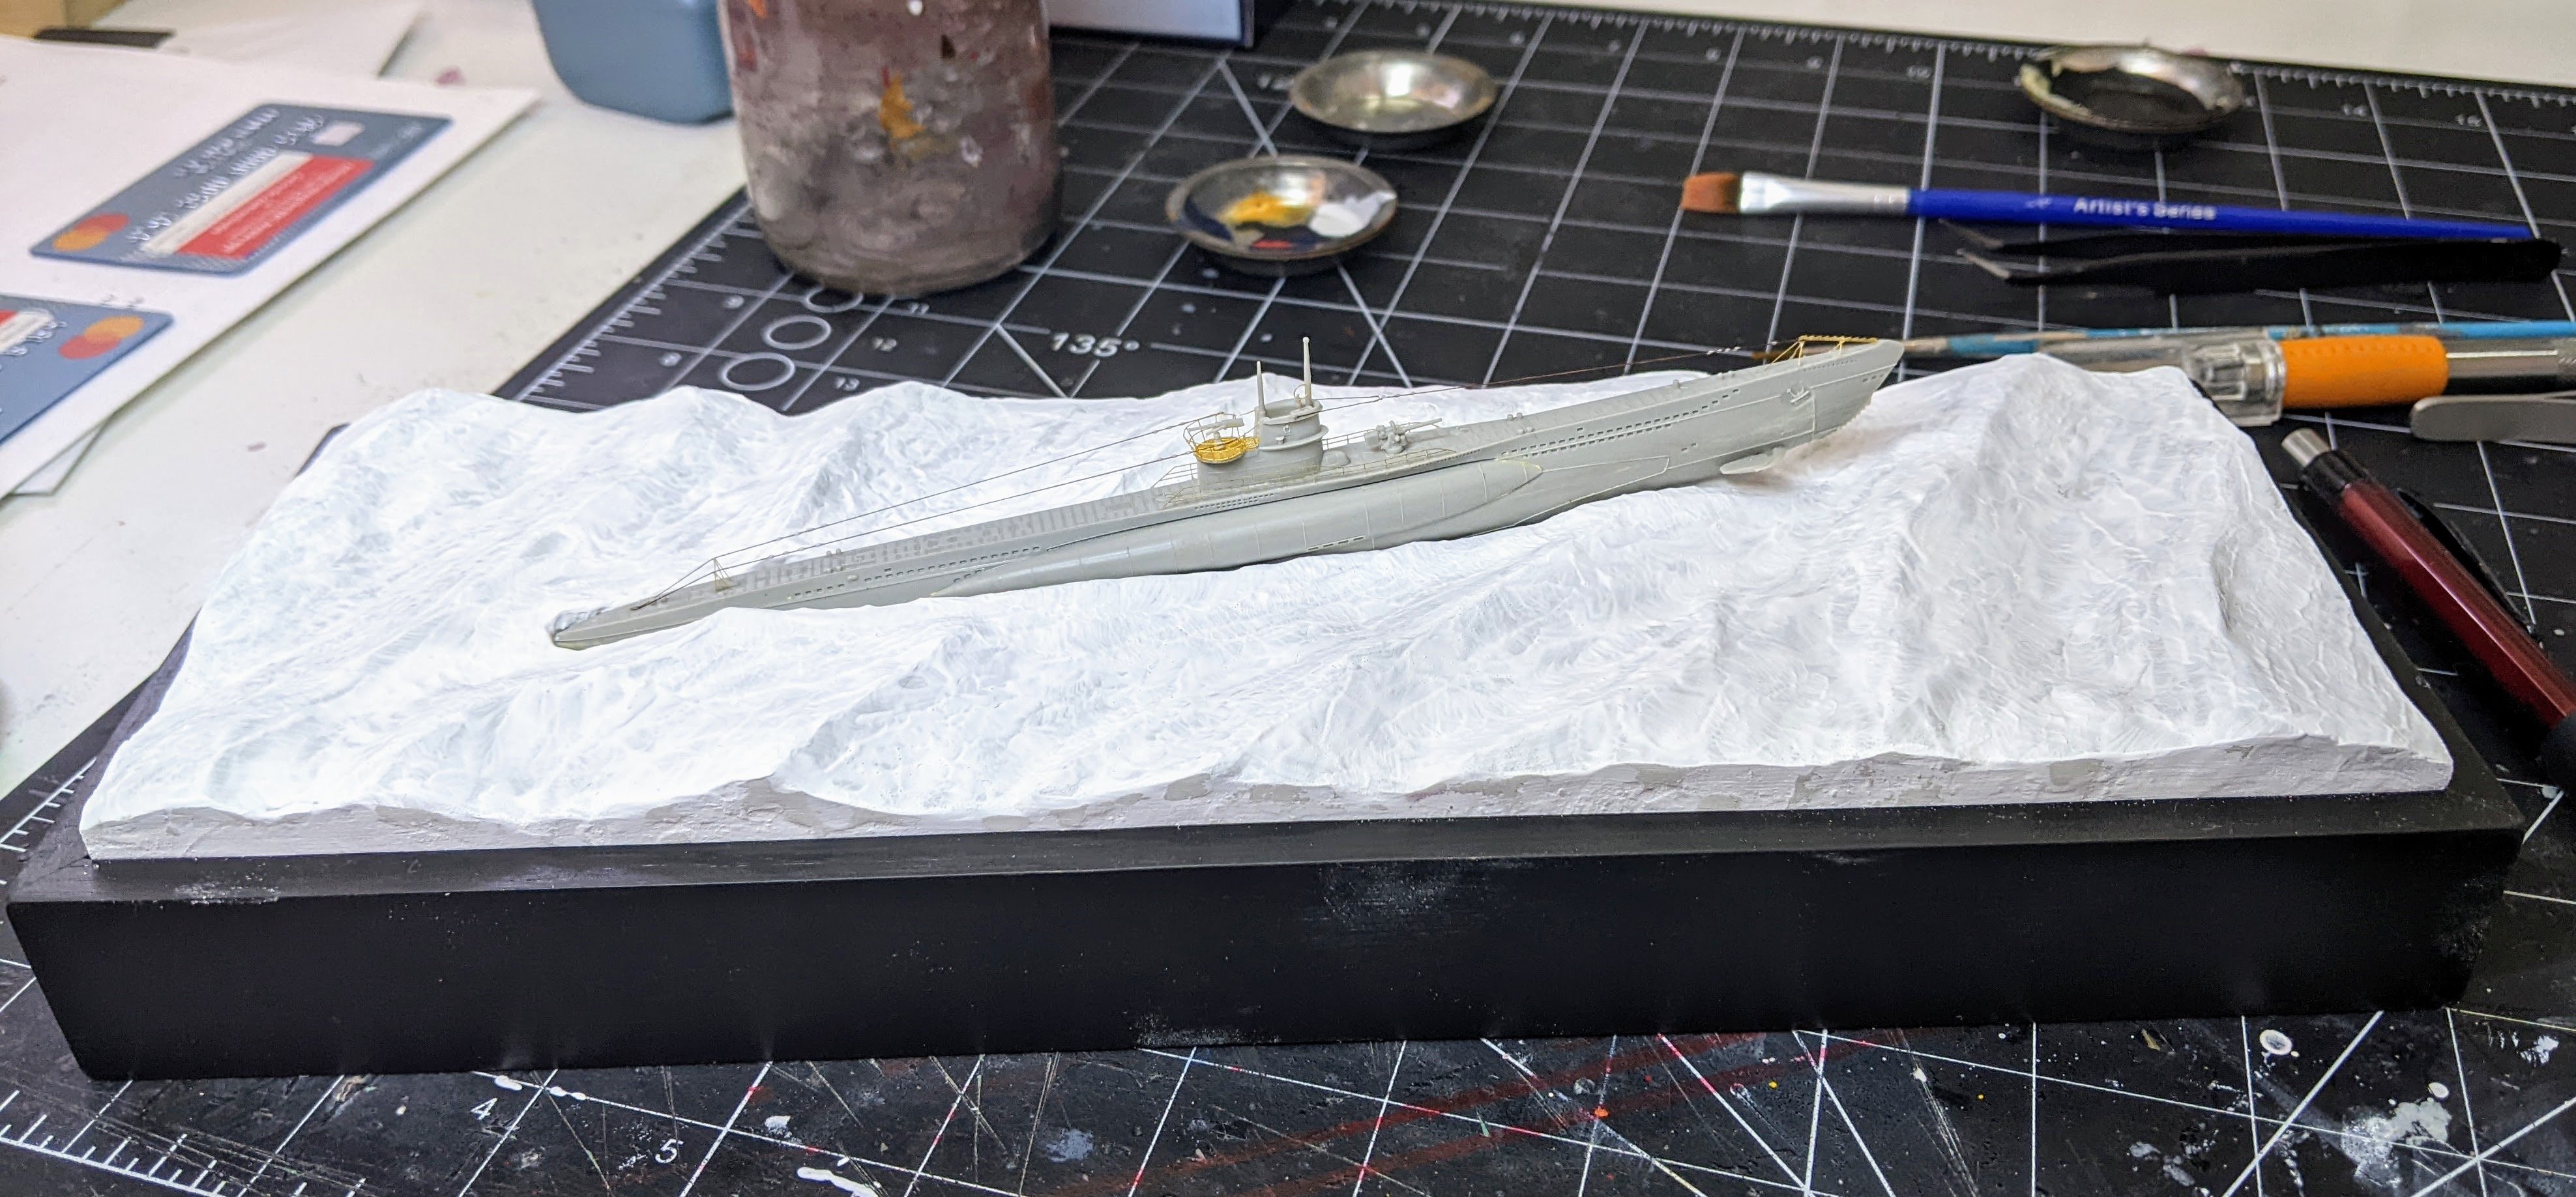
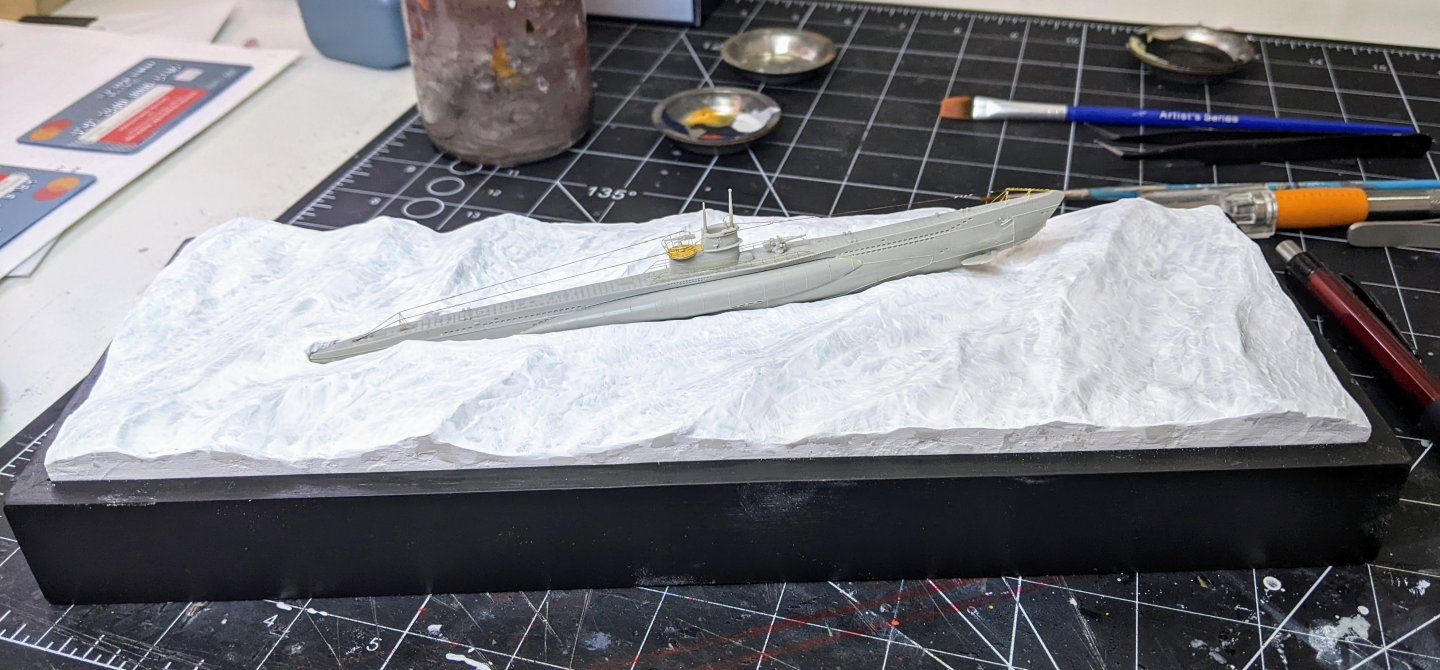
Final update before painting. I went back in and did some more touchups with gesso accenting waves and fixing minor issues I didn’t catch with the first pass. I also added the cables using 10/0 fly tying thread and then added small mod podge droplets with a toothpick to simulate the connectors on them.
-
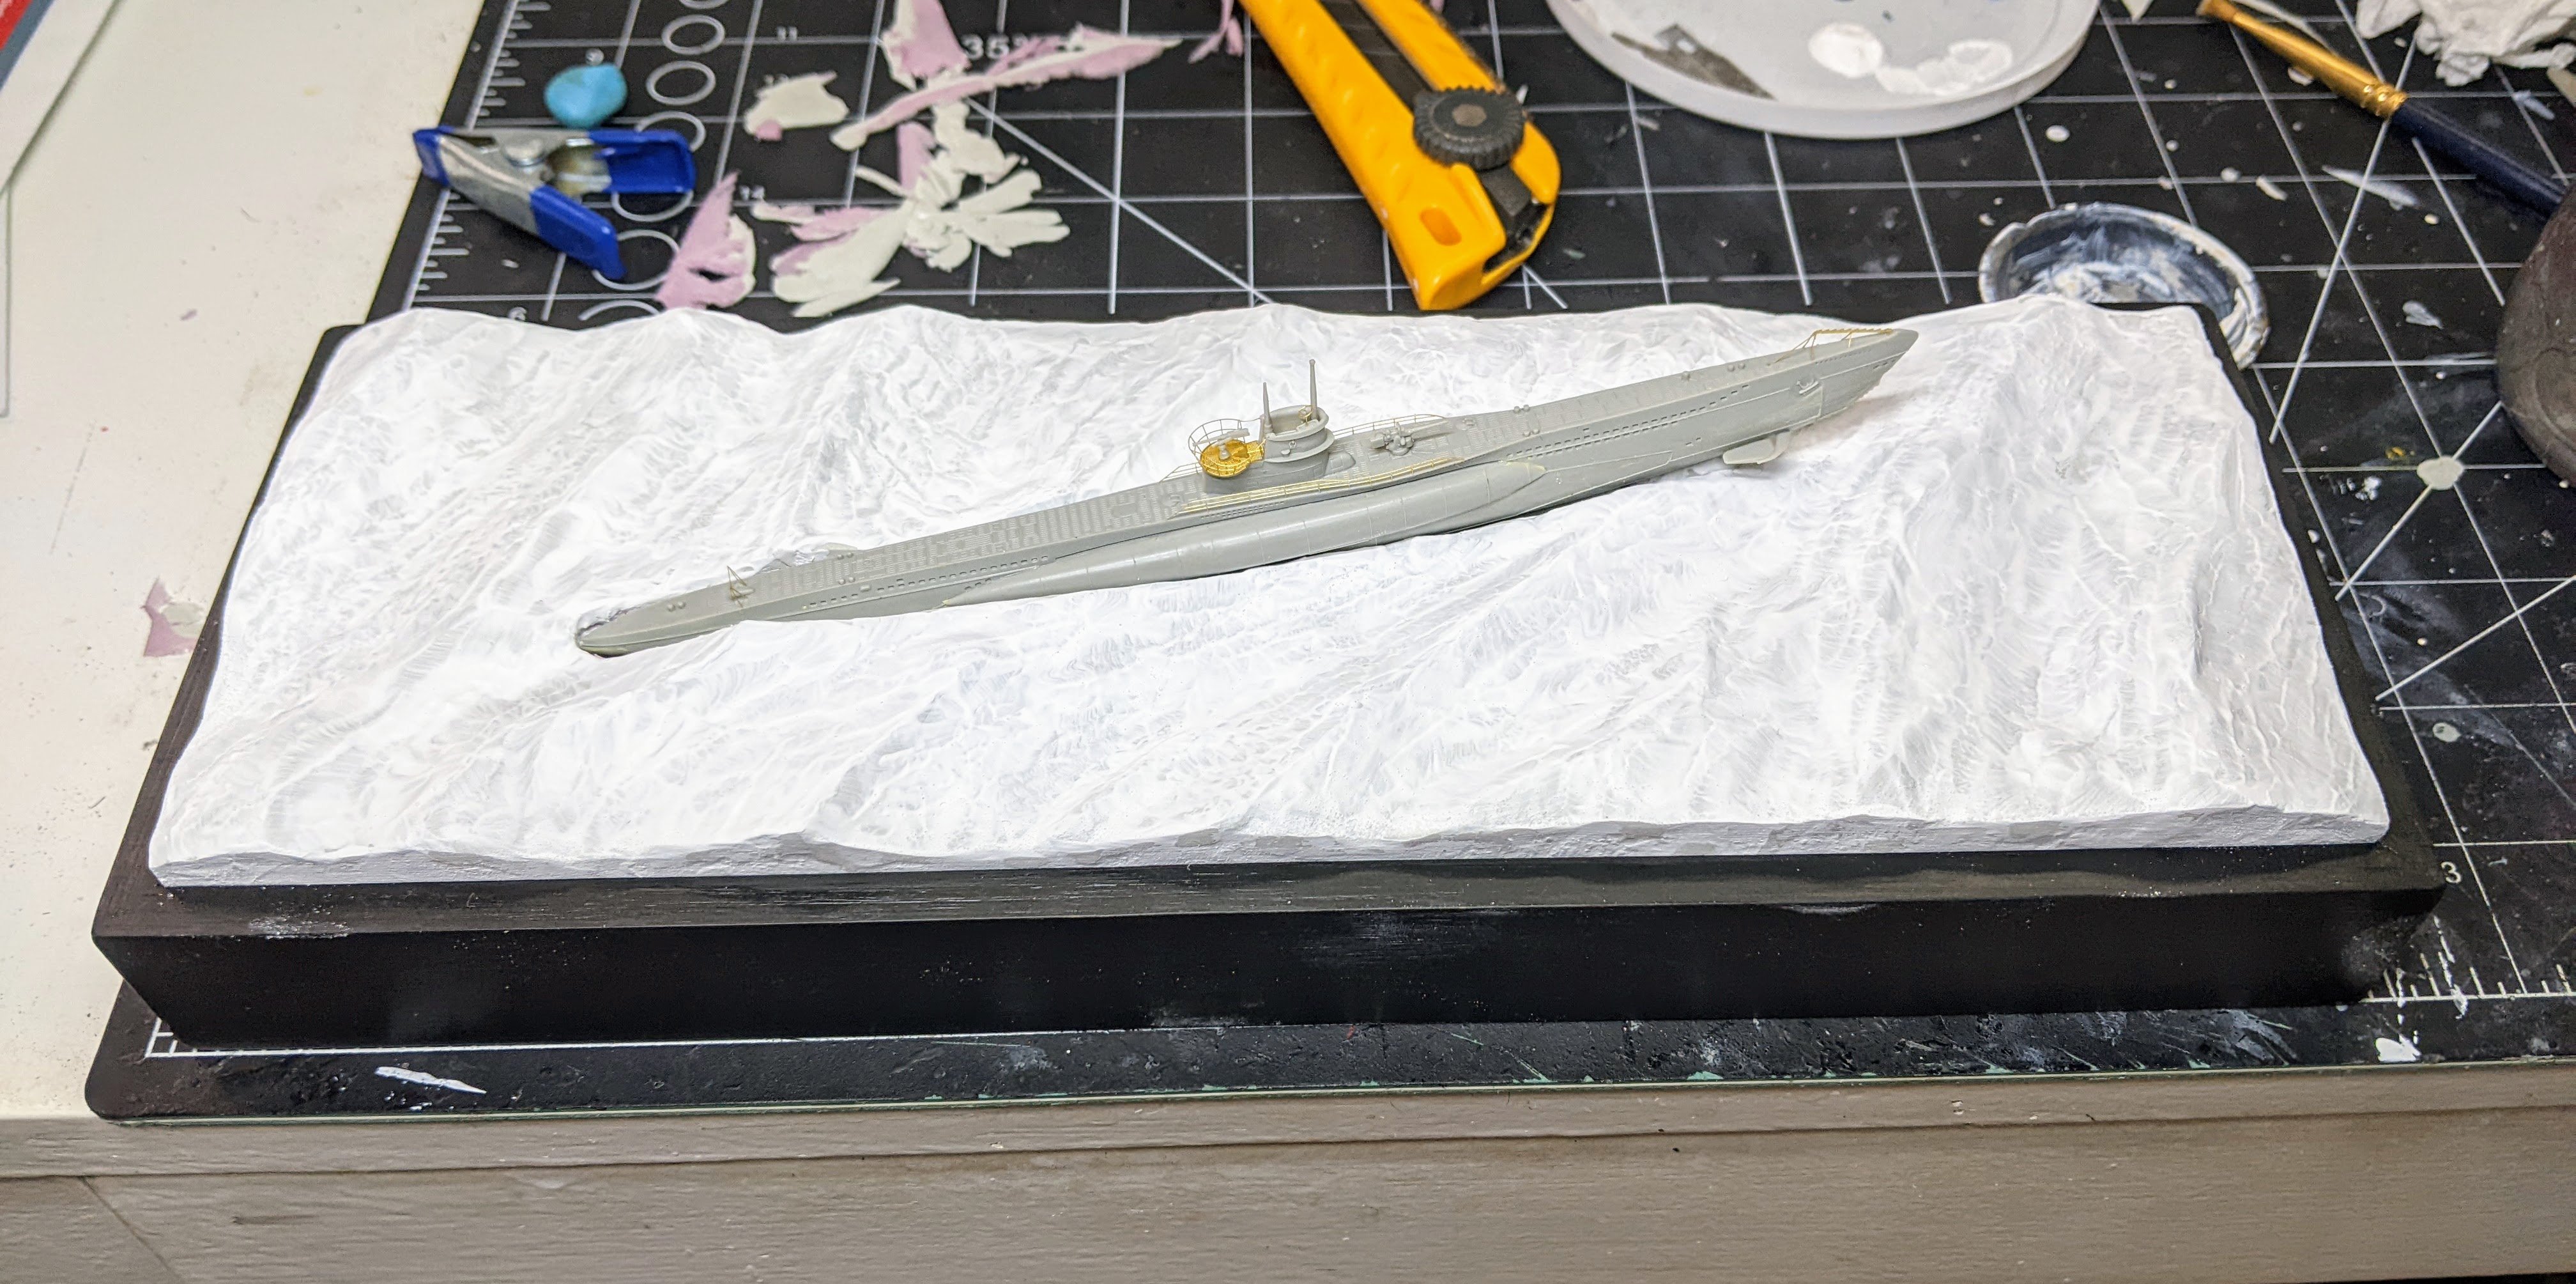
@mikegr's suggestion worked really well. I was able to cover up all of the seams and also add some texture to simulate the smaller waves. Next up I need to attach the cables and then on to painting.
- 54 replies
-
- 10
-

-
Congrats, that thing is so huge, I never really appreciated how big till I saw these most recent pictures.
-
Good idea, I may try that and as it dries I should be able to texture it a bit. I had planned to put another thin layer of putty, but that might be easier. Thanks for the suggestion.
-
Log #3: Service History Part II - George Keith Elphinstone A lot of work is going on in the background that is not yet ready to share, but to avoid this log going too dead I am going to keep dribbling out some of what I have already gotten done. We are going to work our way through the service life of Perseus starting today with her first and most famous commander George Keith Elphinstone. As I have a lot of info on his time in command of Perseus I am going to break this up into two parts. I should also note that all of these posts are lifted from the research document I am working on which I plan to release on MSW whenever it is finished (likely not for a while yet). That document will contain more detail as well as extensive notes linking almost every assertion made back to primary sources. If in the meantime anything I am talking about peaks your interest I am more than happy so share relevant sections of the draft for feedback / to aid you in your own research. A painting of Elphinstone in 1799, Royal Collection Trust. RCIN 400990. George Keith Elphinstone was born on the 7th of January 1746 in the county of Stirling in central Scotland. At the age of fifteen he joined the navy as a midshipman on board the Gosport (44) under Captain John Jervis. With the start of the peace in 1763 Elphinstone found himself transferred from ship to ship in search of a berth. There were few opportunities for midshipmen in this period and so the young Elphinstone resigned the navy in favor of an opportunity with the East India Company on board a vessel commanded by his elder brother William. Elphinstone returned from his eastern expedition sometime in early 1771 and with war looming on the horizon he was shortly thereafter reinstated in the Royal Navy with credit given for the experience gained in his time with the East India Company. On the 21st of May, 1771 he was appointed 2nd Lieutenant of the Trident (64) part of the Mediterranean fleet of Admiral Sir Peter Dennis keeping an eye on French and Spanish ports. He received his first command on the 18th of September 1772 with the sloop Scorpion (14). He spent several years cruising the Mediterranean until in the summer of 1774, Scorpion was ordered back to England. Elphinstone was given command of the Romney (50) on the 11th of March 1775 with his promotion to post Captain coming on May 11th. However, his time on Romney was to be short lived. After returning from escorting a convoy to North America, in March 1776, Elphinstone was appointed to command the newly constructed Perseus (20). The Romney in action later in her career, National Maritime Museum, Greenwich, London. PAF5826. Elphinstone by all accounts appears to have been an active and competent commander. In his writing you get a sense of his forceful personality and the energy with which he carried out his responsibilities. Perseus had been built by contract and Elphinstone was not pleased with her status upon first inspecting her. There are a number of letters in which he makes a flurry of requests for surveys to fix defects and supplies for the fitting out of the ship. Perseus departed Spithead in July 1776 with a convoy of vessels bound for North America. Perseus was evidently the only Man of War present and a number of the vessels in her charge went missing. Elphinstone recounted many of these difficulties in his explanatory letter to Vice Admiral Howe, the British Naval Commander for the North American Theatre, on November 6, 1776. It is beyond a doubt that I chased different Ships of the Convoy the whole day, fired a great many Shot at the offenders, rebuked the Masters &c. and with difficulty once more collected them. On the 18th I parted from the Lark and the Snow under her Convoy, consequently 17 remained under charge of the Perseus, not one of which was lost before our being driven on the Banks of Newfoundland, where we were dispersed by Gales of Wind and thick fogs. (Elphinstone, Nov 1776) It is evident that Elphinstone had a talent for taking prizes. There are Admiralty prize records for at least 24 different prizes captured from 1776 to 1780. His first prize was taken before he even reached his station. While escorting the aforementioned convoy, he took the American Schooner Viper. This incident also illustrates the energy with which he did everything. The Captain’s log for the 26th of September 1776 describes how with great difficulty they managed to get one of the 9-pdrs. up to the forecastle to fire on the schooner as they pursued her. Once in North America Elphinstone was placed in a squadron of 4 ships under the command of Andrew Snape Hamond of the Roebuck. There was a brief period in 1776 when Elphinstone was transferred to the Pearl (32) and command of Perseus was given to Captain Hon. Charles Phipps. The transfers were ordered by Vice-Admiral James Young while the squadron was refitting at Antigua following the death of the Pearl’s captain, but upon them regaining their station in North America, the appointments were reversed by Vice-Admiral Lord Howe, as he considered the appointment should have only been made by him.
-
The issue is not the general shape. I am pretty happy for that as a first try, it is seam lines where I put putty on top of other putty which really doesn't look like water. You can't see it easily because everything is white, but once I start painting they will be very visible. As to the techniques the answer is some of them. I have not yet seen the workshop, but I am familiar with his method as I followed his build log for Camilla. Some of his techniques are pretty universally used, but some of them are more specific to his scale. Where I am at 1:350 it will change some things. I plan to go back and watch it before I actually start doing any painting to get some ideas, but mostly I am following techniques from this youtube channel: https://www.youtube.com/@studioblueocean4590
-
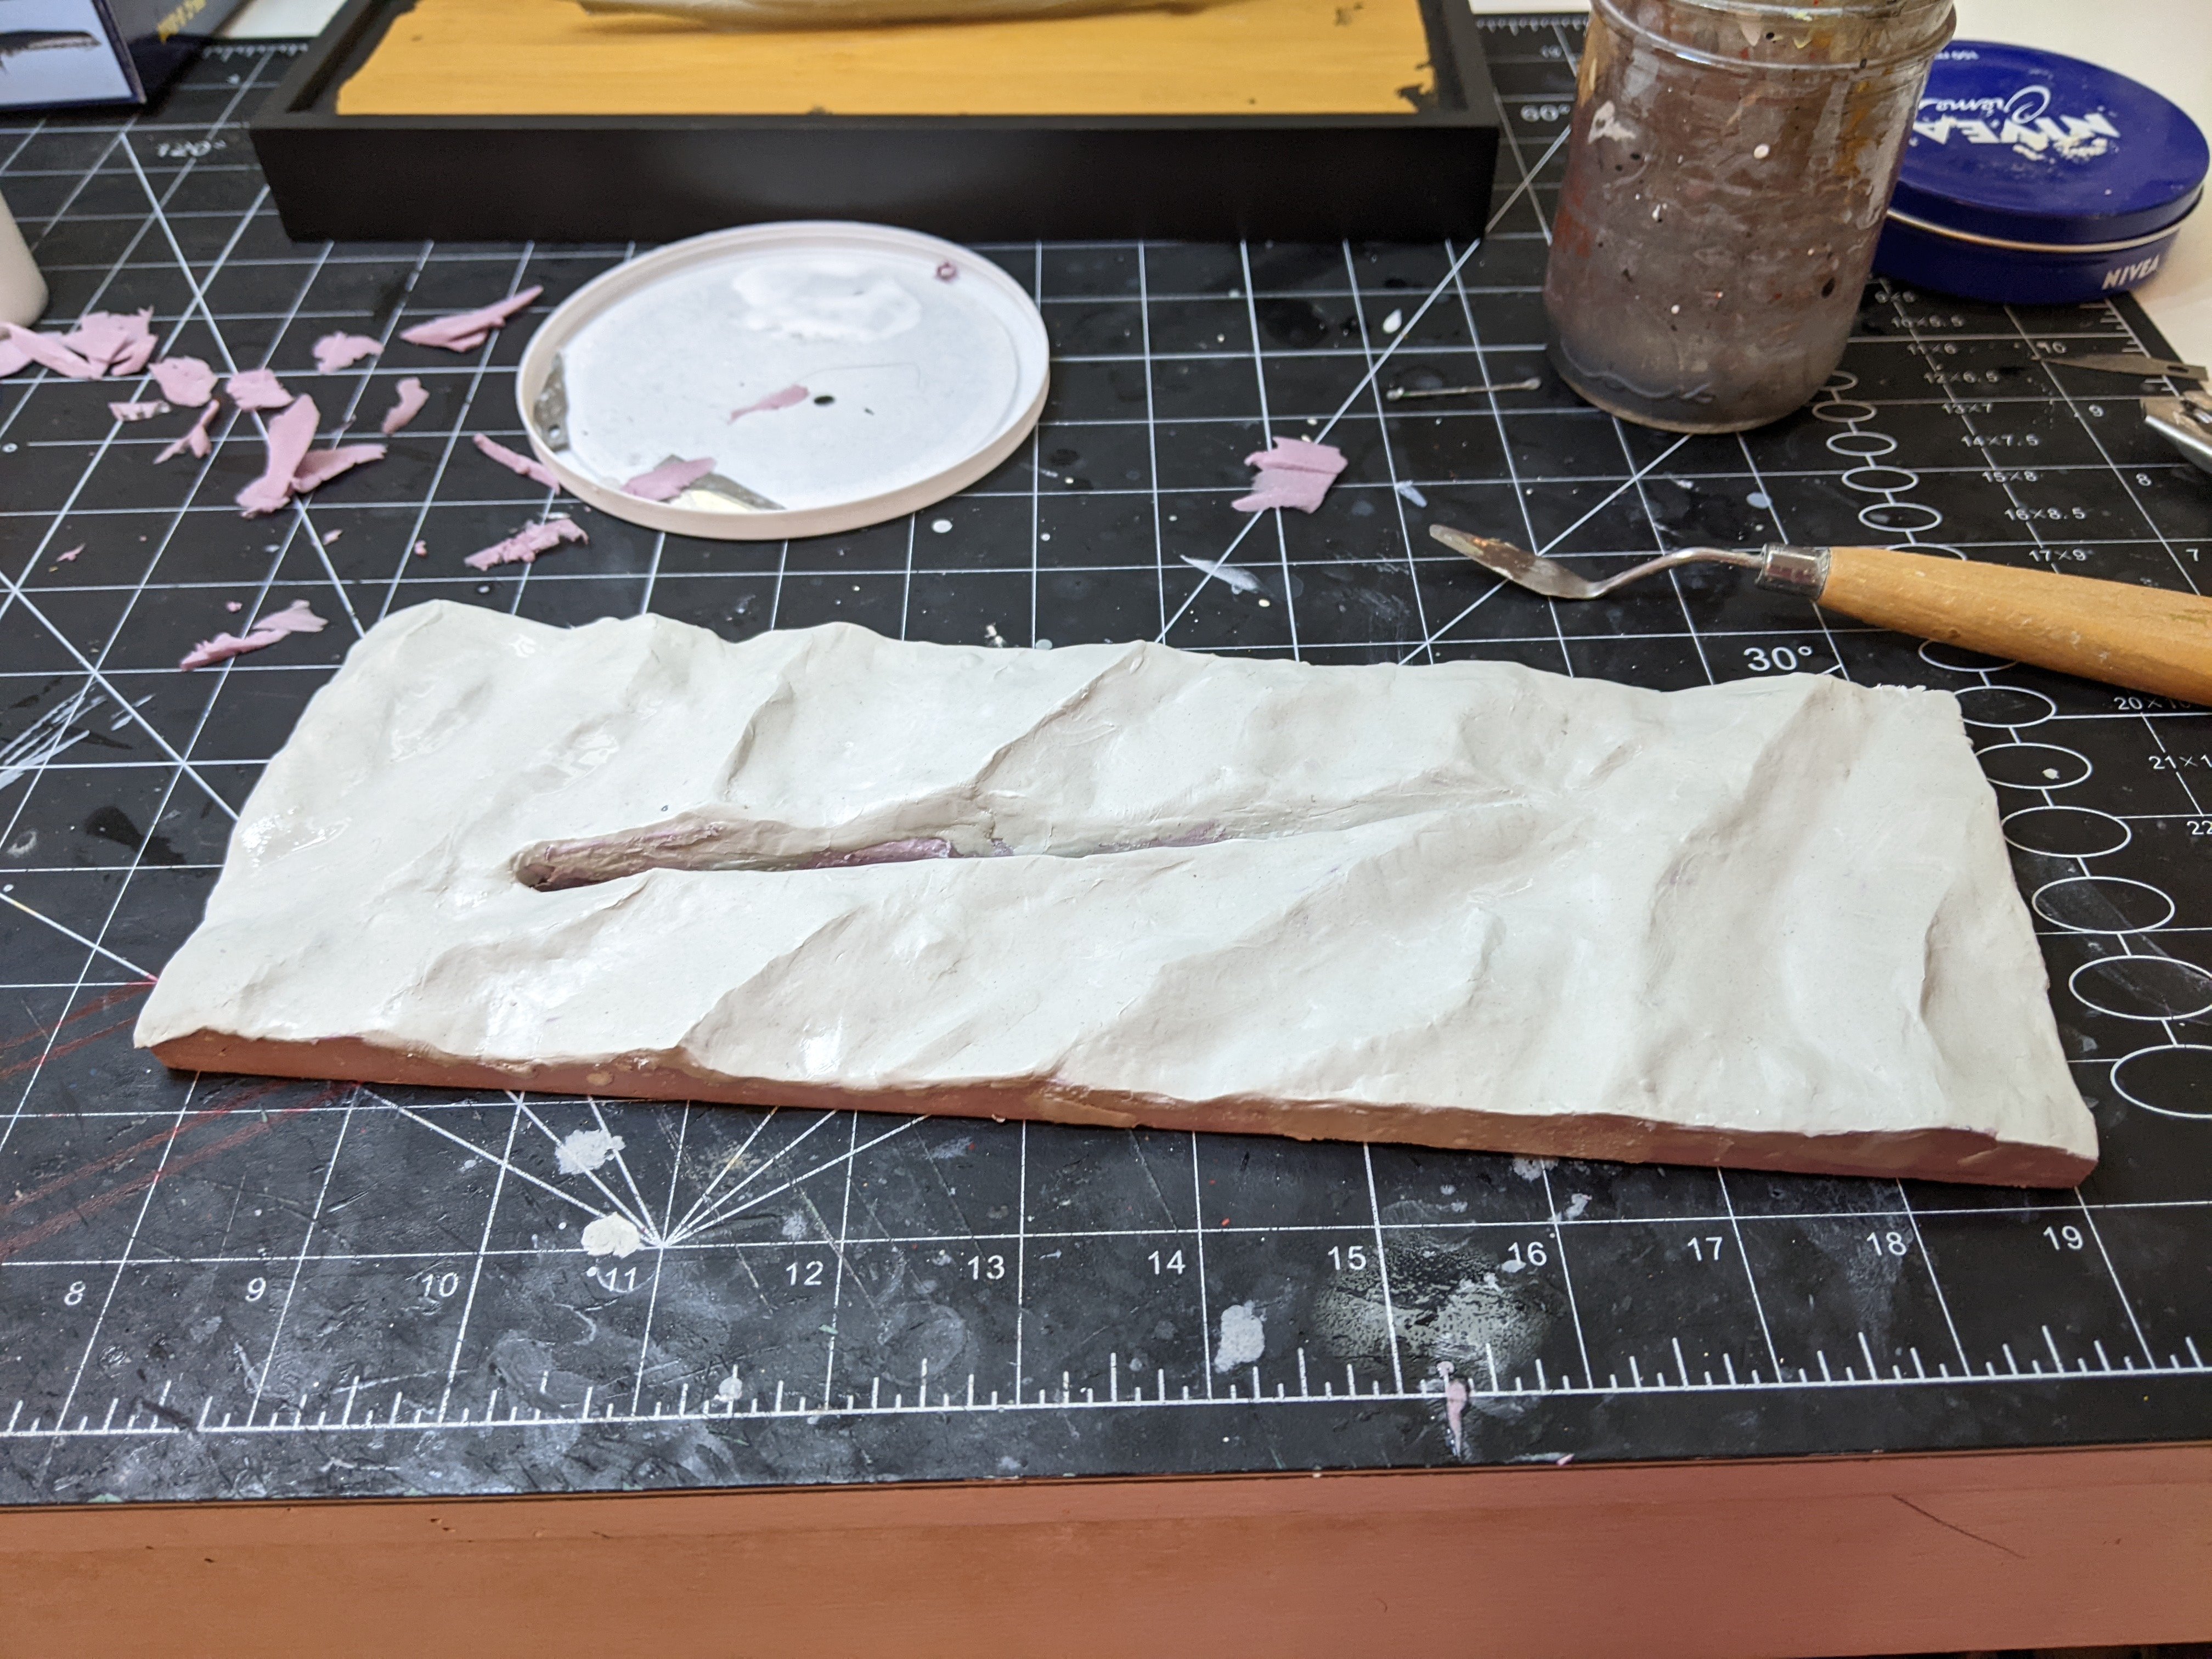
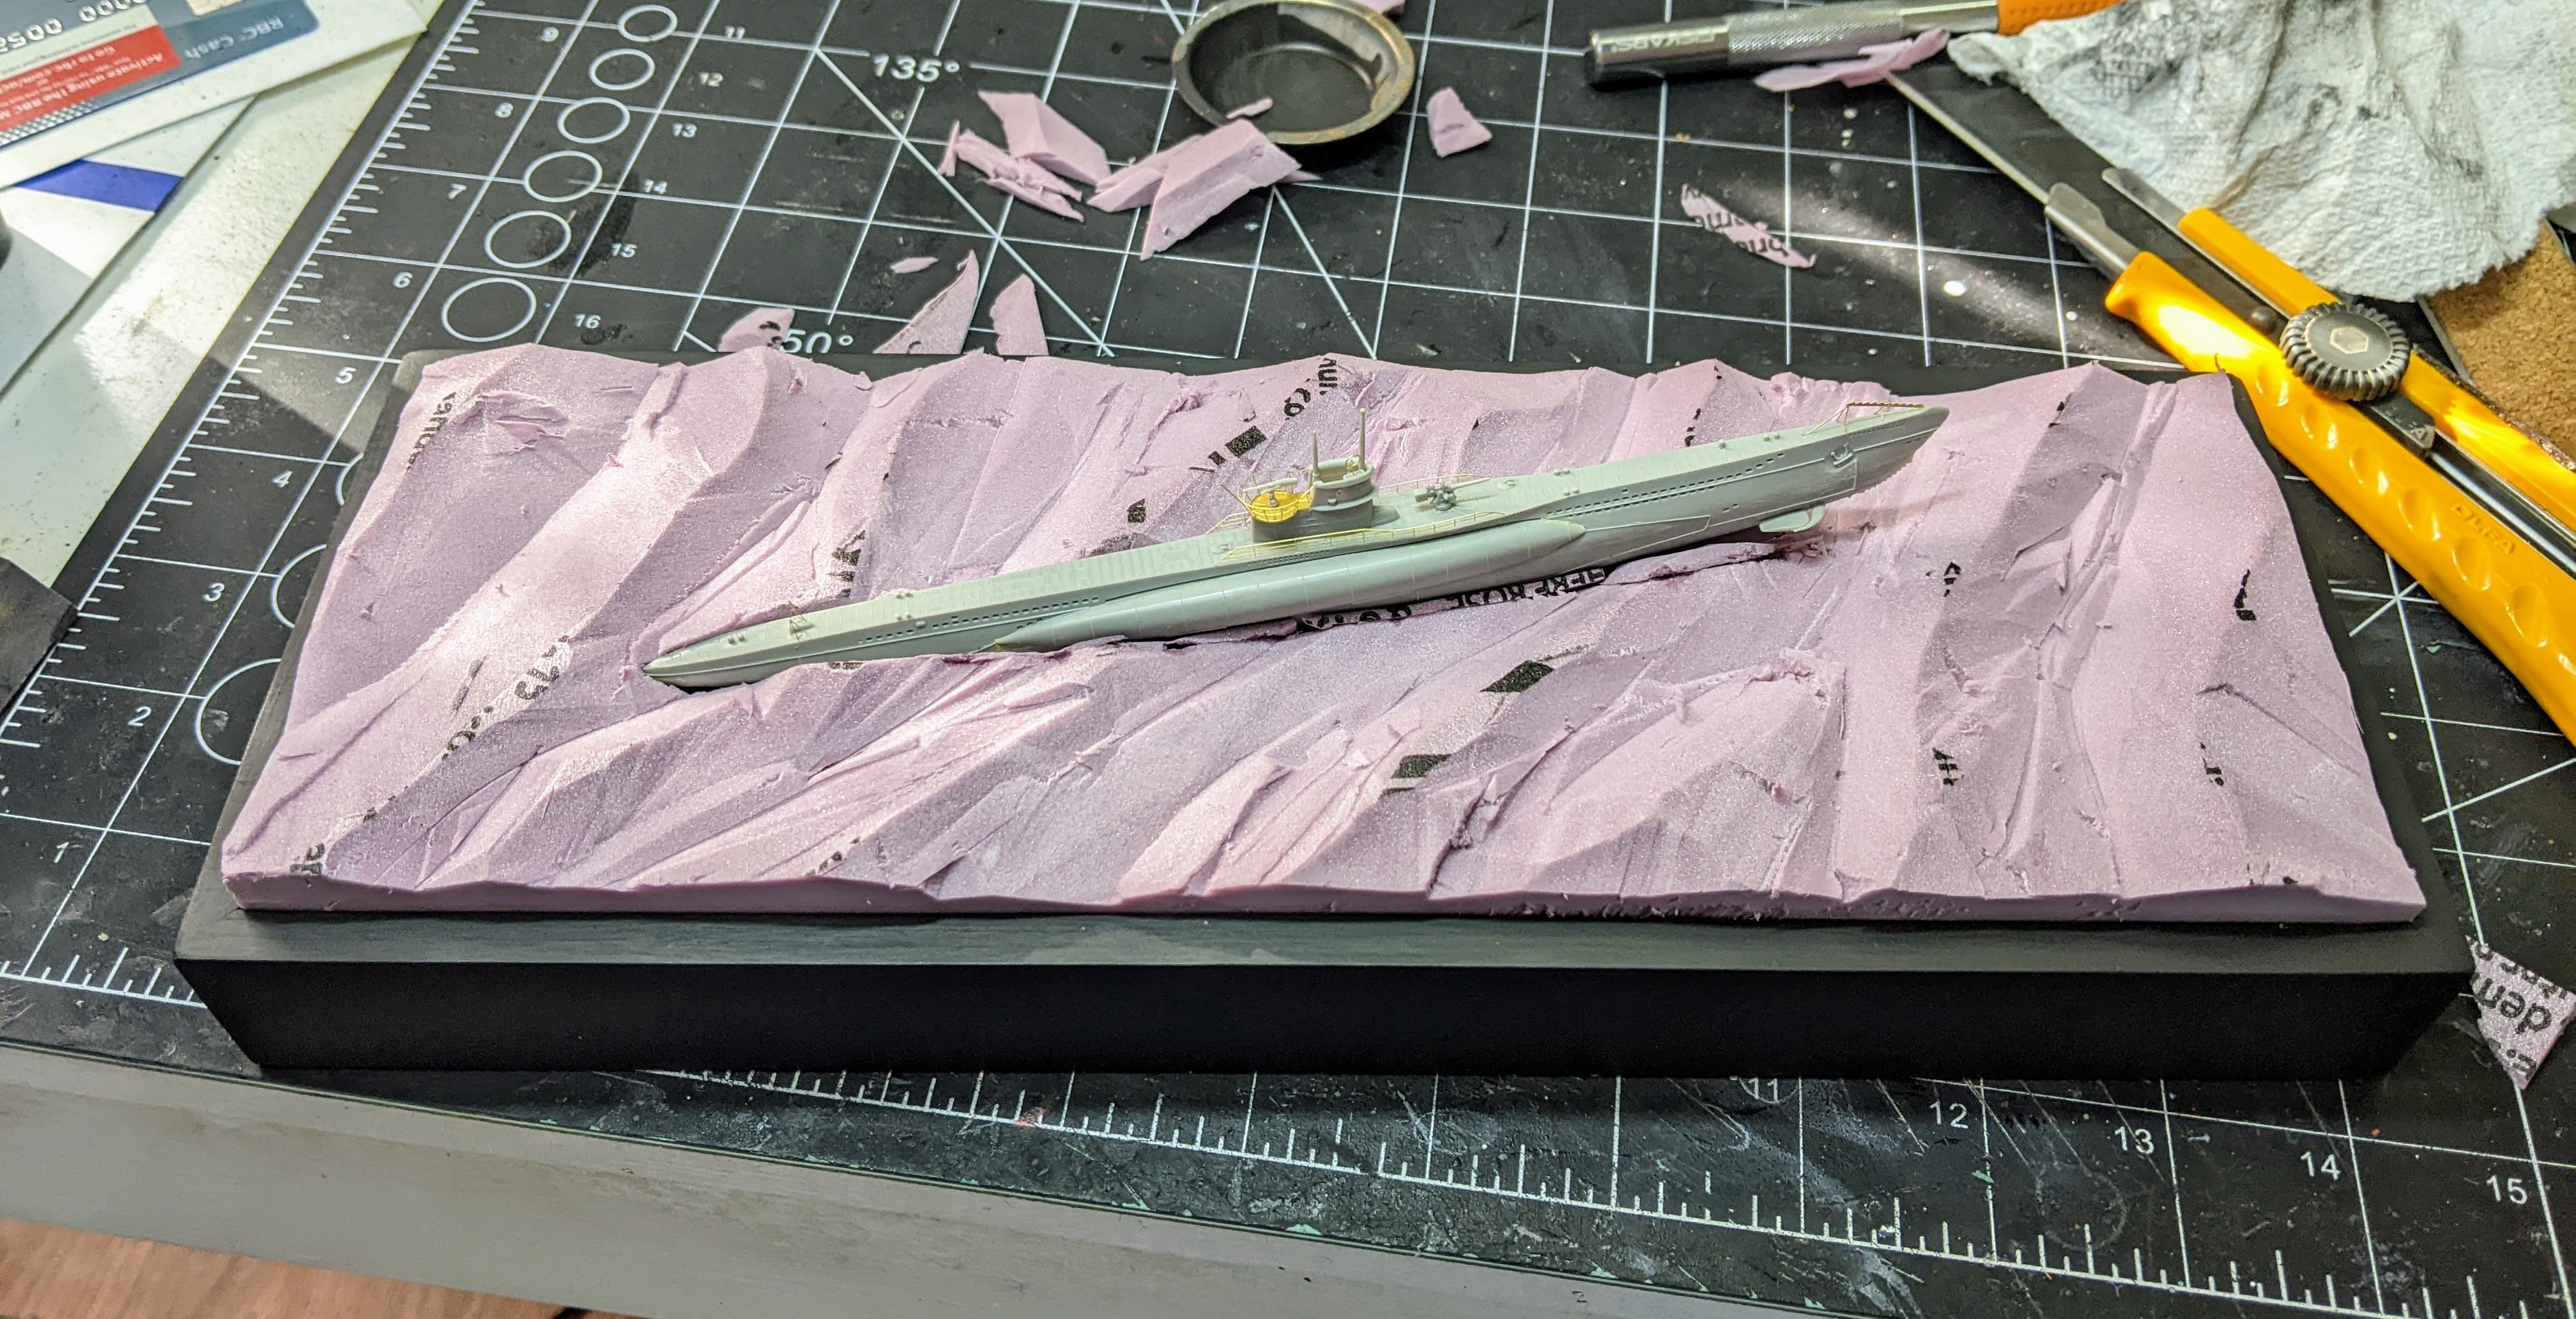
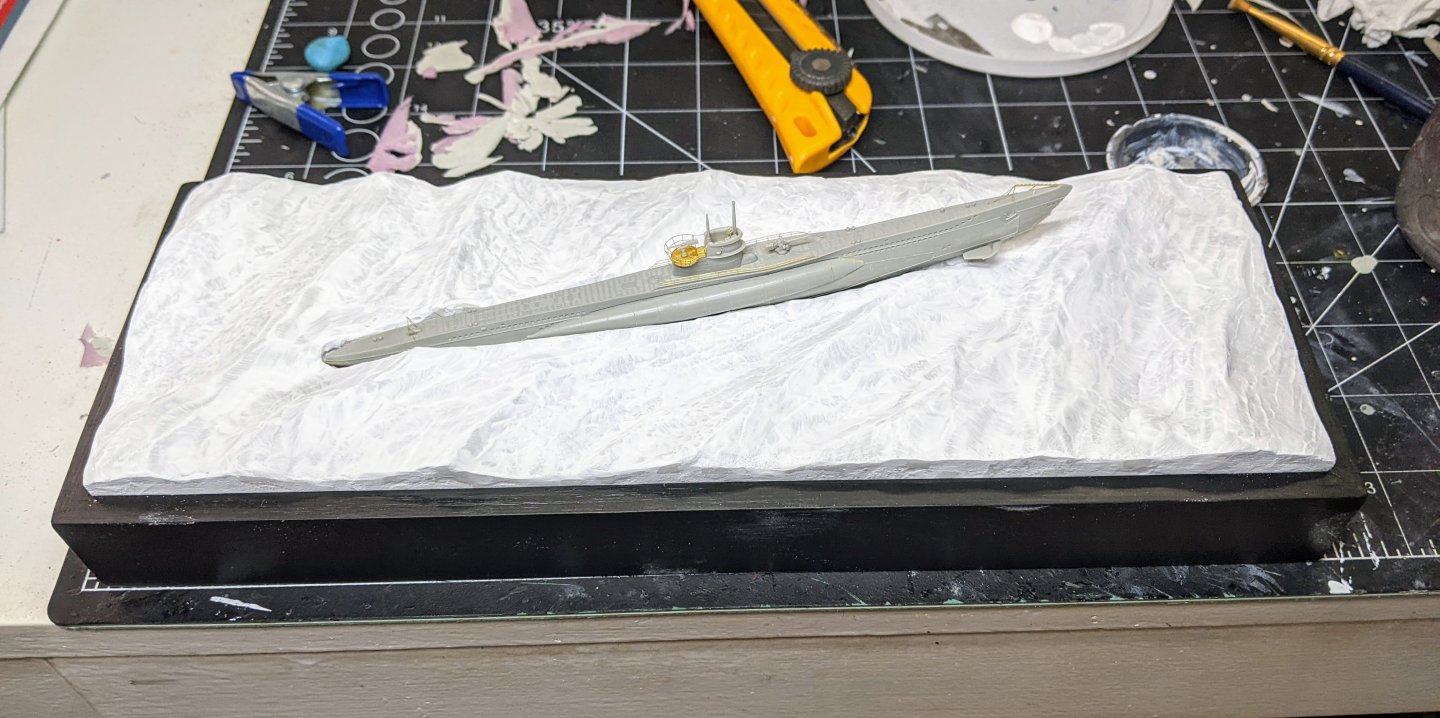
Work is progressing briskly. The base of the seascape is now covered in epoxy putty. This did not turn out exactly how I was hoping and I had issues shaping the smaller ripples in the water. My plan for texturing the surface didn’t work and I am going to have to come up with a new plan, probably involving building up gloss medium or something like that. However the other issue is the surface is not as smooth as I would like for this, I am going to have to go in with some extra putty to smooth up some of the seams and unwaterlike shapes. Here is the current state of things after I cut off the overflow on the edges and trimmed the hole to allow the model it sit in it properly.


- 54 replies
-
- 13
-
-
Looks great. If you are planning on adding sails I would suggest checking out this log: Though it is for a much larger ship, I suspect the same principles will apply.
- 207 replies
-
- 10
-
-

-
In all likelihood I would say if the masking tape is pulling it up then the splinters were already there waiting for something to pull them up. That is very frustrating. Maybe try sticking some tape to the uncut piece before cutting it to see if anything comes up. Then if not you can go ahead with cutting.
- 82 replies
-
- 4
-
-
-
- half hull planking project
- half hull
- (and 2 more)
-
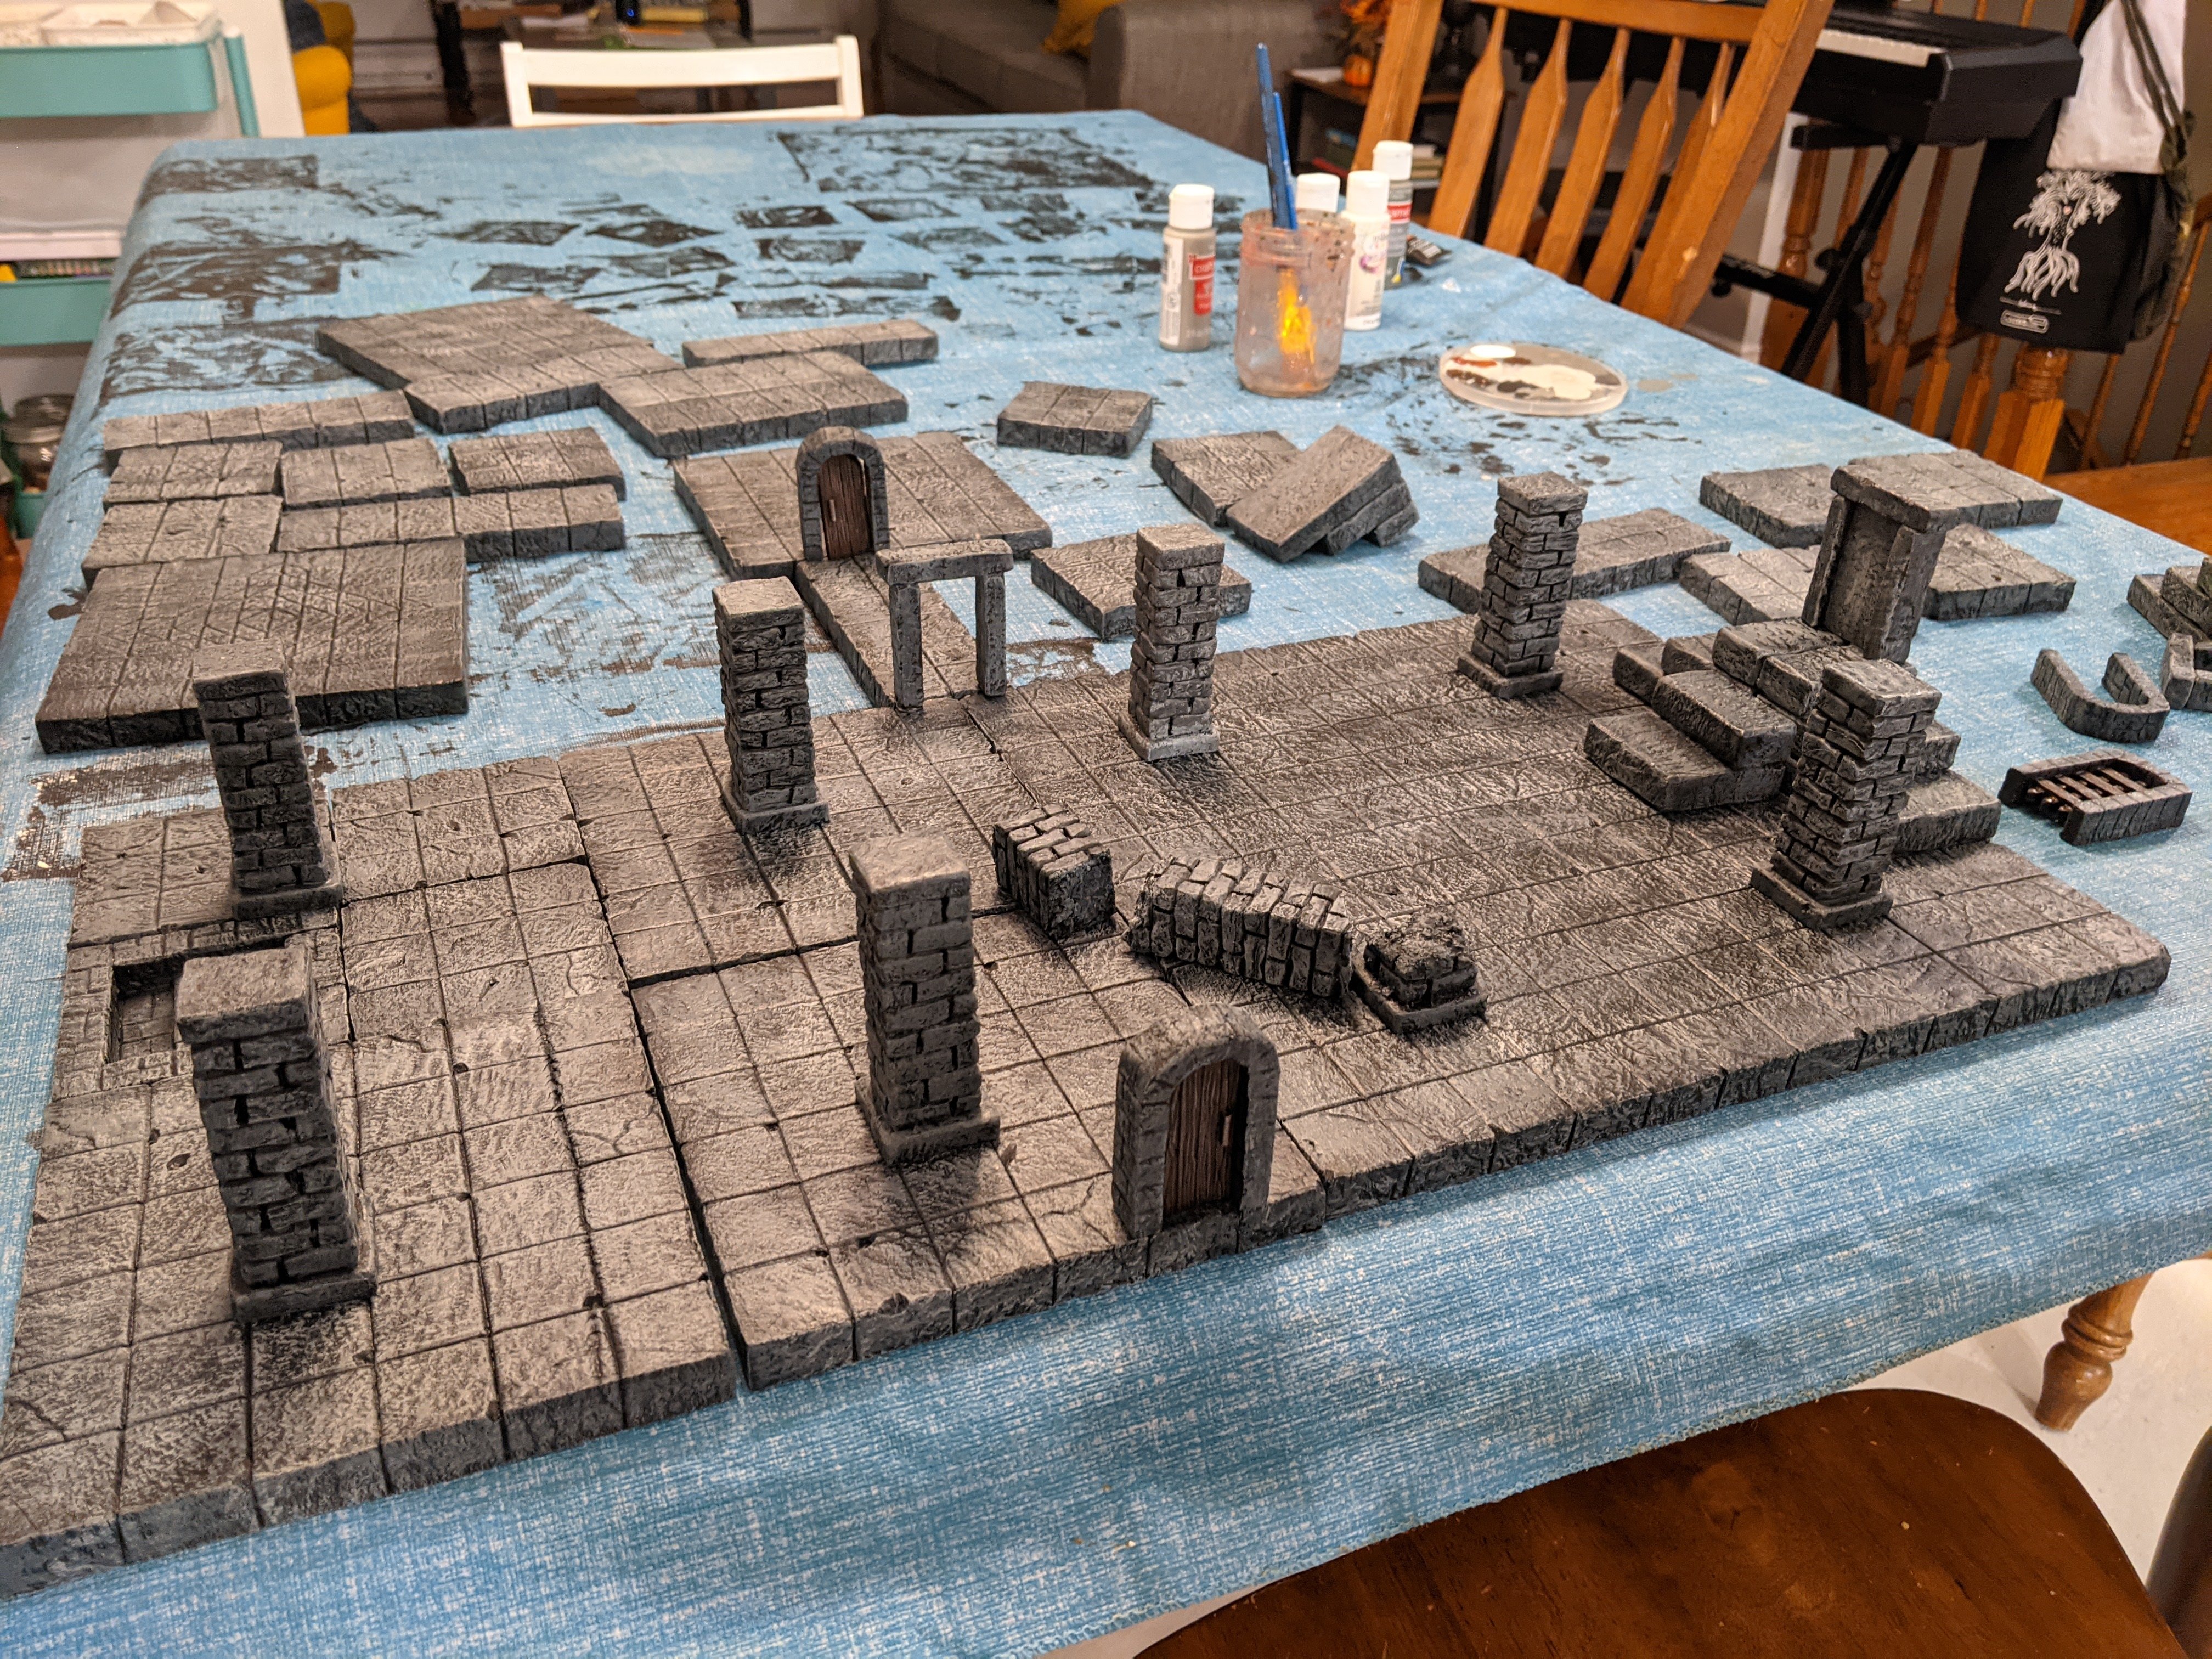
I assume you mean the foam. It is great stuff. It is light and strong, but you can imprint shapes into it. I make all sorts of hobby stuff out of it. And if you have a hot wire cutter (I don't) you can get really crazy with it. All of the terrain below is made out of the foam.

-
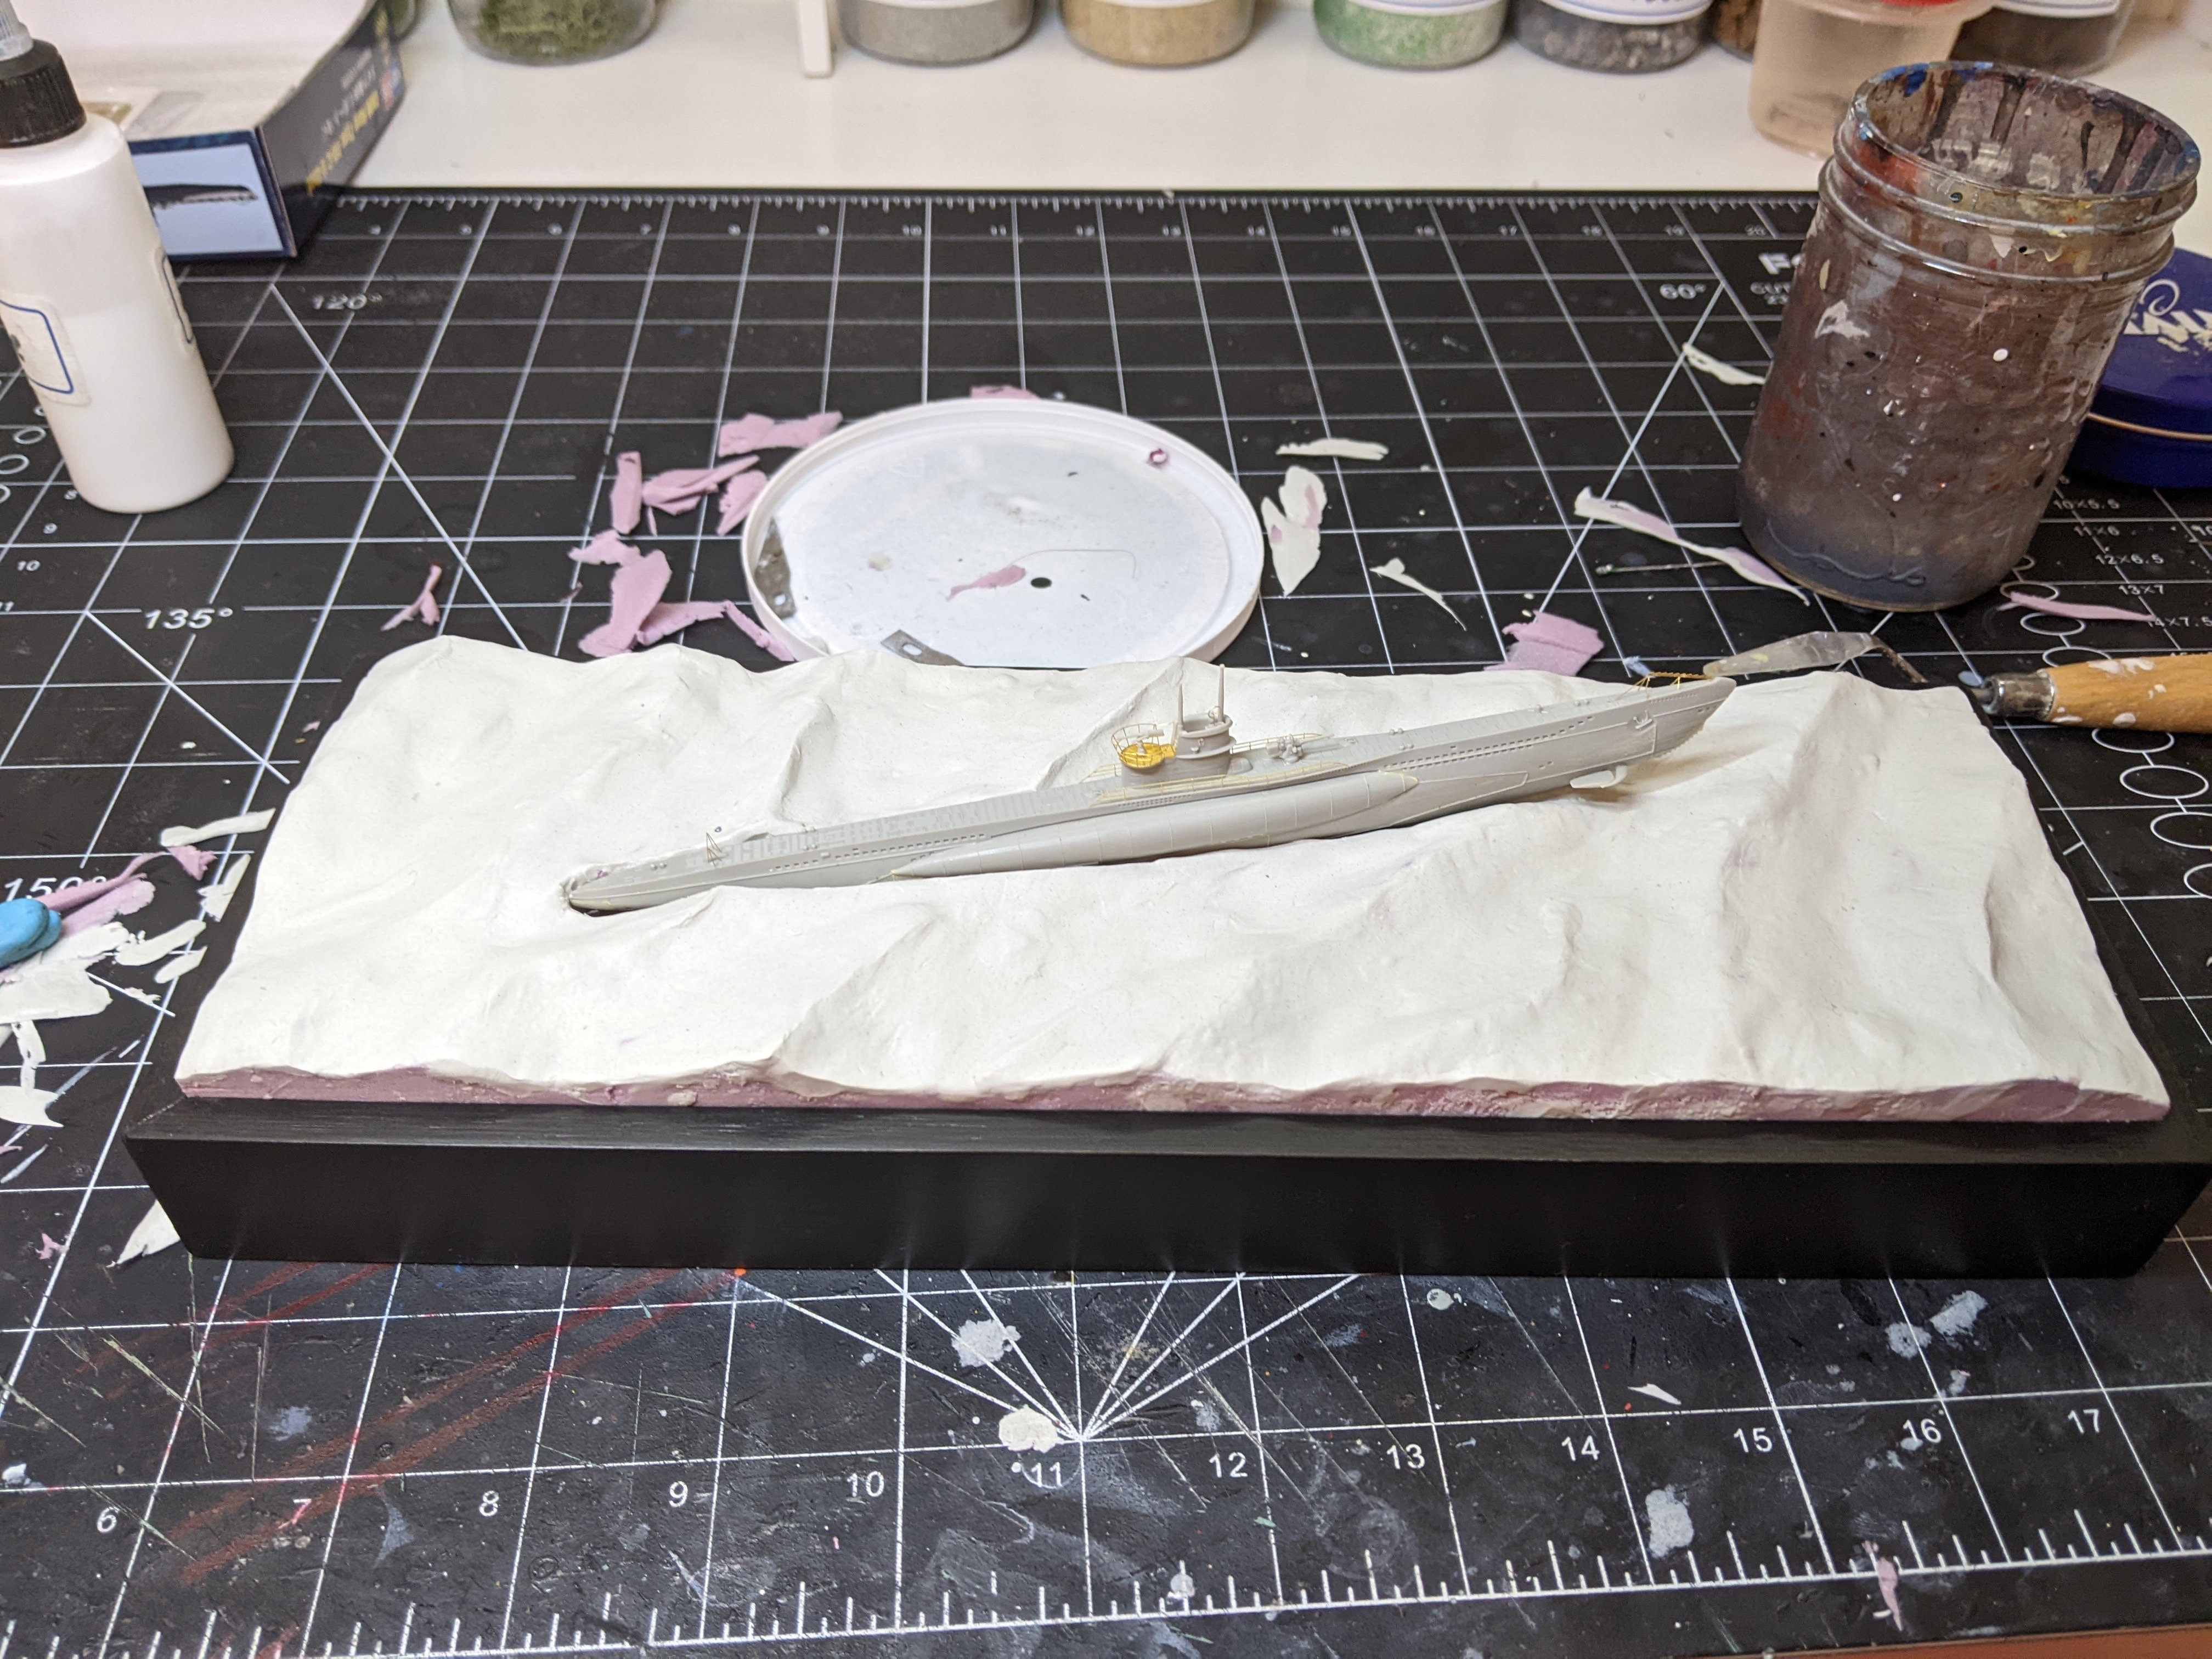
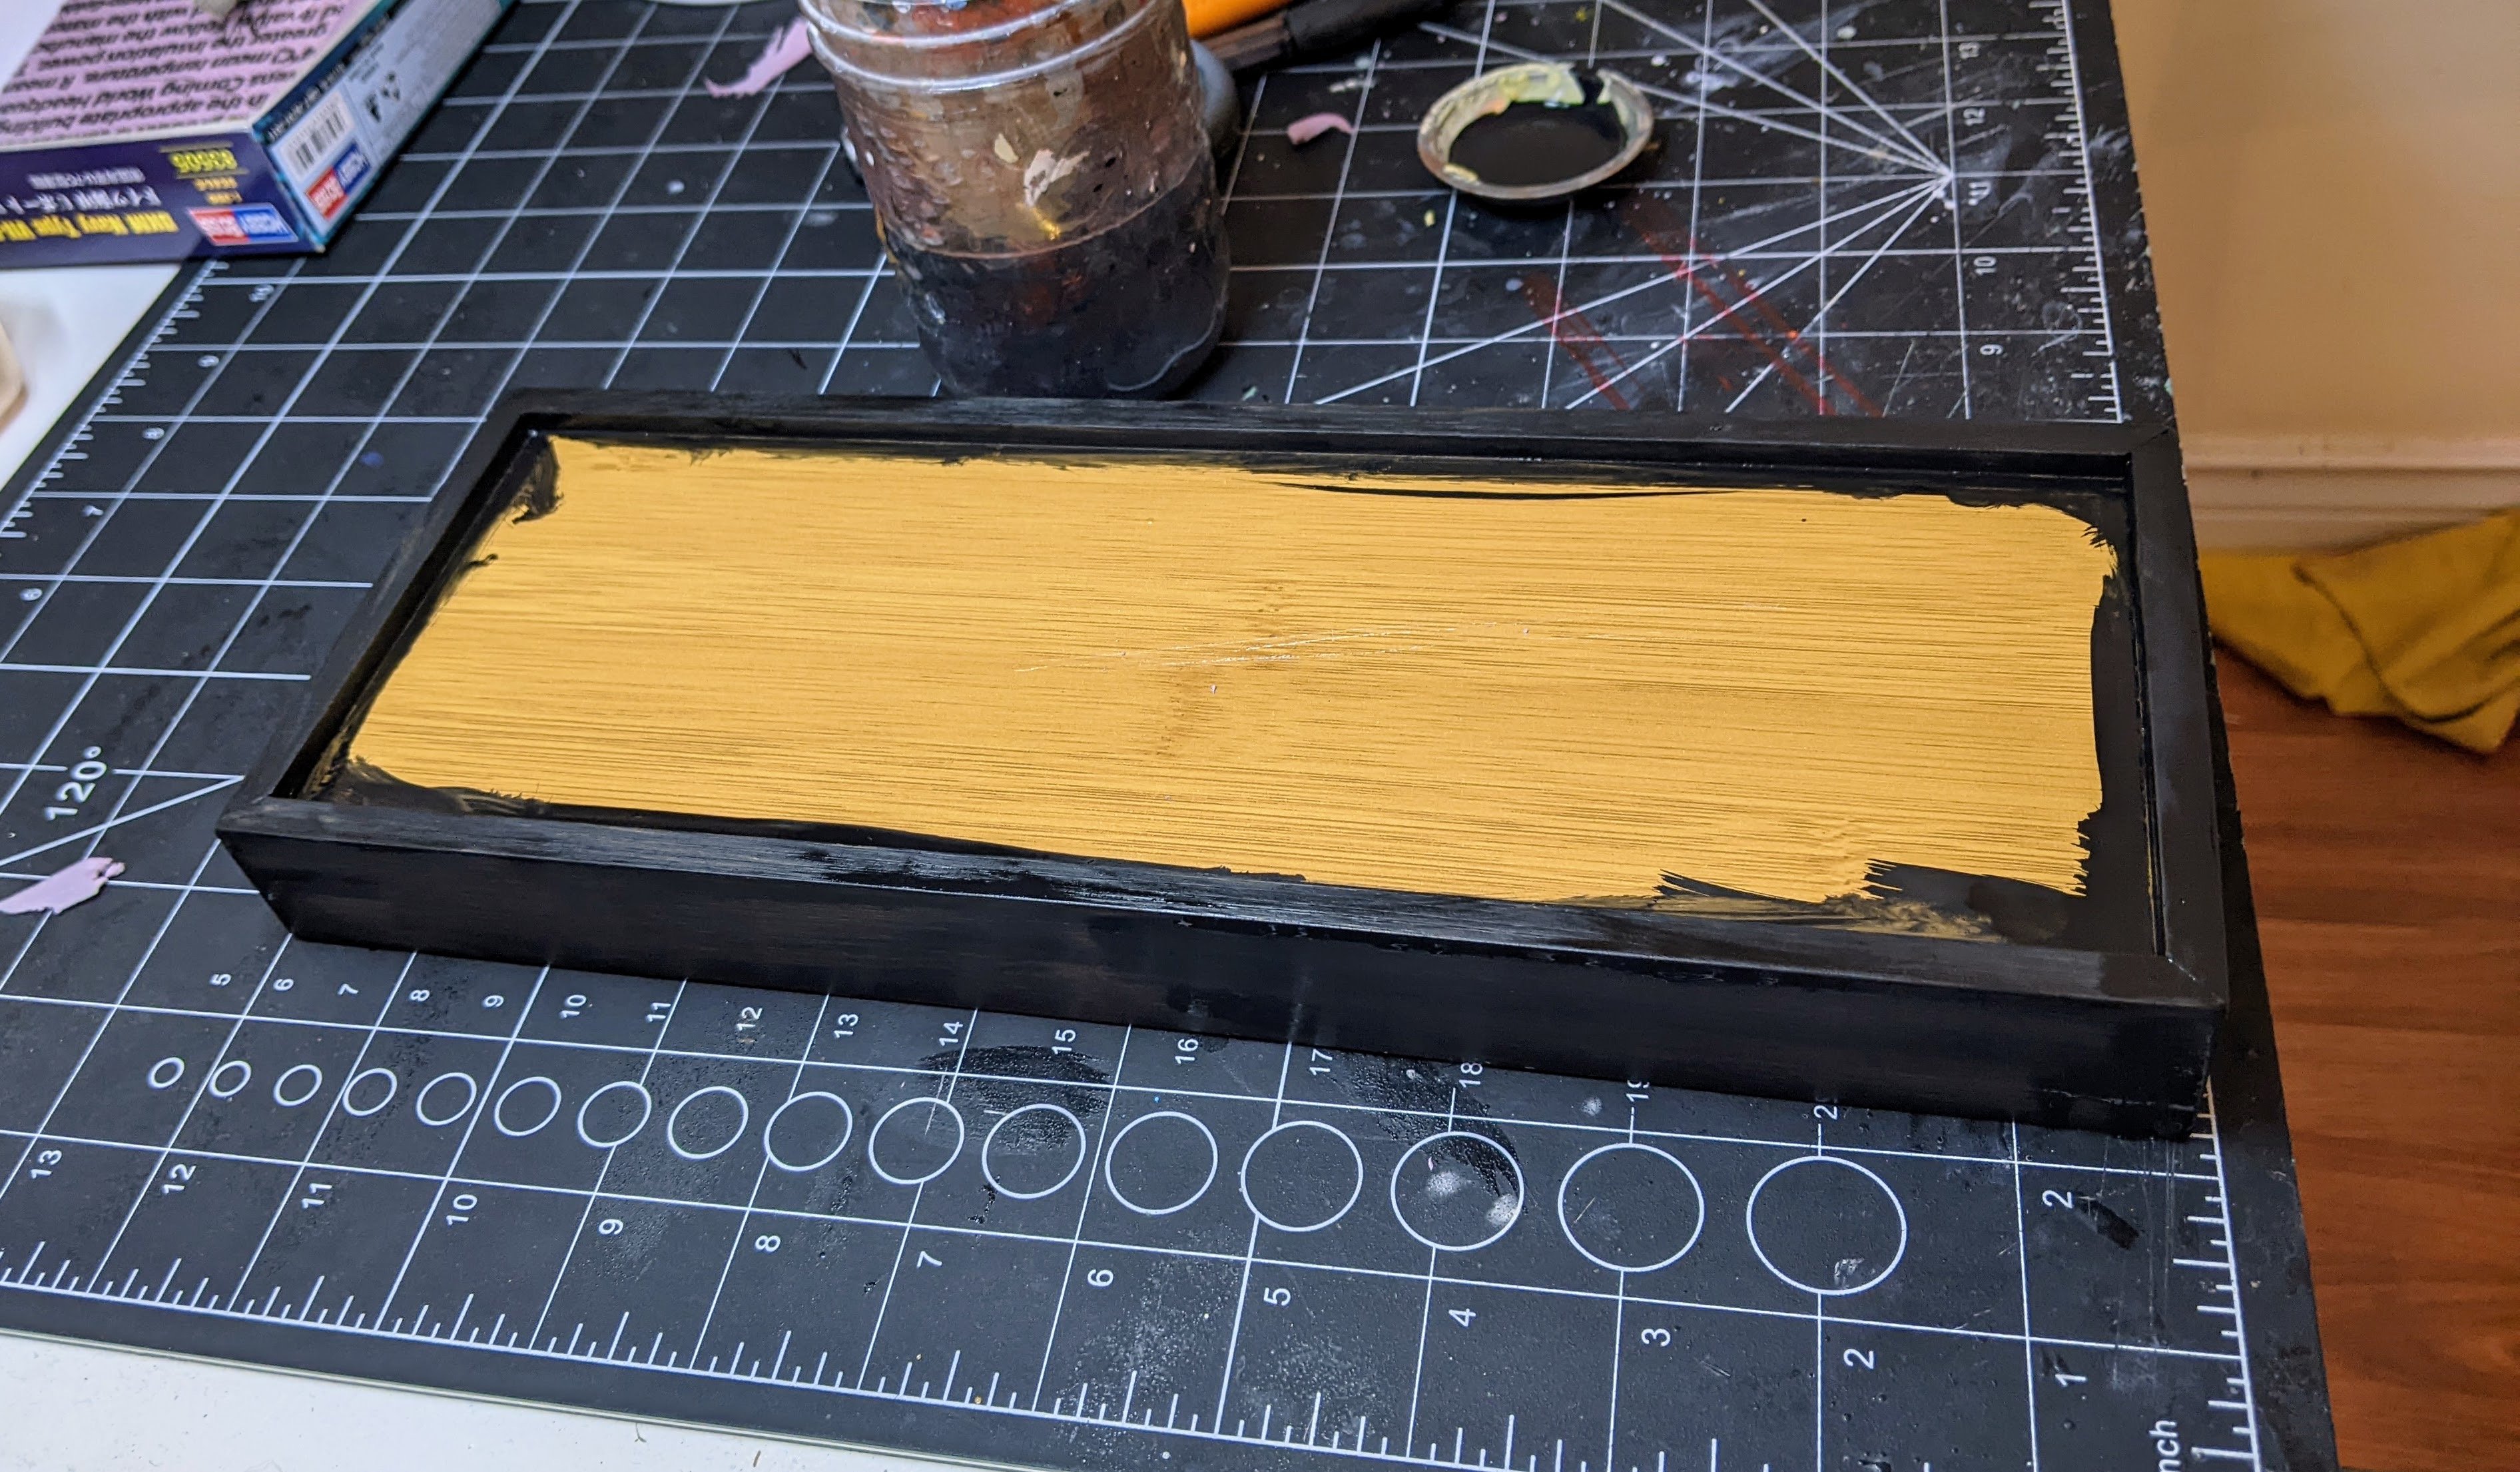
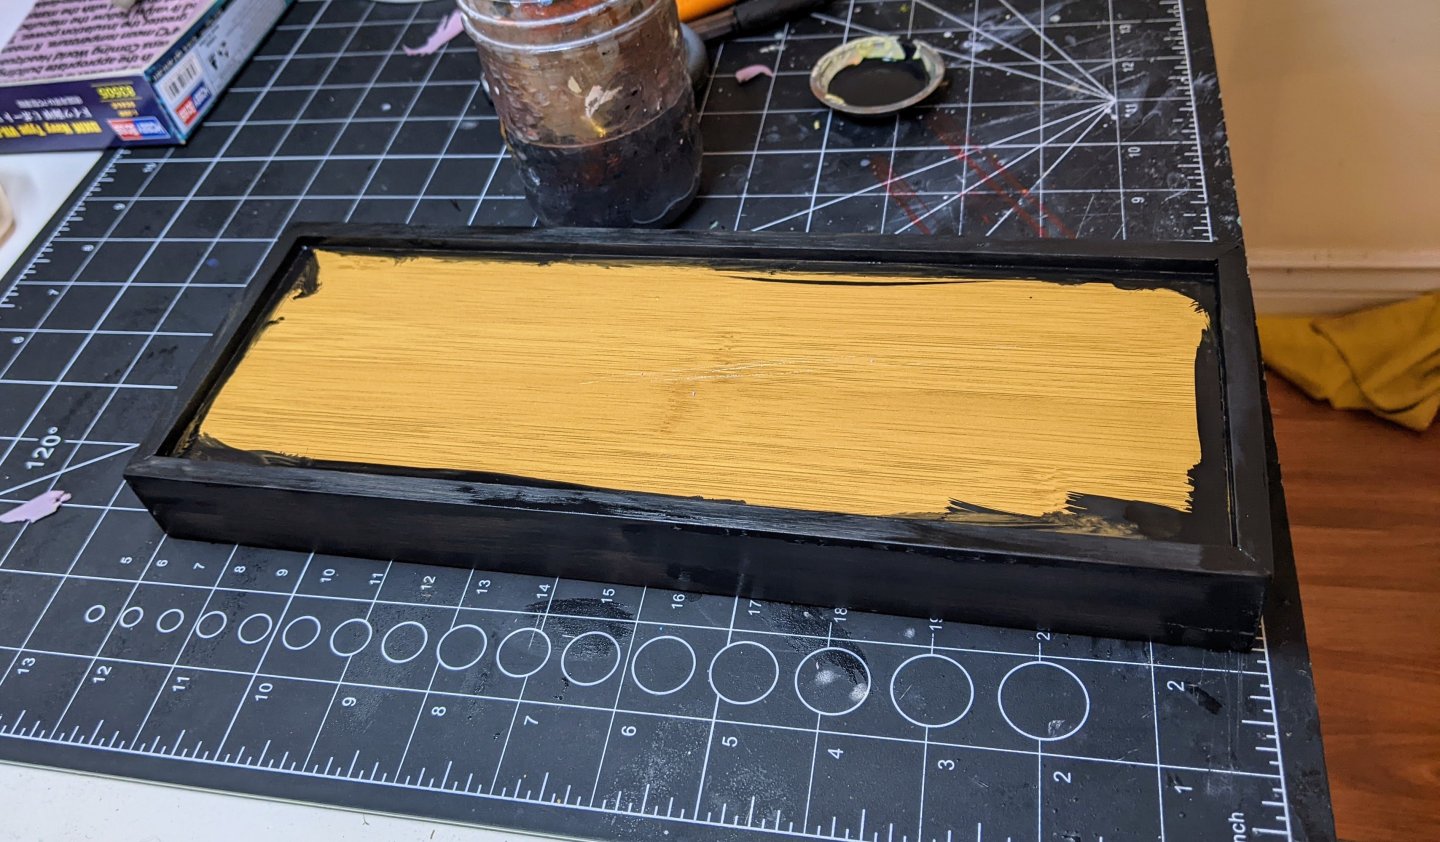
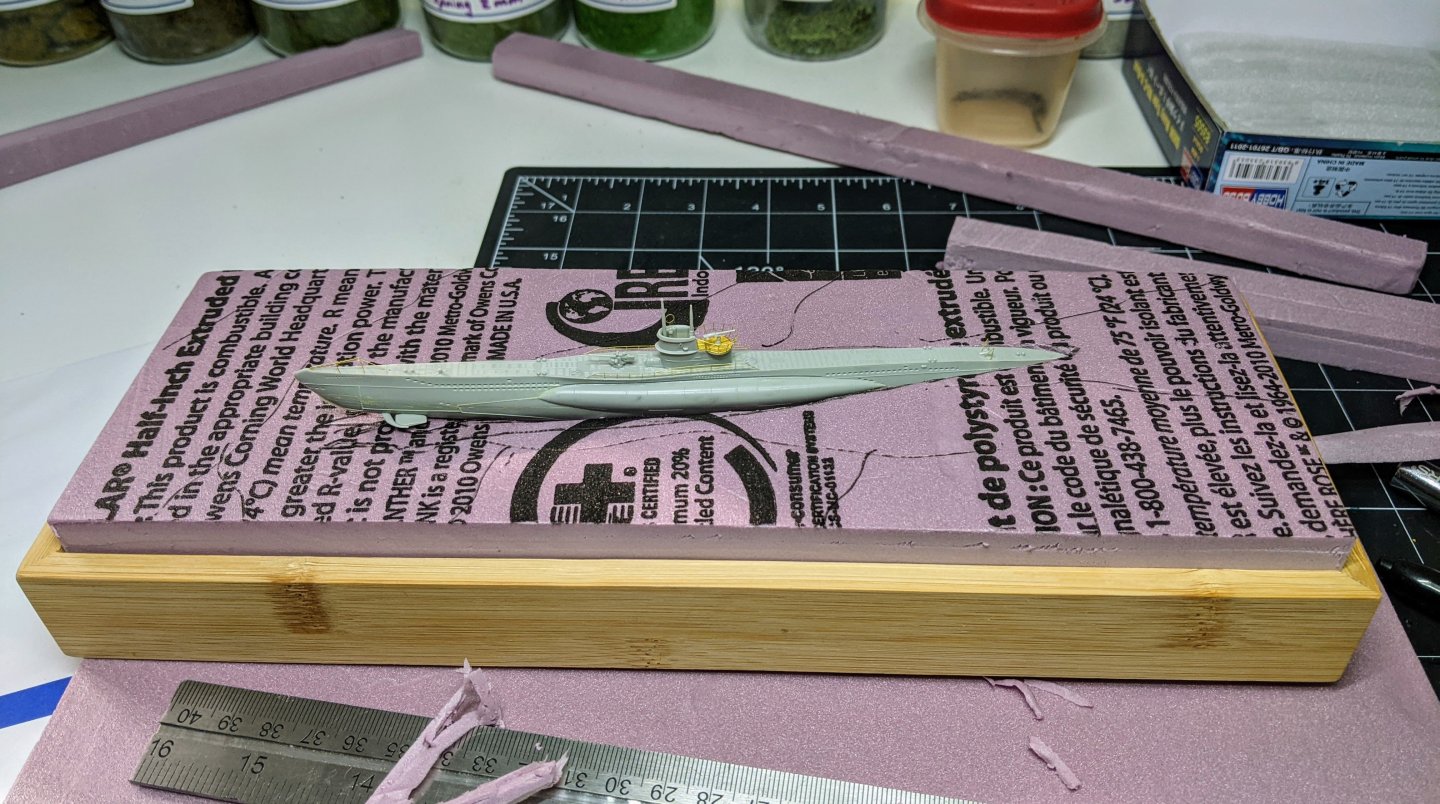
With the model assembled it is time to turn my attention to the base. I found a bamboo tray at dollarama which was about the right size for the base. I flipped it over and used the bottom which had a lip and cut a piece of pink insulation foam to fit. I roughly positioned the model on it and cut out the hole for it to sit in. Next up I painted the base. This took many layers with sanding in between. Here is what it looked like after the first coat of primer. Then it was time to figure out the rough shape of the waves. This involved a lot of reference pictures as I have never done this before. This is only the base for them, the will be refined more in the next step. You can see in the picture how I inserted back in some small strips of foam as I adjusted the position of everything. Next up the waves need to be refined a bit more.

- 54 replies
-
- 12
-
-
I believe they are the amati nails so you should be able to get them at ages of sail (one of the site sponsors) https://www.agesofsail.com/ecommerce/am4134-07-amati-brass-nails-7mm-200.html Not sure if those are the correct size, just check your size and then do some googling.
-
Ahoy from Southwest Arizona
Thukydides replied to CaptainBlackbeard's topic in New member Introductions
Welcome to MSW! -
Welcome to MSW
-
Hold a test strip against the bulkheads to make sure it lays flat against them. Do this all over the hull to test all of it. Getting the faring right will make the planking much easier. I didn't fare the bow on alert enough and it caused me all sorts of headaches with the first planking layer.
- 177 replies
-
- 2
-
-
- Sherbourne
- vanguard models
- (and 3 more)
-
They all look fantastic. Are you still planning on doing the darker ones? Also would you consider other blocks such as the ones with two notches for double strops.
-
I think that looks really nice. Makes it look more like a painted decoration which is what they were. Well done the colour choice is perfect and there is lots of contrast. You clearly have the ability. Great job.
-
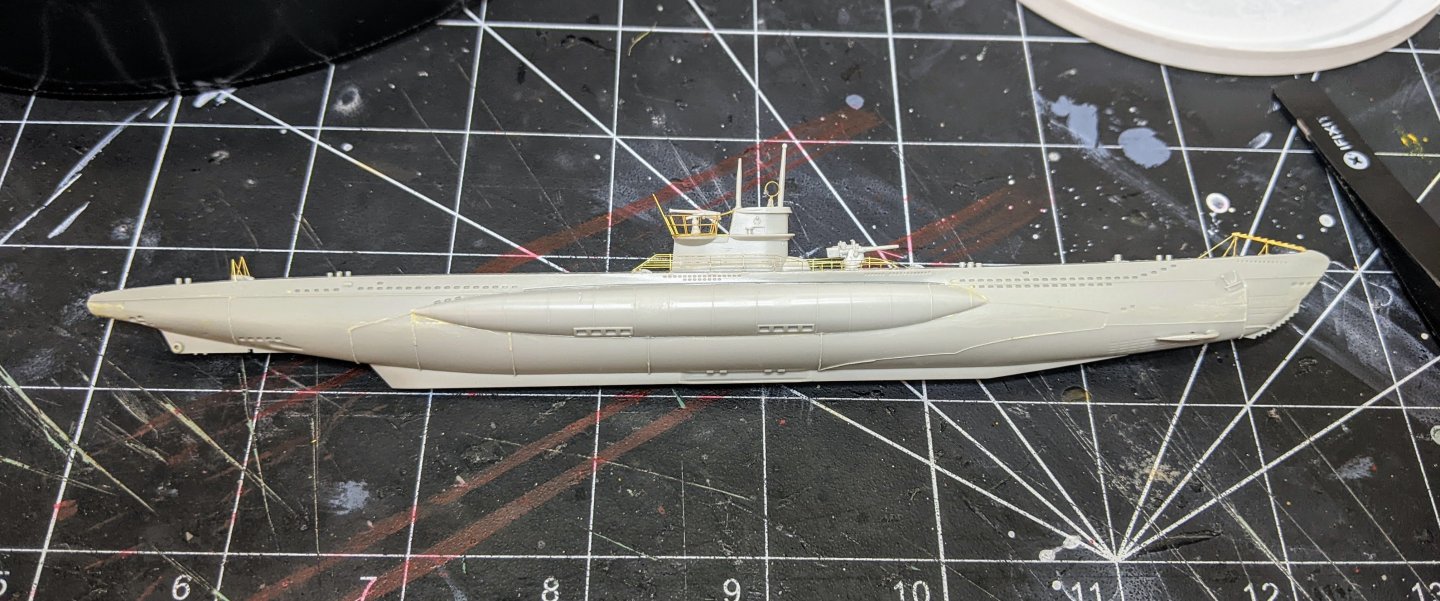
Model is now all assembled with PE attached. I still need to add the cables and then it will be on to painting. You may notice that I didn’t attach any of the propellors. That is because they will be hidden under the seascape so no need to bother with them.
- 54 replies
-
- 11
-
-
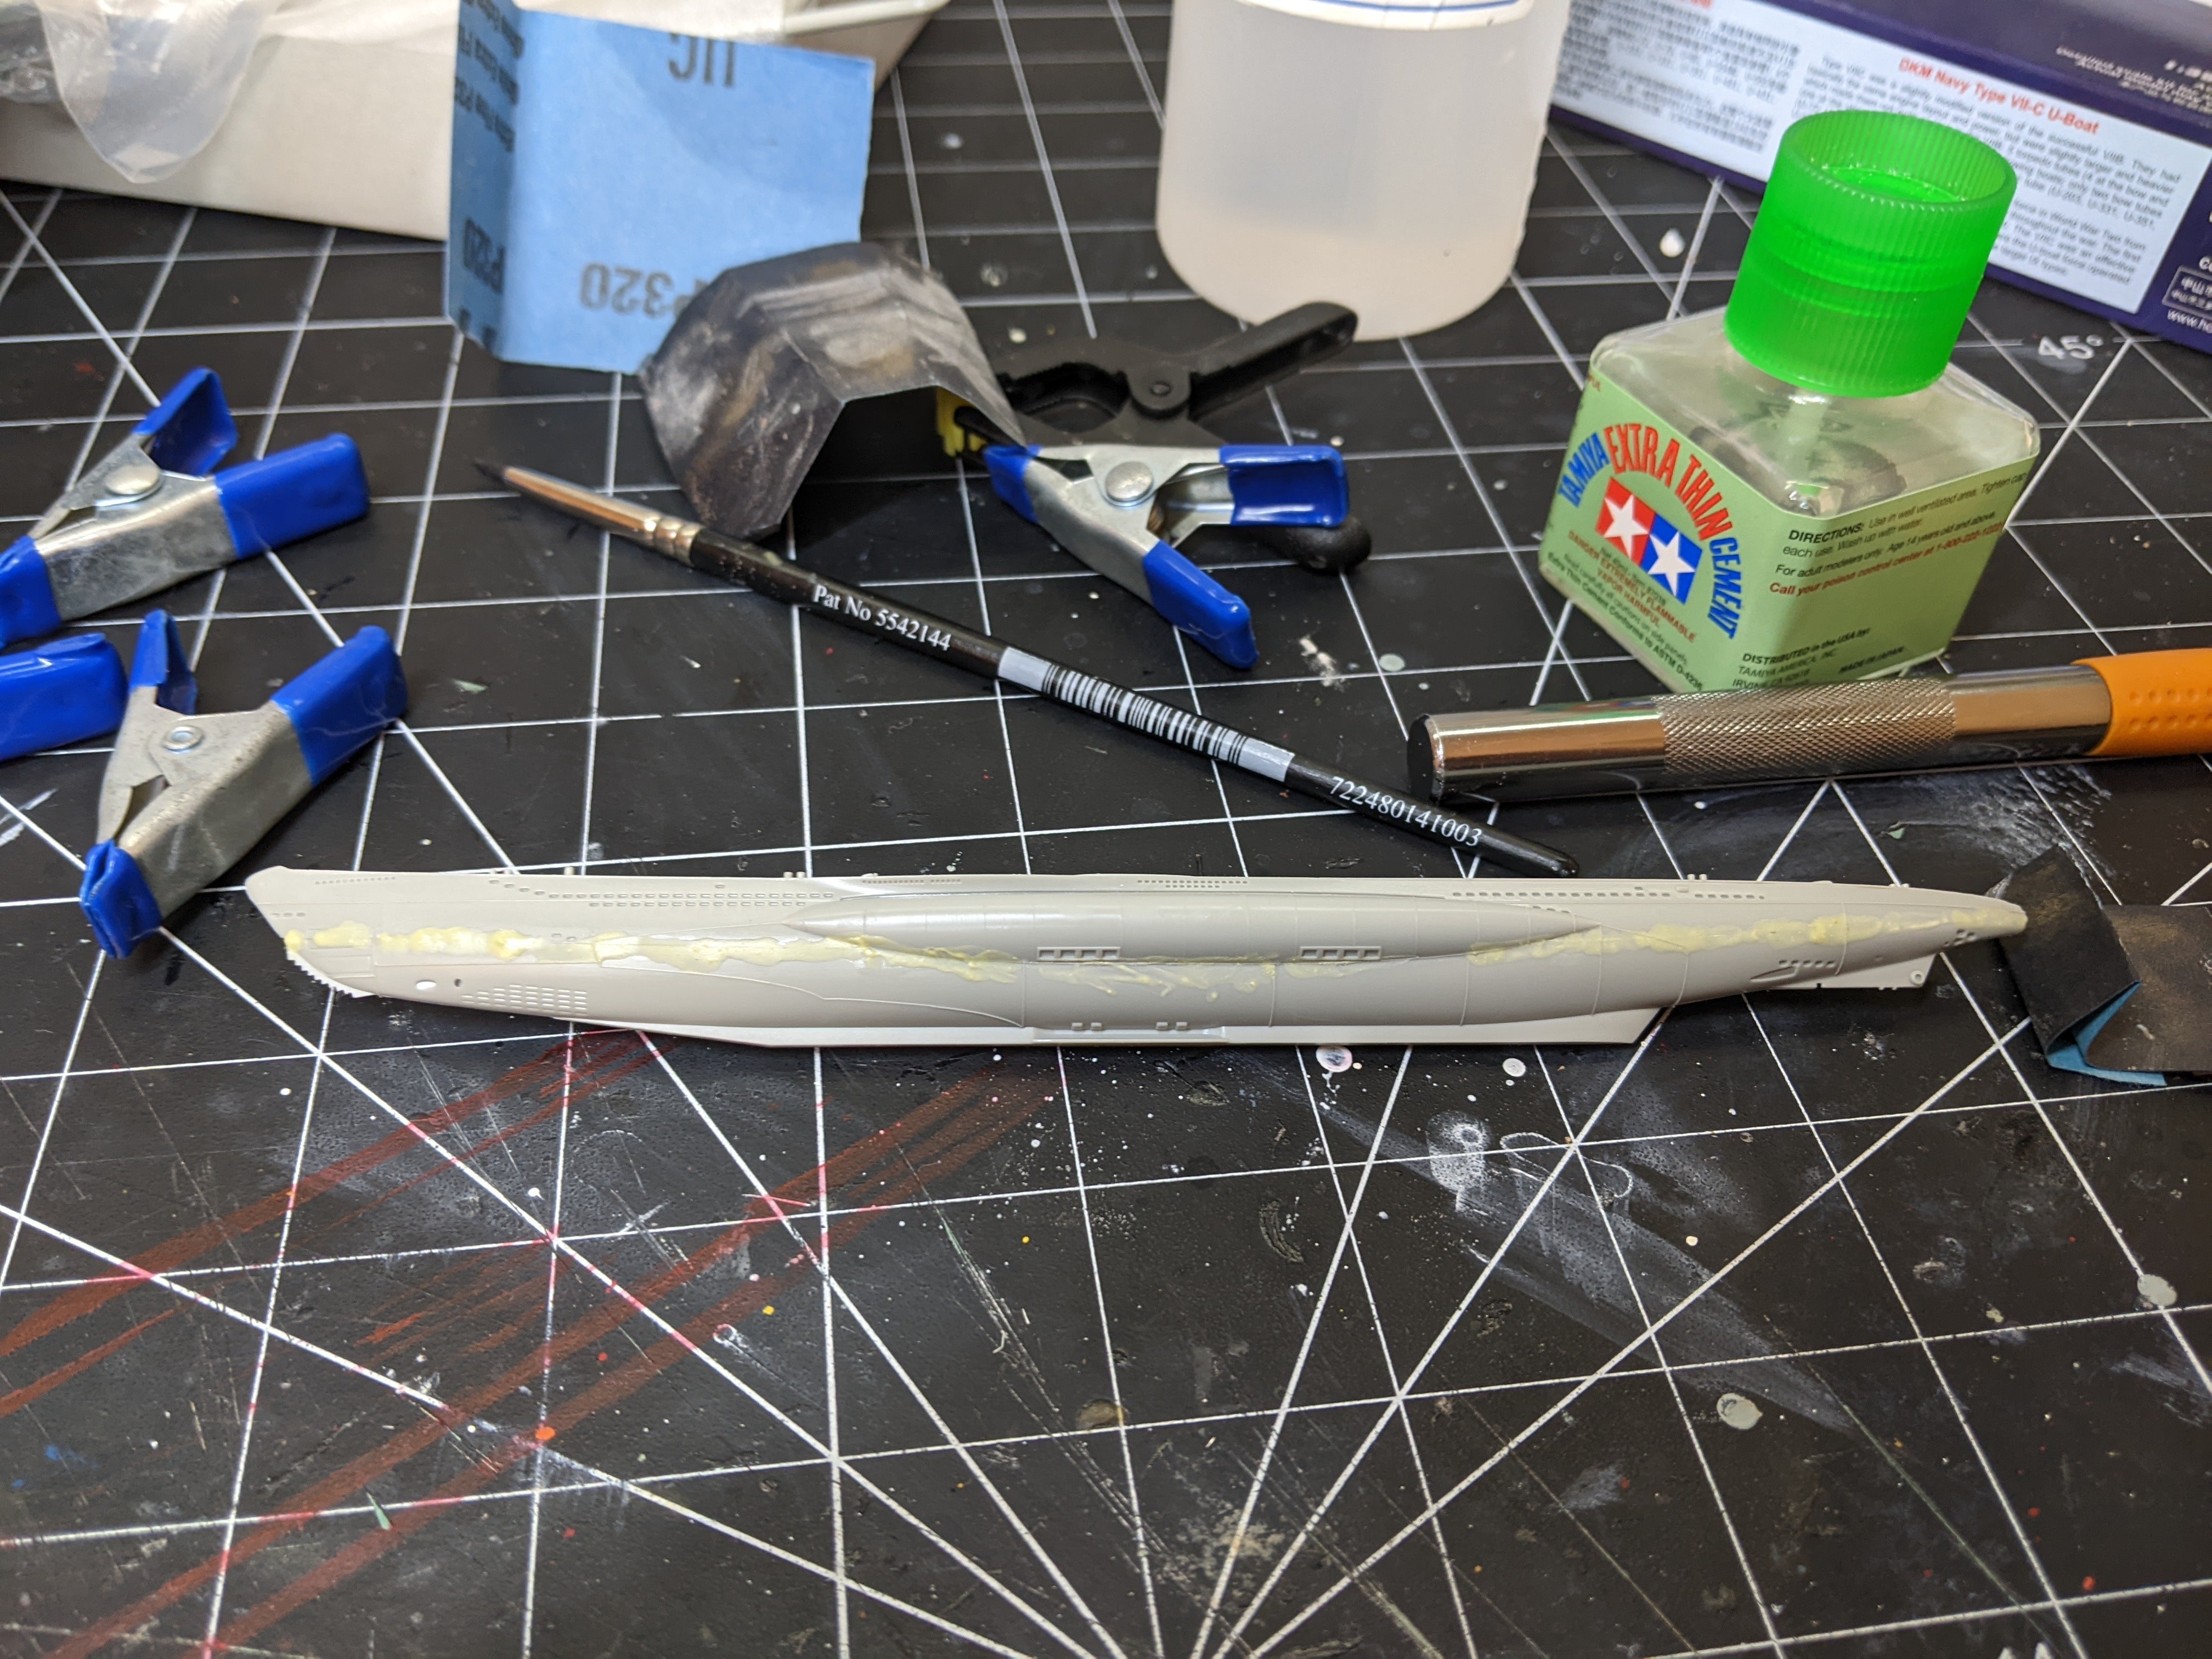
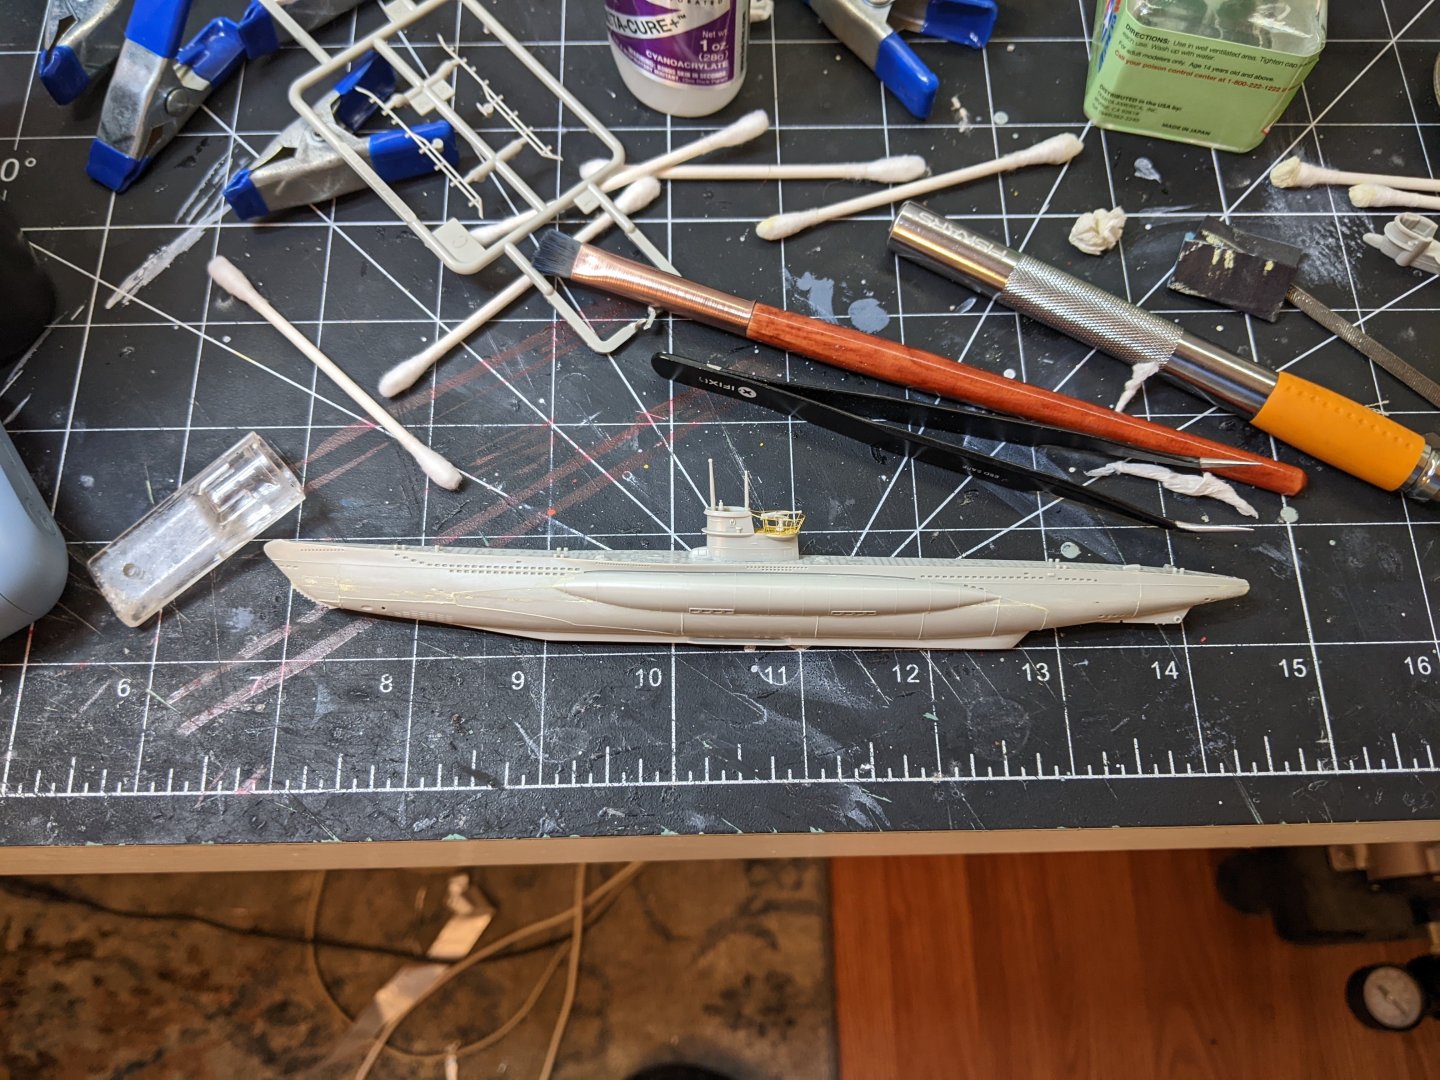
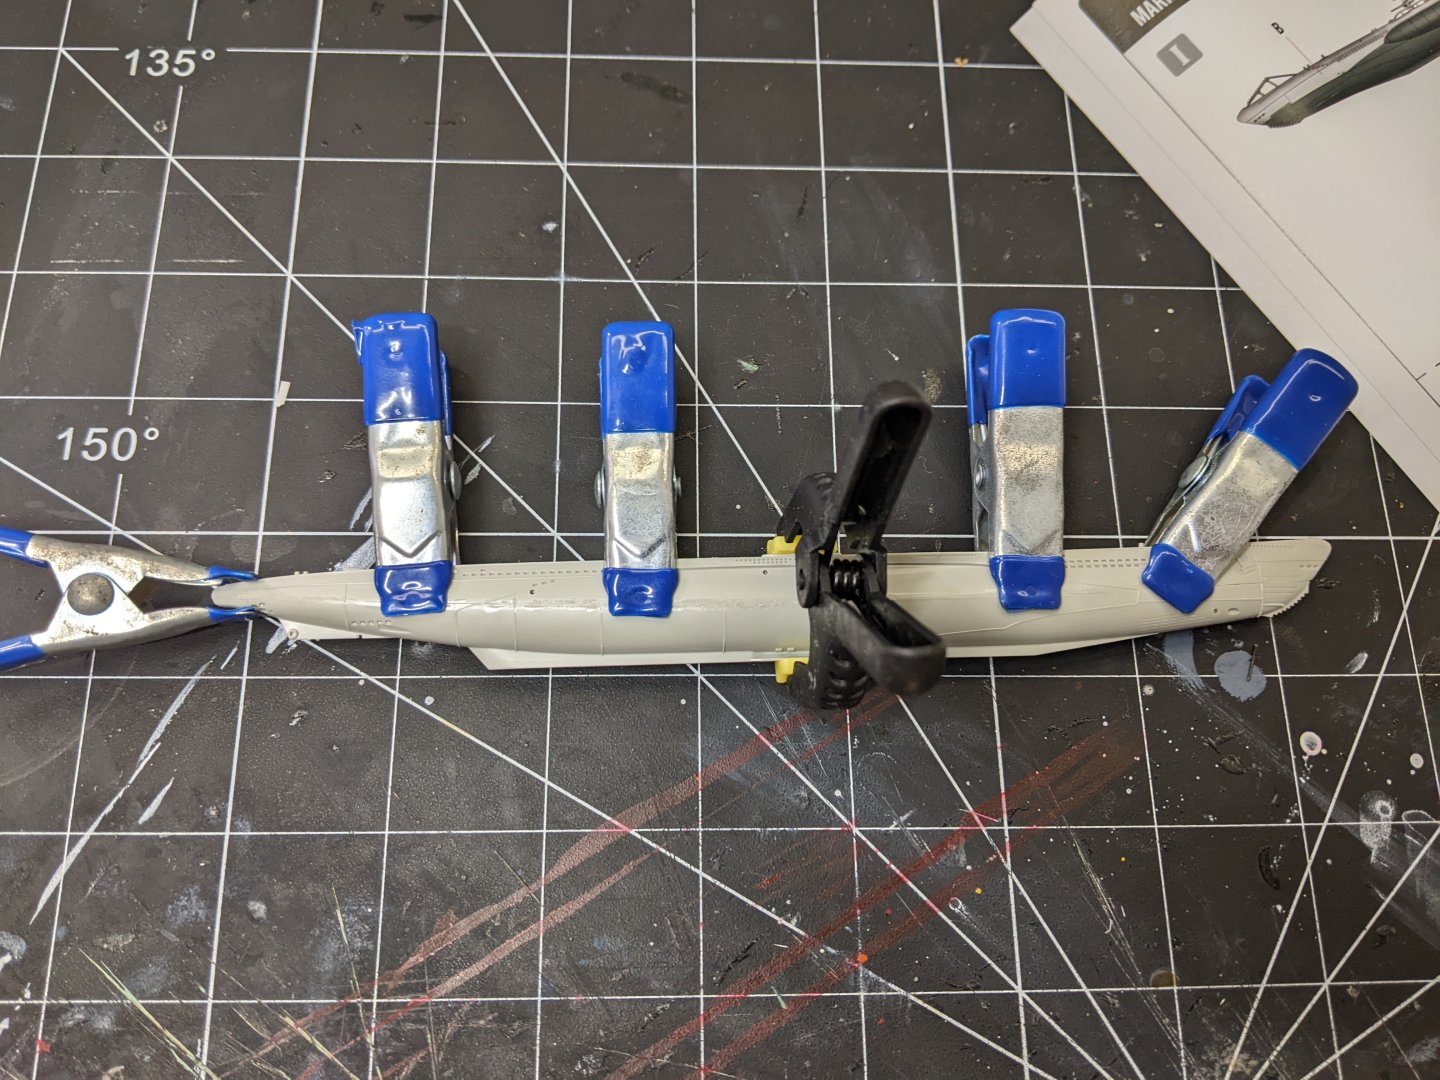
I began construction on the hull. The main hull was a bit warped so I had to use clamps to hold everything in the right place. Once the main structure was together I then had to do some gap filling with milliput mixed with a bit of isopropyl to make it runny. This was then sanded smooth once cured. Then I began work on the coning tower. The PE for this sure is fiddly, but it feels like this build is flying together compared with working on Alert. Though I suspect the painting will go much more slowly than the construction…

- 54 replies
-
- 12
-
-
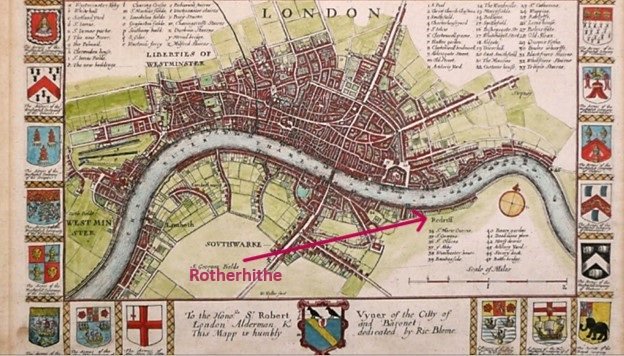
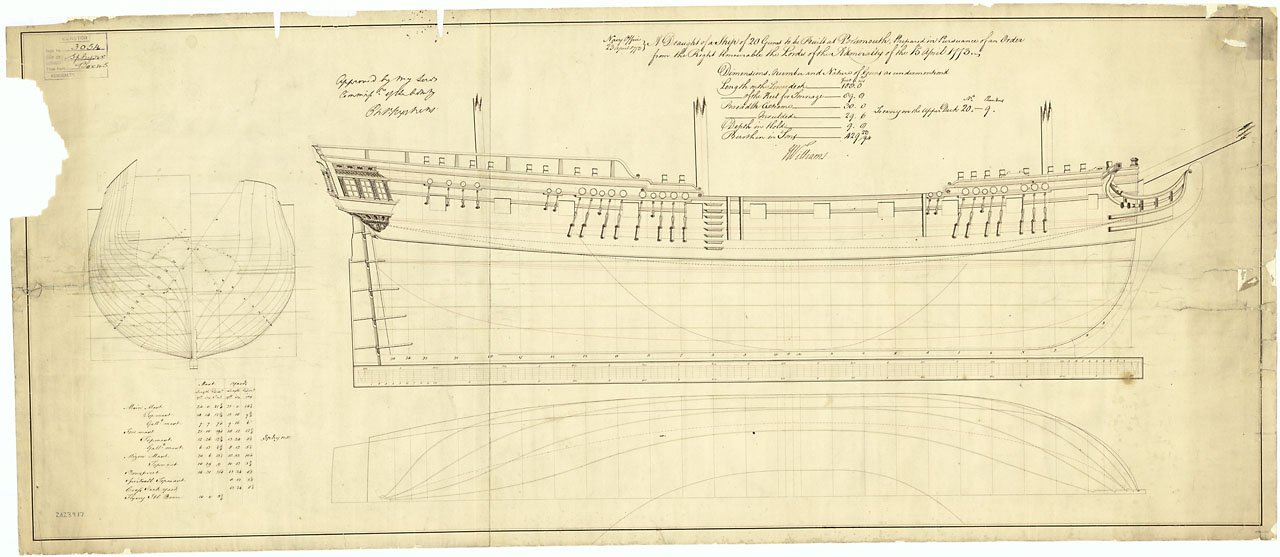
Log #2: Service History Part I - Design & Construction Thank you to everyone who has pulled up a chair to follow along with me on this journey. It really does help motivate me to do these logs when I know others find them helpful. I apologize in advance as the entries for the foreseeable future will involve more text than pictures until I actually start construction. My Alert log was an exploration of ship modeling from a beginner perspective. I tried to show my thought processes working through the necessary modeling techniques (both the successes and failures). This log I plan to focus on the why of ship modeling. What sources informed my modeling decisions, why did I choose those sources and so on. We are going to start by working our way through the history of Perseus, then we will consider some of the key sources of information available to us and hopefully by the time we get through all that I will have started building the model and I will have stuff to show you. HMS Perseus was a 20-gun Sphinx class 6th rate post ship launched in 1776. As was previously noted, post ships were the smallest ship rated to be commanded by a post captain, larger than a sloop, but not as large as a frigate. Draught of HMS Sphinx, National Maritime Museum, Greenwich, London. ZAZ3917, 23 April 1773. The Sphinx class ships were designed by John Williams, the surveyor of the Navy from 1765 to 1784. In this time he designed at least 21 different classes of ships ranging from the 100-gun Royal Sovereign to the 10-gun Childers. List of Sphinx Class Post-Ships Name Ordered Launched Out of Service Fate Sphinx 15-Apr-1773 25-Oct-1775 24-Jun-1811 Broken up Camilla 1-Dec-1773 20-Apr-1776 13-Apr-1831 Sold Daphne 1-Dec-1773 21-Mar-1776 ?-May-1802 Sold Galatea 1-Dec-1773 21-Mar-1776 ?-Apr-1783 Broken up Ariadne 10-April-1775 27-Dec-1776 1-Aug-1814 Sold Vestal 1-Aug-1775 22-May-1777 31-Oct-1777 Foundered Perseus 3-Nov-1775 20-Mar-1776 ?-Sep-1805 Broken up Unicorn 3-Nov-1775 23-Mar-1776 7-Aug-1787 Broken up Ariel 3-Jul-1776 7-Jul-1777 10-Sep-1779 Captured Narcissus 8-Jan-1777 9-May-1781 3-Oct-1796 Wrecked The Sphinx class were the first batch of 20-gun ships ordered in more than 20 years after the Glasgow, the last of the Seaford class was launched in 1757. Though the Sphinx class ships had somewhat finer lines, they were in many respects identical to their predecessors, with the same armament, approximate length and layout. They carried 9 pounder guns and had a complement of 160 souls. In total ten were built with the lead ship of the class, Sphinx, launched in 1775 and the final ship, Narcissus, launched in 1781. The first of them were built at Navy dockyards, but with the start of the revolutionary war in North America and shipbuilding capacity stretched, additional ships were ordered to be built by contract at private yards. HMS Perseus was constructed at Cuckols Point, a private dockyard in Rotherhithe, London, England. Her sister ship, HMS Unicorn, was also contracted to the dockyard in 1775 with both ships being launched in March 1776. The Sphinx class post-ships saw service over a turbulent period of the RN’s history. It was a period of war, from the revolutionary war in America to the French Revolutionary Wars, and a time of technological change, with the advent of the carronade. Many of the Sphinx class served in the North American theater in the early part of their careers and those that were not broken up or sold during the peace went on to serve at various stations in the French Revolutionary Wars. The last to remain in service, HMS Camilla, was sold on the 13th of April, 1831.
-
As Alan said you best bet is probably to get someone with a cricut to cut you some stencils into contact paper and then airbrush on the letters. However If you can't find anyone to do that then you could also consider painting over the transfers once they are on. As long as you pick a similar colour you can stop your painting just short of the edge and the lighter colour will serve as a bit of a highlight. That way you can you can tint the transfer such that it looks right while still getting the benefit of the crisp lines.
-
Part of the reason I picked this scale is if I want to do a larger ship I have the option at this scale. And my OCD demands that all my ships be the same scale. Also it is small which allows some cheating on the painting.