Thukydides
-
Posts
1,363 -
Joined
-
Last visited
Content Type
Profiles
Forums
Gallery
Events
Everything posted by Thukydides
-
 Congrats, you should be proud of her.
 -
Another wonderful model and as usual you present it very nicely.
- 131 replies
-
- 1
-

-
- Medway Longboat
- Syren Ship Model Company
- (and 1 more)
-
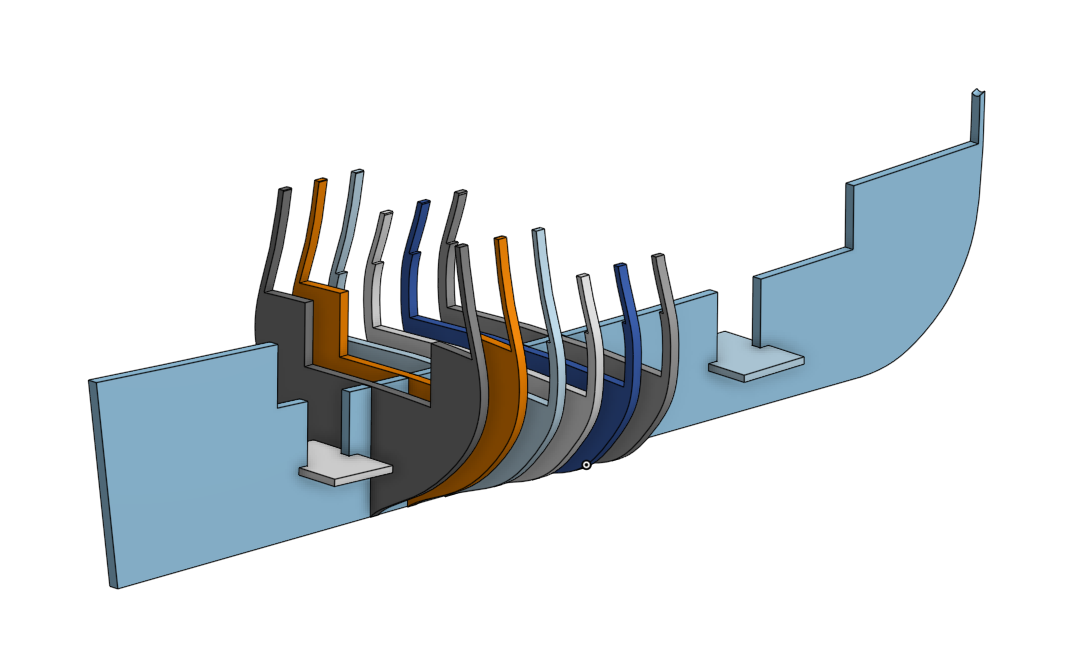
As it has been a couple weeks since I updated the log I figured I would give a minor update as to where things are at. I am still documenting a bunch of the research and have started work on the structural designs for the bulkheads. I will talk a bit more about what I am trying to achieve in a later post, but for now I figured I would share the current state of affairs on the design side. A few notes on this: This is very much a work in progress so if you see any problems feel free to point them out. I am unsure how much of the lower deck I want to show (I may do cutouts on the main deck or may not). So the current design reflects the maximum I might want to do. I am cheating a bit on the frames for the parts of the lower deck that are open. I made the frames a little thicker than they really should be to give more structural strength. This will not be possible to tell once the model is all put together.
-
The difference is anchor stock (#3) is symmetrical where top and butt (#1) is not.
-
Those look really good. Thanks for detailing the process. I will have to remember to come back to this whenever I get to making rings in a few years.
-
So is this just a single sheet of silk span with more paint on certain parts?
-
Fantastic work, those have got to be some of the nicer sails I have seen on this forum. You almost make me wish I had put sails on alert :). On the airbrush, I would imagine you should be able to run the wash through the airbrush and it would produce a more even coat. I suspect you were running too much through. That being said if the spray bottle does the job then why fix what isn't broken. The wire is a good idea and it really doesn't stand out at all. I wanted to put wire in my flags, but was worried it would be too visible. Now I have the issue that the ensign is drooping a bit more than I would like so next time I will probably try the wire or just go full tinfoil on the ensign. I do have one question which is not clear to me from your pictures. The reinforcing strip on the outside folded around the wire, is that a separate piece you glued on after cutting the sail to shape? All in all great job.
-
Those sails look fantastic Andrew, I really like the method you came up with. They really do give a lot of visual interest to the sails.
-
I have been digging around the forums and in my searches have found inconclusive answers to this question so I figured I would pose it to see if anyone is able to clarify this for me. This is what my general understanding of naming is: My question is what would the joint in the below plan be called? They have the scarfs of hook and butt, but appear to be simply two scarfed strakes. Could this also be called hook and butt? For clarification these two strakes show the upper deck clamps for Sphinx 1775.


-
USS Cairo by Zetec - FINISHED - 1/50 scale
Thukydides replied to Zetec's topic in - Build logs for subjects built 1851 - 1900
Congrats, she looks fantastic. -
Those oars look really nice. Also as usual I learned something. I always appreciate that you take the time to explain the why not just the what.
- 131 replies
-
- 2
-

-
-
- Medway Longboat
- Syren Ship Model Company
- (and 1 more)
-
I use mini files. If you look at my alert log I show some examples of this. In general I find PE often looks out of scale and so you need to file it a bit to get it to look right.
- 177 replies
-
- 3
-
-
- Sherbourne
- vanguard models
- (and 3 more)
-
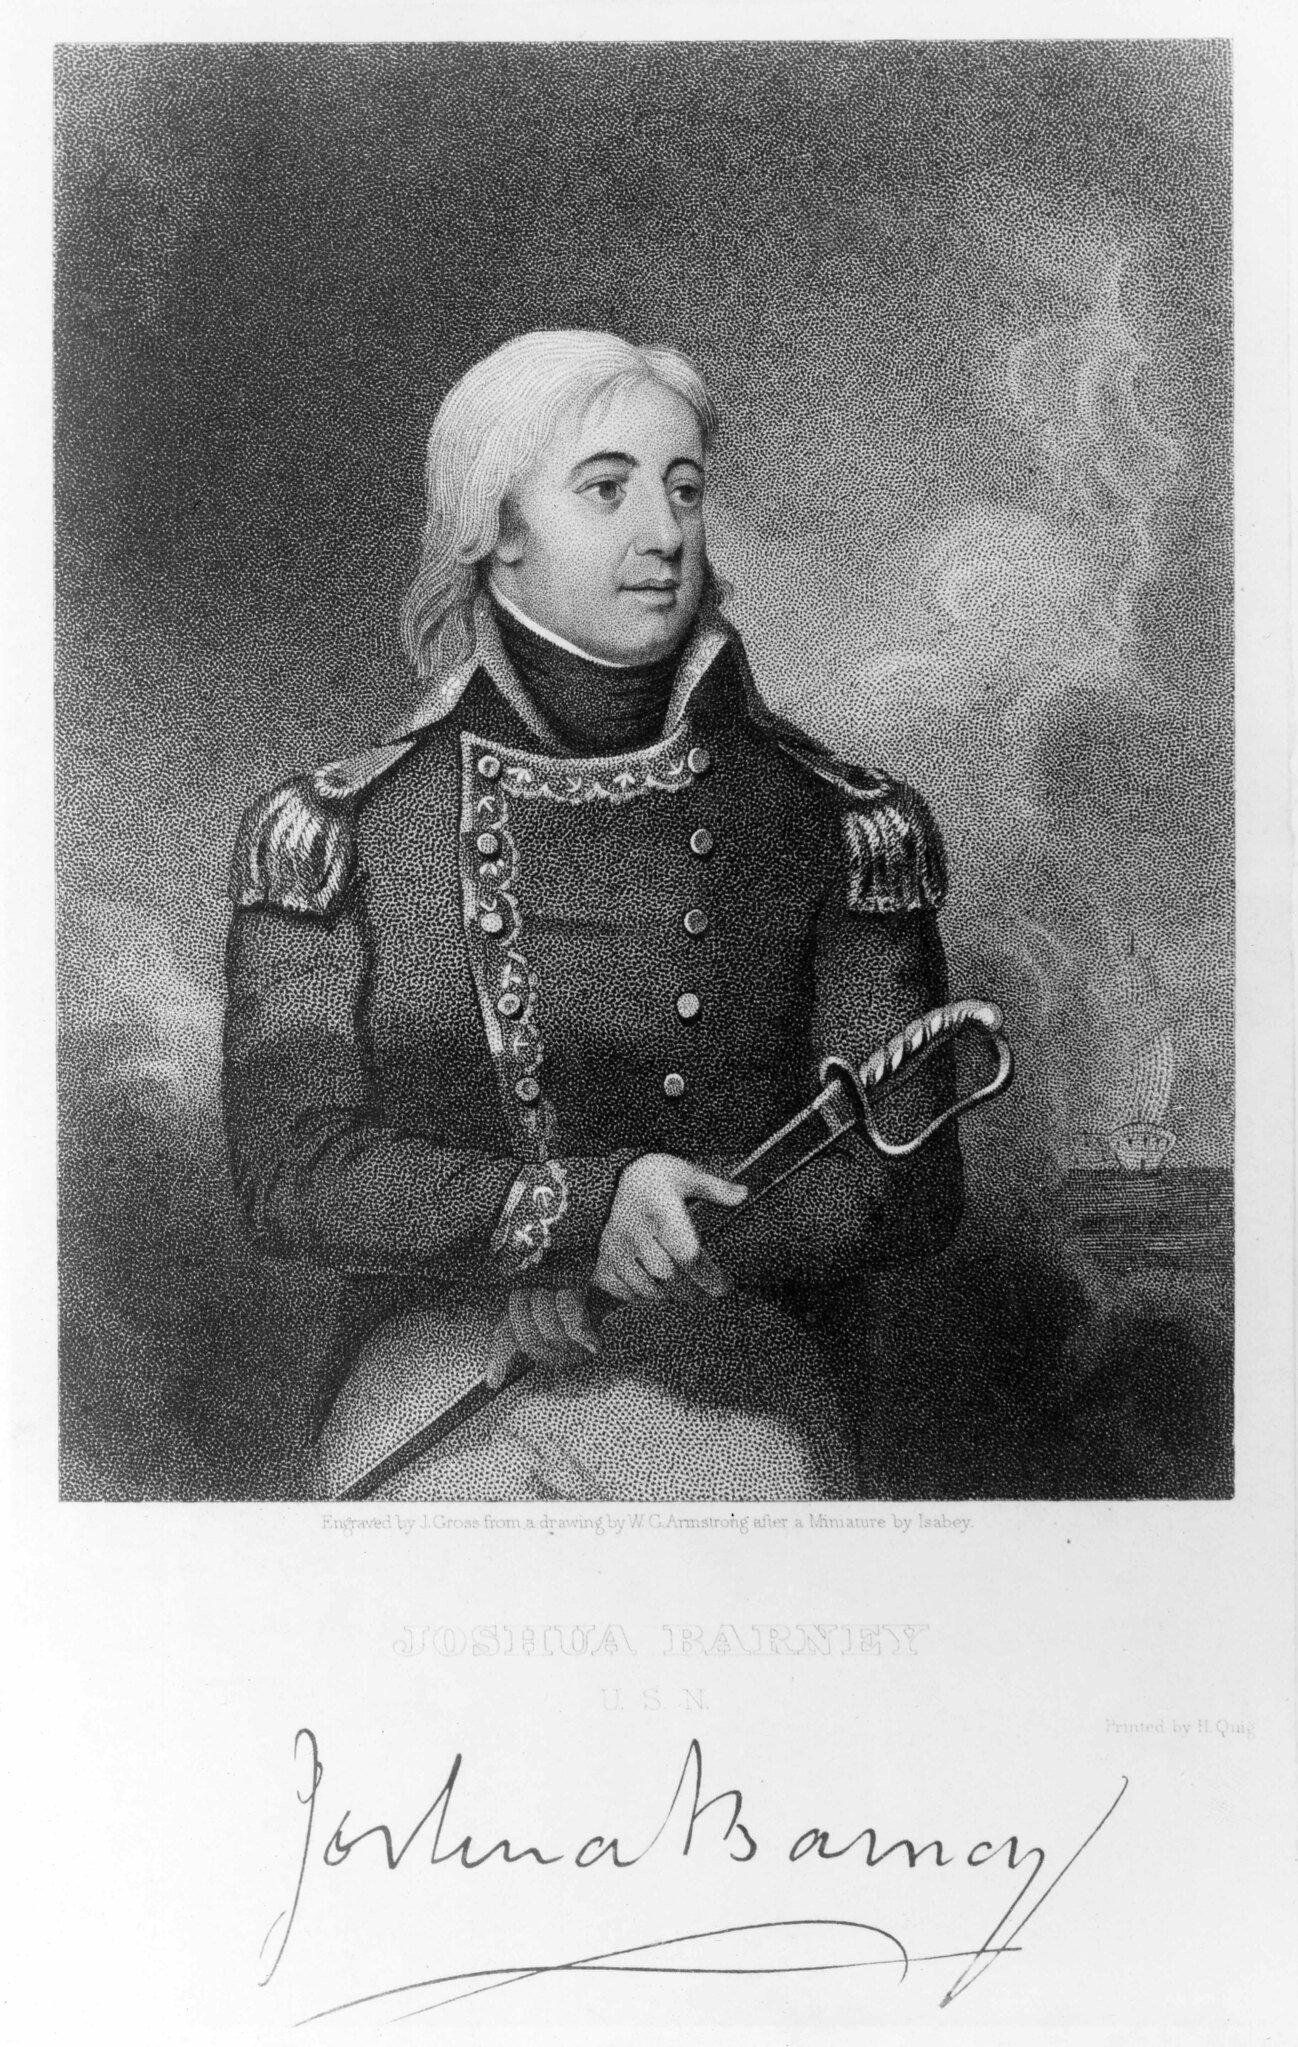
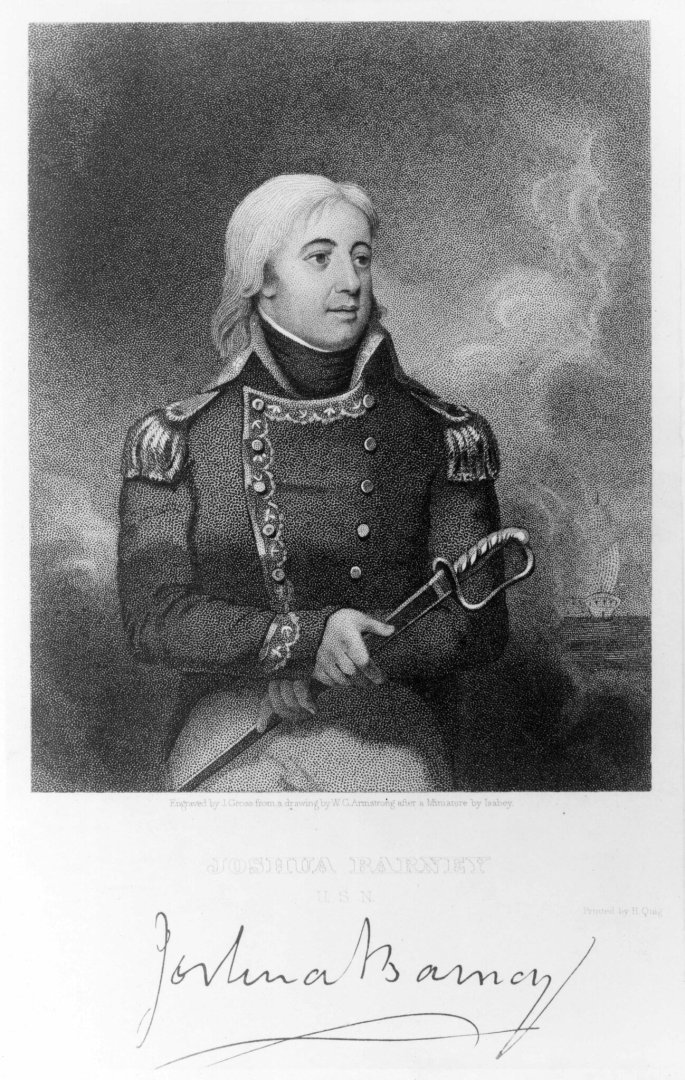
Log #4: Service History Part III - George Keith Elphinstone Continued From late 1776 until late 1779 and the siege of Charleston, Elphinstone continued cruising up and down the North American coast taking prizes at a remarkable rate. One of his most prolific periods was between September 1776 and and September 1777 when he captured at least 14 different prizes ranging from privateers to merchants. In January of 1777, Elphinstone and the Perseus captured the snow Thomas, a British ship which had recently been captured by the Continental brig Andrew Doria. This event is notable as the American prize officer in charge of the Snow, Lieutenant Joshua Barney, later had a memoir written which recounted the events providing some insight into Elphinstone’s character. Due to the limited number of crew available, Barney convinced a number of the prisoners to help make up the complement of his crew. A few days later a British warship, the Perseus, was seen on the horizon and it was at this point the prisoners became mutinous and refused to assist in setting sails until Barney shot one of them through the shoulder. However, the delay allowed the Perseus to close the distance and the Thomas was boarded and captured. Upon being transferred over to the Perseus, the sailor who had been shot by Barney complained to Elphinstone regarding Barney’s actions. Elphinstone, without bothering to even enquire of Barney as to his version of events, chastised the sailor and “declared that the latter had done no more than he would himself have done in a similar situation.” Joshua Barney National Museum of the United States Navy, NH 56818 This problem of desertion and insubordination appears to have been quite common for both sides of the conflict. Later in the same year, 10 men who had previously been in the service of the Continental Forces deserted the Perseus taking with them an 8 oared cutter. Despite Elphinstone’s attempts to capture them, they made it to shore at Annapolis and were welcomed by Major John Fulford who requested in a letter to his superior, Governor Thomas Johnson, if he could keep the boat and pay the deserters for it. Elphinstone’s most significant prize of his North American career was the capture of the 20 gun French ship La Therèse in November 1779 off Cape Charles. The La Therèse proved a difficult opponent and it took 40 minutes of action in which time she “did considerable damage to the masts, sails, and rigging of the Perseus before she struck.” In late 1779, the decision was made that the time had come for the British to capture the port of Charleston. A barrier to the northward progression of British success in Florida and Georgia, the city was protected from the sea by a sand bar and heavily fortified islands guarding the harbor. Alonzo Chappel, The Siege of Charleston Anne S.K. Brown Military Collection. Brown Digital Repository. Brown University Library. Elphinstone was dispatched in advance of the campaign to procure galleys and transports for the assault as well as procuring the necessary supplies to support the seaborne invasion force. Once the attack began in earnest, Elphinstone lead a force of four hundred and fifty seamen ashore to support the attack and serve as the line of communication between the army and the fleet. The city fell on the 12th of May and as a reward for his efforts, Elphinstone and the Perseus were selected to carry Sir Andrew Hammond with the dispatches announcing the fall of Charleston back to England. Perseus was paid off on the 17th of July, 1780 and Elphinstone was given command of Warwick (50). Elphinstone, who is perhaps best known in modern times for his appearance in the Jack Aubry novels as Lord Keith, went on to have a very successful career becoming one of the more decorated and famous naval officers of the Napoleonic period. Notably, it was under his command that Napoleon was transferred from the Bellerophon to the Northumberland for his exile to St. Helena in 1815. He retired having reached the rank of Admiral and passed away on the 10th March 1823 in Tulliallan Castle in Scotland.
.png.c1c5f8da9629457a3474b31c6c121600.png)
-
Those joints look really clean, great job.
-
The rigging is looking really nice. It holds up well in the close up pictures. I would say on average I also had to redo about 50% of the rigging I did.
-
Another wonderful SIB. I think it is you basing that really sets it apart. I love the way the whole thing is integrated together.
- 235 replies
-
- 5
-
-
-
- Banshee II
- Bottle
- (and 1 more)
-
Fantastic work BE. I do have a question on the windlass. Were these on all longboats or only the larger ones?
-
Unfortunately I don’t have much wisdom to offer here, this is my first time using this small PE. I just used thin super glue and it didn’t work out as well as I would have liked. If you look closely you will see in a few of the joints there is indeed a bunch of excess glue. The main problem I found was getting it right the first time. If you have to redo the joint several times there is inevitably a buildup.
-
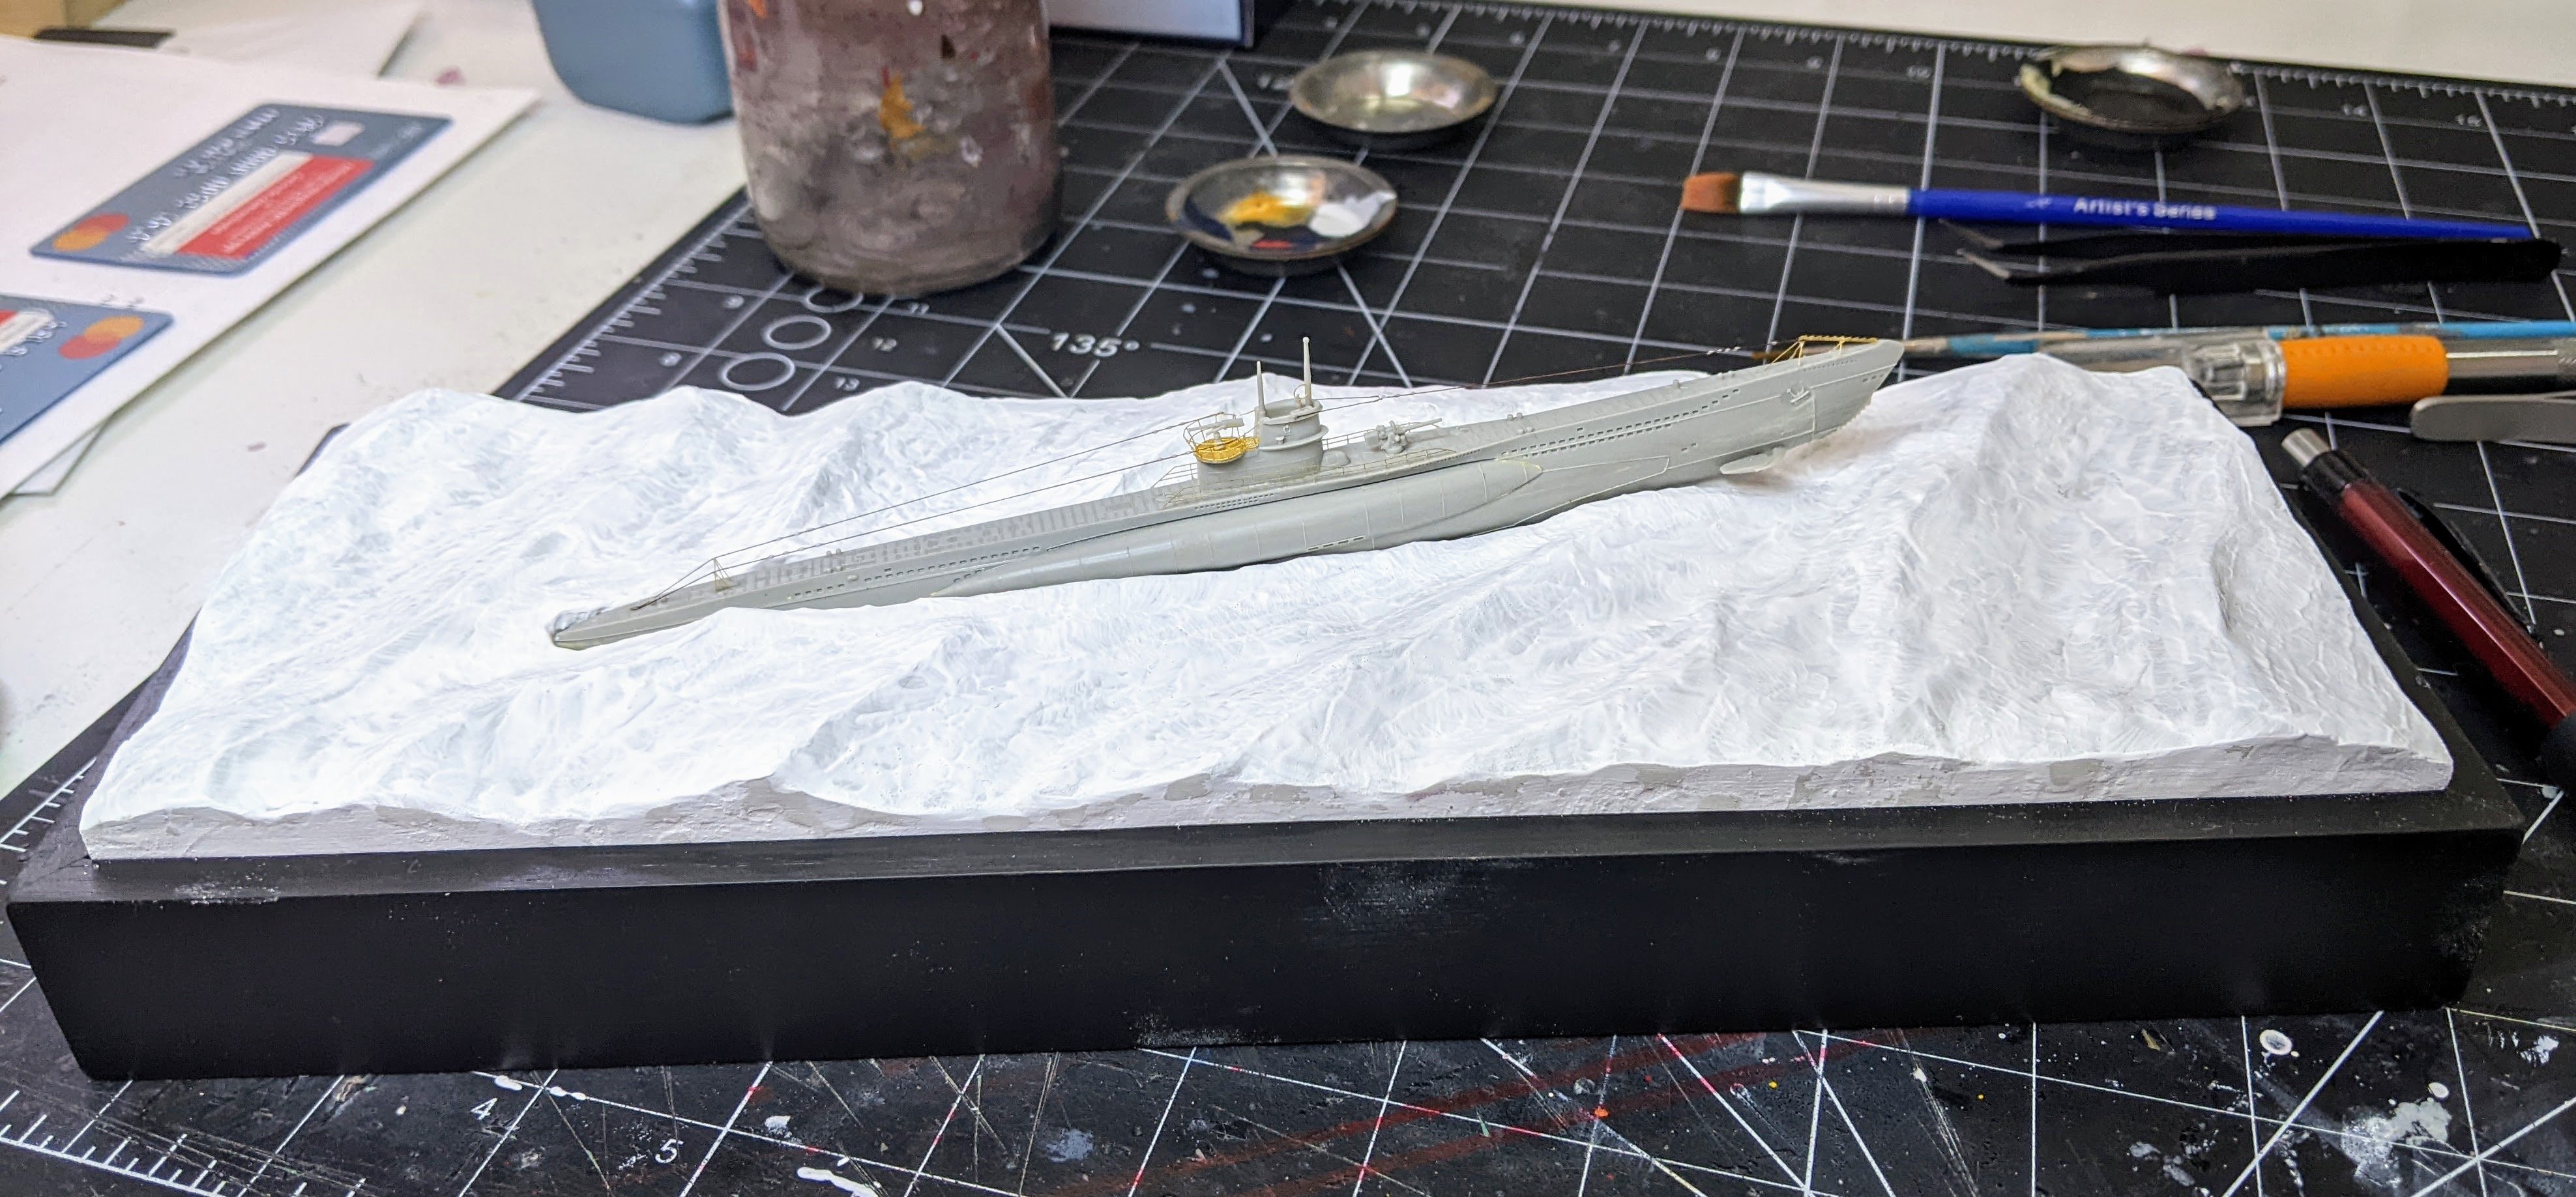
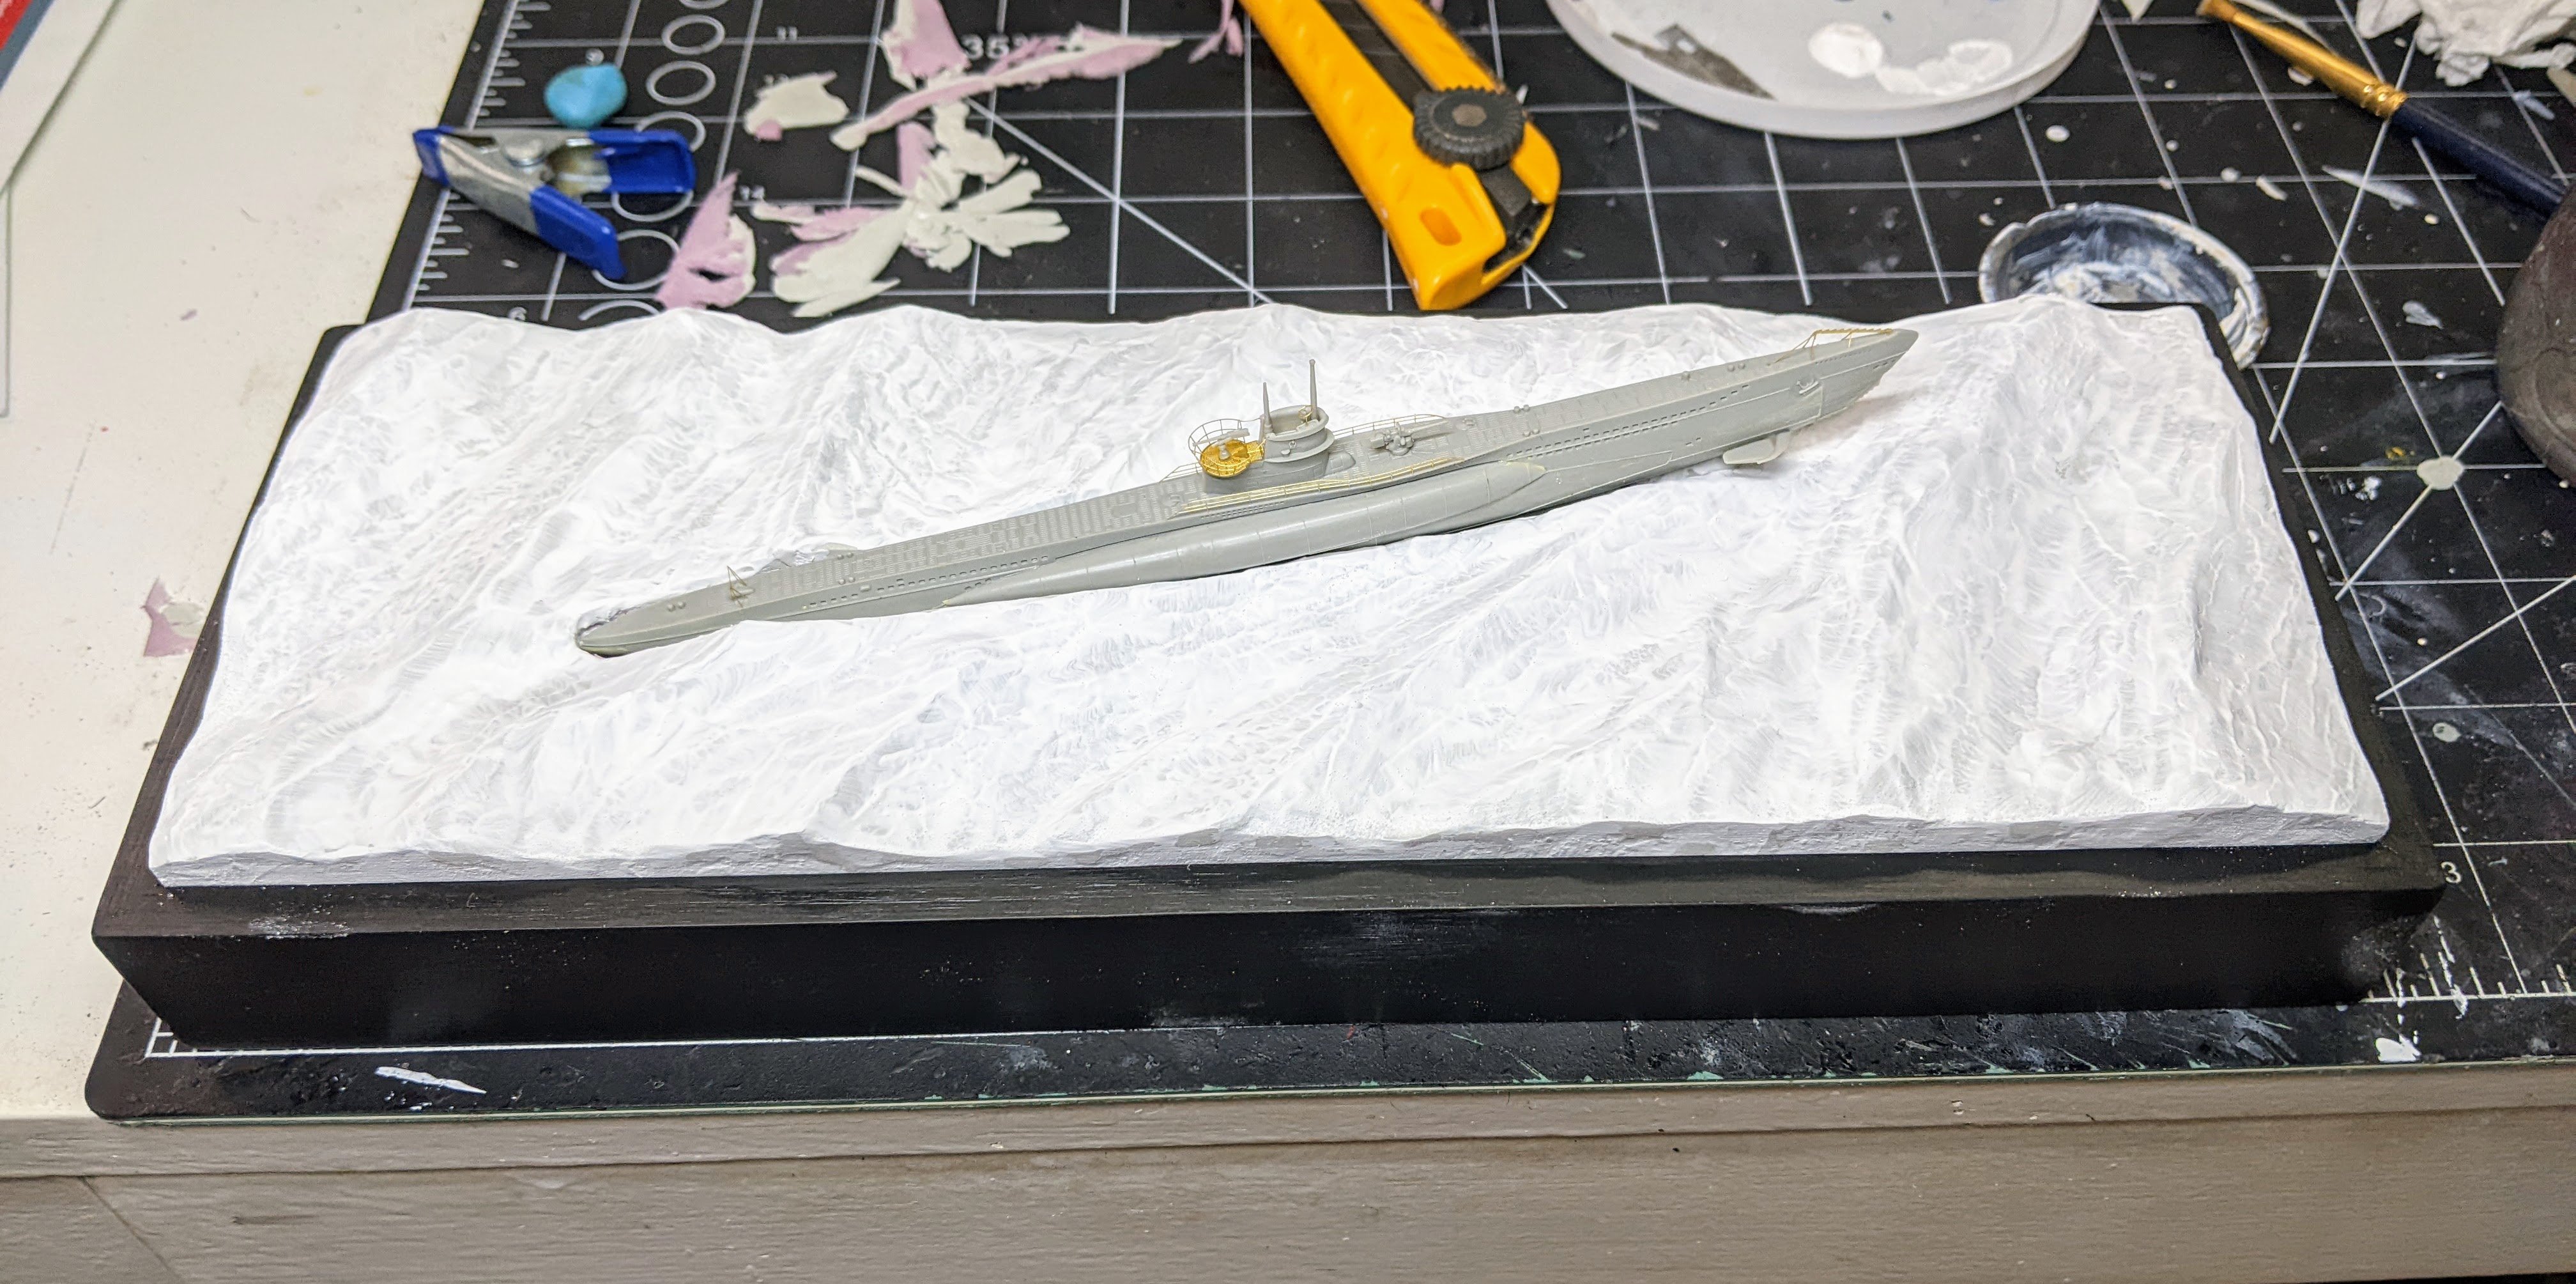
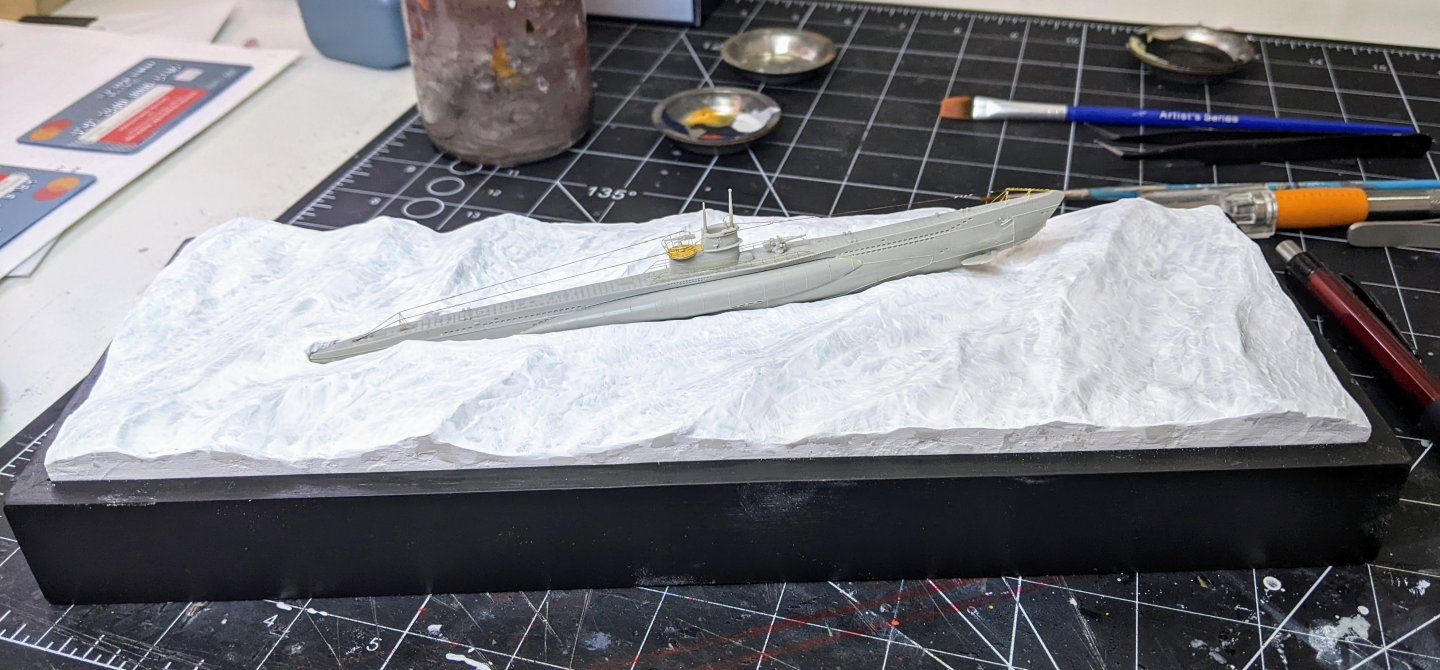
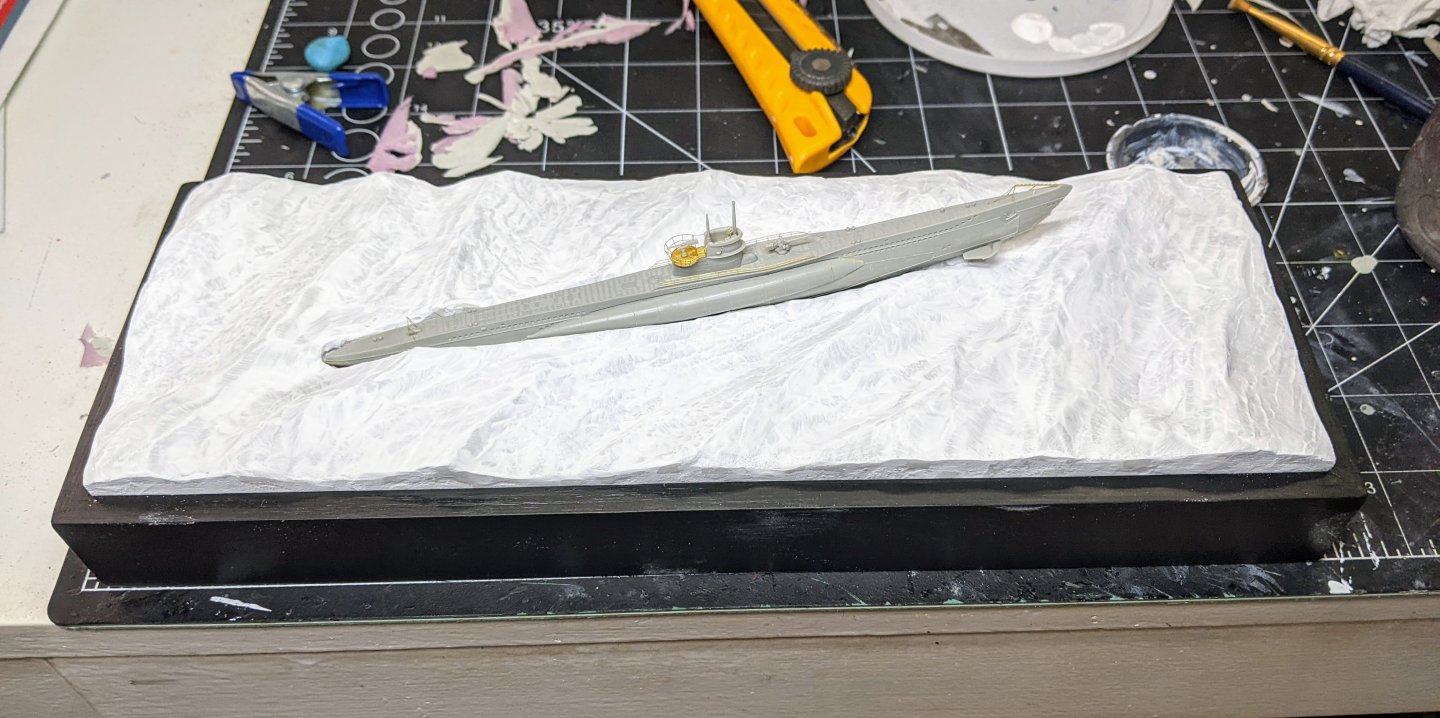
Final update before painting. I went back in and did some more touchups with gesso accenting waves and fixing minor issues I didn’t catch with the first pass. I also added the cables using 10/0 fly tying thread and then added small mod podge droplets with a toothpick to simulate the connectors on them.
-
@mikegr's suggestion worked really well. I was able to cover up all of the seams and also add some texture to simulate the smaller waves. Next up I need to attach the cables and then on to painting.
- 54 replies
-
- 10
-
-
Congrats, that thing is so huge, I never really appreciated how big till I saw these most recent pictures.