

Stevinne
-
Posts
303 -
Joined
-
Last visited
Content Type
Profiles
Forums
Gallery
Events
Posts posted by Stevinne
-
-
-
I went to the neighborhood thrift store and picked up an old plug-in percolator-type coffee pot. I believe that's what Frank Mastini recommended in "Ship Modeling Simplified." The only thing I have to do is make sure it's unplugged when I'm done using it.
- Canute, mtaylor and thibaultron
-
 3
3
-
4 hours ago, Roger Pellett said:
How about a model of a Sunfish sailboat?
Last night I finished reading SECOND WIND by historian Nathanael Philbrick, a quick read about his quest after a lapse of 17 years to compete in the North American Sunfish Class Sailboat Regatta.
Mr Philbrick a noted American historical writer was a champion Sunfish sailor as a teenager in the 1970’s who went on to become a College All American Sailor.
I bought the book because my father and I built a Sunfish from a kit back in the 50’s before they went over to the dark side (fiberglass). They were and still are great little boats- pure sailing fun.
Roger
Going to have to read that. I've read a lot of his books, I didn't know he's a sailor and I don't think I've ever read anything about sunfish, though I've had one in some driveway or the other since I was a kid.
- mtaylor and Roger Pellett
-
2
-
-
Just jumping on to this log now. Beautiful work. I'm building the Roter Lowe and had been concerned about the paper decorations. But yours look great.
-
2 hours ago, rcweir said:
I have a Badger 150 that has served me well (when I've needed it) for many years. When I got it I was living in an apartment and the noise of a compressor was unacceptable, so I started with CO2 and have stuck with it. CO2 is silent and there are no concerns about moisture in the supply, though I don't think this is the cheapest route for a heavy user. However, since there are often years in between my uses, that hasn't ever mattered much. I hate the racket from compressors!
I use acrylics (Tamiya) exclusively and completely disassemble and clean the brush after every single use. Trying to shortcut cleaning has never worked for me.
I use acrylics, too, and what rcweir said about cleaning is very true. When I have problems with my airbrush, it's usually because I got lazy and didn't clean enough. Whenever I'm done, I'll run straight water through the airbrush to clear out the paint and then disconnect the supply, turn it upside down, and blow out whatever water remains. That's usually good enough when working with multiple colors, but when I start a new project, I usually take mine apart, clean it pretty thoroughly and start anew.
- lmagna, Canute, Ryland Craze and 1 other
-
4
-
I've had a Badger for about 20 years now, I believe it's a Model 155. The thing is well made, is easy to clean and usually allows me to do whatever it is I want to do with it. It's also easy to take apart and reassemble when I want to give it a really good cleaning. I think it's one of Badger's relatively inexpensive models. Got mine, along with a compressor, from Model Expo. Both have held up very well. I would recommend getting a compressor. Prior to getting the Badger I'd tried using an inexpensive plastic airbrush with cans of air and didn't have much luck and really couldn't figure out how to clean it.
-
I just recently ordered one of their small torpedo boats and their PC-461 subchaser. I haven't built either yet, but they came quickly and the quality of the moldings seems good with lots of detail molded on, though there is a little flash. I've never done resin before, and these looked like good places to start. At about $25 for each kit, though they are small, they seem like a good deal, since they do come with the photoetch you need. Let me know if you'd like pictures of the unbuilt kits.
-
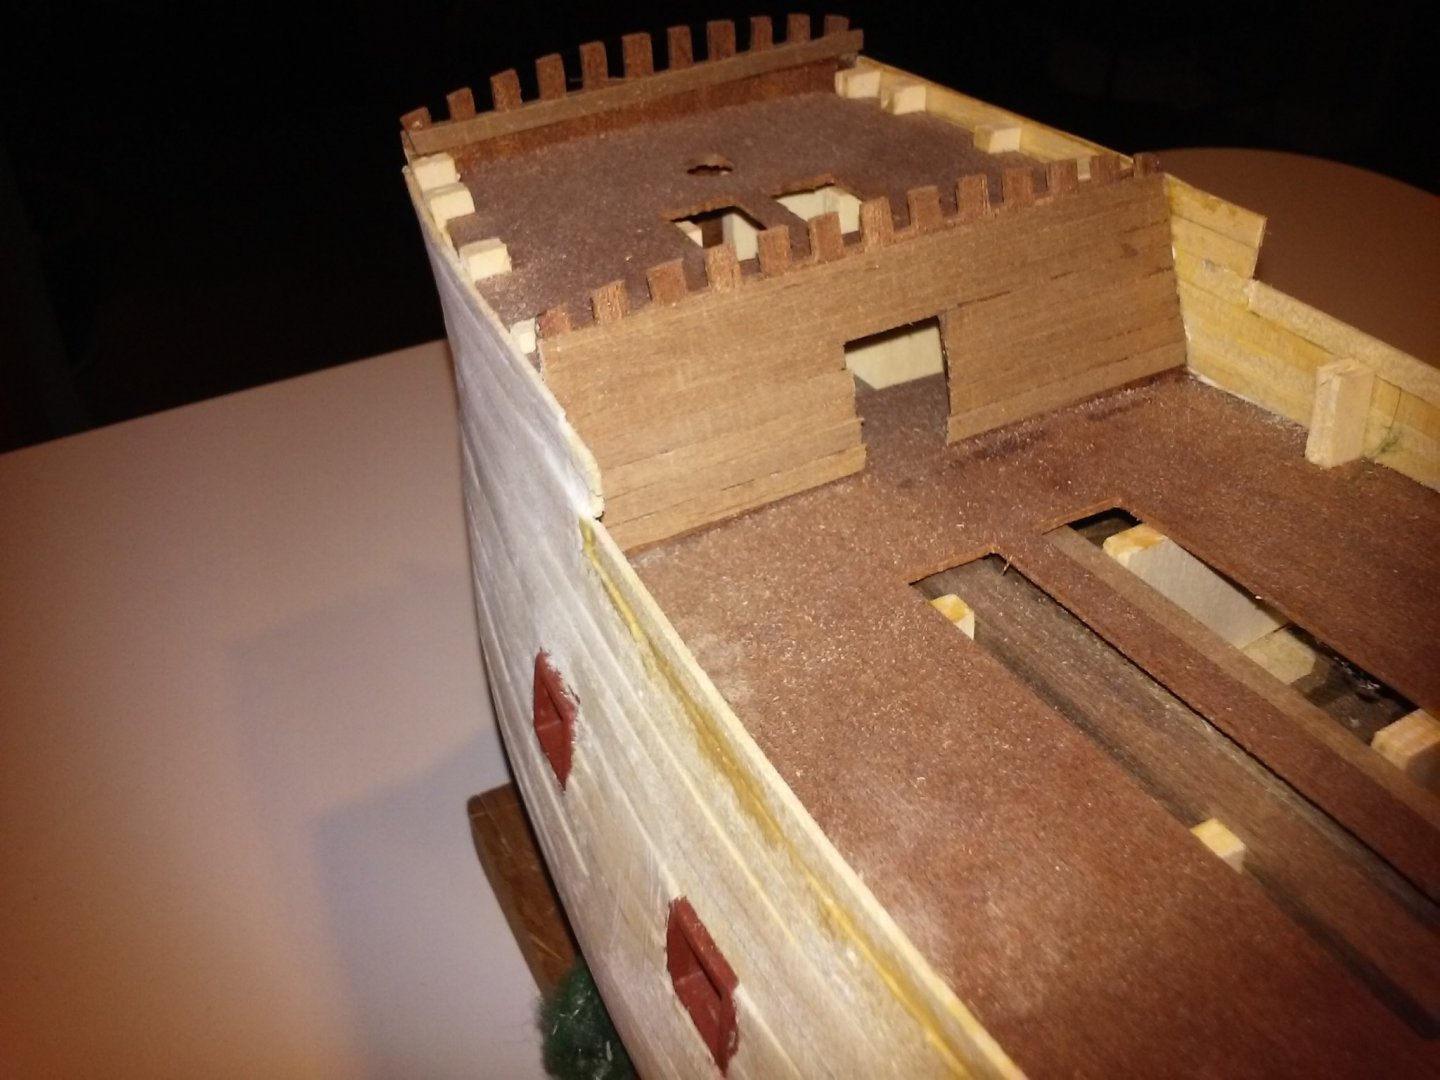
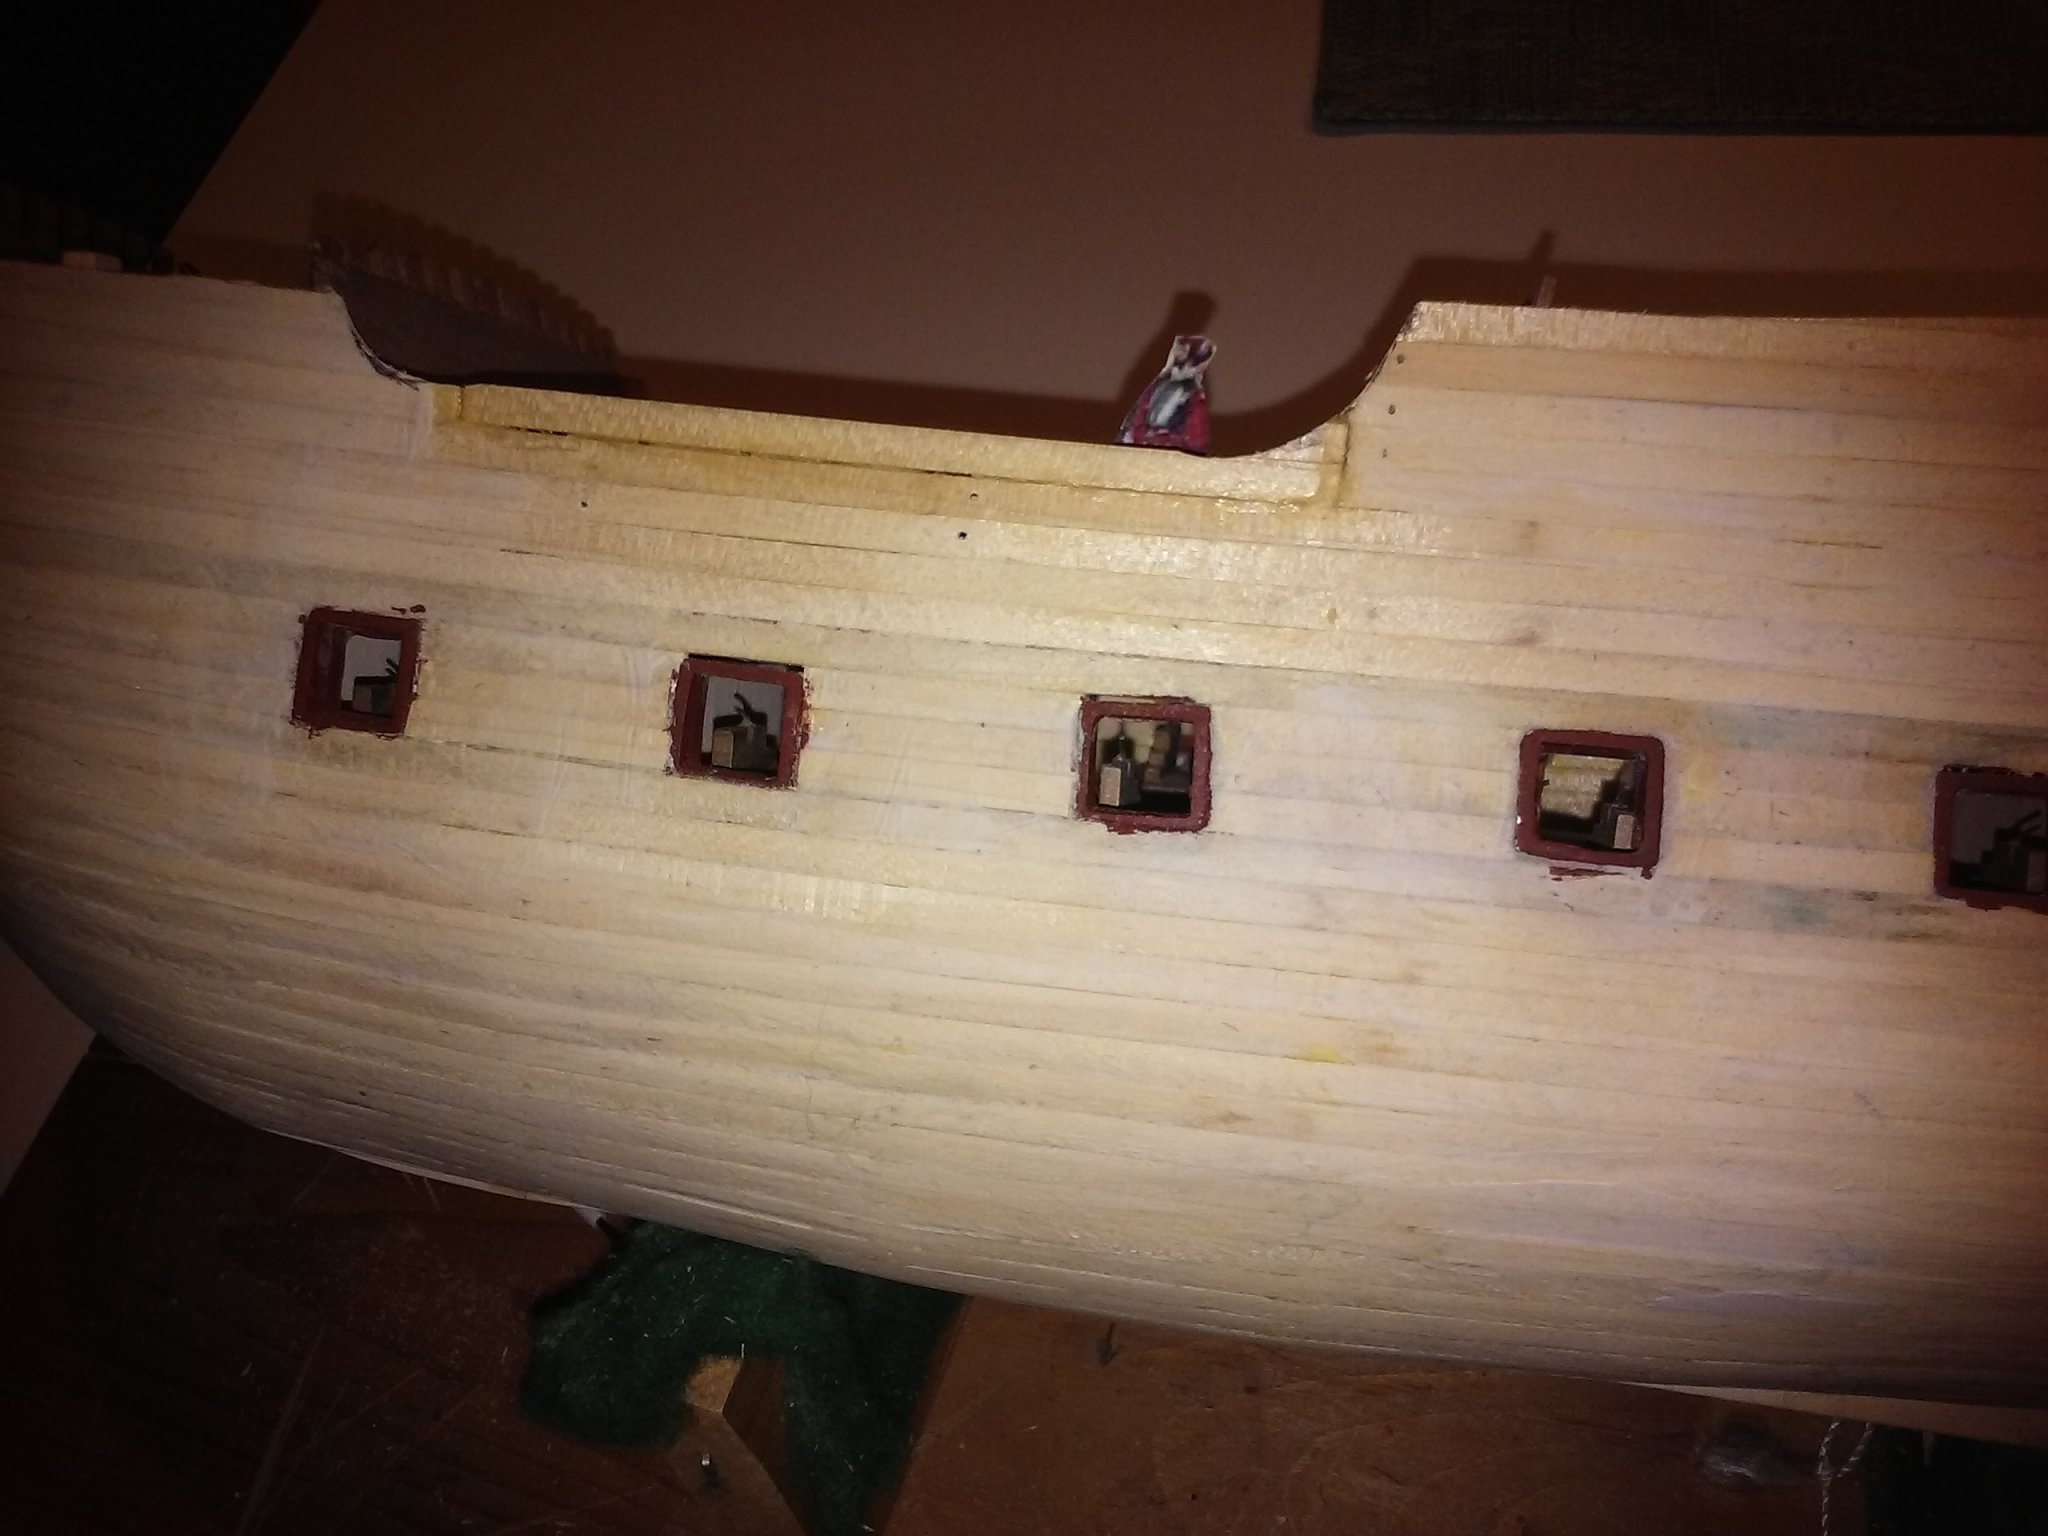
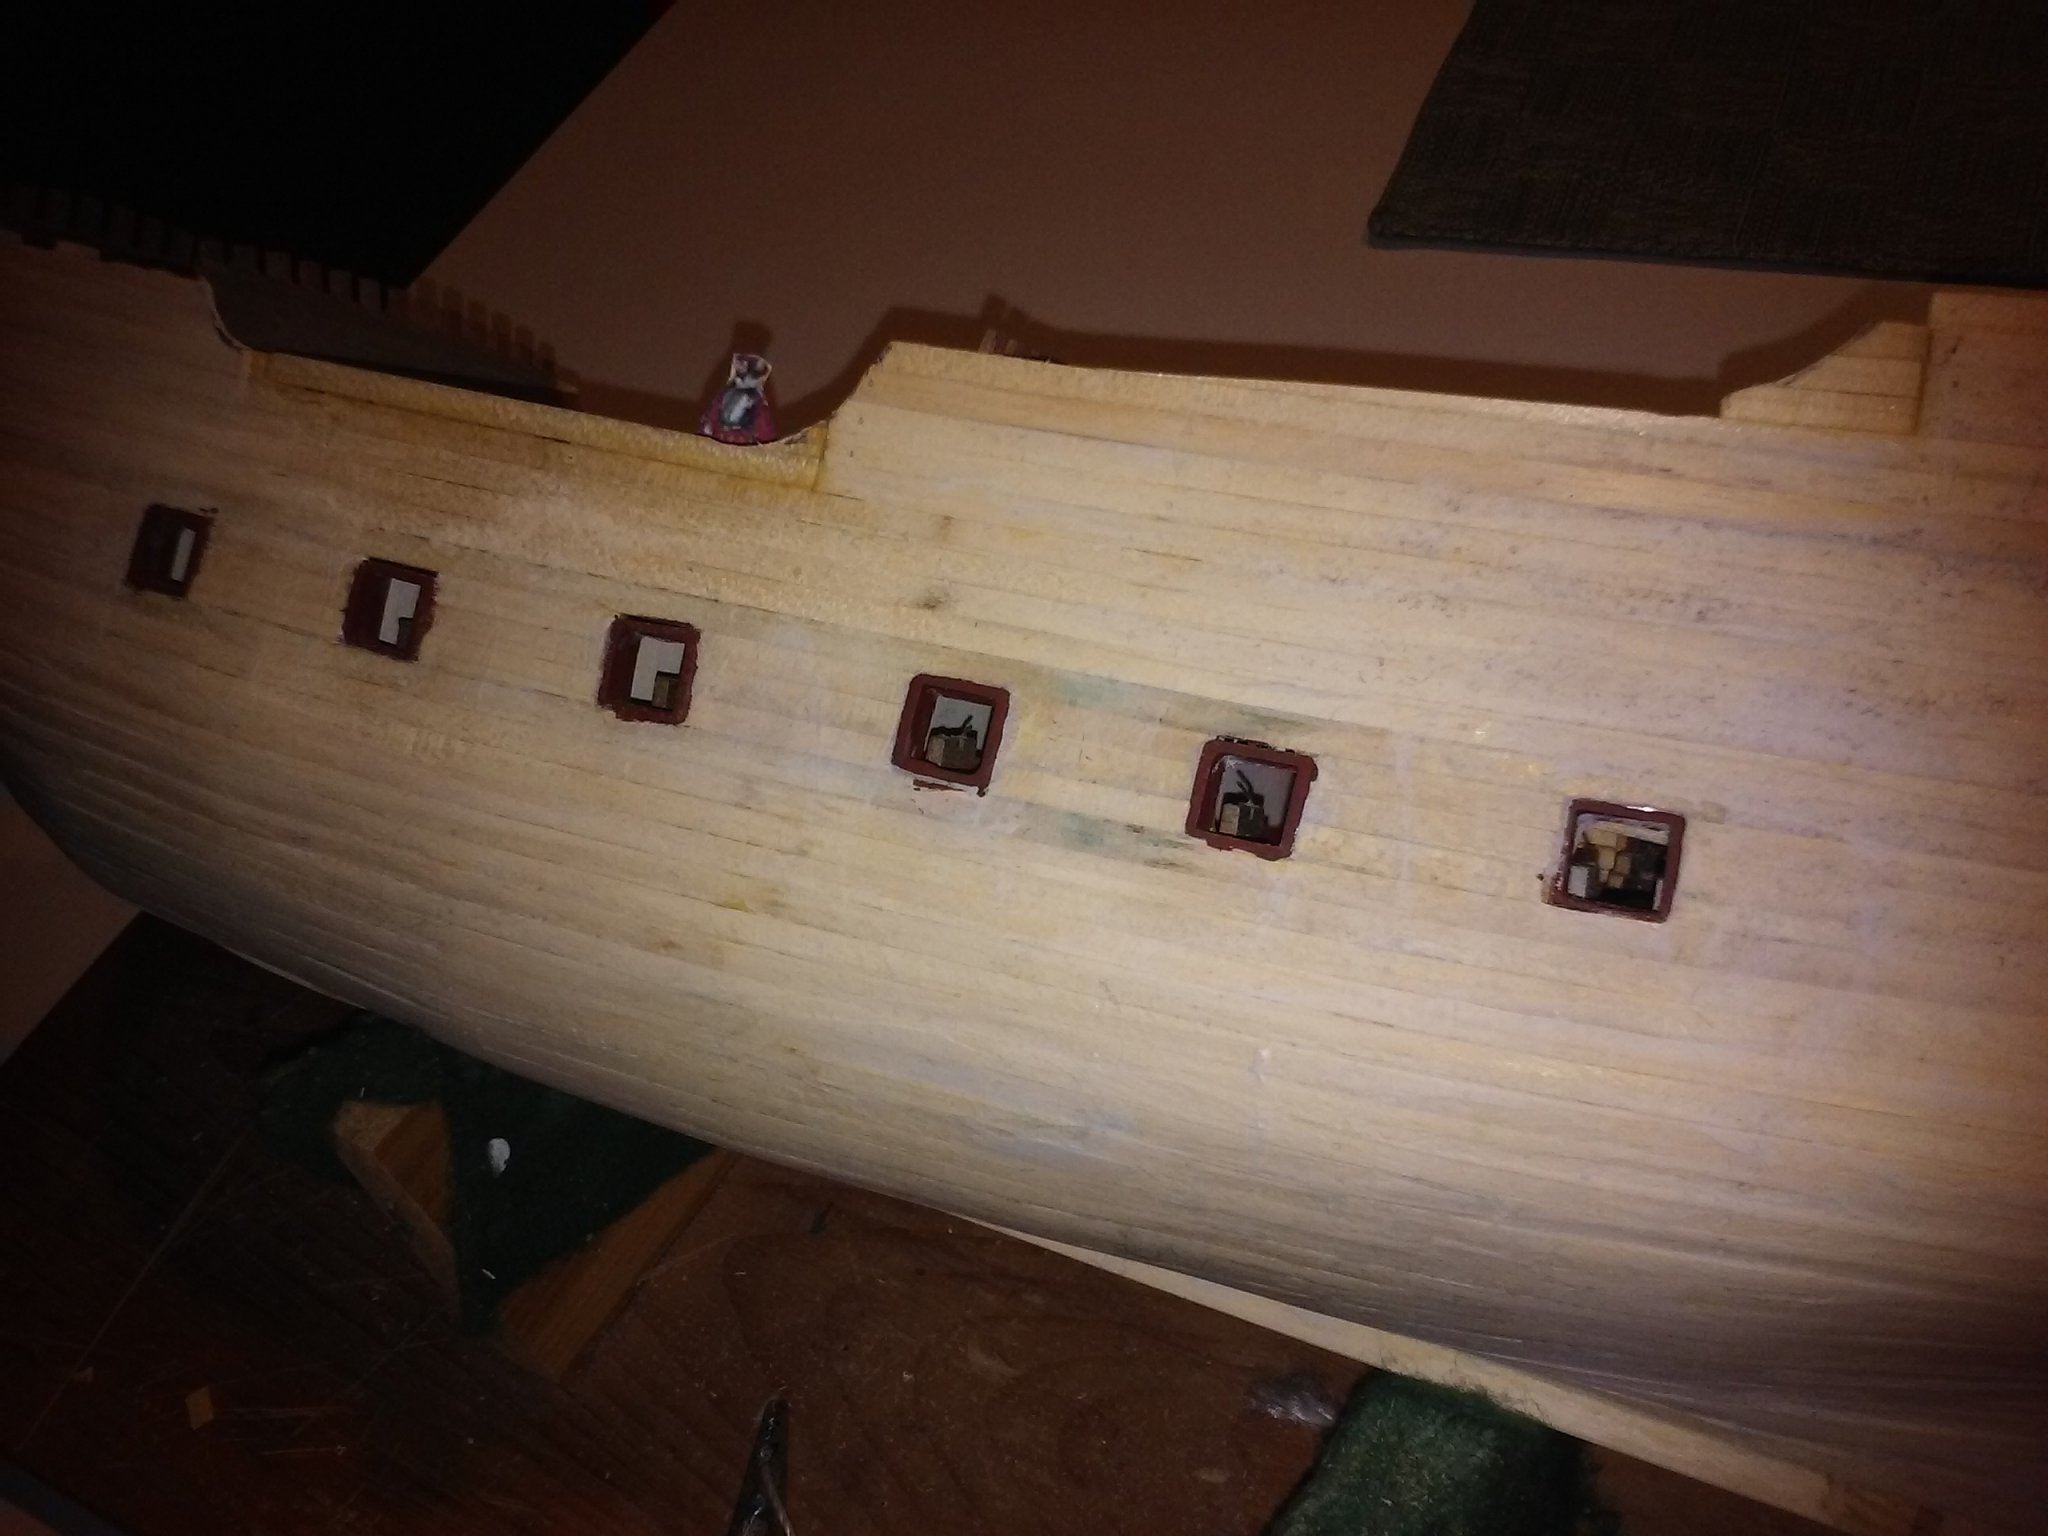
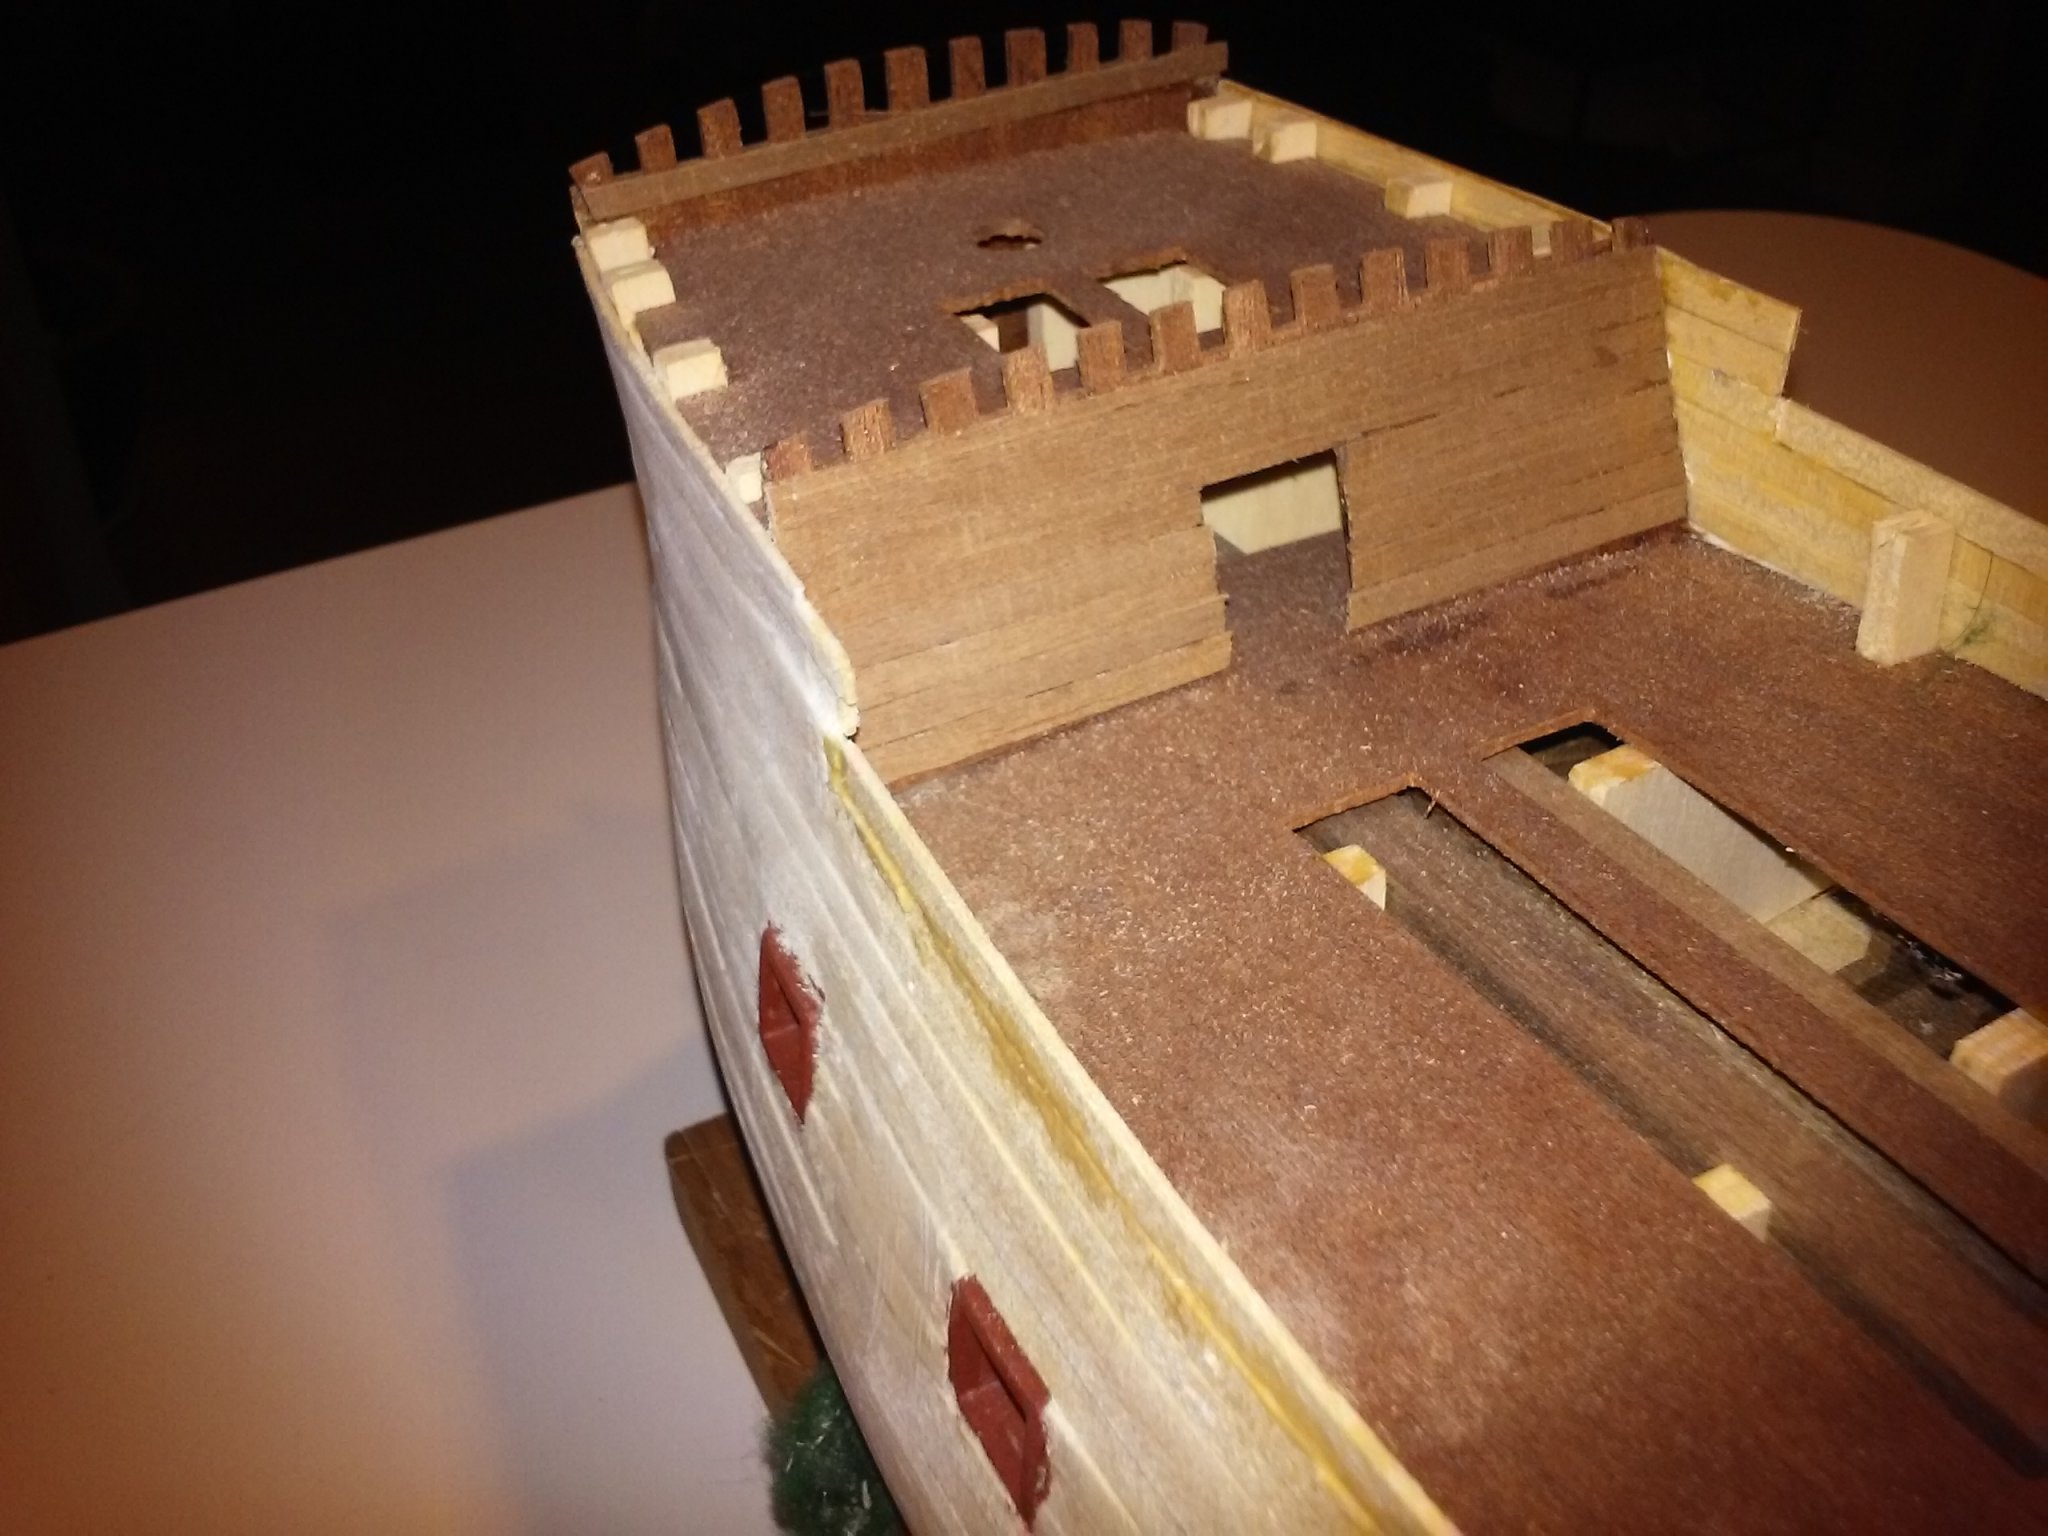
Going a little covid-stir-crazy, so broke out the Dremel tool today and filed the bulwarks to the curved outline from the plans. Fairly easy to do, though the Dremel quickly takes wood away and I have one divit that I will need to fill when I sandwich it between two layers of second planking.


- EJ_L, GrandpaPhil and BobG
-
3
-
On 7/6/2017 at 10:03 AM, Jean-Pierre said:
Oh, just a little detail: the name Roter Löwe is German, so I suppose the ship is from one of the German states, and not Dutch (from the Netherlands)
Jean-Pierre, you are right. The ship history that came with the kit said she was a ship used by the Elector of Brandenburg. She was built in the Netherlands and then sold to him. That's why I called it Dutch. It looks like she served in the Baltic around Konigsberg.
- EricWilliamMarshall and EJ_L
-
2
-
On 10/10/2017 at 1:14 AM, zappto said:
Hi, this is nice work indeed, will you cover stern on the second planking?
Zappto, Sorry for not responding sooner. Yes, the stern gets a covered during the second planking. I will do it first, and then the rest of the hull. This way, the ends of the stern planking will be covered by the ends of the hull plank, which should make it look better when viewed from the side.
- EJ_L and EricWilliamMarshall
-
2
-
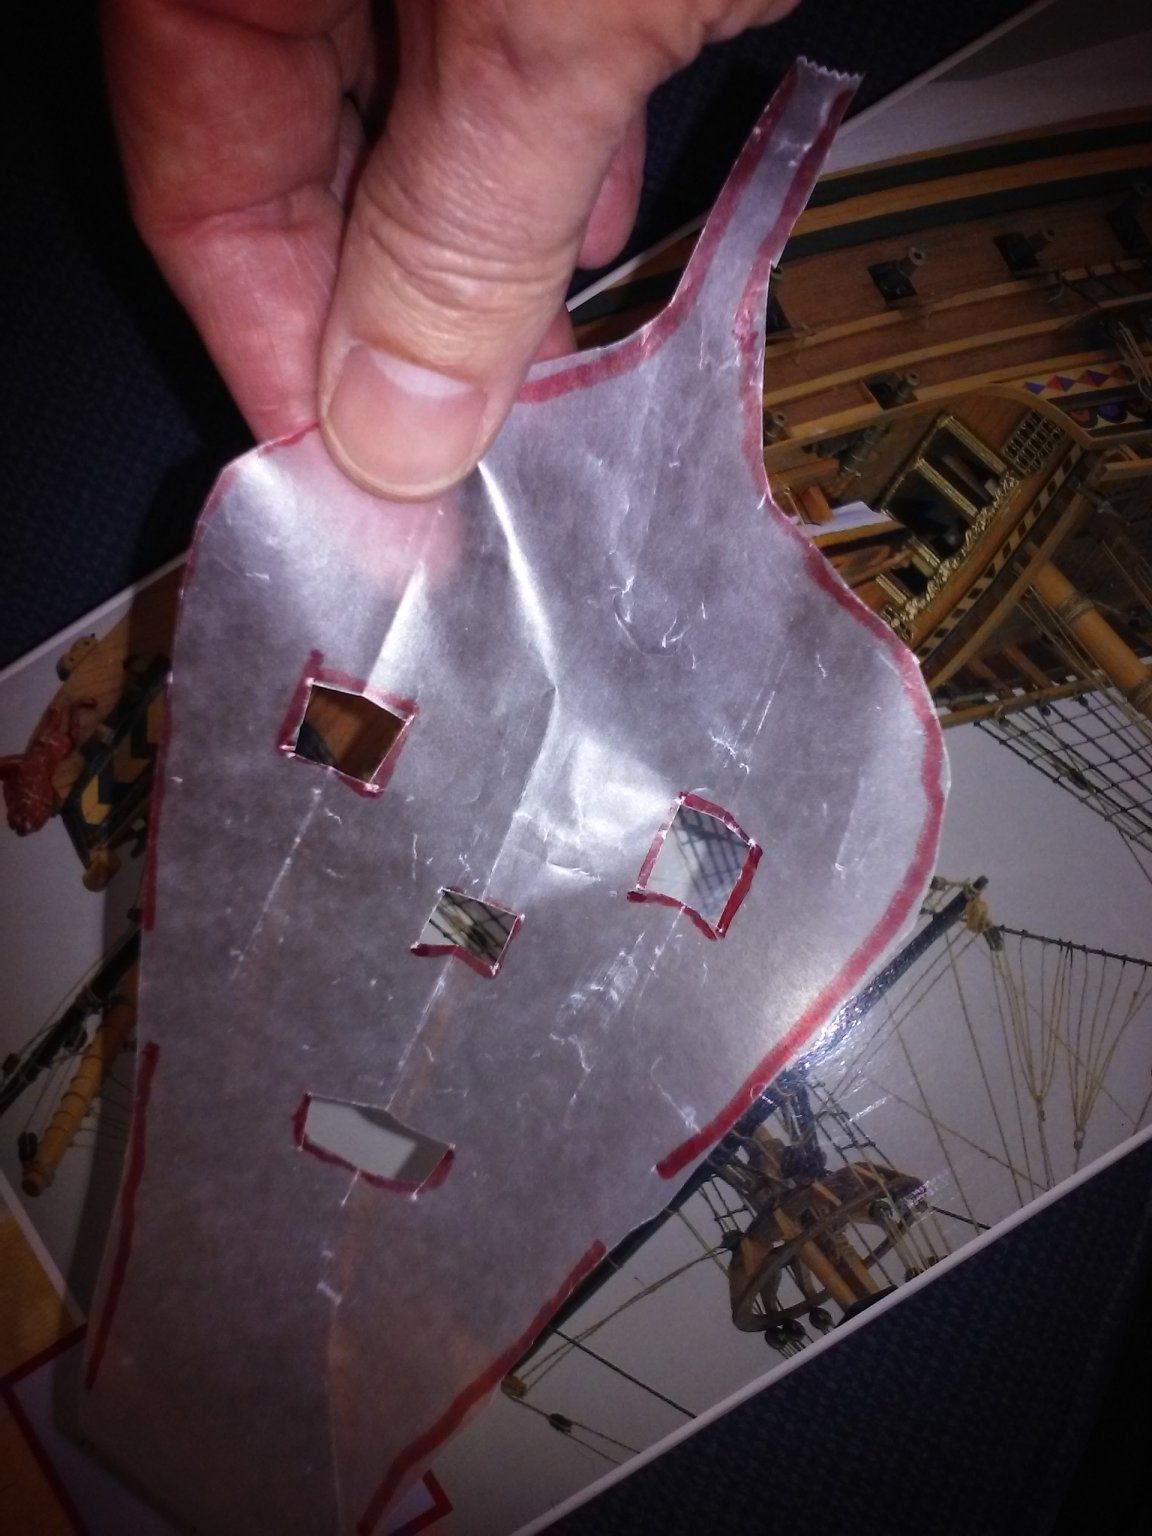
I figure since I am moving forward, I'll post some pictures of the jig I used to determine the angle of curve for the bulwark. My wife saw me cutting out the stern piece and wanted to know why I was making a wax paper jack-o-lantern.

-
7 hours ago, EricWilliamMarshall said:
That is so true!!! I imagine tuba players have the same issue. I’m much better at my ‘quieter’ instruments. But only due to my desire to stay married...
I also play the tin whistle and recorder and have been threatening to learn the bagpipes, but had the same fears about maintaining my marital status. This year for Christmas I got an electronic bagpipe chanter that allows you to play while wearing headphones. I think it was a subtle comment on my playing.
- EJ_L and EricWilliamMarshall
-
2
-
9 hours ago, EricWilliamMarshall said:
And for the record, from the ‘outside’, the build looks great! I look forward to more. I’m having a challenge to get time to work on my build as well, in this time of plague. On the the other hand, I’ve never had a spot to hang my plans. I did see another build log where an easel was used for the plans and another who made a frame from PVC pipes for the plans. As fate would have it, I have a banjo - I’m gloriously awful at it.
")
The problem, I find, with being bad at banjo is that the things are so godawful loud. I can play my electric guitar with the headphones on and not bother anyone. I need to close the door when I pick up the mandolin, but it can also be played pretty softly. But the banjo? That sends folks running for the hills when I attempt it.
- EricWilliamMarshall and EJ_L
-
2
-
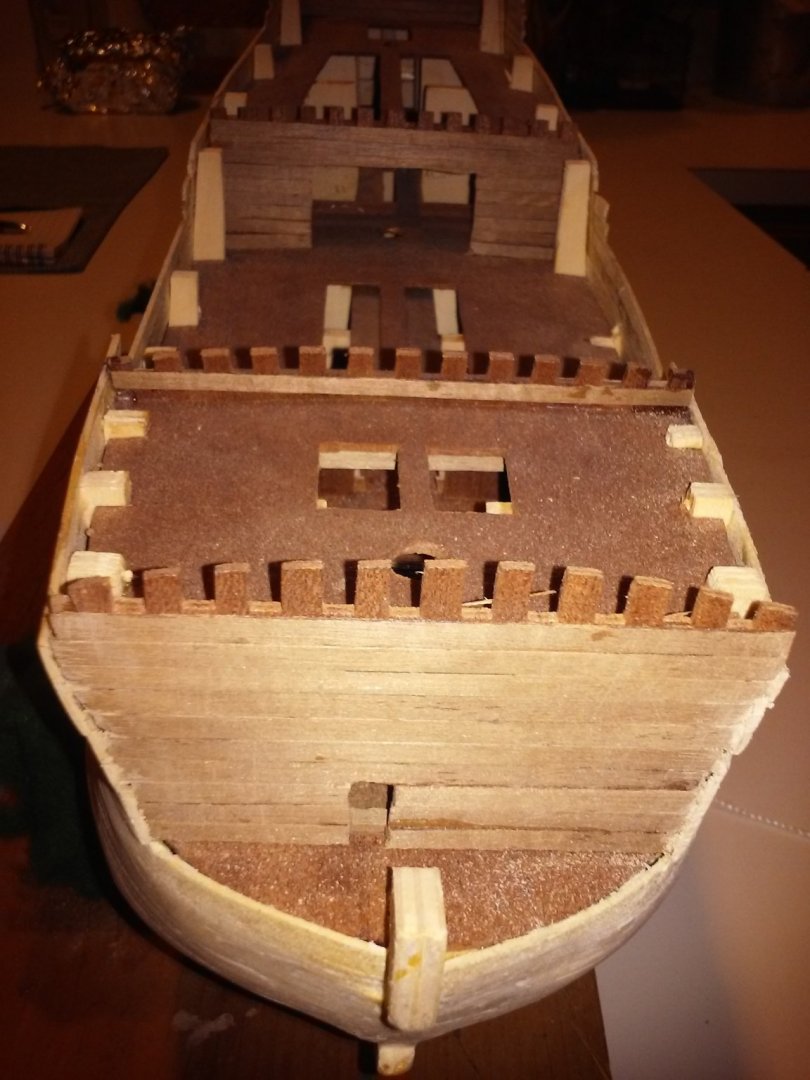
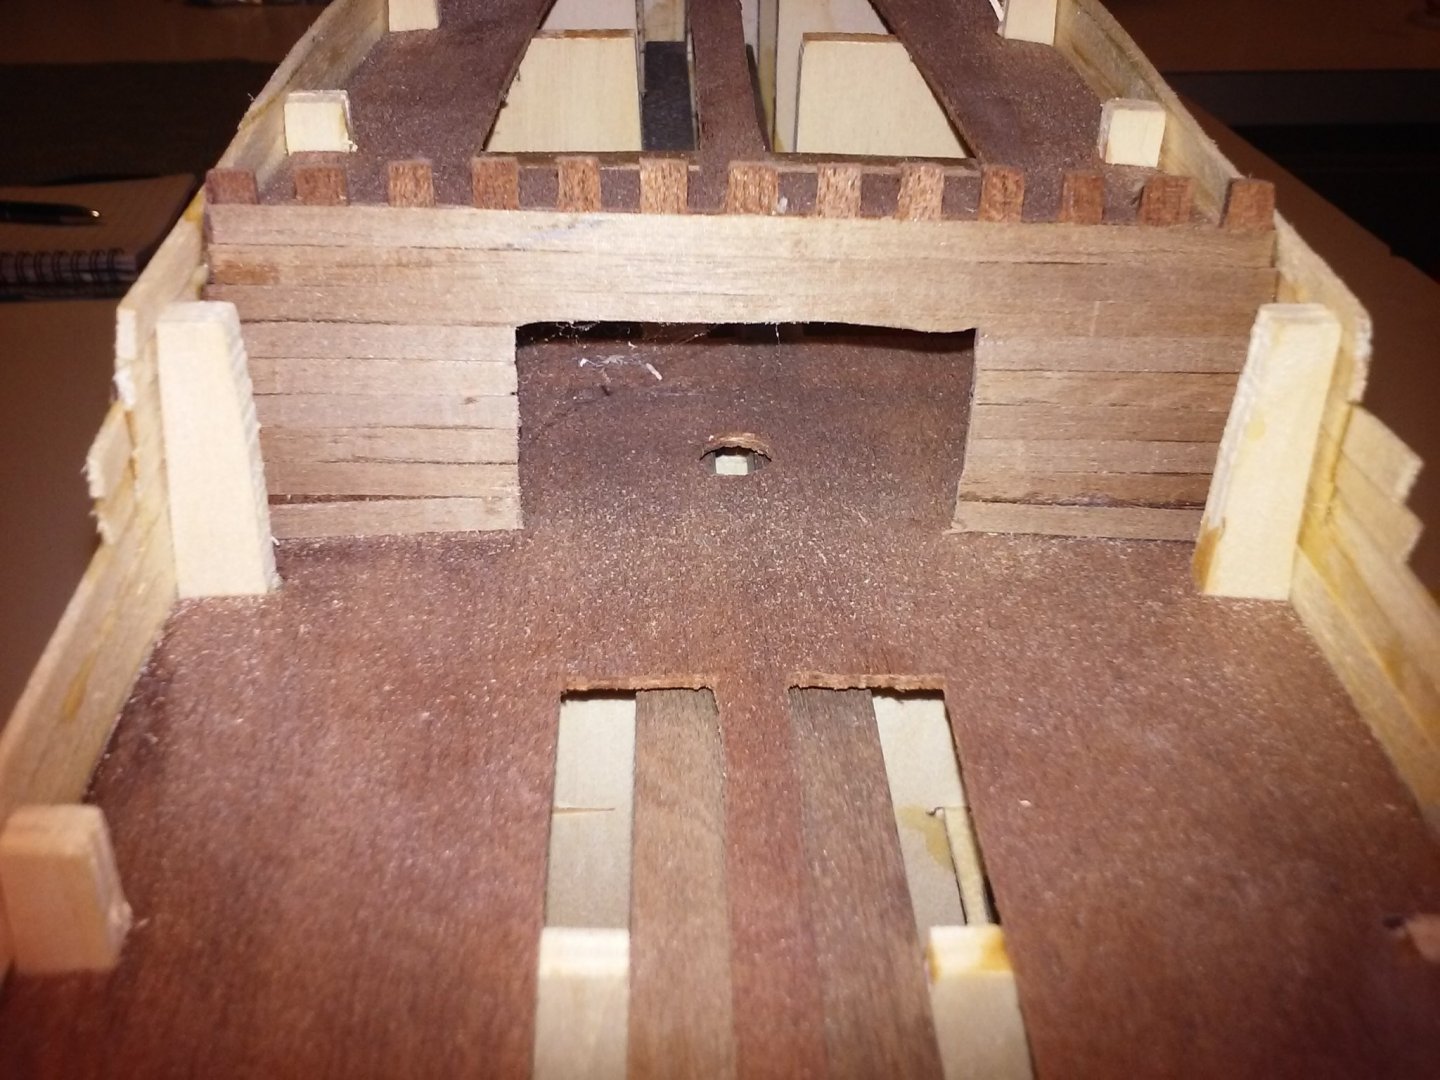
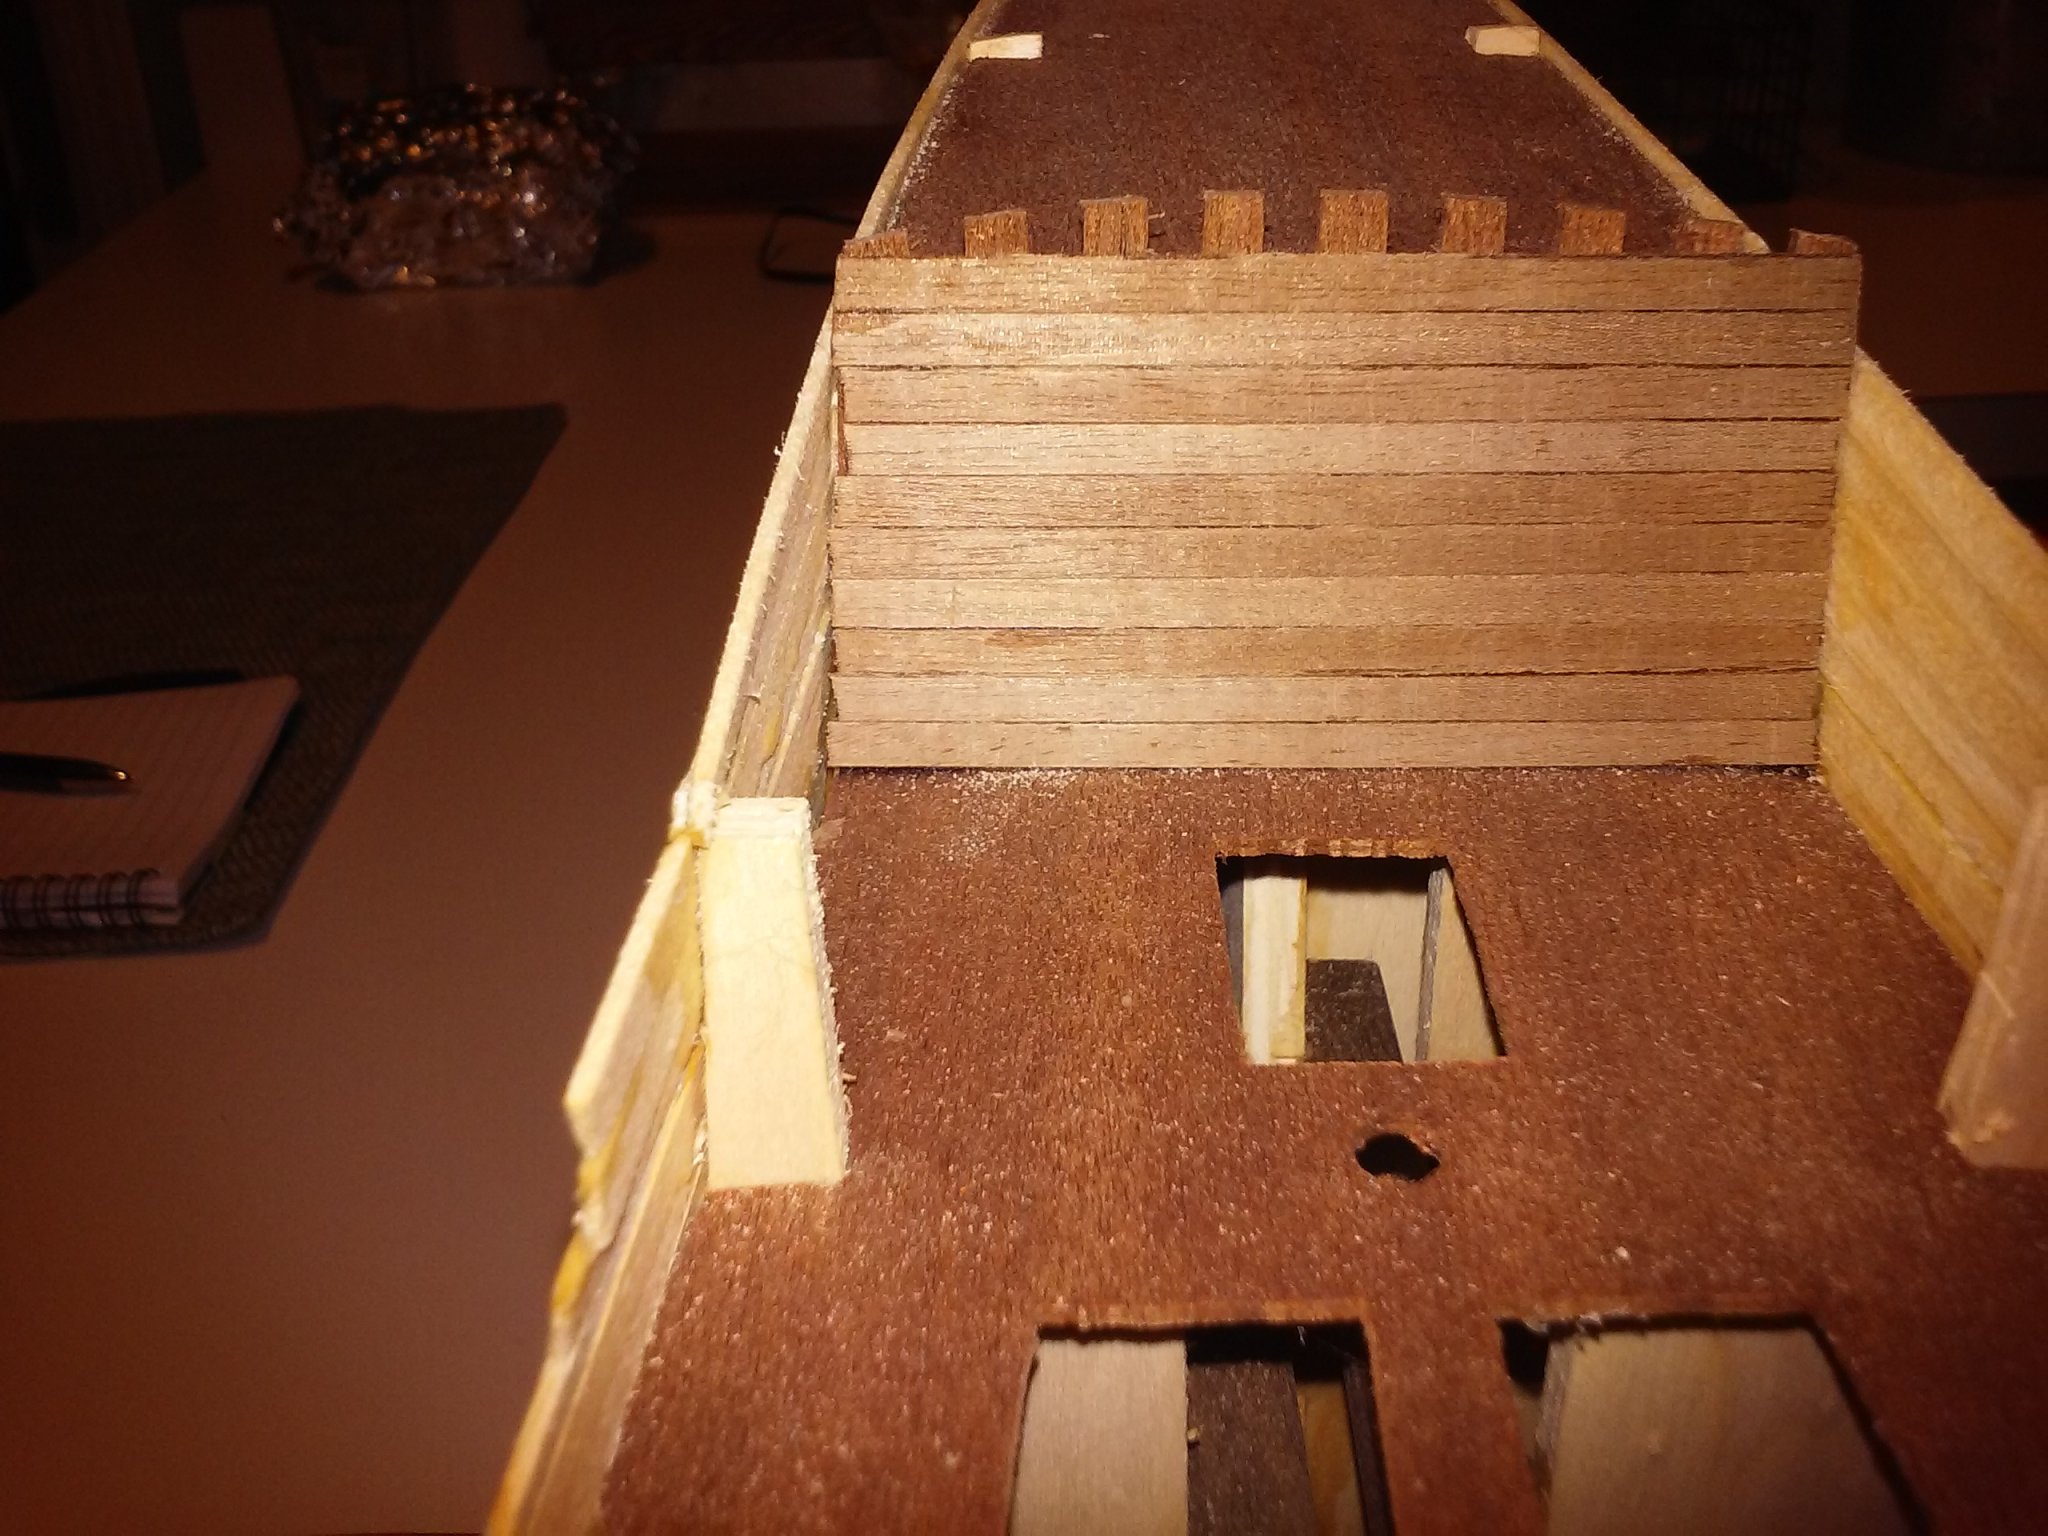
Taking a look at my log, I realize I had skipped a step. A couple of months ago I planked the facings of the cabins. I wasn't particularly happy with how they turned out, (maybe that's why I didn't post pictures) particularly the facing of the stern castle leading to the waist. On reflection, I probably should have planked them once I installed the false fronts and before I did the hull planking. I also starting from the top and worked my way down, since I had to leave the posts for the rails uncovered. That led to some difficulties when I got close to the deck. Something to consider if you are ever building this kit. My plan now is to add a water/glue mixture to the gaps once I remove the frames and see if sawdust might hide some sins. My other regret is that I didn't plank the deck before I planked the hull. I did this because the frames continue up above the deck. The idea is that the frames lend support while planking the hull and are then cut off, the nubs sanded down and then the deck planked. But now it is going to be difficult to make the deck planking in the big opening in the waist leading to the stern castle look good. Oh well, a hobby is supposed to fill the time, right?

-
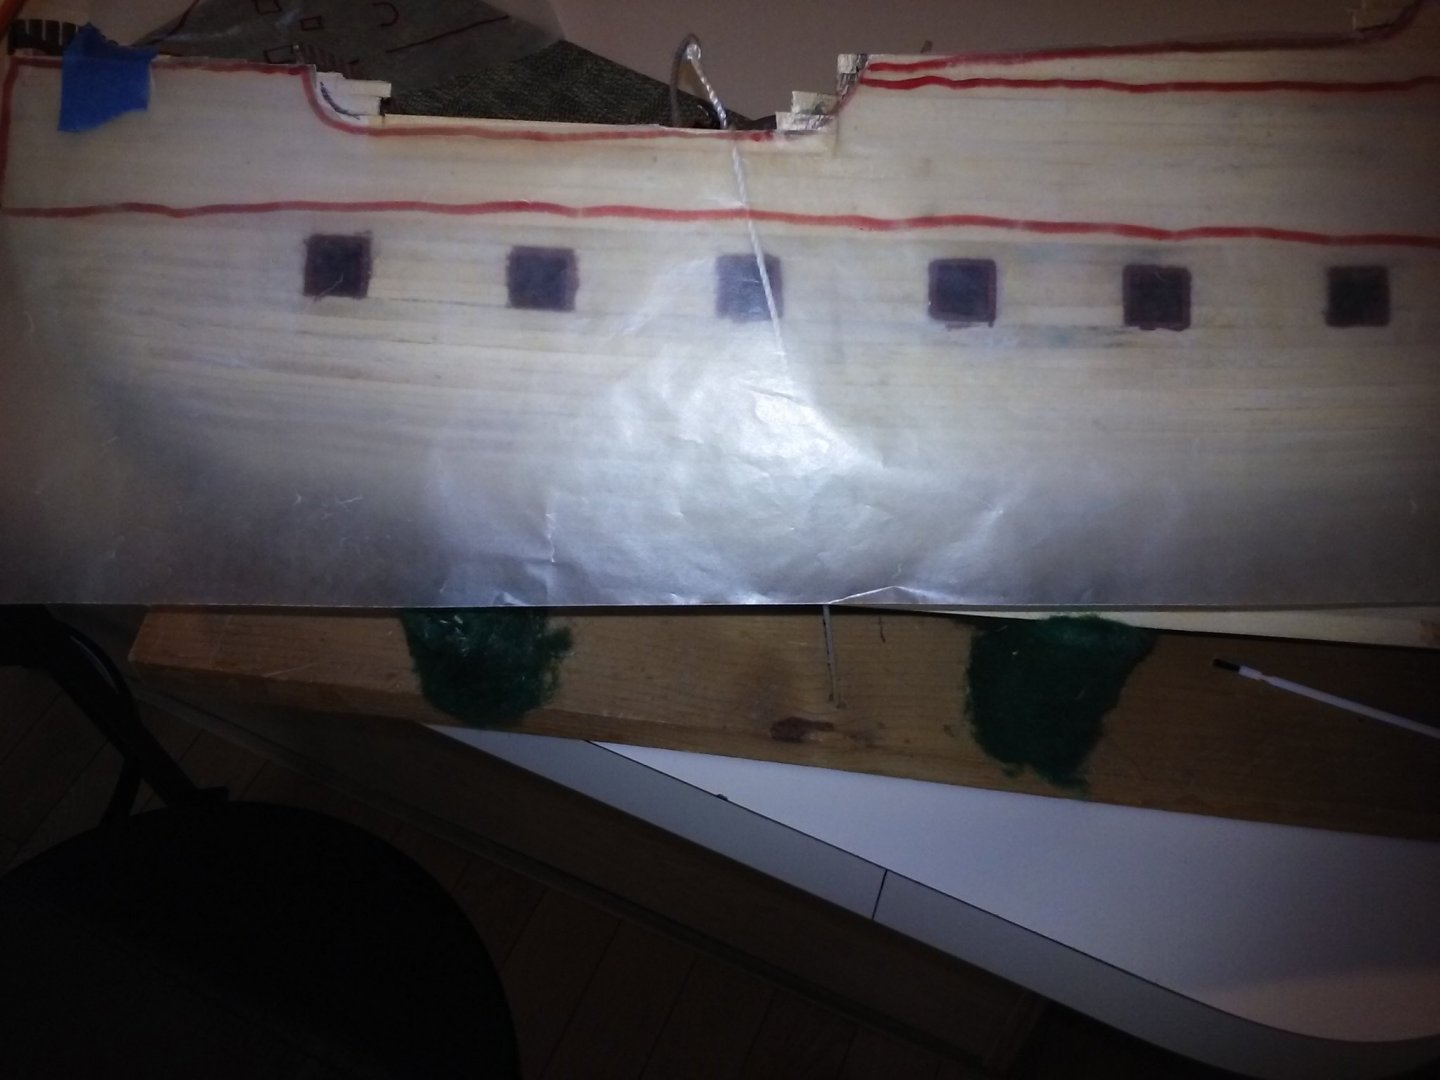
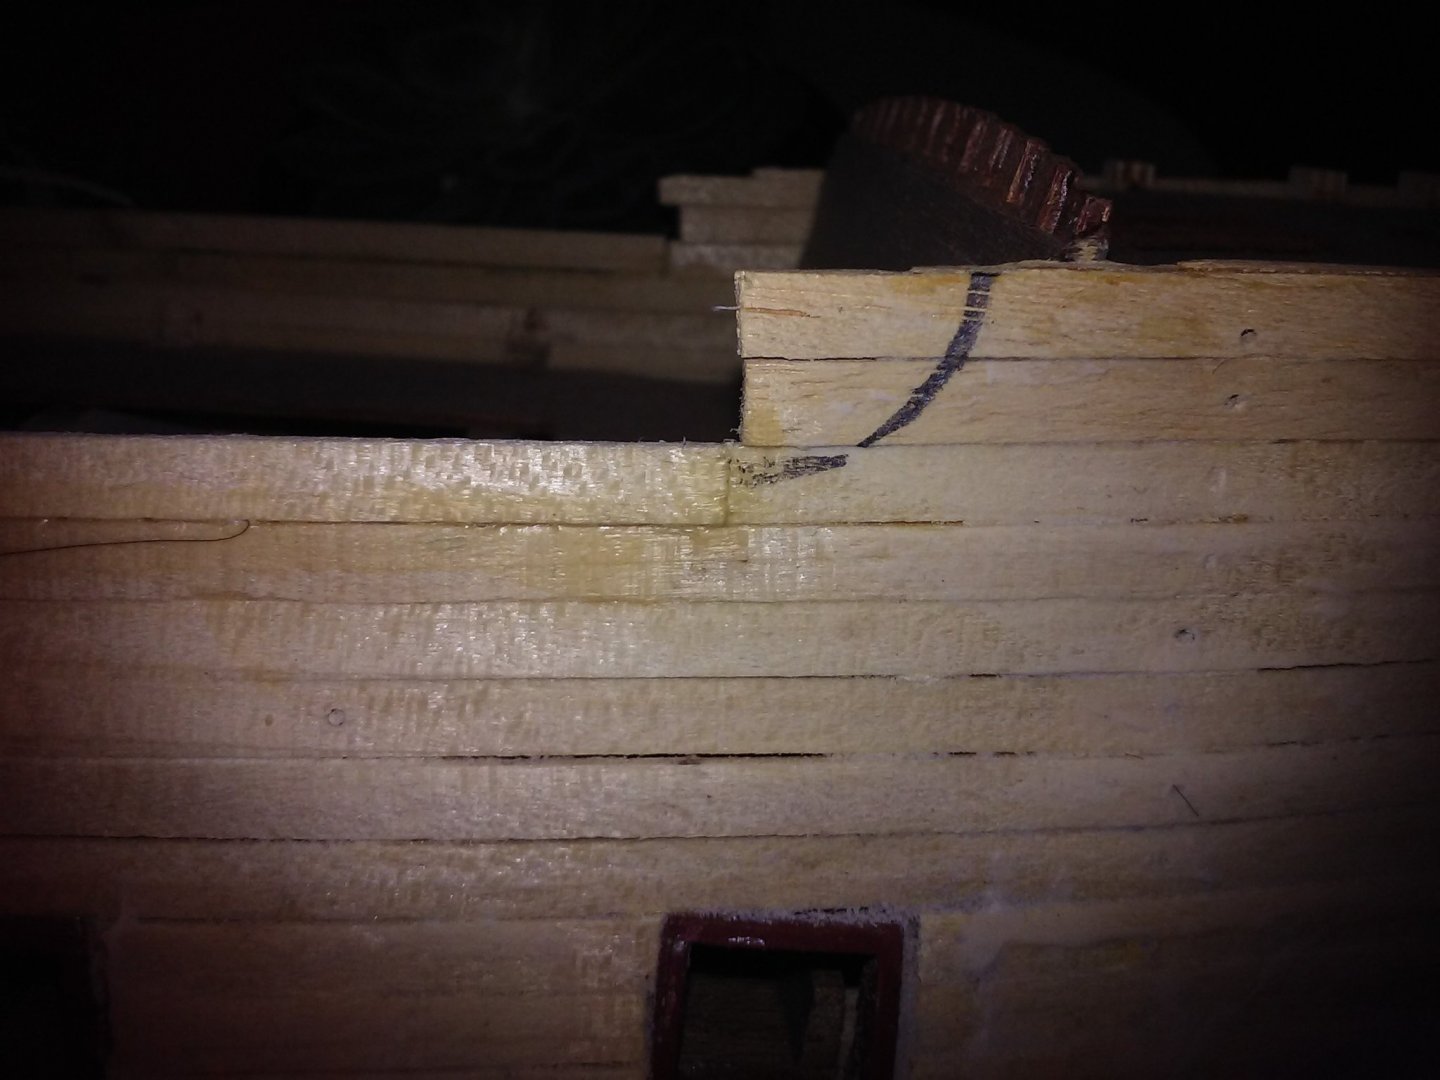
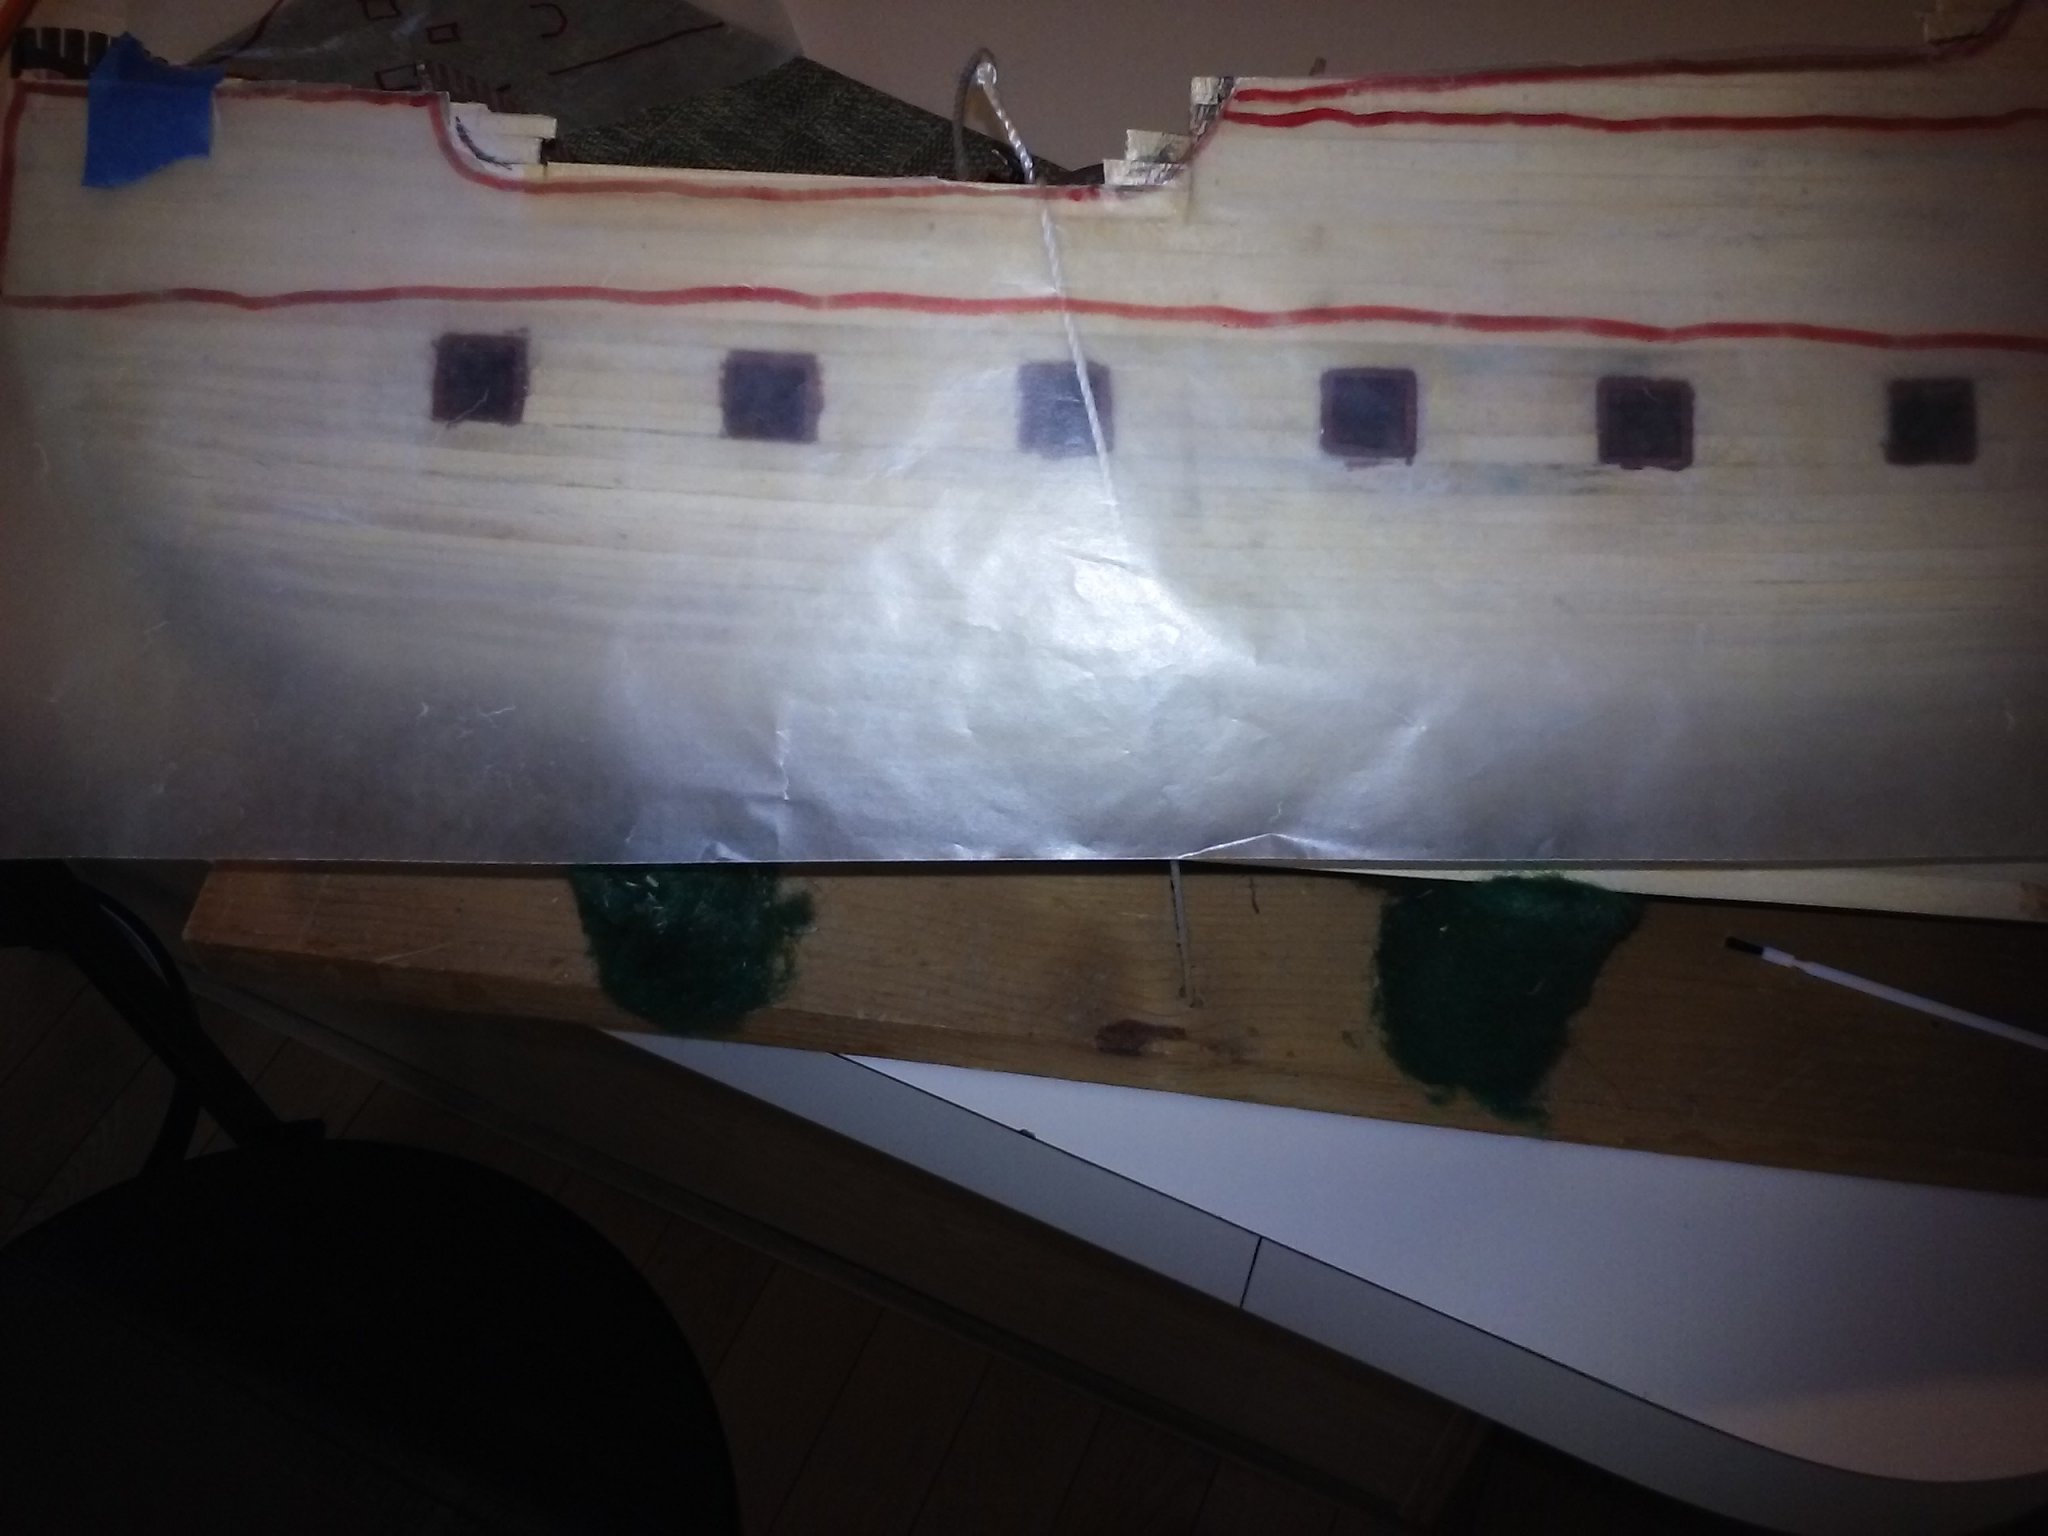
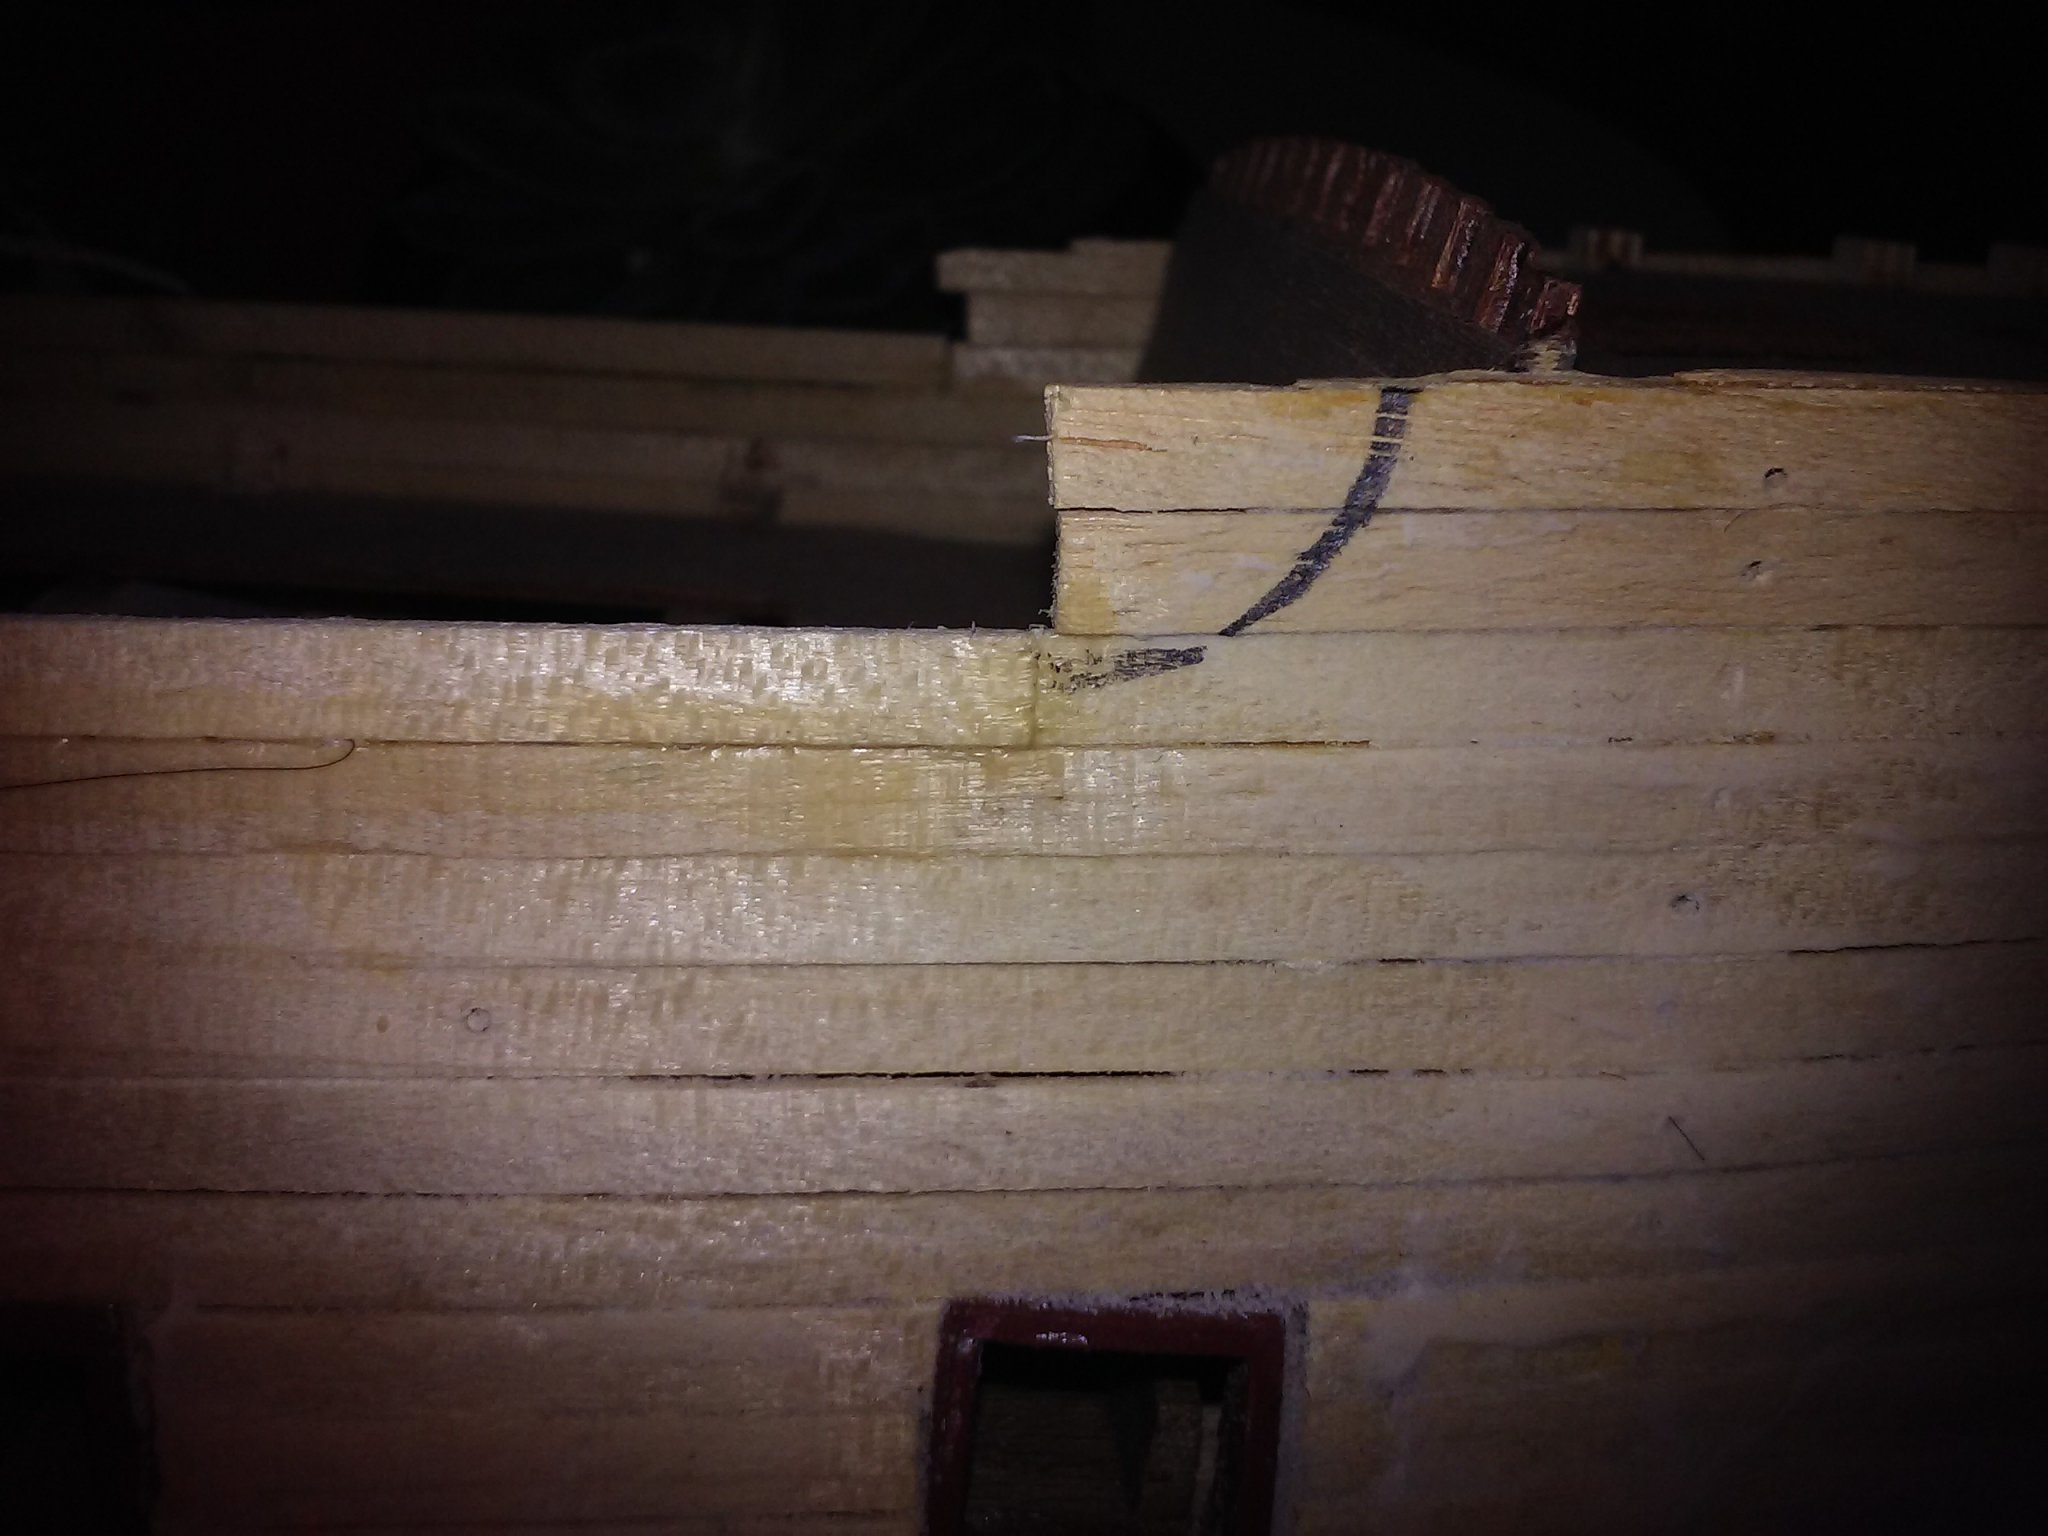
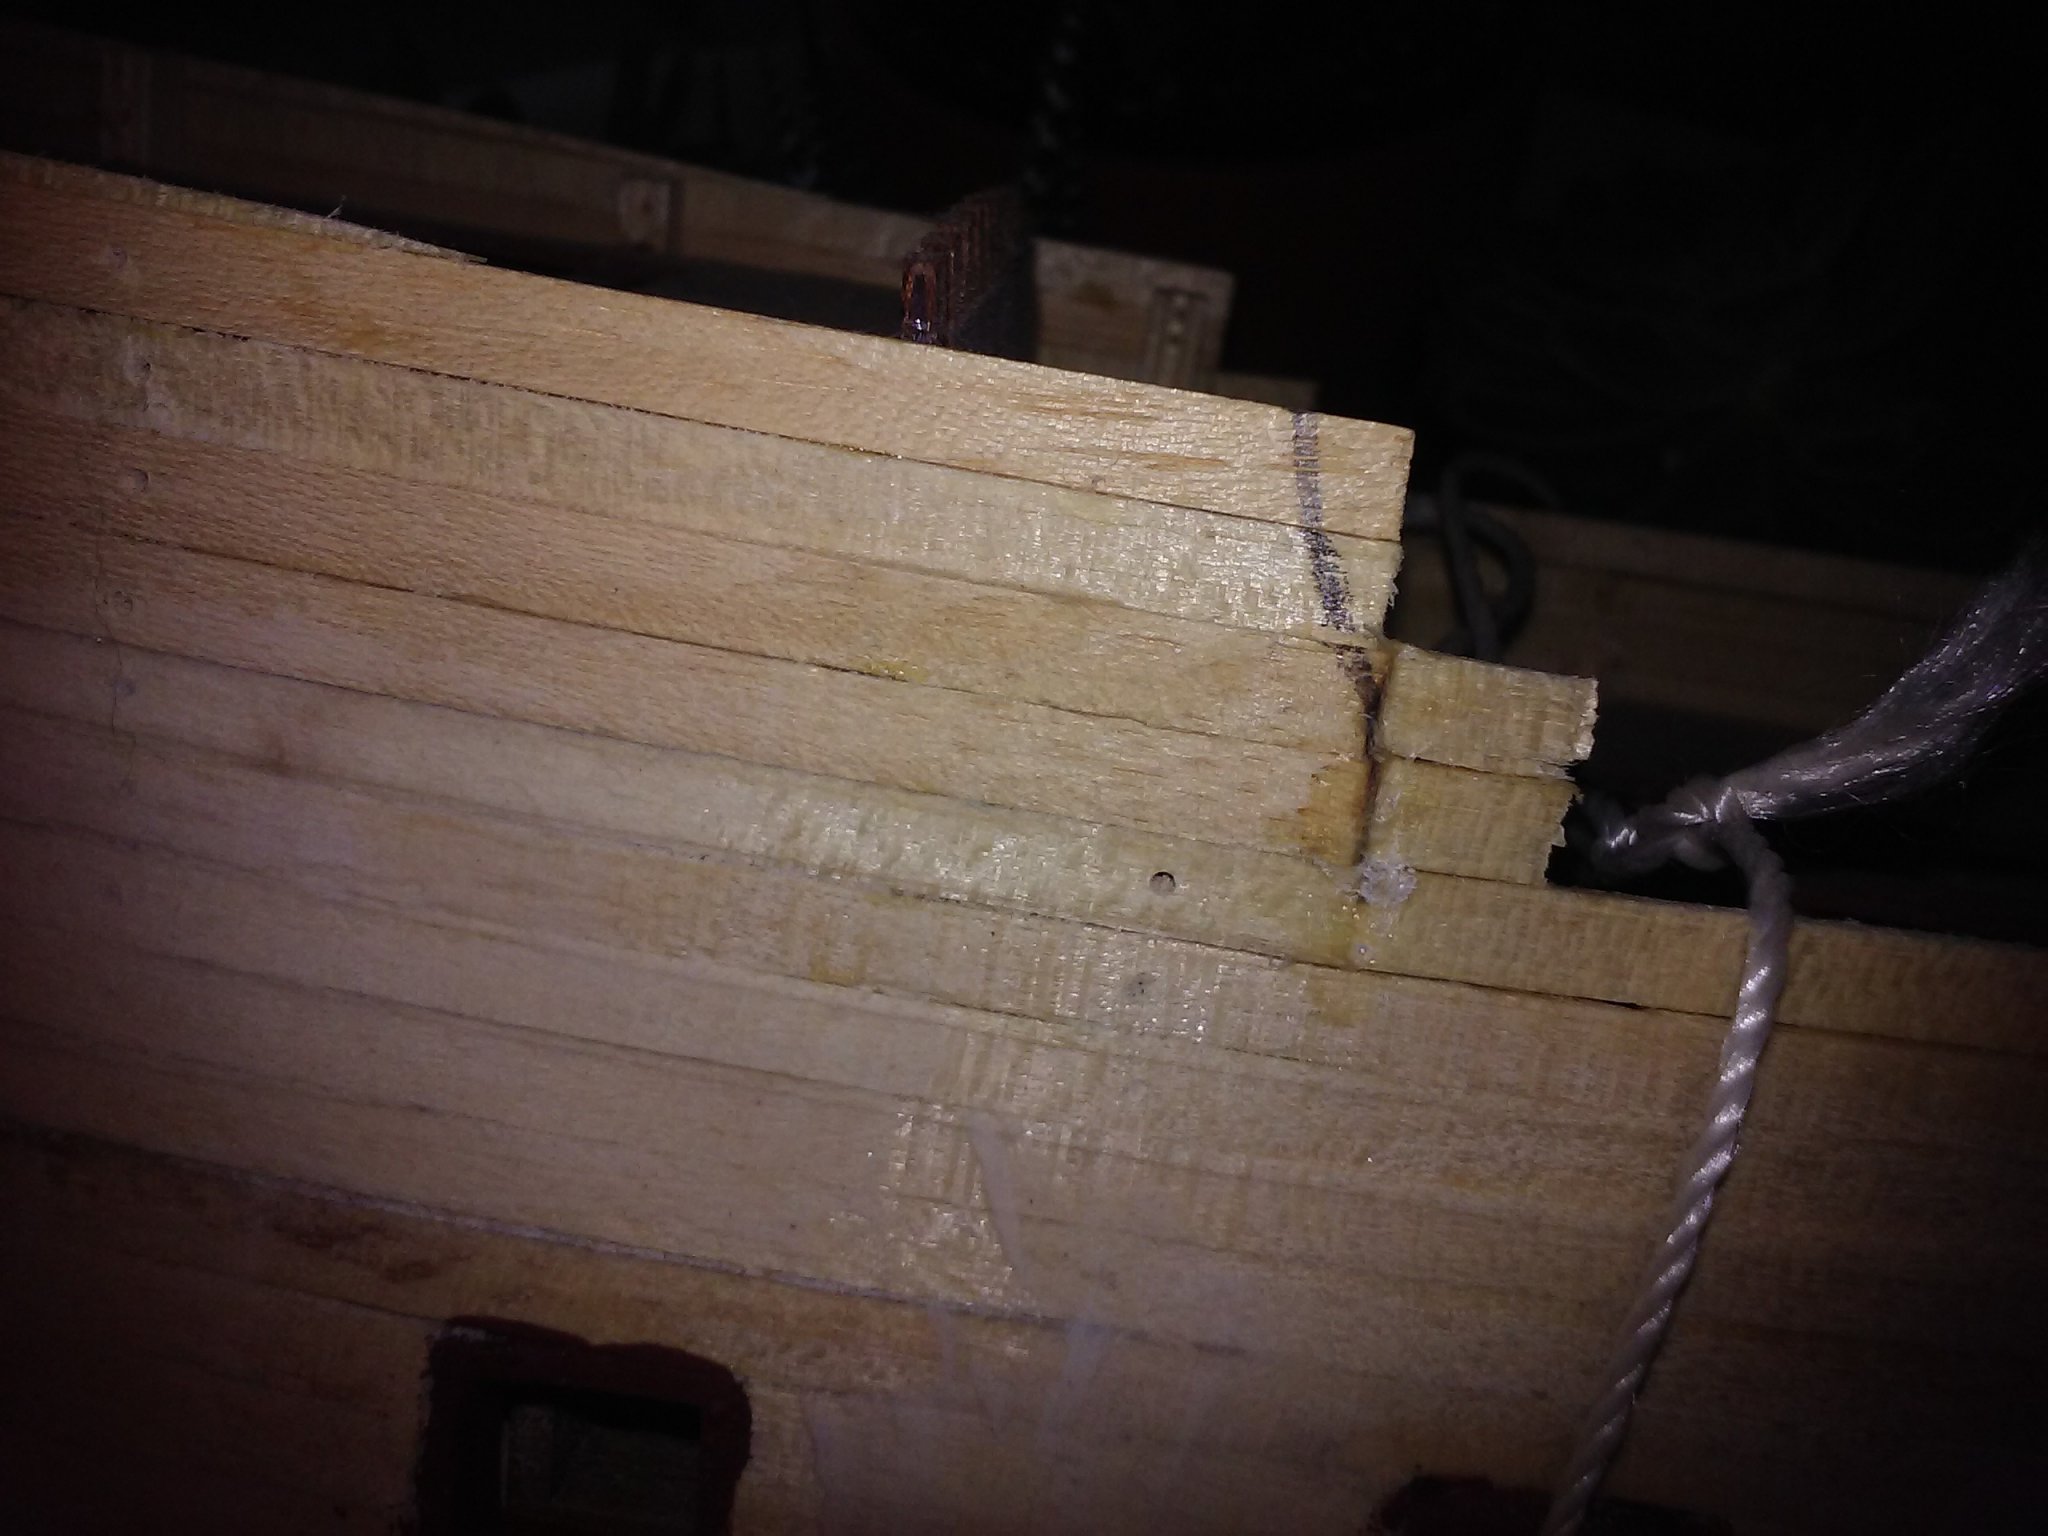
Been a while, and I'm sorry. I'd like to say that in the intervening months I had gotten better at the mandolin and learned the banjo, but that might be exaggerating things. I had hoped that by now I'd be out of the unheated garage and into an indoor shipyard, but this virus lockdown has delayed my daughter's plans on moving out of the room that I have been quietly coveting since she completed her masters degree, since here they aren't sending out inspectors to issue CO's. Can't complain though. With my son back from college for the rest of the year, and my daughter pretty much prevented from going anywhere during the evening and my wife's library closed, we are all home together and getting along surprisingly well. I'm sure that I, at least, will always appreciate this extra, unexpected time together before my kids truly become adults. One of the problems with no dedicated build space is that I have no place to permanently hang my plans. Earlier this week, during lunch while working from home, I laid them out on the table and traced the lines onto a piece of wax paper and compared them to my model in preparation for the second layer of planking. I outlined the curve of the planks that I need to sand on the forecastle leading to the waist, and found that I had cut a little too much from the planking leading from the stern to the waist. Since this model will be double planked, not too big a deal. Rather than tearing all the planks off, I just added extensions. My next task is covering these with artist's paste and then sanding flat and then cutting gunports on the stern as well as a cutout for the tiller to enter the hull.

-
-
-
My advice for a first build is to pick something simple that is double planked. The first layer of planking is relatively thick planks that let you learn how to plank a ship model. The second layer are usually a paper-thin veneer that lets you easily cover up your first mistakes and gives you a good looking model. One plus of Model Shipways kits is that the instructions are usually better than most other kits, usually written by folks to whom English is a first language and their are sometimes free practicums that you can download that provide step-by-step instructions on how someone else built the kit.
- modeller_masa, mtaylor, Gregory and 1 other
-
4
-
-
-
I built this kit and glued the channels onto to the side at the bottom of the top rail (if that makes sense). The two-point gluing and the chains add support and I've never had any issue with them, though I don't do much with my completed model other than look at it and occasionally dust.
-
-
I used to love the Aurora tanks when I was a kid. They were pretty high-quality models for the time.
- GrandpaPhil, Canute, mtaylor and 1 other
-
4


No fool like an old left handed fool
in Modeling tools and Workshop Equipment
Posted
I went to Catholic school in the 1960s, where I guess it was better than in earlier decades. The nuns didn't stop me from writing with my left hand, as they did with my grandfather, but woe betide the lefty who blessed themselves with their south paw.