Thunder
-
Posts
584 -
Joined
-
Last visited
Content Type
Profiles
Forums
Gallery
Events
Everything posted by Thunder
-
I thought it was John Bowen that did the model shipwright books.
-
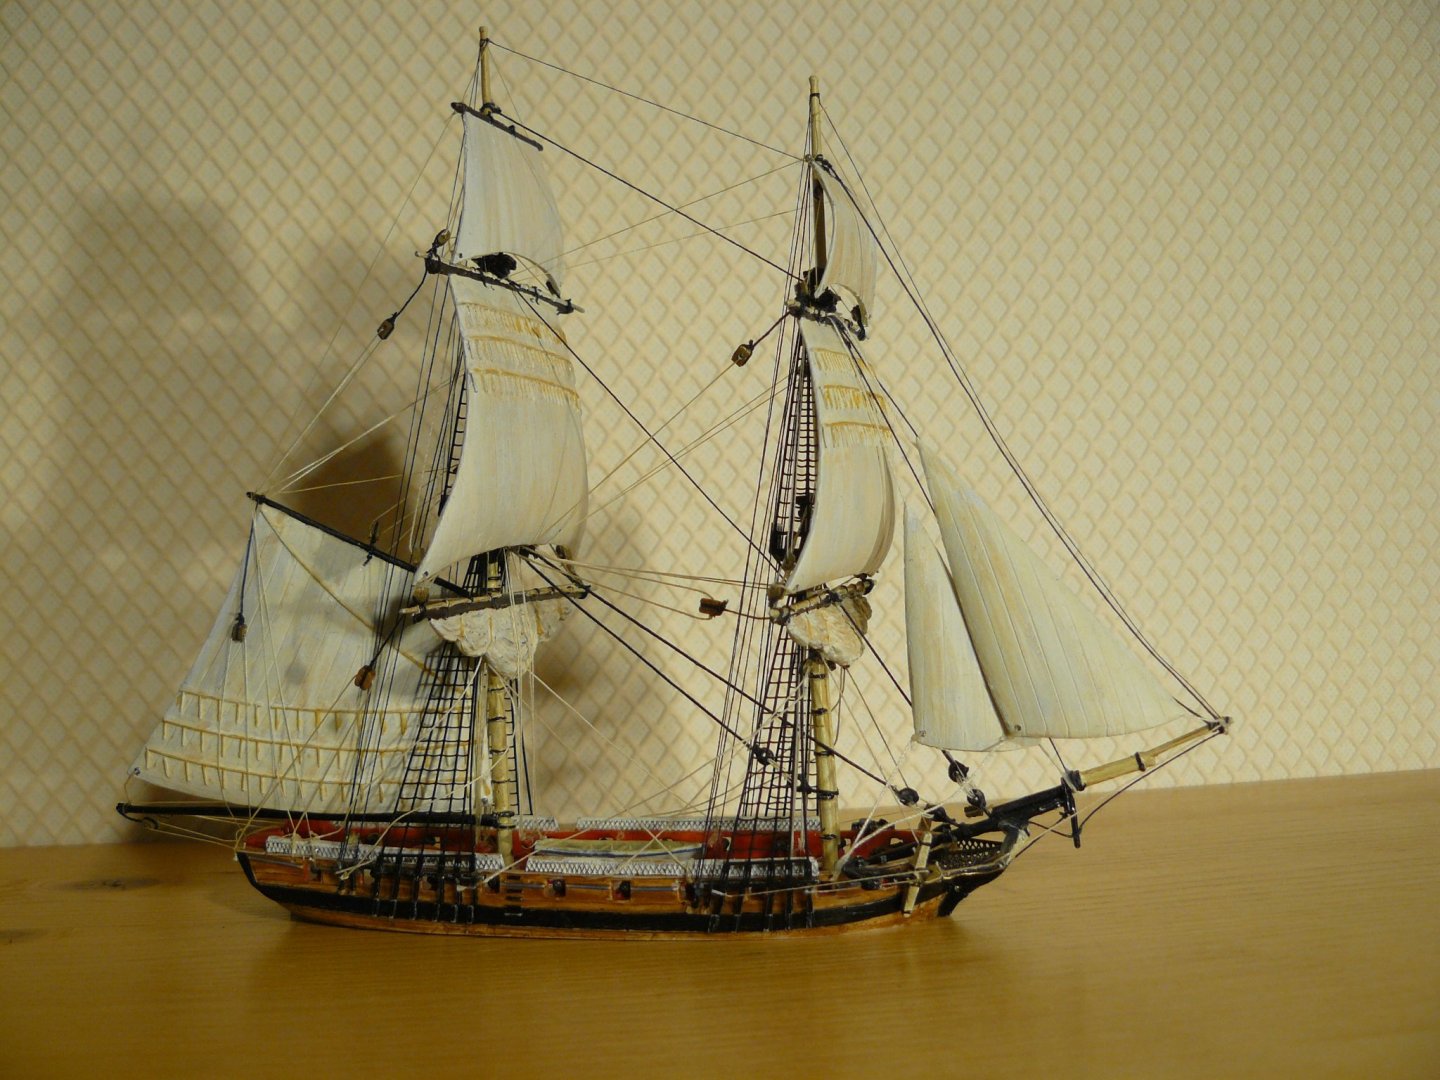
Below is a 1:300 scale brig of the cruiser class by Langton Miniatures. This is not a wooden kit though, it is a resin hull. There is also the Pyro range of kits but these are plastic. I have built some of these but cannot find any photographs. I do have them still, will have to take some.

-
Excellent, have the first three volumes and was looking into getting the plans as seemed little point having the books without them.
-
The most important thing is that you enjoy what you are doing, that is after all what having a hobby is all about. I like to think I am producing something of accuracy but that does not mean that is right for everyone. You build your model the way you want it and enjoy what you have produced.
- 265 replies
-
- 4
-

-
- Golden Hind
- Airfix
- (and 1 more)
-
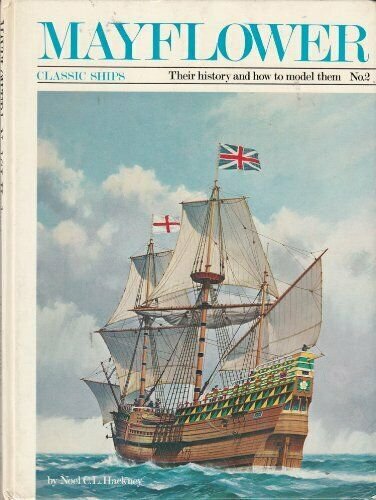
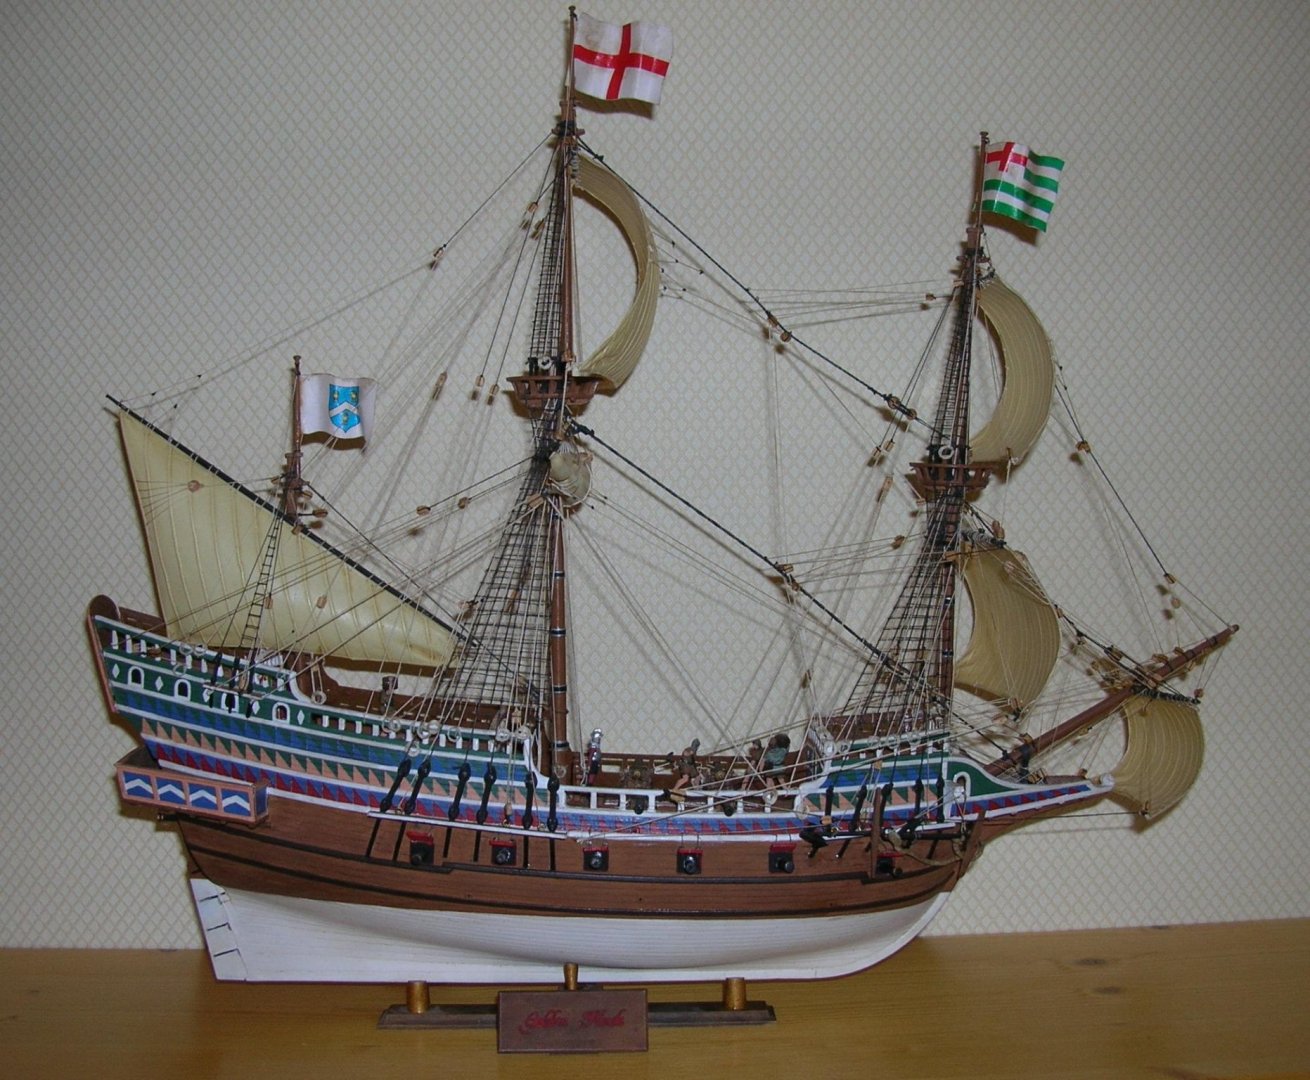
Just my opinion but I think what could be a great model can be made to look like a toy if the rigging is poor. It does not take a lot of effort to make it look better, even just the use of different size threads makes a difference. I have said many times but the best guide for an Airfix / Plastic kit is the books by Noel C Hackney. For your period of rig you would be best with the Mayflower book. Especially as you have this kit on your shelf. Takes you through the build and any modifications that you can possibly do to improve. It then takes you through the rigging step by step. I used it as a basis for my Airfix Golden Hind.
- 265 replies
-
- 6
-
-
- Golden Hind
- Airfix
- (and 1 more)
-
Hi, just seen your build for the first time. Do not know much about this kit but looks like you have used walnut for the deck planking and the first planking, is this correct? Usually this would be for the second planking only, don't want you to end up short for that.
-
The answer to that might be that the designer left them and they no longer have anyone that can finish it.
-
I would take a look at the 'Modellers Shipyard' kit range. Their Mary Burne ketch or mermaid cutter would be good options and less war like. Never seen one of these kits to say how good they are but subjects look good. I think there is a Mermaid build on here.
-
I did see the Arkowood, there is also Ahorn (maple), Birke (Birch), and Weisbuche (hornbeam or white beech?) which all look to be good woods. Thank you for your comments. Tempted to try.
-
Hi they have labelled it as Buxbaum Castello wood from Brazil which I believe translates as boxwood. Thank you for your comments a great help.
-
Thank you for the replies, I was looking for something to replace the walnut in my next kit and found the above site after someone placed it on here. The boxwood seems a very good price compared to another provider in the UK which does not sell the sizes the same as the kit. I could actually buy the boxwood and the beech for the same price as the boxwood alone in the UK. Before I purchased i wanted an idea of quality. I have seen a few on site that have purchased box only to find it was what looked like dyed lime. Perhaps i could email for a small sample of each. They do sell pear as well but this is more expensive.
-
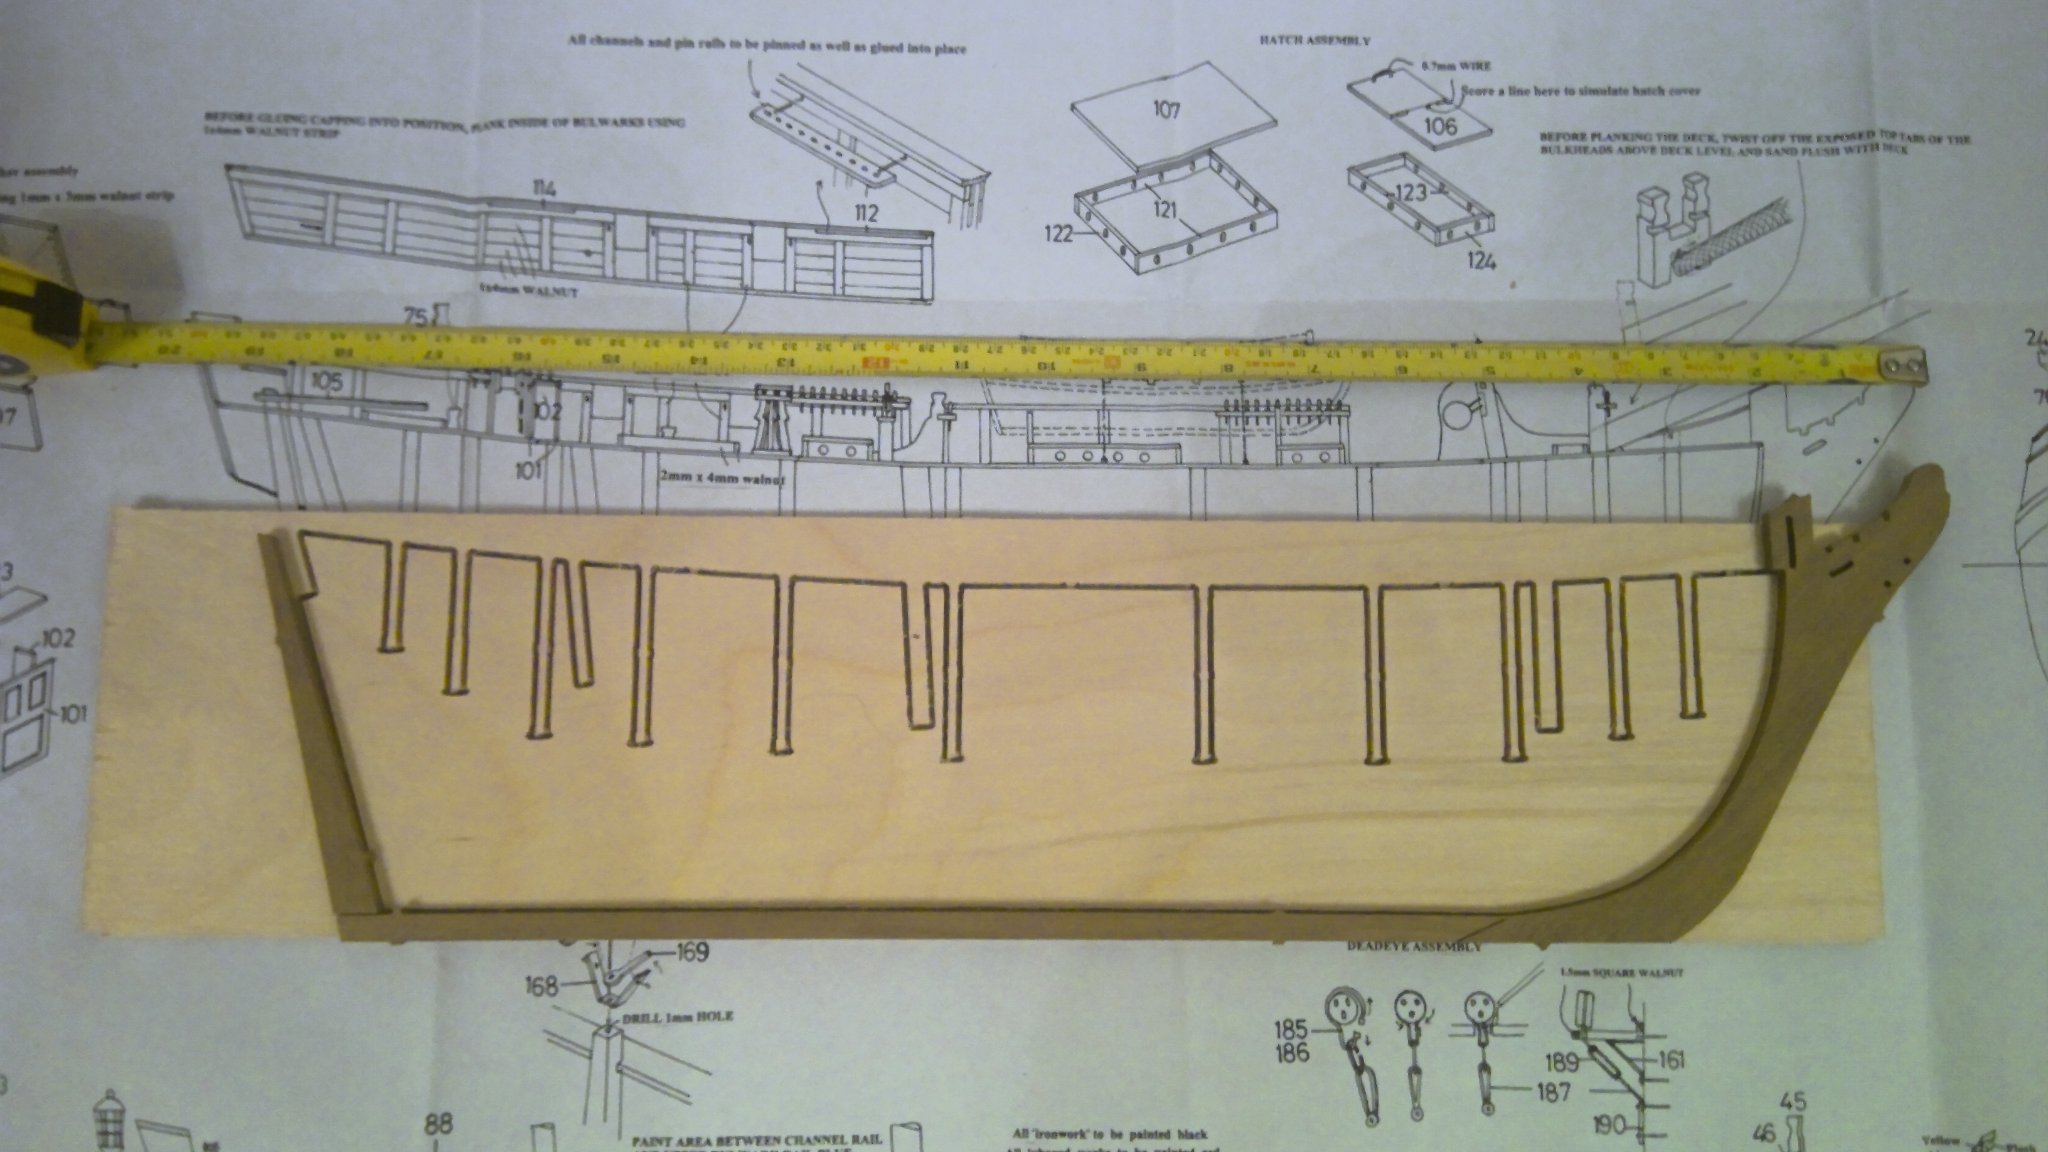
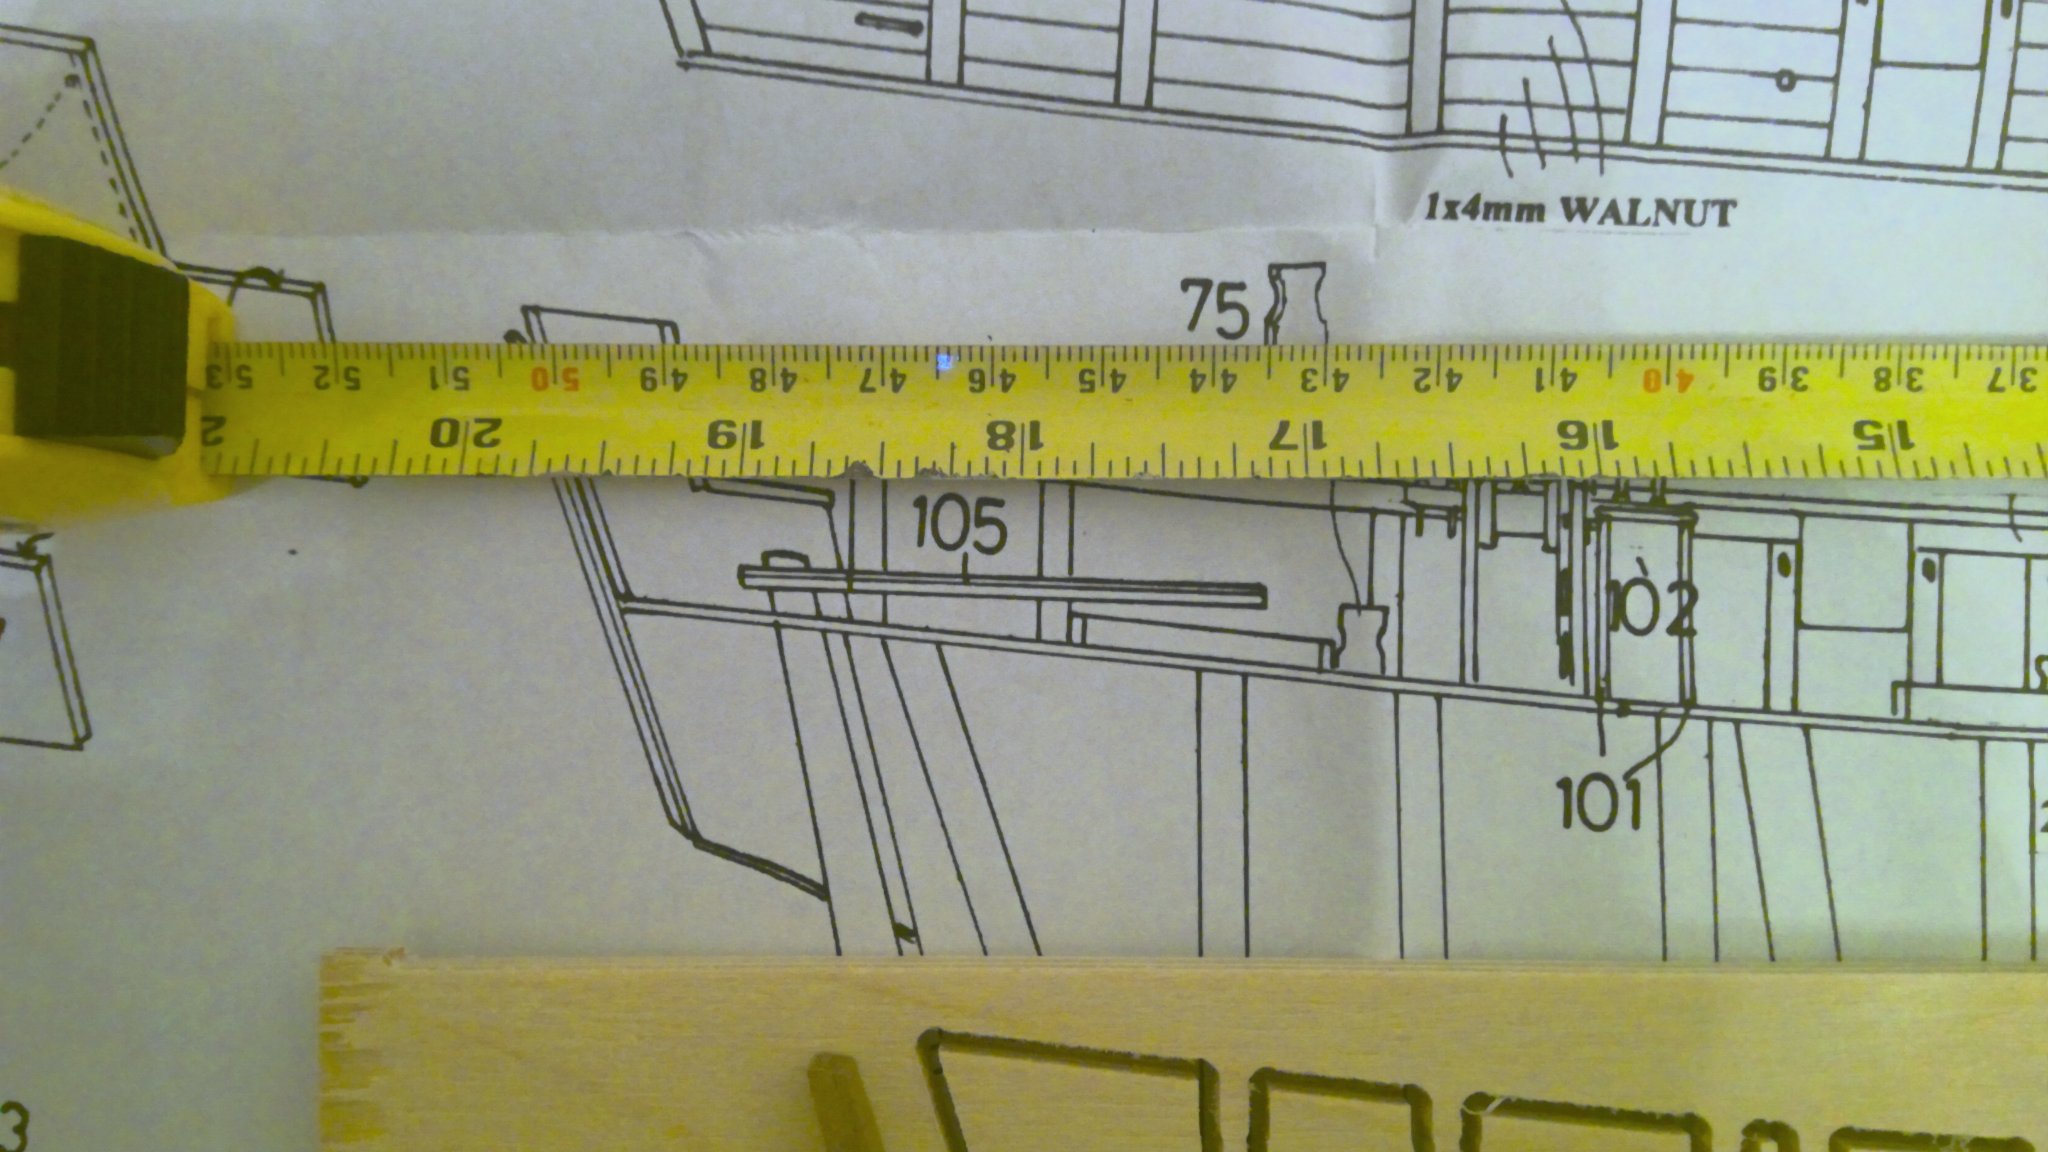
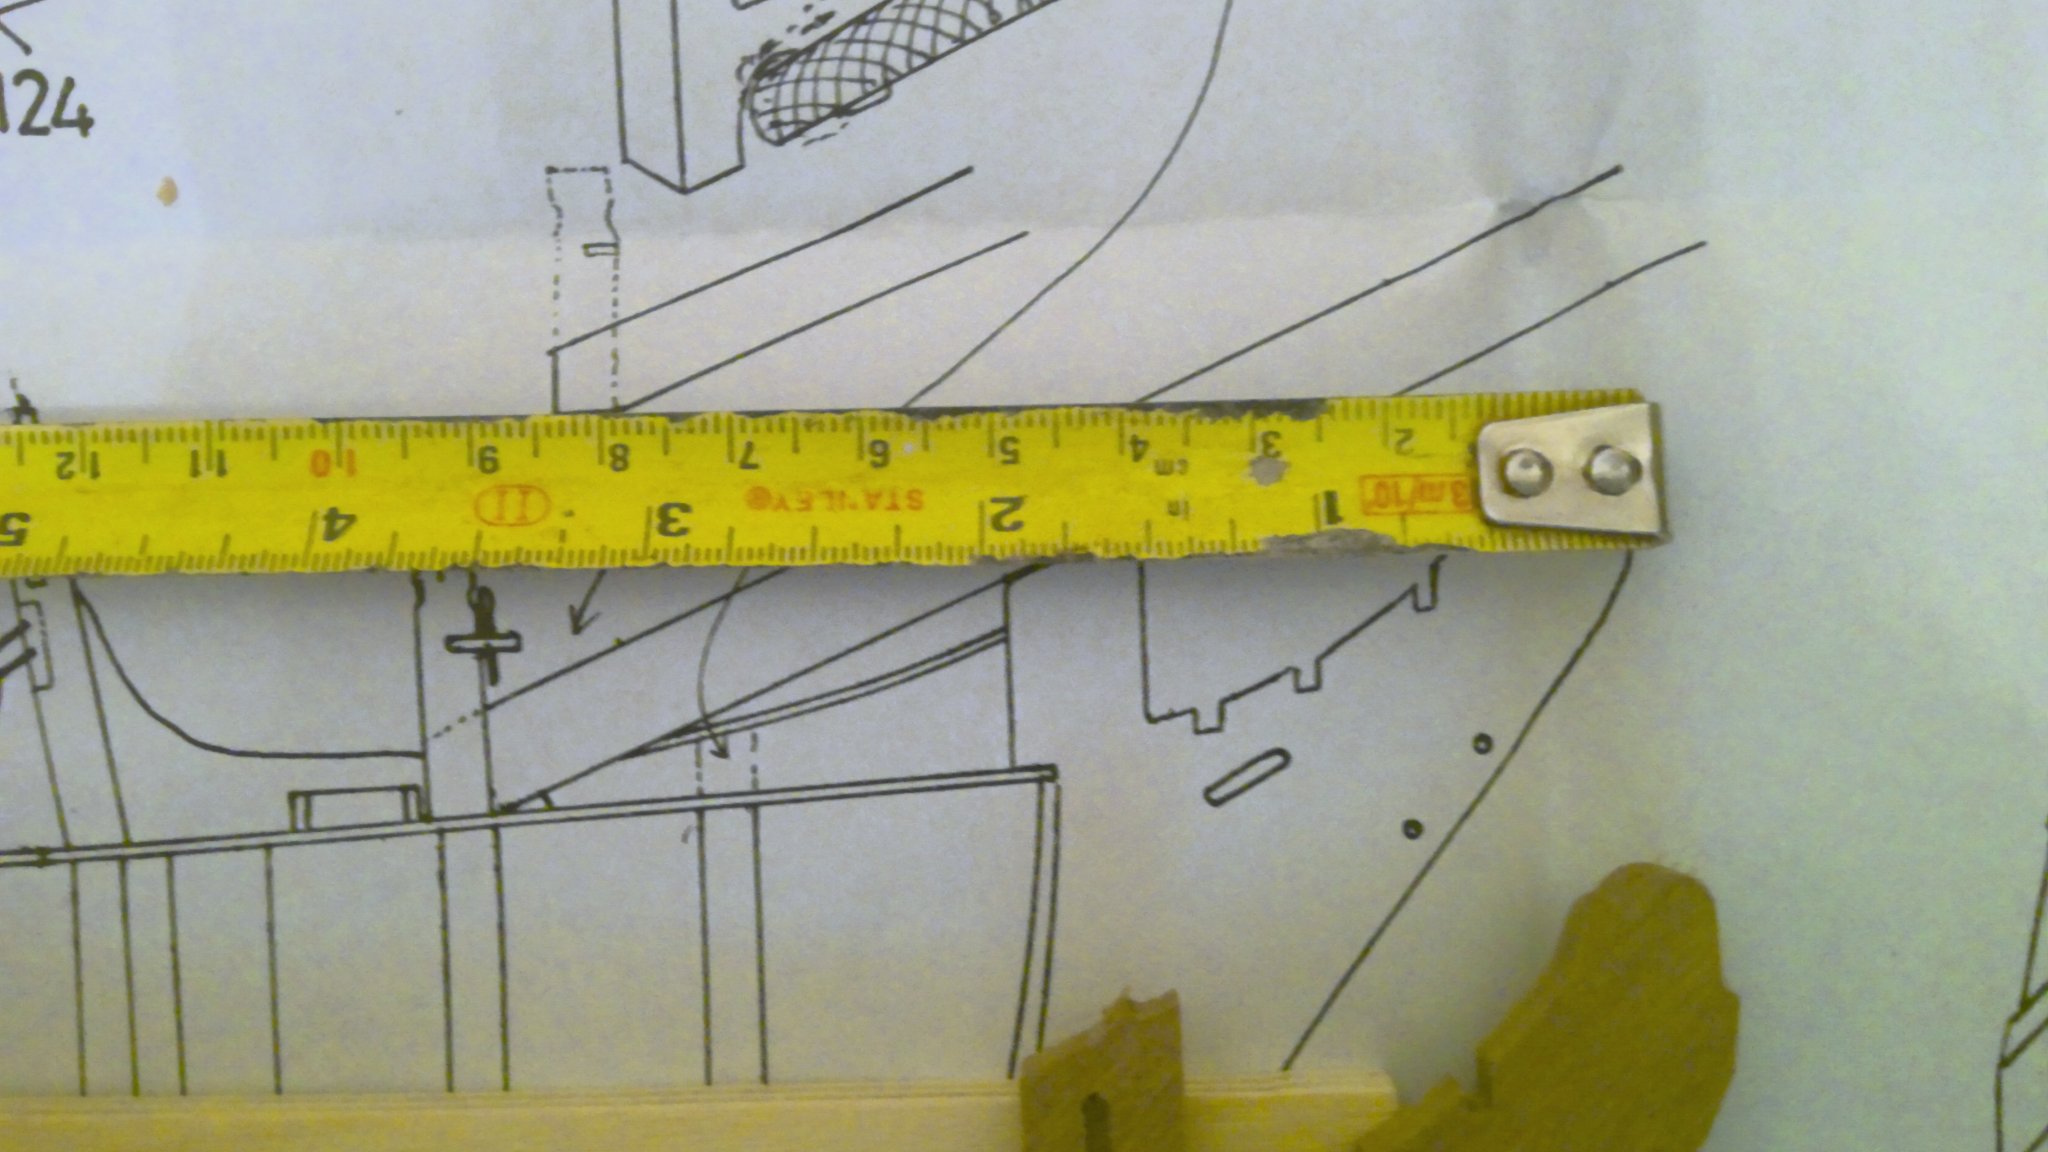
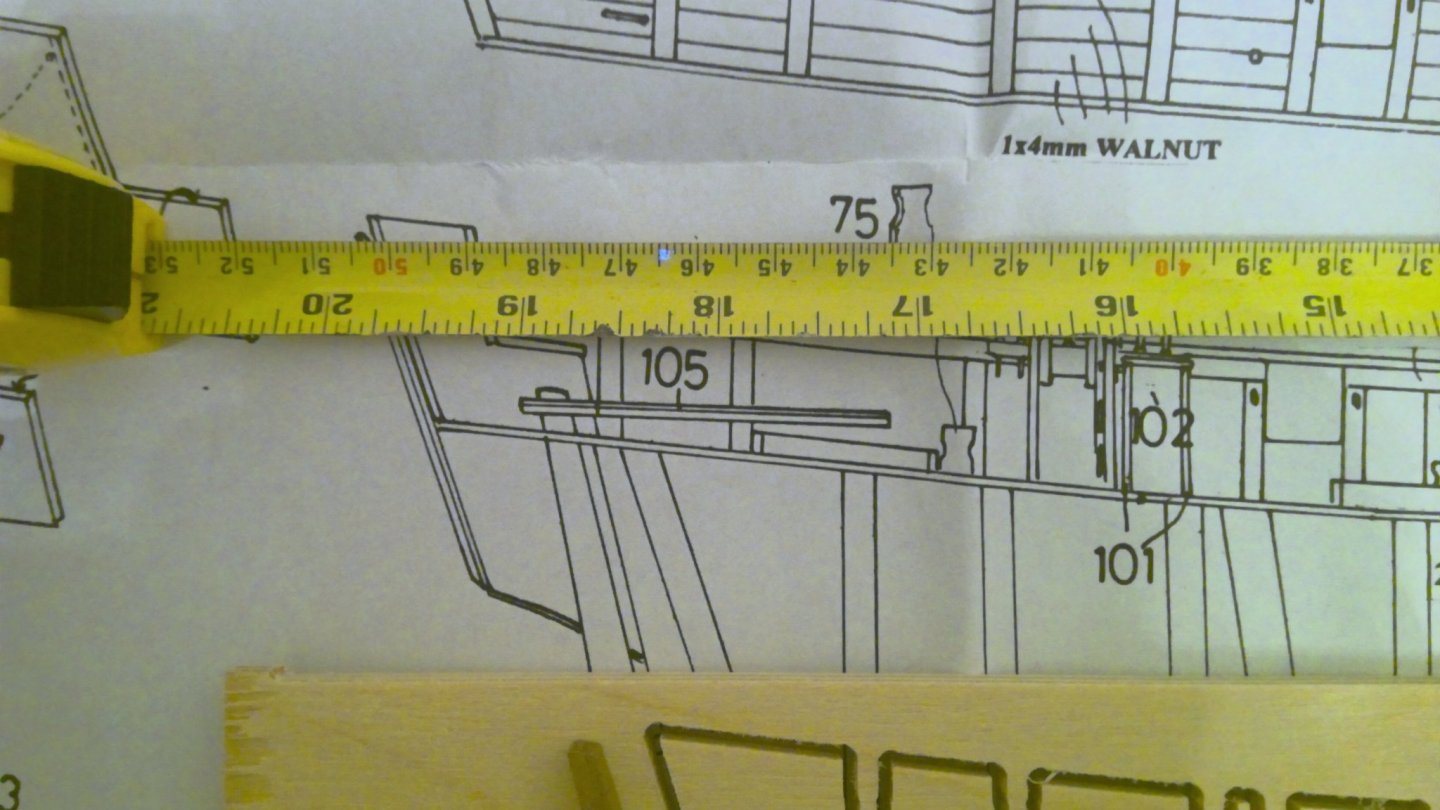
Hi, photographs below are from my unbuilt kit. I have pieced the parts together as best as possible to give you the hull dimensions. looks to be about 505mm from figurehead to taffrail. Measuring from the Anatomy of the ship book Bounty I get same dimension to be 336mm@1/96 scale. Which i think comes out at 504mm @ 1/64 scale.


-
Hi, Two questions, has anyone used the attached site in Germany? Willkommen bei der MassivHolzWerkstatt. - modellbau-holzs Webseite! (massiv-holz-werkstatt.de) Is the Buxbaum Castello wood from Brazil good enough quality for second planking? Oh, a third question. Beech is often described as the scale oak, has anyone planked with this and what are its characteristics? Does it cut and bend easily, is it easy to work with? O.k. 5 questions but whose counting! Adrian
-
Or if in the UK go and take a look at the place below: https://www.bucklershard.co.uk/ Well worth a visit
-
Ships at Trafalgar - what kits are available?
Thunder replied to bruce d's topic in Wood ship model kits
Hi, Not quite the same but many done by Langton Miniatures. I believe at one time you could make a full Trafalgar set for war gaming. http://www.rodlangton.com/index-2.html -
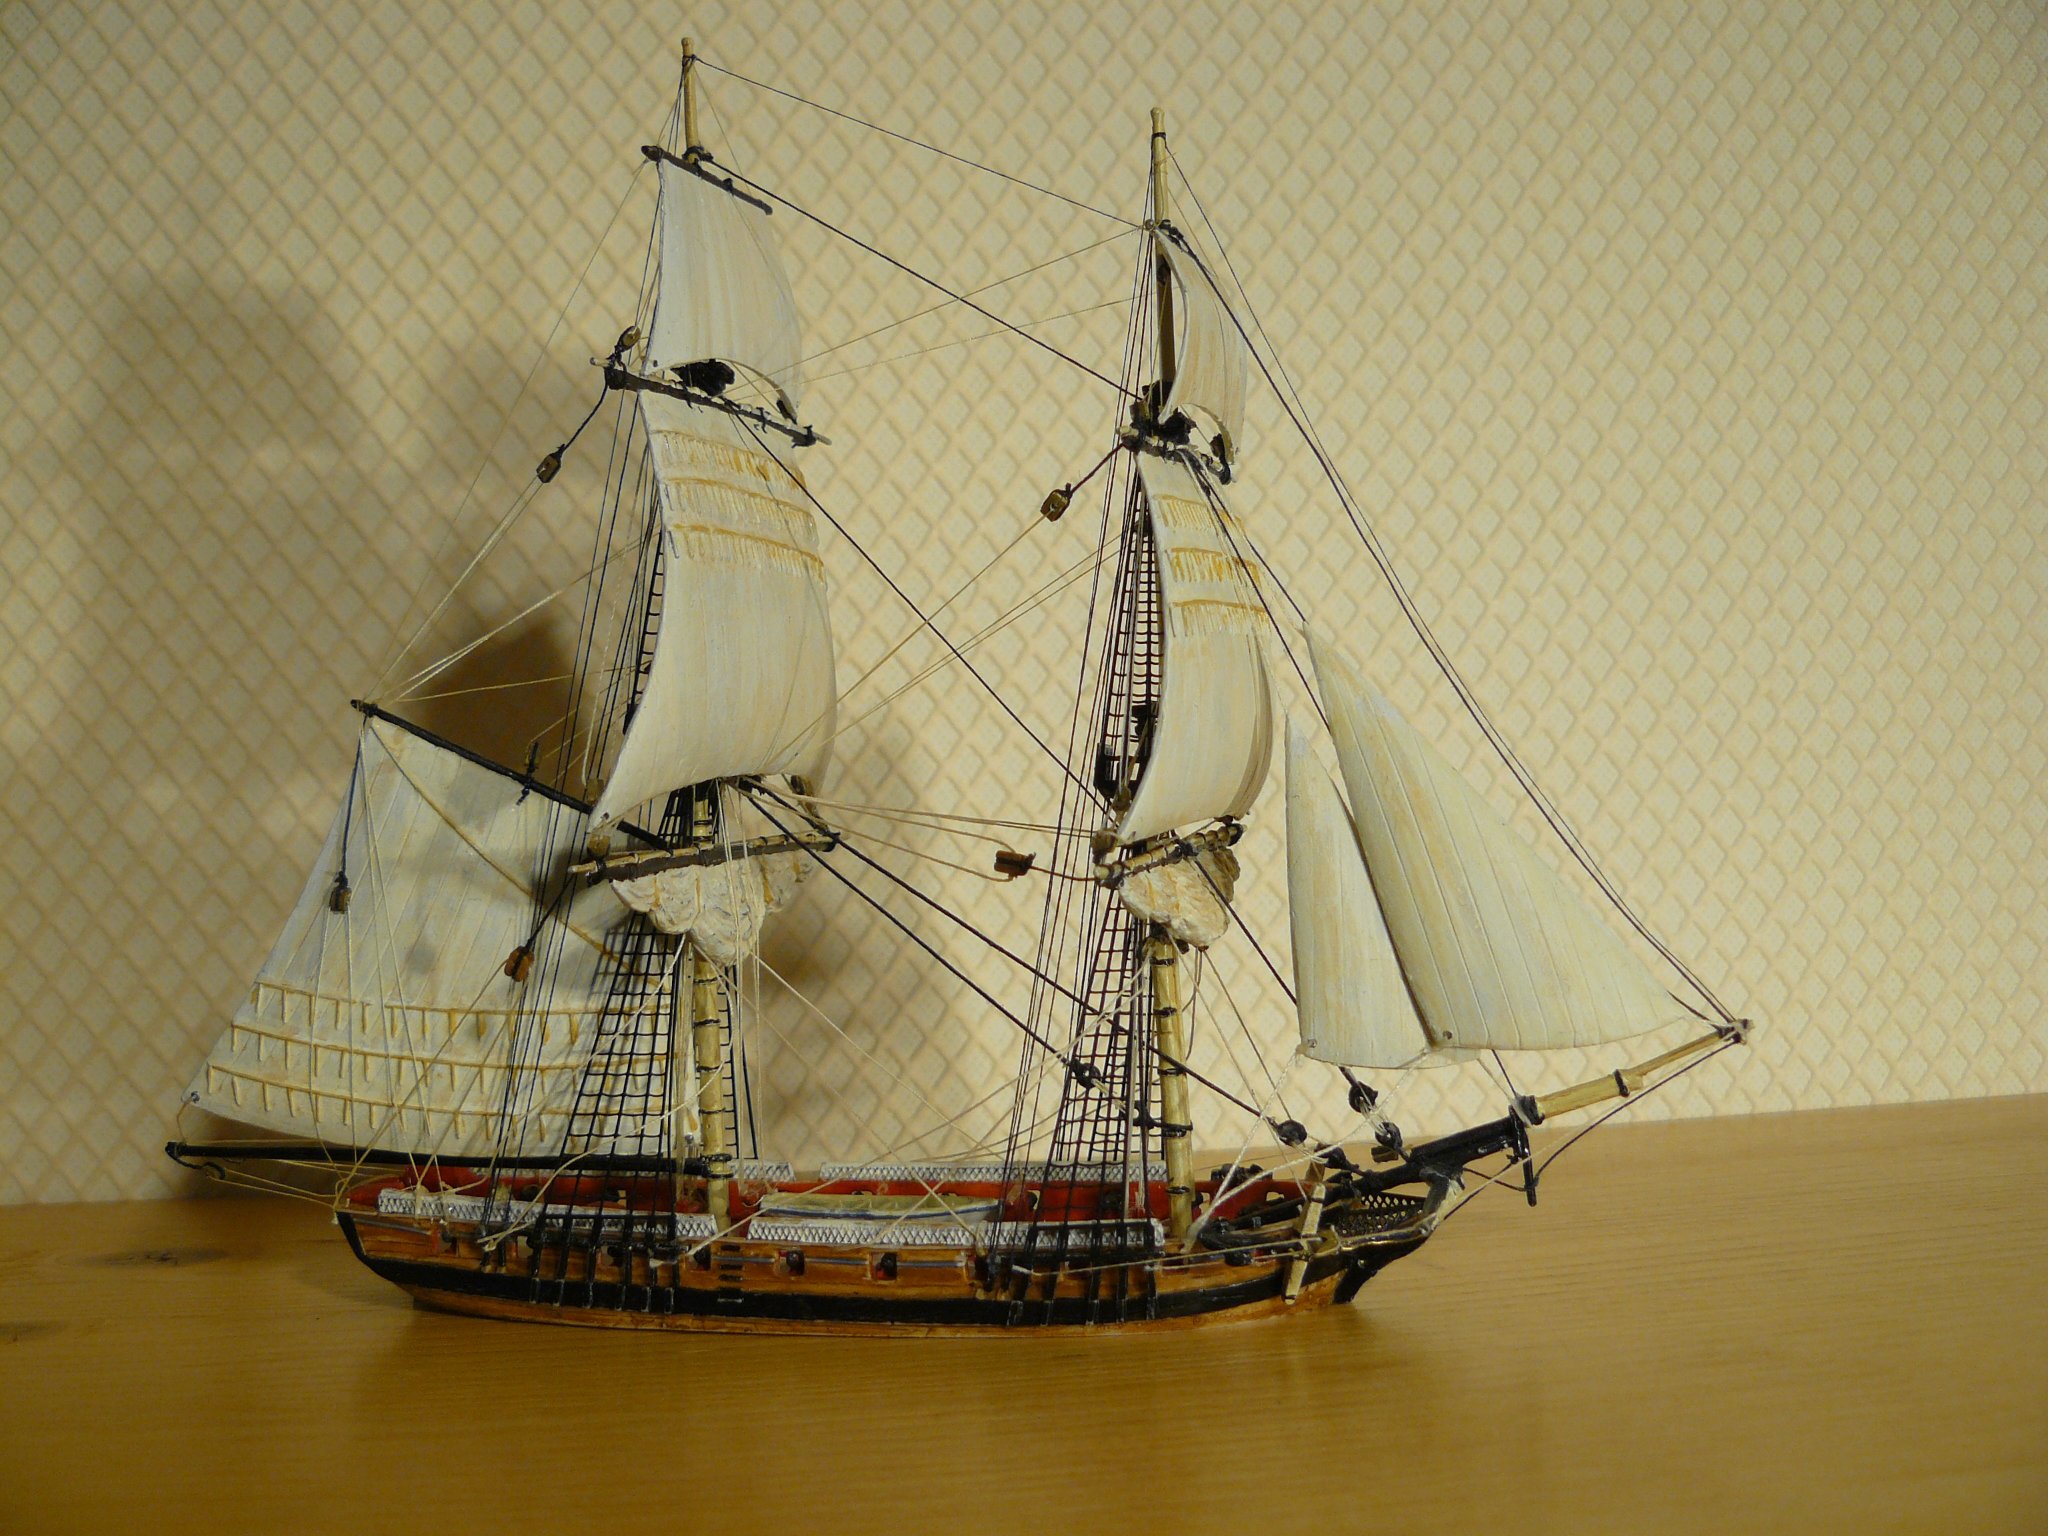
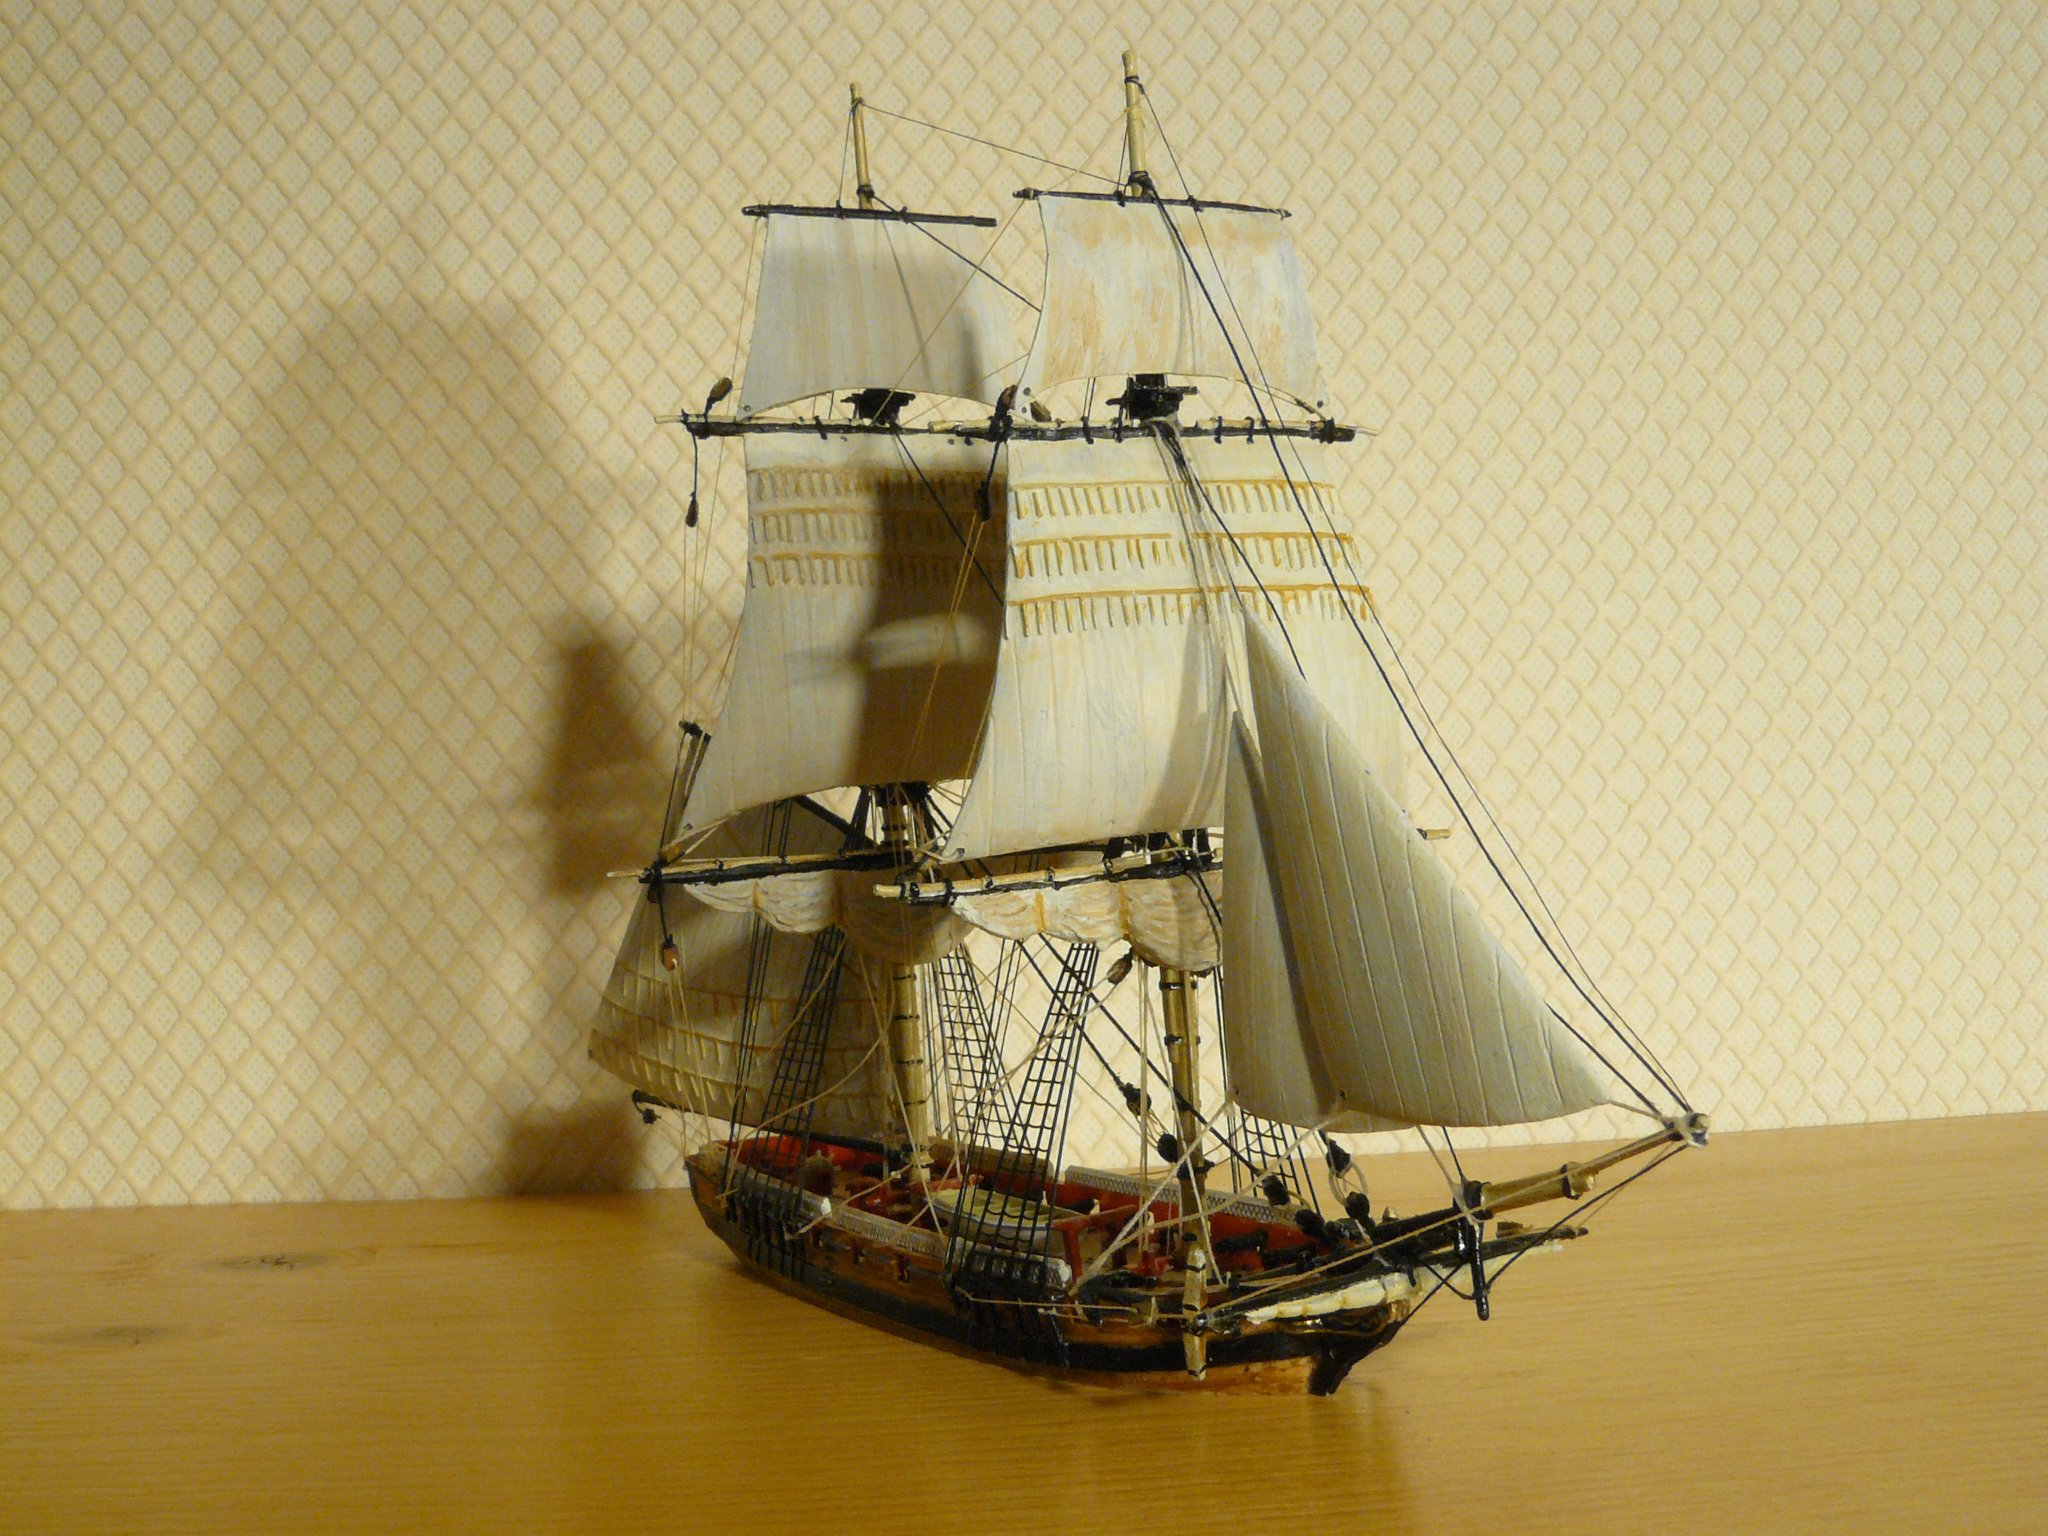
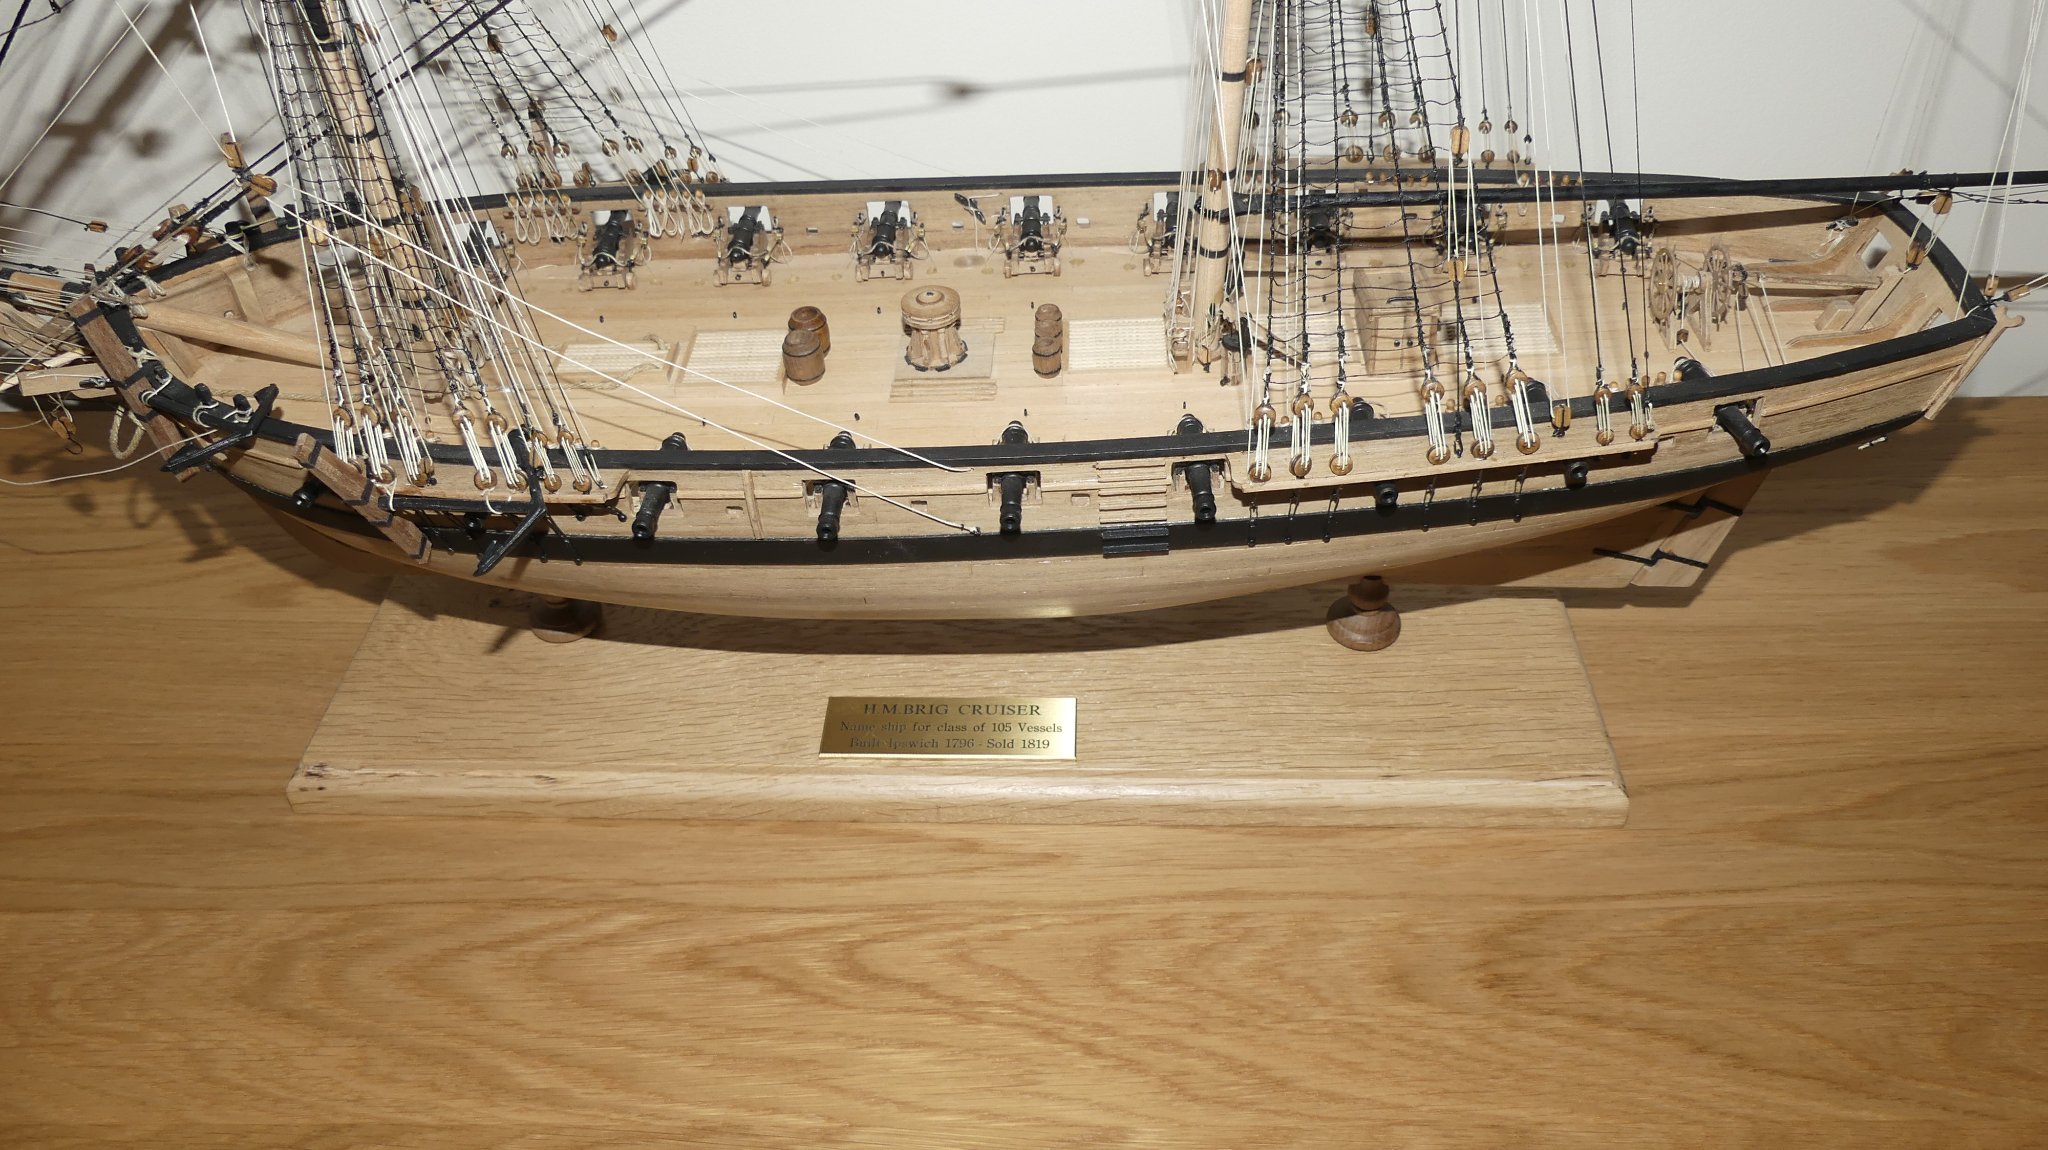
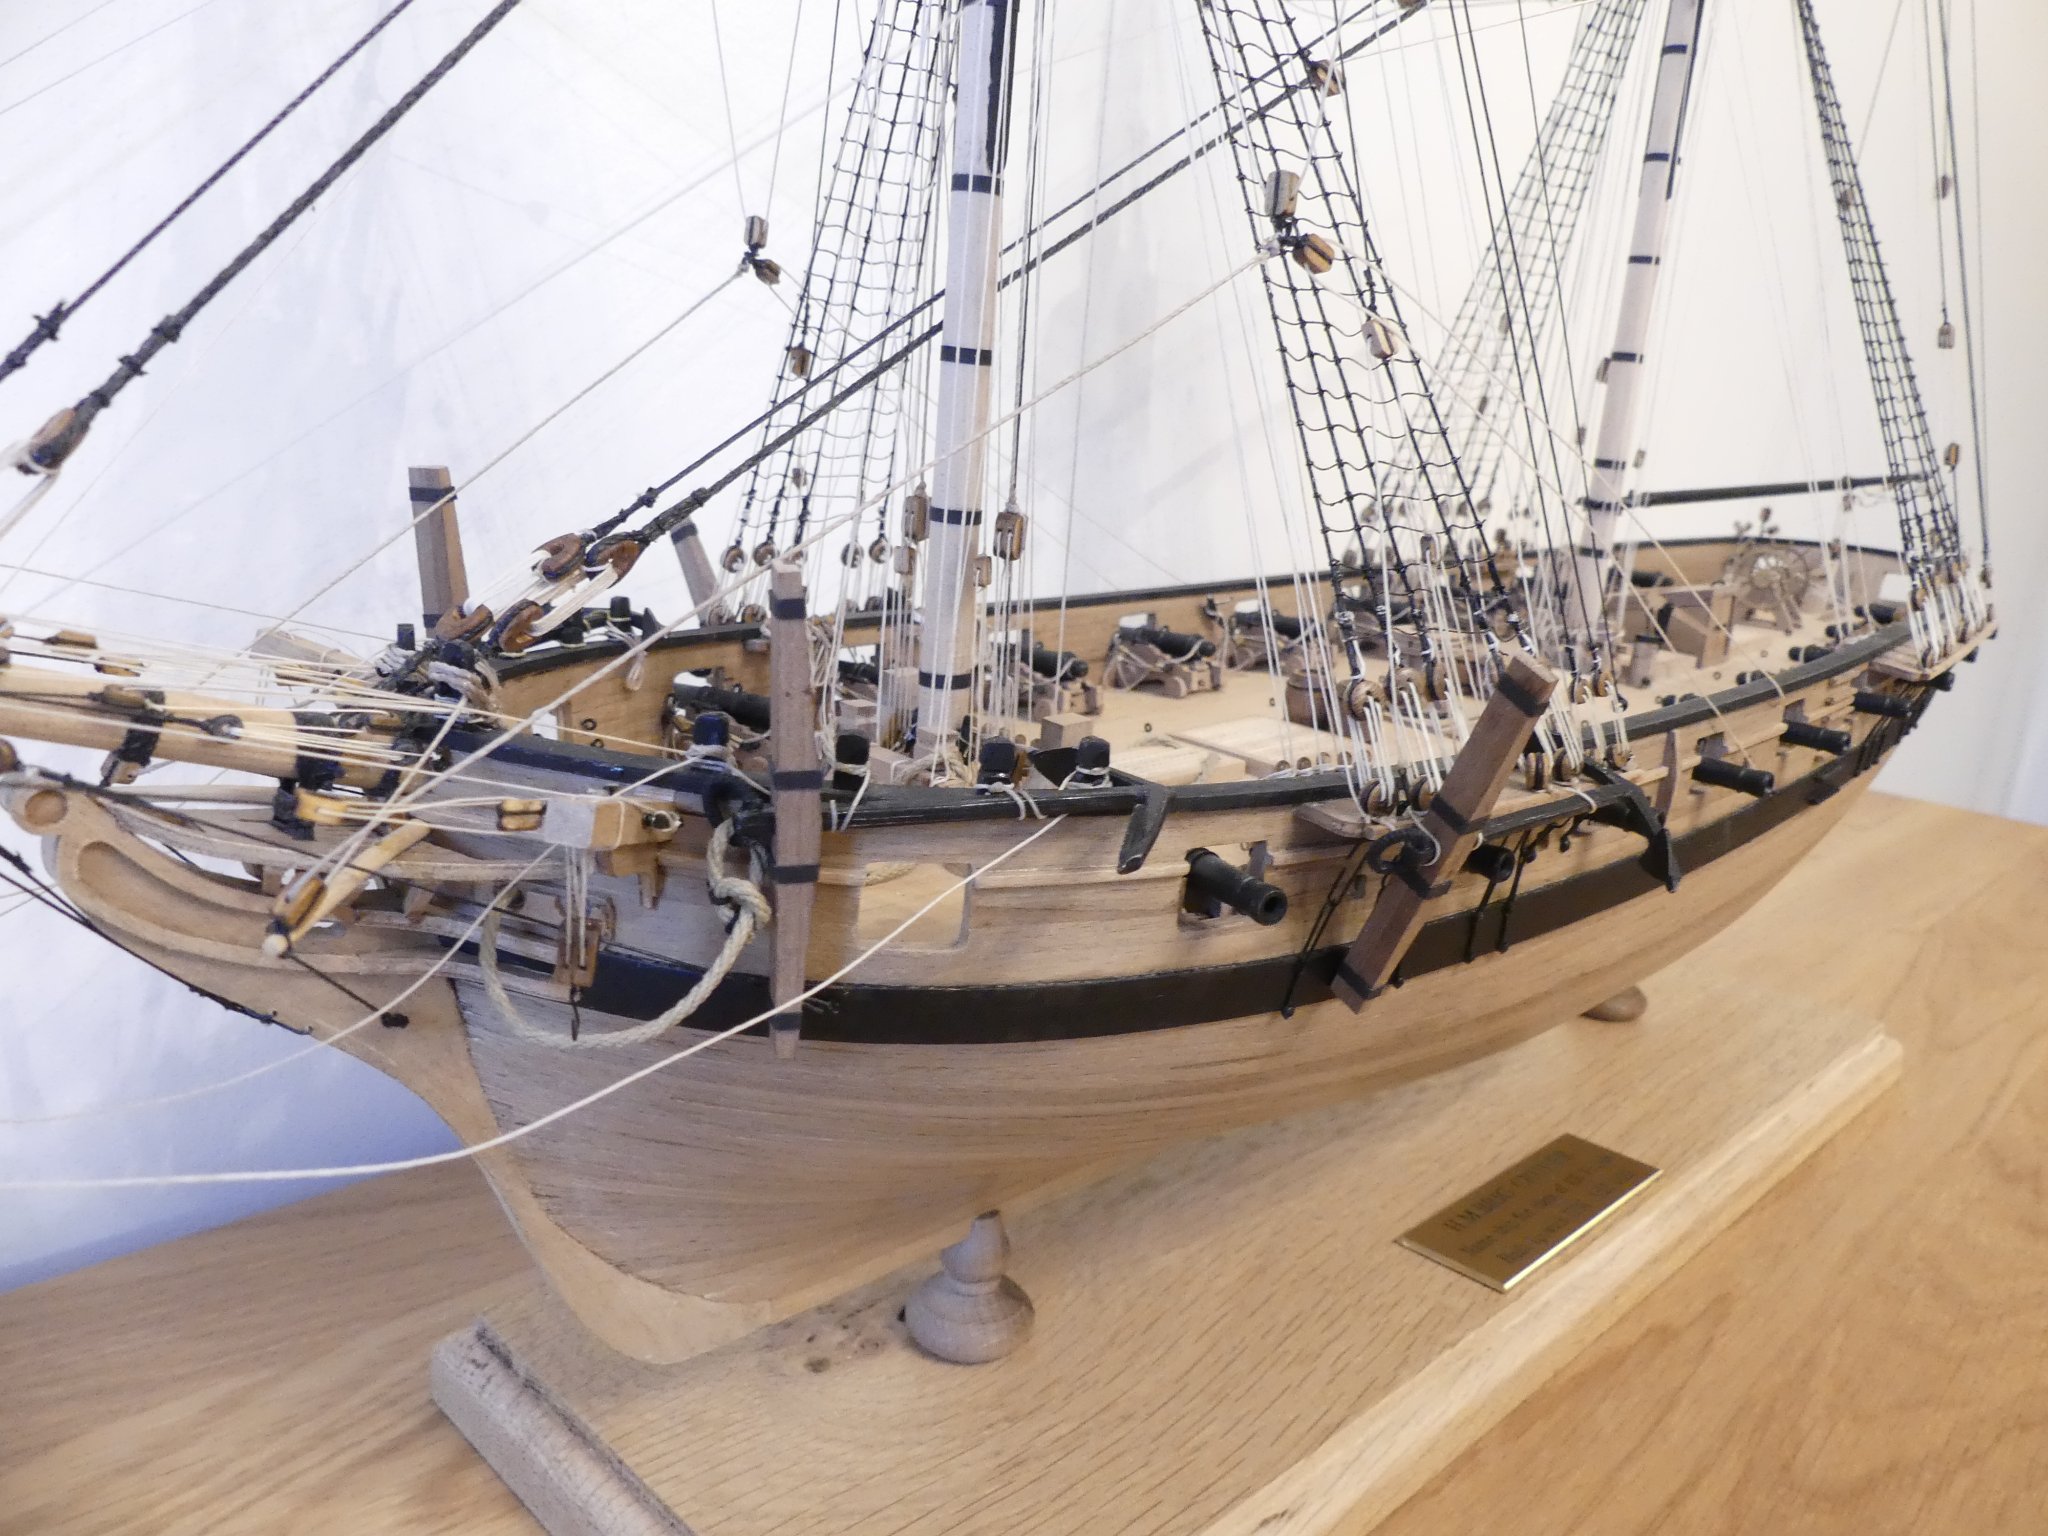
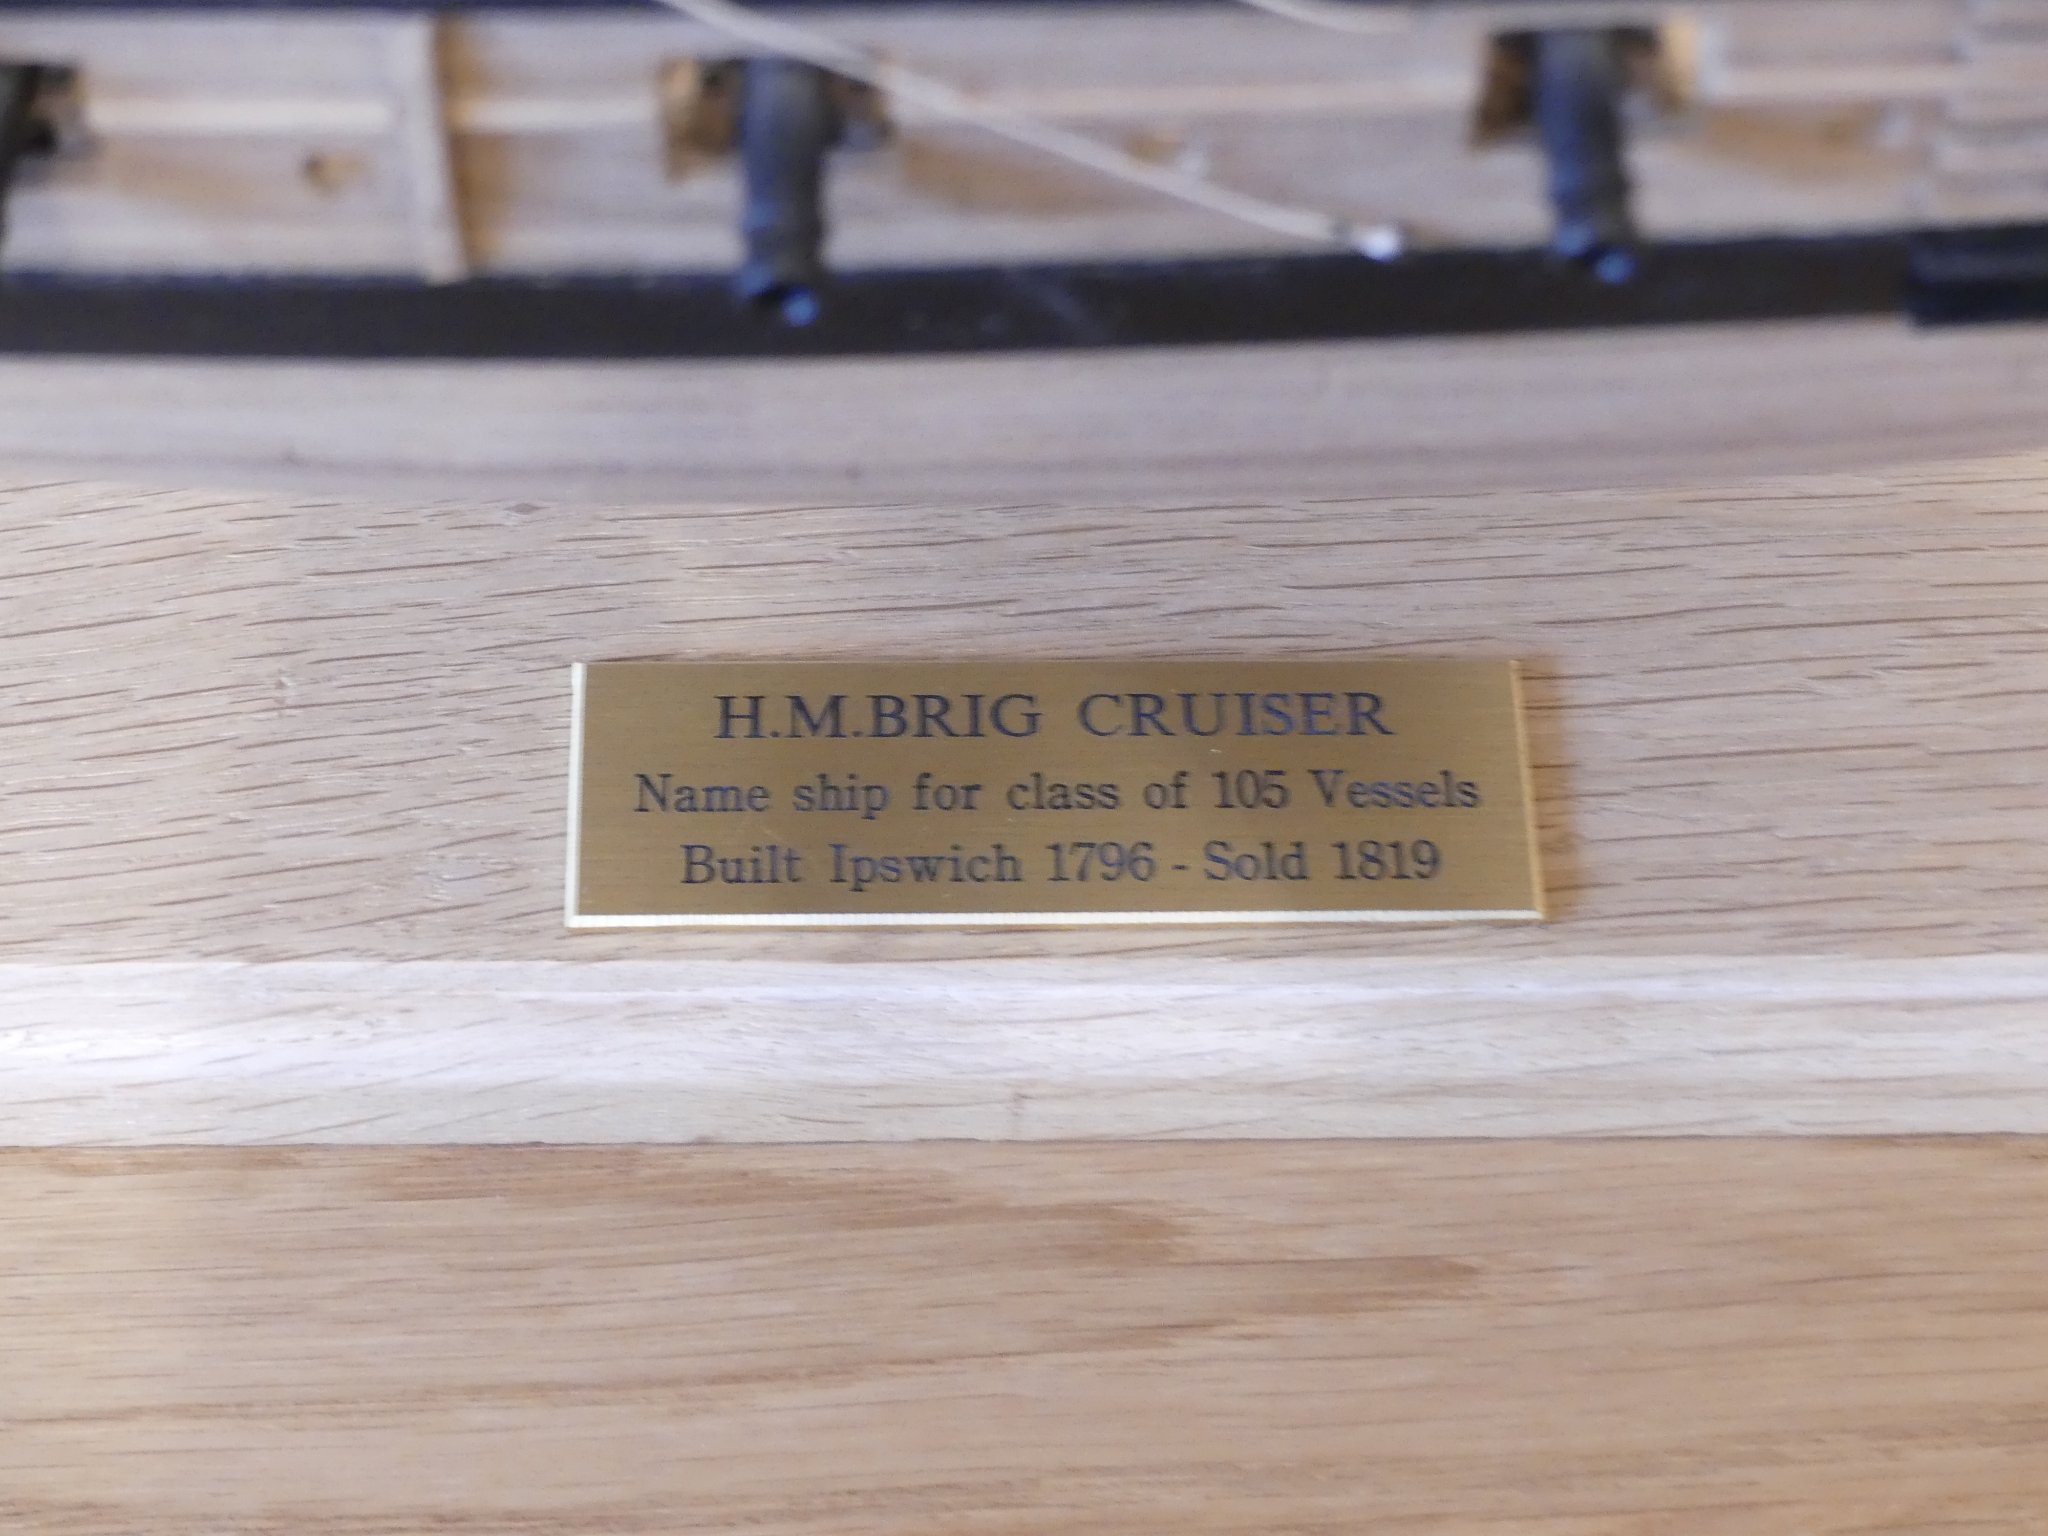
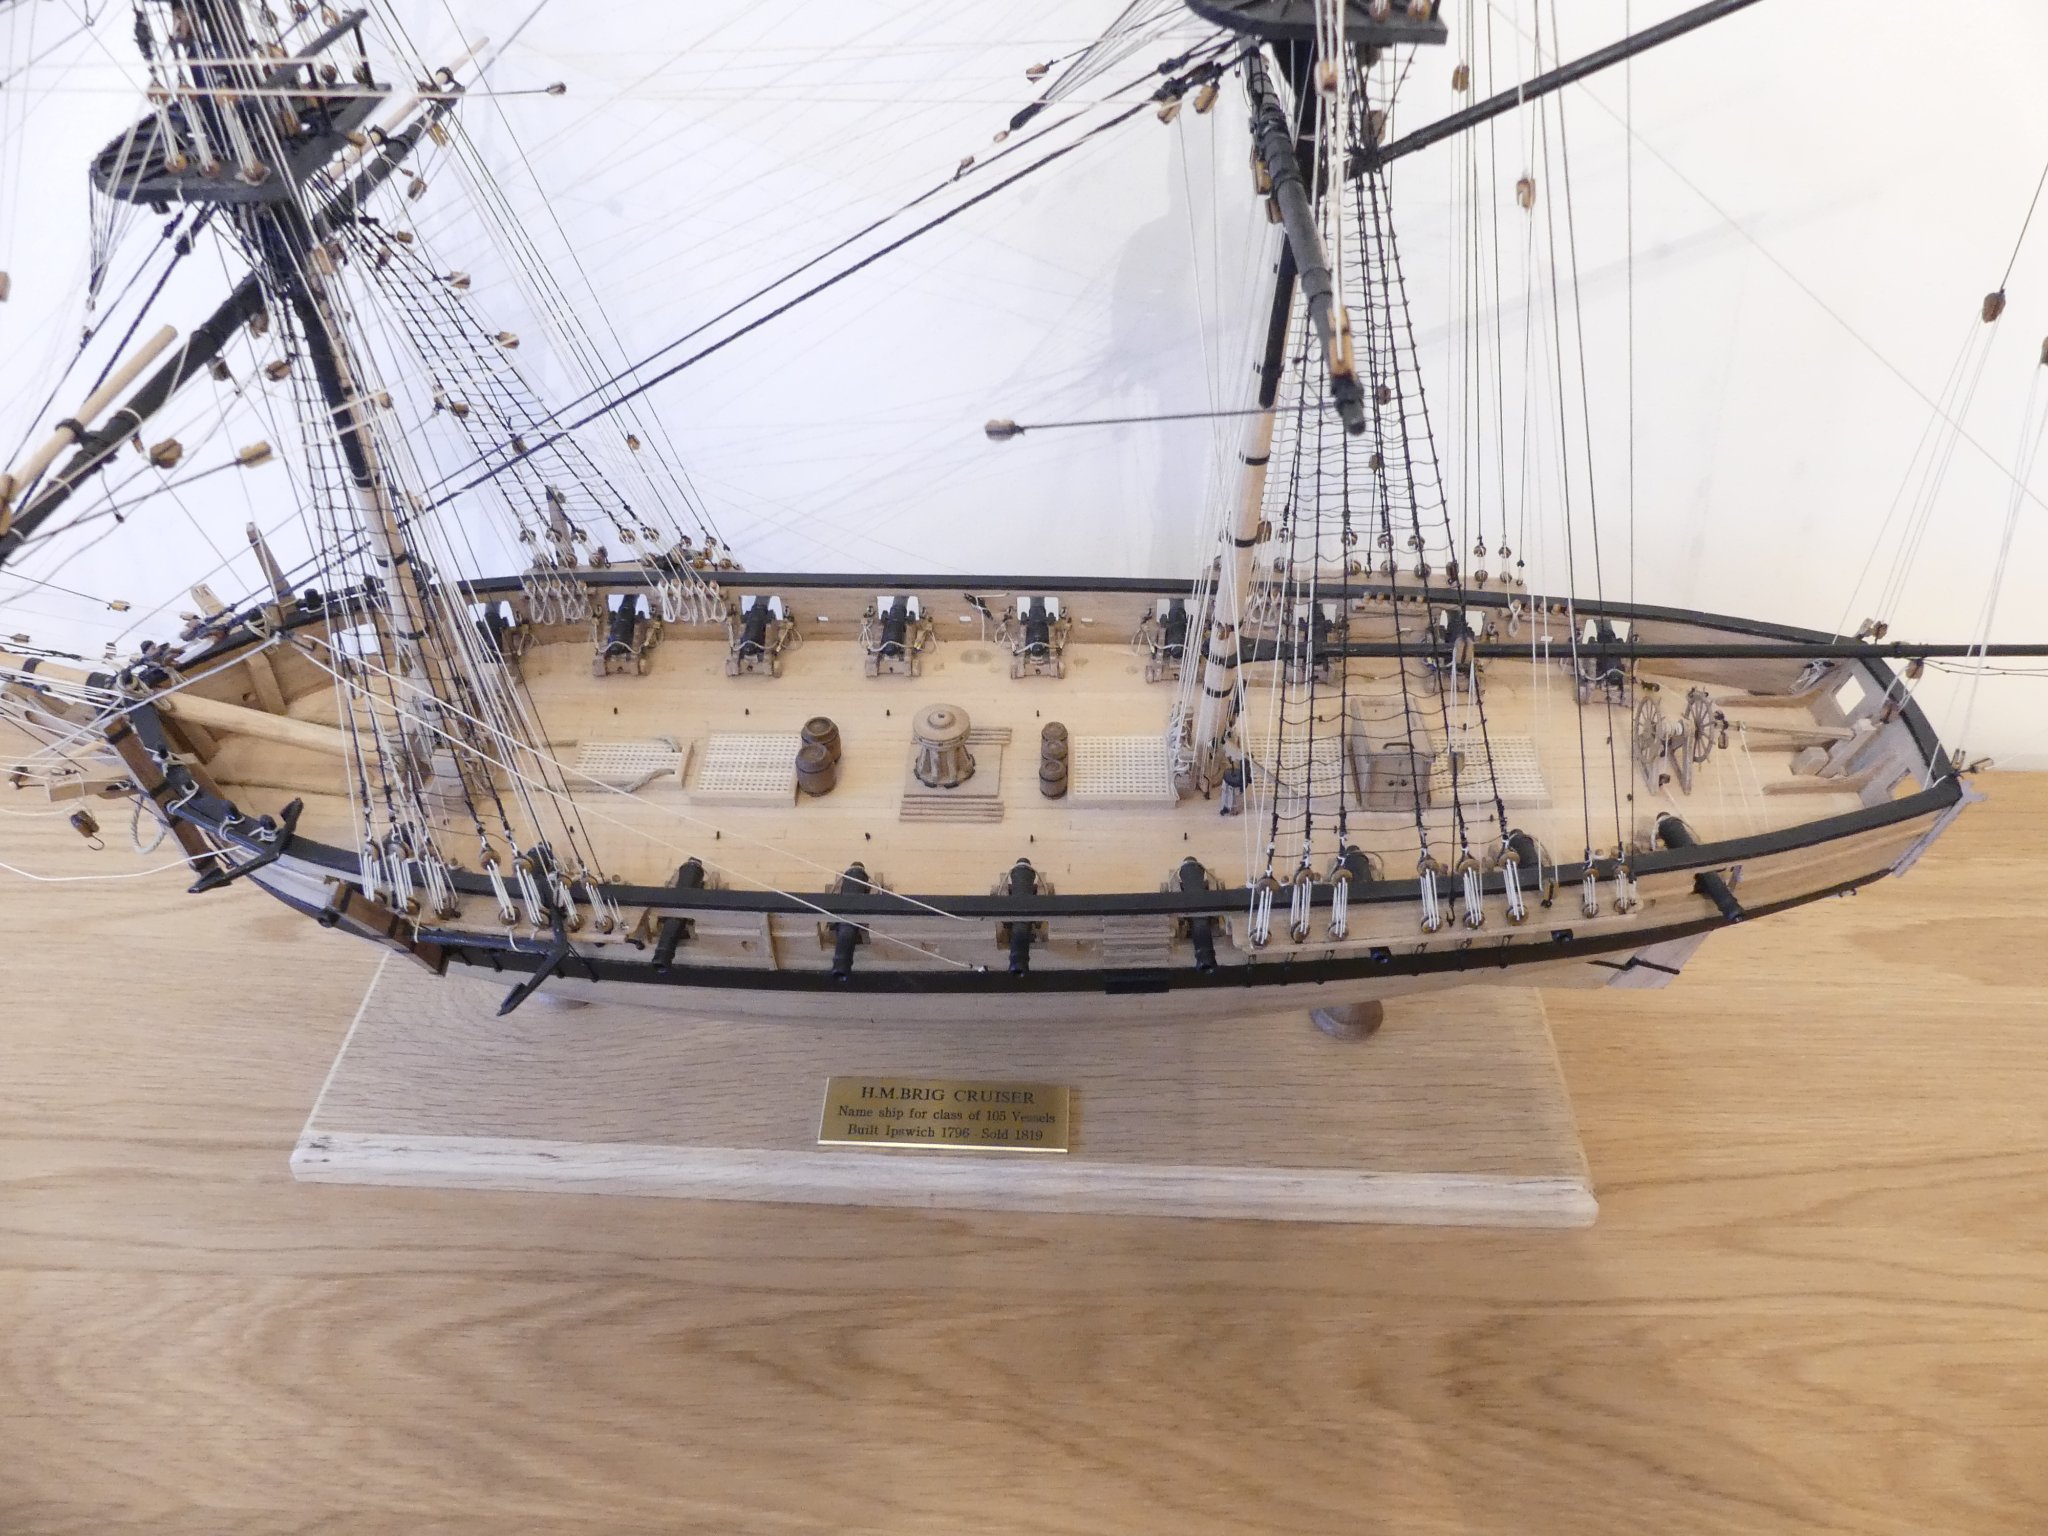
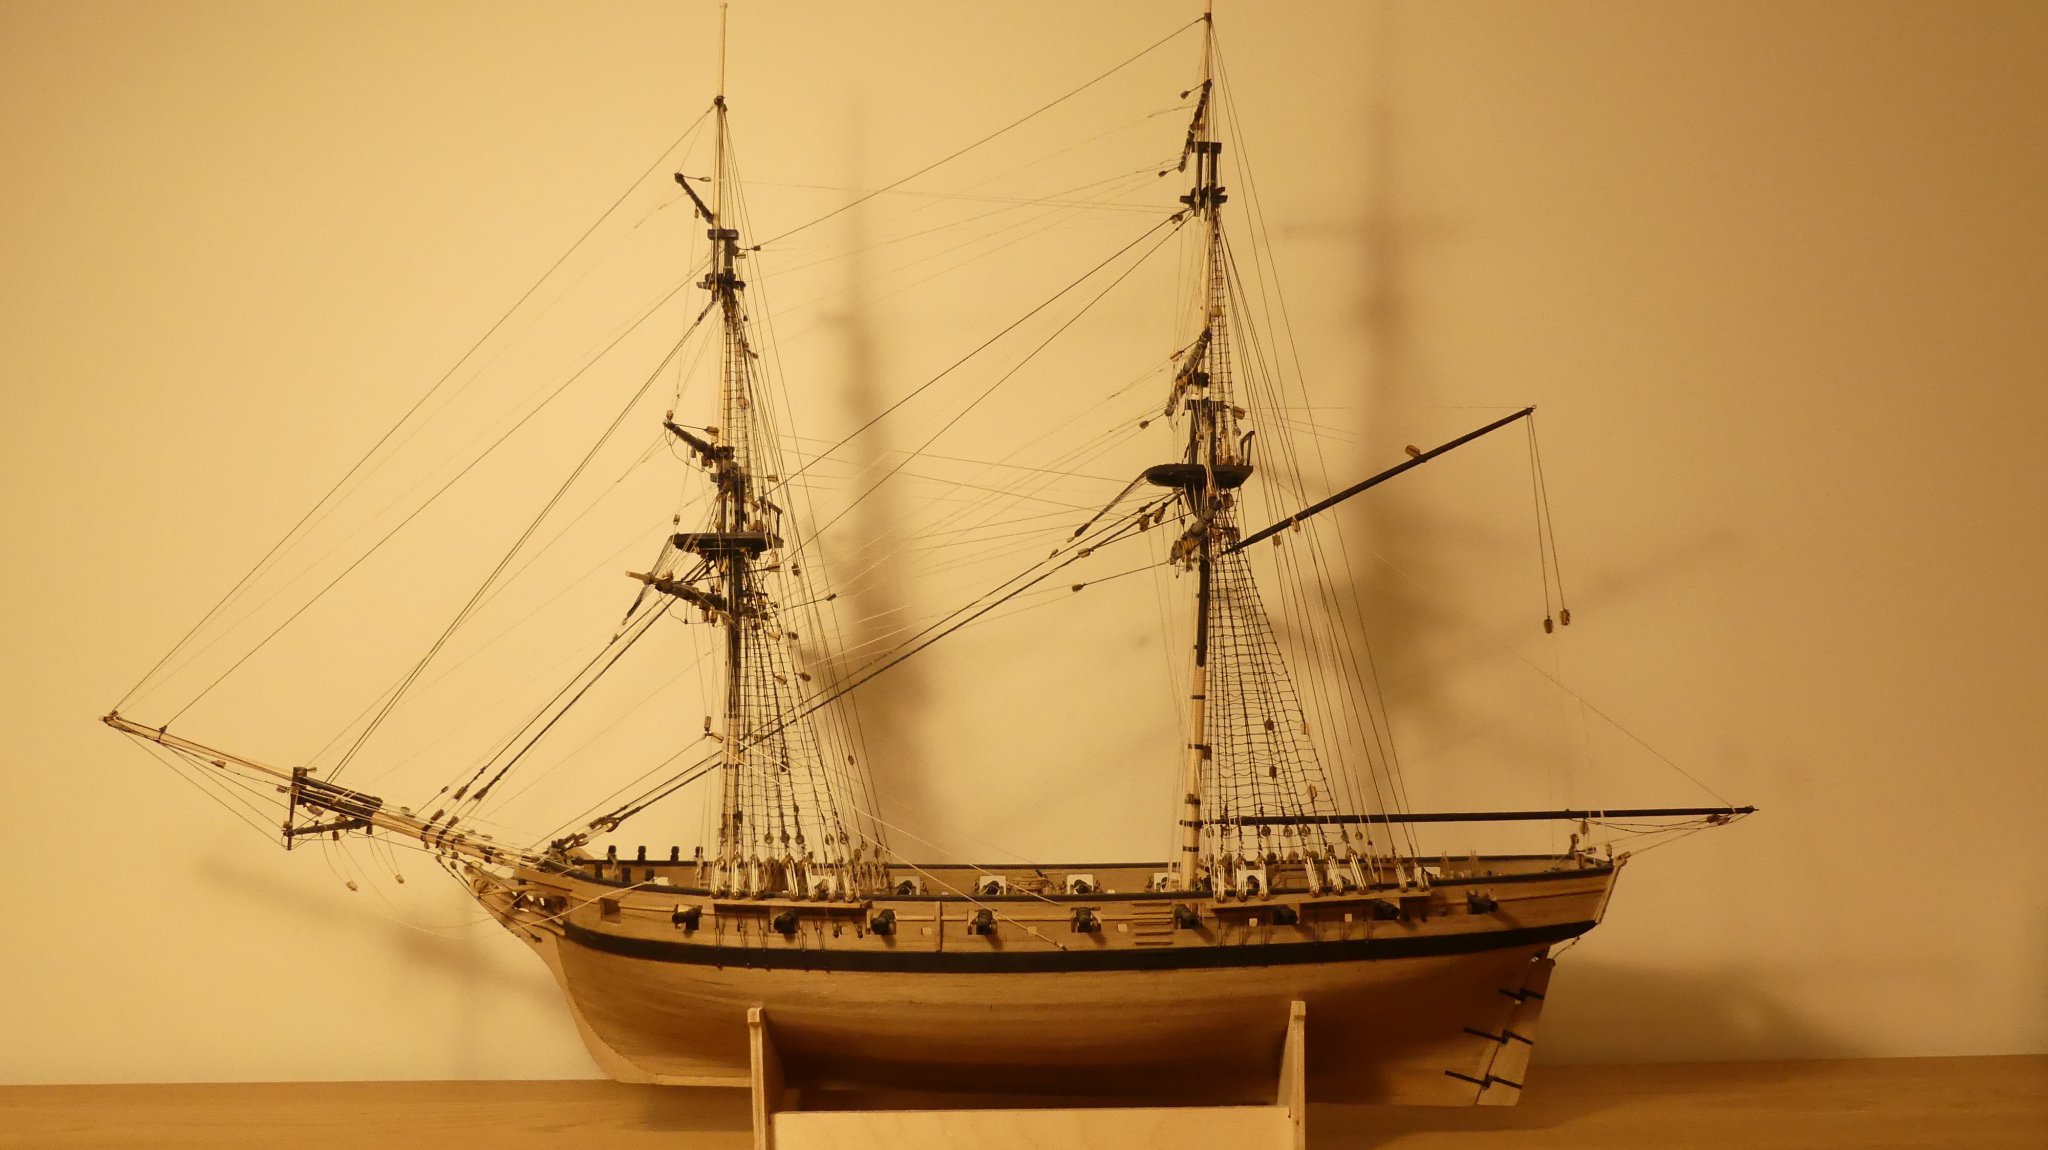
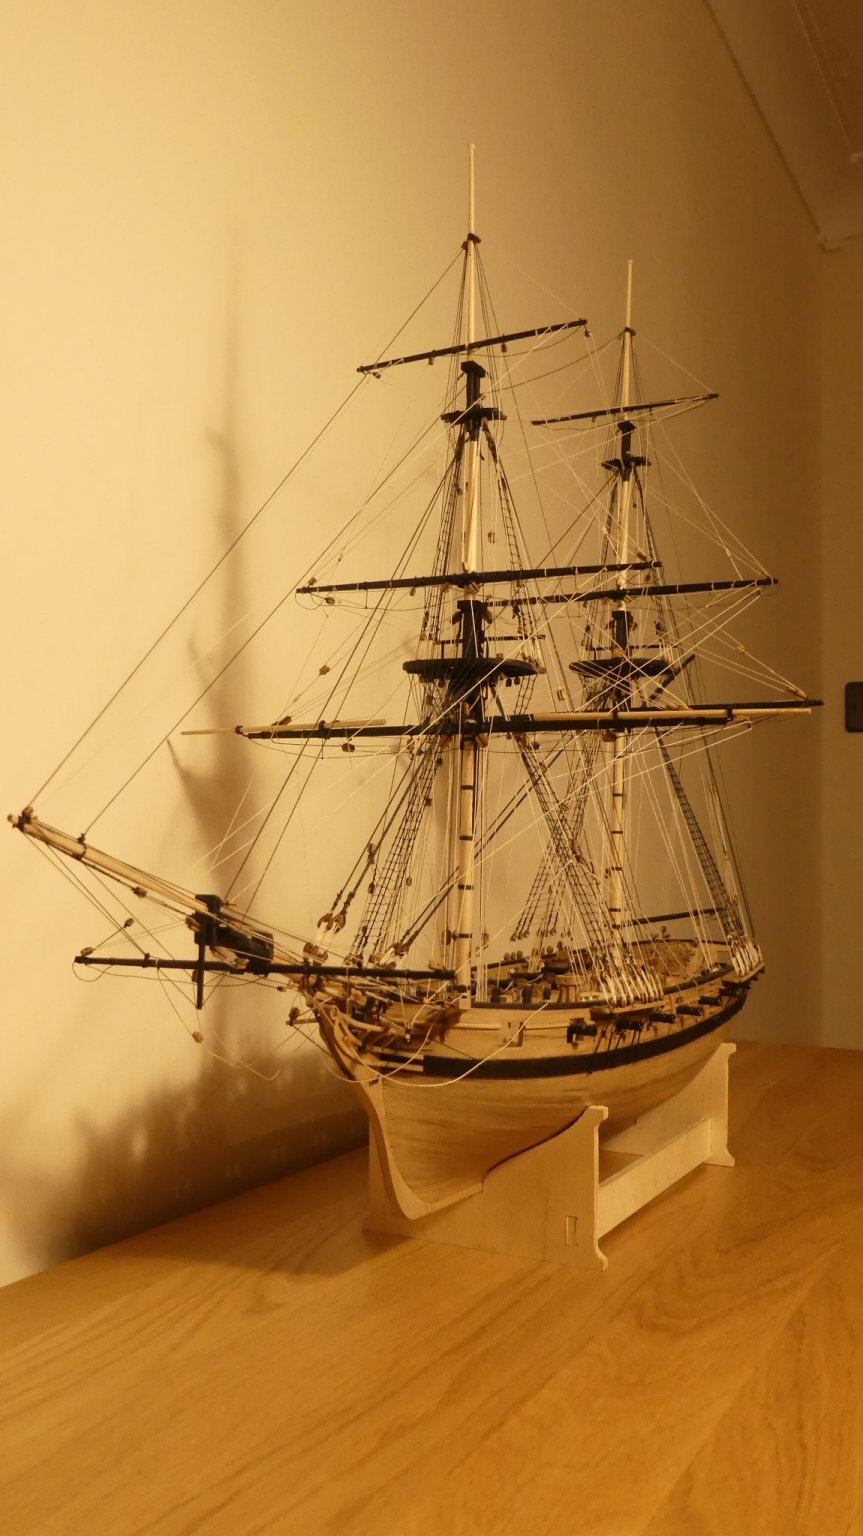
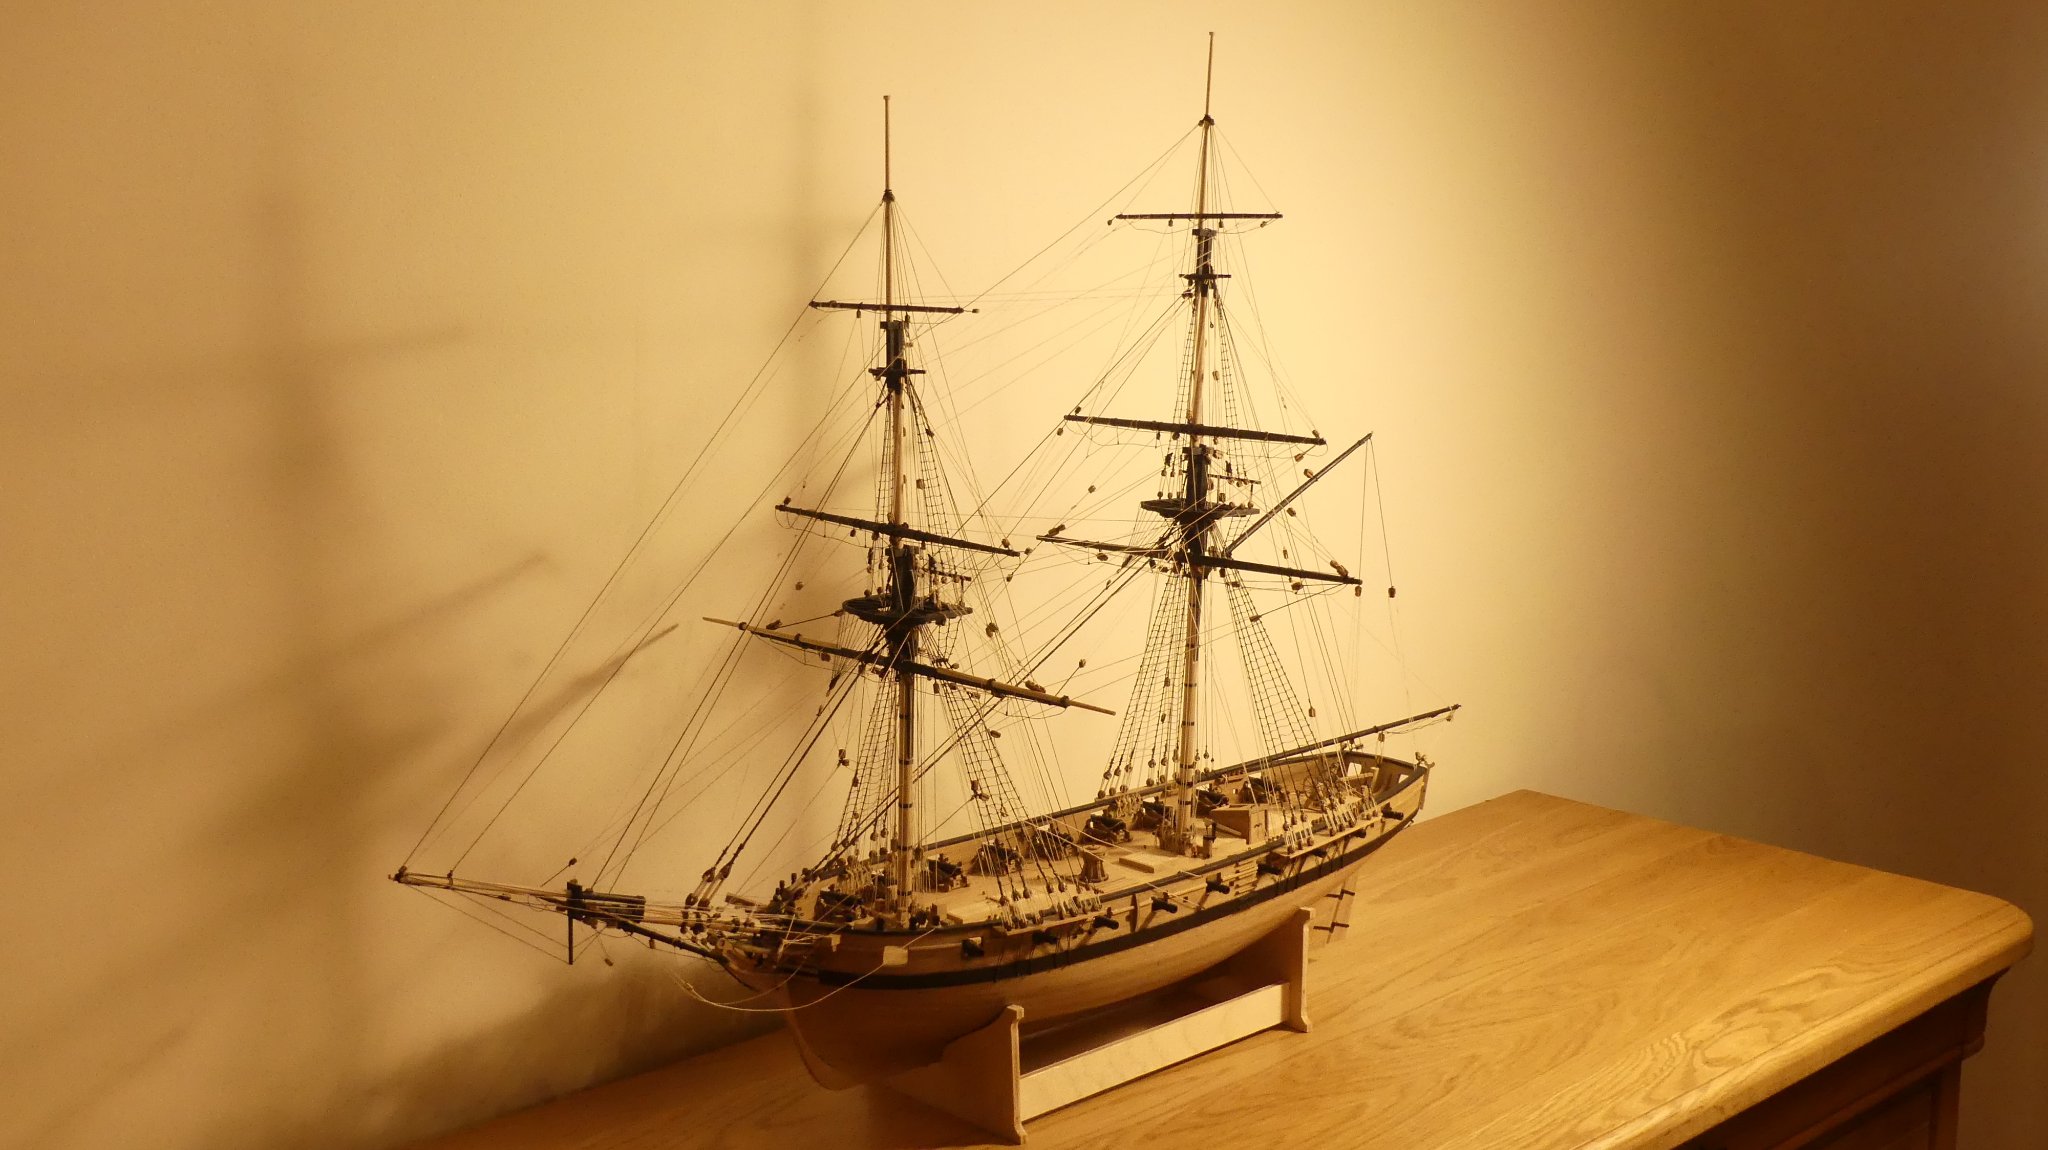
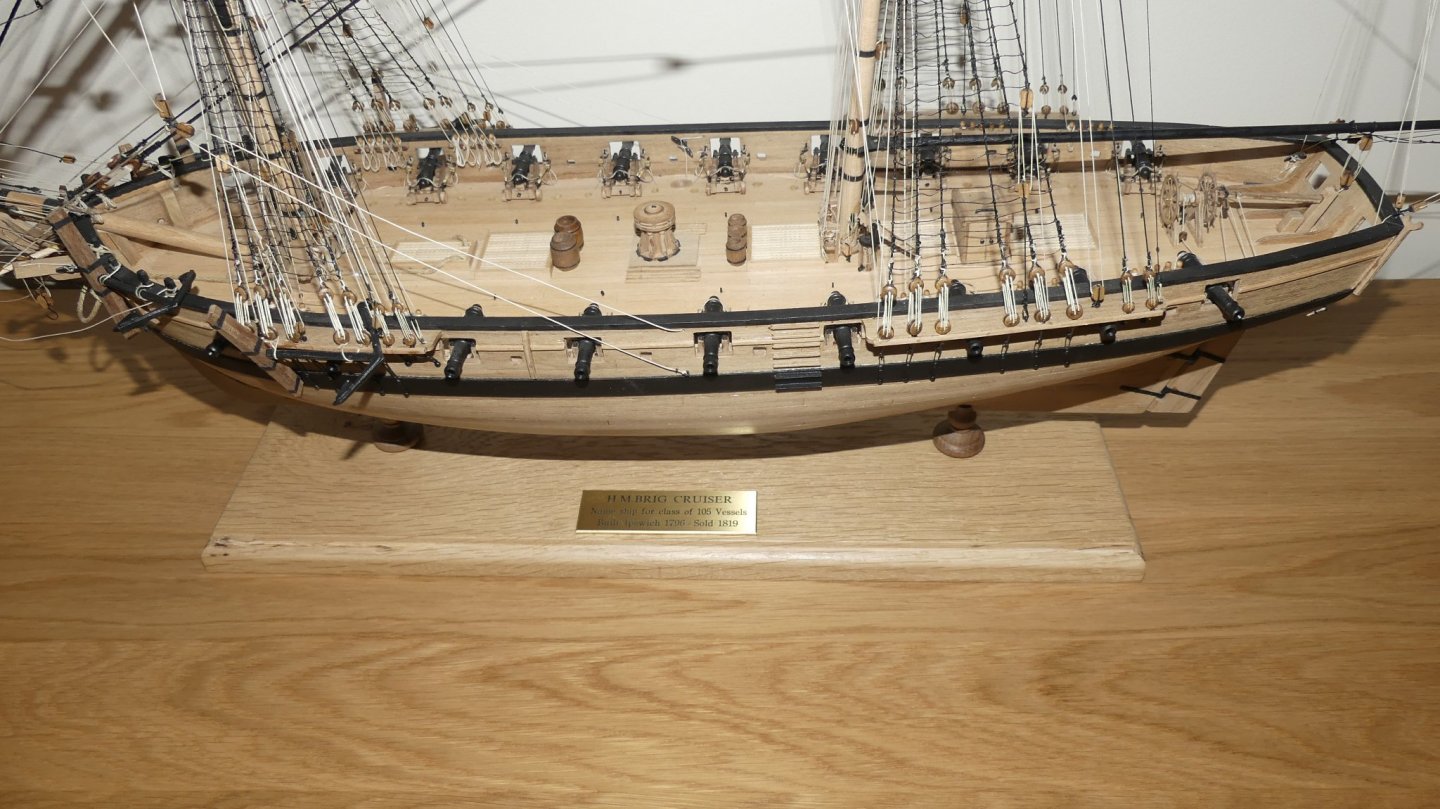
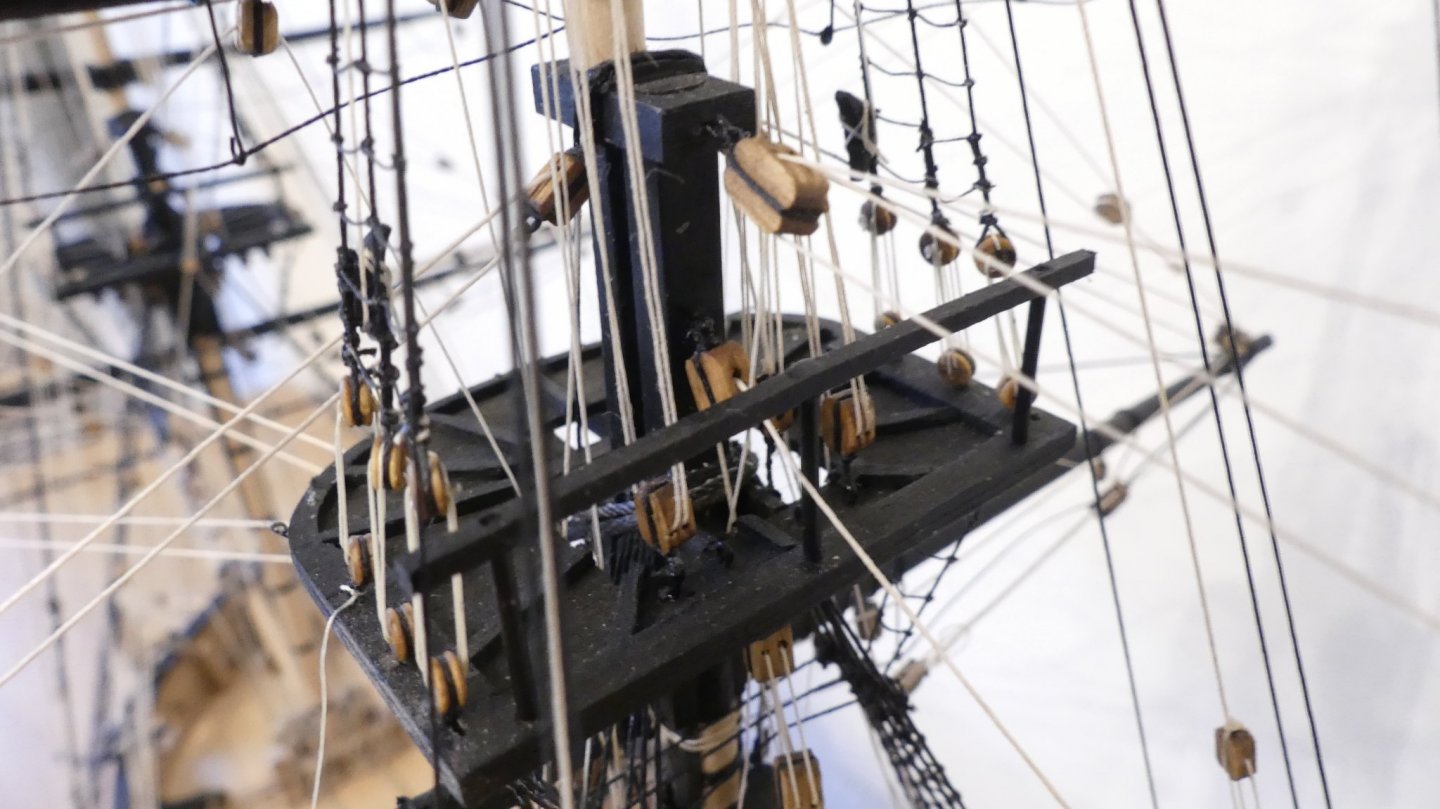
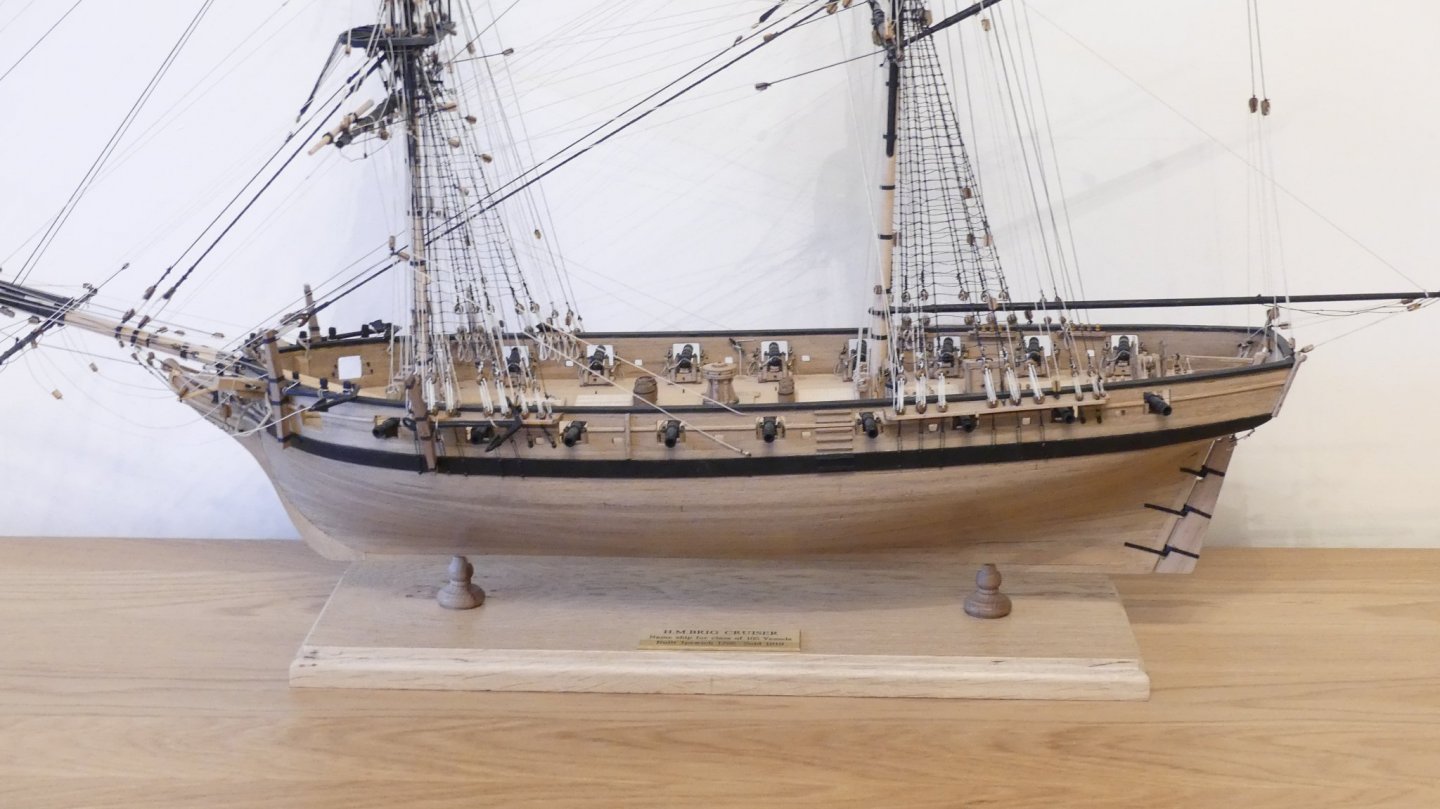
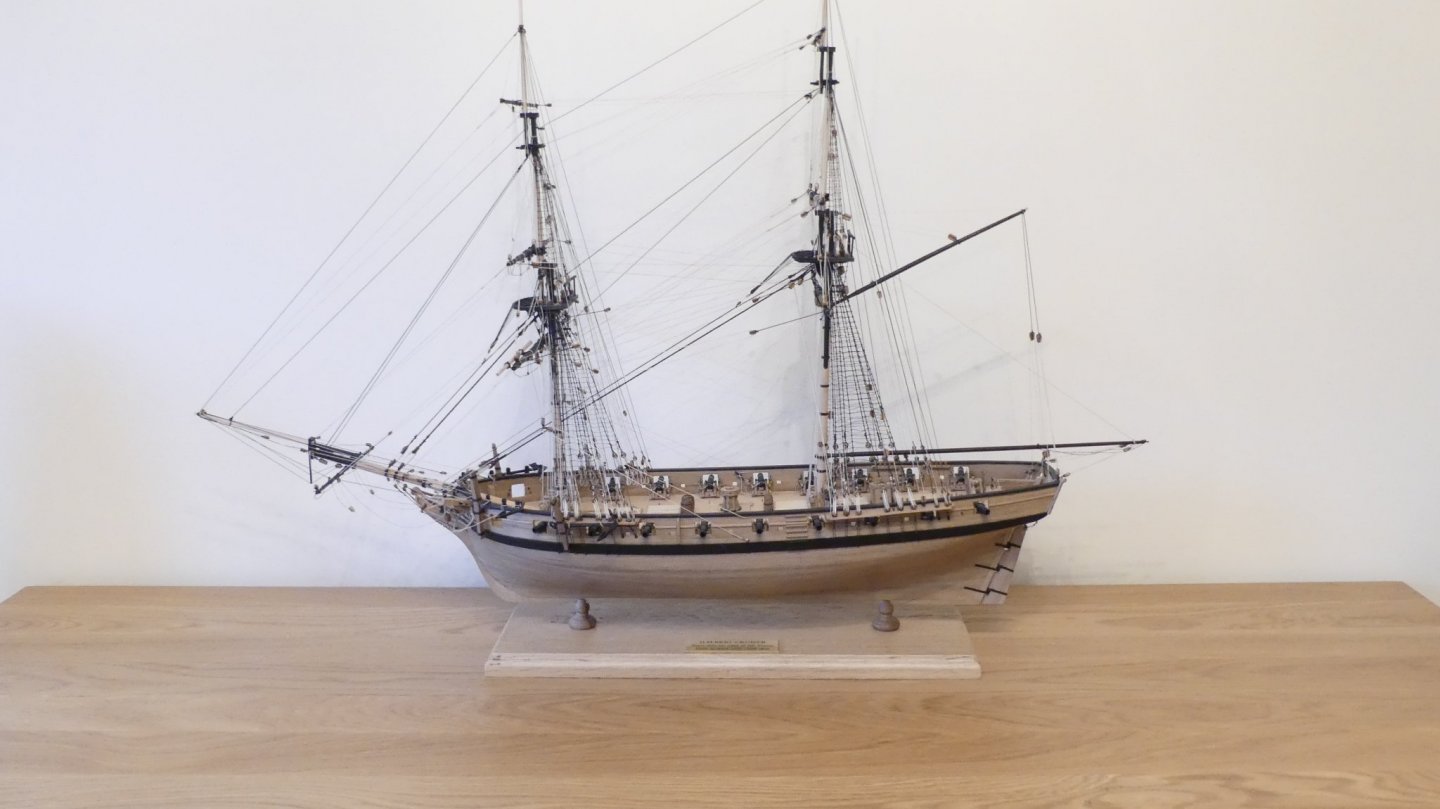
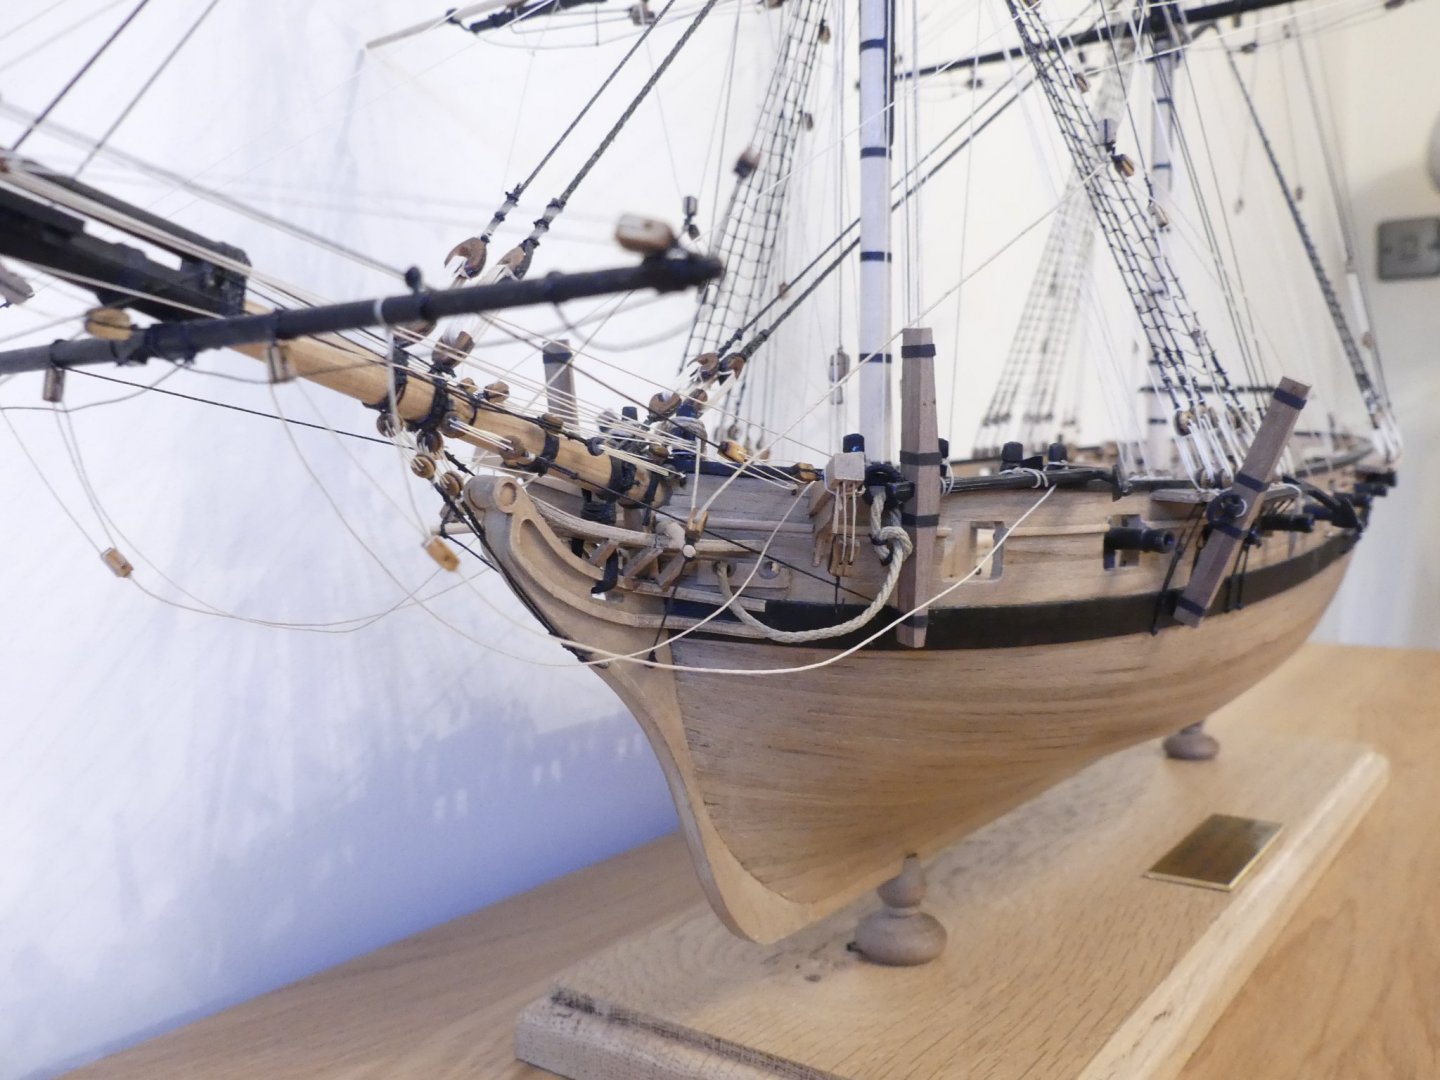
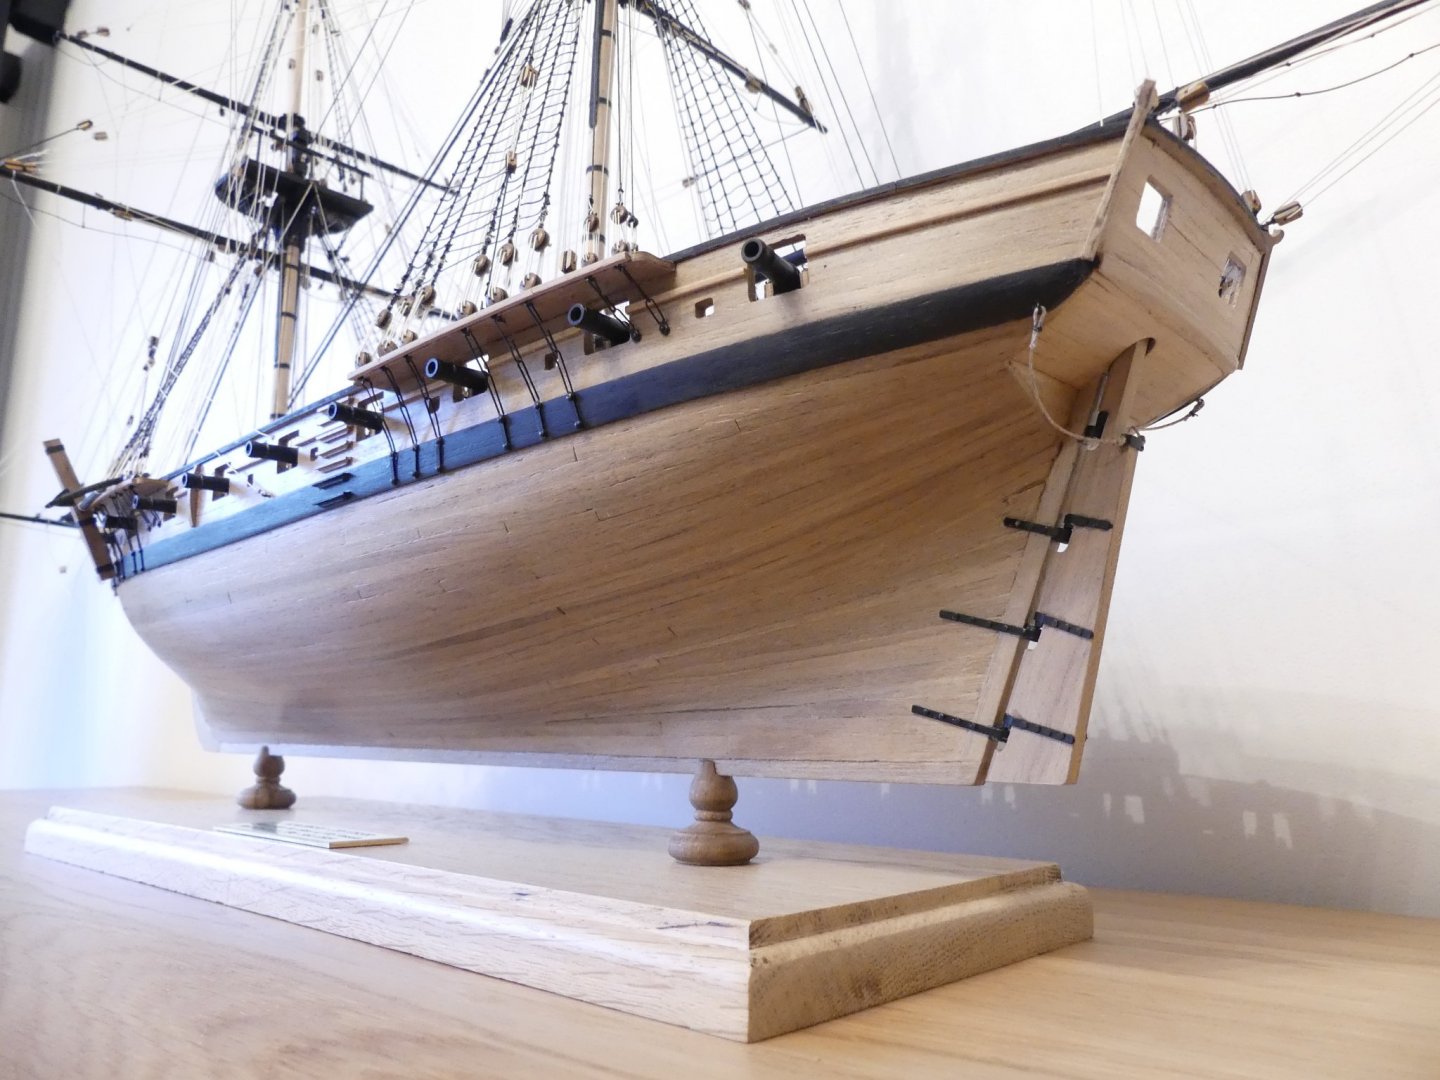
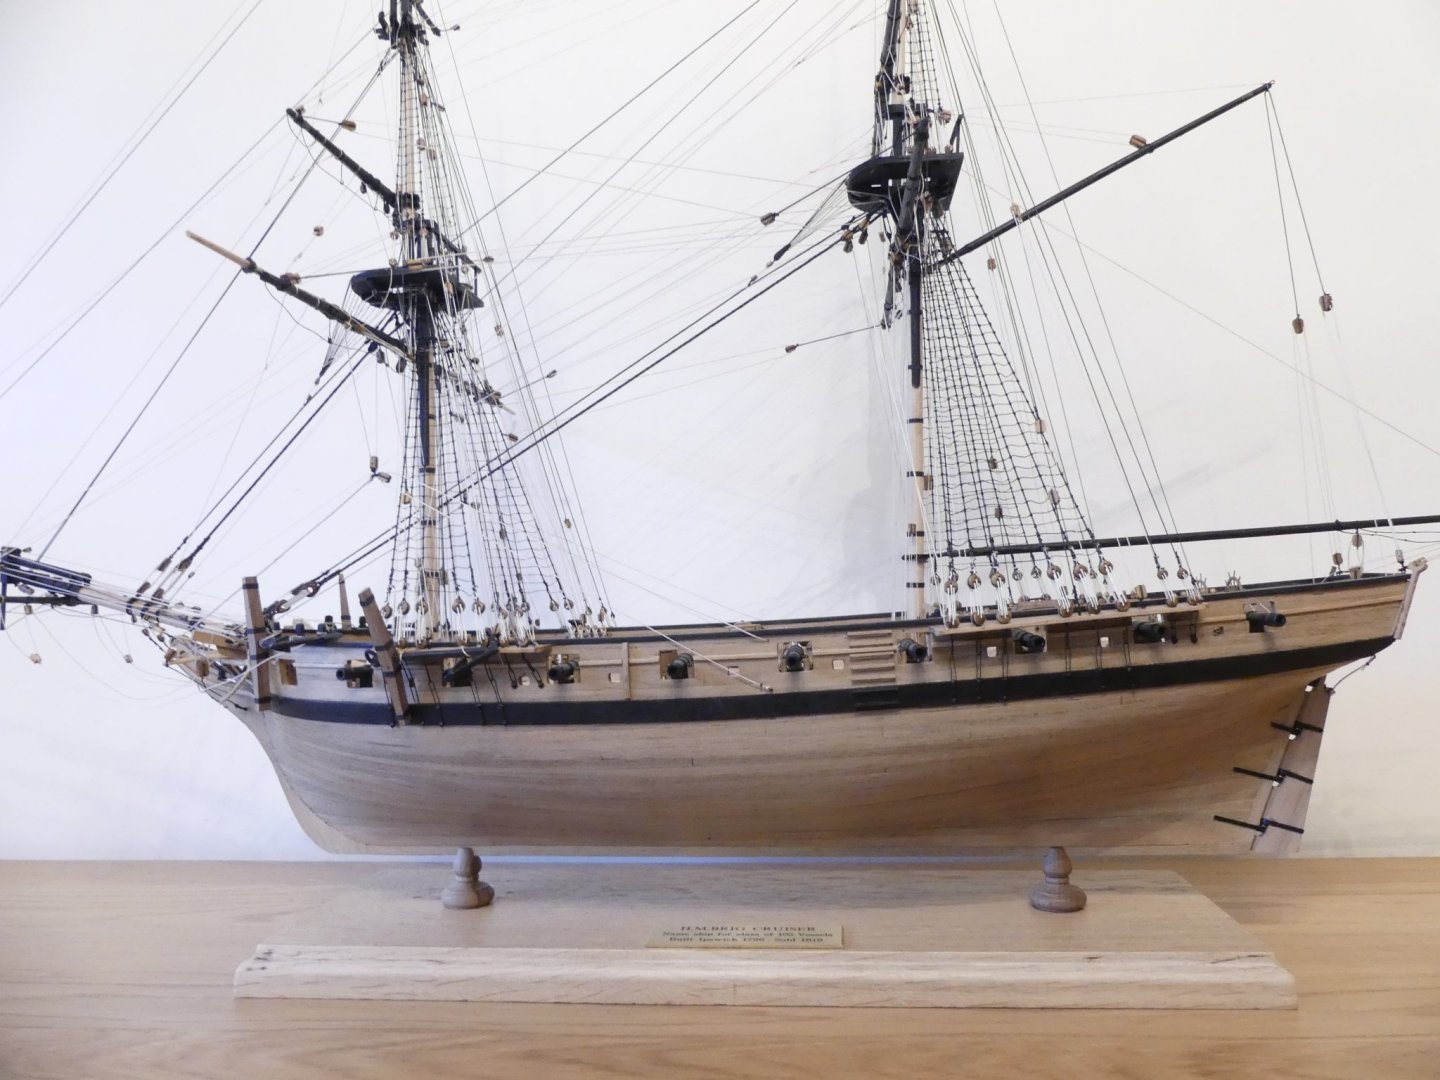
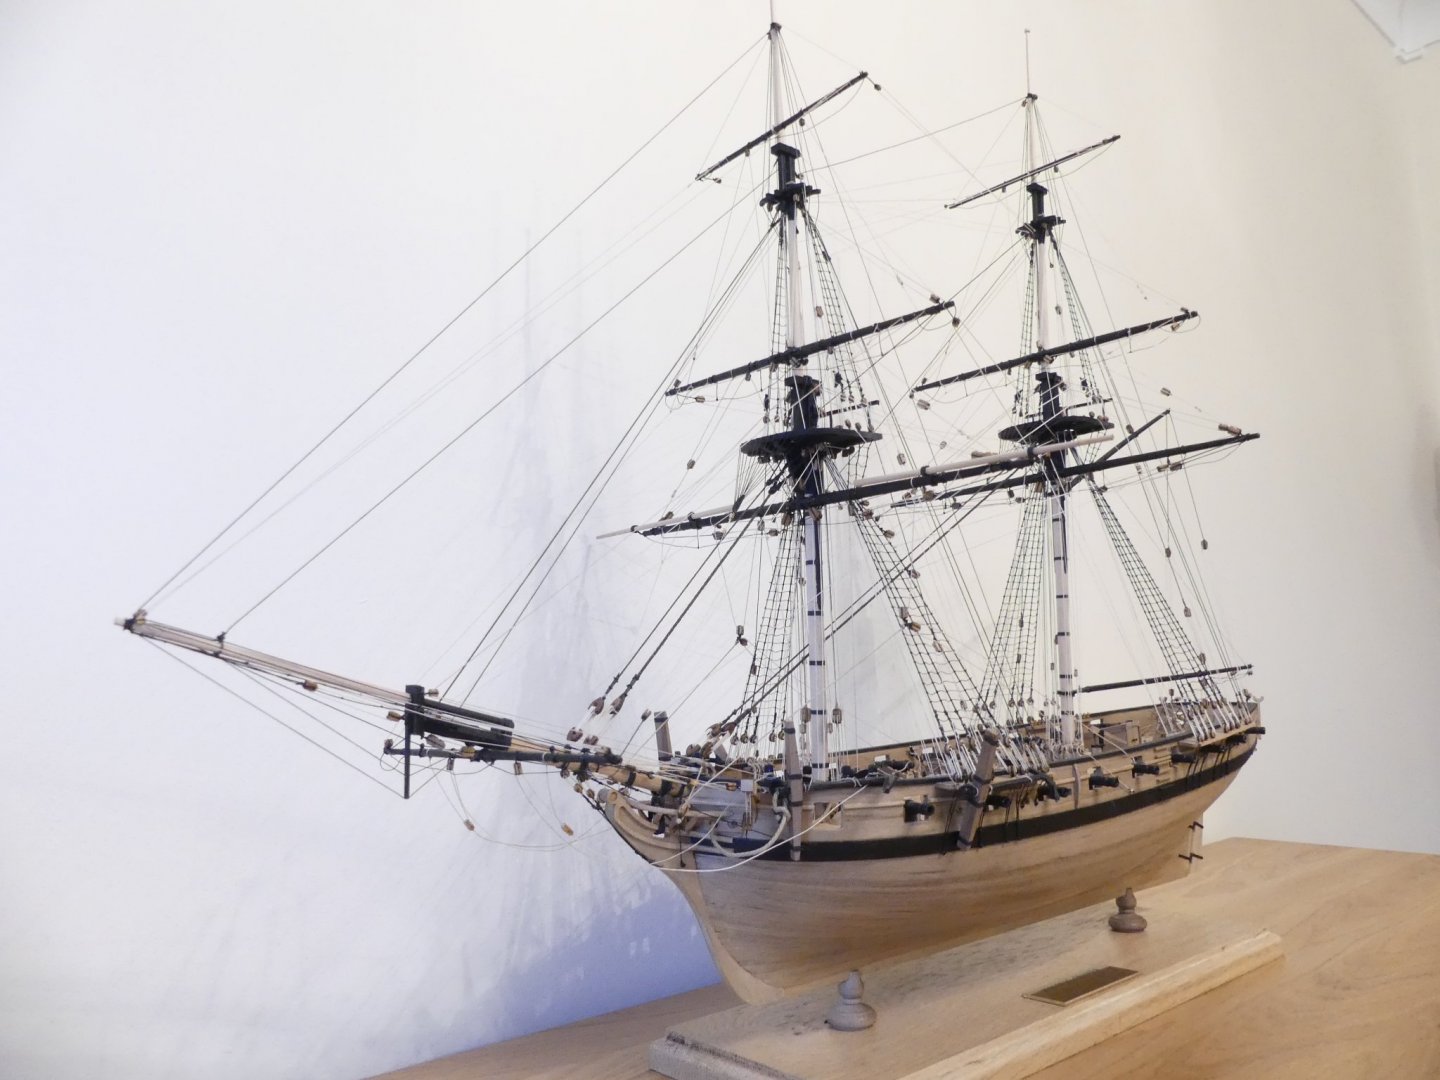
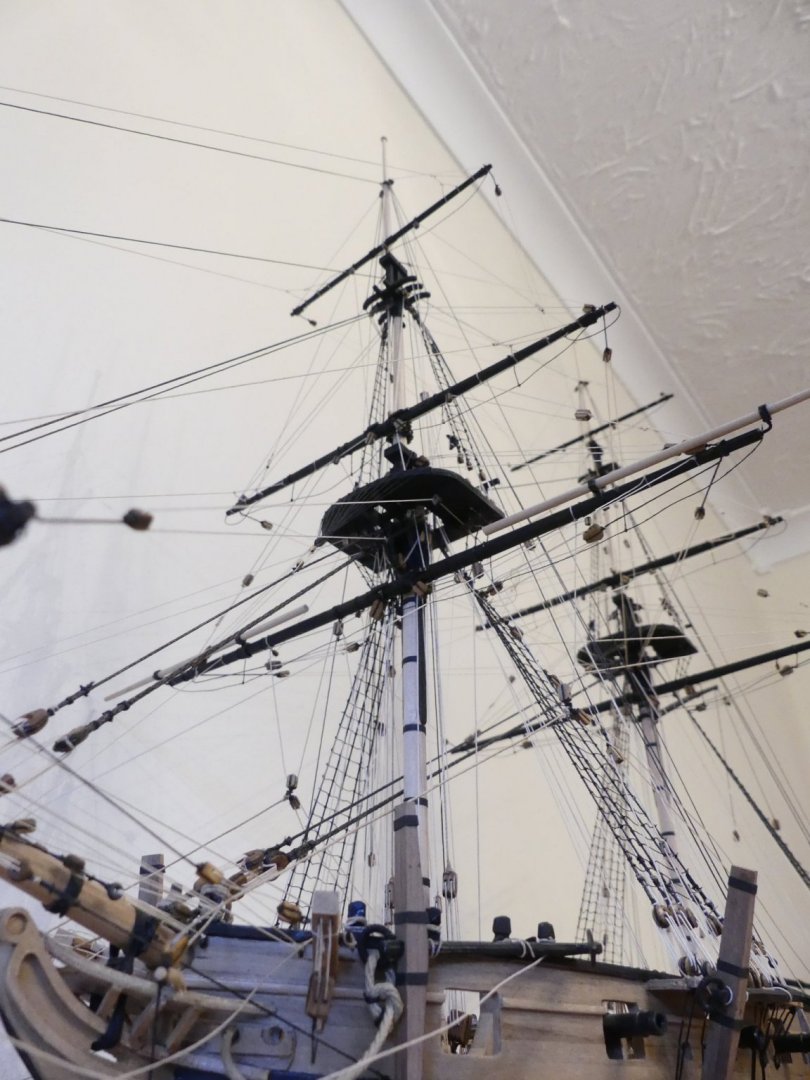
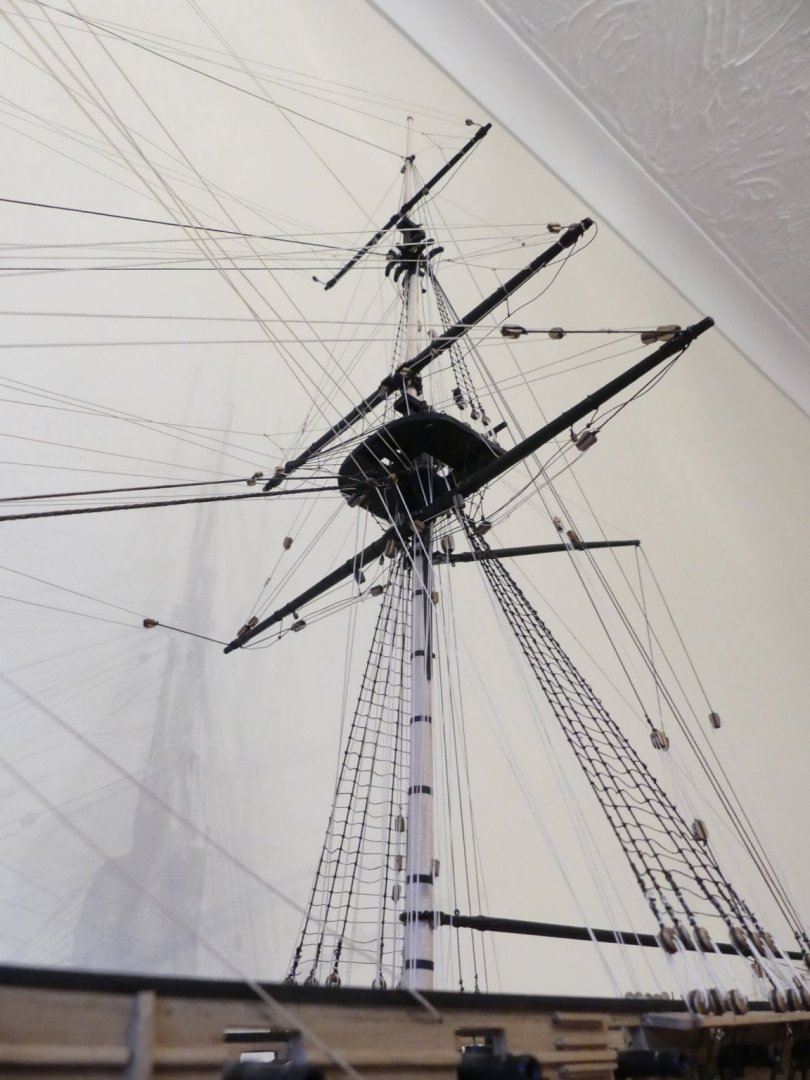
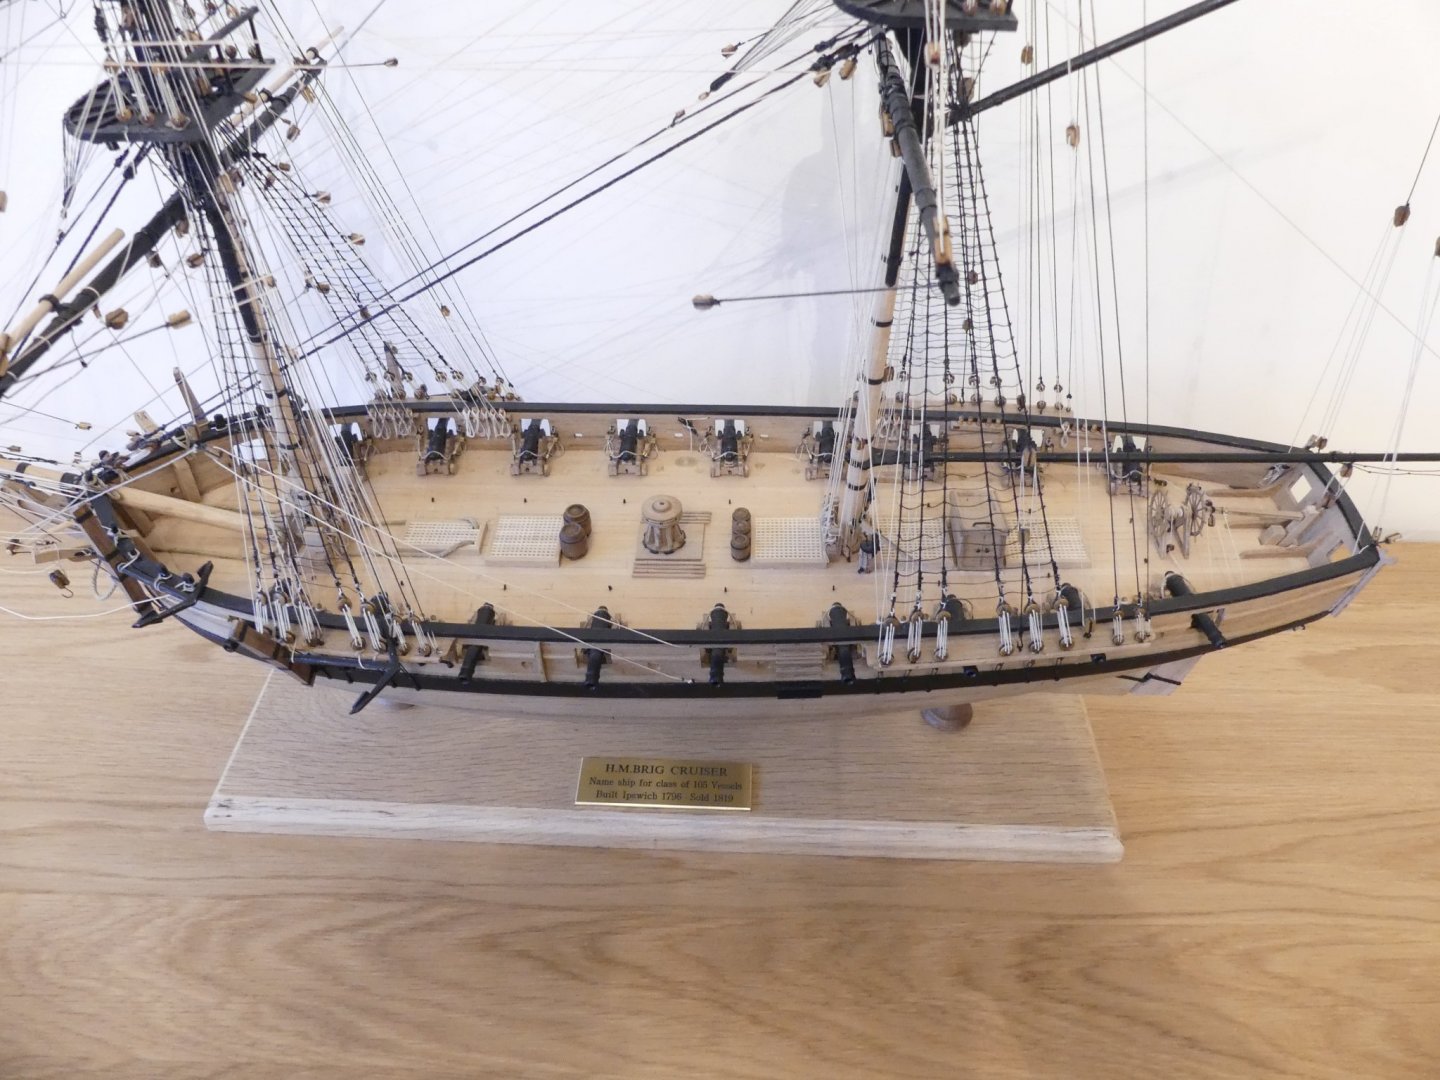
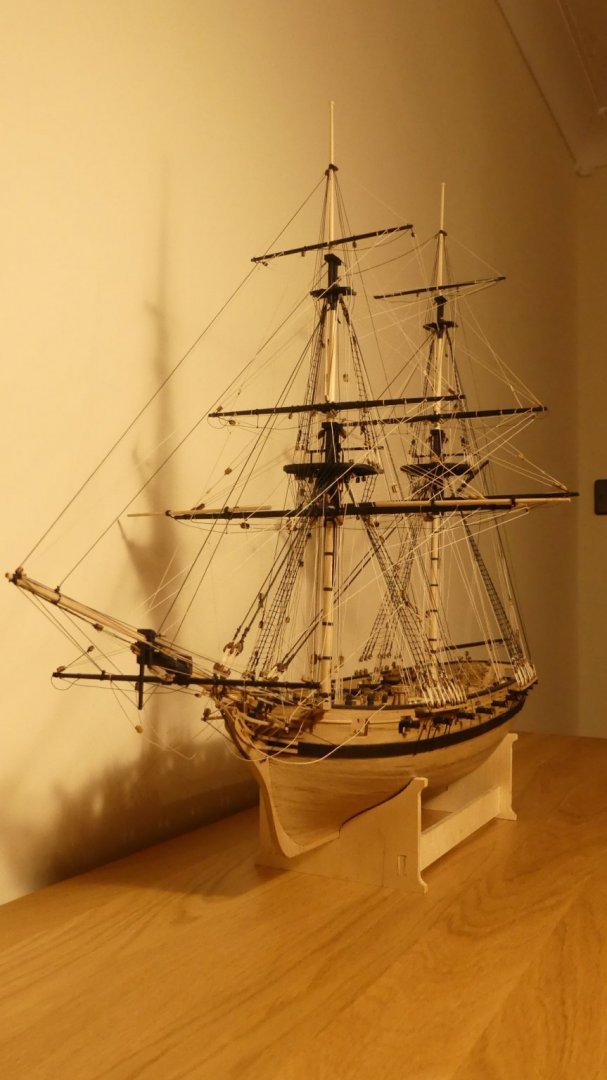
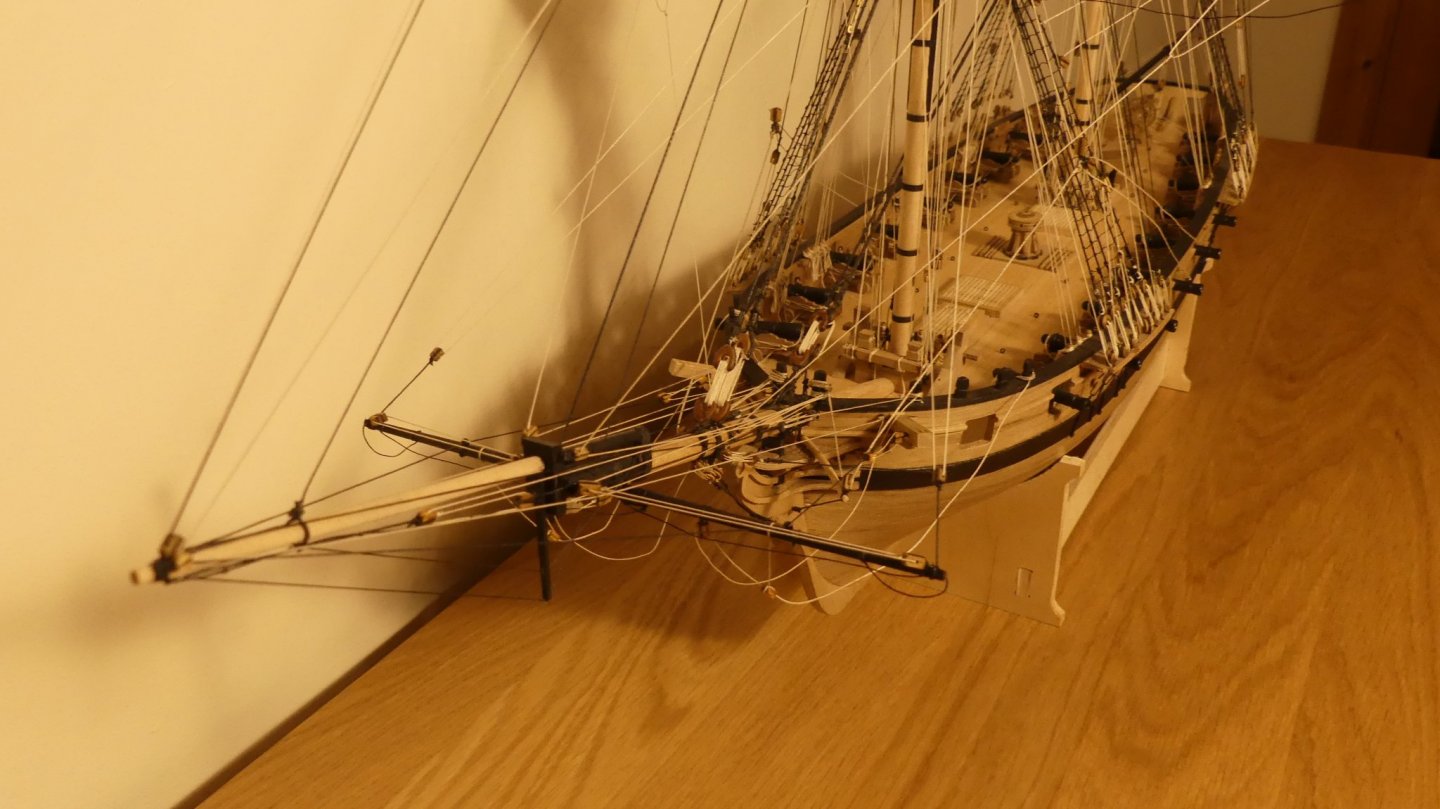
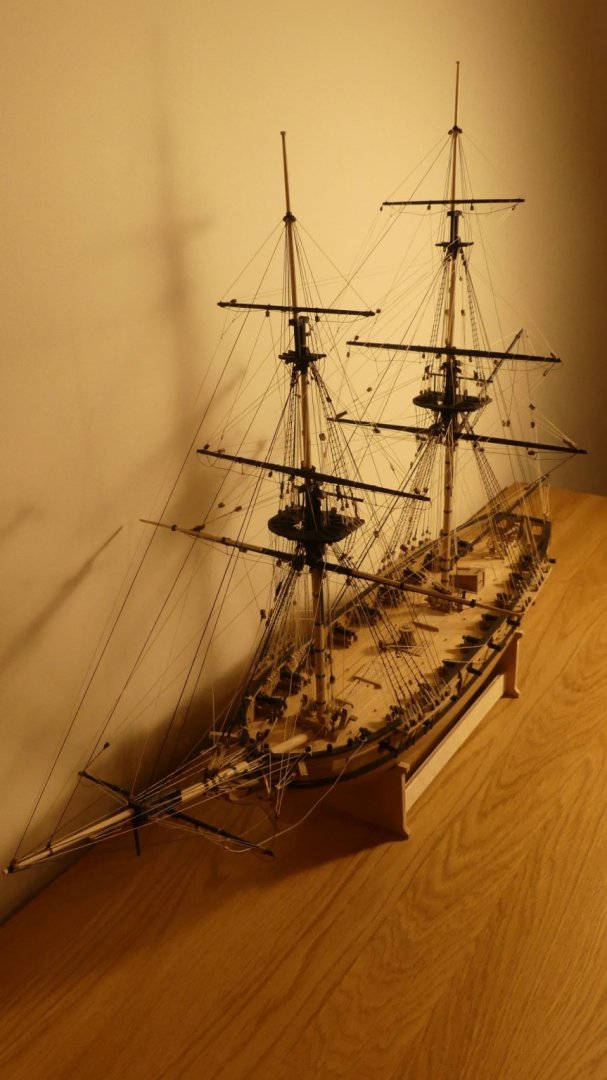
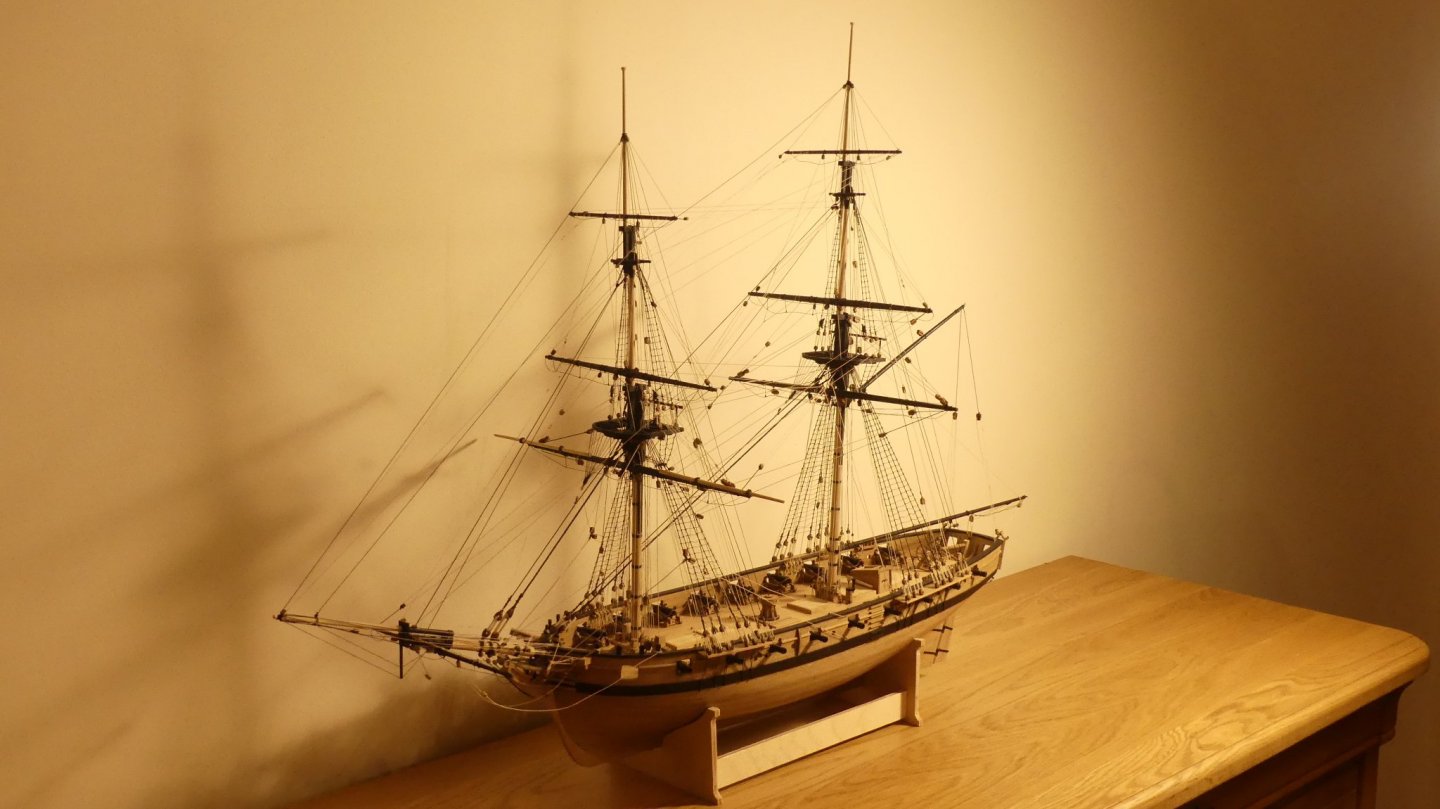
Final photographs. Just a few minor tidy ups to do so as far as here is concerned this build is complete. Base board for stand made out of an offcut from when i did my skirting boards. Brass plaque was from Engraving World https://engravingworld.co.uk/brass.html?p=2


- 102 replies
-
- 18
-
-
- cruiser
- caldercraft
- (and 1 more)
-
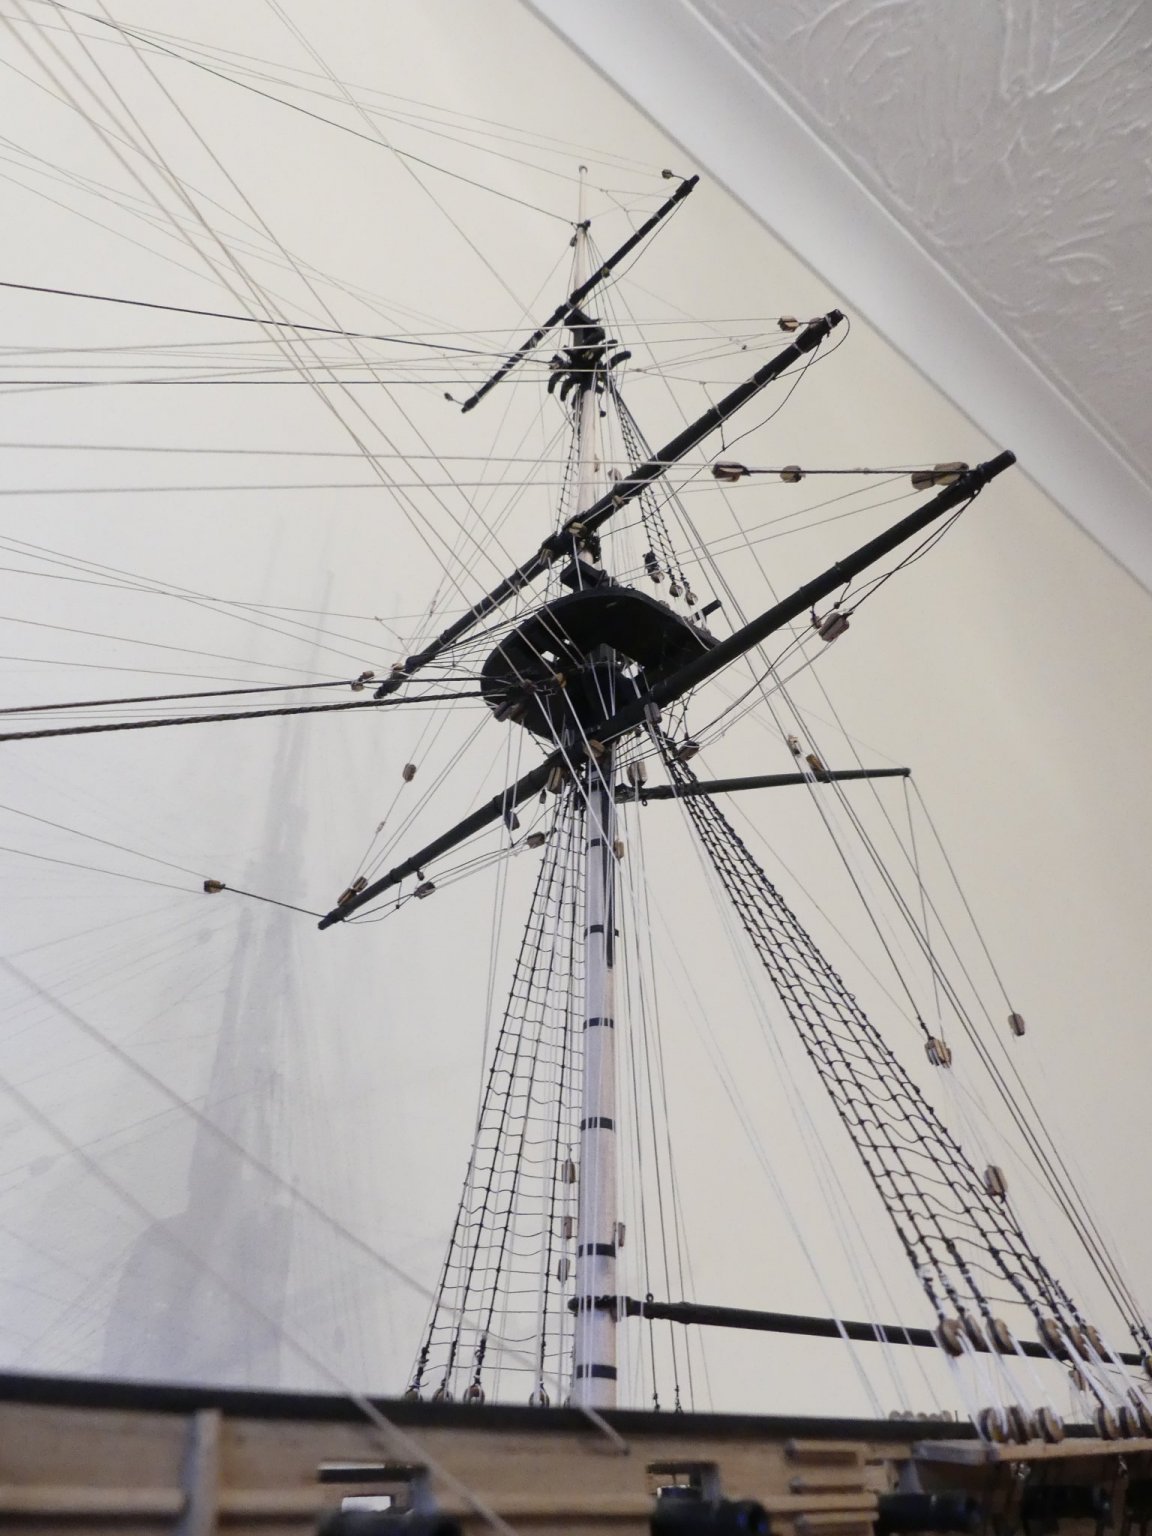
Hi, The caldercraft instructions are to use natural thread but then to colour them black with black indian ink. The reason being is that it is far less stressful on the eyes to rig the natural thread. Just be very careful when using the ink. You get little black dots everywhere if not careful.
-
It is very hard to get them level and you have looked to do extremely well. Are you using a jig? Just a simple piece of spare 2mm ply with four pins for the upper holes of the lower dead eye and two lower holes of the upper deadeye. You then get the distance and tension when doing the shroud rather than when rigging between the deadeyes. Still not easy so, looking at yours, if not using the jig, perhaps you don't need it.
-
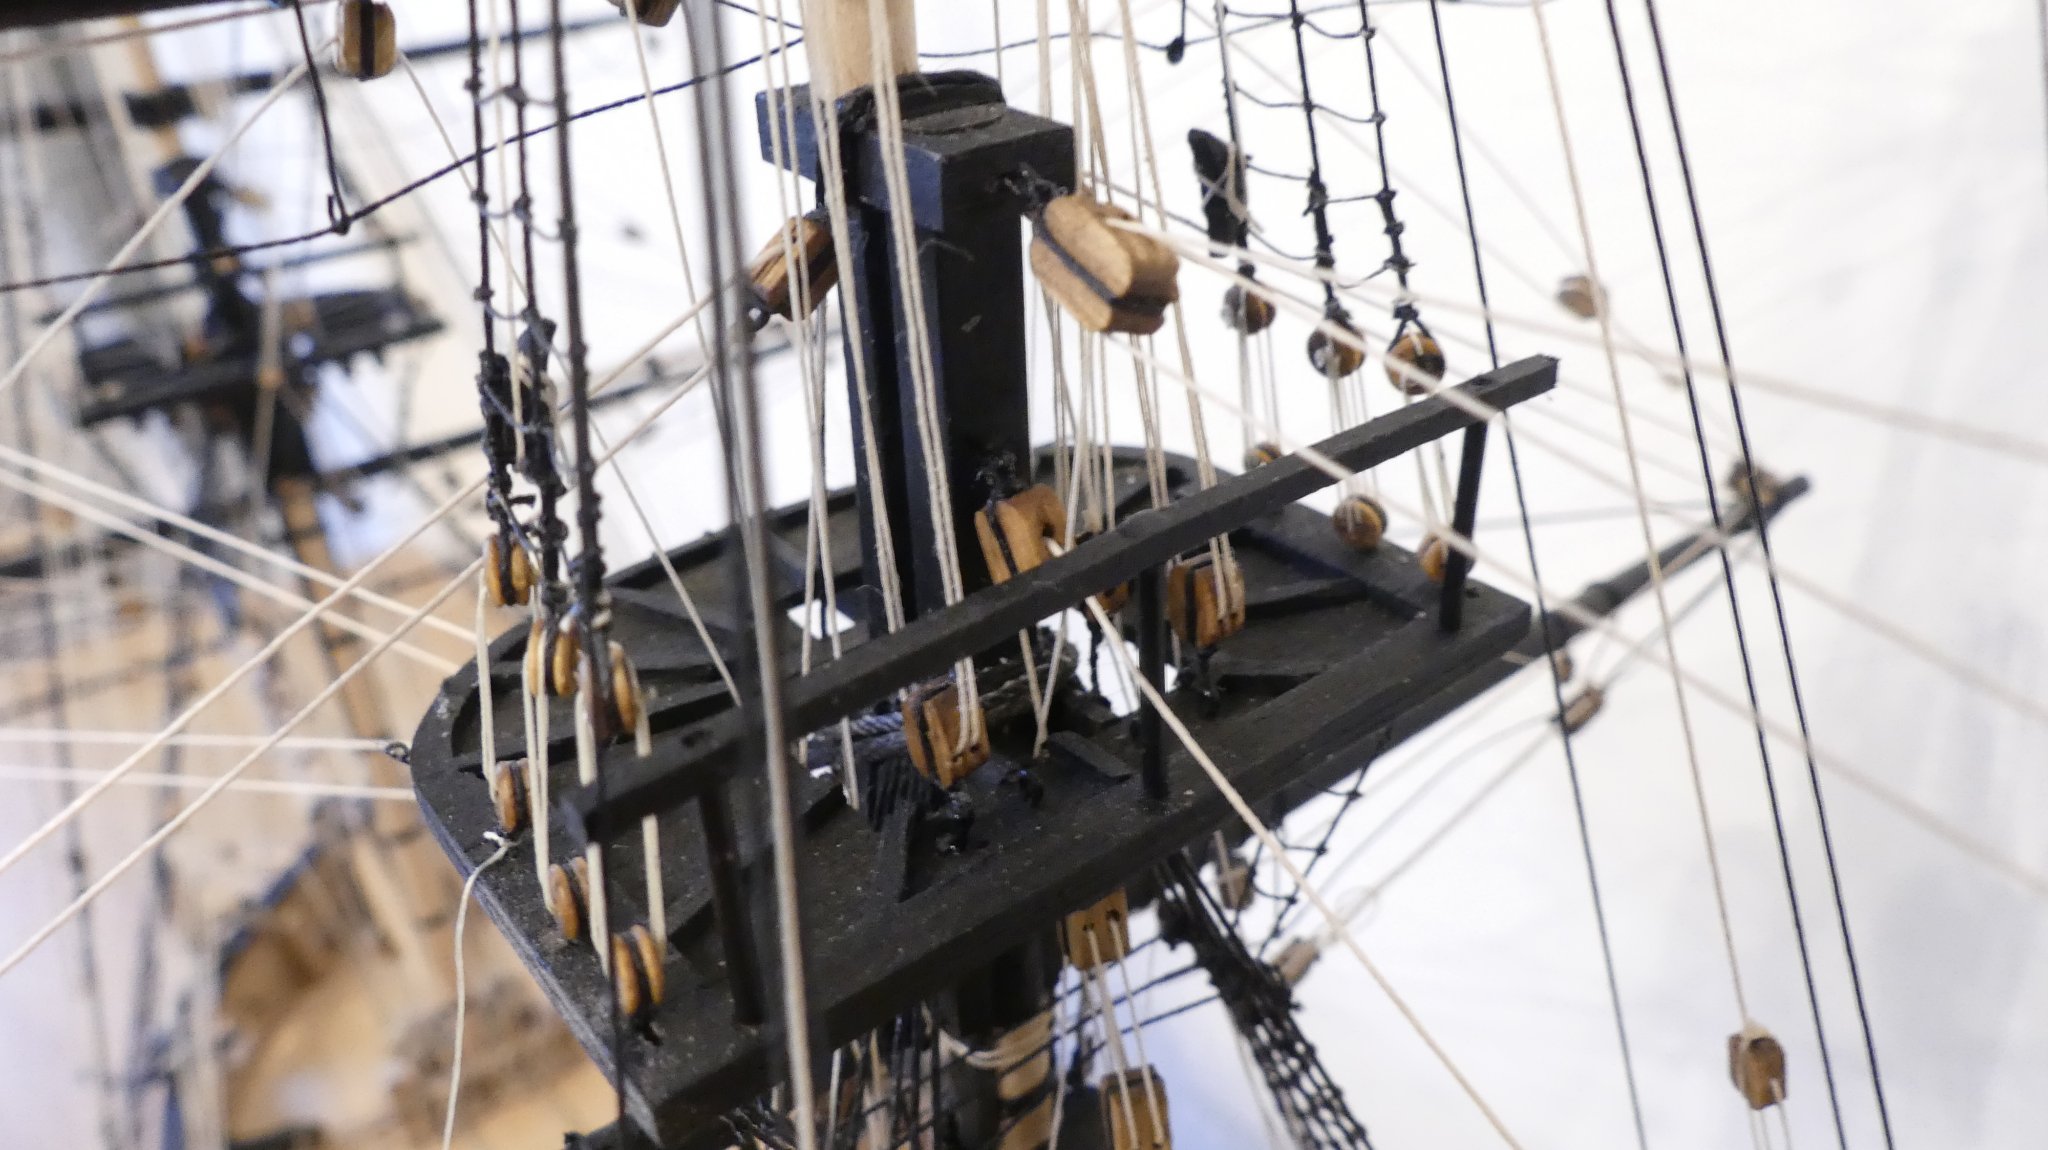
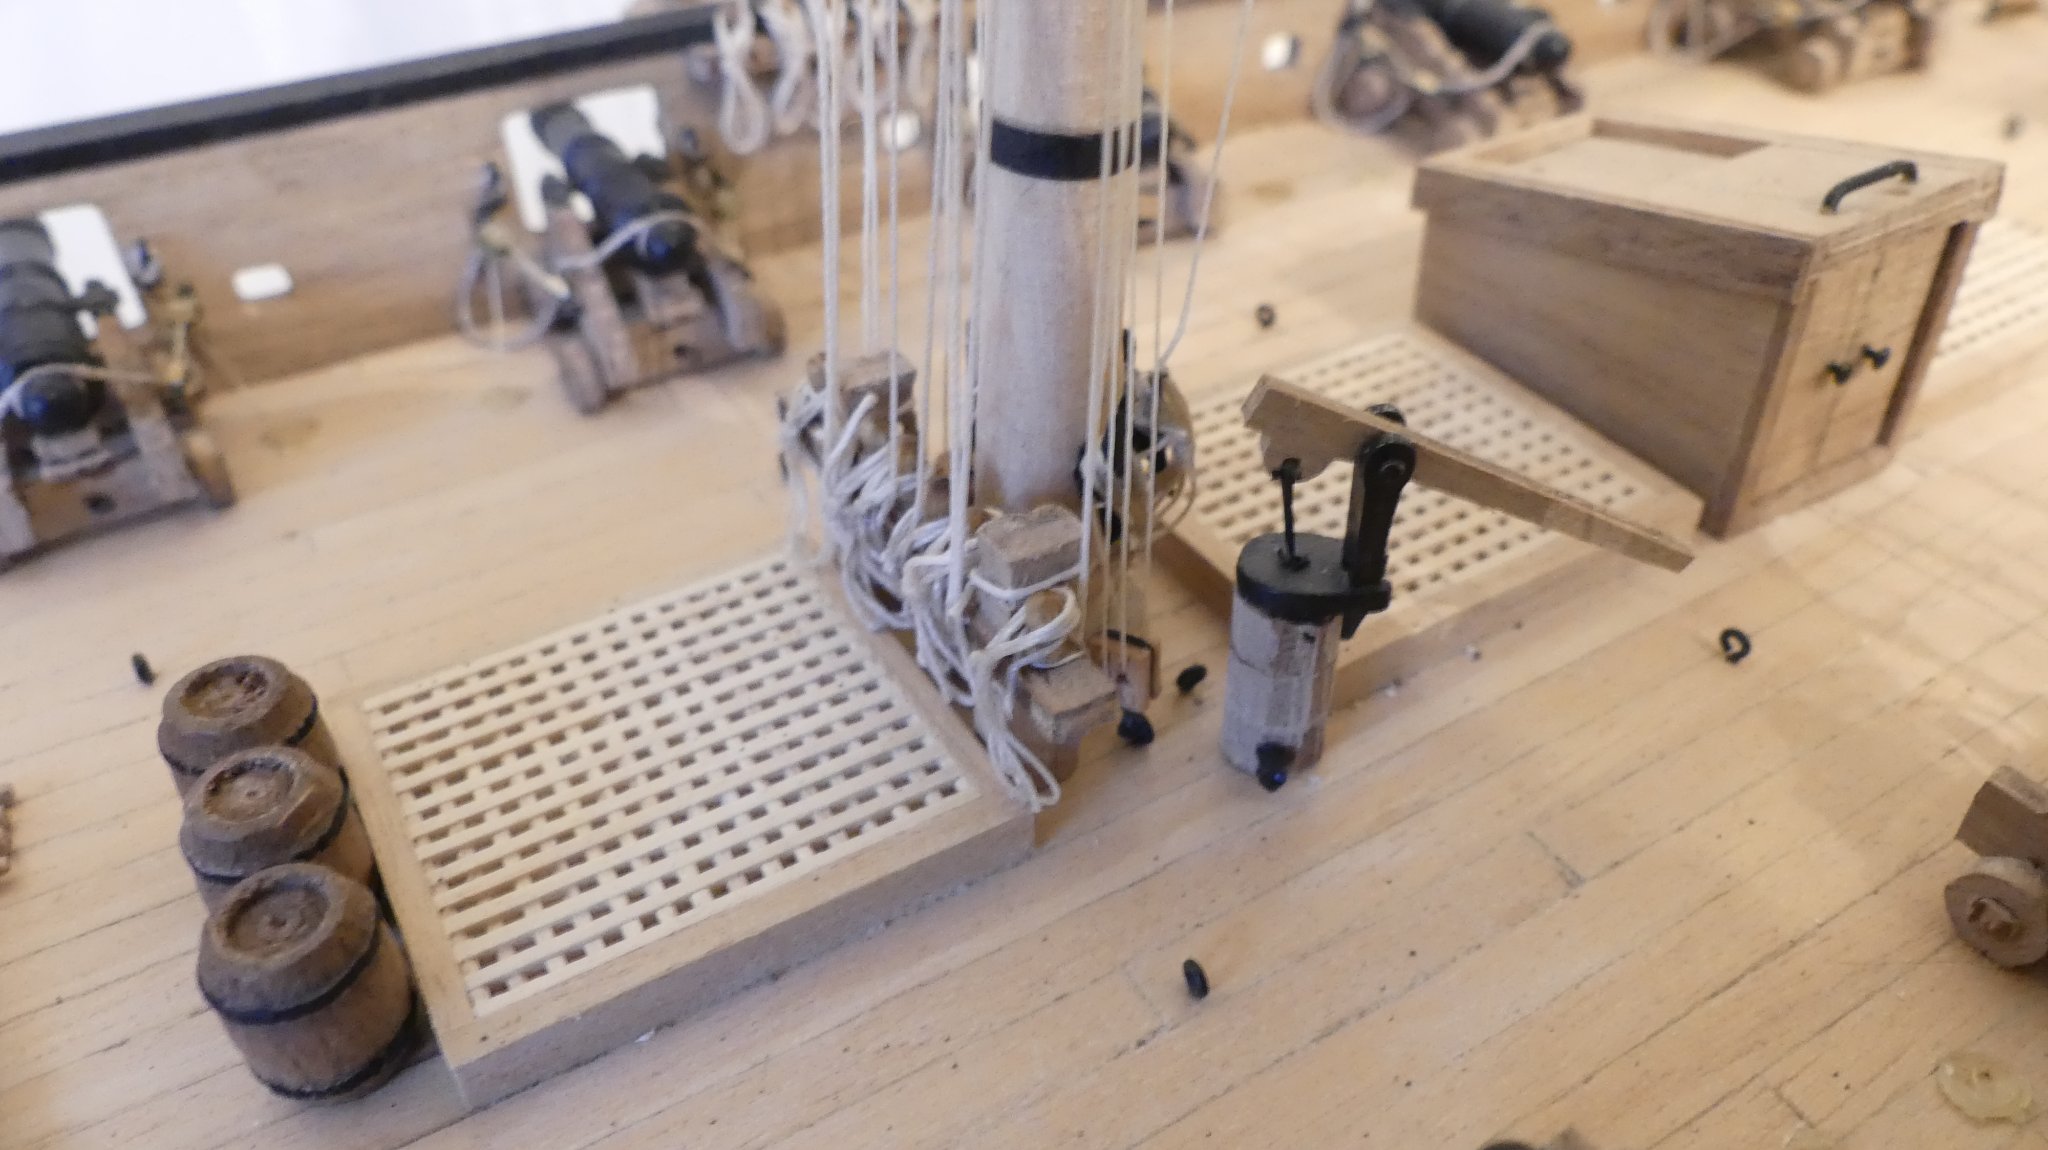
Hi, yes i put eyebolts around the base of both masts and kevels on the masts as well. I found that i ended up doubling up on he foremast. The bitts by rights should also have sheave holes through them and the bits in front of the fore mast belaying points. I also ended up doubling up rigging belays on the knight head timbers for the bowsprit rigging belays. I did end up with a lot of spare belaying pins on the racks between the gunports at the main mast.
- 102 replies
-
- 1
-
-
- cruiser
- caldercraft
- (and 1 more)
-
I think they have made part one a bulkhead as it actually forms the beak head bulkhead at the front of the forecastle. Do you have to cut the bulkheads out? I have this kit on the shelf and they all just press out. Also instructions seem concise, have you got them? If having to cut them out it may be worth investing in a scroll saw such as the Proxxon one, will be easier than a jigsaw. You have asked a question else where about filing down the deck beams to make the deck flush. I would not advise unless sure kit is incorrect. Most ships decks are higher at fore and stern and have a camber so higher along the centreline. Helps with water run off from the centre of the ship.
-
I'm going to complete my rigging research for the Sovereign of the seas whilst also starting a wooden kit. Although just purchased the NMM plans of the Serapis I think it will be either the Diana, Granado or Fair American.
-
Hi Wahka, Yes considering my next build. I do have other kits started, what i call my holiday kits, I.e. kits i start in the evenings when away from home. I have the Airfix kits of Great Western and Sovereign of the seas started as well as the Pyro USS Alliance and Constructo's Halifax. The two Airfix kits and the Alliance are all at the point of doing the rigging. I will be, however, starting a new wooden kit but I have many already purchased to choose from. Just deciding which one is the problem. I have: Jotika's Diana, Granado, William, Bounty, Endeavour, Mary Rose. Mamoli's Yacht Mary, Victory's Pegasus and Lady Nelson. Euromodel's Mordaunt, Aeropiccolla's Serapis, Lauck Street's Fair American. Art's Prince de Neufchatel, Rhoda Mary, Revell's Rattlesnake, SWM's Mevagissey Lugger. Which would you choose?
-
I did take these photographs but did not like how turned out. Will do some more once mounted.


- 102 replies
-
- 6
-
-
- cruiser
- caldercraft
- (and 1 more)
-
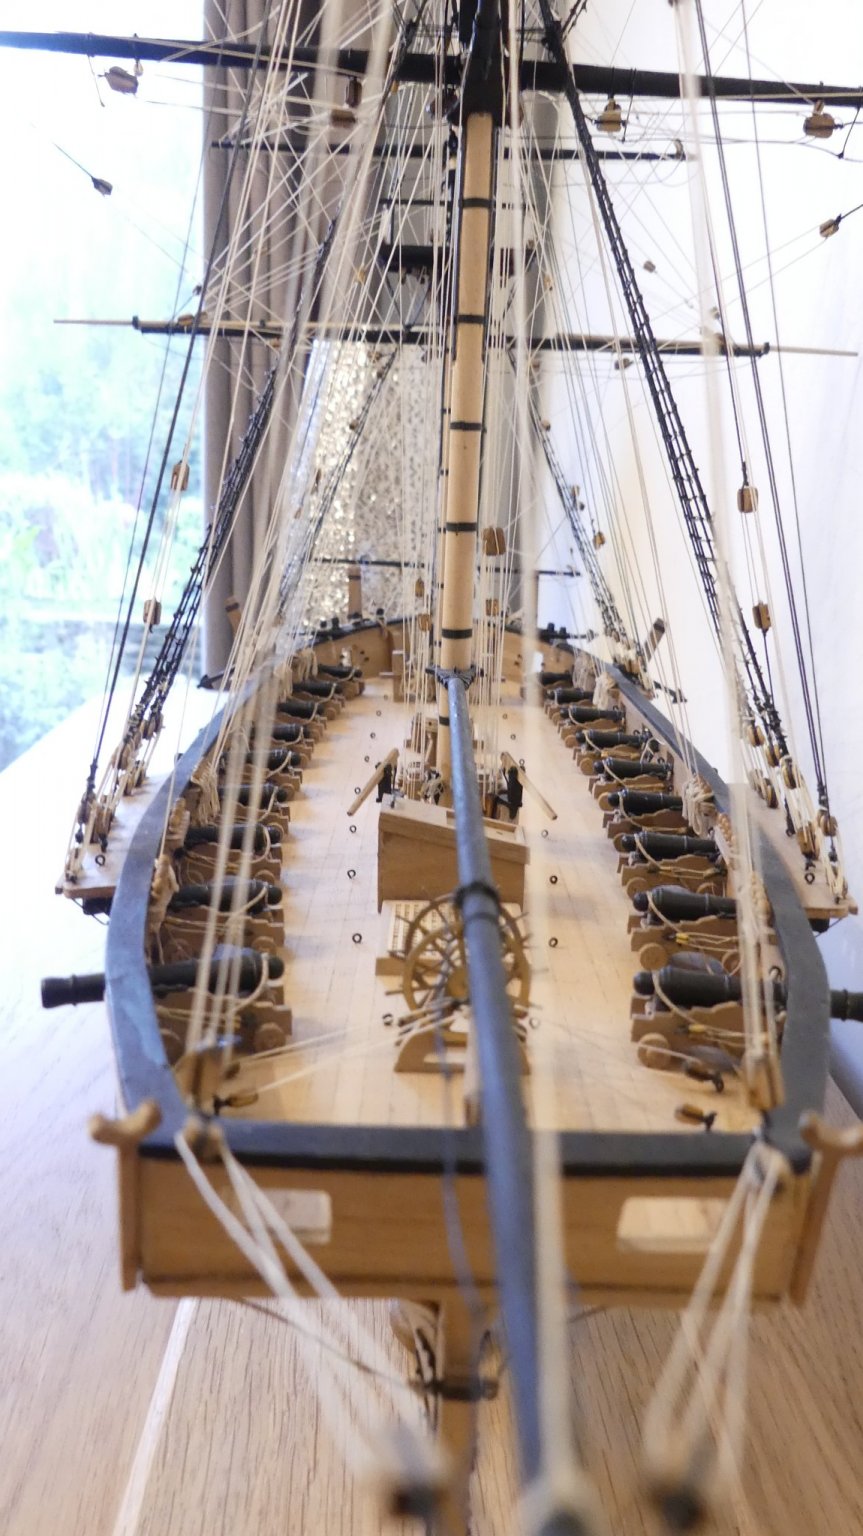
I am at the final stages of my build. Just the final tidying up and mounting on a stand. Wahka, I usually write each stage of the rigging down and did so with this model, however, did not make such a good job of it as usual. Big lesson learnt. On the next model i will do the research before completing the deck furniture to make sure i have the correct belaying points. Better notes and my own drawings.