Supplies of the Ship Modeler's Handbook are running out. Get your copy NOW before they are gone! Click on photo to order.
×


Thunder
-
Posts
581 -
Joined
-
Last visited
Content Type
Profiles
Forums
Gallery
Events
Everything posted by Thunder
-
Sorry got to ask this! The eyebolts before applied look flat but when on the gun carriages look just like the correct wrought iron ones in use during this period. Did you have to fettle them to get this look? I like the way they are solid and not obvious wire loops with an open end pushed together.
-
I thought he mentioned something about the Gallows but not certain now.
-
Thank you, I will defo be taking a look at these. You can make smaller blocks from white styrene, square section rods. There is many sizes and i have made both singles and doubles with it. Using a draw knife, you can actually buy one for cutting styrene, score the groves through the whole length on each side. Paint brown, drill first block holes. Cut to length with side cutters, drill next hole and cut again. Thread all onto some wire and paint ends. What i found that if get the right side cutters, small flush cut for electronics work, as it cuts it makes a nice curved edge to the plastic. Simple turn round for the other end of the block, Turn and cut again to form the next block before drilling the next hole. Gives a little bit of waste but makes nicer shaped blocks. Have managed down to 1mm x 1.5mm.
-
Hi Wahka, I would love to make my own ropes but no struggling on with caldercrafts. I use the Gutermann for the smaller threads and doing the seizing. I really love the look of home made ropes, just wish i had the patience to do it. your right to use epoxy, CA is to brittle. I used to use a CA called Prism 406 which was really good but does not seem to have the same properties now.
-
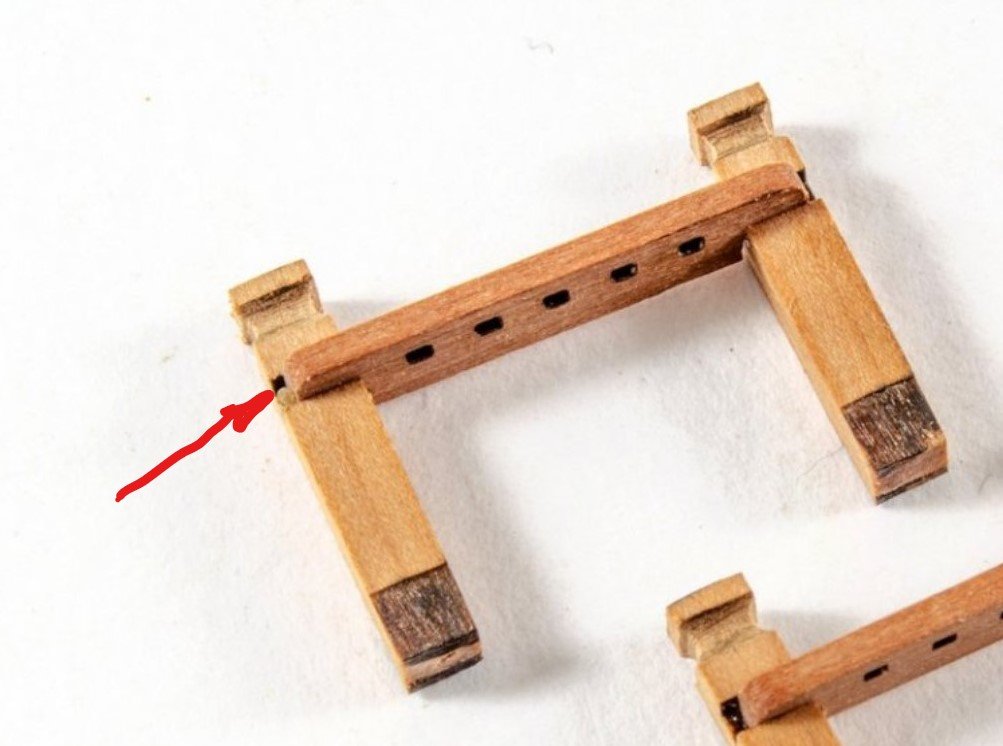
Perhaps they were not criticisms but 'input'. It was not a design being questioned and I said it was a tiny remark referring to the housing joint should be a stopped joint not a through housing which could be impossible at that scale and with a laser. Thought worth mentioning rather than being spotted later when people think the deck placements need altering because they assume the whole slot needs filling with the cross beam. At this stage we do not know what images and drawings are in the instructions to cover this, but again, a well meant remark, could highlight that for you and image is well worth including. Surely half the point of putting on here and the build is to iron out any potential issues before putting into full production. I can understand why you don't want long discussion on something such as eyebolts spoiling the thread but removing well meant comments about something you disagree with because you have misread the intent gives an all together different impression. Don't worry I will not make any more comments, and you can remove this, but I feel, if you do this to all modellers, you are losing a valuable and free resource. Chris, it was the bitts I meant and yes I have seen the Bounty. The Gallows are exquisite and really love the touch of the compass in the binnacle and the way the spiral stairs are done.
- 117 replies
-
- 1
-

-
- vanguard models
- yacht
- (and 2 more)
-
She is looking really great, making a cracking job. With what did you fix the large cleats on the inside of the bulwarks? There is not much of a fixing pin on them and mine 'pinged' off as soon as I tried to rig to belay the rigging to them. Another thing to watch out for. By rights the clewgarnets sheets and tacks should be left loose when no sail is rigged but it is hard to get the ropes to hang neatly. The cleat could not take any tension.
-
Hi, would you mind telling me where these blocks were ordered from?
-
I thought further discoveries had been found when they were dredging the channel for the new aircraft carrier. I have found one reference to this but unfortunately all my searches seem to be swamped with the more recent discovery that the crew was from Africa and how they plan to alter the museum to represent this. I do hope they do not spoil the museum too much for this. I know it is interesting but if it goes like the Sutton Hoo viking ship all reference to the ship has gone and the main display is about how a lady, unfortunately name lost to time, ruled the area at that period.
-
I think you will get away with just reworking the side that is overlength.
-
I never trust the caldercraft drawings as spotted many mistakes in the past. The drawing shown there is out. From the centre of the yard on the Larboard side the yard measures 132.5mm, on the starboard it is 140mm. Neither correspond with the dimensions given. If you take the centre section it says 53mm but off the drawing it is 58.5mm. When I did Supply they have different spacings for the gunports dependant on what drawing profile you look at.
-
Hi Wahka, I have just noticed another mistake i have made that hopefully you can still correct on your build. At the rear of the fore most grating the corners should have sections missing to make larger holes for the anchor cables to run through. I have checked and there is no mention i can find for this any where in the instructions. You can just make them out on sheet 1. It may be worth modifying your belays at the base of the foremast as I do not have a clear run for the anchor cables from the Hawes holes, round the bits and back through the gratings.
-
Hi Joe, thank you for the reply. I decided to stick with it as a cross jack yard as not rigged Jeers etc. I then tried all methods for this my thinking being that it would have been rigged as most practical for the operation of bracing the yard round and so controlling the bottom edge of the topsail. In the end I went with option 2. I have tried getting hold of that book but have only seen tatty copies that seem expensive.
- 102 replies
-
- 1
-
-
- cruiser
- caldercraft
- (and 1 more)
-
The cleats I missed were at the base of the main mast and are poorly shown on the belaying diagram on sheet 3 belaying points for 11,12 and 13. I think there should be bitts here like to the fore of the mast but no room to fit now as grating and pumps in the way.
-
Hi Wahka, Your Cruiser is looking great. As for the rigging and the knots i am feeling your frustrations. Some times my knots have gripped so tightly before actually being pulled tight to the respective yard, that i have had to cut it off and start again. I also think that often using the 'correct' knot does not look right at scale size and the tab ends i just cannot cut close enough. Might be worth using a simple 'granny' knot and then whipping with a thinner thread from the 'Gullermann' range. Scale seems to look better and it pulls tight more easily. This is what i have done with past models but am finding it a bit fiddly now. Think it is me as i used to do exactly the same detailed rig on small plastic kits many a year ago. One other thing I wish I had done with the cruiser kit is to have researched the rigging much earlier. I used to do a whole rigging plan before completing the deck furniture. Due to not doing that I don't have the correct belaying points and missing a set of bits for behind the main mast. Drawings are awful in places and have missed cleat positions. Fixing more of these to the main mast has been very difficult with all shrouds and back stays etc. already rigged.
-
To be honest knots are one area i always promise myself that I will improve. If you have the patience a seizing would look better as this avoids the lump of the knot. A lot of the time i resort to a simple granny knot locked in place with superglue. I always put a small amount of the glue on an old tile and apply with a cocktail stick. Bees waxing the thread seems to make the knot hold better until glued.
- 102 replies
-
- 2
-
-
- cruiser
- caldercraft
- (and 1 more)
-
Thank you for the reply Chris. Wish I realised and asked sooner as I have rigged the yard without Jeers now. It is a shame most books concentrate on the ship rig and have little data for these, the most numerous type of craft. What are your thoughts on which way the braces led and if led forward did they cross over? I assume they crossed over to the opposite fore shroud to allow the yard to be even further braced round. Between a mizzen and main this might have been necessary but the main and fore on cruiser have enough distance between them to not need this. Perhaps for a bit of variety you could offer rigging instructions for Flirt as a Snow, with the additional trysail mast.
-
Hi, I placed as per your green cross. However, i built the Victory over 25 years ago and not sure why I came to that conclusion. I had both of those books but mainly worked to the Hackney book.
-
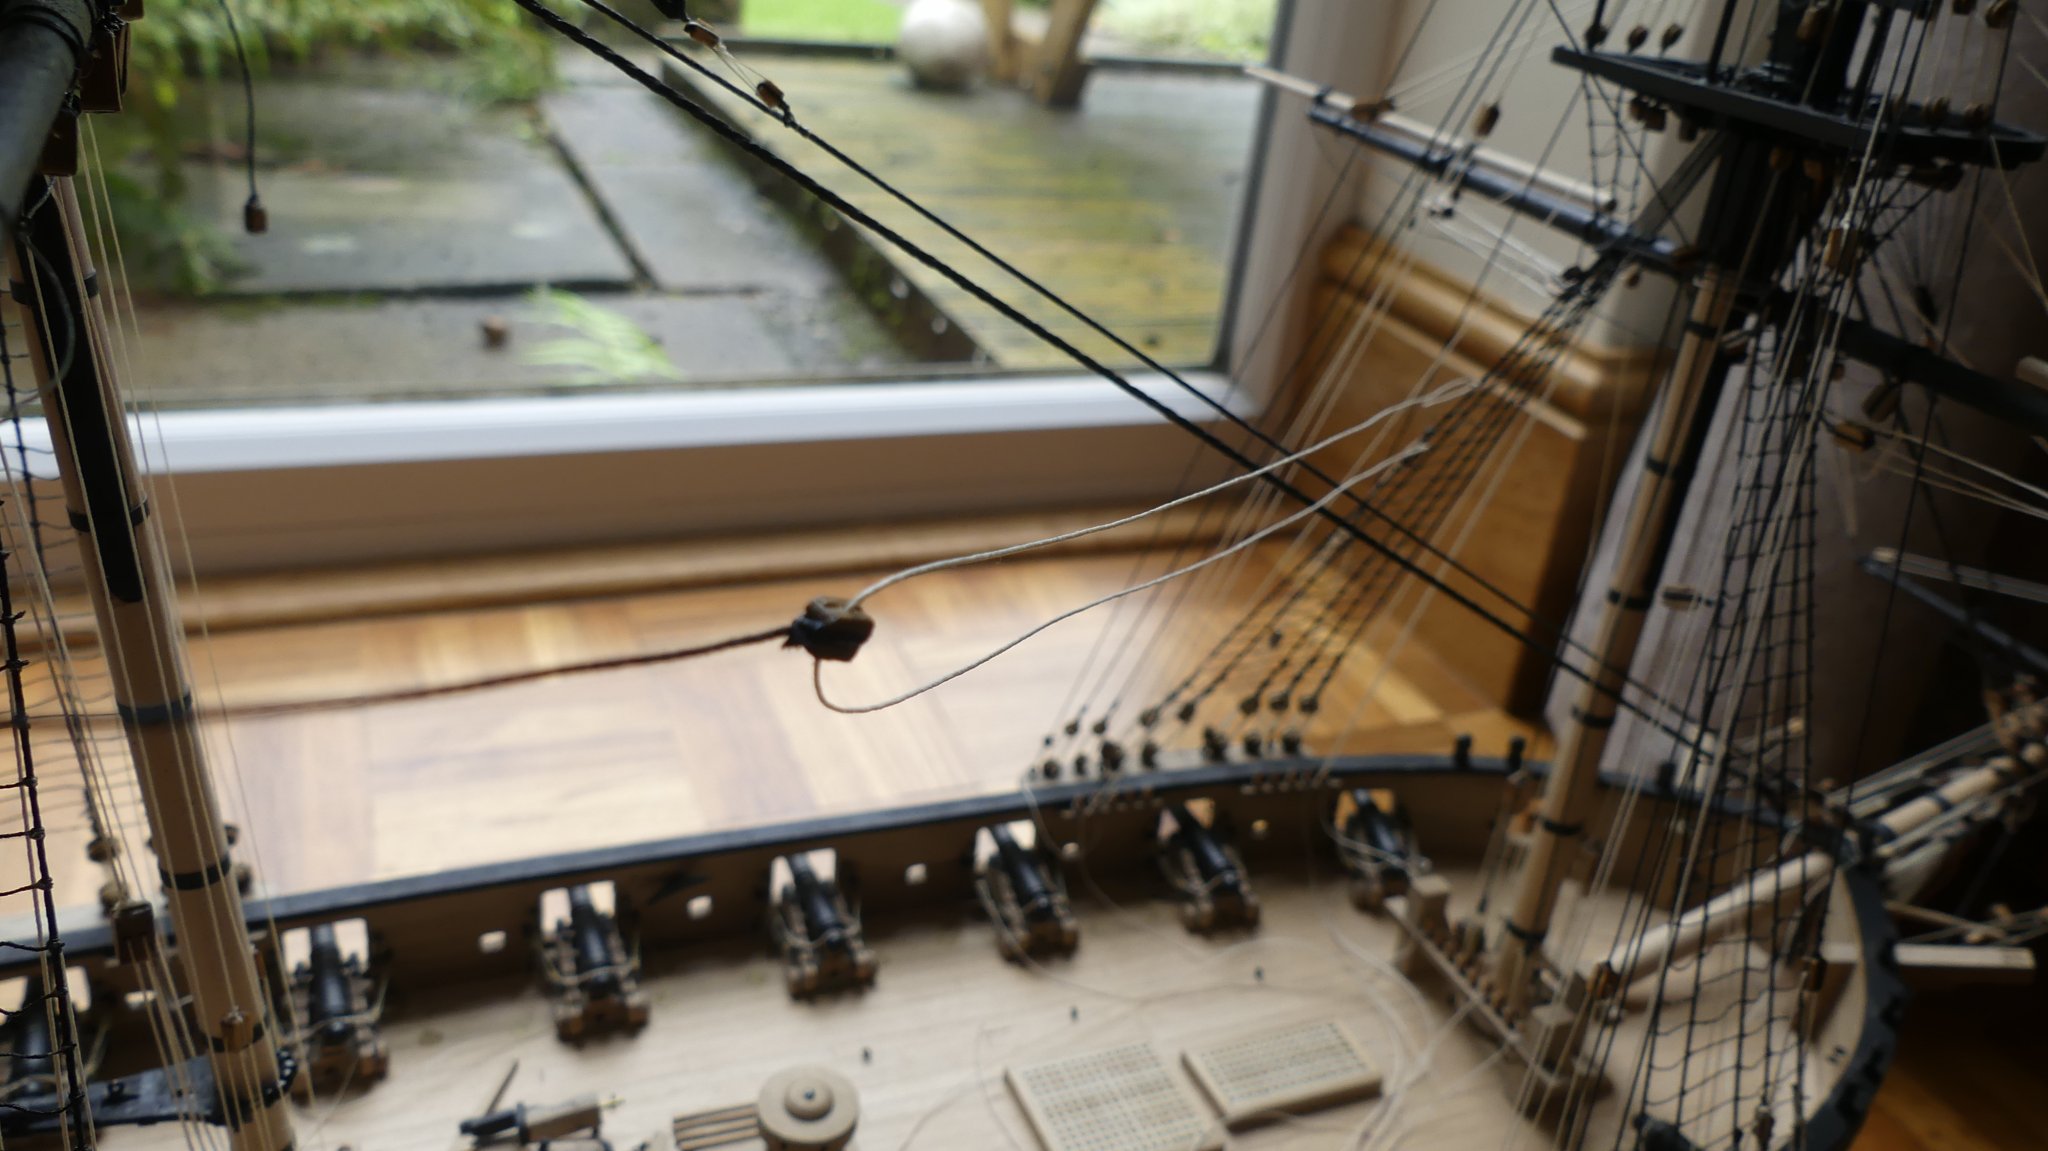
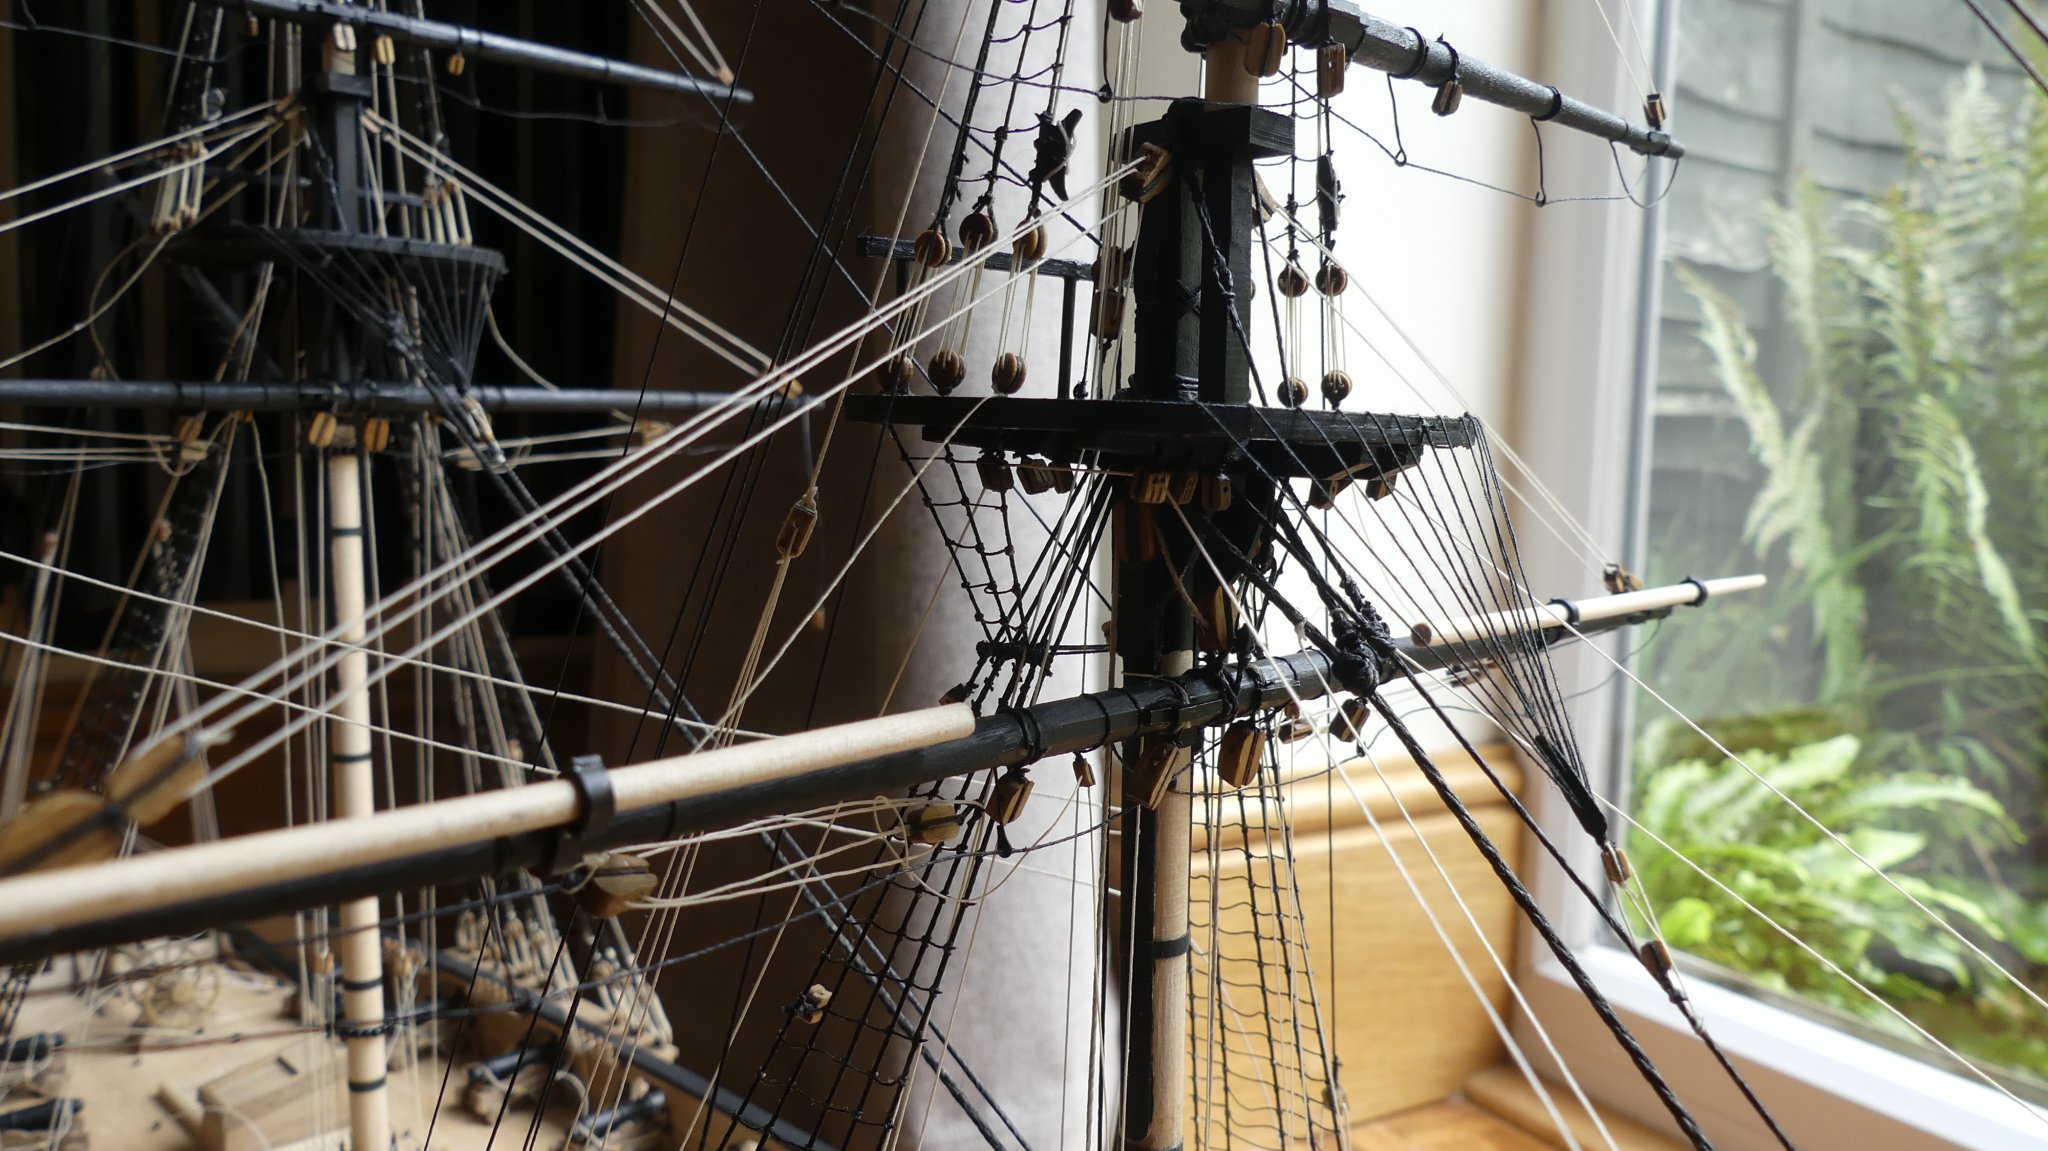
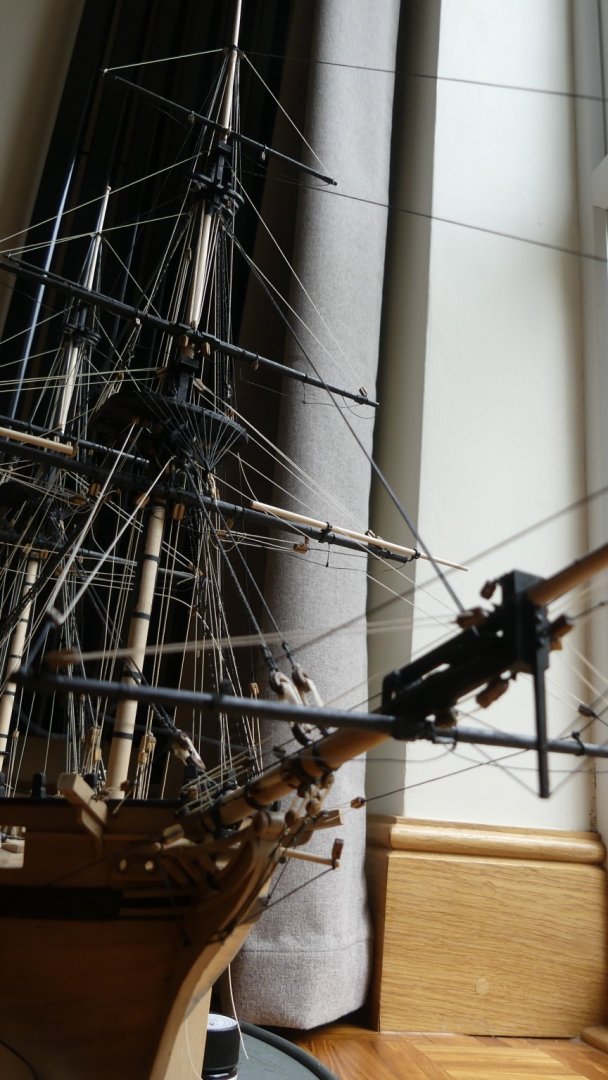
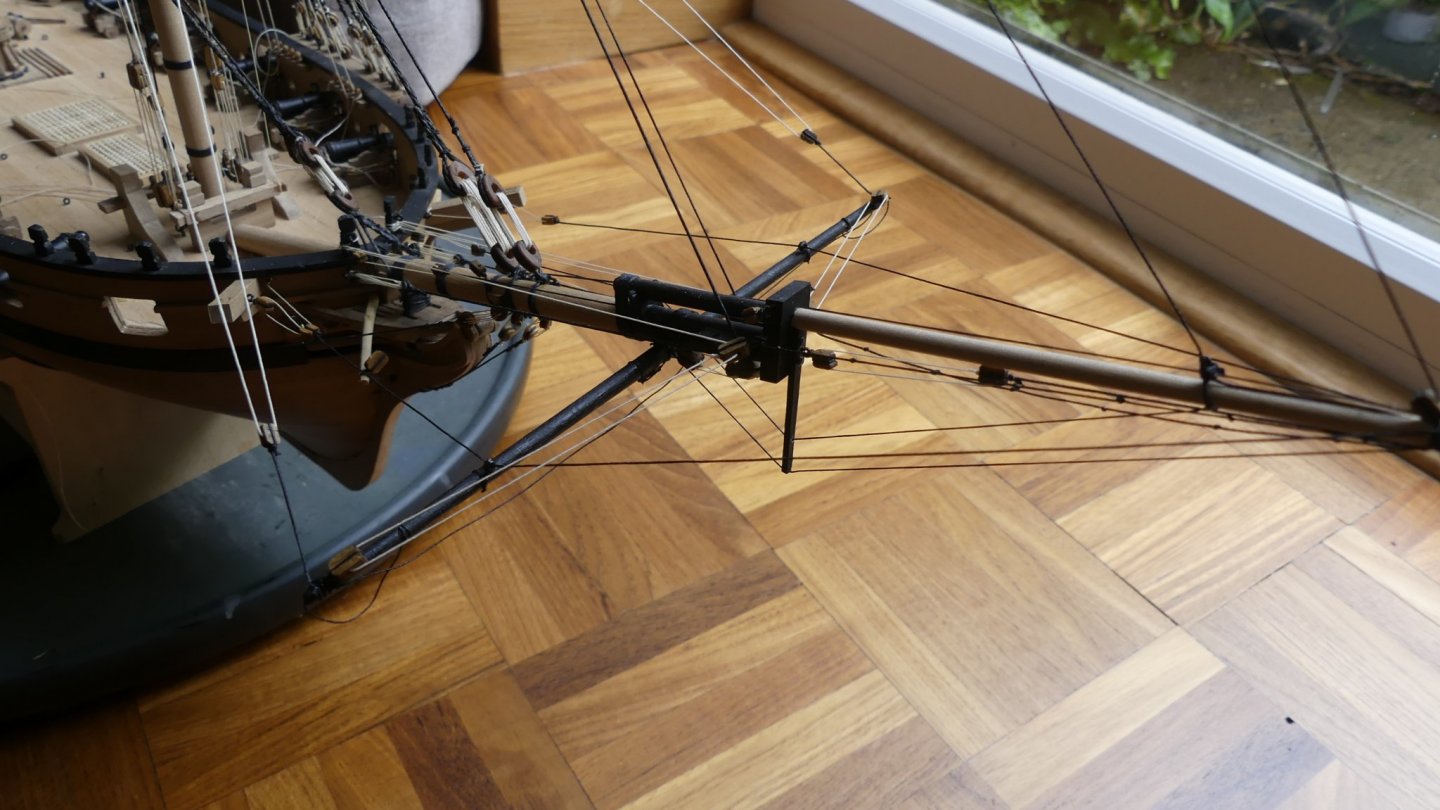
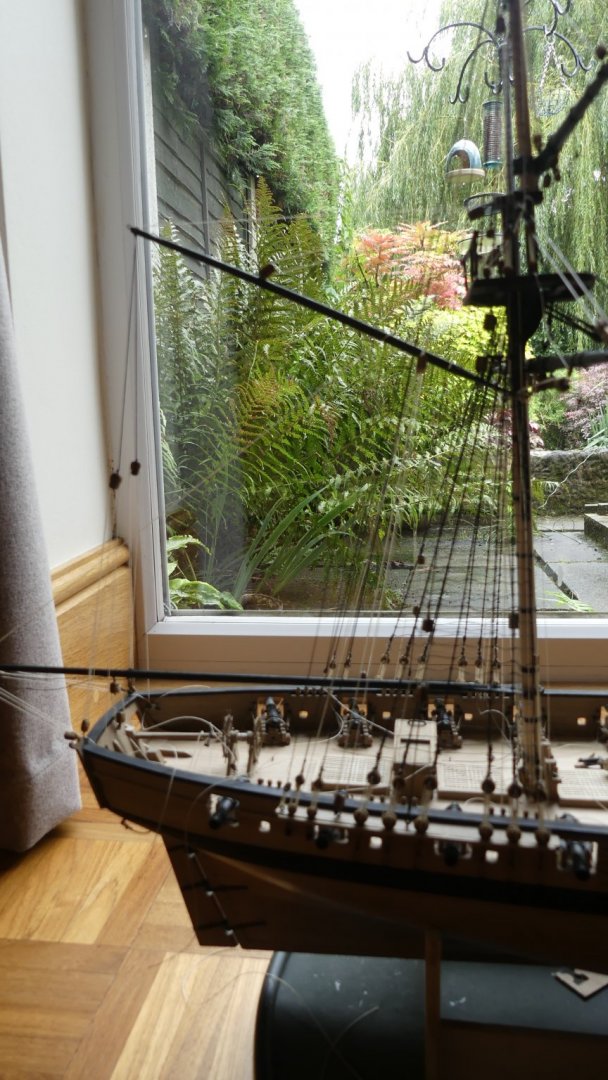
Now I come to where I am stuck. I am at the point of rigging the Main Yard braces. On a brig of this period this was classed as the cross jack yard. For English naval brigs I always thought that the cross jack yard carried no sail. I had planned to rig the braces forward, as on the Mizzen mast of a ship rigged vessel. i.e. crossing from larboard to the starboard shrouds of the main mast. Obviously in a brig this would be from main mast cross jack yard to fore mast shrouds. However, on a ship rigged vessel, this was more to do with the spread of the masts and the angles to make good handling. As soon as I started to rig this I noticed this would not be an issue with the positioning of the masts on the cruiser. This has led me to investigate further and of all the books I have it leads me to conclude that I am correct that the main lower yard was indeed a cross jack yard and that it did not carry a sail. The main sail was a Gaff sail extending over the transom. I further have read that the braces led aft for Royal Naval Ships. They led forward for merchants and other navies. This puts me at odds with all the builds on this site and with the latest models by Vanguard. I am only talking of the period before 1796 as soon after 1800 this did change. This still puts me at odds with the above. Before this period a vessel with two masts and a sail on the main mast would have a shorter gaff sail and be called a 'Snow'. The gaff sail would be laced to an effective mizzen set up to rear of the main. I cannot believe every one else has this wrong but have you all just followed kit instructions. Remember research following an American brig rigging would not be correct for an English vessel. So what is correct: option 1 - crossjack yard braces rigged forward and crossing over from larboard to starboard on the foremast shrouds. option 2 - crossjack yard leading forward to foremast but no cross. option 3 - main yard arm ( so having a sail) leading forward without the cross ( as most have rigged here) option 4 - Main yard with sail, braces leading forward with the cross. option 5 - main yard leading forward but each side of yardarm having braces set to both sides of foremast rigging. Have seen one of this kit rigged like this and does not work when tryng to brace yard to wind. option 6 - crossjack yard braces leading aft (this is what my research suggests but is at odds with everyone. Option 7 - main yard with sail but braces leading aft ( this is shown for all Snow rigs) When i say that most have allowed for option 3 i have assumed they are allowing for a sail by the fact that clewgarnets sheets and tacks are rigged. These would attach to the corner of the sail. photos shows me starting to rig forward before I stopped. I really do hope that I can get the debate I need here and that Chris can demonstrate where he got his rig for Speedy and Flirt as that research would be a great help.

- 102 replies
-
- 3
-
-
- cruiser
- caldercraft
- (and 1 more)
-
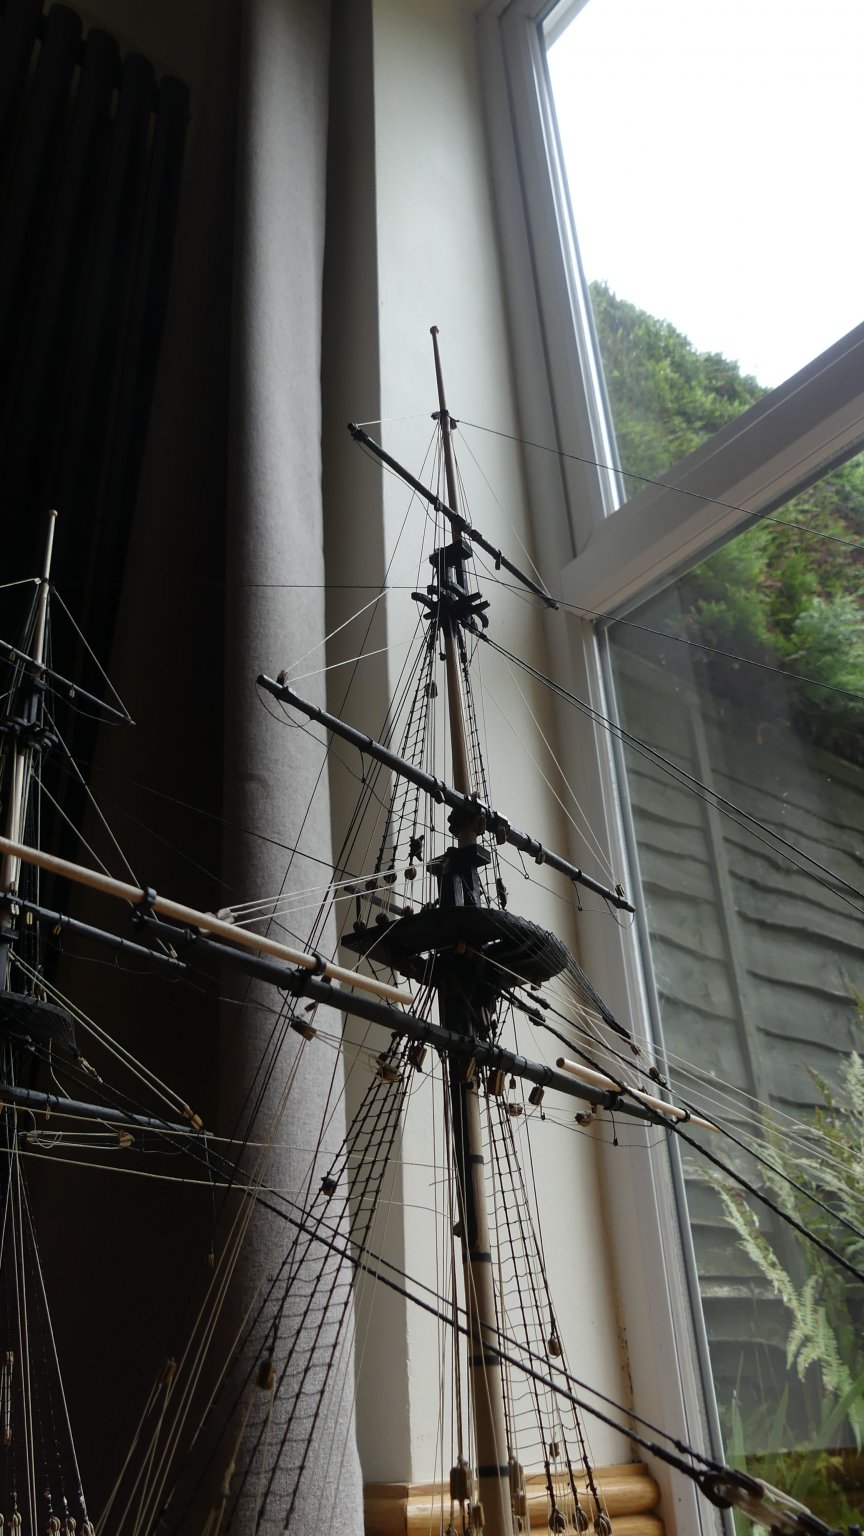
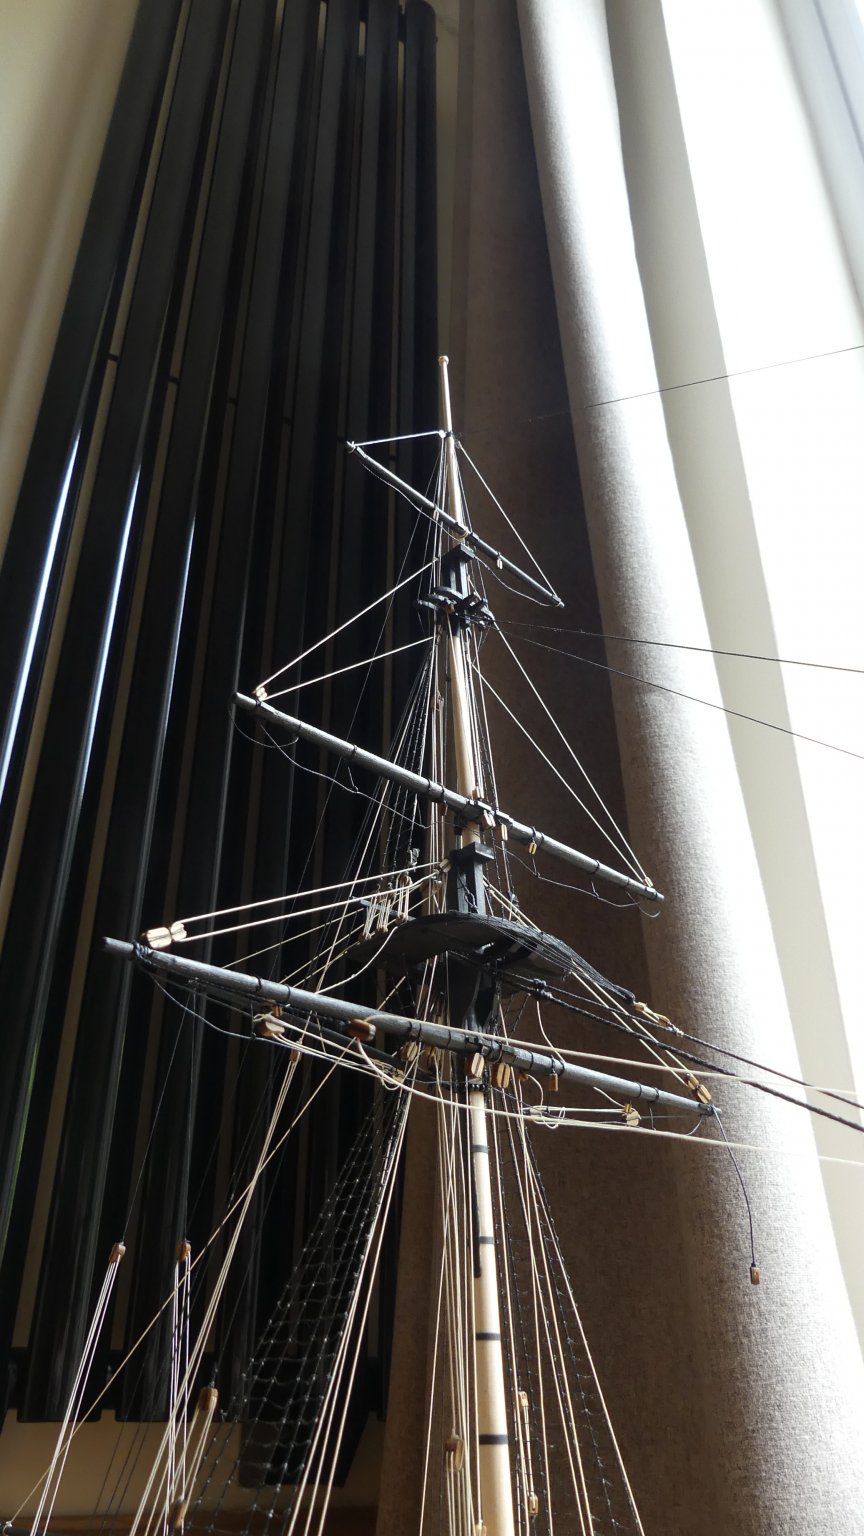
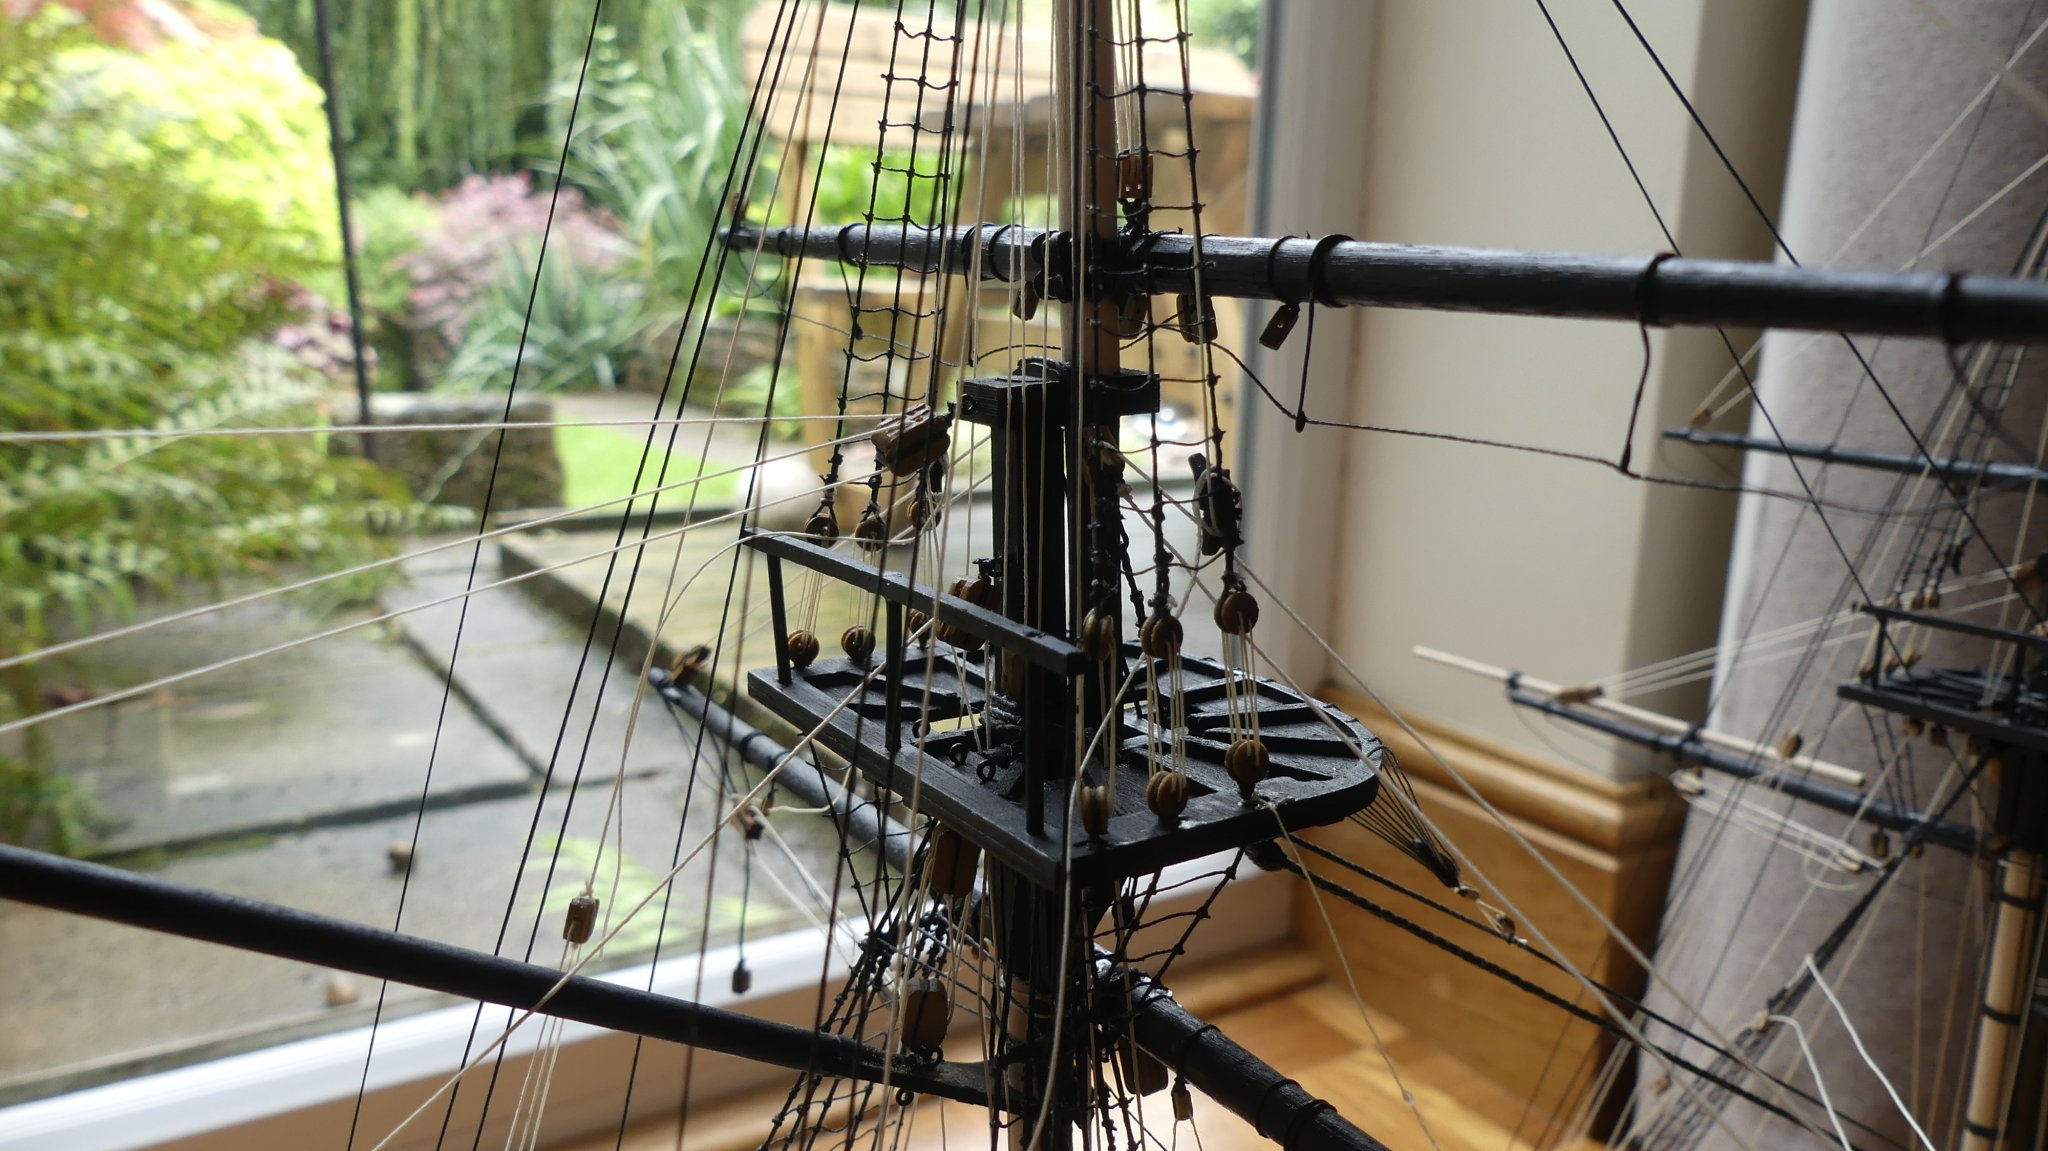
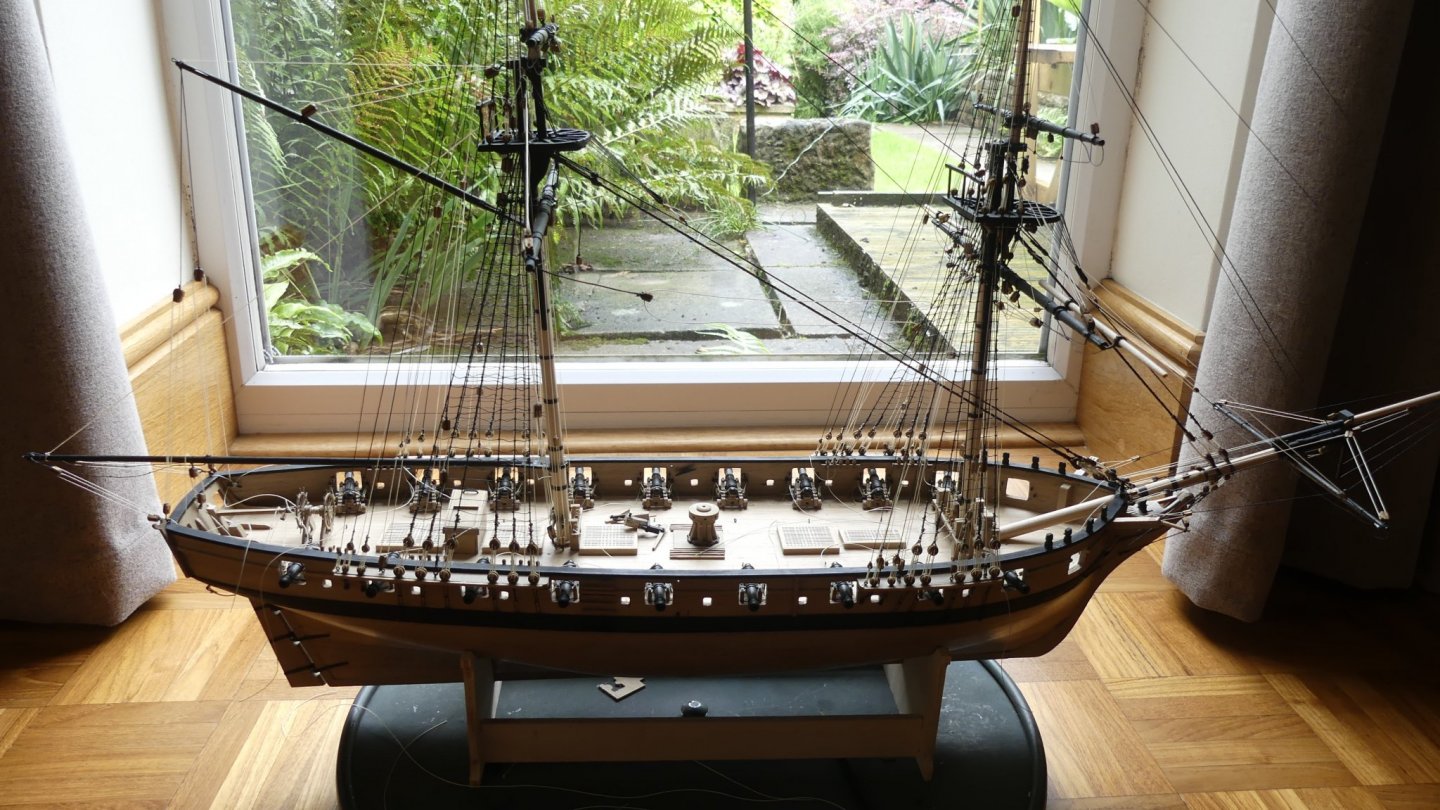
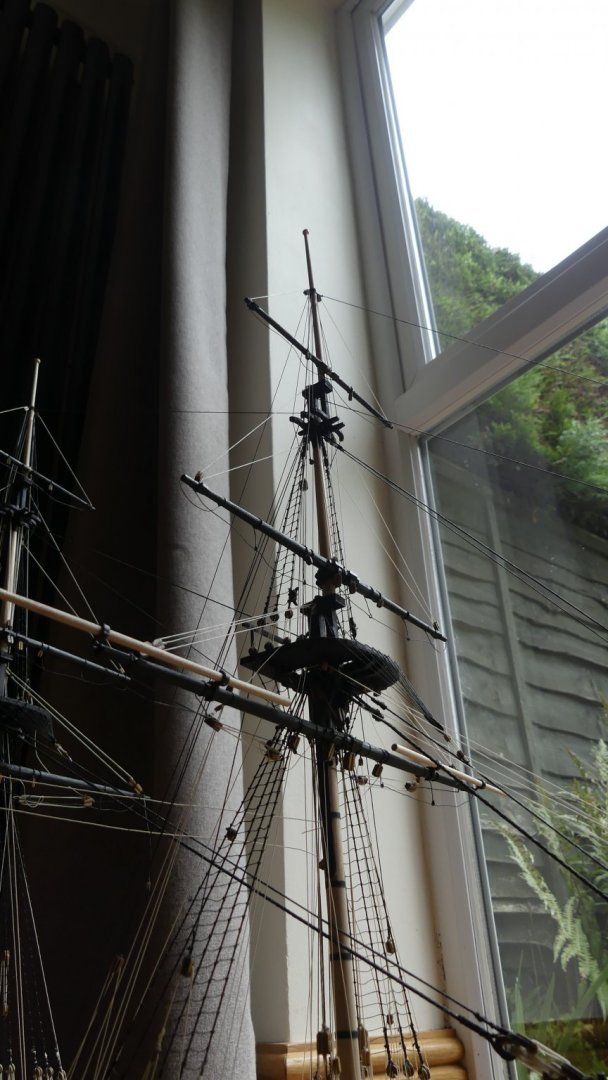
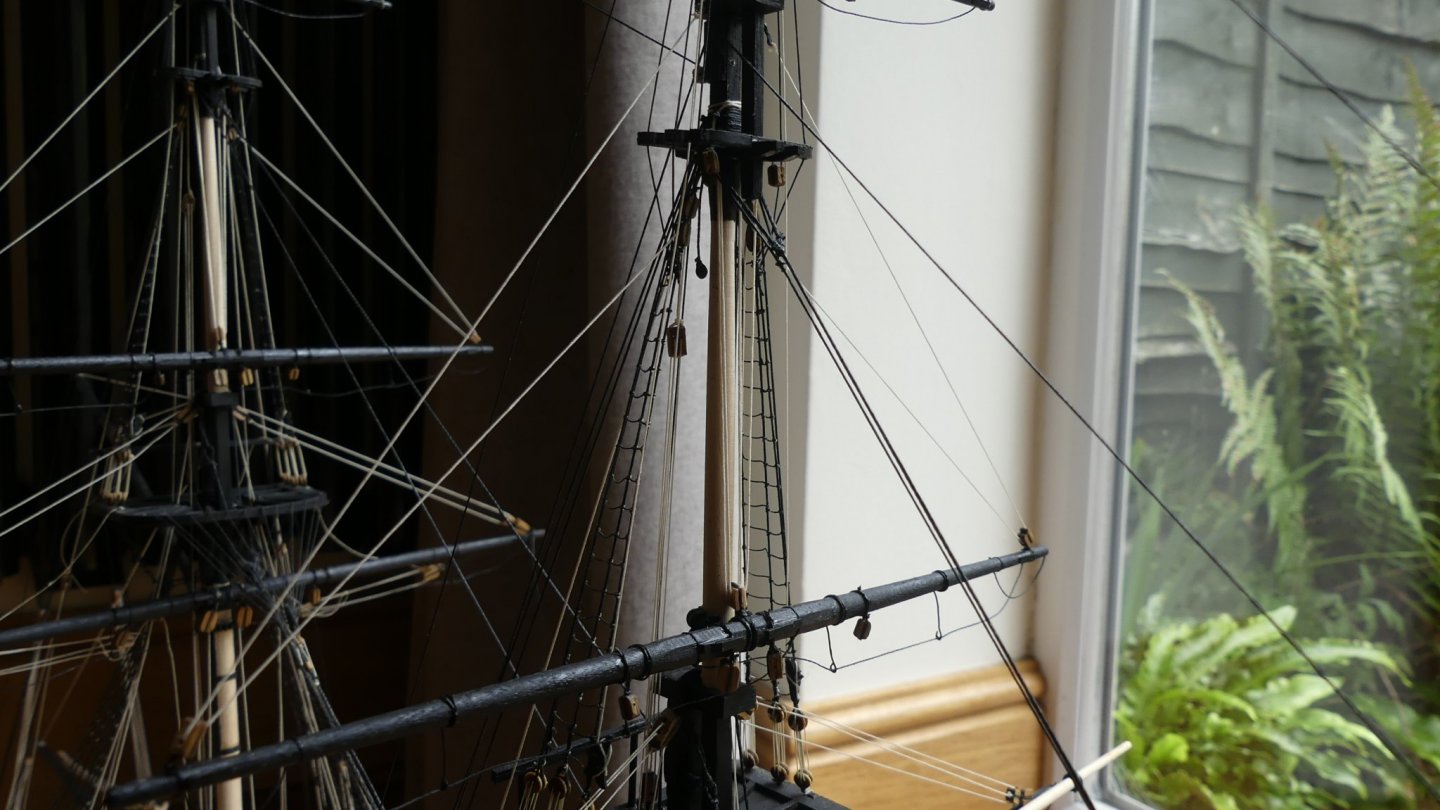
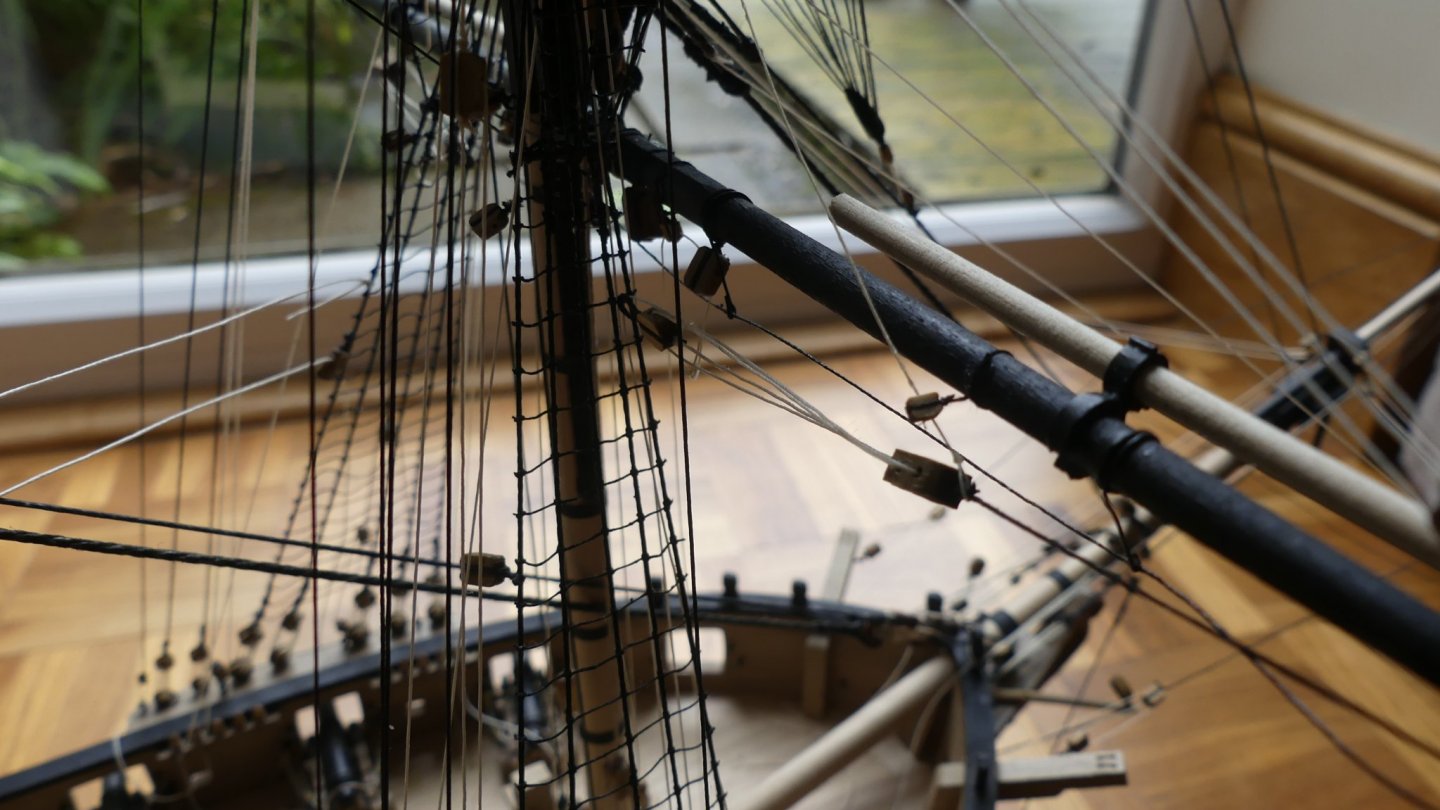
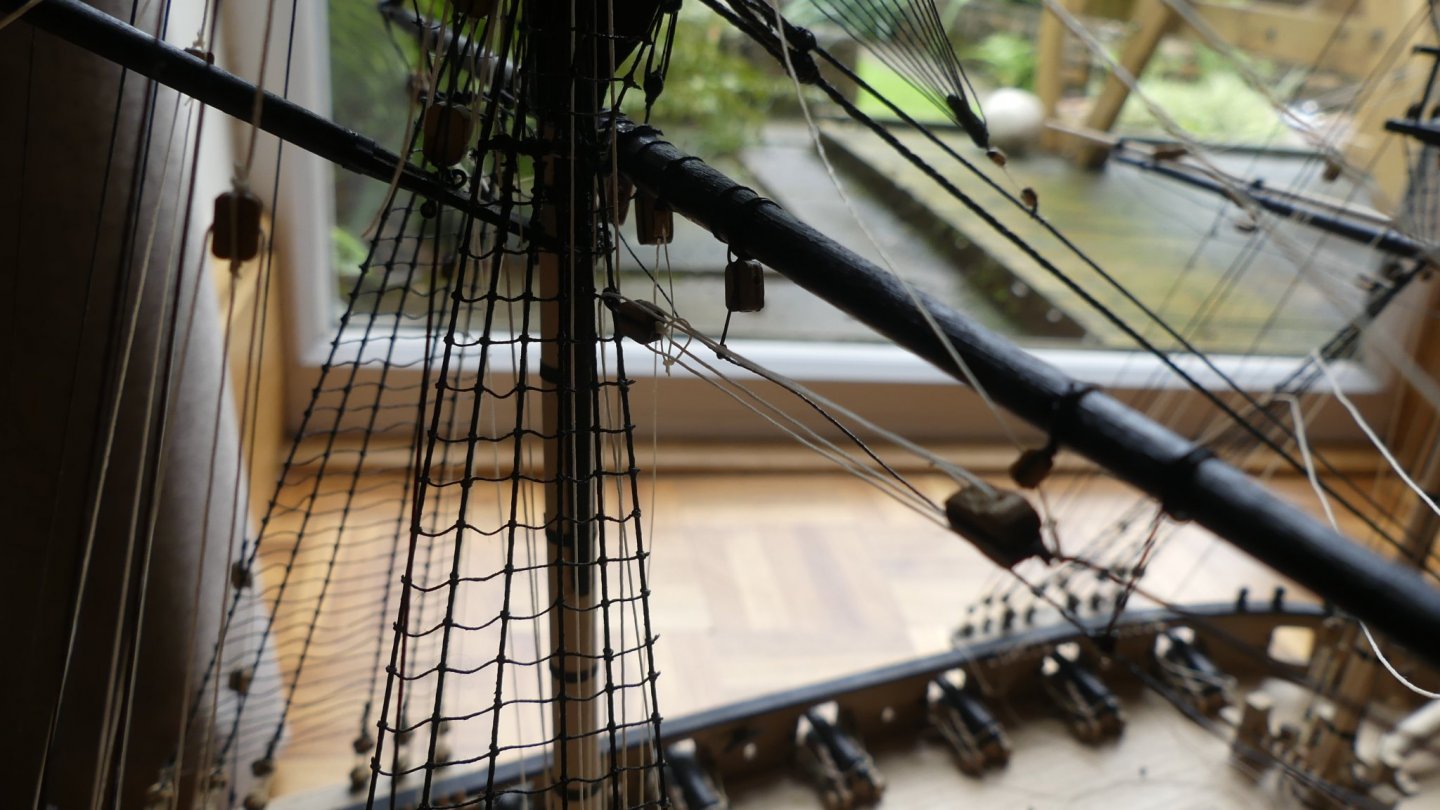
Decided to bring the log up to date. Partly because I need advise or should I say start a debate. Anyway up date first. Since last updated I have rigged the following items: Topmast Stays Topmast Preventer Stays T'gallant Shrouds T'gallant backstays T'gallant Stays Bowsprit horses Martingales Horses and Flemish horses Spritsail Halyards Jibboom Guy Pendants Boomkin shrouds Lower mast slings Jeers truss pendants Tackle pendants inner and outer tricing lines Lifts Driver boom rigging Gaff Guy rigging Update photographs below:


- 102 replies
-
- 8
-
-
- cruiser
- caldercraft
- (and 1 more)
-
Margin plank looking good there. For the nibbling i would make simple. Plank should not be more than half width at the end so lay in place butting against last plank, mark half width point on plank, then mark where on side of plank at the point the margin plank is revealed. Remove plank and cut to the waste side of this line. Lay back in place and with a very sharp scalpel cut along plank edge to remove portion of margin plank. You should now have an exact fit. Two thinks to check, wood grain direction on margin so does not drag scalpel away from plank edge and where plank falls at the joggling joints of the sections of margin planks. The second is more for aesthetic reasons.
-
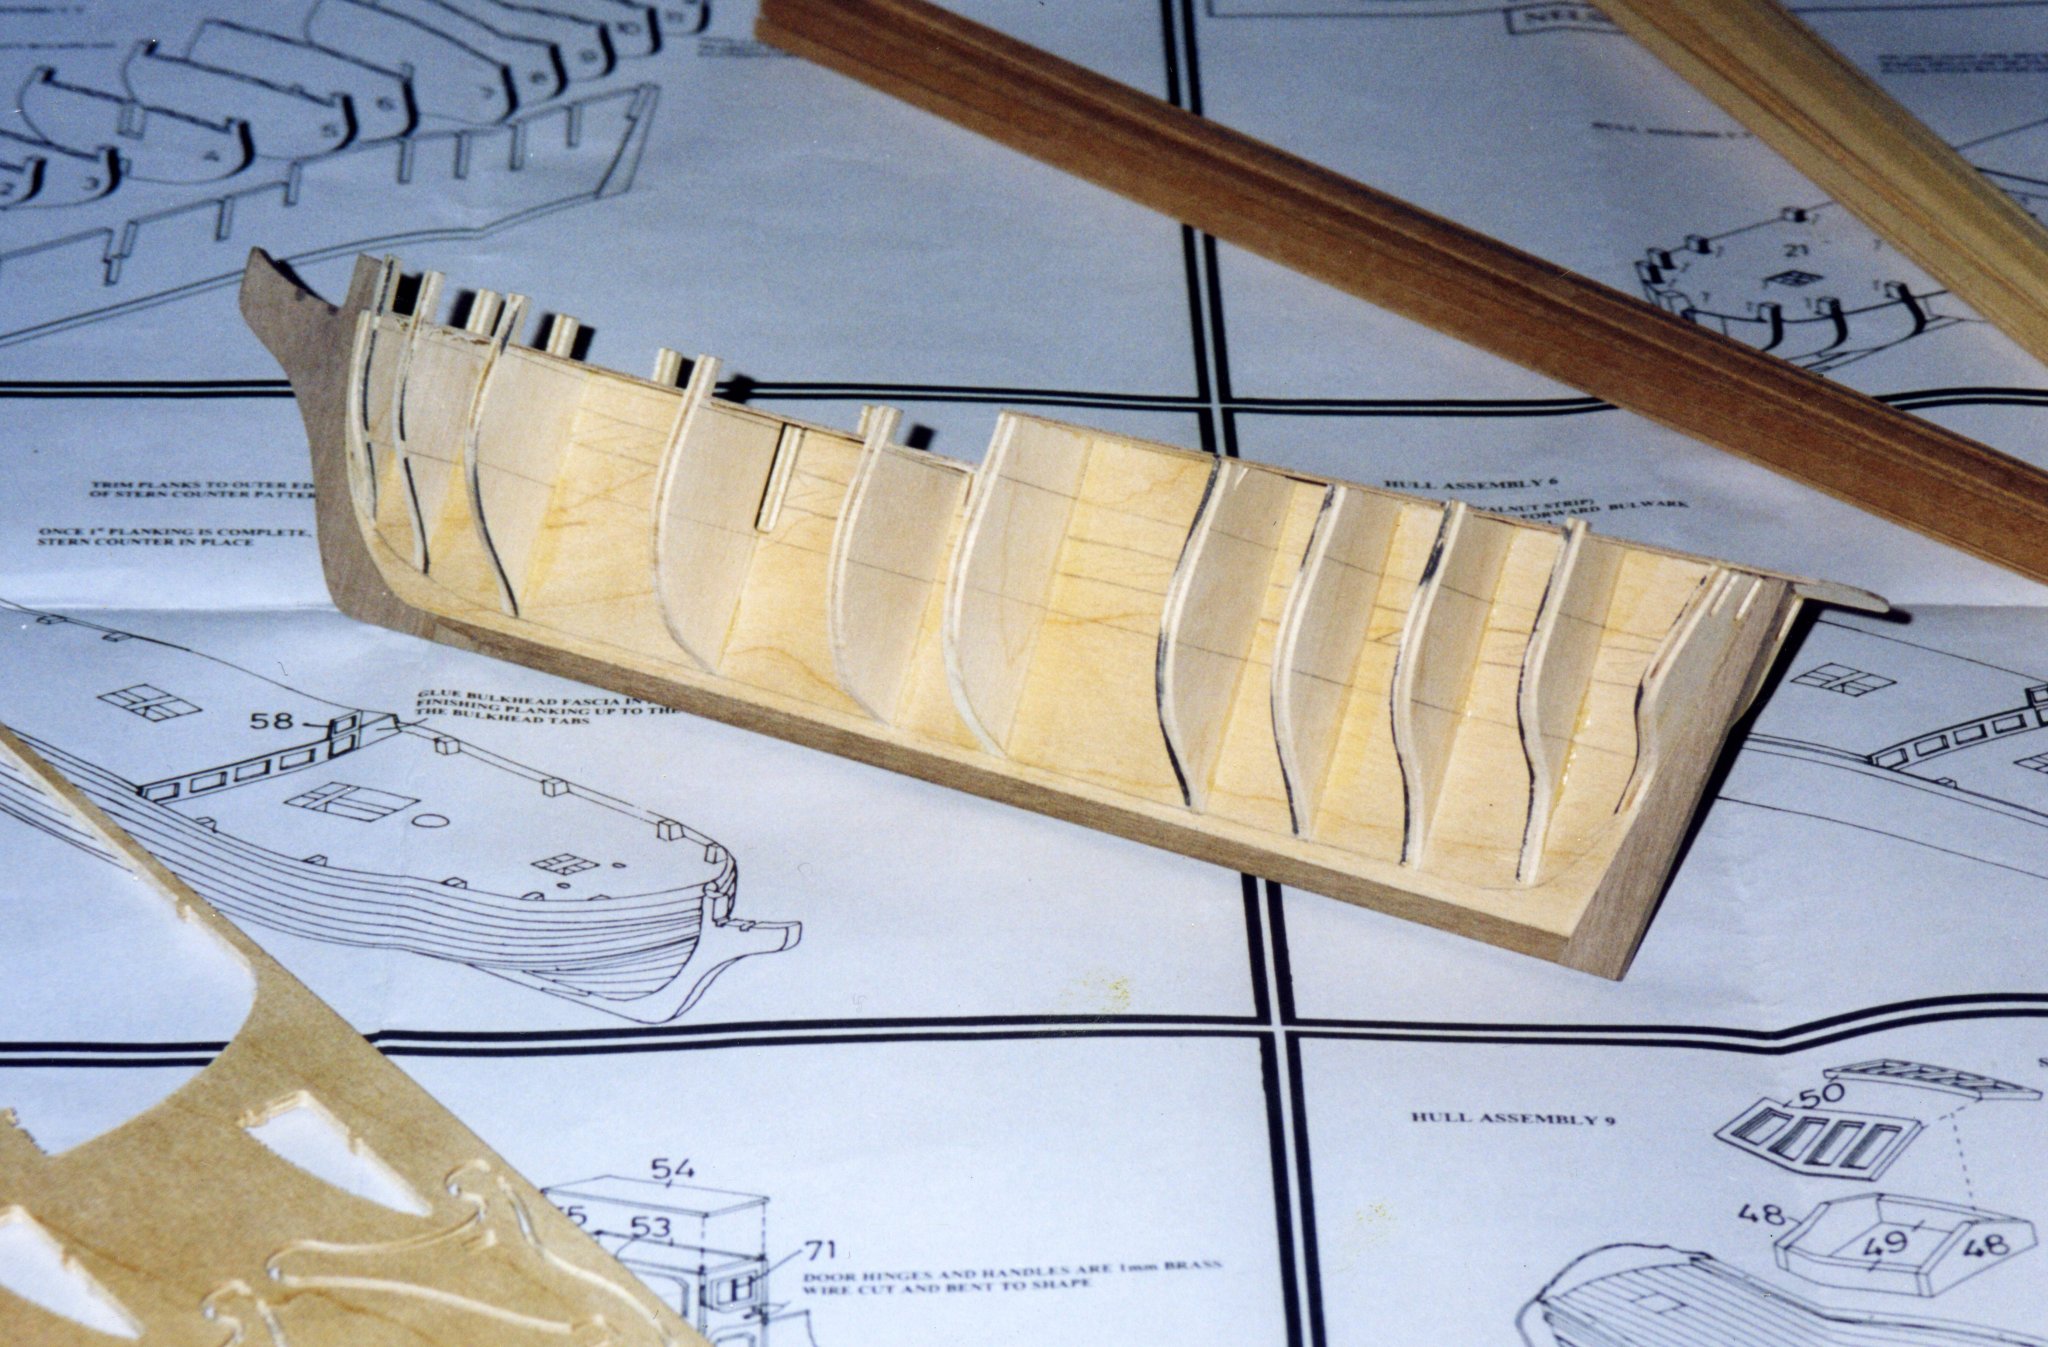
Hi, Had a quick look and did make some notes as I built it. The below might be relevant to the stage you are at. Of course i might have got these wrong. Keel walnut section to short for the plywood piece by 4mm. Not sure what I did about this as looks fine without joints. Found keel slots on bulkheads 1 to 3 not symmetrical or vertical - worth checking because if don't correct hull will look twisted. Found bulkhead 5 oversize and needed material removing and bulkhead 6 needed material adding. Installed additional support to bulkhead 6 for the false deck to stop it pushing down. Hopefully that will help with your early stages. Like I said just a heads up, your kit may be different or i might have got it wrong. You can see below where I have added to the bottom edge of bulkhead 6.

-
Great kit and great choice, I really enjoyed this build. Also had best quality of timber out of all my Caldercraft kits.
-
I would say you have to consider what kits are on the market by other manufacturers. Going by this and taking into consideration the history of the top ship, both historic and in films / fiction, I would say the 38. A 44, however, is not covered by any one else. However, your kits are setting a new standard. If I had not started the Cruiser I would have sold for the Flirt Kit. I would probably consider selling the Pegasus that I have in stock for the Sphinx and my Diana kit if you were to build one of the frigates. I know these are old projects of yours but now you are doing this for yourself you are no longer tied by the company you work for regarding quality, you only have to consider cost. If I had to for go two kits to have one of your higher quality kits then I would be far happier. I wish you had revealed the Duchess a few weeks ago, I was 50 last week and would of asked my wife to give me a late present to get that beauty.
-
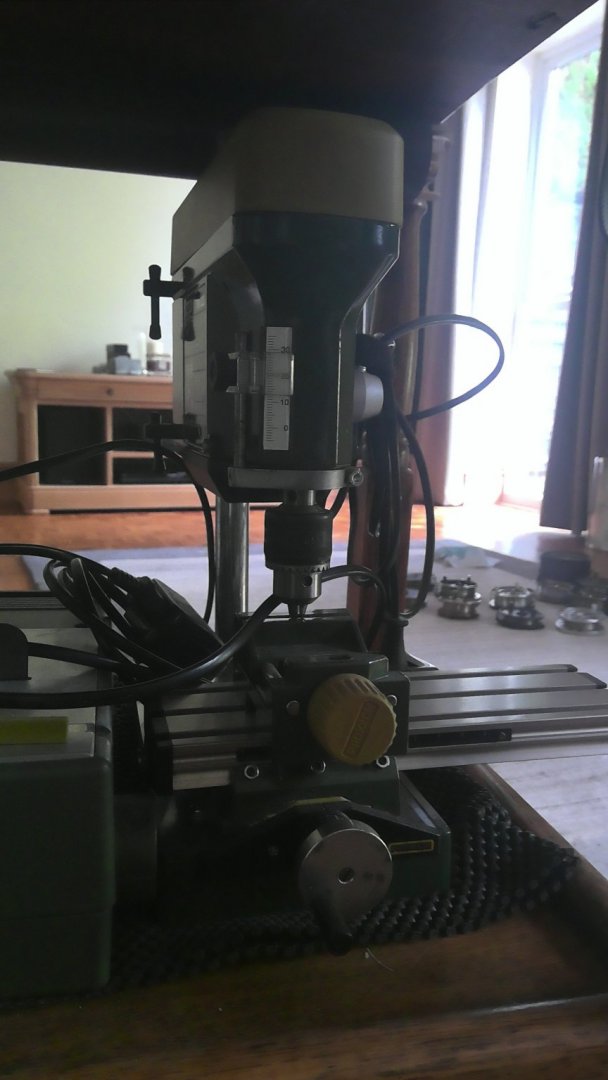
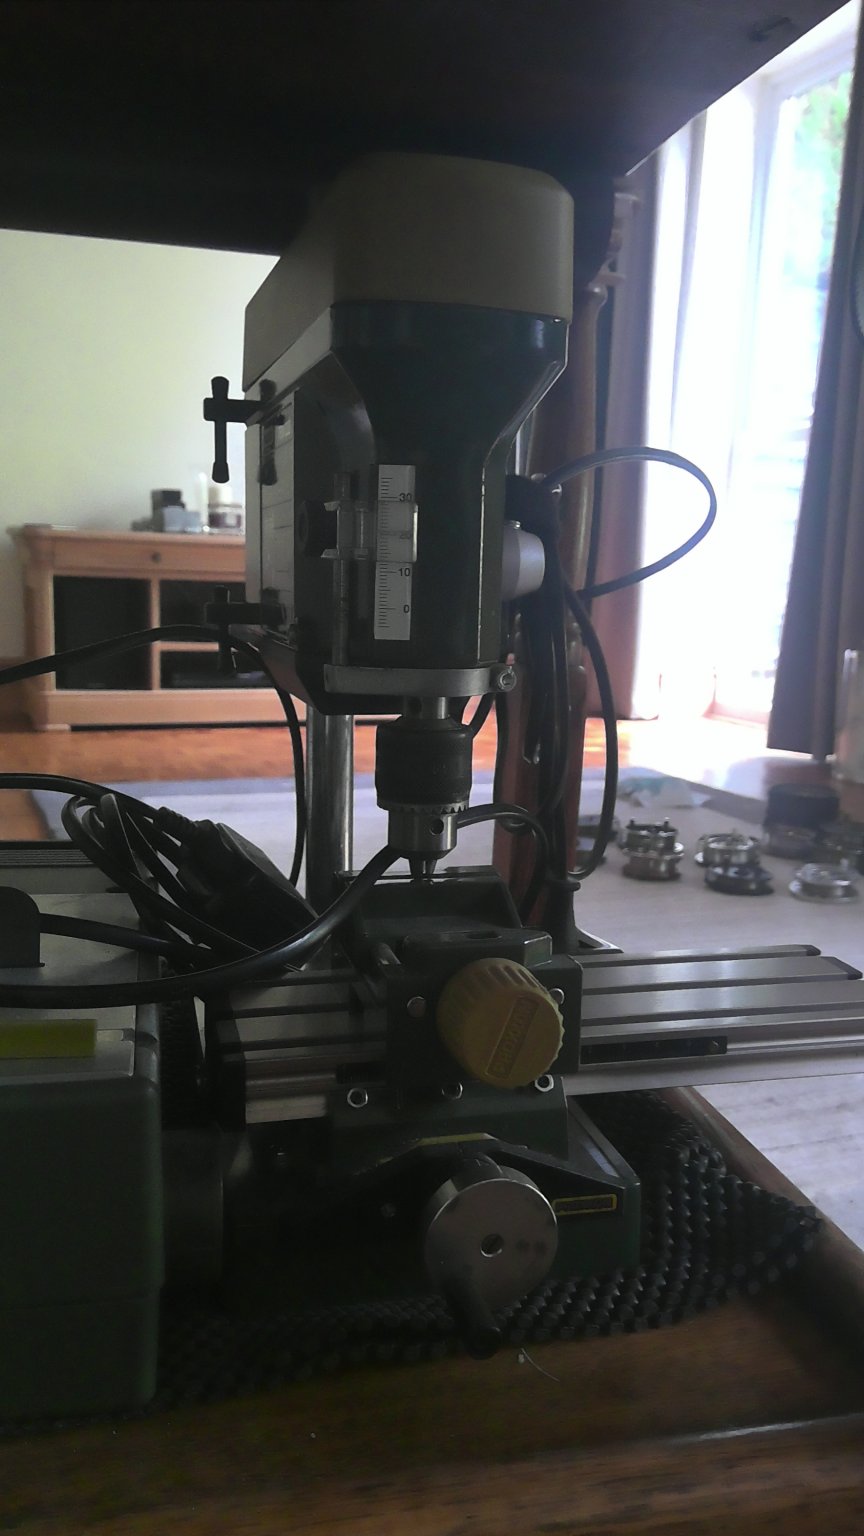
I have it shown with a jacob's chuck fitted but the collets are actually better.
-
Hi, I have the 250m lathe and the tool slide will lift by simply raising by releasing the clamp that also does the angle. I made a new piece that was longer so didn't have to move along whilst doing the mast. It took me a while to understand what you meant by plastic tubes as purchased 3 jaw and 4 jaw chucks for mine and a tail stock drill chuck that replaces the rotating centre. The circular saw I wish had a bed to alter the height of the blade as then you could make gratings with it or cut slots in wood without penetrating all the way through. My disk sander has really been abused, it has been used for DIY as well as I find powerful for many tasks. I did all the metal beading for the edges of the tiles when doing the bathroom. The Proxxon tool i love most is the TBH post drill. With the KT 70 Micro compound table it is good for drilling holes at precise spacings. I have also pushed its limits using it to perform the square sections at the top of masts.