


Oldsalt1950
-
Posts
496 -
Joined
-
Last visited
Content Type
Profiles
Forums
Gallery
Events
Posts posted by Oldsalt1950
-
-
Dave, you might want to do a review on that chamfer scrapper. I hear you on the busy retirement, seems there are a lot of things to do and get done once you no longer have to go to work. 😆
Jim
- Mr Whippy and Keith Black
-
 2
2
-
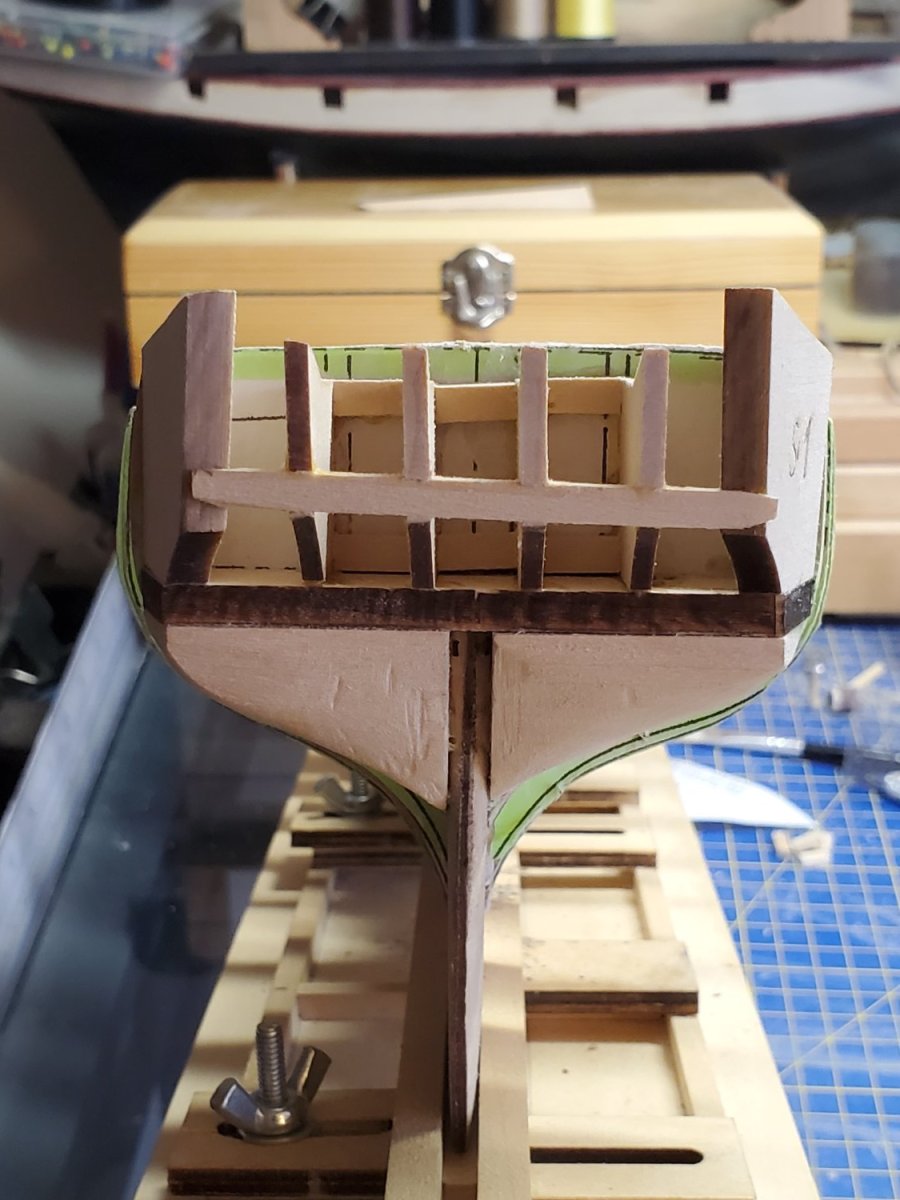
Here are some progress pictures, in the stern pictures you will notice the cross piece is canted to starboard, I'm still working on the placement of the stern lights. The crosspiece is there to establish the spacing of the uprights and will be corrected before the stern lights are installed. The plans for the ship call for transom wings to be installed, but I am eliminating them, as they look like elephant ears. Ship will look much nicer without them, much sleeker lines.
Jim


-
They aren't really needed on any of the weather deck ports. Their purpose was to keep water from entering the ship through the gun port openings. For the weather deck cannon's tampions were used.
Jim
- aydingocer and mtaylor
-
2
-
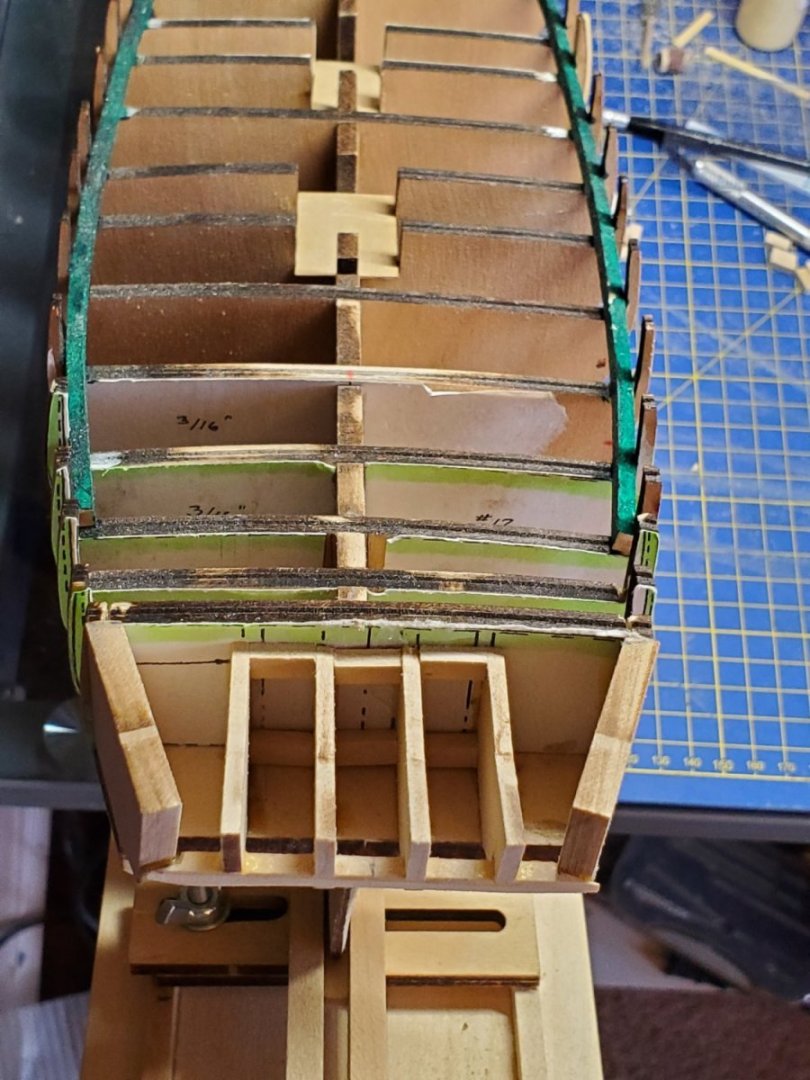
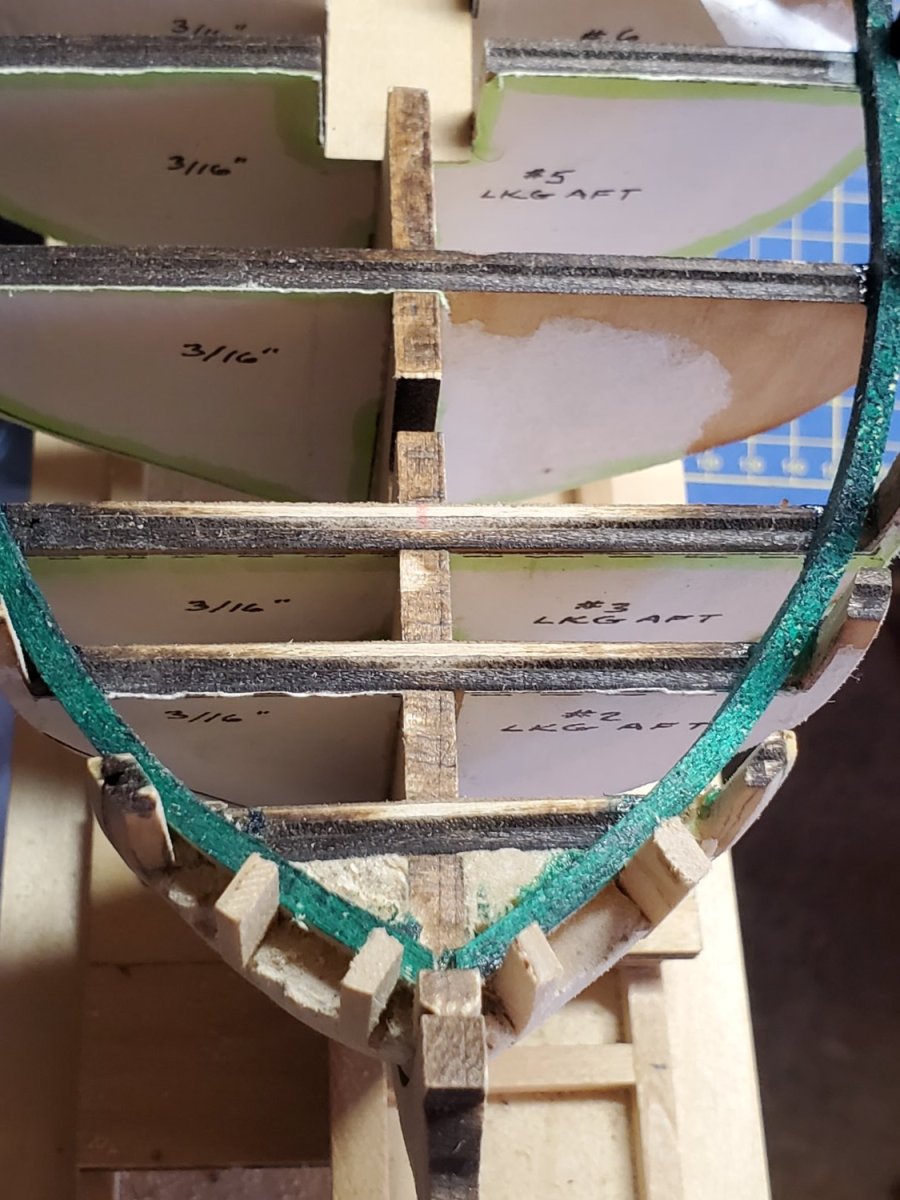
Stern filler blocks have been shaped and installed, stem tapering completed, and Timberhead and knightheads installed and tapered. Next will be building and installing the transom frame and transom, transom lights and wings along with the cap railing which curves all the way over the transom. I'll take pictures of that. Have to decide how many transom lights to install, some have installed 7, some five. Have determined that all the stern decorations will be omitted on The Wendy Kay. This is after all a merchant ship converted to privateer. Not to mention most American ships of war were purpose built and didn't have all the fancy decorations. Paint scheme will also be fairly plain.
Jim
-
Pat,
I hear you. We all live within certain budgetary restraints, and would like to support our local businesses. I'm retire and live on a modest fixed income. I try to buy local and since I am in the States, buy American. Prices for certain items are just way out of my range, so bargain hunting I go. I can't always find something American made or even in Tiawan. Sometimes you just don't have a choice as to where your item will come from, if you need it you are buying it from a source that fits your budget. I am slowly replacing some of my equipment withbetter quality items, but that is on a "It doesn't work anymore" basis.
Jim
- Ryland Craze, hof00, thibaultron and 2 others
-
5
-
A lantern of that type or something similar would have been used.
Jim
-
Think I'll pull up a chair.
Jim
-
Just give it time Dave. We all wind up getting sidetracked every now and again.
Jim
- Keith Black, Dave_E, AJohnson and 1 other
-
4
-
Dan,
For plank bending try this method from Chuck Passaro: Chuck's plank bending tutorial. You are going to have a hard time pulling some of those pins out of your strakes. Don't drive them in so far if you have to use them. Chuck's method should get you bent planks that don't need to be pinned in place.
Jim
-
-
It is obvious that a lot of blood, sweat, tears, and love went into the creation of the Indefatigable kit. You and Jim should be proud of your efforts. For anyone who has not downloaded and read the manual, I urge you to do so. There is a ton of information in it that you did not see here in the forum. Time for you two to take a few days off and enjoy the fruits of your labor.
Jim
- druxey, AJohnson, thibaultron and 7 others
-
10
-
Just making sure gentlemen. The manual is quite comprehensive, You were even kind enough to show the drill sizes for the PC board bits, and the history section is outstanding. Glennard2523's build log should be getting a lot of traffic for the pictures of HMS Trincomalee, which i am sure many will use for some reference of various bits and pieces, and for comparison as they build.
Jim
- Dave_E, Canute, thibaultron and 1 other
-
4
-
-
Outstanding looking deck furniture. Indy is starting to come alive.
Jim
- thibaultron, wernerweiss, KentM and 3 others
-
6
-
You basically have two choices when making a split ring. You can either solder the small gap to close it , or glue it with CA/ Epoxy. You then have two choices again for blackening it, paint it or chemically blacken. My choice is solder because i am more familiar with it having worked as an Electronics Tech, Avionics Tech, Sonar Tech for 20 years in the service, and having done prototype wiring and work as an engineering aide in civilian life. Soldering takes practice and one must match the equipment and materials to the job. Working on such fine material size wise, heat is your biggest problem. You can't use silver solder as the melting temperature is too high and you will destroy the ring. You can use silver bearing paste or regular Lead/Tin solder but be sure it is not acid core. You will also need a couple of files to clean up the solder joint when finished. If you decide to use CA/Epoxy to make the joint/ring whole you will still need to clean up the joint once finished. Stay Bright and a few other silver bearing solders can be chemically blackened, or you can paint the ring.
Jim
-
You might want to see if you can find ARTEZA brush pens, They are water colors and do not warp paper when used and will allow the laser cut lines to show through. Here is a link to their website: Real Brush Pens. Hope this helps
Jim
- thibaultron, mtaylor and Canute
-
2
-
 1
1
-
No pictures, progress is slow but steady. Stern filler blocks are slowly being shaped, and so is the taper and cut out of the stem for the figurehead ( should have done this before mounting the stem) Will need to order some bits and pieces from Chuck at Syren, specifically cannon and their carriages', and a few fiddle blocks. Once that is done and the parts arrive, hull planking can begin. I'm still working on changes to the ship that would make it more reasonably workable as a model of a real privateer, rather than a model of a model with no pedigree.
Jim
-
Congratulations on ten years , Chuck.
Jim
- Canute, mtaylor, Ryland Craze and 3 others
-
6
-
Kit progression or lack thereof is dependent on many factors. Some are withing our control others are not. Money, time and space to model are some of the basics. In addition you have skill sets, medium you are working in plastic, card. wood, kit or scratch built, scope of project or complexity and familiarity with the subject. We each have our own motivators and certain areas we excel at, along with areas we need to improve. There are very few of us that are good at everything. We each have to decide when we are in over our heads and when to seek help or guidance. MSW is a great resource and you can find a solution to any problem if you know where to look and how to ask.
Jim
-
Center would be best based on the location of your gunports.
Jim
-
Kenneth, it is Kevel. MS rigging diagrams are not the best.
Jim
- Kenneth Powell, allanyed and Dave_E
-
2
-
1
-
-
It is starting to take shape well, Dan. You will find you still have some fairing to do, we all always do, so take your time with it. This isn't a race. I actually kind of enjoy fairing and coaxing out the final hull and bulkhead form. I also use to enjoy doing body work on cars too. A good flexible straight edge and some deft fingertips running along it along with sighting along it will get you there.
Jim
-
If you think carefully about what jobs were entailed to man a fighting ship in the age of sail, there are a lot of different figures that could be made to fill in the ship's company and bring it to life. Chris has already provided us with, Captains, a cook, a gun crew, two able bodied seamen. A midshipman taking a fix with a sextant, a few men aloft, a capstan crew, a boatswain mending a sail , a carpenter, maybe a boat crew the list can go on and on. It took a lot of men to man these ships. I served aboard a U.S. DLG an FF and an FFT. The FFT had a smaller crew as we were tasked with training reservists and had various contingents report aboard every month for two weeks. They found out very quickly that they were being put to work and it wasn't a pleasure cruise they would be going on. We also received midshipmen for 12 weeks and they got to experience what it was like to work in each department of the ship, Engineering, Weapons, Deck and Operations.
Jim
- mtaylor, Canute, GrandpaPhil and 4 others
-
7


Silver soldering
in Metal Work, Soldering and Metal Fittings
Posted
Soldering is a skill that must be practiced in order to master. I prefer a soldering iron that I can adjust the temperature on for all my soldering, some like resistance soldering others use a torch still others a gun. For ship modeling and at the scales we work at, a fine tipped iron with adjustable heat is all you really need. Most common solder used in electronics is a lead/tin mixture which works fine for affixing components that are never subject to much stress from coming lose. For items under stress all we really need go to is silver bearing solder not true silver solder to hold the joint together. The parts to be joined should be clean of contaminants, this is best done by abrading with fine steel wool and acetone. When you solder, your finished joint should be bright silver with no pin holes or remnants of flux which usually shows itself as black spots in the solder. The finished joint should be cleaned after soldering again using acetone. Not enough heat will give you a cold solder joint which is usually a dull silver in color, to much heat will usually destroy or mis-shape the part or parts being joined.
To stop heat from soldering from traveling to places that you don't want it use hemostats or similar devices as a heat sink to bleed off the heat. keep the tip of your soldering iron clean and well tinned. If you can no longer keep the tip clean or tinned replace it. Keep combustibles away from the soldering area.
Like everything else in model ship building, the skill must be learned and practiced in order to master, you also should not rush the job.
Jim