allanyed
-
Posts
8,149 -
Joined
-
Last visited
Content Type
Profiles
Forums
Gallery
Events
Everything posted by allanyed
-
 I have never been a fan of edge bending, but that has changed for some situations in the past few weeks. Follow Chuck Passaro's tutorial and you should be pleased with the results. A lot depends on the wood. Walnut in most kits is really miserable wood to work with and often very porous and prone to cracking and splitting so be careful if that is the wood you have to work with. Castello, bass, pear, poplar, and fruitwoods are good candidates for edge bending. Chuck uses dry heat with his heating iron which works, but I found some scorching on a cherry cap rail so added water to the iron and used the steam setting and I was pleased with the results. Allan
 -
A Sailor Went to Sea. Cool name..... Do a search here at MSW on blackening. There are lots of posts on blackening brass with many do's and don'ts. A key point to remember is be sure the pieces are clean. Best to pickle them first, then clean with acetone. Avoid touching with your fingers as oils from your skin getting on the piece will screw up the process. Tweezers are the way to go for handling. Allan
-
Pascoe. I just re-read your note and am editing my first response I assume you have the chain set up for supporting the anchor once it was up and in place to secure it . For the cathead, the cat falls were used for catting the anchor. The fall of the tackle was rove, running from the double block and through the sheaves in the cathead. The standing part of the fall was clenched to an eyebolt under the cathead and the running part led in on to the forecastle, generally to a cleat on the inside of the bulwark or sometimes to a timber- head close by. (From Lees' Masting and Rigging) What are the two lines going to the sprit, topmast stay and preventer stay or some other? You may find good details in Chapelle's book on Baltimore Clippers. I am sure there are members here with expertise in these clippers and can give you better information. Allan
- 1 reply
-
- 1
-

-
- Artesania Latina
- Cats Head
- (and 2 more)
-
Keith, Hope you are right for the day sailors they take out. Druxey, so starting so early in your life delving into ship modeling was what led you to becoming the virtuoso in ship modeling as well as the other arts I know you have succeeded in over the years. Alas, my first wooden model was about 1959 or so and was a POB balsa disaster. Then I took the big step and jumped back in in 1978 and stayed with it pretty much continuously ever since. Couple hiatus in there somewhere before the internet. But, even today with Boothbay 65, it is a never ending learning experience for which I am grateful and thank you and the many others that have shared so much with us. Allan
-
Retired Guy (Love the name) and Bruce, THANK YOU VERY MUCH
-
Keith, The way they explained it to me is that the idea of the vessel is for day trips with pretty large groups and it is outfitted for wheel chair access which has not been done before. In addition to the aft cabin, the forward cabin has bench seating for 16 persons plus 4 chairs. There are also benches on deck for 24 including the enclosed benches just aft of the head. The deck seating will be more clear on the build photos in a few days, but I am not doing the inside for the forward cabin. The aft cabin top is removable so they can take it off and show the head and ramps to prospective investors. I saw no sense in furnishing the forward cabin and they said it was not necessary as it is just seating and such and shows clearly on the architects plans. To paraphrase Alfred Lord Tennyson in The Charge of the Light Brigade mine is not to question why, mine but to ....... :>) Allan
-
Byrnes Table Saw making a 1mm by 1mm strip
allanyed replied to CharlieZardoz's topic in Modeling tools and Workshop Equipment
Cutting strips that small is certainly possible, but..... some wood species are fine for this, others, not so much. Sharp blade for sure, (new saw from Jim, so no doubt a good blade) Or, if you are having trouble getting the size perfect, cut to about 1.5 or even larger, then using a thickness sander (Jim makes a great one) you can safely reduce the size to within a thousandth of an inch or so. Just another way to get to the end result. Allan -
I made some shrouds for 1/450 Victory.
allanyed replied to modeller_masa's topic in Masting, rigging and sails
Hi Wefalck, Great catch, my error for sure. Thanks! Allan -
I made some shrouds for 1/450 Victory.
allanyed replied to modeller_masa's topic in Masting, rigging and sails
Masa Lloyd McCaffery describes in some detail the making shrouds on pages 111-114 of Ships in Miniature. He builds on a loom and for "large" scales such as 1:192 he uses brass wire for shrouds and and smaller diameter wire for the ratlines, and for small scales such as yours he recommends nickel cadmium wire. He uses a flexible glue to coat the entire set while it is still on the loom so the set up is not too brittle. Allan -
I'm old Druxey, but in 1948 I was had not started reading (or ship modeling for that matter). 😁 I know, I know, the book is from 1948, but had to post this anyway. That said, the boot topping is an interesting item to remember. Allan
-
Thank you very much for the references Bob. Gary, what you describe makes sense to me! Thanks for the input, I appreciate it. Allan
-
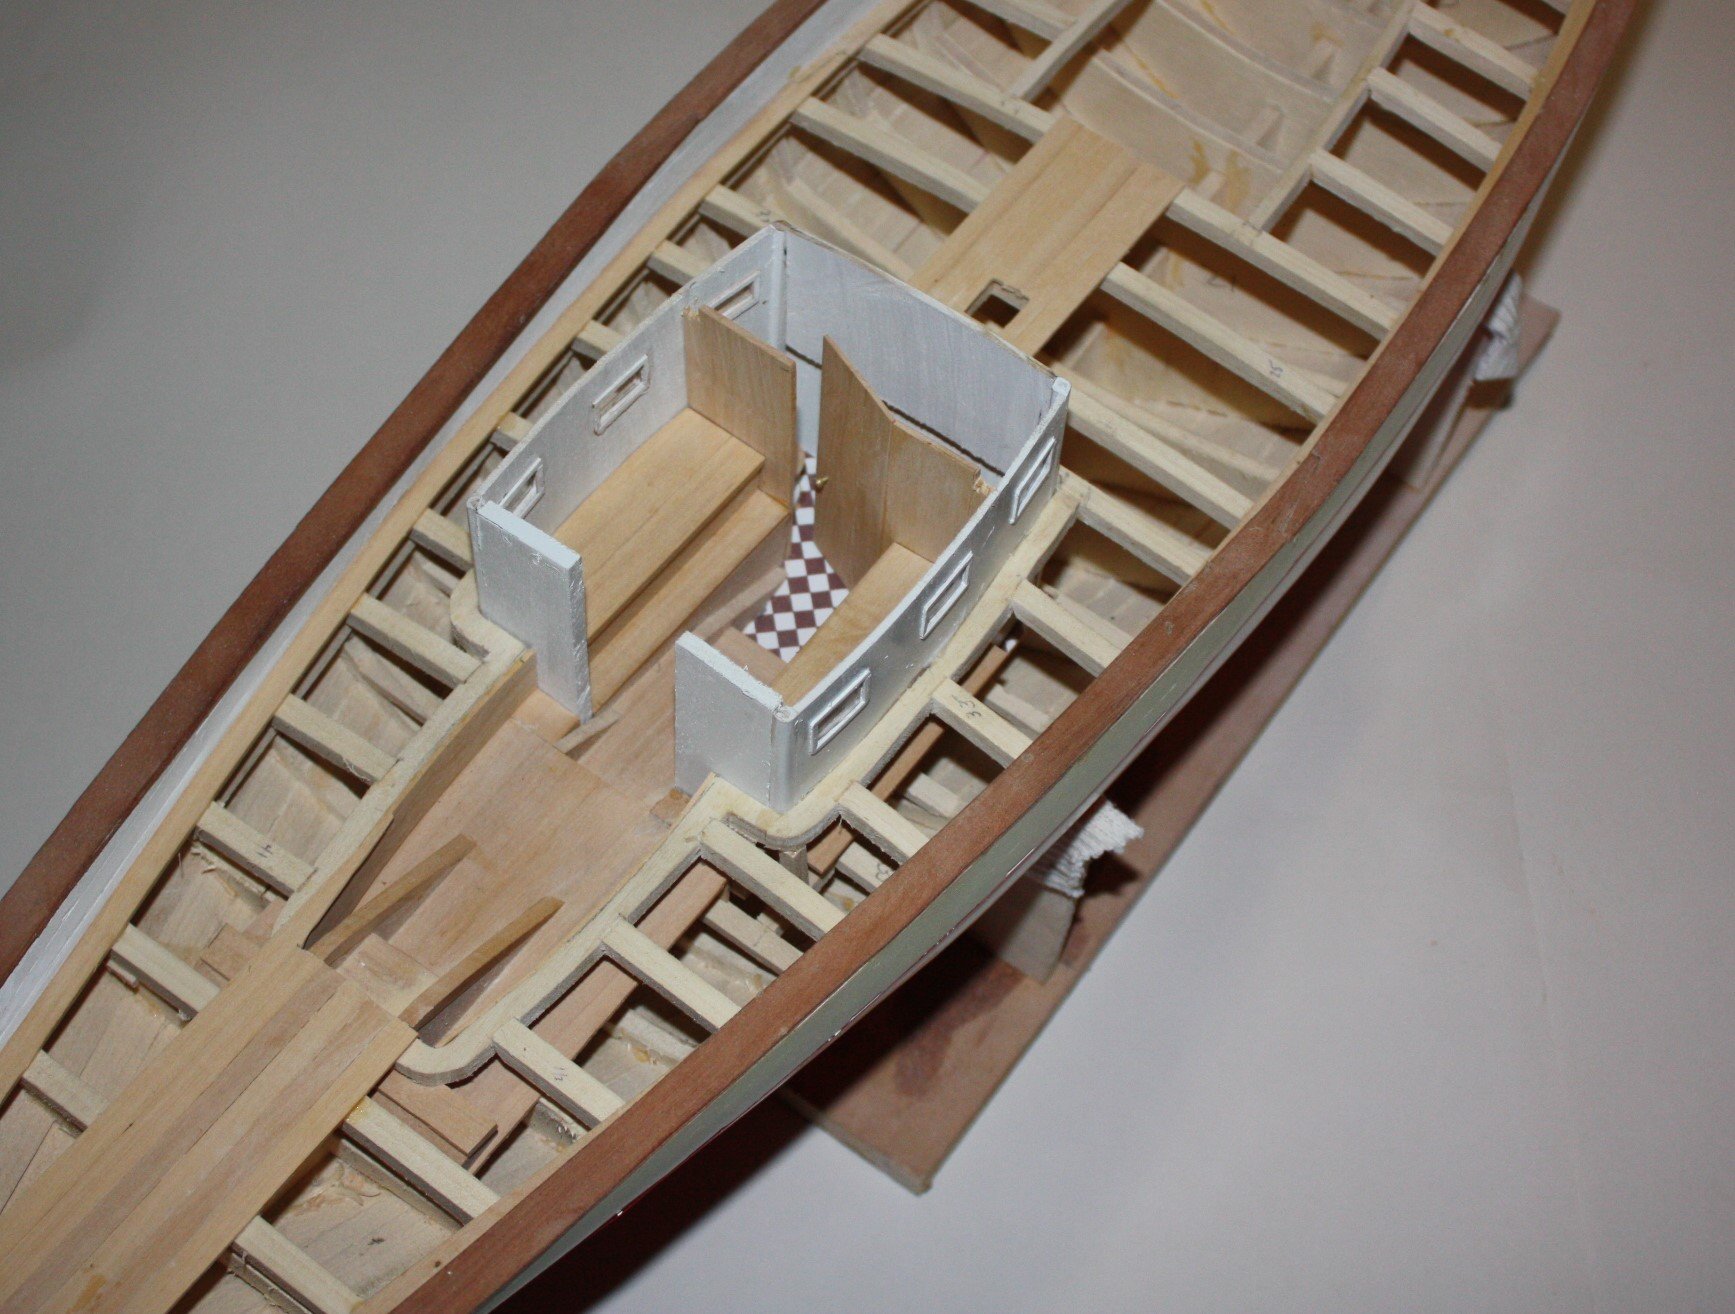
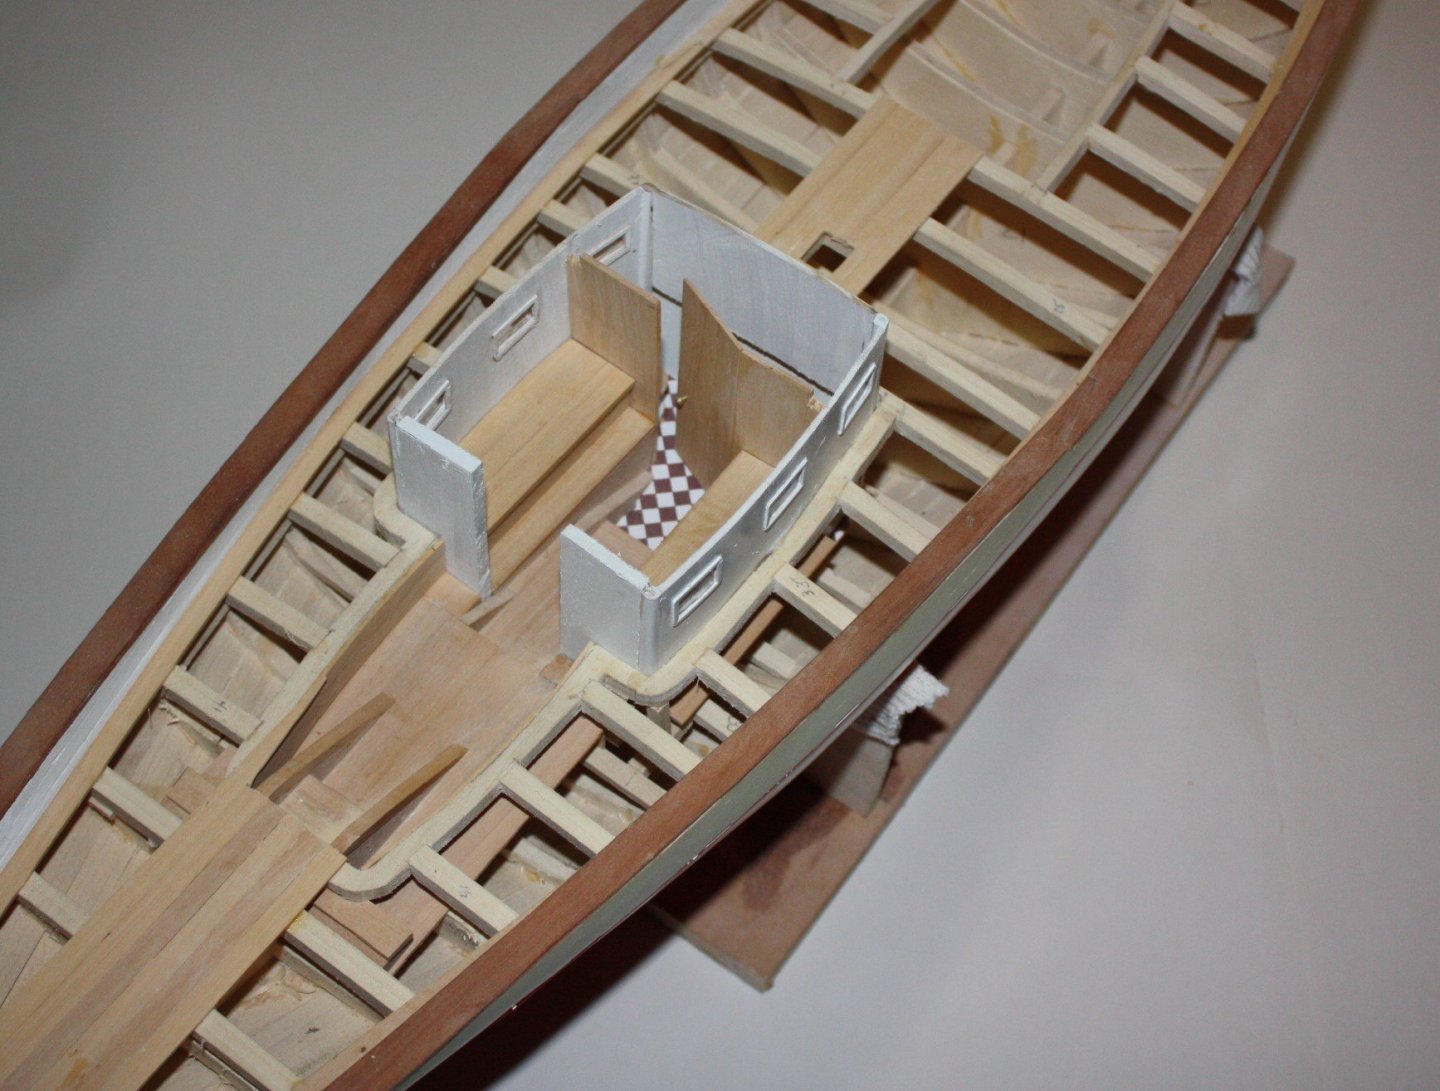
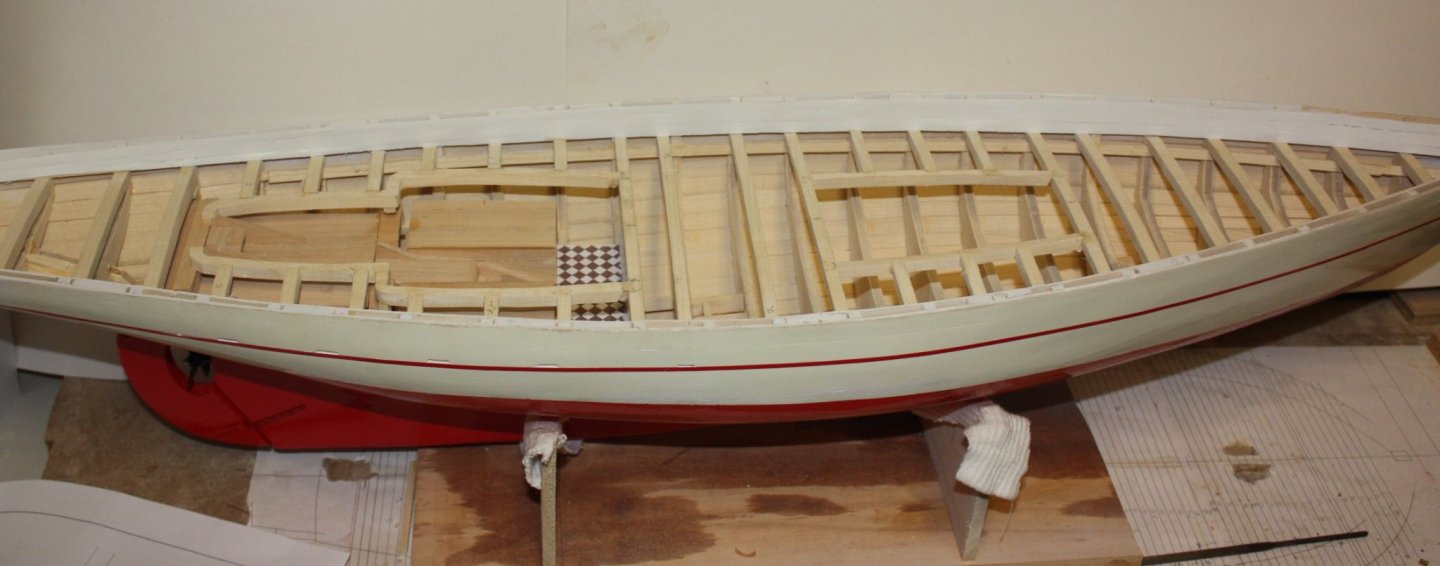
Some up to date photos. White is the theme on this schooner with touches of tans and reds so I have been using a combination of poplar for things to be painted, castello for tan unpainted finish including the deck planking and cherry for the cap rail. There will be a number of trim pieces in red so will likely go with cherry or perhaps Swiss pear. I gave Chuck Passaro's method of bending planks for the cap rail and waterways and must say I was pleased. Being able to cut clean planks then bending rather than cutting curved pieces was a nice change. I did soak the pieces first and I used two hold downs in the center portion of the board during the bending. I used the boss' iron and used the steam setting as on my first test pieces the wood started to discolor when done dry. Probably too much heat, but the steam did the trick. I did trace the curve on paper and transferred it to the heating/bending board as a guide as the curves were not true arcs. Once released from the makeshift jig the pieces held their shape very well. I decided to go with cherry for the cap rail, but found I could not use cherry for the trennals as they were much too brittle and would not go through the draw plate at the smallest diameter that I needed. I opted for pear for the trennals and their cross section matches very closely to the color of the rail. Once sealed and top coated they will show, but should be nicely subtle. More photos of these in the next post. Note that the deck house bulkheads are loose at this point as there is some finish work to do before fixing them in place. Note that it looks otherwise in the first photo, but the door to the head will swing fully open with plenty of room to spare. Does anyone know of book they can recommend on rigging "modern" schooners. I can try to go take a look at some at the local marinas but I doubt they have very many, if any that are this large. The plans that I have from the architect shows the blocks and basic lines, but there are a lot of details that I would like to study if there are any good books available. Allan
-
Mike I have a few models that have been around for going on 30 years in which the lines are still taut so this is a new one for me. In any case, I am not sure why you would worry about the pins being glued. The lines are the only things that need to be removed and tightened as the pins would be kept in place. Just make sure you have sufficient line coiled as you mention. Allan
-
Welcome Dave!! I am with Ryland regarding painting. Actually I much prefer to not use paint but rather different types of wood, but that is not always possible. For my current project there is quite a bit of painting including the hull in two colors above and below the waterline, painted deck houses, and bulwarks. Once the hull was planked she was painted, but individual parts such as the deck house bulkheads have been painted before being fixed in place as not everything gets painted. Allan
-
Hi Dan, Welcome to MSW and thank you very much for your introduction. Feels like we now know you a bit and that is a good thing. Don't fret about being too near the sea, you are less than 500 miles up river from Pilottown at the delta. :>) Be very happy to have your heirloom vise. I have the very good fortune to have my grandfather's work bench which is just over 100 years old now. Again, welcome aboard. Allan
-
Rigging Question - HMS Ontario
allanyed replied to David Lester's topic in Masting, rigging and sails
My fall back for any British ship is Lees' Masting and Rigging. Can hardly go wrong using his book. I have seen it as low as $68 at Abe Books. It has served me well for the 15 years or so that I have had it. Lenarth Petersson's book Rigging Period Ship Models is cheaper ($33) but extremely limited compared to Lees' book. Odd thing is that on Amazon, the hard cover for Petersson's book is about $33 but the paperback is $400 up to $651. Very strange. Allan -
Rigging Question - HMS Ontario
allanyed replied to David Lester's topic in Masting, rigging and sails
David, Hopefully someone will have an answer, but I have never seen hearts for shrouds with our without deadeyes as well. I checked a few of my books and cannot even find where hearts alone for shrouds are used. The first drawing you show has a label Version A. Is the second labeled as Version B by chance? As she was discovered in tact by Kennard and Scoville, perhaps this can be confirmed as accurate with some digging into their research of the wreck. I am curious to see if anyone has knowledge of the use of these hearts in place of and/or in conjunction with the deadeyes. Curious minds want to know. Allan -
Arthur Welcome to MSW. Please post an intro on the new members forum, you will get a warm welcome. You may want to PM Pete for information but also, there is a sizeable collection of many L. Francis Herreshoff plans at Mystic Seaport, so you might want to contact them as well to see what is available and the cost. Or just do a search on the net for information on the BB 14 . I found the following Googling Buzzard Bay 14 in a few seconds and there appeared to be a lot more that might be of help once you have the plans and start a build. https://www.artisanboatworks.com/classic-designs/sailboats/buzzards-bay-14 Allan
- 258 replies
-
- 1
-
-
- buzzards bay
- herreshoff
- (and 1 more)
-
Regarding the port holes, based on the fact that you could machine away the outermost surface of the square brass tube, it is apparent that the soft soldering was sufficiently strong. Which soft solder and method did you use for these delicate parts? As above, very clever solution to making these pieces!! Allan
-
Hi Keith, Sorry for causing some confusion/miscommunication. When machining on the lathe, for example, I just go with the hardened brass. I only soften the brass pieces that need to be bent into shape such as the saddles, goosenecks, &c. For the cutting and filing of sheet material, for example, I have never really noticed much difference, if any between softened and hard brass. Regarding the waterline, I have not asked the architect about this feature. He has been extremely difficult to reach as he just about lives in the Ernestina while they are rebuilding her so I have limited my questions for now. I am curious to know about this myself. Hopefully will have that mystery solved down the road a bit. Allan
-
Lev Are you going to build the frames as was done in real practice or will they be paired/sandwiched frames? If the former, any of the woods mentioned work well as well as castello and others. If you are going to make paired frames wherein there are two laminates, you can go with an inexpensive species such as poplar, especially if you are going to plank over the entire hull. Allan
-
Thanks to all of you for your comments. I am always very interested to hear of any questions/concerns/mistakes I've made in order to make improvements in my never ending journey towards the quality of a Greg, David, Keith, Gary, Chuck, Ed and many other artists out there. I have huge doubts about ever reaching that goal, but there is a lot of fun and satisfaction being gained during the trip itself even if the end is still nowhere in sight. Allan
-
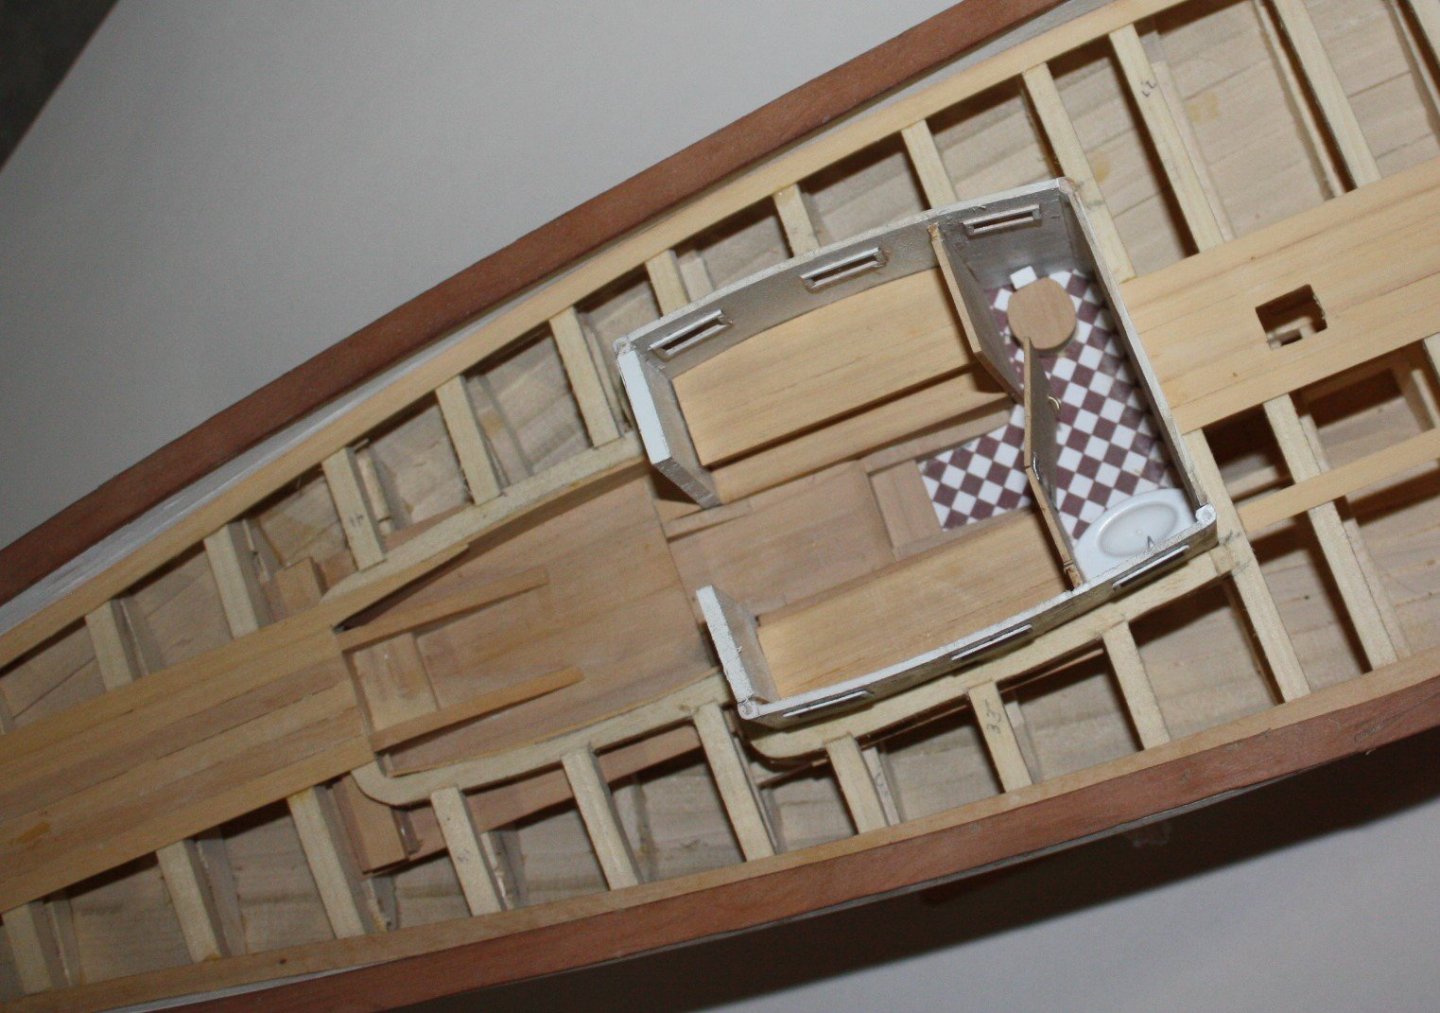
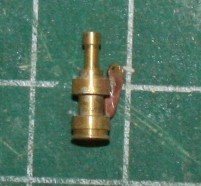
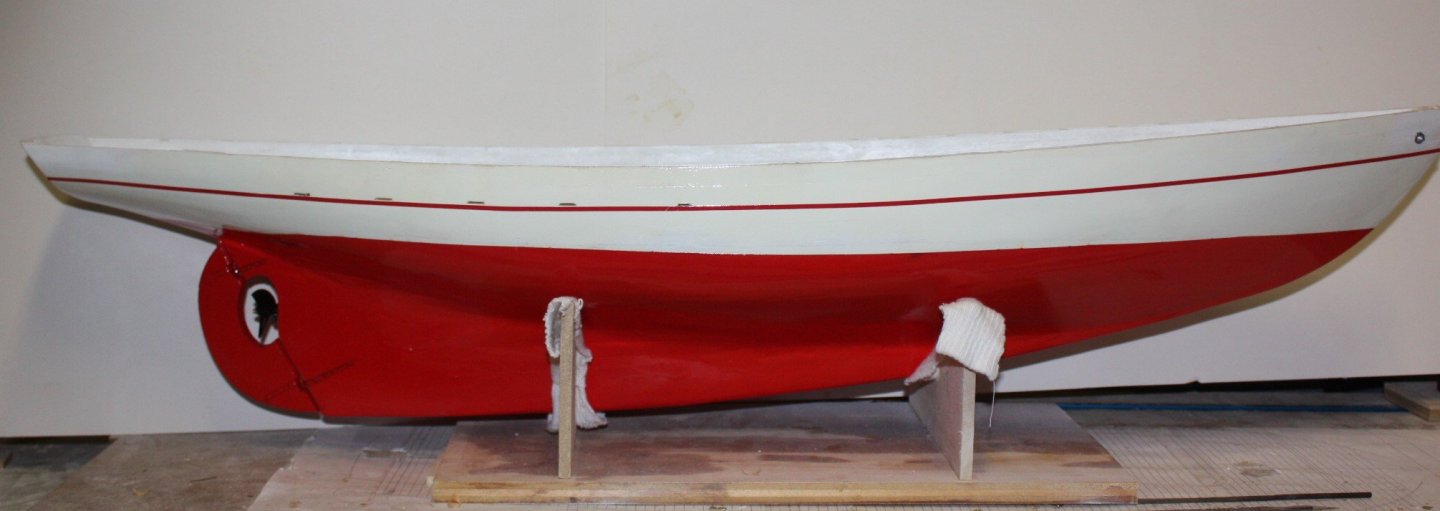
The hull is painted and the rudder and prop mounted. Few spots need a touch up, but in pretty good shape so far. The upper roller for the jib furler needs a pickling bath before getting blackened. The deck house is unusual (for me at least) in that it has curved bulkheads running fore and aft, thus the shape of the beams in the photo. These bulkheads will fay to the inboard side of the fore and aft beaming, leaving a solid landing for the deck planking on top of the beams. Based on the architect's drawings, the top edge of the red bottom paint is not perfectly horizontal. It lies 0.25" above the water line aft. 0.20" above the water line midships, and 0.38" above the water line forward. The stripe follows the sheer line of the deck. Allan
-
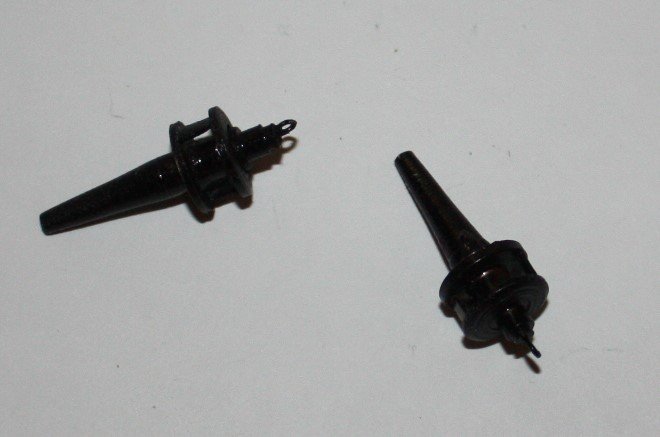
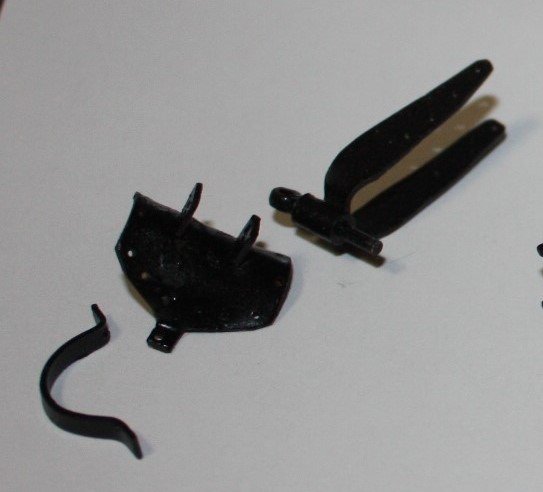
While coats of paint on the hull dry, some metal work was done. I have been using brass and silver soldering with no issues. As this is a modern day schooner, there will be jib furlers used. This took some research to understand how they work and what they look like as these were totally new items for me. Making the parts took a little doing on the lathe, but in the end I was able to make each of them in two pieces soldered together. The saddles and other parts for the booms were pretty straight forward to make and solder. I softened the brass before shaping, cut and filed to shape, then soldered. Everything was then pickled for an hour and hit with steel wool before finishing. Allan
-
Hull Planking
allanyed replied to shortgrass's topic in Building, Framing, Planking and plating a ships hull and deck
SG, Is this for your Bounty model or some other? Goodwin gives lengths for the bottom planking at approximately 25 feet for British men of war. If this is for Bounty, and she was built as a merchant vessel, it may be a little different. Allan