allanyed
-
Posts
8,149 -
Joined
-
Last visited
Content Type
Profiles
Forums
Gallery
Events
Everything posted by allanyed
-

ARGHH!!....Making A Mouse For Stays
allanyed replied to bigcreekdad's topic in Masting, rigging and sails
MD1400CS That method looks very much like one posted years ago, I think at the old Dolphin Street site. It was for the Victory by a very talented Japanese modeler who's name and information escaped me a long time ago. In any case the method looks to be the same, and if not, it looks to work extremely well. Well done! Allan -
Sorry folks if I am missing something here. As the shrouds are some of the heaviest lines on the vessel, why use the smallest that is provided with the kit? That is unless they are replicating wire rope only for the shrouds, thus smaller diameter than other standing rigging. Allan
-
Treenails
allanyed replied to pugman11's topic in Building, Framing, Planking and plating a ships hull and deck
Ditto to Mark's comment. I have a Chinese plate that is OK, but limited and a Byrnes which is great and goes down to 0.016" I have had no success at this smallest size with any wood except bamboo. Whatever species is used of the 1000 bamboo species that are available, the skewers sure seem to be the right one. With upwards of 10,000 trennals used on a fully planked hull and decks, and at different diameters, making them is the best way to go for many of us. Allan -
Microscope slides work well if you want to scrape with glass. You get eight scraping surfaces as the glass is thick enough to have an edge on each surface and four sides to work with. The thicker slides are strong enough to hold up to the task. Scraping works especially well on deck planking as well as the hull. If there is concern about breaking the slide, wear leather gloves for protection. Allan
-
With all of your work that I have had the good fortune to see up close and personal over the years, this one blows me away as much as the "big" builds. Painting a burl finish?? Please tell me you did not also make that US 25 cent piece you show in the photos :) Allan
- 641 replies
-
- 8
-

-
- greenwich hospital
- barge
- (and 1 more)
-
Masking Problem
allanyed replied to mikiek's topic in Painting, finishing and weathering products and techniques
I have sprayed or brushed a clear coat over the tape edge allowing it to seep under the tap and then let it dry, before painting. The clear coat seals the edge of the tape so paint will not seep in. Of course the tape should be tight to the wood to start, but the clear finishes the sealing. Just be sure it is the same clear you will be using on the finishing of the unpainted wood, be it flat, semi gloss or gloss.Multiple layers of paint are thus not needed and no lifted edge problem. Allan -
What lays first?
allanyed replied to Telp's topic in Building, Framing, Planking and plating a ships hull and deck
Hi Telp Yes the coamings and head ledges rested on the beams and carlings, but some other deck furniture such as capstans and ship's wheel pedestals the planking ran beneath them. Allan -
Cutting slots that small with the saw may be tough as the blade widths are probably too much. Chisel or other sharp hand blade may be better. Allan
-
Effie M Morrissey by allanyed
allanyed replied to allanyed's topic in - Build logs for subjects built 1851 - 1900
Thanks again to everyone for the compliments and likes. I will try to post more pics when I return next week from traveling on business. No golf and no ship modeling for over a week, the withdrawal systems are already cropping up! Allan -
Phill, I have sent you a PM Allan
-
Effie M Morrissey by allanyed
allanyed replied to allanyed's topic in - Build logs for subjects built 1851 - 1900
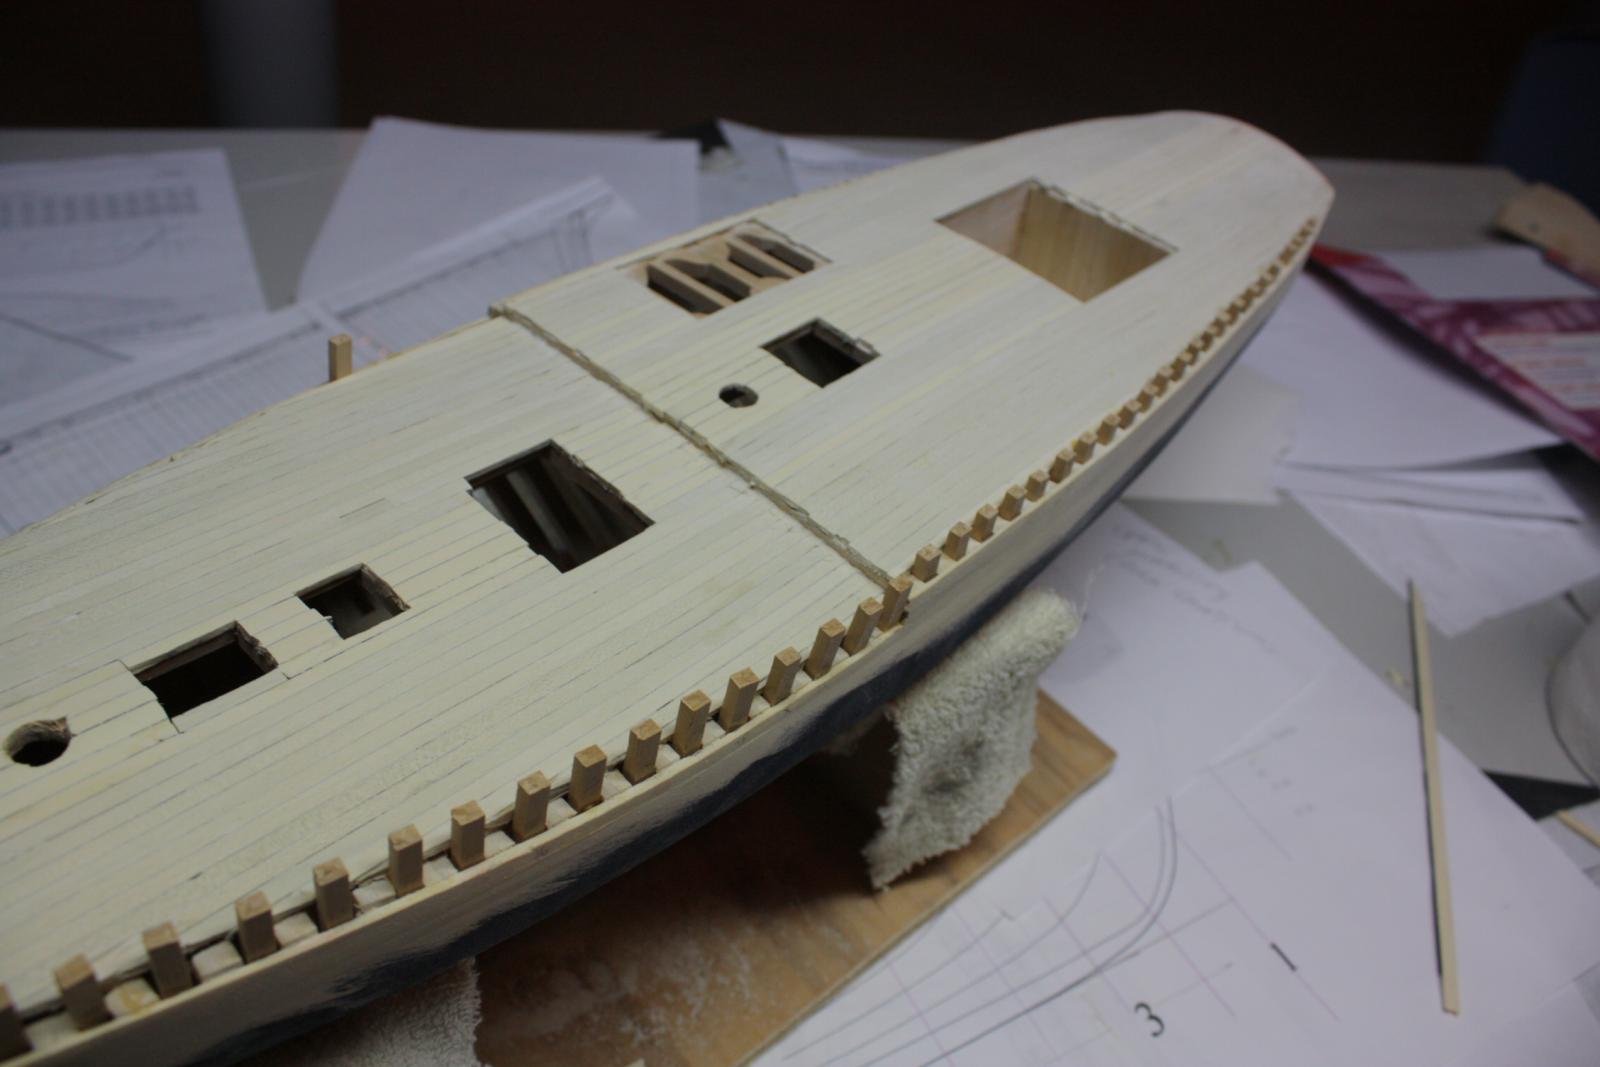
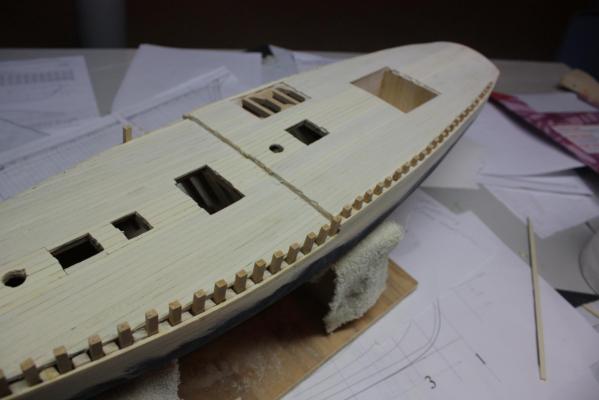
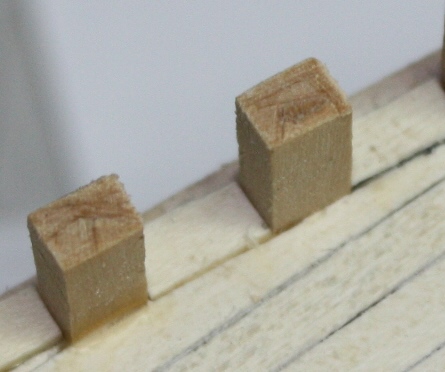
Thank you Omega, and to everyone for the "likes", it is very much appreciated. Deck planking and bulwark stanchions came next. Once the bulk of the deck planking was complete the stanchions were made and glued in place. They are shown clearly on the isometric drawing so it was pretty clear on how they looked and were placed. Deck filler pieces between the stanchions was a hassle, but time and patience work wonders. Allan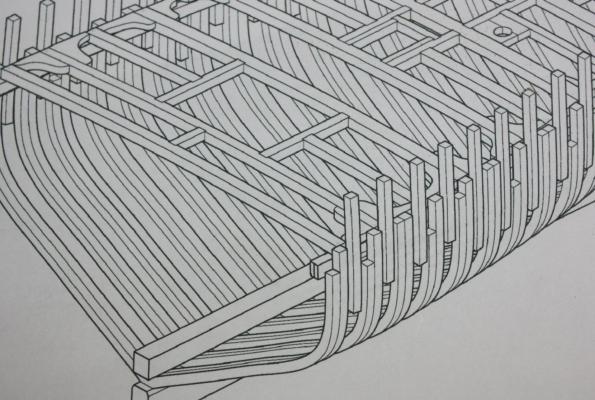
- 15 replies
-
- 10
-
-
Phill, Scratch building the boats is actually a fun mini project for many of us. There are plans available for a lot of ship's boats at the NMM collections site. You can probably use some of those as guides for making accurate representations of the Bounty's boats. Details on "how to" make these can be found on this site and several books using the plug/frame/planking method. It has worked well for me for many, many years. Allan
-
Effie M Morrissey by allanyed
allanyed replied to allanyed's topic in - Build logs for subjects built 1851 - 1900
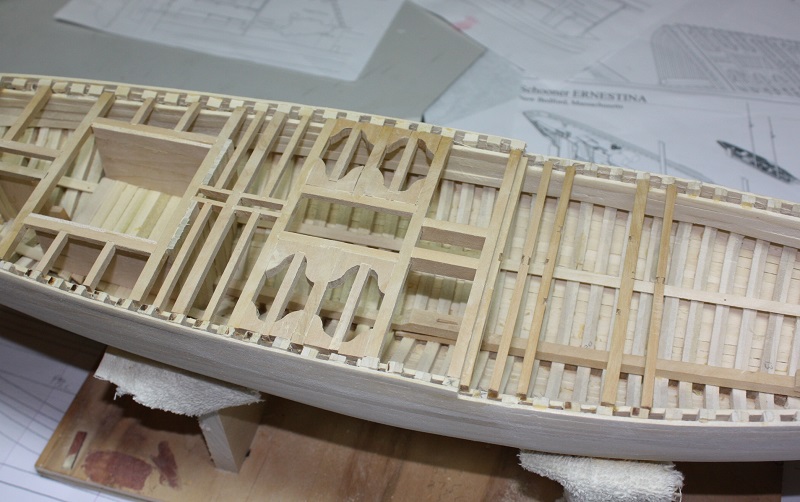
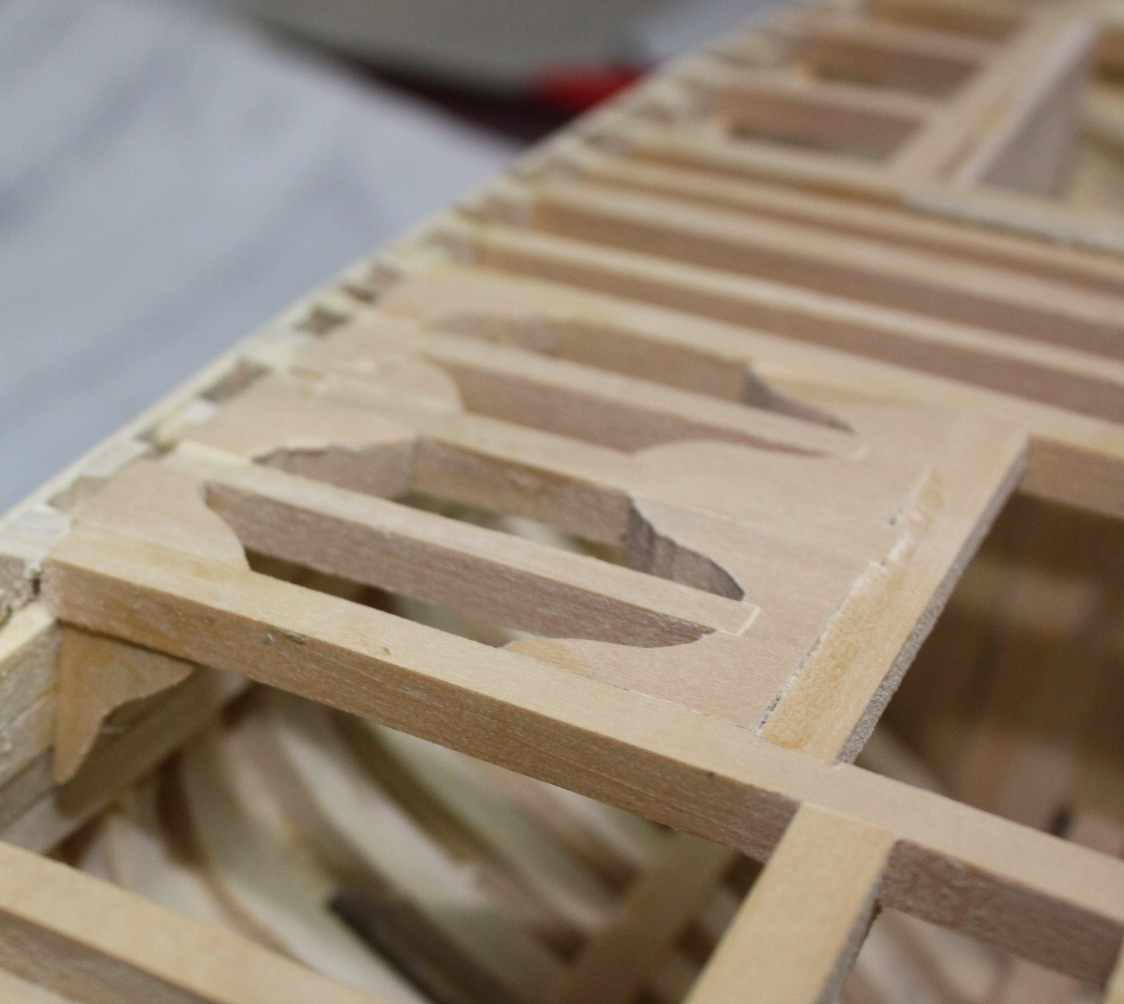
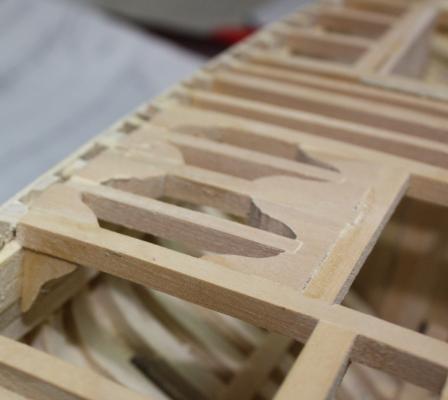
Next up is the deck framing. The mast steps were added before hand. I did plank the trunk cabin as I had considered furnishing it at that time. The lodging knees were only added where the deck planking was left off for viewing. Allan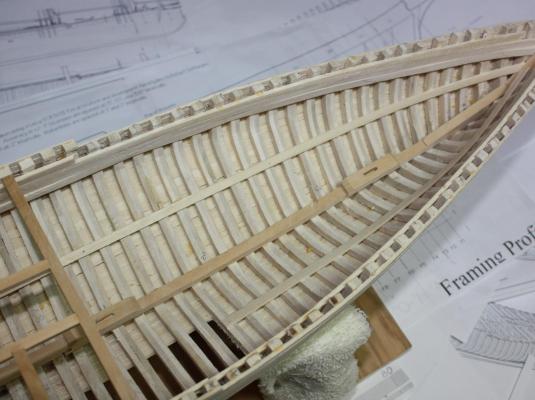

- 15 replies
-
- 14
-
-
Effie M Morrissey by allanyed
allanyed replied to allanyed's topic in - Build logs for subjects built 1851 - 1900
Thanks folks. Feels good to be working on Effie Druxey. I have been researching 1719 Establishment 50's as well as quietly building the Gjoa for about 6 months as there was a deadline so I have not been totally idle in our model building arena. This is a fun build, but I am at an impasse on the Gloucester steering wheel. My lathe is down and out until it gets replaced or repaired so I am looking for a good way to make one. Even at 1/4" scale I have not found a solution to date. I am wide open to suggestions. I just need to make one good one using any materials that work then can make a mold and cast a few in pewter but so far all efforts have been rather poor. As small as the metal ring is, I am looking at trying some stiff card stock and brass rod next. Allan -
Chuck, If you are going to fully rig those guns, I know a place to get really fine small blocks. Beautiful workmanship throughout! Allan
- 1,051 replies
-
- 7
-
-
- cheerful
- Syren Ship Model Company
- (and 1 more)
-
Effie M Morrissey by allanyed
allanyed replied to allanyed's topic in - Build logs for subjects built 1851 - 1900
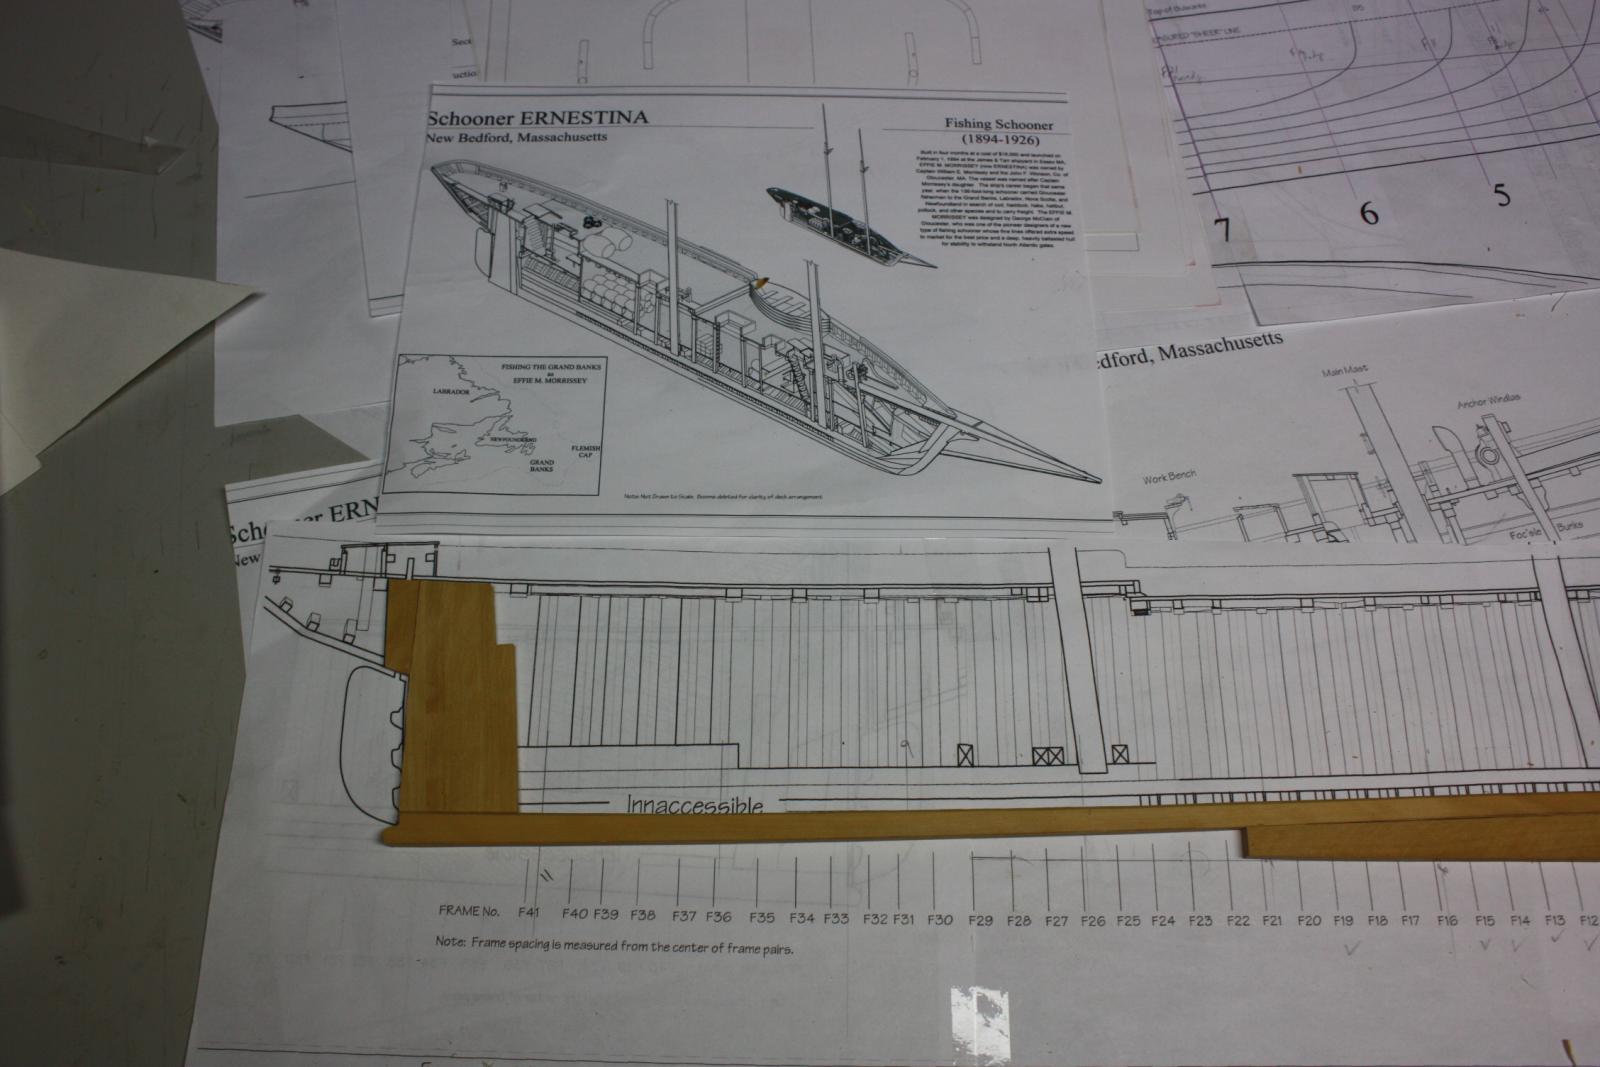
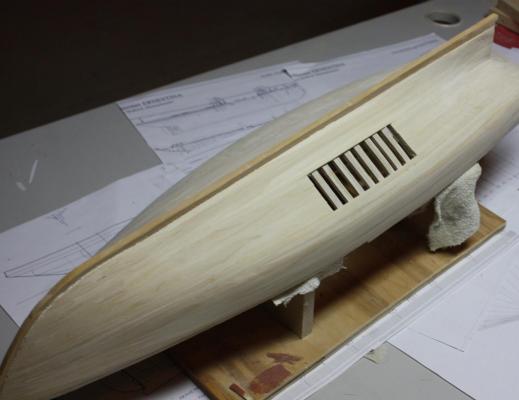
Thanks Patrick, fire away with any questions. Scale of the build is 1/4" to the foot. I inserted the L.O.C. drawings in TIFF format into Turbo Cad as they had the best resolution. It was then easy to take the drawings up to full size with the CAD program using the scale on the drawings and then scale down to 1/48. More photos from earlier on in the build follow. The first is framed with keelson and deck clamps in place. The second shows the hull planking partially sanded with a "window" to show the framing. Planking is poplar. The color of poplar can vary but as it was later painted, it was of no concern. Some Plastic Wood filler was used before final sanding and painting, mainly at where the planks were not a perfect fit at the rabbet. With painting, I did not feel the need to be quite as careful as I would normally be when I am not painting the hull. Allan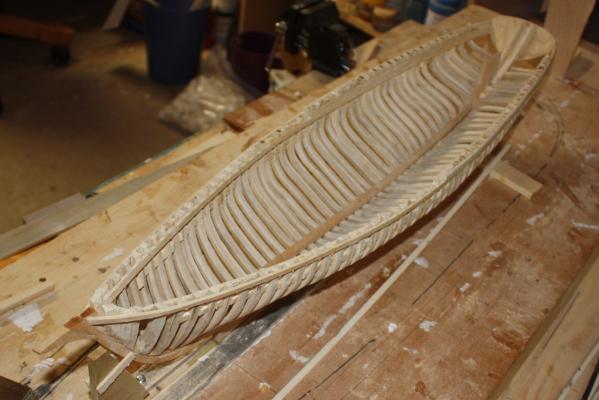
- 15 replies
-
- 16
-
-
Effie M Morrissey by allanyed
allanyed replied to allanyed's topic in - Build logs for subjects built 1851 - 1900
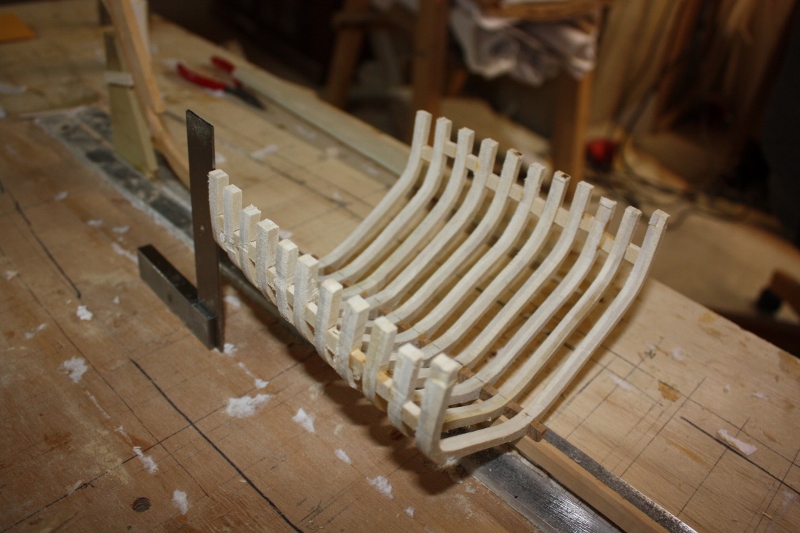
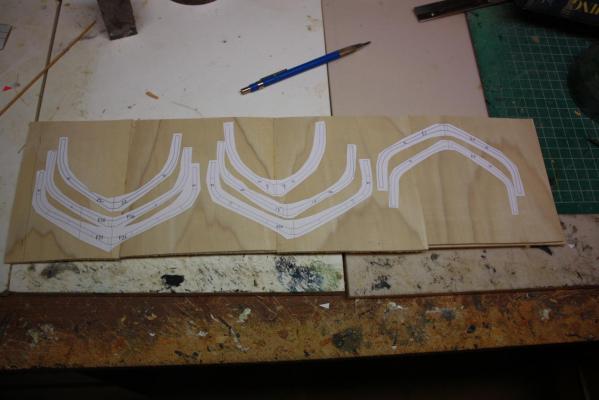
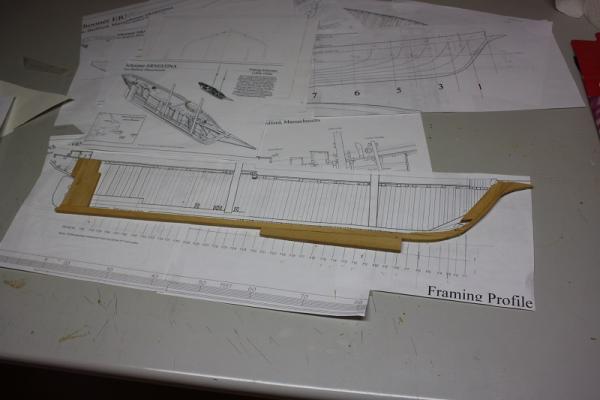
The frames are doubles and the framing plan is quite detailed on where they lie on the keel. The isometric drawings were a big help in framing the stern area and the bow area. I used poplar for the frames. After planing to the proper thickness I glued two sheets of wood together with the grains running at 90 degrees to each other. The frame drawings were printed on label paper then adhered on the laminated wood sheet and cut out on my scroll saw. I am no draftsmen compared to Wayne K, Druxey, and so many others here. I downloaded the plans from the L.O.C. in TIFF so was able to insert them into my Turbo Cad drawing with very high resolution. I then used the body plan to make the frame drawings, including the frames between the stations. It was just a matter of dividing the space between the body plan lines at 5 or 6 points along the curve then using arcs to draw the frames. Not necessarily the way they did them in real practice, but it worked out well with minimal fairing needed. The keel was marked for each frame location. The square assured the frames were set at 90 degrees verically in relation to the building board and 90 degrees to the keel horizontally. Spacers were used between each frame to maintain spacing and to give some rigidity. Allan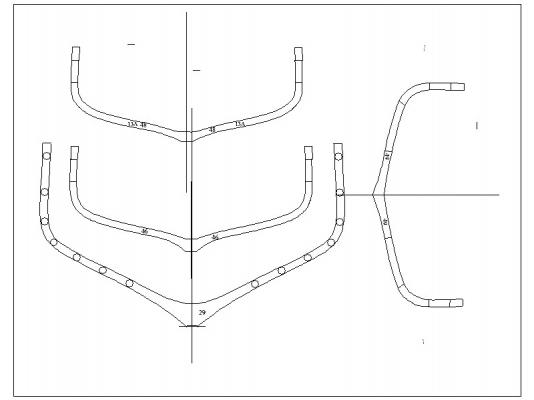


- 15 replies
-
- 10
-
-
Effie M Morrissey by allanyed
allanyed posted a topic in - Build logs for subjects built 1851 - 1900
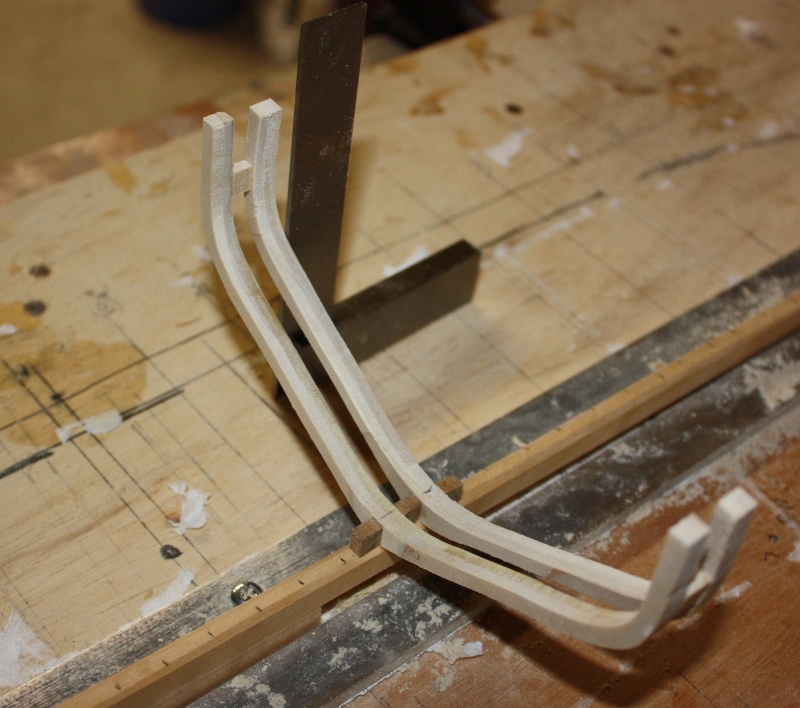
I wanted to build a schooner fully framed and found as detailed a set of plans as possible for a Gloucester schooner on the US Library of Congress website. I started building the Effie M. Morrissey (renamed in 1948 the Ernestina) about 3 years ago and have been back and forth on her as a couple other projects intervened. The building sequence is nothing unusual, starting with the keel, stem, and stern post, which are made of Costello Boxwood. Note the angled piece under the keel. This was temporarily glued to the bottom of the keel so it would stand at the proper angle during the framing process. The frames were hung at ninety degrees to the building board, not the keel. This was shown clearly on the drawings although hard to see in the photos. Next up, framing. Allan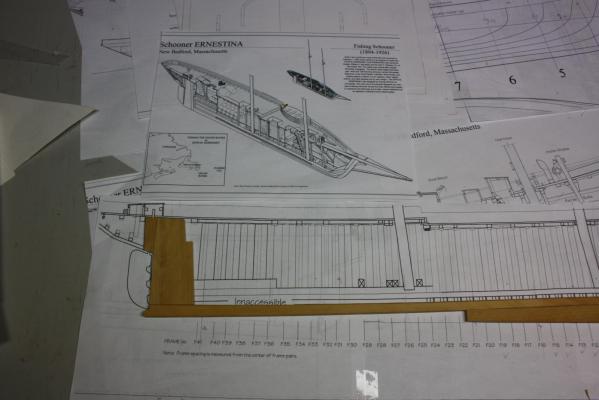
-
Removing Blacken-It from Brass
allanyed replied to mtaylor's topic in Metal Work, Soldering and Metal Fittings
Hi Mark, Why does it need reblackening? If it needs this after a few years I would be worried about what happens once the parts are on board the model? Have you tried a pickeling solution? I don't know that it would work on the blackened pieces, but I find it the best method of cleaning brass before blackening as it takes off any protective coating, finger oils, flux from silver soldering, etc, and leaves a microscopically etched clean surface that blackens better than any other method. Might be worth a try. Allan -
Alan, The sharpening jig is a must IMHO. I would never attempt to sharpen my chisels without using it again. I did not see a mention of stropping above. I know many feel stropping is also something to consider, but honestly I am hard pressed to see a difference between going right from my 6000 grit water stone to the wood, versus stropping first after using the stone. Maybe I am not doing the stropping correctly. I use the dressing that came with the strop, but don't see much difference, if any. Regarding the tissue, I use it between planks more than any other method, but for the scarf joints on the keel I add a dot of black water base paint to a little puddle of carpenter's glue, mix it thoroughly and it shows the same as the paper on the finished joints. Plus, the paper can be a weak point, straight blackened glue won't be. Just another route to get to the same destination. Allan
-
Alan, I like how you clamped the keel to a steel rule to make sure the entire length winds up dead straight from the start. I will remember this technique in the future. Allan
-
Nibbing Strake
allanyed replied to mikiek's topic in Building, Framing, Planking and plating a ships hull and deck
Mike, I am really curious to see how it goes from this point to laying the prefab deck into place. Can't say that I have ever seen a complete planked deck fit in place this way. With the round up and sheer, are you concerned about these two bends being problematic? Allan -
Just as there are no two faces that are exactly the same across the 7.4 billion of people on this earth, (even in identical twins), no two people have the same amount of patience for a given task. Even as one person, I have varying amounts of patience, attention to detail, and different attitudes as to what is good enough. I did not realize this until the Admiral asked how I have the patience to spend years on a model yet have less than 10 seconds of patience with the guy driving too slowly in the passing lane on the highway. Allan
- 1,051 replies
-
- 5
-
-
- cheerful
- Syren Ship Model Company
- (and 1 more)
-
Ed, As always, it is joy to follow your builds. Just a small FYI, I have been using holly for the frames for the various ship's boats and they bend very easily after being submersed in water for a few minutes. It works for even those frames where the moulded dimensions increase at the floor rather than just having the same moulded dimension the entire length of the piece being used to make the frame. In the end, this increase in the moulded dimenion at the floor is barely noticeable at the smaller scales, but can be done if desired. Allan
- 3,618 replies
-
- 5
-
-
- young america
- clipper
- (and 1 more)
-
Giorgio I have made one to six trips a year to Italy for the past 30 year, mainly for my job so I had to learn to speak a little Italian as a result. I think there are more cab drivers in Firenze and Milano that speak English than in New York though I may start a log on the Effie M. Morrissey as I do not want this to turn into a hijack of your log. I really look forward to your progress on the rigging. Allan