allanyed
-
Posts
8,149 -
Joined
-
Last visited
Content Type
Profiles
Forums
Gallery
Events
Everything posted by allanyed
-
 Ed, Cudos continue from all of us, and justifiably so. In addition to the quality of the workmanship that you show, I really believe the step by step process you have taken the time to photograph and show has shown a lot of members it is not that hard to do. It takes a willingness to try, and the patience to try again and again at times. Broken down into each single step as you show on the hanging standards (I still think those are standards, not knees :>)) it takes the fear out of the process. Thanks again for sharing. There are a lot of great builders that are members here, but you are the teacher of the year as far I am concerned. I hope this is a lesson for others to try to share as much as you have. Allan
- 3,618 replies
-
- 3
-

-
- young america
- clipper
- (and 1 more)
-
Making small nails with round head
allanyed replied to Aleksei Domanov's topic in Metal Work, Soldering and Metal Fittings
Alexey, Simple, fast, easy, inexpensive, you gave us the complete package! Thank you very much for sharing. Allan -
Keith This subject got me doing some research. As you probably already found, the Harland book, Seamanship in the Age of Sail and the pages mentioned are on line from Google Books. I also found a very nice Texas A&M thesis on anchors by Harold Jobling that is wealth of information on anchors tehmselves from 1550 to 1850 and his research sources. Nautarch.tamu.edu/pdf-files/jobling-MA1993.pdf Allan
-
Bob, A very sincere thank you. . Allan
-
Keith, In addition the the sources Druxey gives, Pages 129 and 130 in James Lees' Masting and Rigging has drawings and a detailed text description of the buoy and rigging. Allan
-
Making sails for HMS Victory
allanyed replied to rafterrat_2005's topic in Masting, rigging and sails
Having just seen Blue Ensigns photos, I humbly stand corrected as he has shown it can be done. Allan -
Making sails for HMS Victory
allanyed replied to rafterrat_2005's topic in Masting, rigging and sails
Frankie, I think the consensus is sails on a model at scales such as 1:98 look terrible. They are near impossible to make to scale regarding thickness and sewing pattern, they make rigging more difficult, and they cover from view a lot of the work that goes into the model. Allan -
Hi Hamilton When you say a fair run of the planks, what do you mean? I took it that you were talking about the width of the wales, not the thickness. The thickness did taper in order to seat into the rabbet as Druxey points out, but the width is another matter. The other planks taper in width as they approached the bow, so it is a fair question to ask if the wales also taper in width. Allan
-
Monello, Welcome to the club of redo, we all have a scrap box of mistakes. I don't know about others but from my experience, oak was not a friendly wood in terms of cutting, carving, or chiseling and the large grain is not attractive in most model scales. I know you have that lovely stack of dried timber, but this is something to consider and I for one would like to hear if anyone else has had bad experiences in using oak. Allan
-
Danny Wouldn't it have been quicker to order a piece of tubing and soldering than sanding and filling Disk sander or not, that is a LOT of material to remove. I must say they do look very very good. Allan
-
Did you consider not gluing them? Drill very small holes and pin them to the hull with tiny brass nails or brad. Paint over the "bolt" heads to match the flags as close as you can. OR drill and pin with shoirt pieces of very small diameter brass rod then put a dot of epoxy. Allan
-
Naci Three sources are The Art of Ship Modeling, TFFM Vol. 2 and Euryalus 1803, Vol 2. Each is a bit different than the other, but all three work. My preference of course is the last, because it uses a single piece mold, not two part split mold, thus not parting line down the middle of the barrel. I am sure there are other viable sources that other members will hopefully post for you. Allan
-
This topic has been moved to the furniture, guns, etc forum. Allan
-
Nacioffi, Further to Druxey's comment, if you do not have a lathe, purchase one of each size barrel, that you require and then cast your own in resin or pewter. It is not terribly difficult, it will save a lot of money, and it really is gratifying. Careful to get good quality, scale, proper era barrels in the right caliber. Allan
-
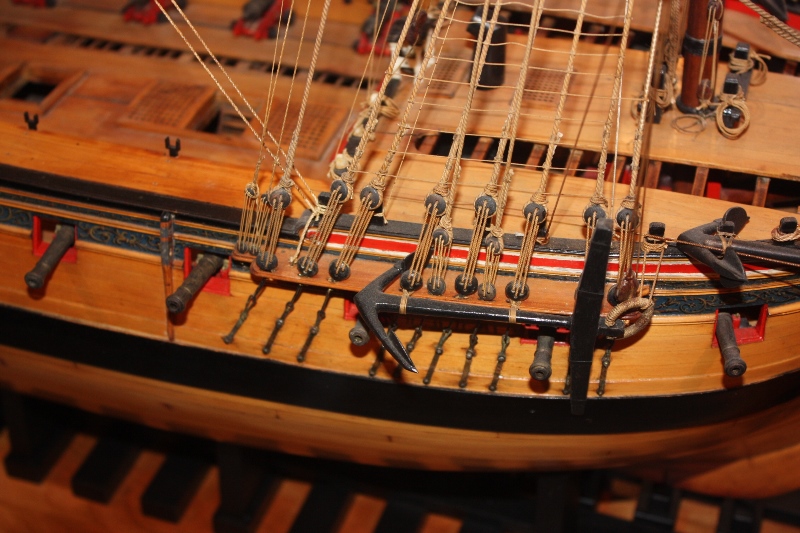
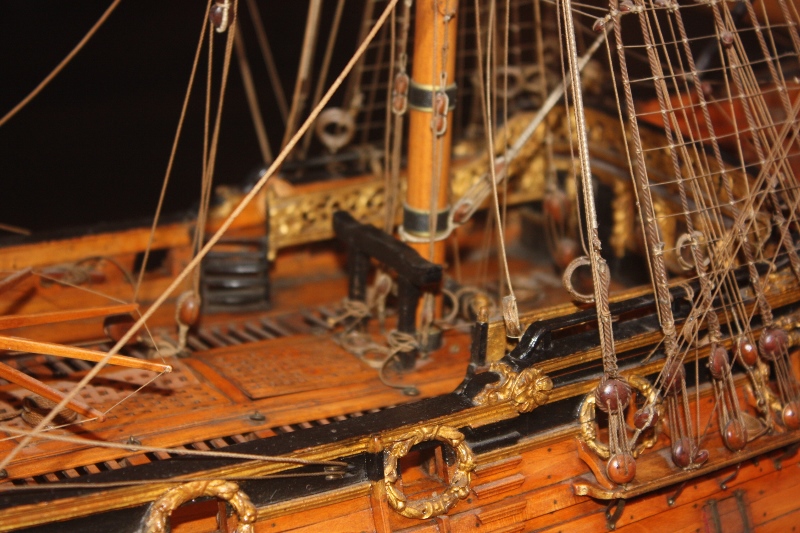
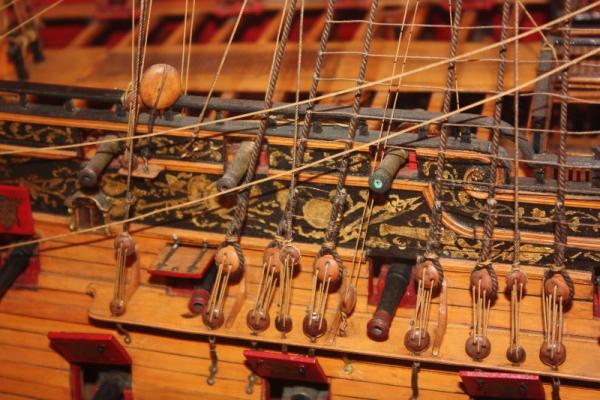
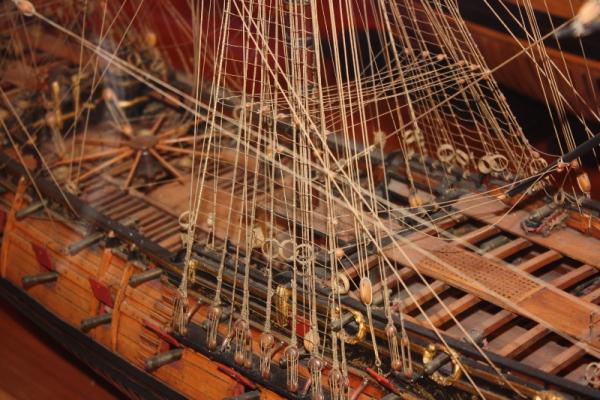
I thought to look at some contemporary models for an answer, but I am more confused. They all show natural ratlines, but the standing rigging is natural except on the Prince Frederick. The top photo is a 60 of 1705, the second is a 36 of 1780, the third is the Portland 1693 and the last is the Prince Frederick 1714 Not also that the lanyards for the deadeyes are natural in each case as well. Allan


-
Thoughts on standing after running rigging
allanyed replied to cwboland's topic in Masting, rigging and sails
Mike, When at all possible, work from the inside out and then the spars and running rigging. If you do not already have any, consider getting a rigging book or two. Volume 4 of TFFM by David Antscherl, James Lees Masting and Rigging are VERY good. The former explains how-to rig a sixth rate, but much of the information will serve you well for any vessel. The latter covers a range of vessel sizes from 1625 to 1860 in such a way that you can calculate mast, spar and rigging sizes. It is not so much a "how to" book but gives a wealth of information including where each piece of rigging starts and ends. It is laid out in pretty much the order you would do the rigging. There are a few others that many of the folks here like and can recommend. These two happen to be my personal favorites. Allan -
Mark, It may be easiest if you spile those last few. There is a lot information in the tutorials at MSW on spiling. It is easy to do and saves a lot of wood as you will get the shape using some card stock first versus your planking materials. Once you make the card stock plan you can trace it onto the wood. Or you can just get the card stock and trial and error until you get the exact shape, then trace this onto the wood. Allan
-
Steve, I went to the video and I must say, it was nicely done. For anyone that has not been using clove hitches, this video should convince them it is not only the easy, it duplicates real world practice. Allan
-
Rob, As the saying goes, necessity is the mother of invention. There is so much information out there that is simply too difficult or expensive for most of us to access so when this chance came up, I knew what I wanted to do and Bob Friedman was instrumental in making it happen, in spite of a lot of agida that came with the project. Allan
-
Thanks Druxey! Allan
-
Wayne, You like the book more than I do!! I cannot thank you enough for the review, you absolutely made my day, week, month, more..... If it helps the modeling community one tenth as much as you indicate it might I will be a happy man. Allan
-
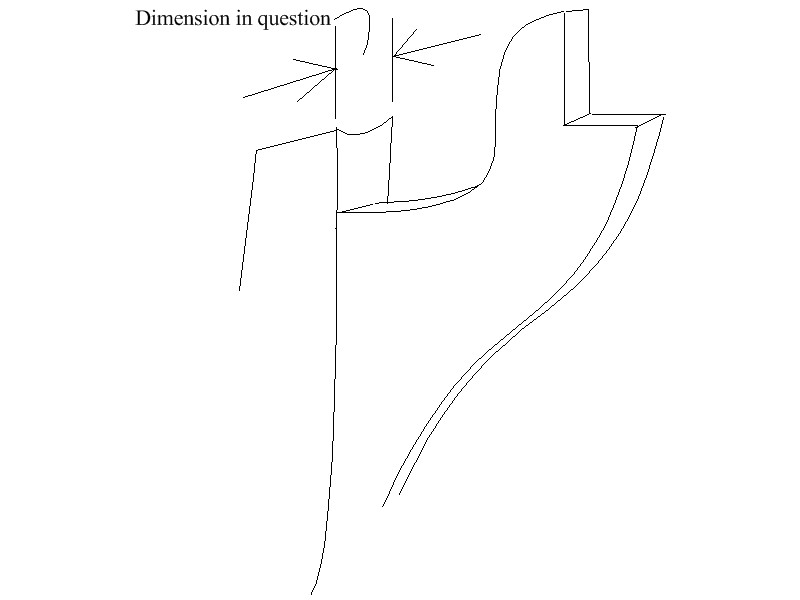
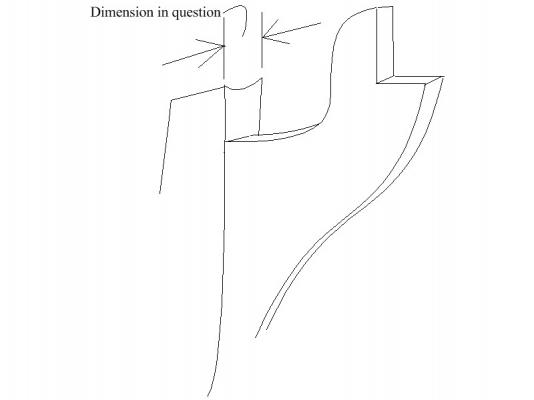
Rob, I am very happy that you like the book, I appreciate you taking time to post that. As to Q&A, I am always in the learning mode as well. I must admit I have no sure answer for you. The 1719 Establishment had a line that this dimension was the same bigness as the keel amidships. I merely copied the same dimensions from the appropriate line of dimensions. Unfortunately, as I was transcribing, I did not look at what many items actually are, but now I want to know as well. I have attached what MAY be the answer. I hope some of the more learned members kick in their two cents be my answer right or wrong, more likely the latter. Allan
-
Shihawk, If the guns were run out, they were there to be fired. If they were there to be fired, I bet no one was too concerned about making nice cheese rolls on the deck or worried about rot or much else. They just wanted to be sure they could cleanly move the lines so they could haul the gun into place with the barrel outside the hull before firing. Perhaps a neat but not perfect coil was used if only to minimize tripping hazards or kinked lines that would impair use of the lines when hauling or during recoil. If the ship was not engaged in battle or practice firing, the guns were secured inboard with the barrel up and tight against the inside of the hull, and the side running tackle ends frapped, not hitched or coiled on the deck. The tackle used to haul the piece inboard was removed when the piece was secured like this. Is that the only way it was done? I have no clue, but these are the methods I have seen decribed most often Allan
-
Gun Port Lids
allanyed replied to wq3296's topic in Discussion for a Ship's Deck Furniture, Guns, boats and other Fittings
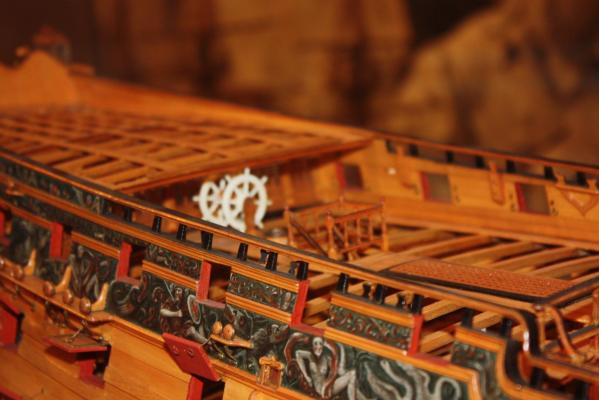
Regarding the red paint on ports and bulkwarks, the following are contemporary models in Rogers collection at the US Naval Academy Preble Hall museum. Most had red lids, but the upper bulwarks were sometimes red, sometimes left in the natural wood color. Allan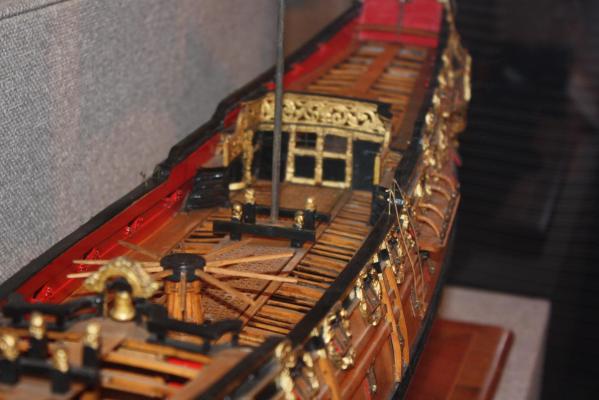

-
Keith, I am sure Nigel will answer you, but from my experience, the glue holds the planks upright, no problem. If they are close together they will wind up glued together. That is my experience anyway. Allan