allanyed
-
Posts
8,149 -
Joined
-
Last visited
Content Type
Profiles
Forums
Gallery
Events
Everything posted by allanyed
-
 Thanks for the cudos guys. I sent a note to Bob at Seawatch last night as there is an error on the website. The blurb states tables from the various sources, including the 1715 Establishment. That should read the 1719 Establishment. It has a table with the 1719, 1745 (and 1750 changes to the 1745) in one set of tables and the Shipbuilder's Repository and MOST of the Elements and Practices tables by Steel. It does not have the merchant navy dimensions given in Steel but it does include separate tables with scantlings for boats and another for anchors. Allan
 -
water way?
allanyed replied to jhl's topic in Planking Techniques's Click Here for Topics dedicated to planking!!!!
JHL Please let us know your name, it is much nice than addressing you with nothing or with three letters The attached is from the original cross section of Euryalus (1803) when she lay in ordinary in 1815 going through a refit. Allan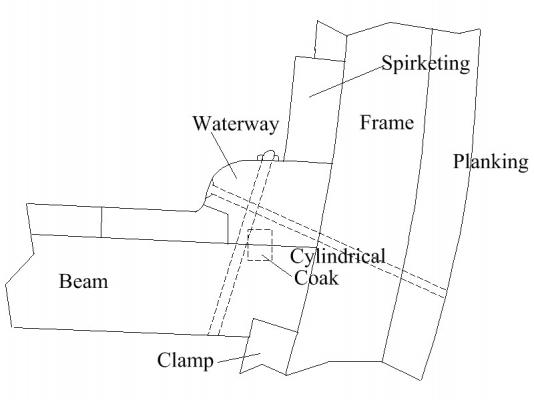
-
Jeff at the Hobby Mill is providing a heck of a great service to those that need precut wood and I would use his service if I did not have a plainer and thickness sander in my little shop at home. If you can start with rough cut pieces, two other suppliers from whom I have purchased wood over the years and recommend are Exotic Woods in Burlington Ontario (bought from them at their place when driving to Toronto) or Gilmer Woods in Portland Oregon which was strictly by internet and mail. Over the years the savings of sizing my own wood has more than paid for the plainer and thickness sander. Allan
-
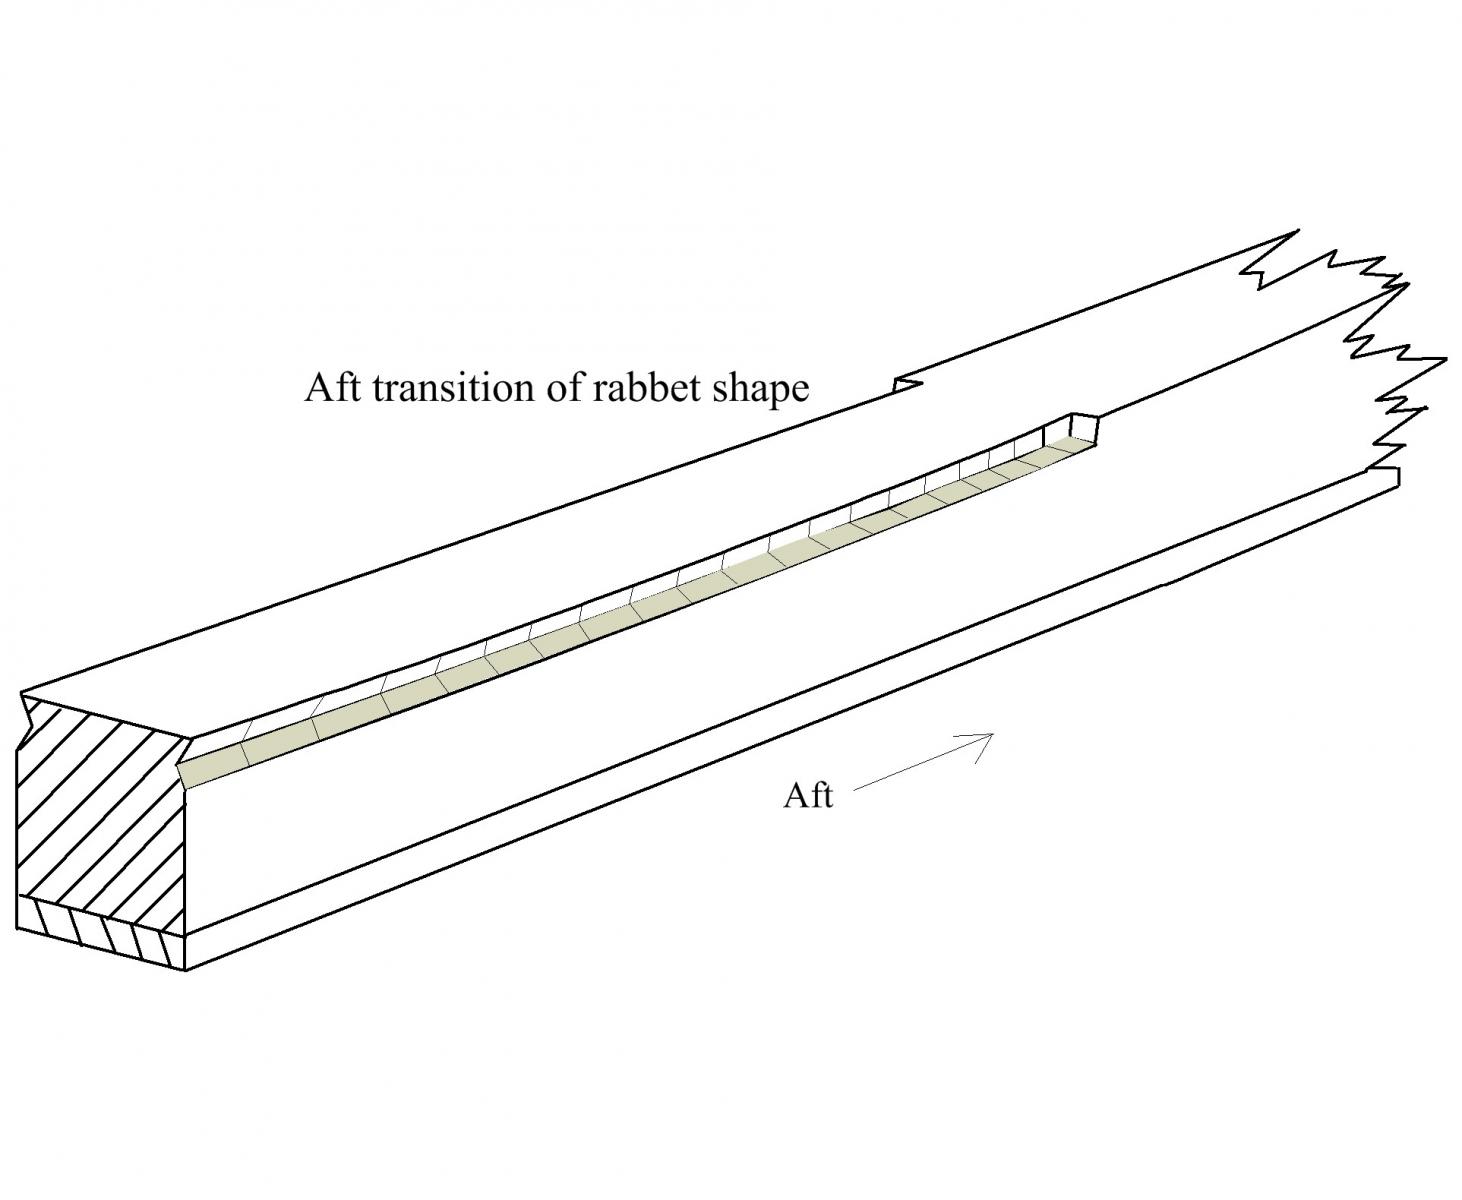
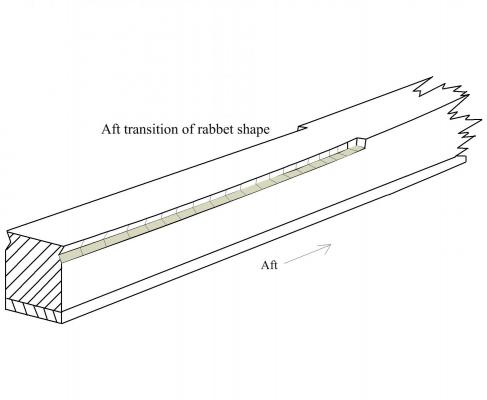
Hi RAFTERRAT2006 It would be nice to have a name that we can call you. Thank you. The rabbet is not a vee groove for the entire length. It is a dynamic groove that matches the lay of the garboard strake for most of it's length. It continues to change as it rises at the bow to match the angle at which the planking will land in the rabbet. Near the stern it is virtually a vertical "L" shape . As far as how to make the groove, I start with a vee chisel as described above, but for only a shallow cut. I then go to a small, extremely sharp flat chisel to finish the rabbet. Be sure the keel is secure on the work bench so you can control the chisel with both hands. The attached sketch may be a better explanation. Allan
-
HMS VICTORY 1759 by isalbert
allanyed replied to isalbert's topic in - Build logs for subjects built 1751 - 1800
Isalbert I enjoyed looking at the photos of your model as Victory was my first pretty good build many years ago. One small thing that I found to be new is that the capstan is sitting on a grating. I had only seen them resting on partners in the past, so I am not sure if this was an alternate possibility. Thanks for sharing your build Allan -
11:40 PM Ships time, 102 years ago today, April 14, 1912. Allan
-
Coastie, Shrouds went on first, in a specific order. Stays went ever the shrouds. What ship/era are you working on? Allan
-
Michael, I am not 100% sure but the axle trees where probably not cylindrical except the portion that extends beyond the brackets, but rather would have been square or rectangular, not unlike the French and British carriage axle trees. There are some great photos of the Wasa, including cannon and carriages showing simple pins to keep the trucks from coming off the axle trees. www. vasamuseet.se/en Go to the search box and type in carriage, but have fun surfing the entire site. Allan
-
Danny, Always a joy to look in on your build. I may have missed this, or more likely forgotten, but are you going to rig her? Allan
-
What is the name for the netting under the bowsprit
allanyed replied to HKC's topic in Masting, rigging and sails
H If you live in the US did you contact Billings service department for the US? bbusa@billingboats.com Allan -
Hanging Magazine
allanyed replied to LFrankCPA's topic in Building, Framing, Planking and plating a ships hull and deck
Your number of 80 is close to what was written in Caruana, so I certainly would not quibble. The arched ceiling was, I think, so one could get up or down the ladder without having to bend over and crawl onto or out of the steps, especially if carrying goods up from the magazine. The attached may be of some help. This the aft magazine on a 36. The top sticks up above the platform and the arch goes to the beams of the lower deck. Hope this helps. Allan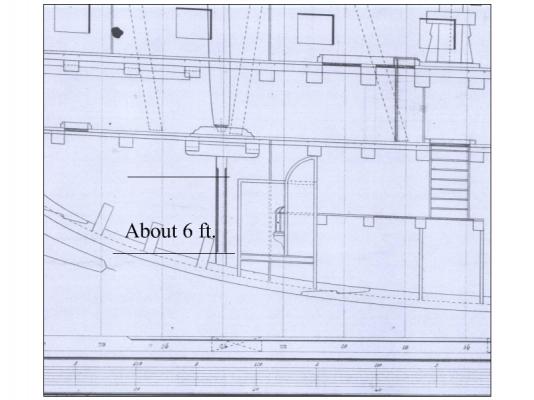
-
Hanging Magazine
allanyed replied to LFrankCPA's topic in Building, Framing, Planking and plating a ships hull and deck
Gary Bishop shared the following from Caruana Volume 2 page 67 with me: Regulation of 1723, for Foreign Service in time of war (PRO WO 55-1739). Round shot, 100 gun- 9440, 90 gun- 8480, 80 gun-7480, 70 gun-6480, 60 gun-5520, 50 gun-4560, 40 gun-3600, 30 gun-2840, 20 gun-1680. They are talking over 90 rounds of round shot. This does not include grape which was from about 4 to 7 rounds per gun according to the 1745 Establishment. So, to answer your question, where did this stuff get stored. Shot lockers. shot racks on the various decks, and ?????? I would like to know this myself. Allan -
Hanging Magazine
allanyed replied to LFrankCPA's topic in Building, Framing, Planking and plating a ships hull and deck
Larry, Where did you get the 80 rounds per gun? I am not doubting the number, but quick calculations, assuming an average of about 5 inch diameter shot, has the lockers having capacity for half that amount and there surely were not 40 rounds per gun on deck. Can you send a picture of the area on the hanging magazine top. Are you sure it is not just the curved entries to the magazine and light room? Thanks Allan -
McMaster Carr Item 9666K11 is 0.009 and 9666K12 is 0.010" diameter. It is a coated wire so I do not now if you can blacken it as is or have to strip it clean first. I have used 0.010 brass wire without problems. It of course can be blackened and no rust to worry about either as the years go by. I found the brass wire at a few model RR supply sites. Allan
-
Al The method you describe is pretty much the way I have done this, albeit in a limited way. The same method has been used by others to completely redraw old sets of plans such as found at NMM and other sources. Allan
-
Hi Al, I for one look forward to watching your progress. I have gone from PDF to DXF for other drawings but it was a circuitous route to get there and it would be so much easier if there was a dxf with which to start. It will be interesting for me to see what route you take. Allan
-
Well executed. The lesson should be useful to many a schooner builder here. Allan
-
Ed, You continue to amaze. Treenailing is good to get one into a meditative state. Sort of like zoning out while driving and you have no recollection whatsoever of the previous 10 or 20 km. You look at the hull and think, when did I put in those last 100 treenails???? I WISH it was like that. Allan
- 3,618 replies
-
- 1
-

-
- young america
- clipper
- (and 1 more)
-
Sumpter 250 I see that was your first post. You posed some well thought out questions, but you may be better off starting a new subject here in the rigging forum. I am sure you will get answers to all your questions. Hint, Bosun's chair is part of the set of answers. Also, please be so kind as to post a little about yourself in the new members forum so everyone has a chance to meet you and get to know a little about you, including your name (if it is not Sumpter250.) Thanks Allan
-
In addition to the fantastic build itself, your photos are showing some very nice detail on the jig set ups and much appreciated. Small, simple, and used to good effect. Allan
- 1,215 replies
-
- 1
-
-
- sloop
- kingfisher
- (and 1 more)
-
GREAT JOB on the and the pumps! Allan
-
Alan, Sorry, yes there are only two pages with information. Should have looked for blanks on the original Excel pages. Allan
-
Alan, Maybe the following will help a bit. It has the scantlings from the Elements and Practice of Naval Architecture, SR and the Elephant contract. Allan 74 gun frames.pdf
-
Alan, Gary beat me to the punch. I will dig out the scantlings on the framing from the Repository, Steel and the contract and try to put them side by side when I get home tonight. The contract for Bellerphon may be the most accurate for your project, but do not be surprised if the scantlings in the contract do not match the drawings. As built drawings are best if they exist. Allan
-
I agree with Mark, the aft magazine was not a filling room, it is an area for racks for cartridges filled in the filling room forward. From there they can be more easily provided to the aft guns than bringing them from the forward magazine, especially in time of battle. Allan