


pompey2
-
Posts
511 -
Joined
-
Last visited
Content Type
Profiles
Forums
Gallery
Events
Posts posted by pompey2
-
-
Rob
Love the idea of printing the brass ornamentation, makes sure you can prepare beforehand.
Keep up the good work
Nick
-
I would certainly suggest ratlines first.
There will be a lot of reaching in and around shrouds and yards are easy things to catch and tear off.
Nick
- CaptainSteve, thibaultron, mtaylor and 2 others
-
 5
5
-
I think it is a little too pink, but actually not that far away.
Also stay away from the gloss, it should be flat matt really.
Nick
- Canute and thibaultron
-
2
-
Hi Terry
I visited the Tincomalee a couple of years ago, I knew her as a hulk in Portsmouth Harbour when I was a lad.
The museum that houses her and the ship itself are well worth a visit, I was very impressed.
I captured a bunch of photos and posted them on the site under NRG news, here is a link if anyone is interested.
http://modelshipworld.com/index.php/topic/6335-hms-trincomalee/
Nick
- thibaultron, CharlieZardoz, GemmaJF and 3 others
-
6
-
Hi Rob
Just checking in.
Nice use of the real Victory timber.
She is looking good even if progress is patchy.
Keep up the good work
Nick
-
Lovely work Alexander.
- mtaylor, WackoWolf, aviaamator and 1 other
-
4
-
What a great idea.
I use a strip of rigid clear plastic as a spacer and guide.
But that does not stop what you call the hourglass effect which is always a problem.
The twin strips and sandpaper will sort that out a treat.
So I will be stealing this if you don't mind.
Nice one!!!
- mtaylor, thibaultron, -Dallen and 1 other
-
4
-
-
Nice to see your log restarting Nigel, looking good.
Nick
- CaptainSteve and UpstateNY
-
2
-
I have been using the tool now for a little while and moved from trials to real planking.
And I have found a few more things that I really like.
First don't try to hold the tool by hand, in the short time it takes to holster the tool before two hands are available to bend, the part has cooled too far to be effective.
So I rigged a simple stand to hold the tool and use both hands to bend as I apply heat.
Then the quick cool down helps.
Once you have the bend you want, move it out of the flow, hold for a few seconds and the bend is set.
The other thing is that you can bend, fit, bend, fit, bend fit as many times as you like.
So you can slowly achieve the bend amount, position, twist etc. as you go.
I believe that's easier than than soaking, clamping and having to do an amount of forcing into place, especially with spring back.
So I think I will be sticking with this method for a while
Nick
- mtaylor and thibaultron
-
2
-
After reading this thread, which certainly got my attention I went in search for a hot air re-solder station as described.
I was amazed how cheap they are, I opted for a reevla station which is a knock off of a better unit but seemed to have pretty good feedback.
It was only £26 ($40 ish) including delivery so a pretty low risk if it proved rubbish.
It arrived yesterday (late xmas list item) so I spend some time last night having a play.
I must first say how impressed I was with the functionality and even the build (given the price).
Much like Michael's it has a dial for wind speed
 and a digital readout with up and down buttons for temperature.
It has a sensor in the handle such that when you replace the tool in its cradle it switches to cold air.
That ensures it does not continue to blow hot and shorten element life, be a risk etc.
When you pick it back up it reverts to your last selected temperature and gets there in just moments.
You should wait till lower than 100C before turning it off but that was about 15 seconds.
Because the heat is so localised it is pretty safe, you can hold a piece of timber 1/2" or so away from the nozzle quite easily.
It's very low noise because of the low volume fan.
So I'm pleased with the tool itself.
I ran a few simple trials with some 1/8 x 1/4 maple strips.
A bit early to draw conclusions.
The advise is to use highest flow rate with minimum temperature to prolong element life, so I started low and gradually wound up the temperature.
Below 250C the effects were minimal.
At about 300C the wood was pliable enough to hand bend, I managed to break a few bits by being too keen.
My trials seemed to have a fair amount of spring back, up to half of the bend sometimes.
I think more trials, probably higher temp and better technique might help there.
One problem I did find was the speed of handling required.
You can raise the wood temperature locally and quickly but once the heat is off it cools very quickly.
I need to try with the wood already under strain maybe.
More trials required but I must say it looks promising.
Many thanks to Michael for the pointer.
Nick.
- tkay11, mtaylor, thibaultron and 1 other
-
4
-
-
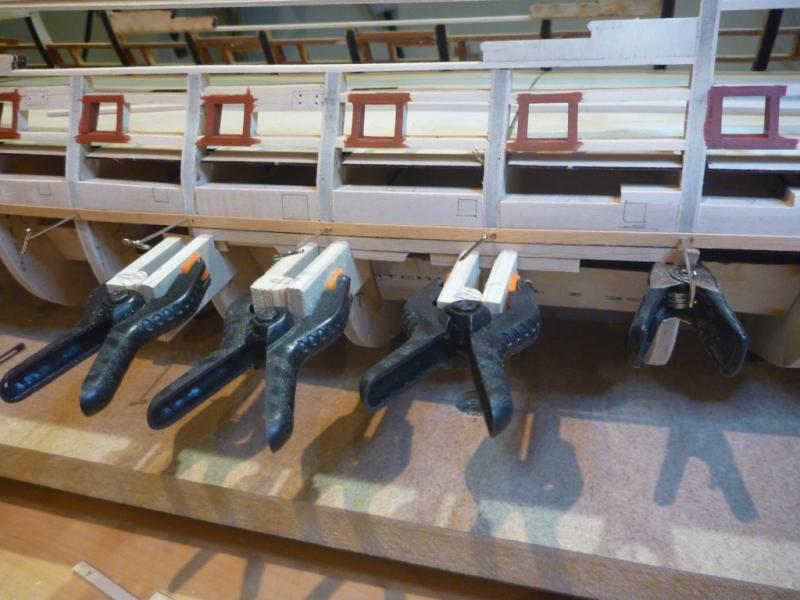
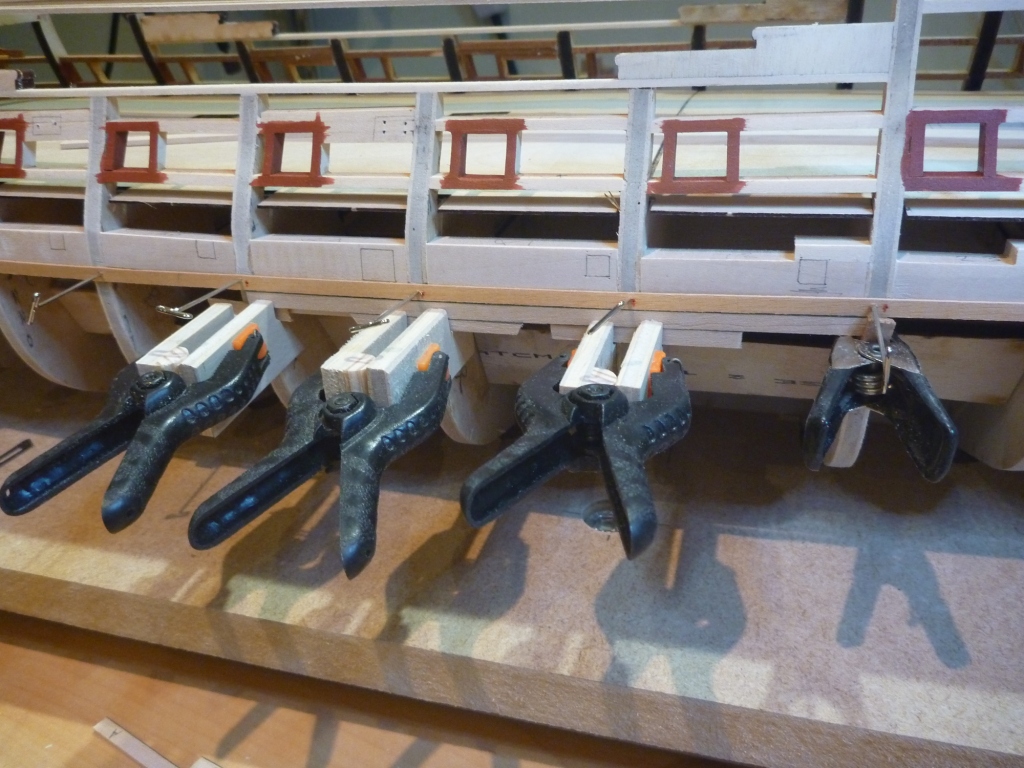
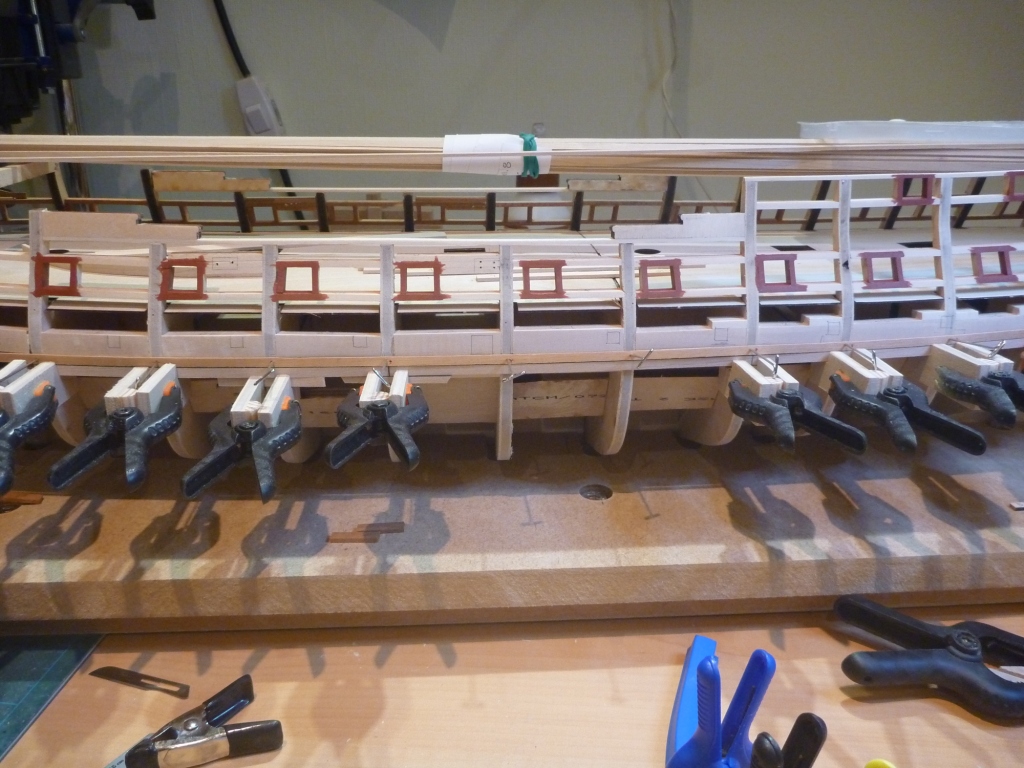
I have now painted the gun port linings with a bunch of thinned coats of red ochre.
And now I've started the hull planking proper.
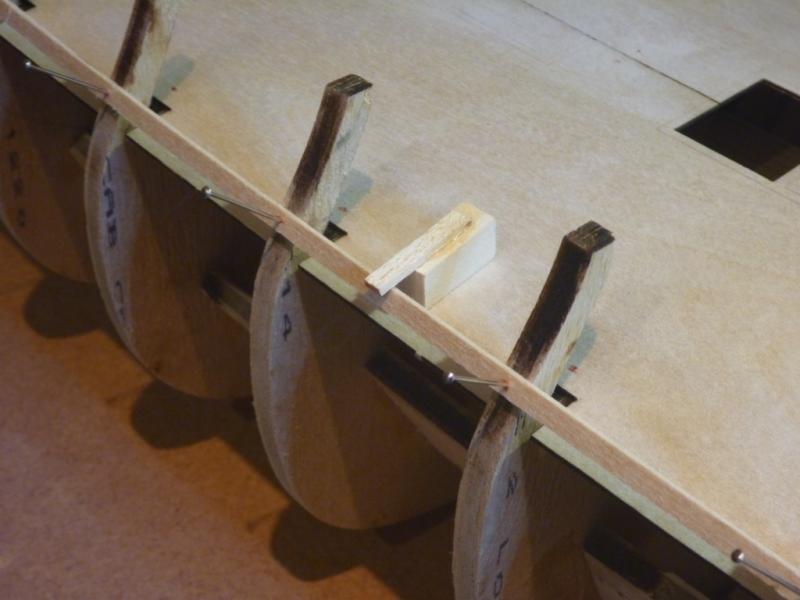
Another batten put in place to guide the top of the first strake which is the topmost wale strake.
Then the first plank.
I am using some plank clamps I made up.
They are two parts with a notch cut out to push the plank on and up.
One part has a half round at the back to provide a pivot and a normal spring clamp keeps it in place.
The inner faces have sandpaper glued on to give some friction.
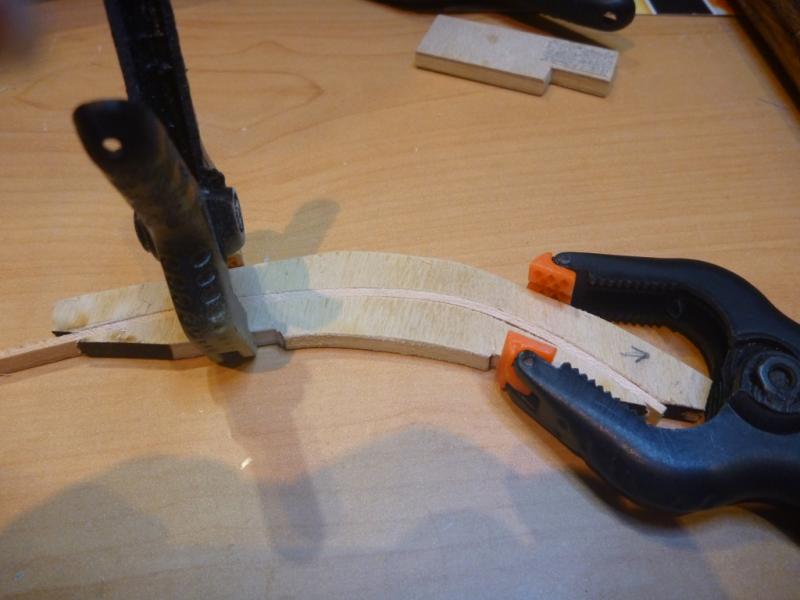
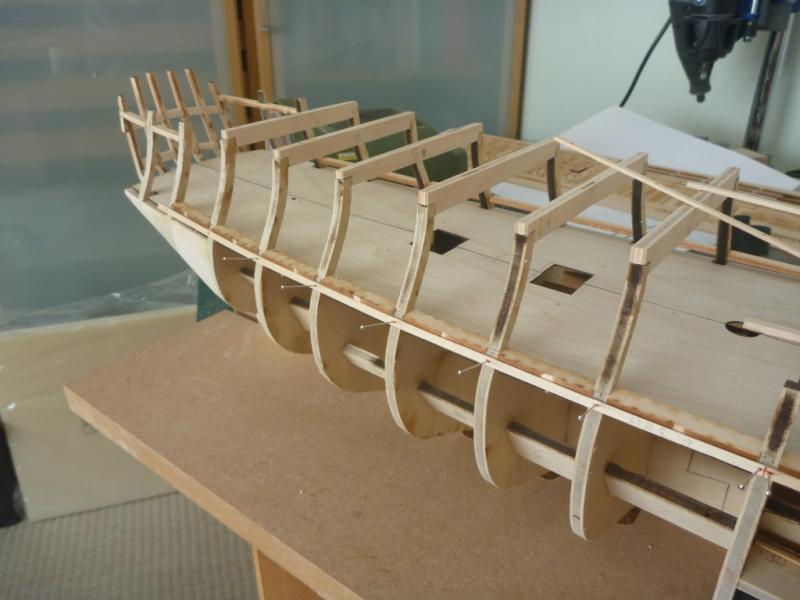
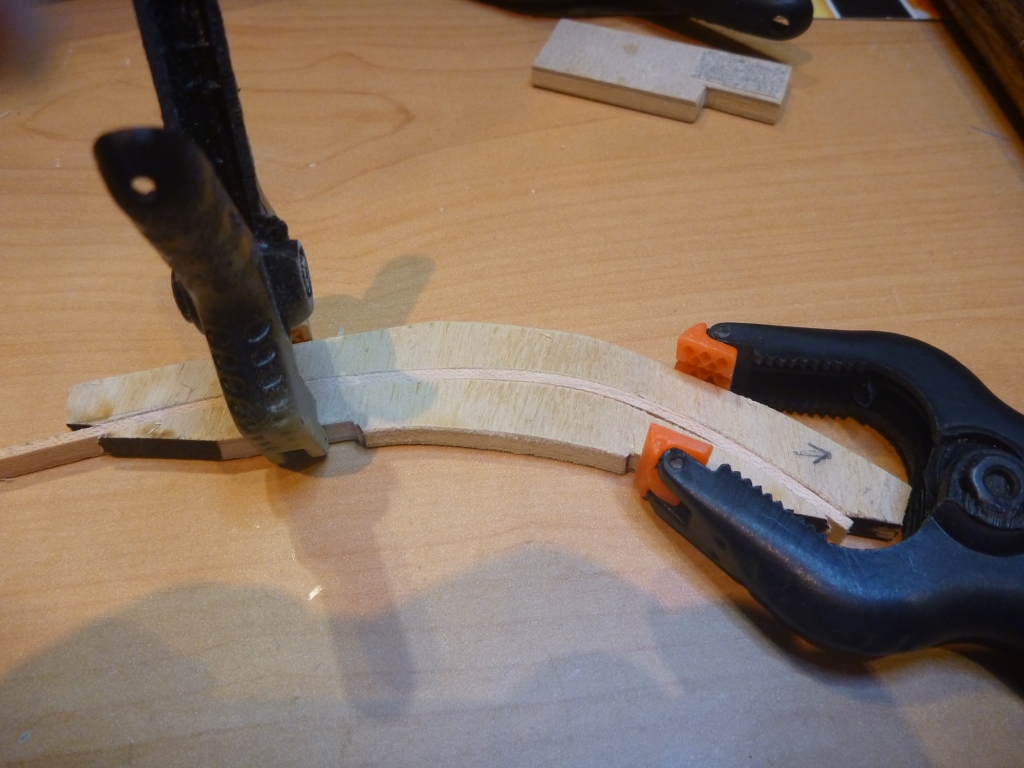
For some of the more gentle curves I am using a flexible curve to form the wet plank.

And for the tighter curves, especially when I want to keep them consistent I made a jig.
This one is for the bow curve.
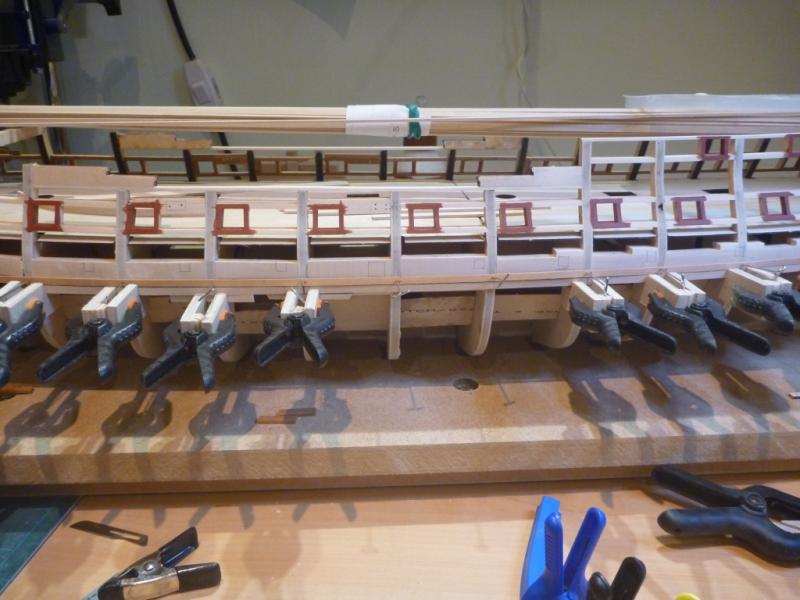
Continuing with the first strake.
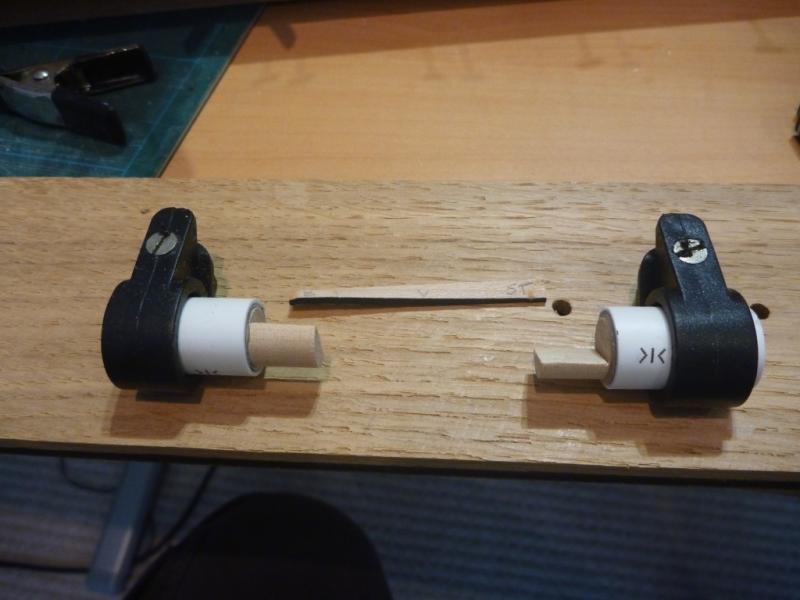
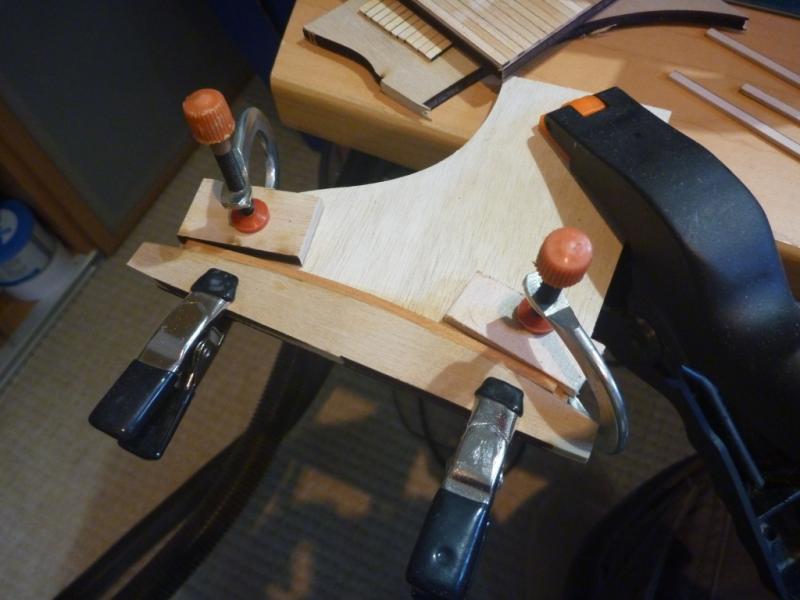
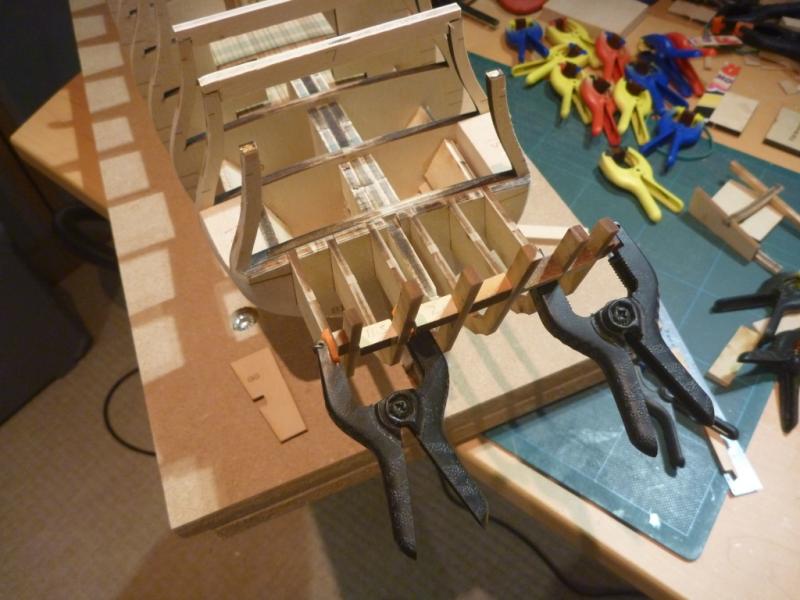
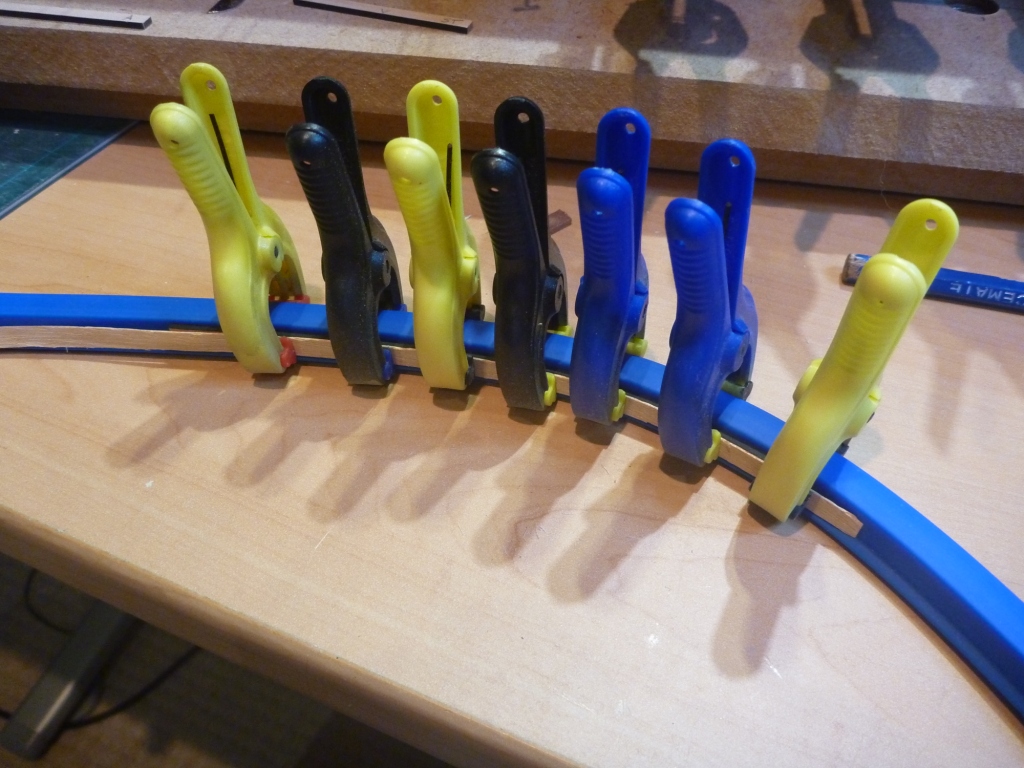
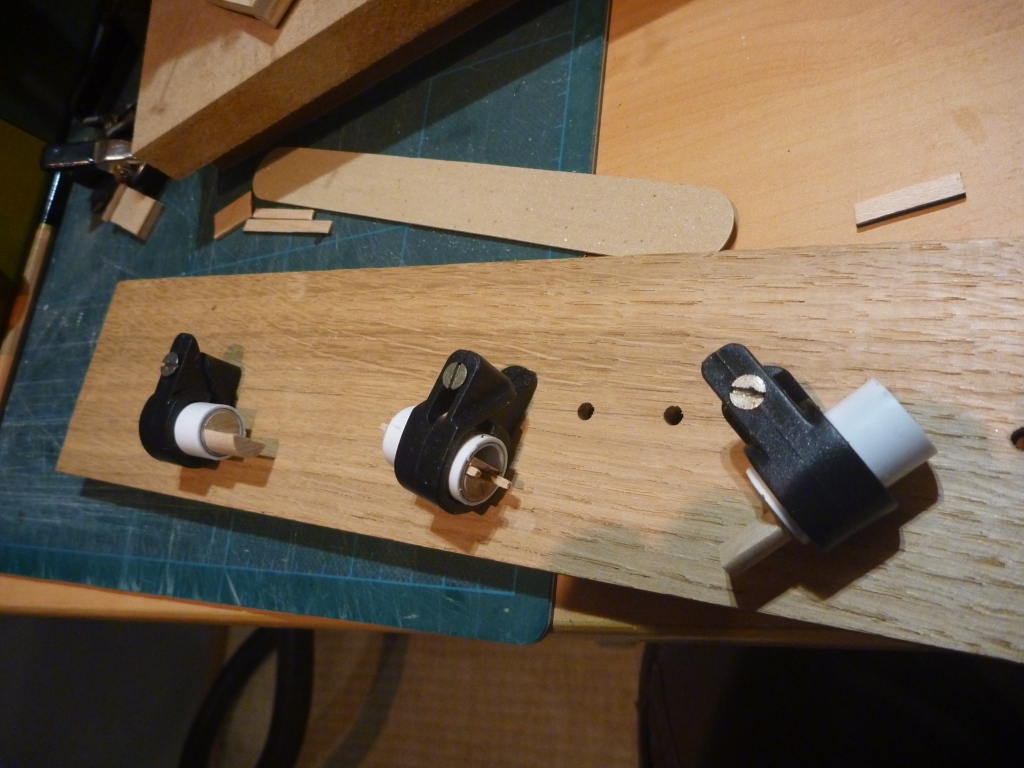
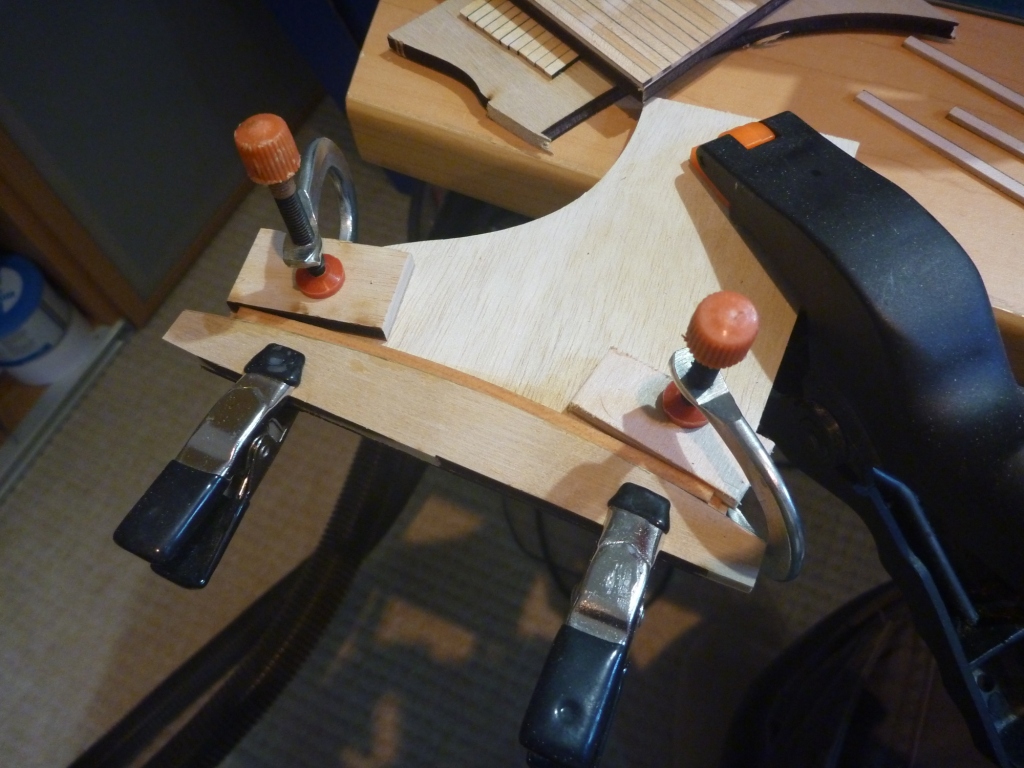
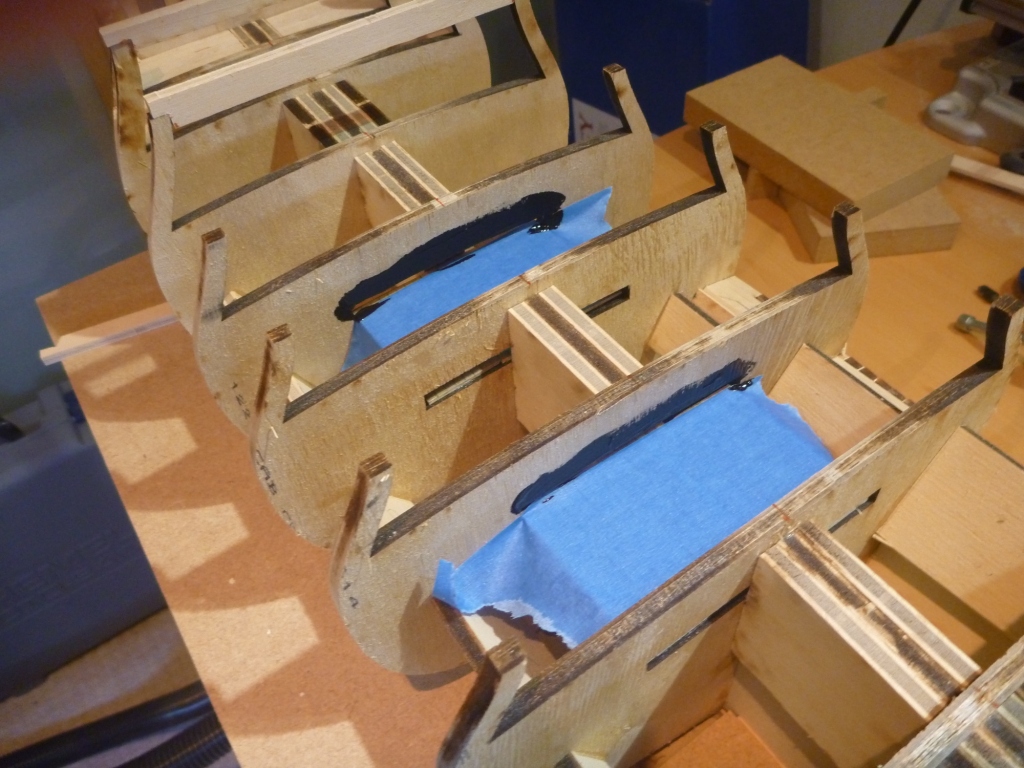
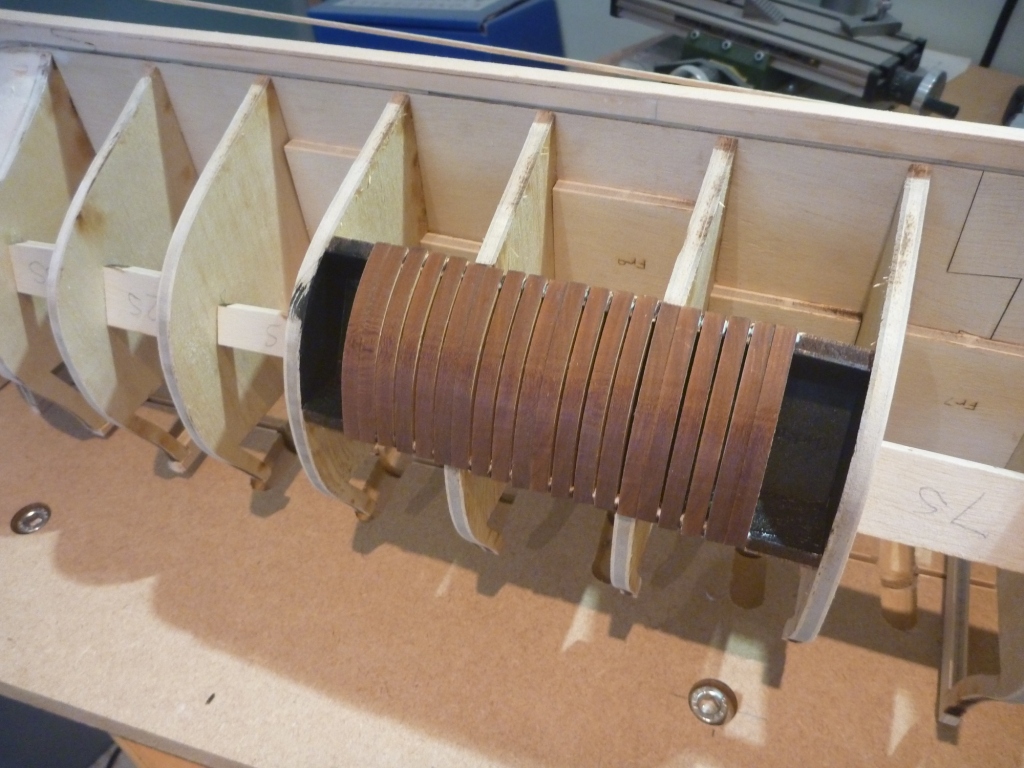
Then I tackled the problem of planks needing a partial twist along their length, generally for the stern.
So after a lot of thinking time and rummaging through various boxes in the garage I came up with this.
A base with a line of holes to accommodate different lengths.
The a piece of plastic pipe placed in an old armour cable cleat, that allows the tube to be rotated and then fixed.
I turned a few bits of dowel to be a snug fit into the pipe and glued them in place.
Then cut a half round out of the protruding pieces of dowel.
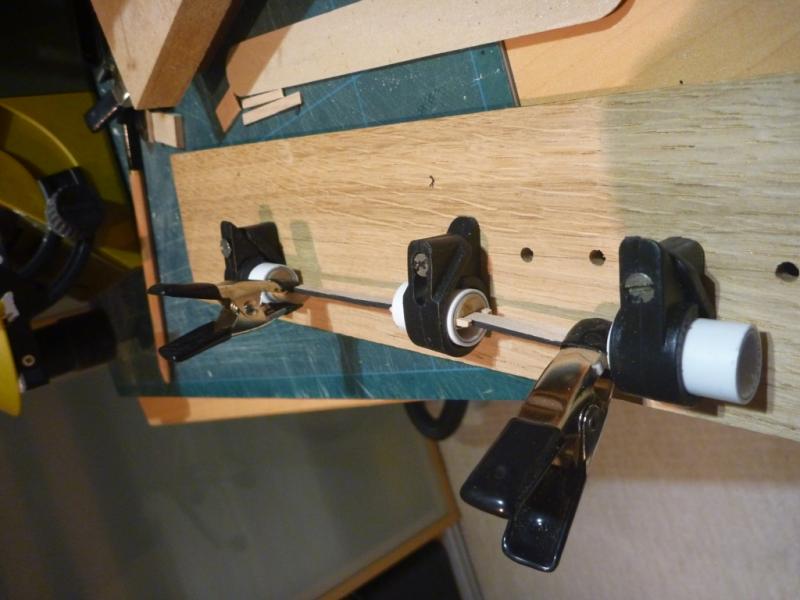
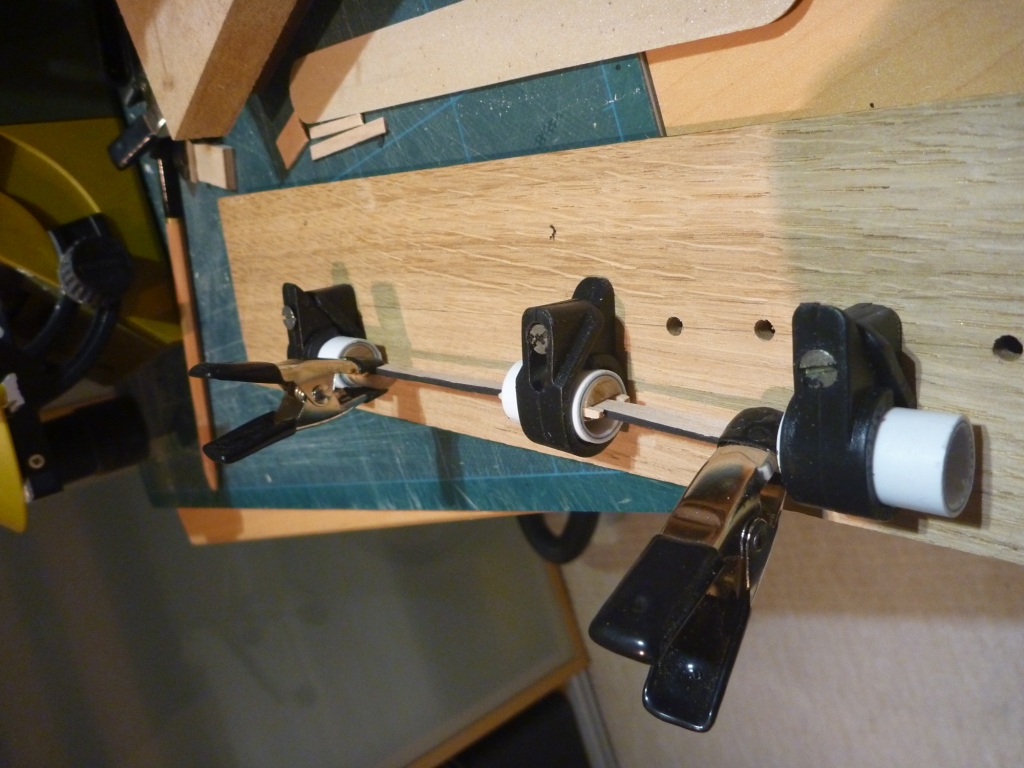
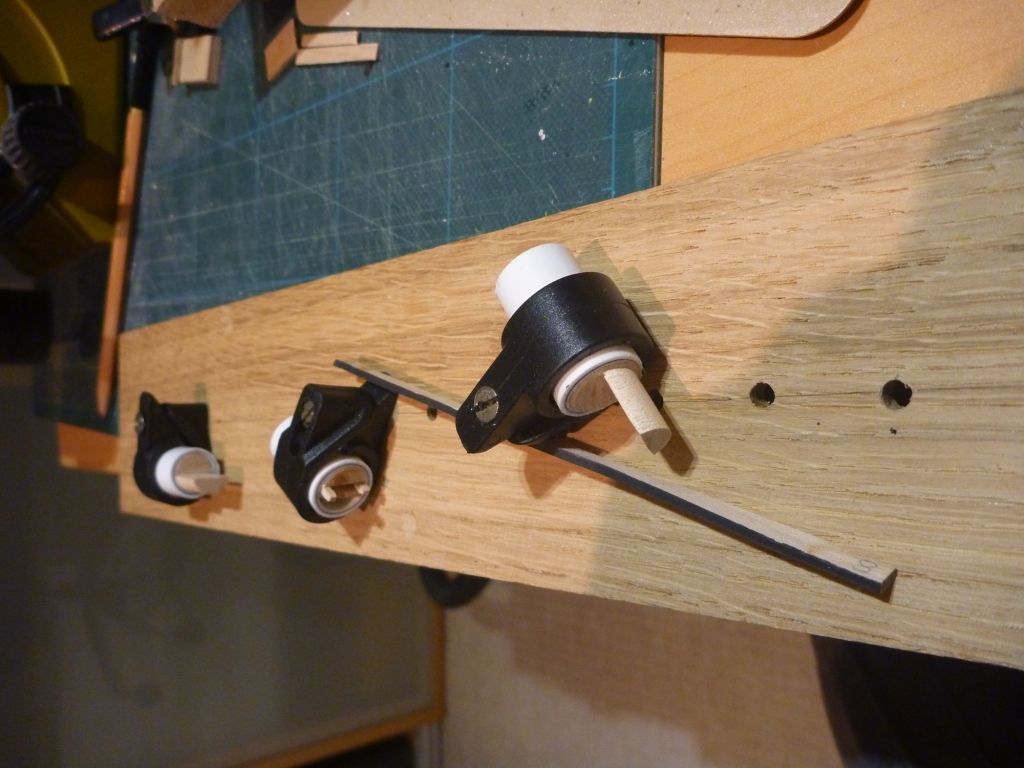
This setup now allows me to clamp a plank at one end onto a dowel flat.
Then clamp the other end to the flat of a rotated dowel. Planks soaked, then clamped overnight.
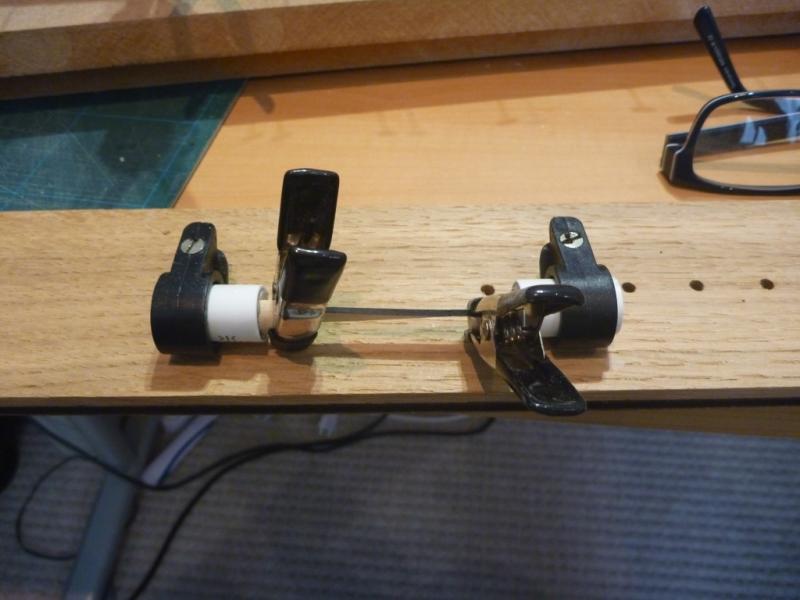
After drying overnight I get a twisted plank.
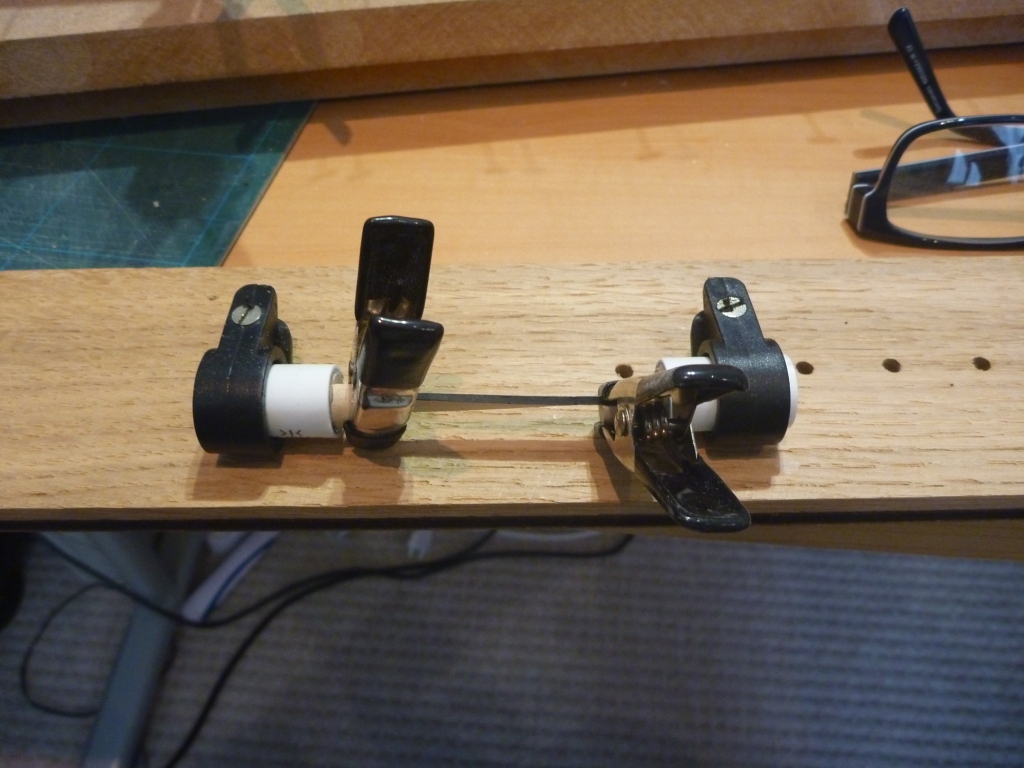
I also made up another clamp which was the same except it has a slot right through the centre.

That allows a longer plank to have a twist starting part way down.

That bring me pretty much up to date now, so thanks for calling in.
Nick
- CaptMorgan, mtaylor, zoly99sask and 6 others
-
9
-
Thanks for the comment and likes.

So, to continue.
I have opted to go the 'glued paper' route for simulating Caulking.
I sourced some thin(ish) black paper for this.
Here's my process.
I have moved on now to planking the Beakhead, Deck and Bulkhead.
So I cut my planking into approx length strips, painted some black paper with a 50/50 PVA and water mix.
Then stood one edge of the planks onto the paper, weighted them down and left to dry.

Once dry I used a scalpel to cut the plank from the paper.
Here is the deck with the planks rough length.
Then the Bulkhead and all of the lengths sanded to shape .
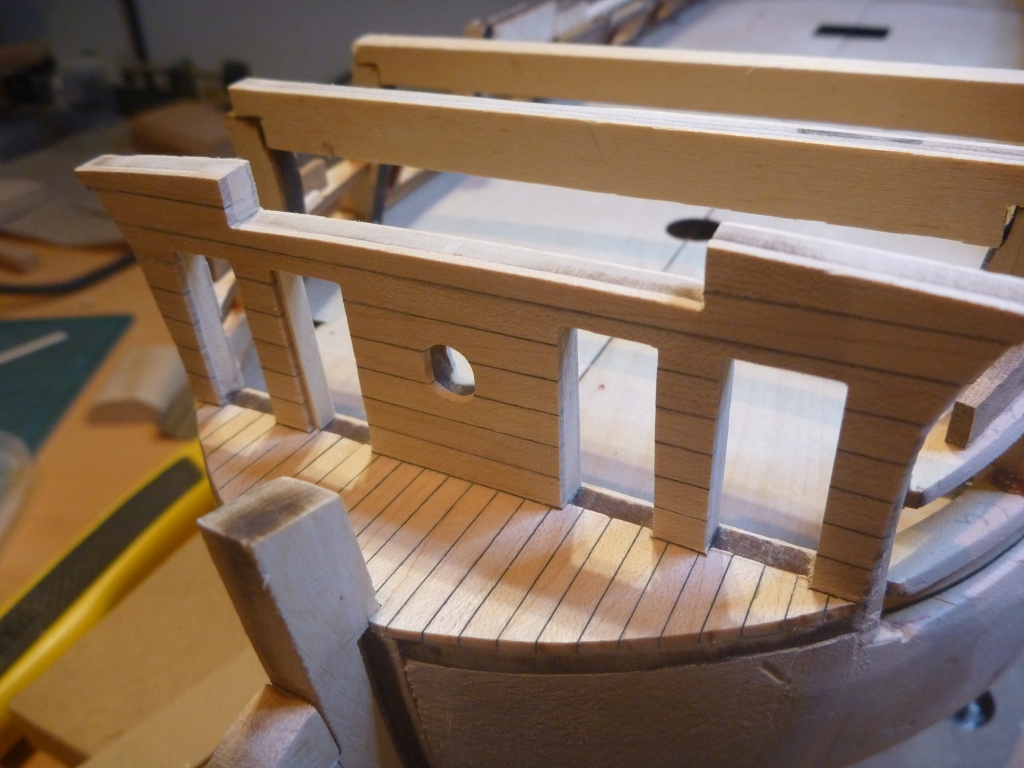
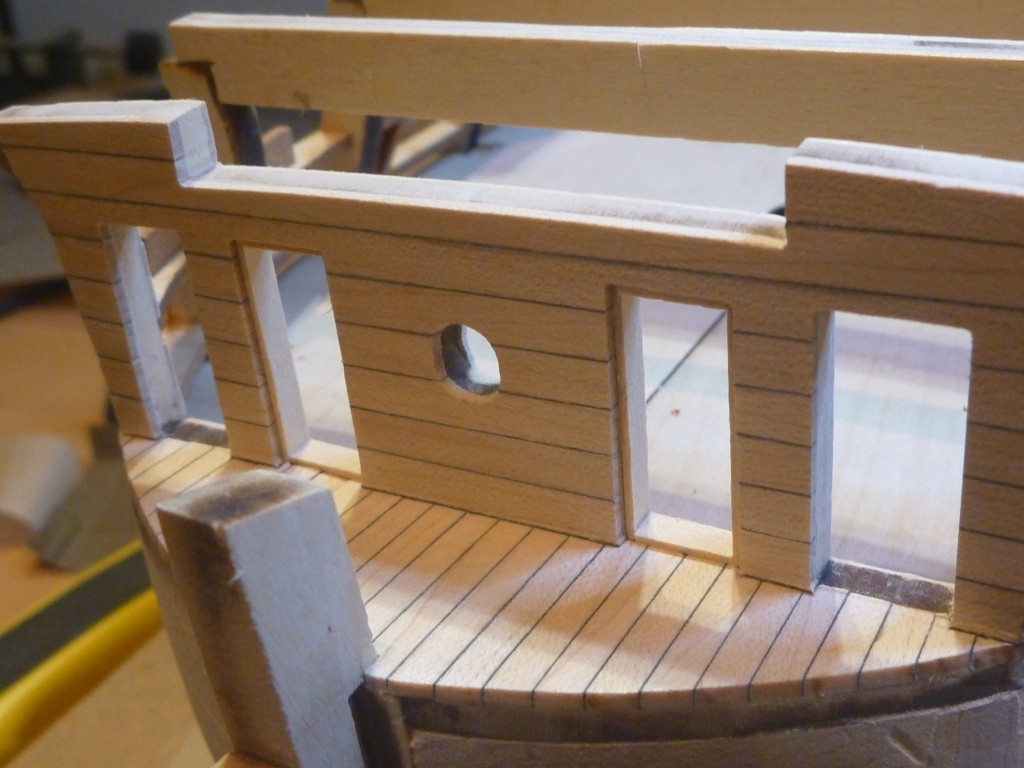
And then I put in liners to the two external doors.

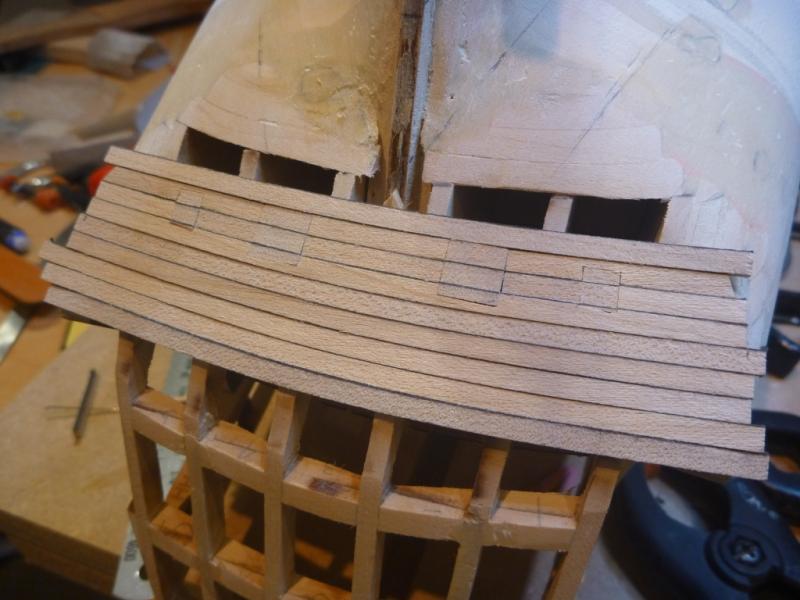
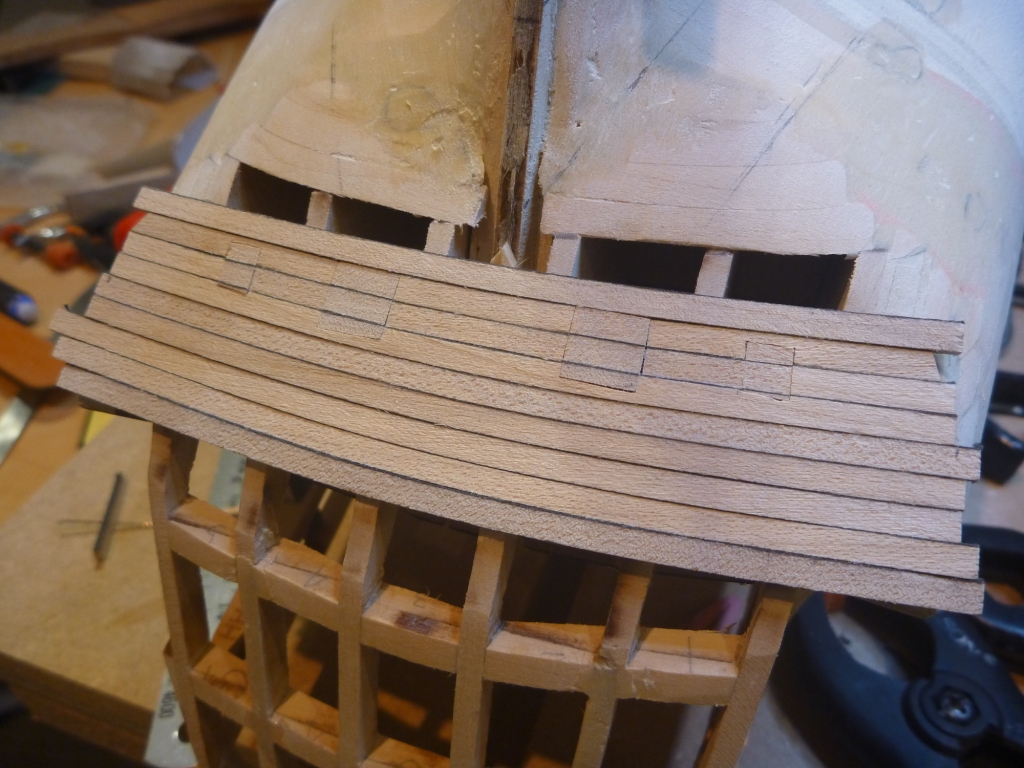
Next Job is planking the stern lower counter.
First made up a little width bend jig to get the bend repeatable.
And I started laying the planks in place.

I made up the closed ports as I went.
The rough ends still so they need finishing to length and a good sanding across the faces.
Onto next post.
-
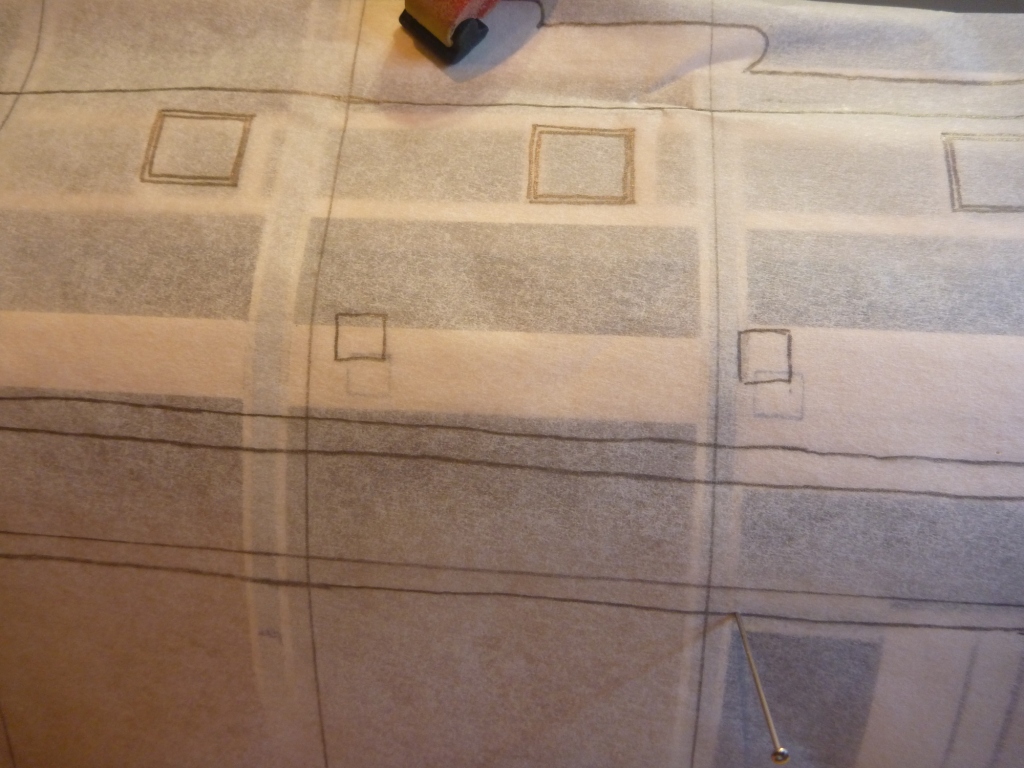
At this point I and read Dirk's (Dubz) problems on alignment.
I must say I was very please I did. So a big thanks to Dirk.
I replicated some of his checks, not as well as he did mind you.
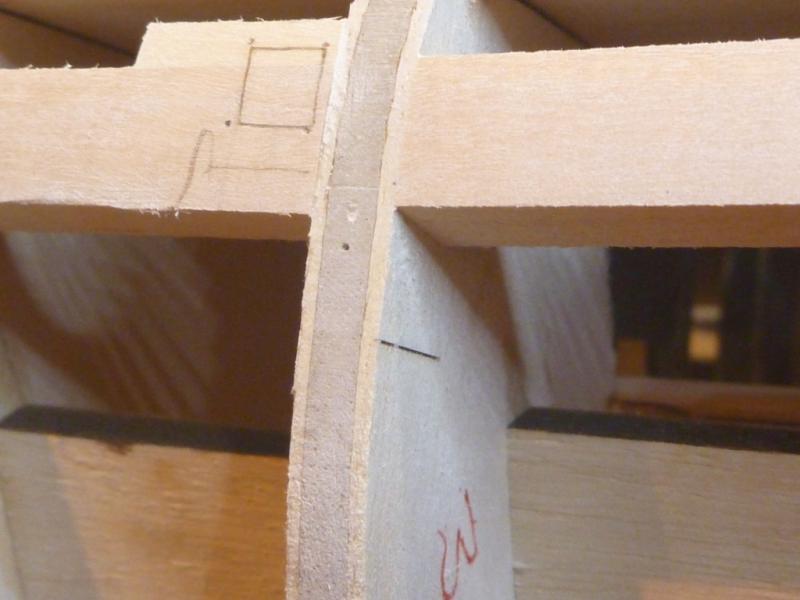
Here you see where I had already marked the sweep ports vs. where the tracing put them.
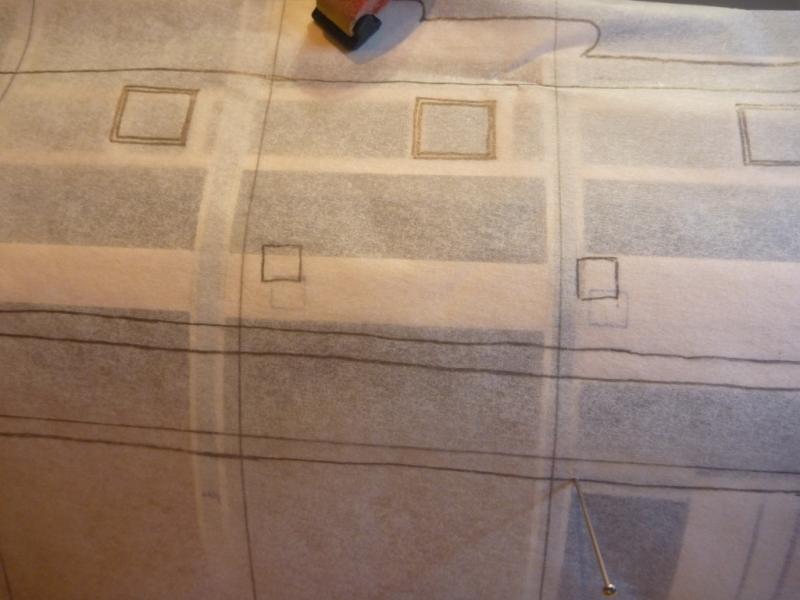
The same tracing confirms things because the gun ports are pretty well aligned.
In some places I had to add extra pieces to the port backing blocks to cover the ports.
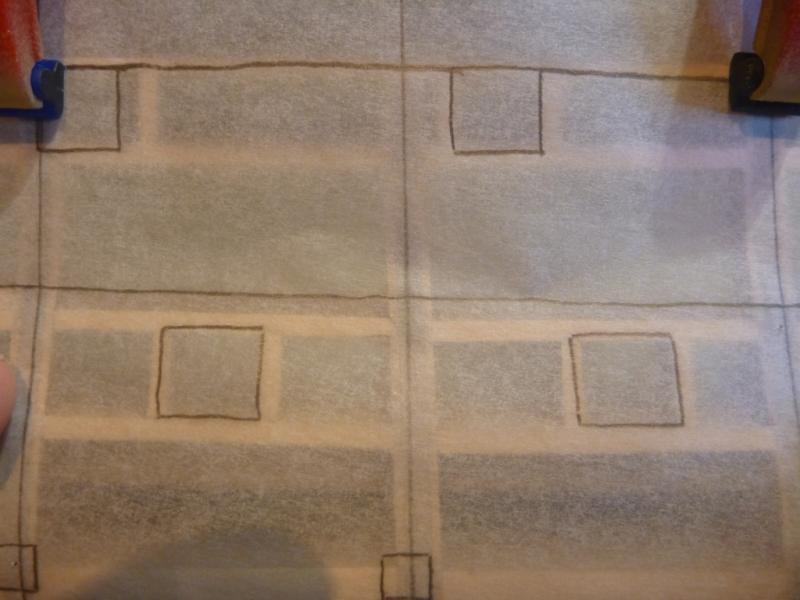
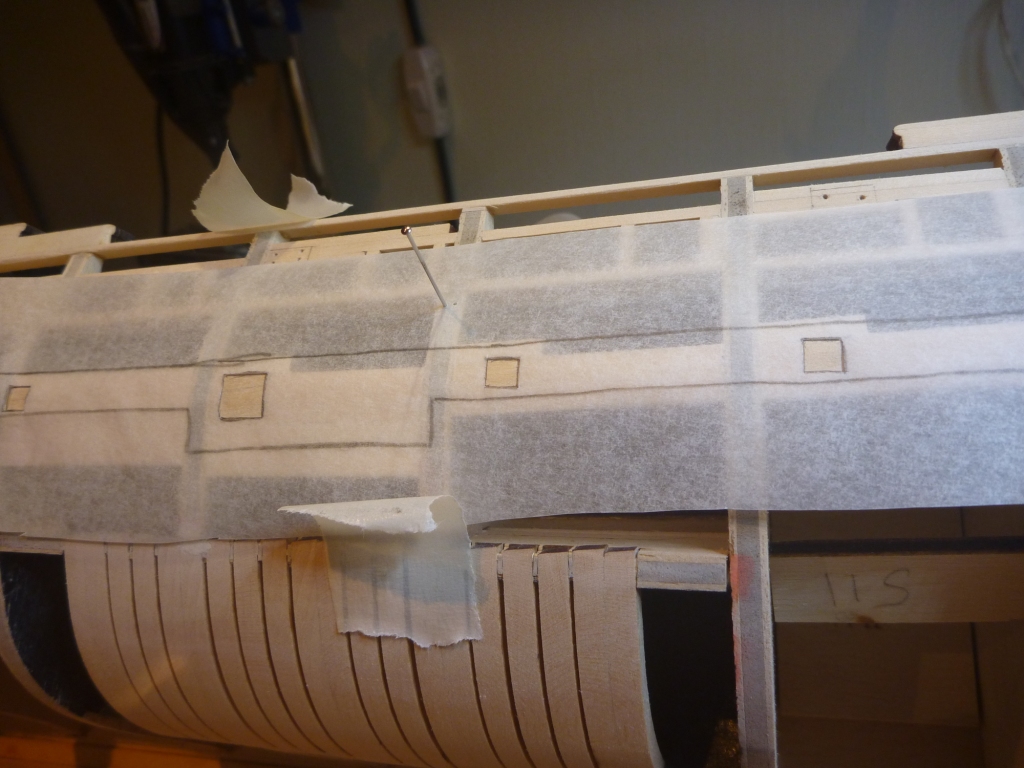
I have also done the fairing to the upper works now.
Then revisit the tracing paper and confirm the sweep port positions.
I wont use the rough tracing paper to actually place them.
Finally I used the template supplied in the kit (traced) to mark the proper positions of the ports through cutouts in the template.

Now, that's better.
I still have some catching up to post so will continue later.
Thanks for dropping by
Nick
-
Thank you all for the likes and comments, much appreciated.
So here we go with the next few installments.
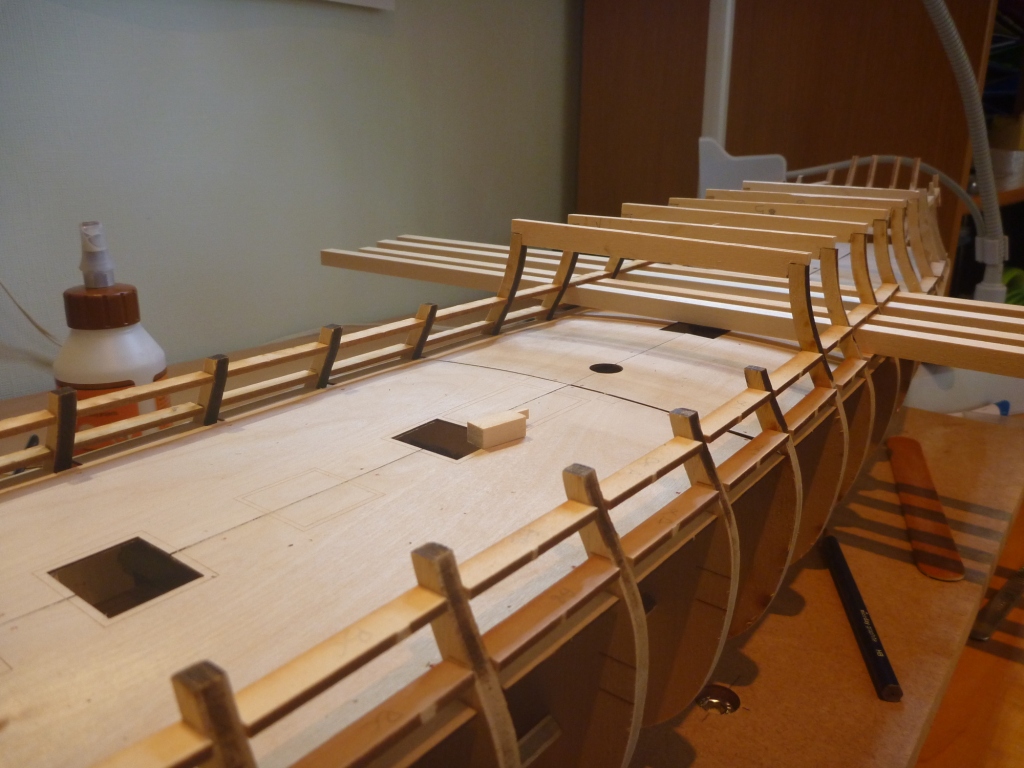
Using a couple of lengths of kit stock to get the correct gap and then gluing the gun port lintels in place.
Continuing with lintels.

Gunport sills and lintels now in place.
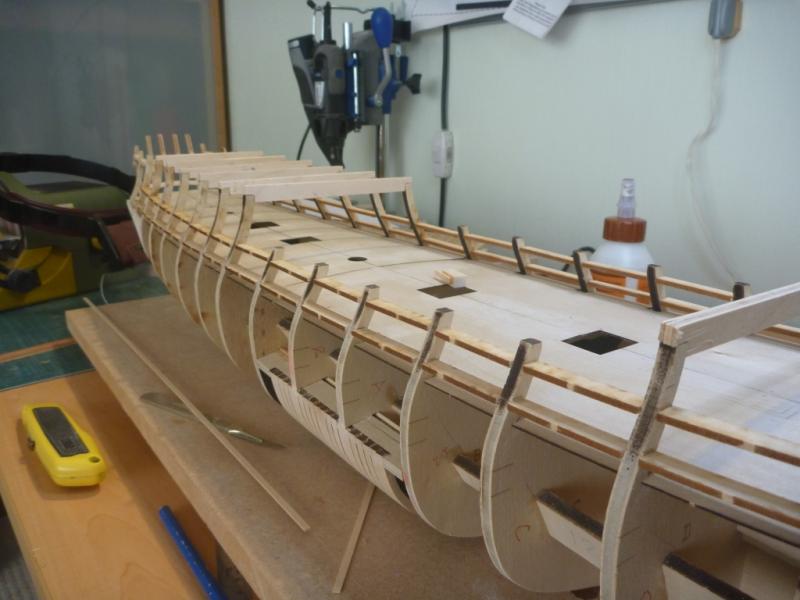
Now I’m struggling to recall what’s happening here, it’s my age you know, my Grandad was the same…… before the end.
Actually I used another batten to place the Quarterdeck gunport sills, seen in place, and before I place the strip that forms the lintels/rail I have run a second baton which is what you see here.
Then I can use that batten to bring the tops of the bulkheads down to a common height by sanding them down to the batten.
Once trimmed the top strip can be glued on which is what you can see on the Port side.

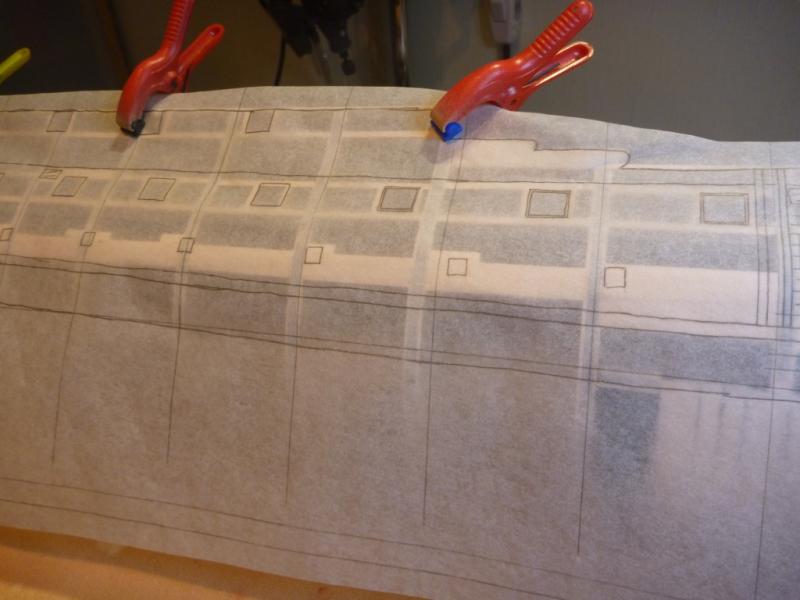
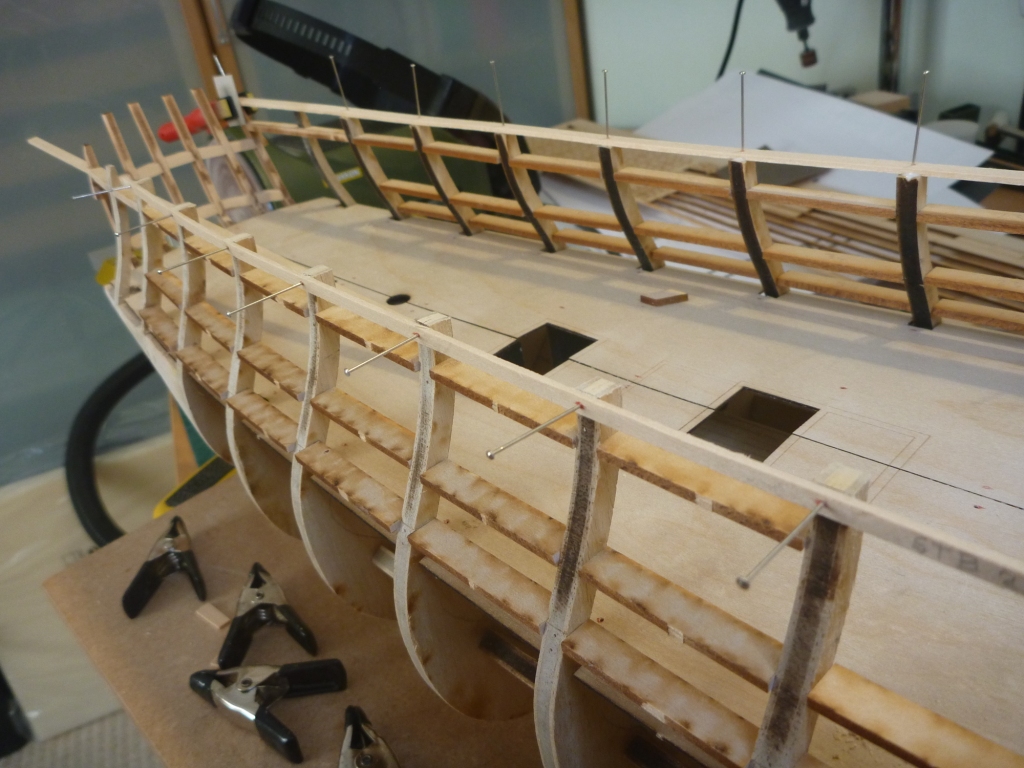
Then onto placing the gunport sides. I traced the plans onto a piece of tracing paper and pinned it to the frames. Then used a pin to mark the positions through.

Quarterdeck done, now doing the same on the main deck.
Gun port sides now done, I made a few adjustments by eye to keep both sides matched. And now I need to take out a bit of bulkhead where it crosses a port.
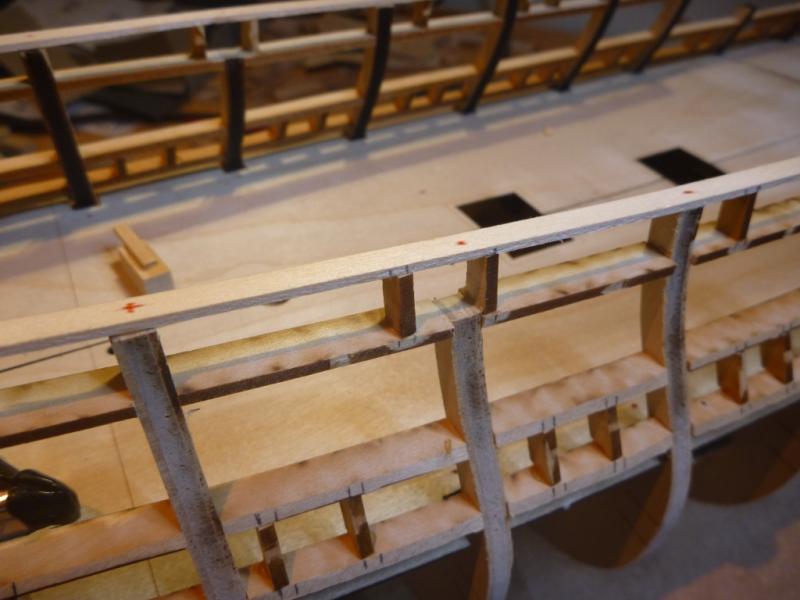
Then capping strips added along the sides of the Waist.

Once that was on I could add the Hance pieces to the top.

Then another batton, this time used to place the blocks which will back the sweep ports.

- GuntherMT, WackoWolf, Ryland Craze and 3 others
-
6
-
-
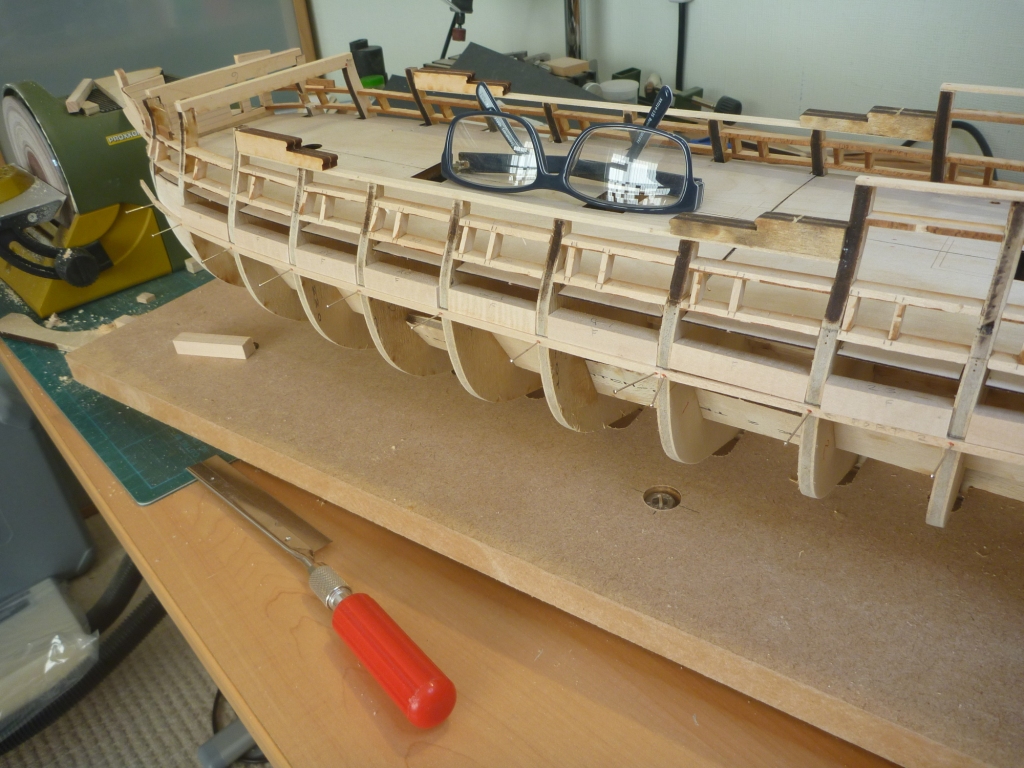
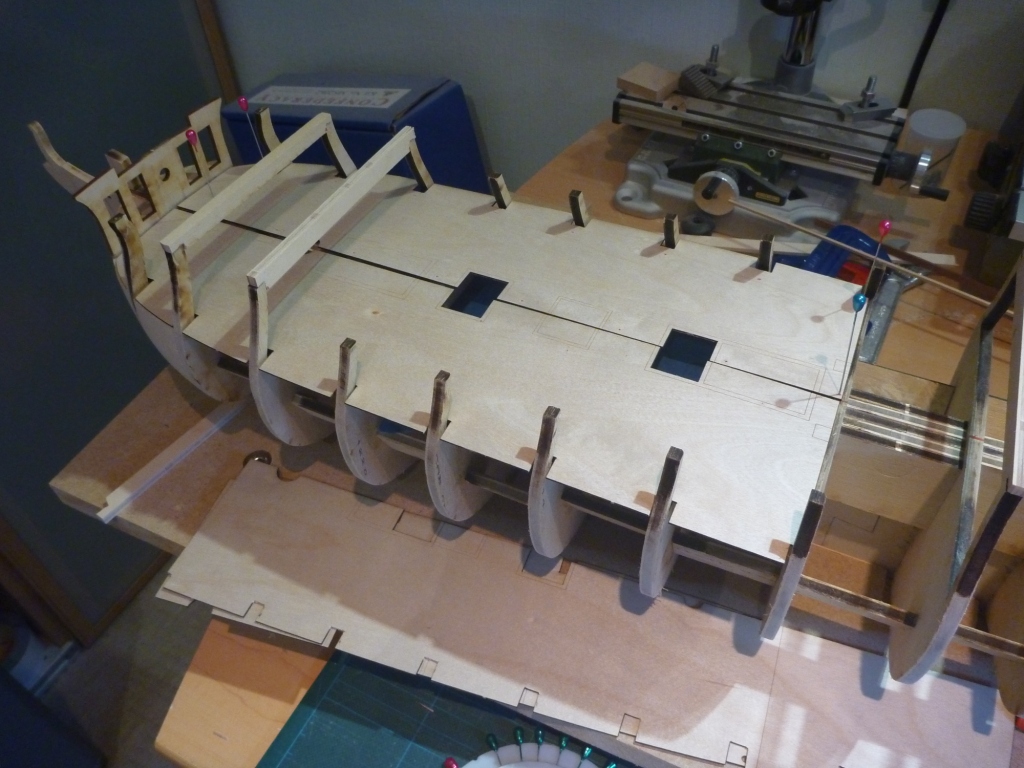
Next, getting the false deck to fit cleanly.

And before I put the deck in place, painting the faces adjacent to the lower decking black.

Then glue and pin one side of the false decking.

Once the other side was glued on I moved on to getting the gun port Sills in place. First running a batten right along the side. I also checked things out by using a little height gauge from the deck surface.
Starting adding the sills using the batten to confirm height.
I still have a bunch more updates to add, so i will continue tomorrow.
Nick
-
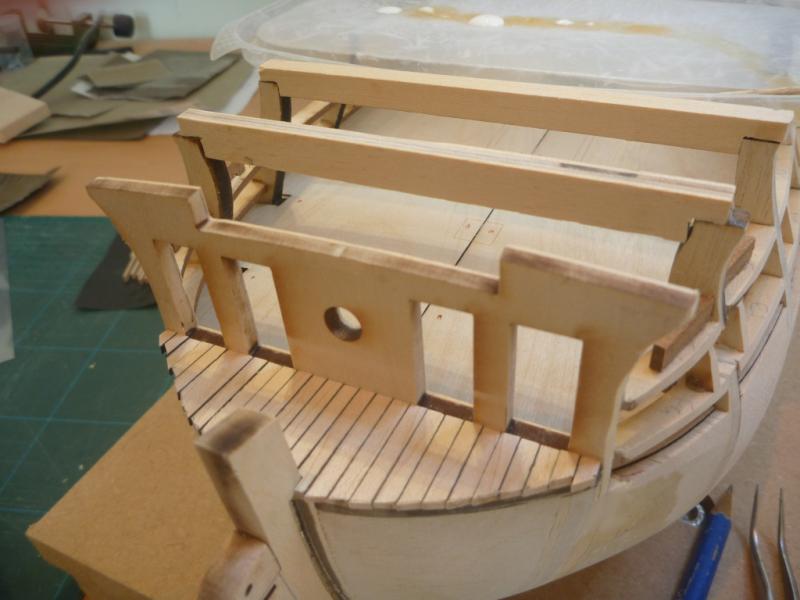
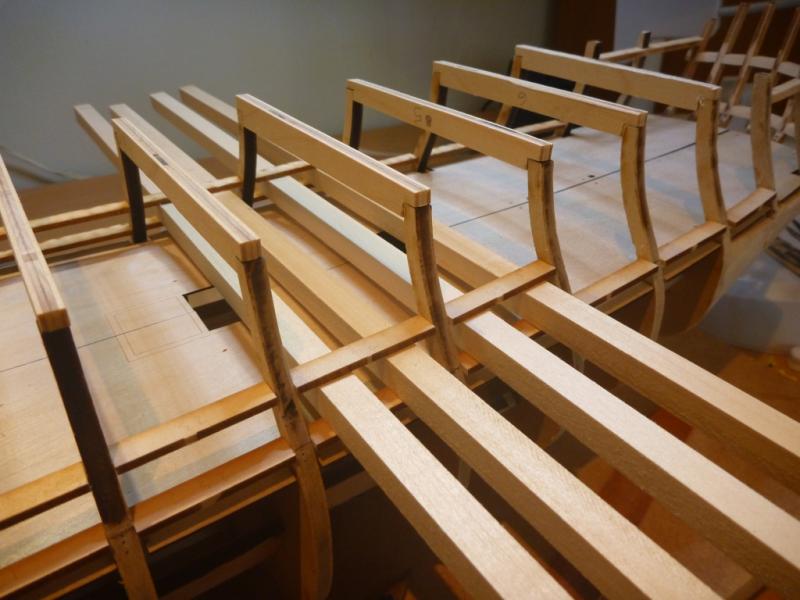
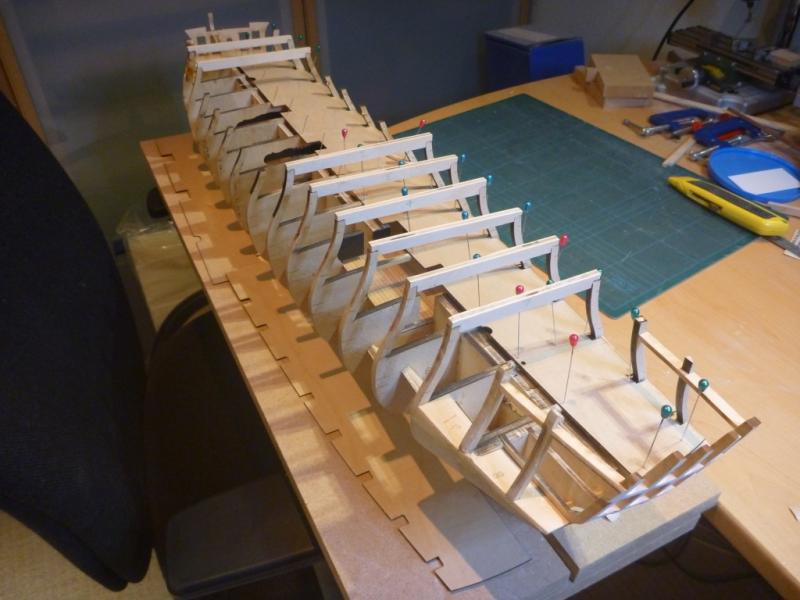
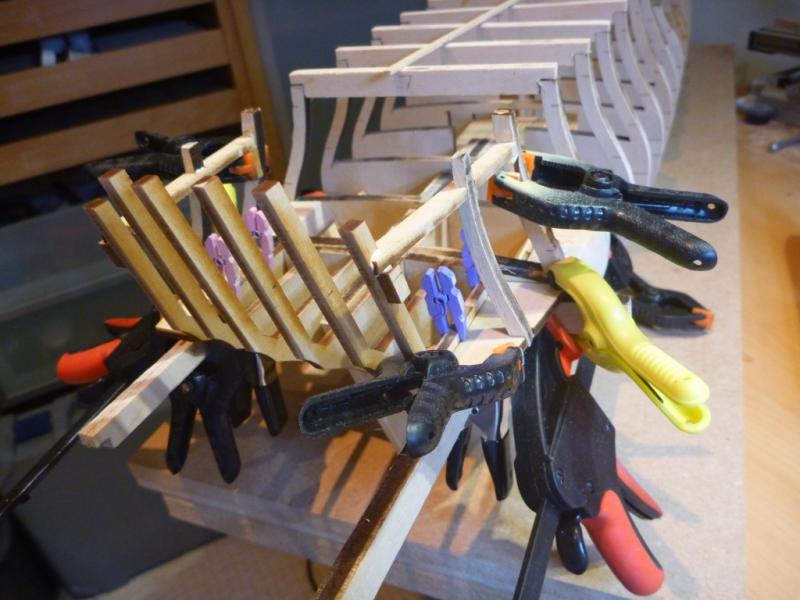
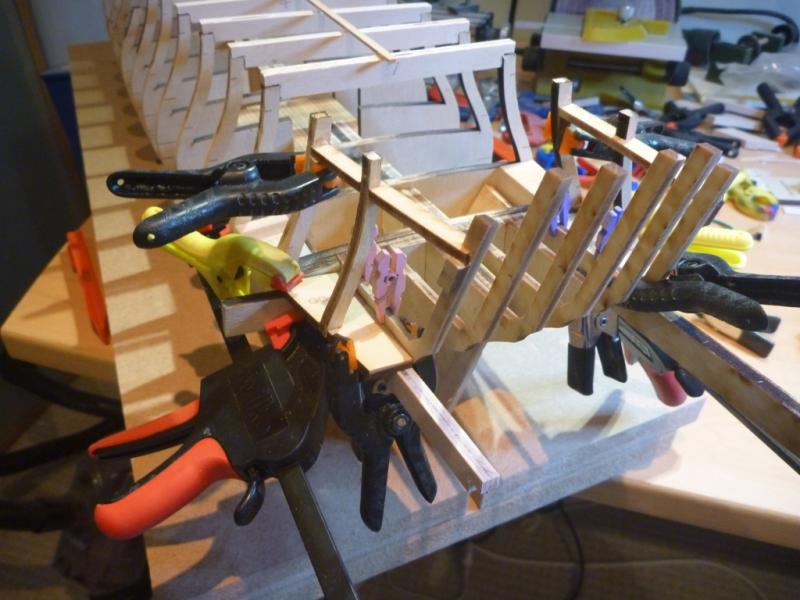
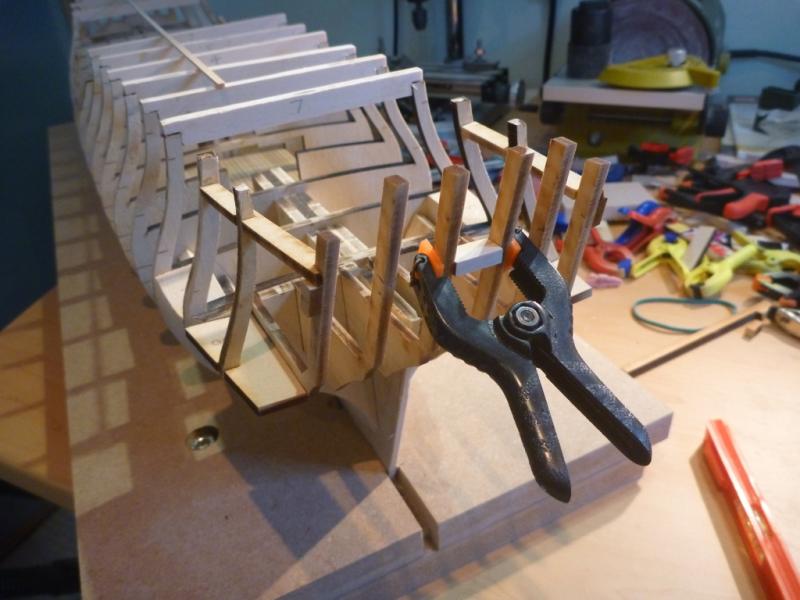
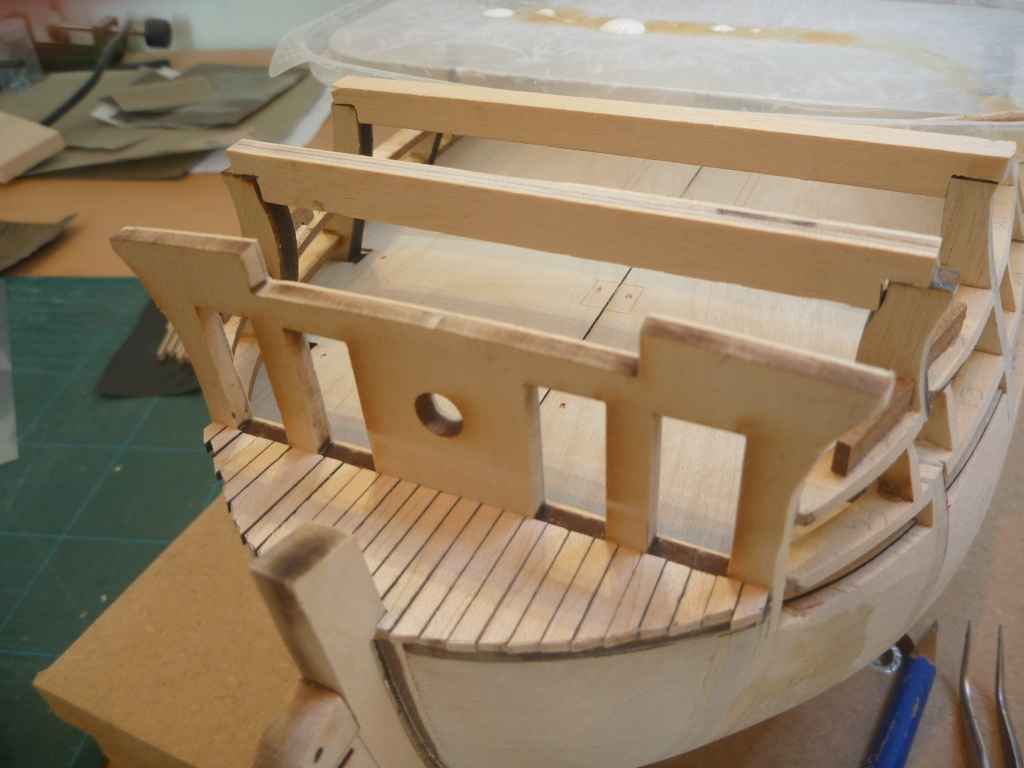
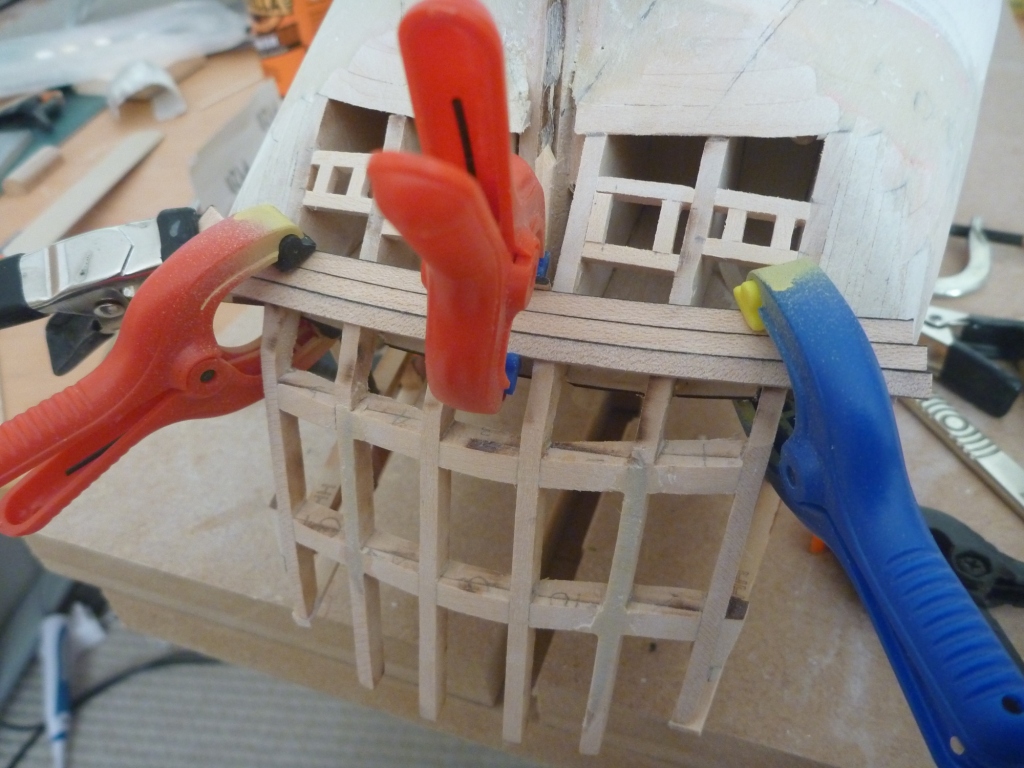
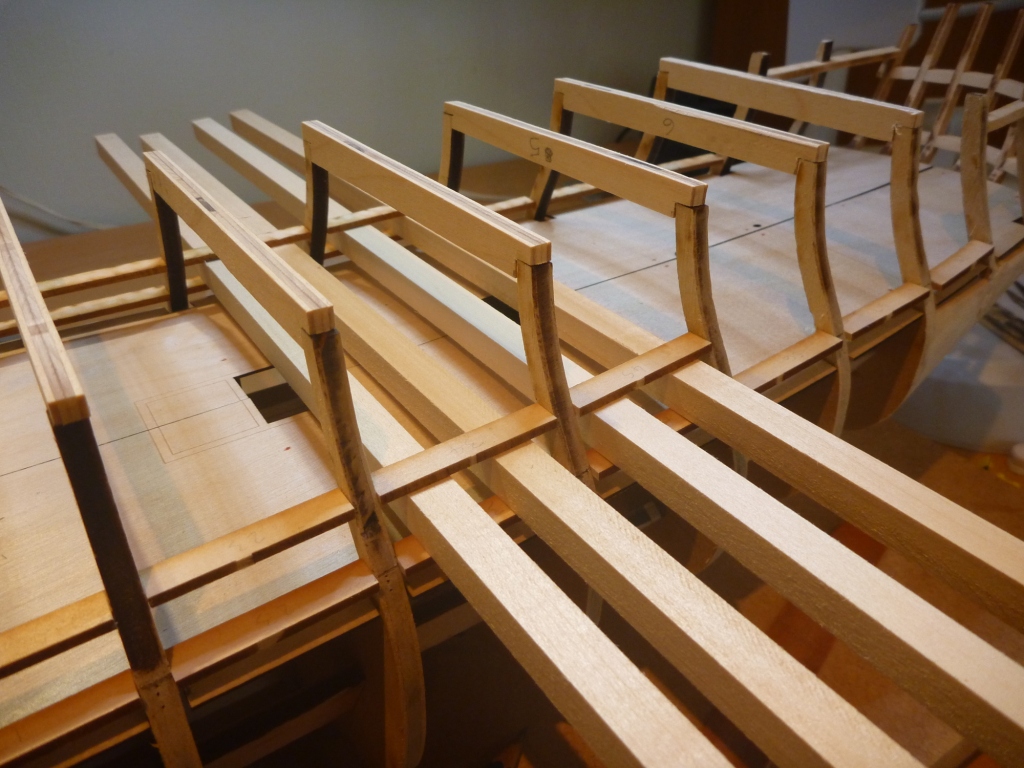
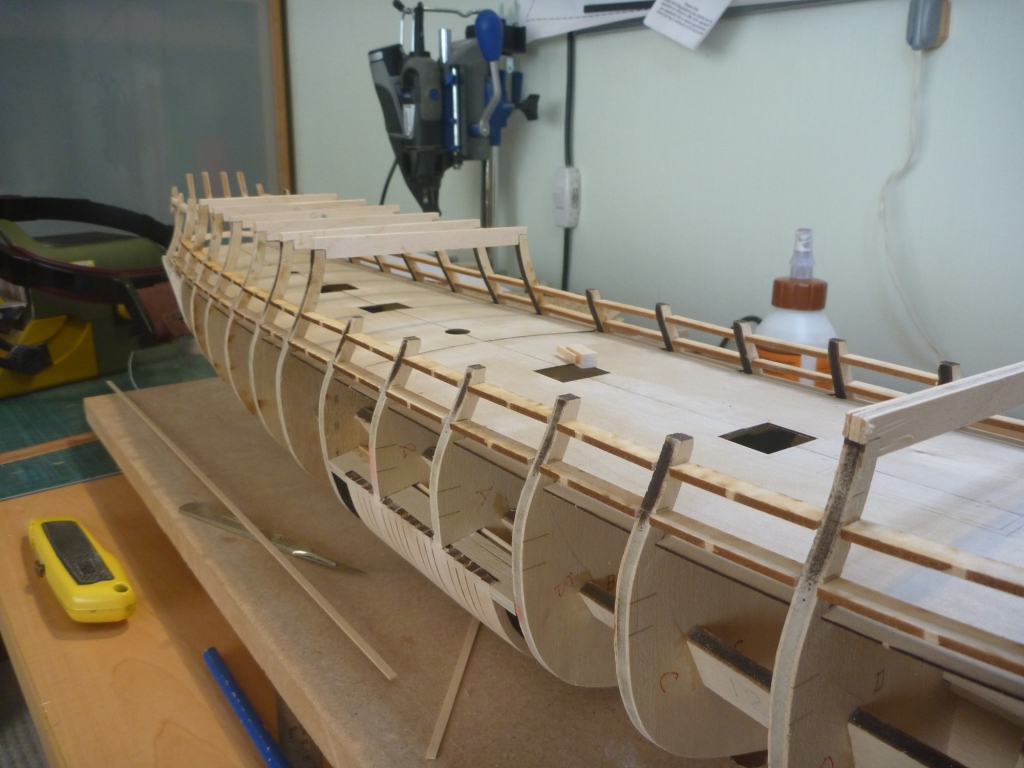
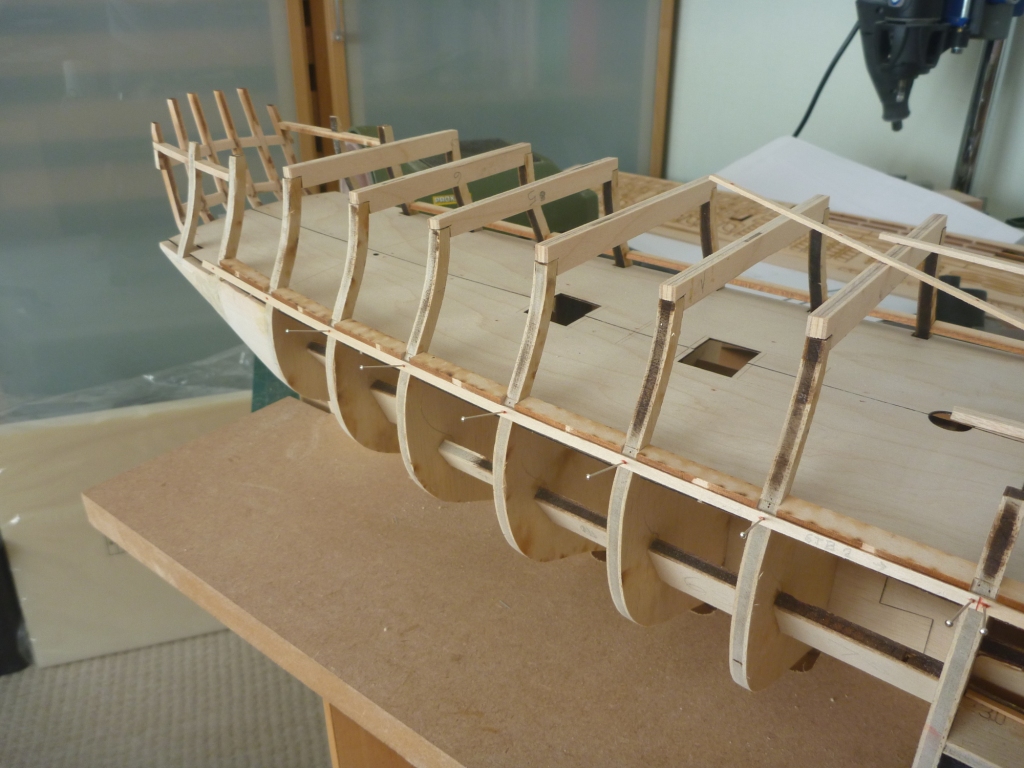
Next onto Framing the Stern. First the two centre frames, carefully clamped to be square and correctly positioned etc.

Then the four outer frames using the lintels as spacers and the first frames as guides.
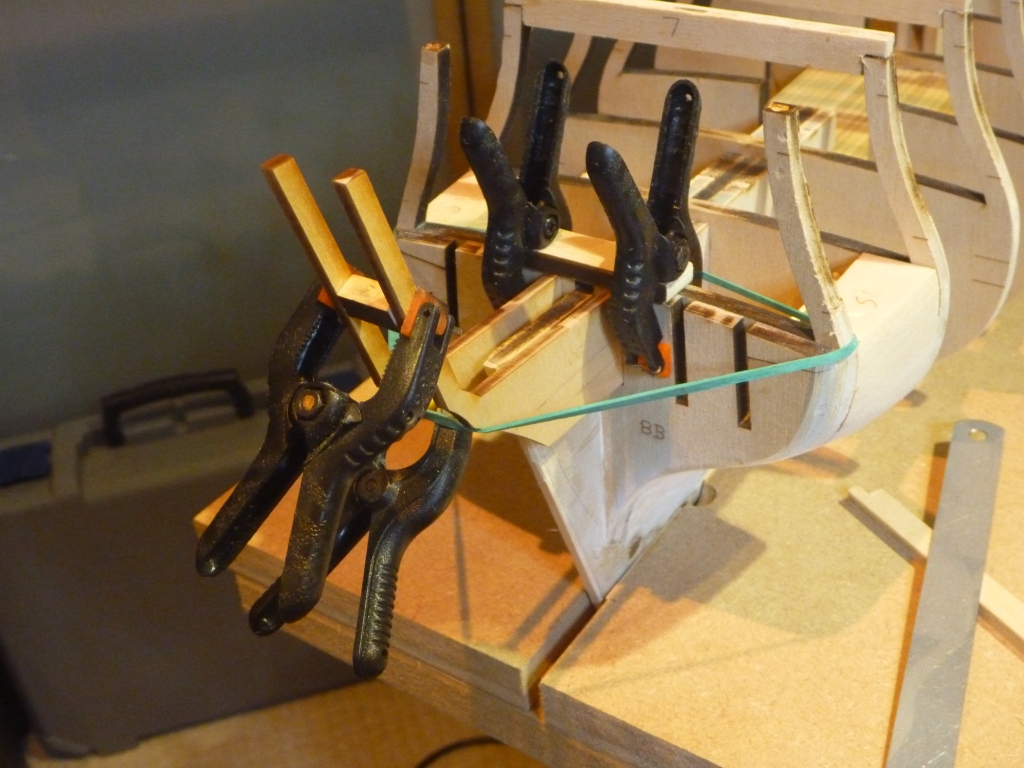
Then moved on to the Quarter gallery framing and flooring etc. The objective here is to see how many different types of clamp I can get into place at once.
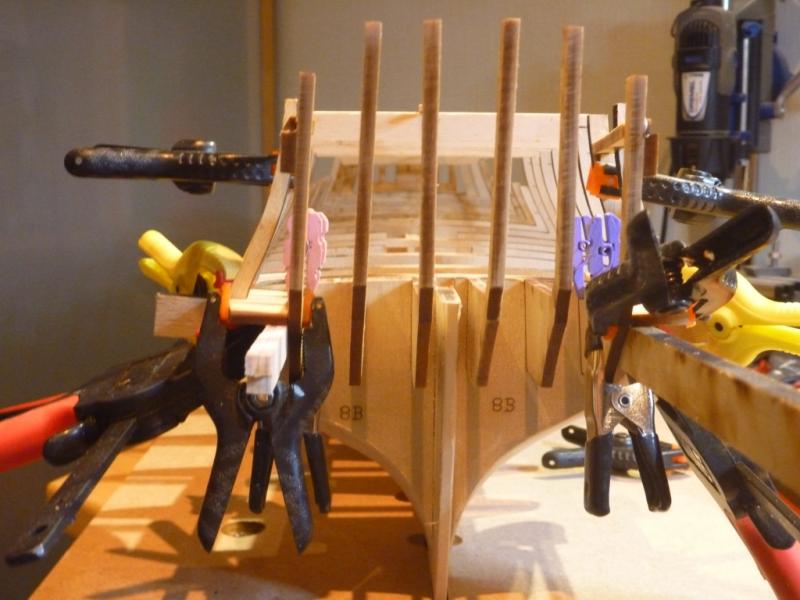
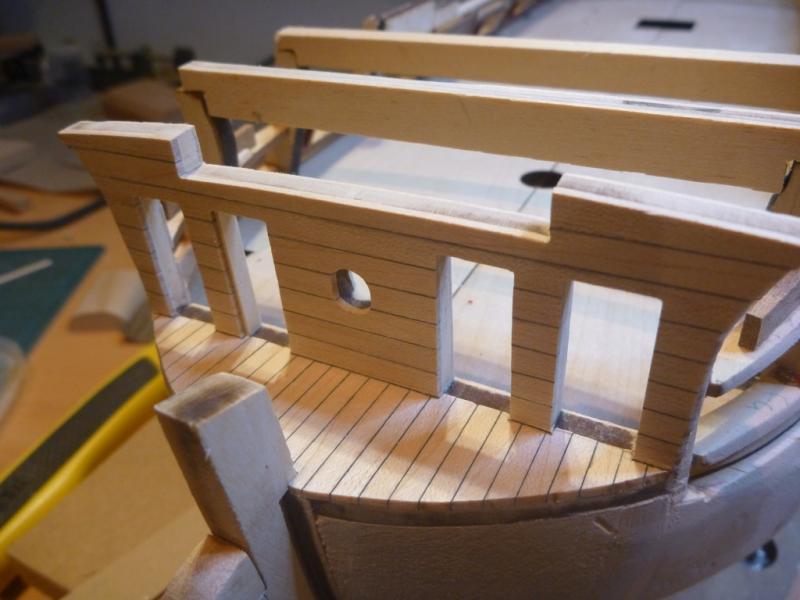
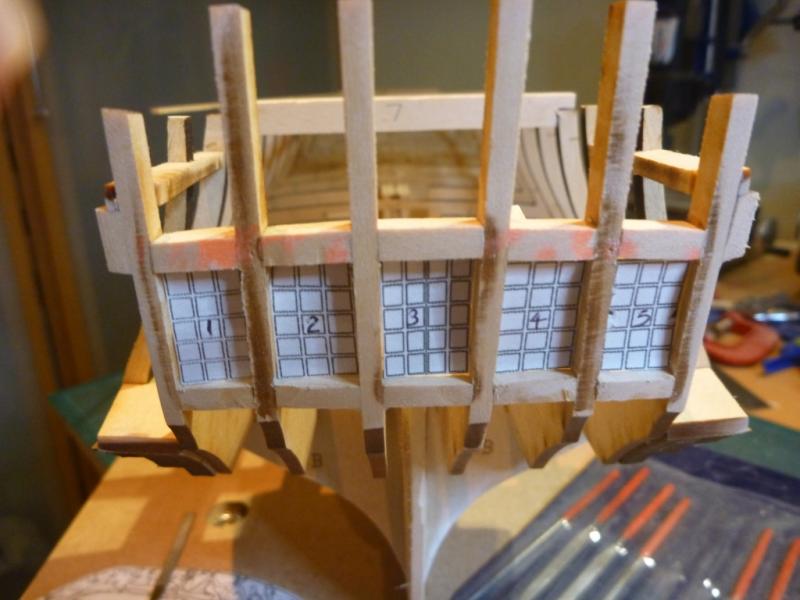
Then onto the window lintels and sills.
I used cut outs of the windows from the plans to check that they were positioned to allow the windows to be fitted later.
Then framing the ports in the lower counter.
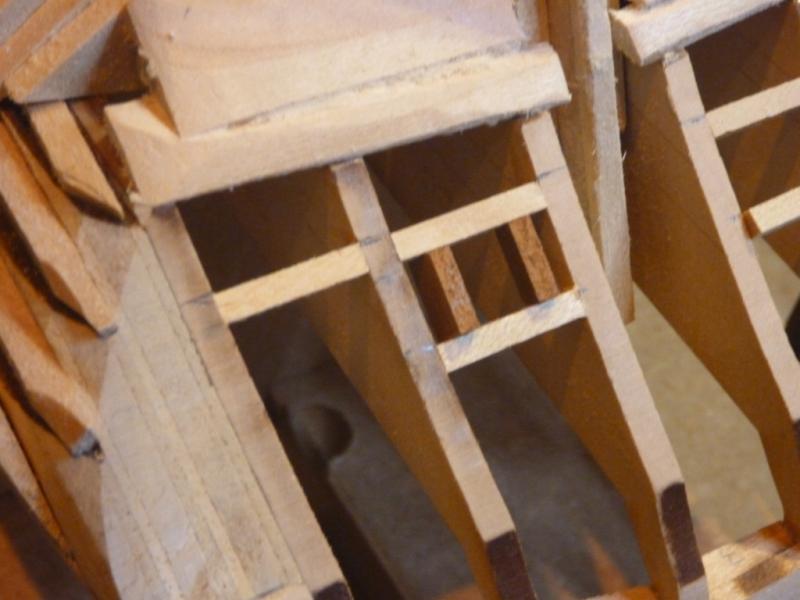
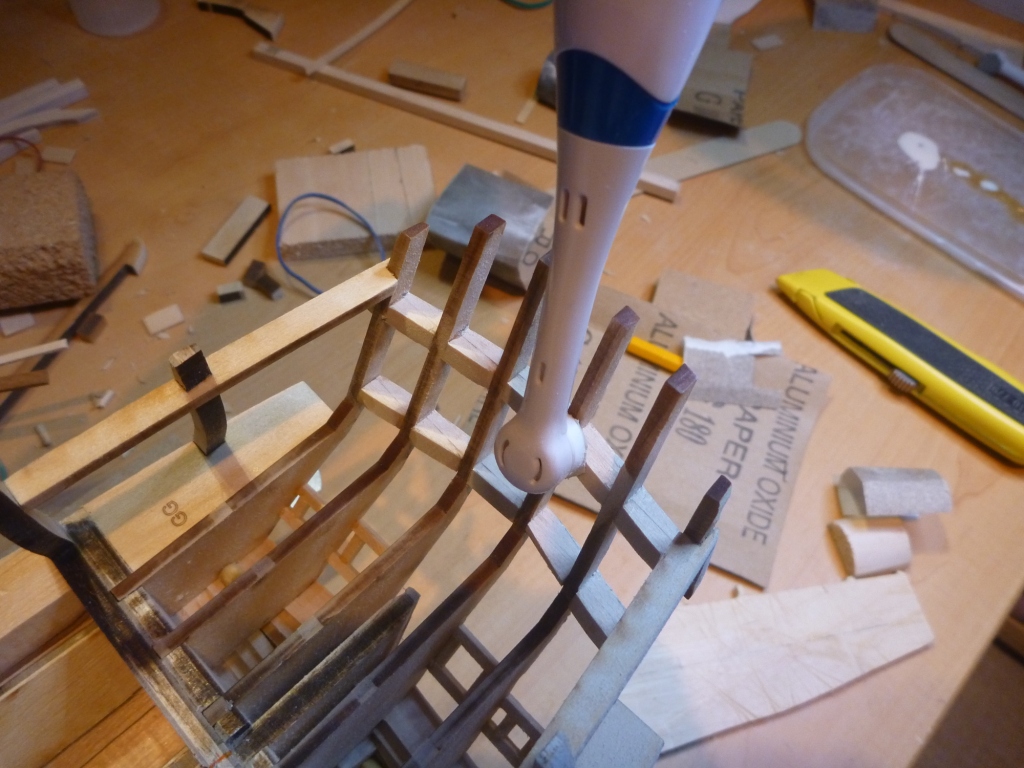
Then some fairing of the outer face. And, using a converted electric toothbrush, fairing the inside faces.

- Dubz, Tigersteve, Jack12477 and 7 others
-
10
-
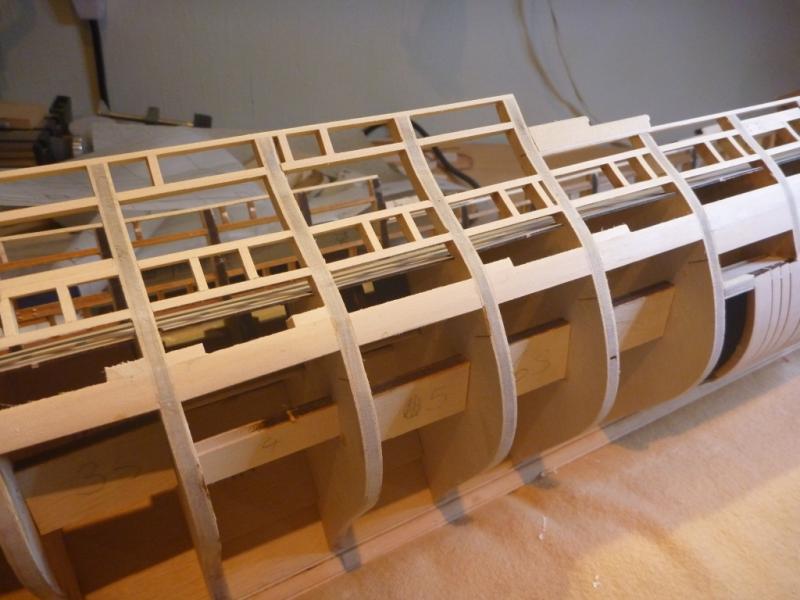
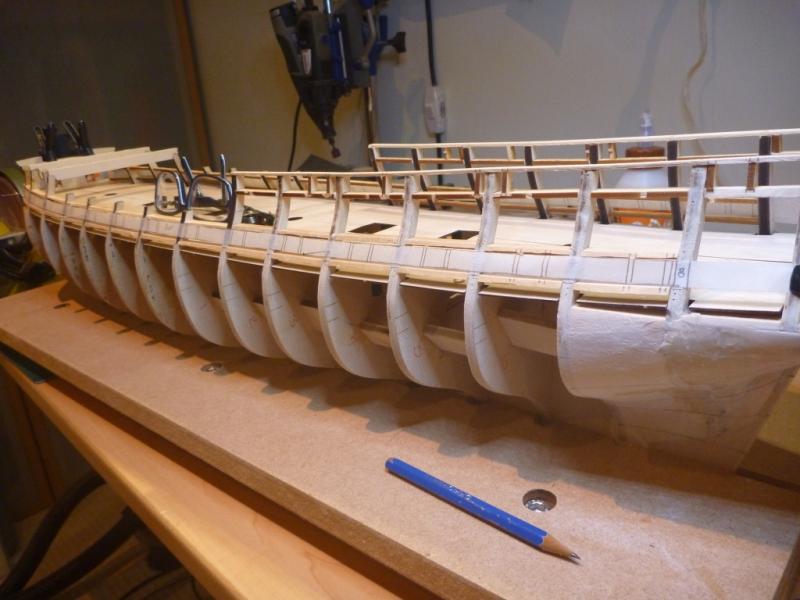
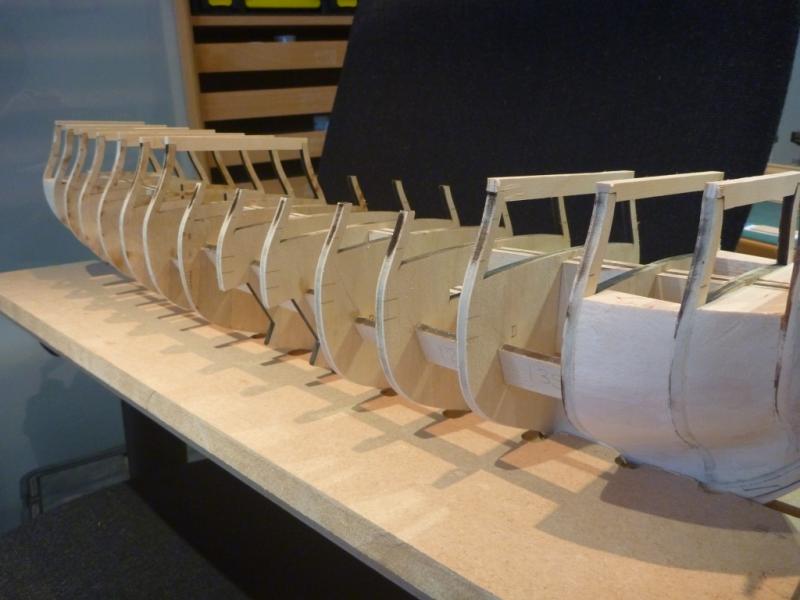
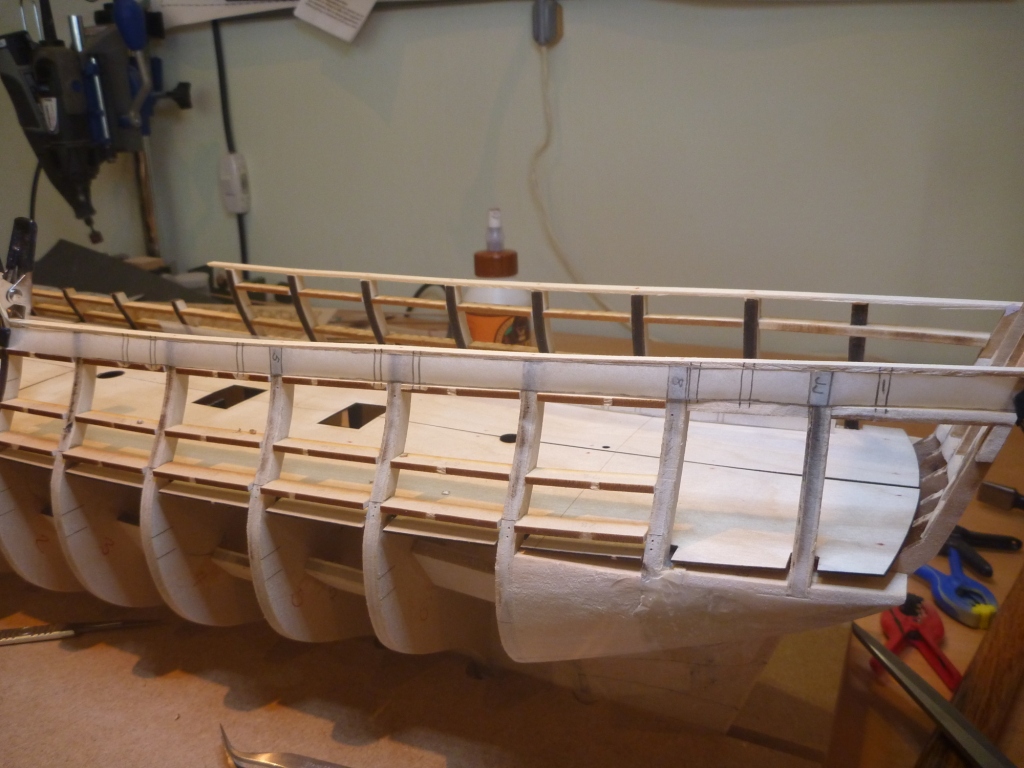
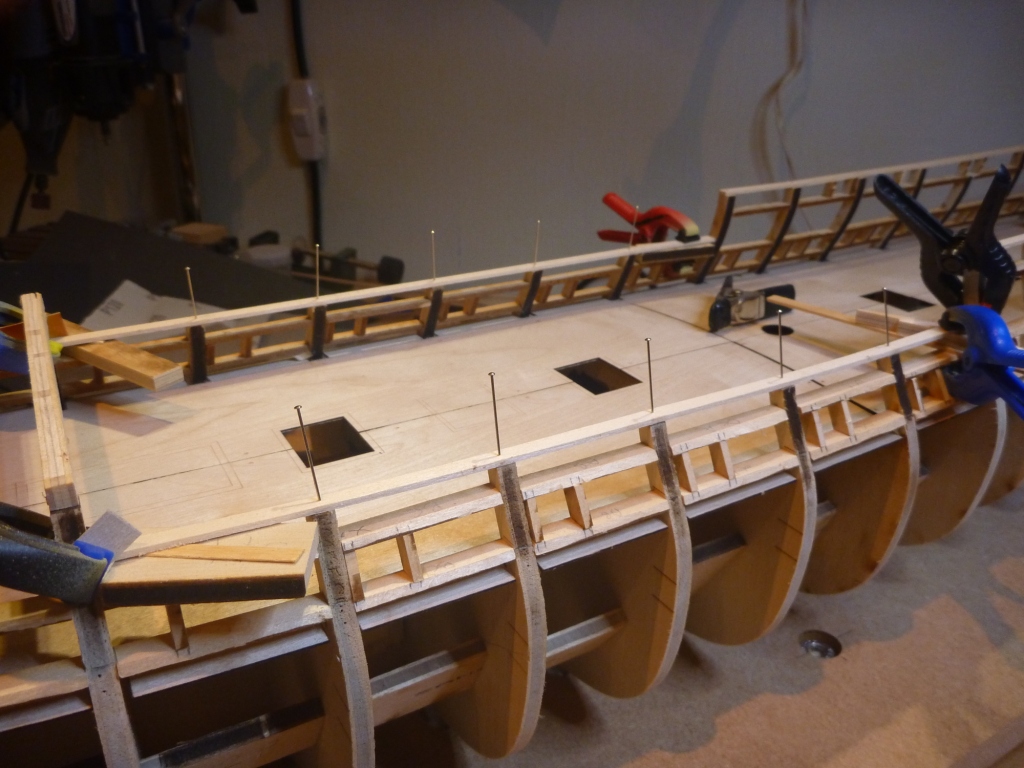
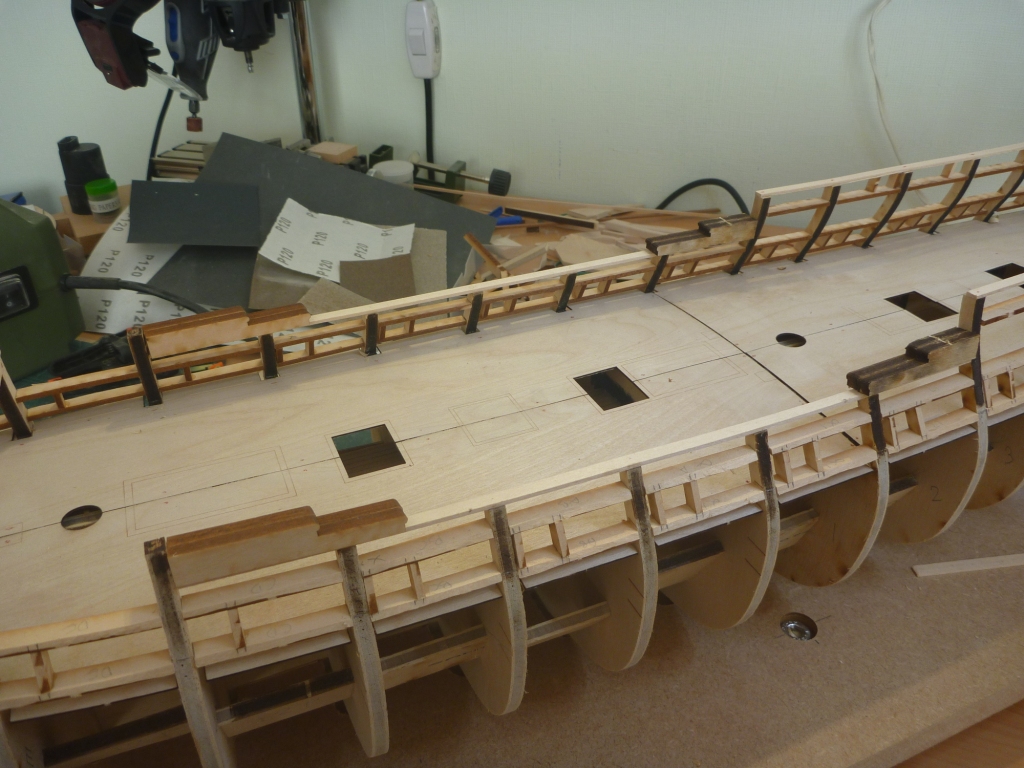
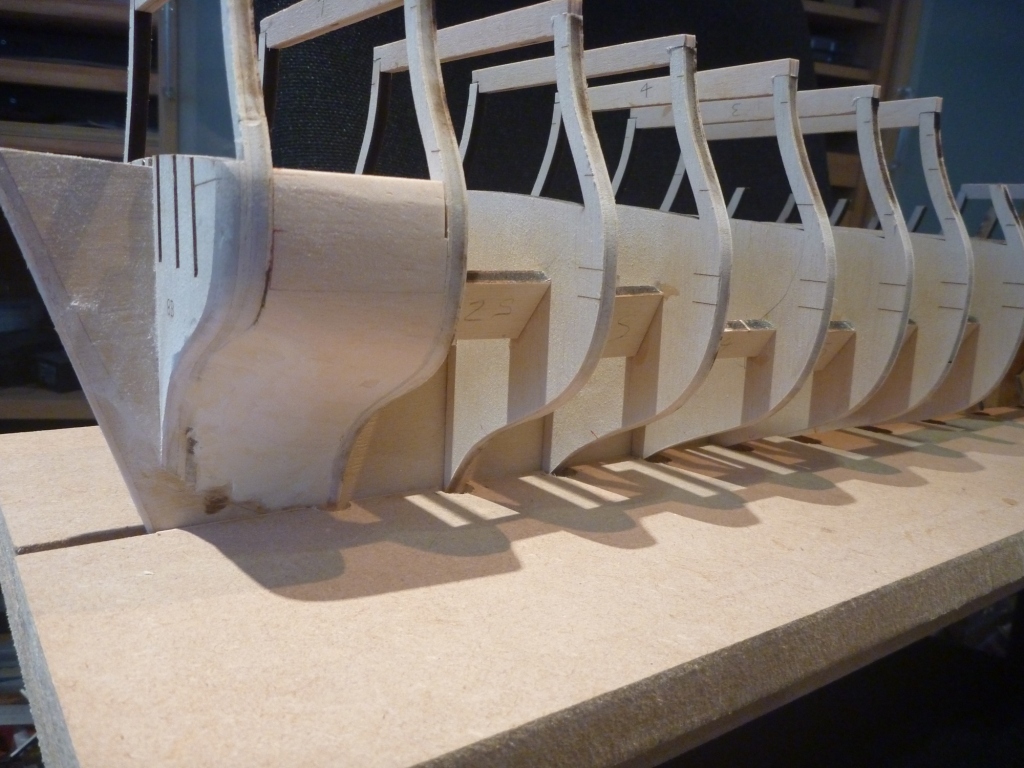
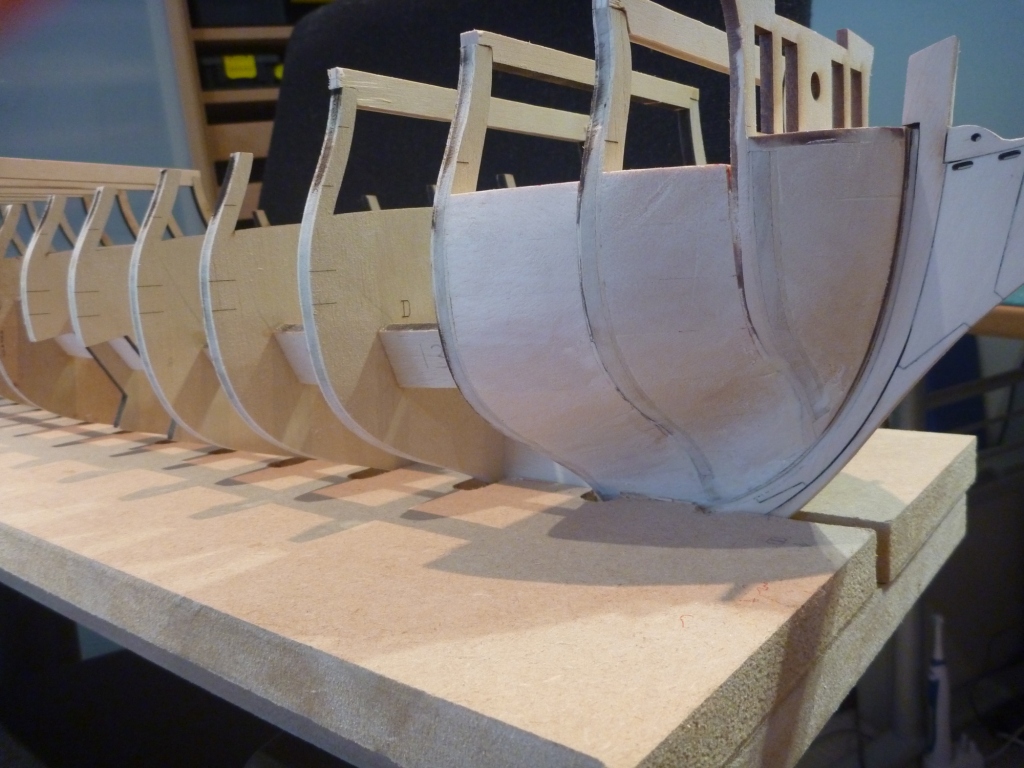
Done most of the initial fairing – stern infills.

Bow infills.

And hull. I will need to do some more yet but will wait until I can finish the whole hull together.
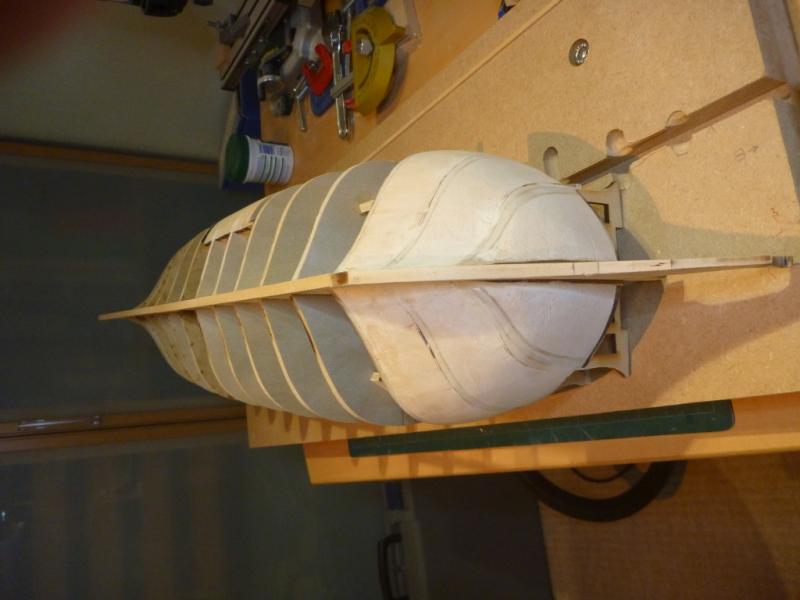
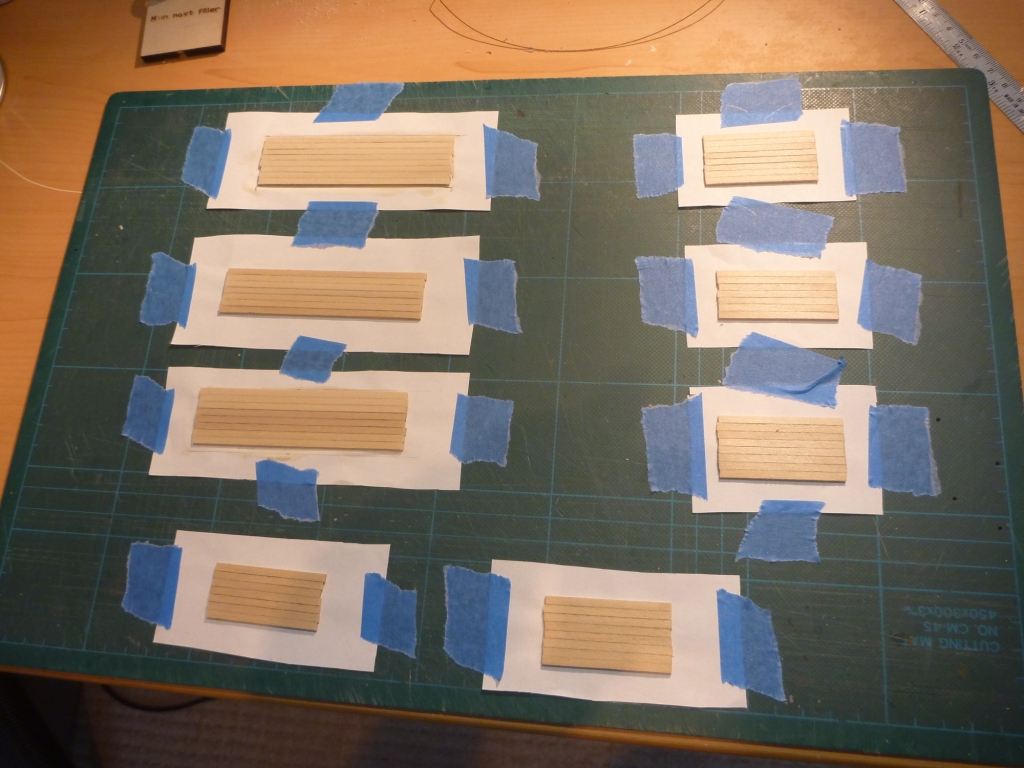
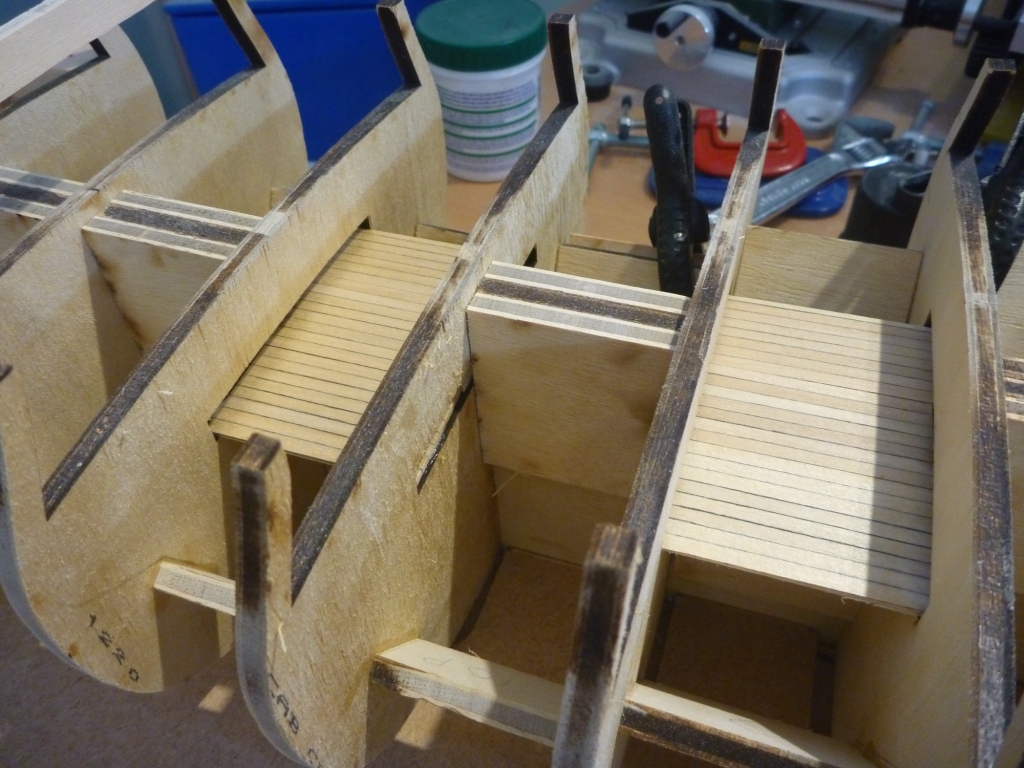
So my next job is to plank the sub gun deck platforms. I made them up in sections glued to a paper backing to avoid having to place them in awkward positions one at a time.

Then after trimming the backing they were glued them into position.

Next I made up the shadow box for the exposed hull frames and placed the frames into position.

So this is where we stand, now with the frames faired as well.
Will continue on another post
Nick
- Dubz, mtaylor, zoly99sask and 3 others
-
6
-
-
My experience with Caldercraft is that the instructions and drawings are good.
I also think it depends on your native language.
If it's English then a kit from UK, US or other English speaking country are likely to be better.
It a kit comes from a non English country the instructions have generally been translated and that is a difficult process with technical phrasing etc.
I know there are exceptions to this and I'm sure members will point then out, but I believe it's a good rule of thumb.
Nick
P.S. definitely endorse the 'Chuck' observations.
-
Chuck, like you I use a No 11 blade for nearly all tasks.
However you might find some of the other blades available may be worth exploring.
Very occasionally I use a 12D blade.
The nice thing about these is that they have a cutting edge both sides.
You can then alternate the side to better suit the shape you are dealing with.
They also seem to have a tighter / sharper angle at the very end allowing better angles of approach.
Nick

-
Progress is looking great Robert, your work rate is impressive.
Nick


HMS Victory by Seventynet - Caldercraft - Scale 1: 72 - first build
in - Kit build logs for subjects built from 1751 - 1800
Posted
Just been entertaining myself with catching up on your log Ian.
Have to say it's really lovely work.
Looking forward to seeing it progress.
Nick