rtropp
-
Posts
936 -
Joined
-
Last visited
Content Type
Profiles
Forums
Gallery
Events
Everything posted by rtropp
-
I will buy HMN Swan Class 1767-1780 Vol 4 By Antscherl ISBN 978-0-9820579-8-8. - $15.00. (water damage top binding area) It will be shipped to 30223 Richard
-
I have used thin CA or gap filling CA and had a firm hold after a few moments of holding. Some, who are not fans of CA, will use PVA but put a couple of spots of CA to get the plank started. Downside is if you want to remove it you end up needing acetone and alcohol to dissolve the glue. So, for me, if the area is easy to clamp, or not under stress, I use PVA. Otherwise, like hull planking, I will use thinned CA. Thinned CA is also useful for prepositioning then allowing Thinned CA to "seep" in. The "seep" in method is becoming a favorite practice. We will just have to see if problems develop with CA over the years. Richard
-
Great work. I'm going to give it a try. Can you tell me where you got the patterns for the blocks? Thanks, Richard
-
Allan, The Victory cross section I am working on is 1:98 so I will give thread a try. I have some "rope" being delivered soon. Thanks Richard
-
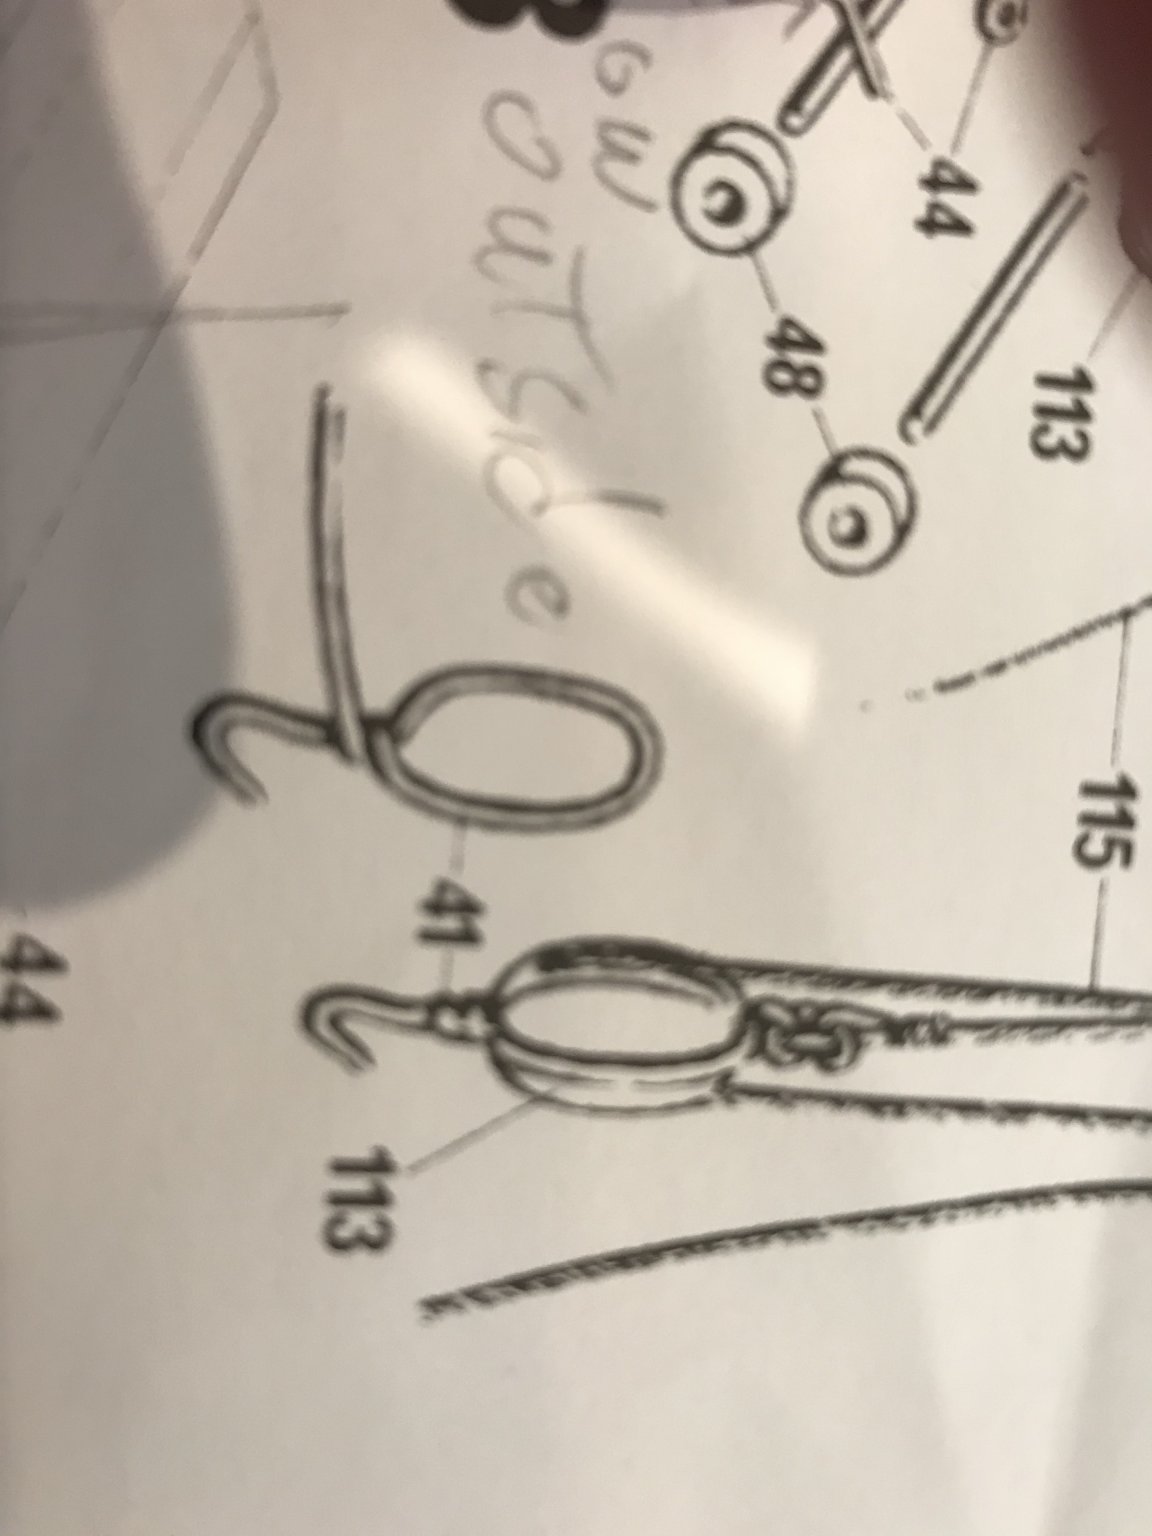
Allan, thanks for the link. Seahawk, very understandable instructions. The hooks should be easier to fabricate now. Richard, the thread was an eye opener. The build's instructions show rigging the wire around the block and then forming the hook in one piece. But, everything I have seen here shows using "rope" around the block and the wire only for the hook itself. You can see in my first picture at the start of the thread that I have been wrapping the wire around the block and continuing into forming the hook. I did do some research but never noticed that the blocks were wrapped with rope. (new glasses are definitely in my future.) So, I guess my decision is do I continue with the wire as per the instructions or use rope. I would like to practice the method I will be using if I ever get to a scratch build. I have enough supplies coming from Syren to do either. What do you all think?

-
Thank you all for your help. I believe my first priority is getting more comfortable with the smaller scale. I am getting better at working with the 3/32 blocks but now need to work on smaller rings. I have ordered wire gauges from 26 to 30. I couldn't find 32 yet. The wire working tools I bought from one of the hobby suppliers do not get down small enough. If need be I can grind my own as suggested. With the drawings and suggestions given I believe I can get a lot further along. Getting confirmation of the sizes to use will move me along nicely. I was having some difficulty with scaling but found software for my iPhone that automates the conversions. It is called "Model Scaler" and really easy to use. While I am not ecstatic with the quality of the materials and instructions for the Victory Cross Section, I do want to rebuild my skills for my next, hopefully scratch, project. Again, thanks to all for the help. Richard
-
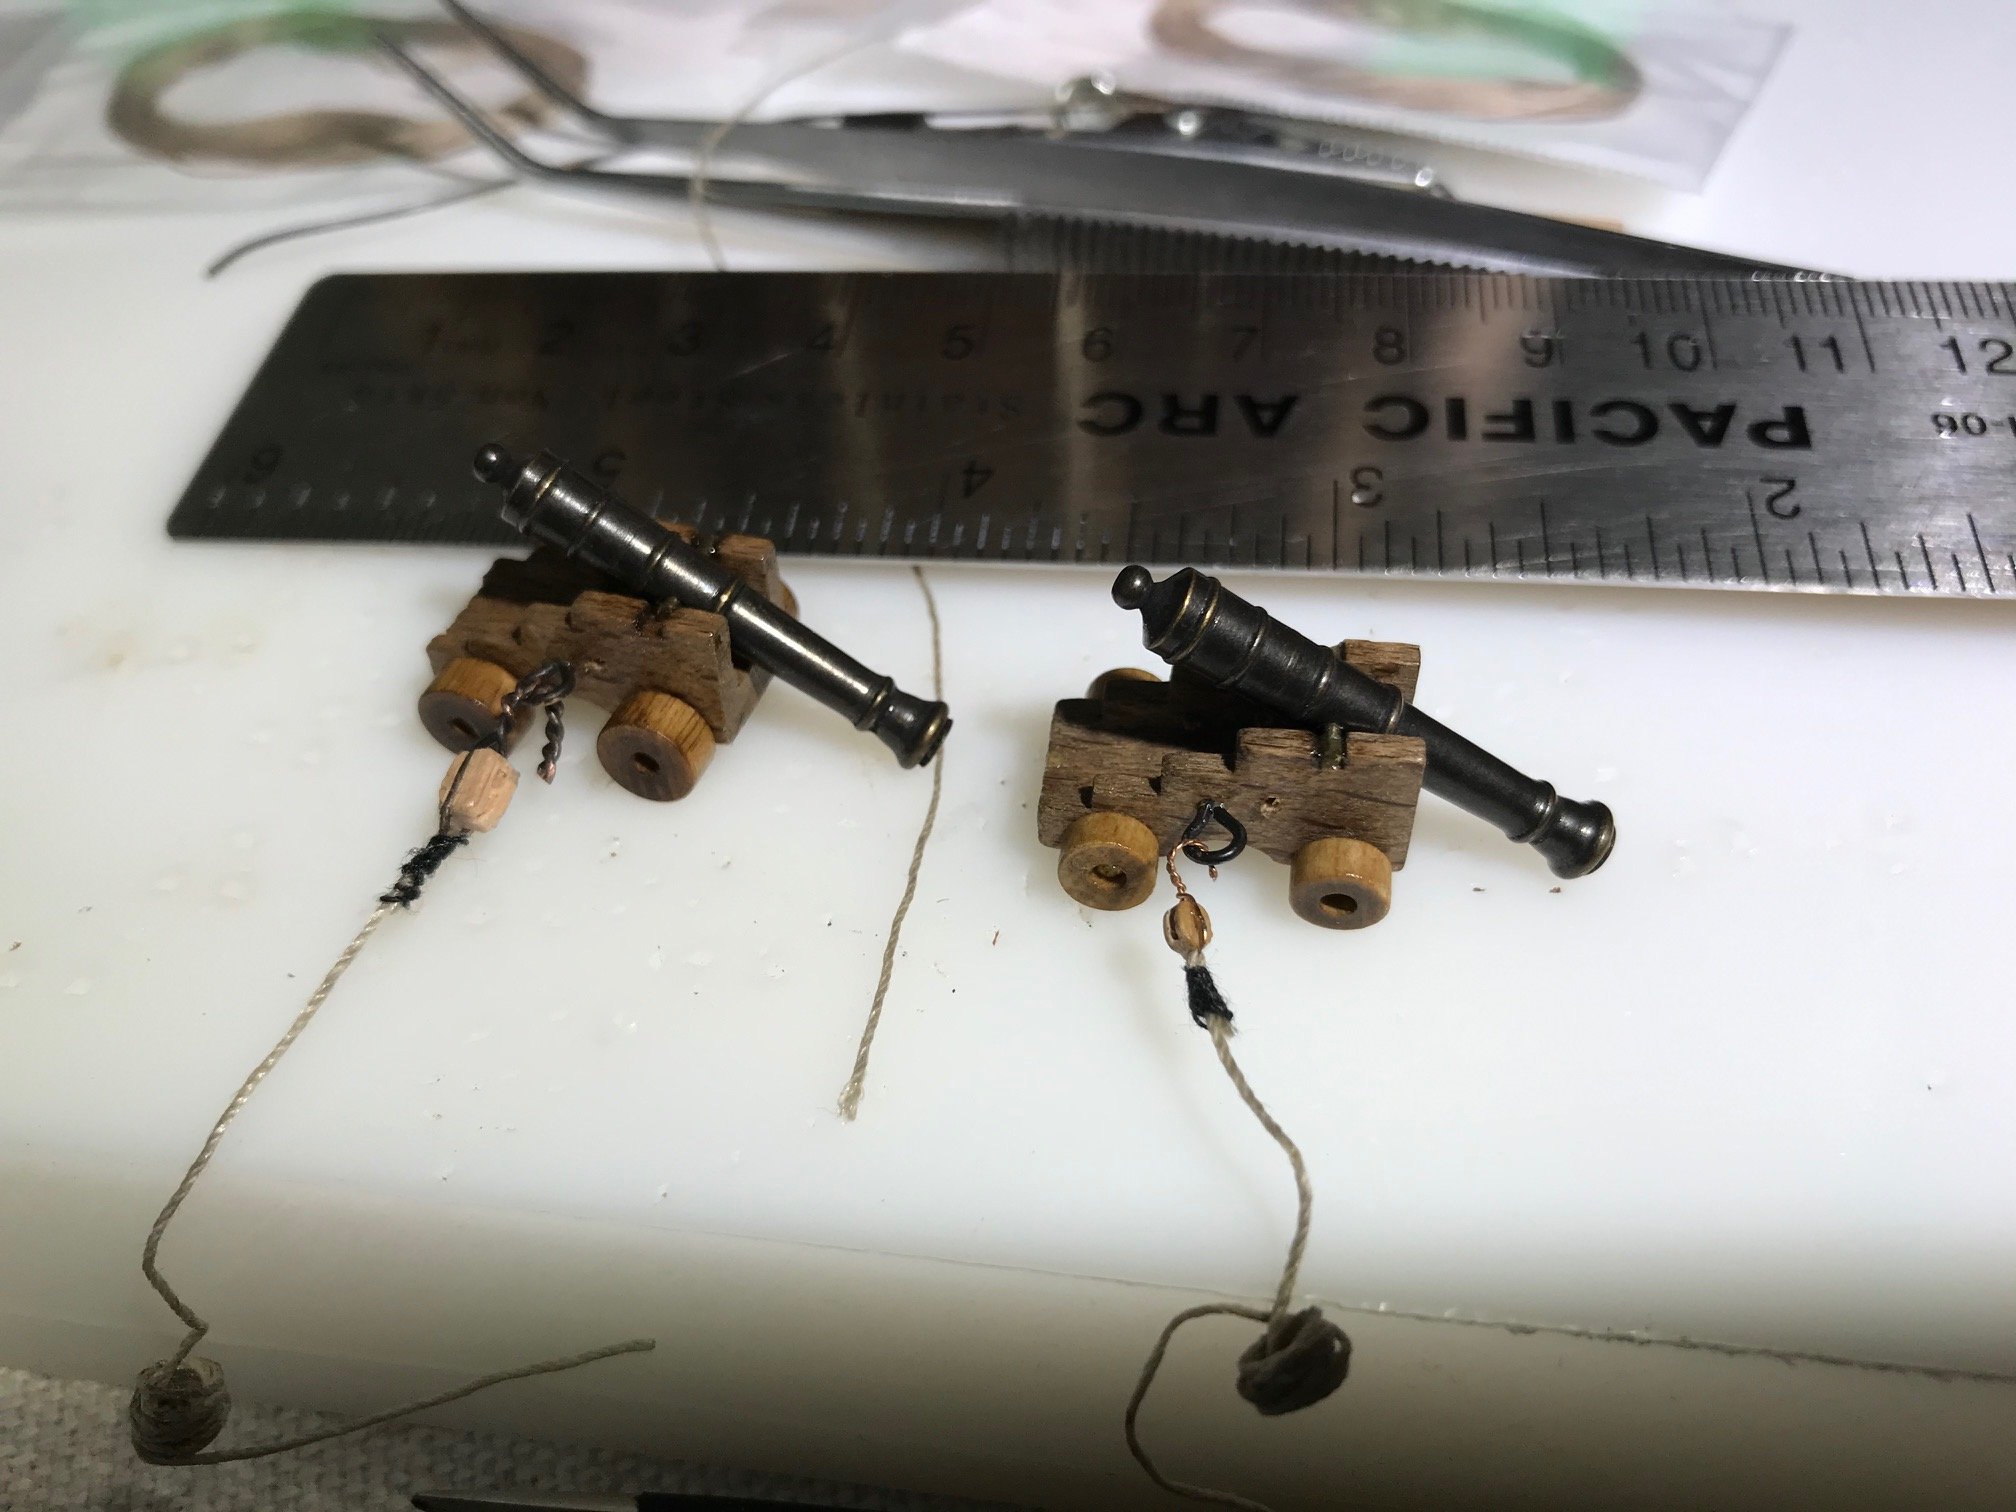
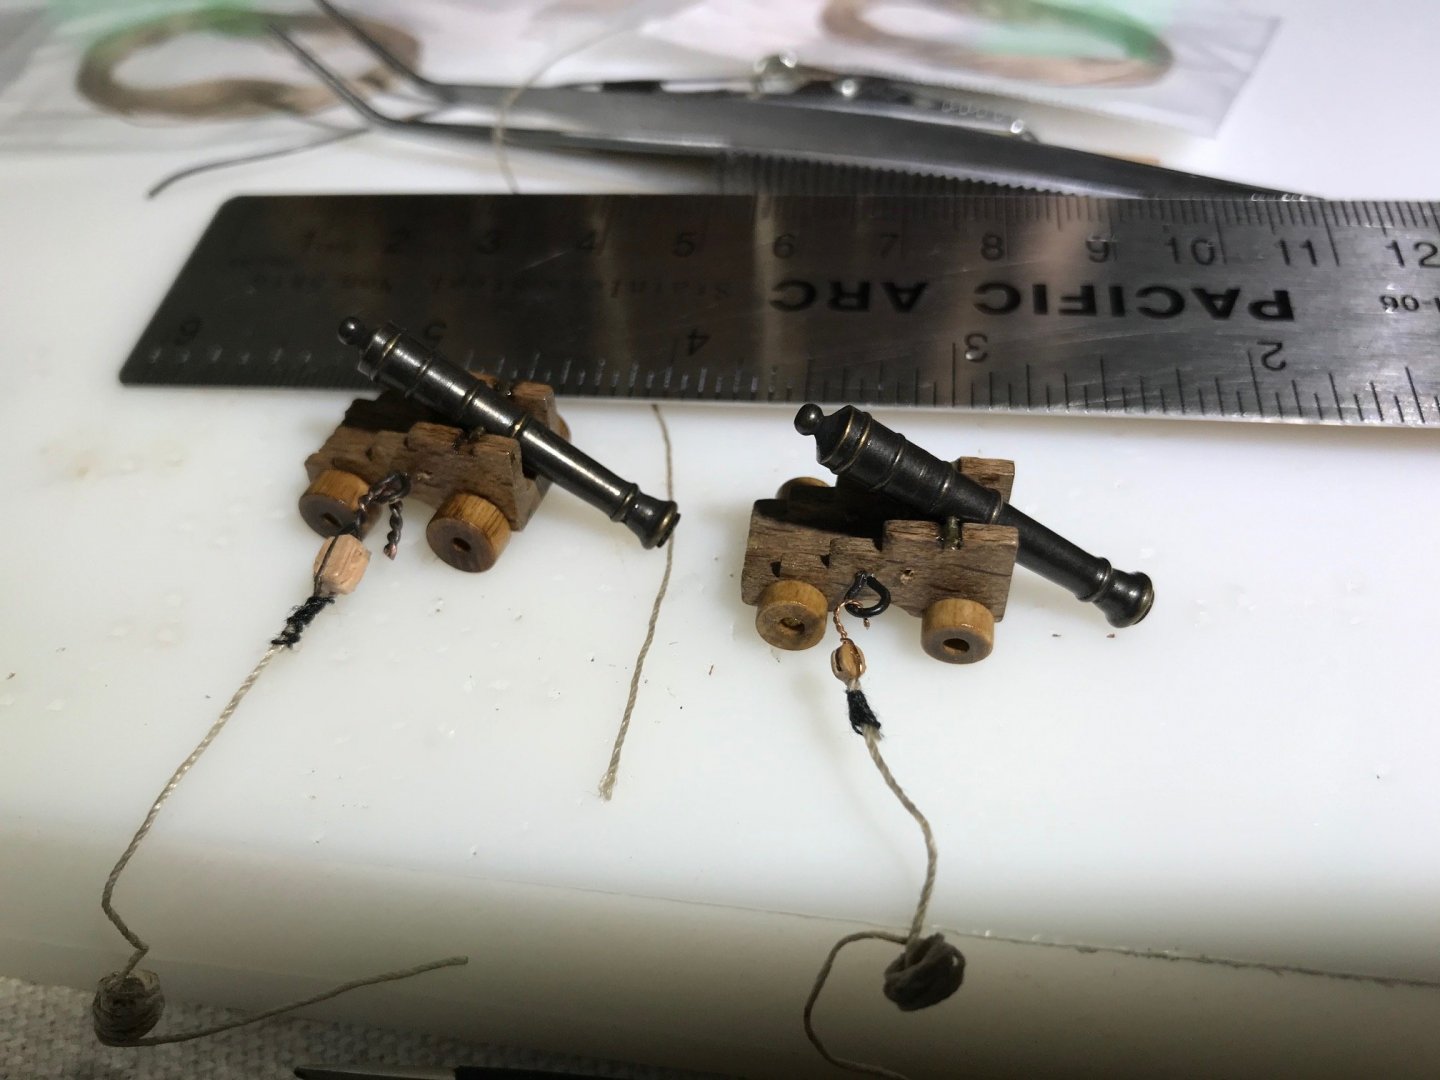
I am building the Corel Victory cross section 1:98. I've been practicing rigging the cannon. The 3mm blocks that came with the model fall apart with the slightest pressure. (well, maybe not so slight.) I am using 2.5mm blocks from Syren Ship Company, which are really nice. The issue is what size block to use. Those cannon were heavy so the big one makes some sense. The small one looks nice but then the eye ring looks too big. So I figured I'd ask what you all think. Thanks, Richard By the way, these are my first practice attempts and hopefully the final ones will be better.
-
could we get a picture of how they mounted and set up the repeatable jig. R
-
Proxxon DB250 mini wood lathe
rtropp replied to Jorge Hedges's topic in Modeling tools and Workshop Equipment
If I were already saving for a replacement, I wouldn't look to improve or upgrade. I would put my time into learning to use the tools so I was ready when the Sherline came along. R- 11 replies
-
- 2
-

-
- db250
- mini lathe
- (and 1 more)
-
Degluing
rtropp replied to Zooker's topic in Building, Framing, Planking and plating a ships hull and deck
Alcohol or CA de-bonder are very thin and I found that even when being very careful, the liquid will seep into multiple layers of wood and also that they can impact the finish. One testimonial at the link cited says "It doesn't affect finishes, so for glue cleanup it's fantastic. The nice thing is that it won't seep into glue joints, so you can use it around a bridge or neck reset or anything like that." I would be especially curious bout " wont seep into glue joints." One hand sounds great for cleaning up glue on the surface of the work but does not sound like it would seep into, say, a wood plank you want to remove. Watcha' all think? Richard -
Caullking Planks
rtropp replied to shortgrass's topic in Building, Framing, Planking and plating a ships hull and deck
Hi, I never thought of that. It sounds pretty straight forward so I will try it on my current project. Thanks for the idea Richard -
Hawse holes
rtropp replied to allanyed's topic in Building, Framing, Planking and plating a ships hull and deck
Why would there be two different methods of framing? I never noticed that before... but then I am not that experienced. Thanks R -
US Brig Syren by Gahm - Model Shipways
rtropp replied to Gahm's topic in - Kit build logs for subjects built from 1801 - 1850
Looking great. I am close to the point of restarting my Syren after a few years away and would look to yours as well as Jesse's to help move forward. Richard -
Thank you for the time and effort it took to post this article. It is clear, concise and easy to follow. This will help a lot of folks including me. I was unable to find an English version of Apprendre le modelisme naval and my language skills are wholly inadequate or I would be tempted to build along rather than just read along. Richard
-
Understanding scales
rtropp replied to kier's topic in Building, Framing, Planking and plating a ships hull and deck
I was having difficulty with accurate, and quick, calculations. I found an application for my IPhone called Model Scaler. It was a free application in the Iphone app library and best of all, while it had some presets geared to train enthusiasts, it allowed you to put in custom scales. So, I could enter the actual size, say 60 feet, and it would translate it to the size in 1/64, i.e., 11.25 inches, or convert into any other scale I chose. Richard -
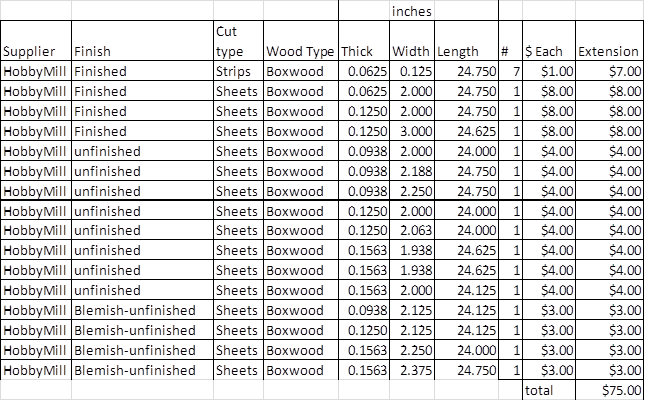
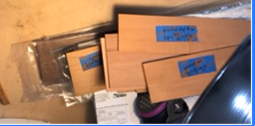
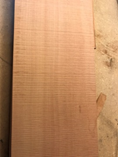
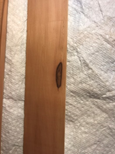
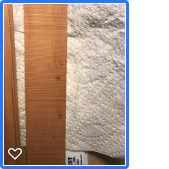
Thanks to all who responded. The wood was sold to the first buyer who bought the whole lot. My wife informs me that she remembers there being more so I might be posting again. Thank you all Hi, My wife and I have been preparing to downsize and I ran across a batch of lumber I bought from Hobby Mill just before they shut down. Wood Types I have pieces that are boxwood, cherry, holly, Swiss pear, and walnut. These are a mix of: Cut to size and finished. Cut to size but unfinished Cut to size and slightly blemished, most are unfinished Also there are some small blocks suitable for carving. Pricing Prices, in U.S. dollars, are listed in the spreadsheet below. Shipping and Handling will be calculated and added as actual costs. My payment preference is PayPal. I will send an invoice once shipping and handling are calculated. PM me if you need my phone number. I am located near Atlanta, Georgia, USA. Bulk discount A single purchaser of the entire inventory will receive a 20% discount. I will not be selling individual pieces or custom mixes at this time. Each wood type is sold as a complete batch. Individual prices are posted only to give an idea of how cost were calculated. Pictures The first picture shows some of the pieces. The second picture is a sample of pieces that are cut to size but unfinished (not smooth sanded.) The third picture shows a sample of one of the blemished pieces. It has one of the larger blemishes,most are smaller as in the fourth photo. Only pieces that are described as "Blemish" in the Finish column contain any blemishes. The other pieces are all clean. Price List HobbyMill Finished Sheets Walnut 0.0625 3.000 25.000 1 $2.00 $2.00 HobbyMill Finished Sheets Walnut 0.1250 3.000 25.000 1 $2.00 $2.00 total $4.00 I have not done this before so I hope it is understandable. Please ask any questions and/or let me know if you spot any errors. I will also be selling two Euromodels, the Falmouth and the Ajax. I have not priced them yet but would be in the range of 60% of their list prices plus shipping and handling. Both are new and in the box. Thank you, Richard


-
I have used them and found them useful. the material its squared off sides worked well to quick store stick pins and to keep parts handy, and were especially useful while rigging. I used the large piece of the ship, the smaller part for longboats and smaller ships and the smallest part to brace other pieces while waiting for them to dry. Was it essential? No. Was it useful? Yes. Could I have made my own? Probably. Richard
-
I wonder if anyone has tried the new Ratliner MS7202 The Shroud Building Tool from model expo?
- 1,306 replies
-
- 4
-
-
- syren
- model shipways
- (and 1 more)
-
Hi all, I have been absent for awhile so just a quick note. My build has been put of for awhile. I have not been visiting other sites. I no longer receive emails of updates and that was my primary method of interacting with the various builds. I do not, as a habit, go to this site and then cruise around trying to find updates. That just does not seem to work for me. I have visited the thread about email update problems and it seems that there is no resolution. I have only experienced the problem with this site so really not sure why it can't be reconstituted. I have tried various email addresses from two different providers and no luck. I do miss the interactions but it is what it is. Richard
-
Opinions on Sherline DRO for Lathe
rtropp replied to rtropp's topic in Modeling tools and Workshop Equipment
I had wandered onto the Little Machine shop site and they have a lathe, the Sieg X2D that comes with a power feed and is less expensive than the Sherline and seems to have a larger feature set. I wondered if anyone had experience with it? I know that by now I am belaboring the point but I really feel the need for due diligence before I spend a thousand dollars or more. I am strongly leaning towards the Sherline based on all I have heard so far, plus it is an American company. But I want to check the alternatives. Thanks you all for you patience. Richard -
Opinions on Sherline DRO for Lathe
rtropp replied to rtropp's topic in Modeling tools and Workshop Equipment
Very helpful thoughts from everyone. I have been distracted for a couple of months which is why the long delay in responding. Mark, John, Allen, Al, thanks for the insights, the DRO does sound like the way to go. Don, my rework due to on the fly calculations is a primary reason for considering DRO. Keith, i wasn't sure that the DRO adjusted for backlash. That will be helpful. Mike, the restriction for wheel size is something I did not know. That might put a fly in the DRO ointment. The smaller wheels might be difficult with long use. Dan good idea for the stand. I will keep your set up in mind. Do any of you use a power feed and would you recommend it? Richard -
Arbortech Power chisel
rtropp replied to John Allen's topic in Modeling tools and Workshop Equipment
I have a powered chisel that I use for sculpting. I would not, could not, use it for modeling. Its finest adjustment along with its weight would make it too hard to control given the fine work we require. But I am a slow and go modeler. Even though I have a range of dremels and proxxon tools I still tend to use hand tools for the fine work required. Richard -
Hobbyzone building slip for wooden ship models
rtropp replied to aydingocer's topic in Modeling tools and Workshop Equipment
thanks Mumin. I should be able to modify it for a longer build. Richard -
Hi Bob, Thanks for the product picture. I have ordered it and will give it a try. Thanks, Richard