Rustyj
-
Posts
2,429 -
Joined
-
Last visited
Content Type
Profiles
Forums
Gallery
Events
Everything posted by Rustyj
-
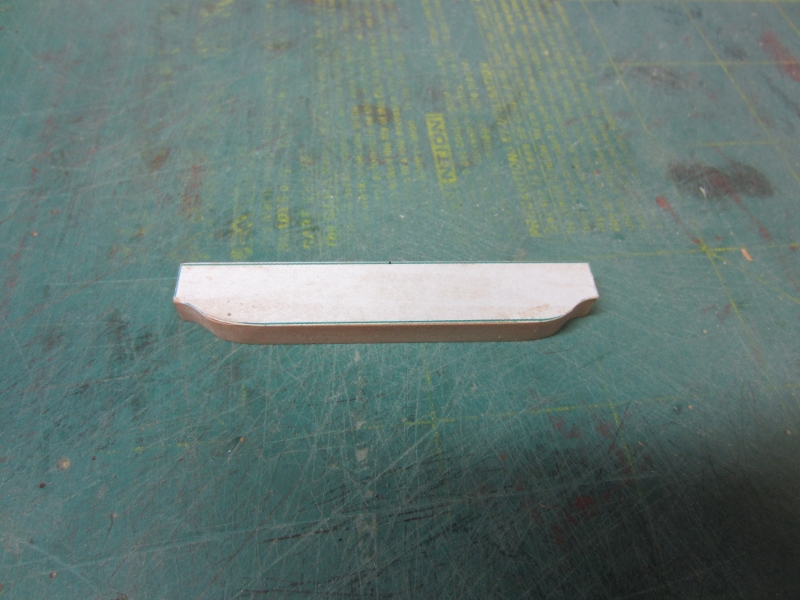
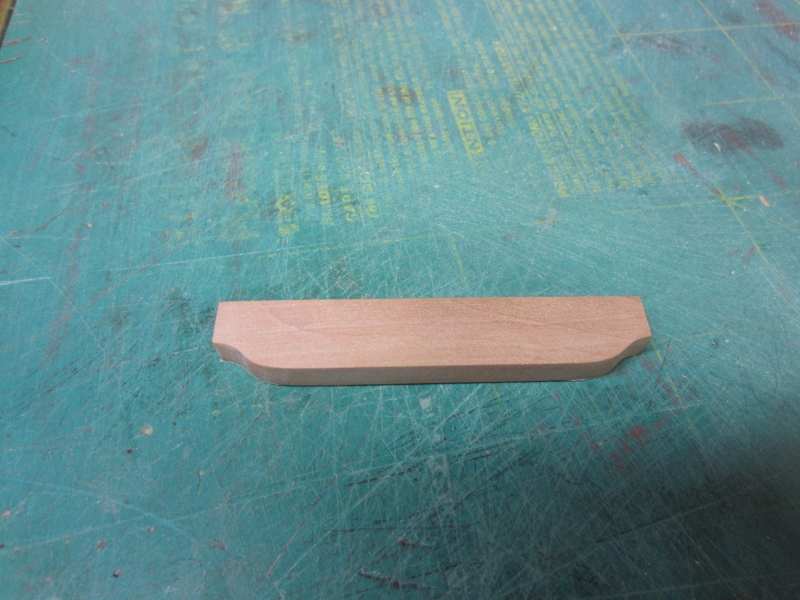
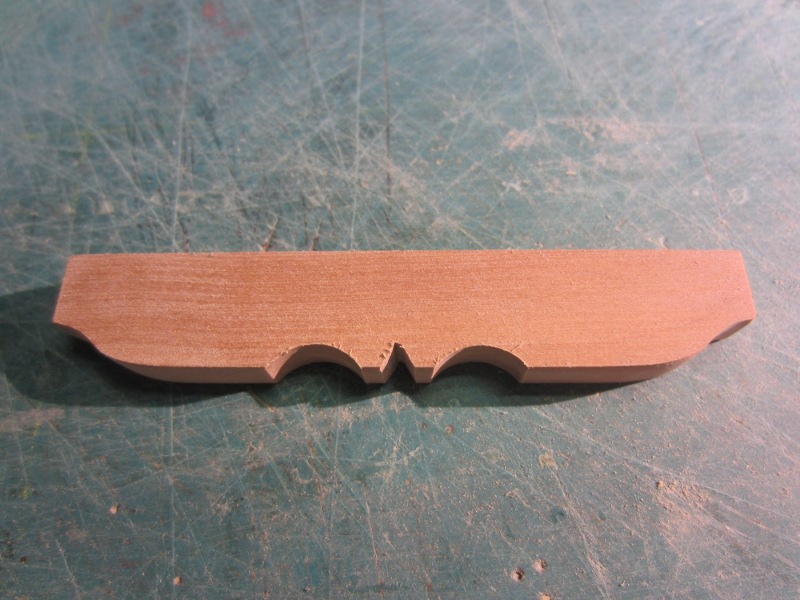
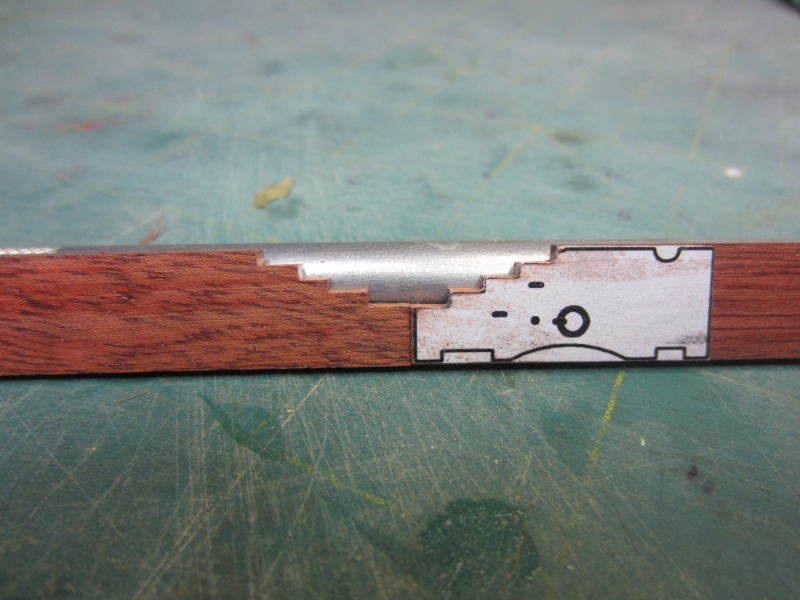
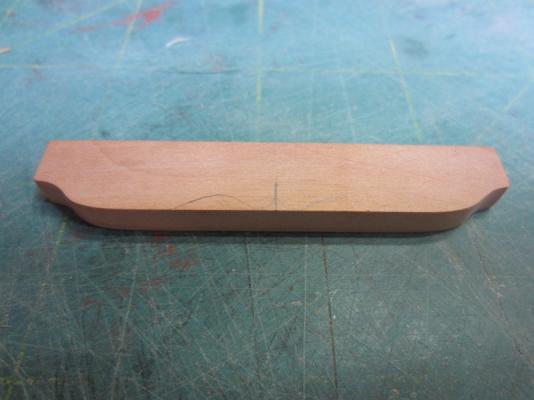
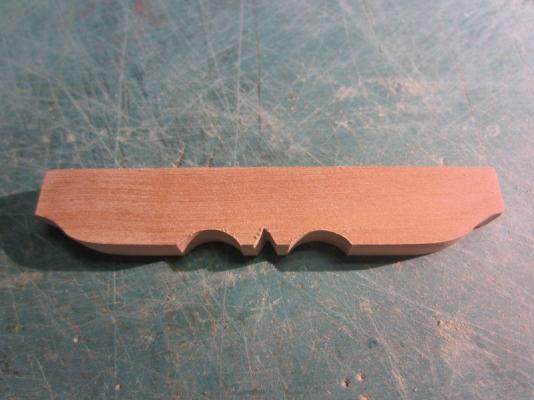
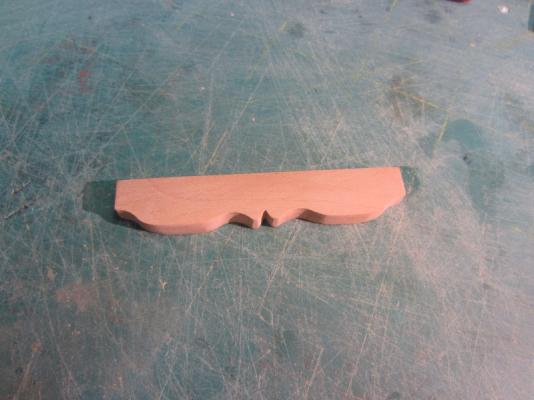
 Next I focused on the Gallows. The plans called for them to look like this. I saw some other builds where people got a little creative with the gallows and I liked the look and figured I’d give it a try. First I cut the gallows as per the plans. After cutting the gallows from the plans I decided on a style I like, traced it on the wood. I then using a ¼” dremel sanding drum, files and sand paper I created the shape. Here it is semi sanded to the desired shape. I don’t know if it is historically accurate but I’ve heard the captain can us his prerogative while building his ship.

- 332 replies
-
- 3
-

-
- Triton
- cross-section
- (and 1 more)
-
Thanks Russ. Yes they are a bit off plus the angle of the camera makes it worse. Once I glue them in place hopefully they will sit straight.
-
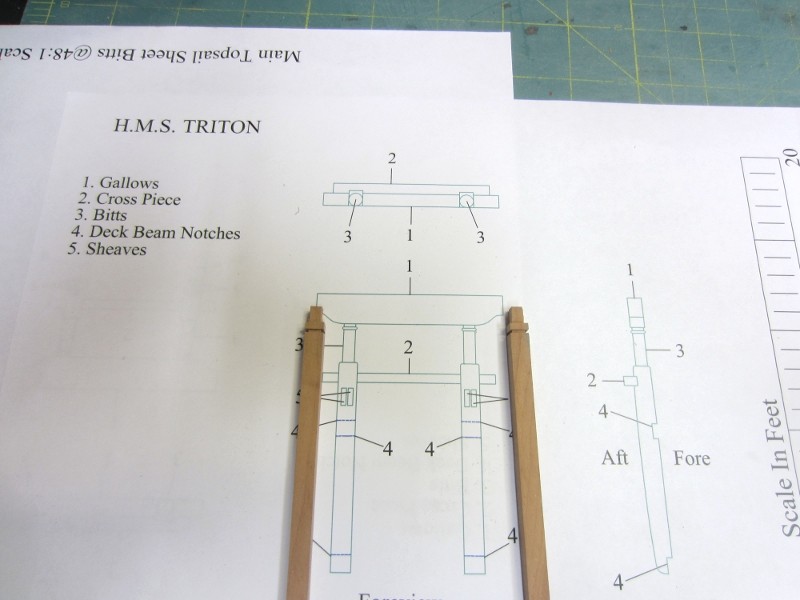
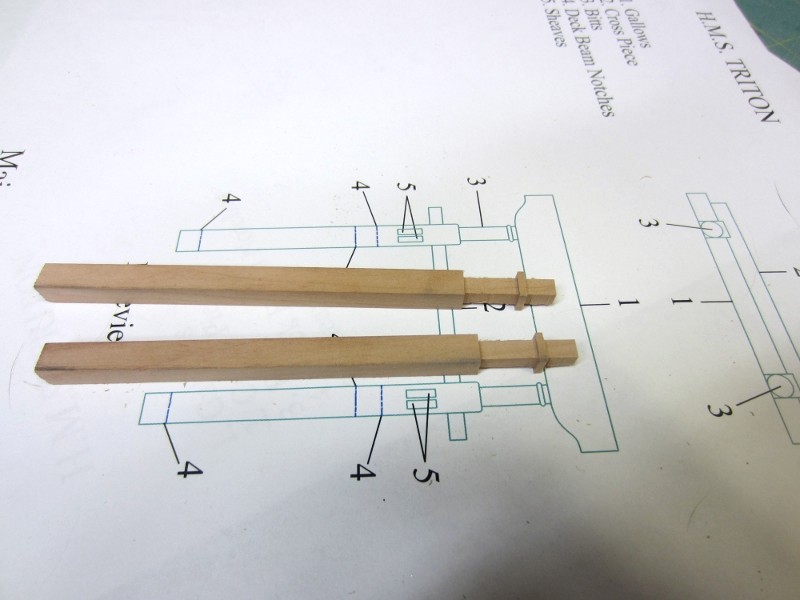
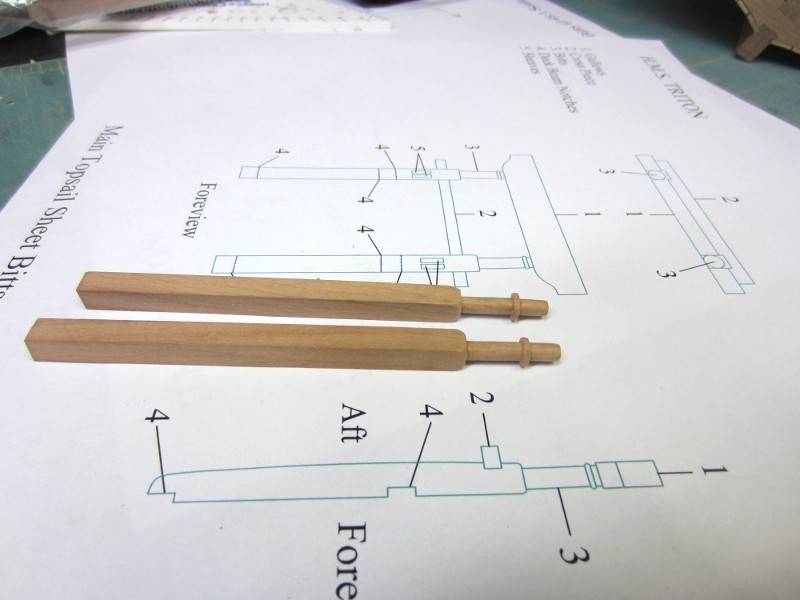
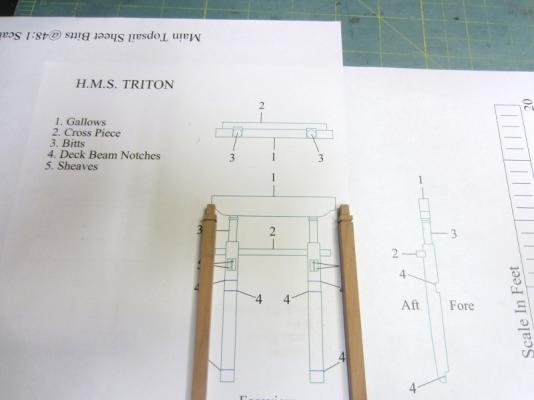
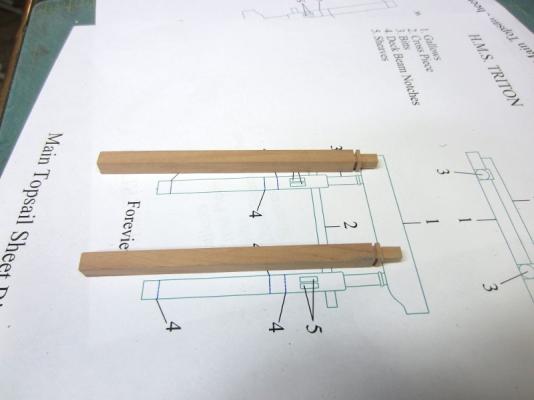
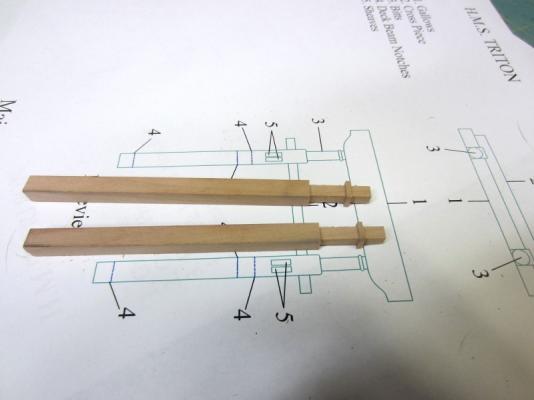
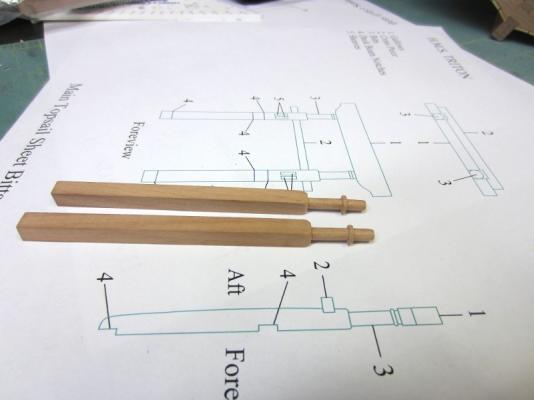
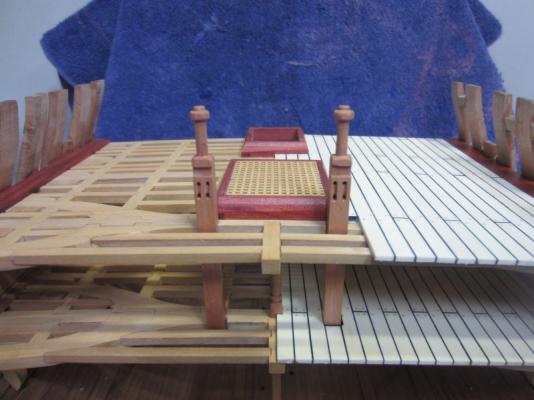
Hi all, Well I’ve been on a bit of a forced break. Our daughter went on a second honeymoon and we had the pleasure of watching three of our sweet but high maintenance grandkids. So needless to say I was lucky if I got to look longingly into the workshop yet not be able to step in and partake! It took one day to figure out where I left off and what to do next. Here are some things I had done prior to their arrival and since the departure. Seeing that I had planked the deck to the point that I needed to install the main topsail sheet bitts before I could continue I figured it was time to make them. I started at the tops, figured the depth I needed to cut them to and the cut away the extra with the table saw. After they were cut square I used a file to sand them down to a round shape. After that I used the table saw to cut the cross piece and deck beam notches. I then drilled the holes for the sheaves and shaped them with a file and xacto. Here they are set temporarily in place.
- 332 replies
-
- 3
-
-
- Triton
- cross-section
- (and 1 more)
-
Hi Grant, Just caught up and I'm glad I did. That's a great idea and will give it a go when I get to that point. Well done and thanks!
-
Hi Mike, I too am glad you started a log. Sure looks like you are off to a good start.
-
Hi Pete, the limber boards look good. If you hadn't fessed up I wouldn't have known. As far as the finish goes I'm a natural kinda guy.
-
Hi Augie, that is one fine job of rigging you have done. You're making a complex process seem effortless. I always enjoy catching up on your build. Well done.
- 1,668 replies
-
- 1
-
-
- syren
- model shipways
- (and 1 more)
-
Hi Jeff. With your experience and workmanship it will be more like a step than a jump!
-
Thanks Pete. Hi Grant. Yes the large piece is the redheart and the grain is nice and tight. The carriage is bloodwood and has a much more pronounced grain. Looking back I find I didn't explain it well. Sorry.
-
Hi Pete, Chach_86 Stated the following in his build log and I used the same for mine. Can’t vouch for the accuracy but they looked good. I hope it helps.
-
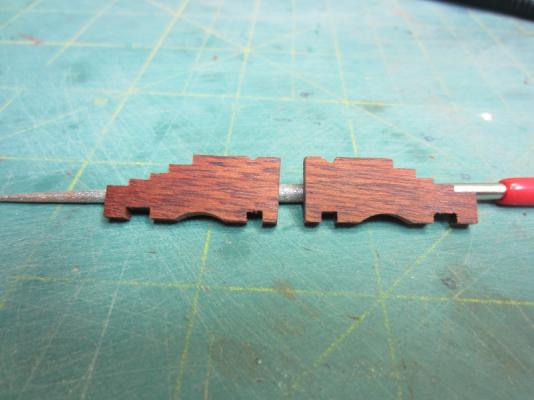
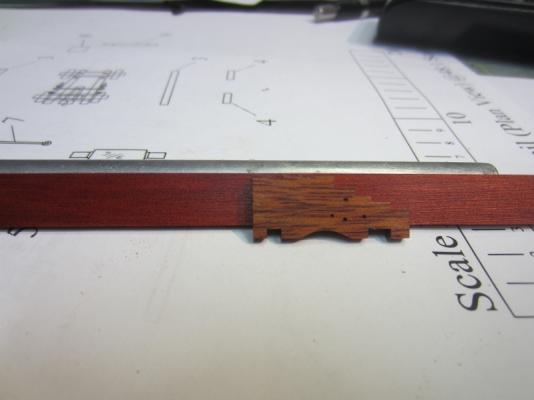
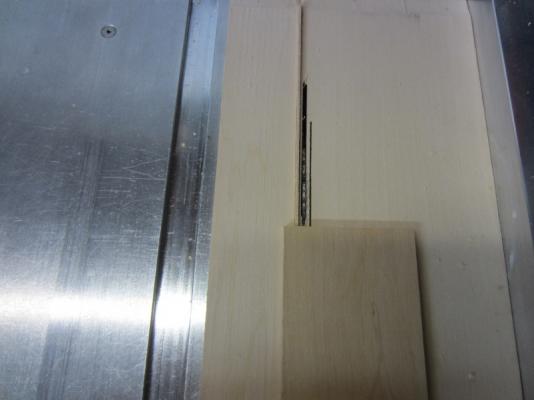
Thanks Pete. 42rocker, At the 4th plank the pattern repeats it’s self. I don’t remember if it’s called a 3 or 4 shift pattern. Speaking about gun carriages made me wander off and start cutting parts for them just to see how they look. I do that waaaaaayyyyy too much. I glued the plans to some bloodwood and used my table saw to cut it out. I increased the depth at each step. I repeated each cut on 4 more pieces before adjusting the depth. Good thing I did too becauase one broke while cutting out for the axles. Here is one with a plans in place and a second one cut out. And more And compared to a piece of redheart so you can see the differance in the two colors. You also can see how nice and tight the grain is. Now I'm trying to decide if I should continue on or get back on course.

- 332 replies
-
- 1
-
-
- Triton
- cross-section
- (and 1 more)
-
Thanks Russ, Grant, Mark, Martin and texxn5. Ben, Thanks but it’s no real insight. I just like the colors and I love playing with different woods. Just to throw a curve I decided to make the gun carriages out of bloodwood. It will be interesting to see the contrast between the two. Joss, That’s why I stuck with paper on this one. I will try the stain sometime though. You and John0868 made it look so good. Most of the deck planking has been completed. I just have to make the bitts and plank around them, treenail it and sand away. With the way the time is going by it could take awhile.


- 332 replies
-
- 5
-
-
- Triton
- cross-section
- (and 1 more)
-
That Redheart looks really nice. I hope you enjoy it.
-
Great work as always. Very nice way of doing the blocks. Gotta remember that!
-
Hi Pete, That is a great way of doing it and was done very nicely. Well done.
-
Everything is looking very good. Well done!
-
Looks like some really nice wood. Can't wait to see it used.
-
Hi Martin, if they bother you now they will drive you nuts later. Like you said it's best to redo them. Get well.
-
The grating redo, although I didn't think it was needed, is an improvement. The rope work is impressive too. Thanks for sharing.Your're doing a great job.
-
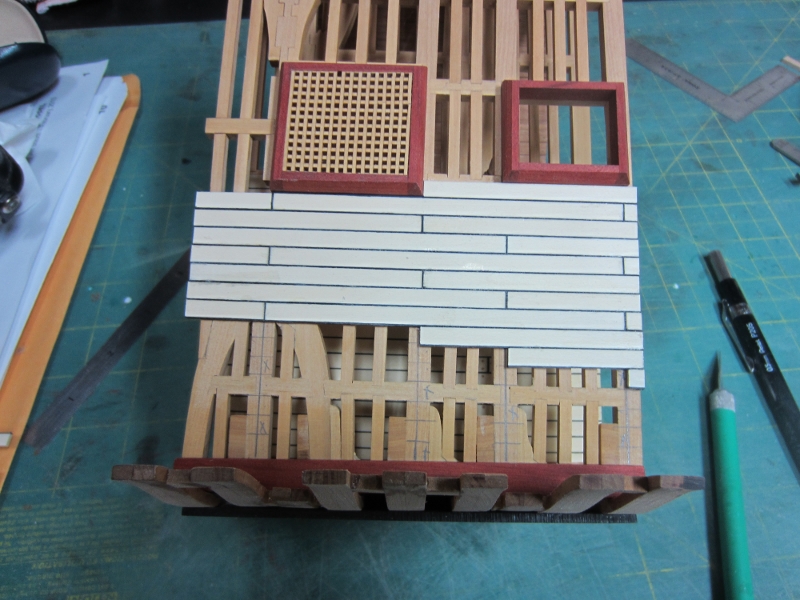
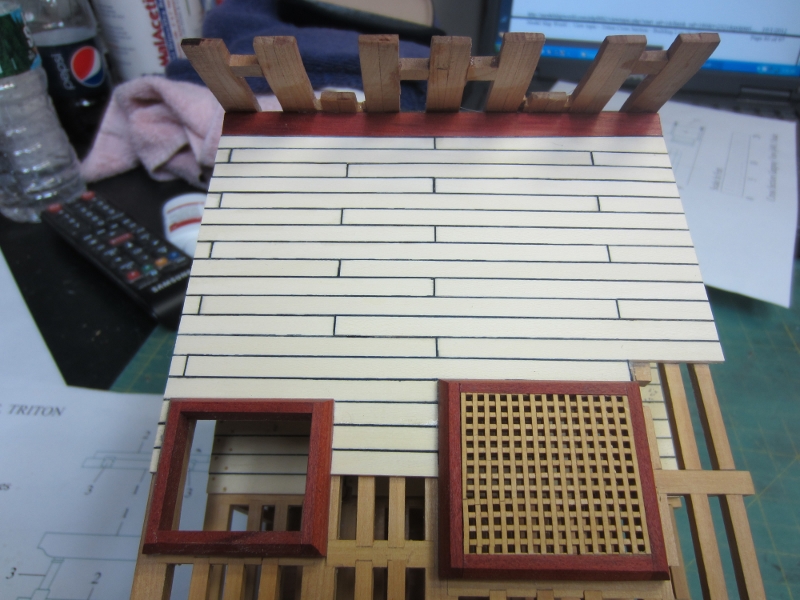
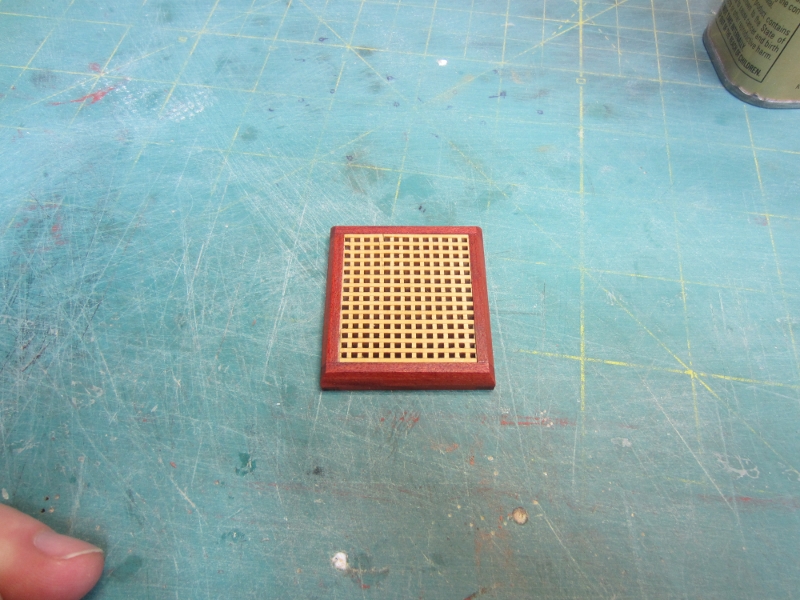
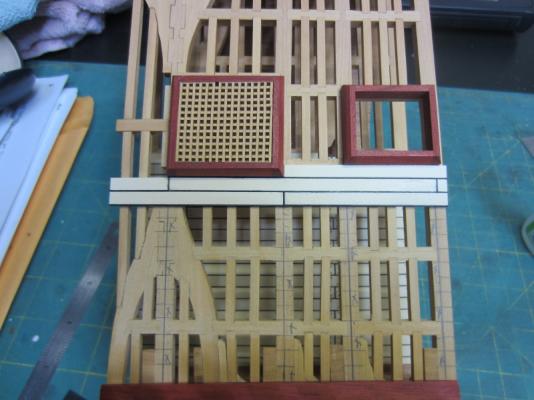
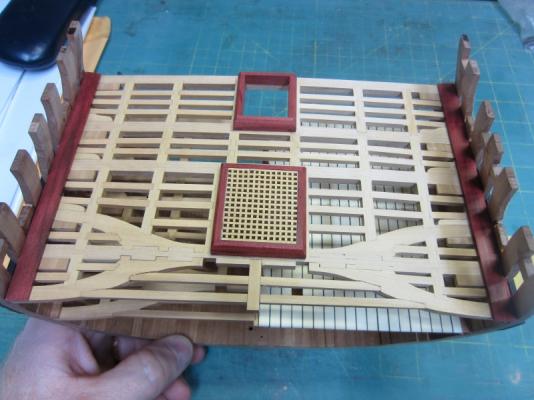
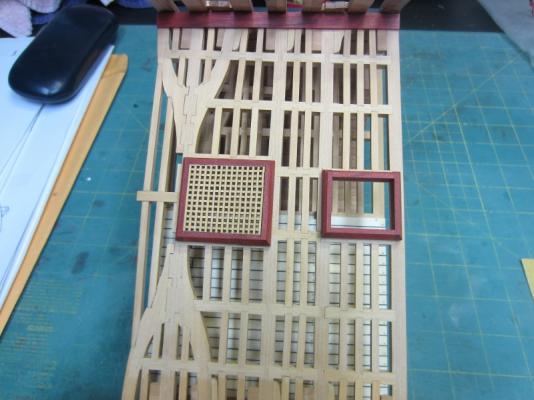
Thanks Pete, Mark, Paddy, Martin, Bob, Ben and Grant. Thanks Russ, I was hoping the colors would look good and was pleased with the results. Thanks Chris. Sounds like a good way to do them and I’ll try it next time. Here they are the hatches just set in place. And here I have glued them in place and started the deck planking. I'm continuing to use Holly planks with black paper for the caulking I'm off to continue the planking and will use boxwood for the tree nails like on the lower deck.
- 332 replies
-
- 3
-
-
- Triton
- cross-section
- (and 1 more)
-
Great job Bob. It sure is a lot more fun planking these!
-
Hi Marius, Everything is looking very good. You may not have xacto blades but your wood is great. One thing with doing the fake treenails, I’ve done the same. I’ve been told that you should use a filler that dries hard. Some filler is firm to start and is wax like but never hardens. Keep up the great work!
-
Ow Martin. I've sliced and diced a few fingers over the years but never got a tendon. I hope all goes well and you make a full recovery. My best to you and good luck.
-
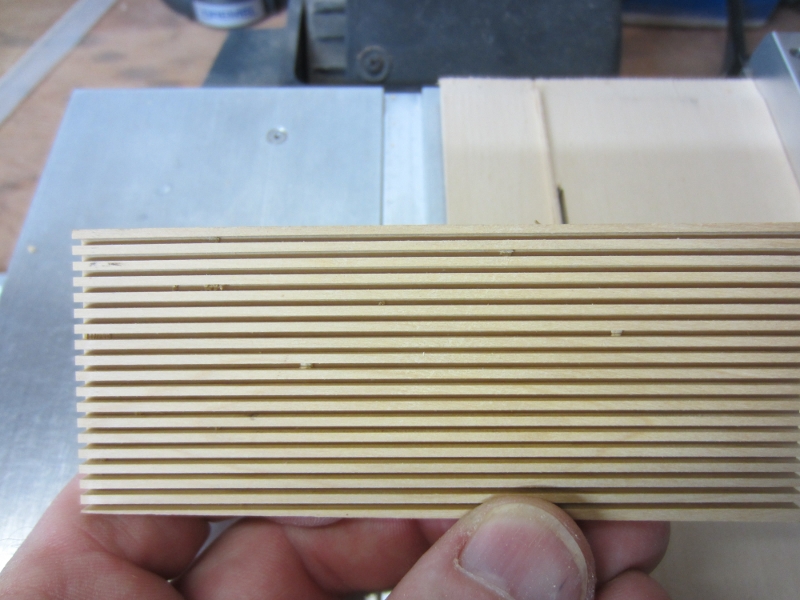
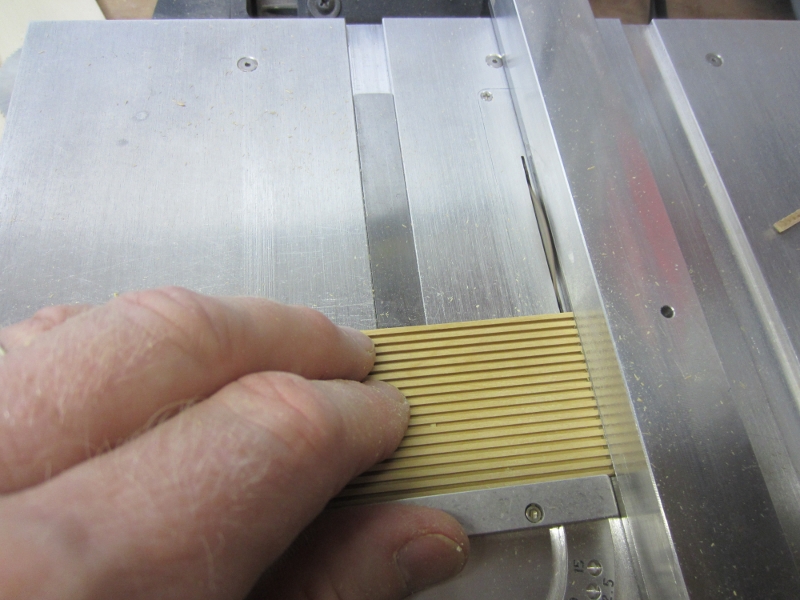
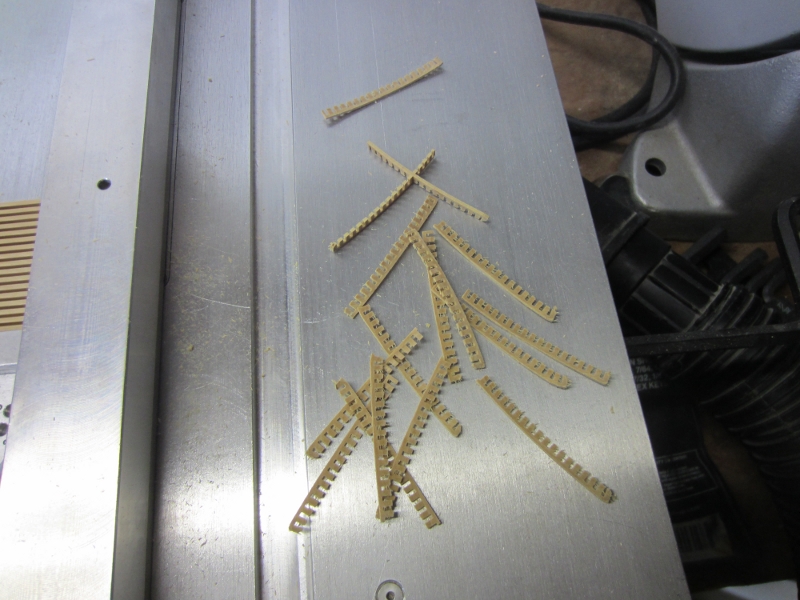
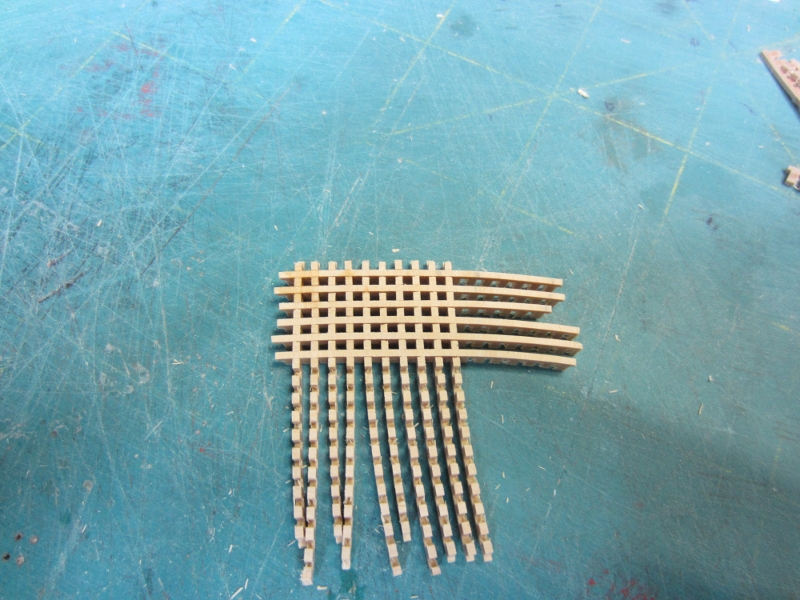
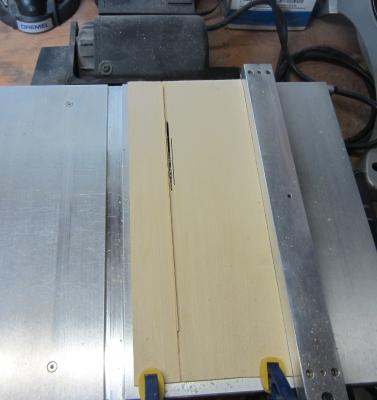
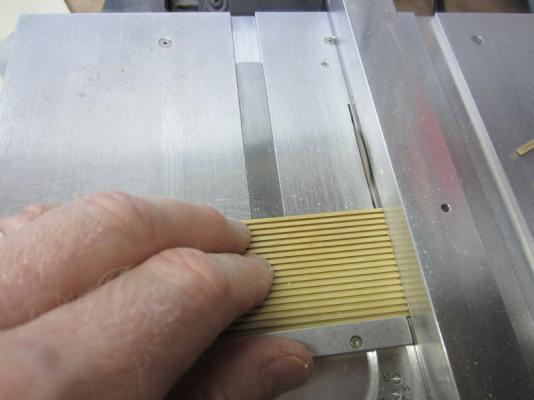
Well I’ve had to spend the weekend before building a deck for one daughter and t hen went on a little 4 day vacation and just got back. Here is an update on what I had done but didn’t have time to post. Also there is a whole lot posts I have to catch up on. Wow you all have been busy. Thank you Shannon, the Byrnes saw makes all the difference. Hi Bob, I do like the color. Of course I got it from Hobby Mill. Hi Joe, It has been quite a while now hasn’t it? Great to hear from you. Hi Ben, Yes it is hard. Might even be harder then Boxwood. As I said it’s the saw. Now that you have one I expect you to practice and be able to do it too. Thanks Wayne. I’ve made the hatch grate using a technique I copied here. I’ll try to explain it in case others haven’t seen it. I used 1/8” boxwood and a saw blade that is .040” thick. First I used a piece of scrap basswood to make the jig, I cut a channel in the basswood the width of the saw blade. I then cut a strip of wood the same thickness as the blade and inserted it into the channel so that 1/16” showed. I then clamped it to the top of the Byrnes table saw making sure that the blade was the 0.40” away from the channel. Next using the jig I cut a series of slots in the underside of the boxwood board, and then sliced the board into strips on the table saw using a fine tooth blade. The strips were cut the same thickness as the blade. (0.40”). I then assembled the gratings like we do when we buy them precut. I hope that makes sense


- 332 replies
-
- 6
-
-
- Triton
- cross-section
- (and 1 more)
-
US Brig Syren by roger
Rustyj replied to roger's topic in - Build logs for subjects built 1801 - 1850
Hi Roger, Frontwards, backwards who cares. It's just great to be able to see your build pictures again.