HOLIDAY DONATION DRIVE - SUPPORT MSW - DO YOUR PART TO KEEP THIS GREAT FORUM GOING! (Only 72 donations so far out of 49,000 members - Can we at least get 100? C'mon guys!)
×


Bryan Woods
-
Posts
551 -
Joined
-
Last visited
Content Type
Profiles
Forums
Gallery
Events
Everything posted by Bryan Woods
-
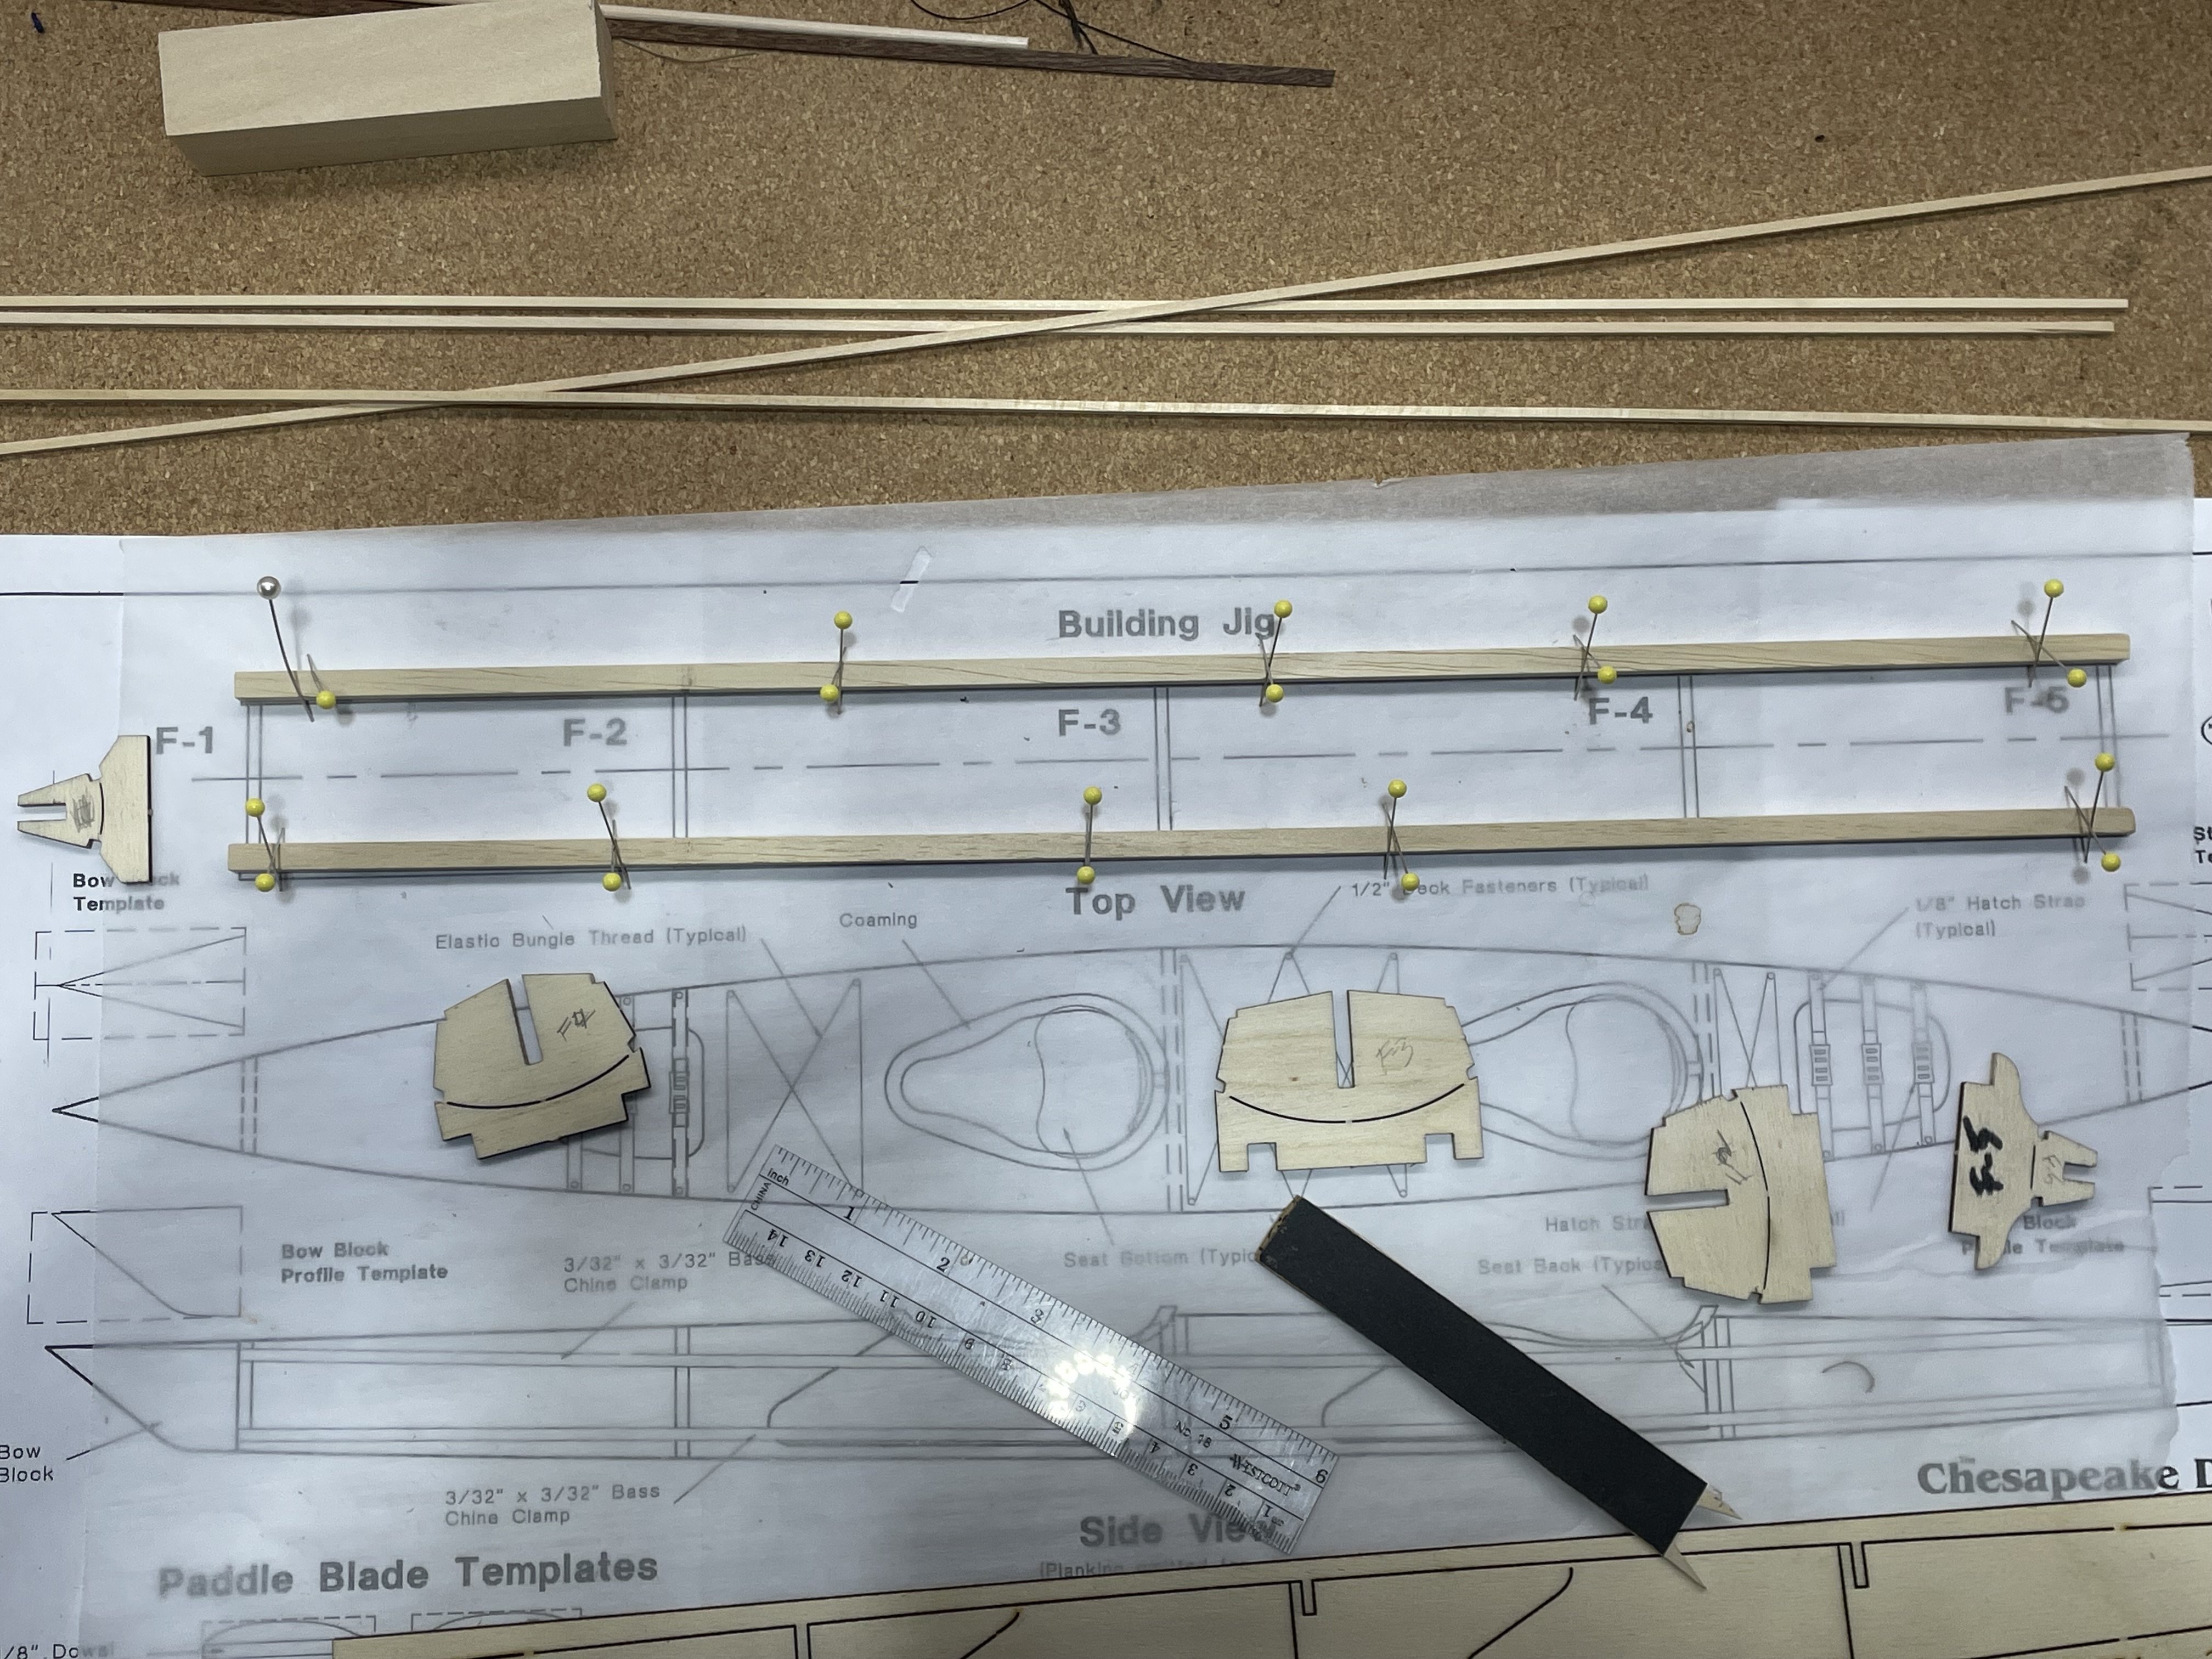
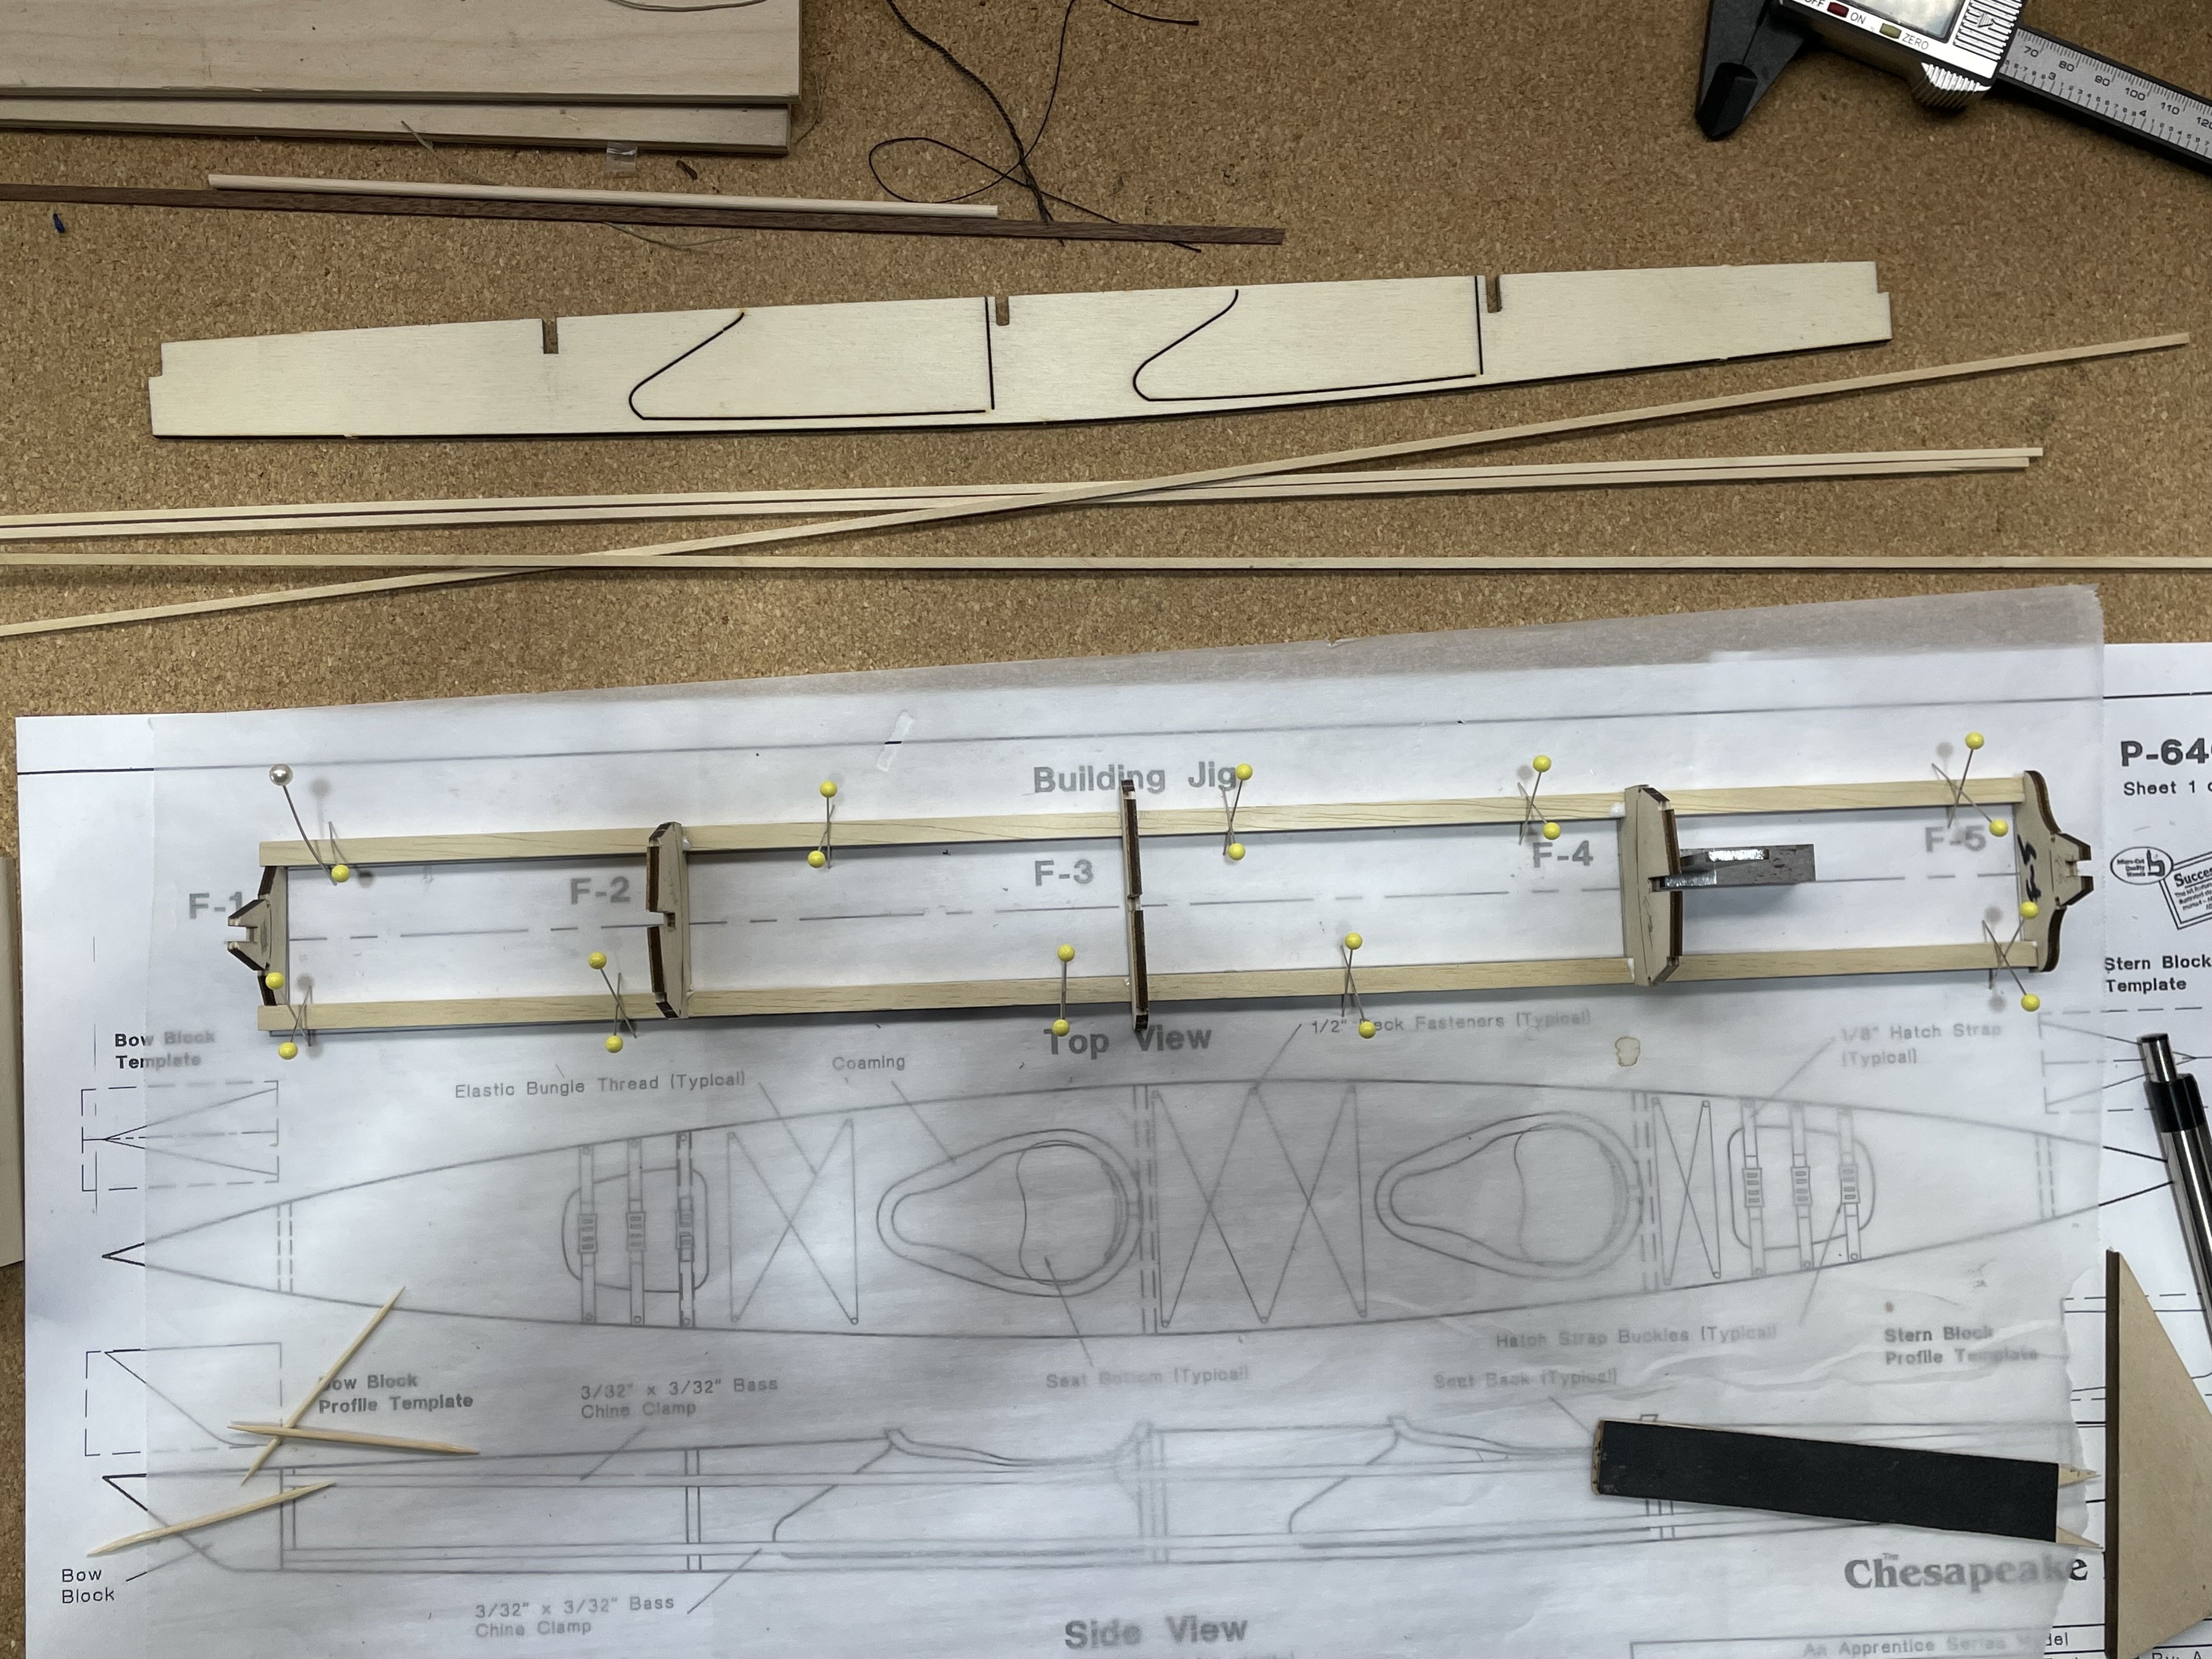
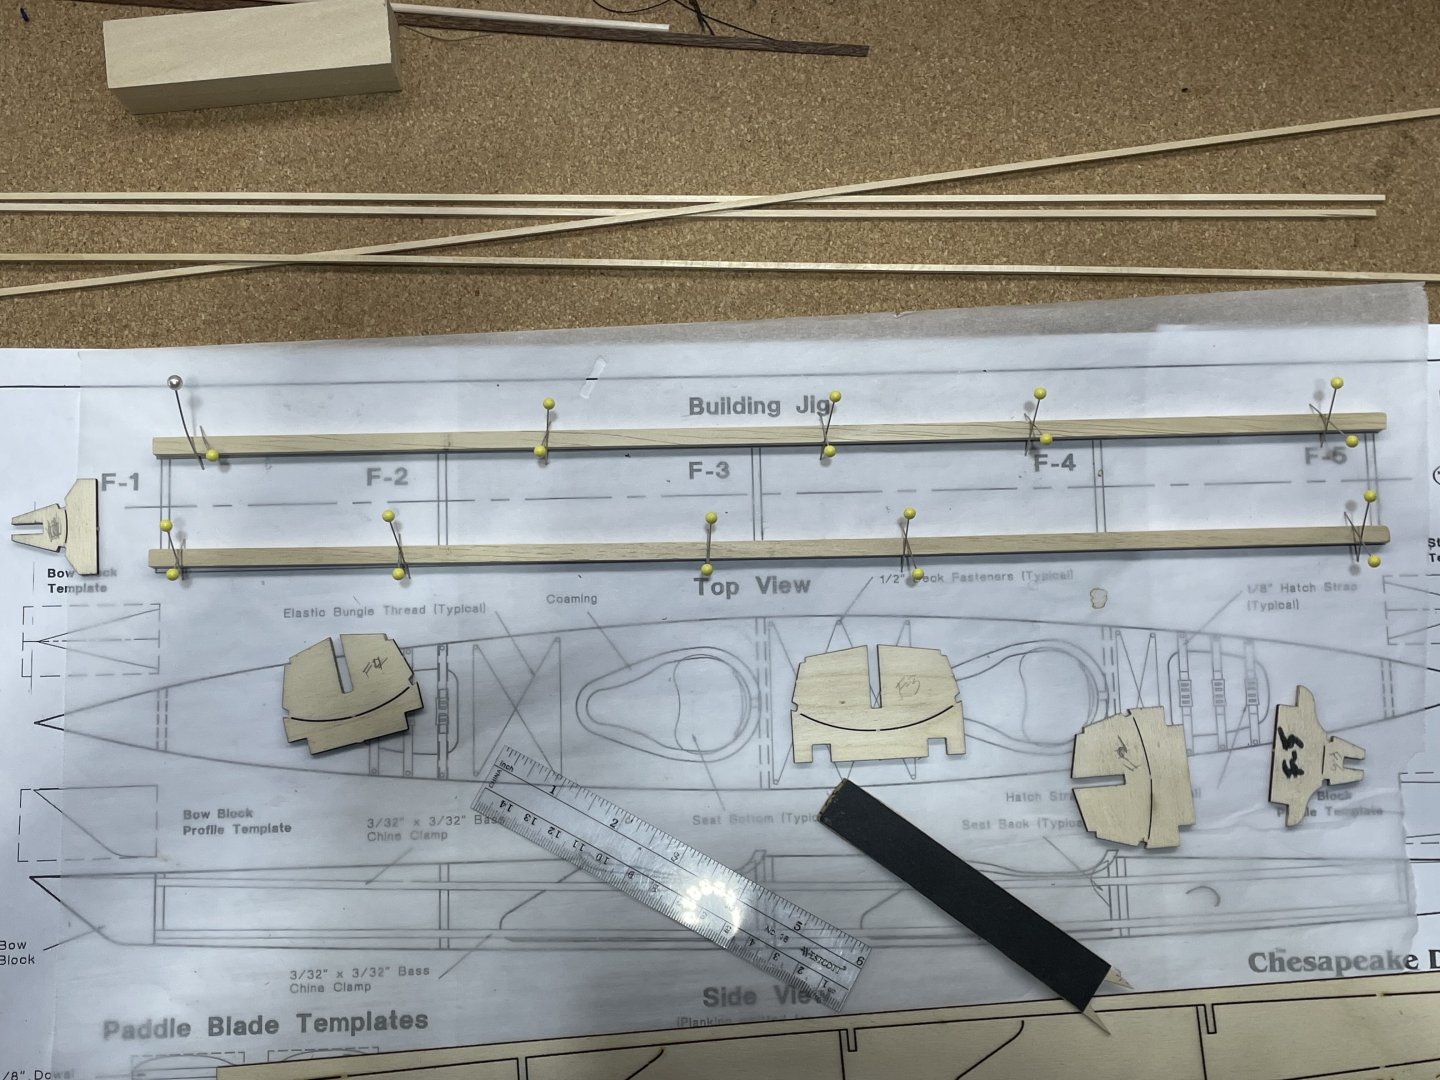
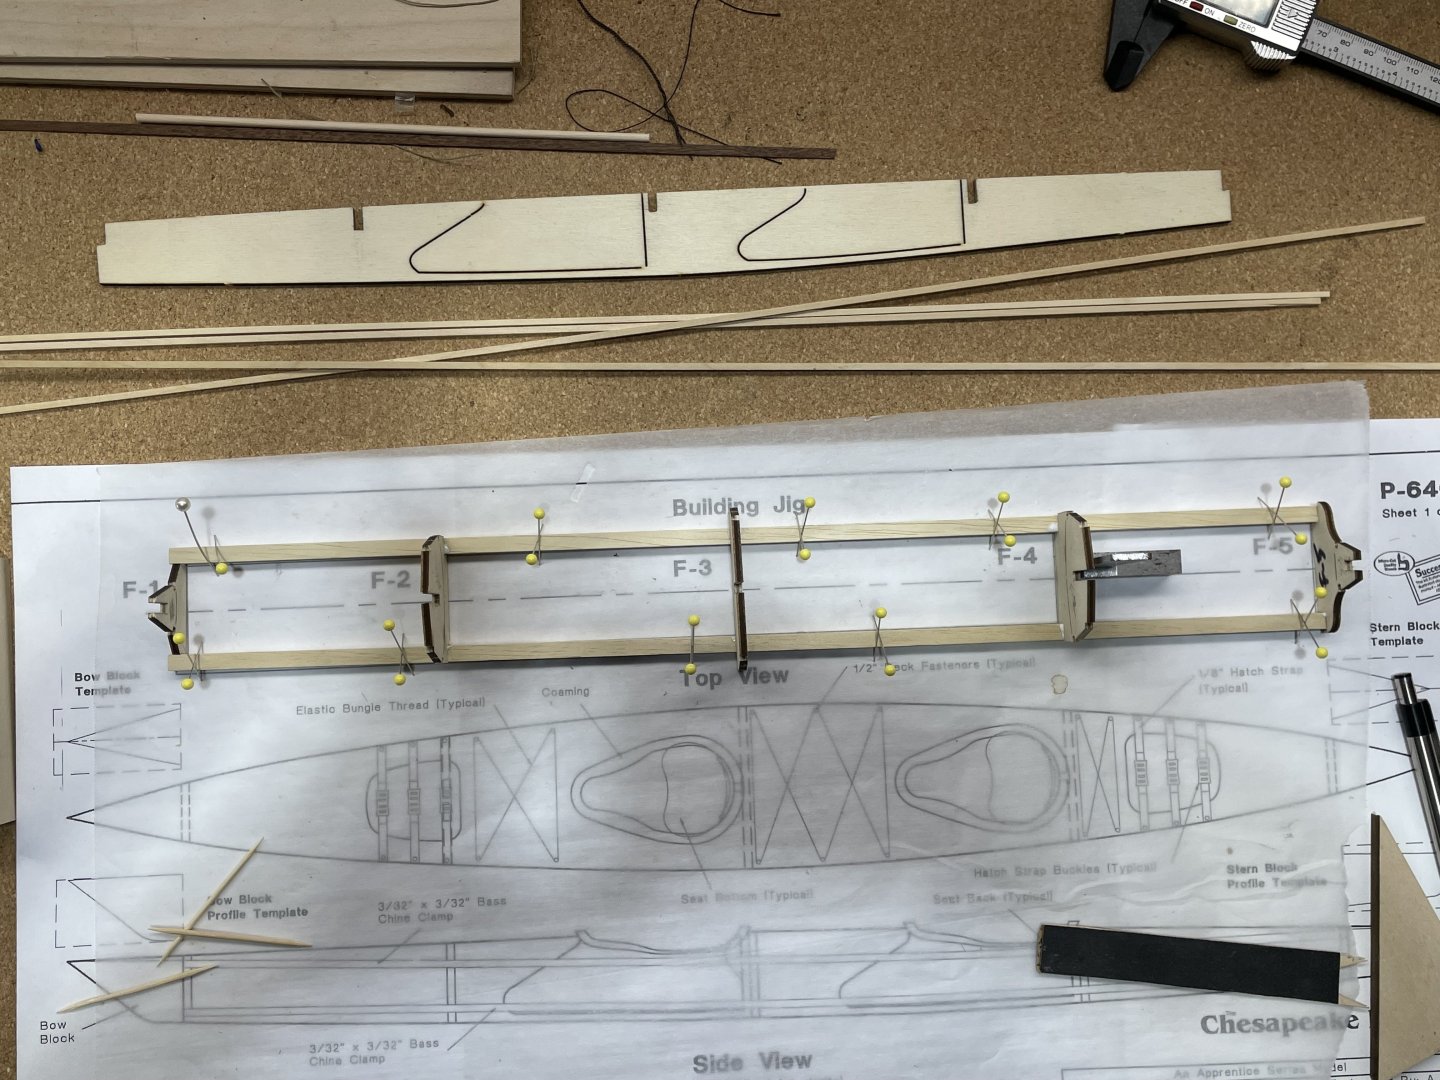
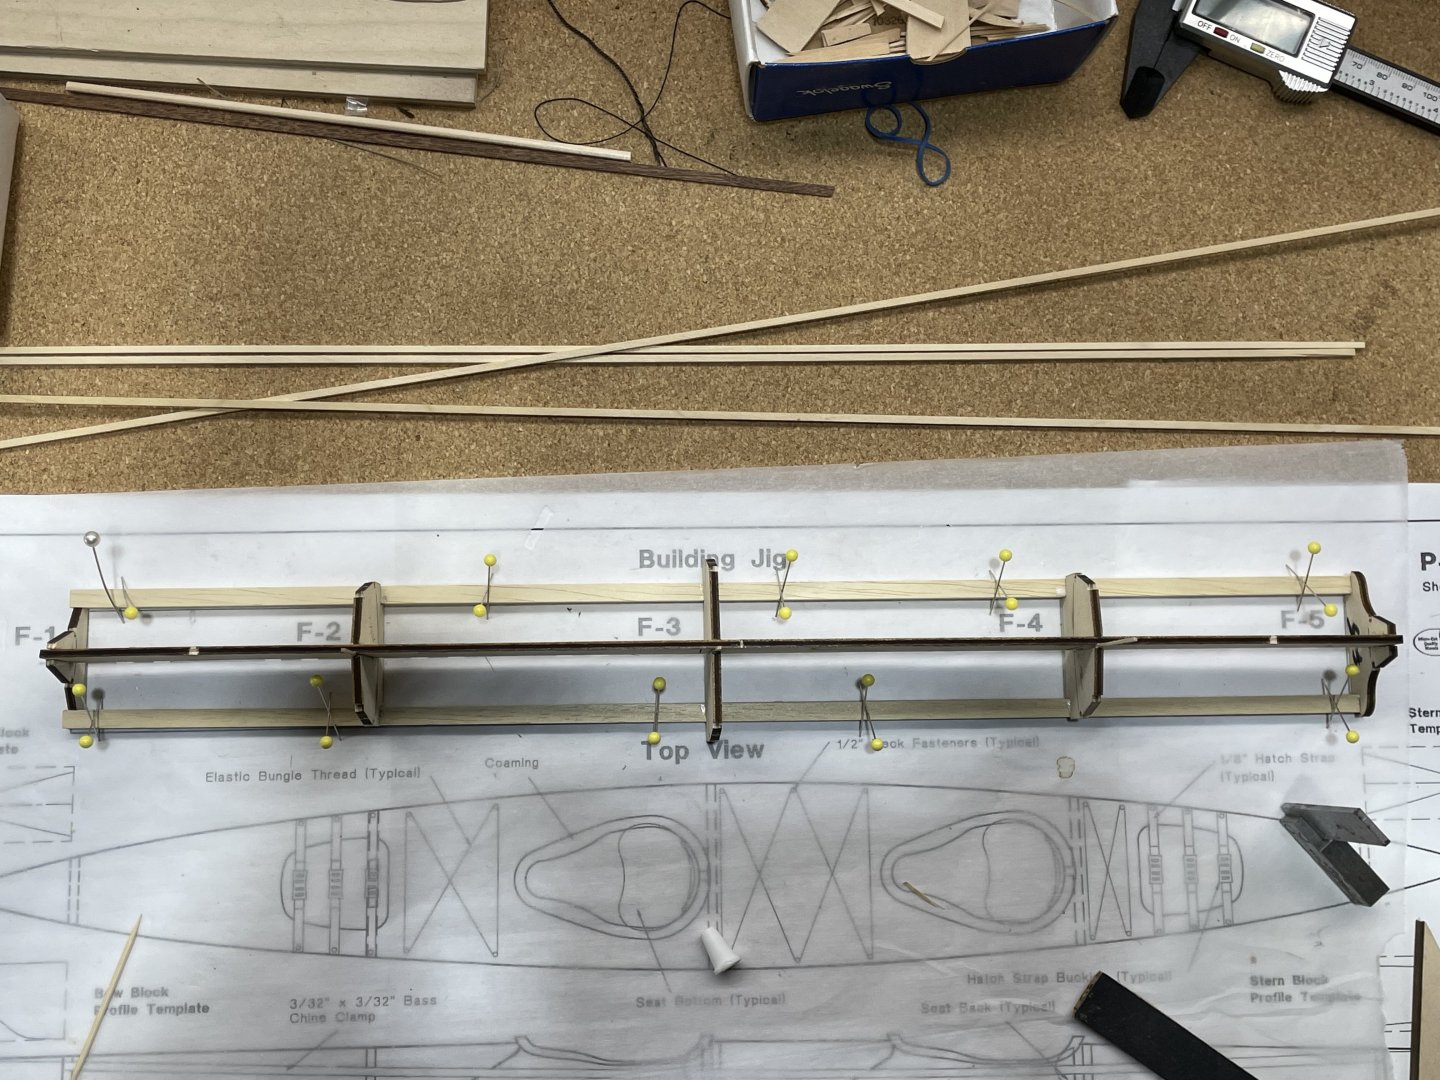
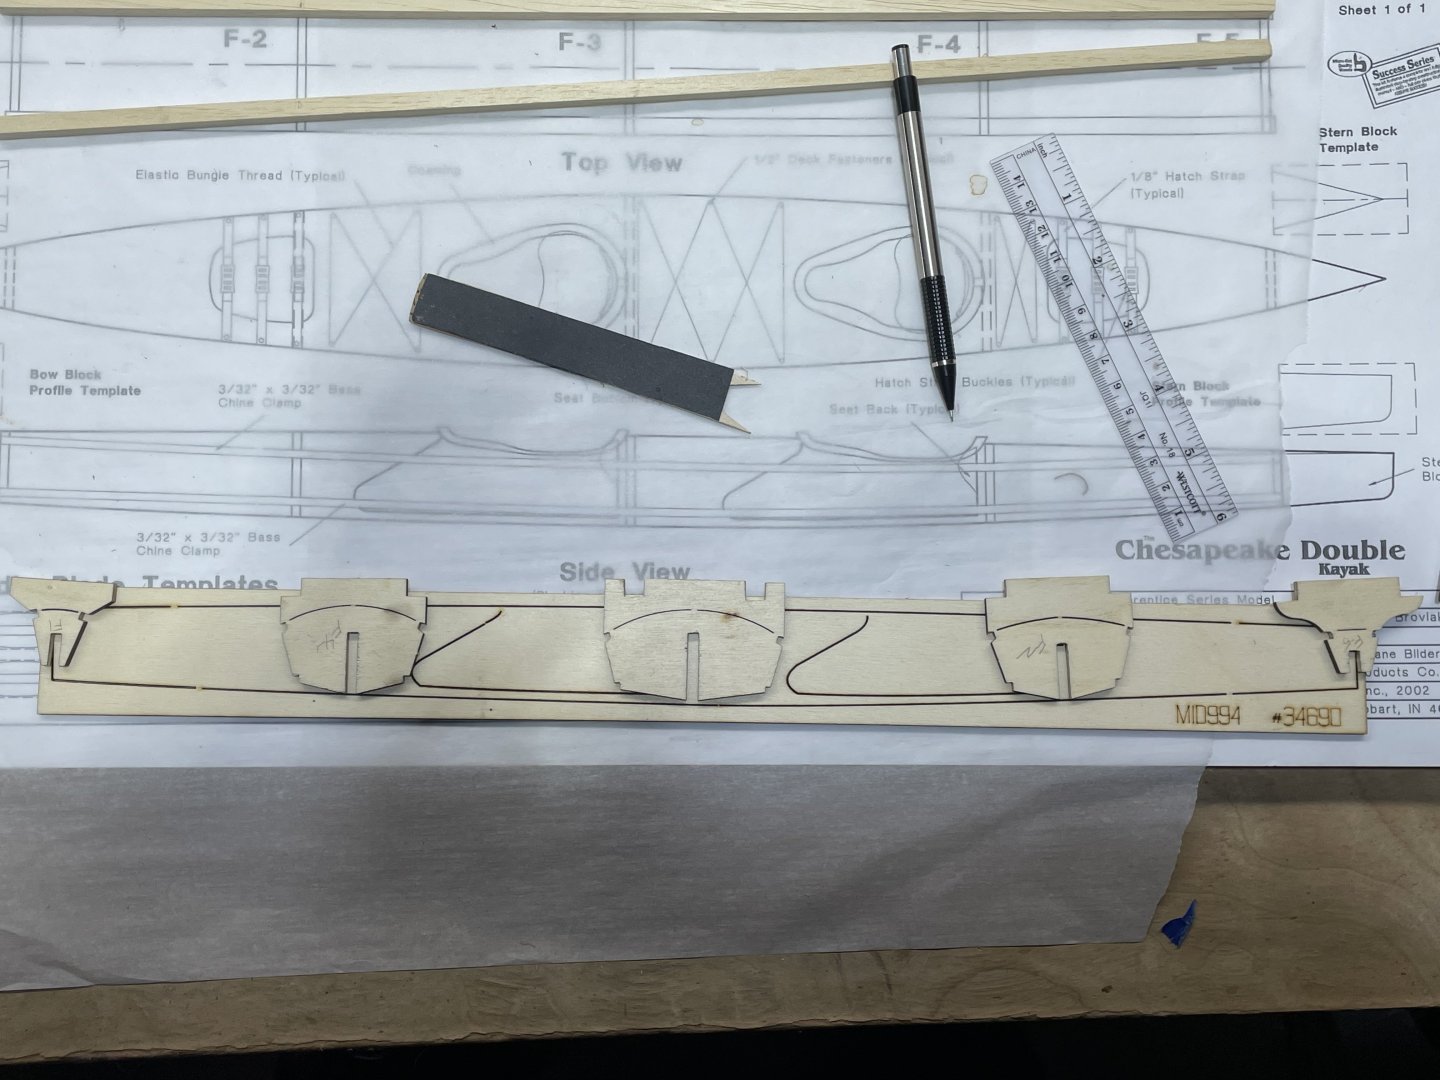
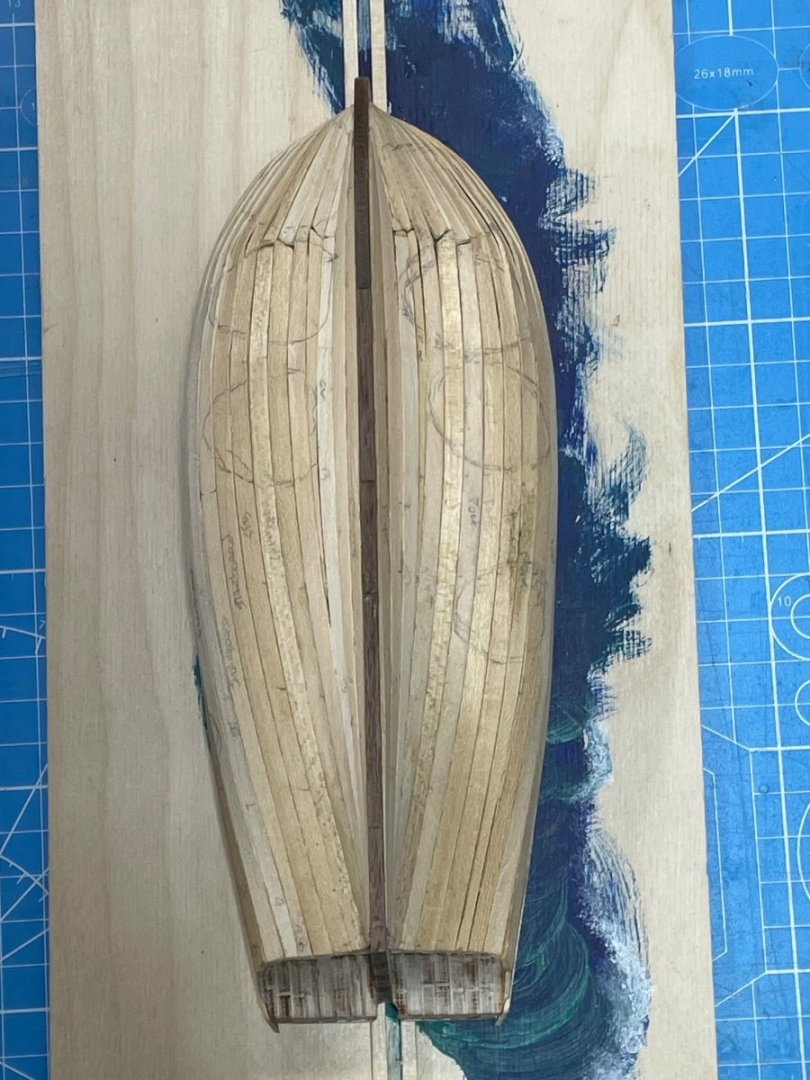
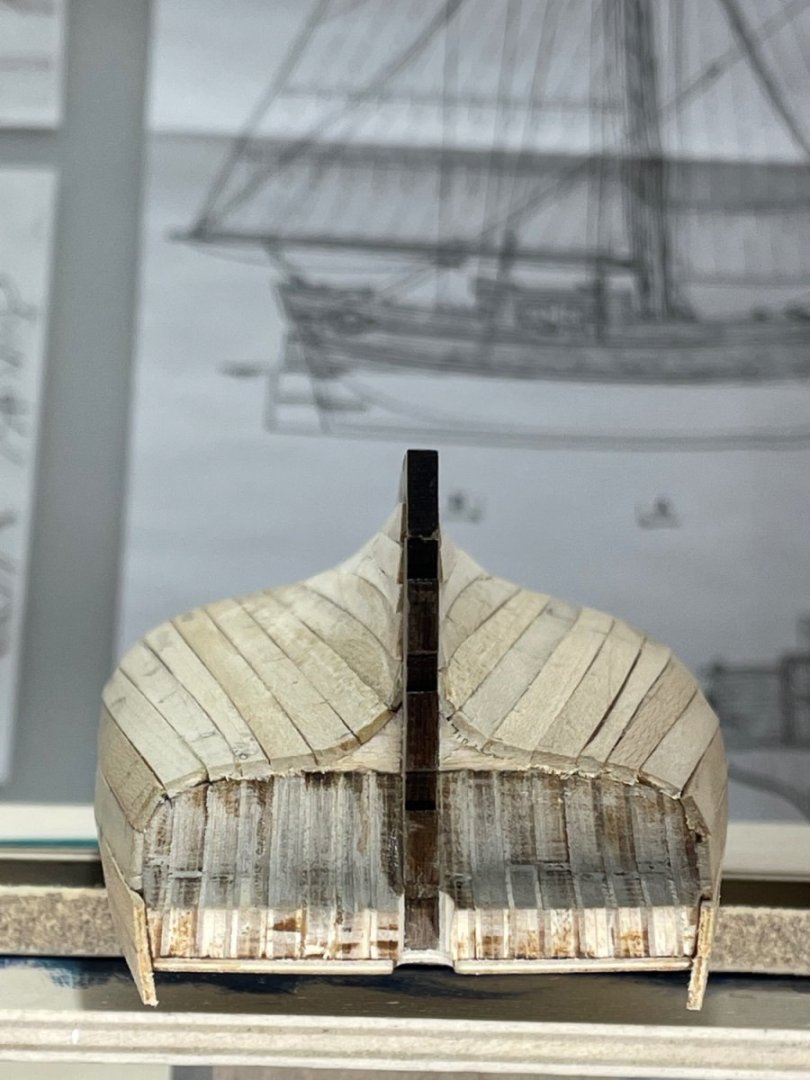
 I was planning on building the Nonsuch 30 next. But yesterday when I went to the post office, to mail the Peterboro canoe to some friends out west. The post master asked “what’s inside” . After I replied, they said they liked canoes:-) I said “what about kayaks “ They replied back, We have those too. So now I get to build this one with a home waiting for it. I have little room to work and really no room at all for for fnished models. First steps are building the strong back. I followed directions and crossed pinned the strongback rails on top of the plan. Next the frames were glued. They were not labeled, 1,3,and 5 were easy to pick out, but 2 and 4 looked pretty much the same until you laid them together. One of them was a tiny bit larger, maybe 1mm. I measured the frames on the side view of the plan and one was a bit smaller. But still not completely convinced, I laid the frames on the spine with the slots aligned, and the larger one went where I thought the smaller was to go:-) Frames hopefully are in the correct place:-) Next the spine, frames 1,3 and 5 may need built up the be flush with the bottom of the spine. I’ll show that side on the next entry.
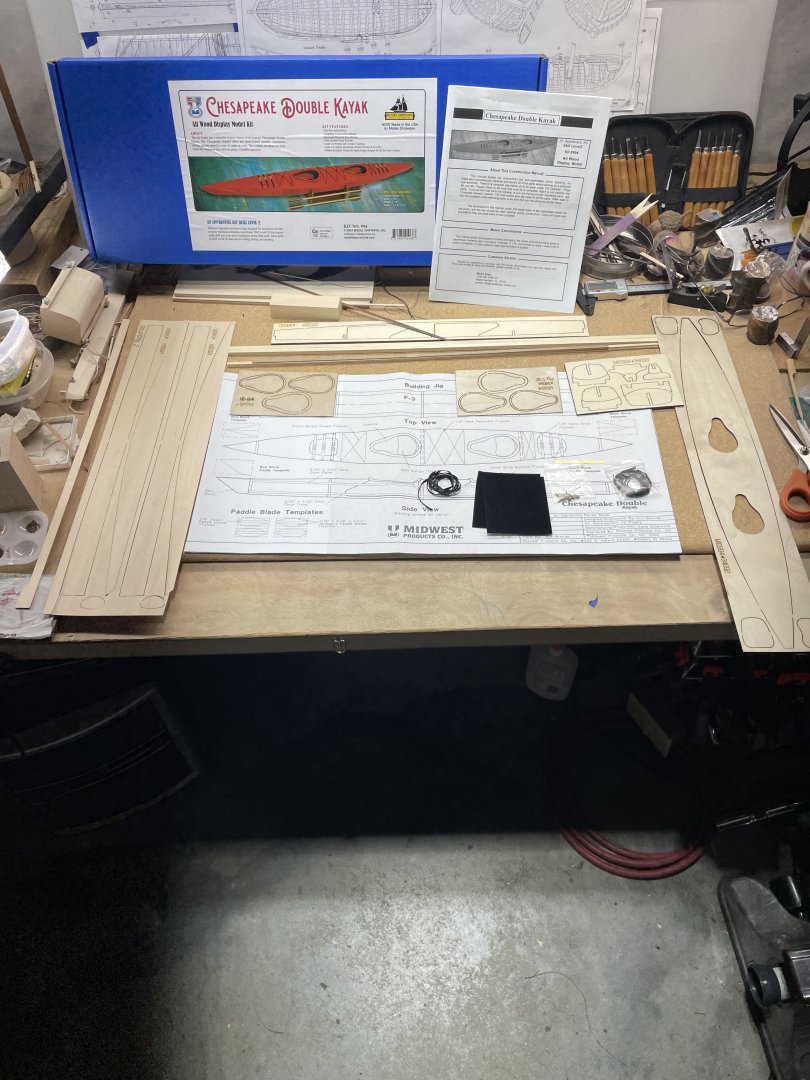
- 33 replies
-
- 8
-

-
- midwest products
- kayak
- (and 1 more)
-
Good morning Dan, the more you try, the more you think of other ways. Then you will find the way that works best for you:-) There are many skilled builders here ( I’m not one of them) that you will witness in their build logs that will spark another idea. I believe things like this just add to the build and also make it just yours:-) Keep up the good work.
- 37 replies
-
- 4
-
-
- Model Shipways
- muscongus bay lobster smack
- (and 1 more)
-
Great work Glen! Thanks for explaining each step. You definitely have have the artistic skill.
- 235 replies
-
- 5
-
-

-
- Banshee II
- Bottle
- (and 1 more)
-
As a novice myself, those type of things make me want to second guess myself. I bet those photos in the manual were made in the 70’s 🙂 This is a build that after you finish, you feel like you could build another. Then you can’t decide, so you just buy several:-) You’re doing a great job!
- 37 replies
-
- 2
-
-
- Model Shipways
- muscongus bay lobster smack
- (and 1 more)
-
Tons of details, gives us a good reason to stare:-) well done Bob!
- 87 replies
-
- 4
-
-
-
- King of the Mississippi
- Artesania Latina
- (and 2 more)
-
Bob, you are my inspiration! If I could build em that looked anywhere near as good as yours do, in such a speedy fashion:-) I’d have 8 on my shelf too. Keep up the great work on your the boats and the short stories that go along with them:-)
- 87 replies
-
- 4
-
-
-
- King of the Mississippi
- Artesania Latina
- (and 2 more)
-
I’m not very experienced with the nautical terms but my understanding it is the tiny groove you cut so the next plank seals against it. I think with the model the intent is for only half of the bottom of the upper plank to show where it meets the lower one. If I remember at the bow and stern they are almost flush with each other. At the time I was building this I didn’t know what it was either:-) so I probably didn’t say much about it:-) Just looking at my pics, it looks like I just sanded a bevel. There is a log here that show where one rigged his plain to cut a gain and it may have been this boat. Here’s his log title, I couldn’t figure out how to link it:-) Norwegian Sailing Pram by modeller_masa
- 23 replies
-
- 1
-
-
- Norwegian Sailing Pram
- Model Shipways
- (and 1 more)
-
Bob, your log was so well written, it made me feel like I was right there wearing a big grin:-) oh yeah, your build looks great too:-)
-
Your sails look great Bob! I have two builds started that will get them. One day hopefully:-)
-
Bob, I’ve been scanning your photos, since I have little knowledge of nautical part names, it’s like finding Waldo:-) Everything looks great! You’re counting how many rat lines to got to do? Are you forgetting you have a lifetime of them to do:-)
-
Bob, you seem to be in a great frame of mind. We’ll be praying for your speedy return, so we can see what the Mayflower really looked like, when it brought our people over here:-)
-
You did an excellent job Gary! I can easily see me building another smack:-)
- 88 replies
-
- 1
-
-
- Muscongus Bay Lobster Smack
- Finished
- (and 1 more)
-
Welcome, my nephew and his family lives and works in Chimala, Tanzania. Safe travels!
-
Wow, Jeremy. Fantastic job on this build. Your well done build log will sure be viewed many more times by ones like me striving to learn more. I appreciate the time you spent explaining and working through obstacles.
- 122 replies
-
- 3
-
-
- Artesania Latina
- Pen Duick
- (and 1 more)
-
I believe sanding the hull down, feeling the curves, in my opinion is a relaxing task that finishes way before I’m ready:-)
- 88 replies
-
- 3
-
-
- Muscongus Bay Lobster Smack
- Finished
- (and 1 more)
-
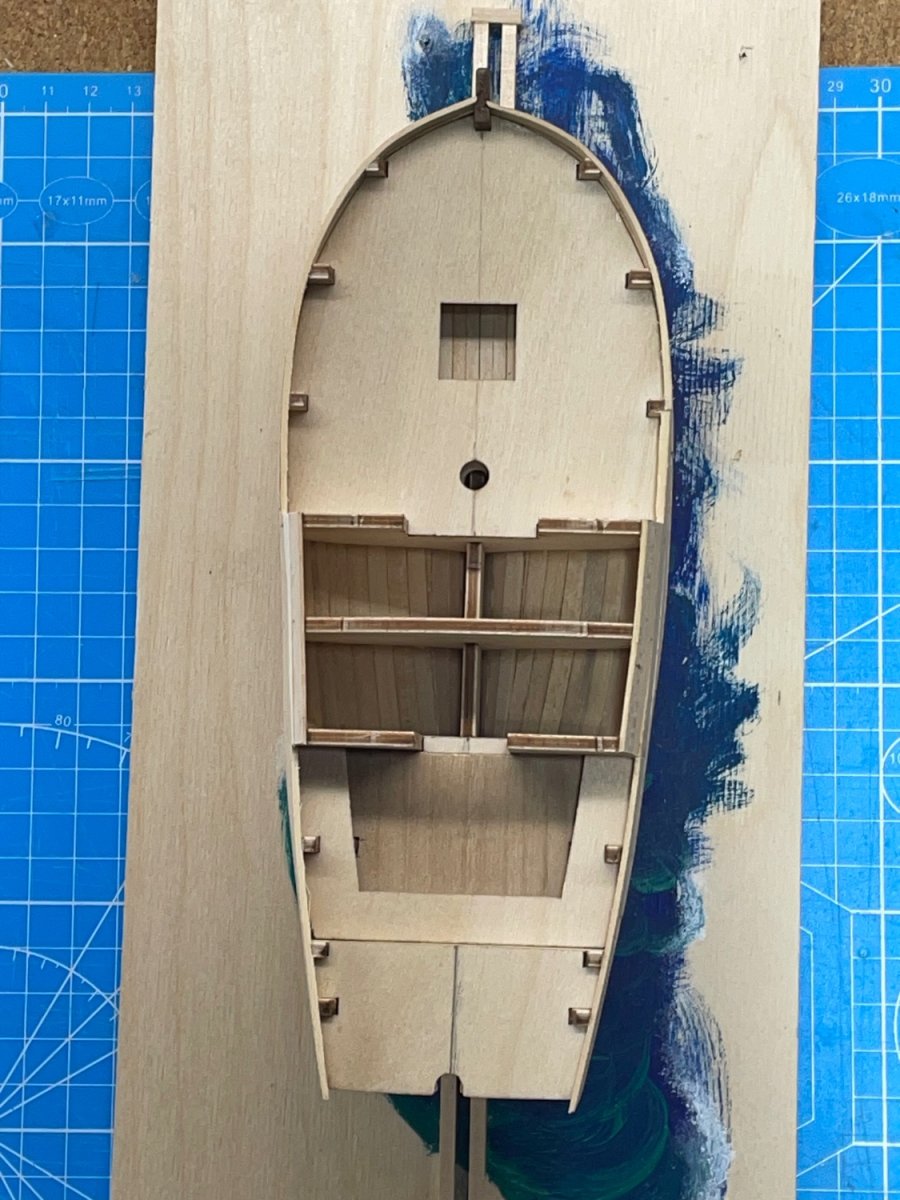
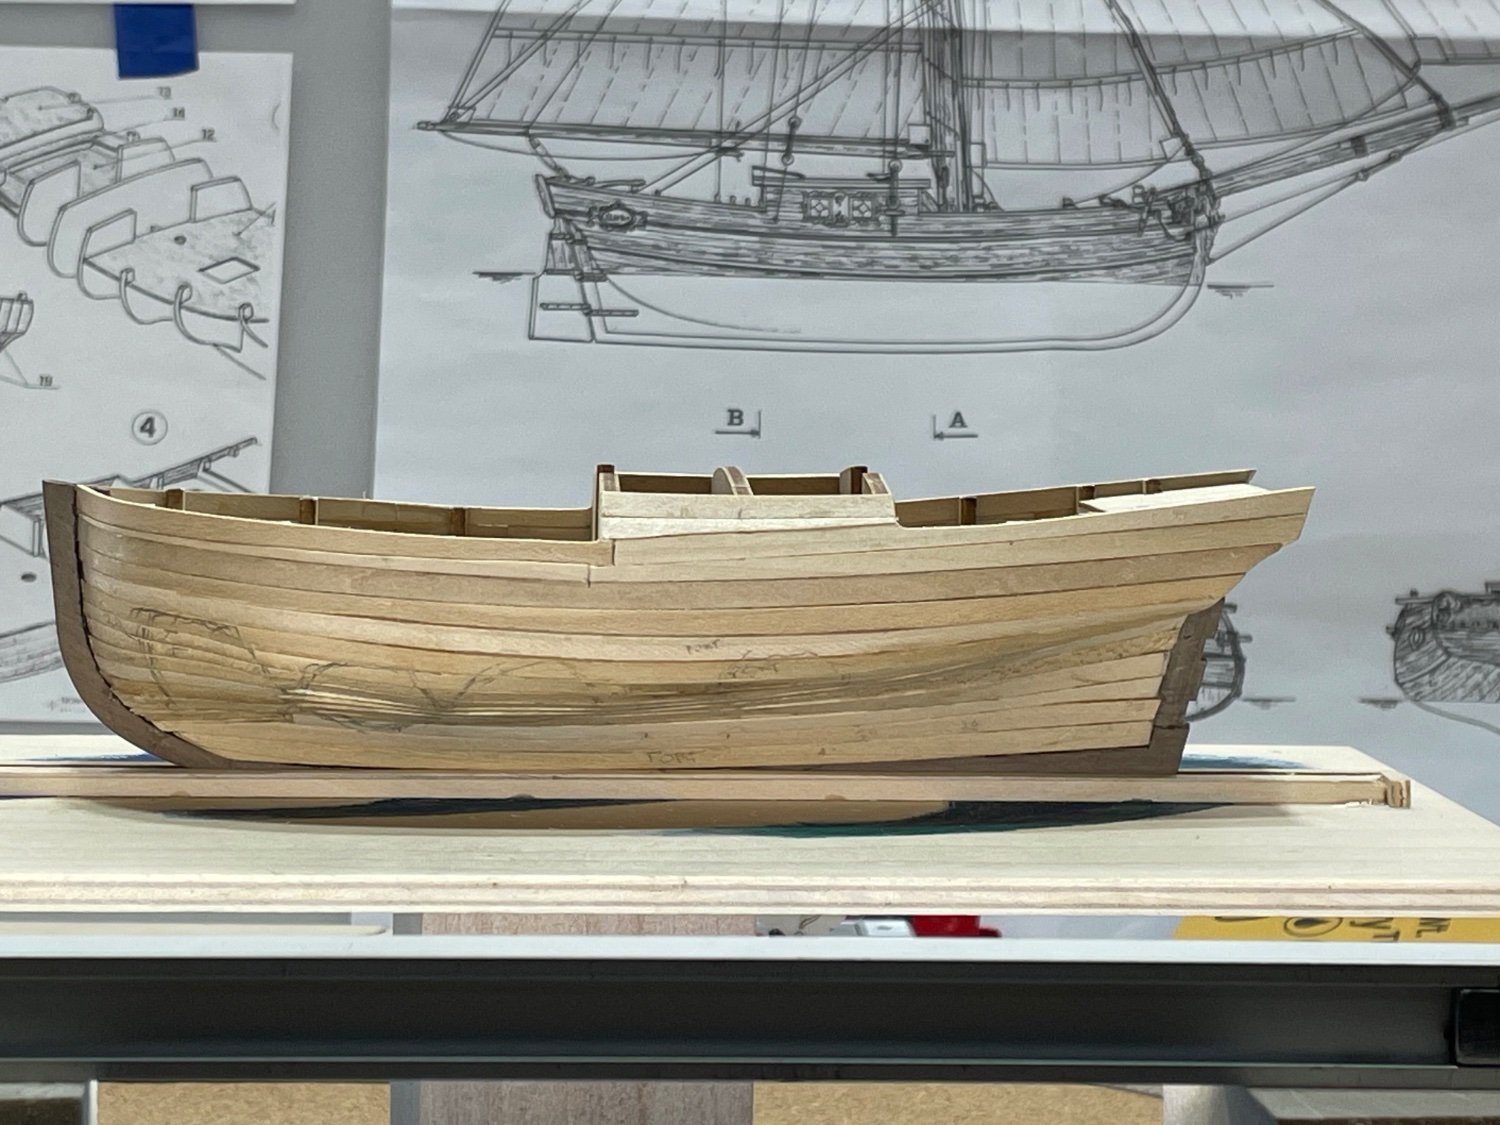
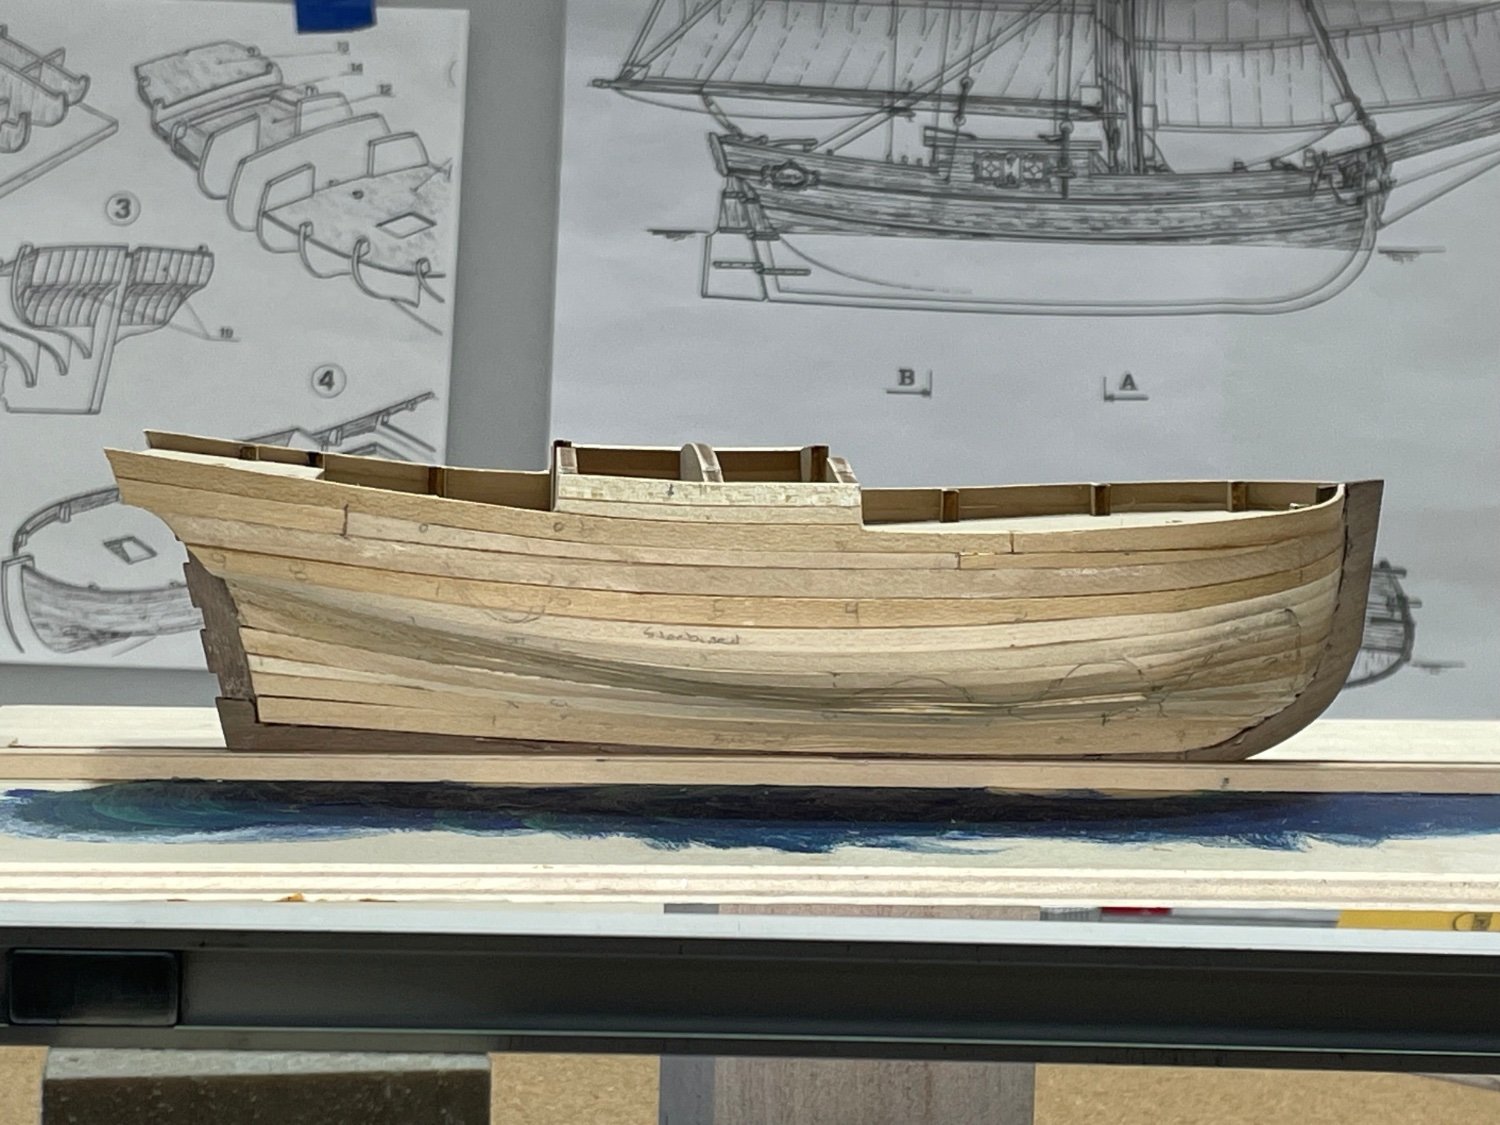
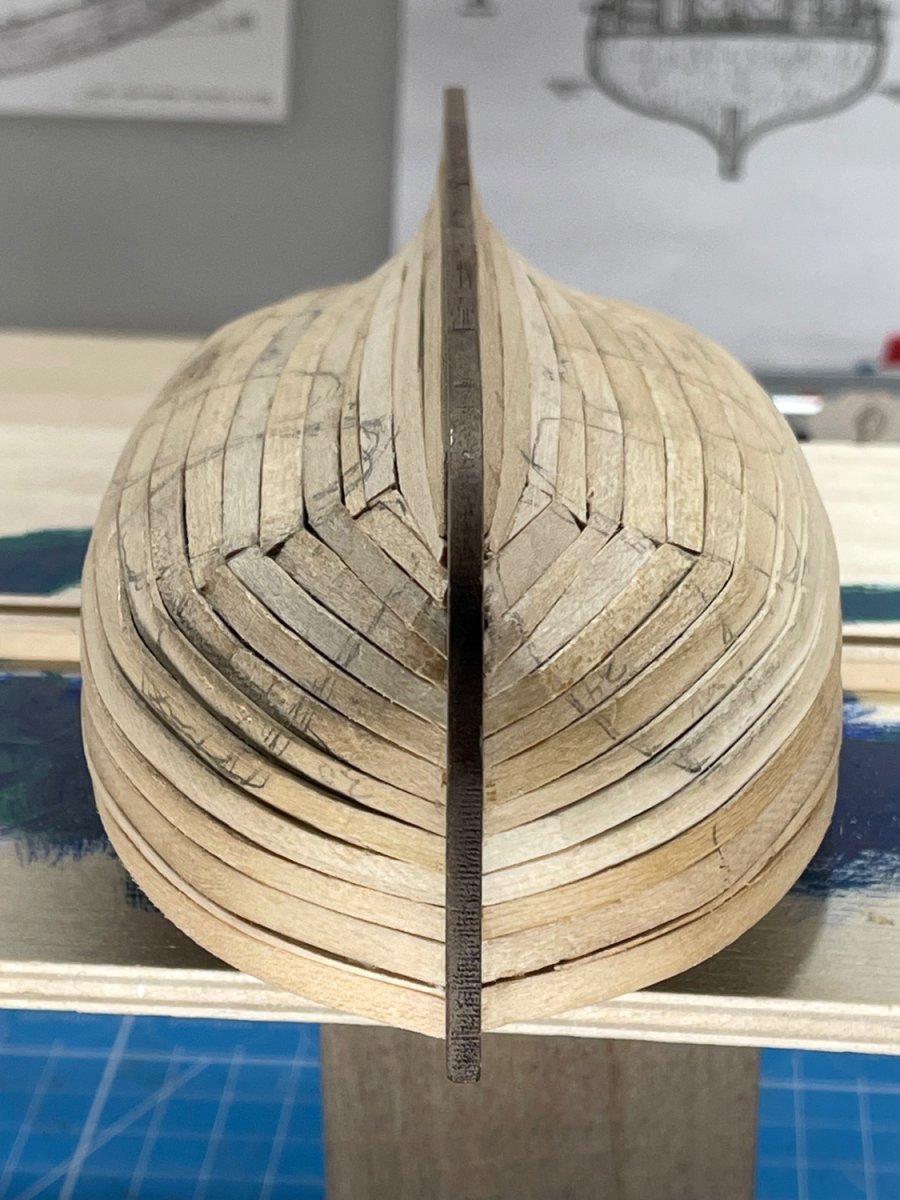
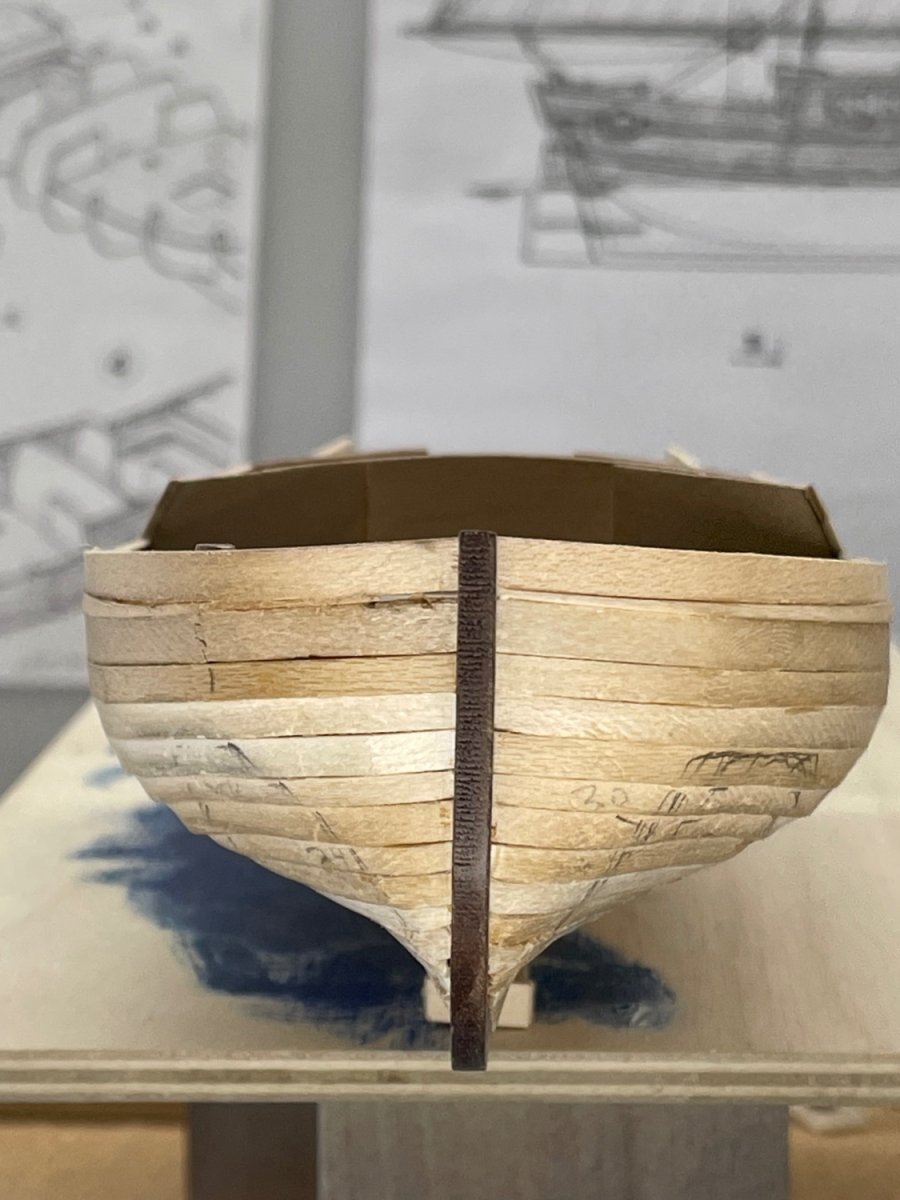
The temperature finally rose, and made it possible for me to finish the first planking. It has made me realize I’m not quite ready to take on the second layer at this time. I may try the half hull project, and see if I feel more confident afterwards. Here are some shots of the first planking.


-
All three look Great! Well done Eric.
- 62 replies
-
- 2
-
-
- Muscongus Bay Lobster Smack
- Model Shipways
- (and 1 more)
-
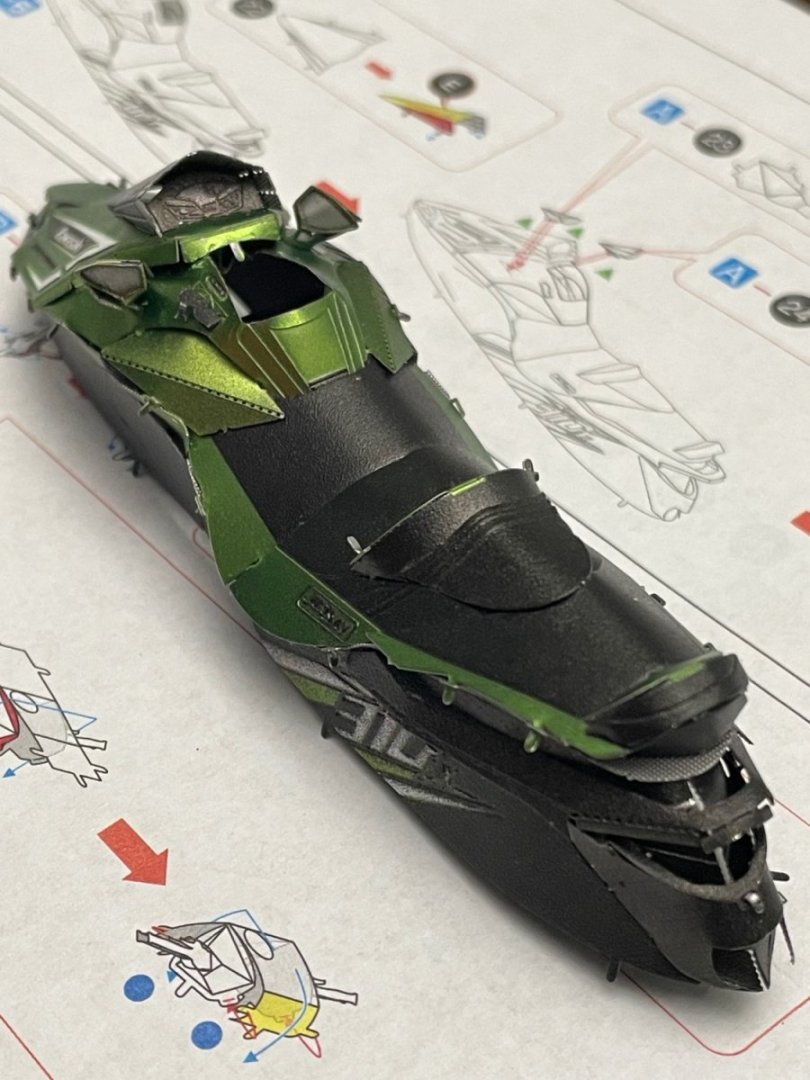
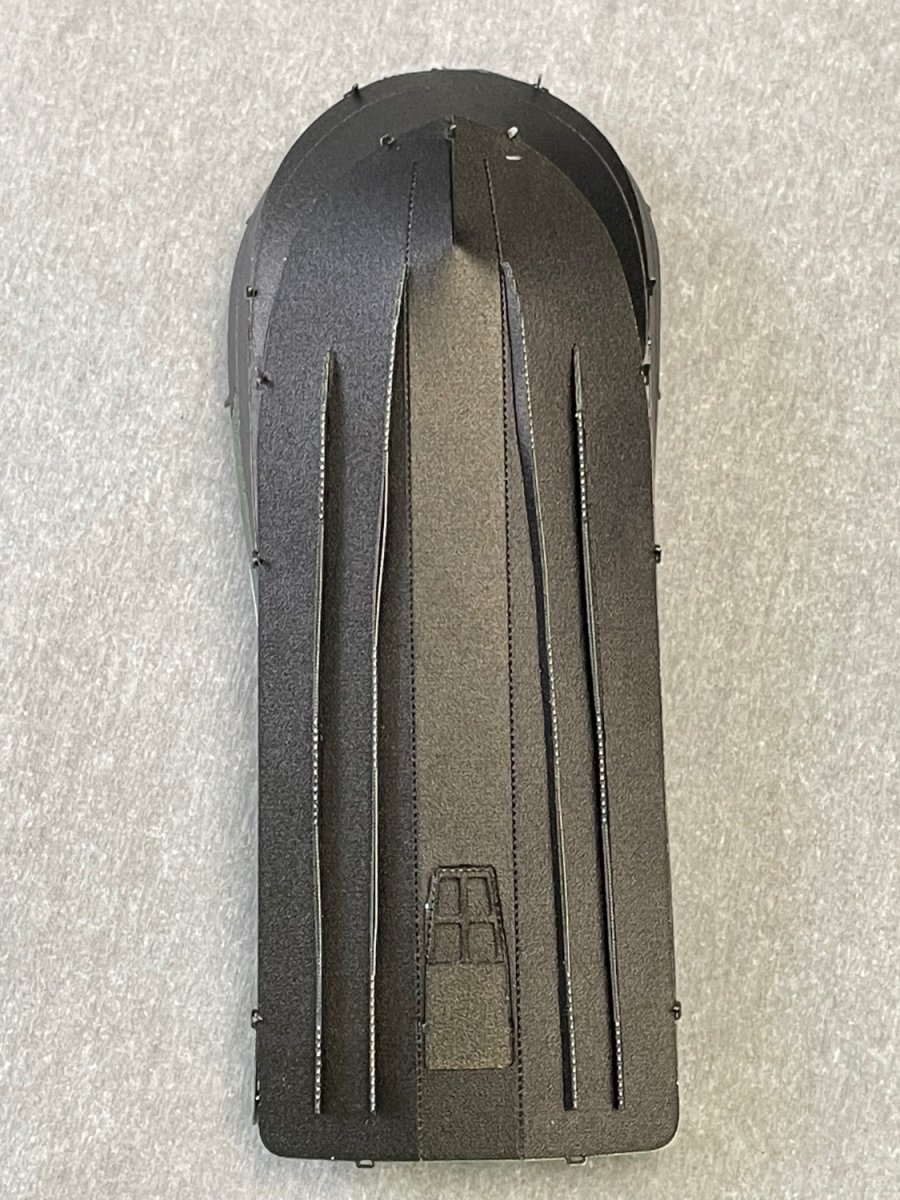
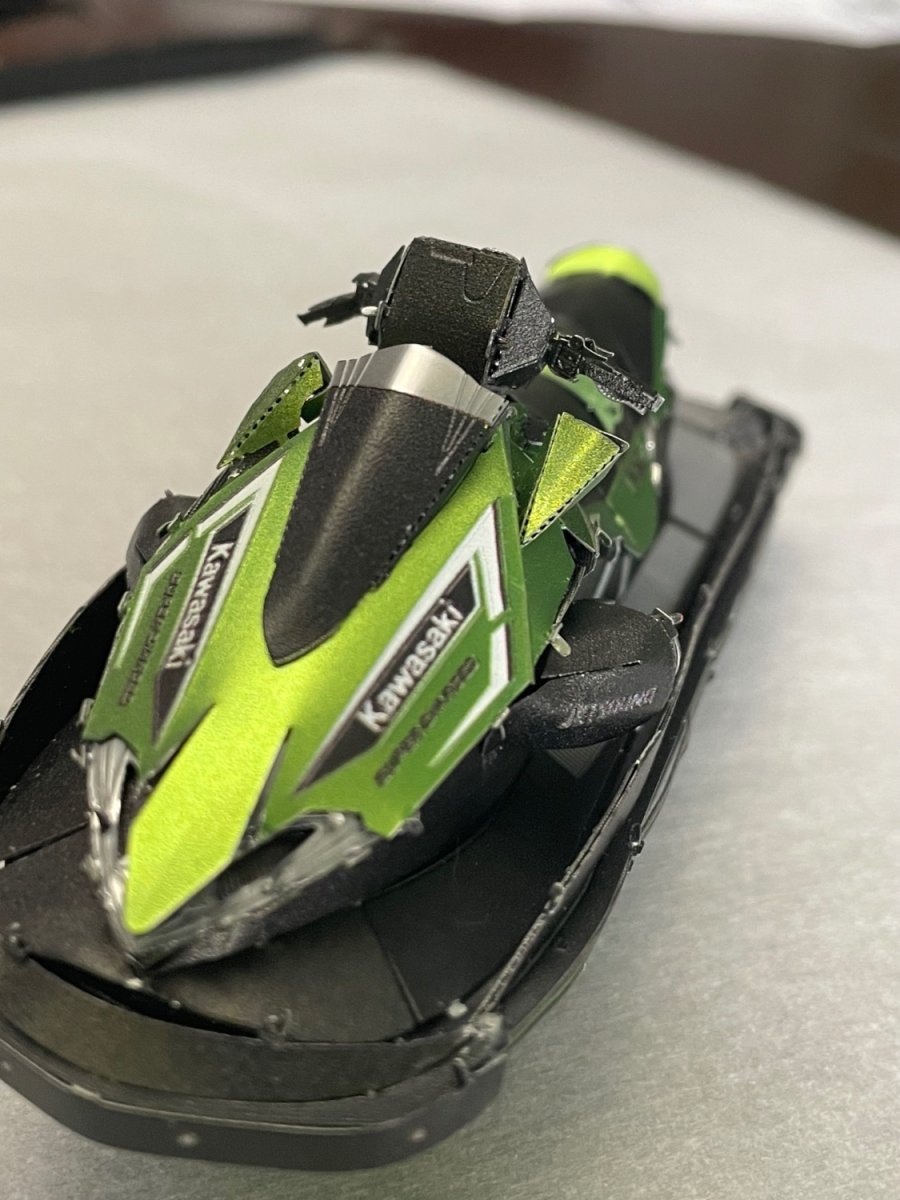
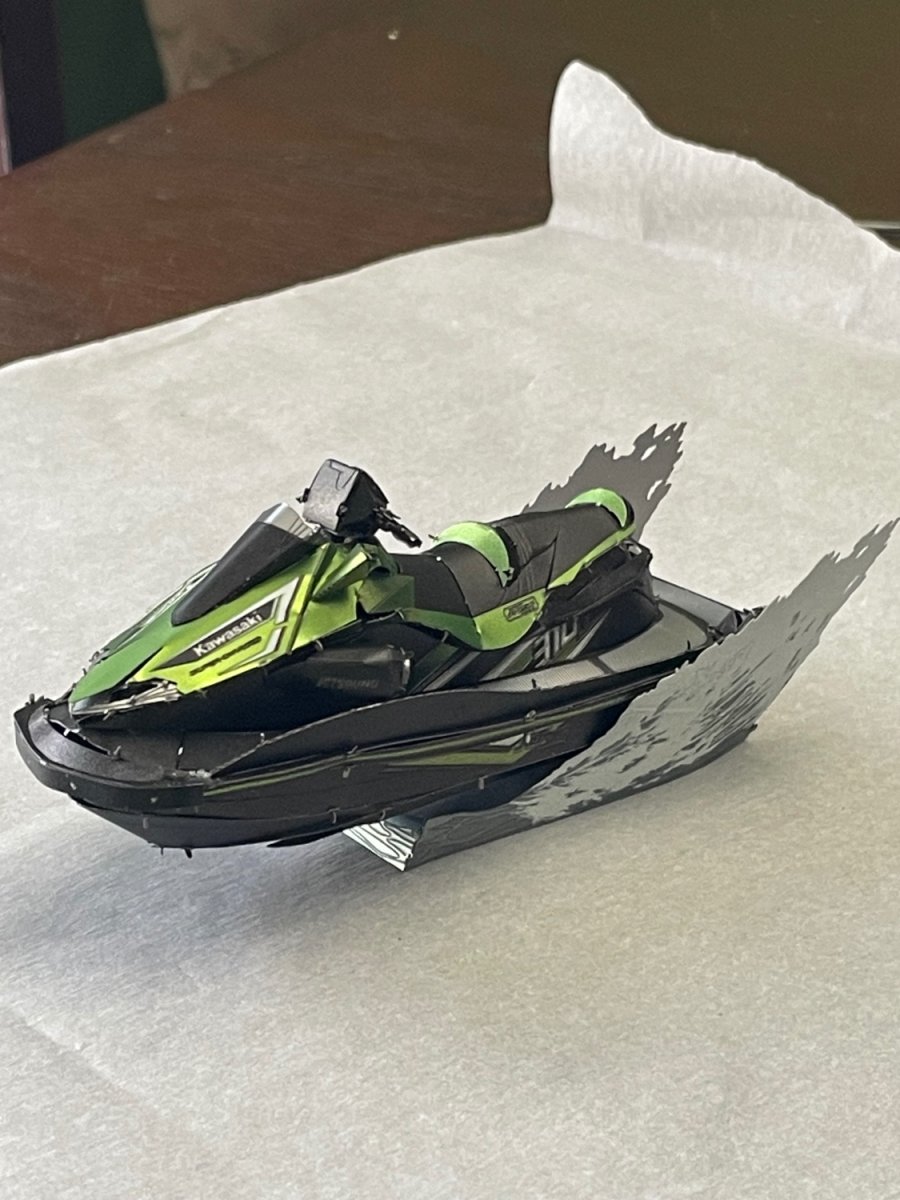
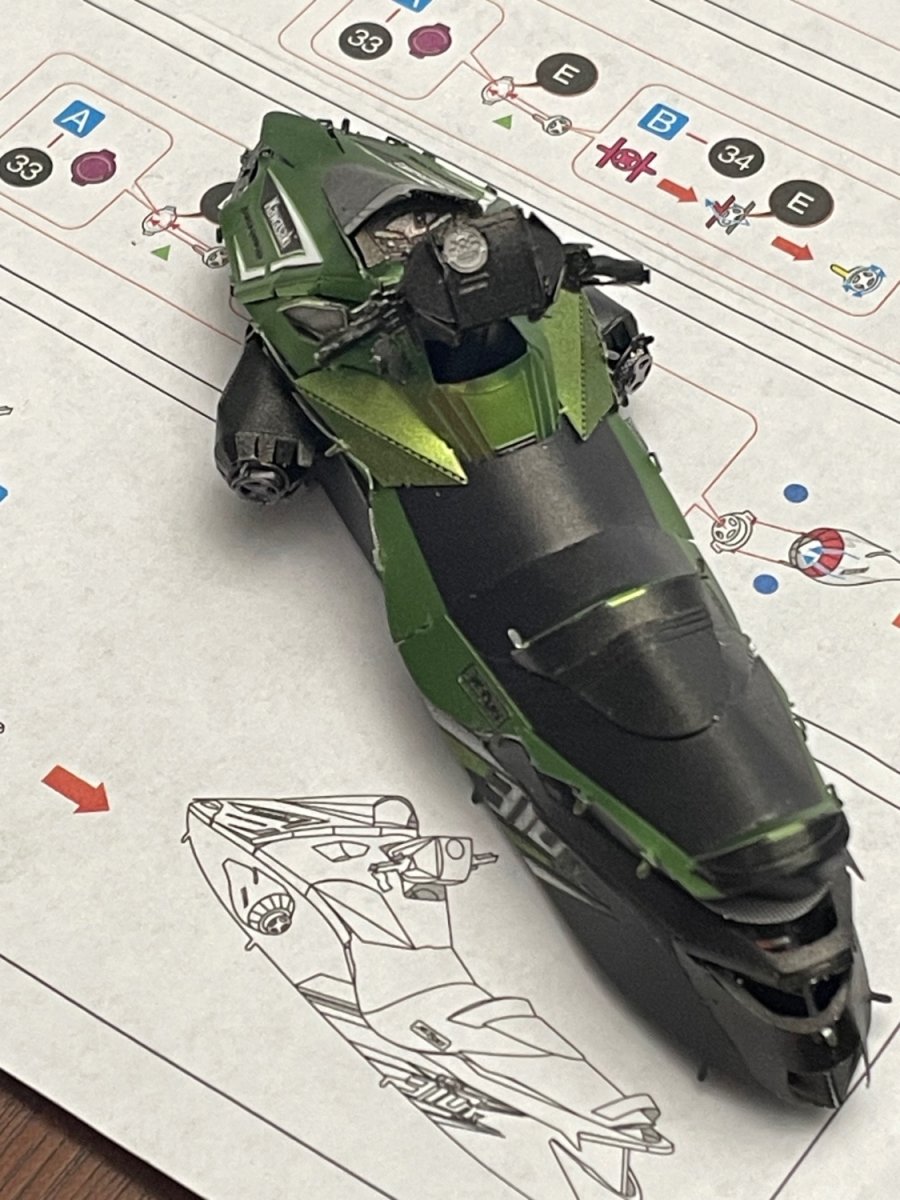
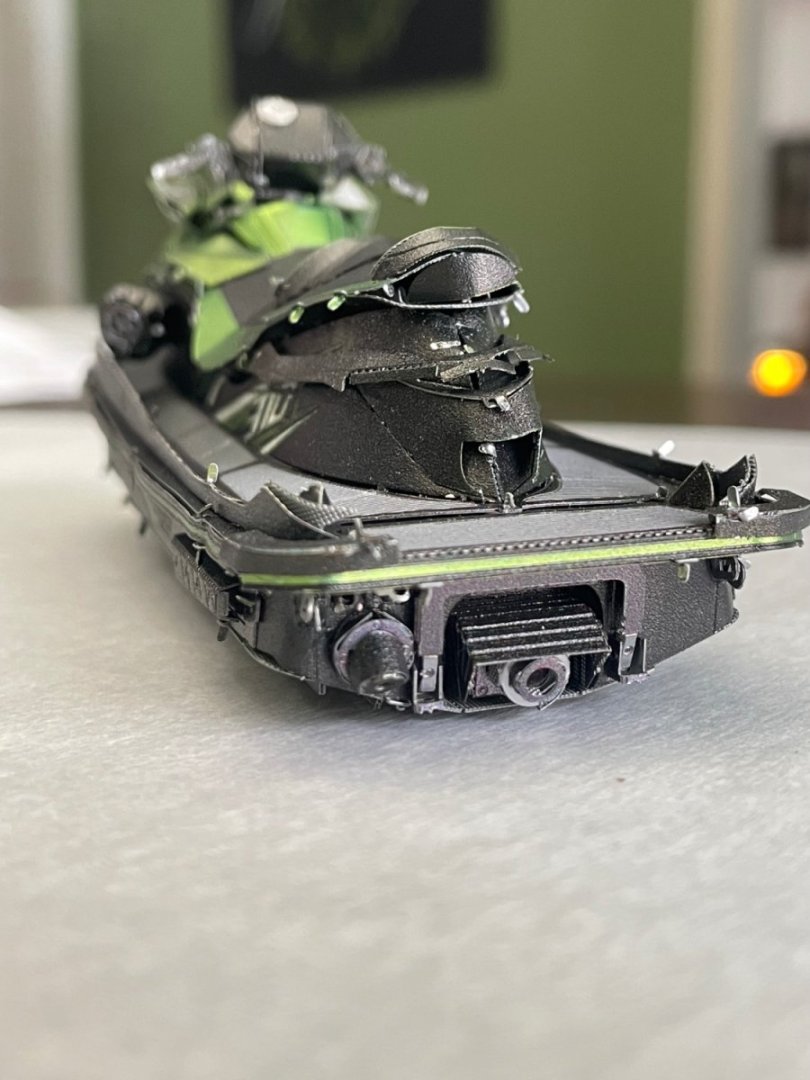
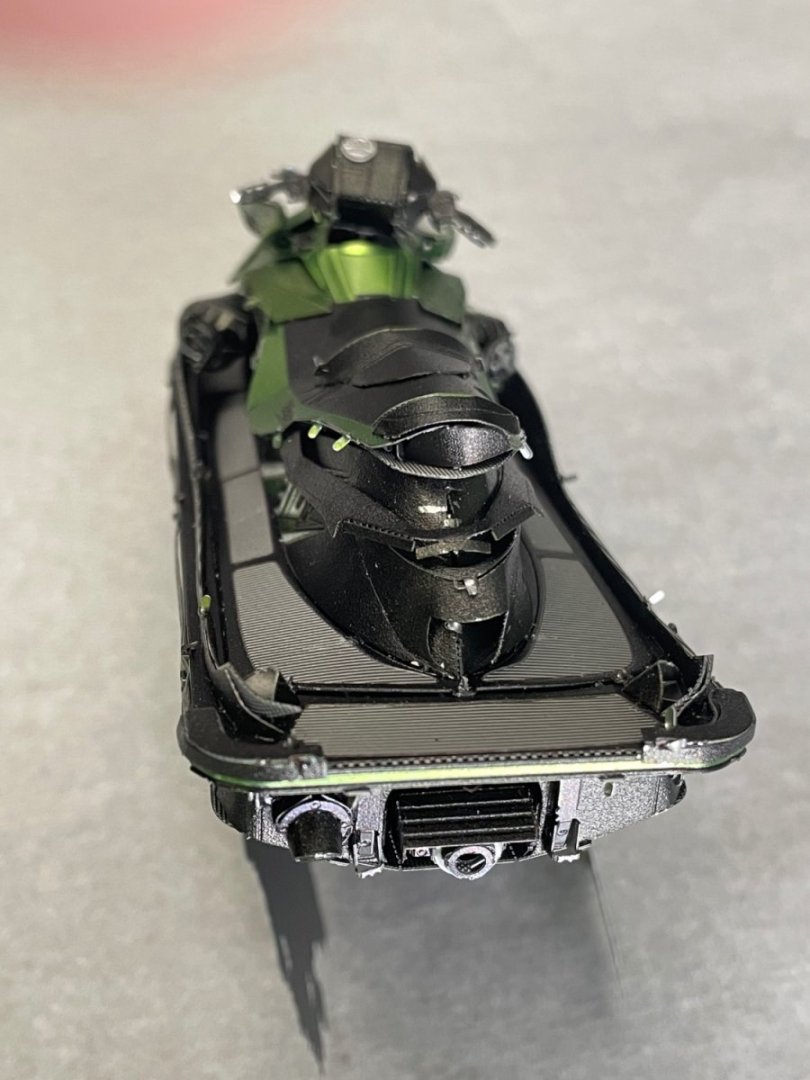
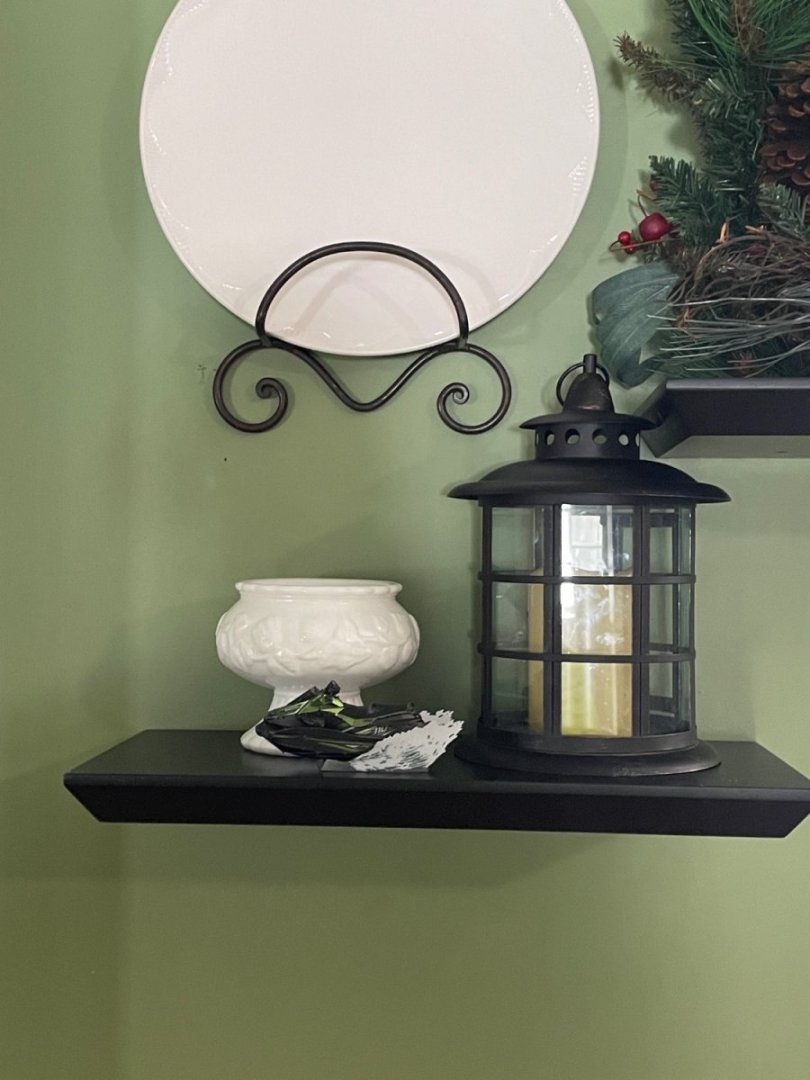
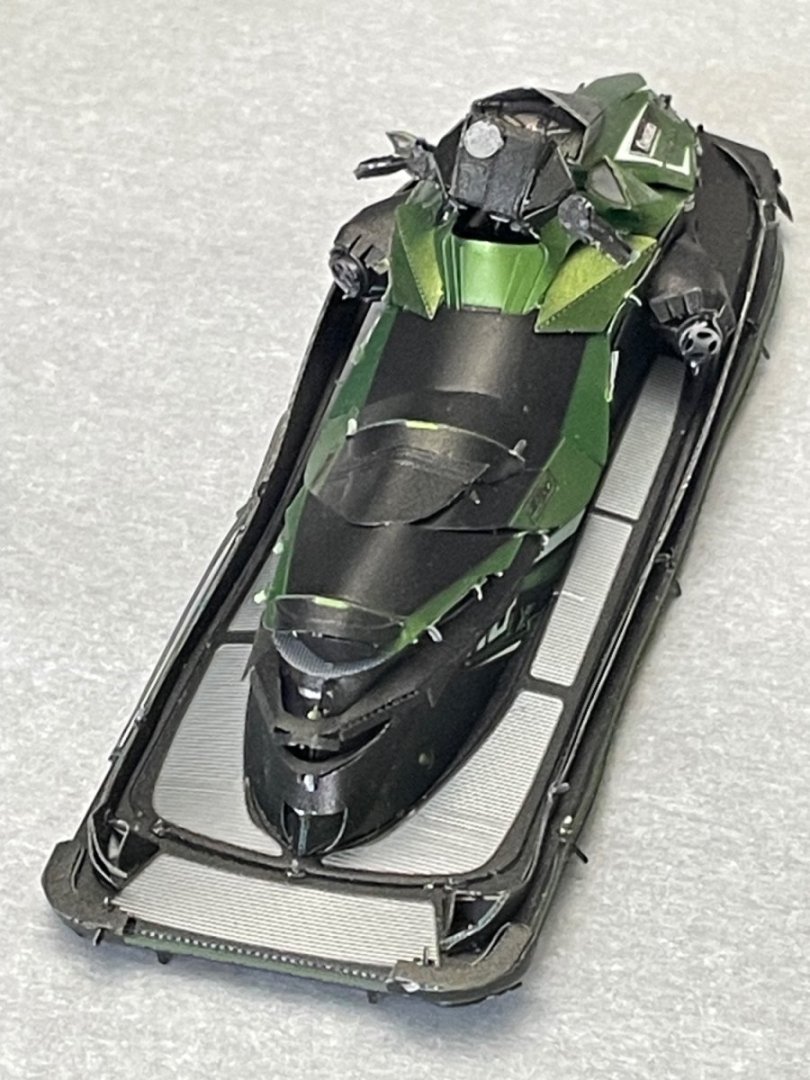
Upper half completed. Here’s another tool that helps accuracy. lower half fits together nicely. Lots of detail around the rear jet. And the two half’s come together, just as the temperature outside creeps above freezing and starts melting the snow. As I cleaned up the breakfast table, after the build was completed. I casually set the jet ski on one of the shelves in one of my wife’s vignettes. We’ll see how long it can stay:-)

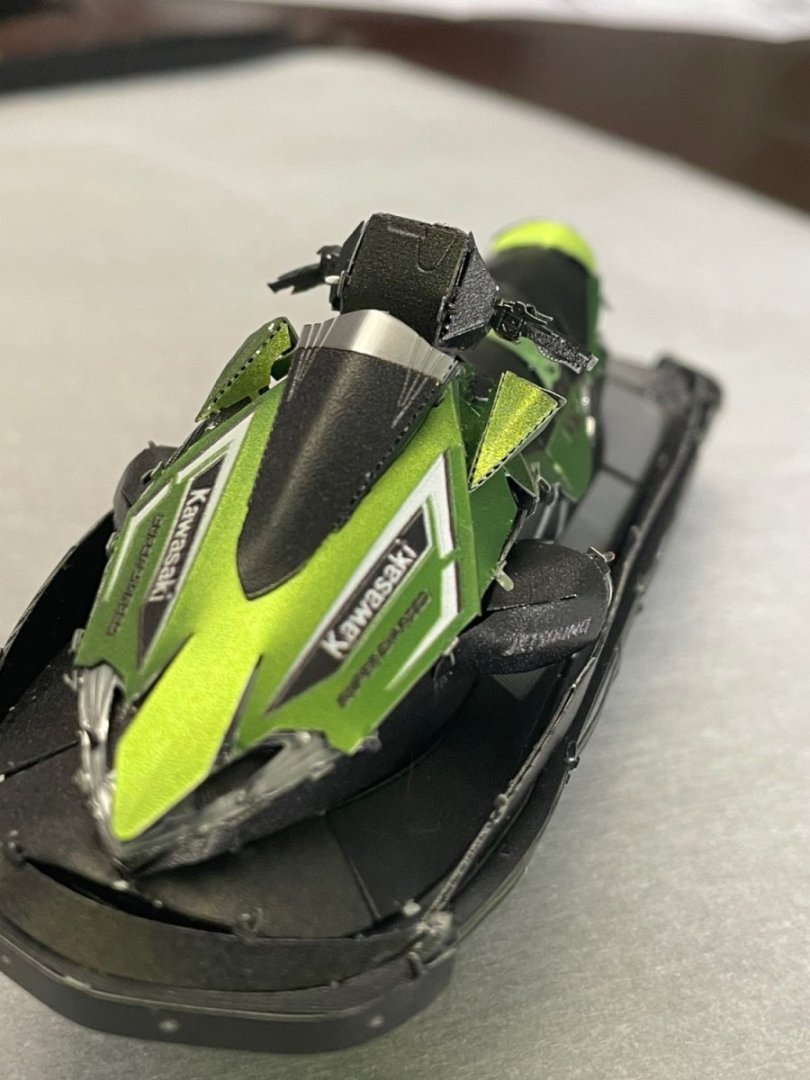

-
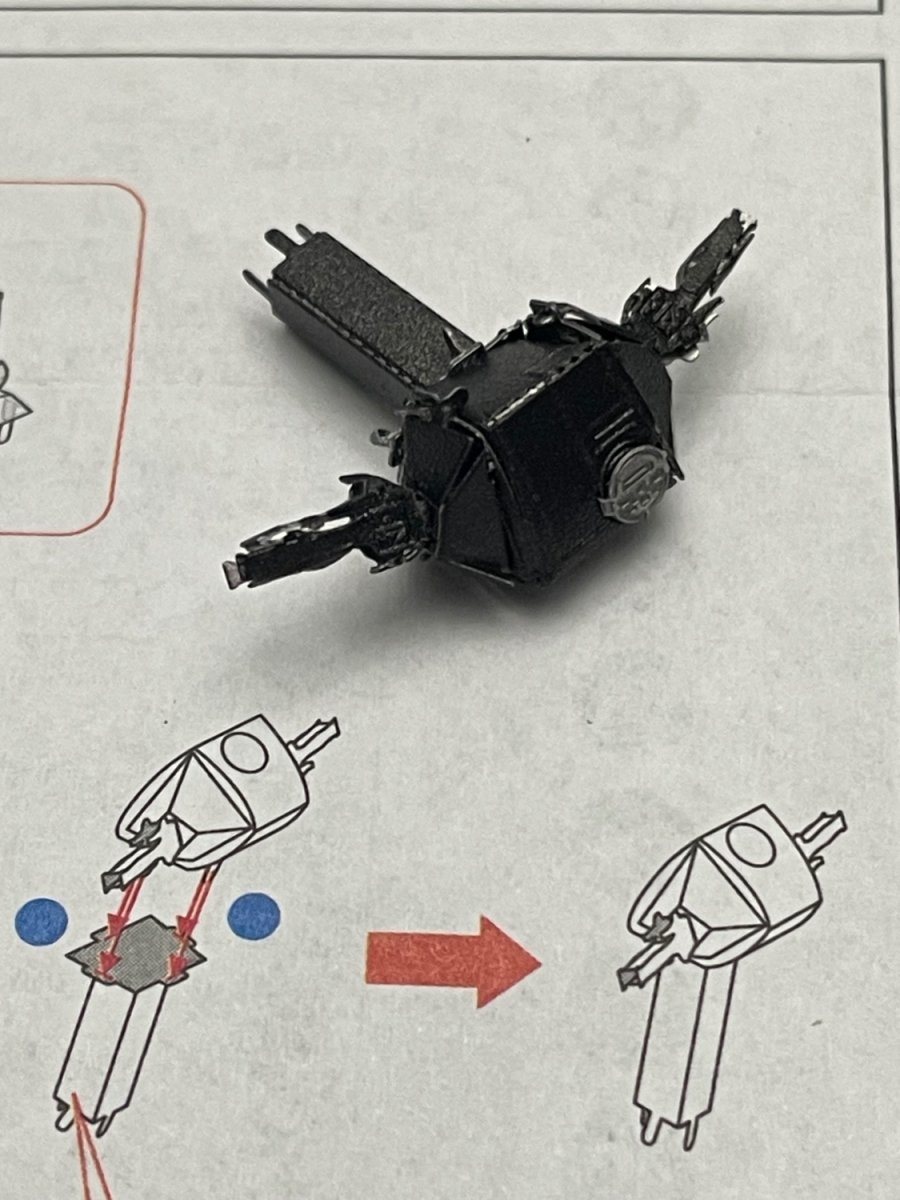
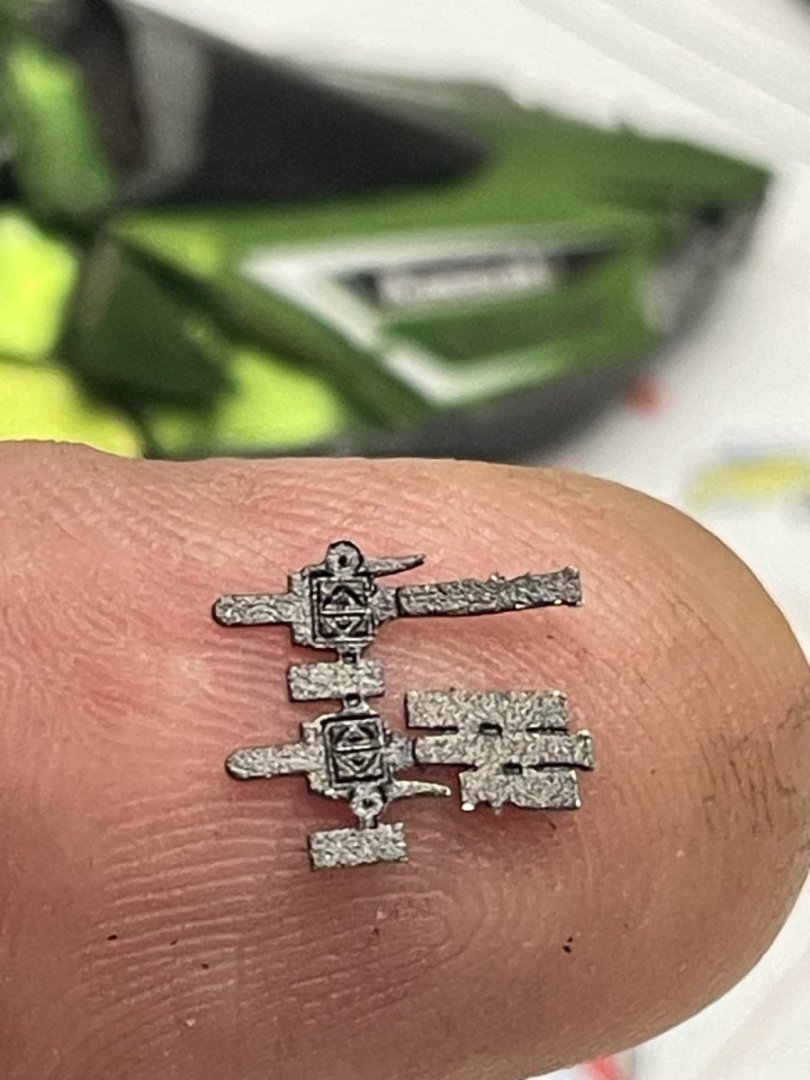
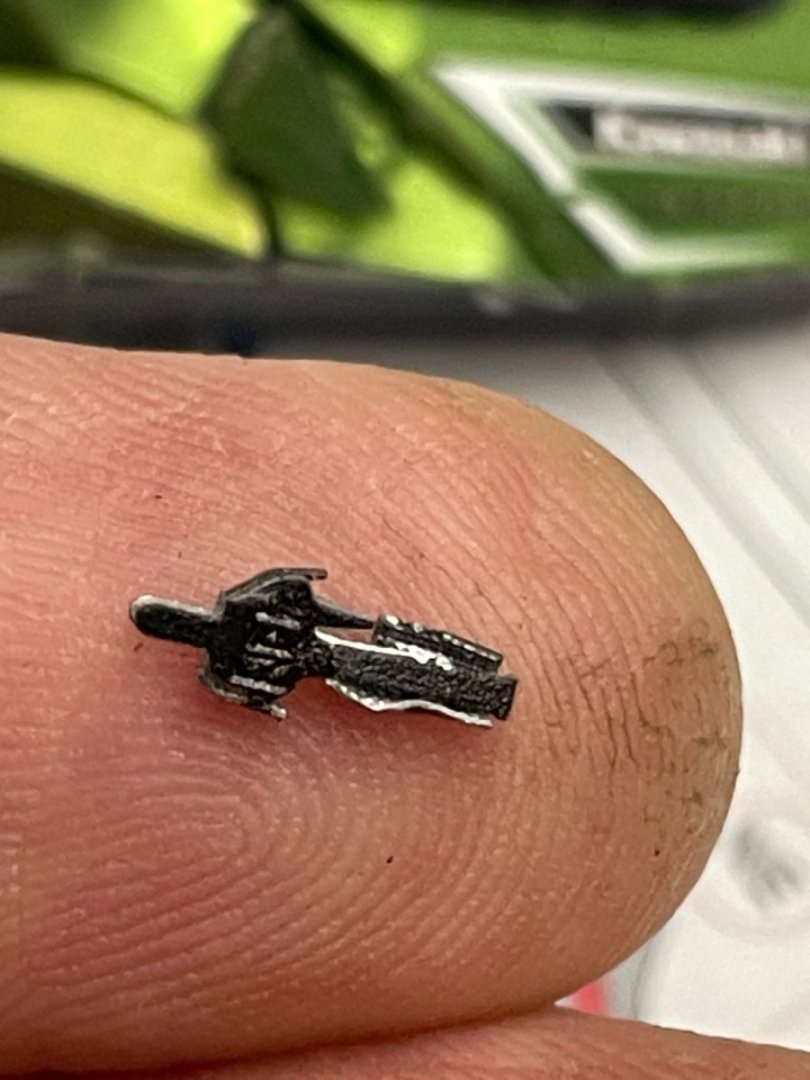
Nothing like a good challenge to start the day:-) Hand grips first things. This Into this. Those together here. along with the jets, it seemed to be a good stopping point for the day:-)


-
Today I just stopped in about four different times and spent about 10-15 minutes at each setting. I’m on step 7 of 15.