marktiedens
-
Posts
1,737 -
Joined
-
Last visited
Content Type
Profiles
Forums
Gallery
Events
Everything posted by marktiedens
-
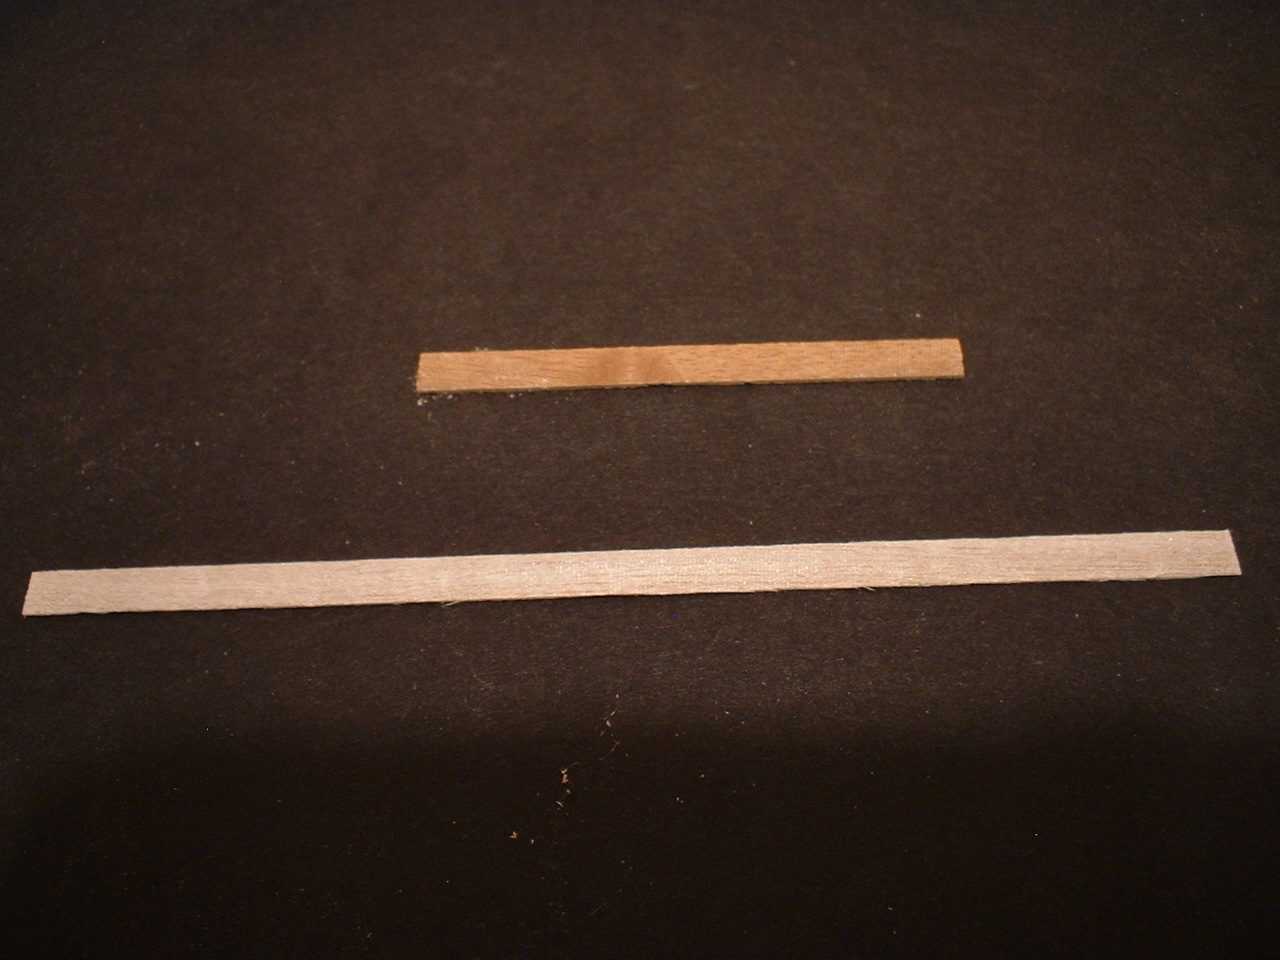
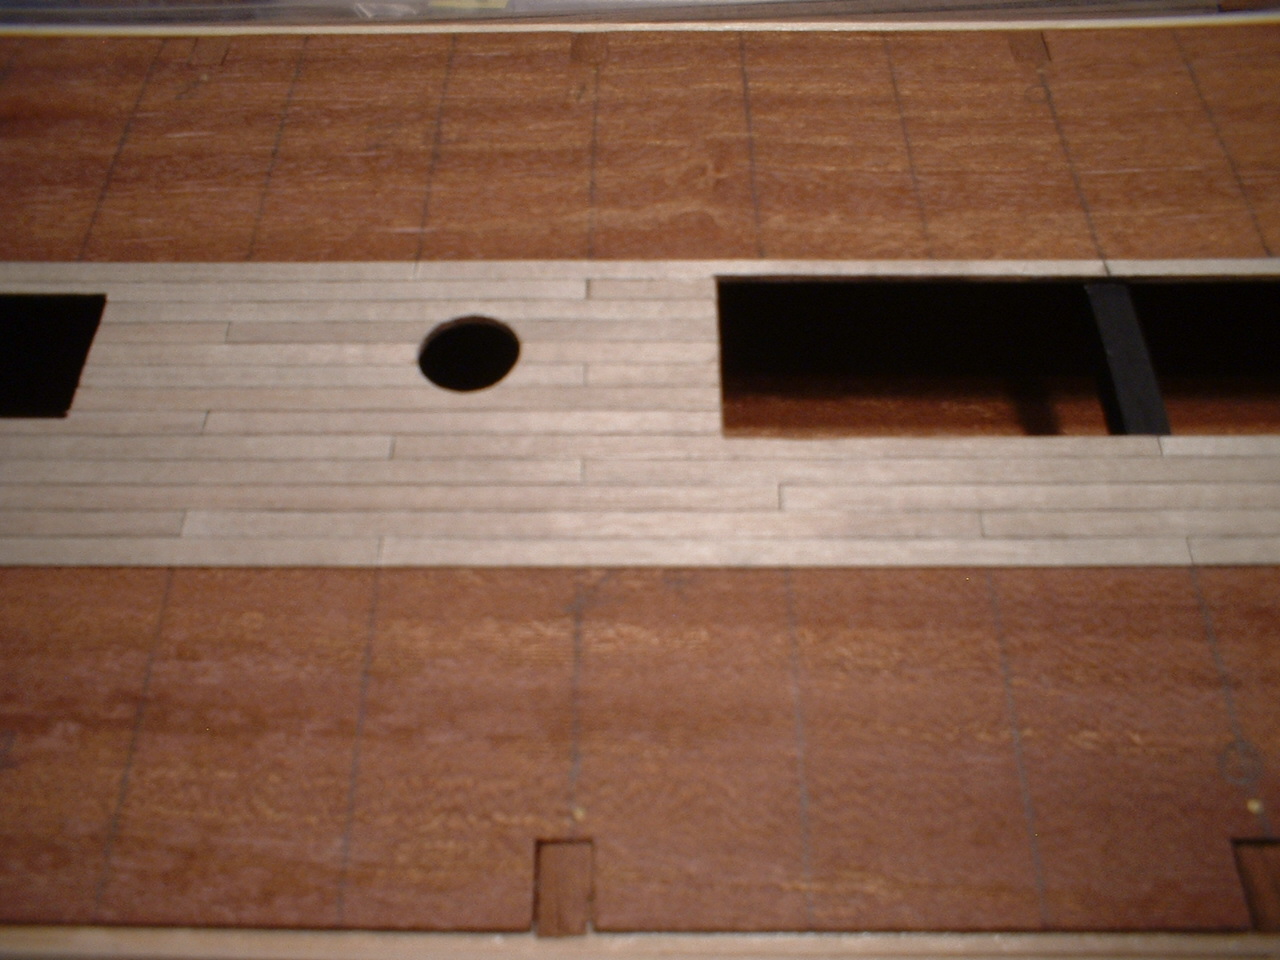
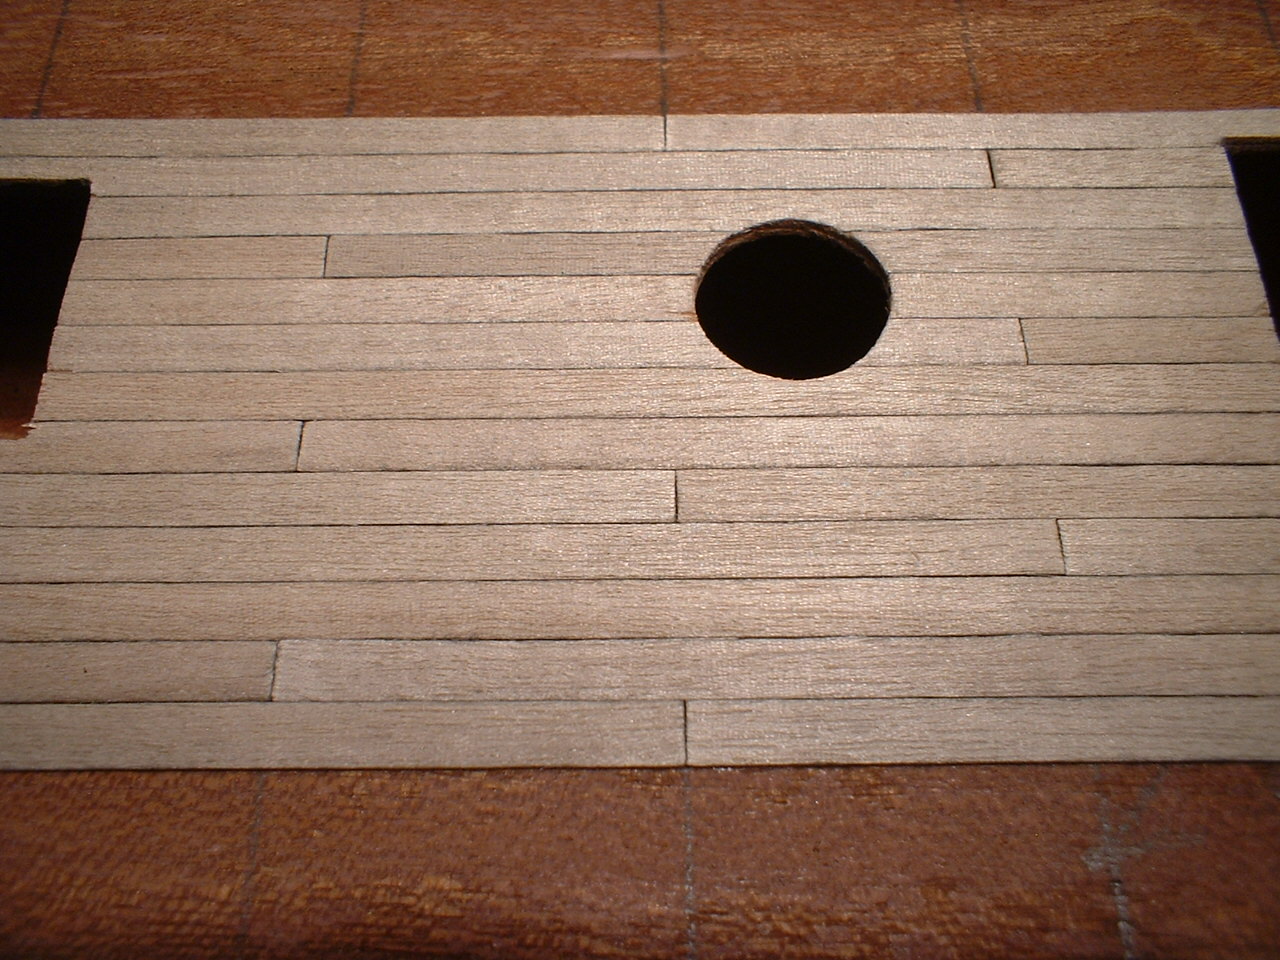
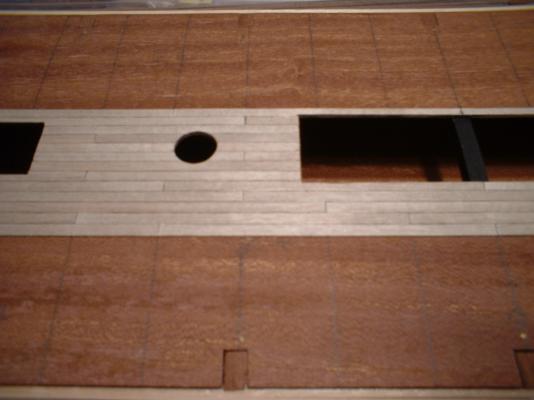
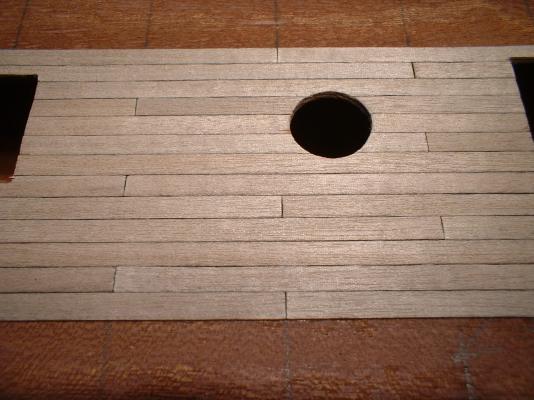
After gluing the metal bulkhead on I thought it would be a good time to plank the main deck - it will only be planked from the metal bulkhead forward because the deck behind it will be enclosed by the other decks & won`t be visible. The wood supplied for the decks is walnut ,which is a little too dark for the decks. I decided to try the soaking in bleach method to lighten them up. After soaking in bleach for 45 minutes & then rinsing very well with water I set them on some old towels to dry. After drying they had turned to a very light gray - much better. I was very pleased by the way they turned out. The first picture is before & after bleaching. Mark

- 652 replies
-
- 7
-

-
- royal william
- euromodel
- (and 1 more)
-
Pete - thanks for your kind words.I had my reservations when I started this kit because I haven`t done much scratch work before,but I am really enjoying it. The closer I look at the castings in this kit the more I am impressed - the detail is better than any kit castings I have seen in other kits.Everybody has different build methods so each one should look a little different. All the best to all this holiday season. Mark
- 652 replies
-
- 2
-
-
- royal william
- euromodel
- (and 1 more)
-
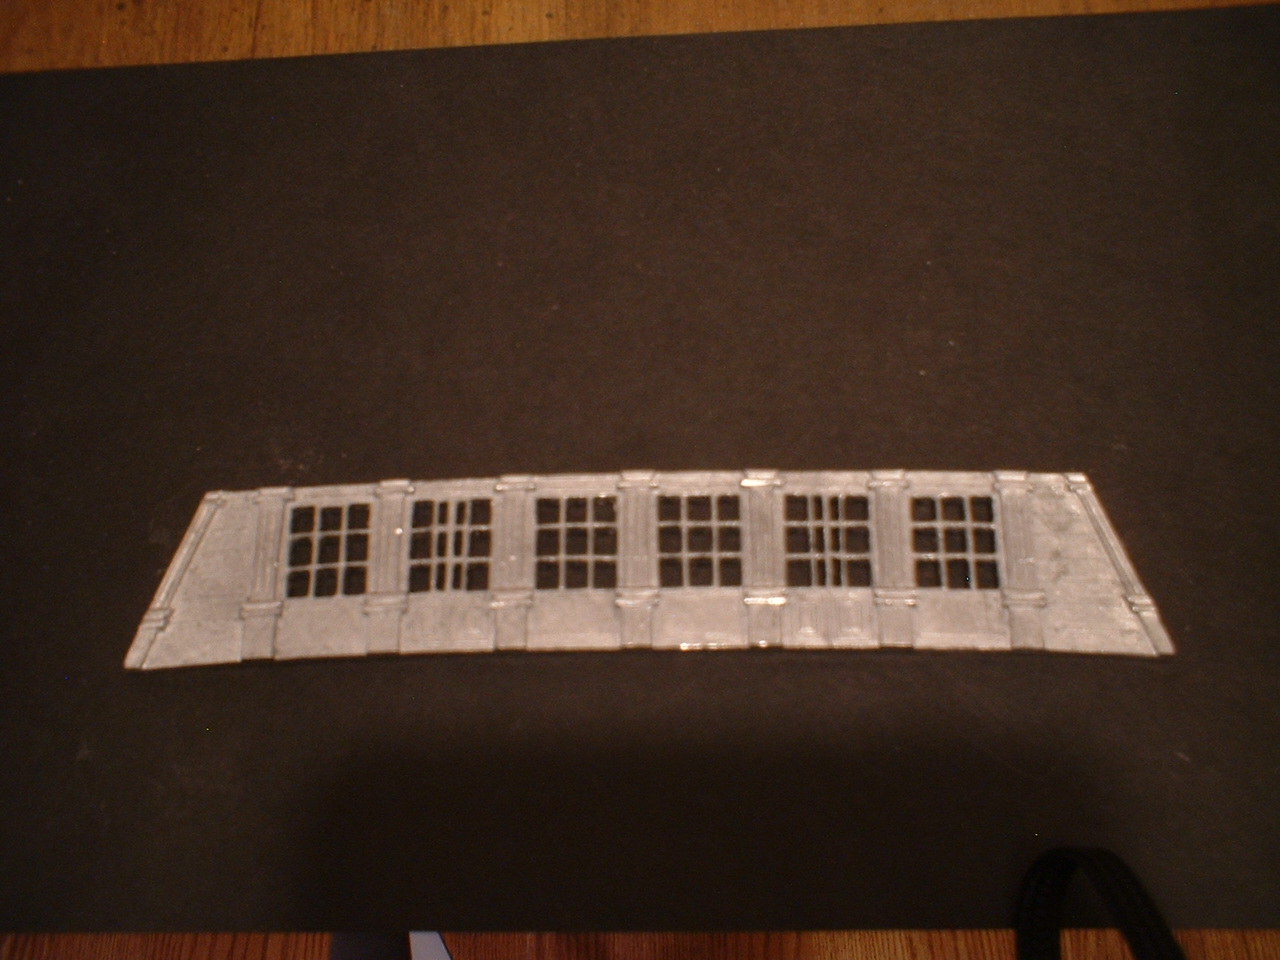
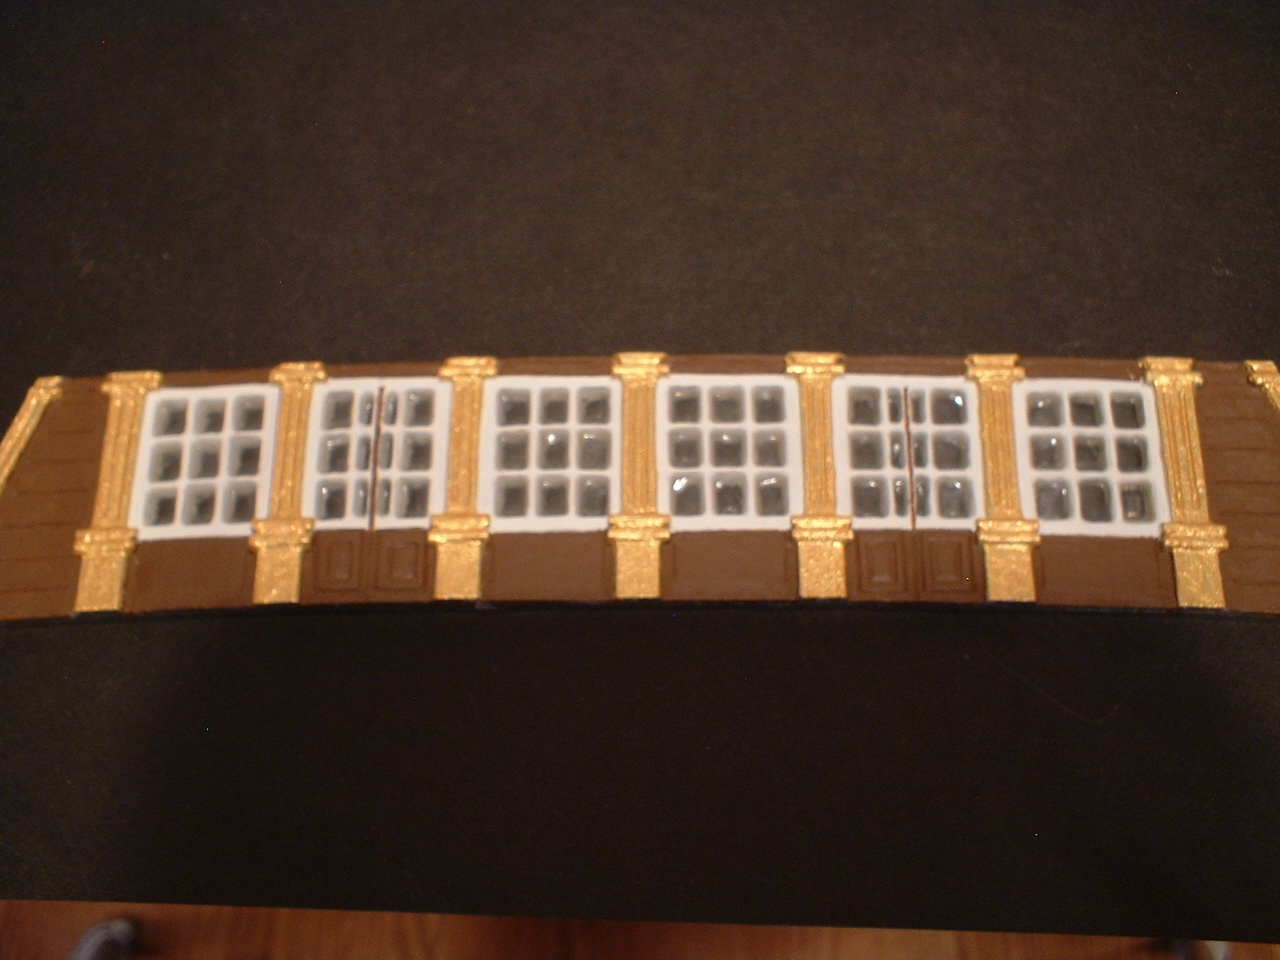
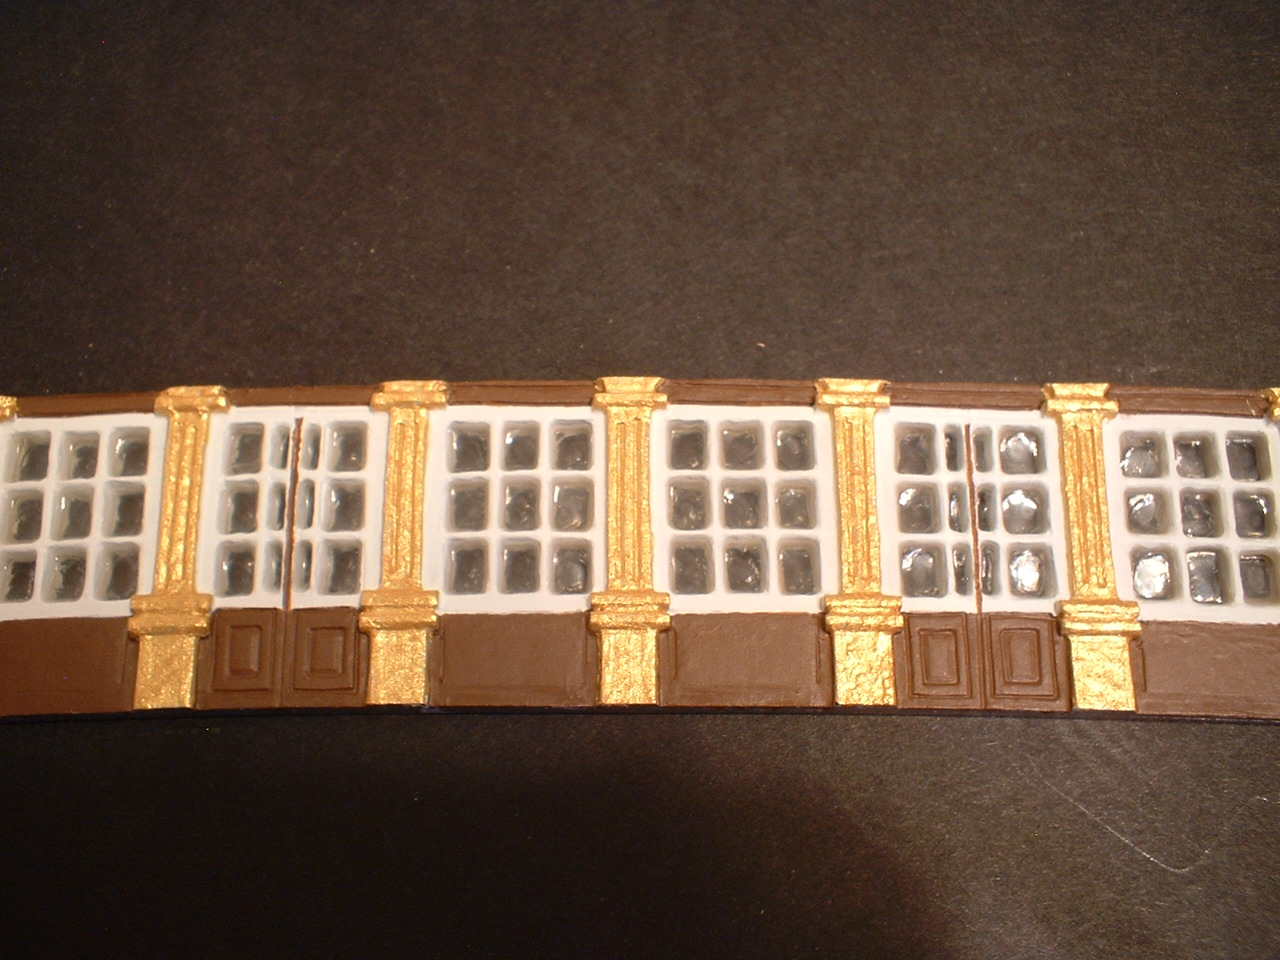
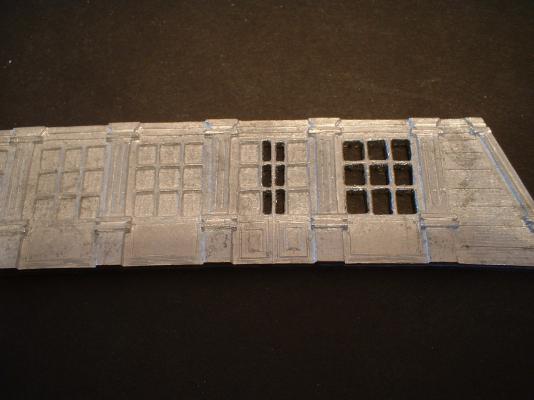
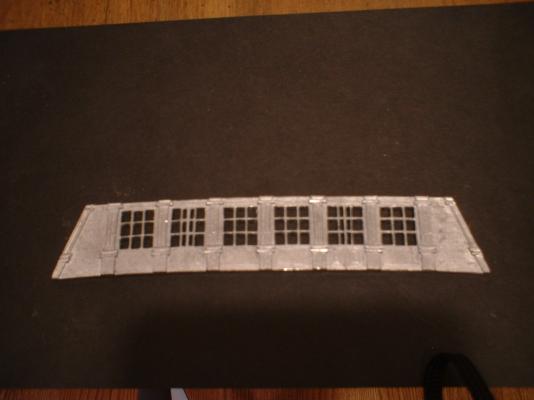
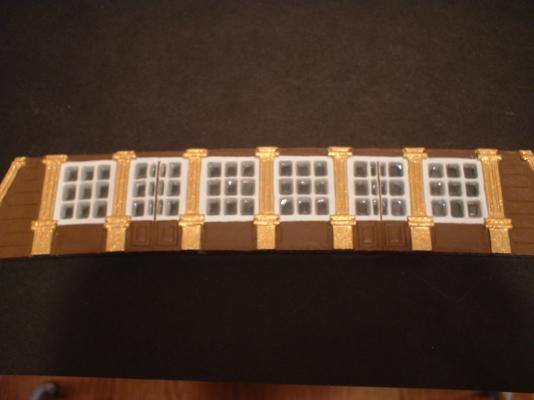
Started working on the cast metal bulkhead which is located under the quarter deck. The detail on the casting is pretty good,but I din`t want to just paint the windows.I got out my little mini drill & micro files & proceeded to open up the window openings. It was a little time consuming but not too difficult. Then I painted it with a medium brown with white window frames & gold trim.I thought it came out pretty good. Also I want to thank every one for there looks & likes. Thanks also to the other RW builders - I refer to your build logs frequently. And a big thanks to Pirate Pete for his very helpful interpretive info. Also forgot to mention I used a product called Micro Kristal Klear to make the window panes. Mark
- 652 replies
-
- 14
-
-
- royal william
- euromodel
- (and 1 more)
-
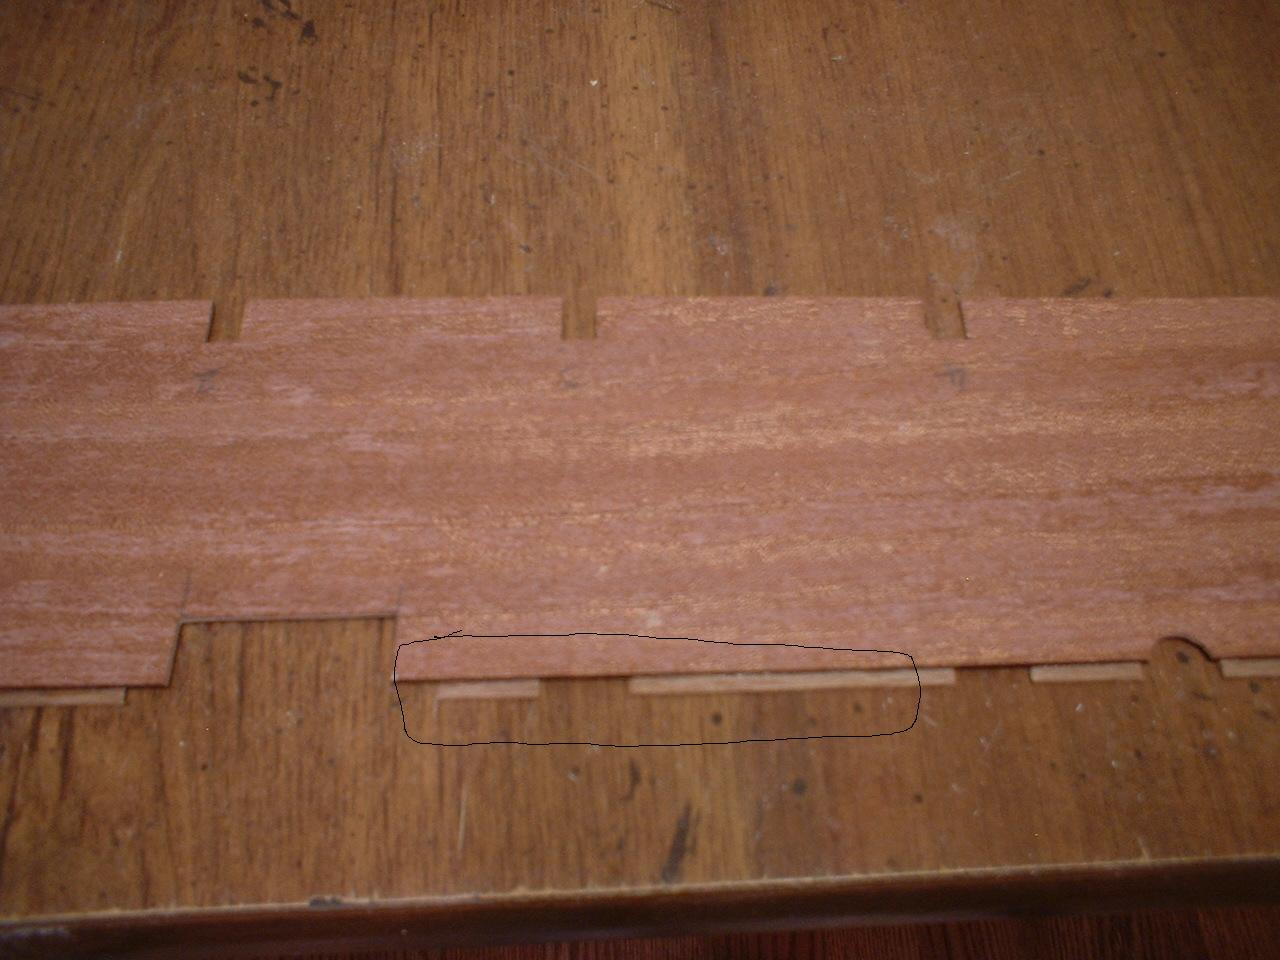
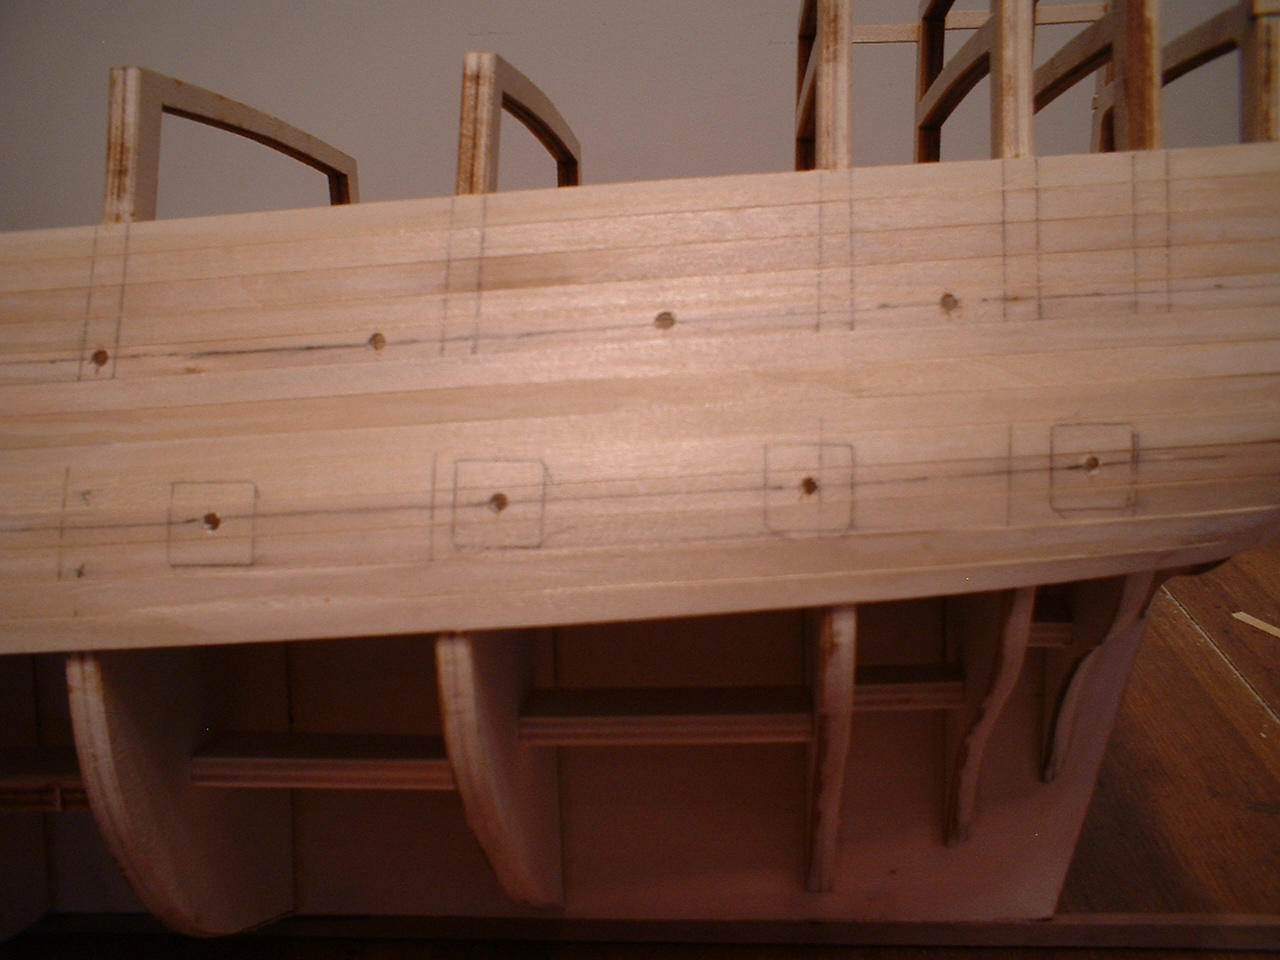
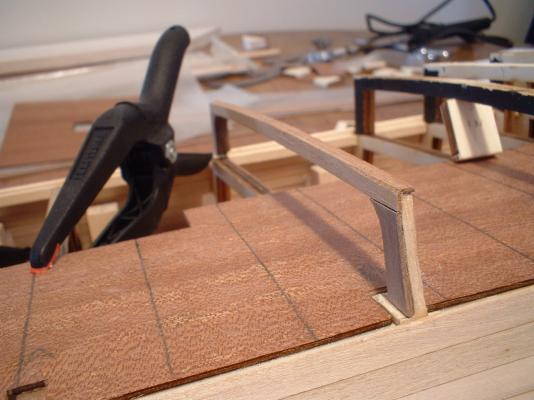
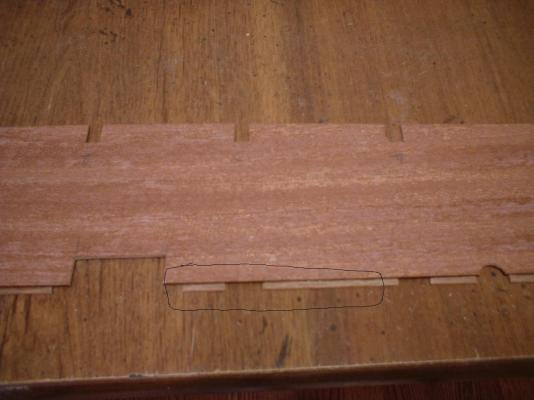
Well,I managed to cut the top part of the bulkhead frame down the middle without breaking it . After gluing on some thin walnut strips I now have a breast beam. I am now gluing the main deck down - I made some wedges out of scrap to hold the deck down while the glue dries. Mark
- 652 replies
-
- 6
-
-
- royal william
- euromodel
- (and 1 more)
-
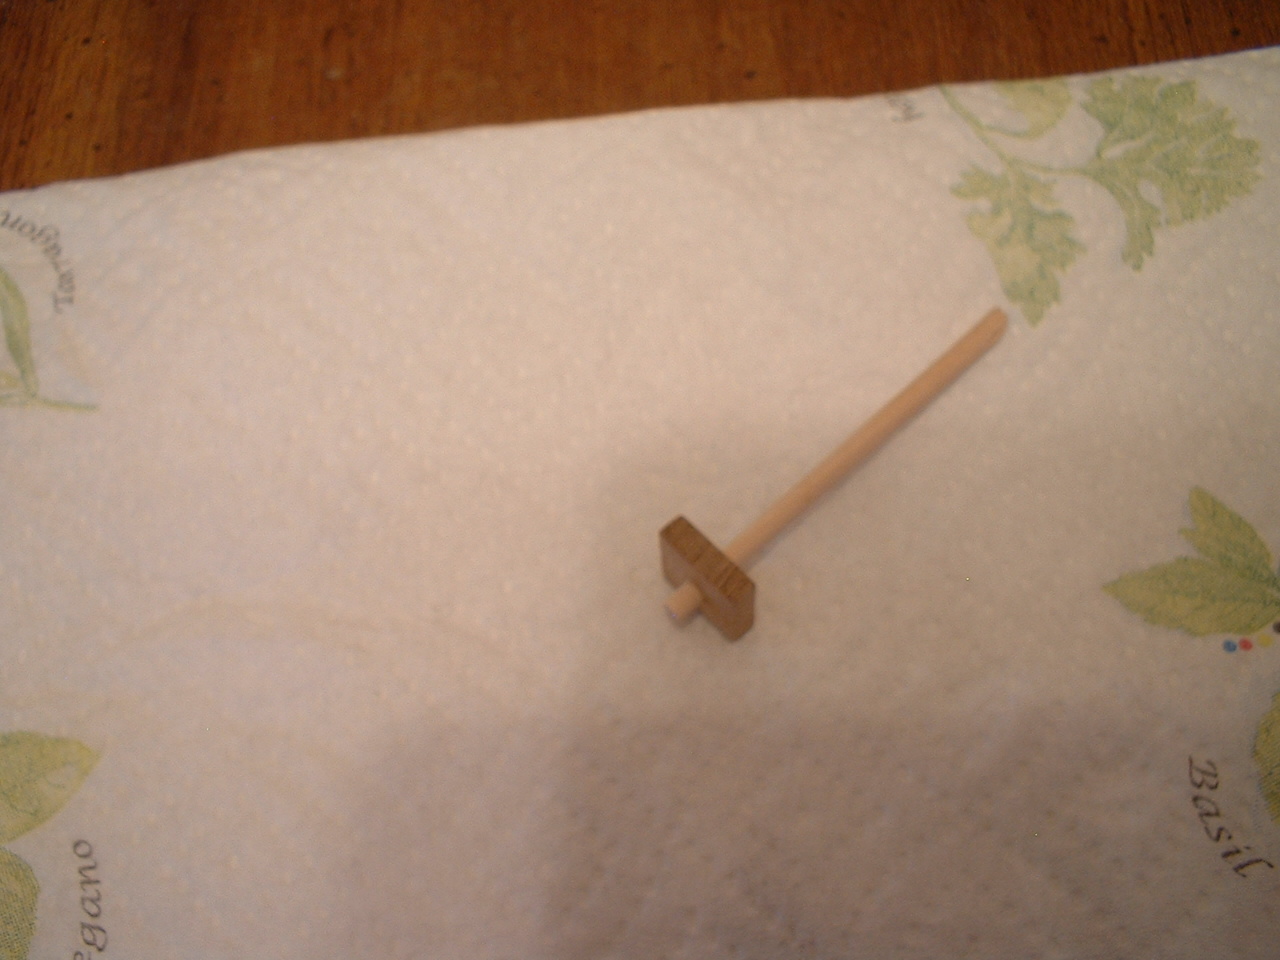
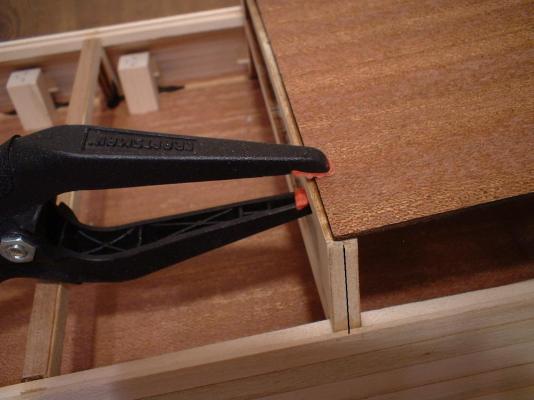
A small update - getting ready to install the main deck. I glued some small strips to the bottom of one of the deck halves to better keep the joint even when gluing. Apparently the top of bulk head B is supposed to be cut off before installing the main deck,then later on after installing the forecastle deck a beam needs to be made to support the rear edge of the deck. After test fitting the forecastle deck I see that it would not quite cover the top of the bulkhead,thus the need to remove it. I had another thought - I could cut the bulkhead down the center so the end would be a couple of MM behind the deck edge.Then I could put on a thin veneer to hide the plywood. That way I would not have to build a beam. I am installing the main deck before building up the bulwarks & leaving that bulkhead in would give the planking a bit more support. Any thoughts to this idea? Mark
- 652 replies
-
- 3
-
-
- royal william
- euromodel
- (and 1 more)
-
I think those are called fenders. I will check them before going any further. Thanks again for the info. Mark
-
Thanks Frank - I would say it`s a little more difficult,only because there are not a lot of pre-cut parts. The detailed plans are pretty good though. Mark
-
Thanks Keith,I will keep that in mind. By side strakes do you mean the wales? Mark
-
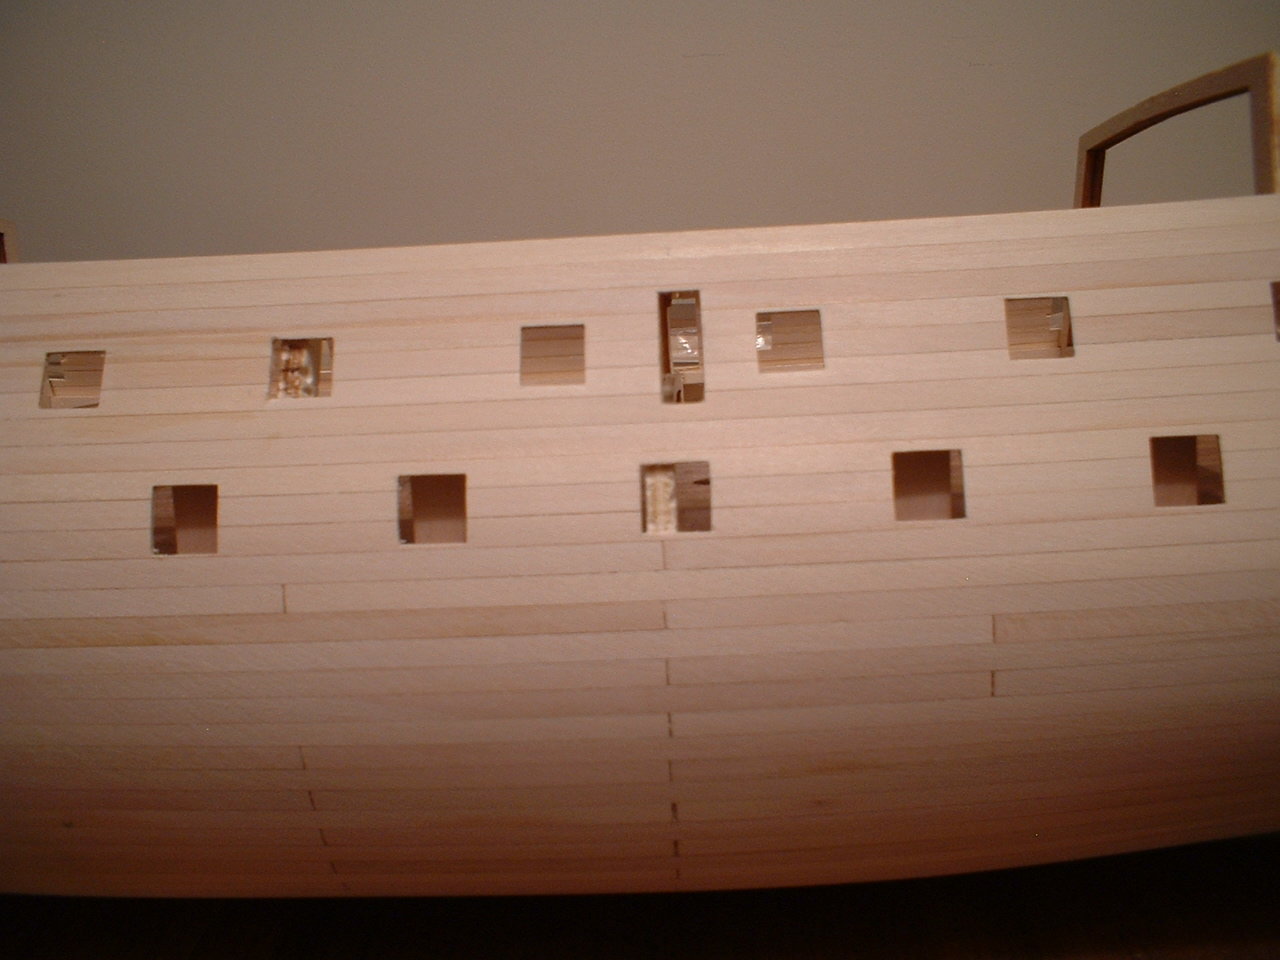
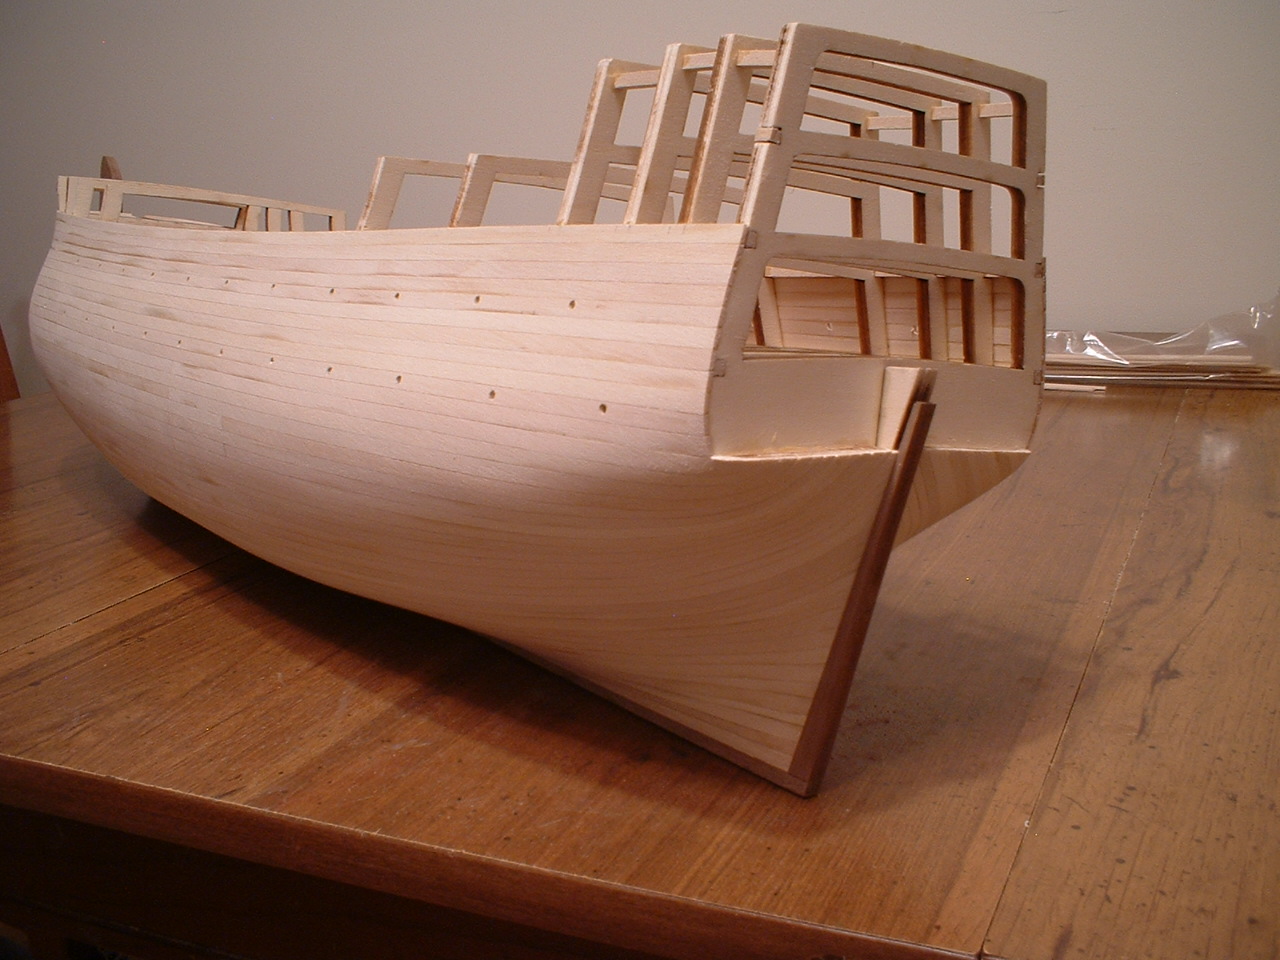
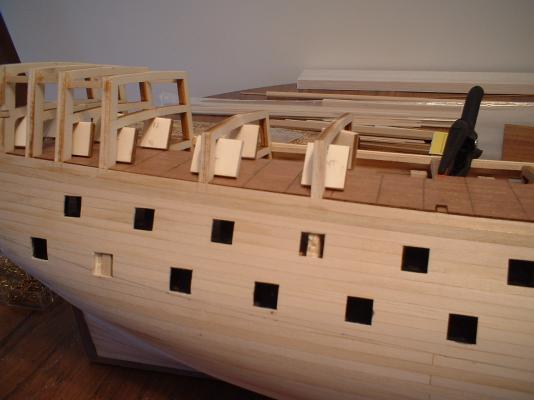
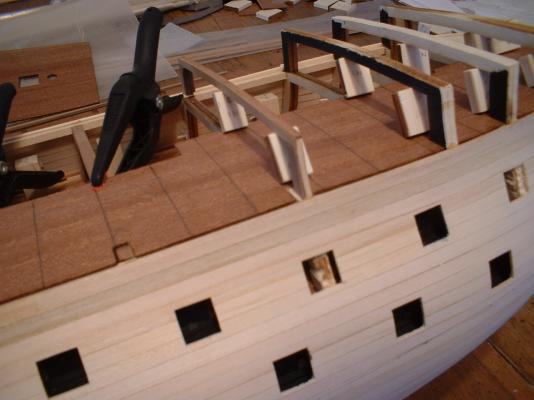
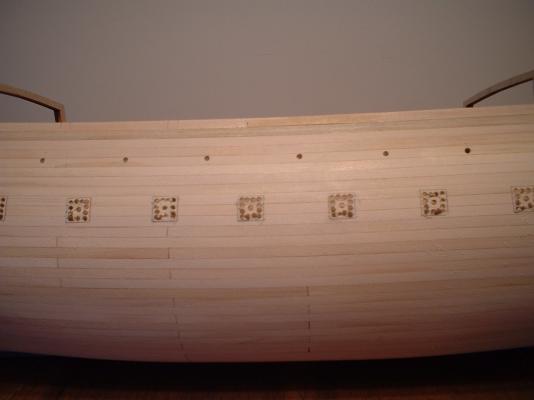
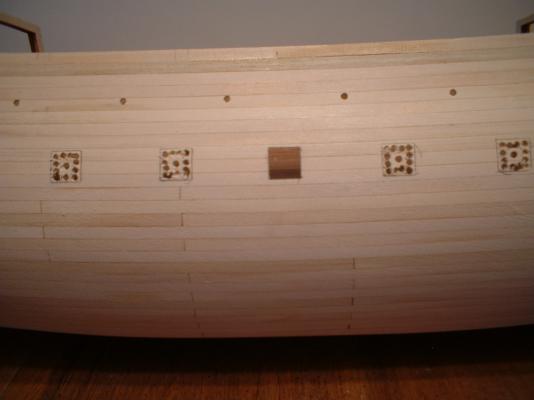
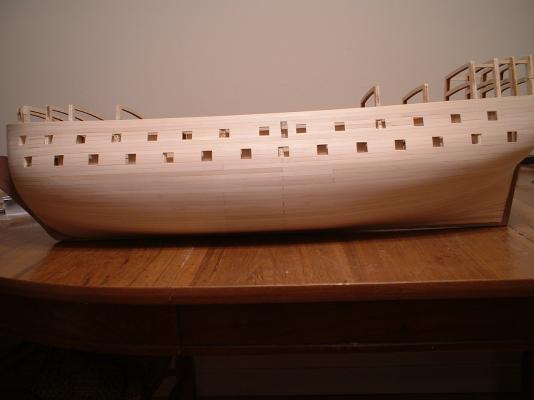
A little progress - I figured it was time to cut out the lower 2 rows of gunports. I have some wood squares on sticks made up of various sizes to mark out the ports. After marking out the ports I drilled a number of holes around inside the lines,cut out the center with a small keyhole saw,& filed them out to size. The lower row are 14mm & the middle row are 13mm. After that I thought it would be a good time also to cut the openings for the side entries. I ran into one small problem - apparently the gunports are a couple of mm too far forward. The side entries should be almost directly above the gunport at bulkhead 1 amidships,so what I did was after marking the bottom of the entry to be level with the second gun deck I simply cut part of the bulkhead out where it interfered. So not really a problem - just a little more work. I don`t know where I was off when marking the gunports because I triple checked the positions before cutting them out .Maybe the positions on the plans were slightly off. Mark


- 652 replies
-
- 12
-
-
- royal william
- euromodel
- (and 1 more)
-
Thanks Mike & Ian. The wood is the limewood that came in the kit. It`s just the first layer - the second planking is still to come. Mark
- 652 replies
-
- 1
-
-
- royal william
- euromodel
- (and 1 more)
-
Thanks Mike & Vince - I can hardly wait until I get to the galleries . Mark
-
Thank you Nigel. I am following your Nuestra Senora build & it looks like a really nice kit. Mark
- 652 replies
-
- 1
-
-
- royal william
- euromodel
- (and 1 more)
-
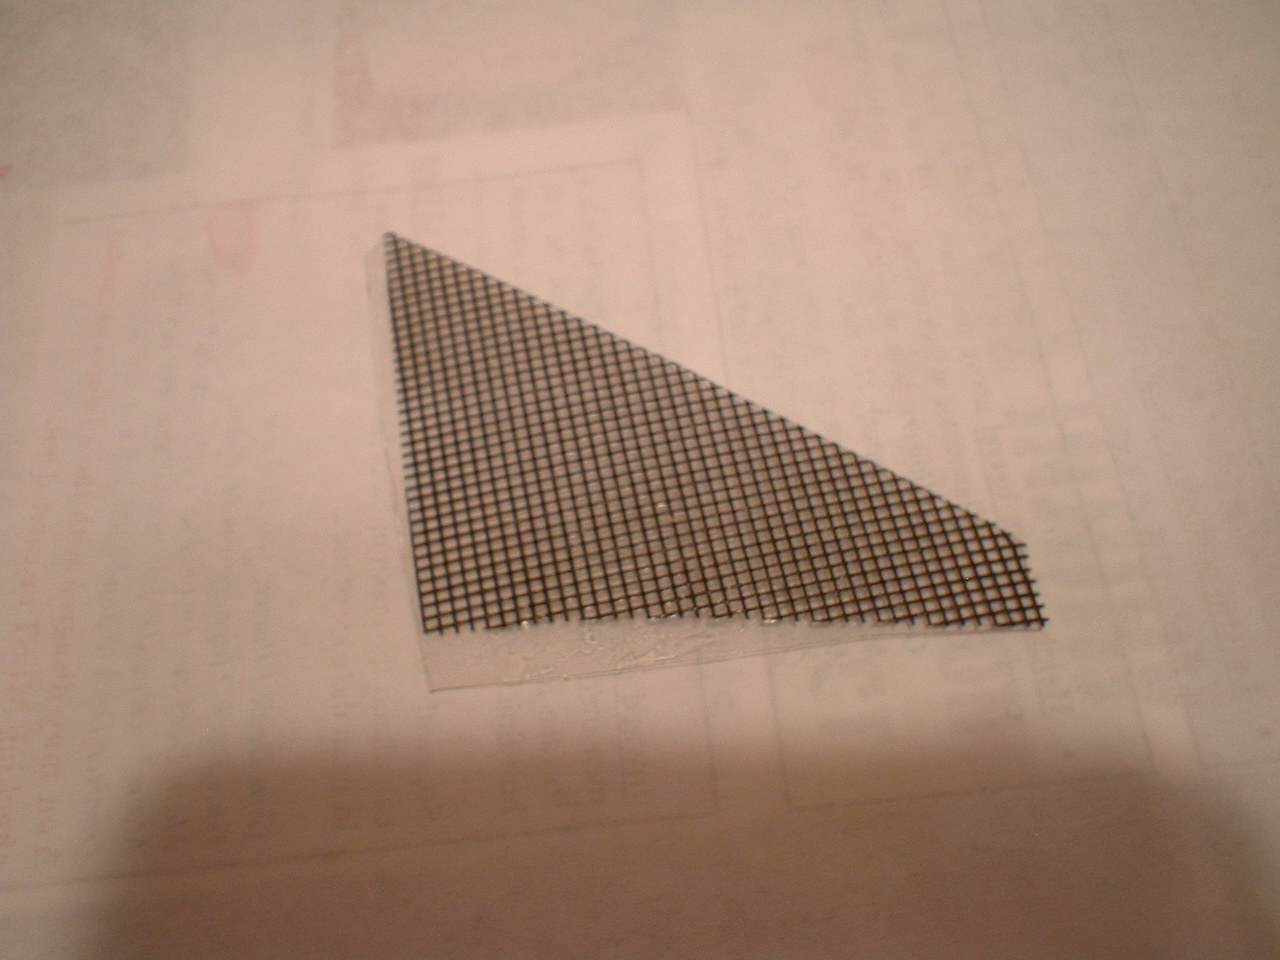
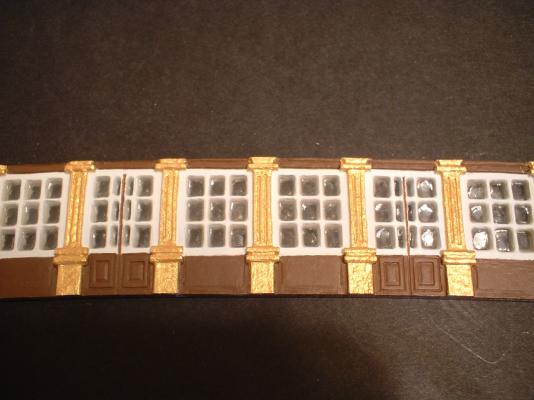
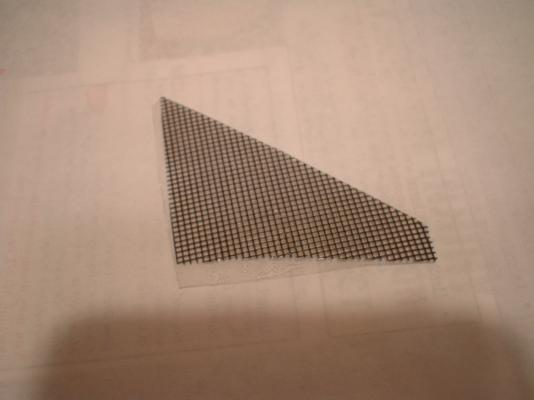
Hi Frank -here is a picture of what I was talking to you about concerning the clear acetate with screen material glued on to simulate window panes. Mark
-
I was born & raised in Des Moines & still live just north of there so I will also follow along. Mark
-
Hi Rob - I put the lower planks on in 2 pieces for ease of assembly. It was too difficult to make the severe bend at the stern with the bow portion already glued in place. The framework is really solid so the strength of the hull is not compromised. The only other pictures I have of the planking are in post #24. I did use more CA than I really wanted to - I did a lot of edge bending at the bow & there was no way I could clamp them well enough for PVA to set up. The glue between the planks was some PVA & some CA. Mark
- 652 replies
-
- 2
-
-
- royal william
- euromodel
- (and 1 more)
-
Sovereign of the Seas kit (was there ever more than one)
marktiedens replied to mtdoramike's topic in Wood ship model kits
I built the old version of SoS way back. I don`t have the plans anymore but I believe they were dated from the 70`s or early 80`s. I remember that it was advertised as 43 inches long. From what I have seen the older kit version is a much nicer kit than the newer version - less pre-made parts but better quality materials. there was no balsa in the old version. I don`t remember the scale. Mark -
Thank you all for your kind words - I would rather spend more time on the first planking than trying to fix it in the middle of second planking. Mike - I have a number of those plastic containers from previous builds. Due to the number & size of the castings if they put them in hard containers the box would probably need to be twice the size it already is. By the way - the castings are top notch except maybe the windows. Photo etch would have been nice for those. Mark
-
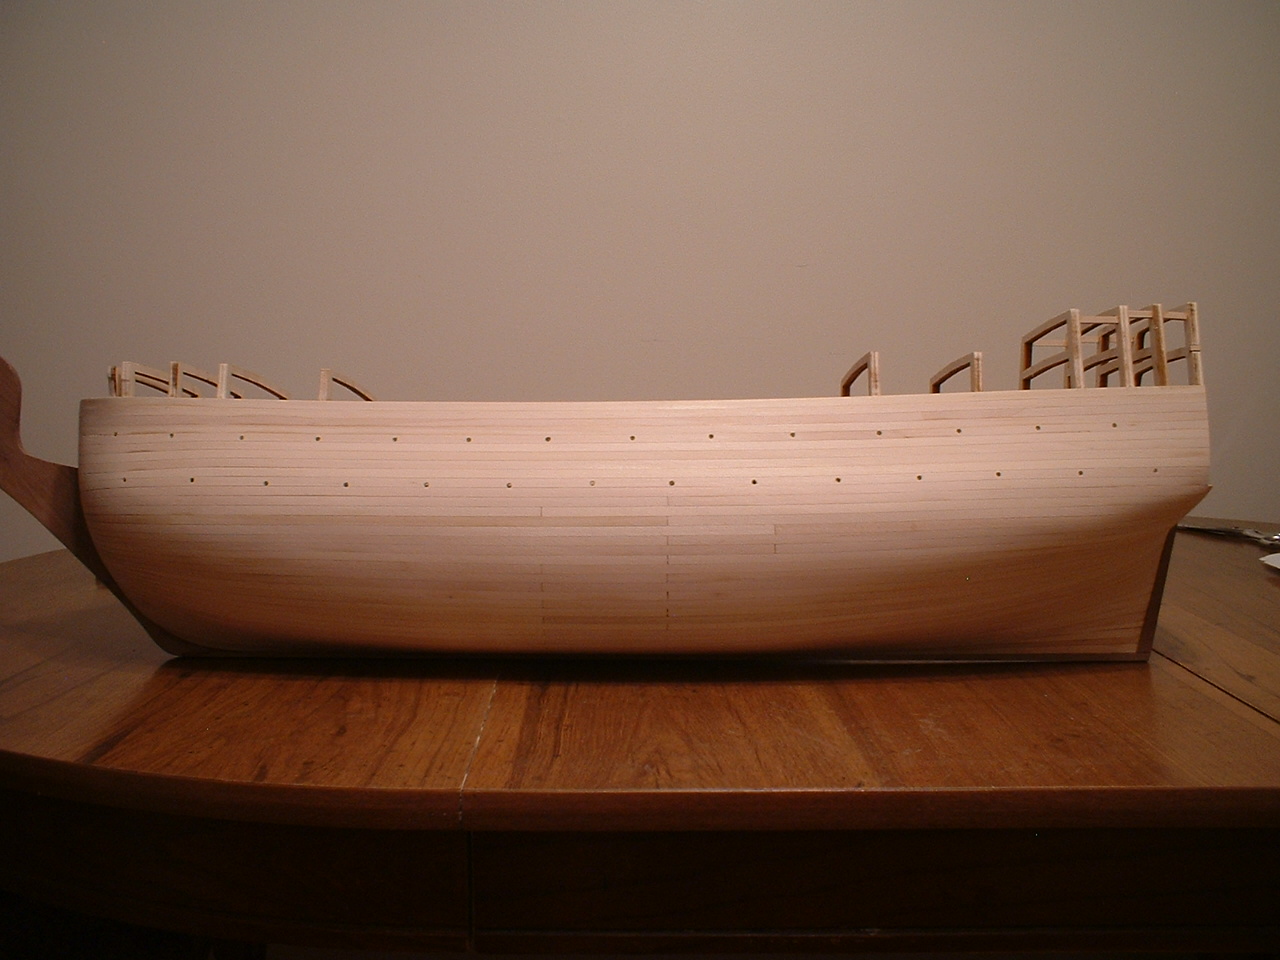
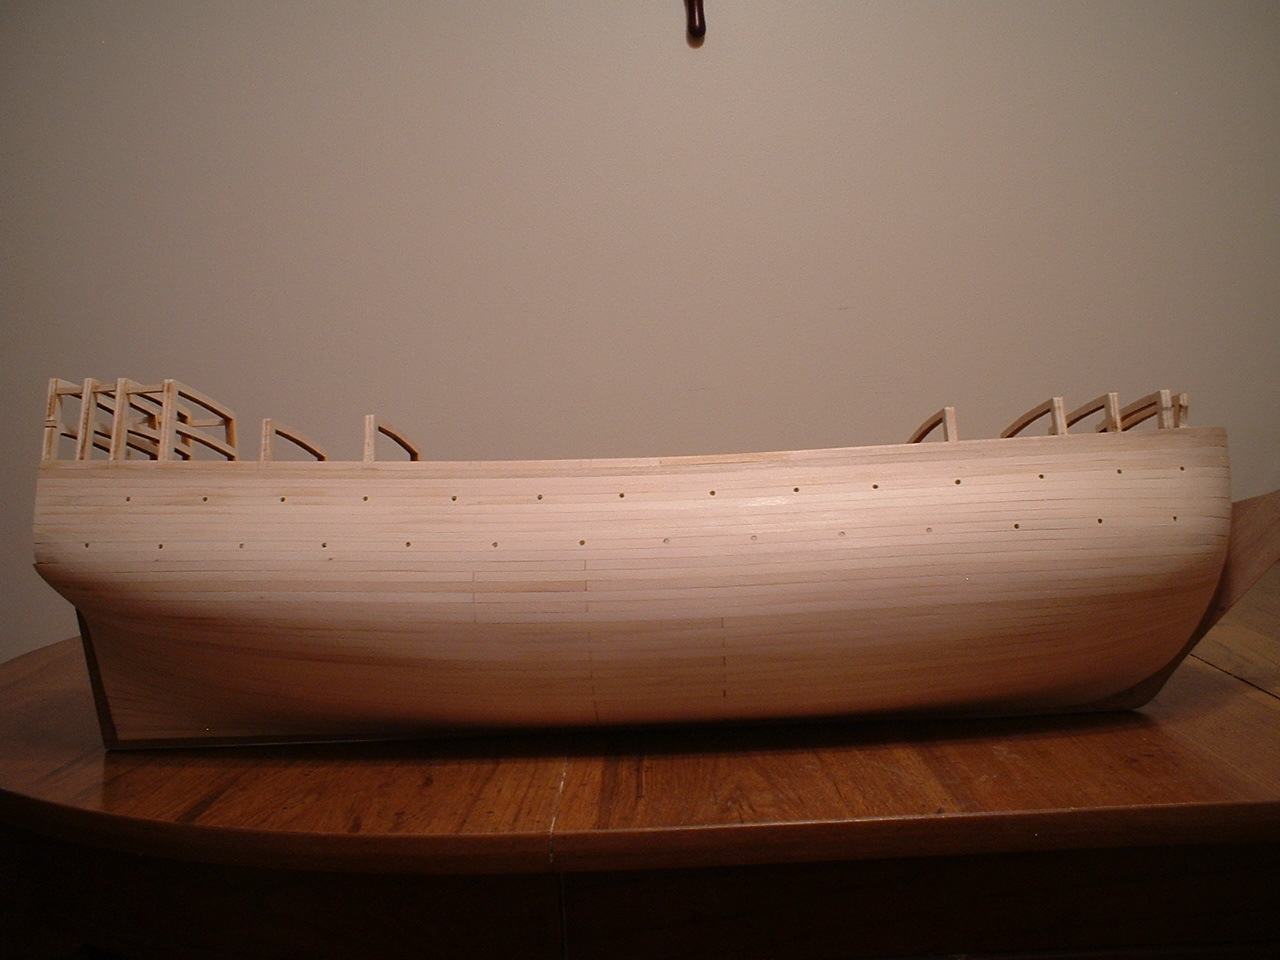
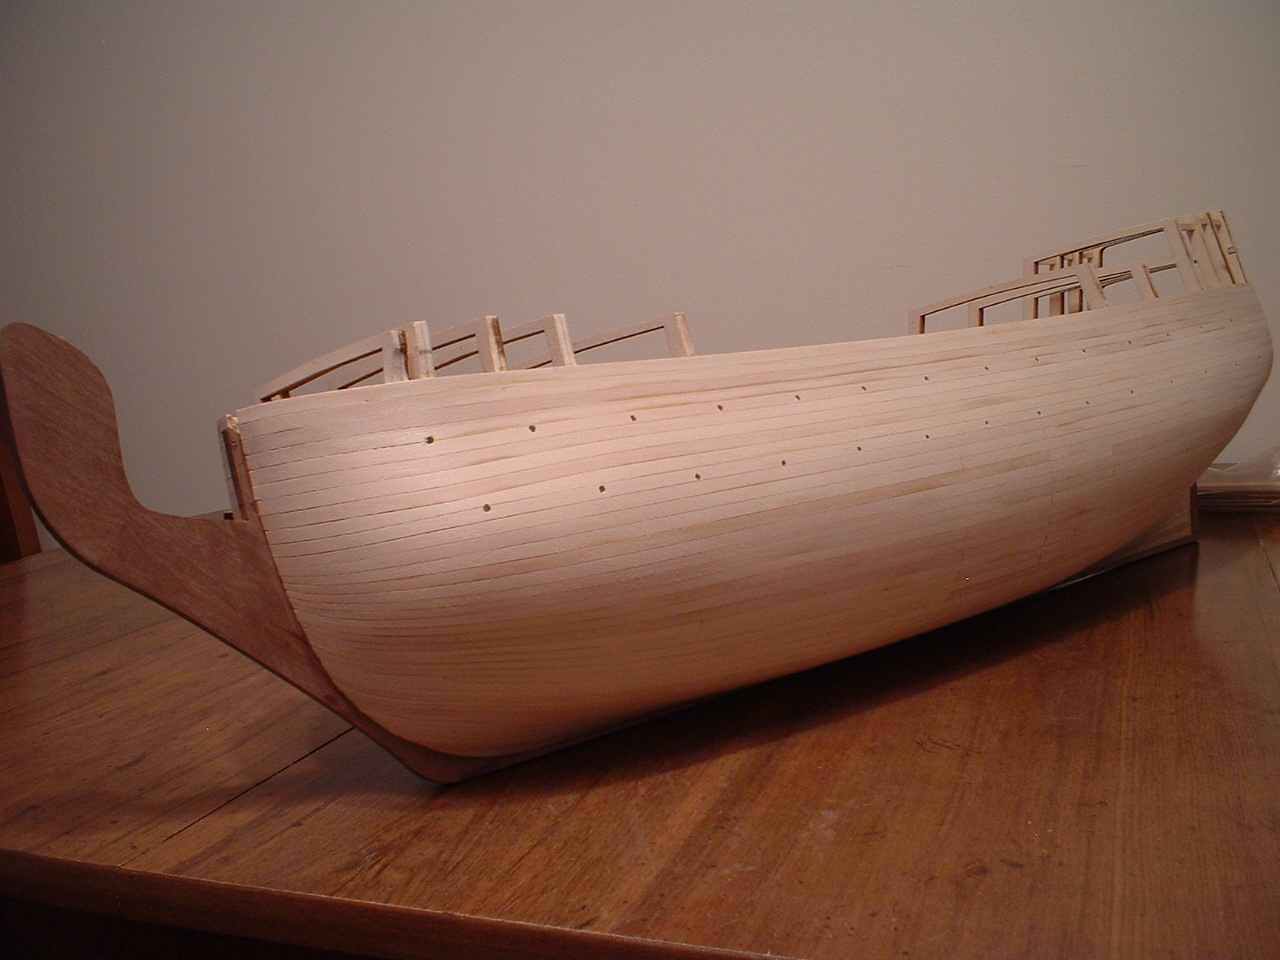
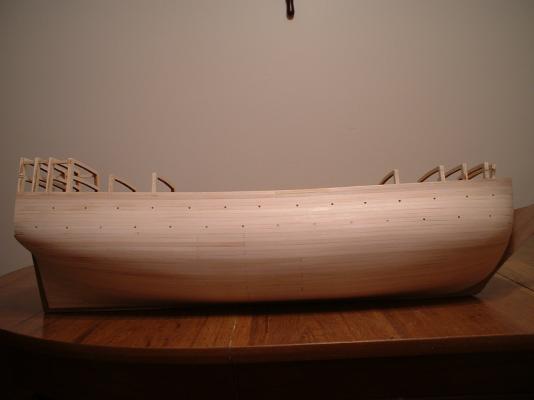
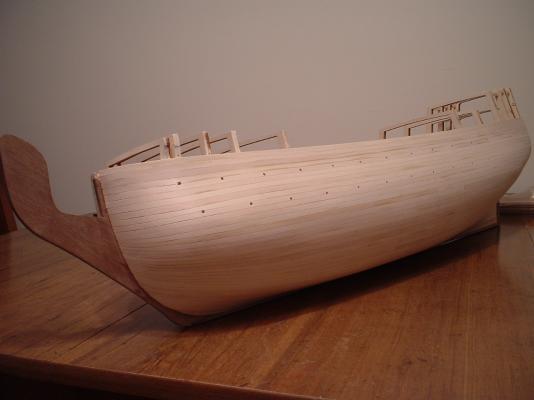
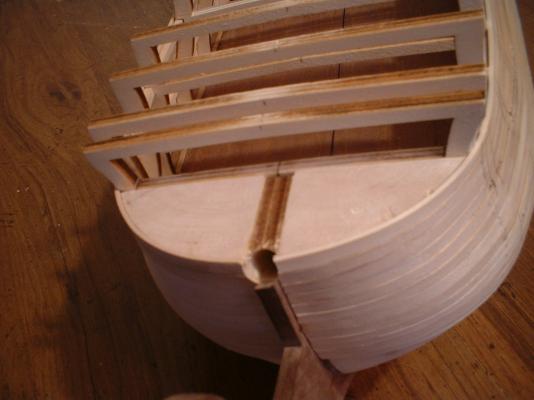
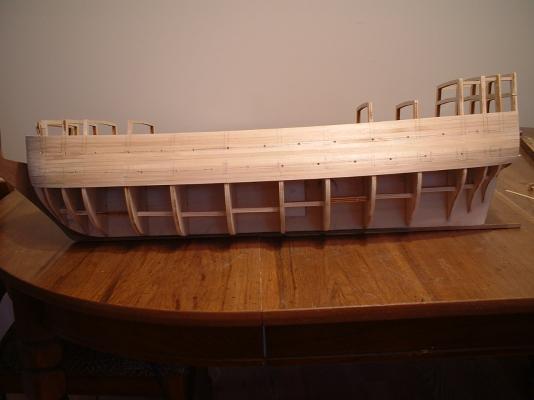
I haven`t posted for a while - been planking. The first planking from the main deck down to the keel is now done & sanded. No filler was needed . I was careful to add small shims & file a little as I planked. next will be cutting out the gunports & adding the mounting blocks for the cannon barrels. I will probably not be adding guns to the ports that are blocked by the bulkheads. Mark

- 652 replies
-
- 12
-
-
- royal william
- euromodel
- (and 1 more)
-
Looks great so far - I`m still working on the first planking,which is also taking a long time. Mark
-
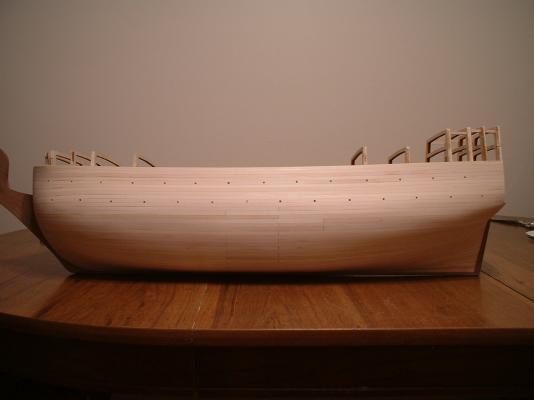
A little update - before starting on the planking I thought it would be a good time to make the hole for the bowsprit. Planked down from the main deck to just below the lower gun deck. After triple checking the gun port positions vertically & horizontally I drilled pilot holes for marking & cutting the gun ports out, I am trying to decide whether to cut out the gun ports now or finish planking down to the keel & sand the hull first. I`m thinking it may be easier to plank the lower part of the hull first so I don`t snag the sandpaper on all the holes. Mark

- 652 replies
-
- 8
-
-
- royal william
- euromodel
- (and 1 more)
-
You may be right about those 4 & 6 hole blocks . However ,I don`t know how you would rig them - one too many holes. Mark
-
Hi Michael - do you know if the fore stay blocks are 4 hole & 6 hole blocks? If they are I guess I missed that one. So hard to find a good close-up of some areas. I can`t tell if Clayton`s is set up that way or not. 99% of the builds I have seen just use 3 hole blocks. Maybe another simplification by Corel . Mark