
HOLIDAY DONATION DRIVE - SUPPORT MSW - DO YOUR PART TO KEEP THIS GREAT FORUM GOING! (Only 72 donations so far out of 49,000 members - Can we at least get 100? C'mon guys!)
×


marktiedens
-
Posts
1,737 -
Joined
-
Last visited
Content Type
Profiles
Forums
Gallery
Events
Everything posted by marktiedens
-
Looks good. As far as the #34 part goes,I would add some material & sand or file it back to match the other piece. Or just install it as is - the small gap will not make any difference when planking over it,especially after fairing the edges prior to planking. Mark
-
Lou - I would drill holes where the ends of the slot is,then use a very sharp knife or mini saw - the kind that fit in an xacto handle - to open the slot between the drilled holes & finally clean it up with a small file. Mark
-
I had the same problem with the plywood delaminating - can be very frustrating. Warping was also a problem - I could have used some of the keel former as a cereal bowl! Mark
-
Thanks Richard Mark
-
Looks sharp Mark
-
Thanks very much! Still have a lot of trim to add. Mark
-
Thanks O.C. Mark
-
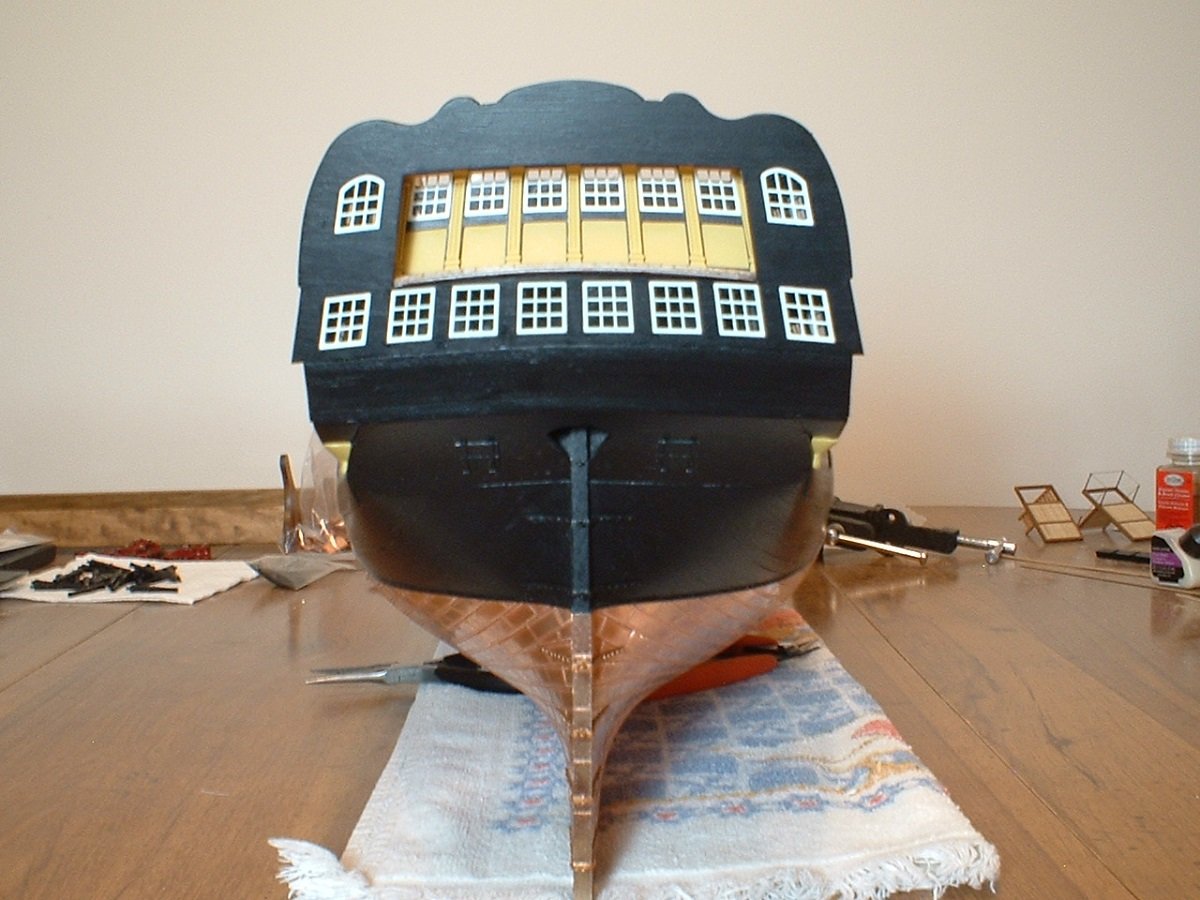
Hi - The poop screen bulkhead is now assembled,painted,& glued in place. Also glued the stern fascia on & added the windows. Mark
-
build logs order
marktiedens replied to Papa's topic in Using the MSW forum - **NO MODELING CONTENT IN THIS SUB-FORUM**
If you click on the little circle at the left of the log title it will take you to the first unread post. If the log title is in gray with no circle at the left,then there are no new posts in that log since your last visit. Mark -
I love these big ships. I have already done the Royal William,so this would be a nice addition! Mark
-
Marvelous presentation & great tribute. Mark
-
Thanks Frank Mark
-
Thanks O.C. Mark
-
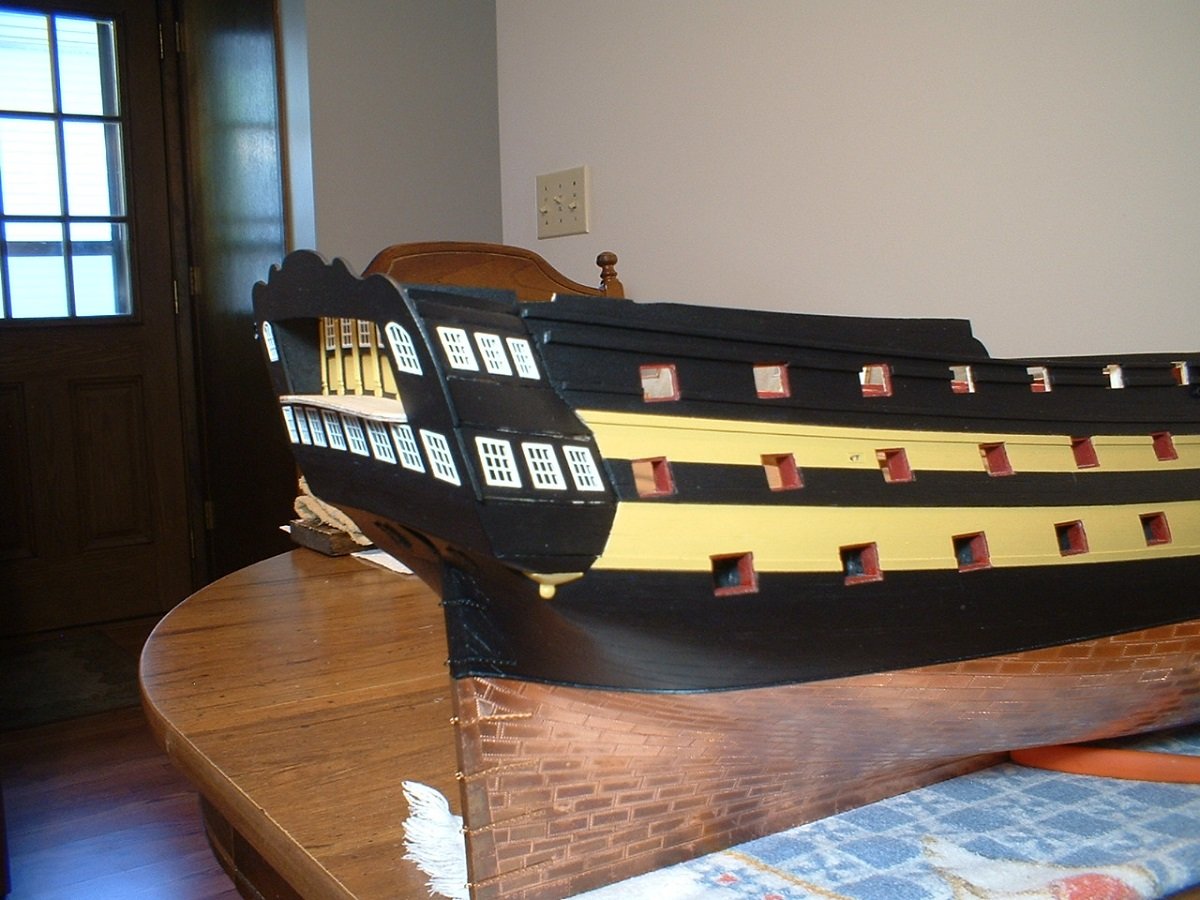
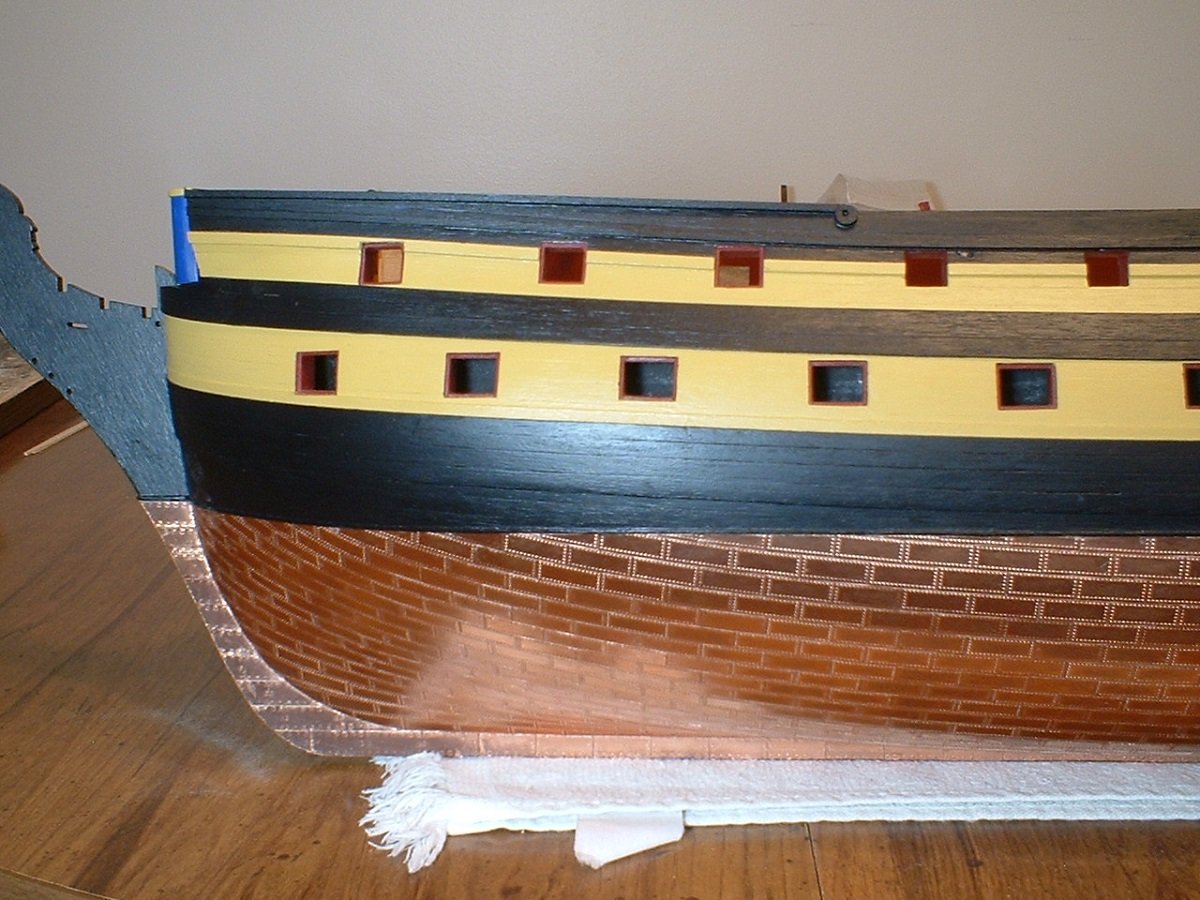
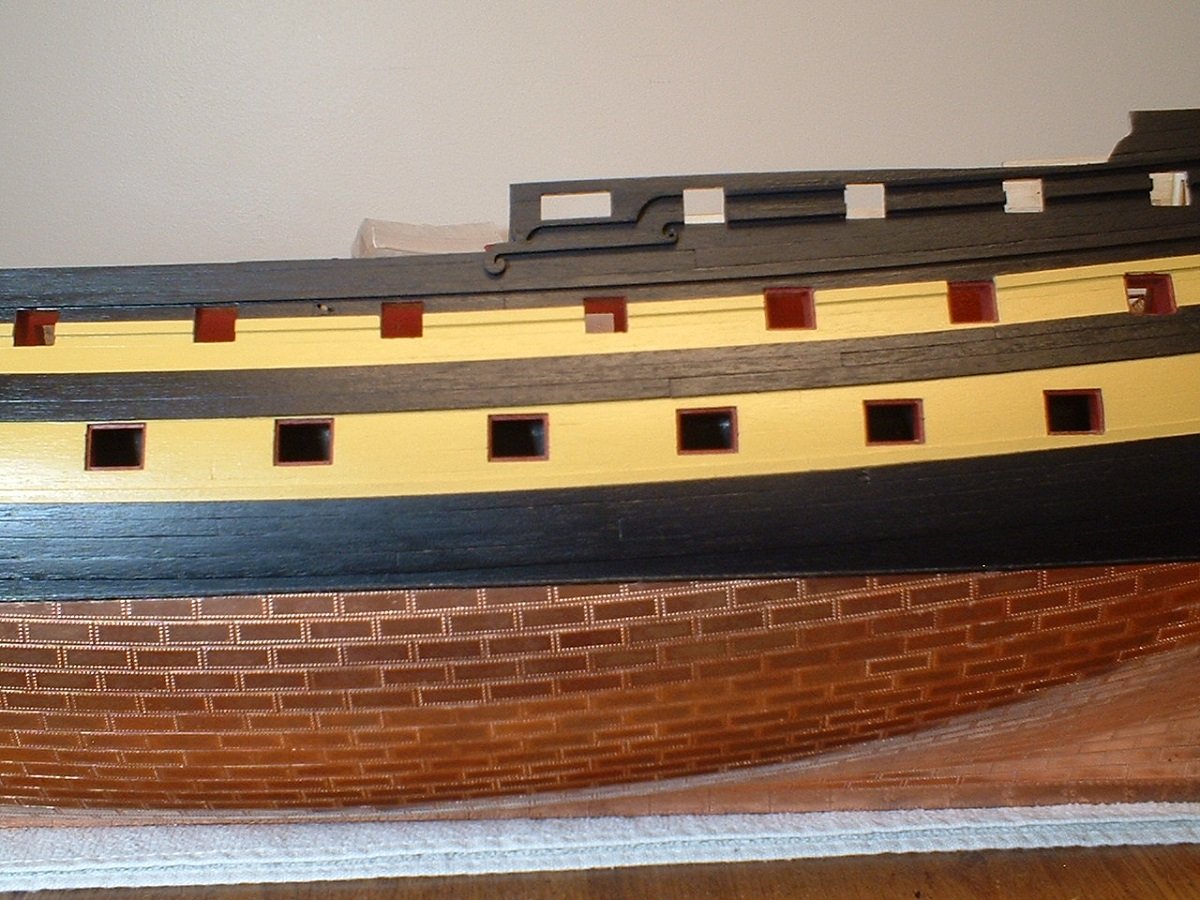
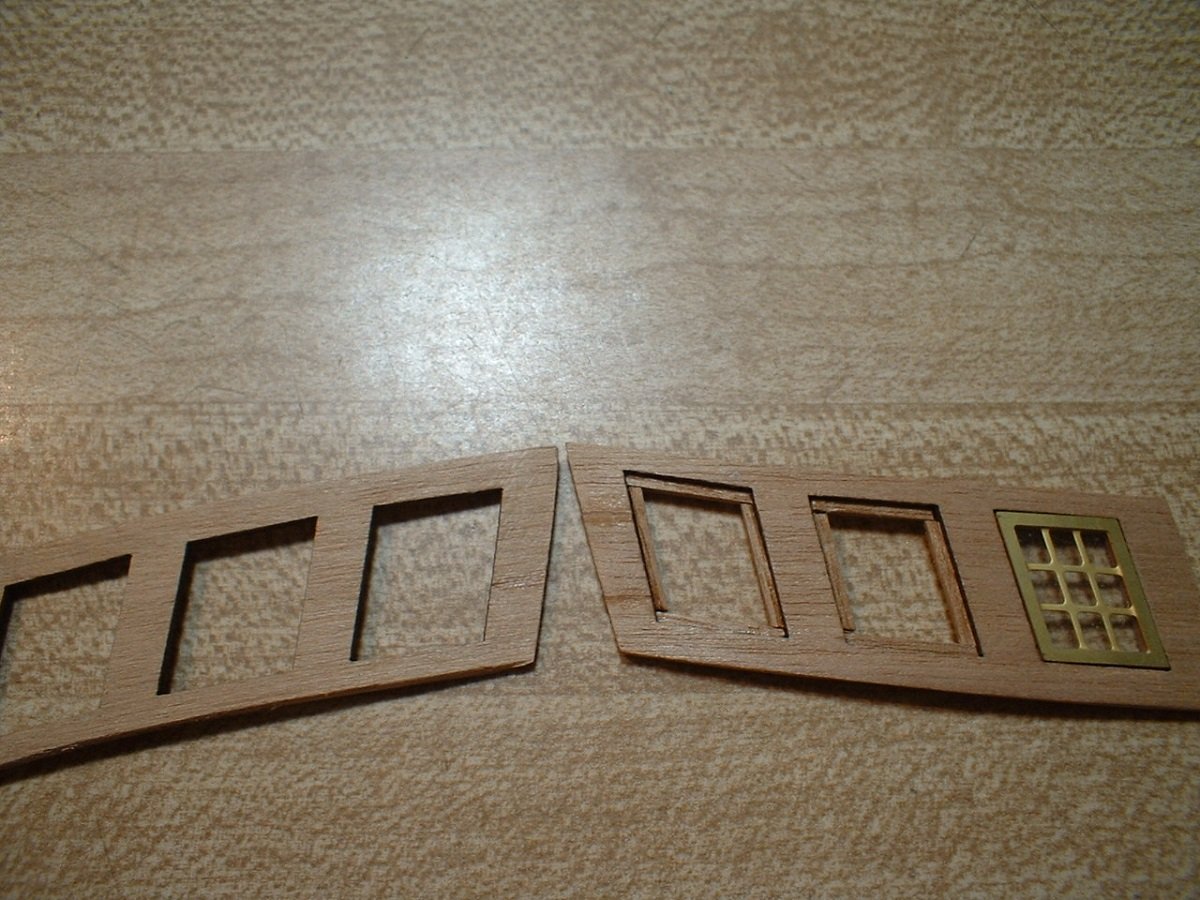
Hi - All the side mouldings are now on,along with the gallery window frames. The decorative mouldings are supplied as laser cut walnut & are extremely fragile - I broke each one at least 3 times just cutting them out of the walnut sheet & smoothing the edges! Some of the laser cutting does not go completely through the sheets. I managed to get them glued back together & on the ship,though. After that the upper hull painting was finished up. and..............the fenders,chesstress, & steps were added The fenders & chesstrees were laser cut & just needed slots filed to fit over the mouldings plus a little filing to fit tight to the hull. The steps were made from 1x1 & 1x2 strips glued together & filed to shape. Thanks for looking in! Mark
-
Great job on a beautiful airplane! Mark
-
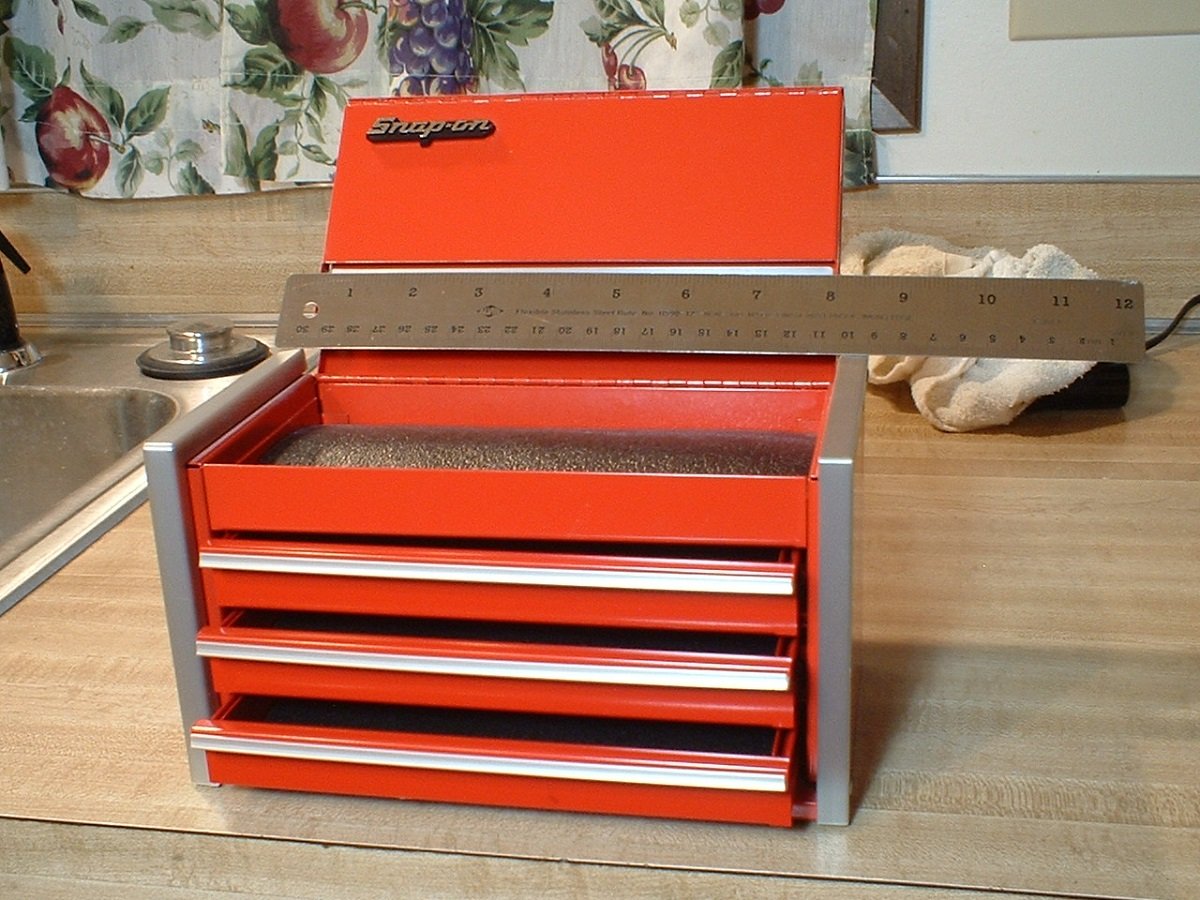
Now THIS is a tool box. Mark
-
And there seems to be plenty more kits on the shelf below! Mark
-
Just remember you`re not older,just more experienced. Mark
-
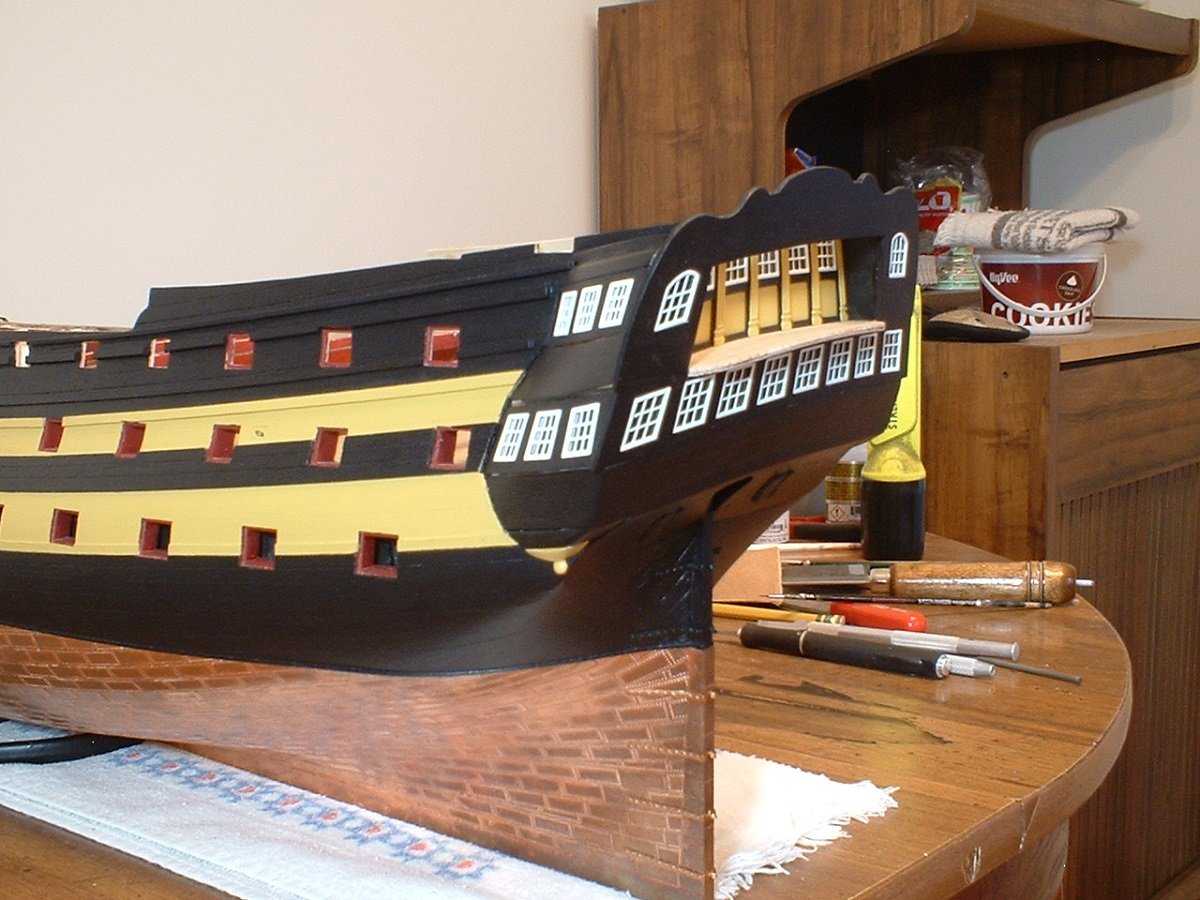
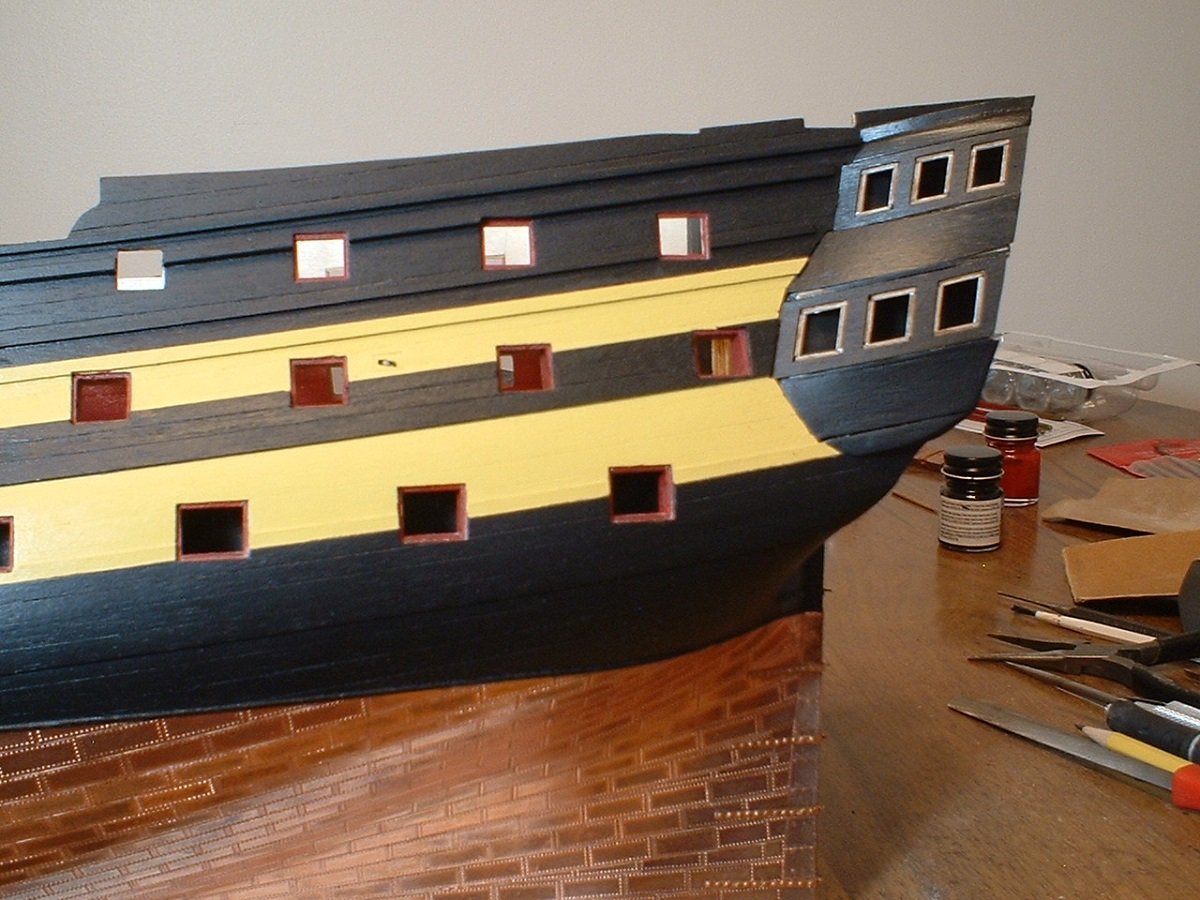
Continuing on....... The openings in the side gallery window patterns are slightly bigger than the the brass etched windows,so with no good way to glue them in I am making some inner frames out of some 1x1mm strips so the windows will have something to rest on. That will also allow me to get the patterns glued on without worrying about damaging the brass windows. Kind of a PITA,but it seems to be the best way I can think of. Mark
-
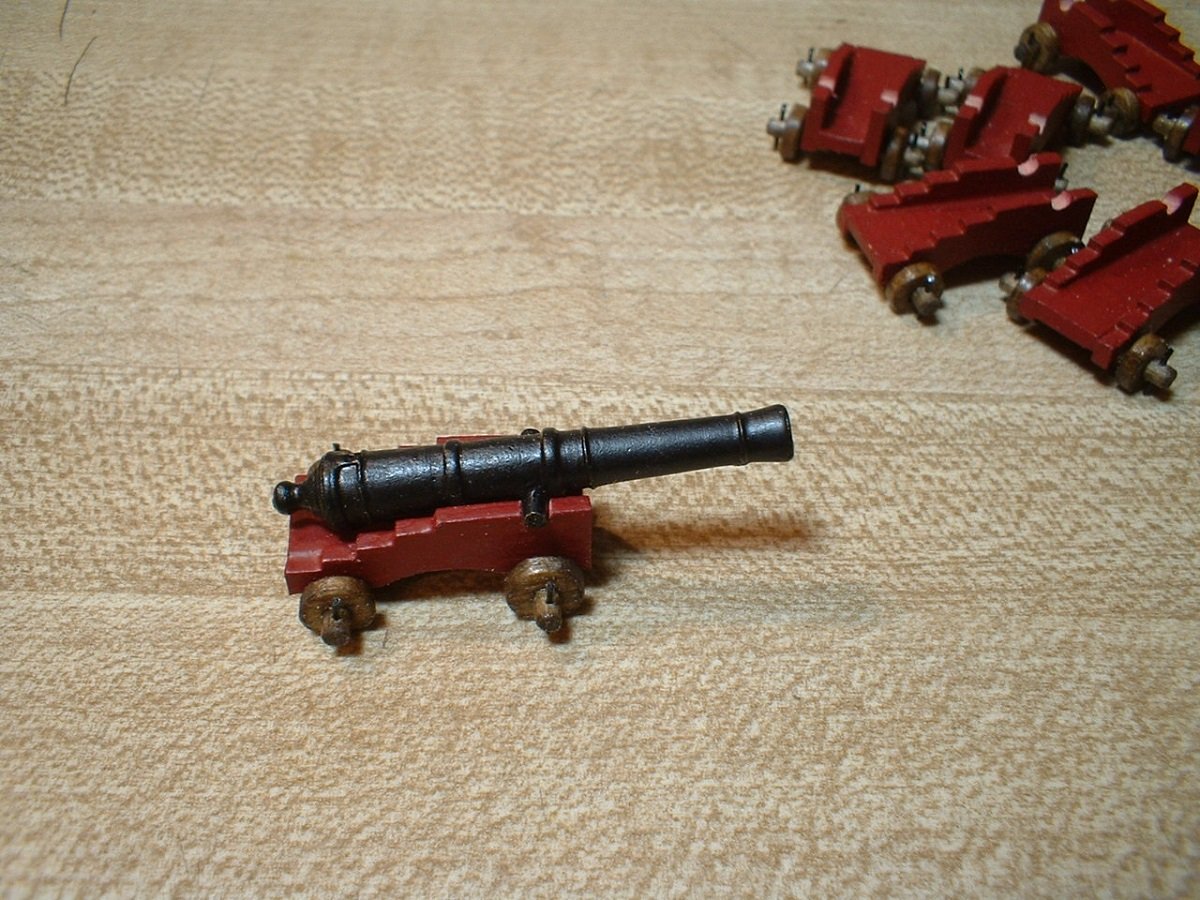
Thanks Frank! No primer - just 3 coats of of thinned satin black which I made up by adding flat black to semi-gloss black to dull it down. I rarely use primer unless I`m painting a light color like yellow or some reds over a dark surface. The paint just doesn`t seem to stick any better on metal if I use primer. I find it more important to make sure the metal is clean before painting. On brass,I scuff it slightly with 4000 wet-dry sandpaper first. If the cannon were brass,I would probably chemically blacken them,rather than paint. Mark
-
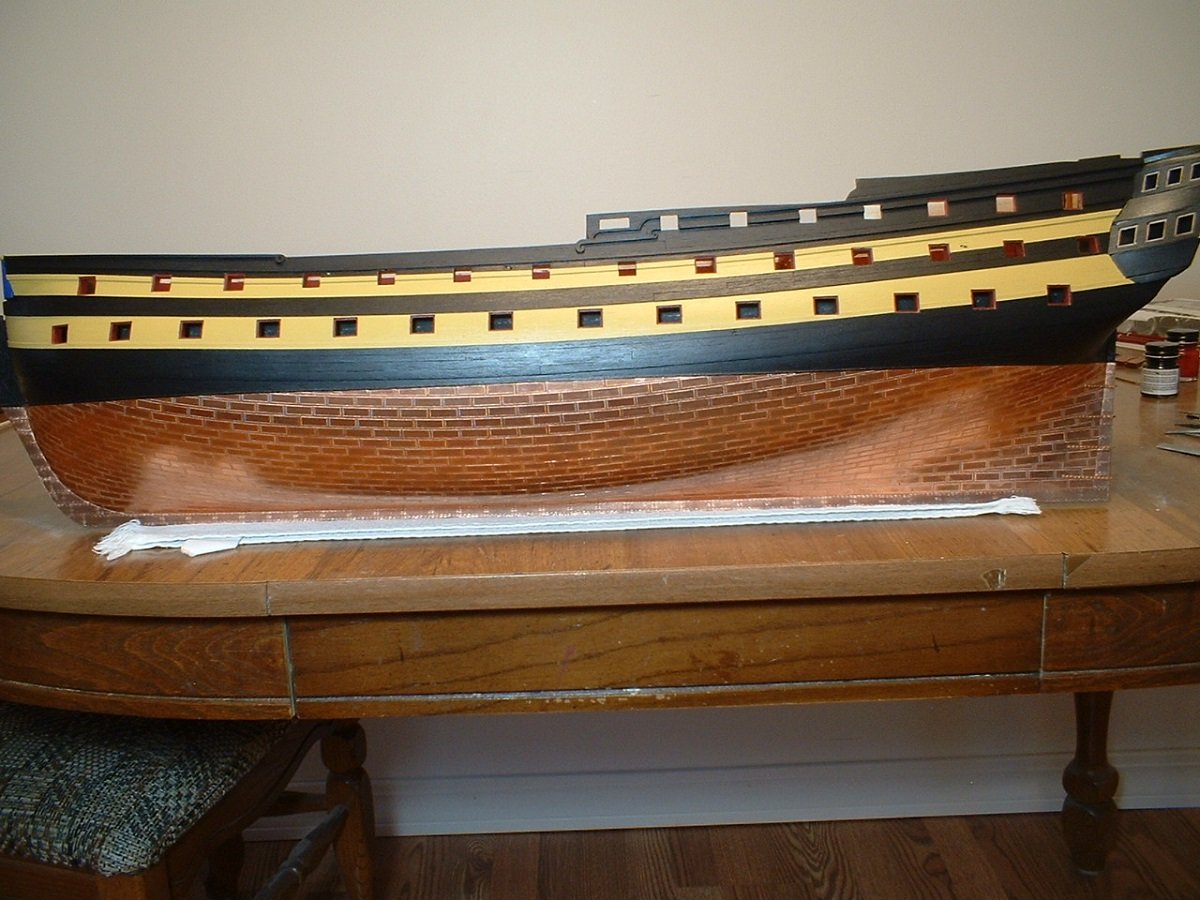
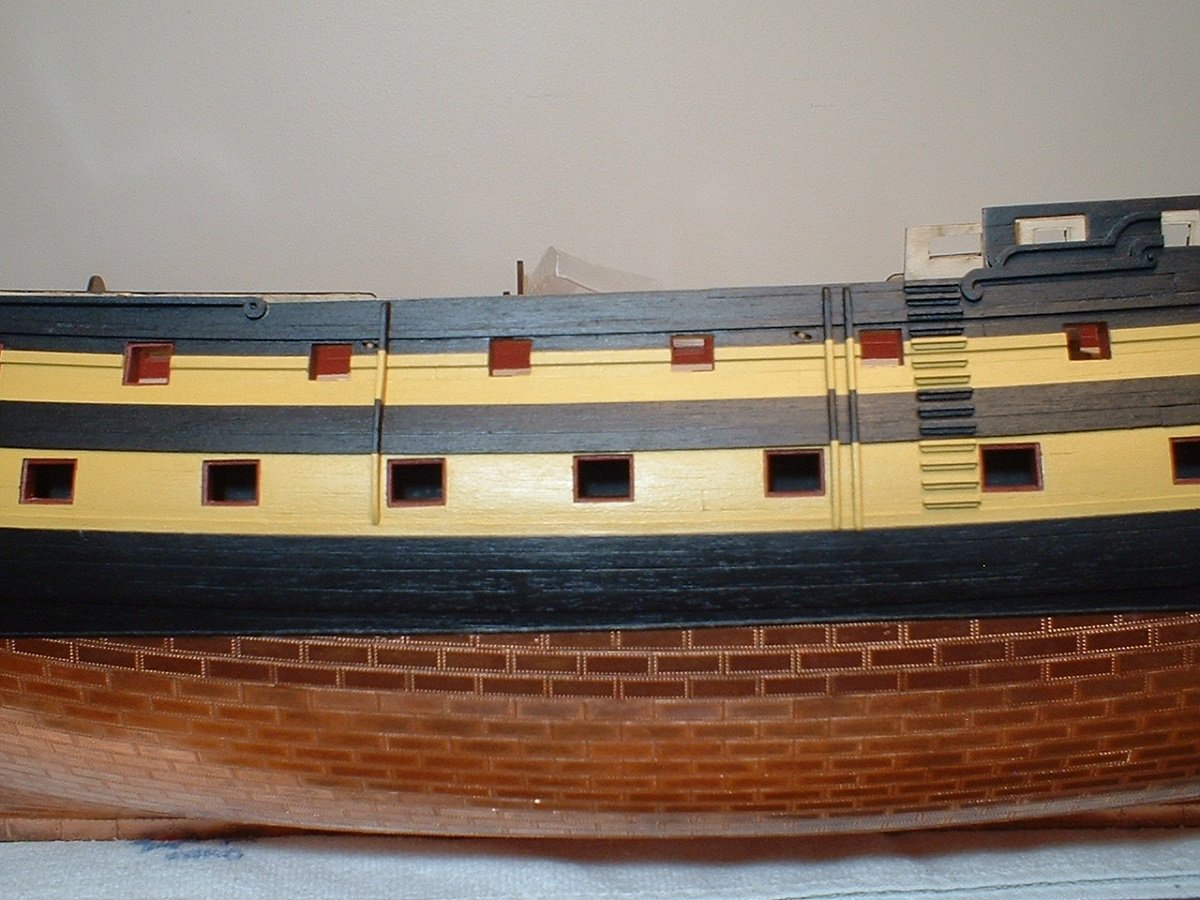
Hi - the 28 gun carriages for the upper gun deck are now assembled & painted. The cannons were simply painted satin black - the last cast parts I tried to blacken came out a chalky gray,so they will all be painted. The surface is not as smooth as brass would be,but they look pretty good at normal viewing distance. Real cast iron is actually a little rough unless it`s been machined,anyway. I still need to add some details like the trunnion caps & ring bolts,but those will be added later - I want to get the quarter galleries done & get the rest of the mouldings on the sides of the hull done first & finish the painting. I`m sure I would knock some guns loose if I mounted them before finishing the outer hull. Mark
-
Mark
-
Thanks Popeye - I didn`t read a whole lot about the numbers or coloring - the more I read,the more confused I got. Decided to just leave it as shown on the box cover. The King will have to wait till I get a bit further along on my ship. Still got a 1/48 B24 sitting on the shelf too. Mark
