

Desertanimal
-
Posts
217 -
Joined
-
Last visited
Content Type
Profiles
Forums
Gallery
Events
Posts posted by Desertanimal
-
-
Continuing on, starting on the rigging. At least the beginning of it.
Made the chainstays according to the instructions.

Made the back stays out of some brass parts.

Rigging up the boom and sheet.


Rigging up the back stay pendants and the topping lift. I’ve also slipped on the shrouds after seizing them in my serving machine.

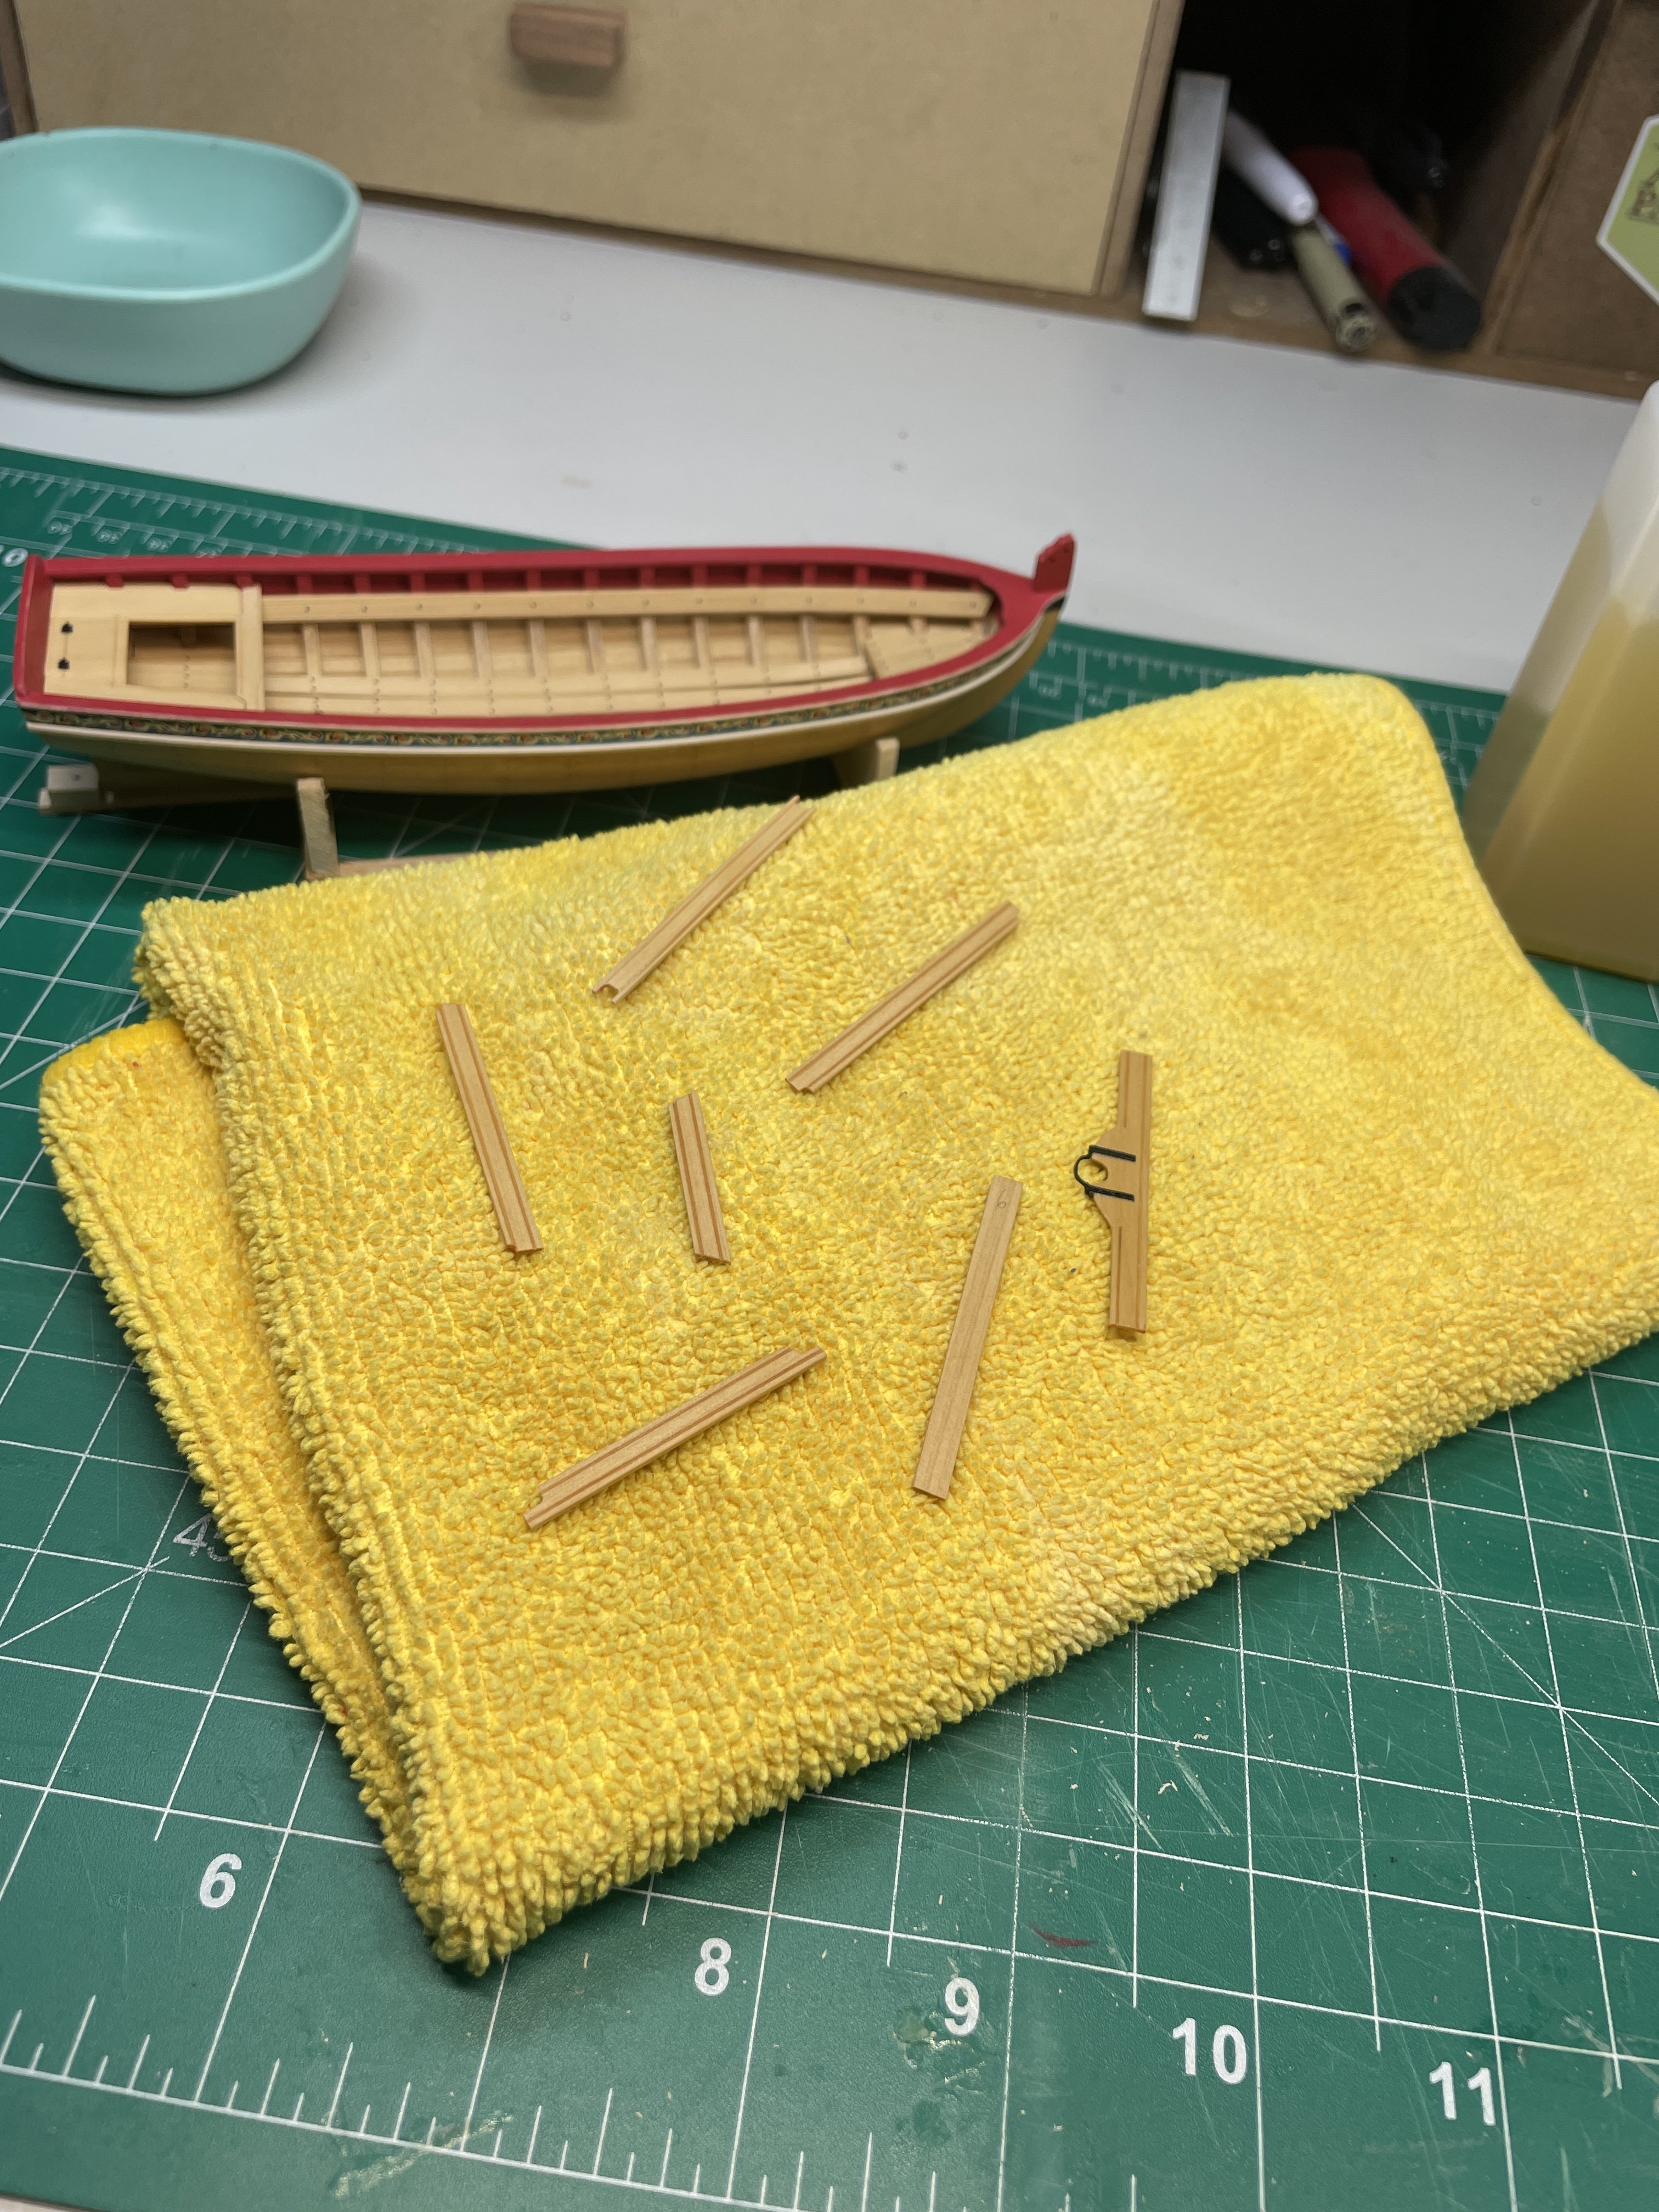
I had some boxwood belaying pins that just needed the bases thinned down.

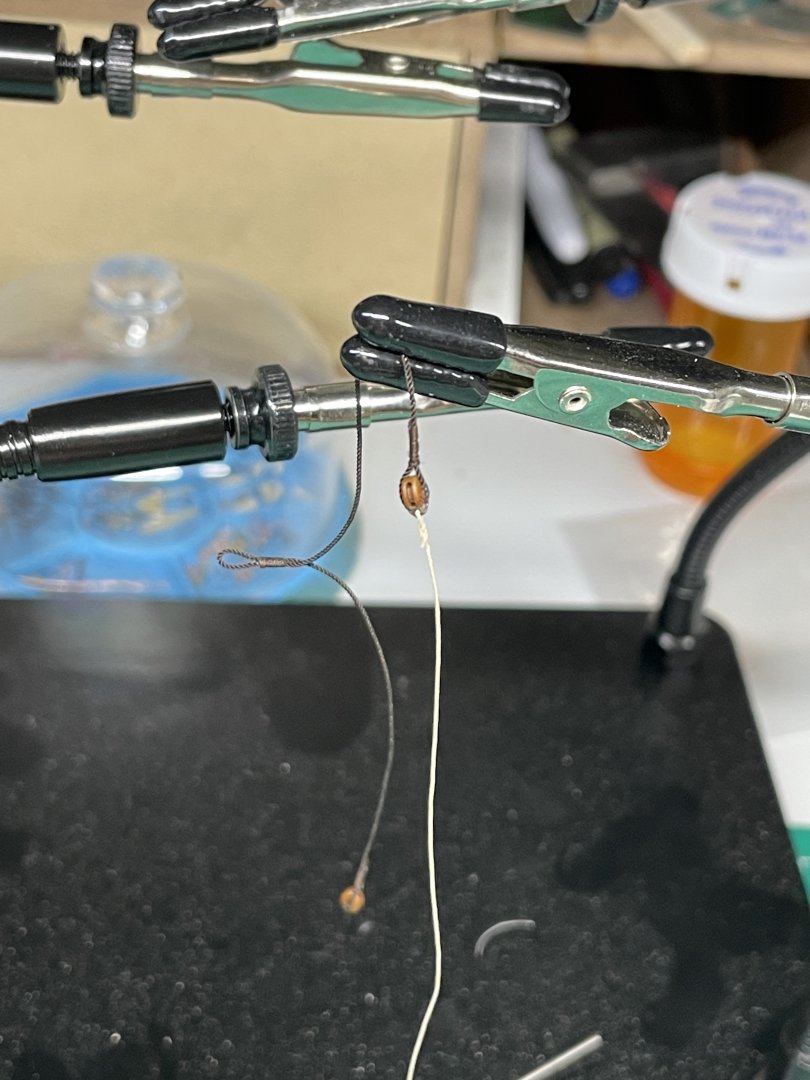
I saw that thread about the fly tying tool used to seize blocks. I made one up and while it was quite a chore to keep all the ends where they needed to be, it worked quite well. I was putting hooks on the blocks so I had many parts to watch. Here’s the results. These are Syren 1/8” blocks and syren hooks, I think it was 4mm.
.35 mm rope with Mara 150 thread.


Putting the deadeyes on the shrouds.

Next up it really will start coming together as the rigging starts to connect all the parts! It’s always very daunting to me but I do enjoy the results of all the work.
Thanks for stopping by!
Chris
- KennyH78, Russ2025, JacquesCousteau and 1 other
-
 4
4
-
About the same here as others. I’ve got one, works great. Cheap Amazon kit. $130?? Don’t use it too often.
Most of the time I can be in and out with a brush without leaving my chair. Faster, looks just as good. Good brushes and quality paint is the answer. No way around that.
Army Painter makes airbrush ready paint. Never used it myself.
Chris -
The dory project sounds interesting. I’ll definitely be waiting on that.
All the best for your surgery and a fast recovery!
Chris- robert952 and JacquesCousteau
-
1
-
 1
1
-
Hi Kenny! Thanks for the comments!
I’ve drilled a couple small holes in the keel for some stiff wire. That wire fits inside a brass tube. That tube will go down into the base of the display. Nothing too fancy, a wooden base and corners and glass sides.
The brass will be blackened as I’ll also be making a little rack for the oars from brass.
Chris -
OK it’s been a bit since an update. Thank you for all the likes and encouragement!
Progress is being made but it’s not been super interesting.
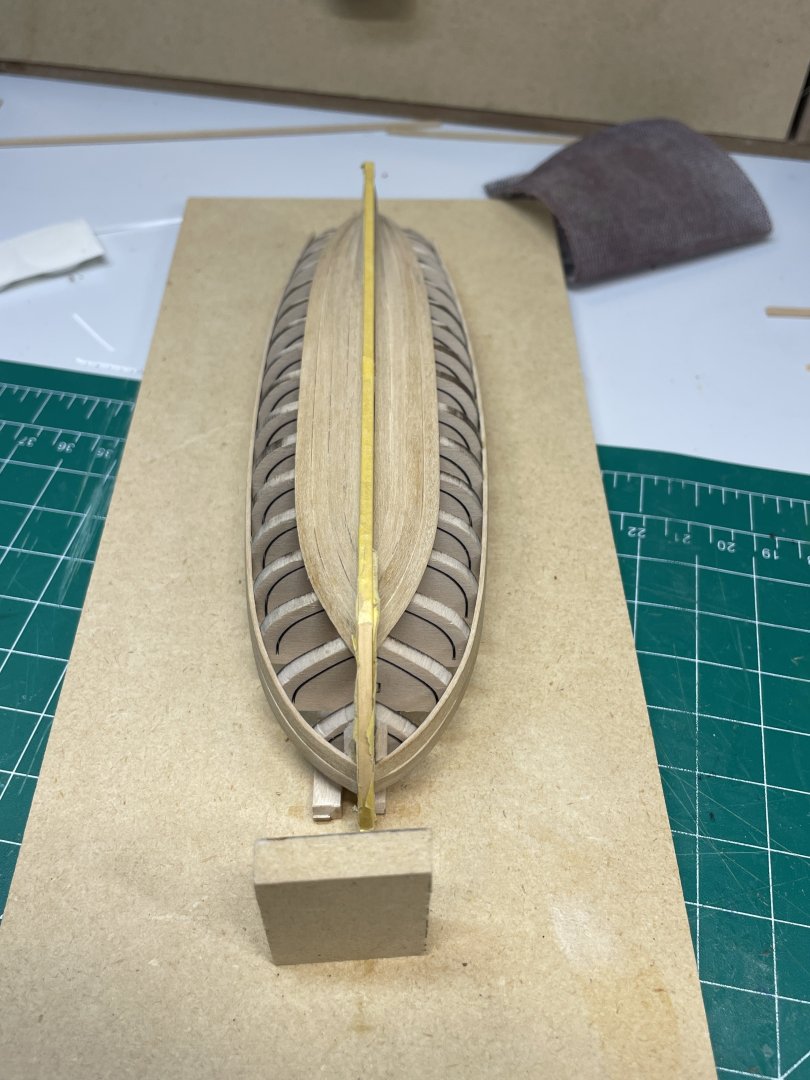
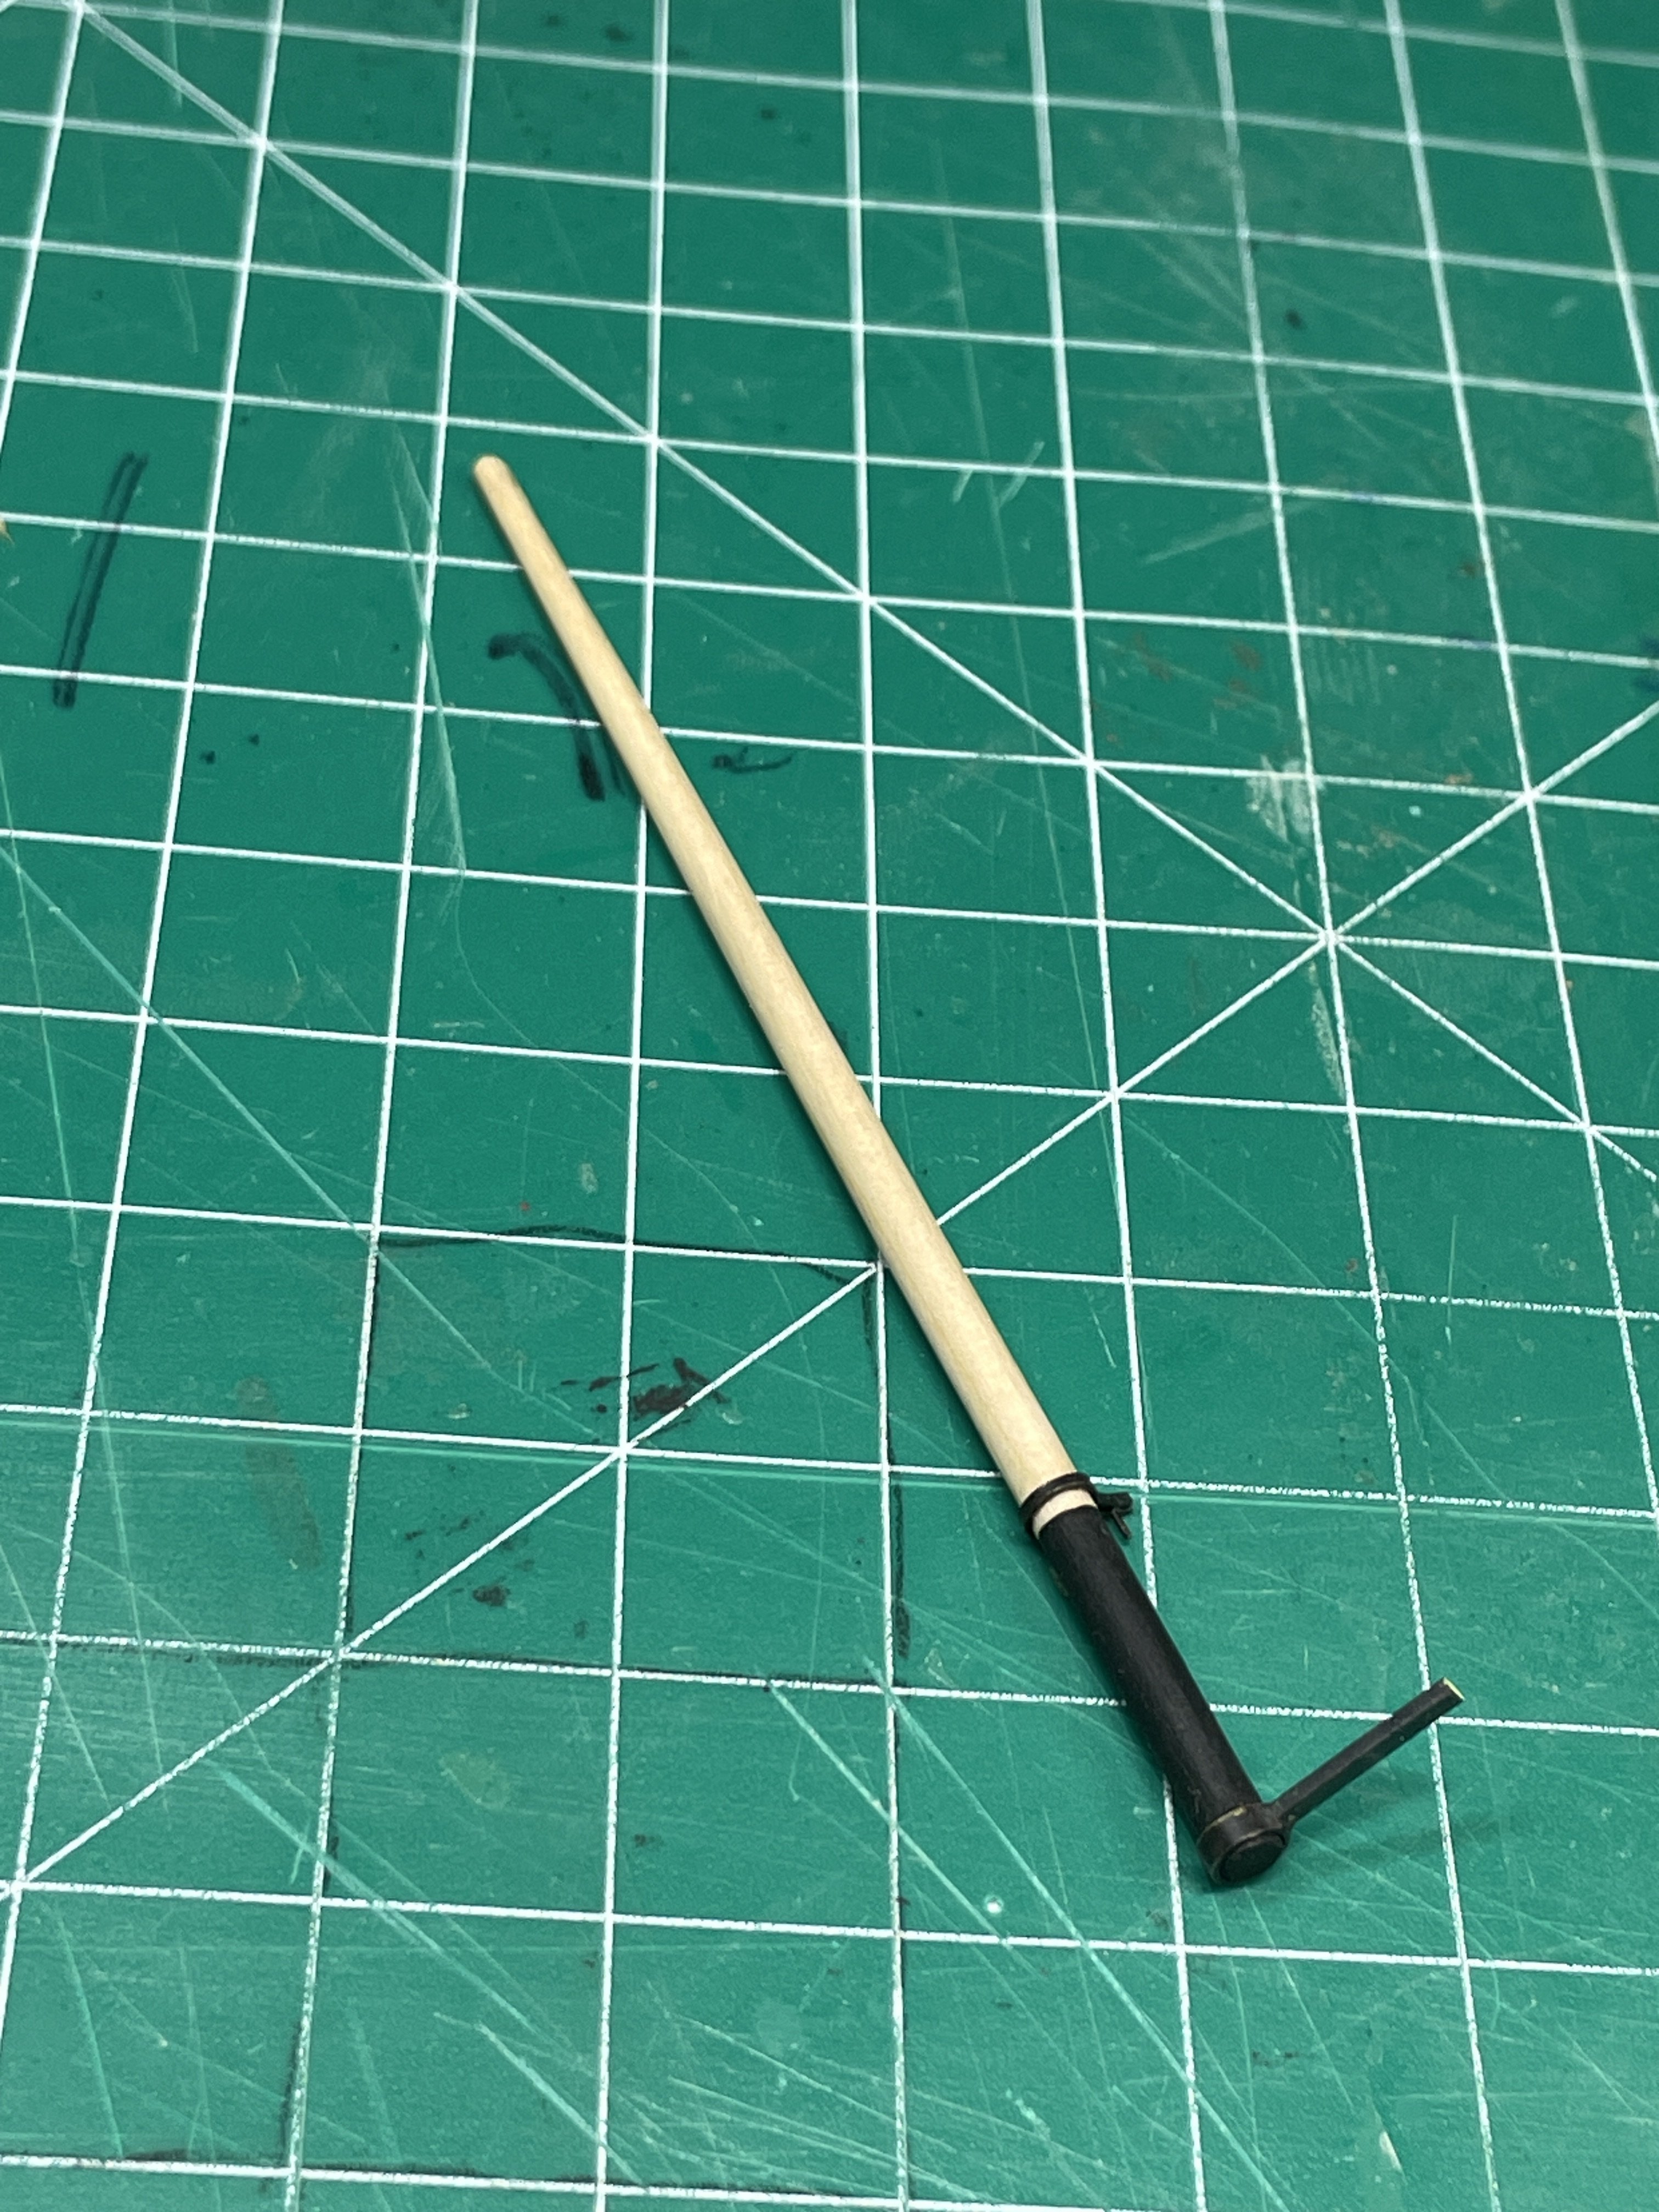
Shaping the mast and bowsprit, I used the drill technique. The goal here is to go slow and check your progress often. I start with 120 grit and go up from there. Be sure to leave enough meat on there for the finer grits.
Getting some paint on the mast. I made a small mistake here. Maybe I can save someone the headache. I usually give something like this a coat of WOP before painting to prevent the paint from running in the grain. I managed to forget that step and the black ran a little. Gotta pay attention.

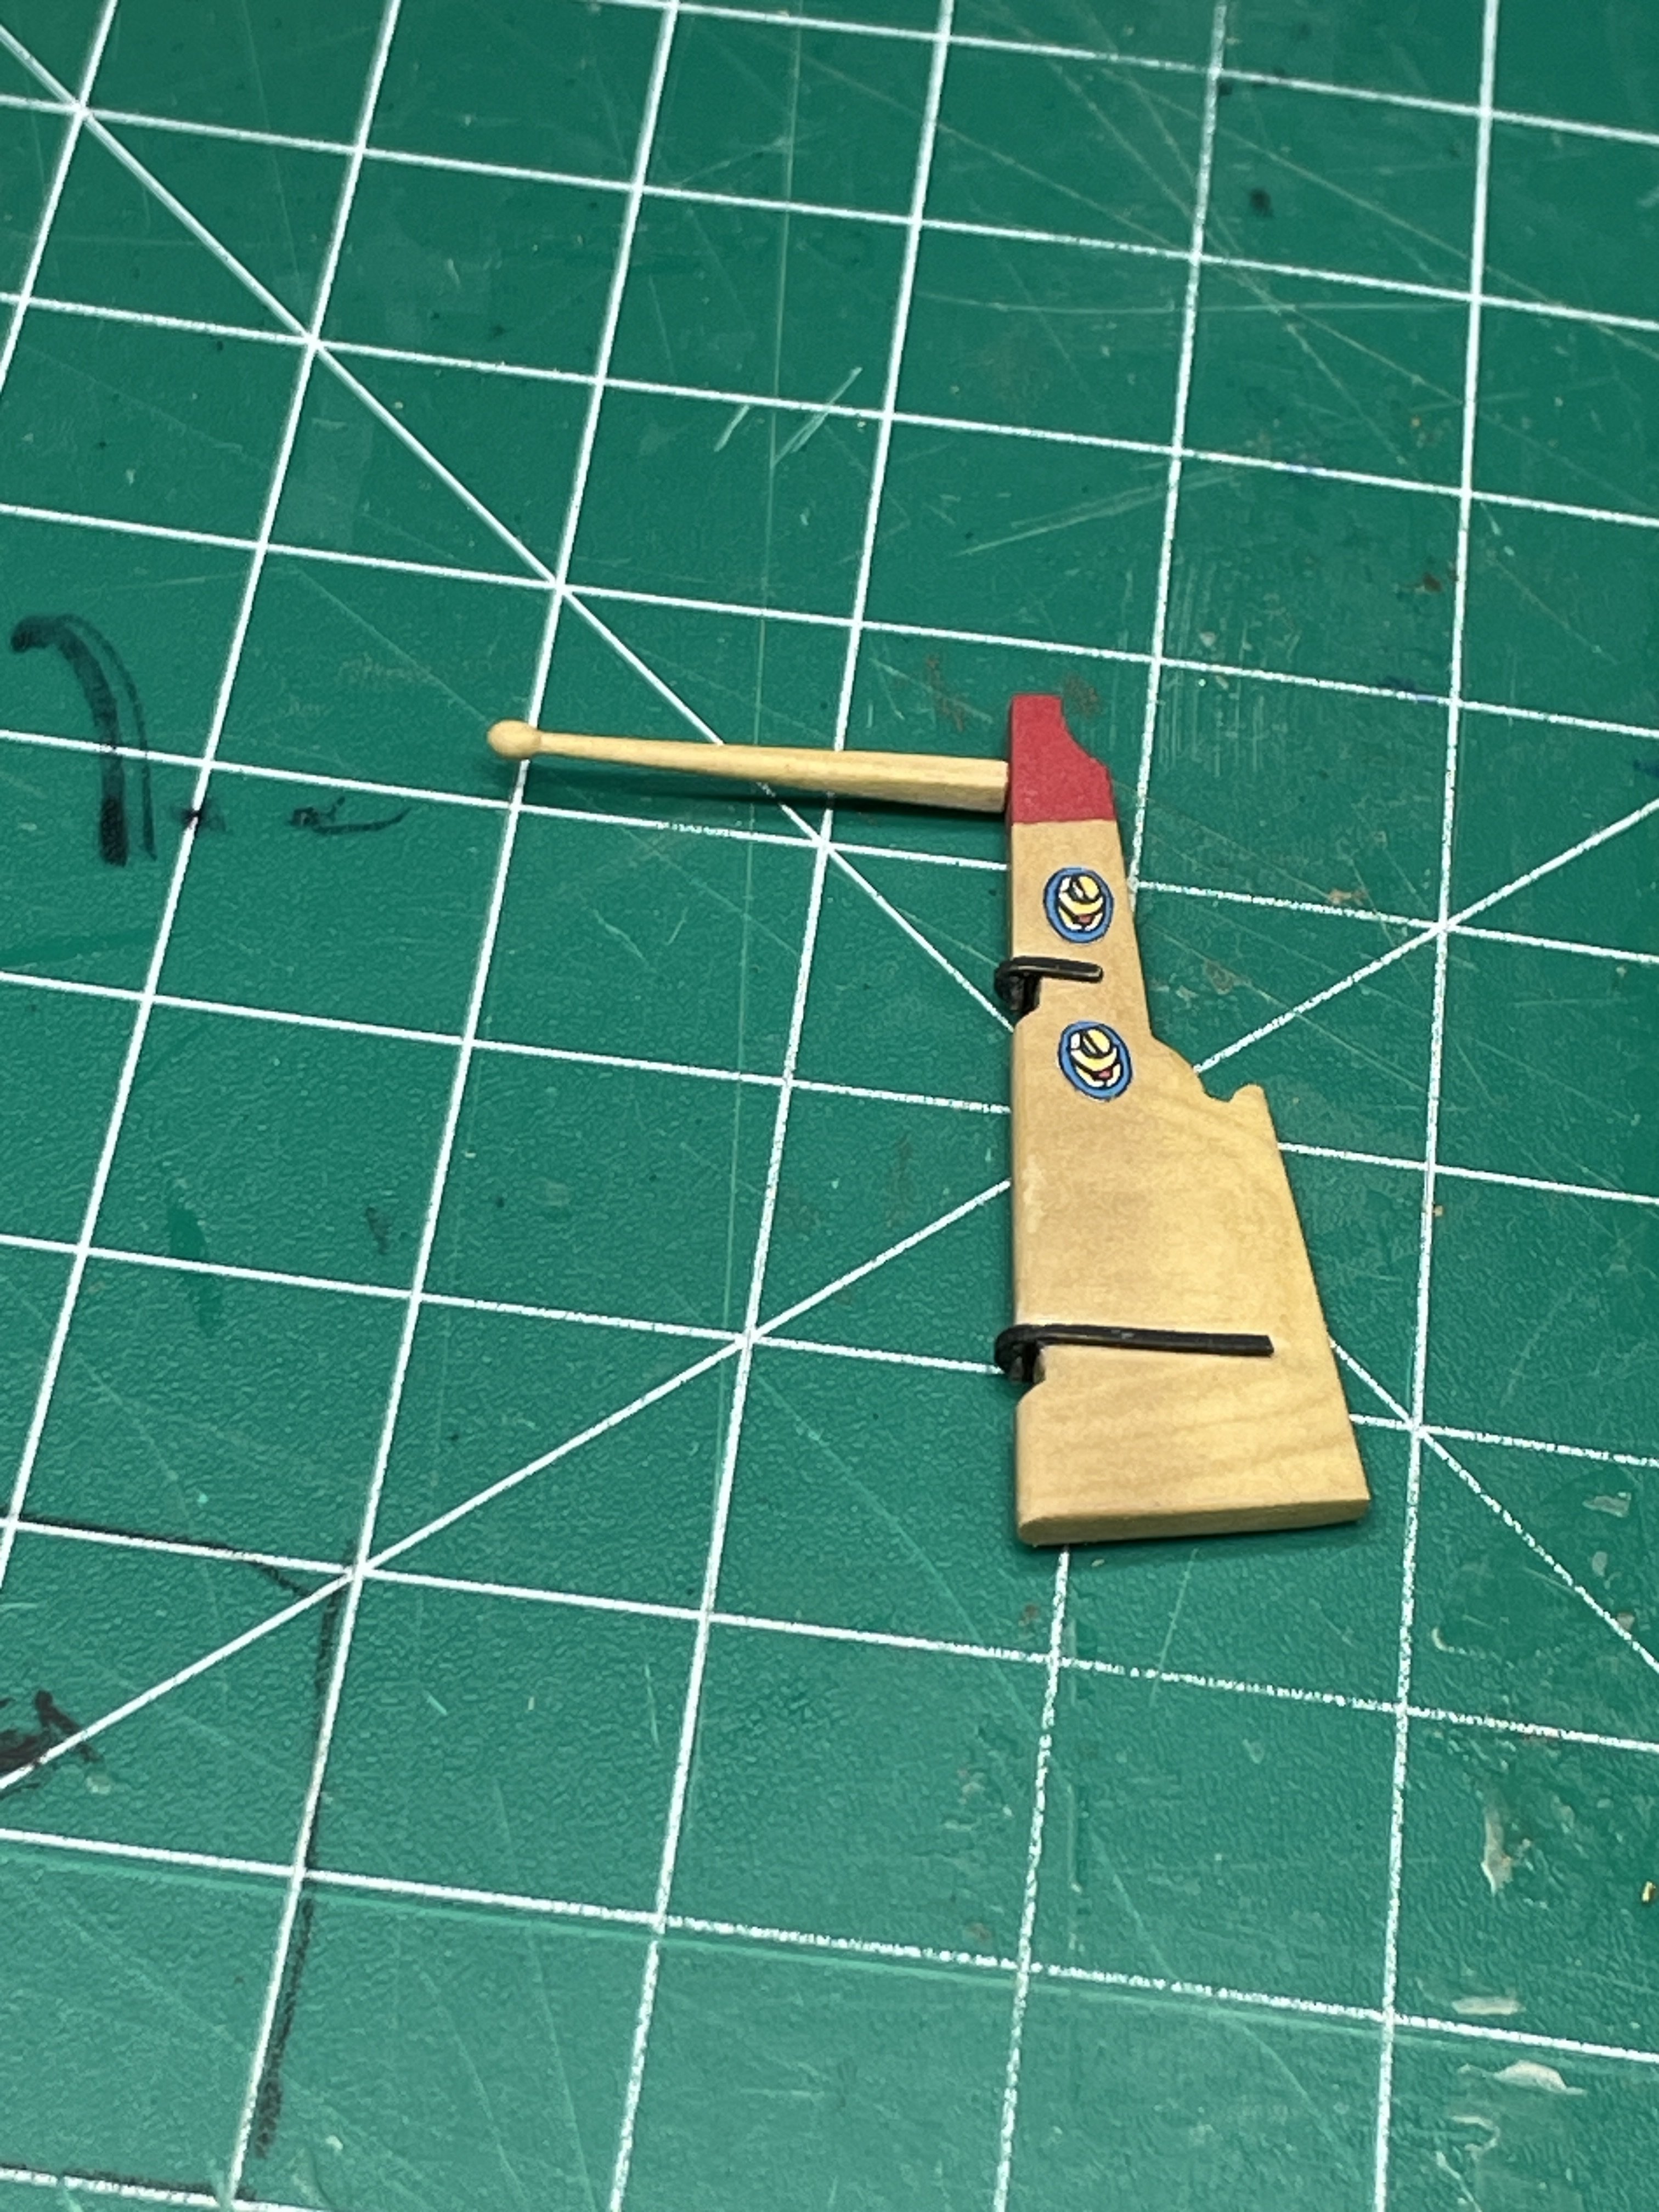
These are the rings for the mast. I ended up seizing the blocks to the upper rings. Then I later read that having them connected with hooks was more historically correct. I actuality I even removed and reinstalled them at least twice. So if I had been paying attention I had multiple chances to change it.

These are the parts for the bowsprit. I decided to solder together some brass parts.


Boom and gaff shaping now.

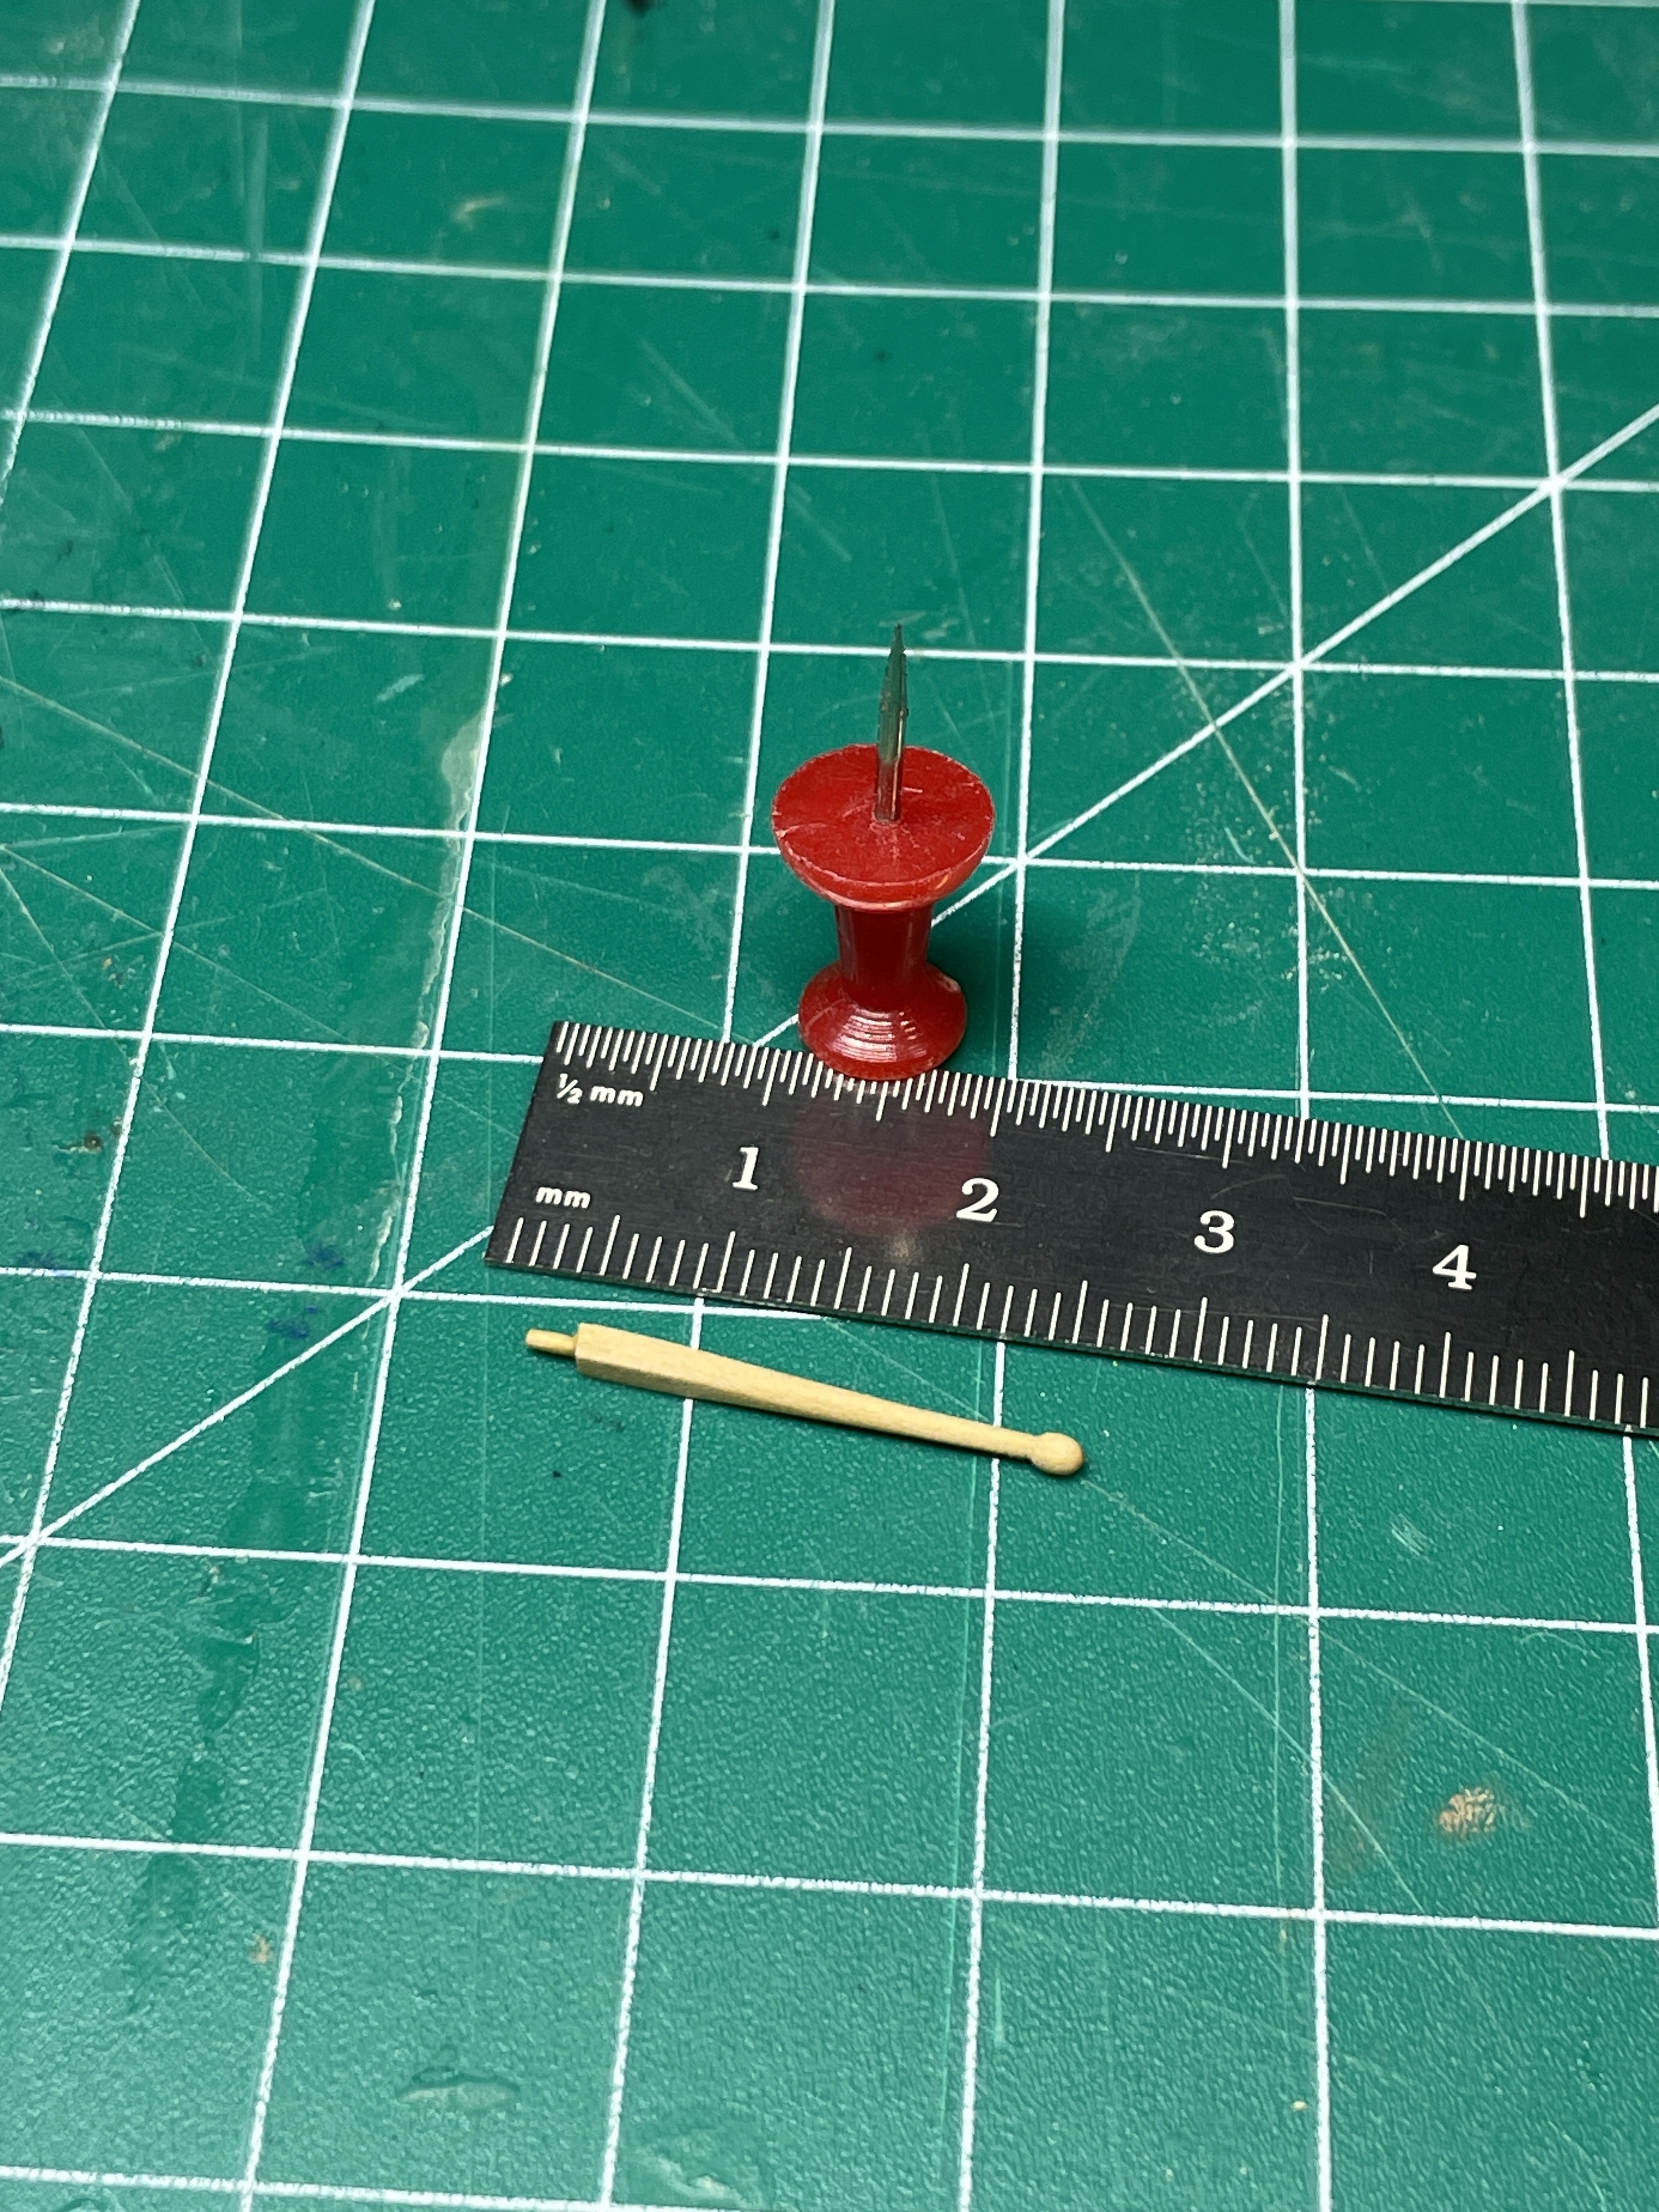
I made at least 3 pairs of these little ears for the gaff before I had a set that was 1- small enough and 2- looked ok and symmetrical..


The boom rigged up.

I had to use some left over blocks for the horse while I wait for my Syren block order to arrive tomorrow.


And the beauty shot of where she sits right now.

Thanks for stopping by!
Chris

- Knocklouder, KennyH78, Ryland Craze and 5 others
-
8
-
-
-
Congratulations on finishing her! She looks great!
Chris
- Keith Black and palmerit
-
2
-
This looks to be quite the project! Best of luck. I’ll be following along.
Chris -
Very interesting. What kind of wood, overall size?
Chris- Jack12477, thibaultron and Canute
-
3
-
Time to work on the windlass. The issue I’ve got is my risers are not vertical near the top where the windlass would sit. I solved it by putting in two baseboards for the it that are sneakily sanded to a wedge shape which brings the mounting area just about vertical so mounting it looked a lot better.
I think I ended up making three for various reasons.
Thanks for dropping in and let me know what you think!

Here is the finished windlass and my homemade broach for making the holes square.


Rudder time!
Here is the rudder, cut from boxwood and matching tiller.
I had a heck of a time getting the ironwork aligned. I think glueing those to the hull and rudder are my least favorite parts.


Thanks for checking out my quick update. Rigging is coming up soon!
Chris

-
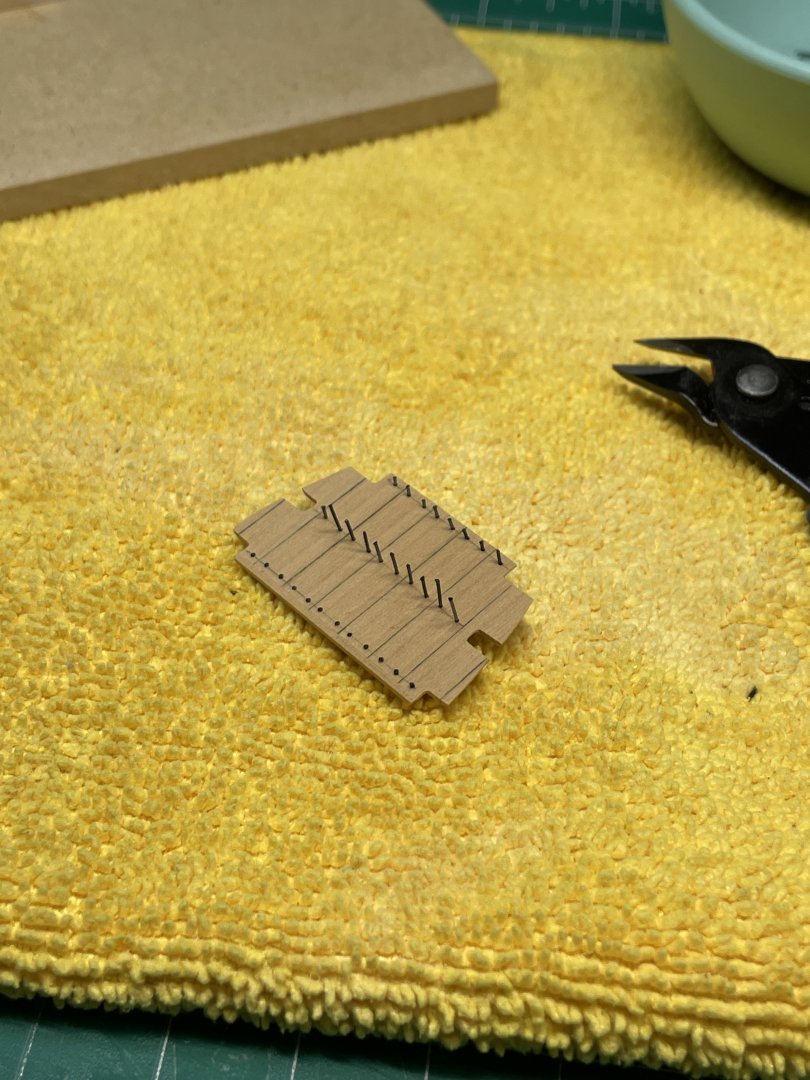
It’s time to install the risers. These were fairly simple however the sides of the frames are not vertical. This comes back to haunt me later.

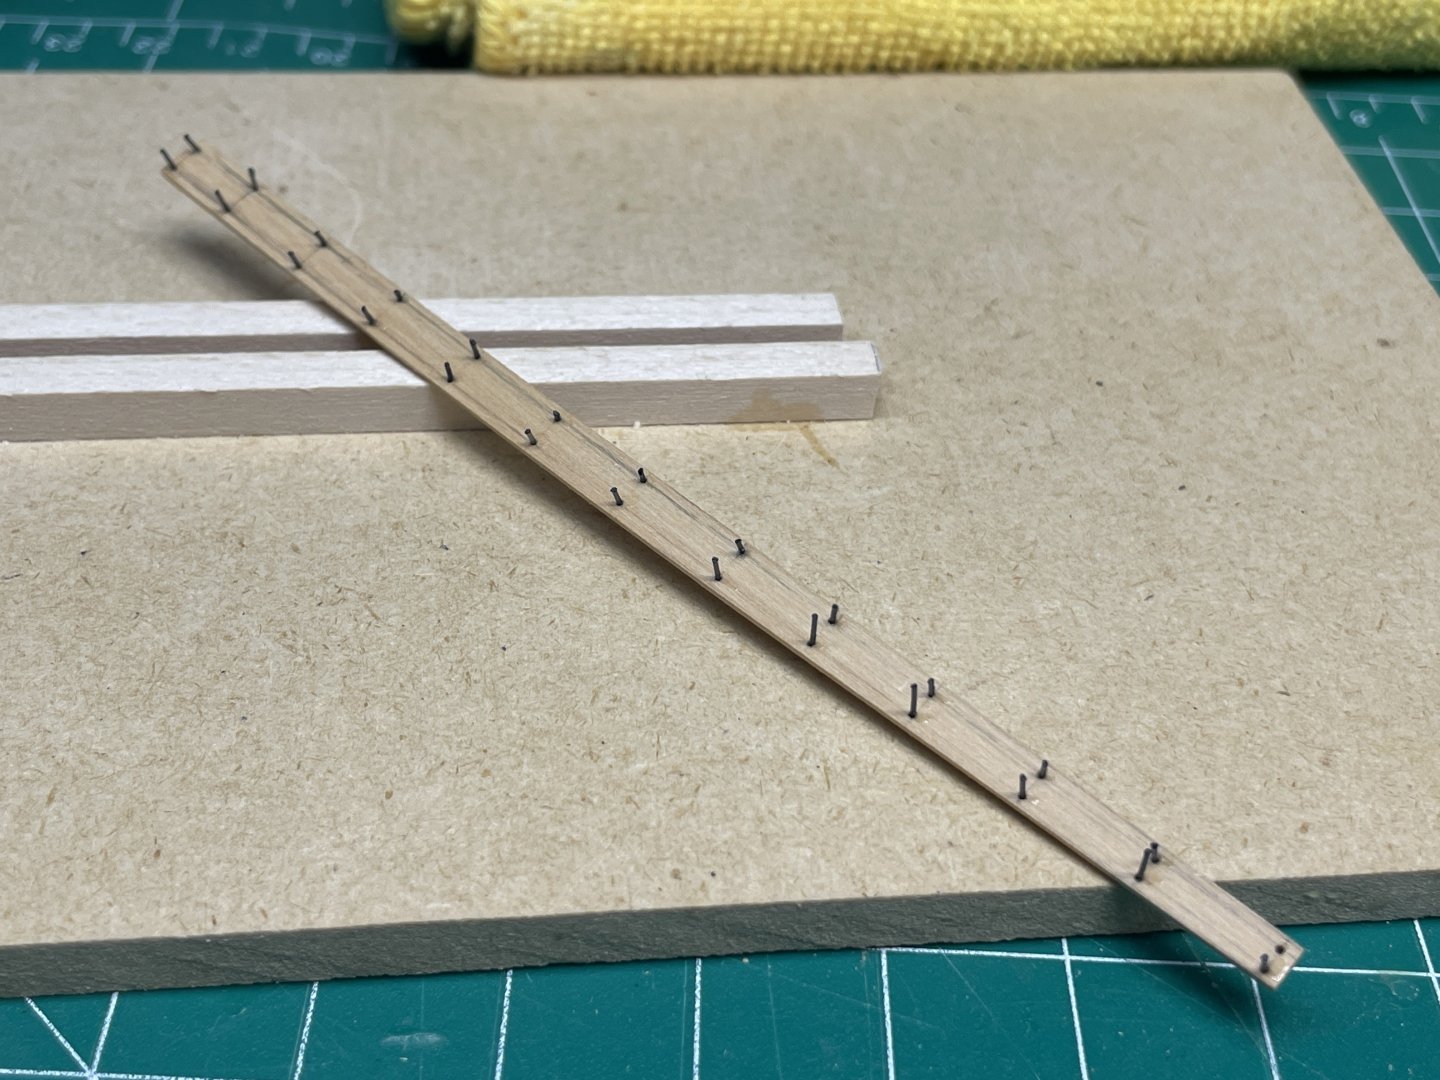
I also forgot to add the nail details until after they were attached so I had to drill them and install the fishing line. I didn’t want to sand the face of the risers because they had been scribed and the edges eased. Sanding the nails flush would remove some of that detail.
So I used really short pieces of line and then put a dab of watered down glue on top to hold them in place.
Now the locker and seating. The seats really gave me a run for my money. Trying to get all the edge detail to line up was a chore. Also these are all cut from boxwood by hand. I used the template technique again and I think I’ve improved how tight the joints are.


The aftmost thwart also needed some custom shaping.

Now the one that holds the mast. The ironwork is black paper.


Some paper hinges with a piece of wire for locker hinges.

Thanks for stopping by!!
Chris
-
-
Can’t answer your color questions other than use what looks good to you.
Airbrush is a great tool. You will be able to see all your details.
Are those other items PE? I have not built Sherbourne. If they are Photo Etched you will probably want to chemically blacken them instead of paint. If you are not familiar there are plenty of posts about doing it. It will give a nice look and be more permanent than paint.
Chris -
-
23 hours ago, Chuck said:
Very nice...excellent work on a model that is not a easy project. Its a challenging project. It looks great.
Thank you Chuck. I wanted a quick little project before I started Cheerful. I’m not sure I chose wisely. HAHA. I love the little boat! I’m just really trying to complete her to my highest ability. So that does not equate to quick little project.
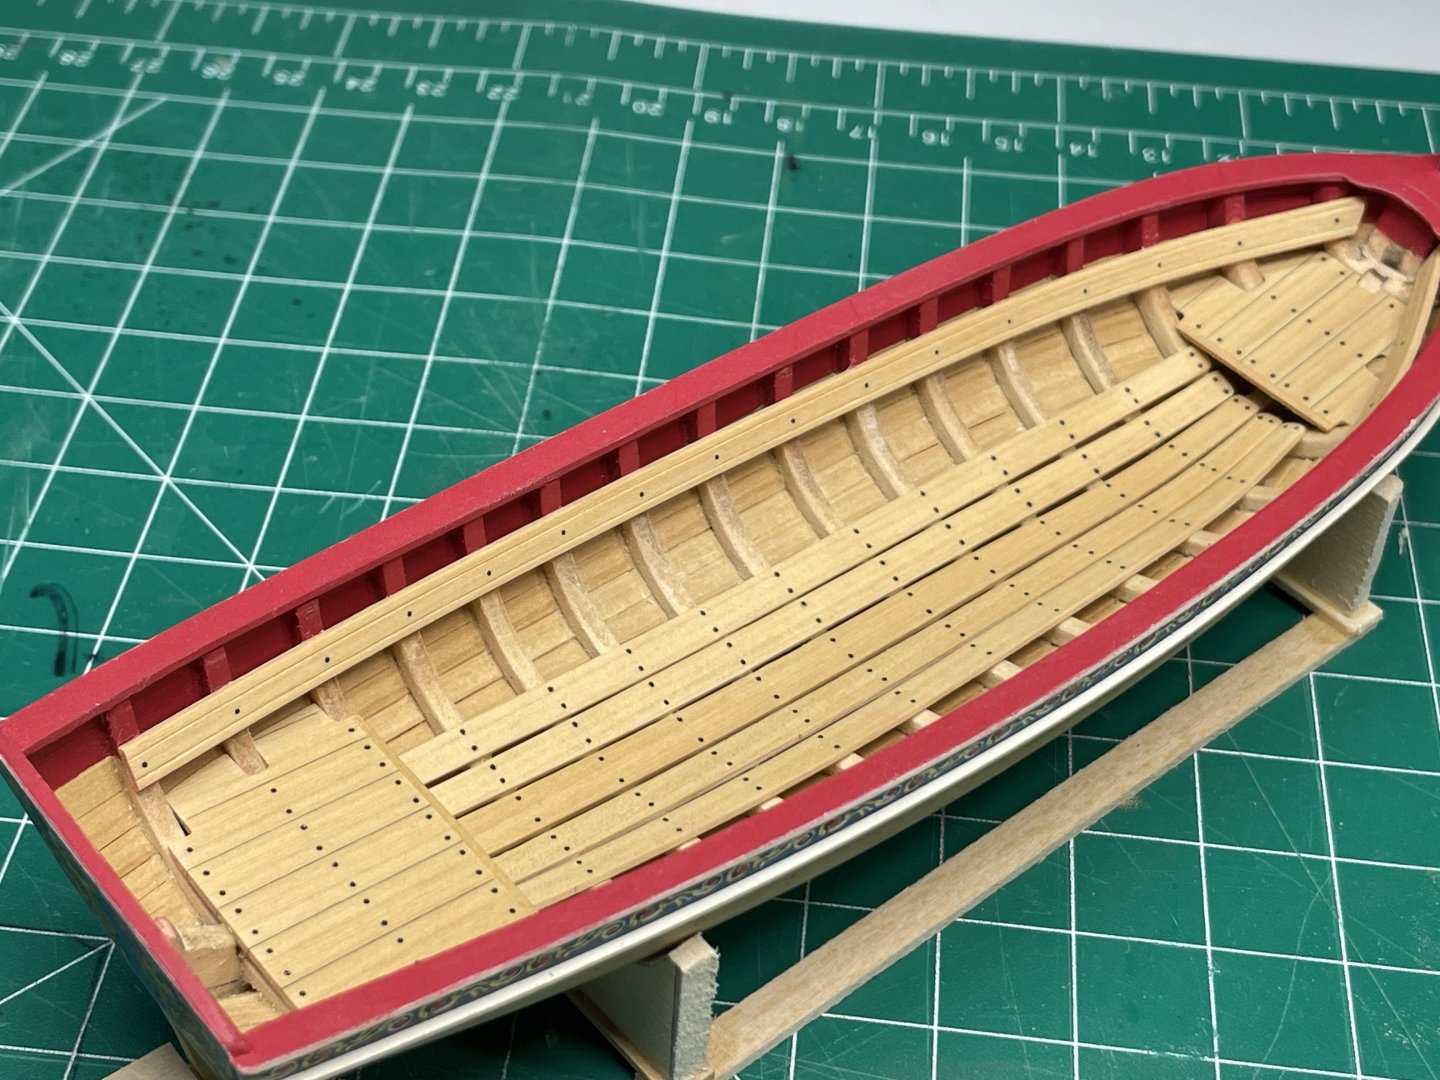
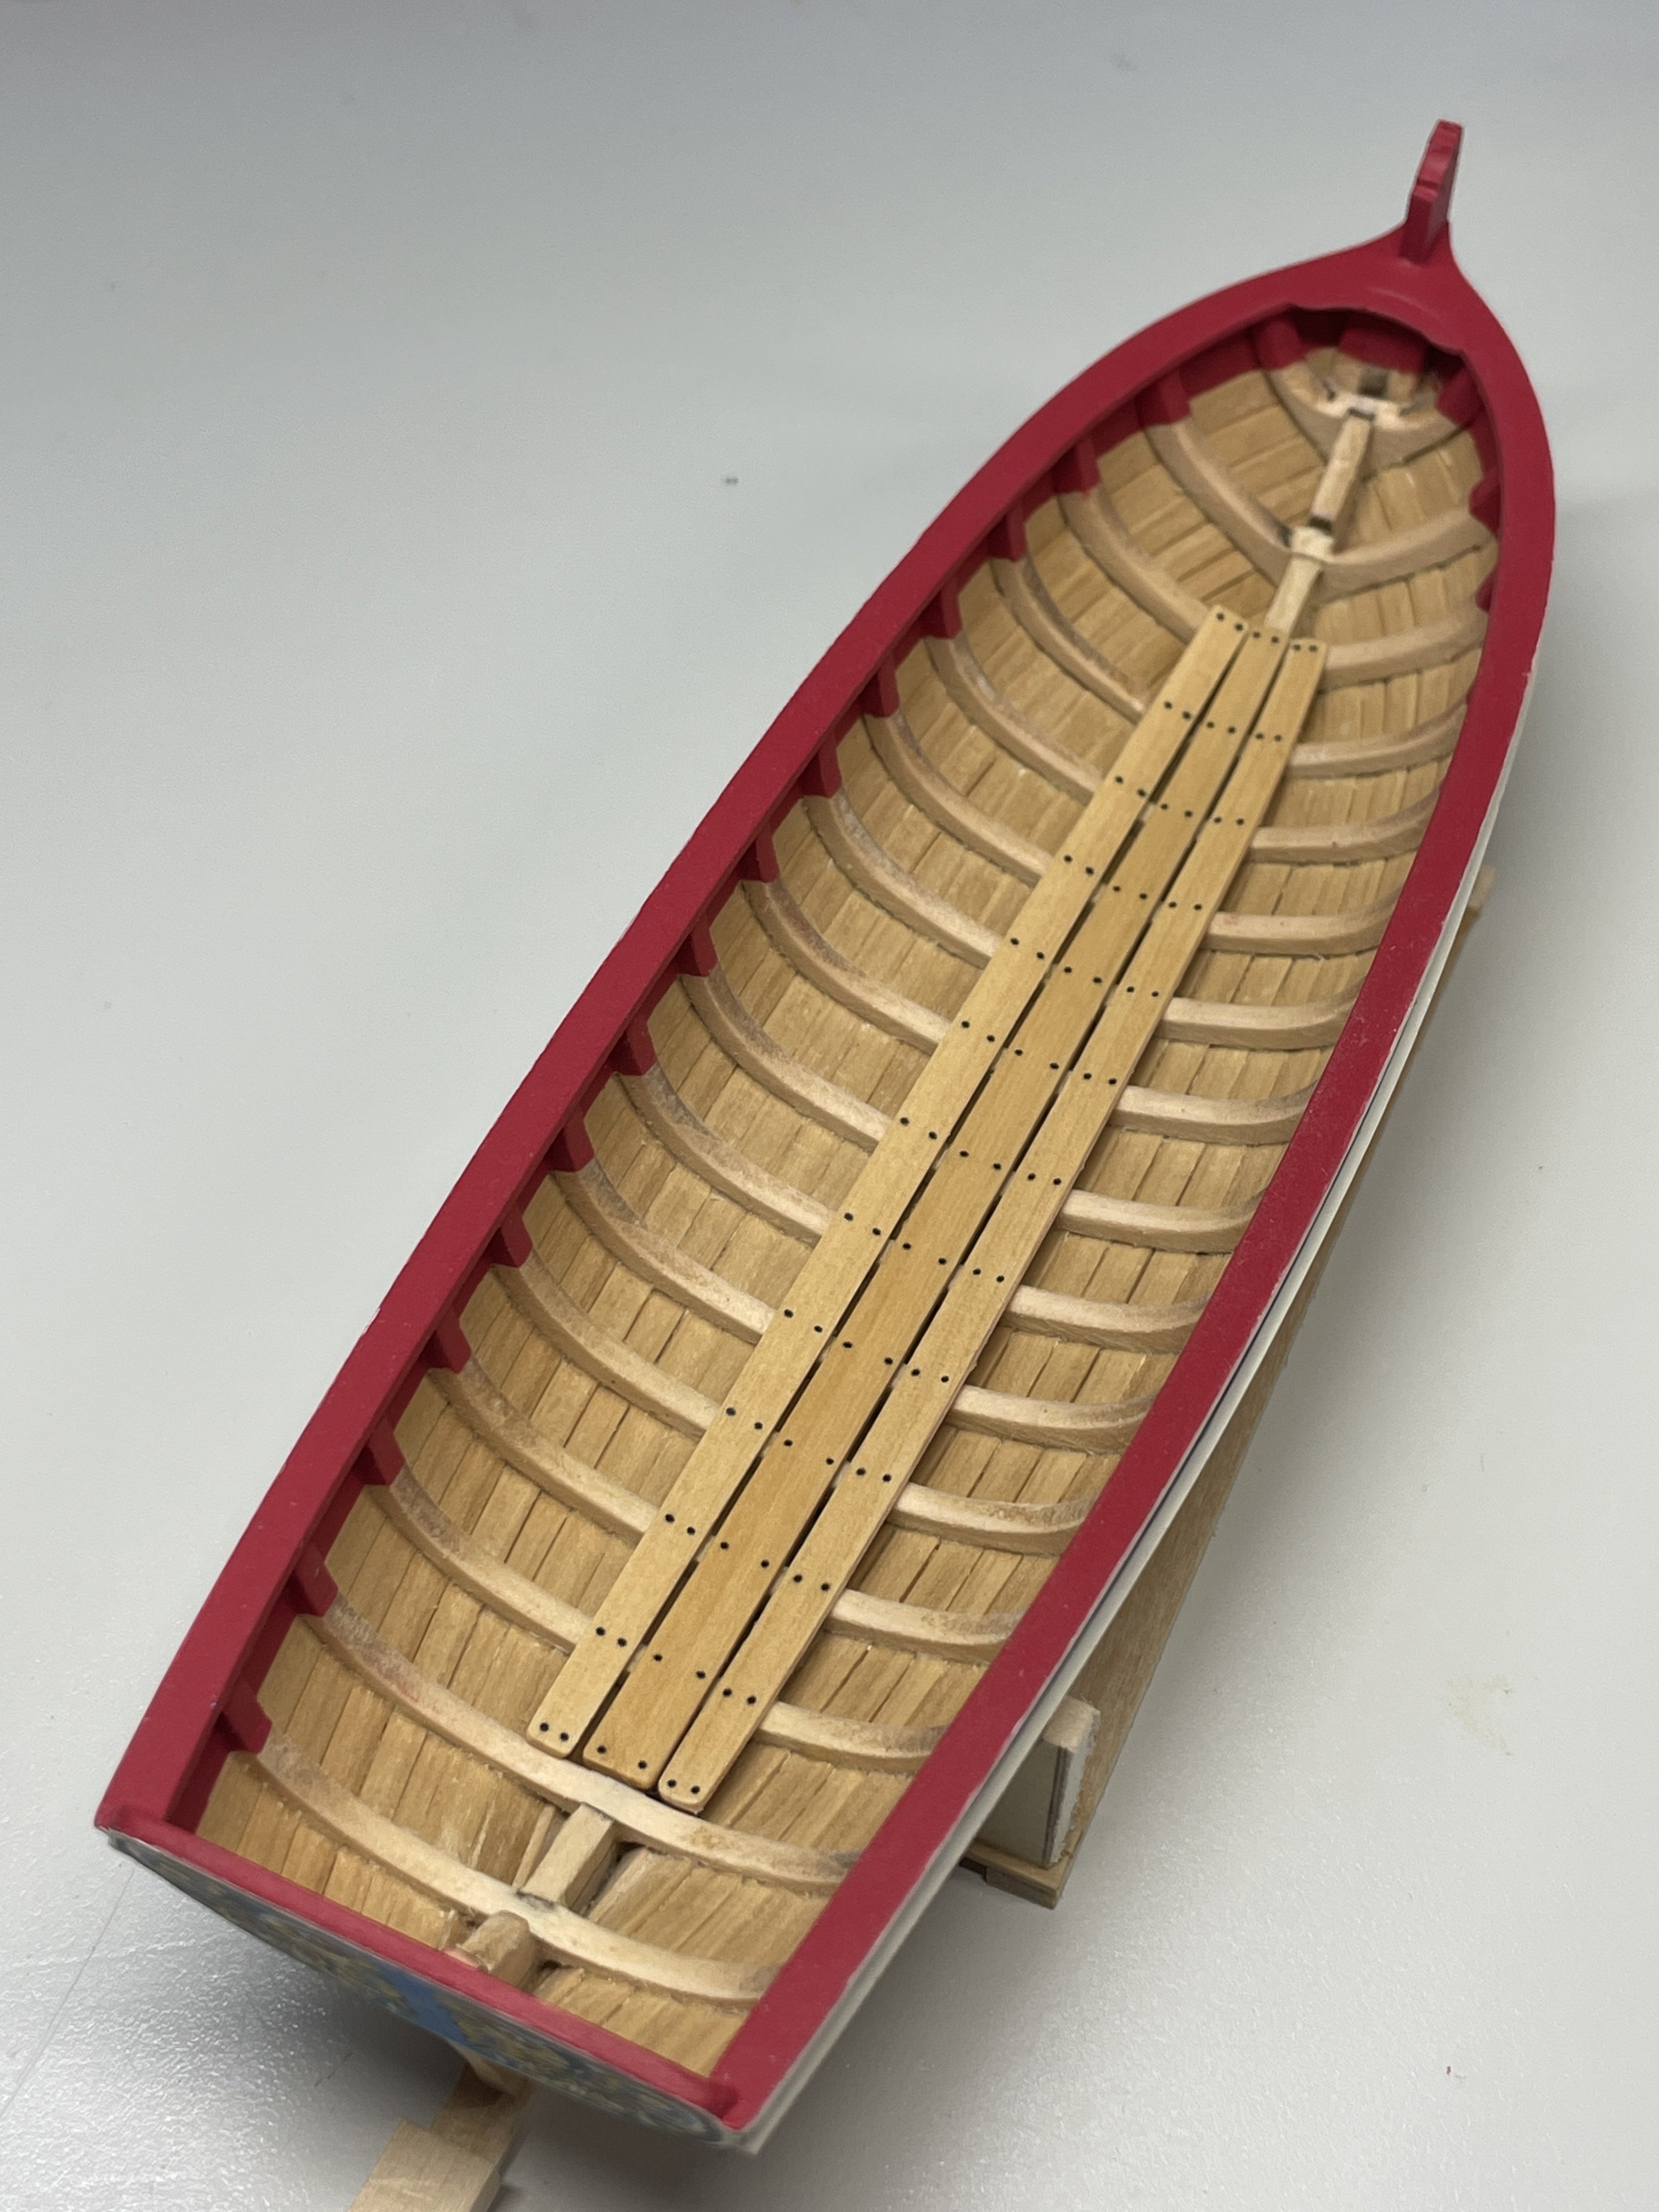
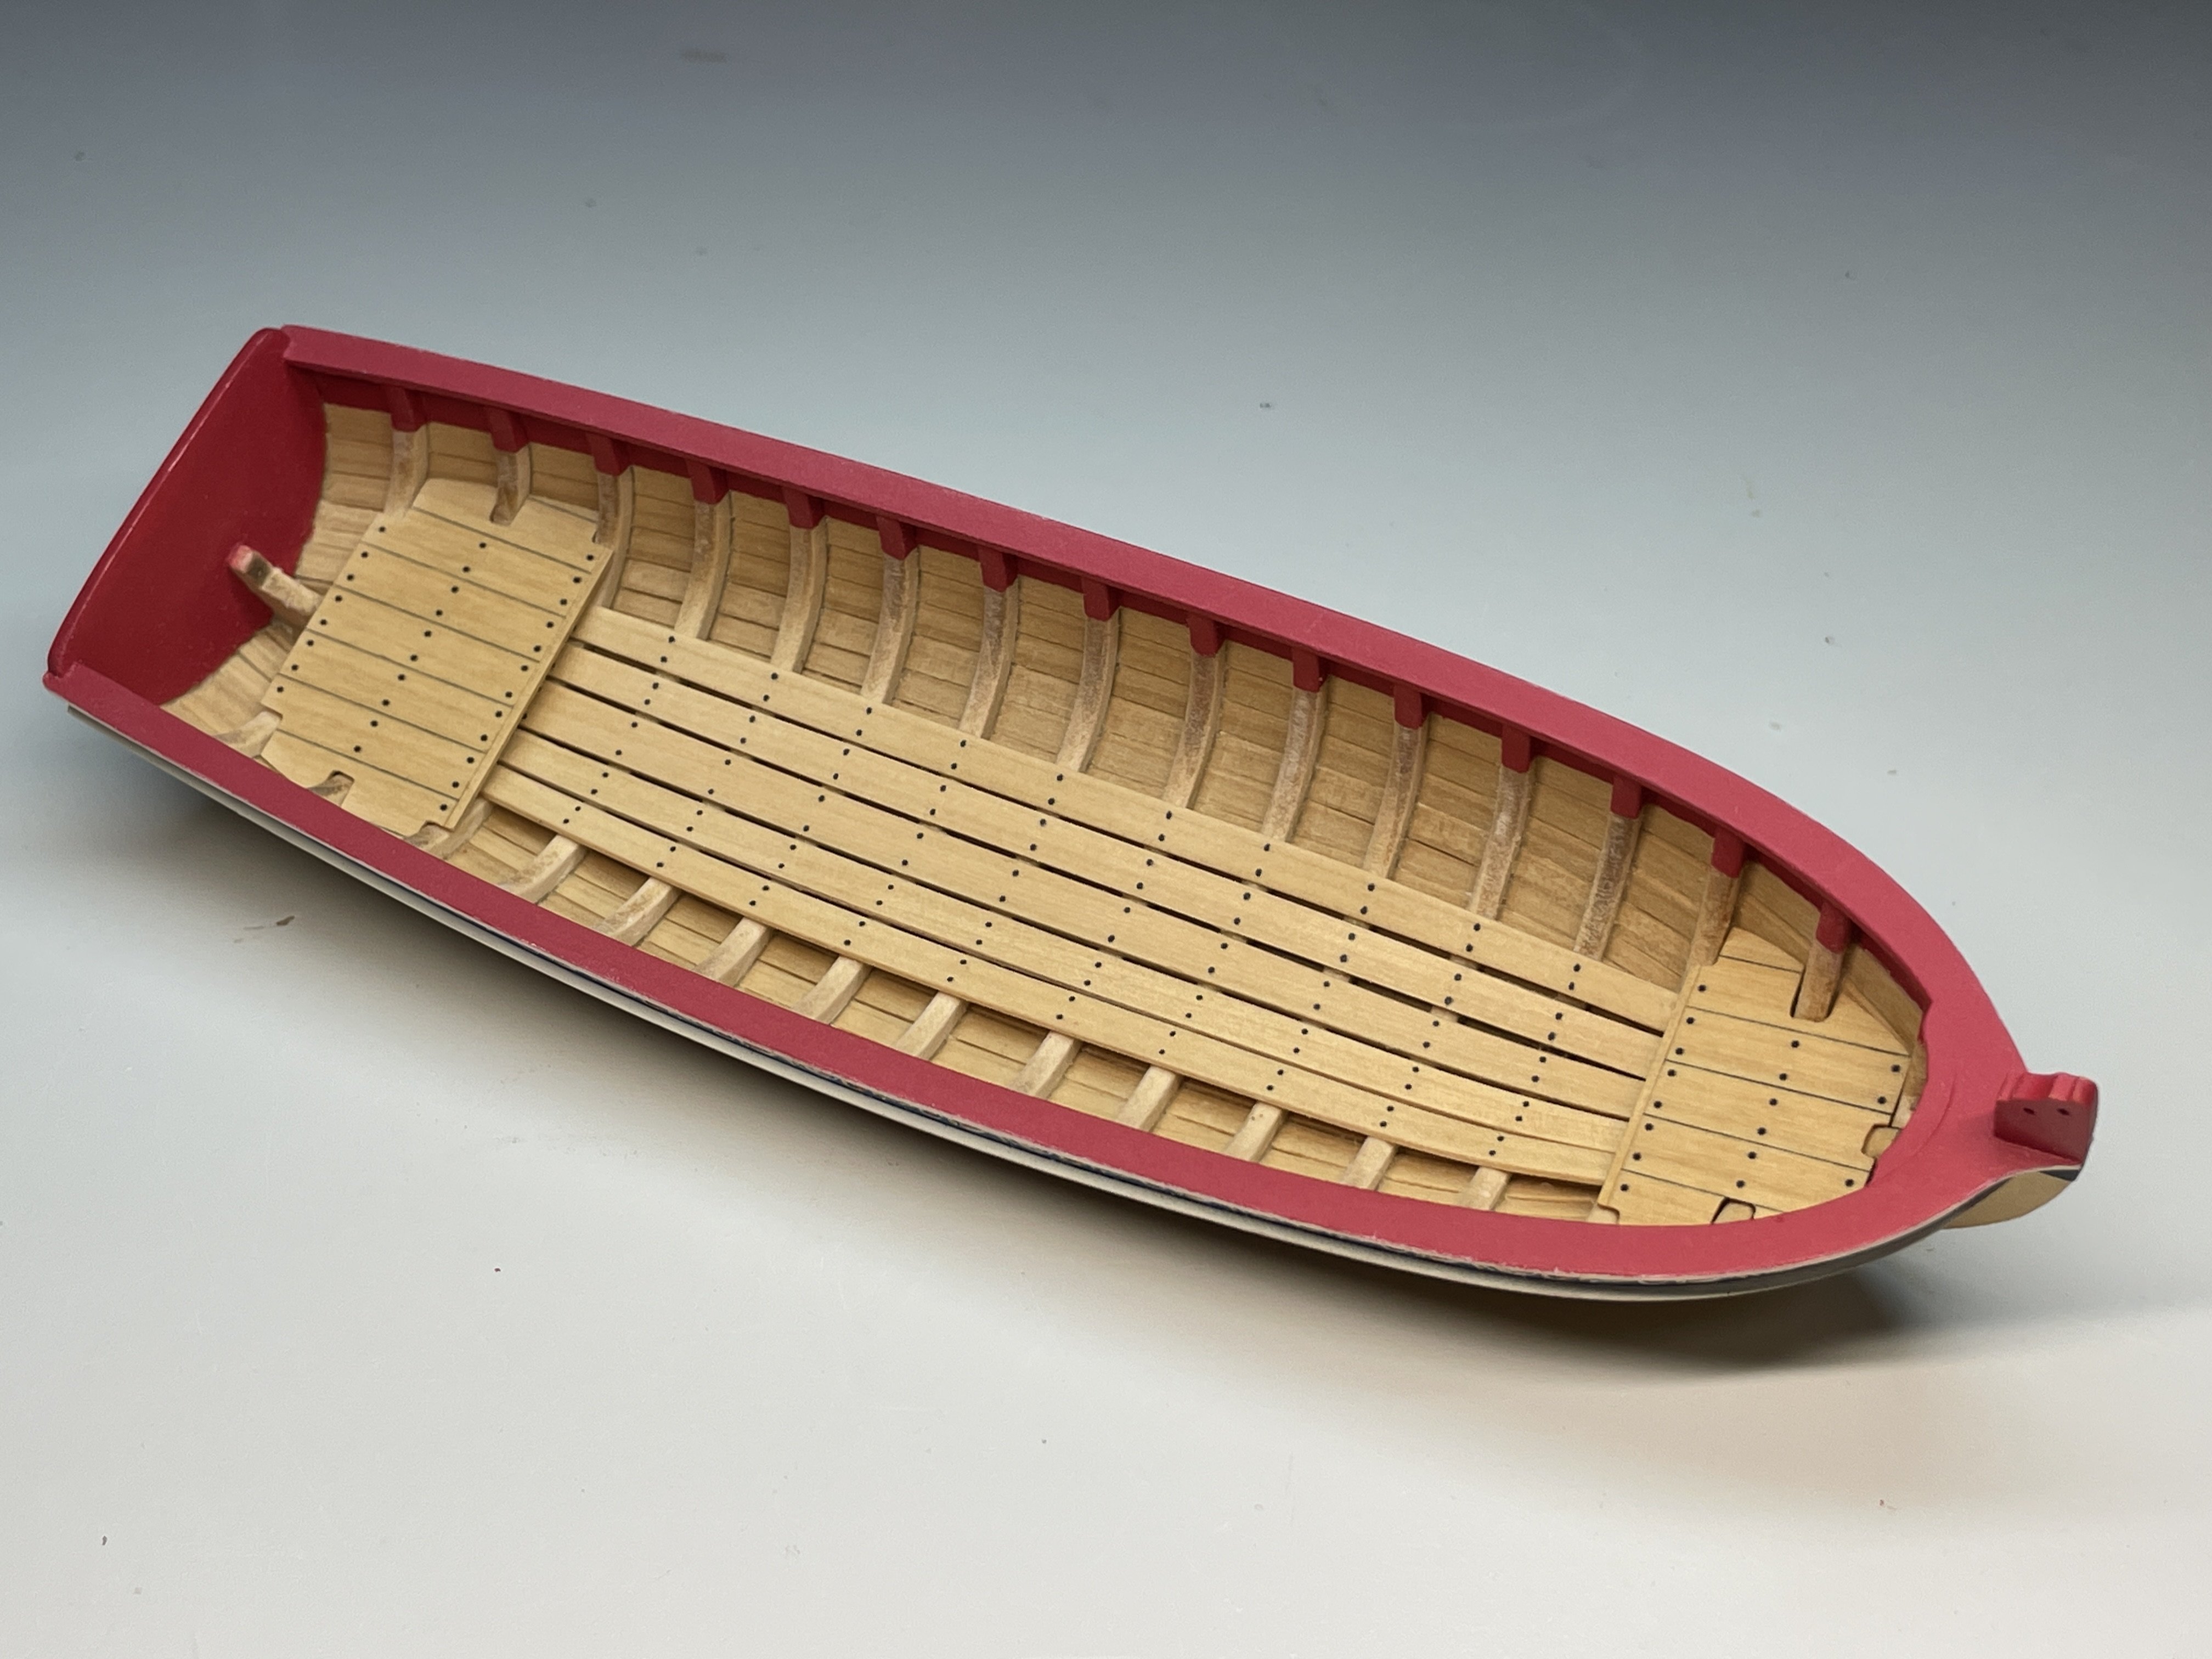
Time to start on the floorboards. I wanted to play around with black monofilament for bolts or nails and such. I did some shaping of the center board from the plans and also did some test holes for the monofilament I have. I ended up using a #77 drill bit. The line is .40 mm.

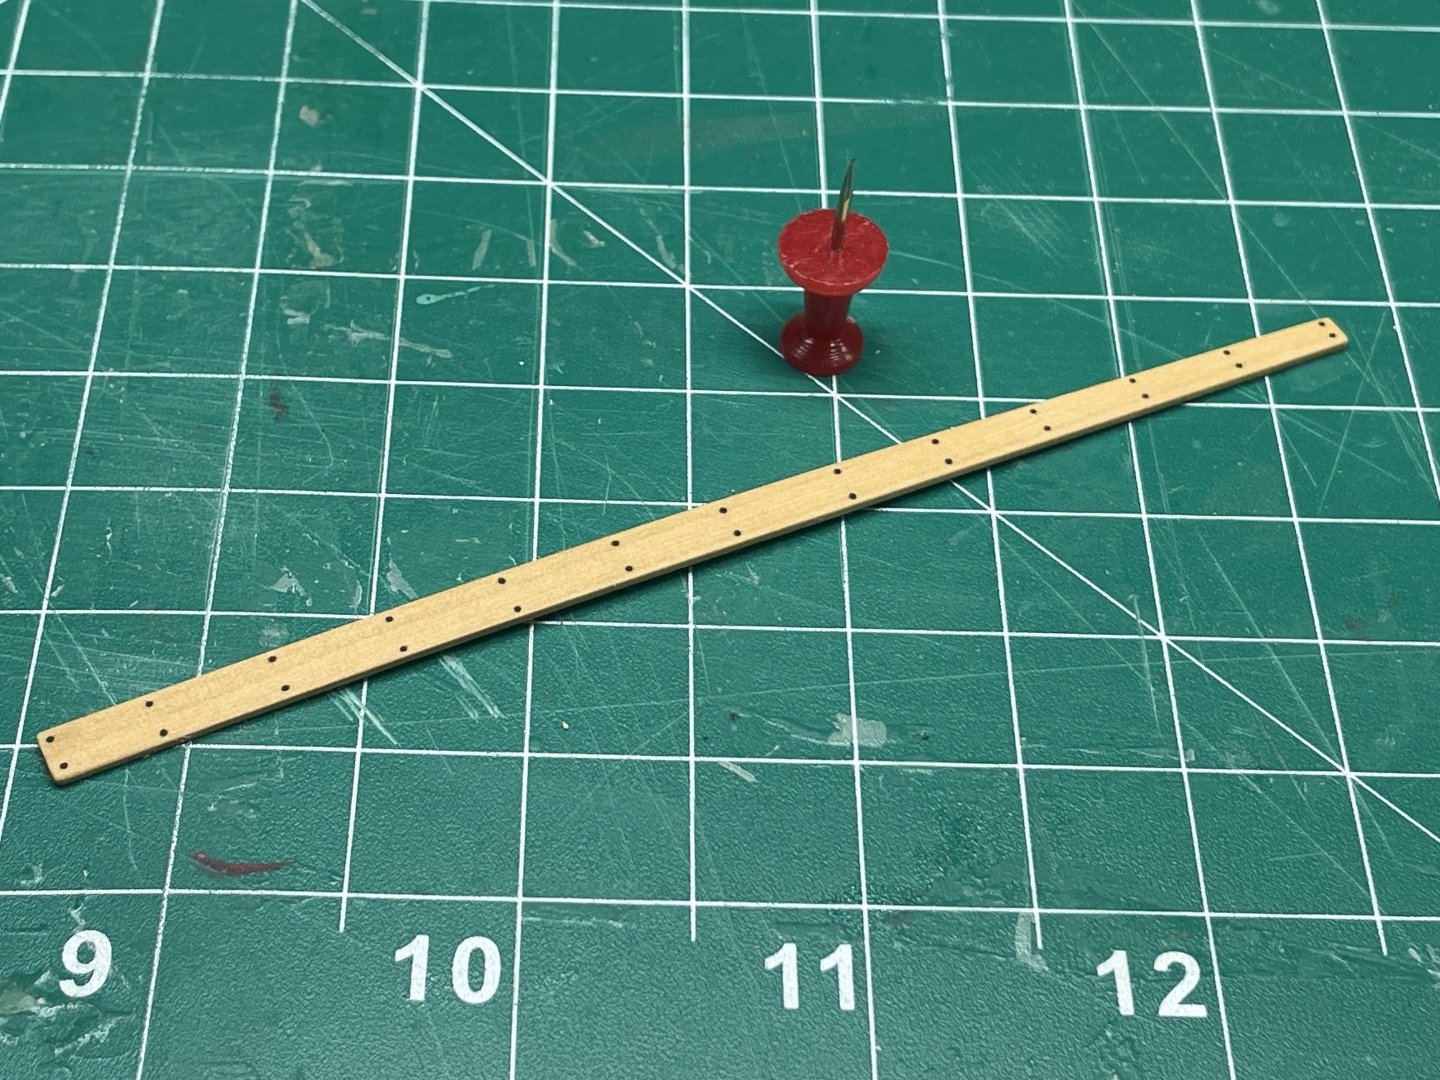
Then just more of the same for the other boards. I really thought I was doing well and I see the nail lines are not straight. There was a lot of things to keep track of while gluing those in. I’m not going to worry about them and just keep it as a lesson to keep a closer eye on those also.


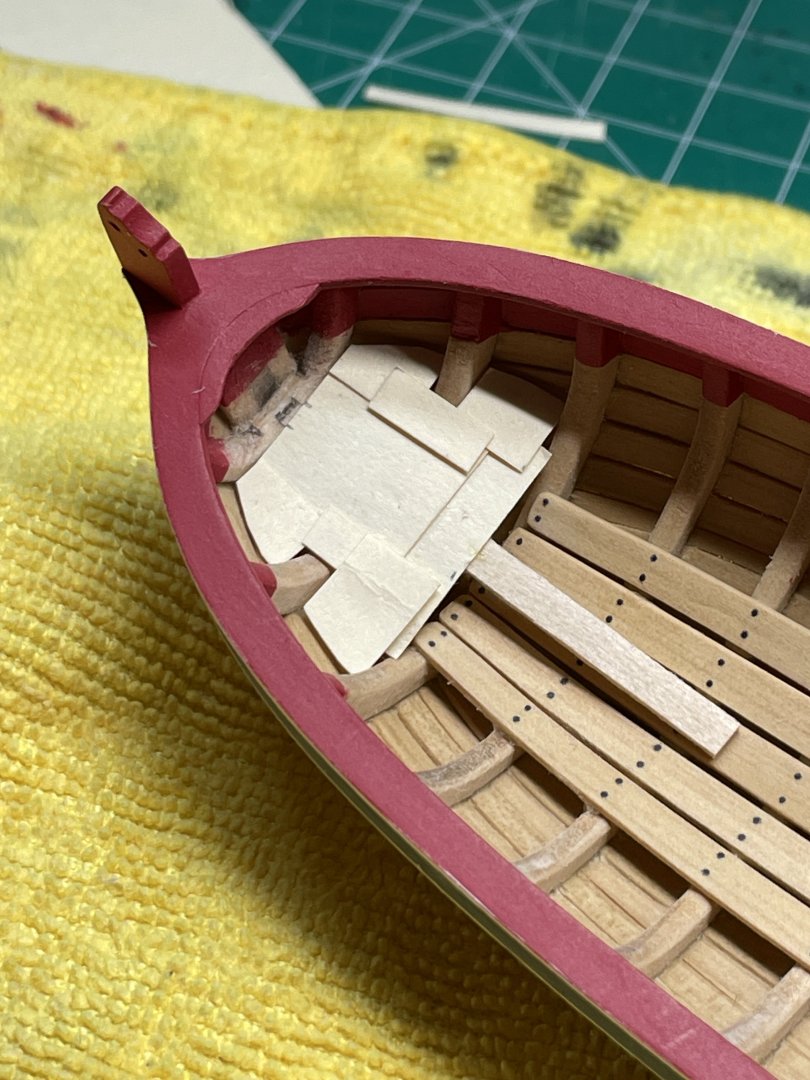
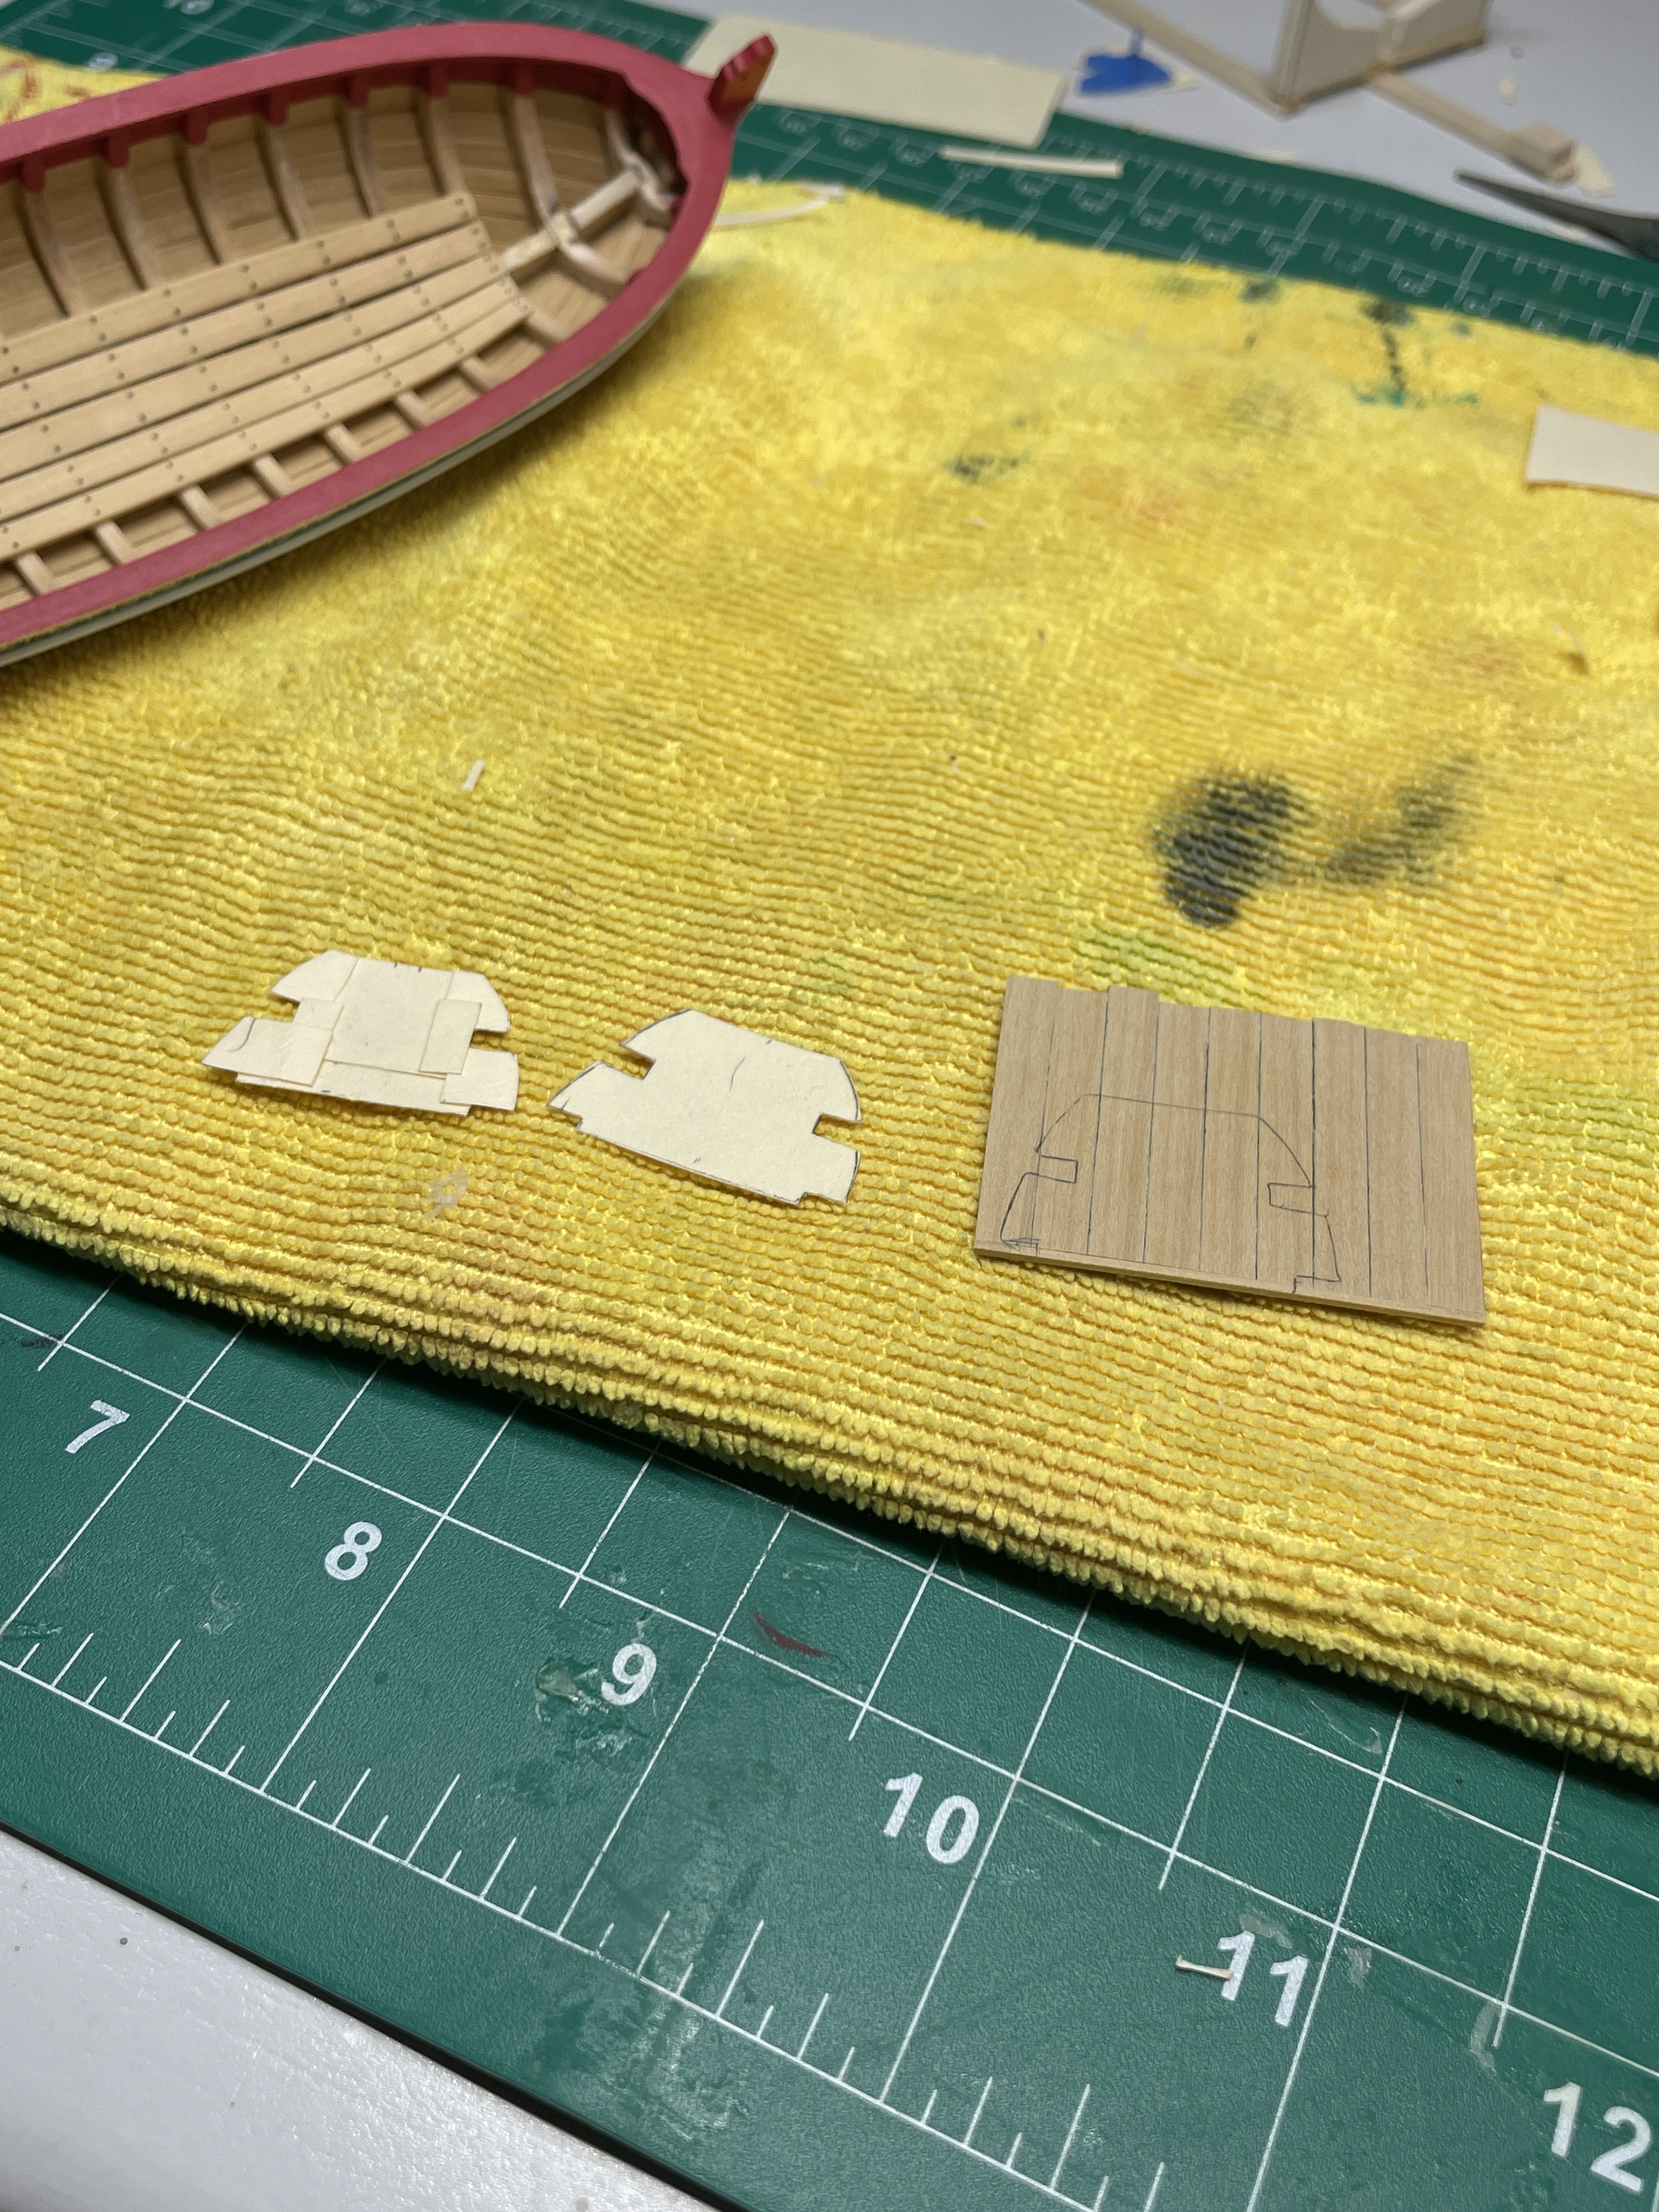
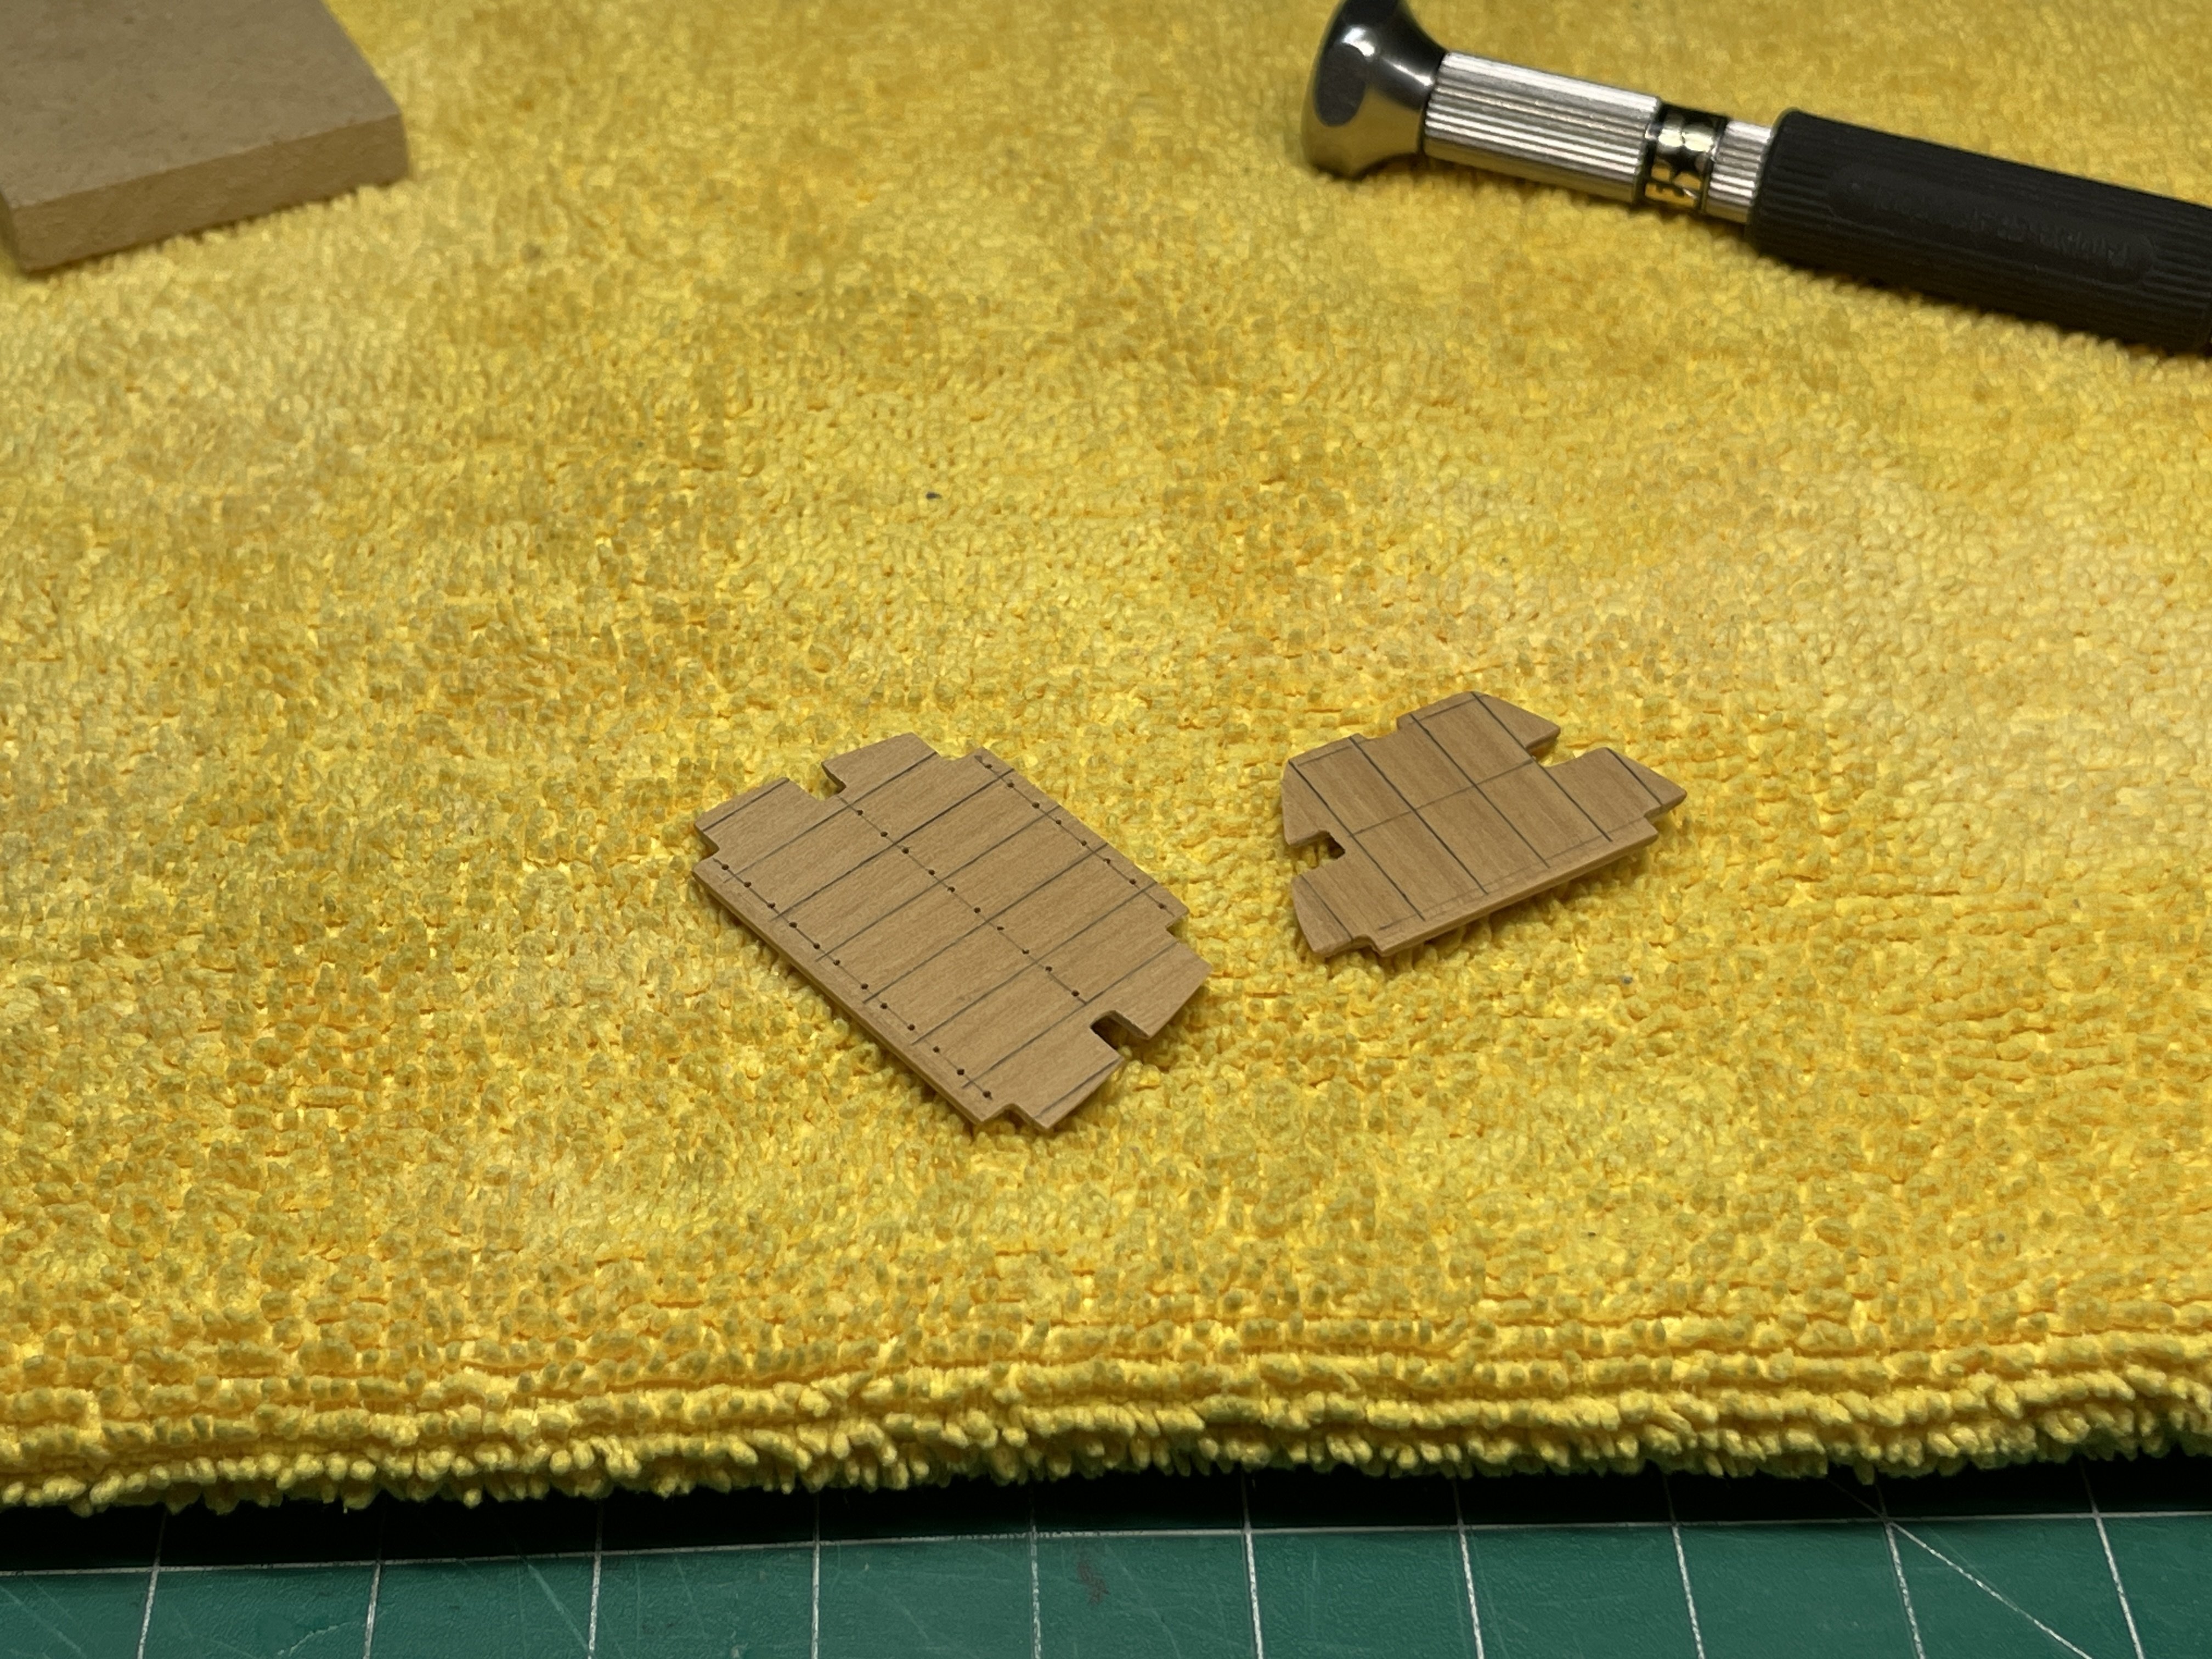
Now on to the little decks. I was not looking forward to these as I have a really hard time visualizing what shape things like this need to be when they have compound curves. Plus its basically impossible to measure in there. I used a trick that I saw in the build log of @BobF. He used little bits of paper and made a template. I tried it and I think it worked out well for me. I transferred it to a single layer of manilla folder then onto the boxwood floors I had made and cut them out. I don’t seem to have any pics of the backs but I did put some 1/32” boards on the back for strength and to help keep them flat. The final fit could be better but I’m good with them.
When final dry fitting something like this how do you tell where the part is getting stuck and needs a little more shaping?

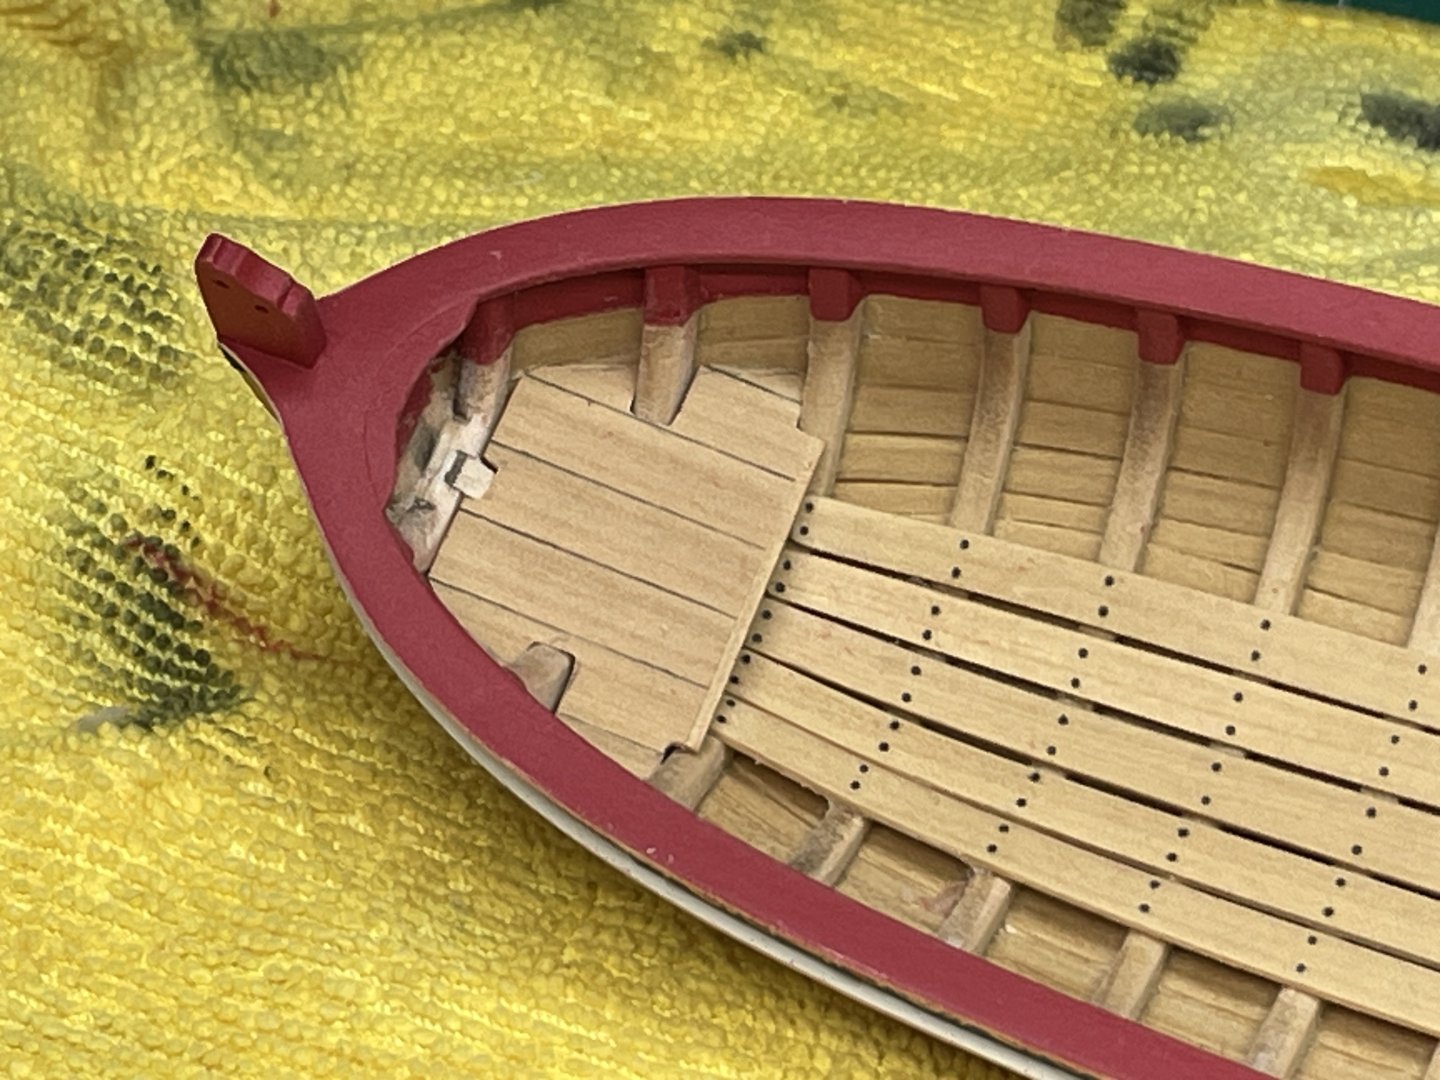
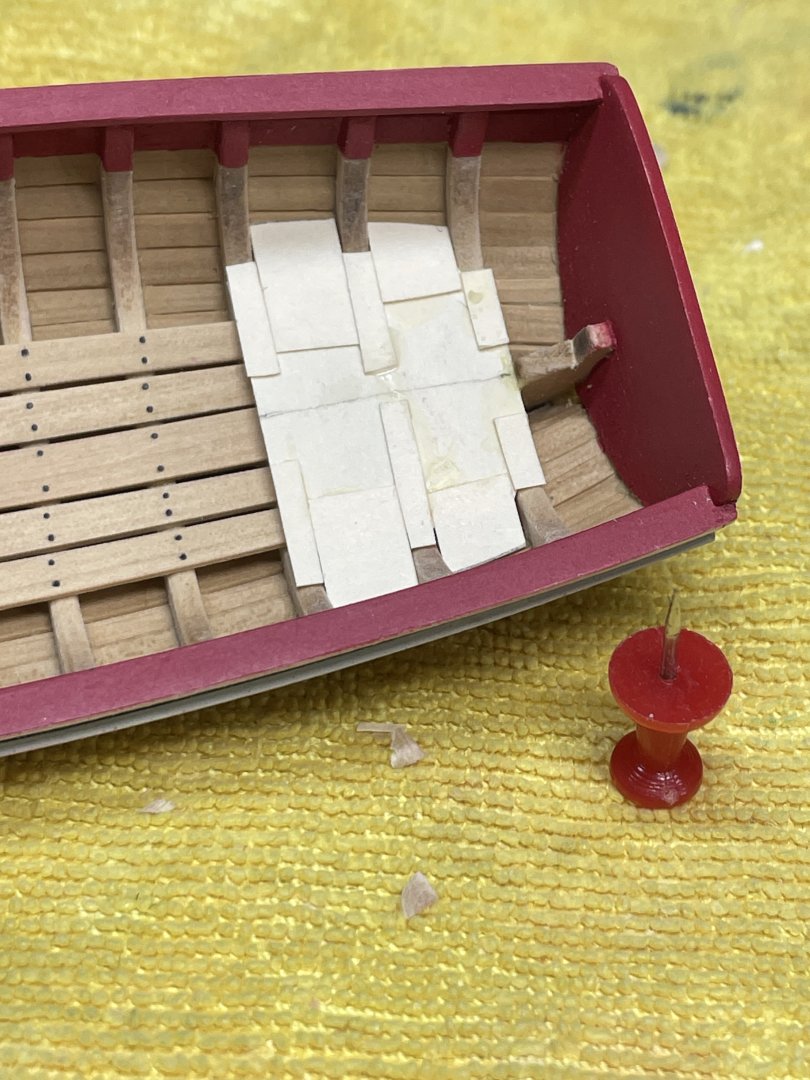

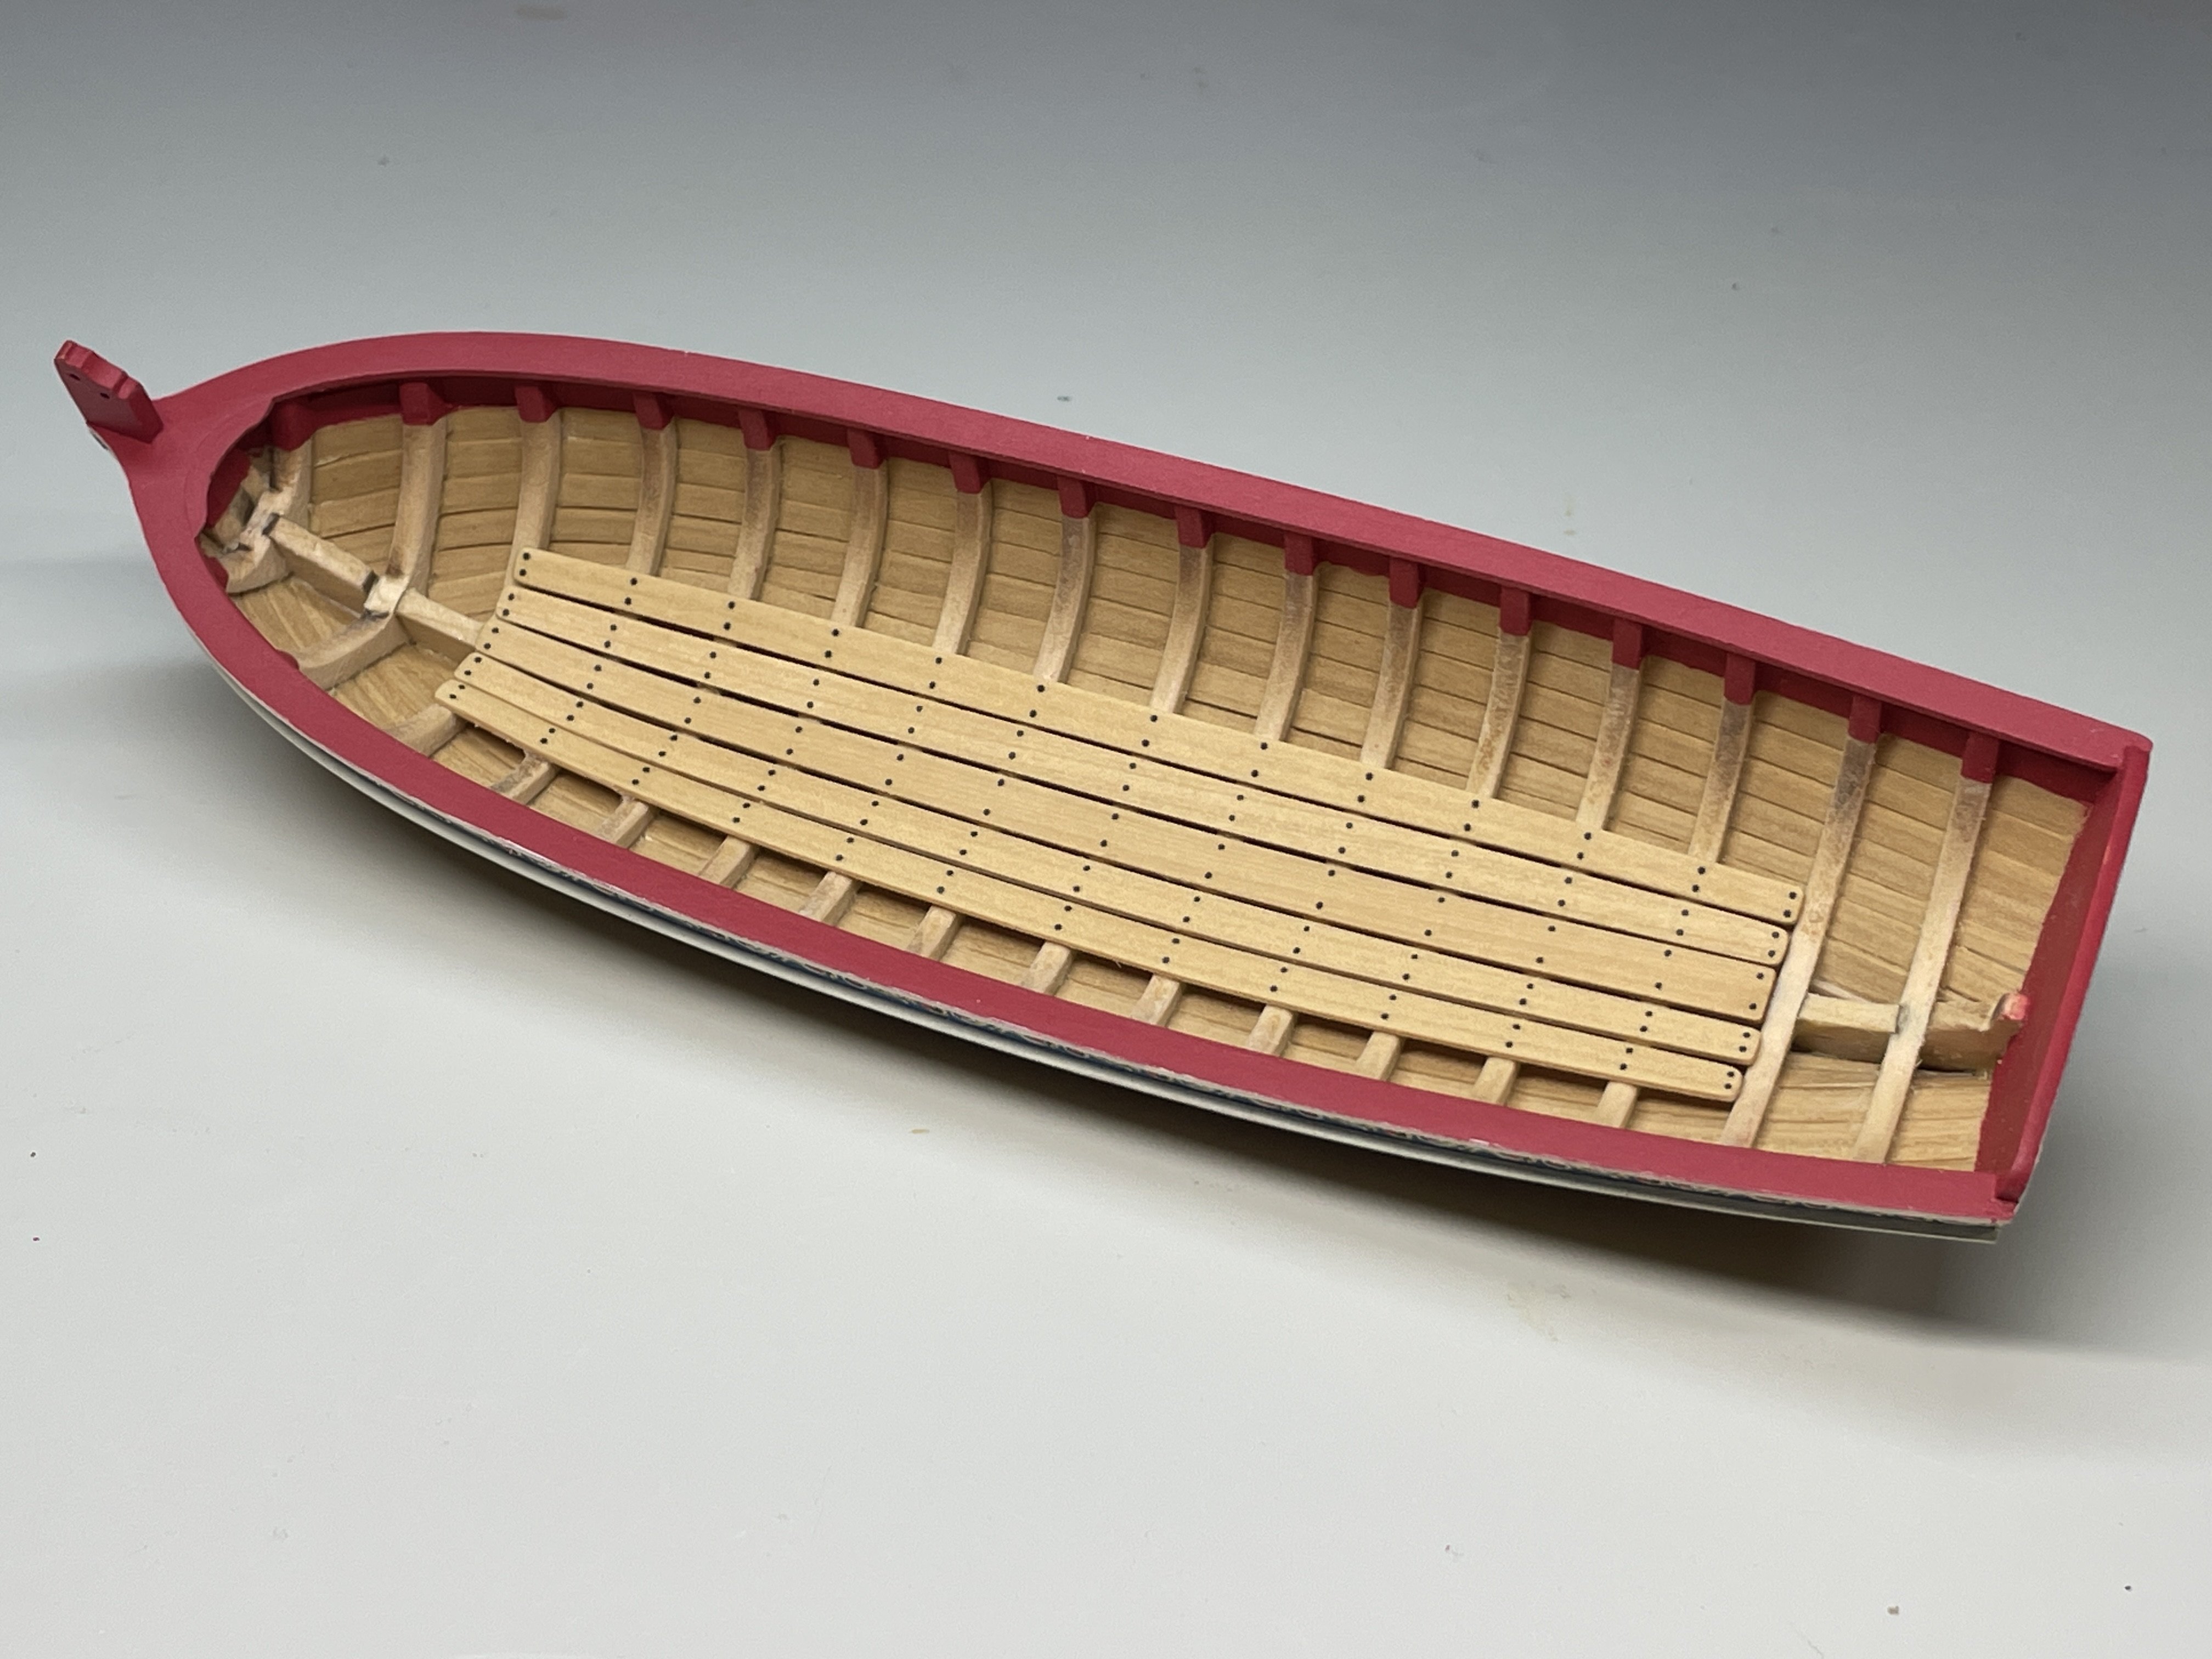
Here they are installed and a coat of WOP.
What do you think of the size of the monofilament? I think it might be a little strong but with all the other stuff going on above them I don’t want them to get lost as they were a lot of work. I’m thinking between the floor boards and the decks I have about 15 hours in them.


Thanks for looking!! I appreciate all the comments and likes!
Chris
- bruce d, SiriusVoyager, Russ2025 and 12 others
-
15
-
-
Question for you. Do you plan on what you’re going to do on paper or is it just in your head after looking at the plans? Like the plan to expose the litter deck.
Chris -
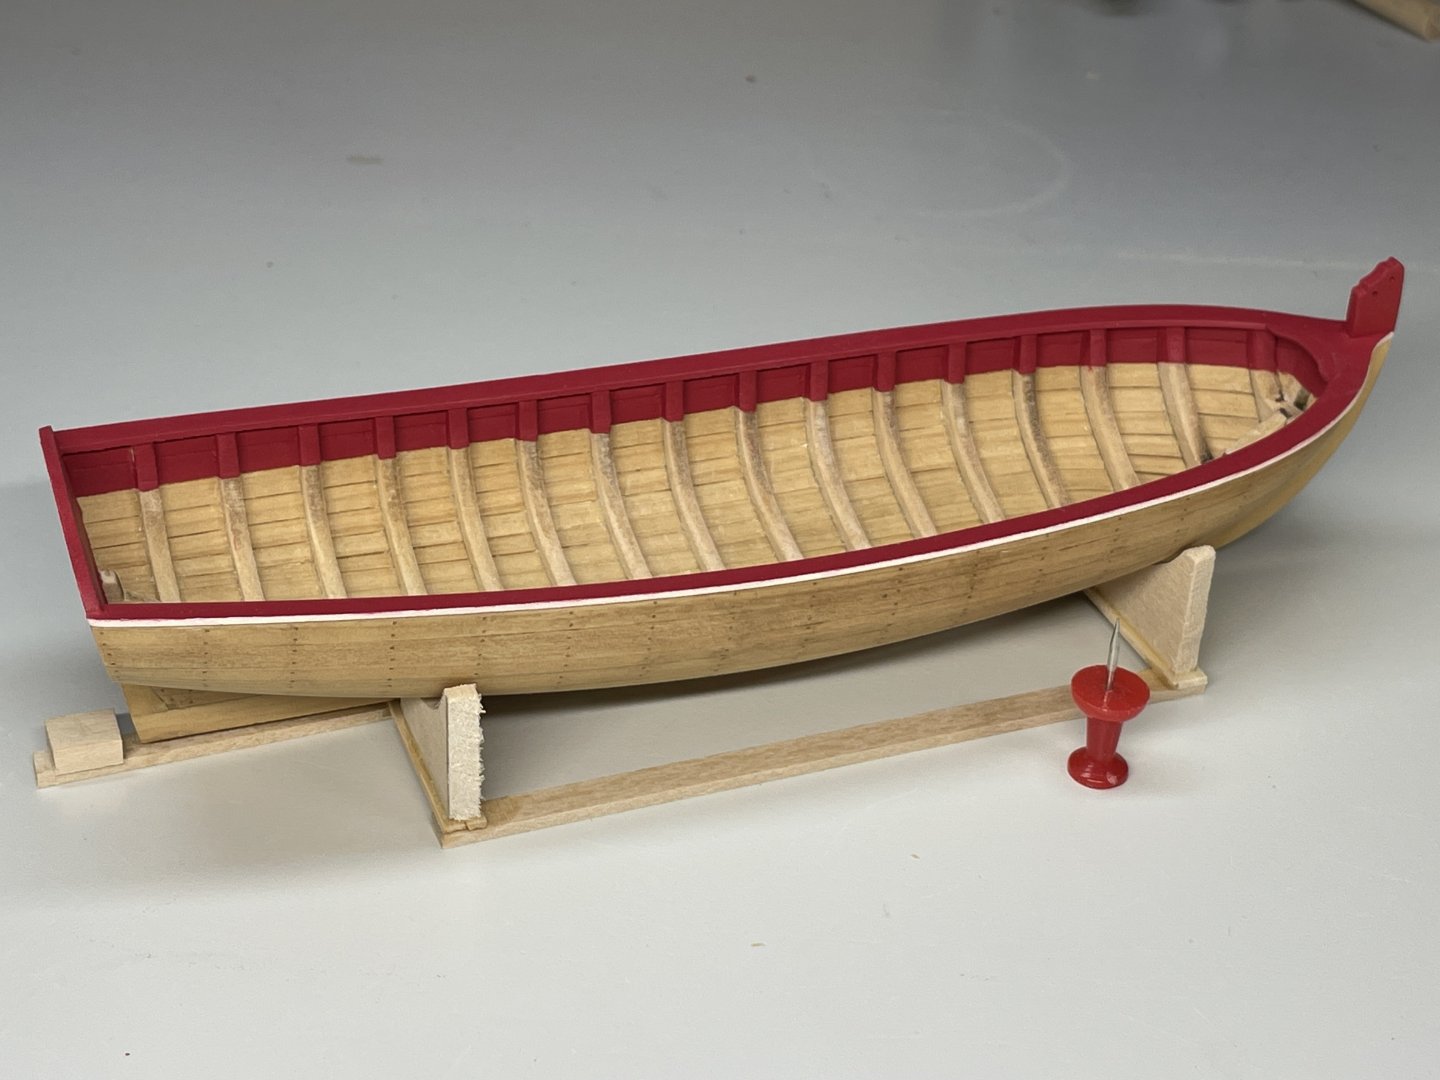
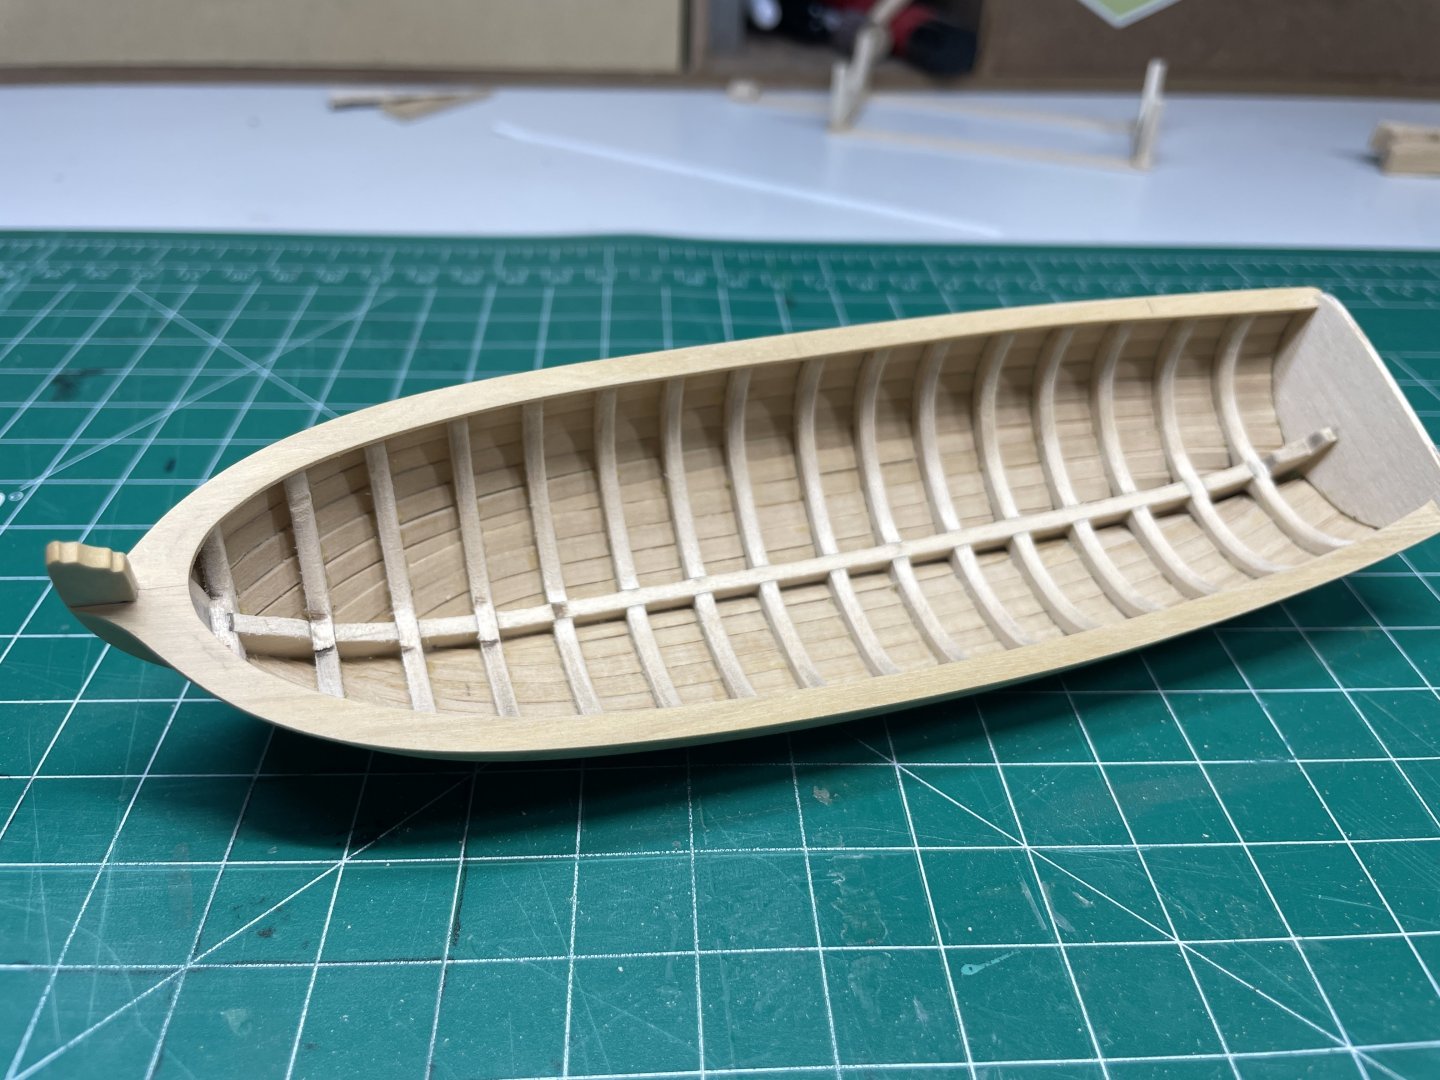
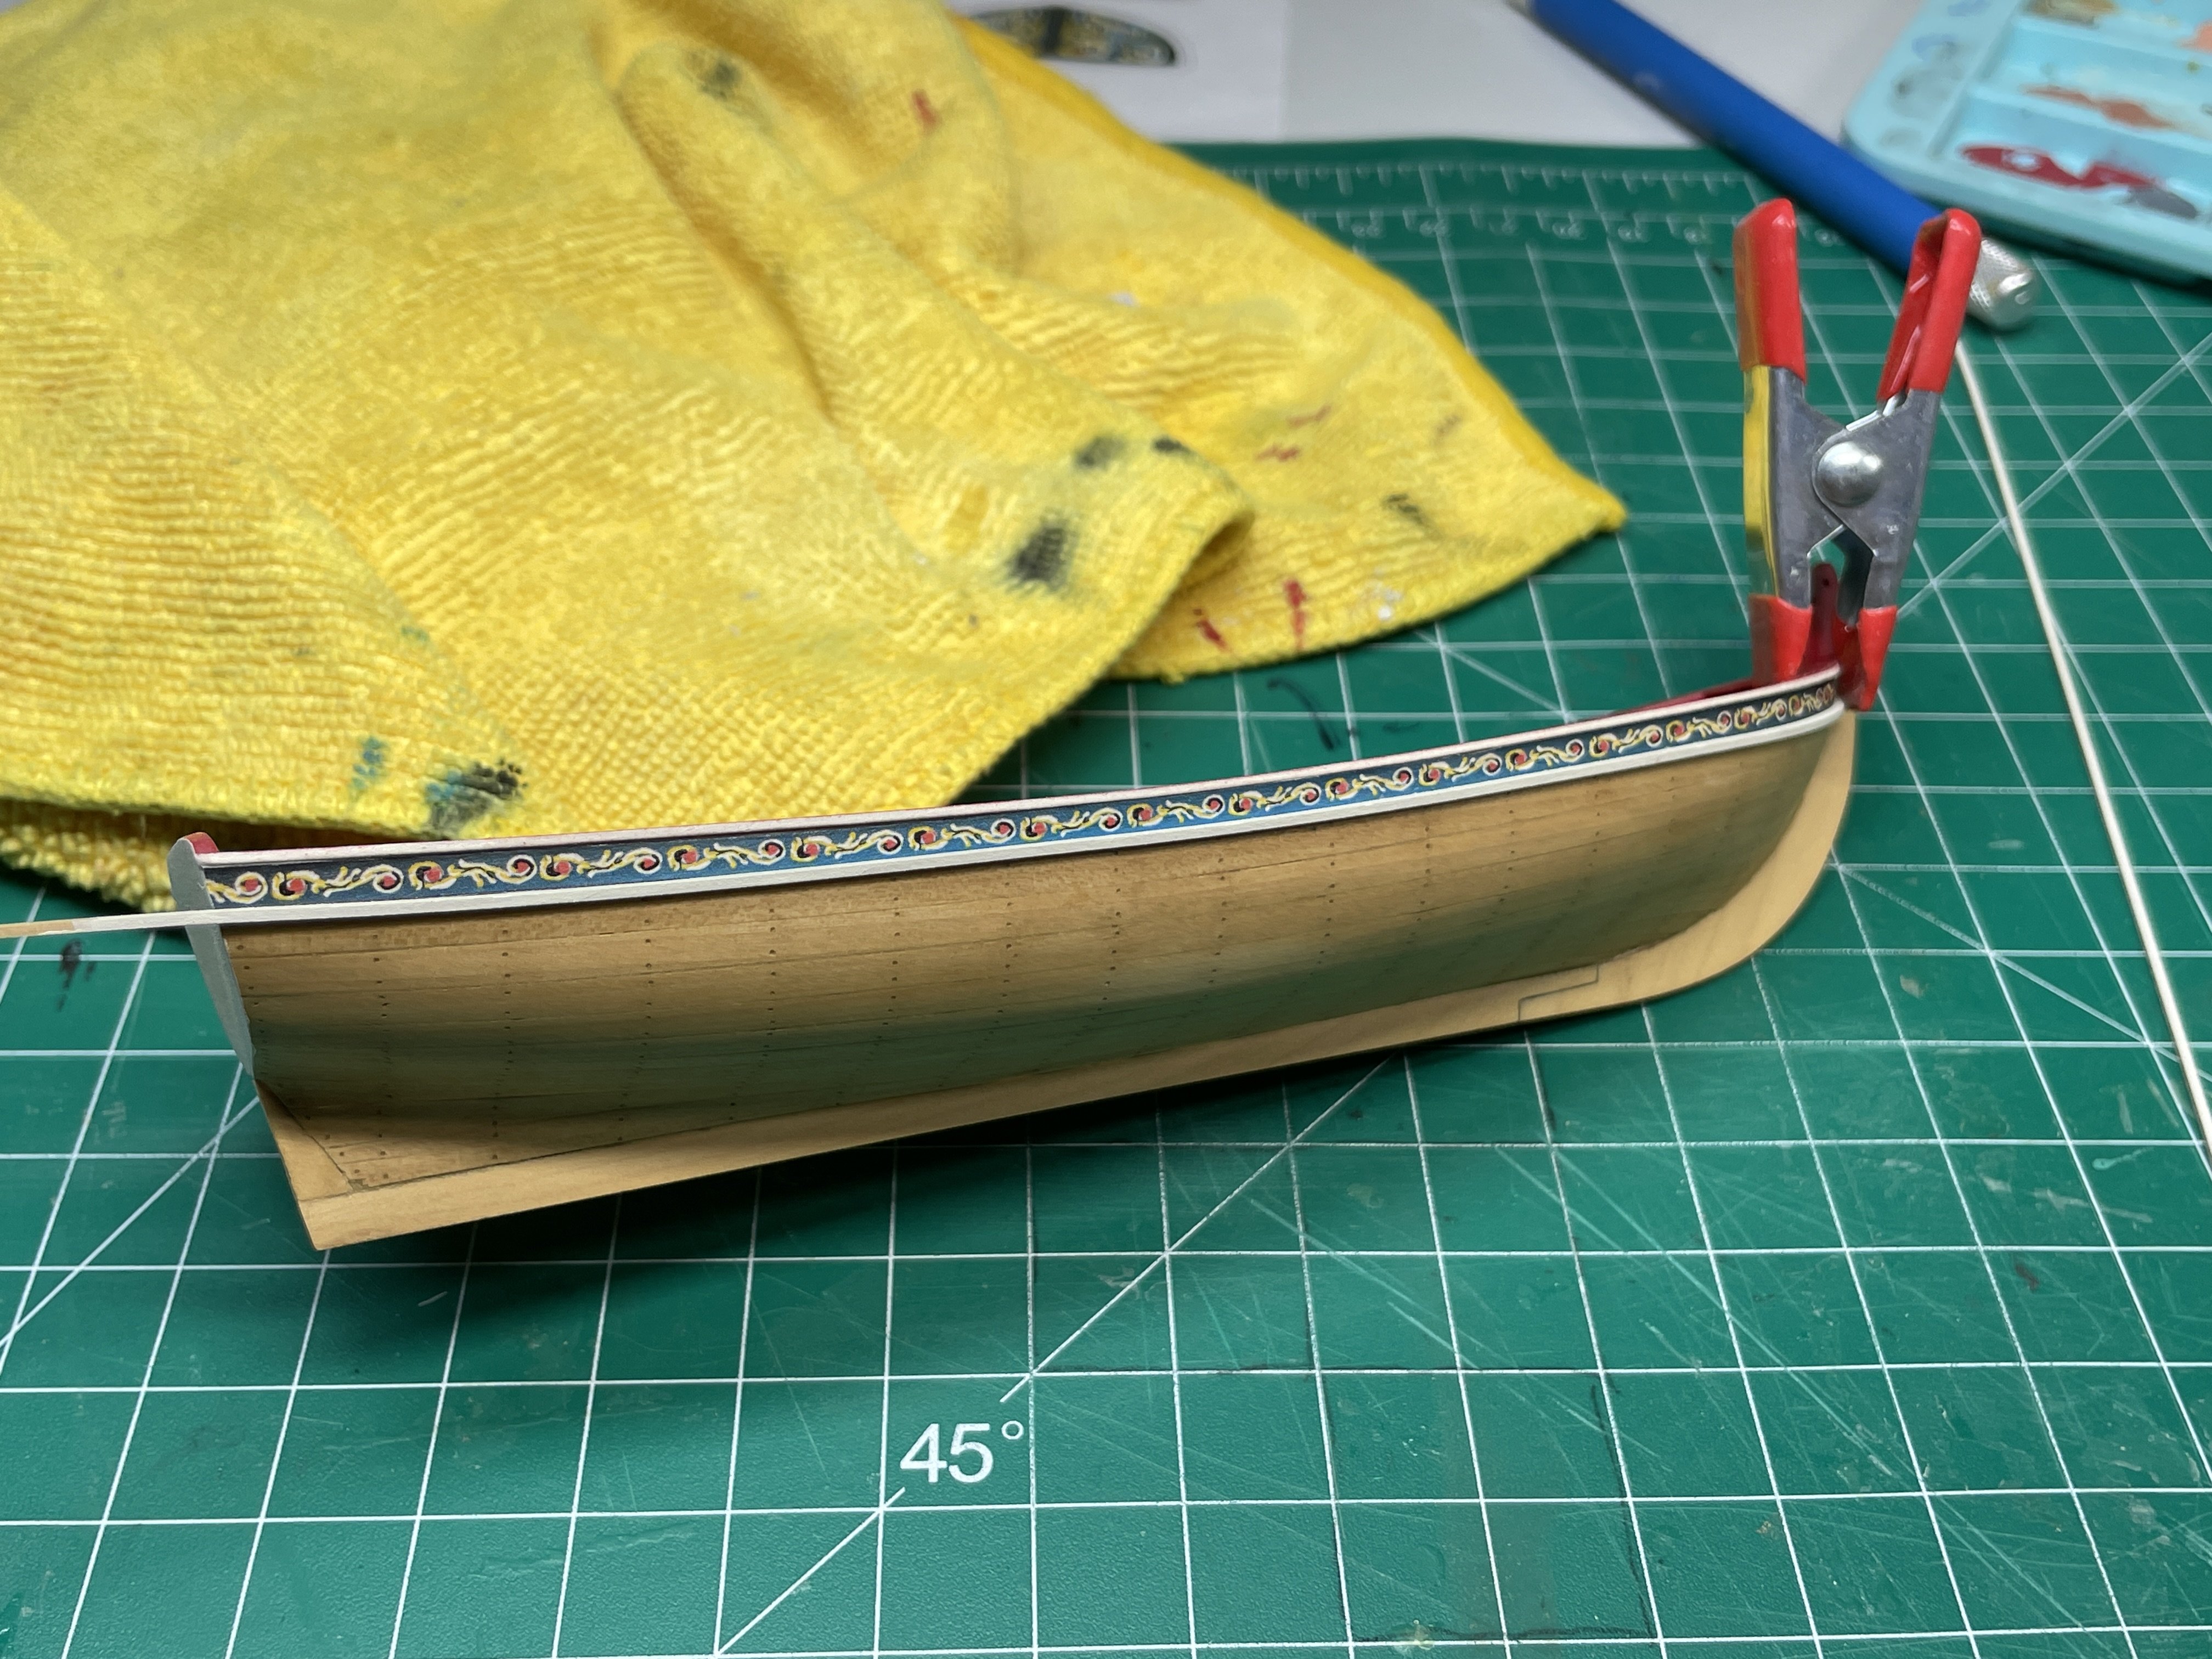
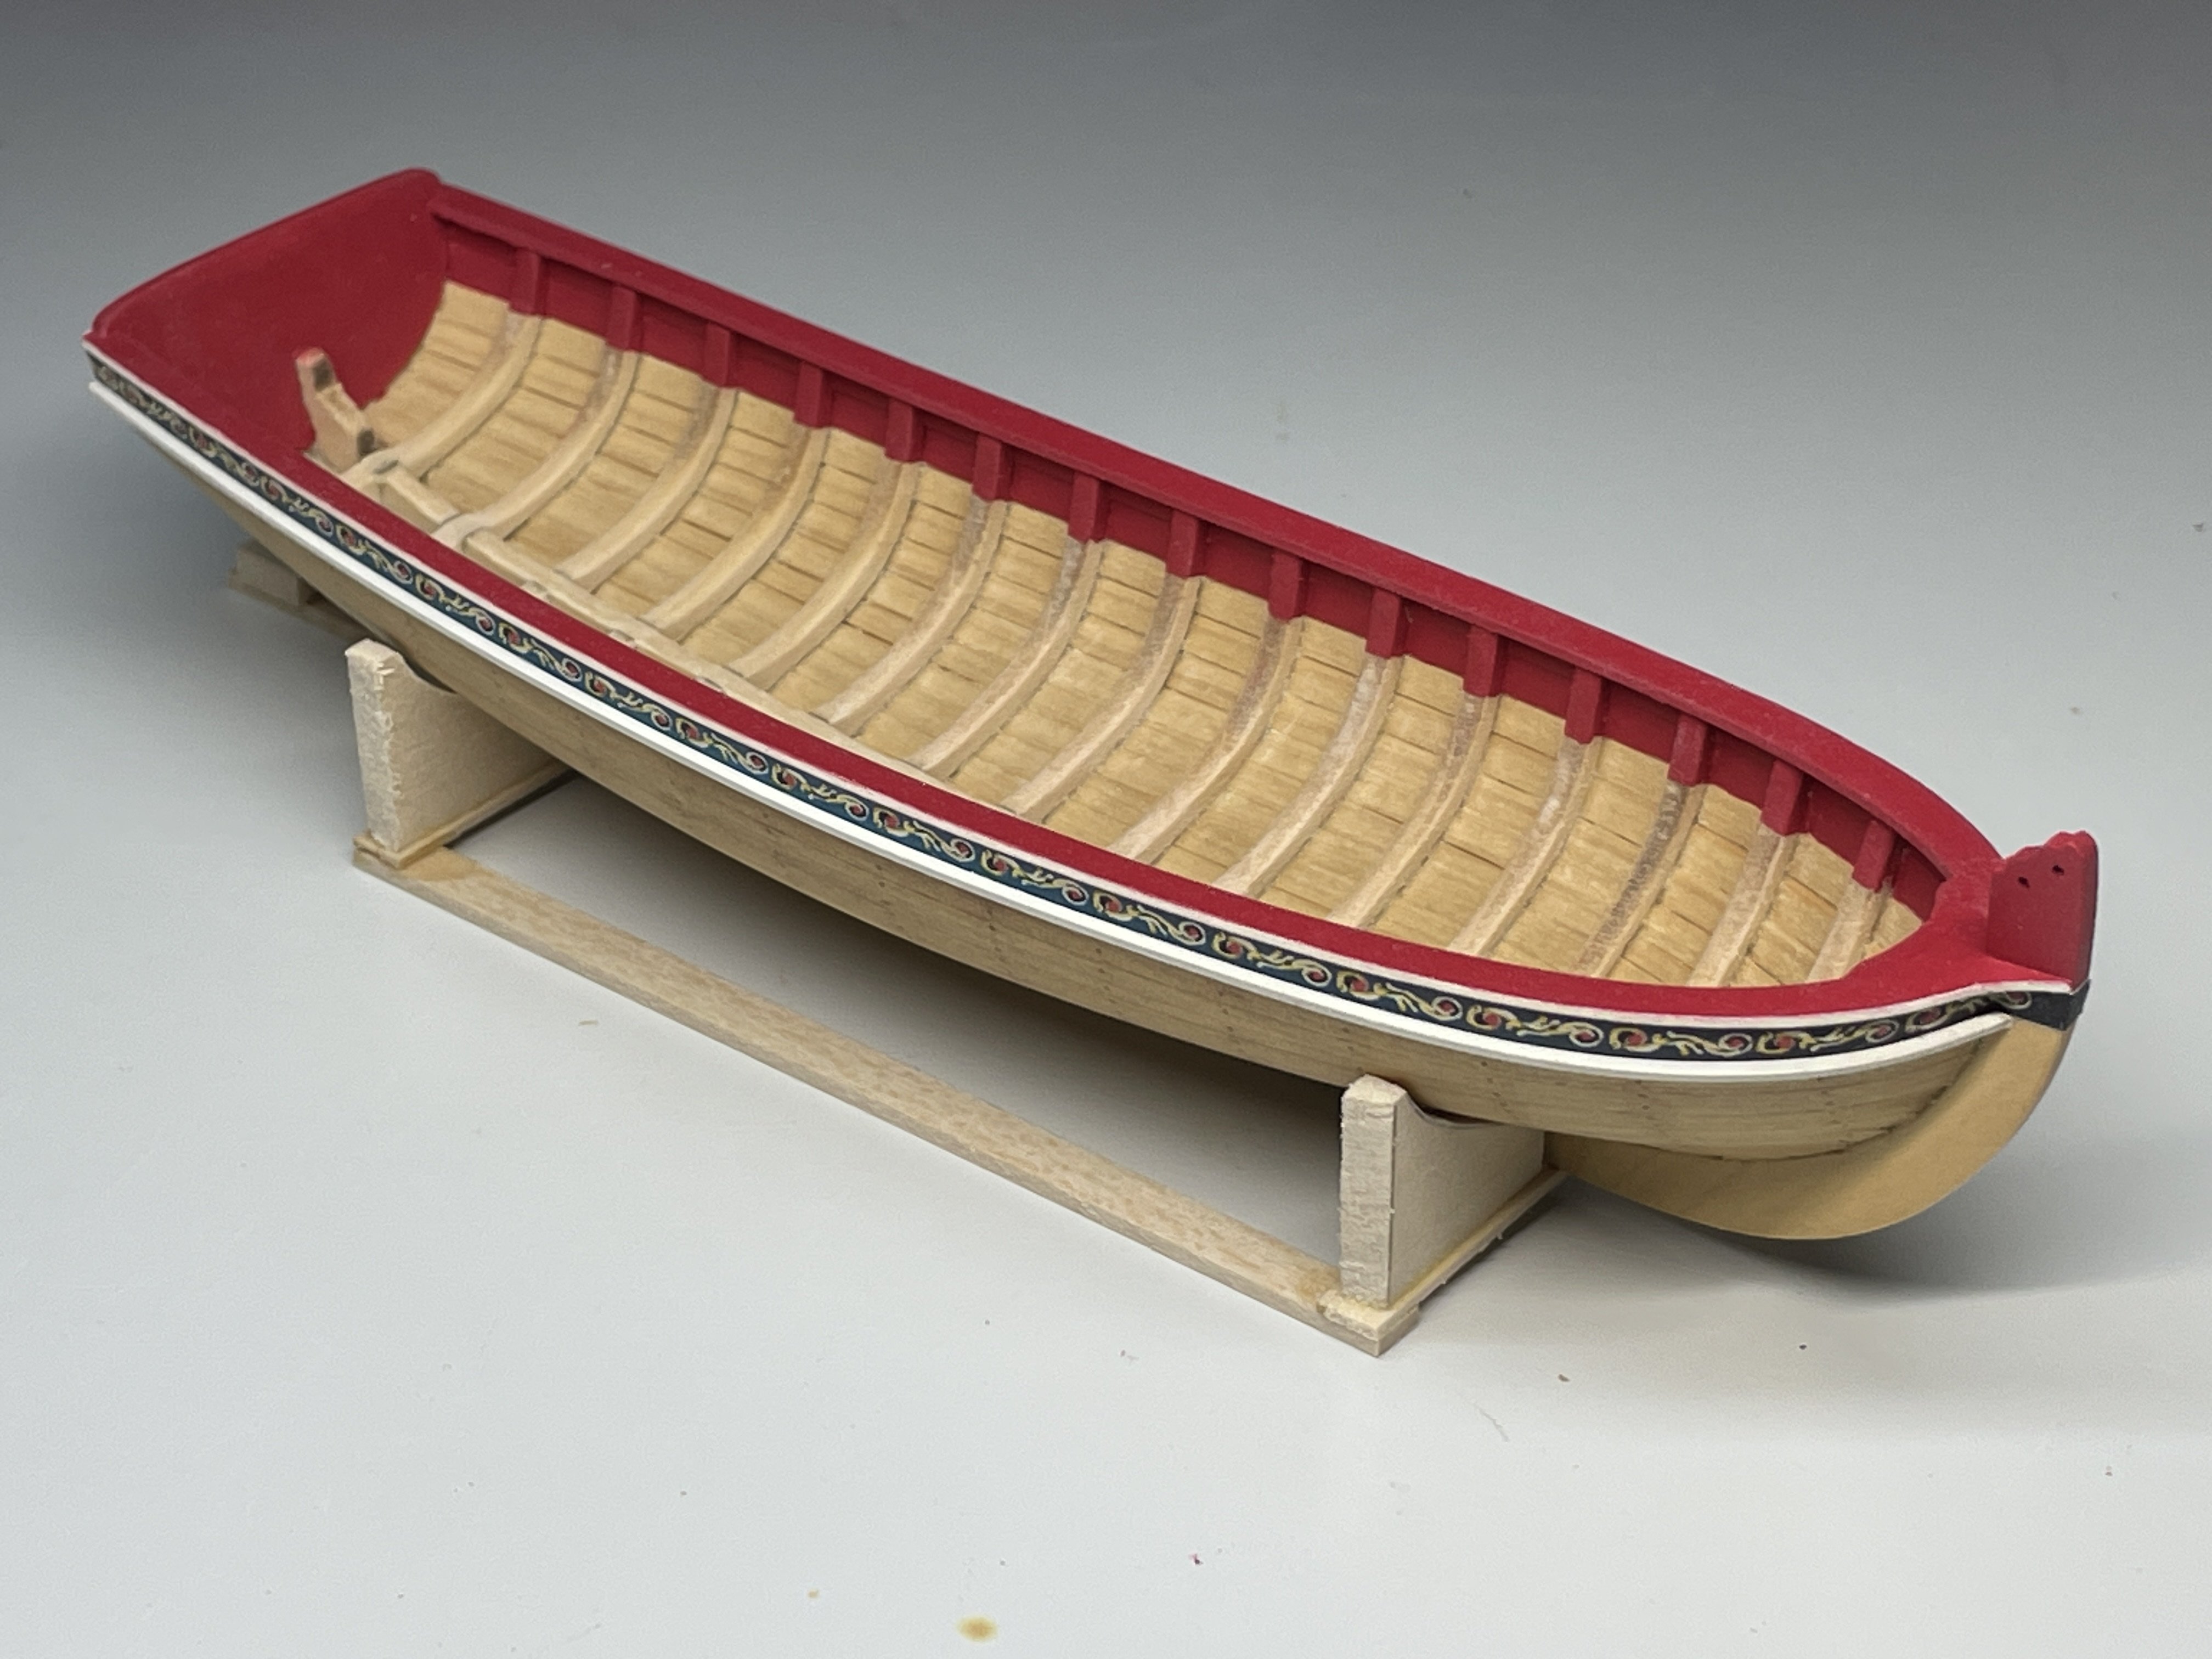
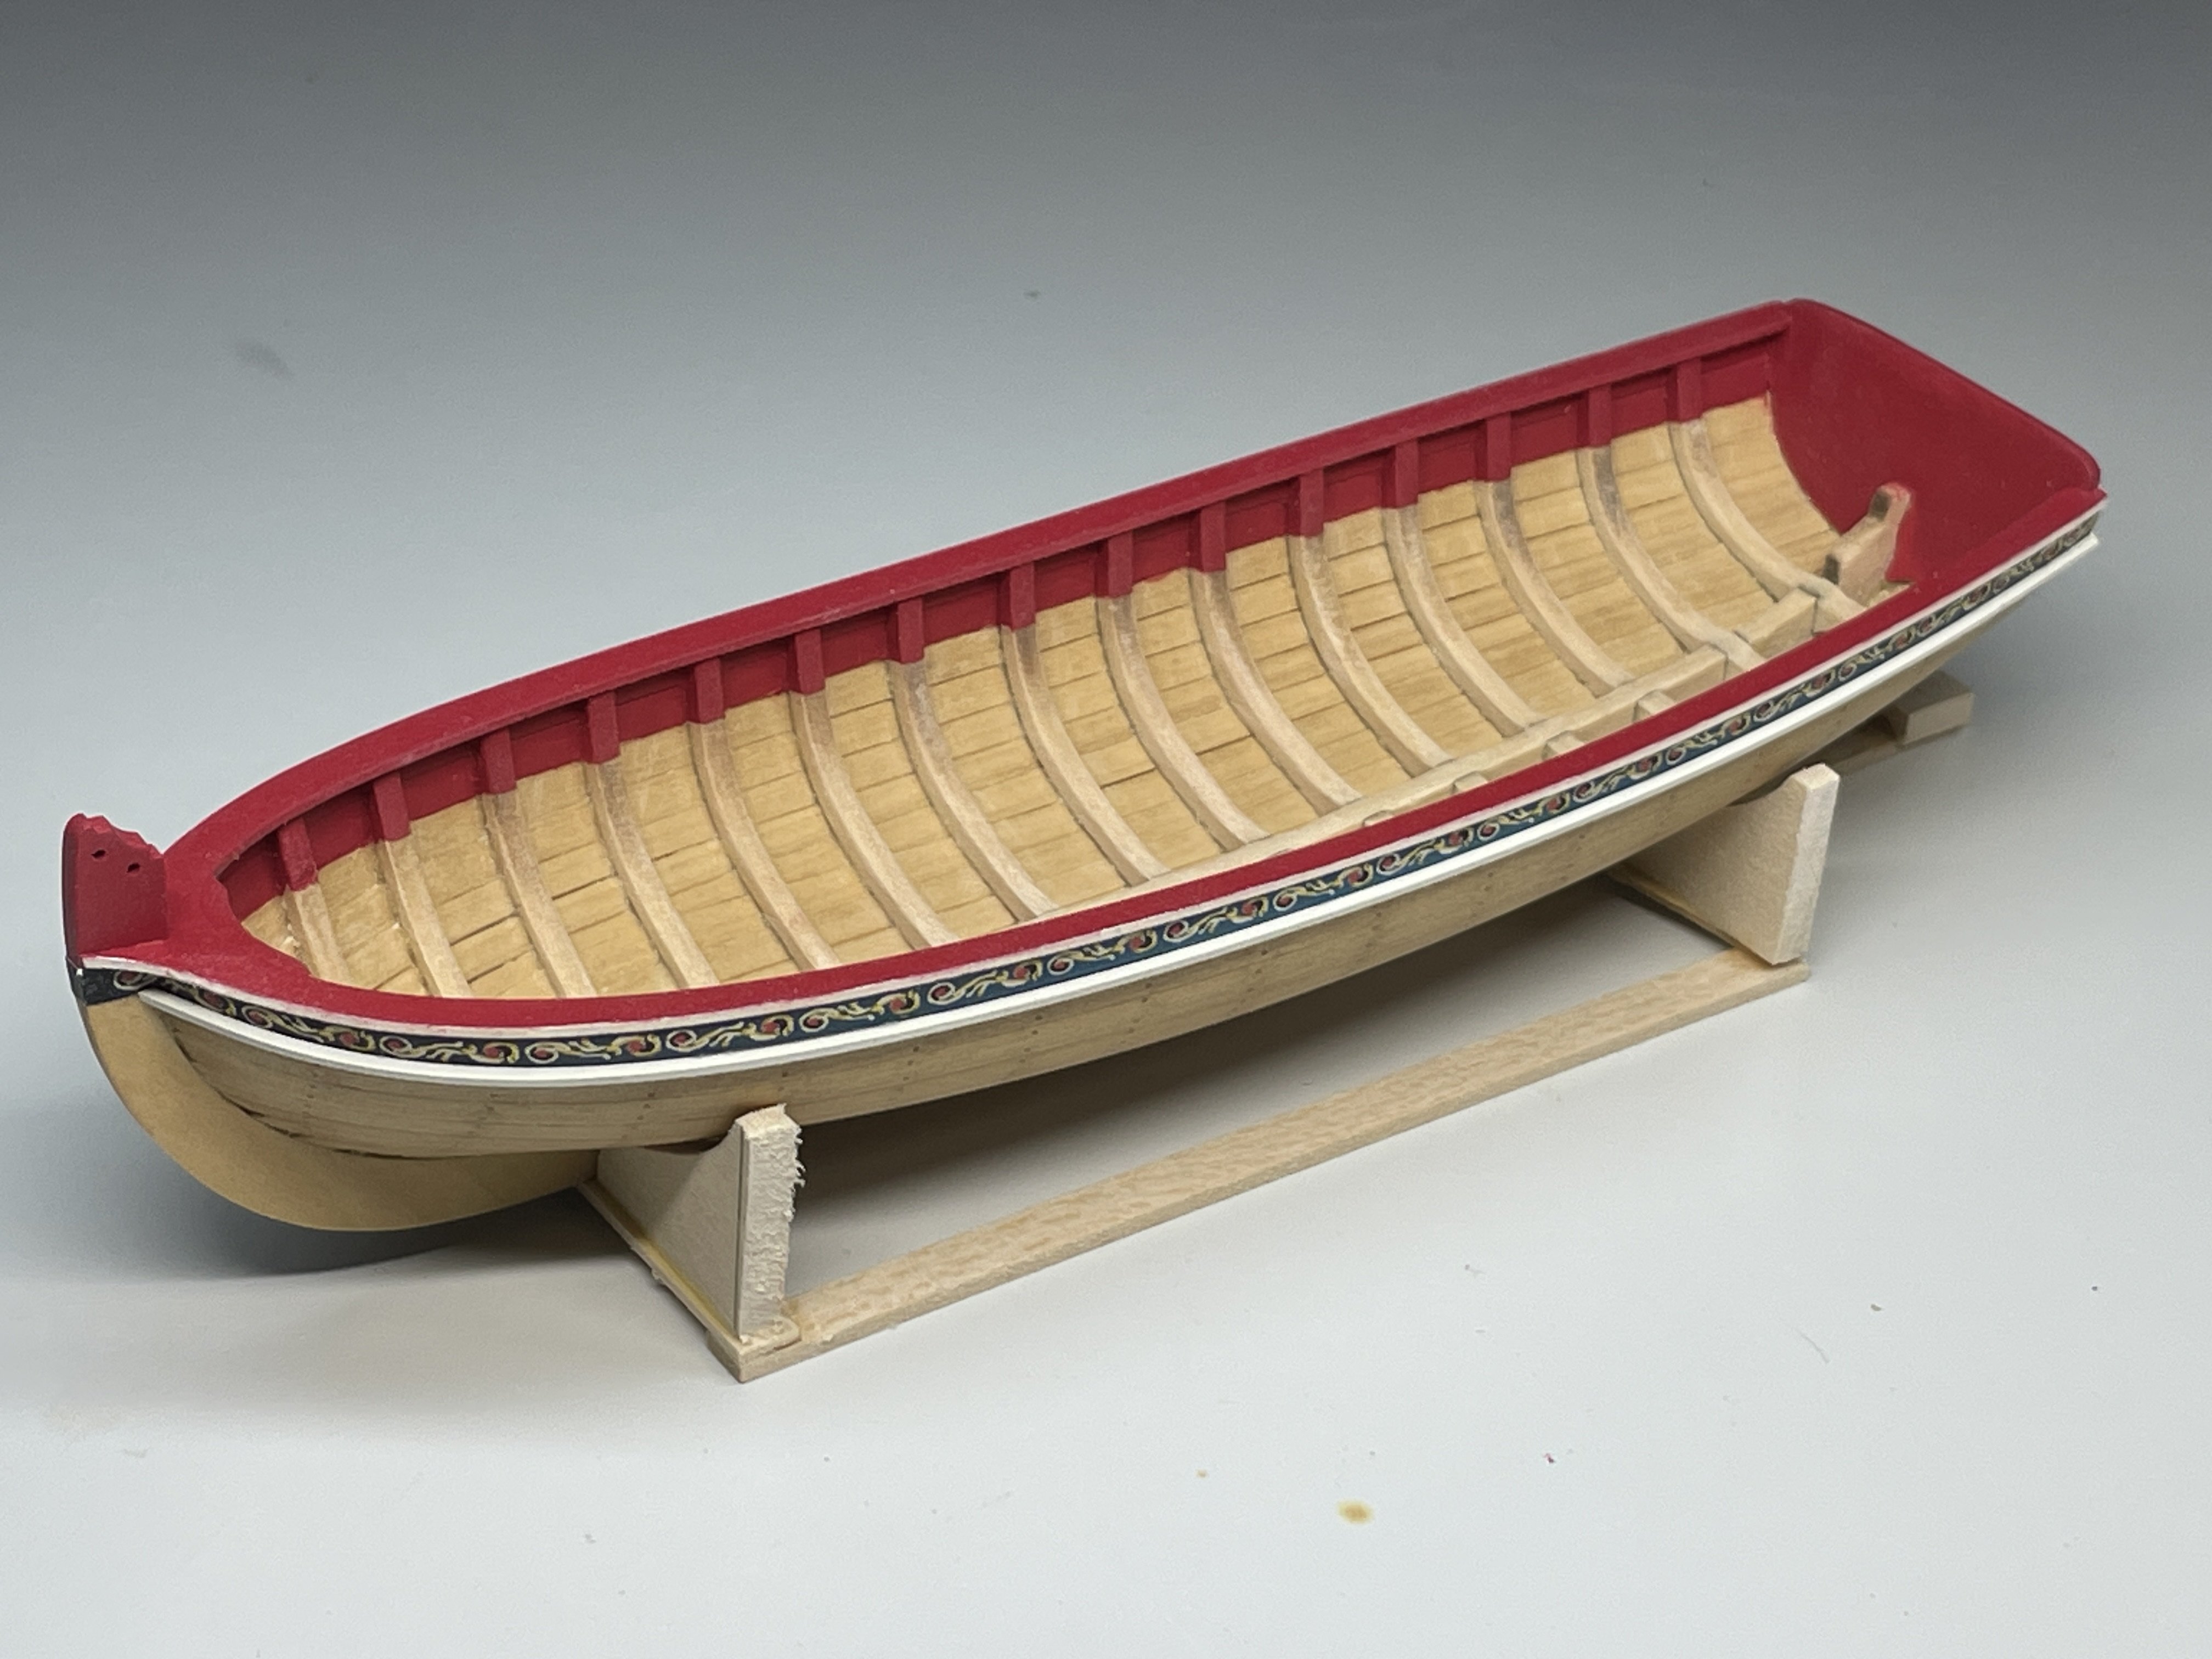
Moving right along this is the final shape of the cap rail. This pic looks like I’ve put a coat of WOP on her also.
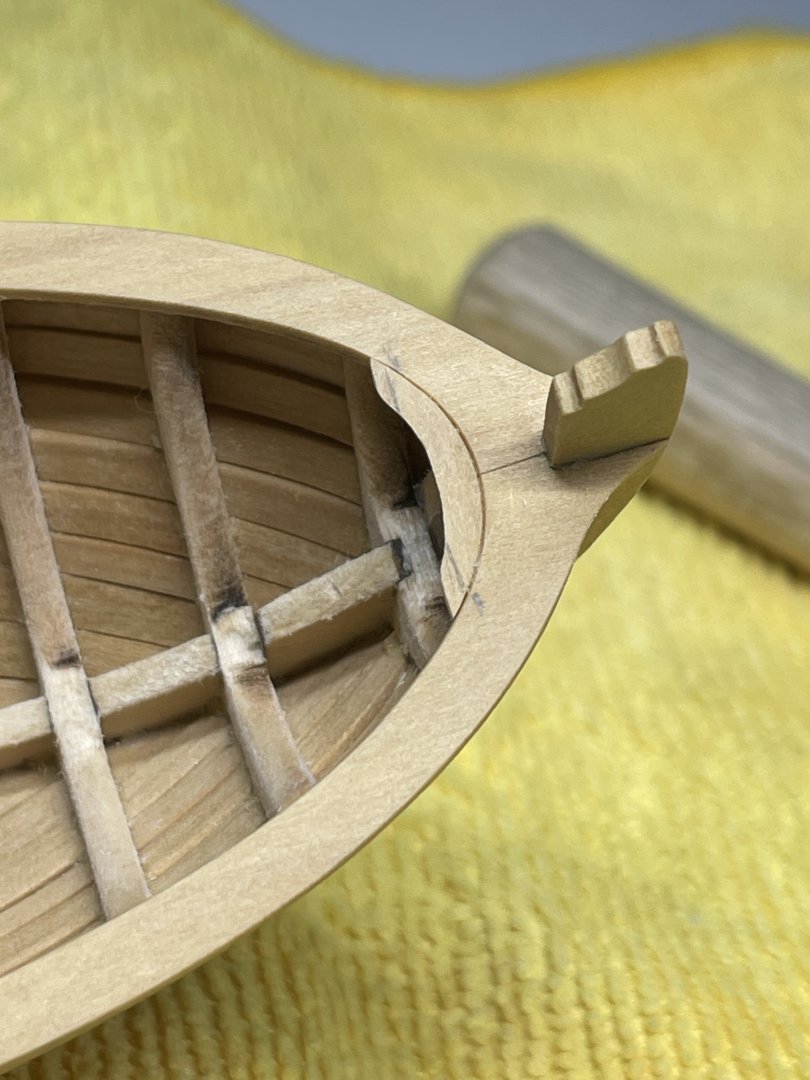
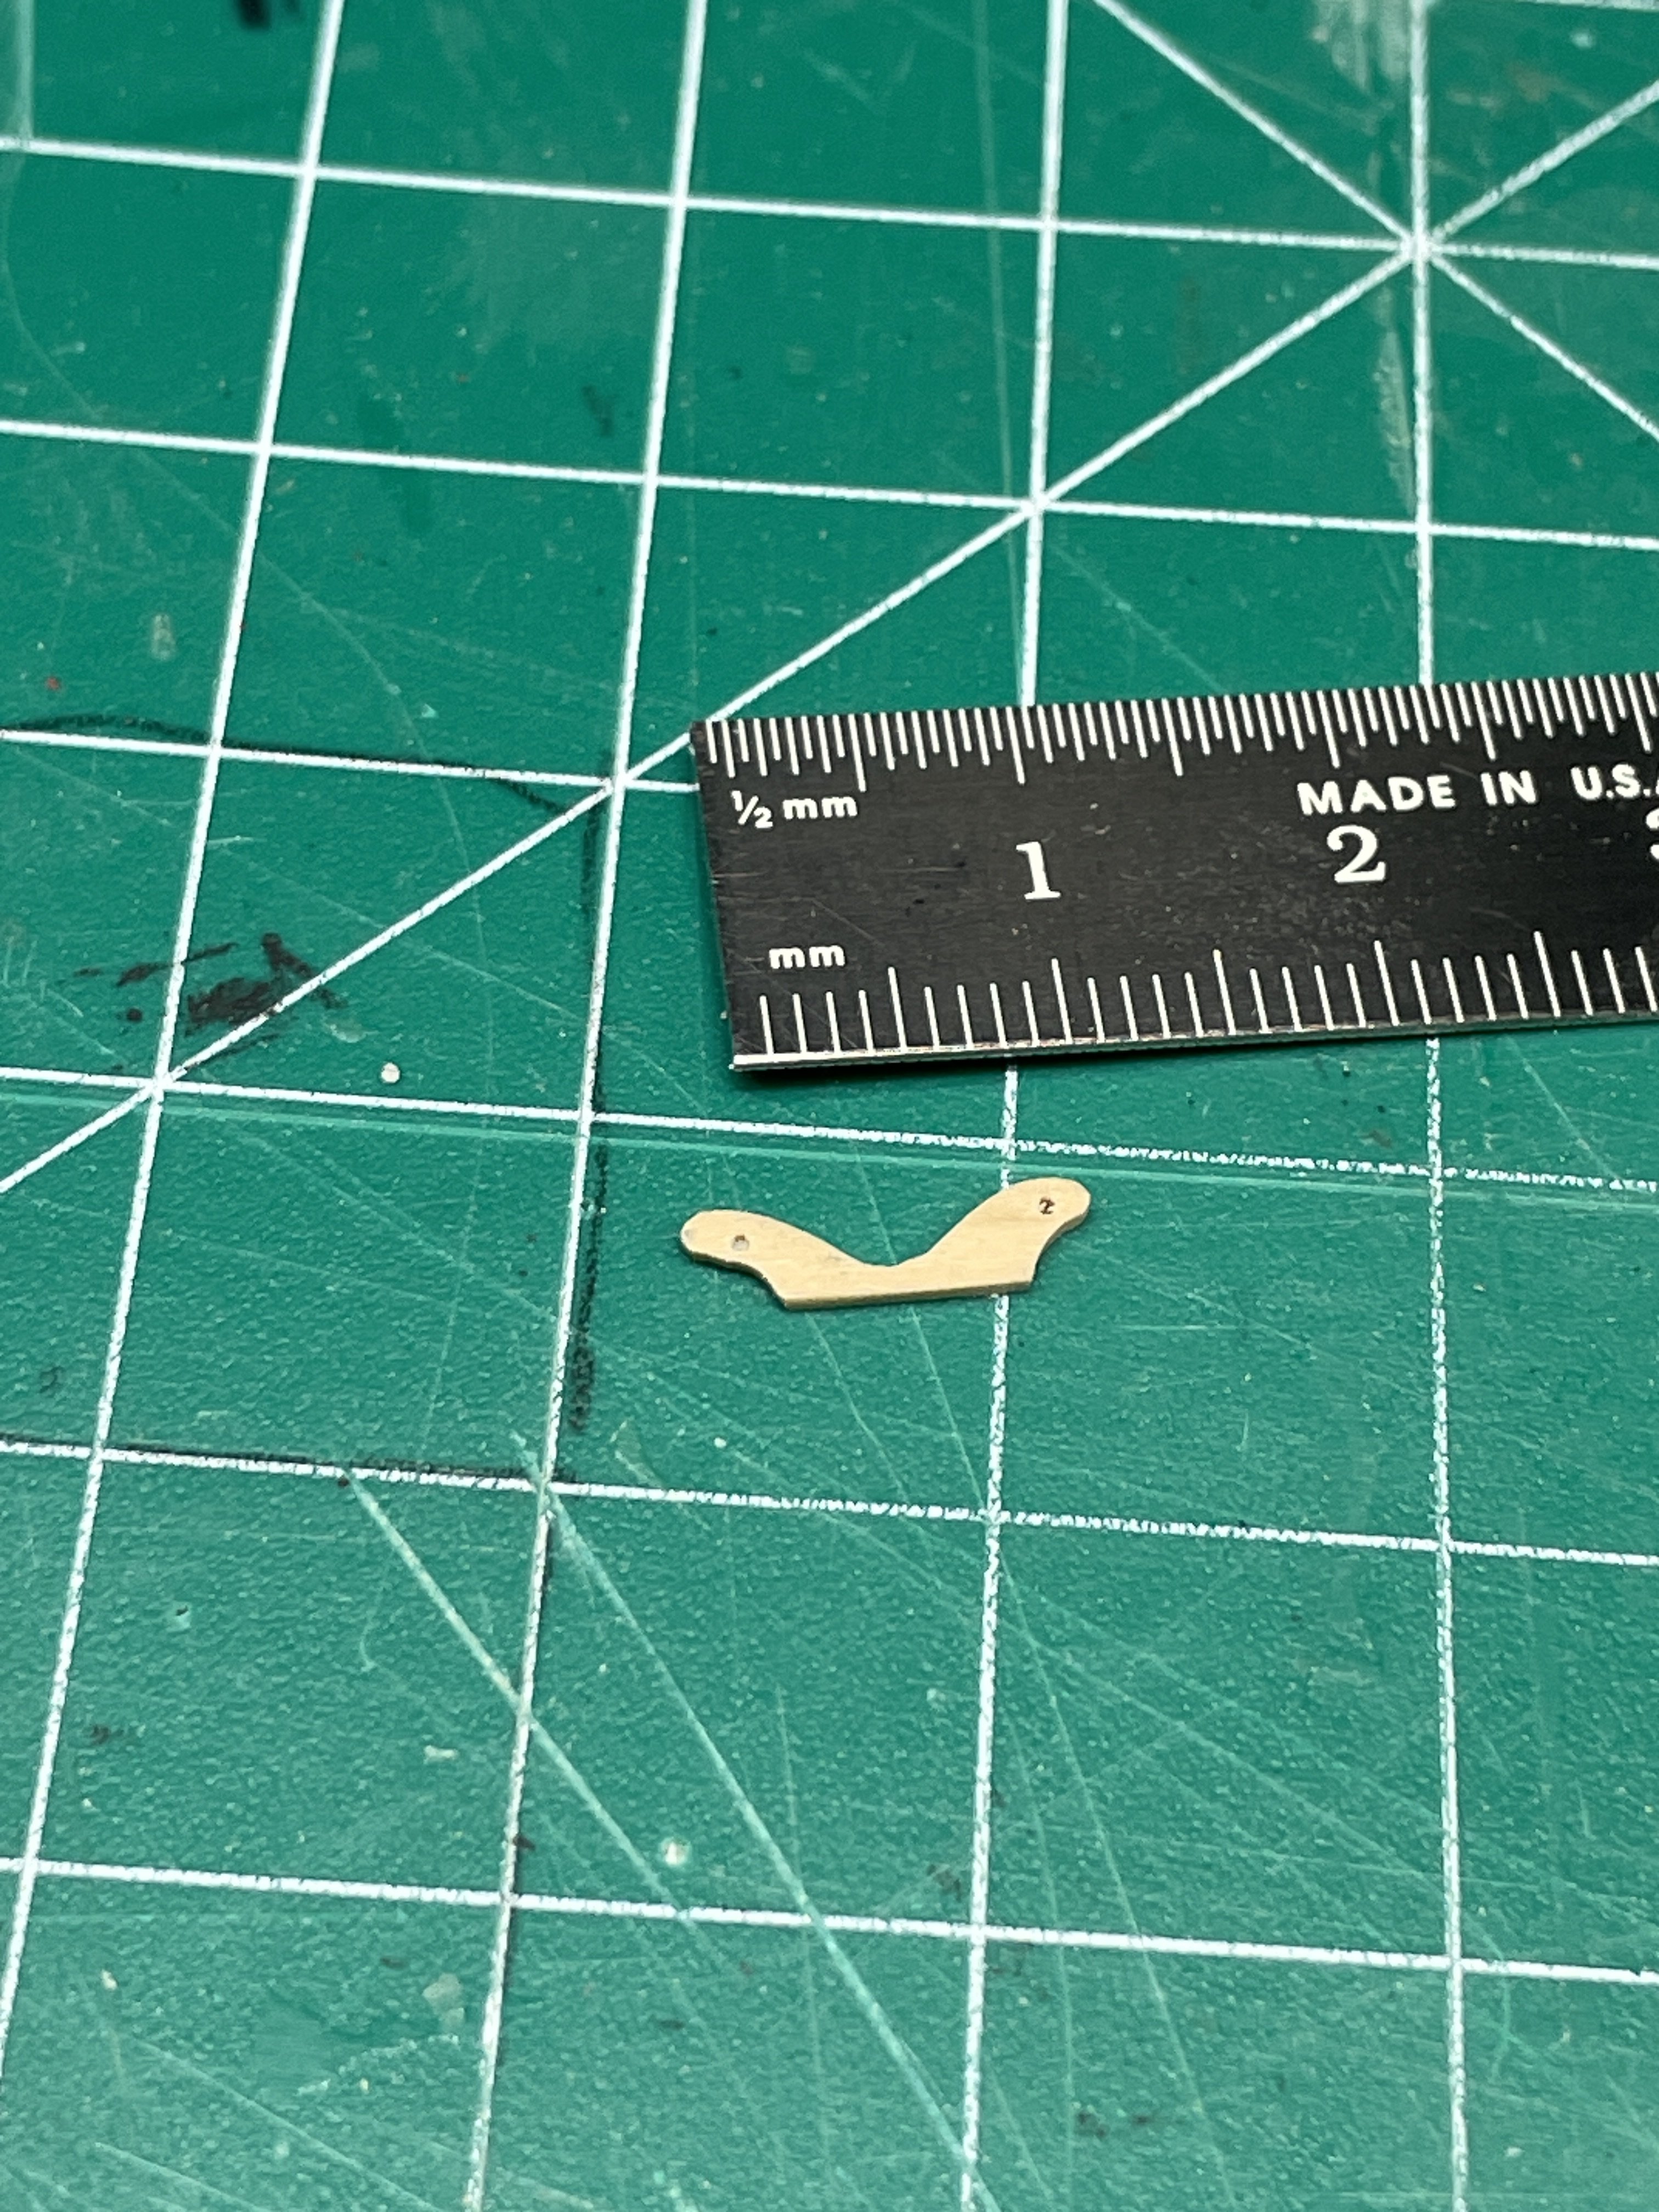
Now time for the breast hook. I got the basic shape from the plans and also holding a piece of wood up against the location on the boat. Never dawned on me to copy the laser cut part. I never even looked for it. I don’t know if it would have helped or not as the shape probably wouldn’t have match as I’m mounting it flush with the cap rail.

Still a little more shaping to do, but it’s mounted.
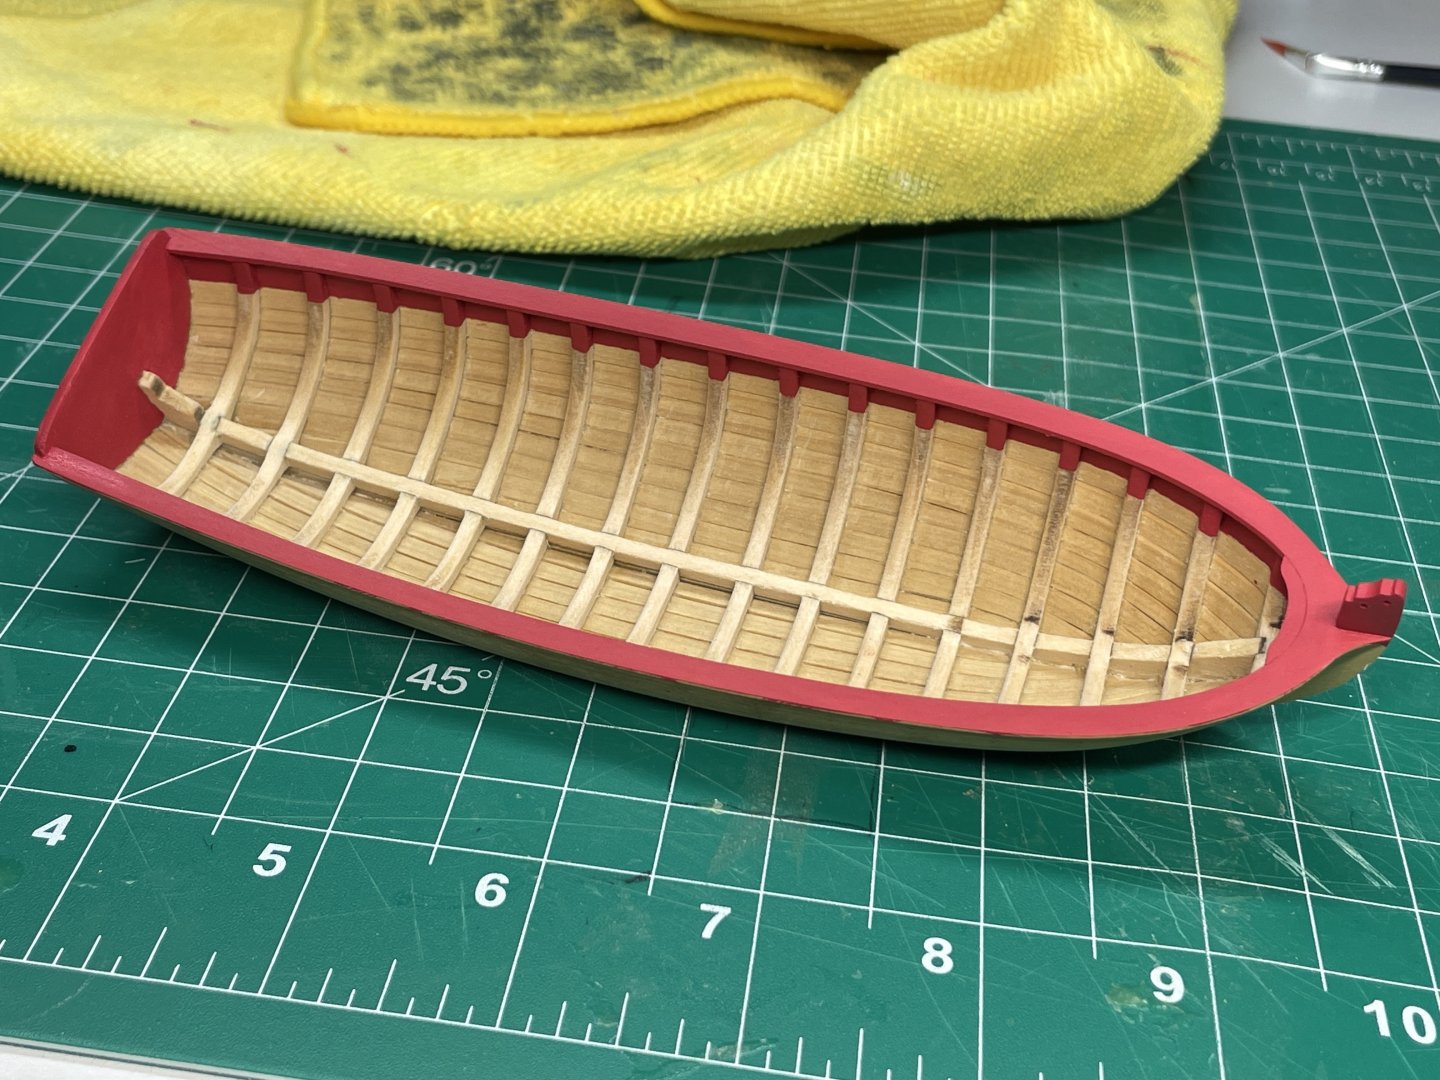
Now time for paint! I enjoy painting, usually. I decided brush was the way to go as I had no interest in masking the inside wales with all those ribs in the way in order to air brush it. I did go back and forth with the edge of the cap being white. I did the red first then the white. Then had to go back and touch up red, then white. I’d say three or four of those cycles and I had it clean. I then used some WOP on it. Later on I was working on it and the poly had not dried and ended up retouching the paint a few more times….
The colors I used are Warpaint- Dragon Red and Brainmatter Beige.

I then sprayed the appliqués with mat fixative on both sides and cut one out after it was thoroughly dry. After dry fitting I applied it with some slightly thinned Elmer’s white glue.
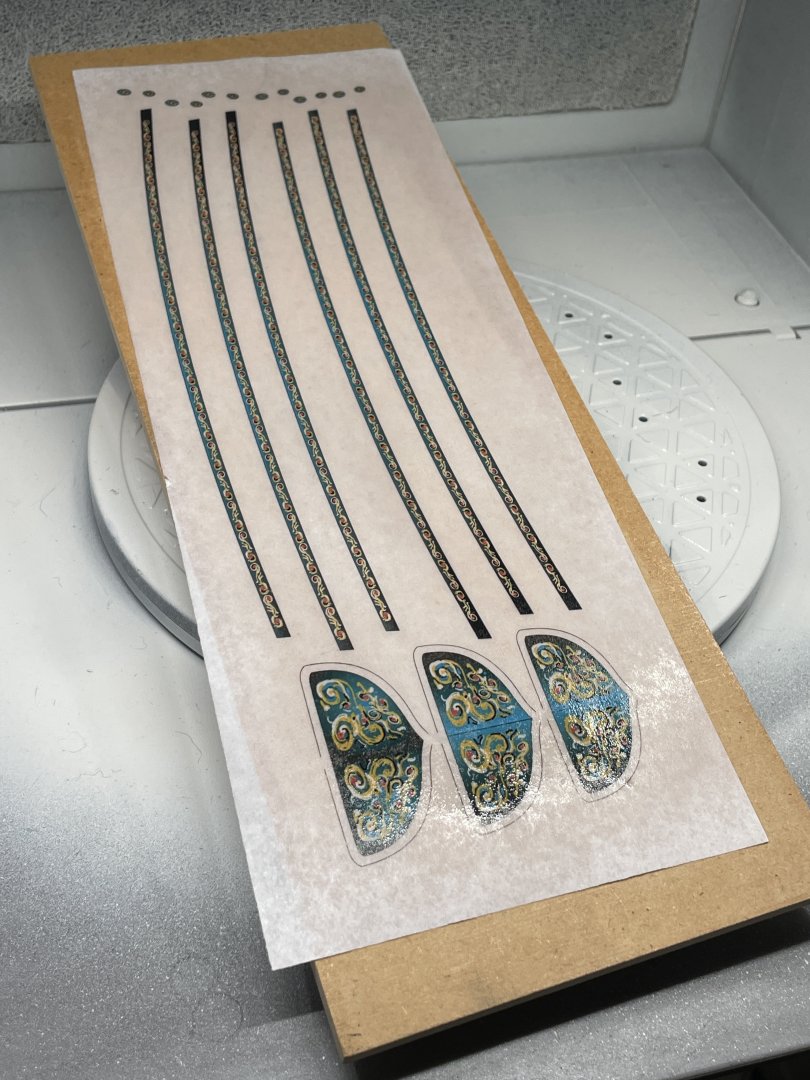
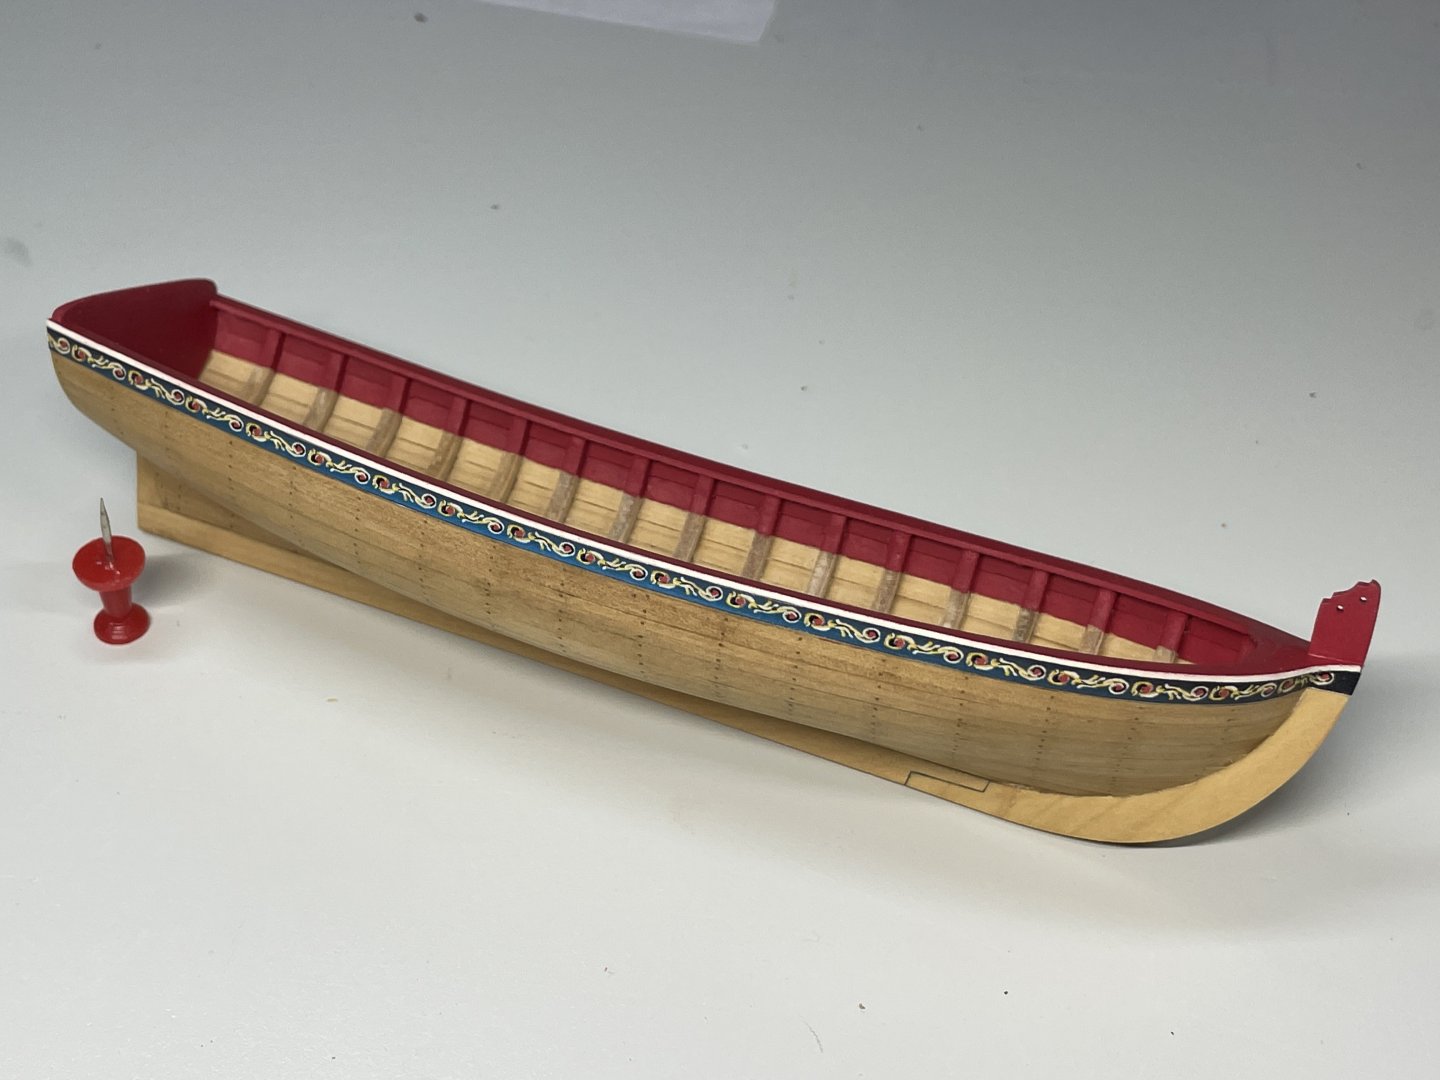
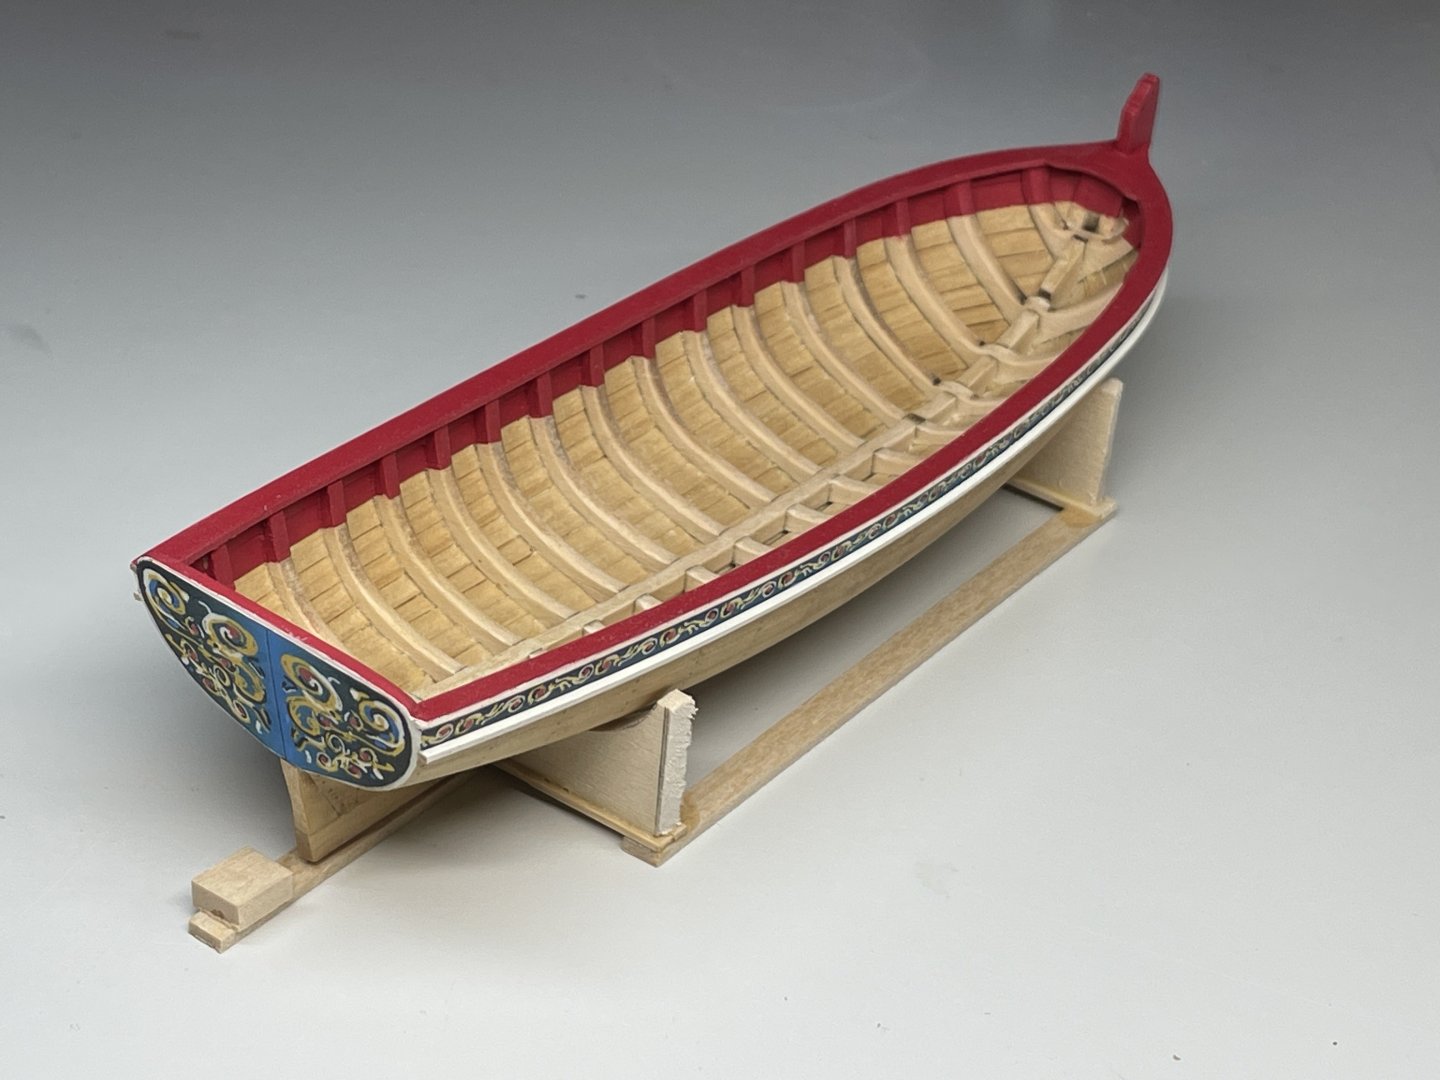
Repeated that on the other side and then applied the rub rail. I had previously painted it beige on three sides. A little dab of water from my finger and it bend around the tip nicely. I started at the bow and used a dab of medium CA with a little clamp. Once that was secure I continued down the side with titebond.

And, as she sits….


Thanks for stopping by!!
Chris
-
-
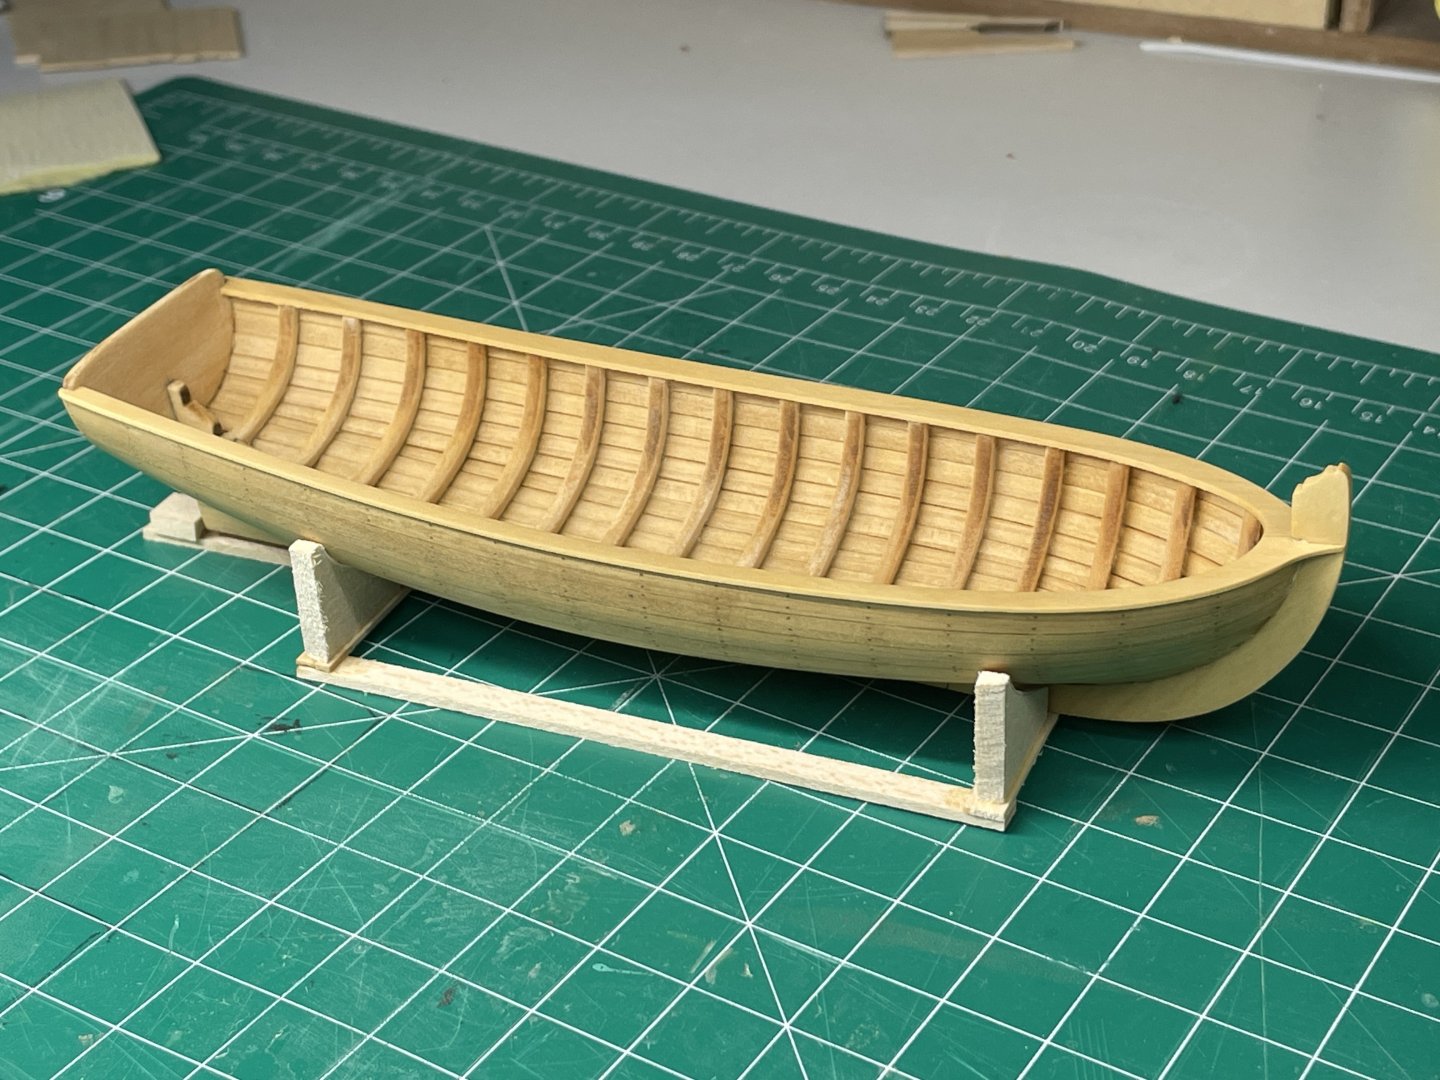
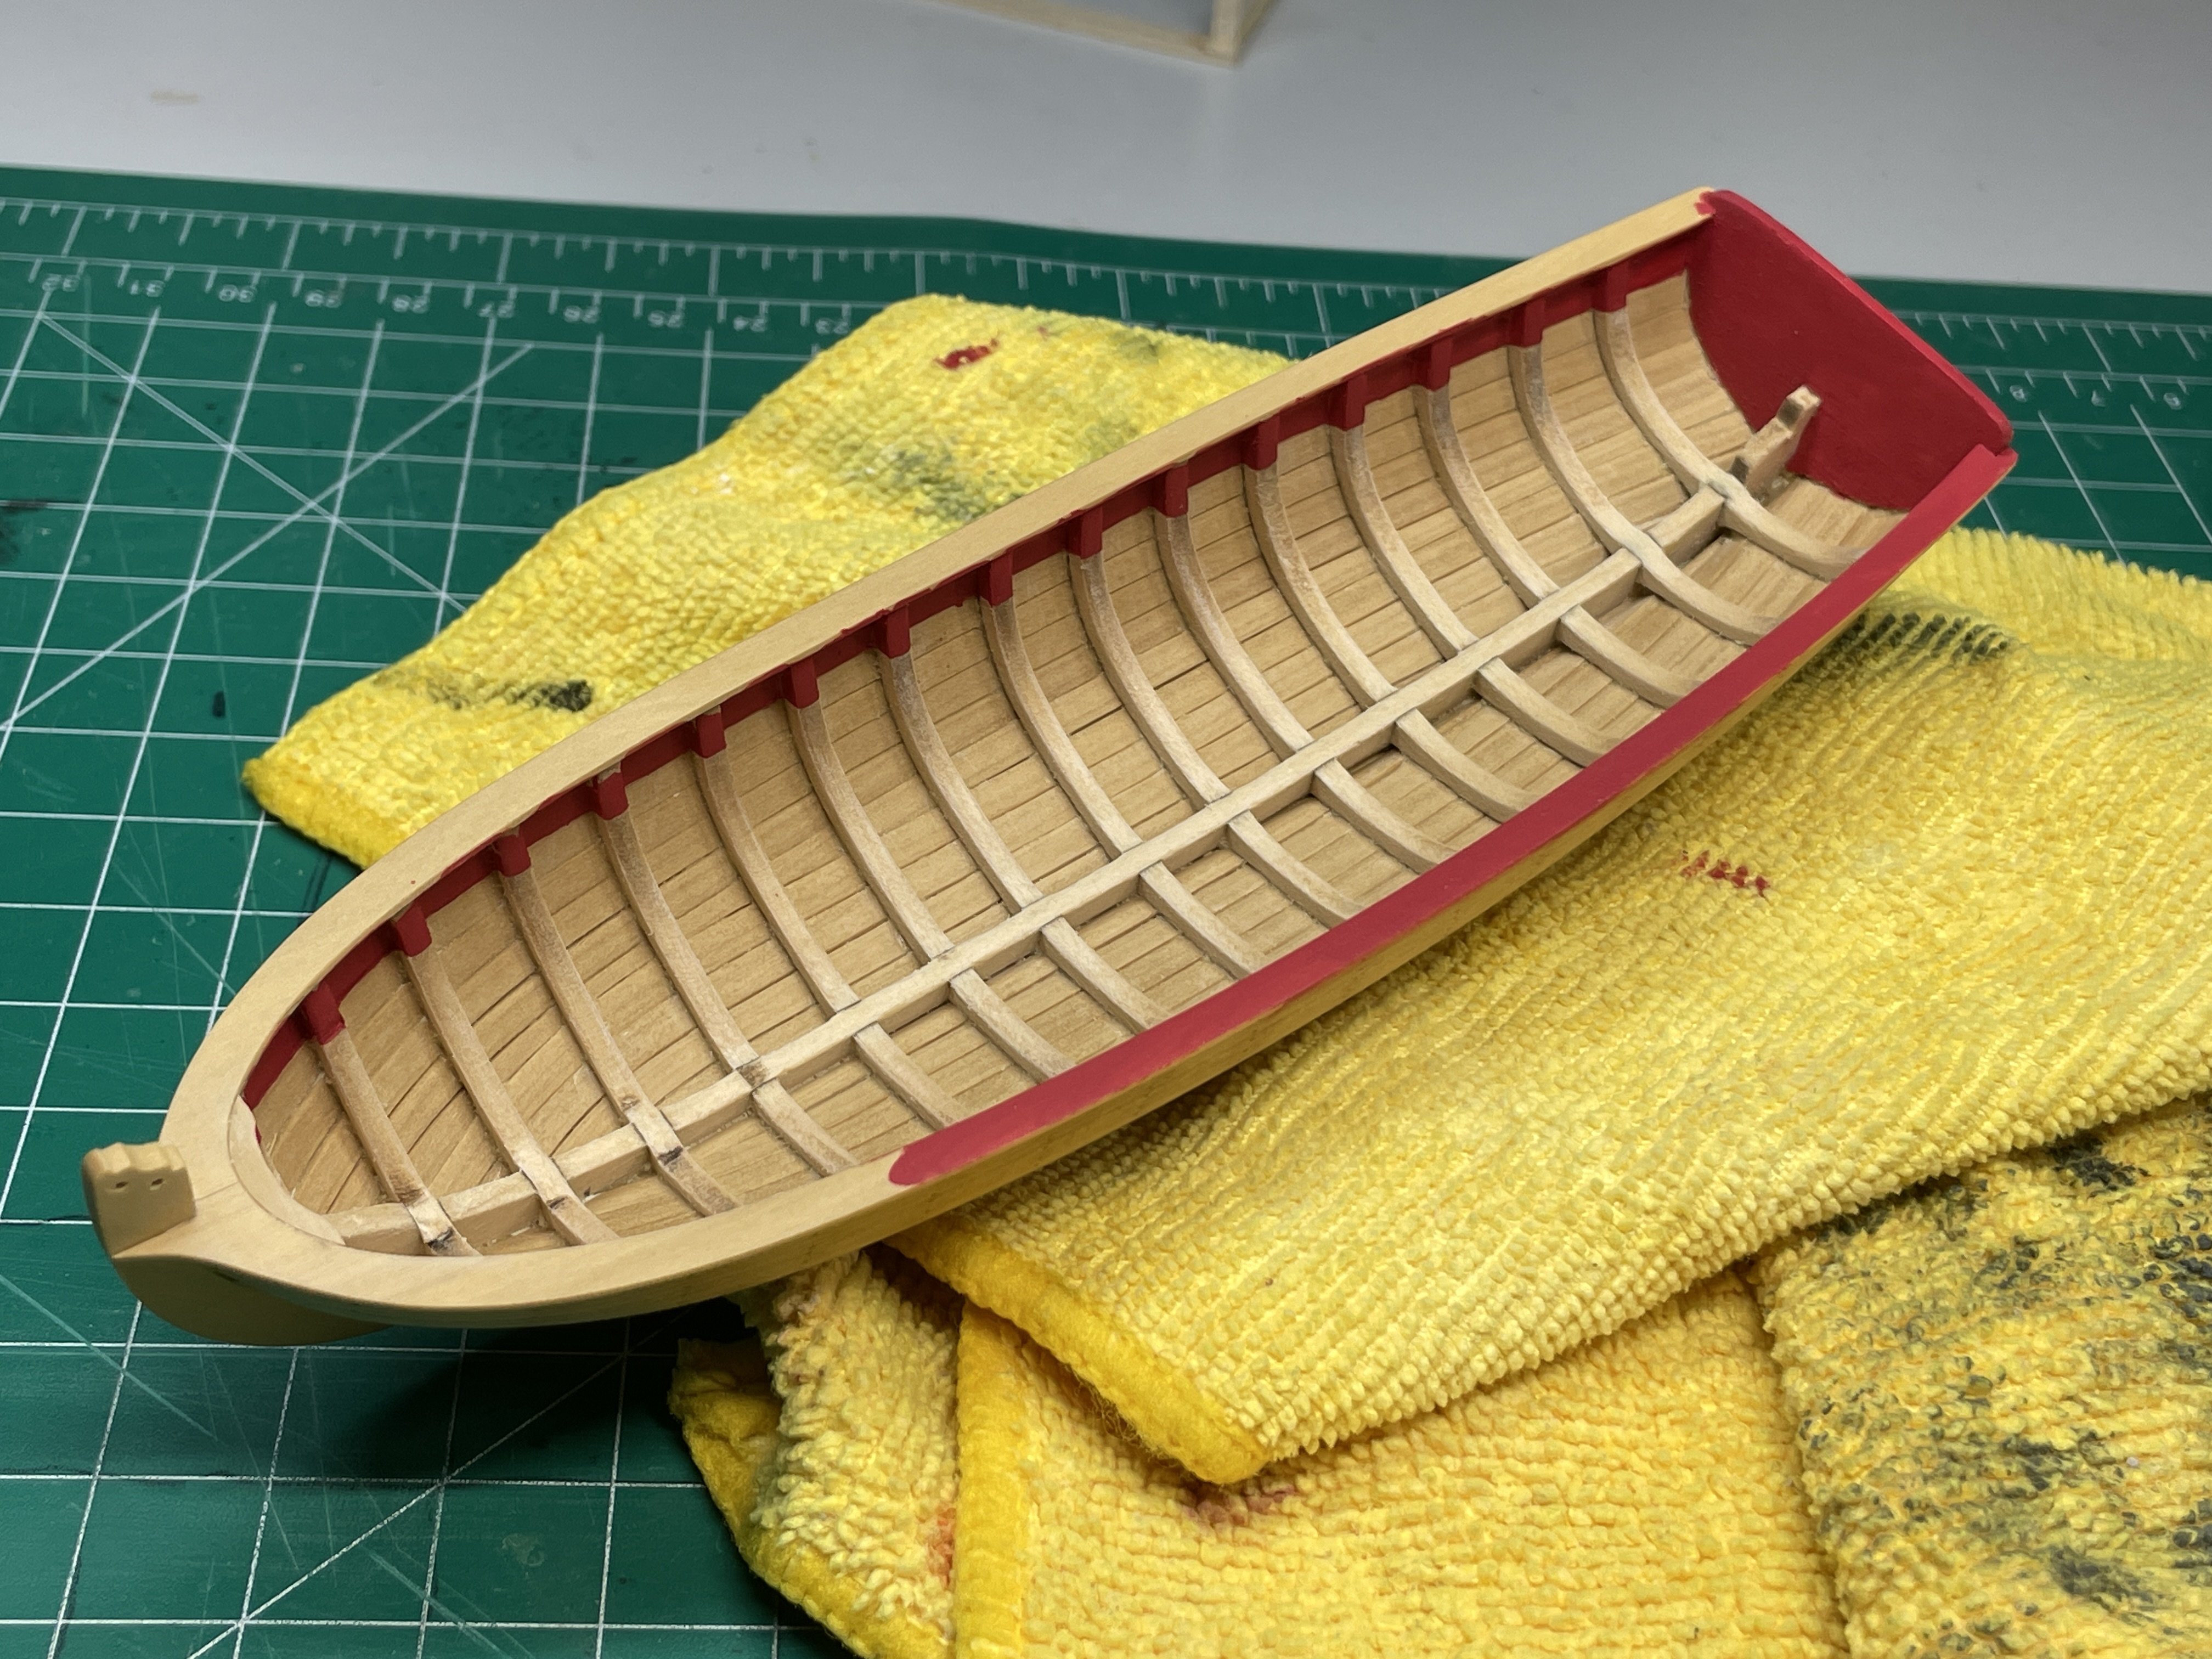
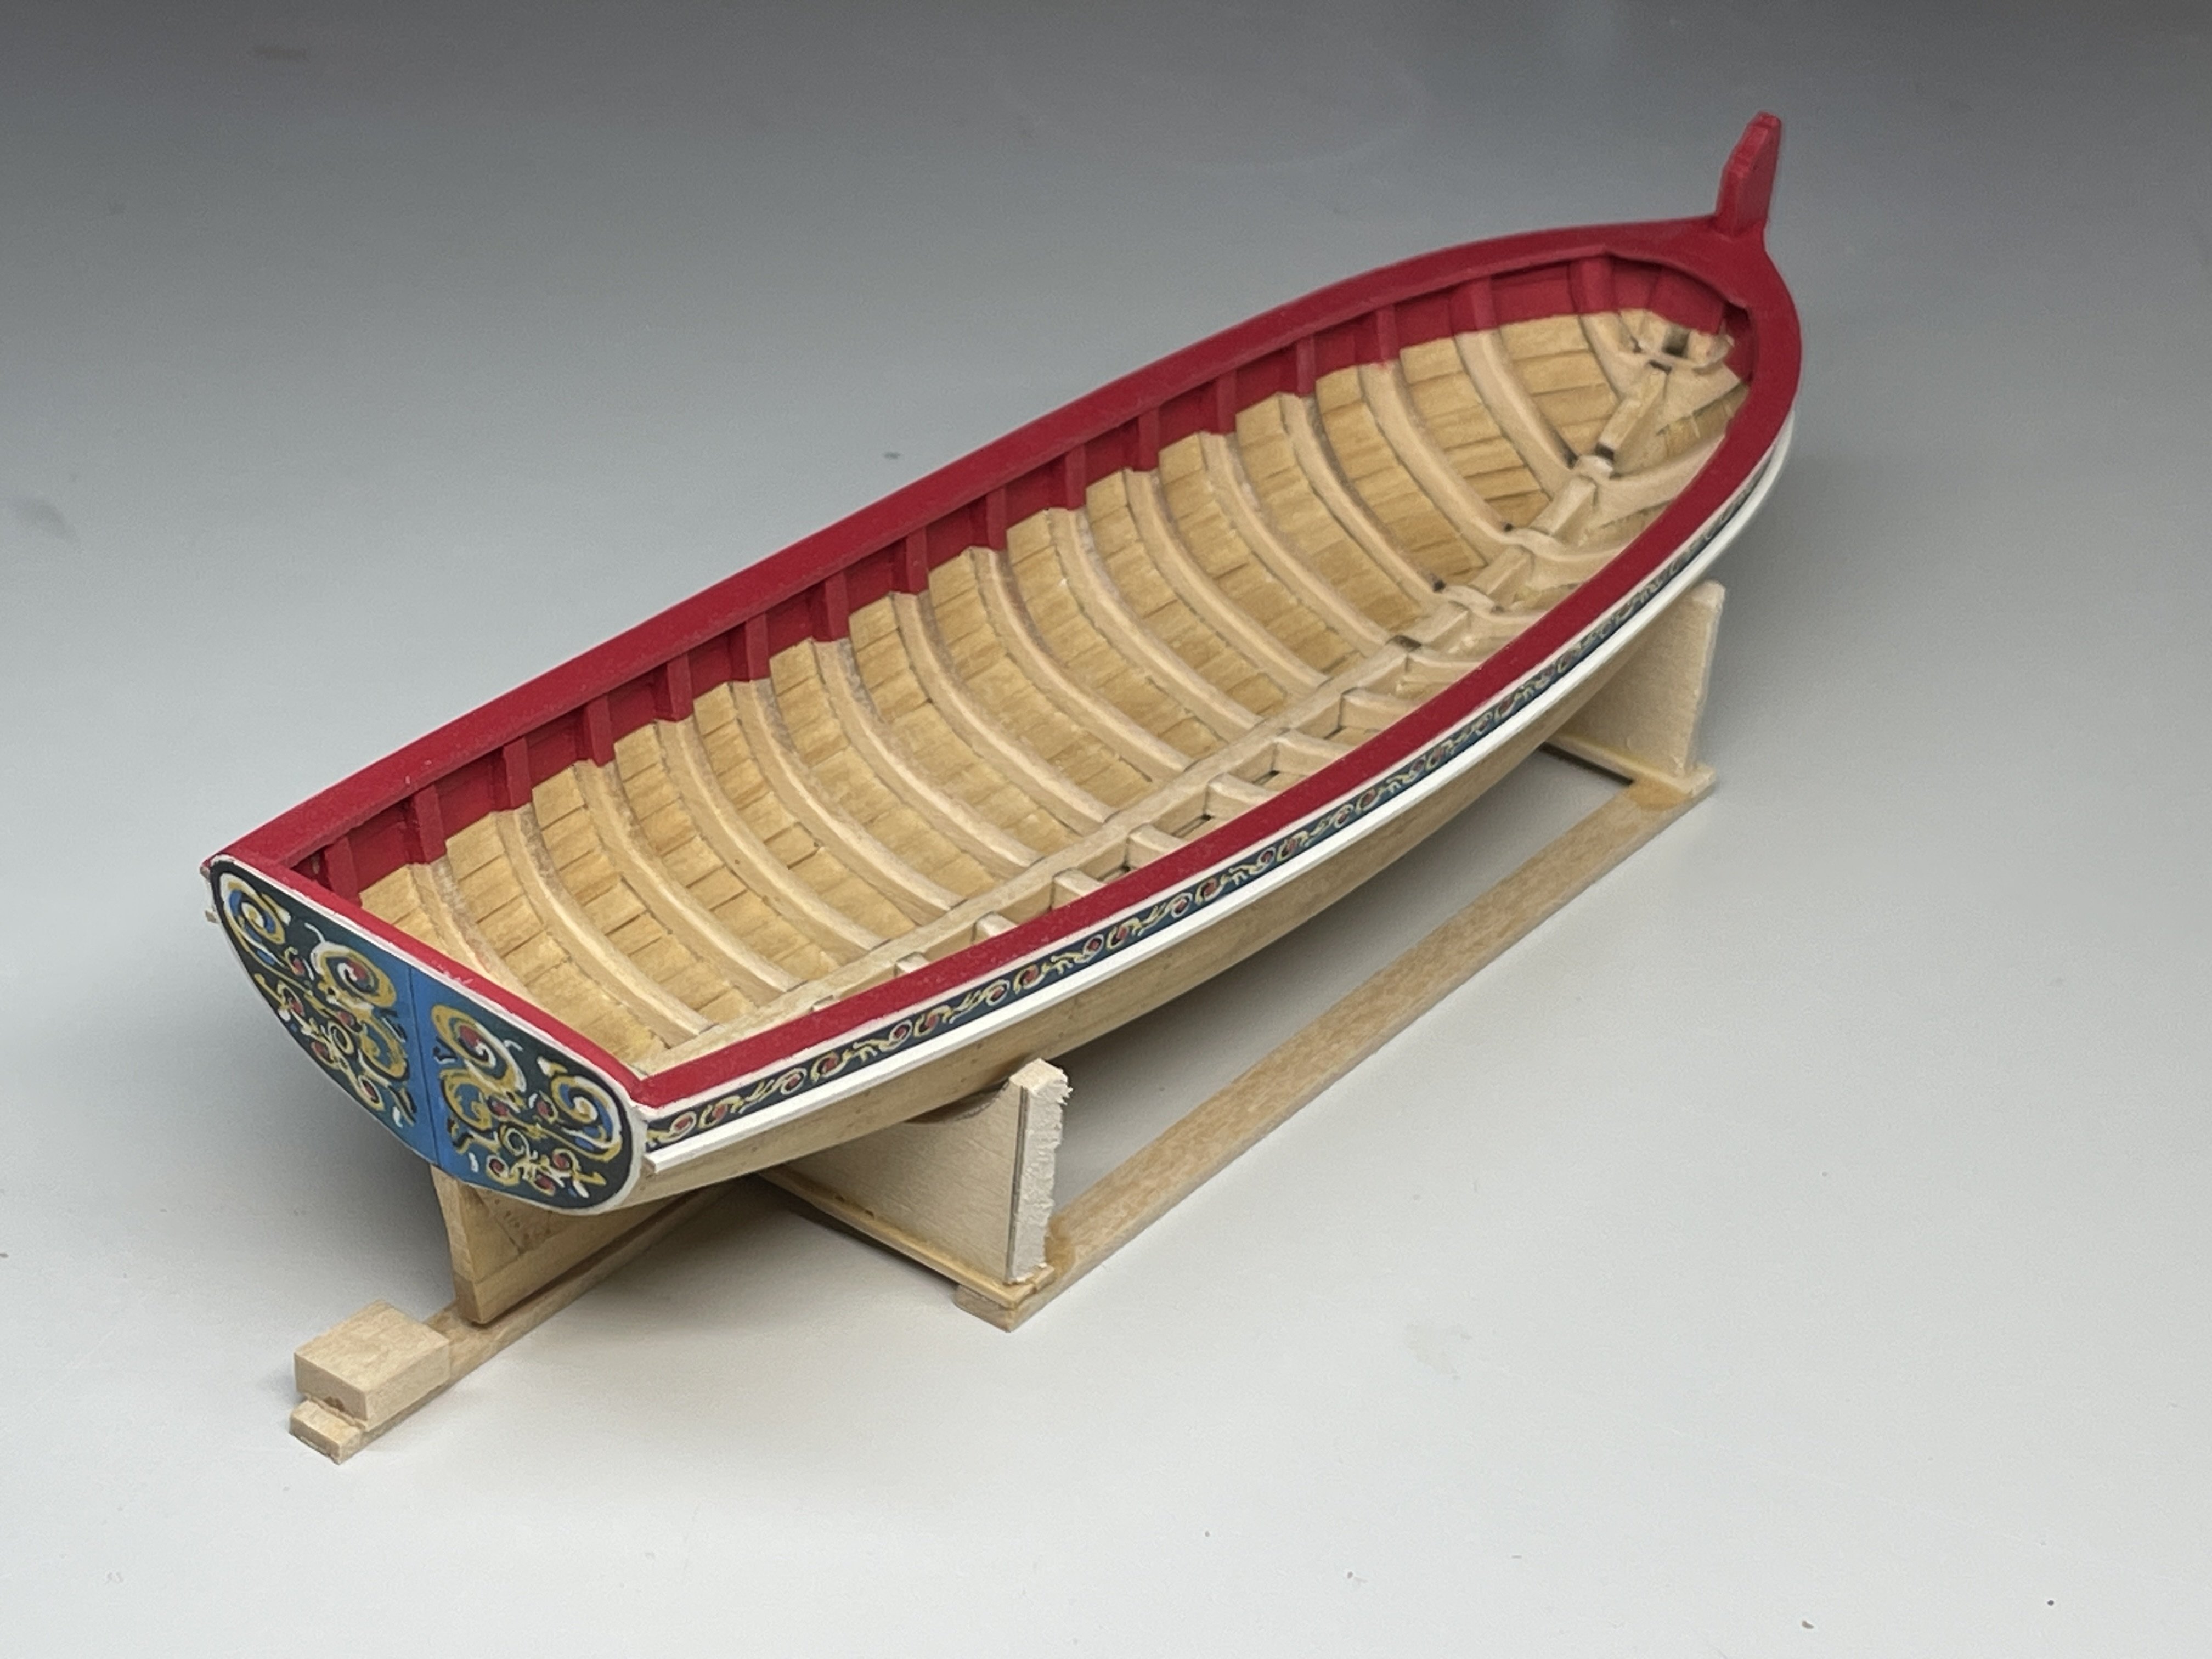
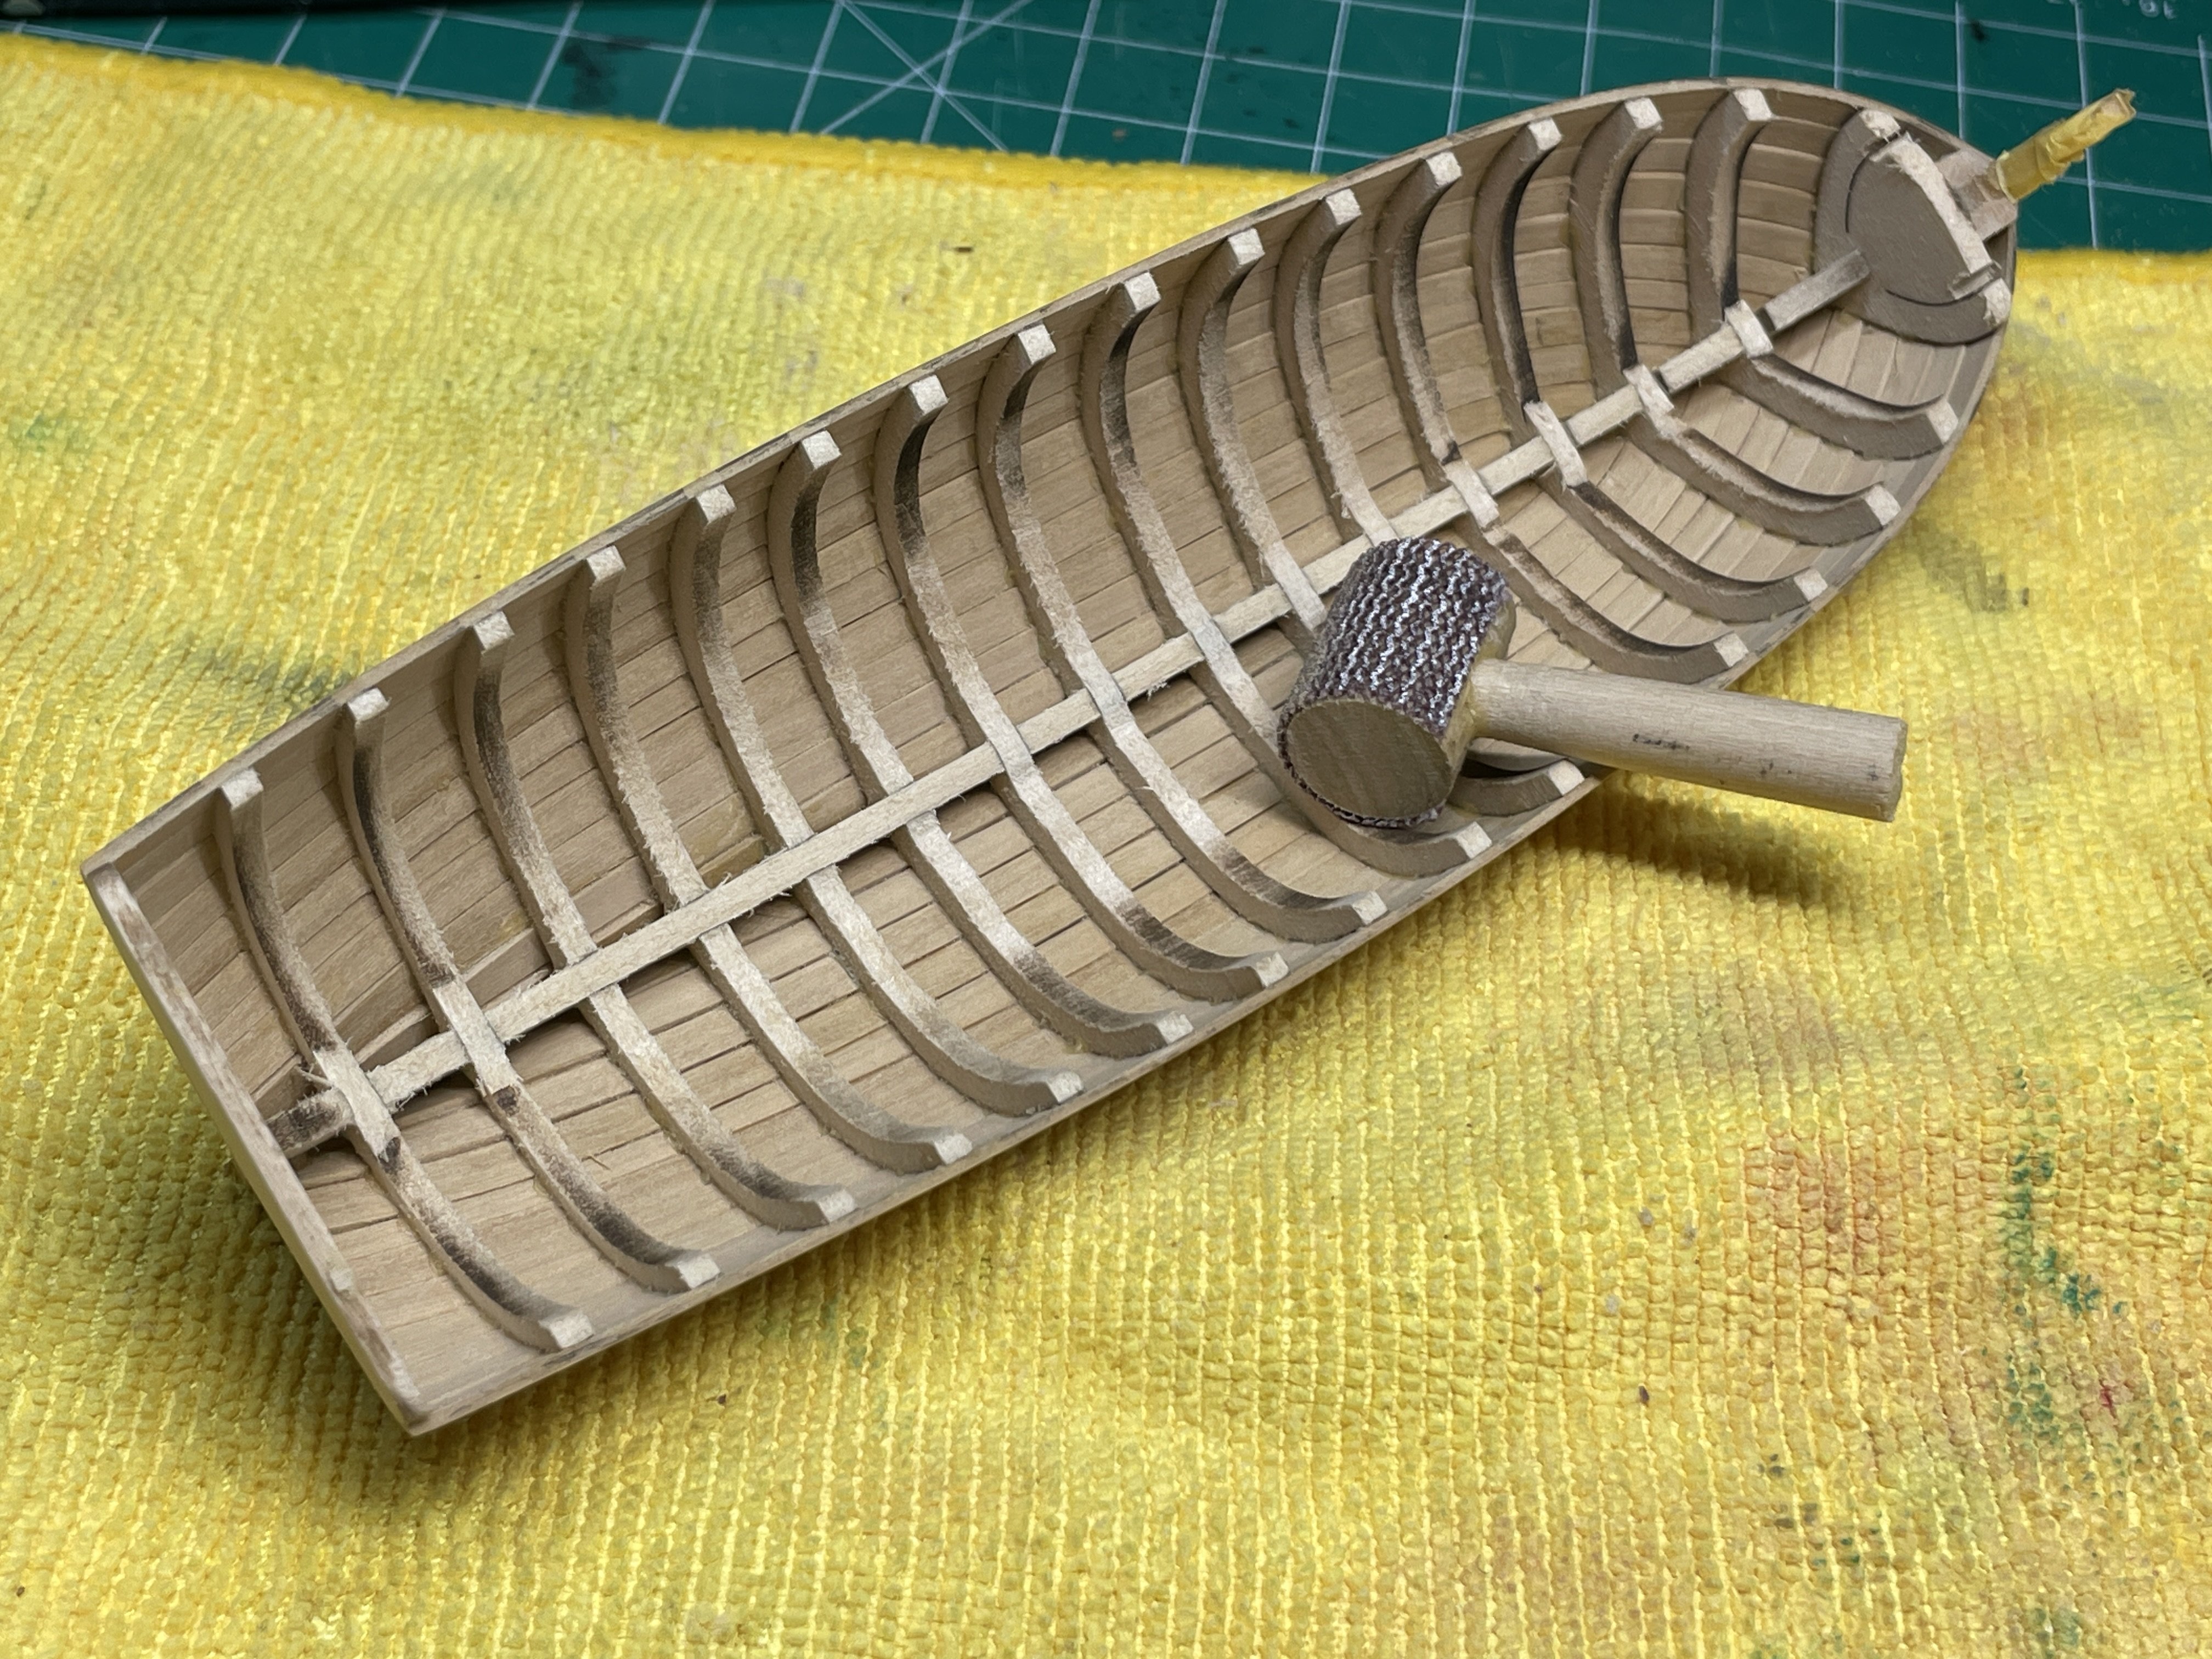
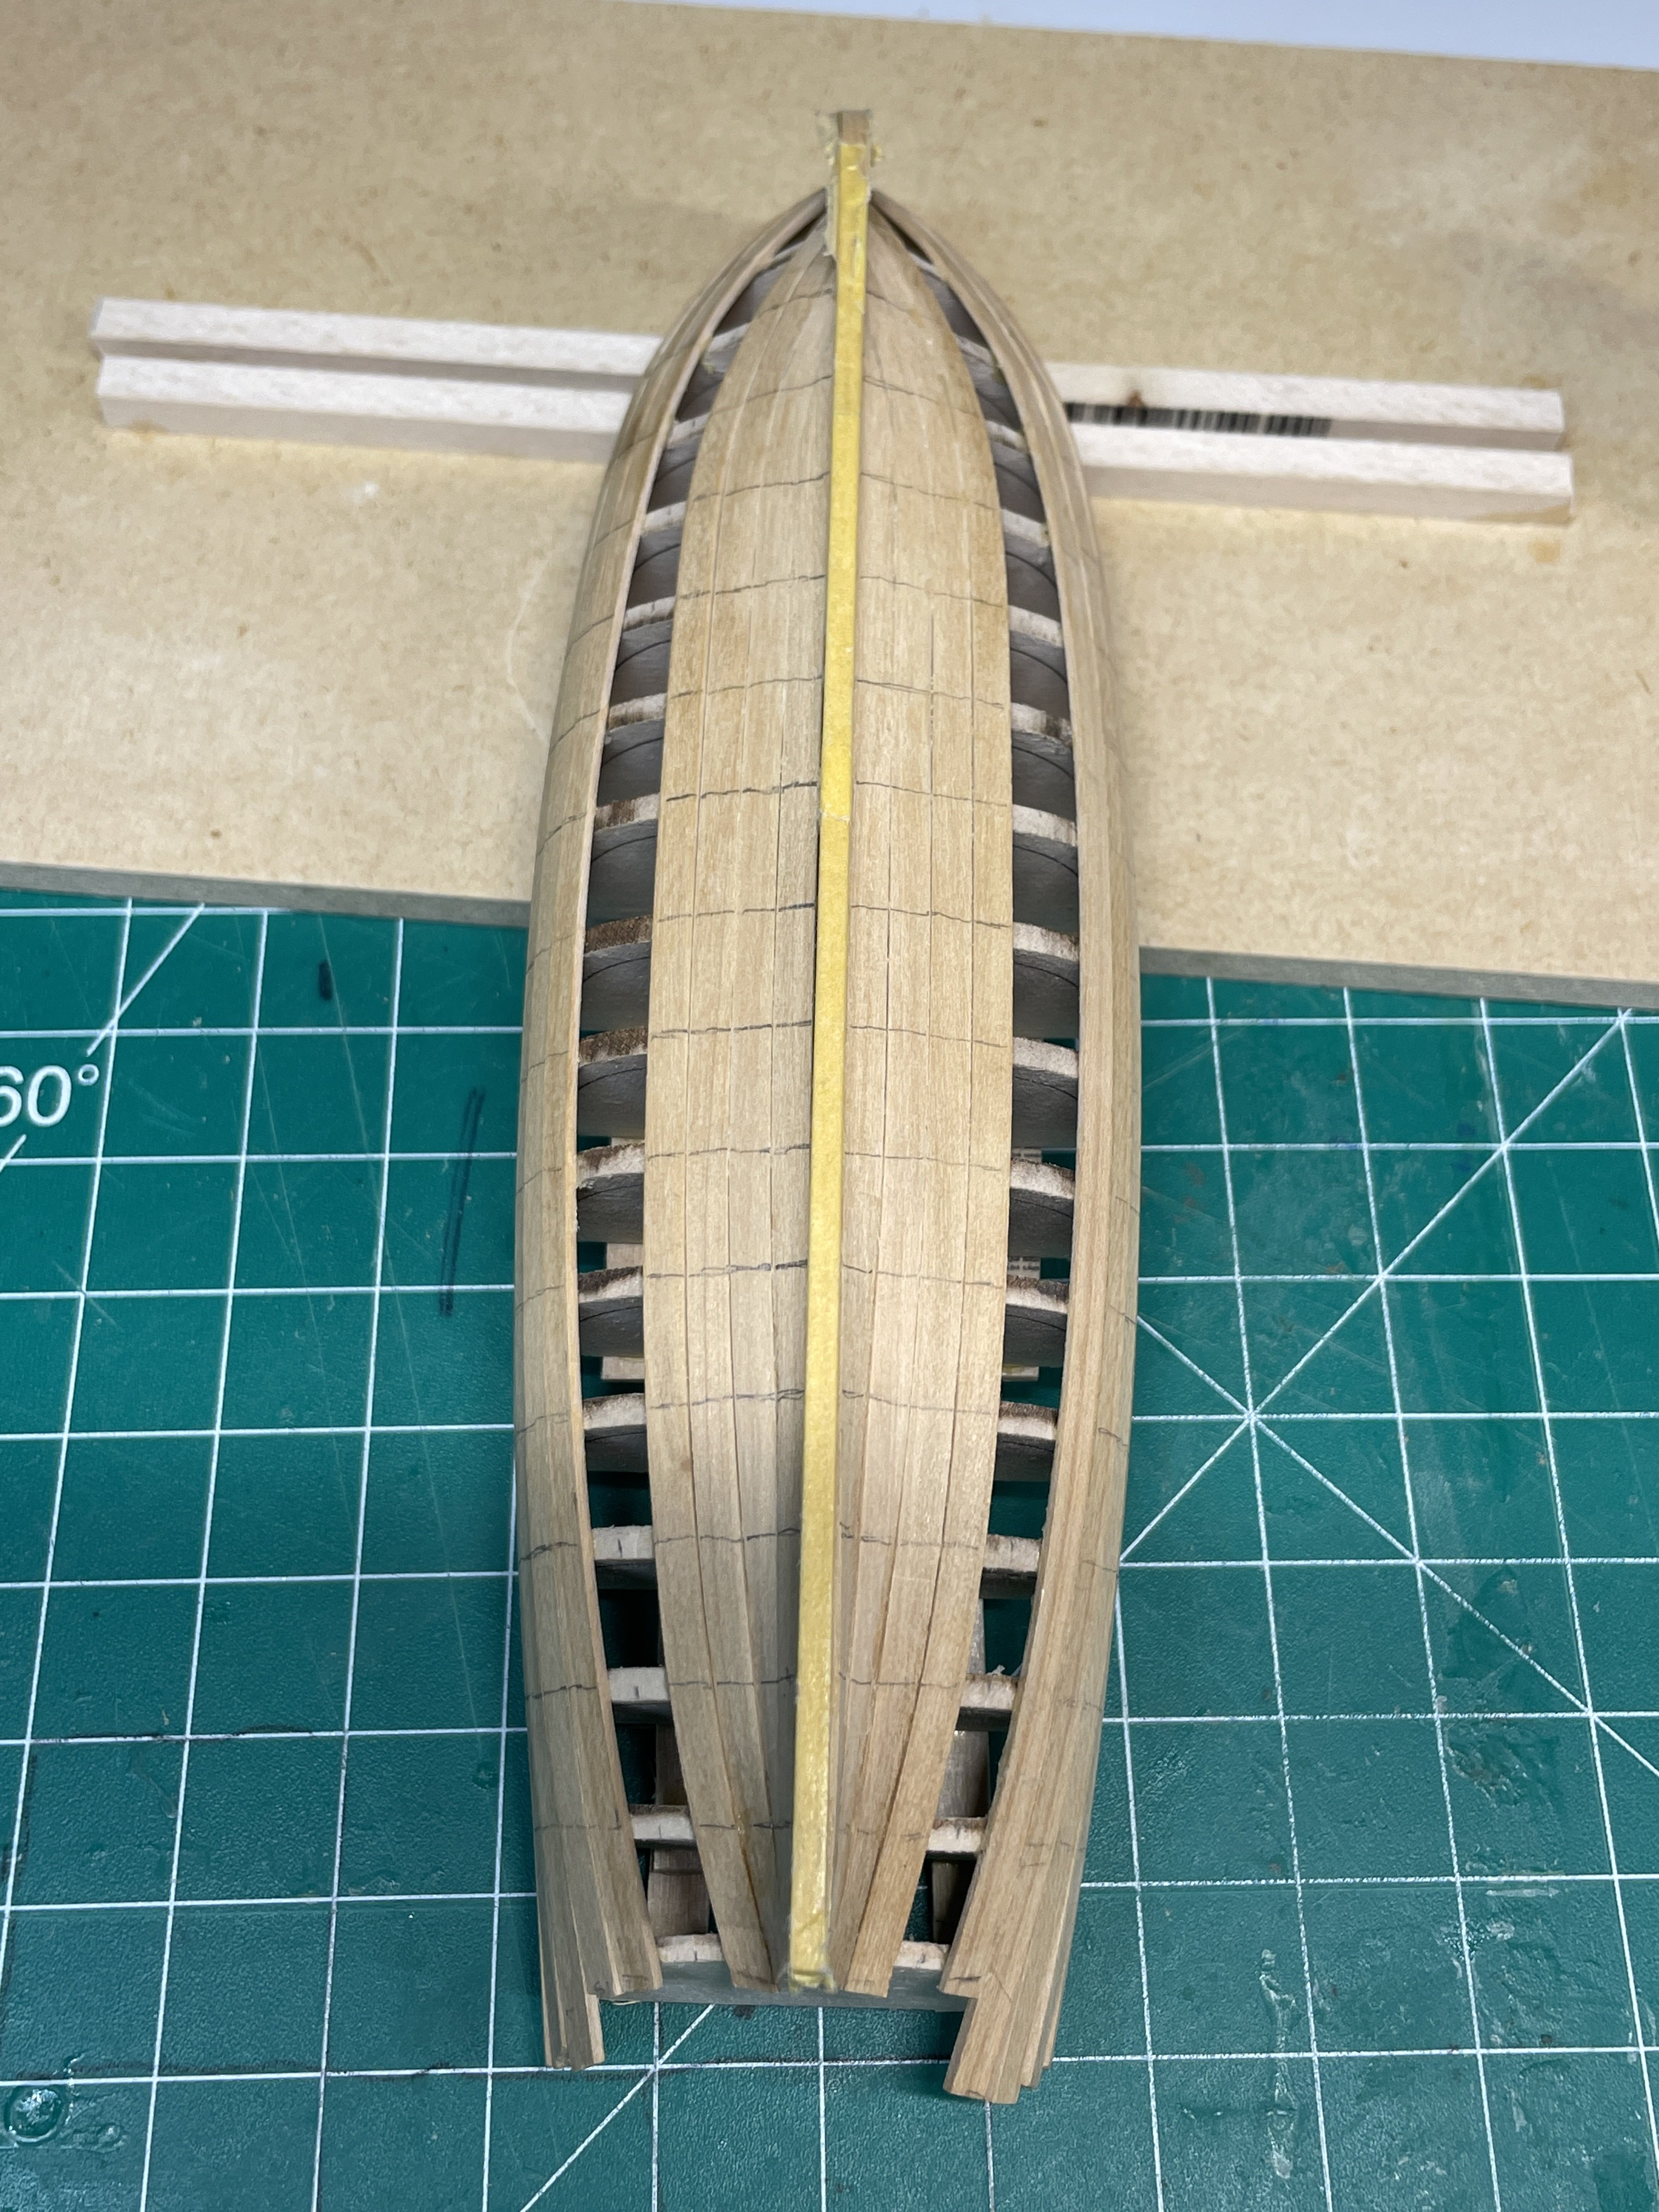
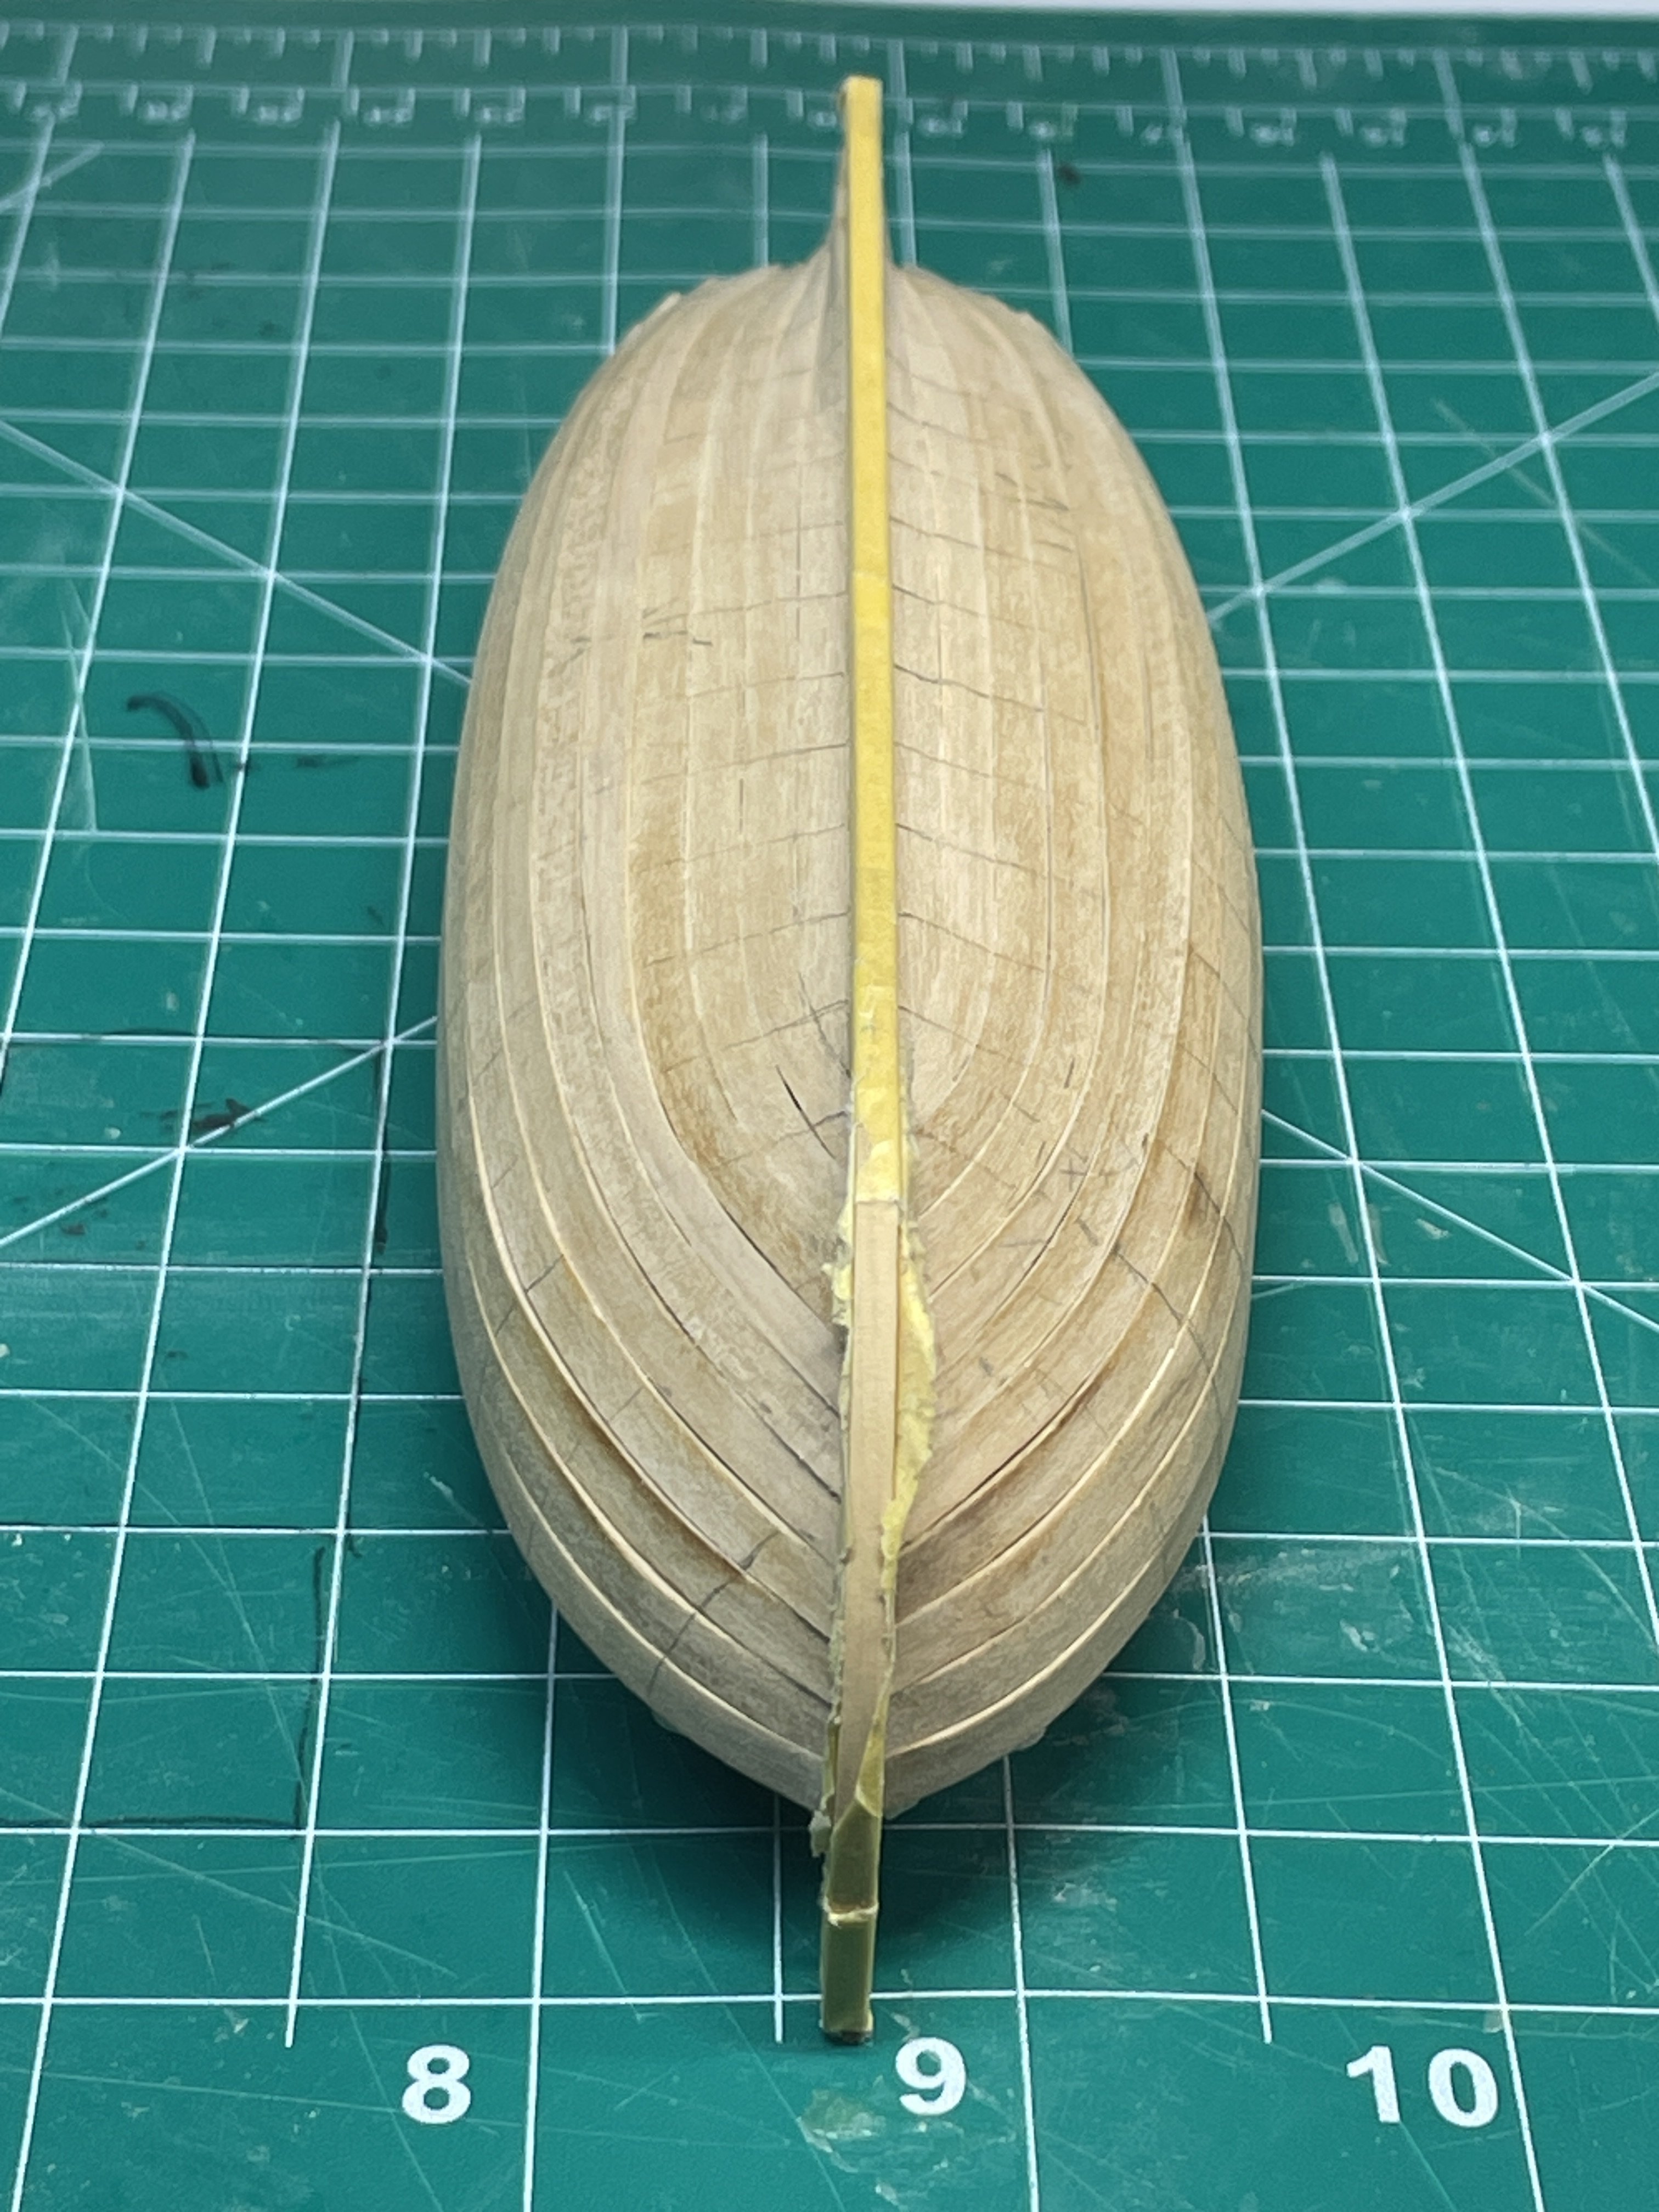
Now it’s time to remove the bulkheads and thin the frames down.
I used one of the course files you get in various tool “kits” from model expo. It made quick work of the attachment points without causing any trouble. I did snap off a couple of frame tips that were not attached to the top planks very well. Those were easily glued back on and it’s essentially invisible. I tended to use lesser than more glue because cleanup was hard to get to during planking and it’s not going to be easy cleaning up a lot of excess glue between the frames.

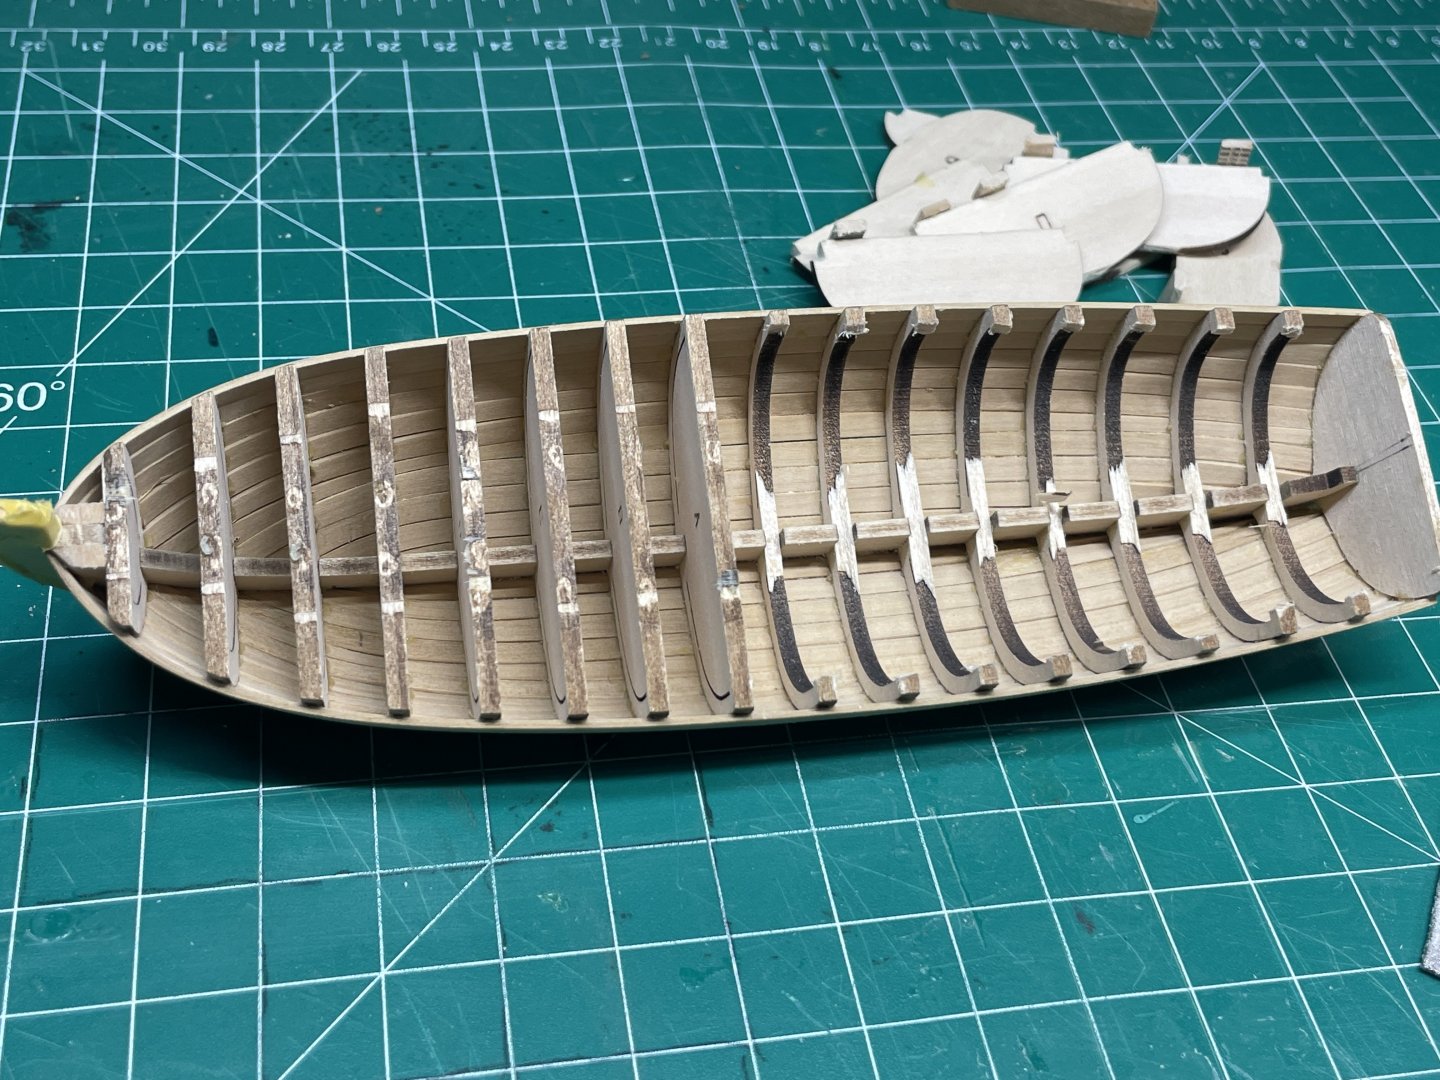
Then sanding them down was tedious. I didn’t want to use power like a dremel for fear of taking too much off. So various grits of sandpaper and I went at it. Made a little Thor’s hammer to help. It was OK but wasn’t used everywhere. I saw this on @BobF’s build of this boat. I actually need to give him more credit than just that as I’ve studied his build log immensely.

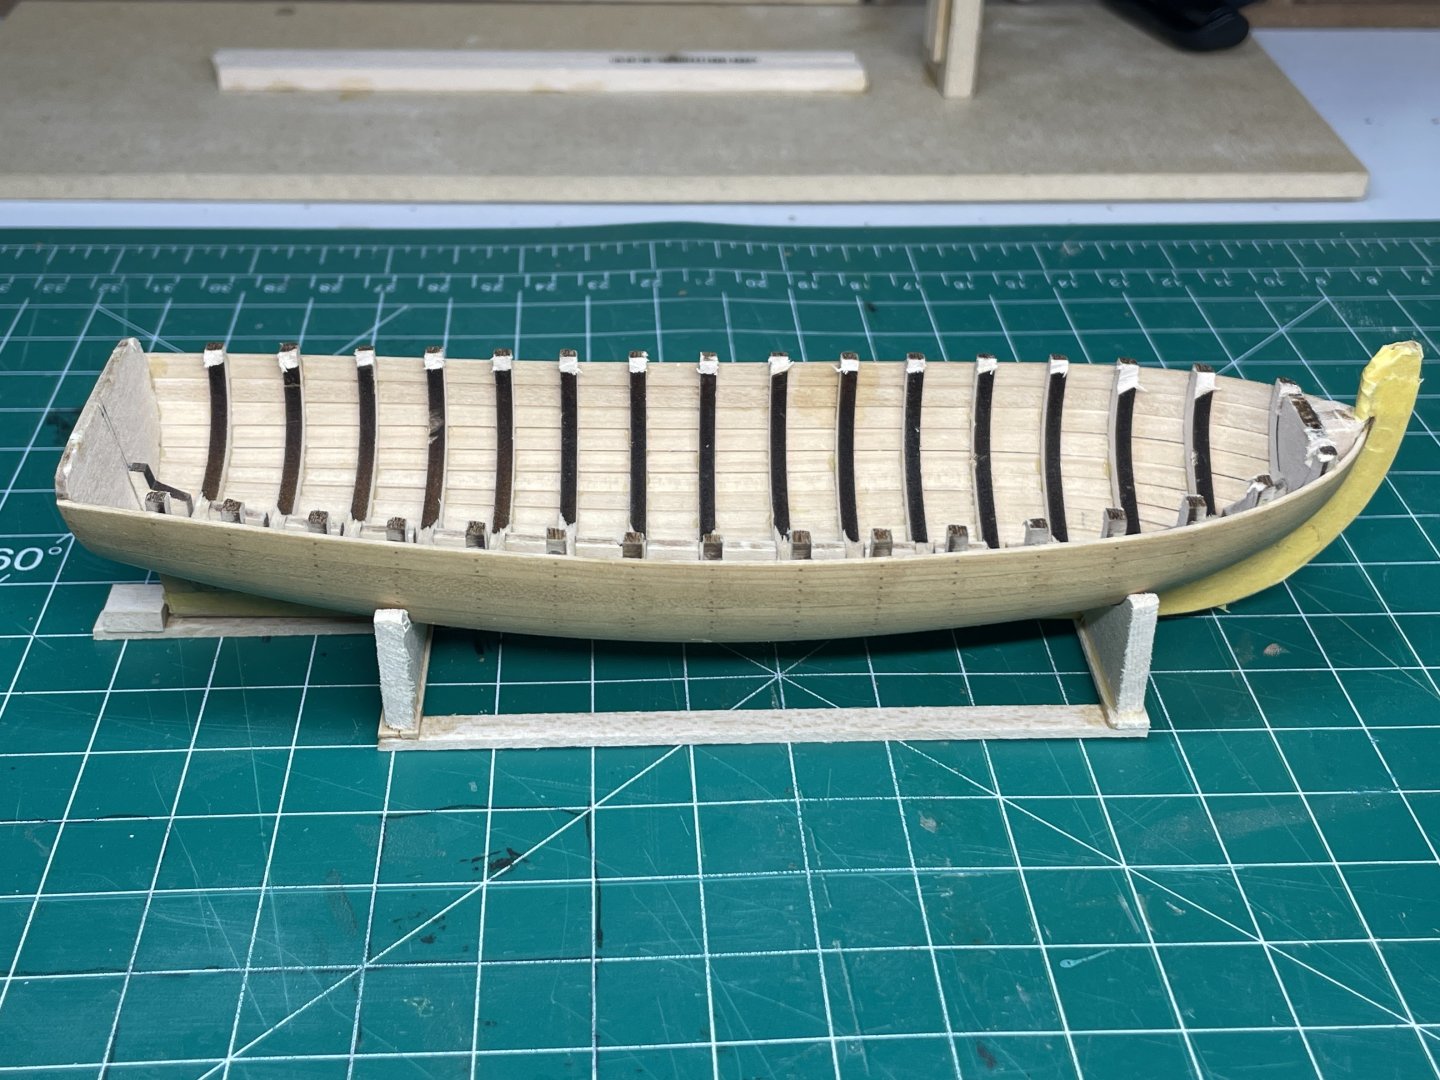
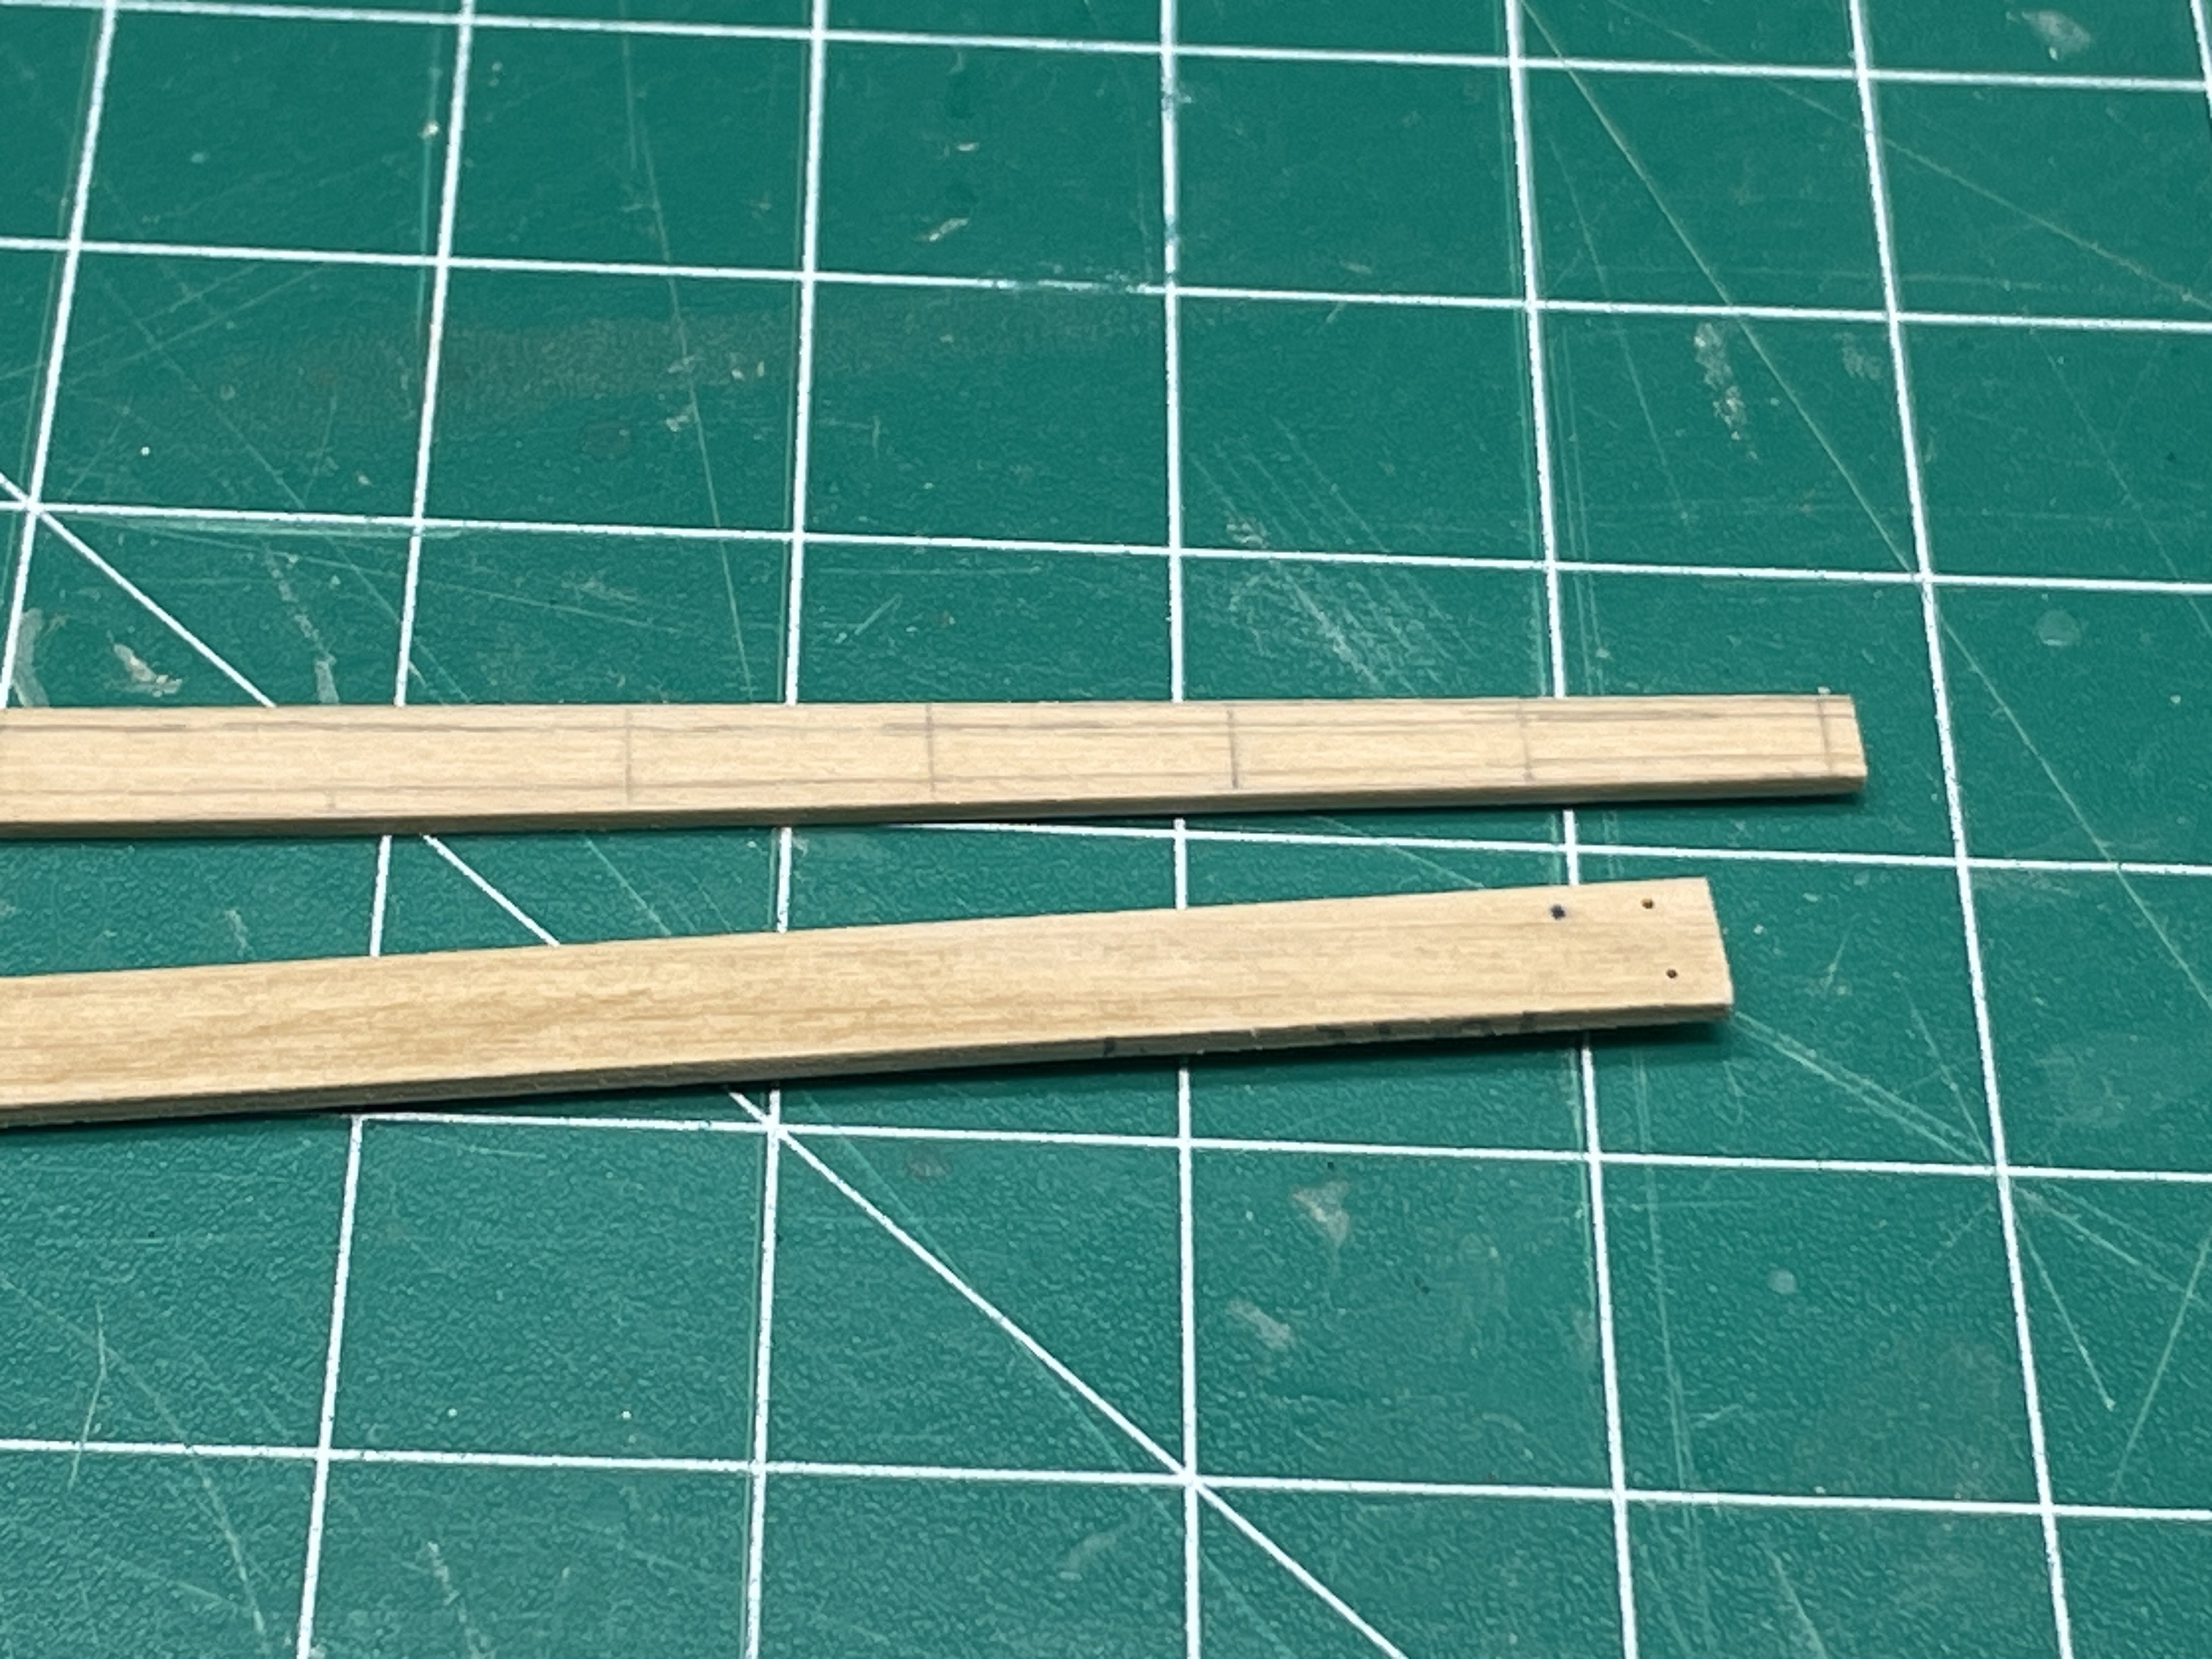
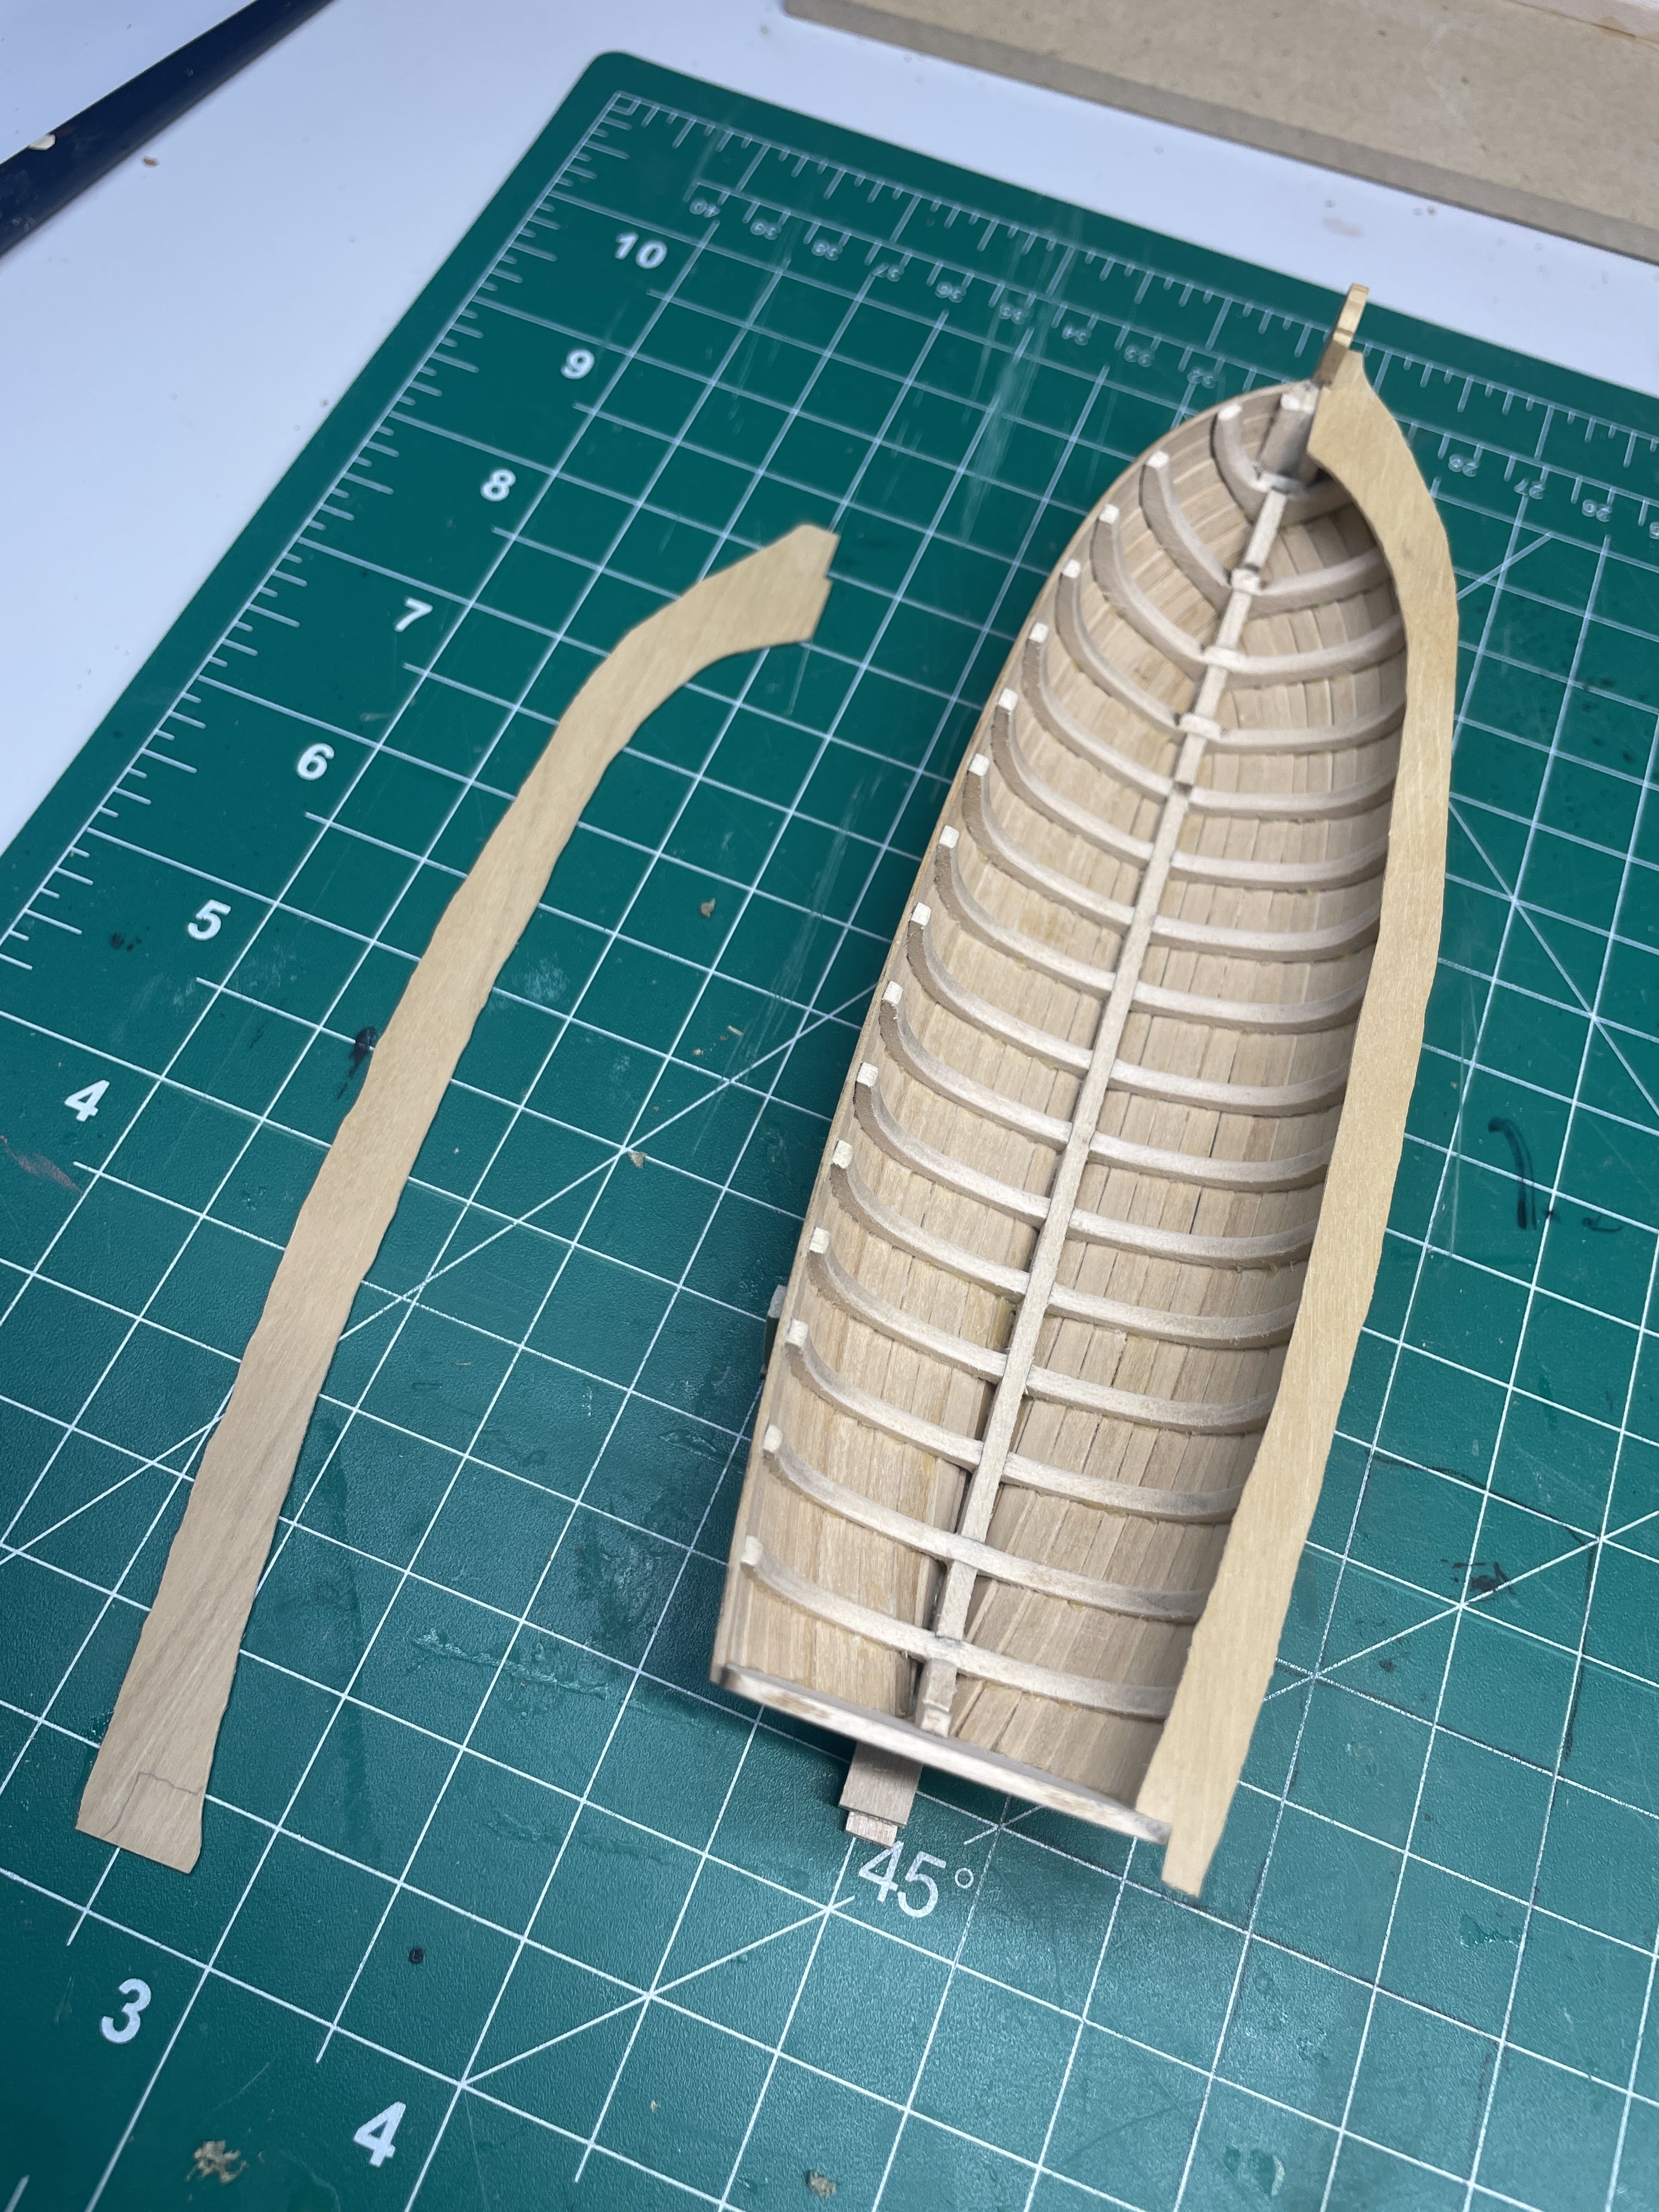
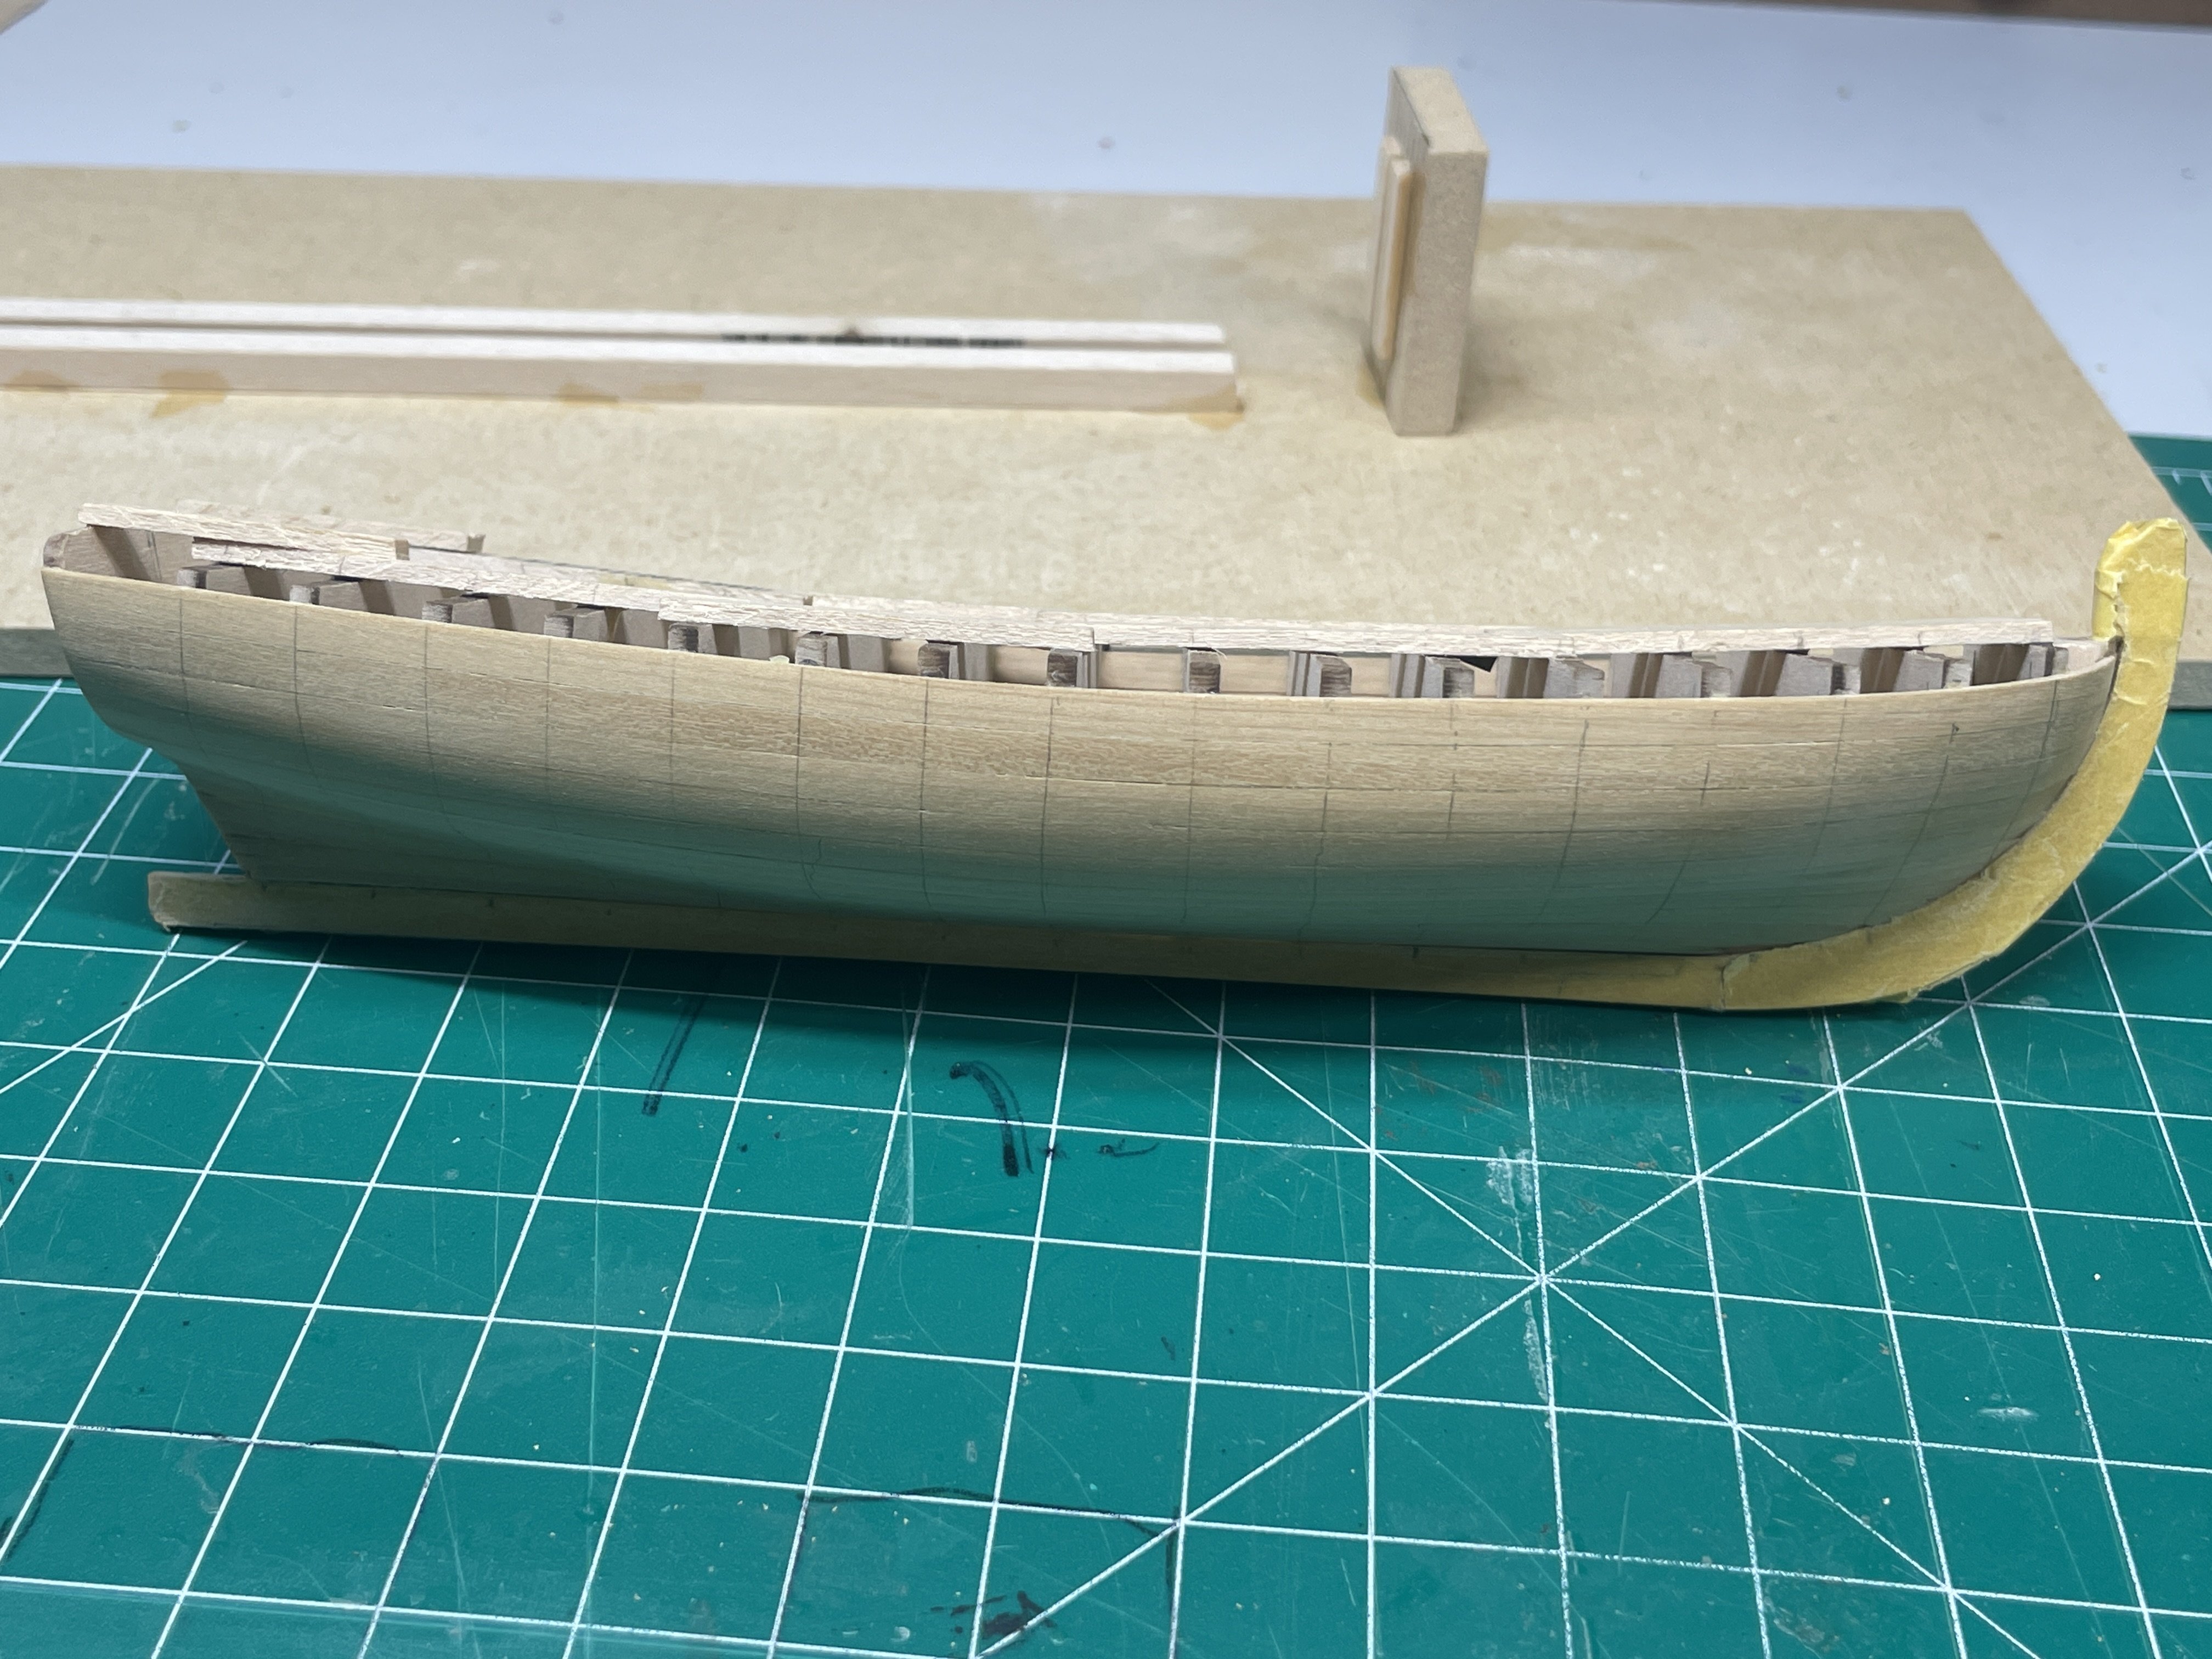
Got them down to where I liked them and then it was time for the cap rail. I held a 1/16 sheet of boxwood against the wale and traced it.
Here’s a question for you guys, while I was cutting out the boxwood it seems really brittle has that been other’s experience? Now I was using a bandsaw with a fairly rough cutting blade so it could have been that. Also cutting out small pieces with a sharp exacto will have it split sometimes also.
Anyway I cut out the piece way oversized. I cut out the part for the stem and glued it on.
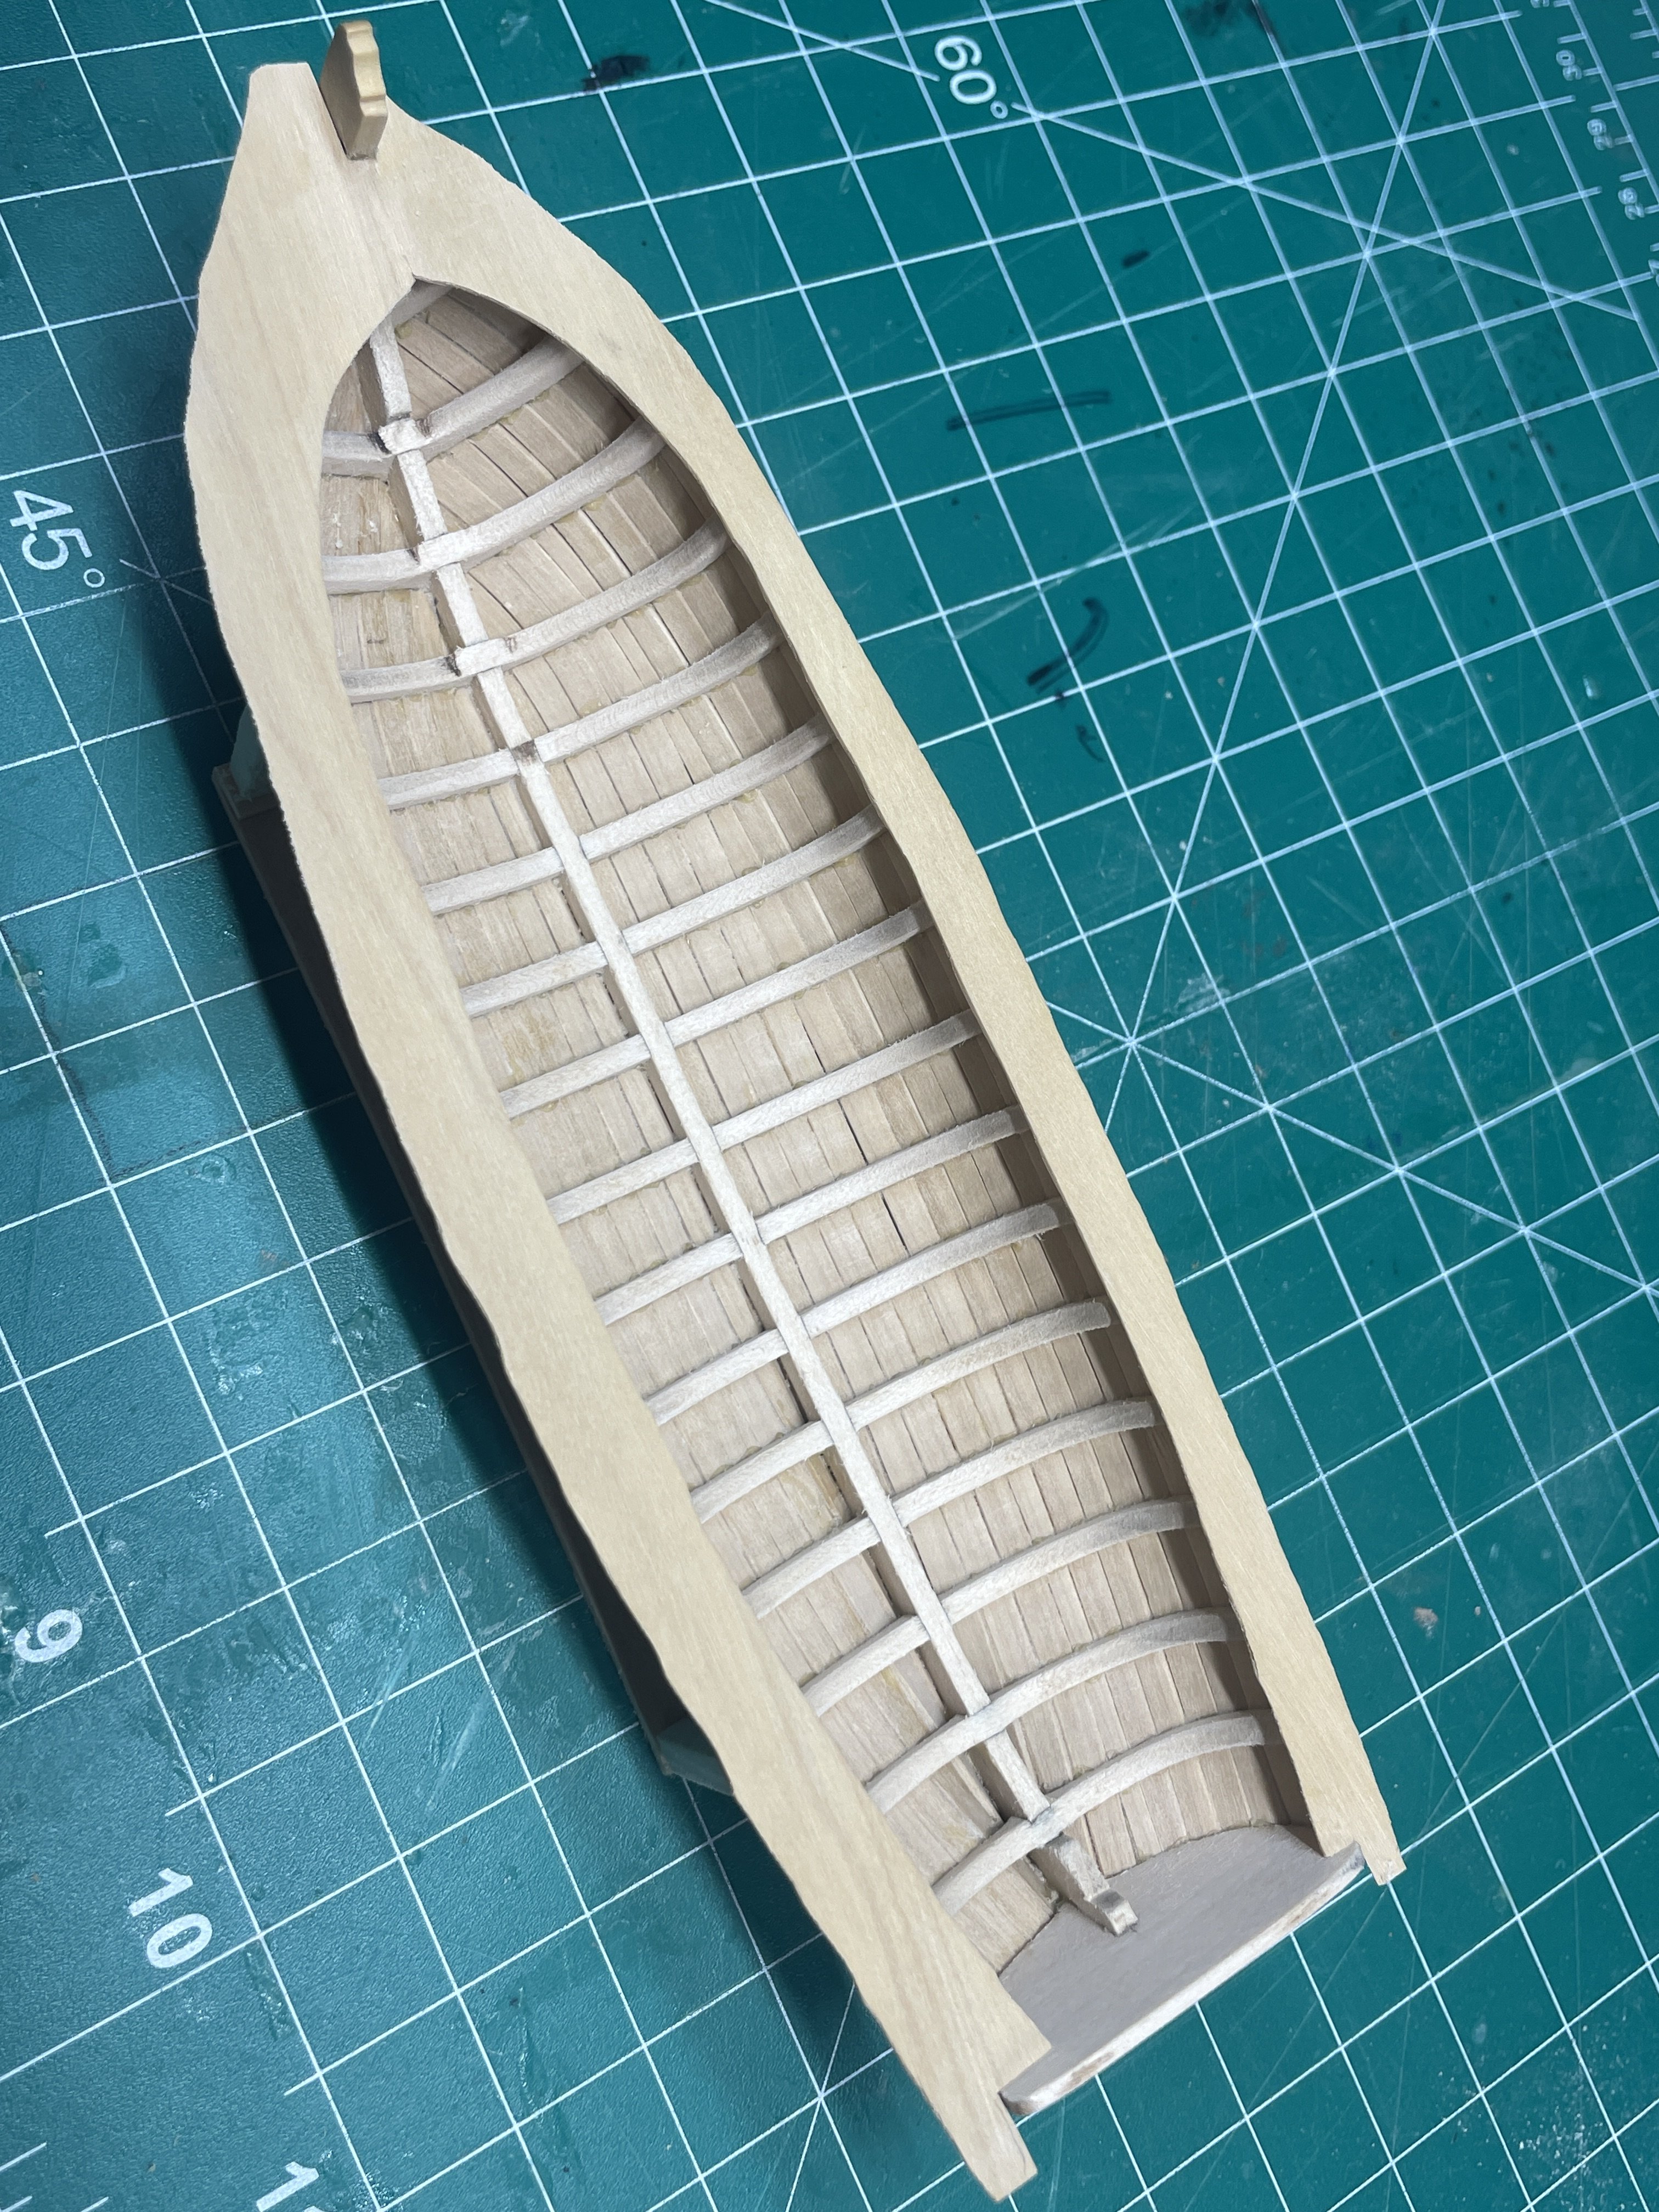
I didn't have any curved exacto blades to use for glue cleanup. I ordered some but while waiting continued working on the cap rails. The plan was to NOT glue them on until I cleaned up the inside. Ooops, I missed that memo. So now it’s a little bit harder to get to! HaHaHa.


I then sanded them down to a 1/64 overhang. It still looks a little heavy where the breasthook goes, so I’ll probably take that down a little more.
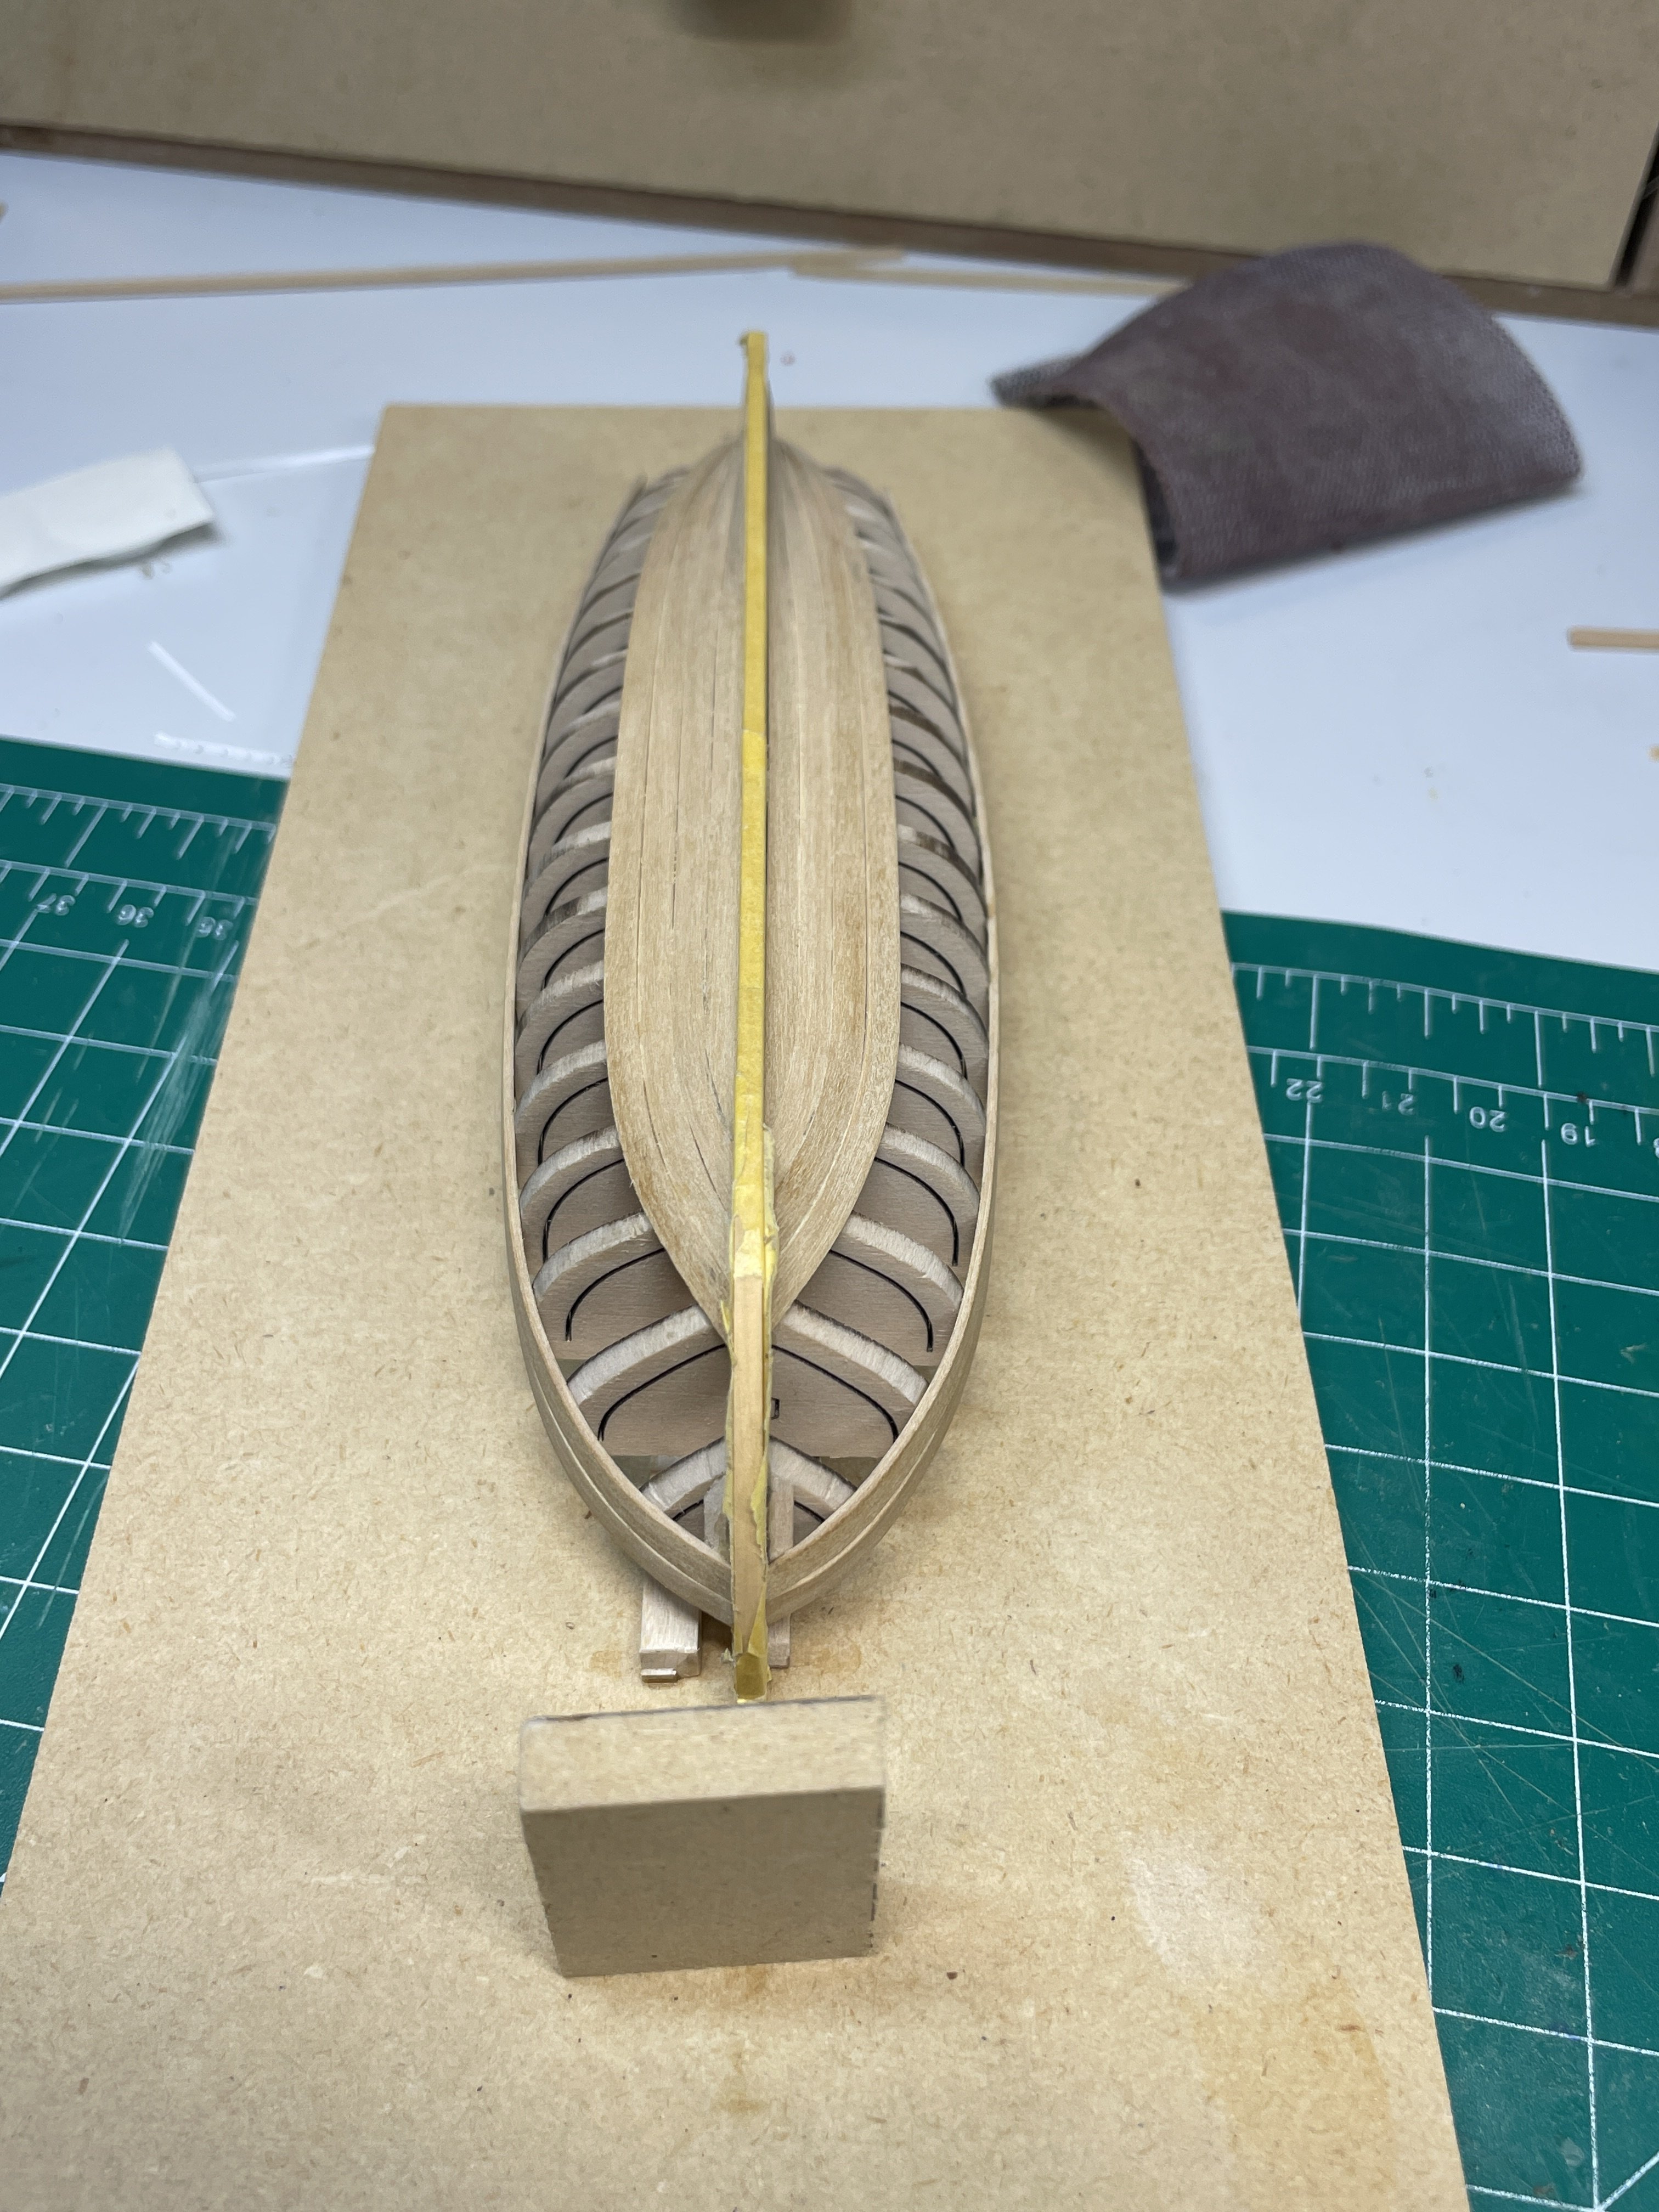
Here’s where we stand so far.
I’m trying to decide if I can get away without painting the wales since it will be a shame to paint over that woodgrain.
Thanks for checking out my build!
Chris -
Thanks Ronald. I really tried to take my time with each plank.
- Knocklouder, Ryland Craze, robert952 and 1 other
-
4
-
OK so I just made this post like an hour ago, I clicked submit reply and it just went away. So if this ends up posting twice I will delete one.
I’m continuing with planking. These are some tight curves since it’s so small. The boxwood seems to want to fight back against bending. Does that match with other’s experience using boxwood?
Used some clamps to help keep the seams tight.
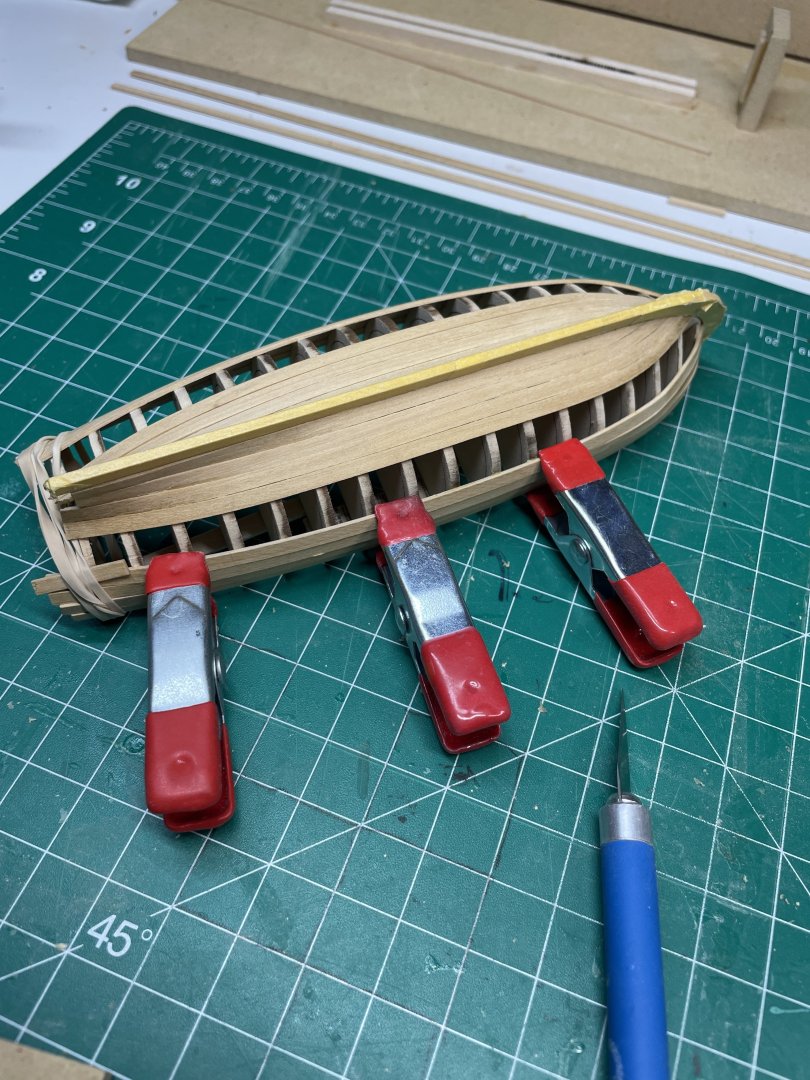
I used the Scotch tape method to get the shape of the final plank and then shaped it.
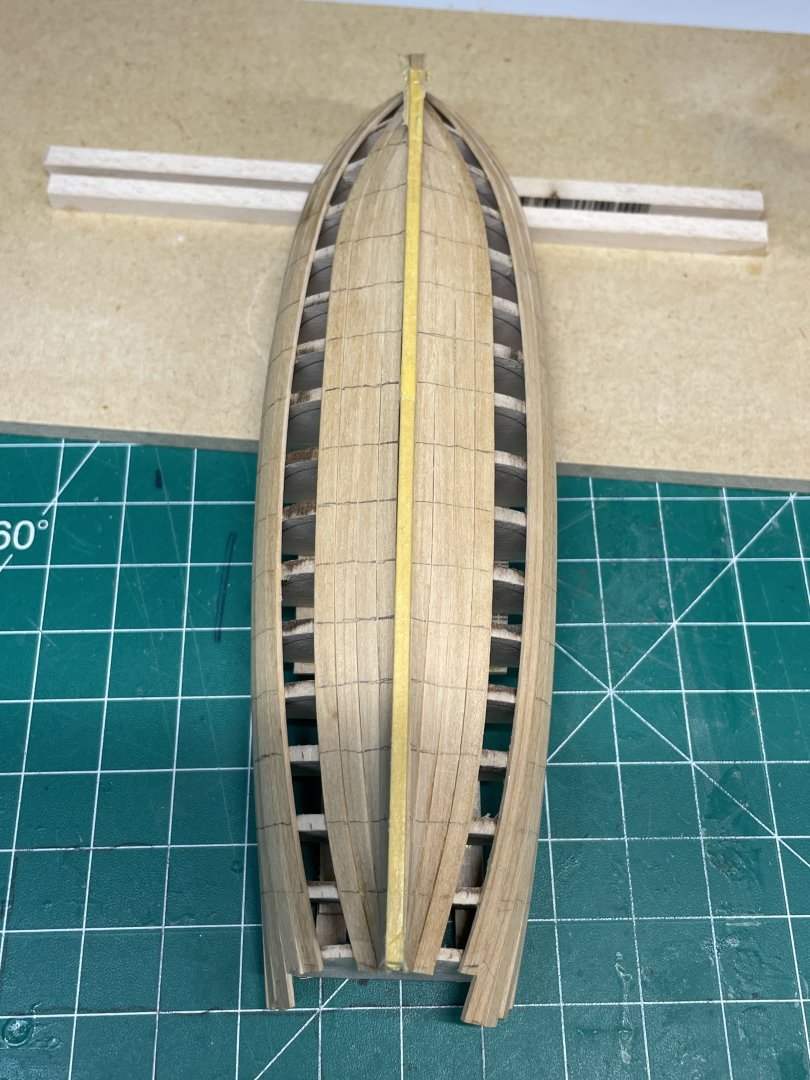
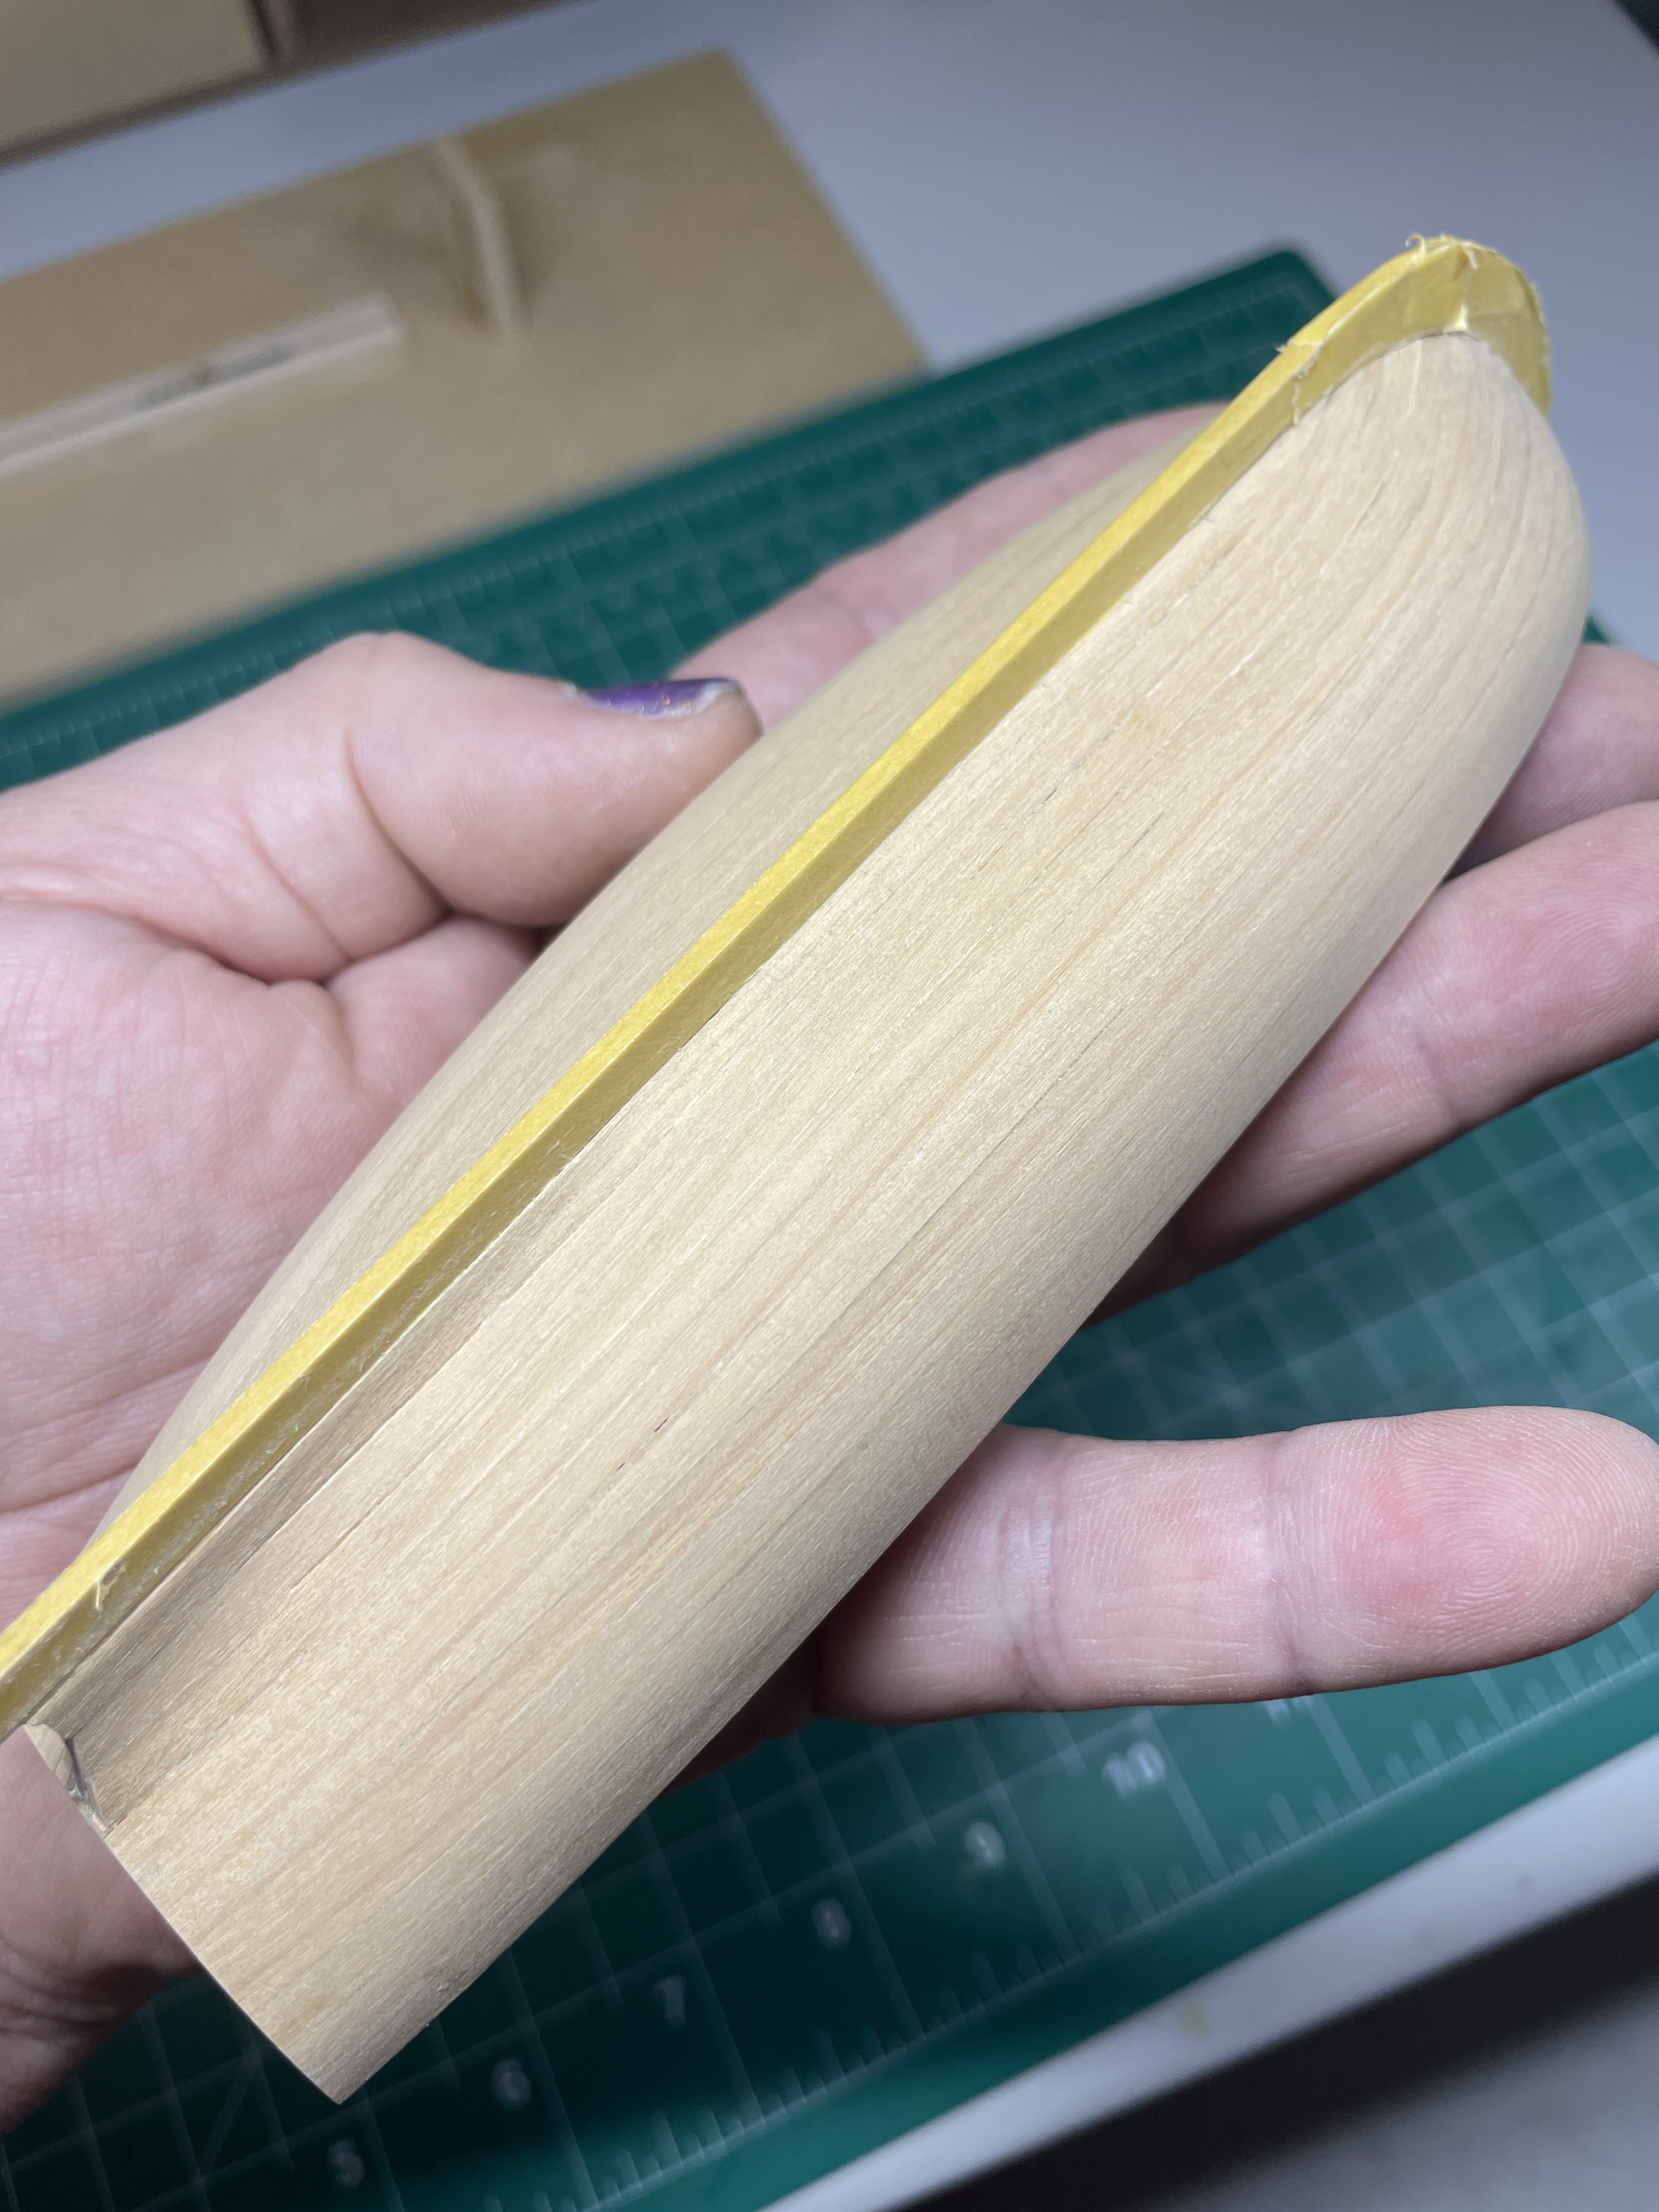
Here she is pre sanding. Not the prettiest planking but I think my skills are improving.
Post sanding. I was able to not have to use any wood filler. I did use a little thinned glue in a few seams while I sanded it smooth.

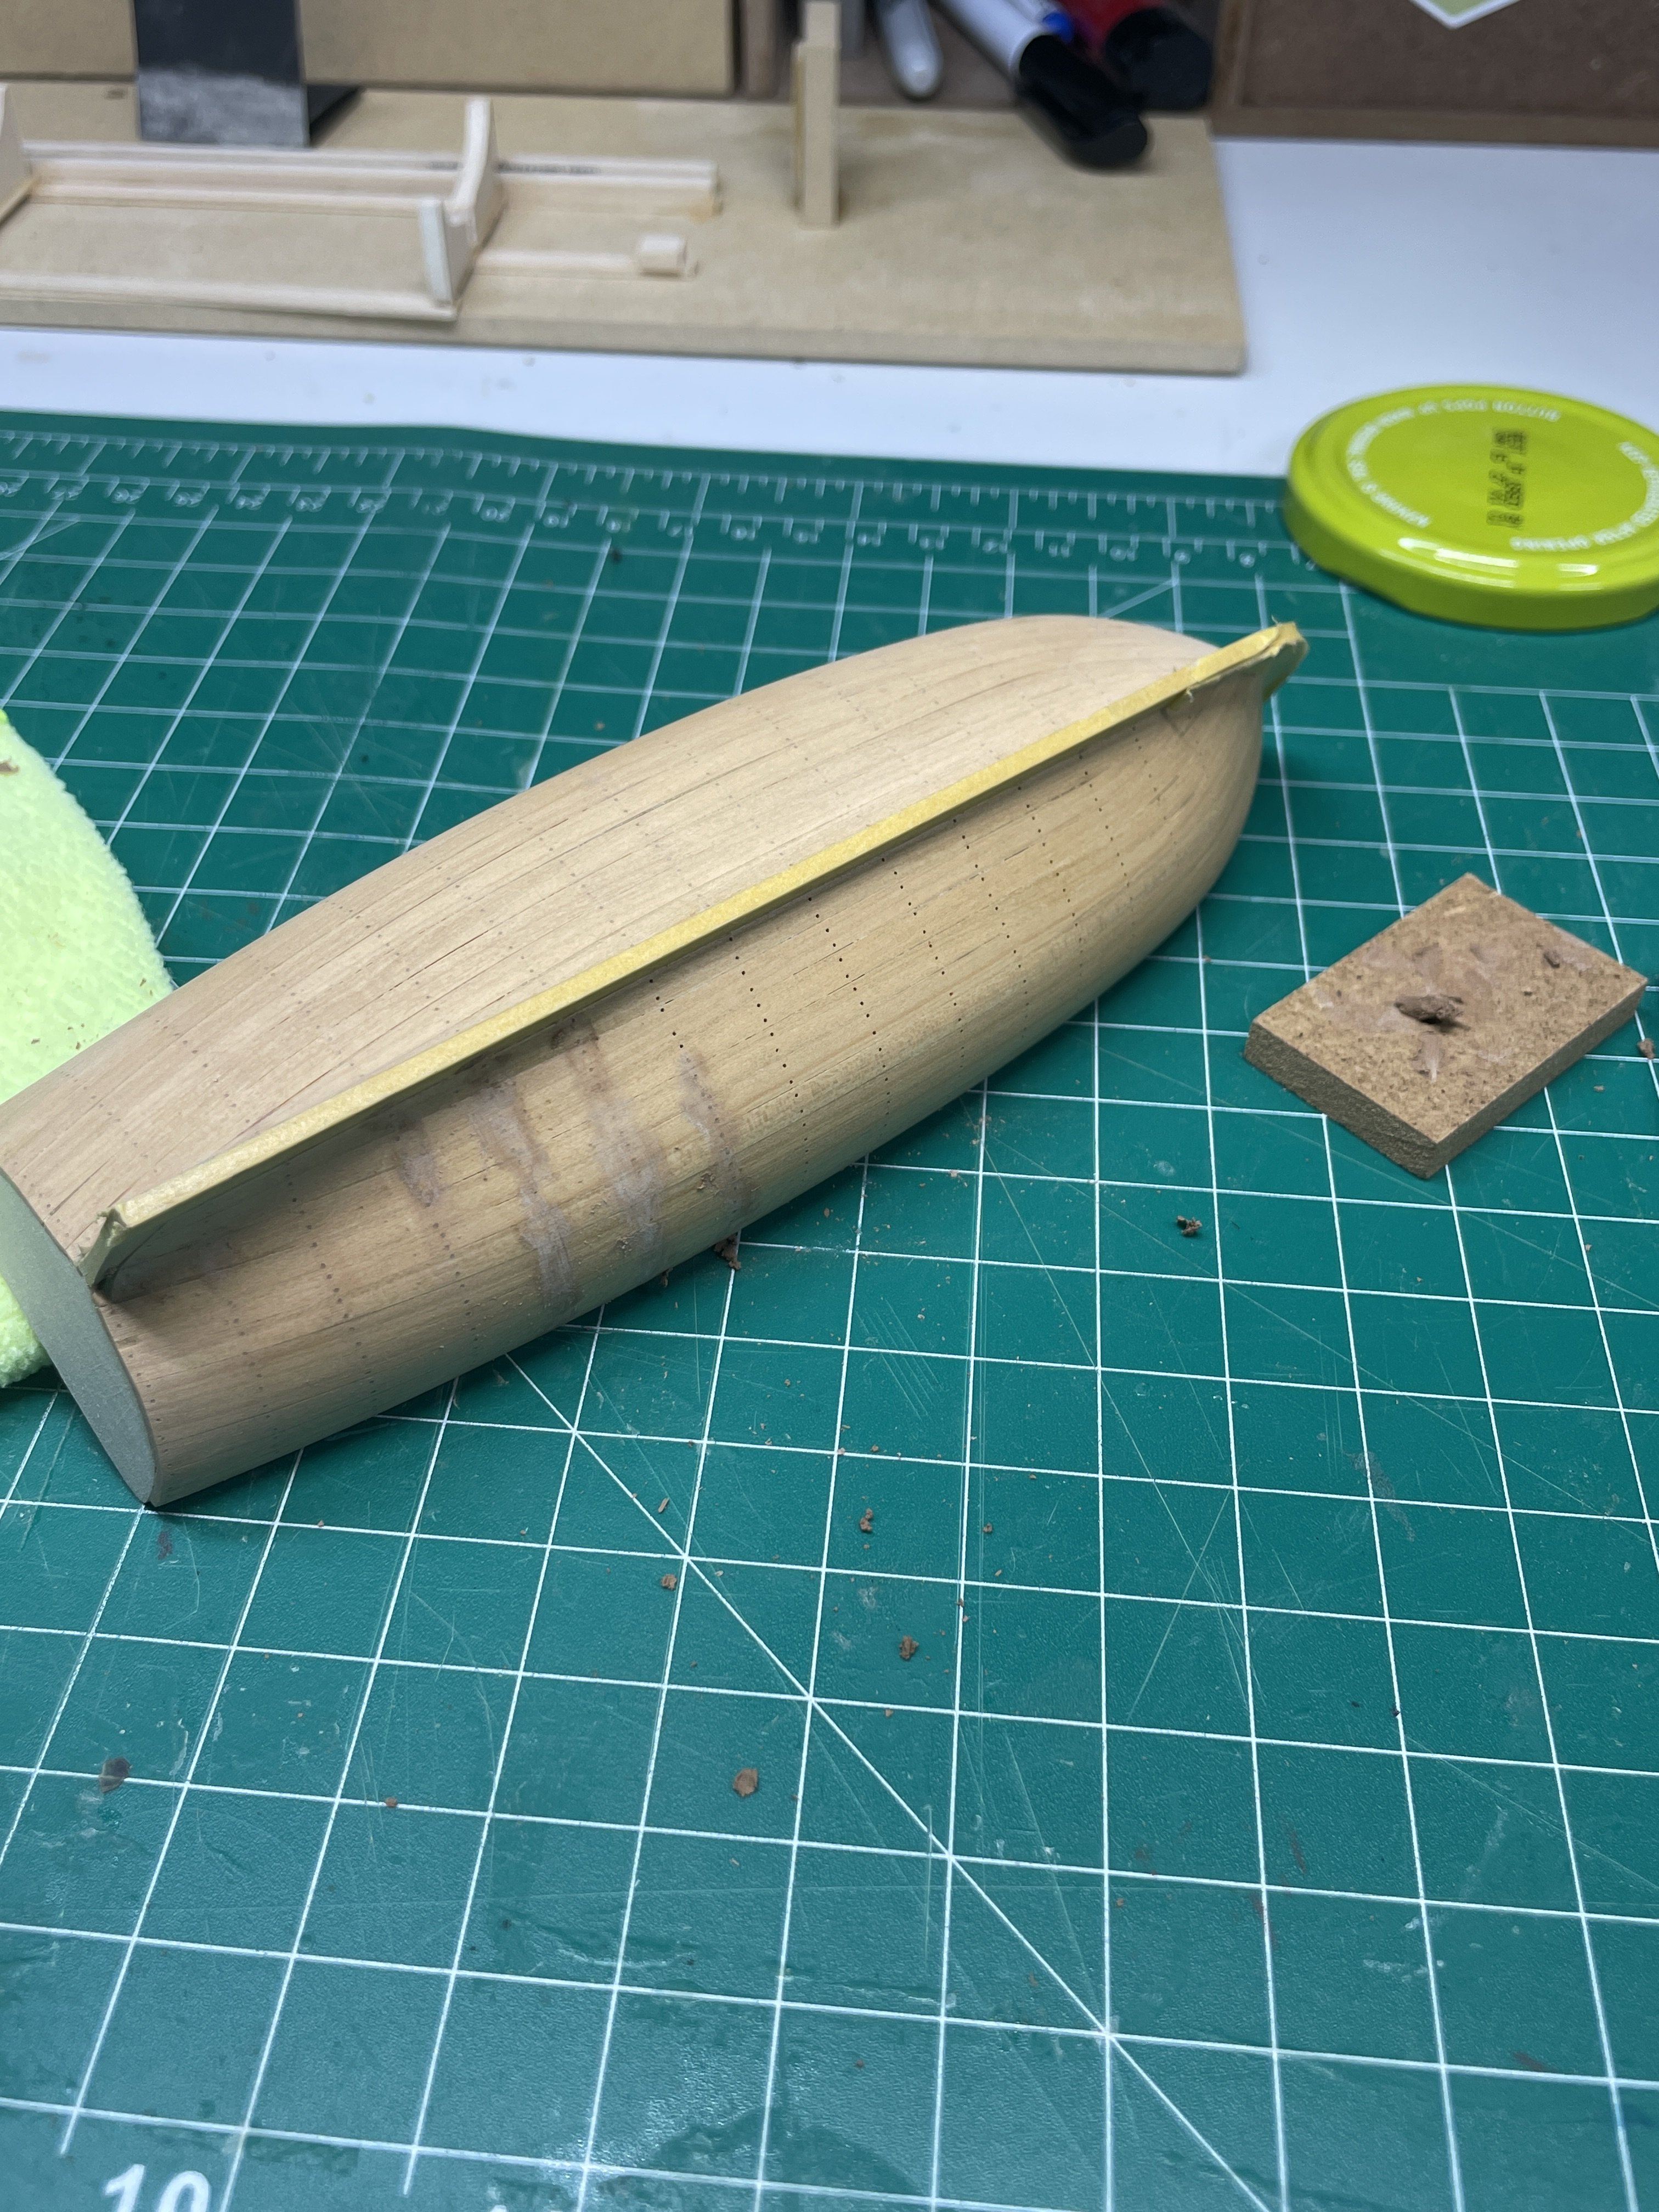
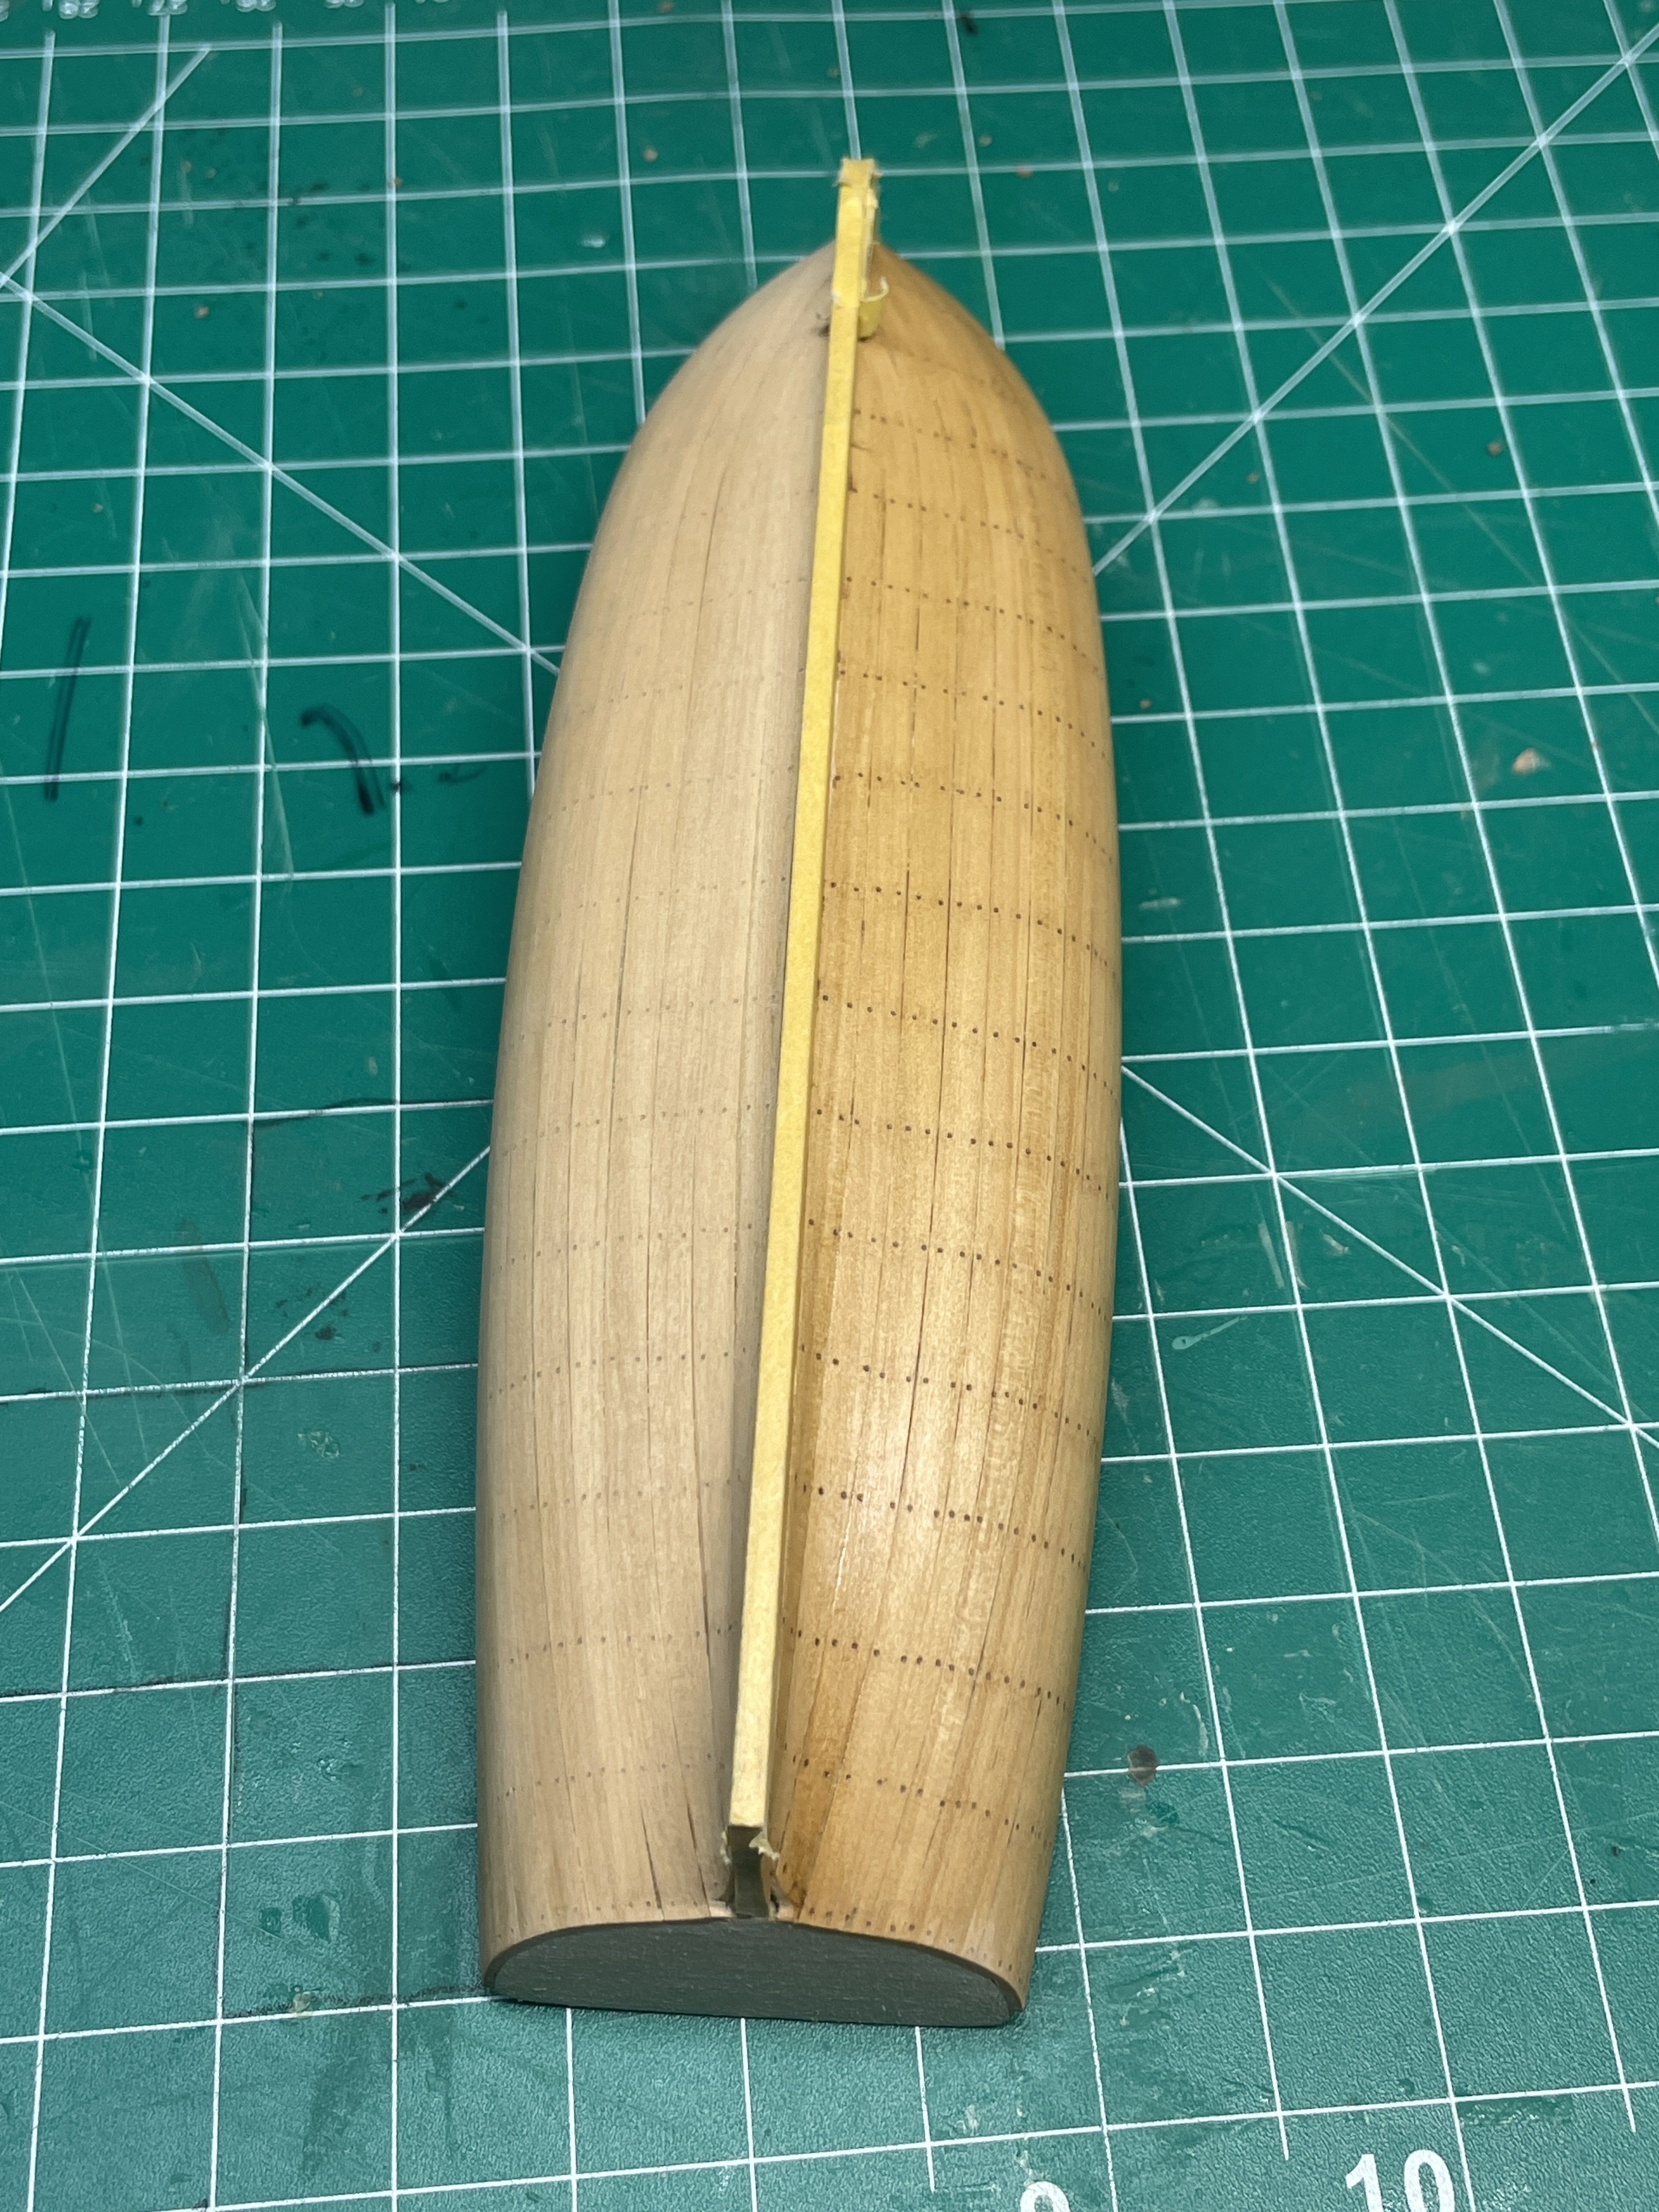
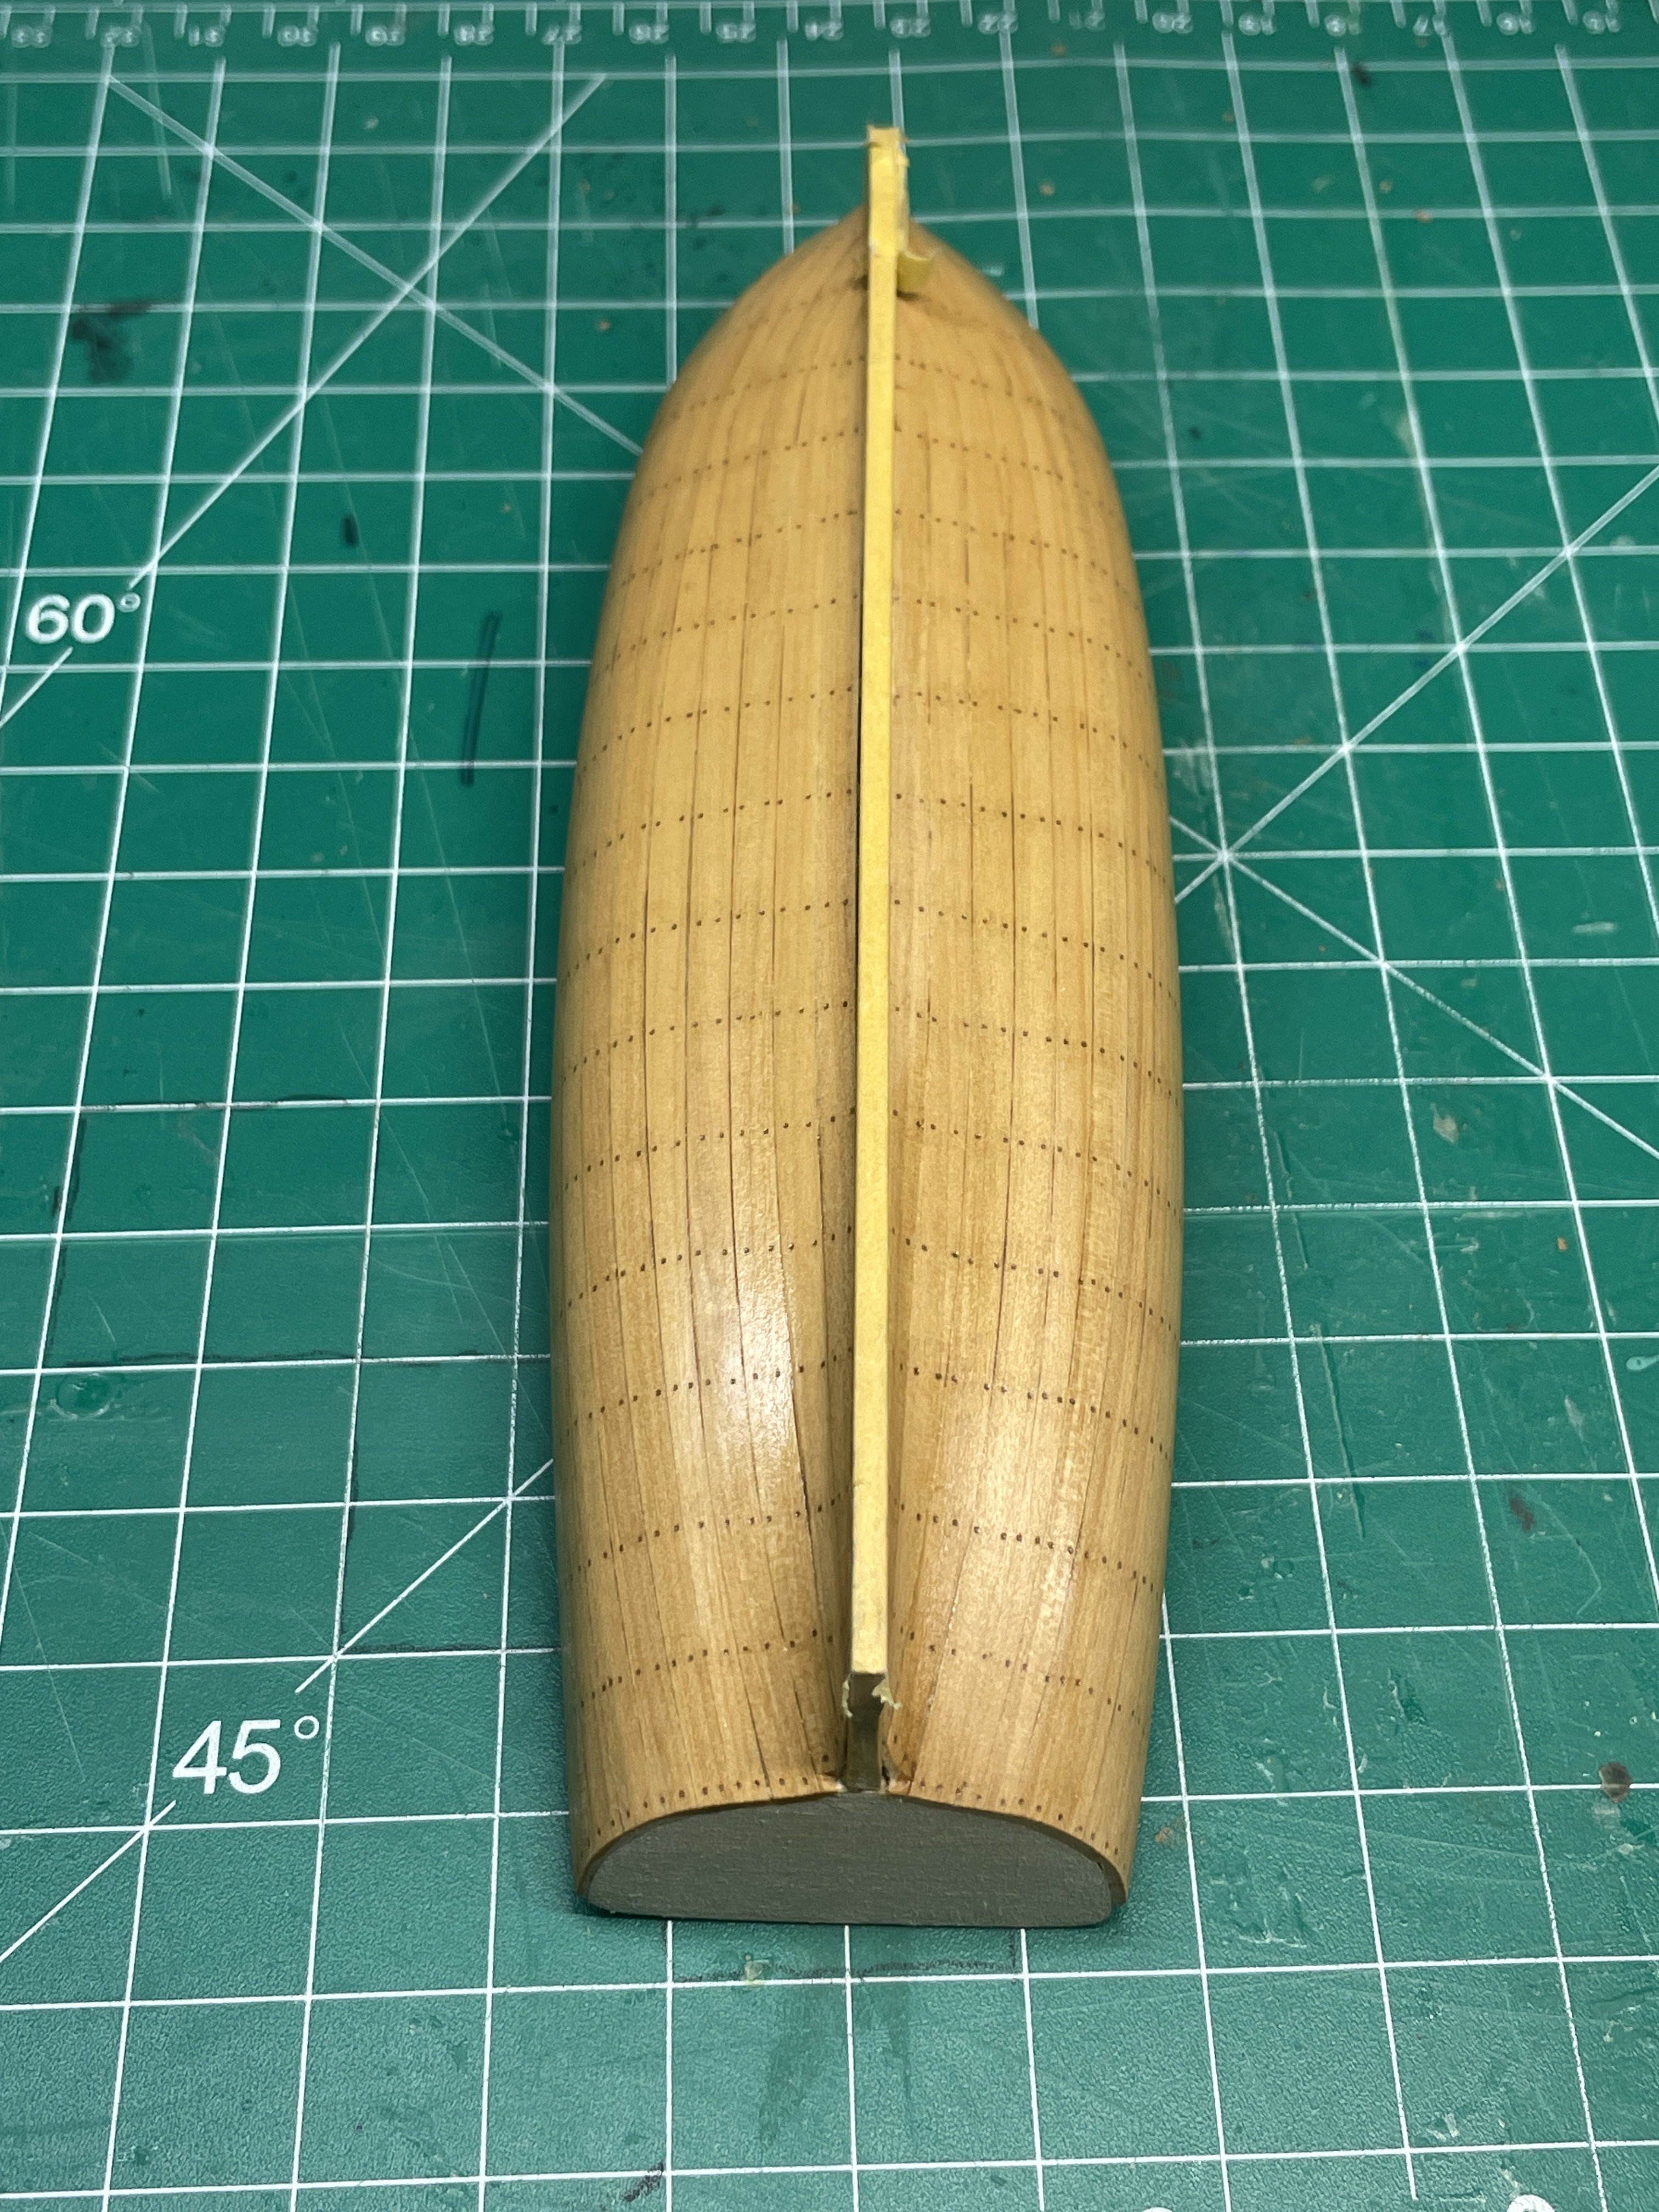
I then used tape to line out the simulated treenails. On the other side I used pencil marks.
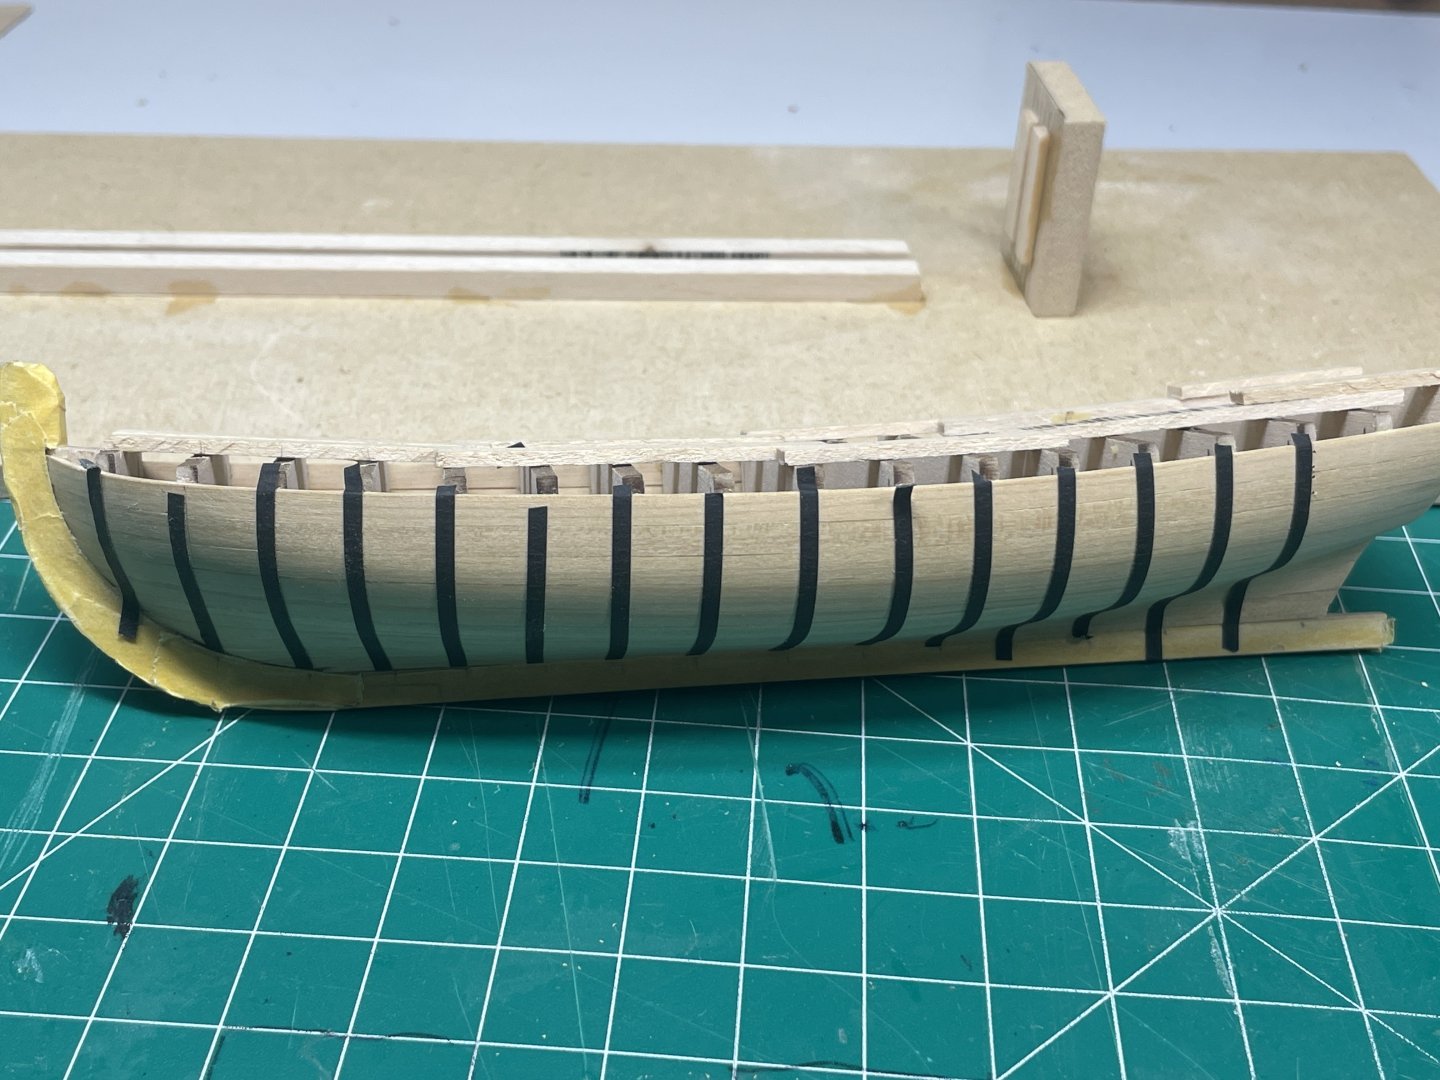

I’m not sure where the line is between dedication to the craft and insanity. If my rough math is correct I drilled just short of 800 holes.
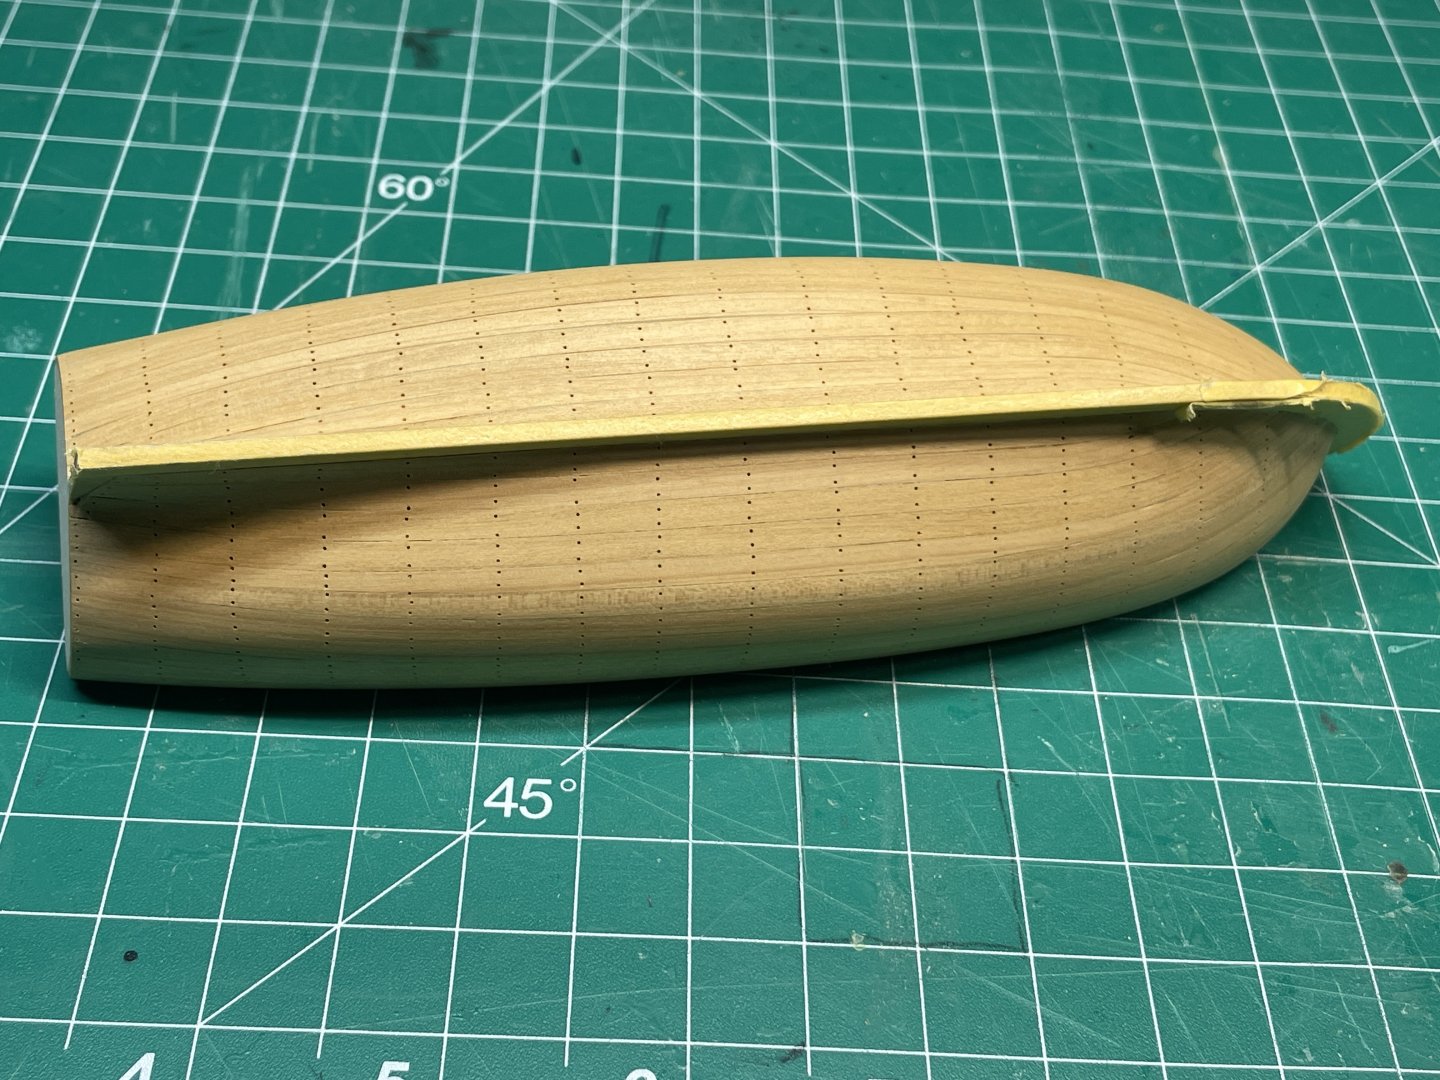
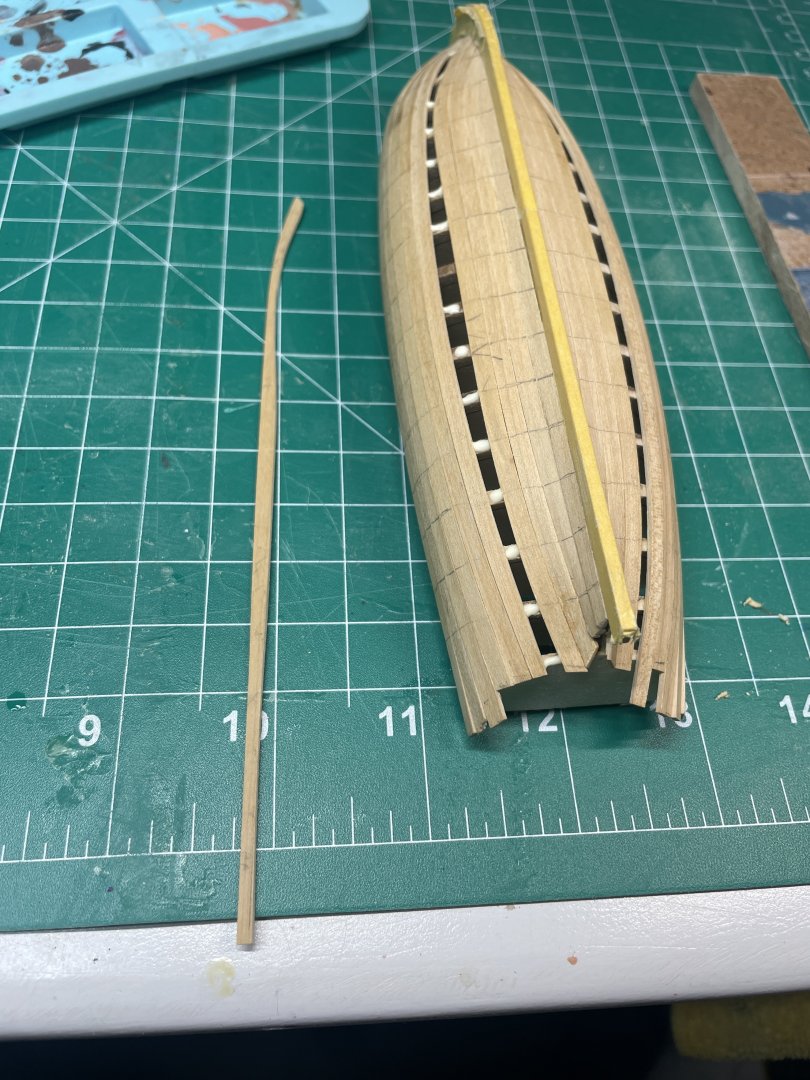
I gave the hull a couple of coats of WOP, this was to try to limit any staining from the wood filler that I plan to use in the holes.
I used a lab spatula to push walnut colored wood filler into the holes. I would then use a damp micro fiber cloth to wipe off the excess.
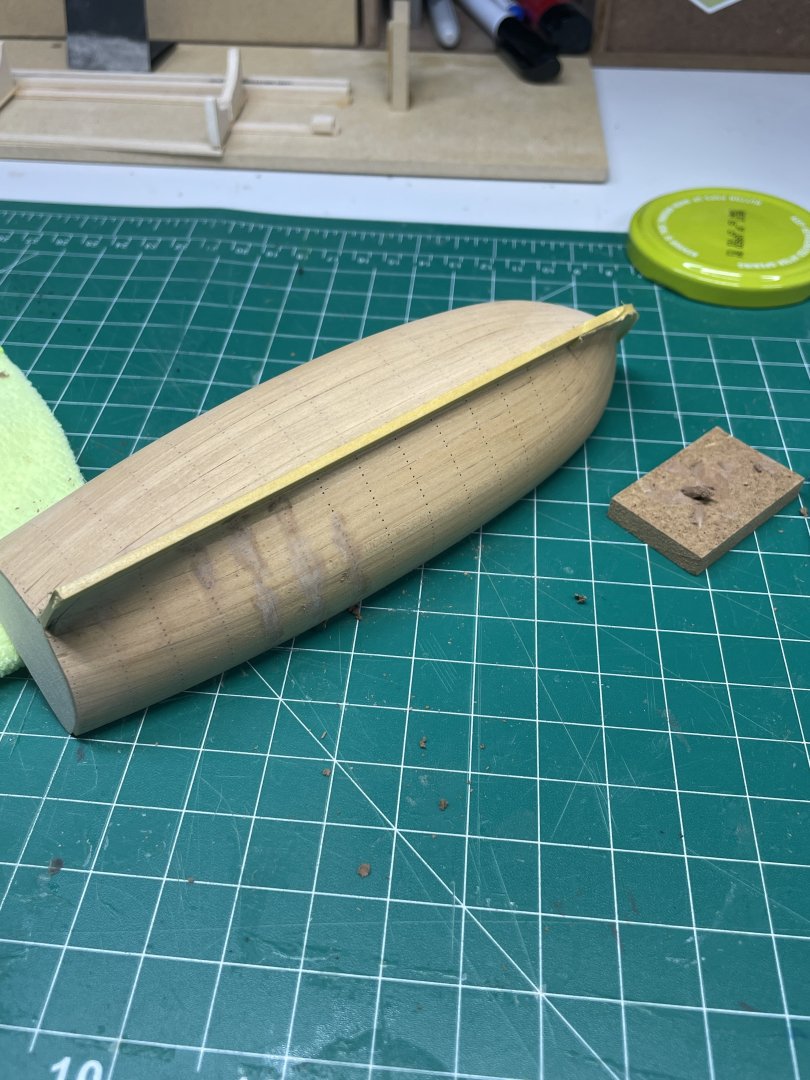
One side is WOP’d the other not.

I’m really happy with the results. It looks a little shiny because it’s wet. The dots are less pronounced after drying.

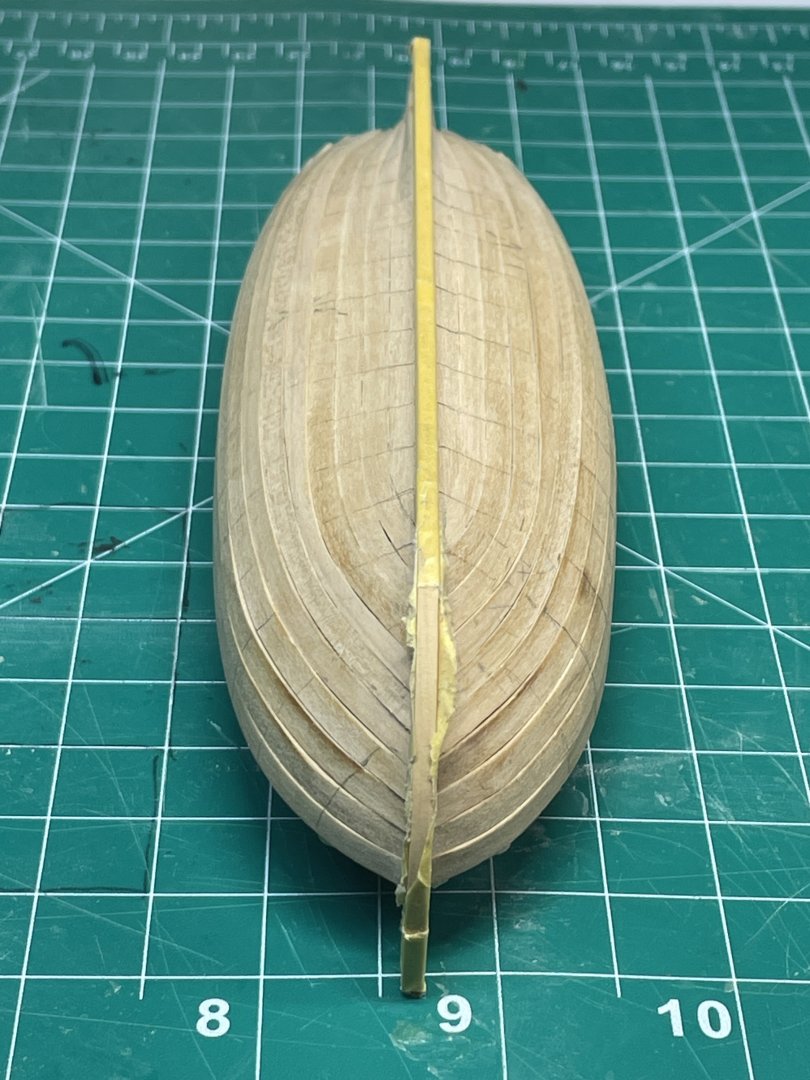
So in the next steps I will be removing the bulk of the bulkheads.
Thanks for stopping in. The likes and comments are always appreciated!
Until next time.
Chris -
I think Hornet pretty much summed it up.
I recently finished Alert. Excellent kit like everyone says. Just less rigging with Adder. Among other obvious differences. You can’t really go wrong with either kit.
You might get more specific answers if you narrow your question a little. “Compare them” is pretty broad.


18th Century Longboat by Desertanimal - Model Shipways - 1:48
in - Kit build logs for subjects built from 1751 - 1800
Posted · Edited by Desertanimal
I read that and said out loud, what? (Scrolls through own thread)
Ummm. I’m more than a little embarrassed to say I’m not quite sure how that happened. I just got carried away I think.
I’m off to look at the plans….😒
C
Edit: Yeeeaaahhh, that’s not supposed to be like that….
Thanks for pointing that out!