

Desertanimal
-
Posts
215 -
Joined
-
Last visited
Content Type
Profiles
Forums
Gallery
Events
Posts posted by Desertanimal
-
-
Did you use anything to darken the seams?
Chris -
So to clarify and follow up a couple of things.
First I stated I hadn’t heard back from them. It looks like my fat fingers typed my email wrong on the contact form. So that’s all on me.
He has now contacted me through text as my phone was smart enough to put in my correct number on the contact form.Second it seems purely to be UPS charging these fees with no prior notification that you’ll be subject to these fees. Not good on UPS.
The seller paid the fees so my products will be delivered for my expected price.
Chris
-
As a follow up, I just tracked the shipment and now it says “the fees on this shipment have been paid”. There is a little information “i” that looks clickable for more info but it doesn’t click.
Do for now it looks like there will be no additional charges.
Still no reply from seller.- Canute and Keith Black
-
 1
1
-
 1
1
-
I’m not very versed in lasers but the main thing is the thickness of material. After you know that, you can look at machines that can cut it squarely. Underpowered machines will wander vertically in the cut. You may find machines that can cut the thickness of material you want to cut will be expensive.
You might want to consider farming out the work, hopefully locally. That way you don’t have to maintain the machine. Just pick up you cut material from the guy that has the giant, fast machine you wouldn’t want to afford.
Chris- thibaultron and tmj
-
2
-
-
I am not able to find a breakdown of the extra charges. I’ve also emailed the company but no reply yet.
- gsdpic, Ryland Craze, Canute and 1 other
-
4
-
I was unaware of those facts. Simply never gave a Canadian company a second thought.
I’ll be using some printed blocks I’ve heard about 😉 for the next build. But I’m mid-build and need them to match.
Chris
- Jack12477, Ryland Craze, Chuck and 3 others
-
6
-
I placed an order last week at Dry Dock models for some blocks and things. They are in Canada, I’m in the US. I spent about $35. It was shipped UPS so I was just tracking it to see when I can expect it. There is a notice that there is a balance due.
Click here to pay…. $61 in tariffs.
That is a problem. 😡😡
Chris
-
-
The first planking is the dressed rehearsal for the second layer of planking. Once you are sufficiently adept at bending the planks fit the fit layer you will just fine tune that fit the second layer. You want the planks to sit in position without having to push or pull the hold them in position. Once the dry fit looks good use a few drops of medium CA glue and you’re off to the races!!
I would say to look at several build logs to get what I mean.
looking good!Chris
- palmerit, AJohnson, Dan Poirier and 2 others
-
5
-
Thanks for the likes!
Time to work on the backstays. Seems there are not only many ways to do it, there is no consensus on how it was done on Alert.
So again I default to those who have gone before and did them as @Thukydides and @Blue Ensign,
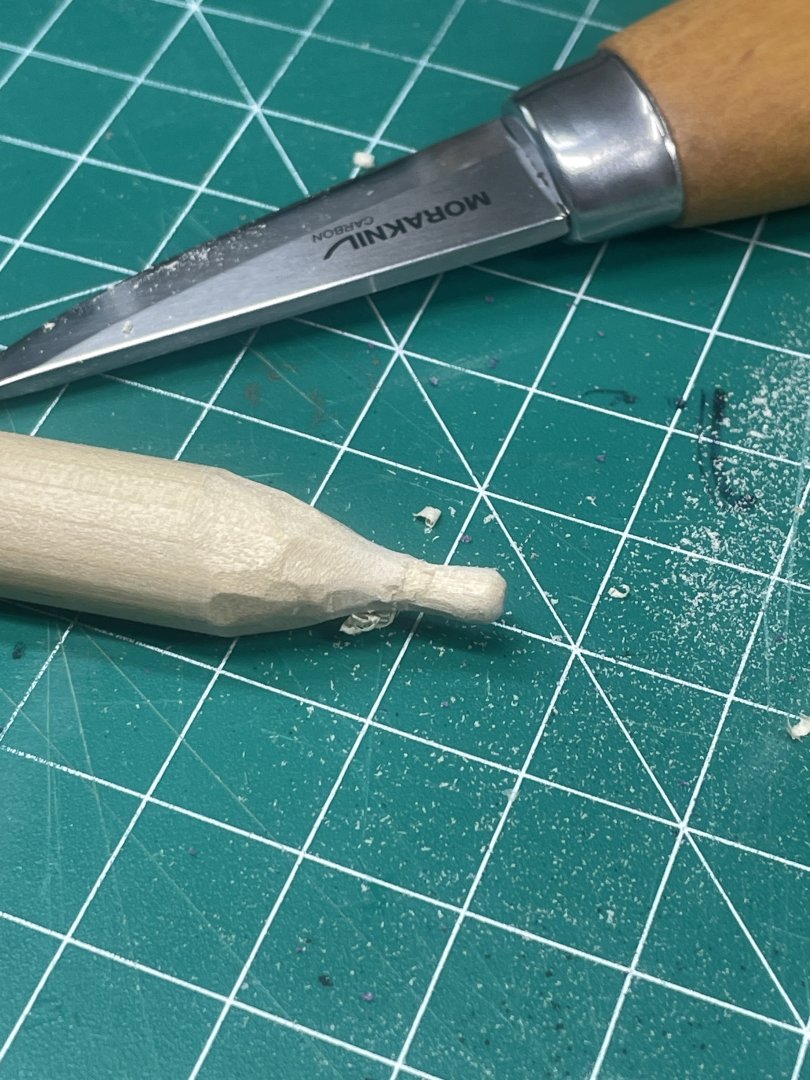
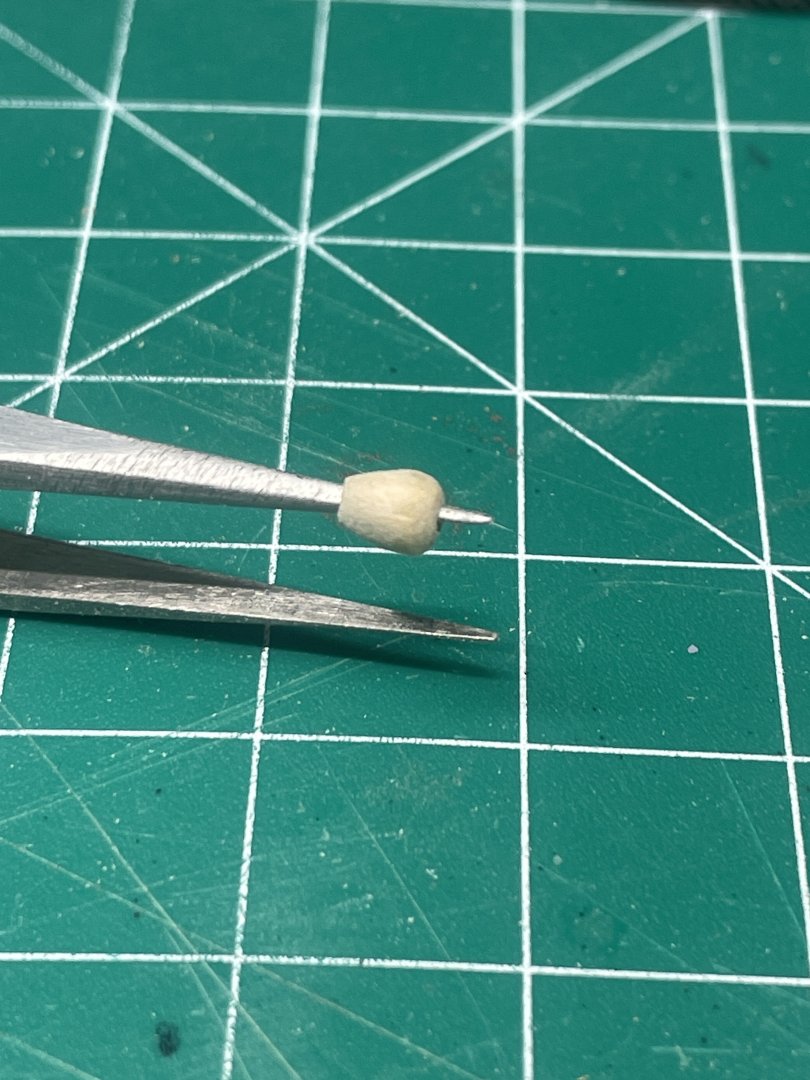
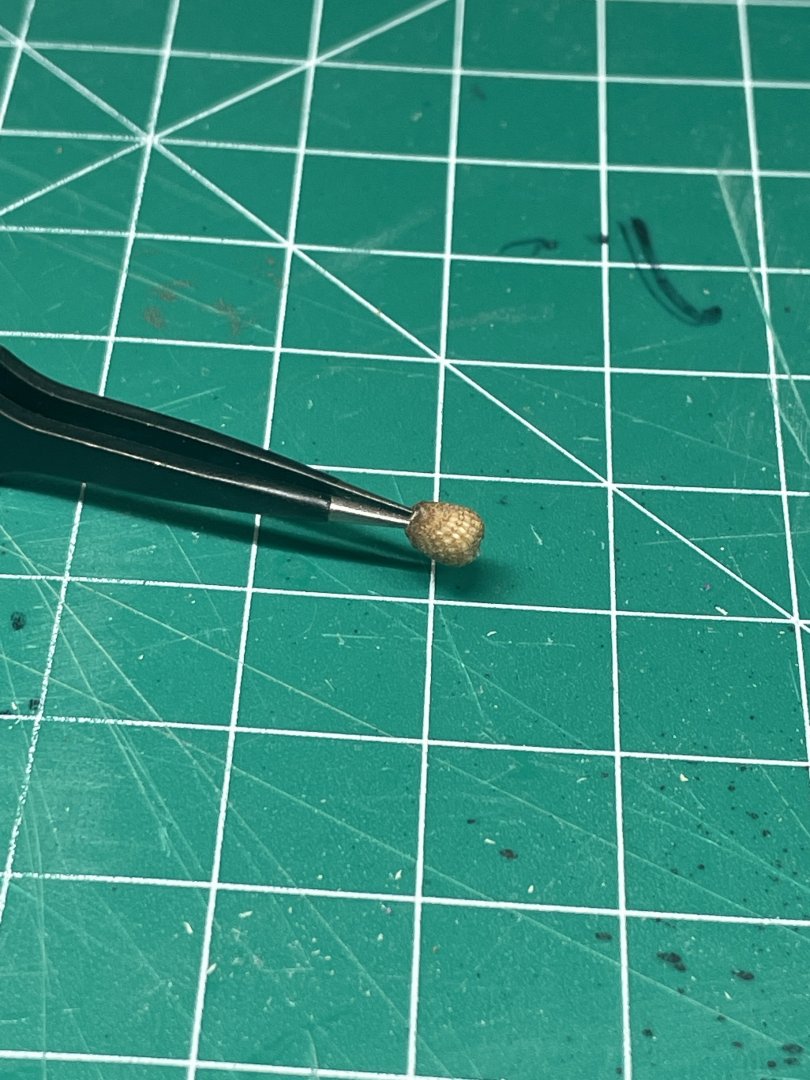
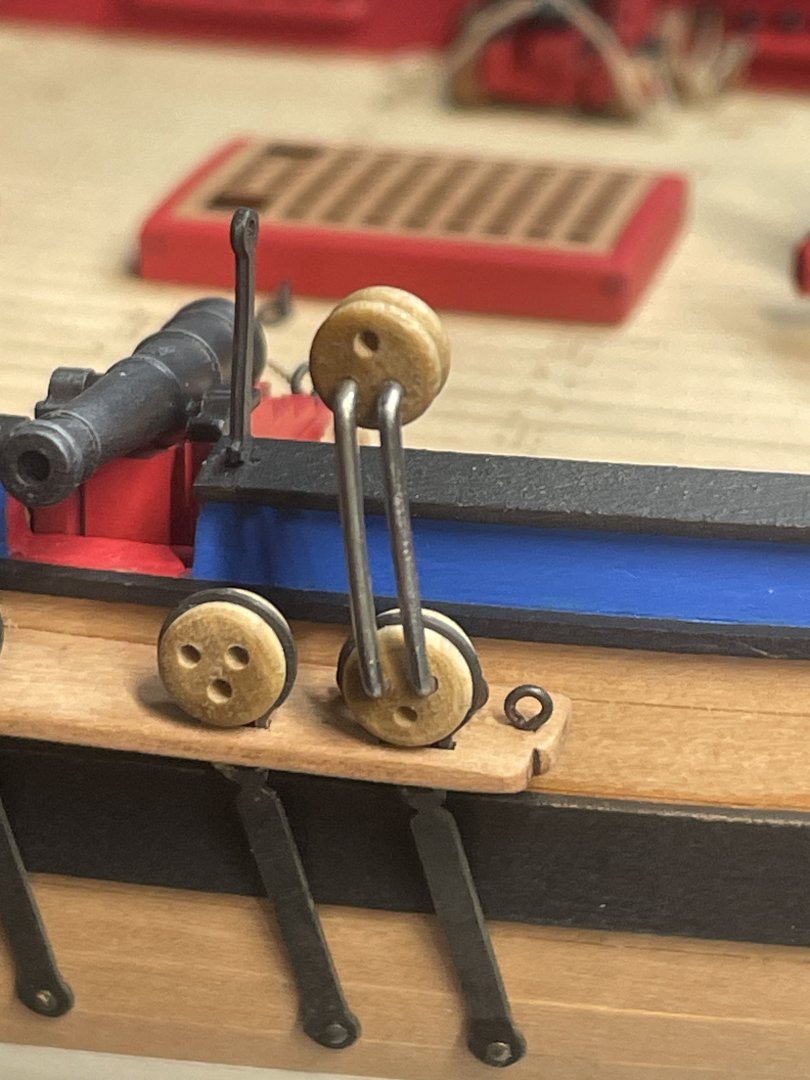
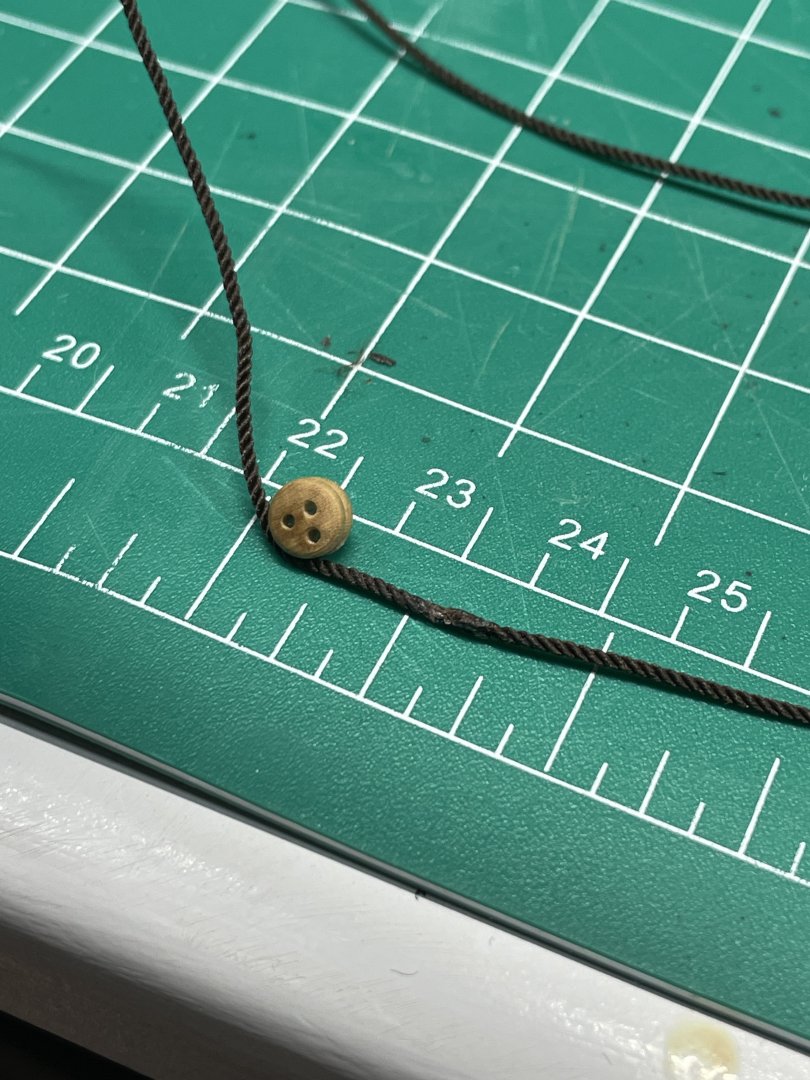
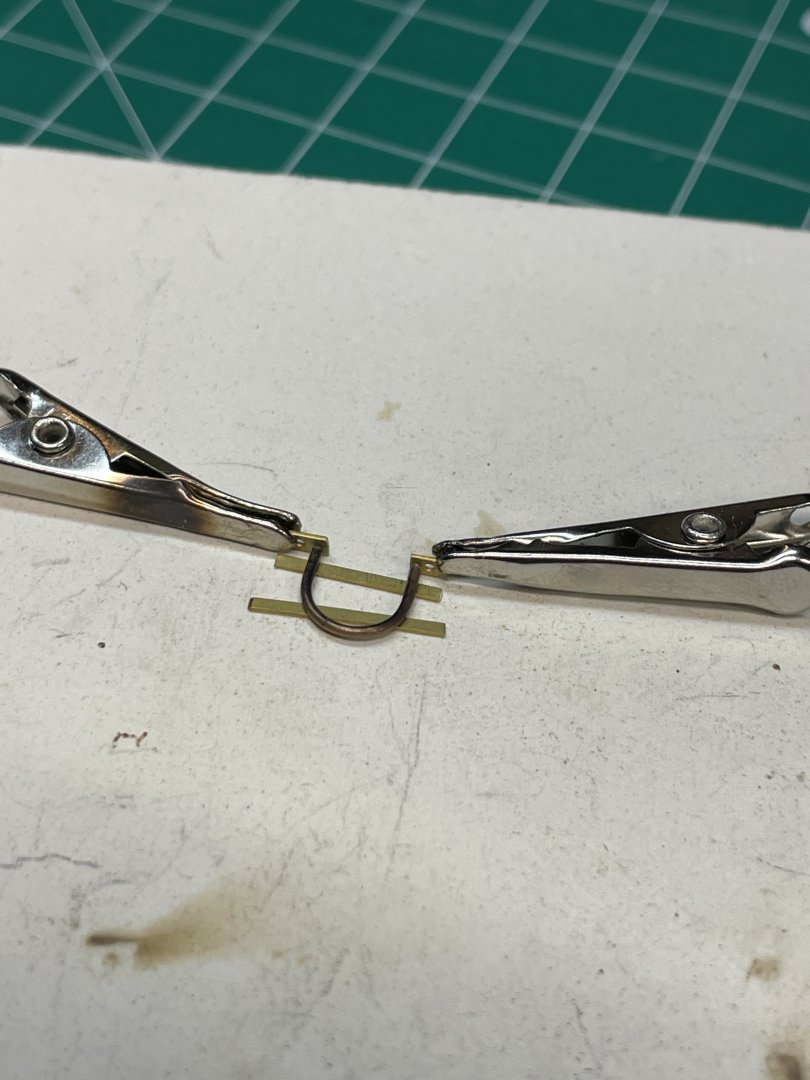
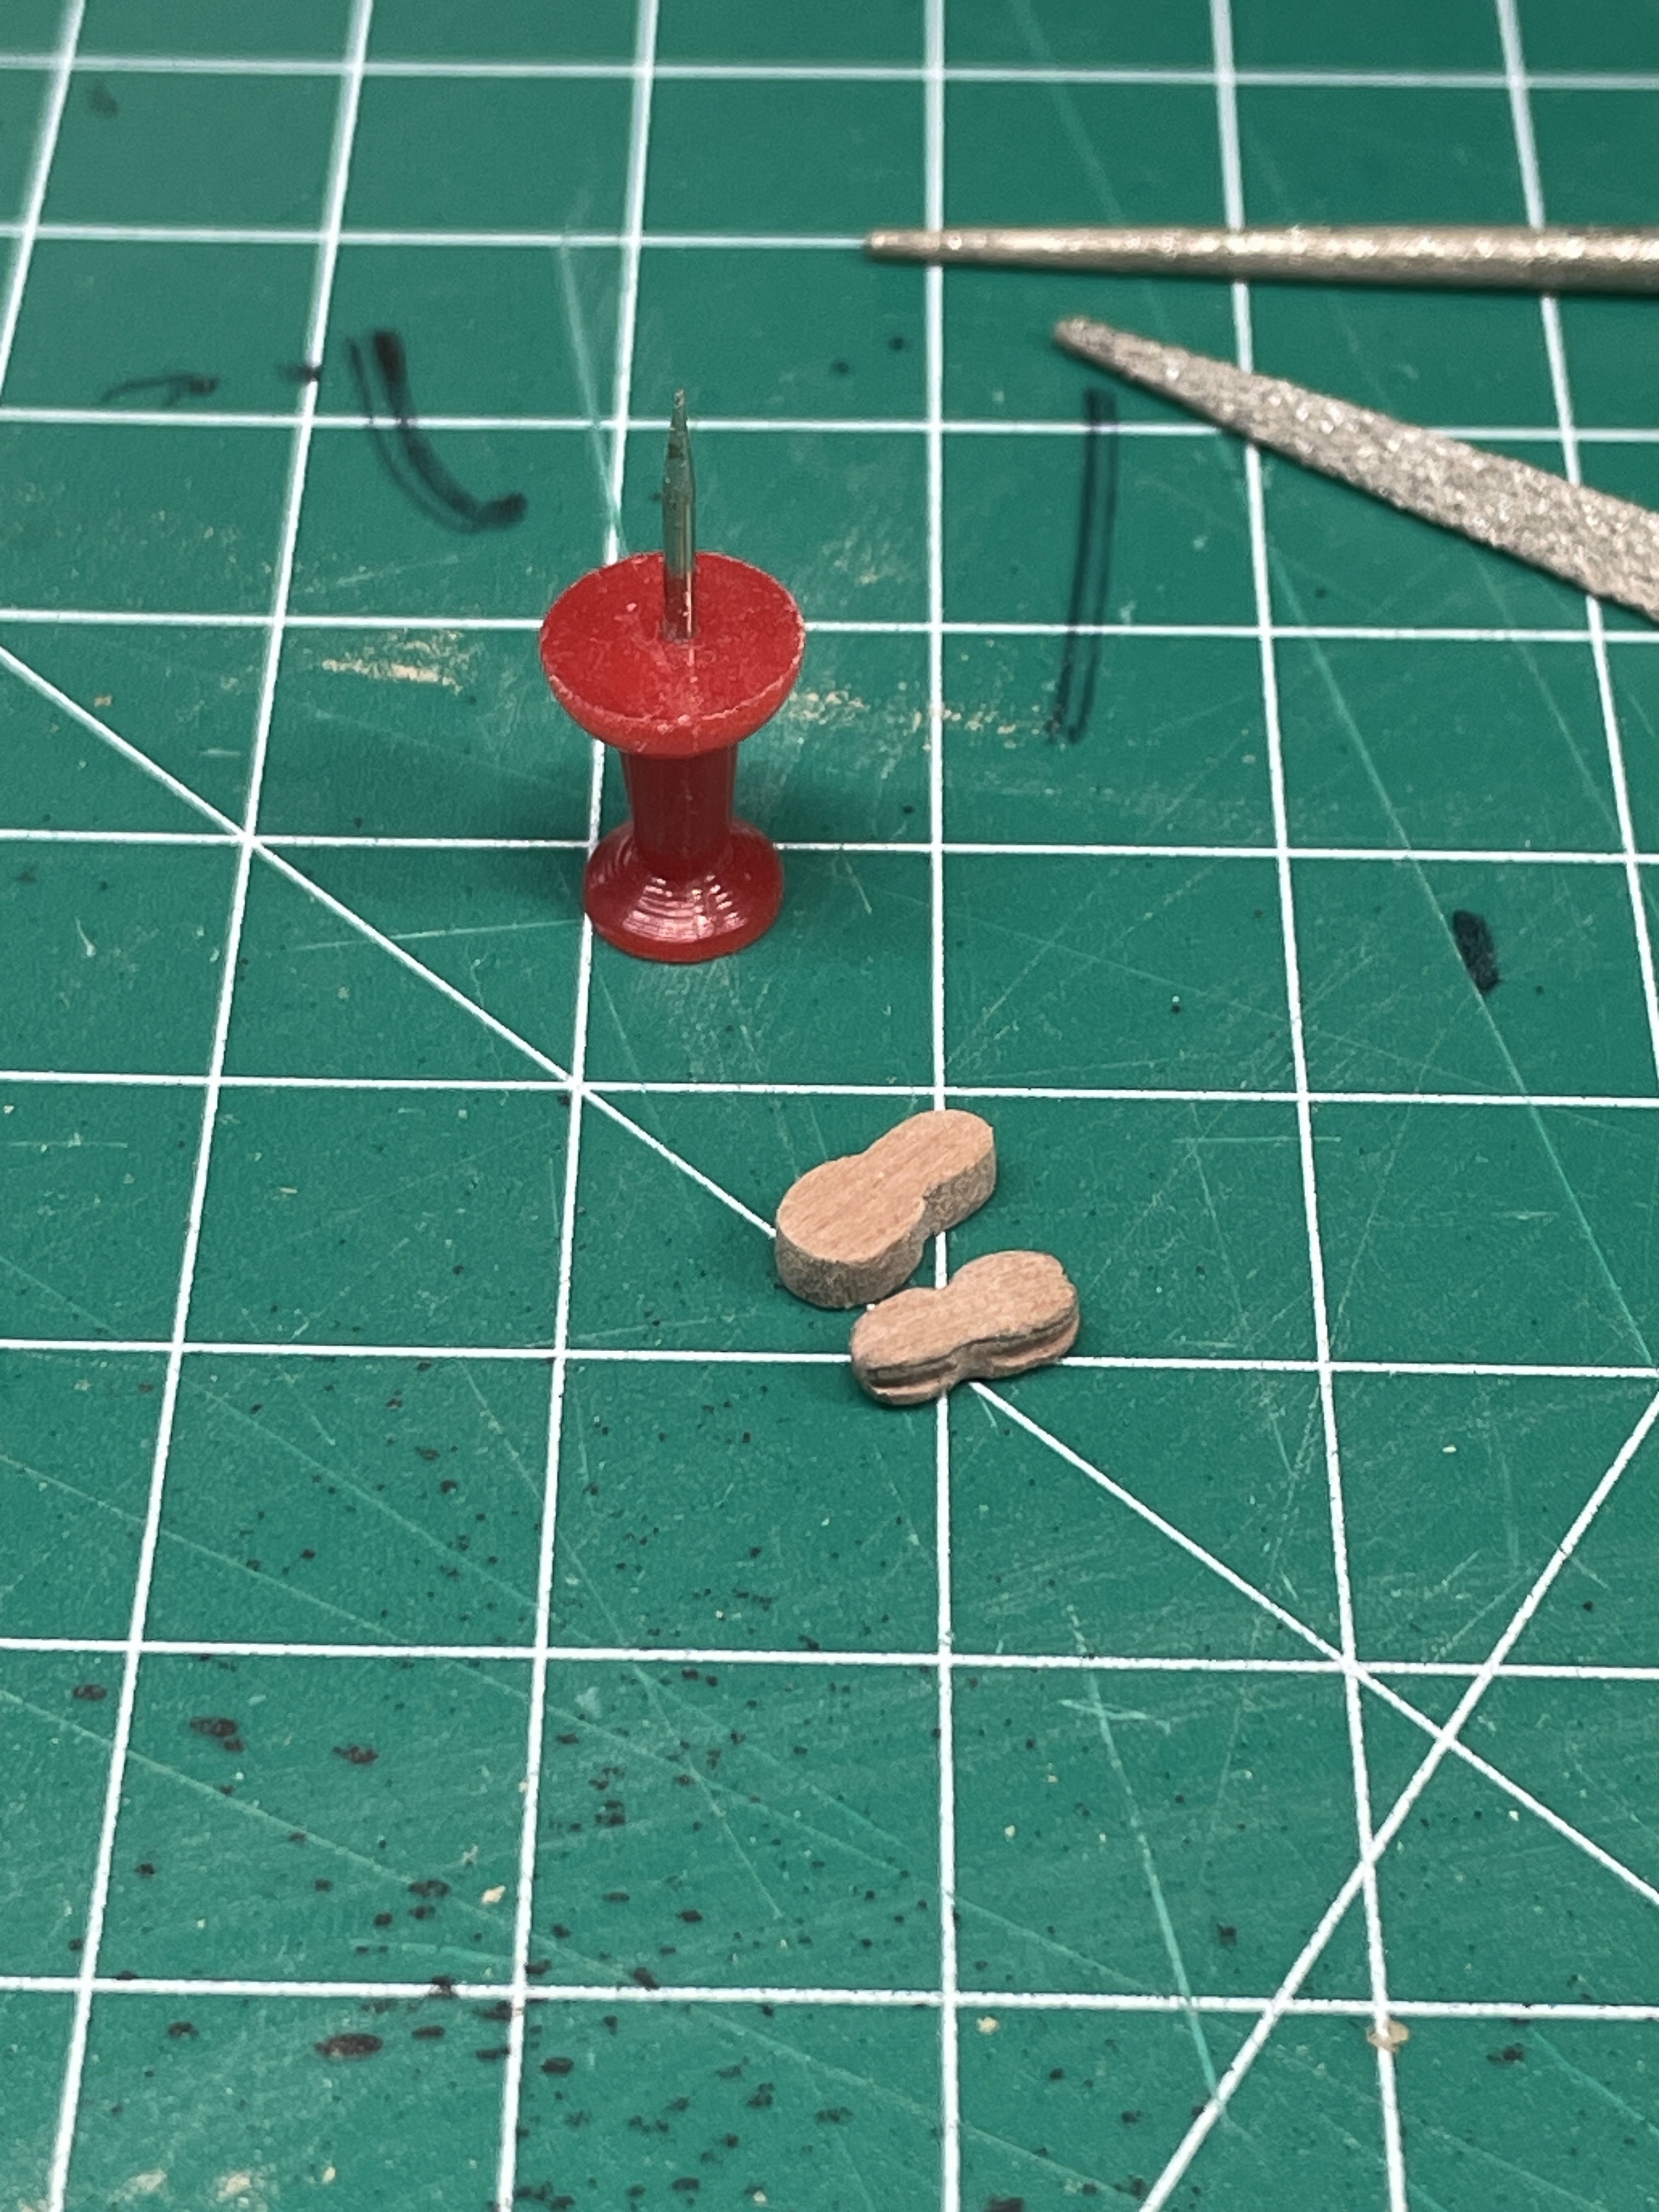
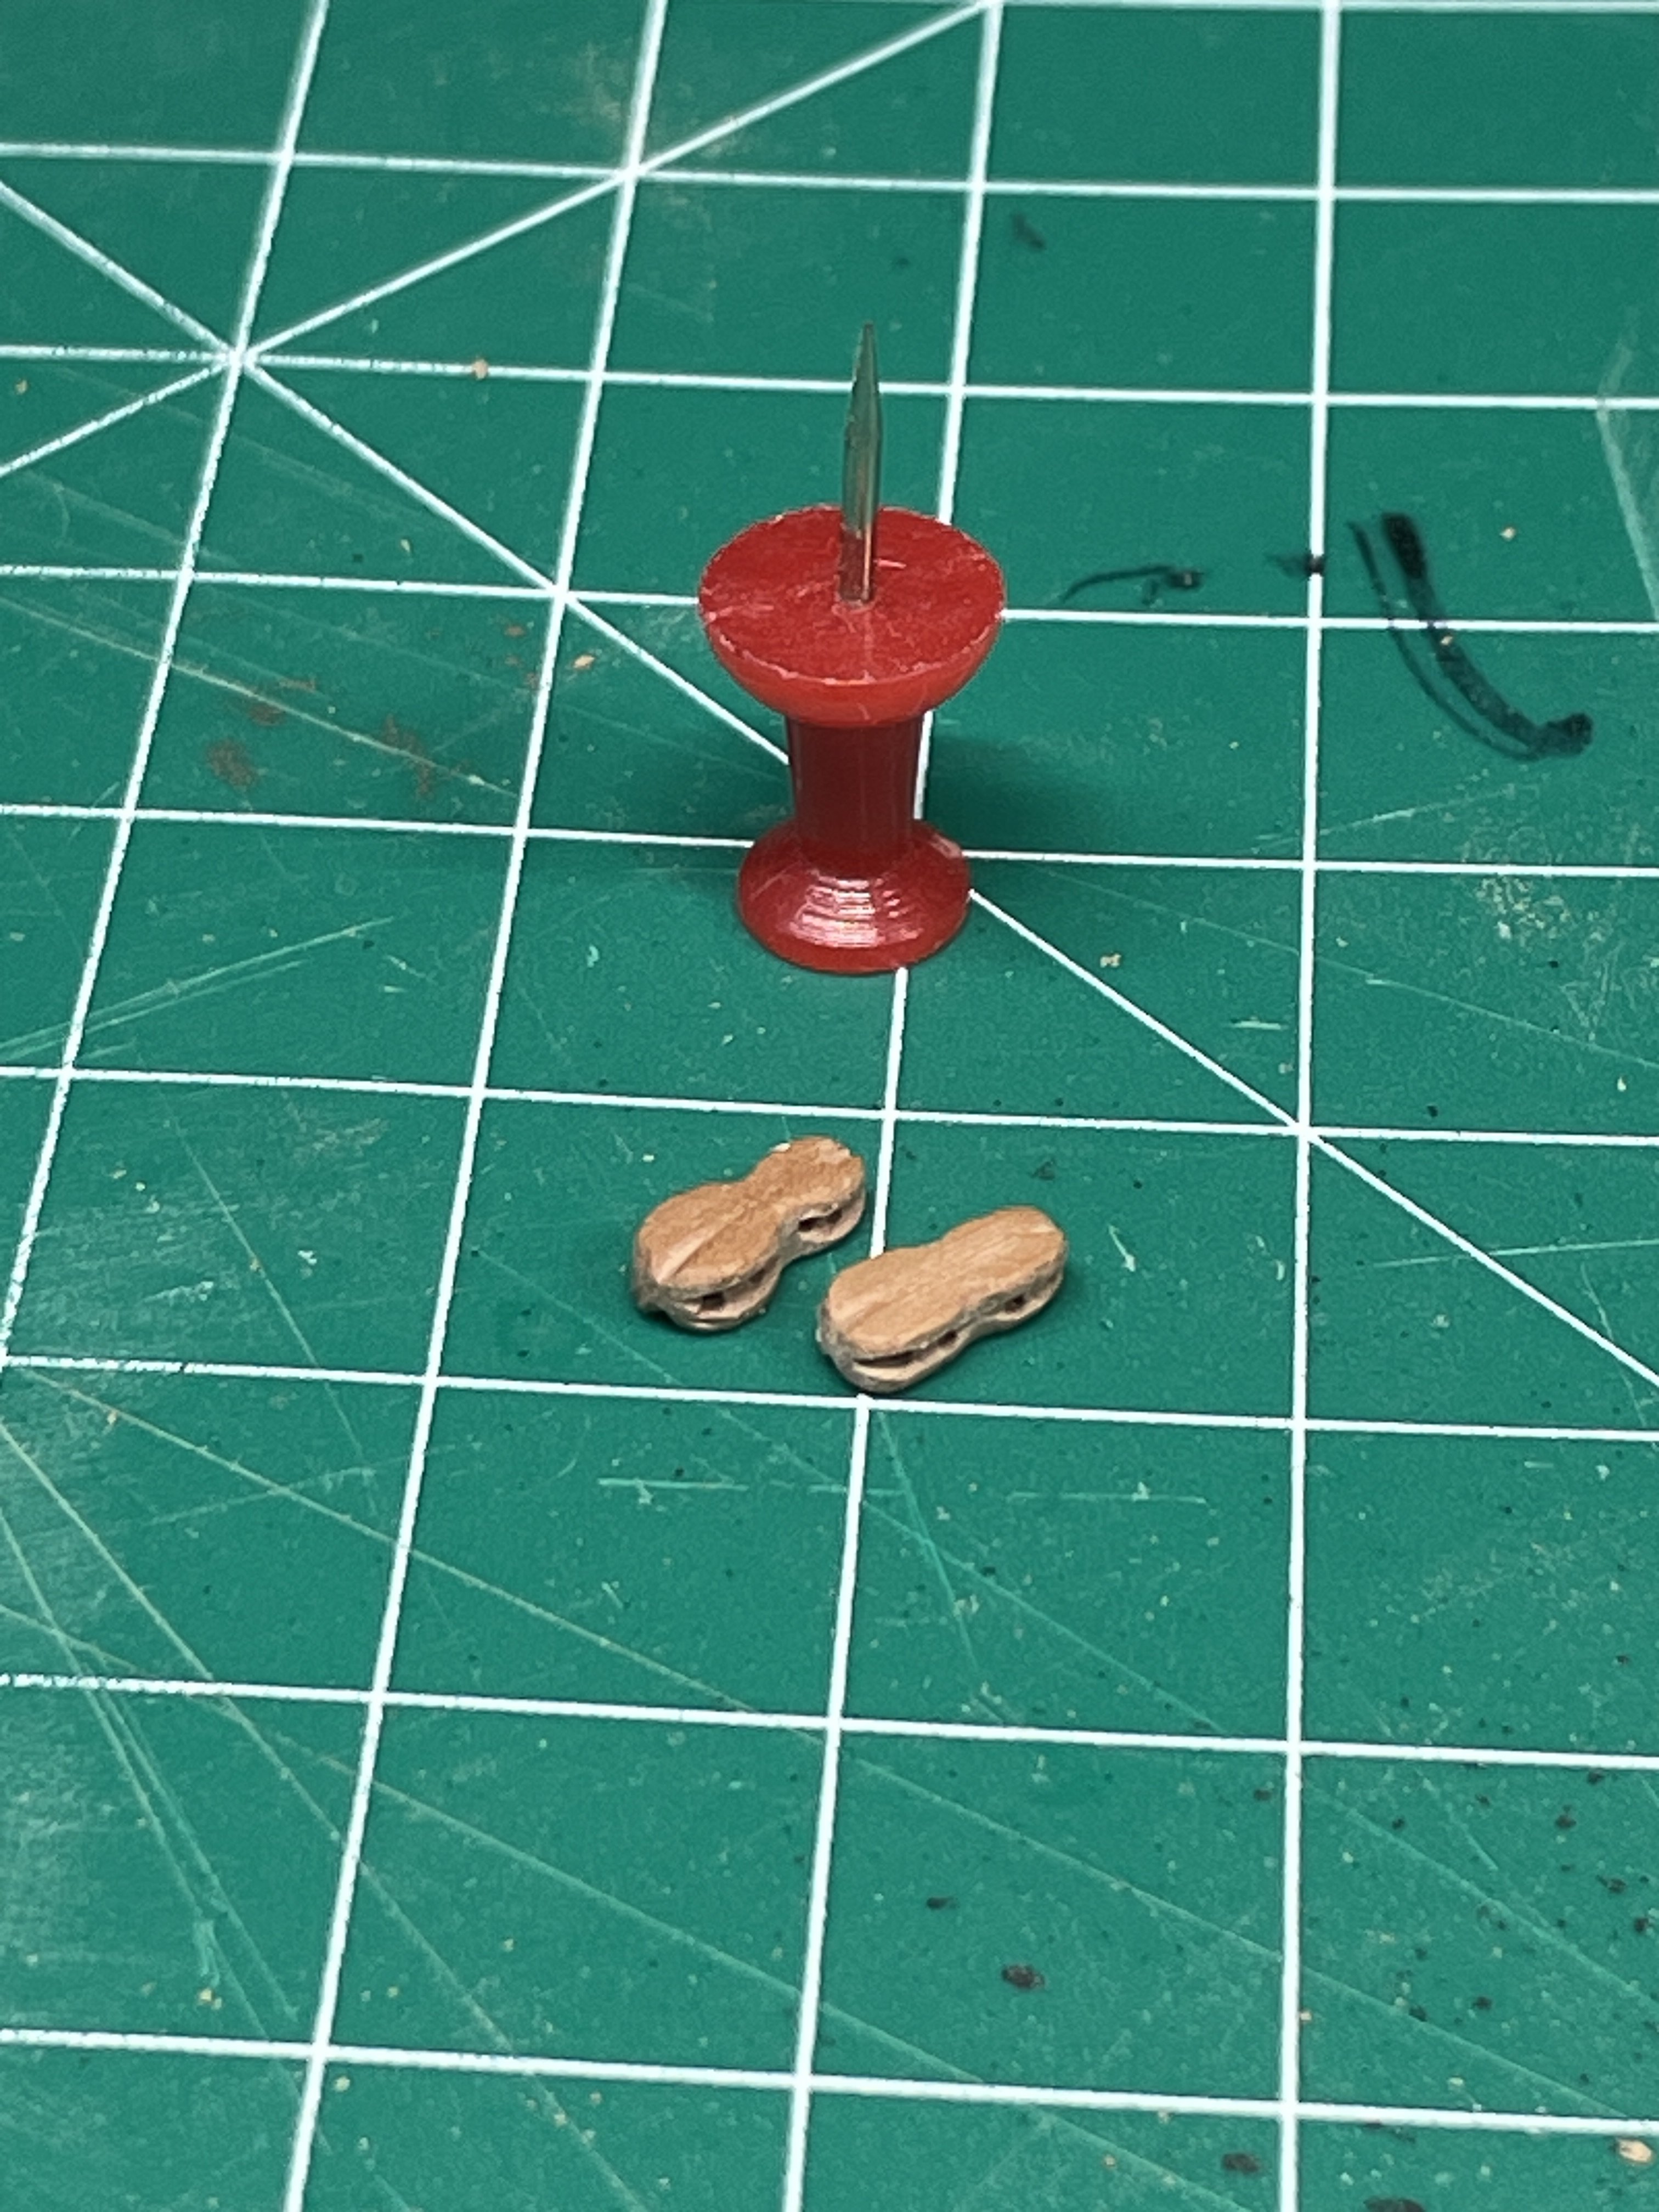
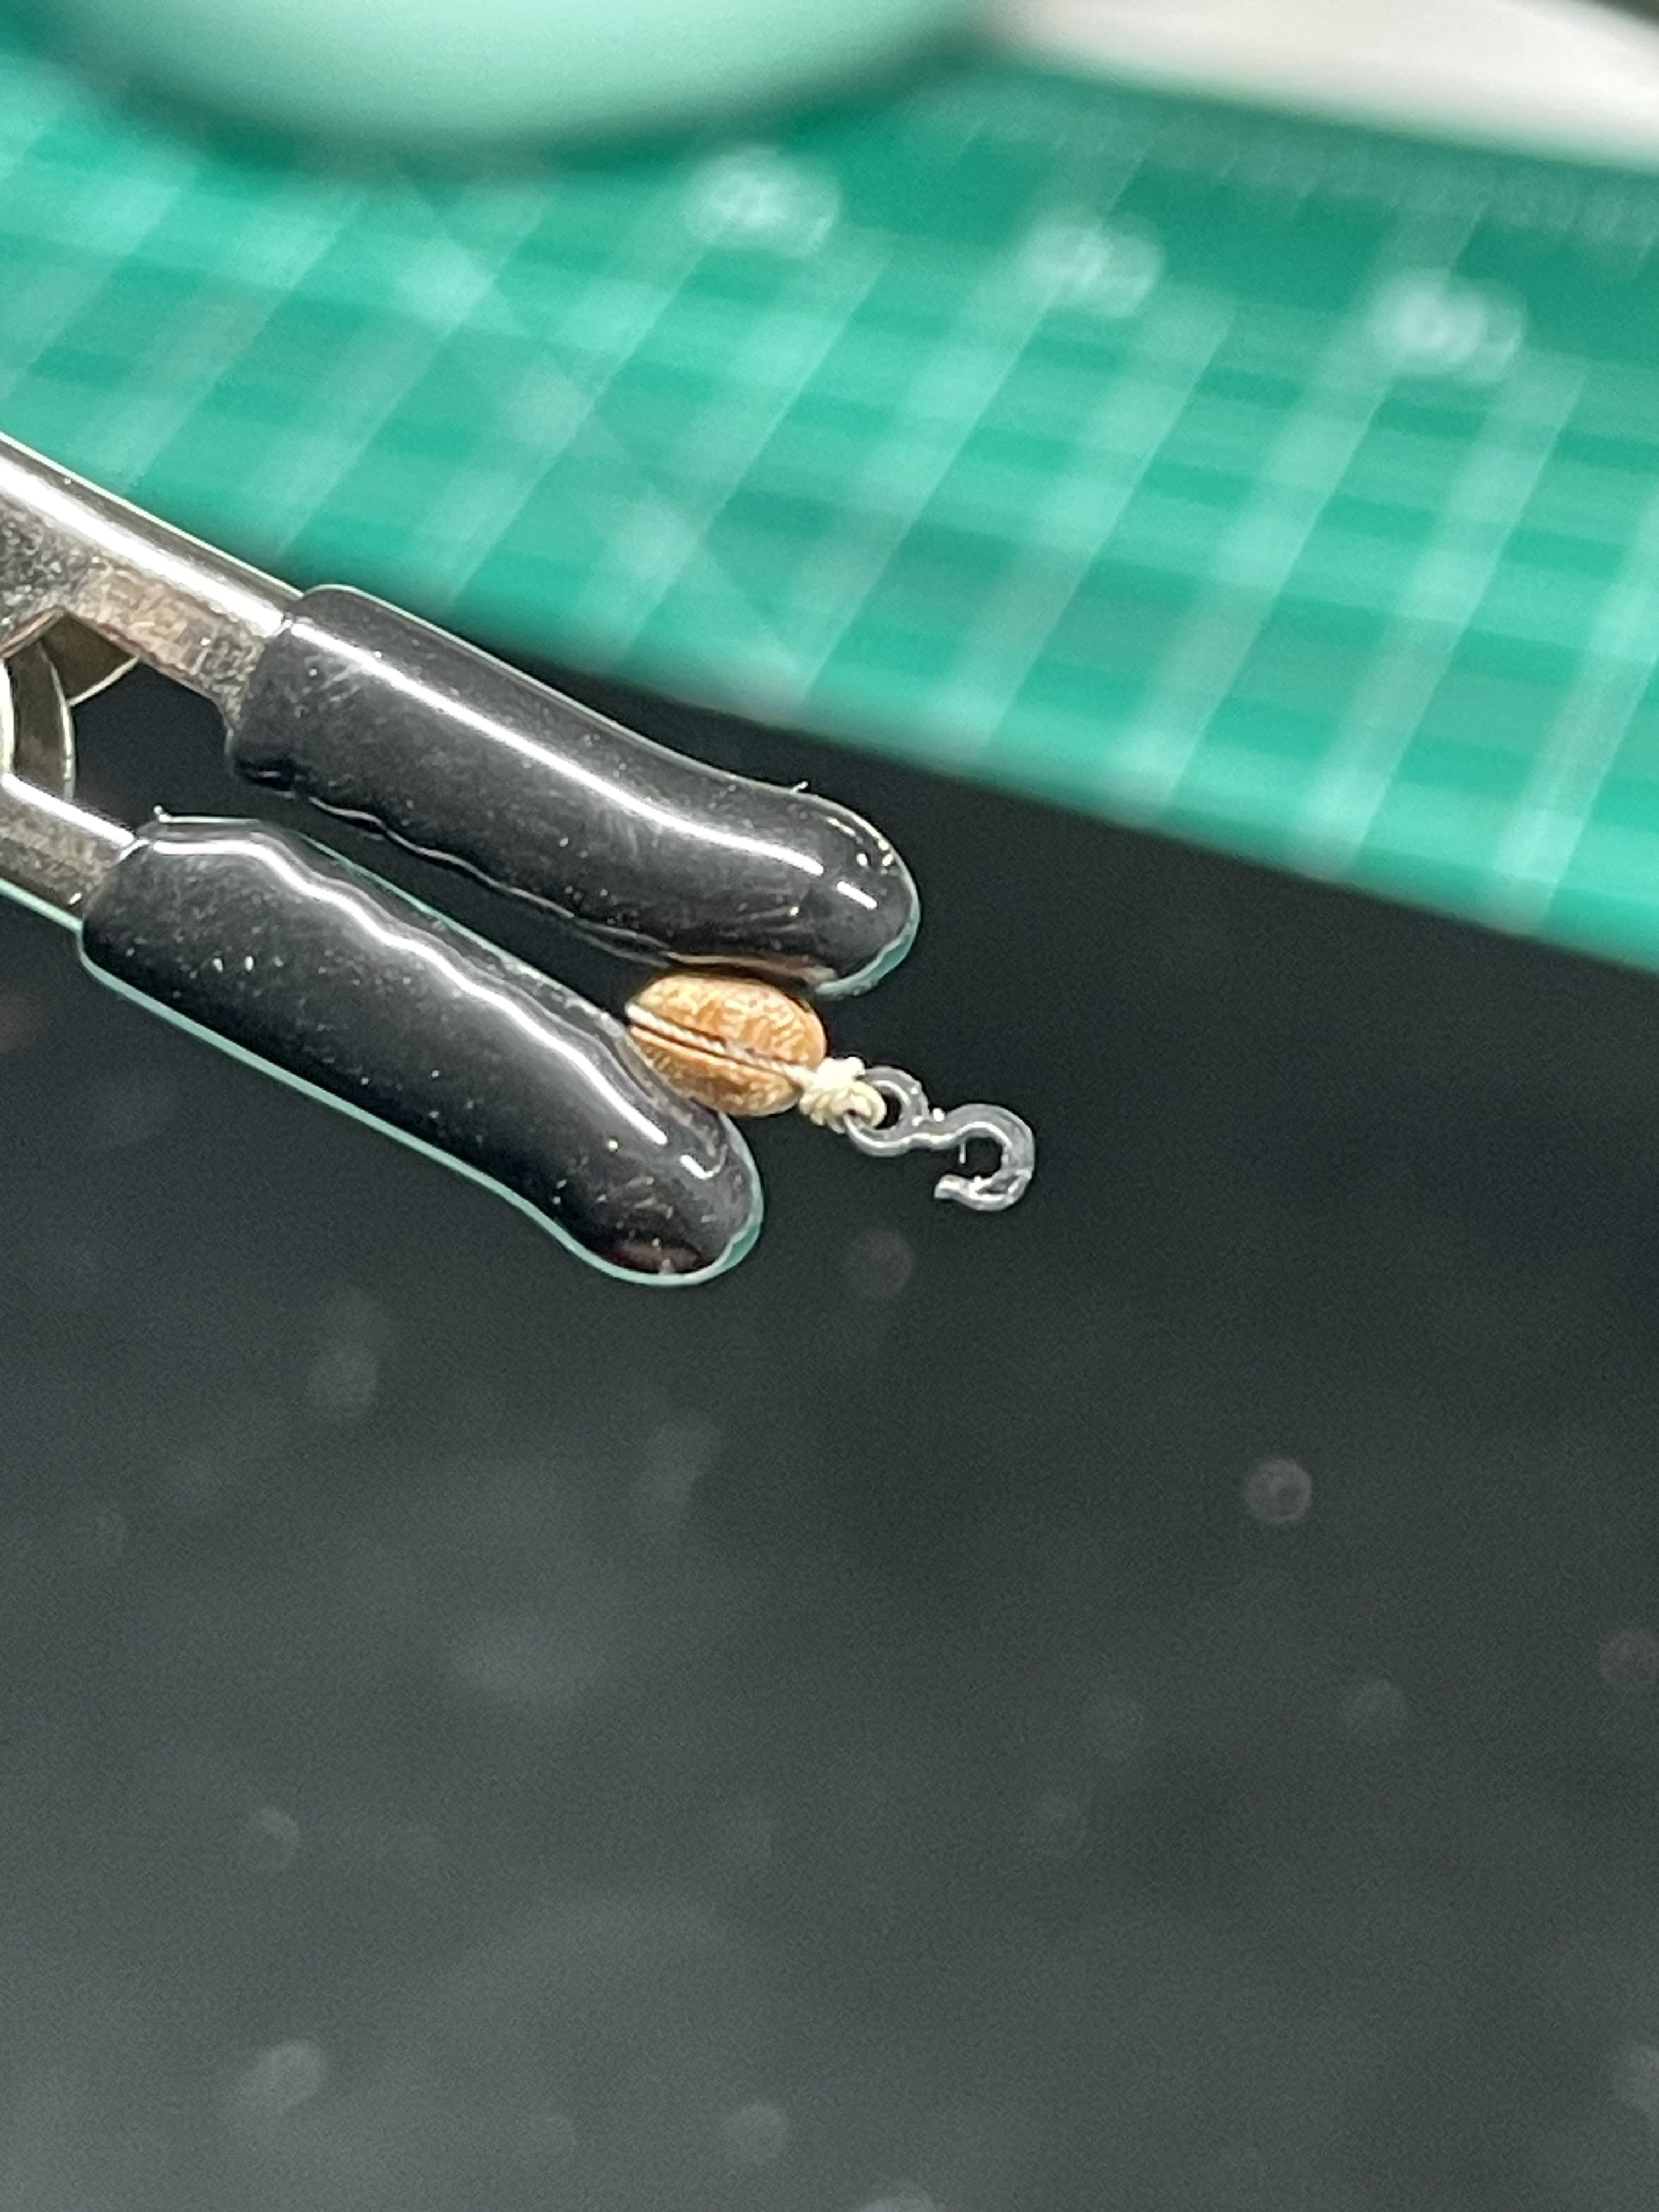
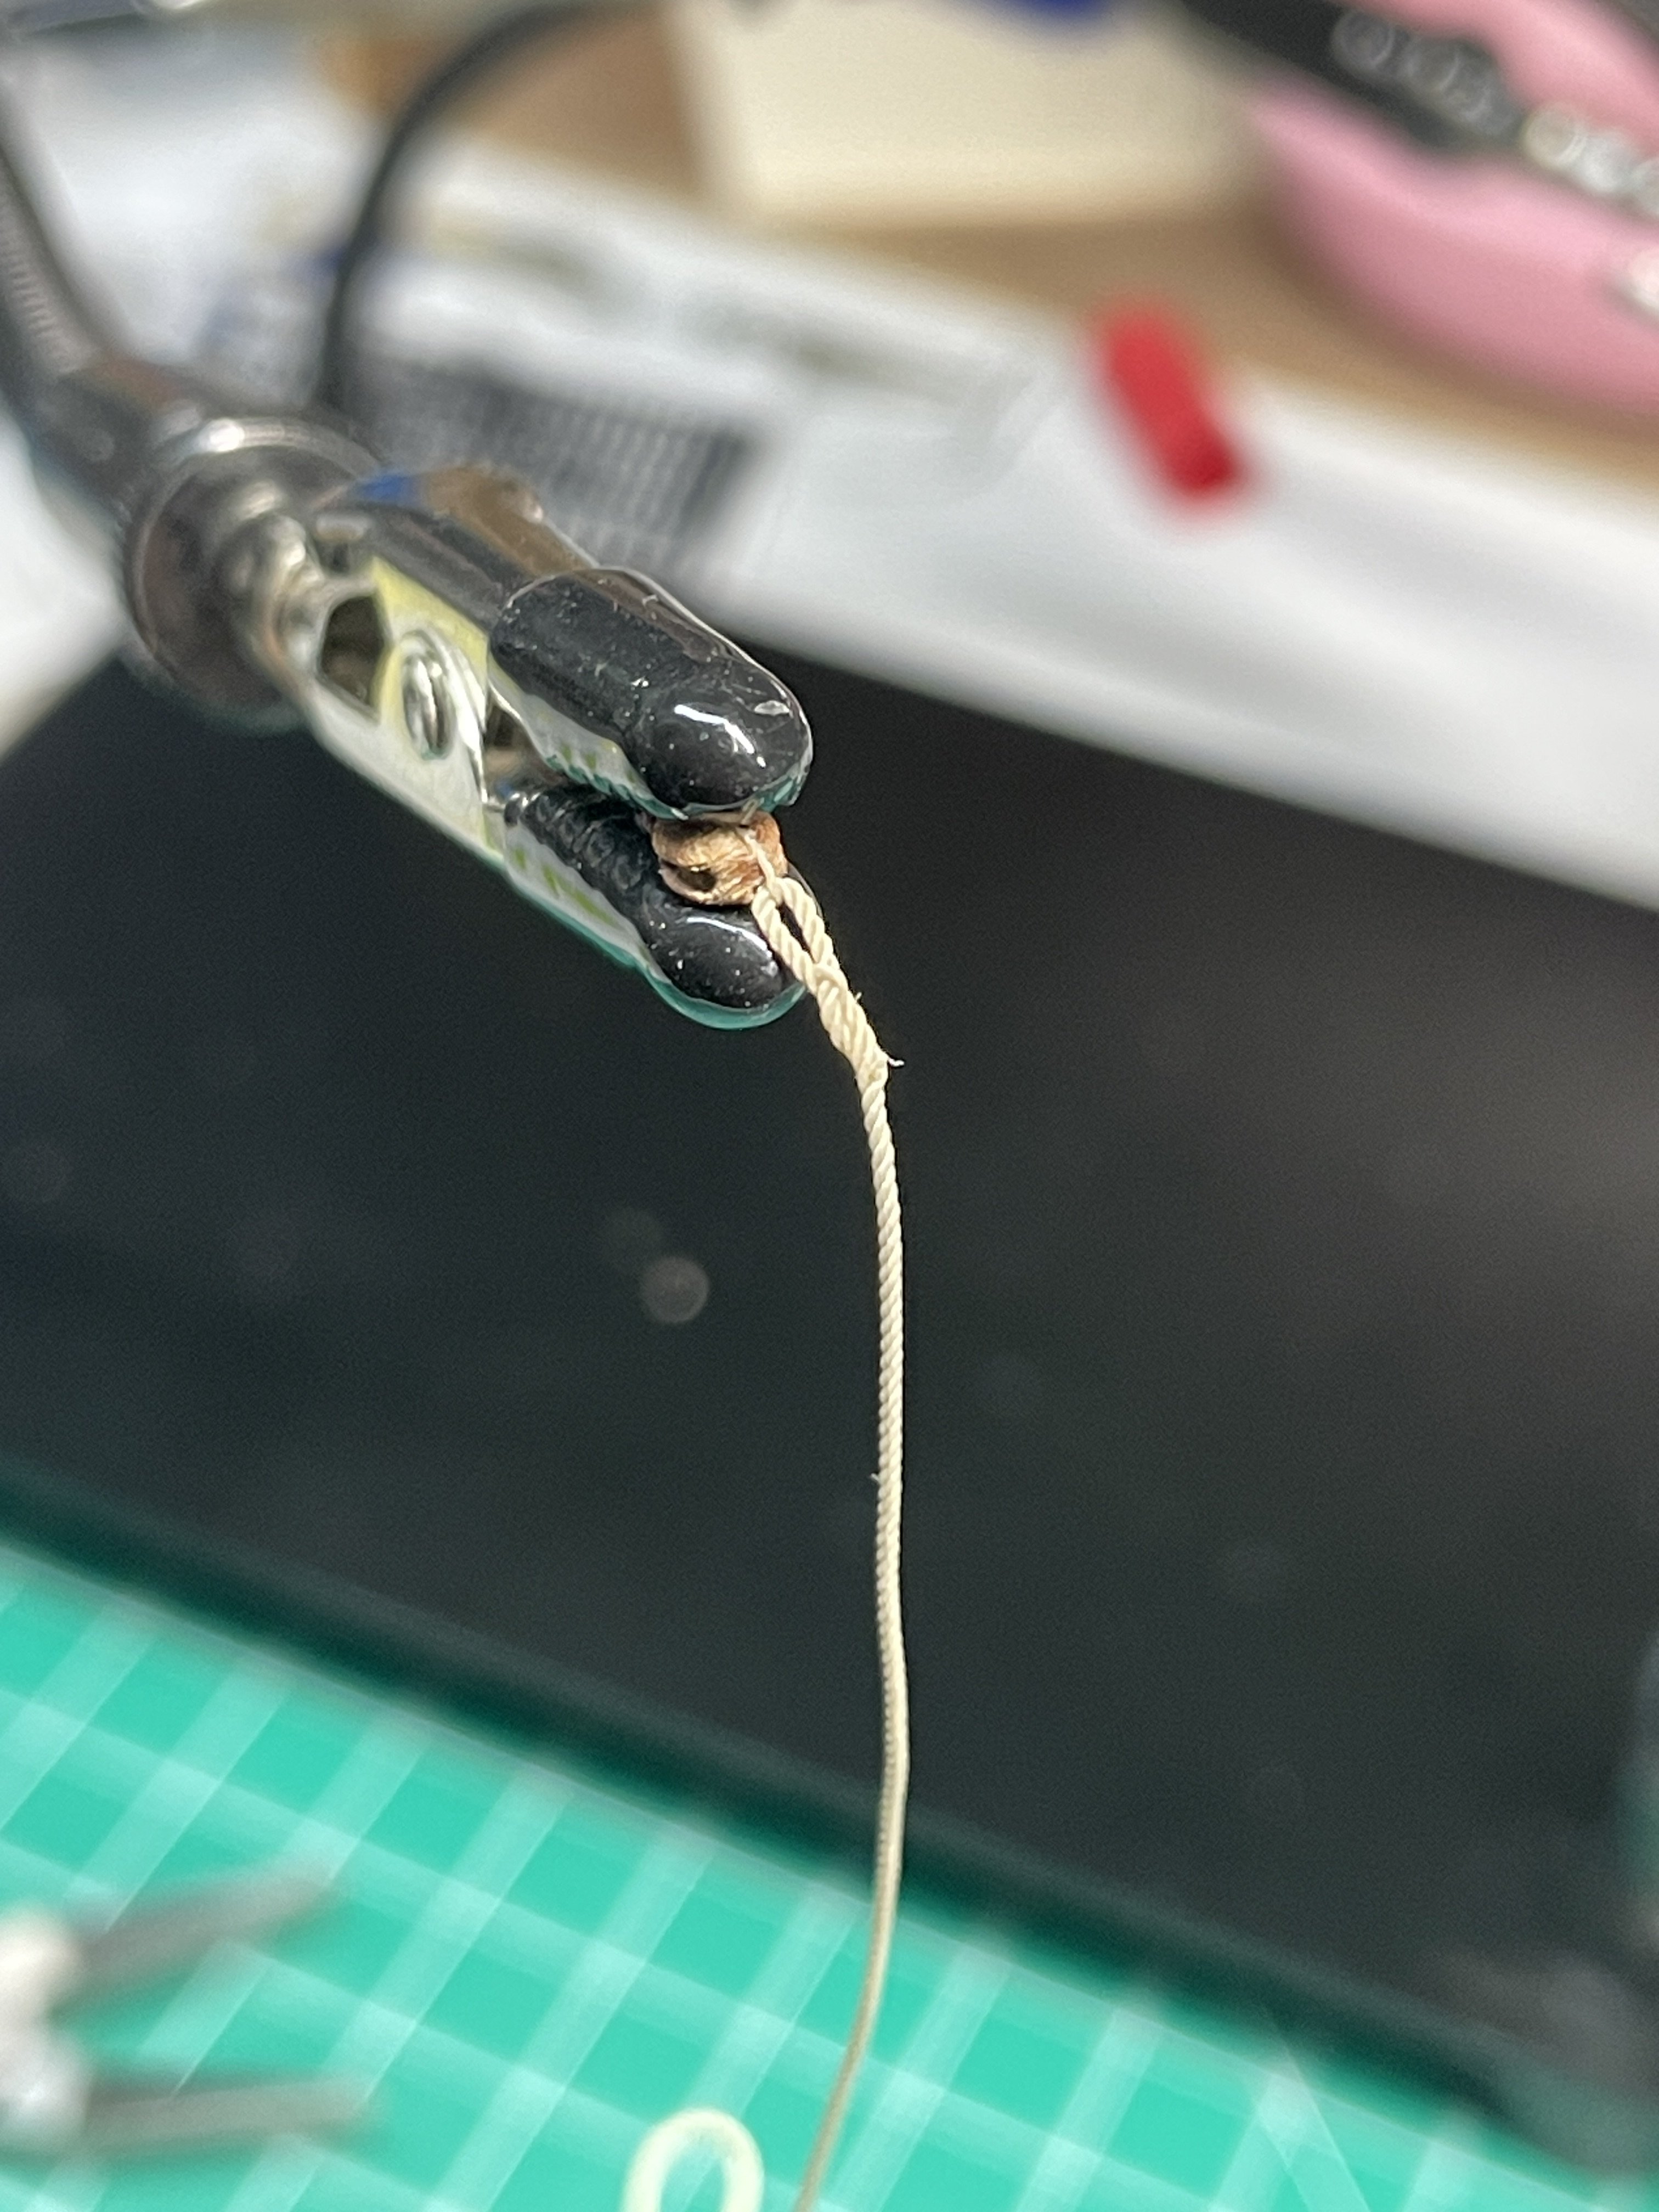
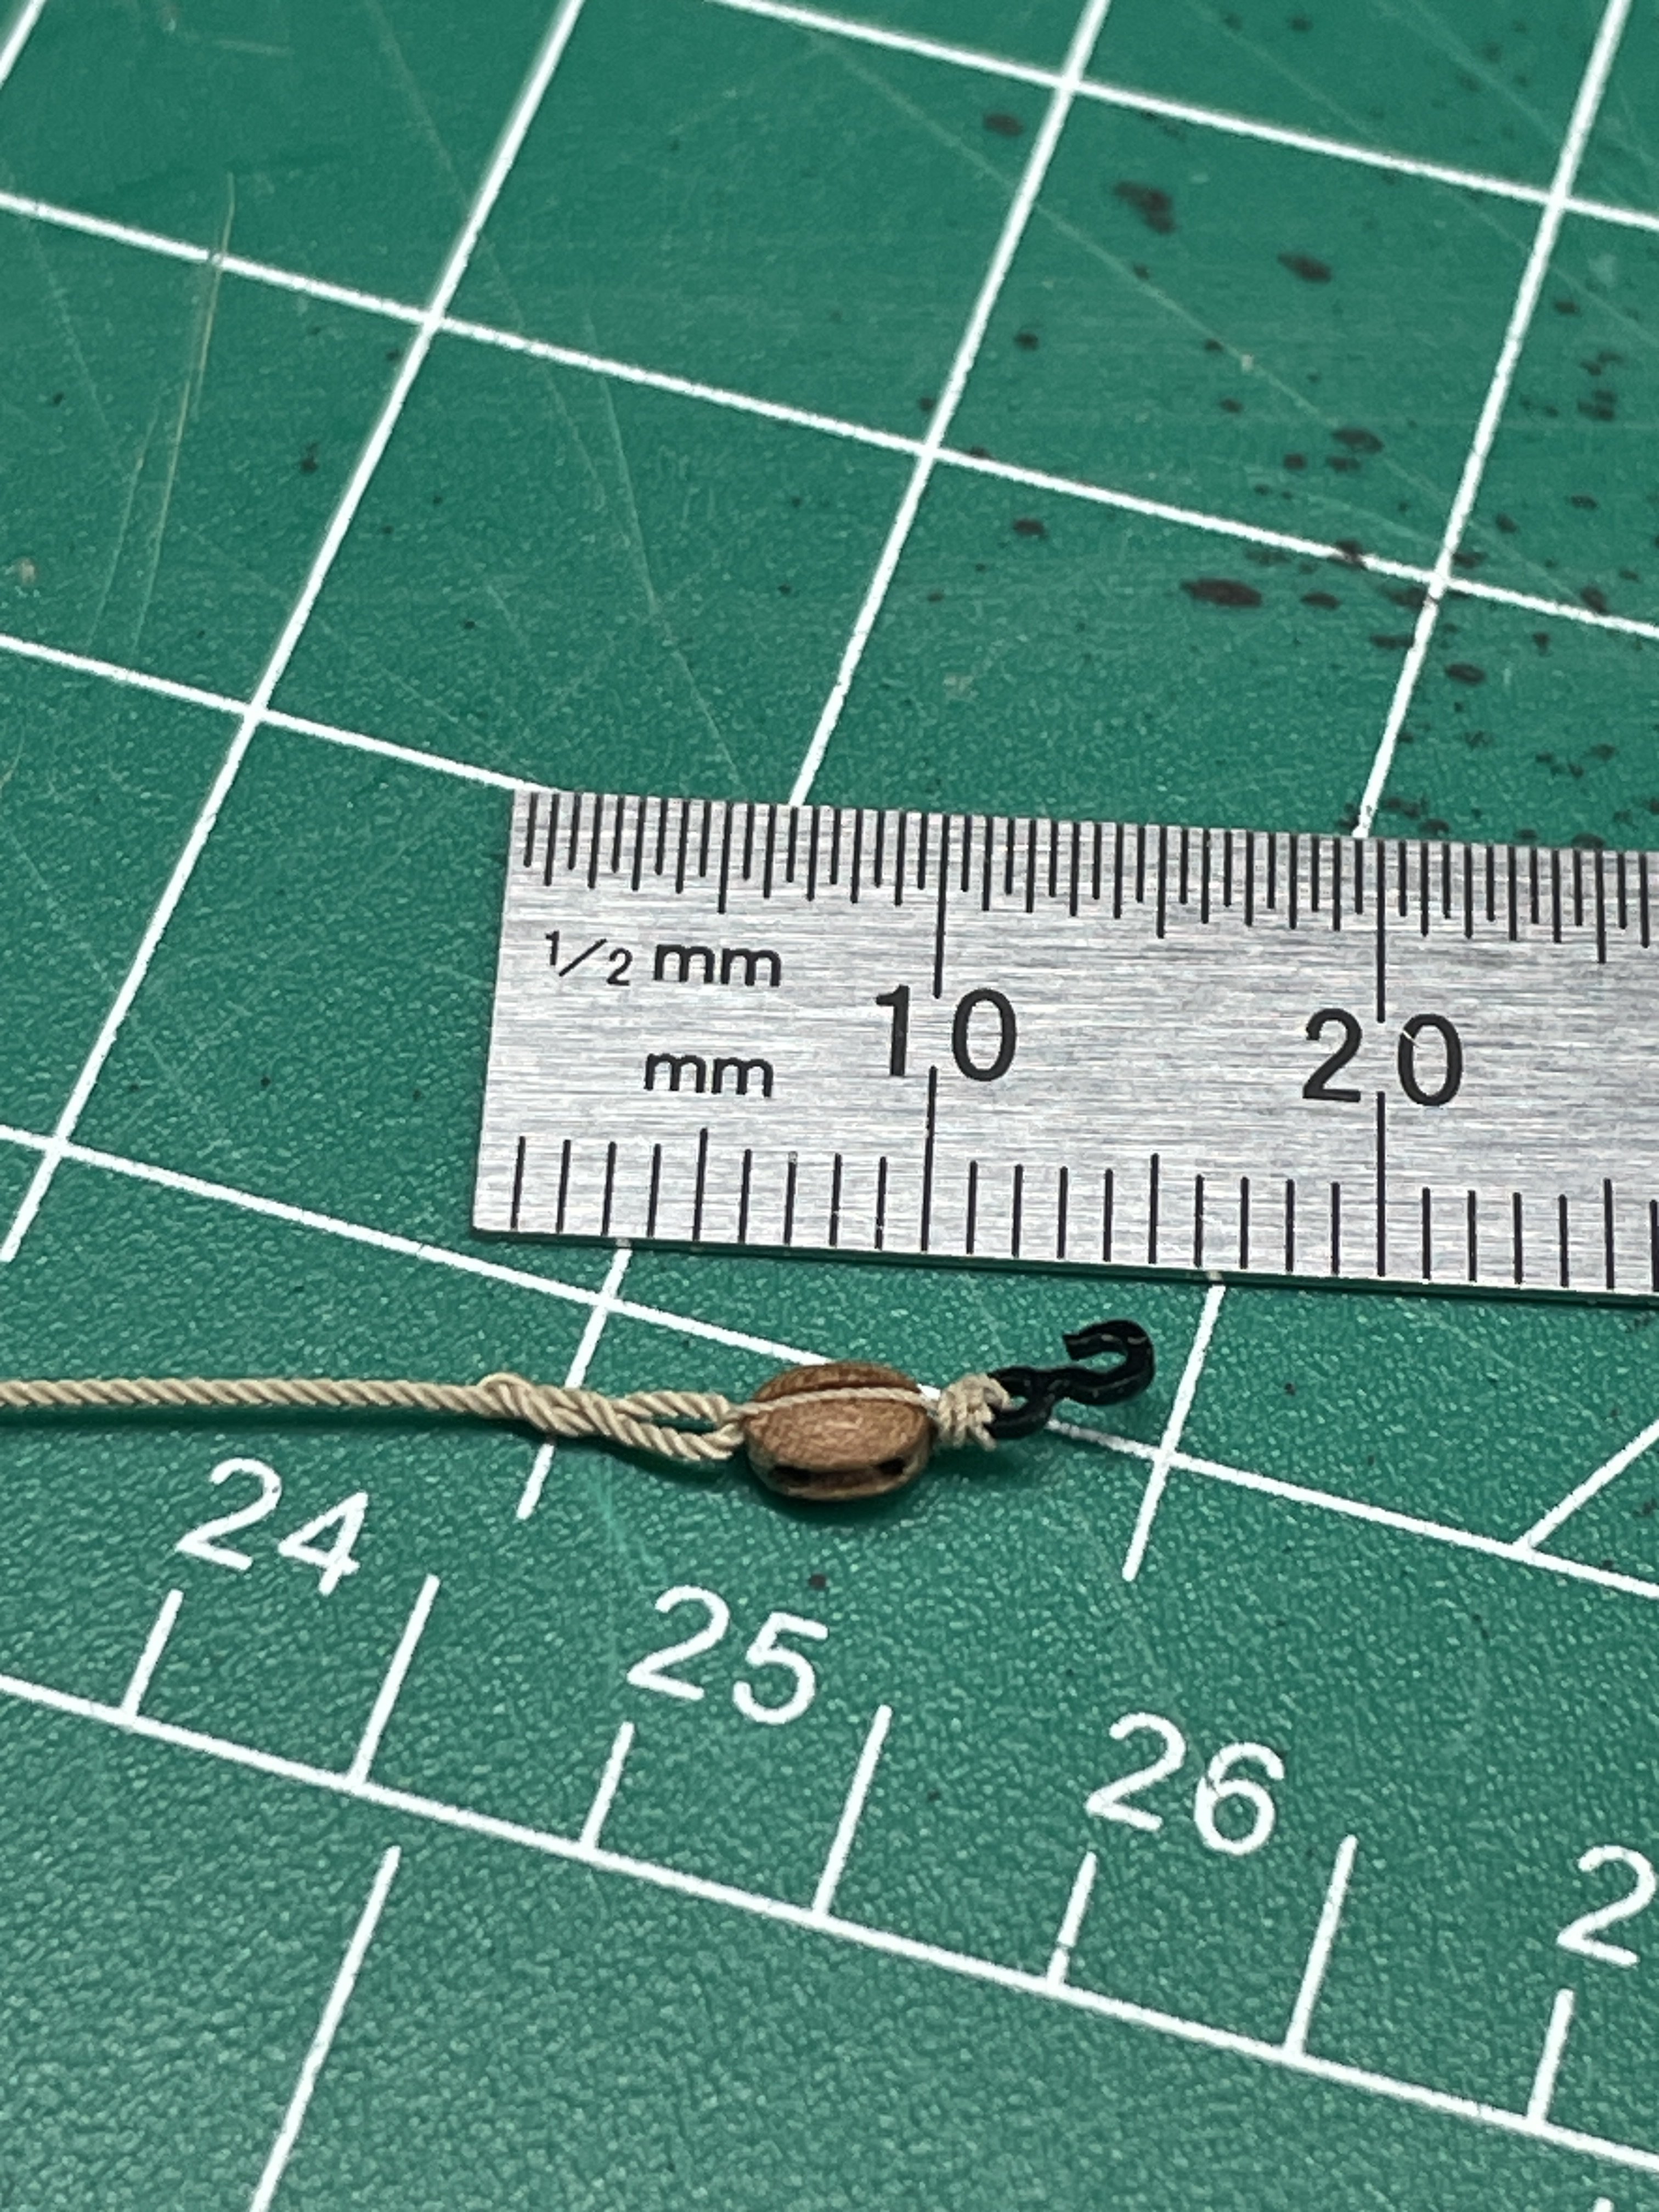
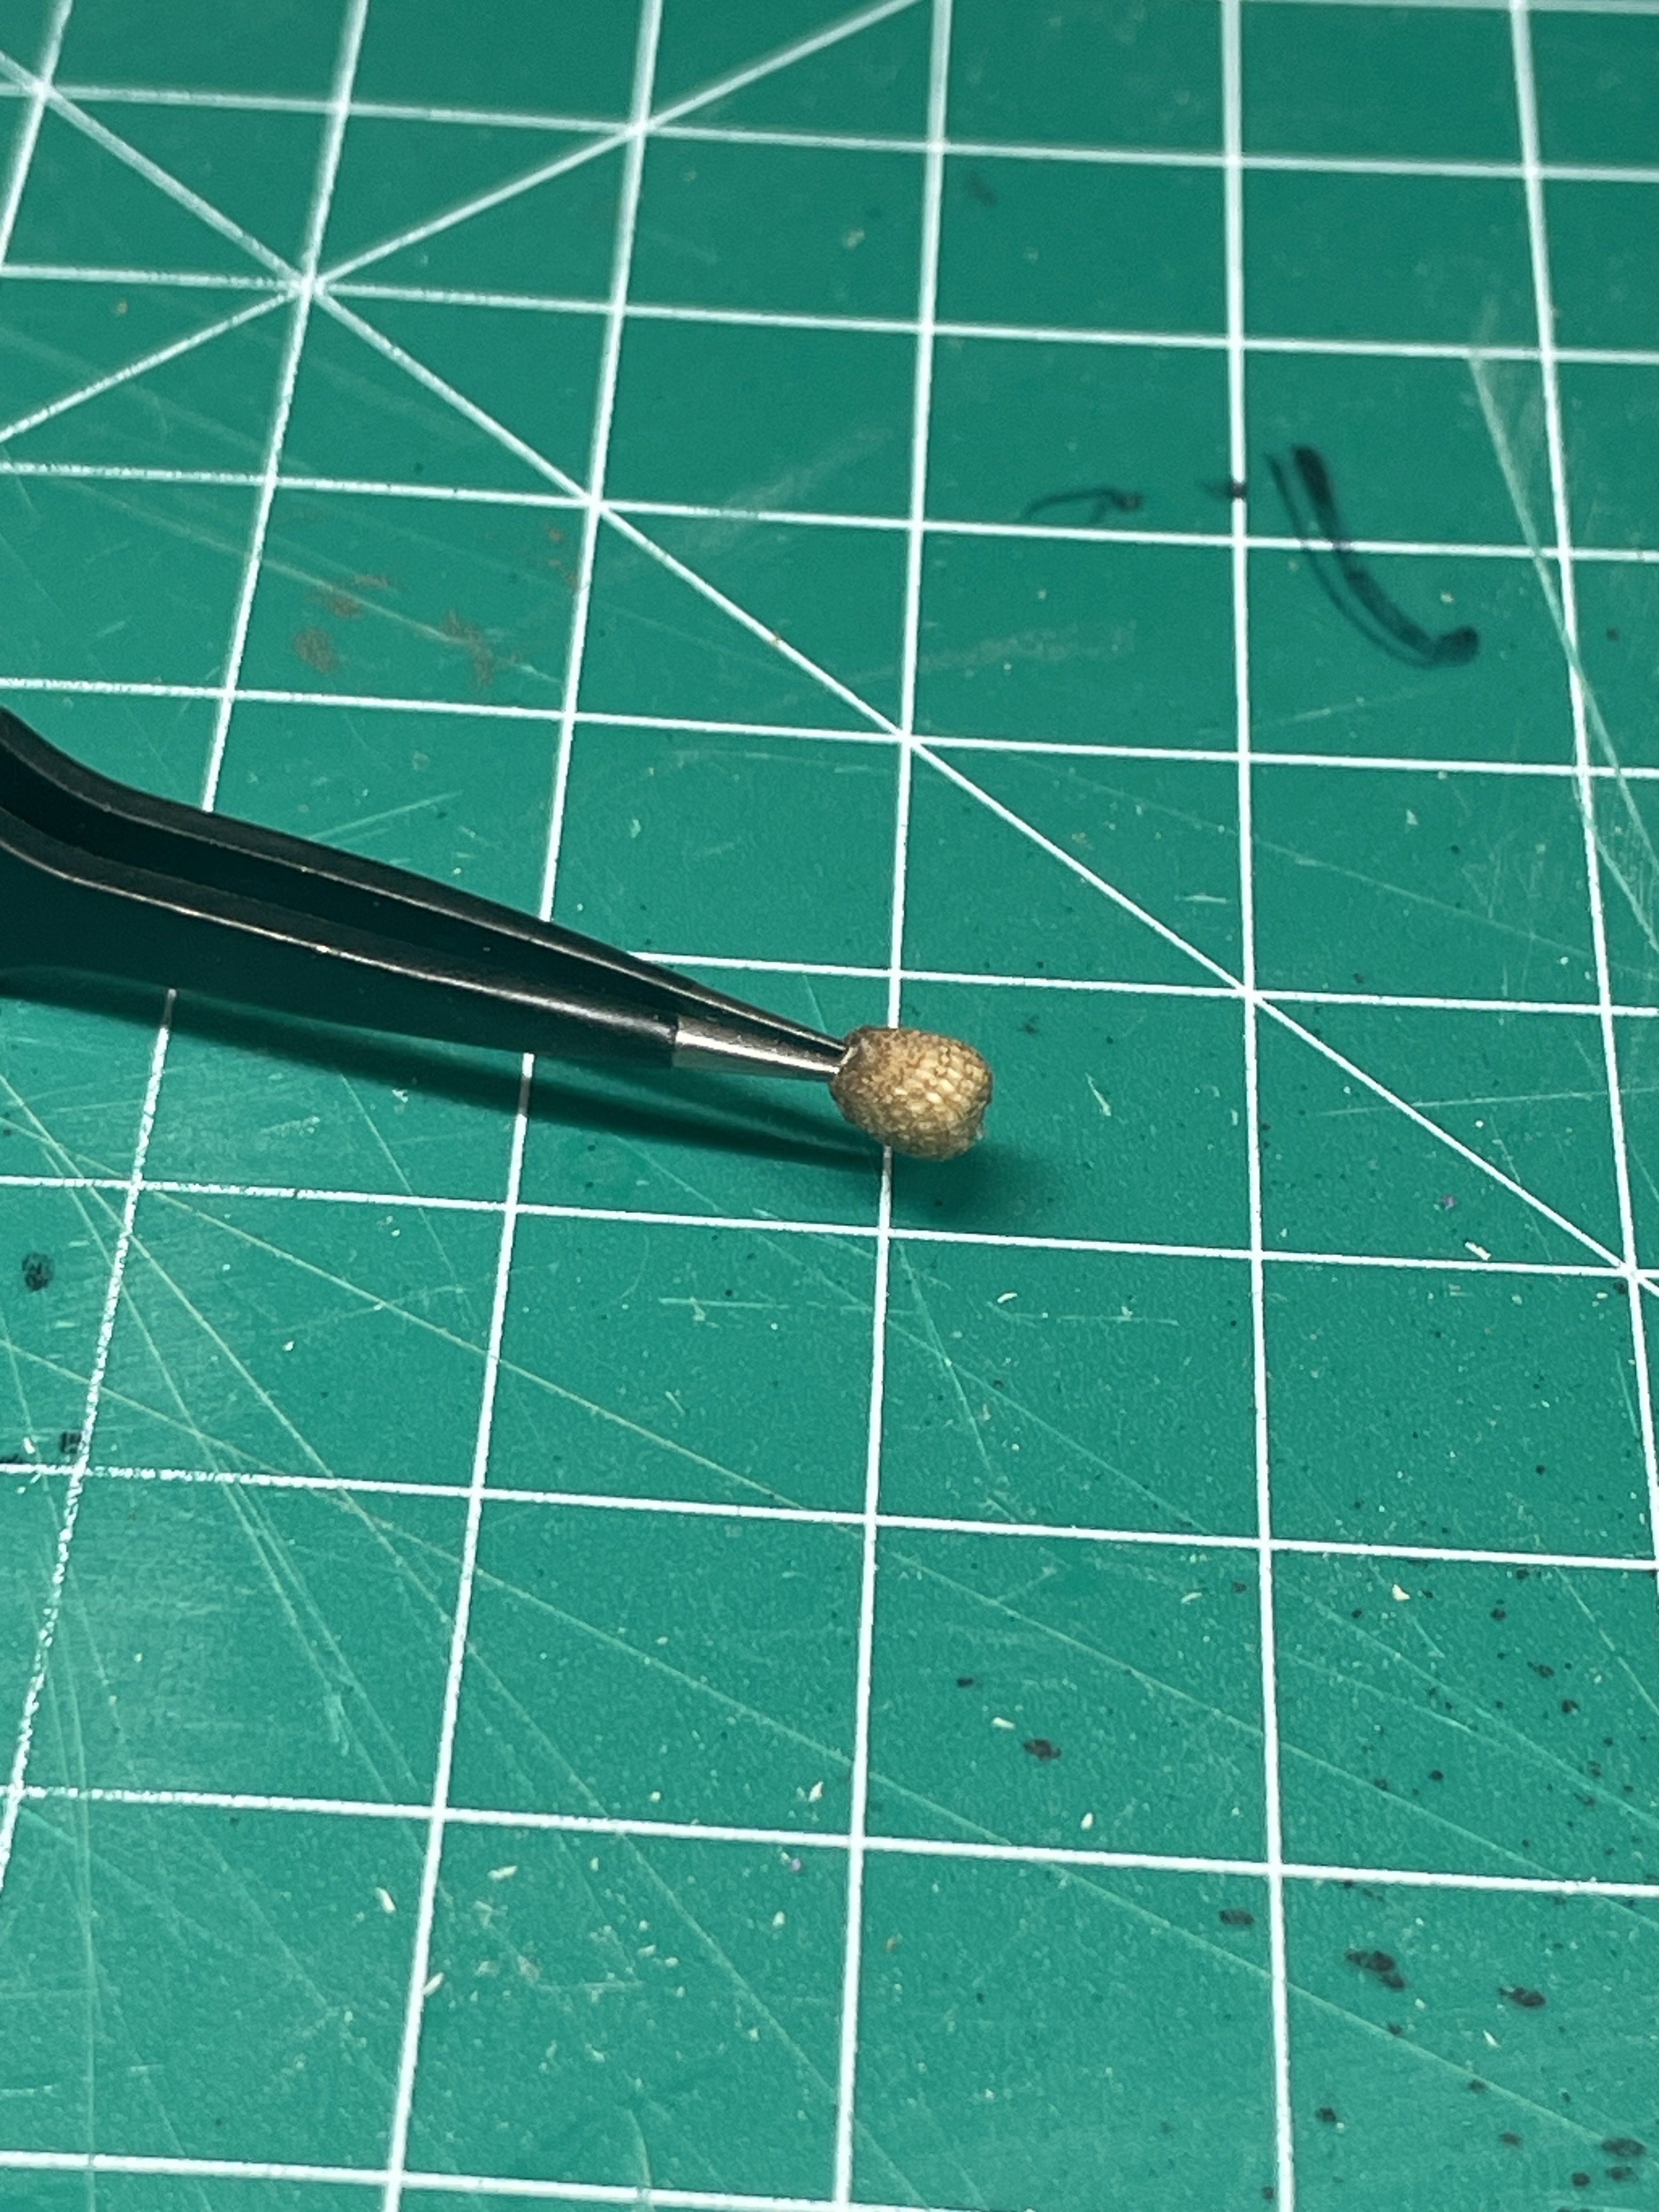
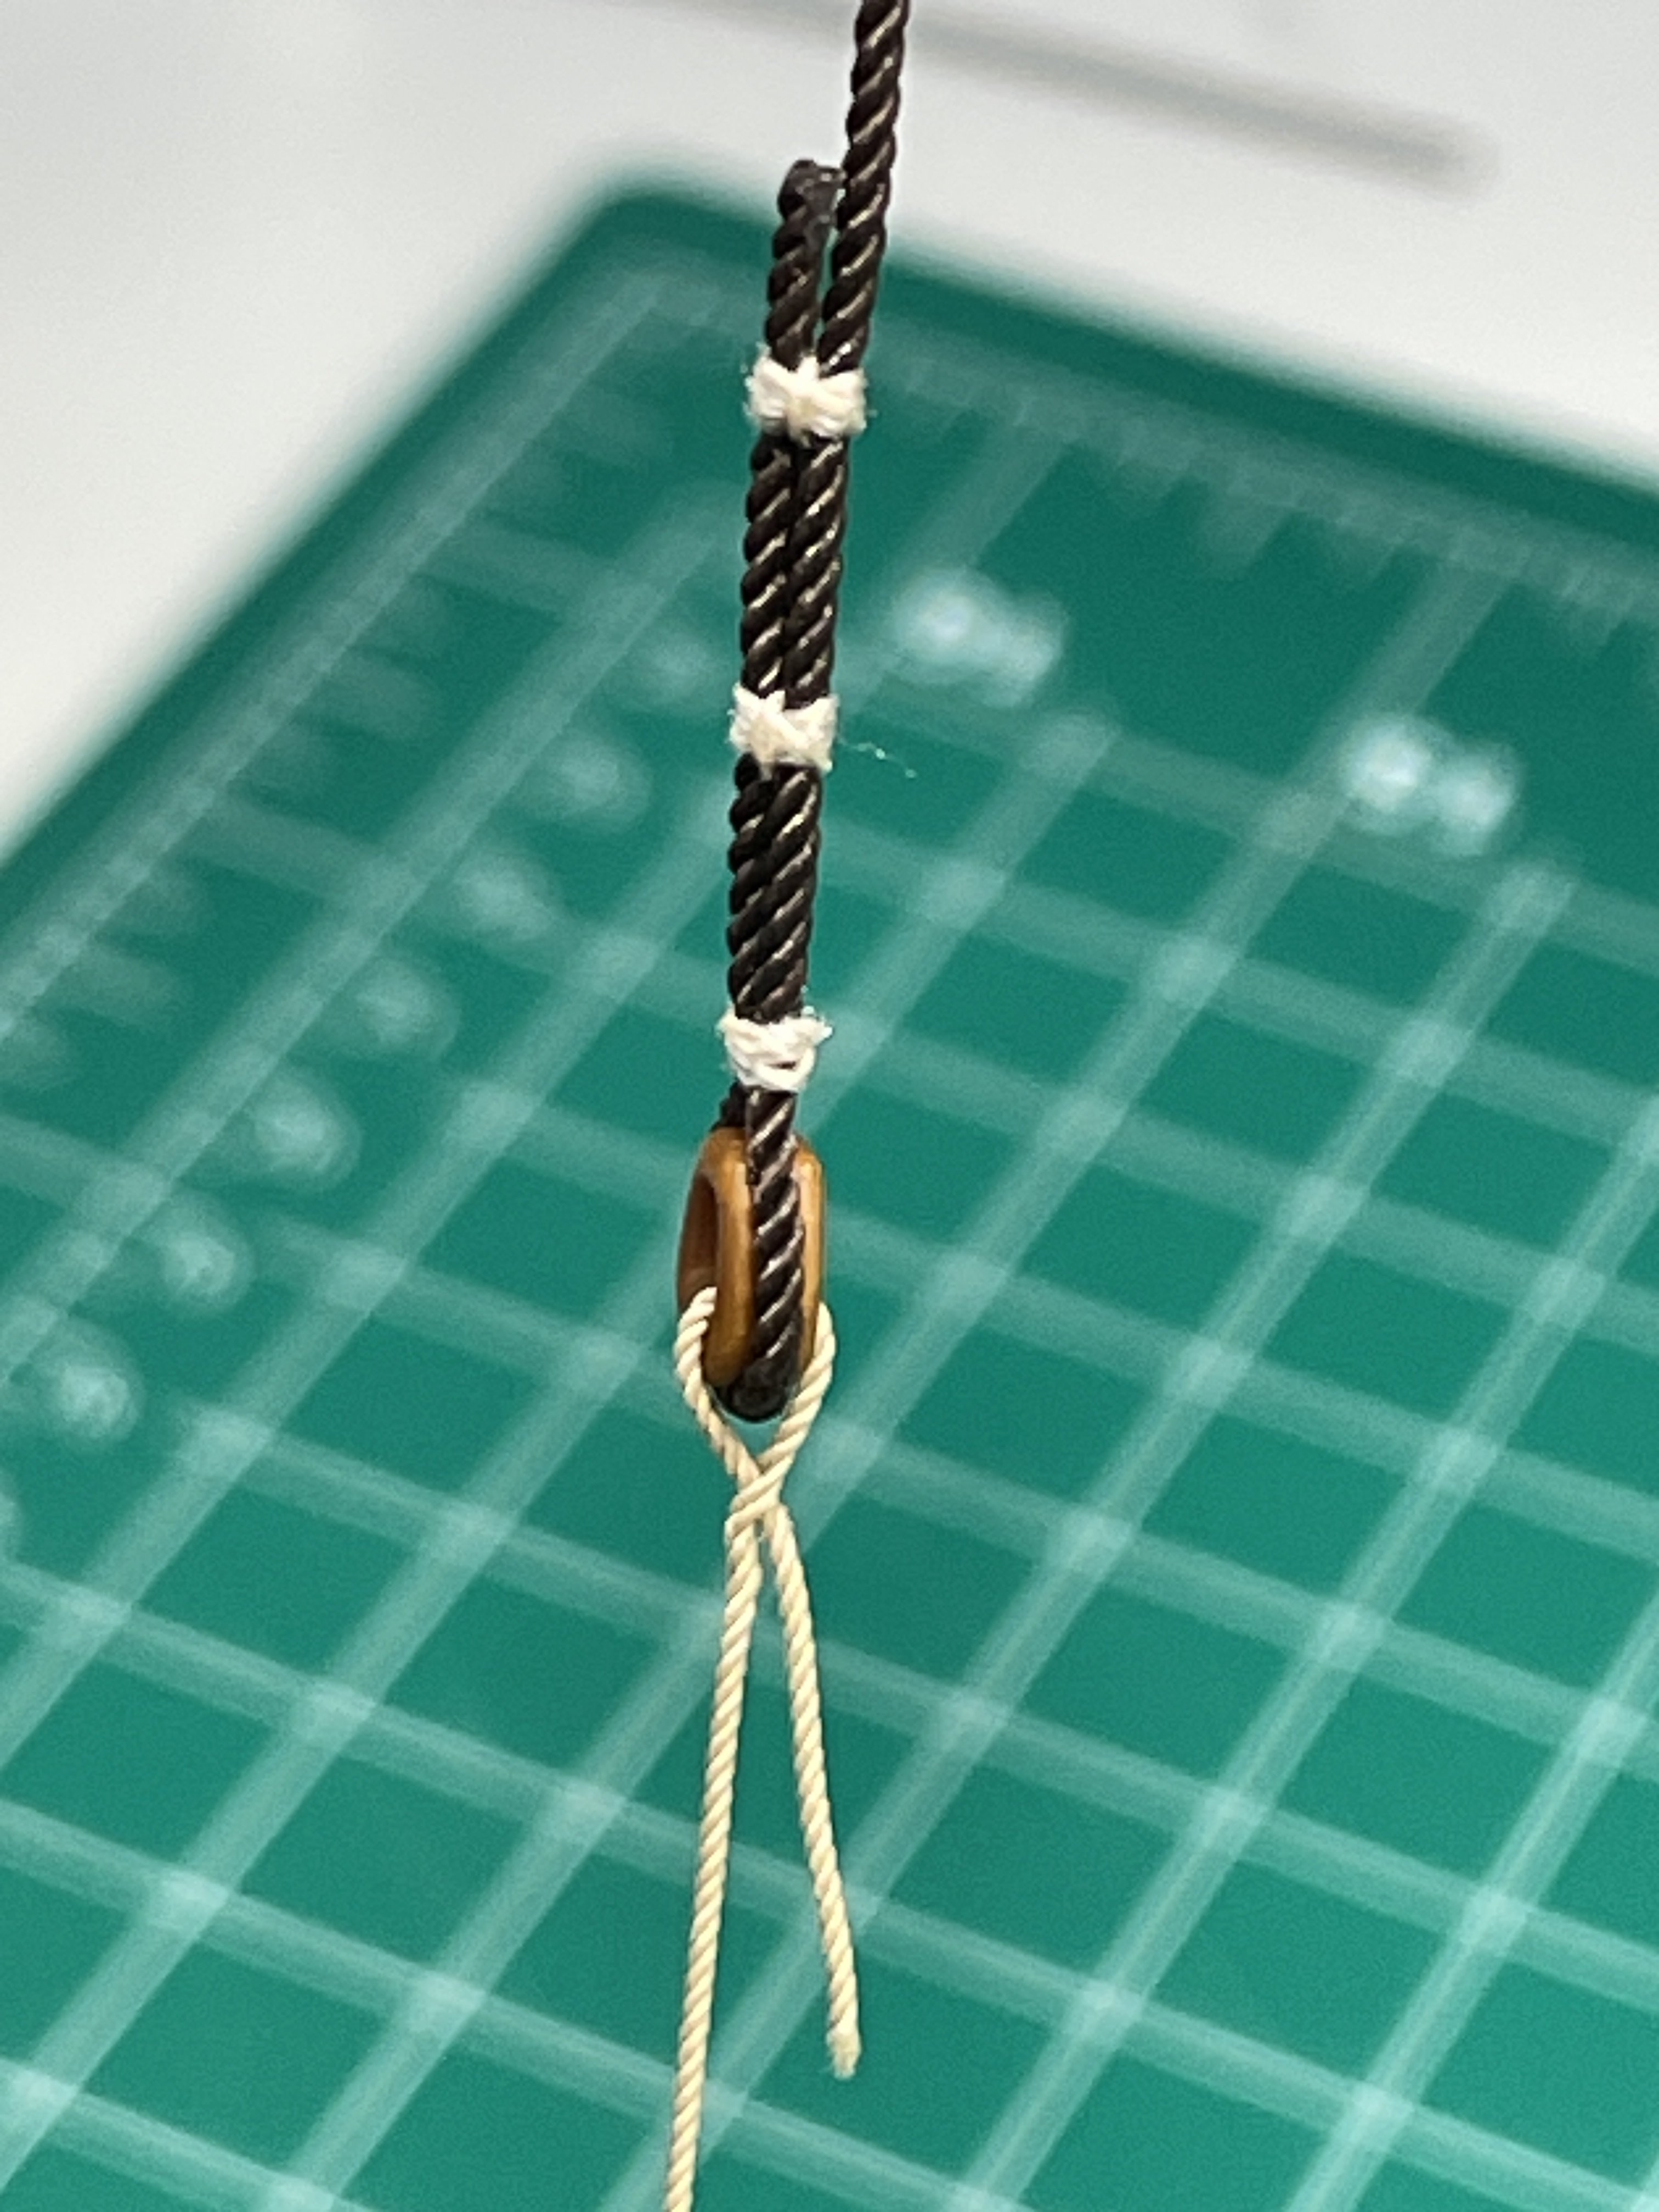
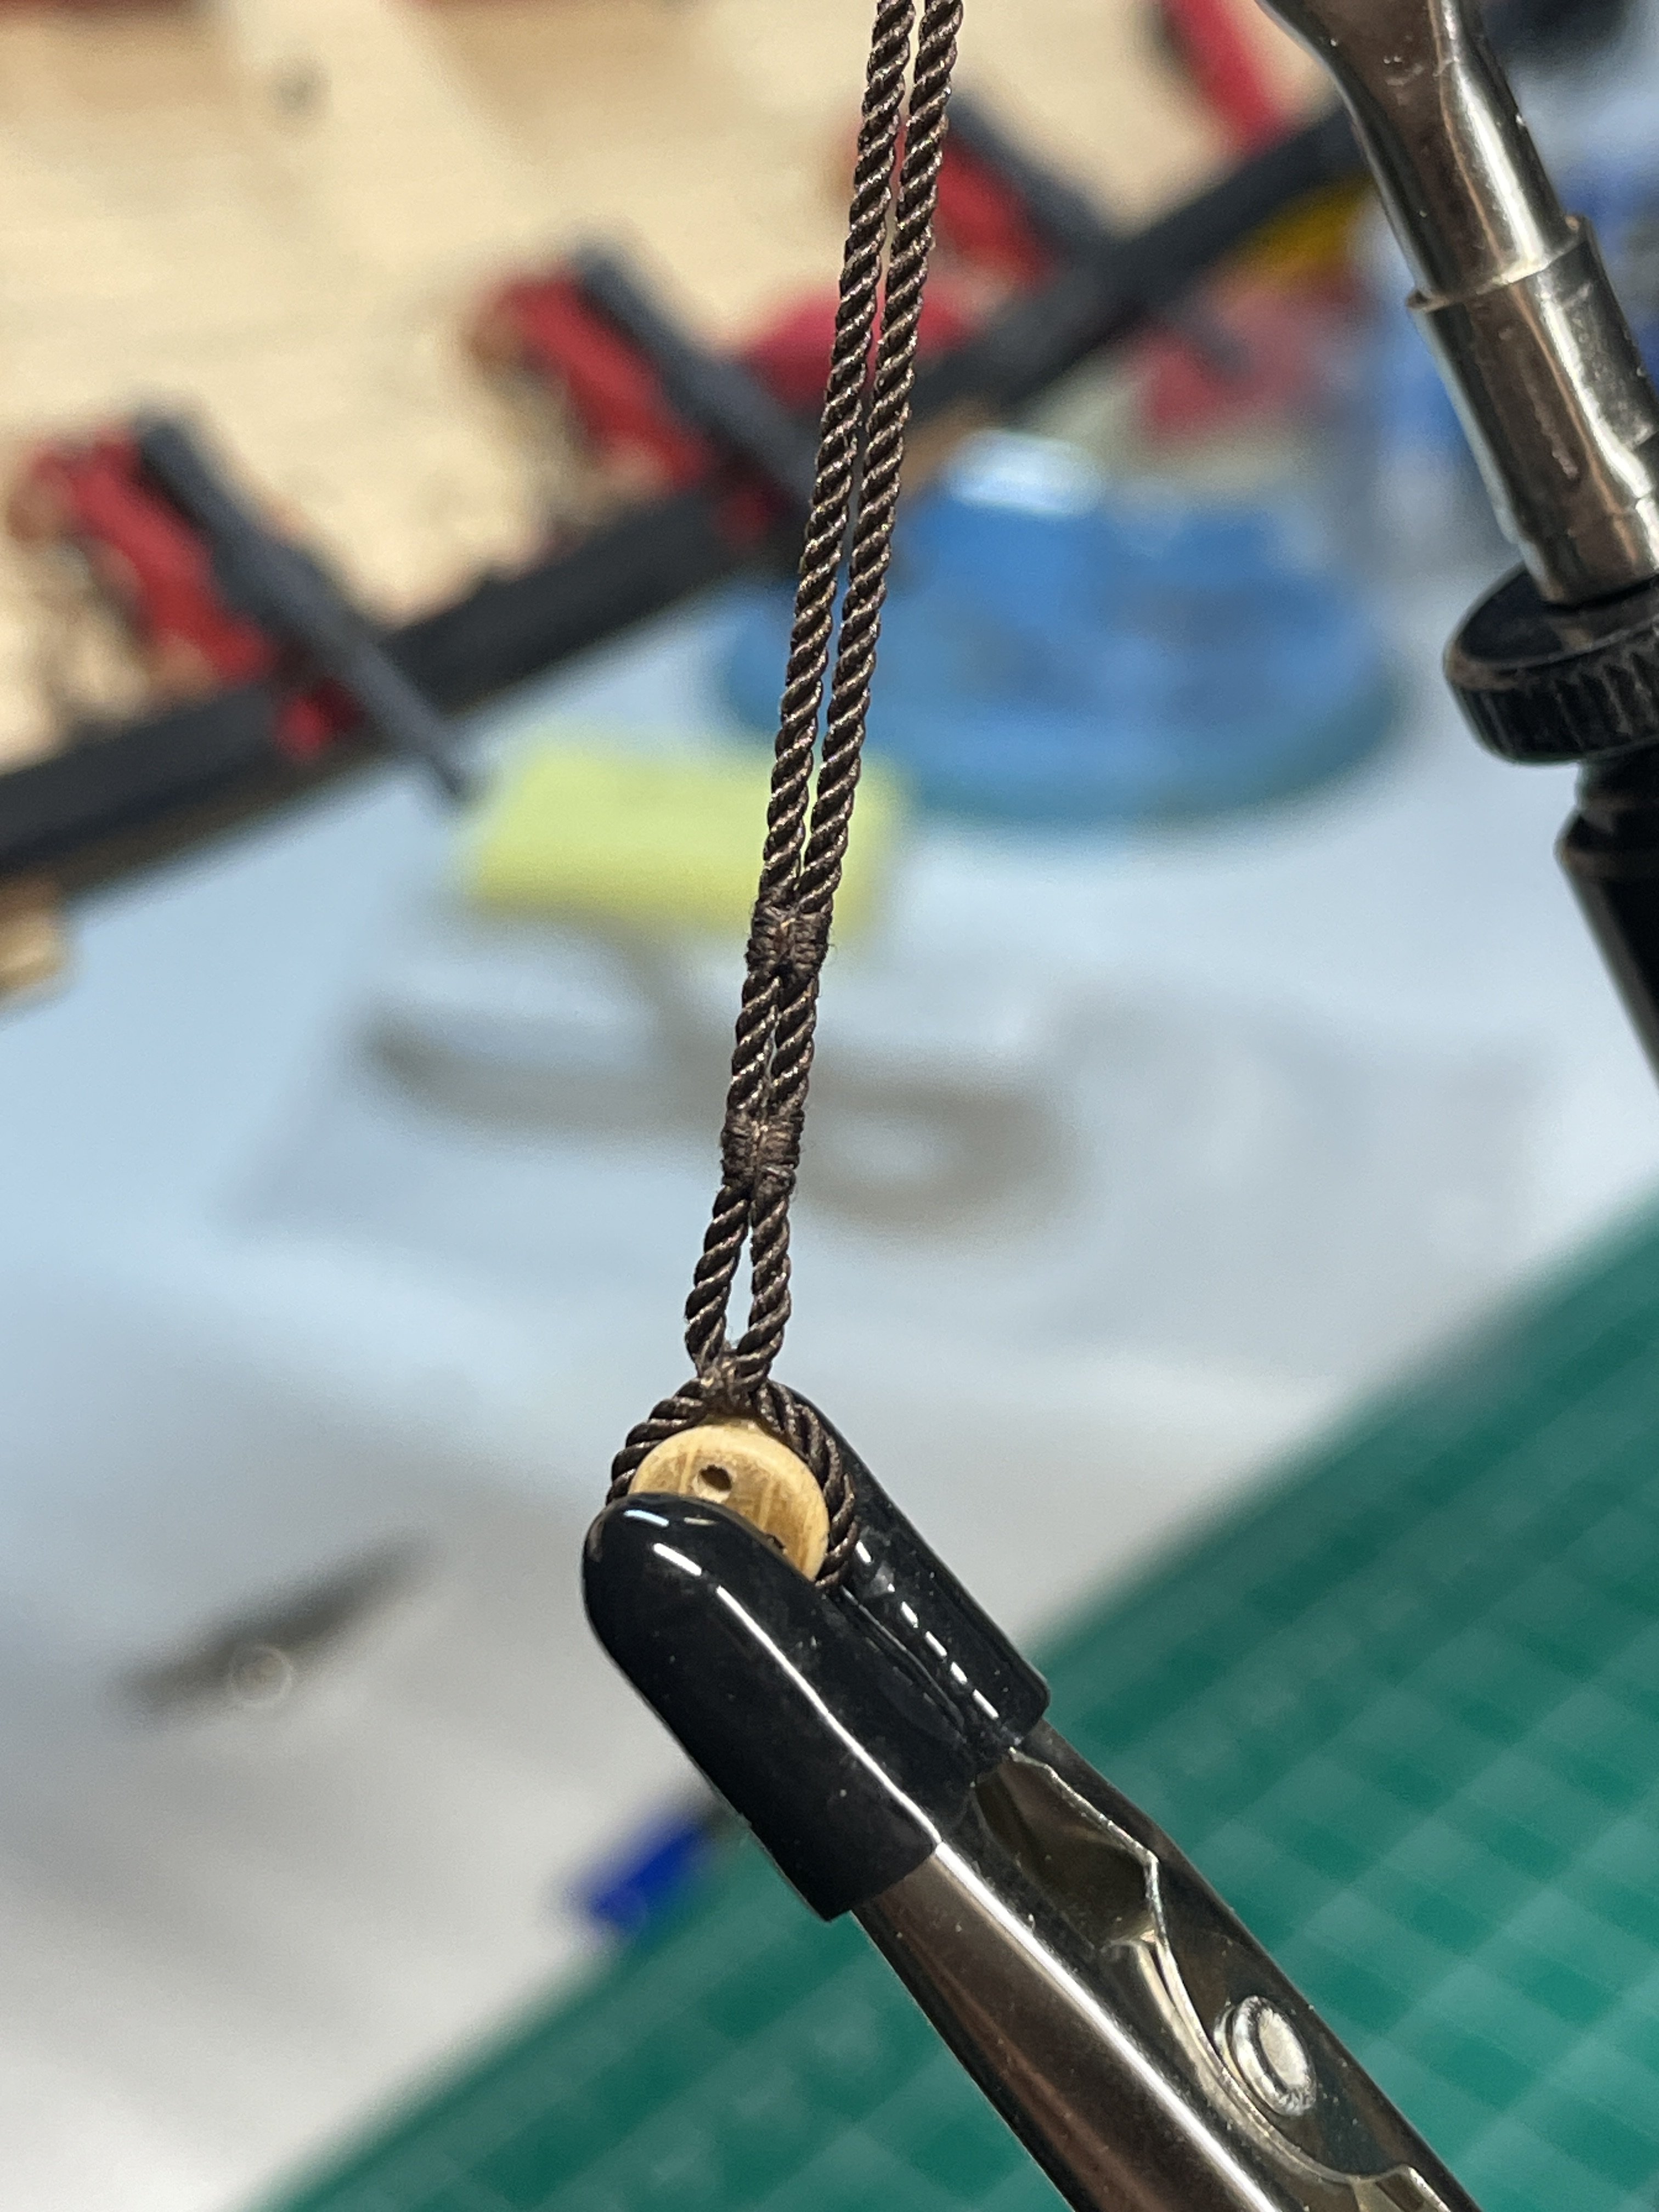
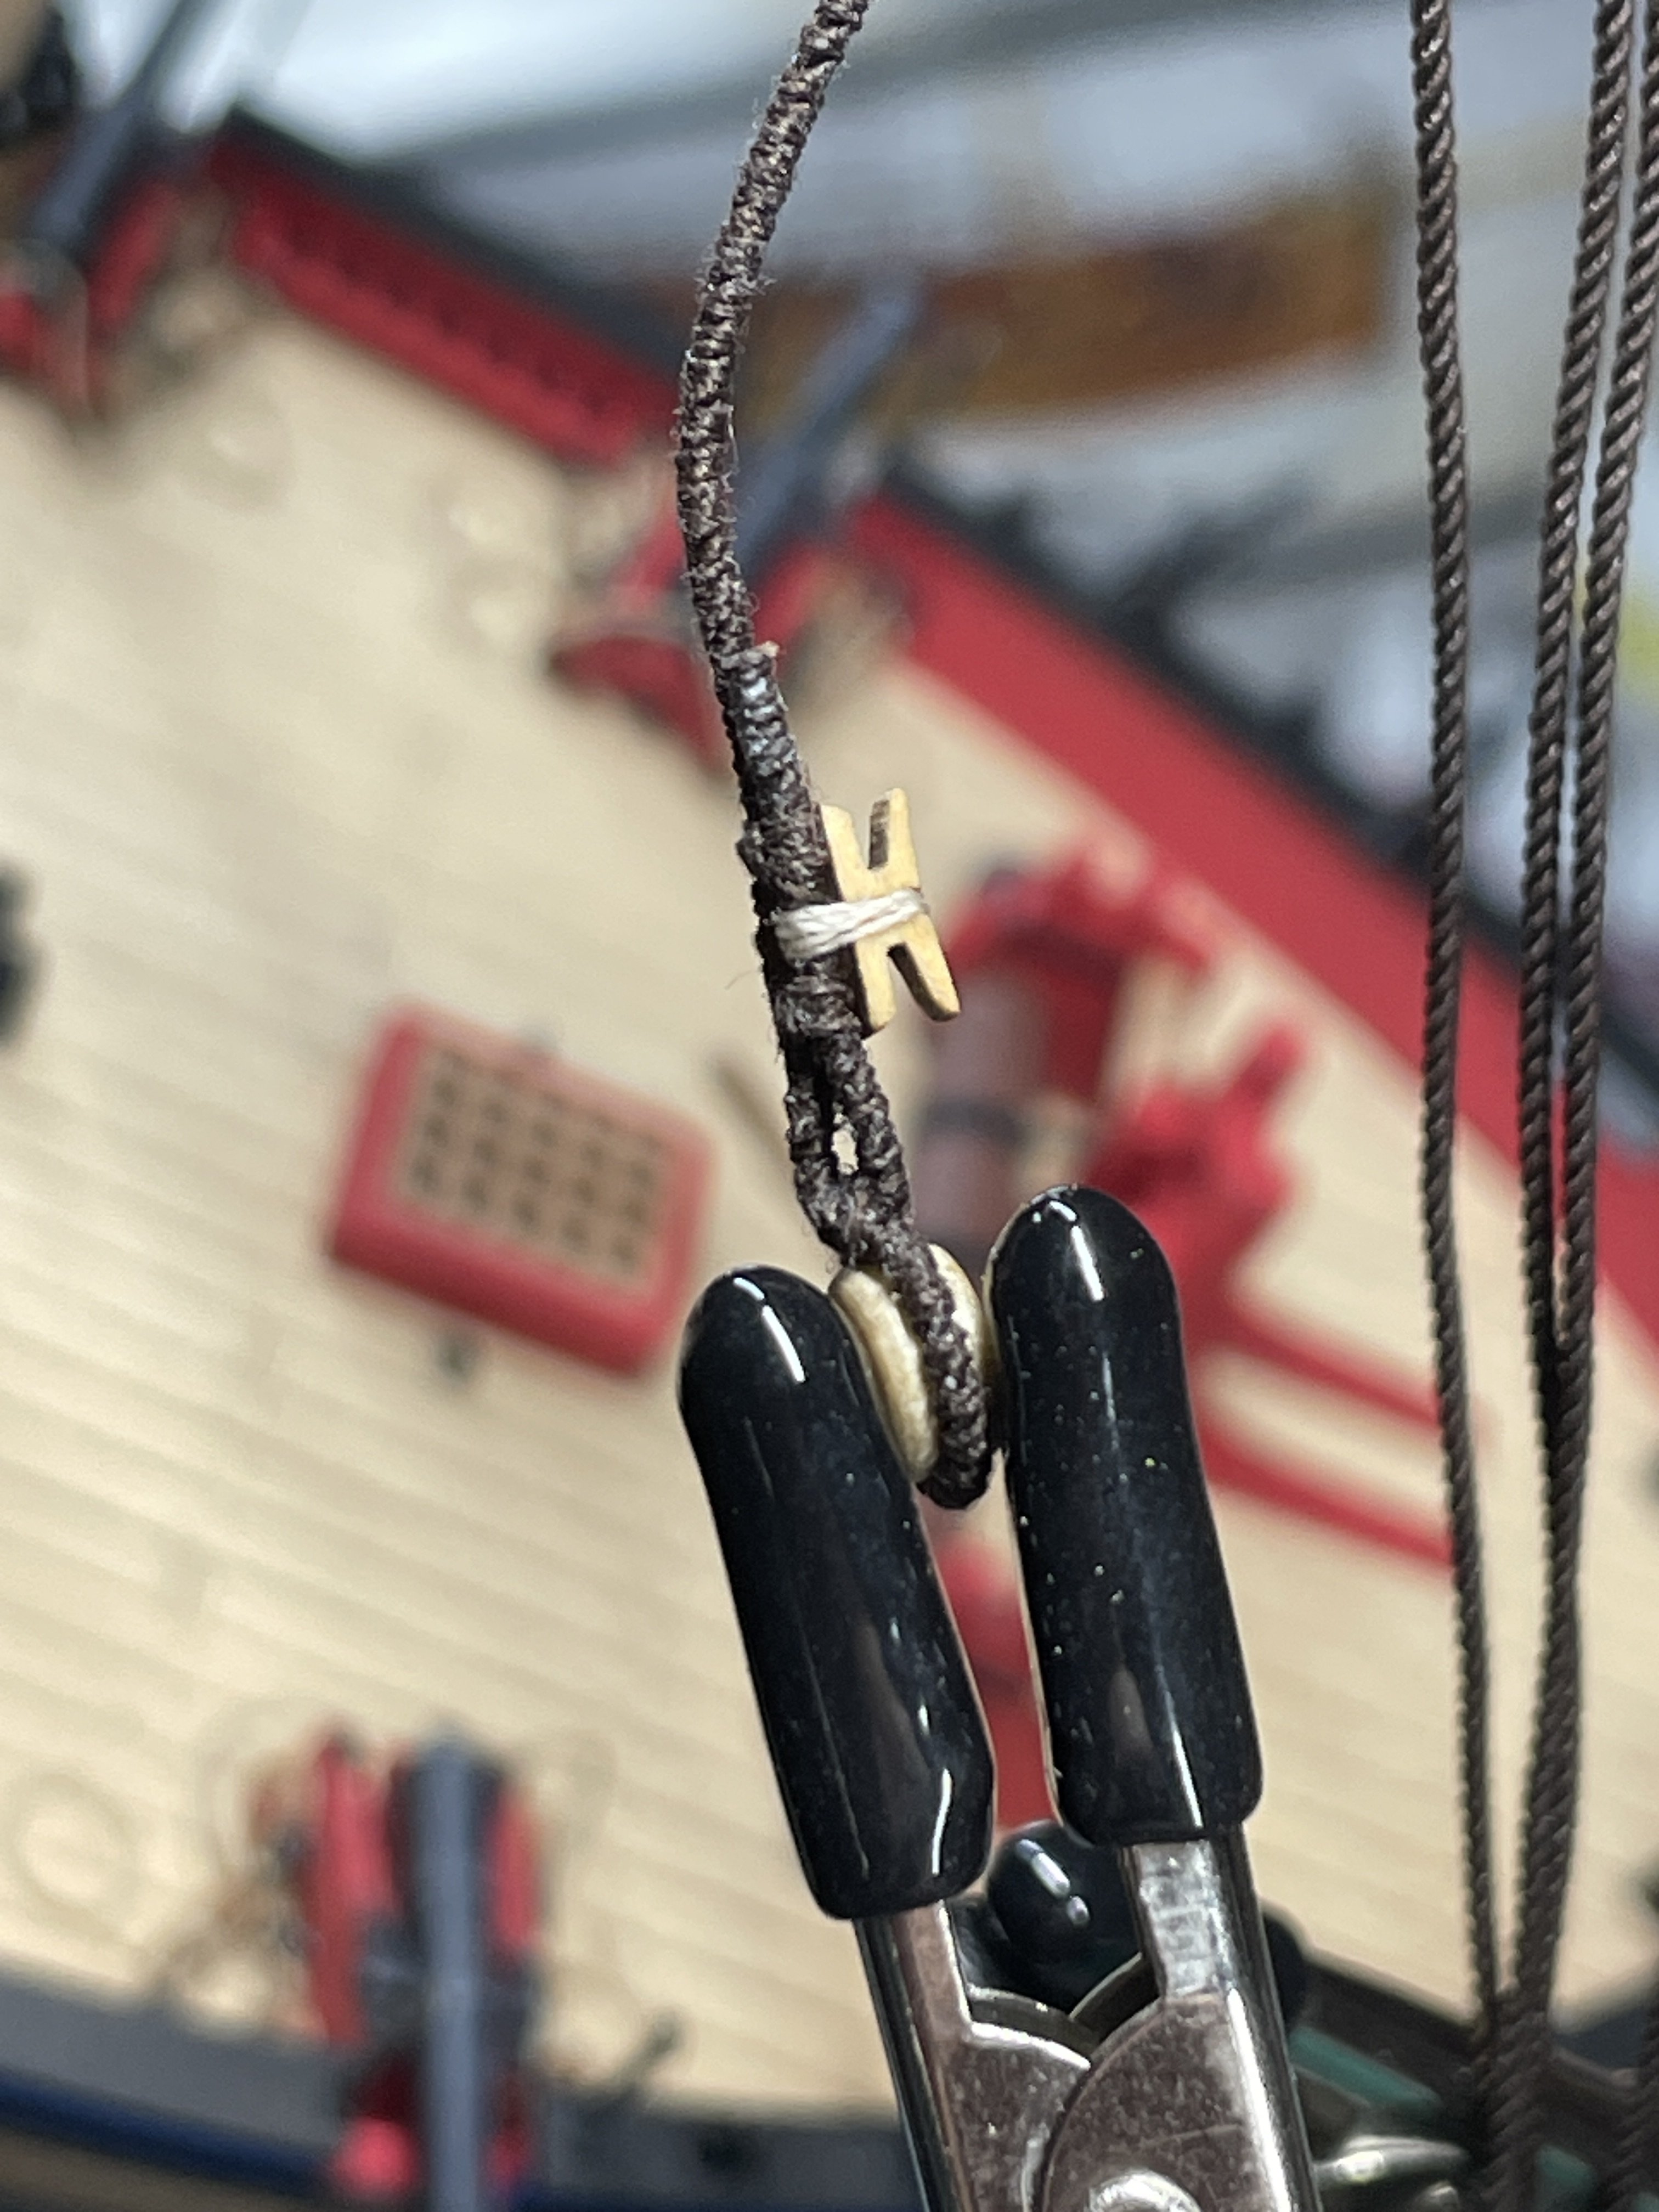
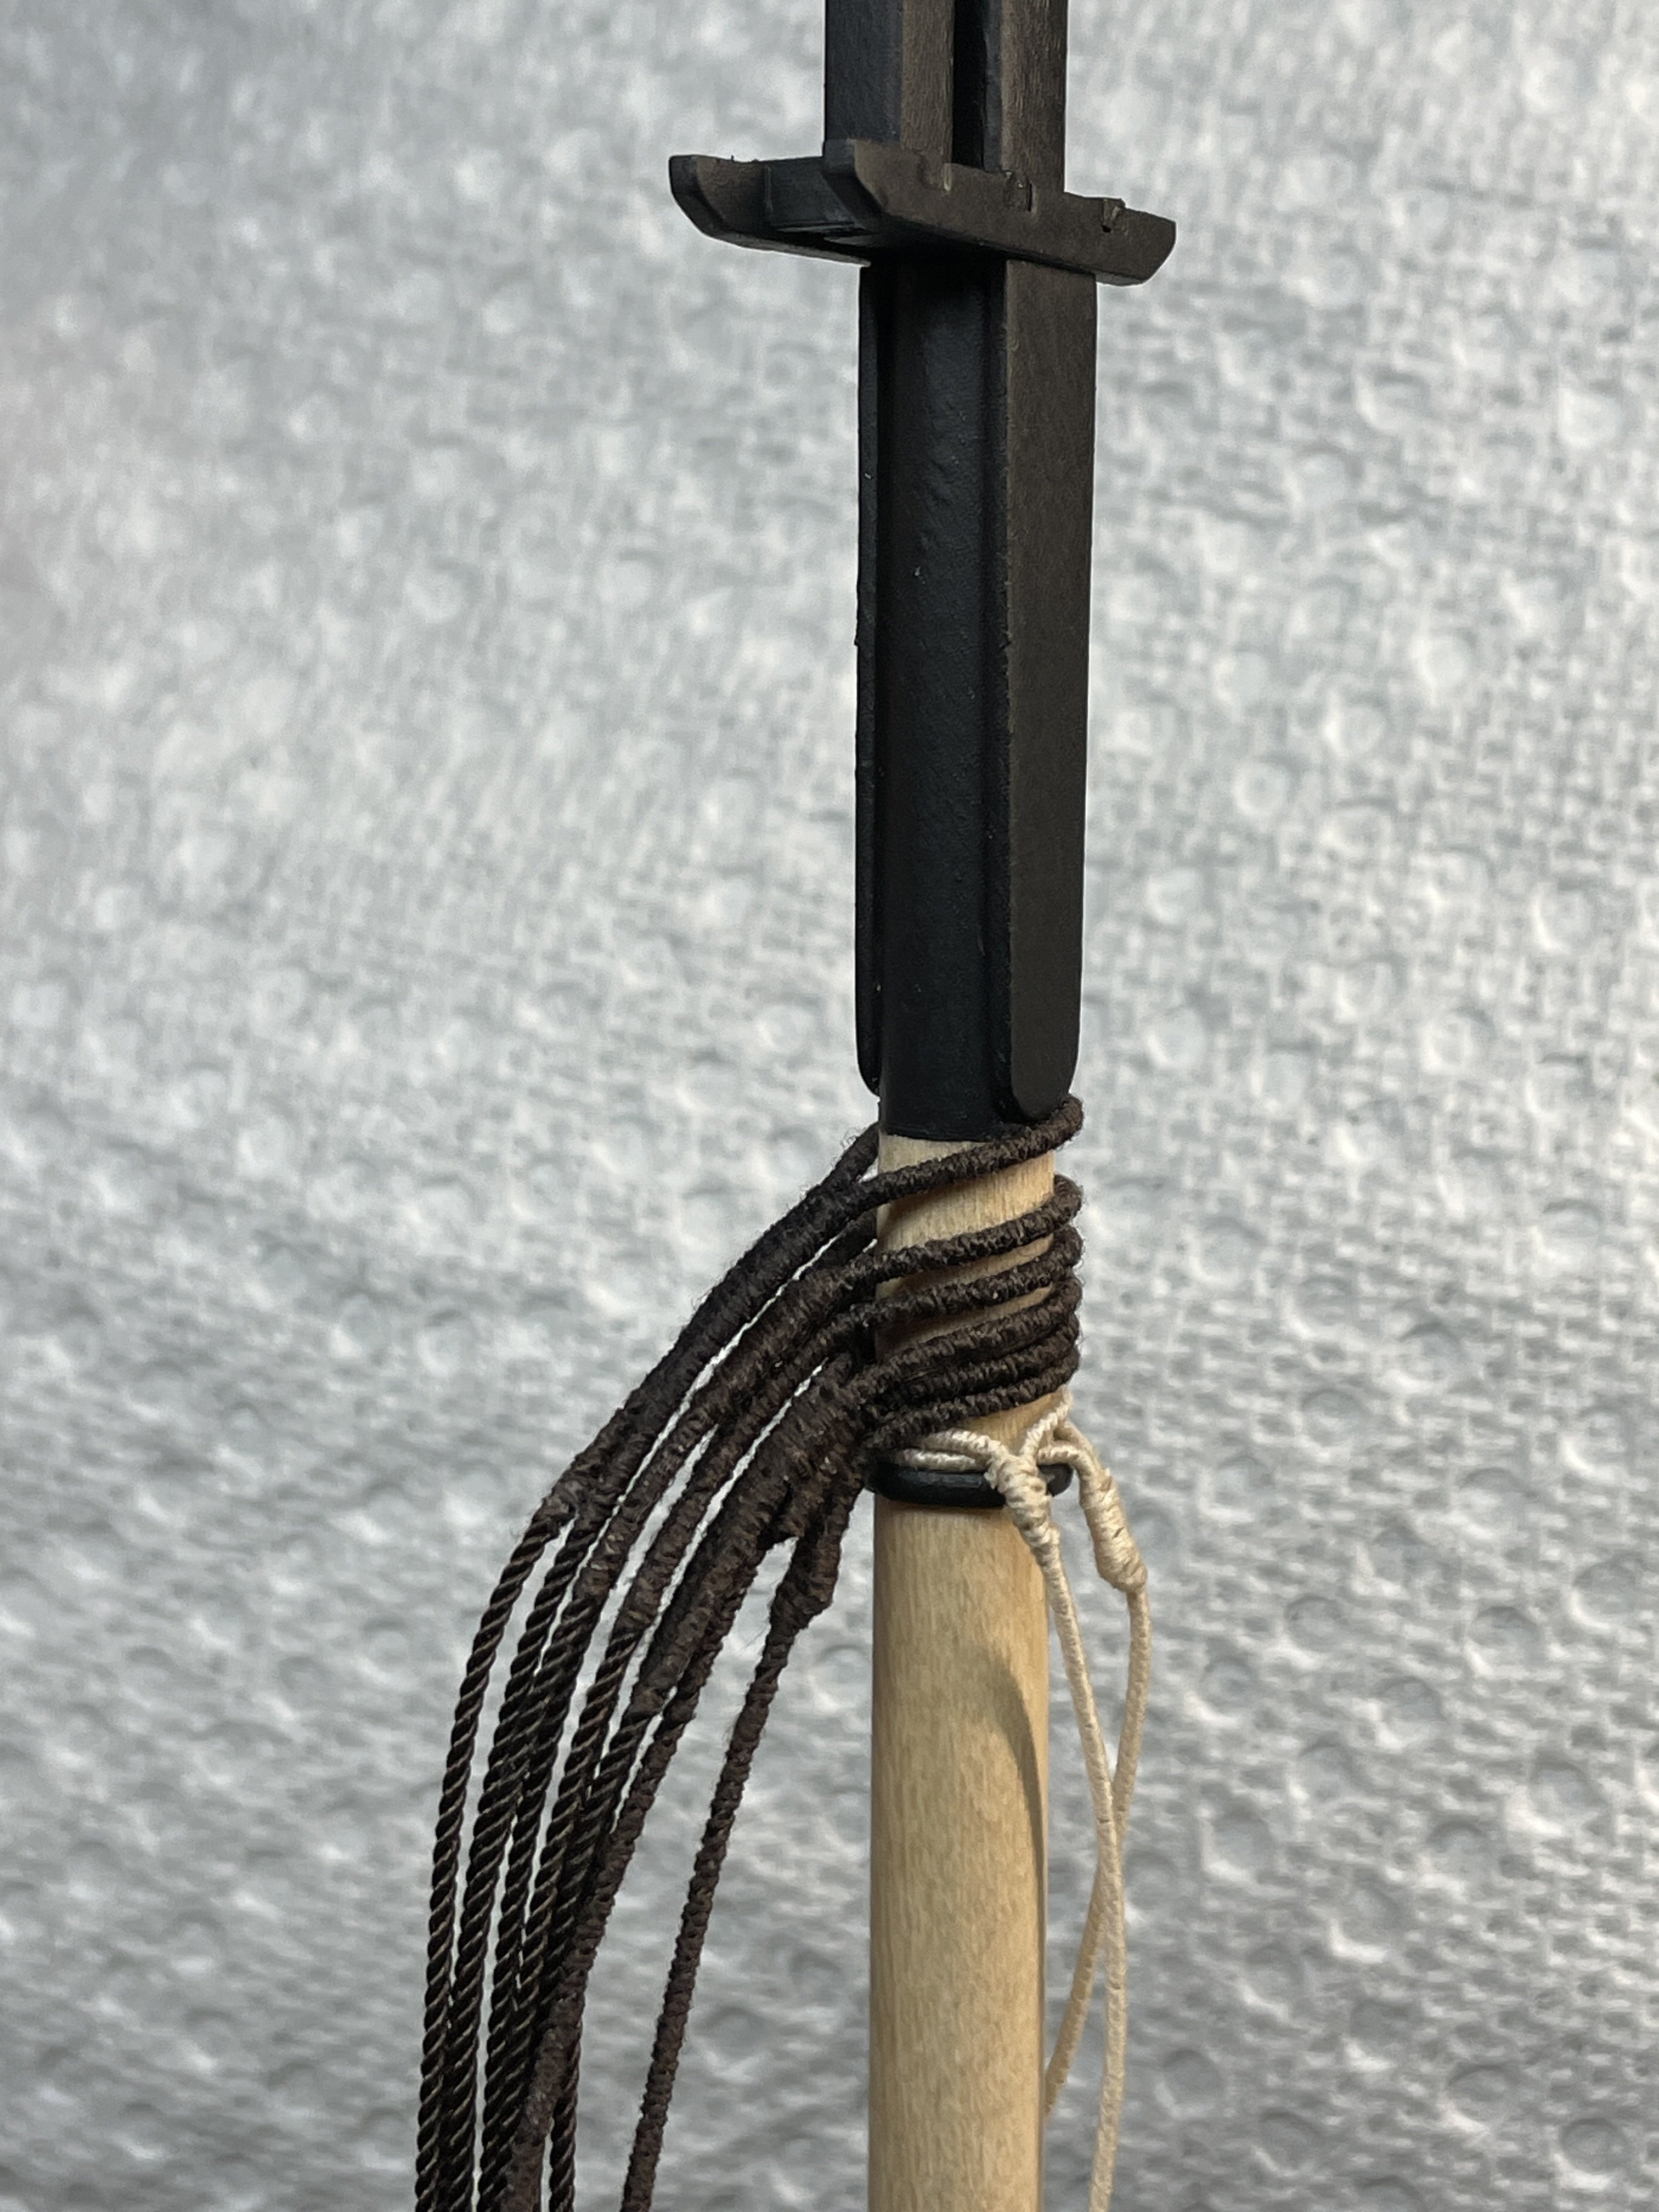
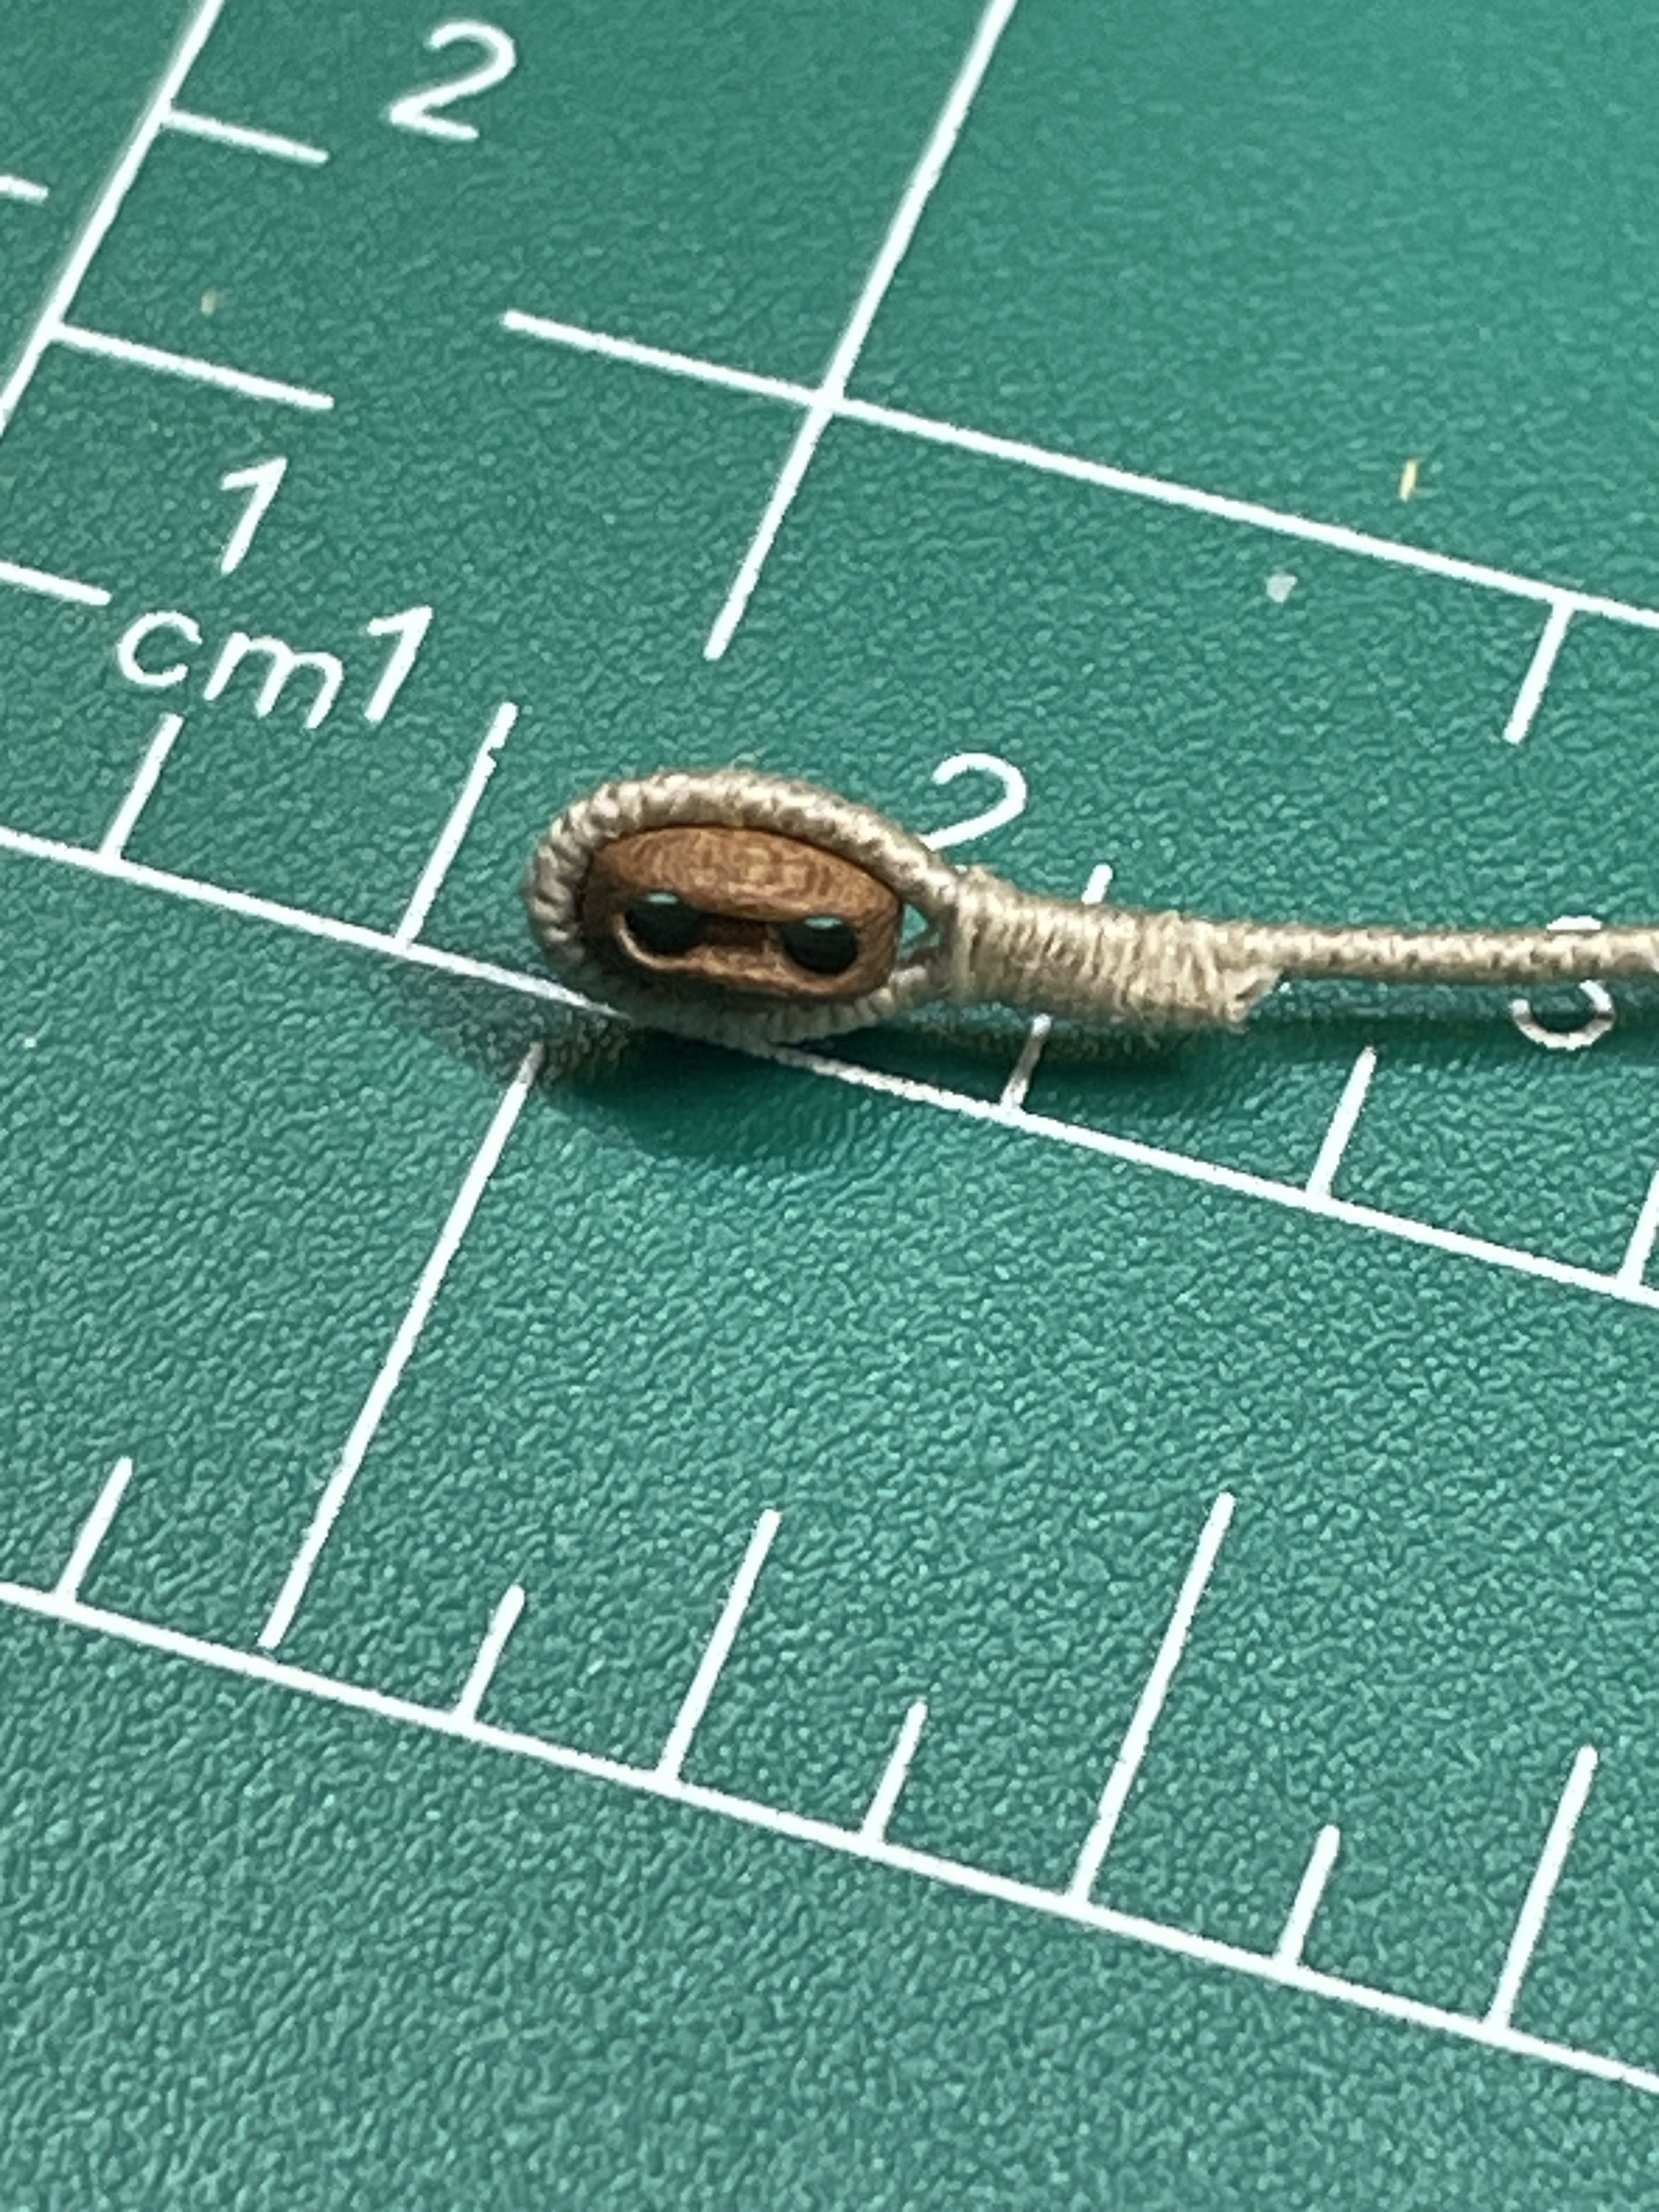
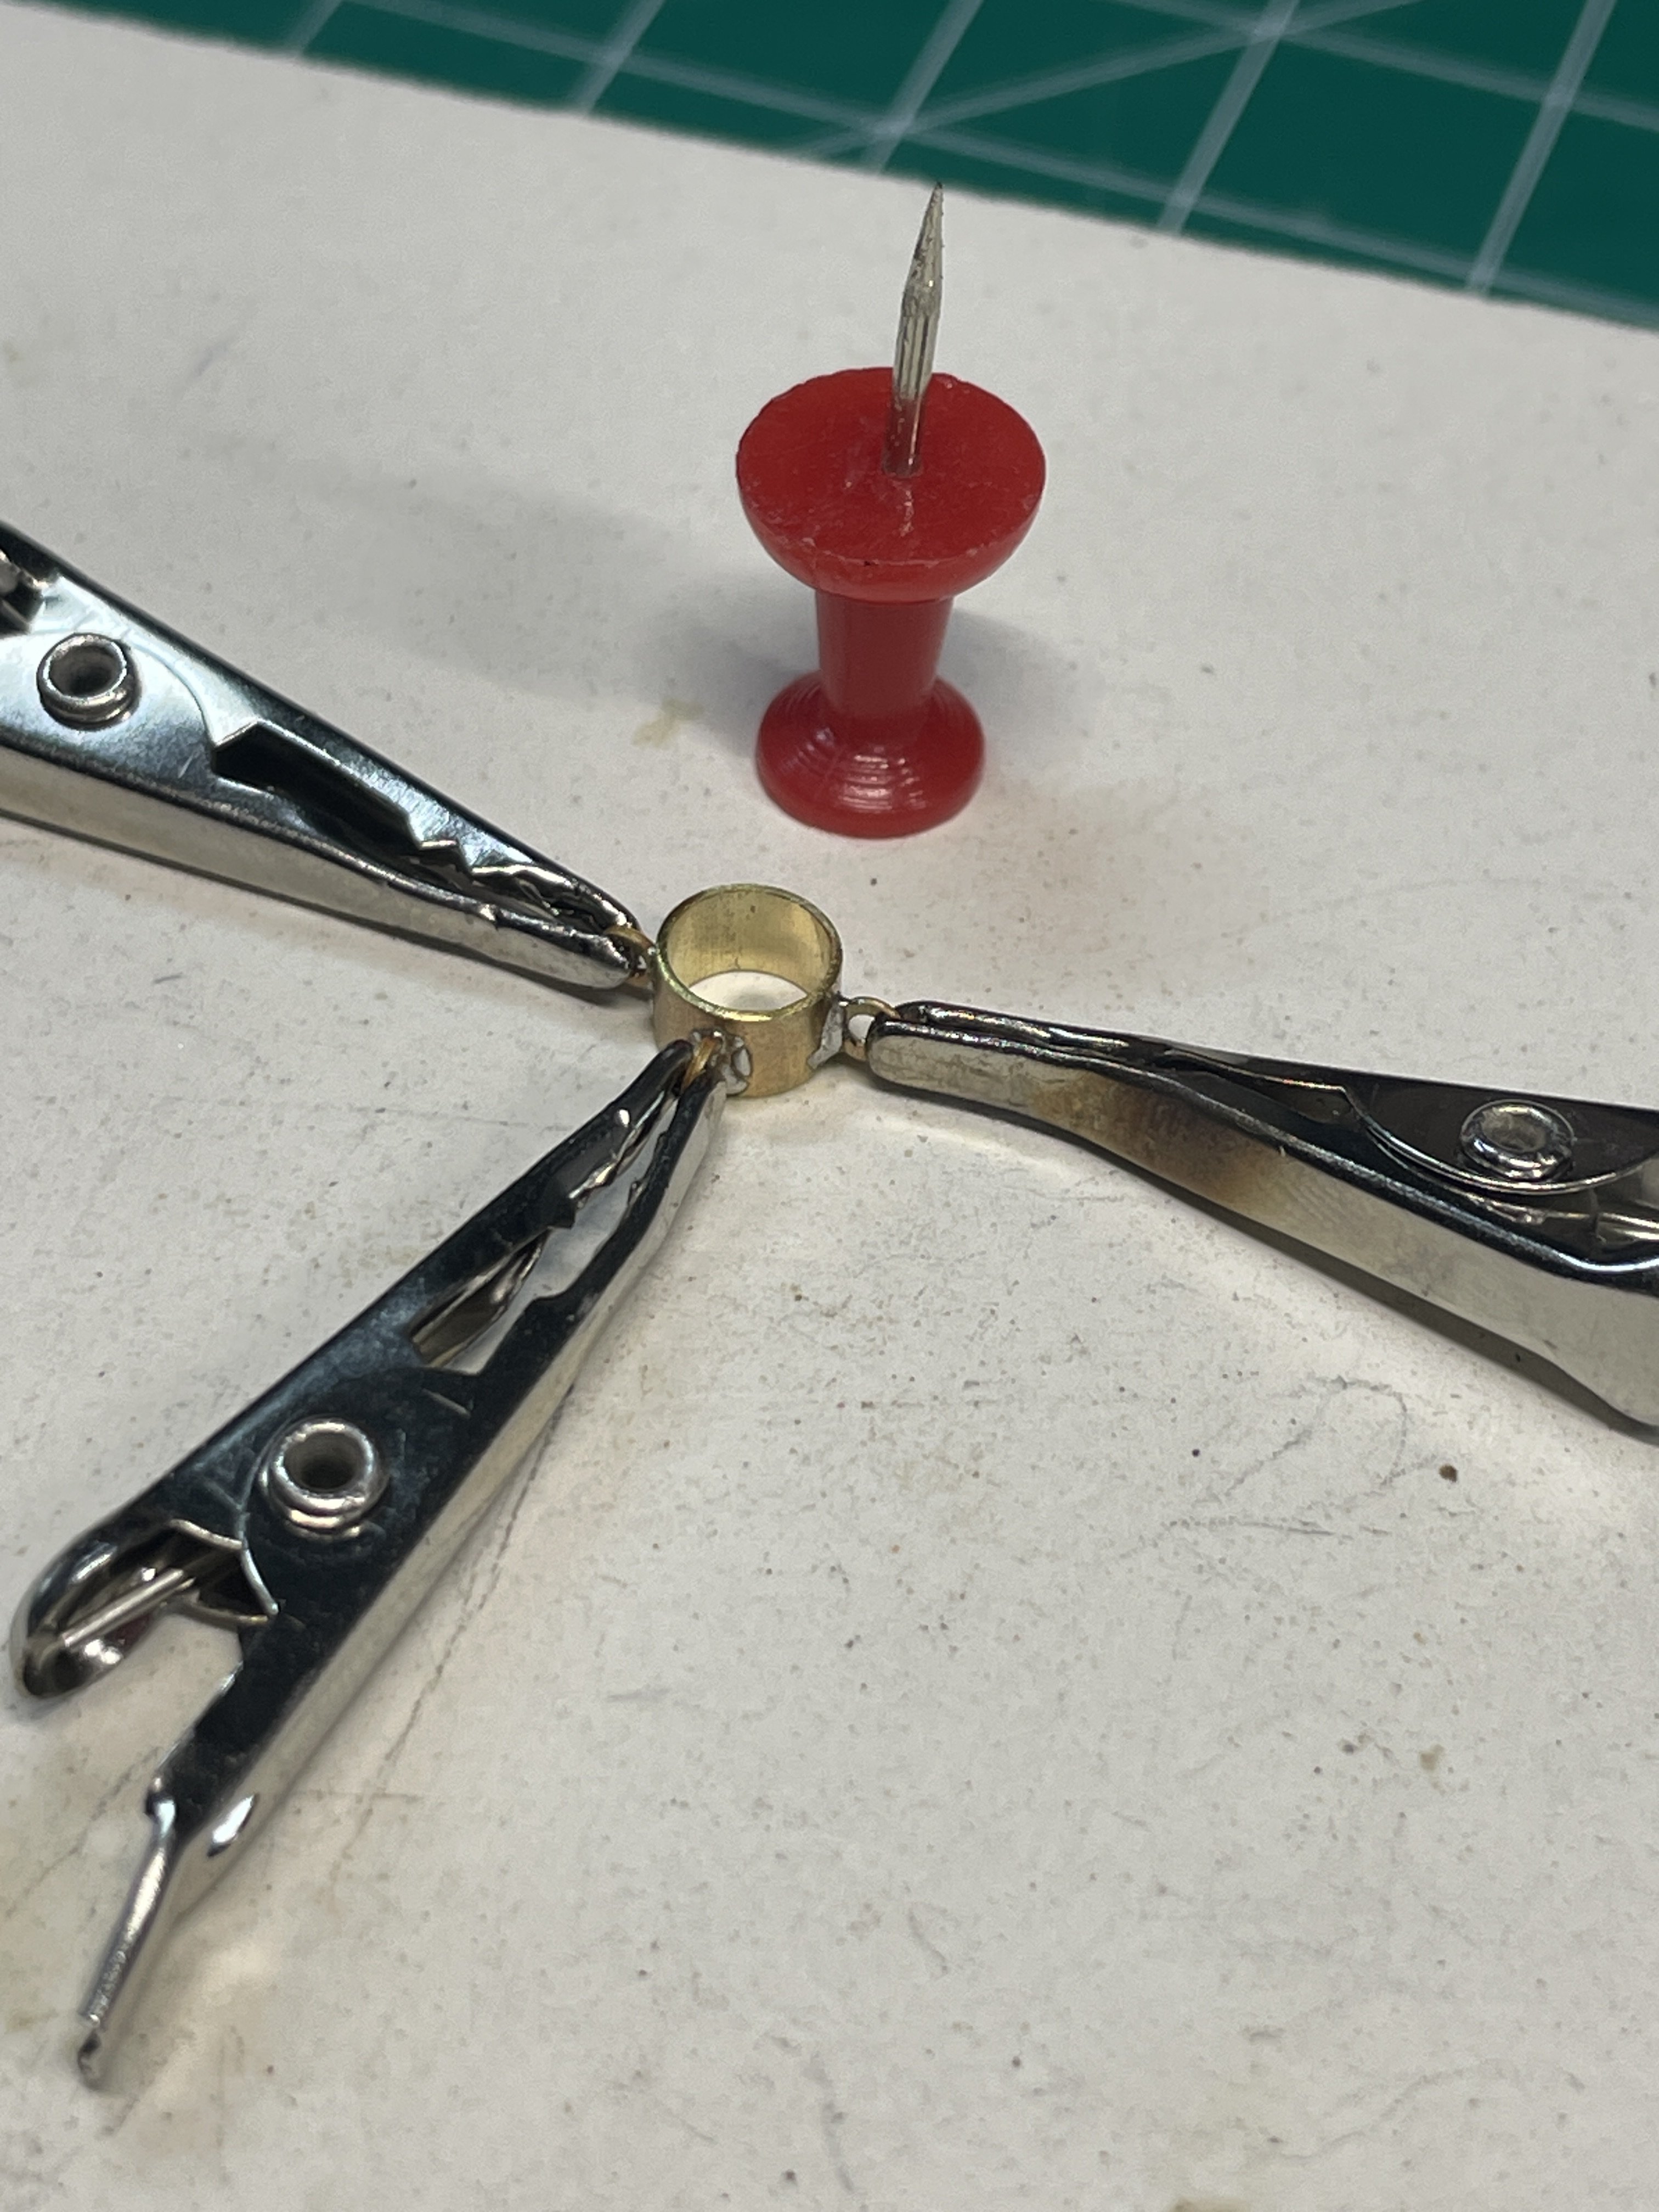
I had purchased some violin blocks but they were way too small. So I needed to make my own.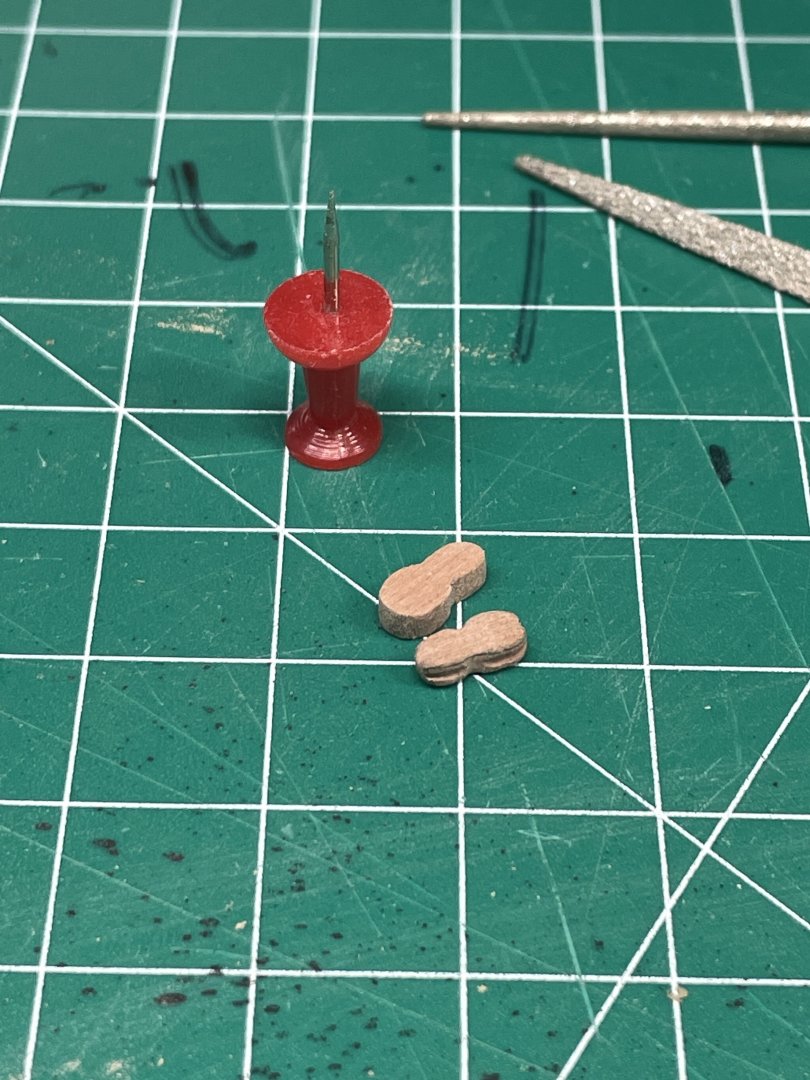
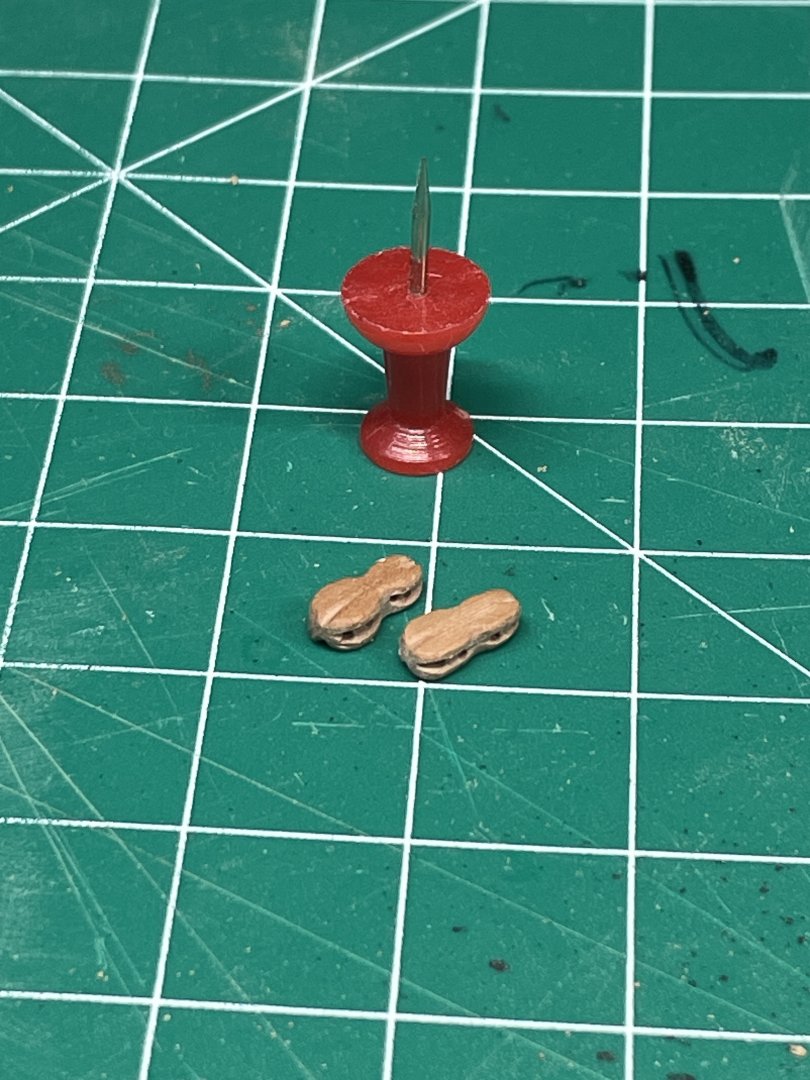
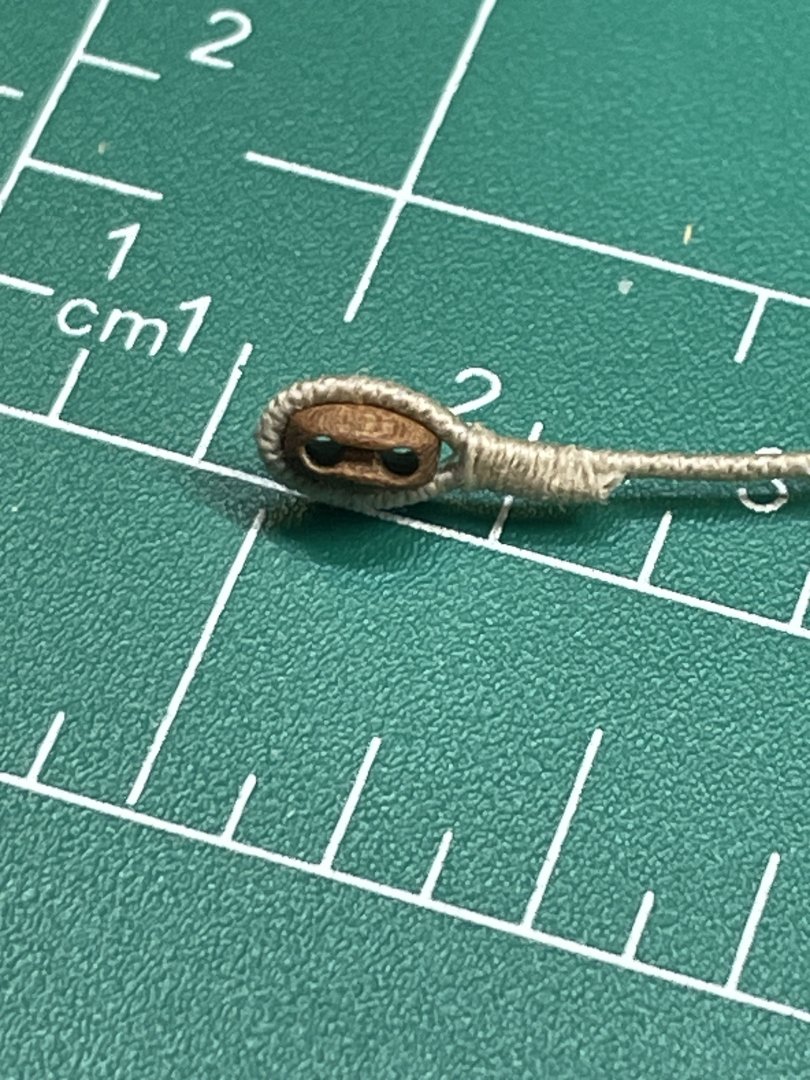
I also needed to lash up some blocks with hooks and the circle thing. Is that called a thimble?


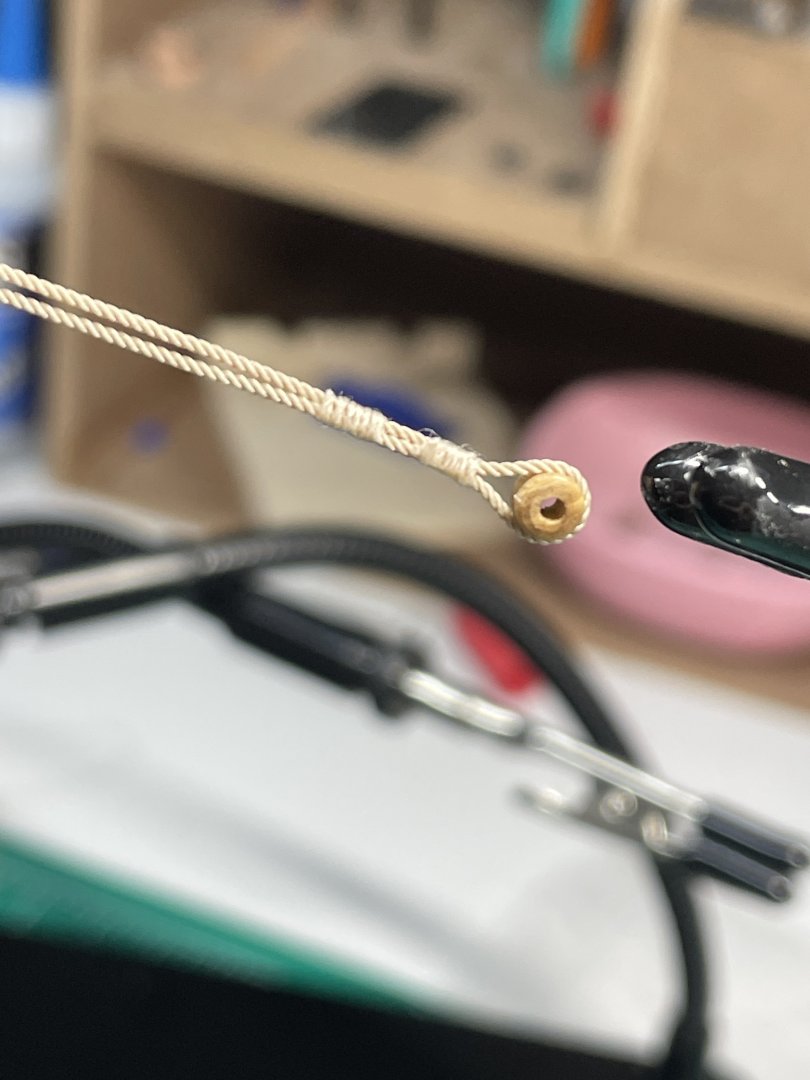
And here is the result of the backstays.


Next I made the mouses for the main stays. I guess I didn’t take a finished photo of them…
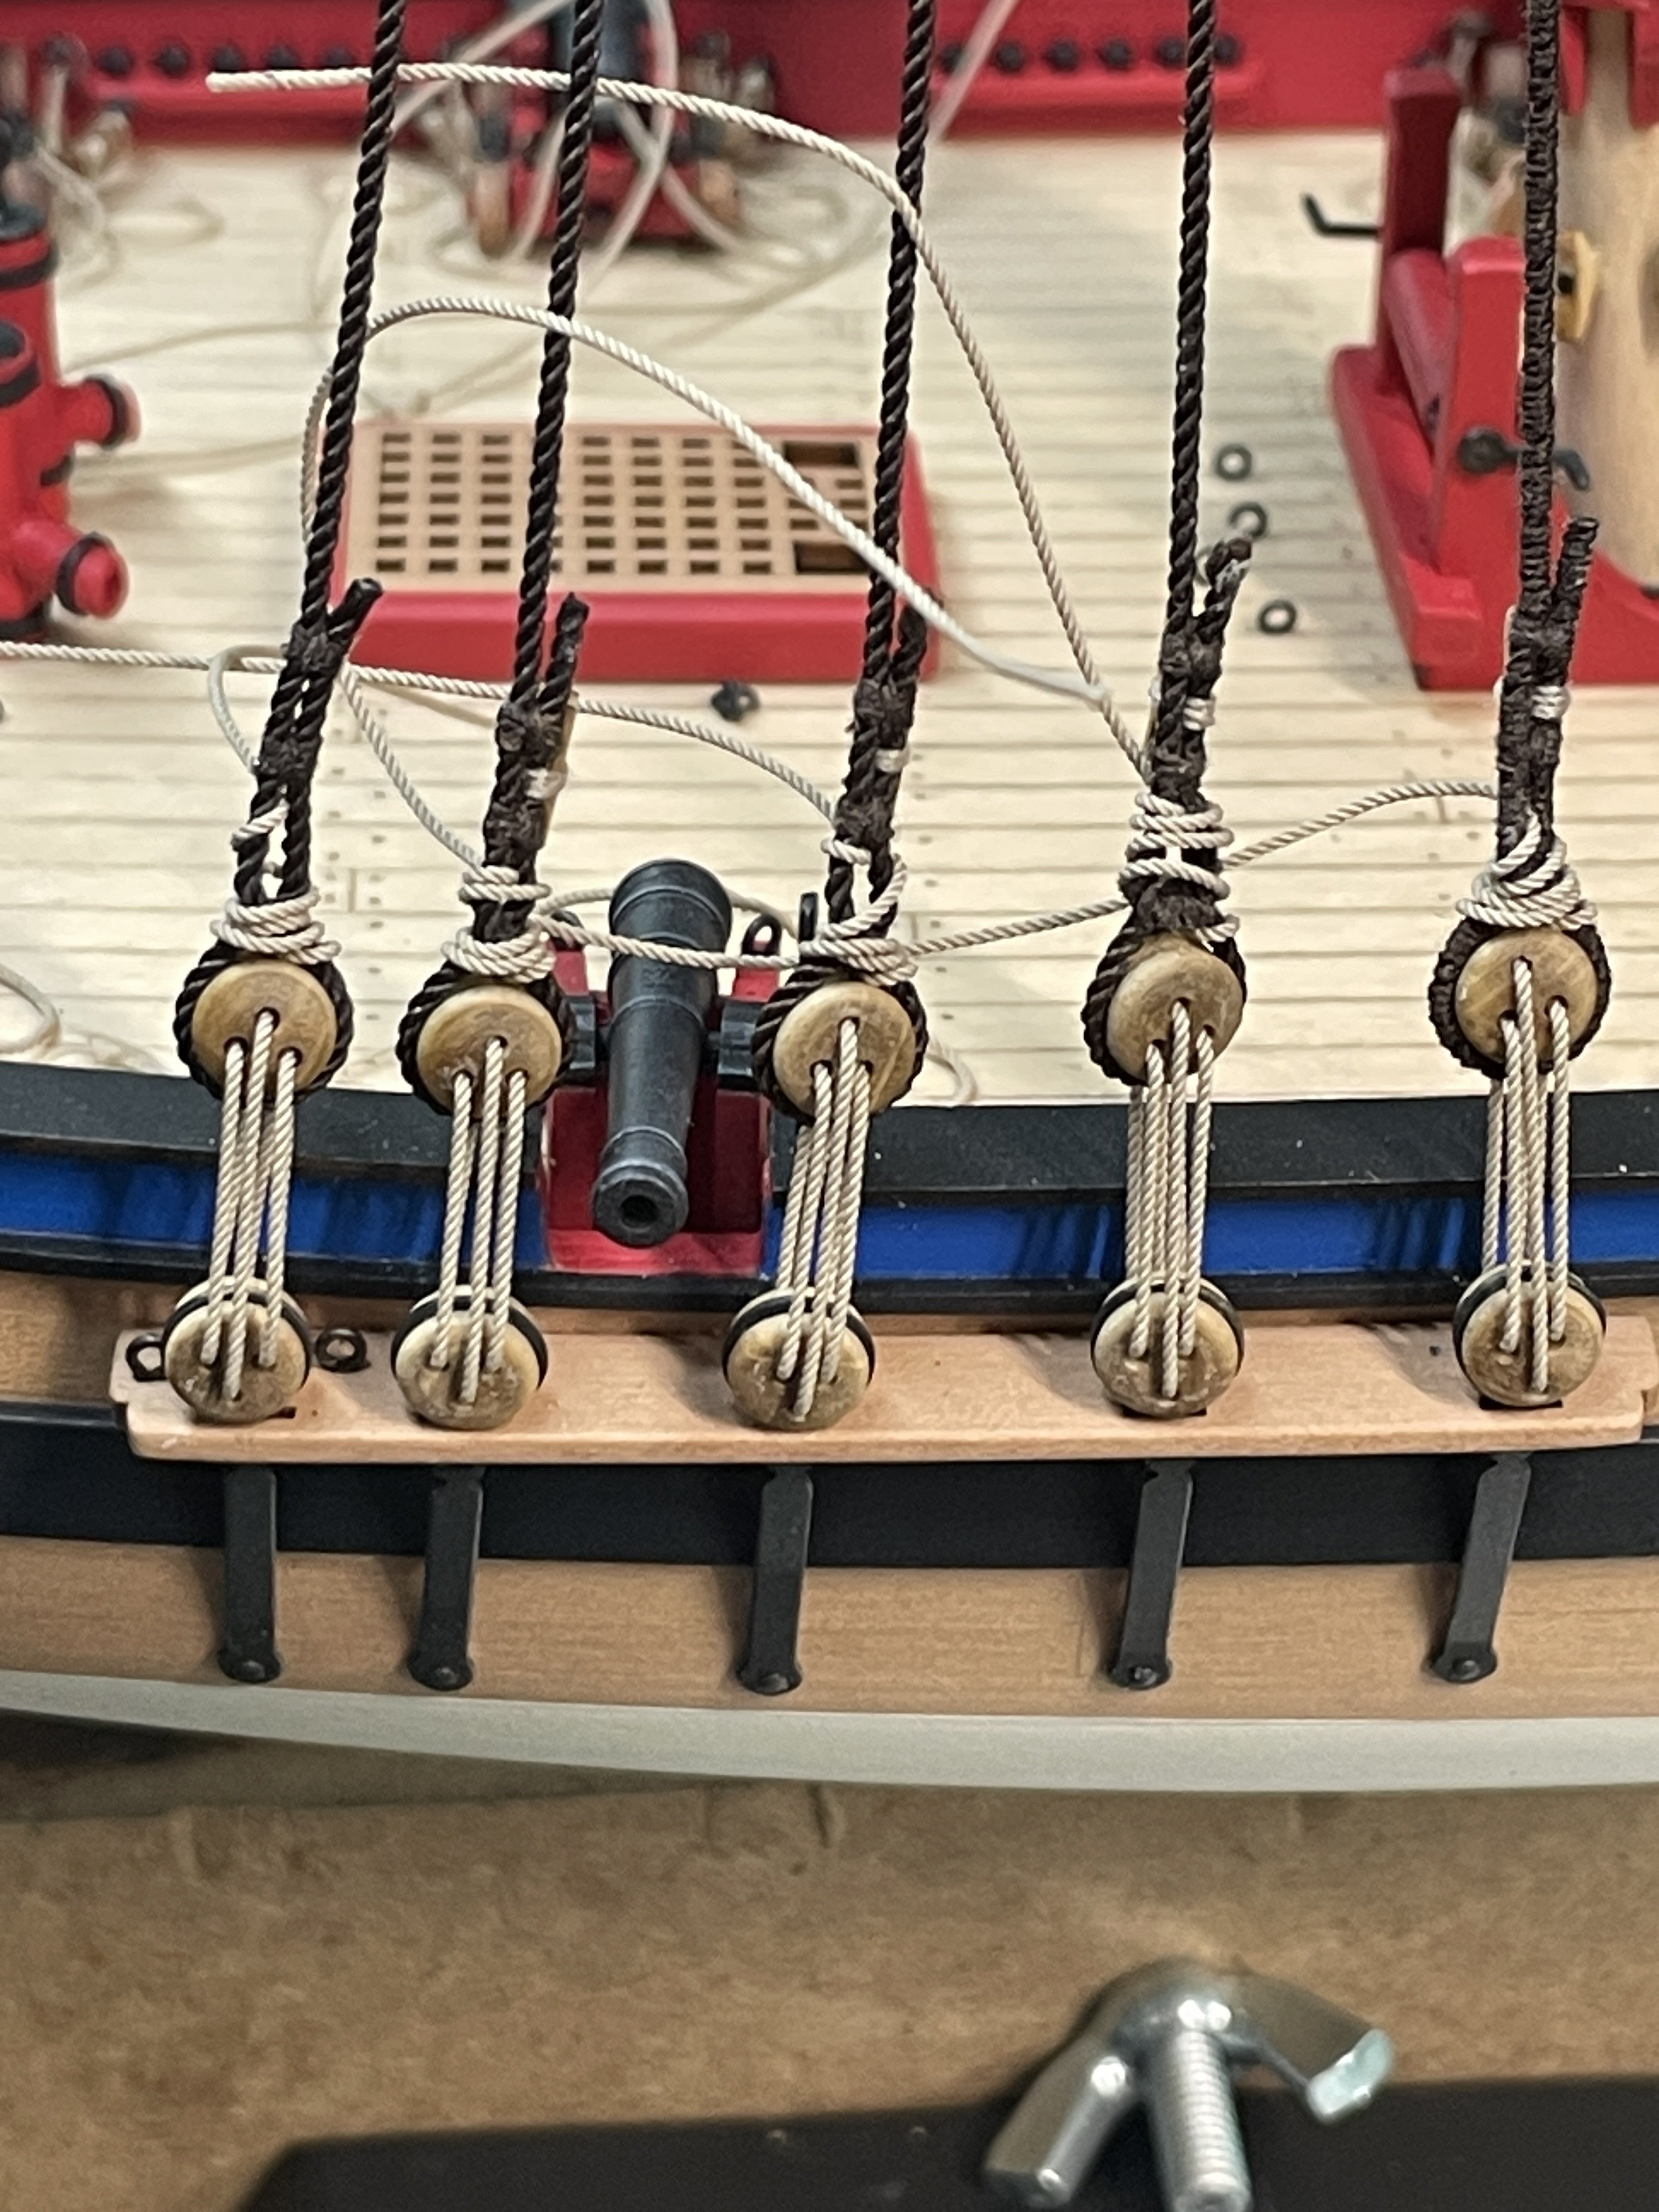
Here is the tackles up front.

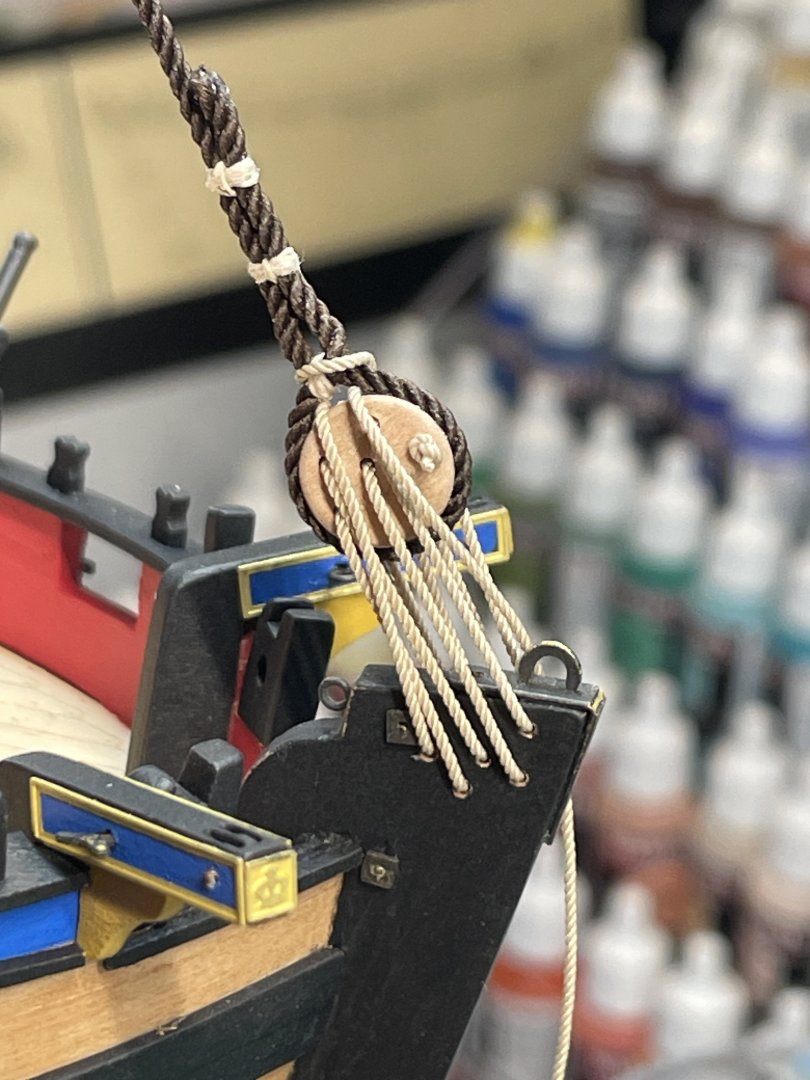

I was really itching to play around with the anchor ropes. I got cable laid rope and it looks so cool I just couldn’t resist at least getting an idea of how I wanted it to lay. This isn’t the final position but I was getting ideas.
Lashing these together was a chore with so much stuff in the way.
Thanks for checking out my build. I appreciate all of you guys!
Chris
-
-
Thanks to everyone still hanging on. Work has been slowly progressing.
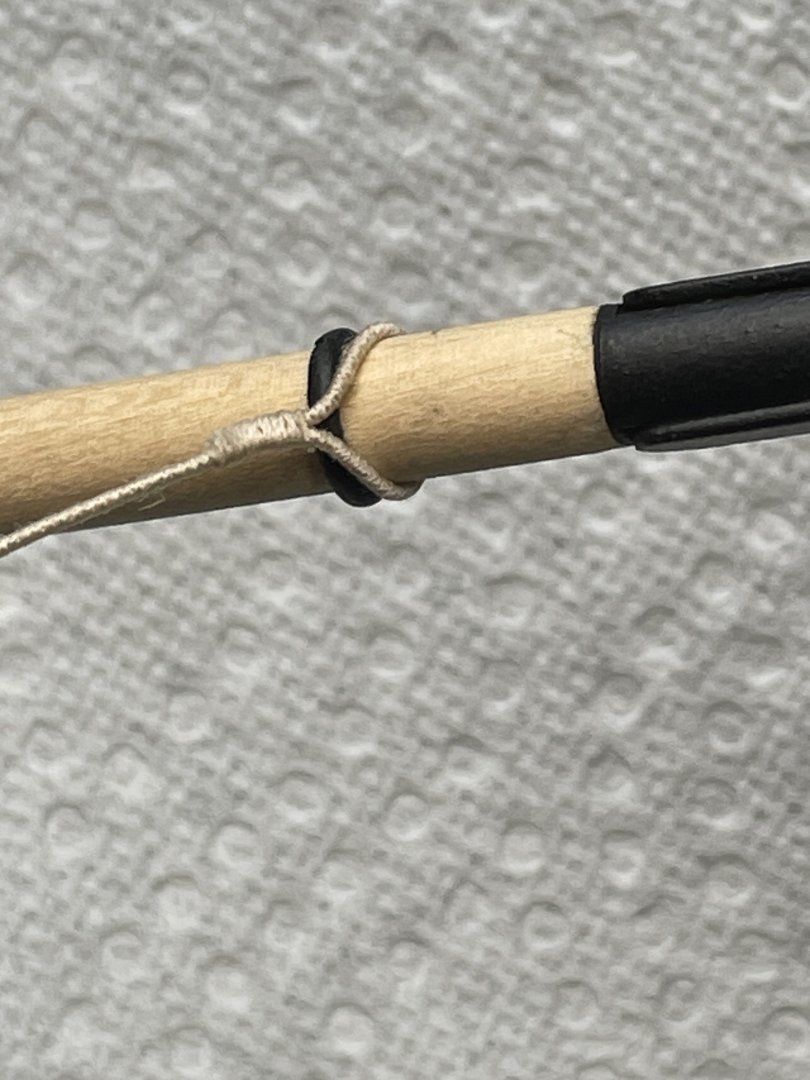
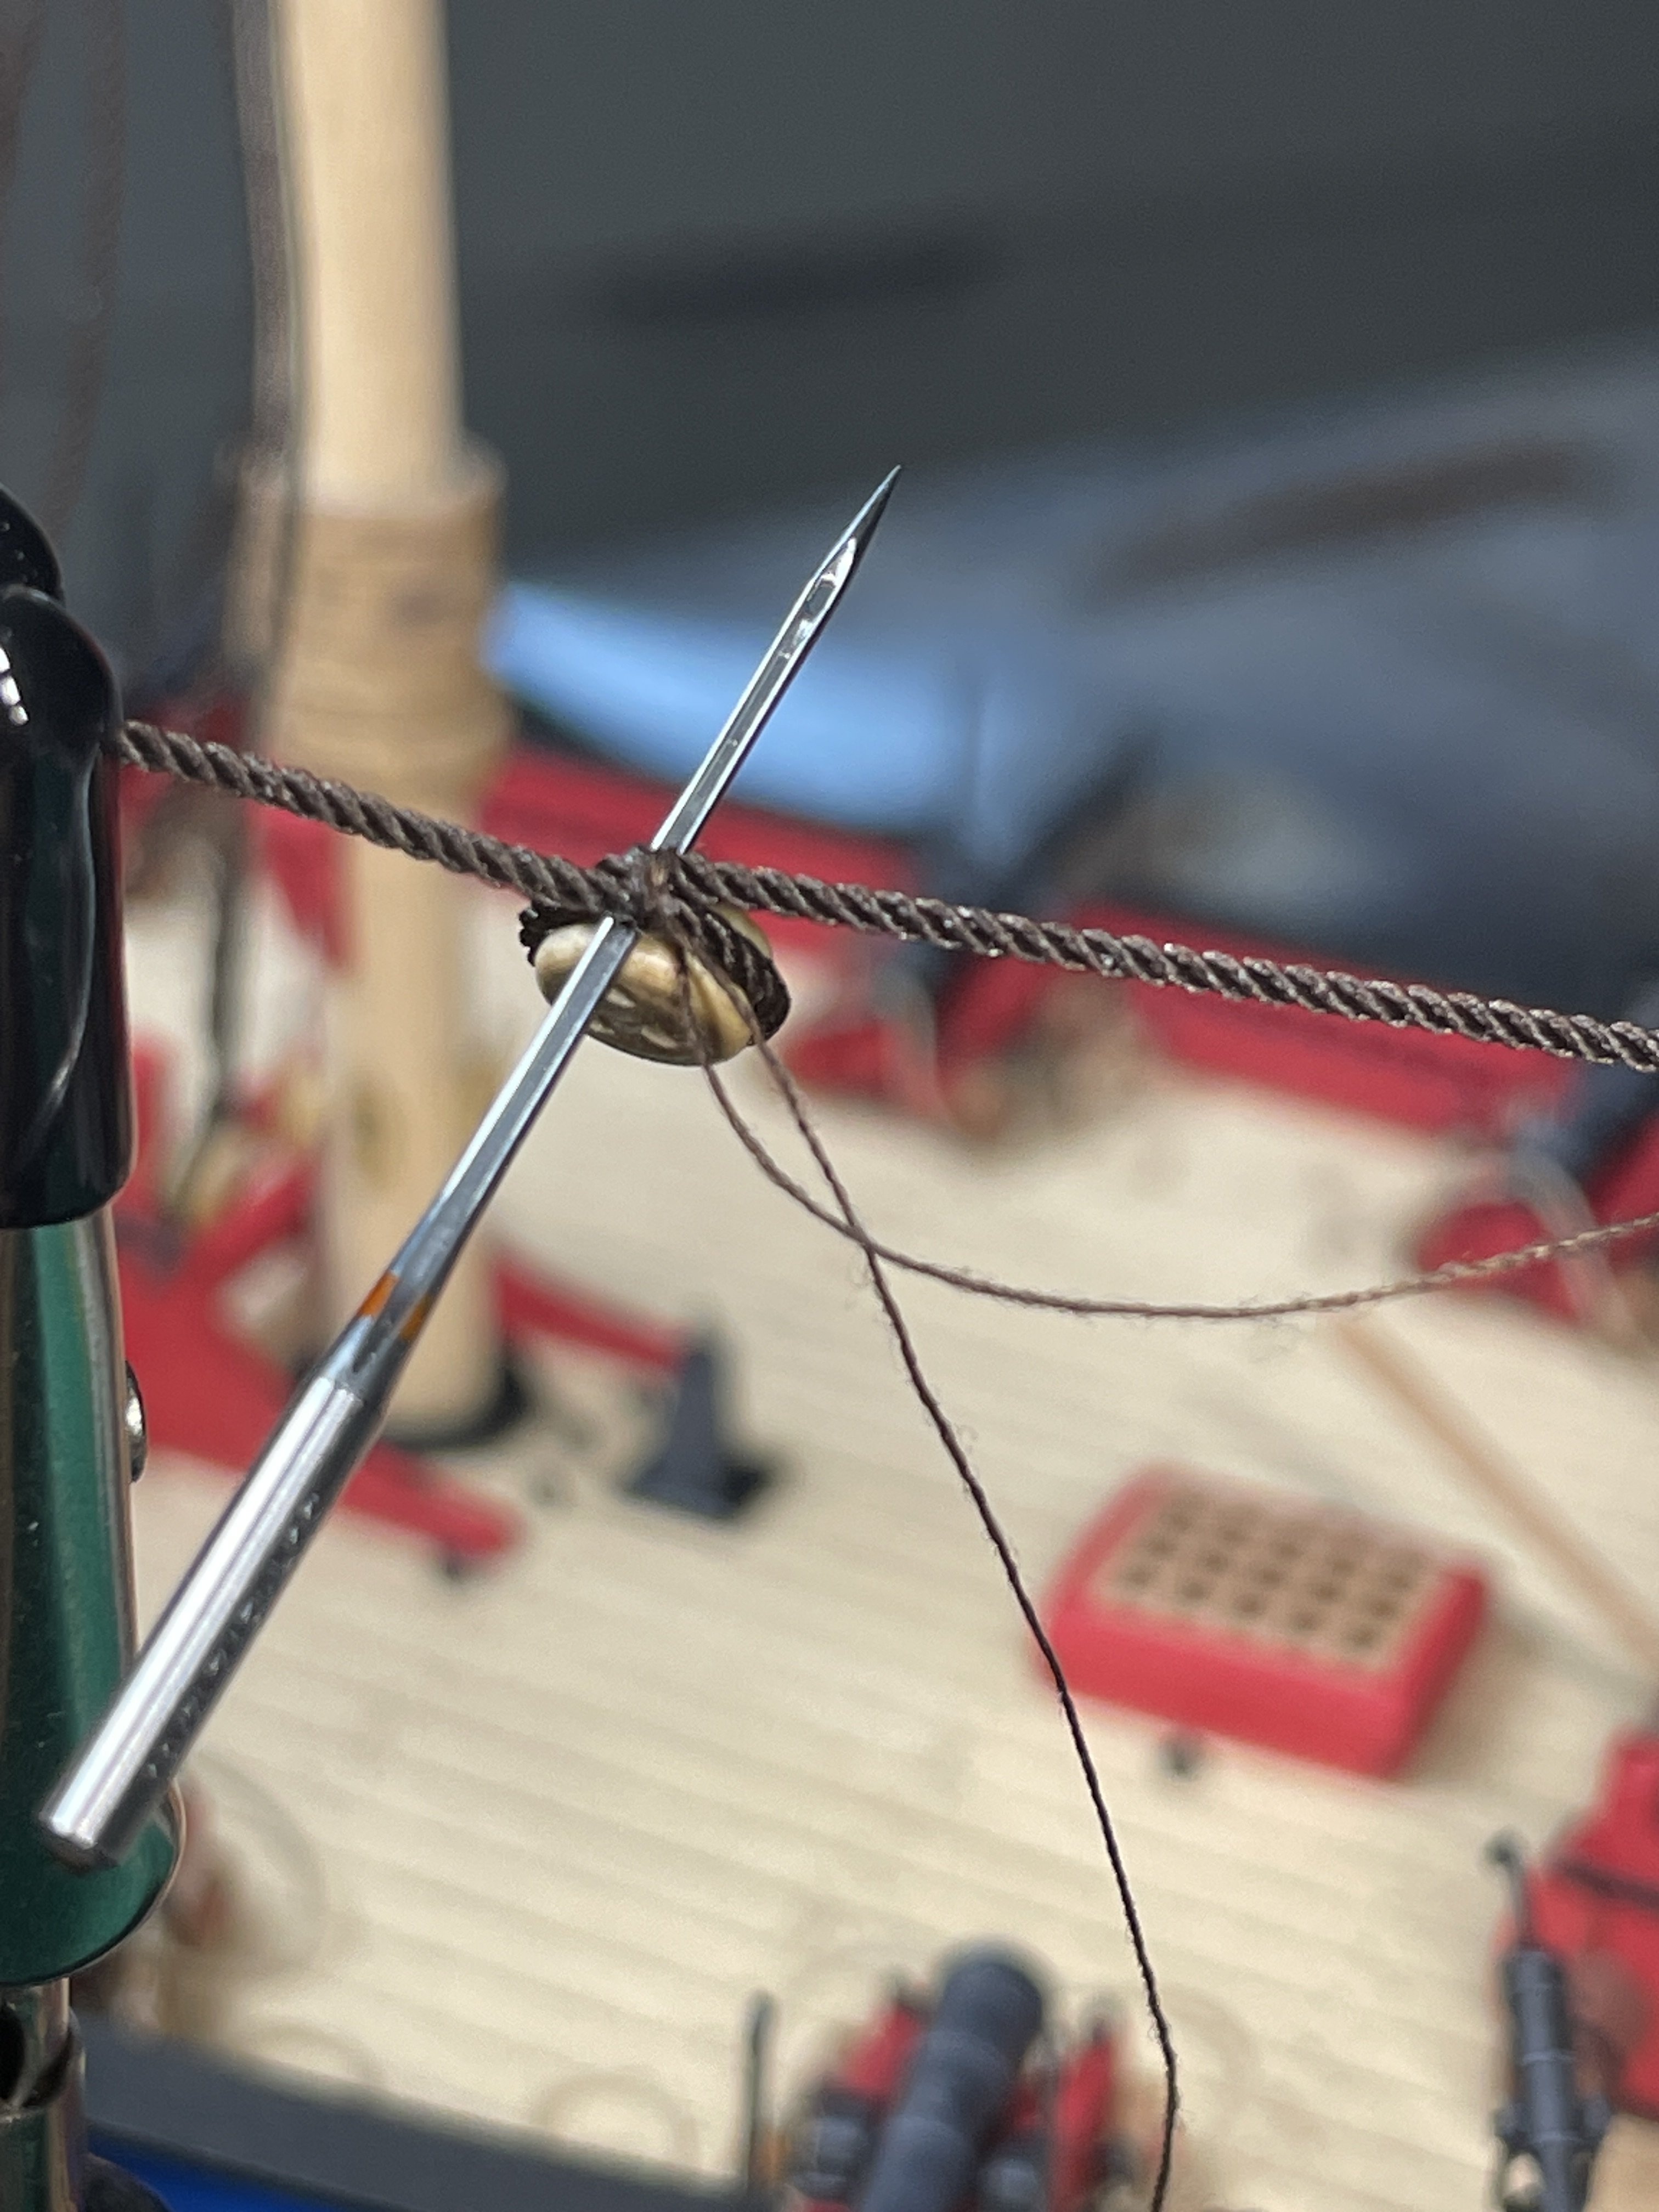
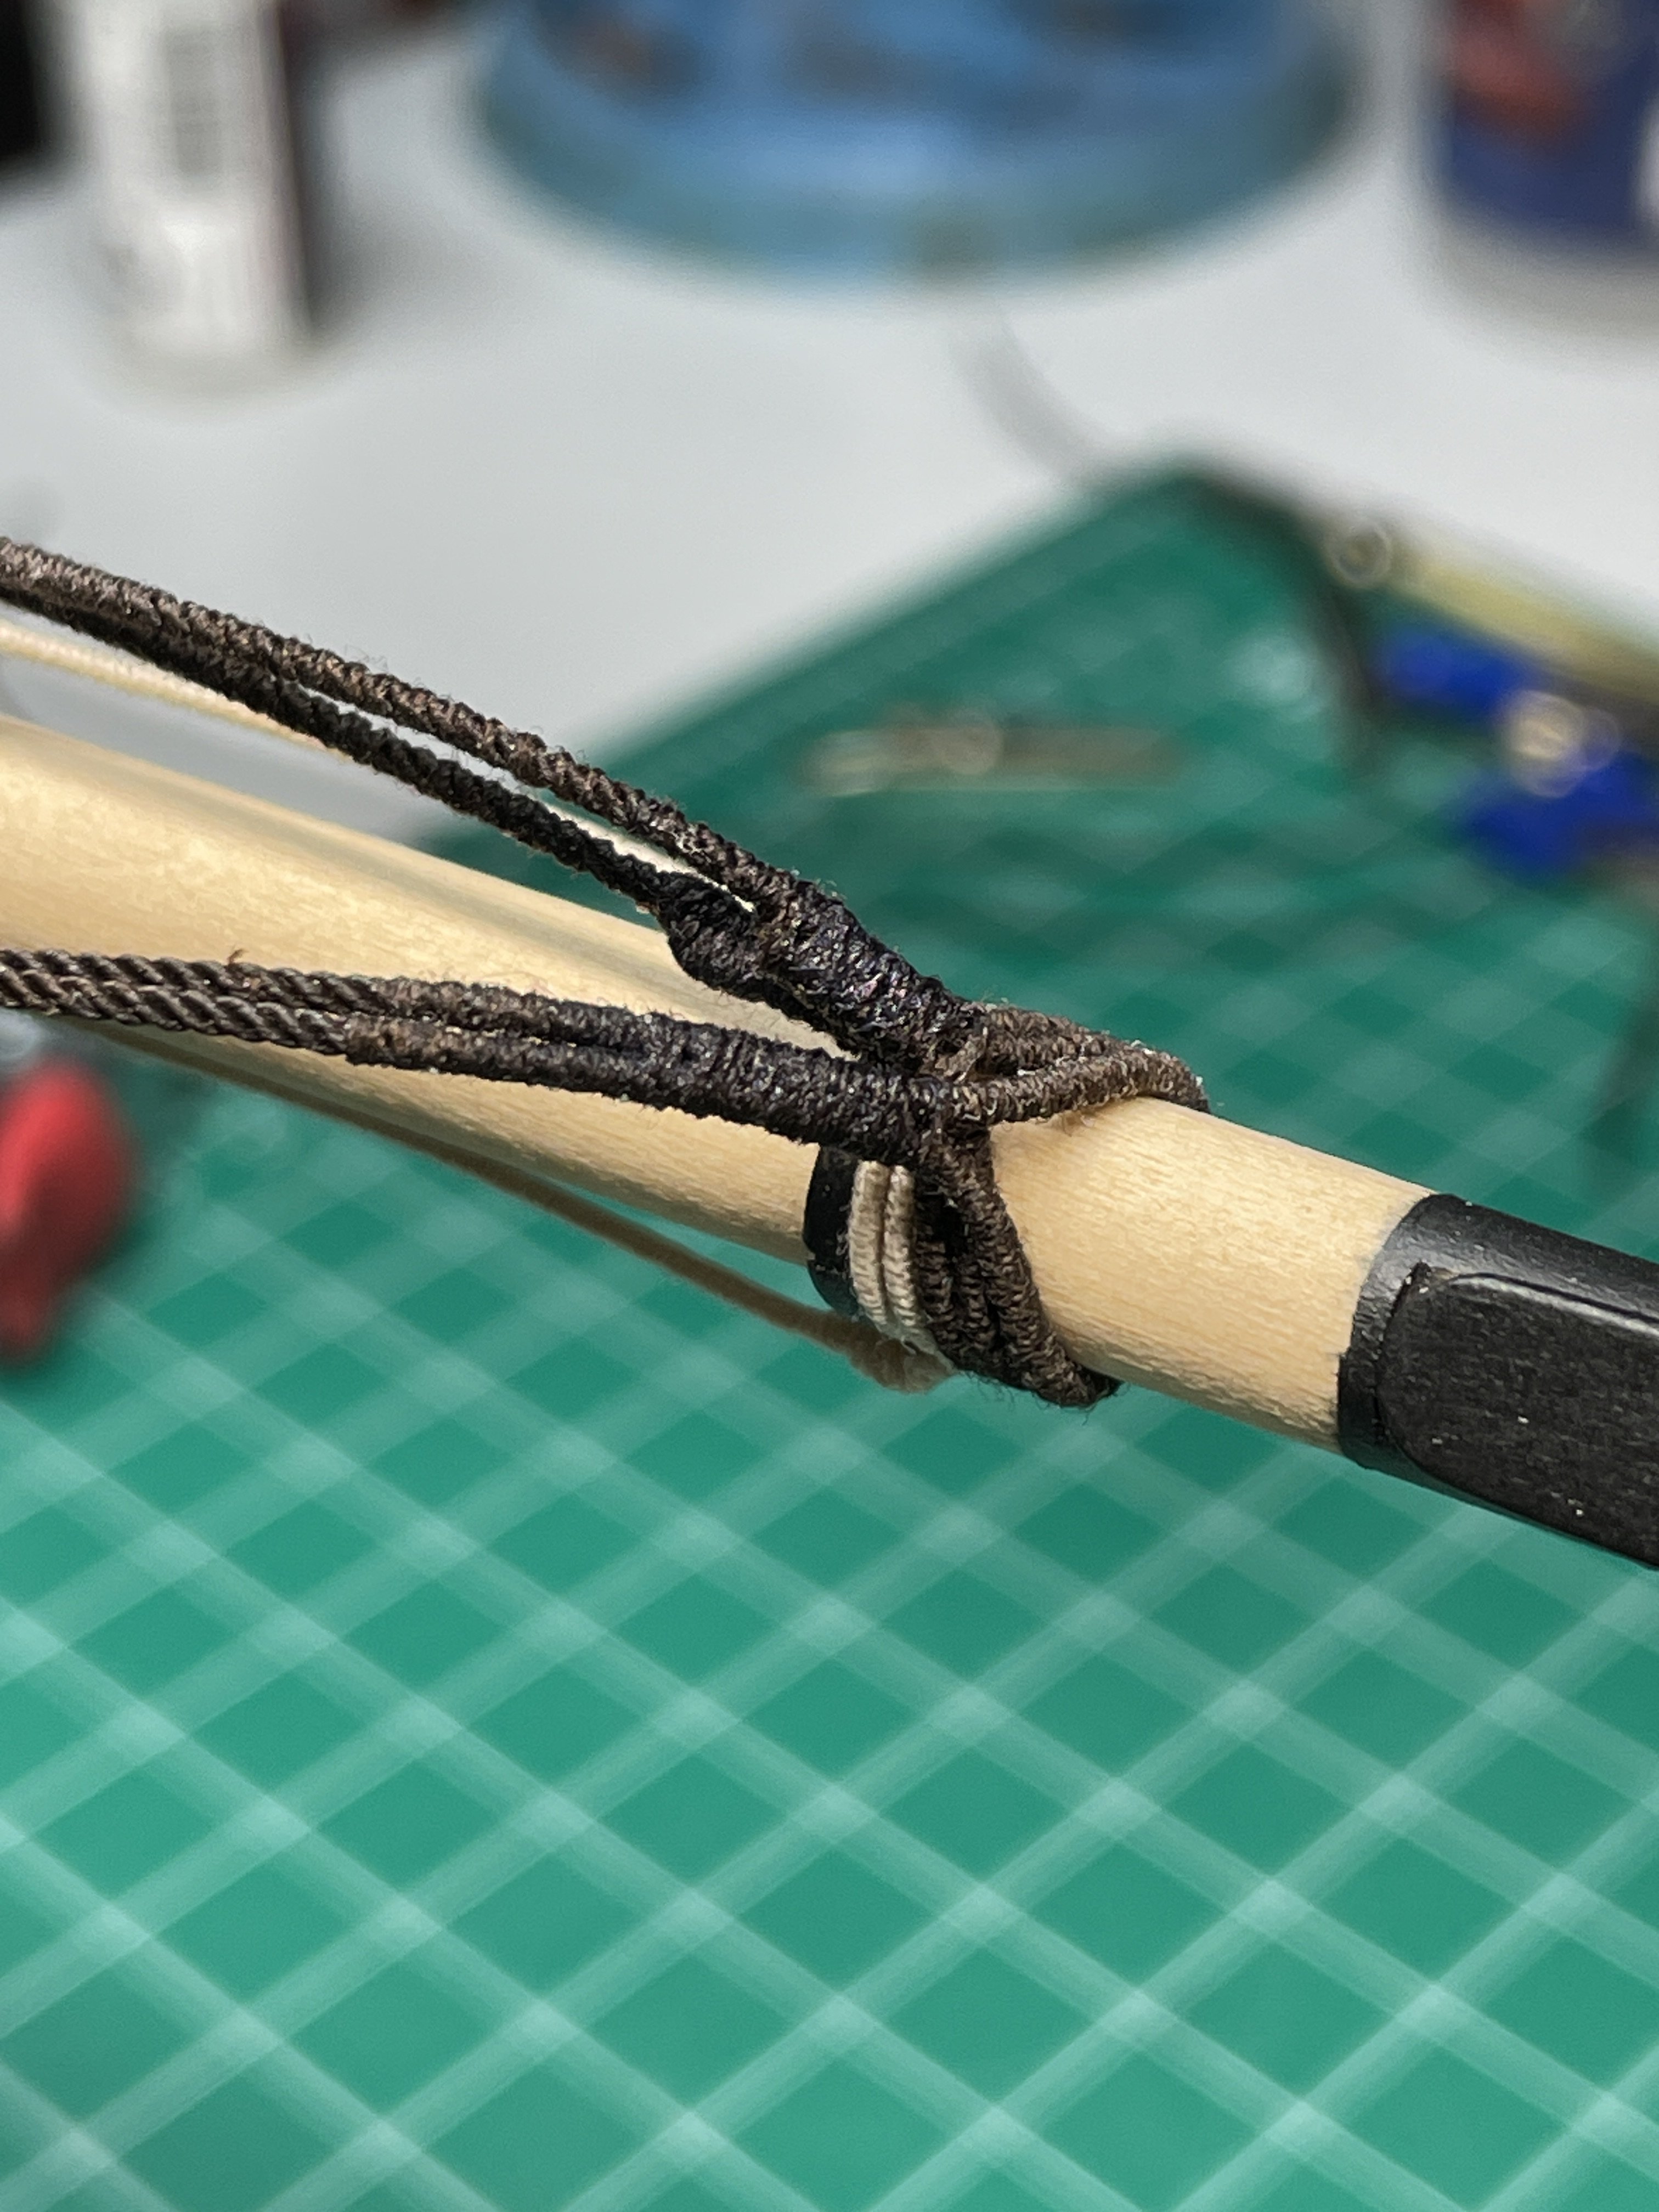
OK time to work on the shrouds. I used some bent paperclip wire to make a jig to hold the deadeyes at a consistent distance. Then I put a dab of CA at the bottom of the deadeye.
Then I used a sewing machine needle to pull the tiny thread under the crossed ropes. I think I did it four times. Finish with a dab of CA then a quick wipe with a finger.


Then pull the end up and finish the seizings.

Then I tied on some shroud cleats from Syren. Looking at the photos now I’m thinking I should have spent some more time sanding them and giving them a little more roundness to their shape. I must have thought they looked good enough at the time.

Then on to the tackles. These were a little fiddly to work through but I think the end result is very rewarding. It adds a great look to the boat. This is my first time doing them. I am pretty happy with how they look.

I experimented with a few ways to tie them off. I looked at build logs and the Peterson book Rigging Period Ship Models. I completed one by itself. Once I was satisfied I did the rest all at the same time to keep them looking consistent.

A few times it looked like a tangled mess, but it turned out ok. Slow and steady is always the answer for me, although sometime I forget the question…

Thanks for checking out my build. I’d love to hear what you think!
Next up is the conundrum of the backstays!
Chris
-
1 hour ago, wmherbert said:
Key for me is using the very fine tips I bought on Amazon. A ton of them for very little money. I get rid of the cap and just use a nozzle. I leave it on between uses. Even over night. If it clogs I just cut a tiny bit of the tip and it's ready to go.
Bill
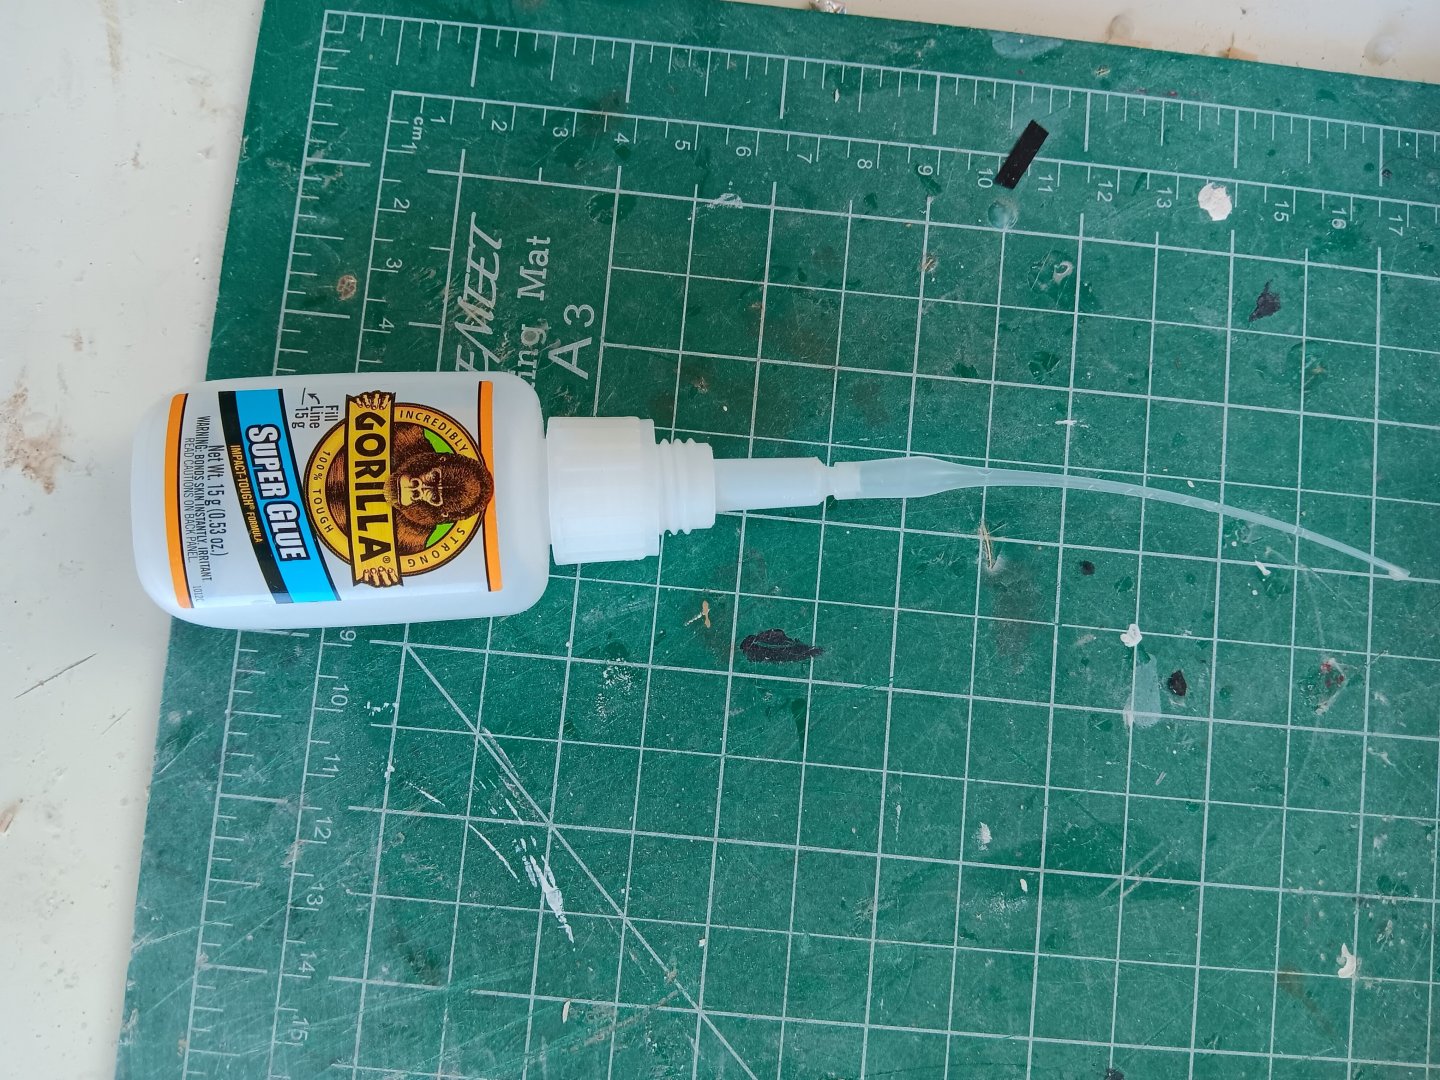
This is exactly what I do. Of course I pretty much have zero humidity in the air.
-
With that much difference it almost sounds like you are measuring with calipers off some sort first. Giving you a shorter distance. Obviously only guessing though.
Chris -
That sounds like pretty good news! Good to hear. Sending you lots of good thoughts!
Chris- Canute, FriedClams, Keith Black and 2 others
-
4
-
 1
1
-
Hi everyone following along! I’m still here. Things got a little side tracked with a big welding project that made a mess of the garage. Well that meant I need to clean up where I’m trying to work. Well, that turned into “this garage really needs a good clean out”. Then I said “hey I have room for a new welder”, then I needed to run a 240v circuit for the new welder…So I’ve been busy. Now that you are caught up on my goings on, let’s get caught up on the build.
Its time to work on the shrouds. We are in brand new territory for me with all this rigging. As I’ve stated previously I’m just going to go slow and try to follow some other builds.
I believe I pointed this out earlier, but it begs to be said again. Don’t complete the top of the mast before putting the shrouds on. It will make your life much easier. At least this part of it.
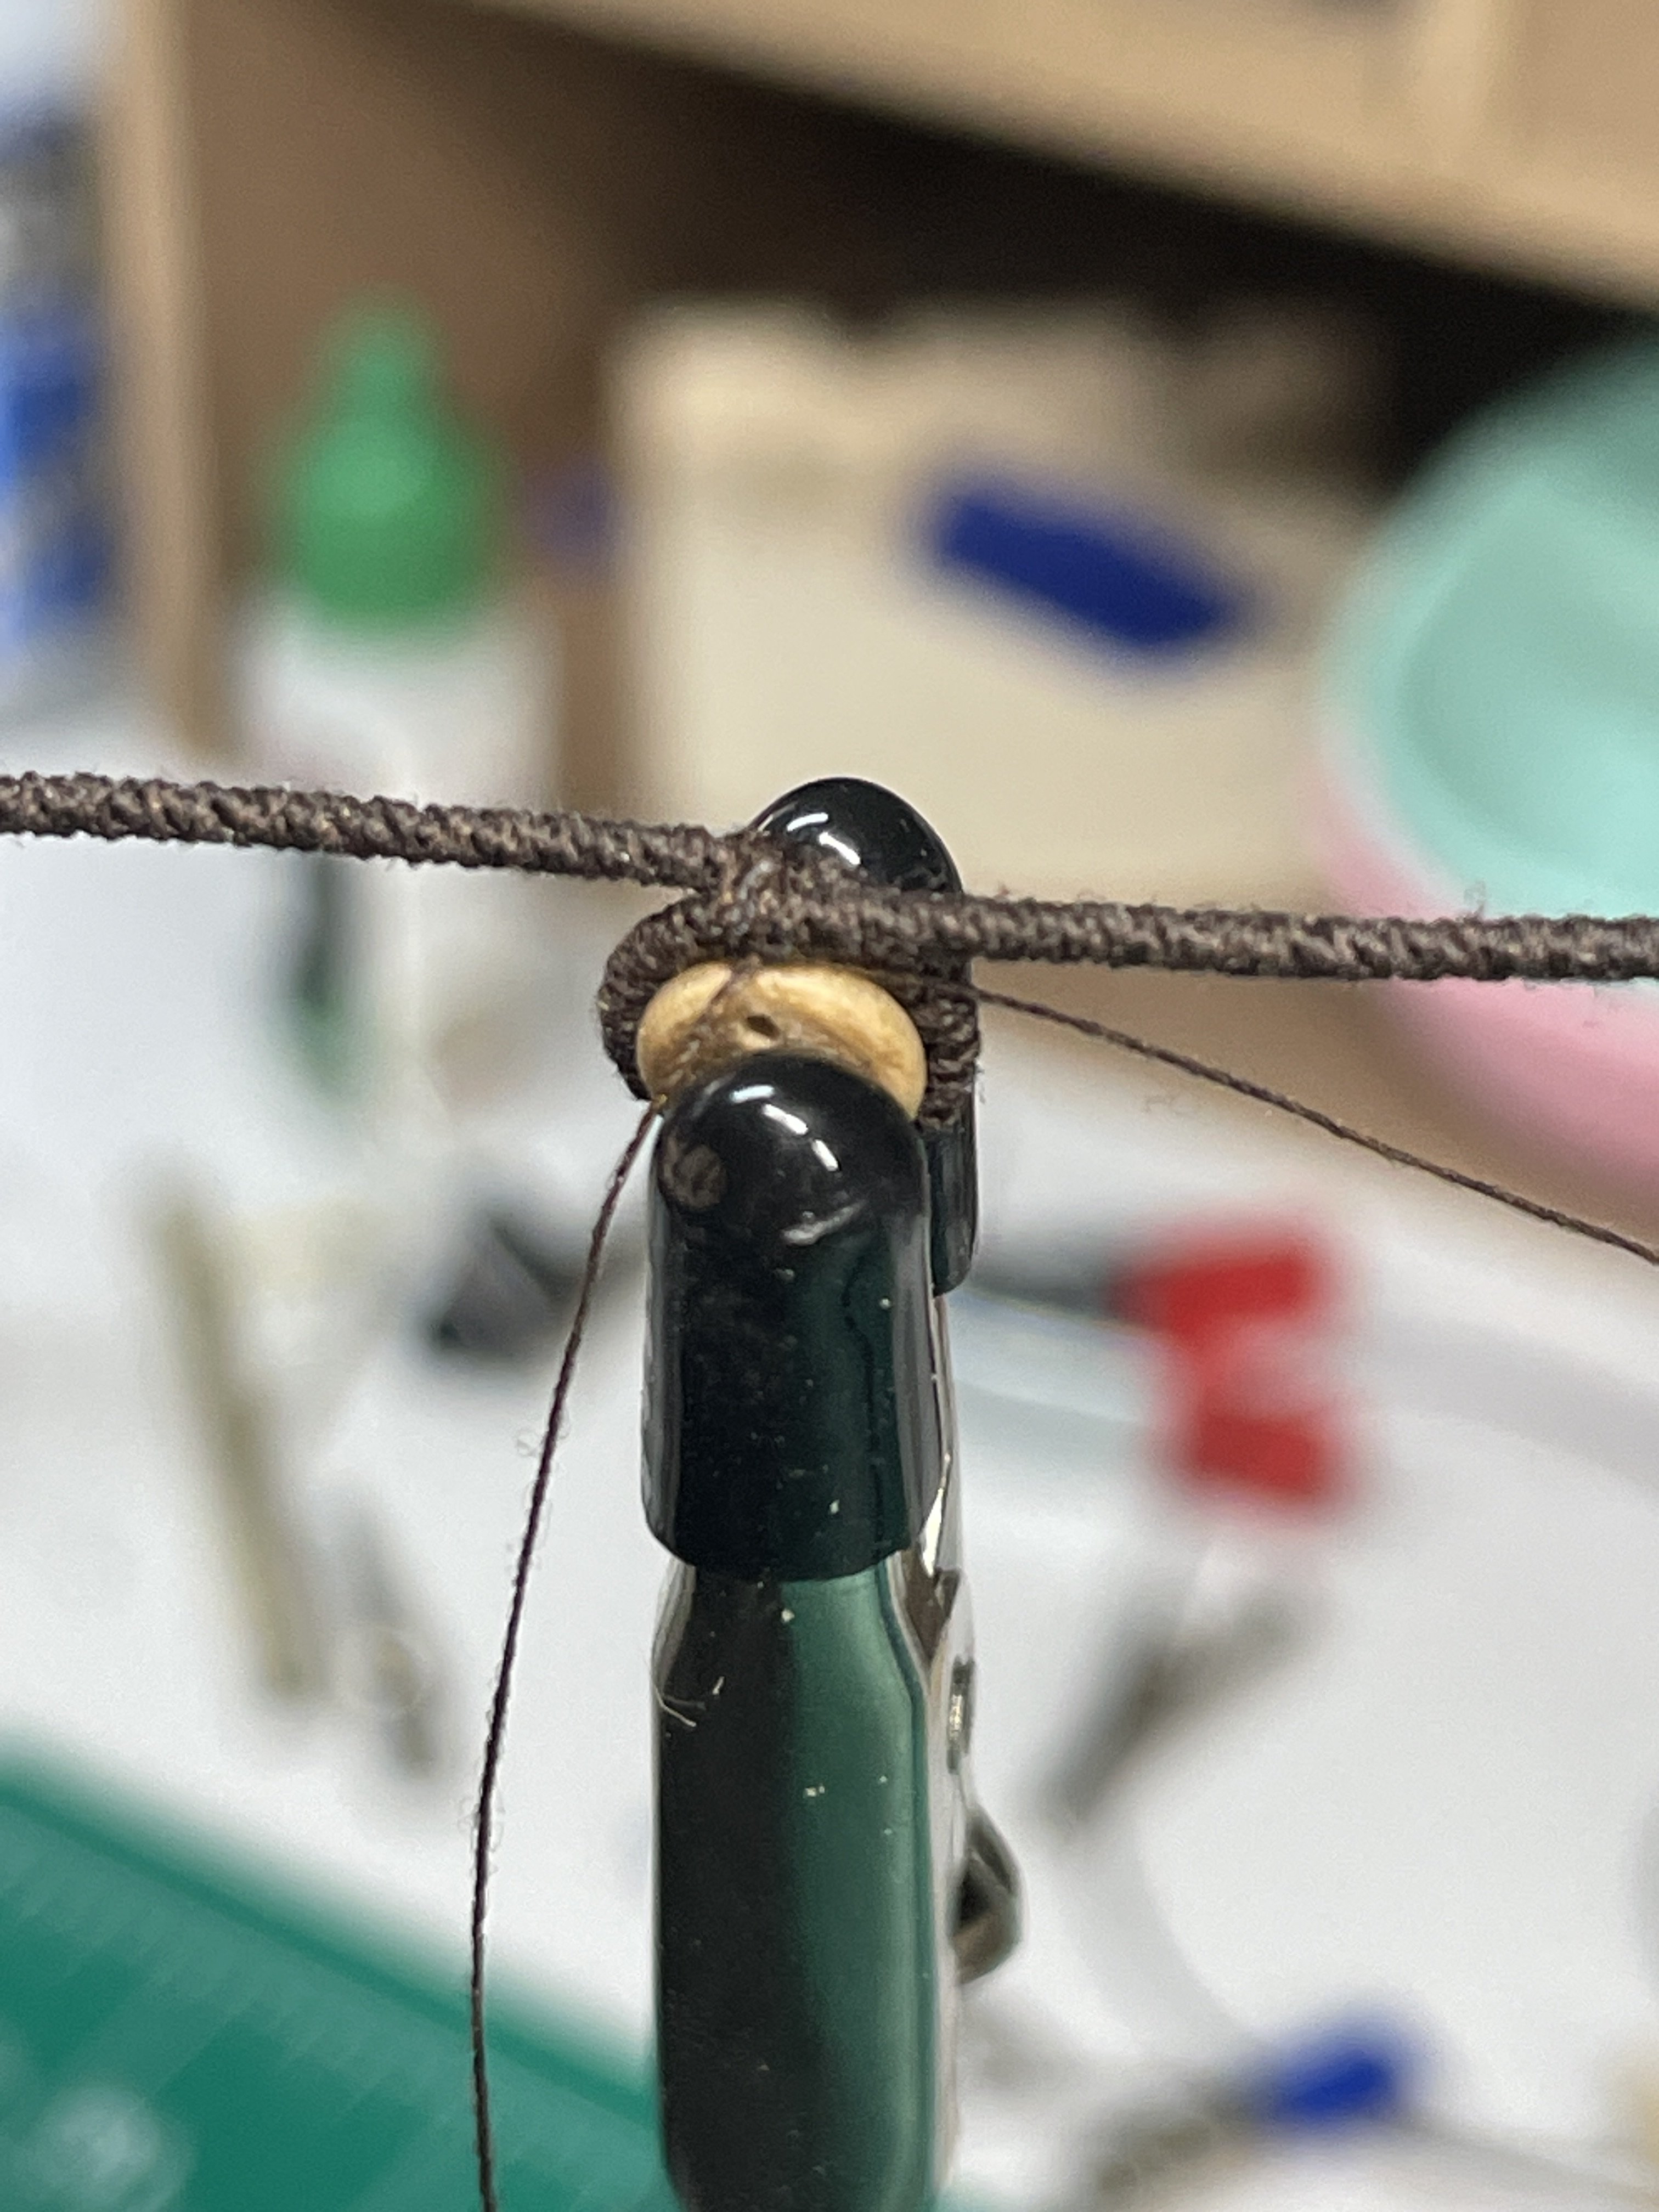
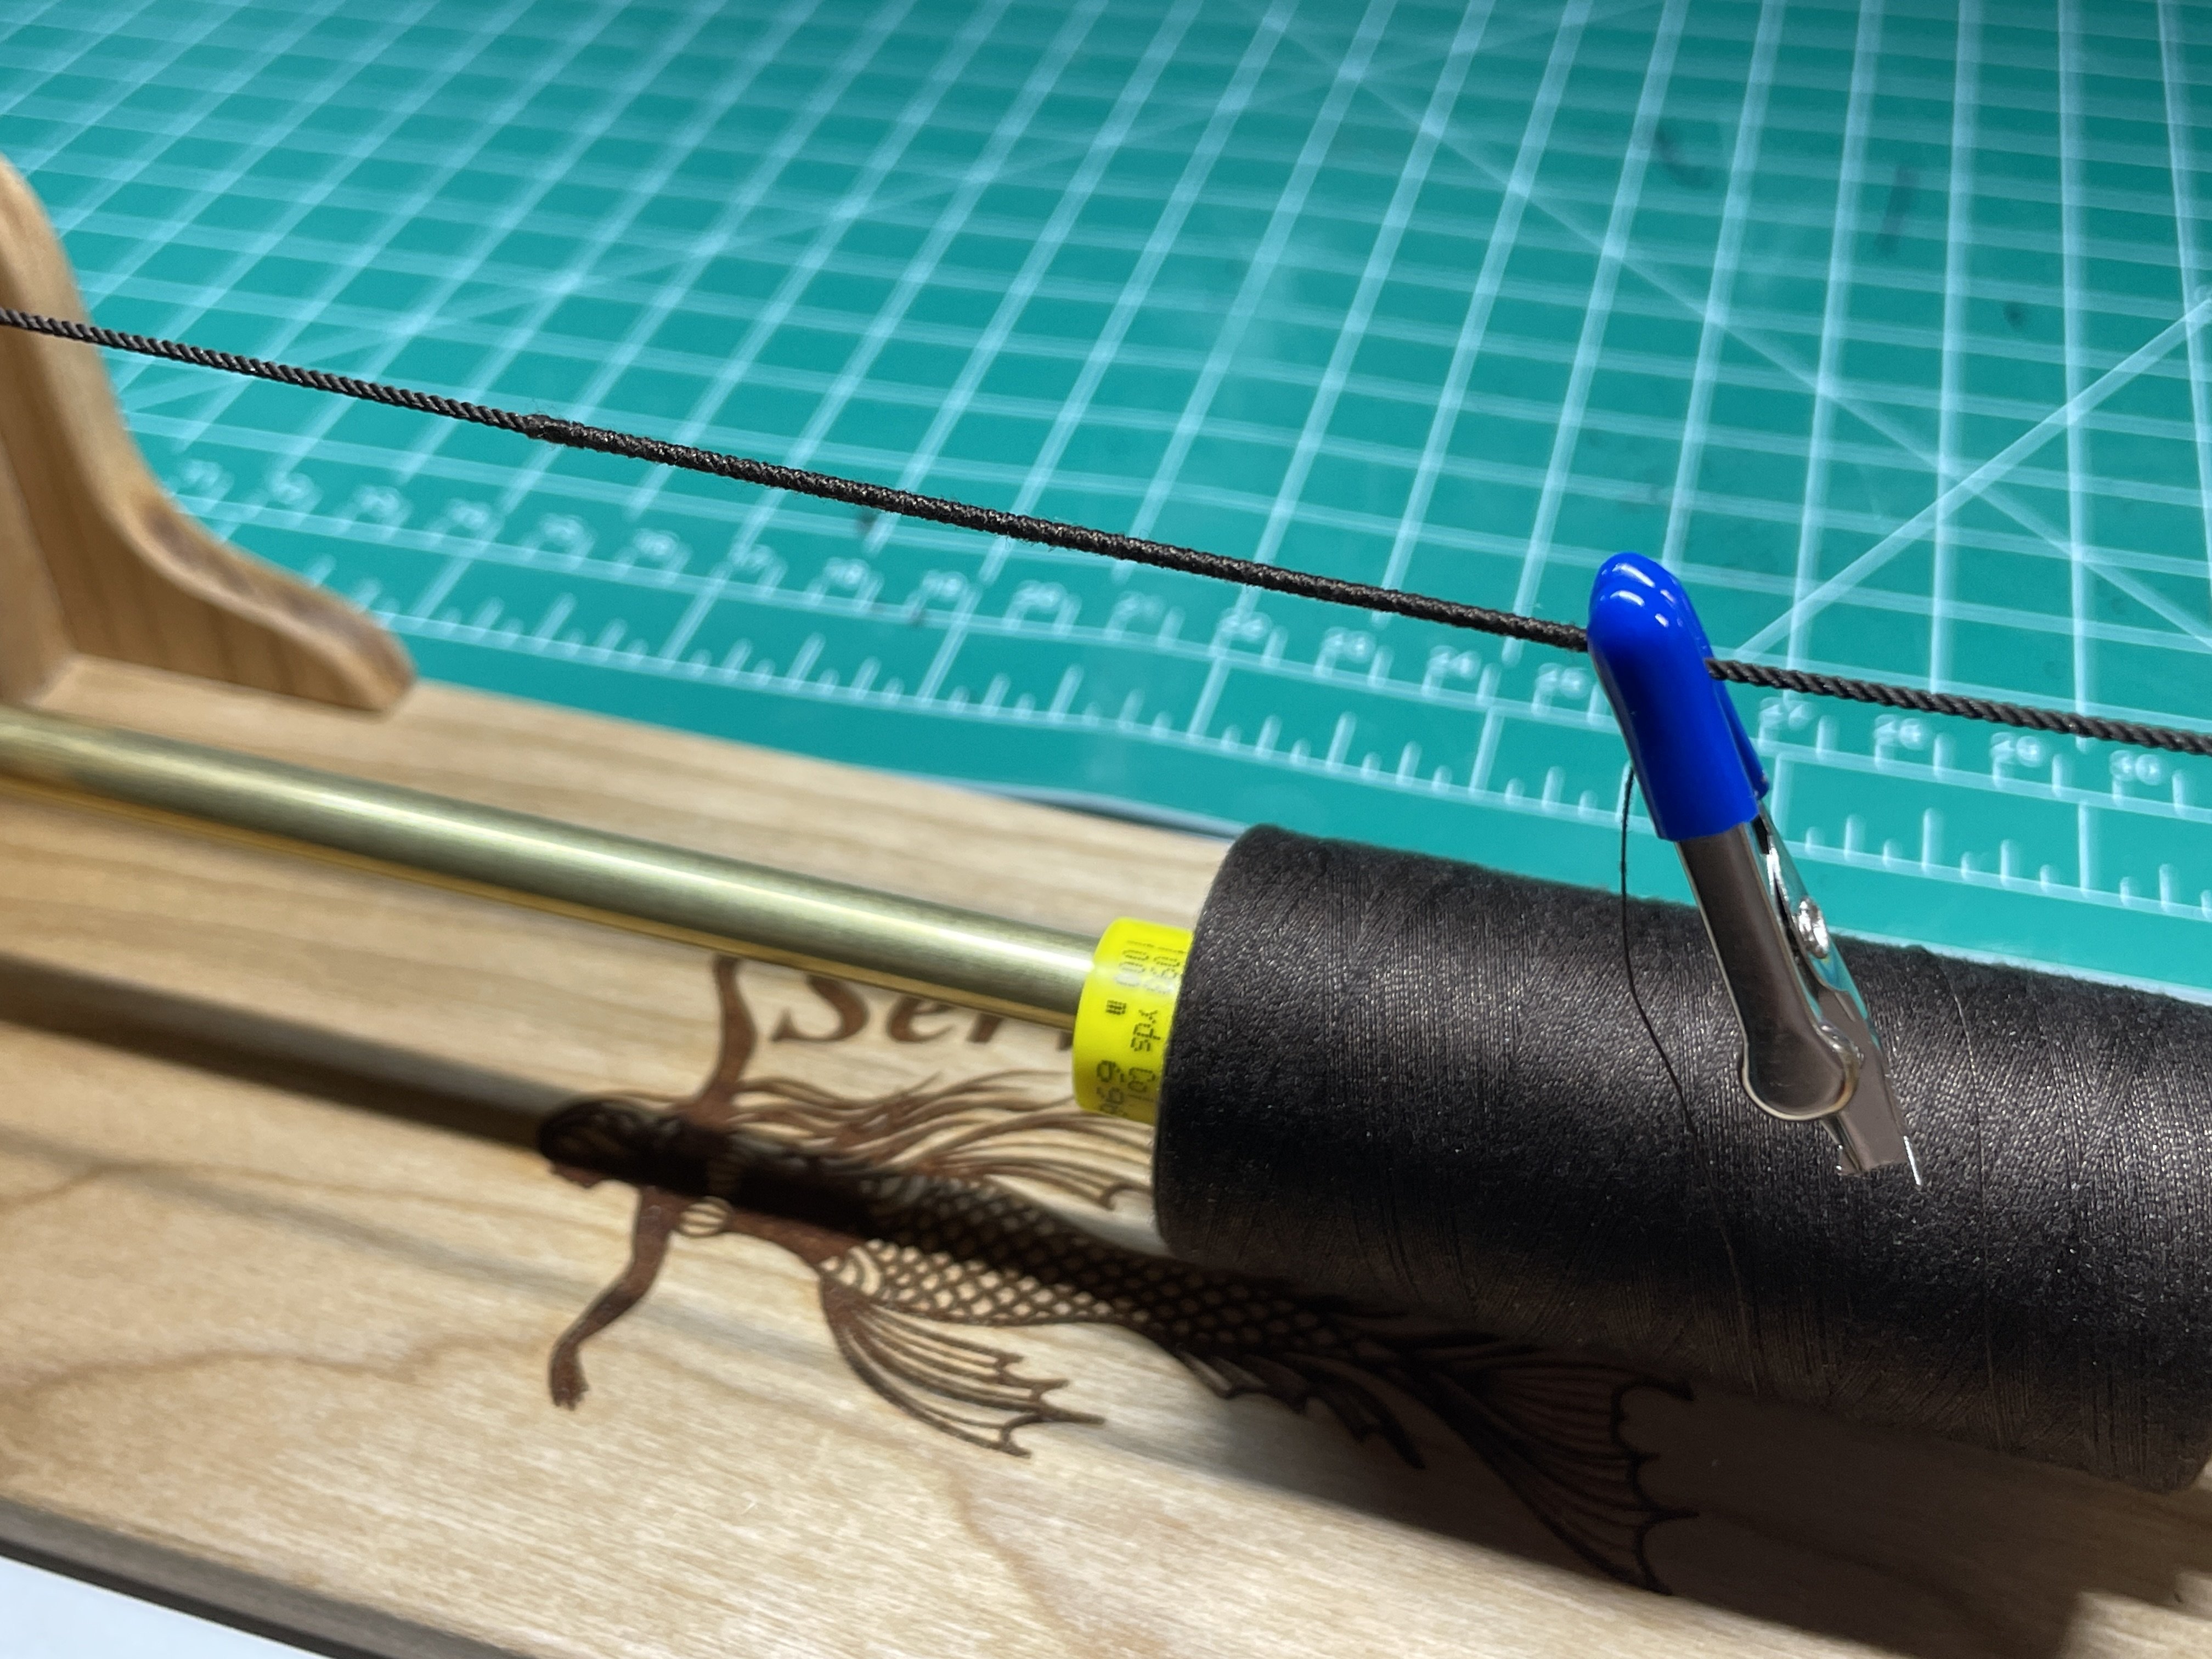
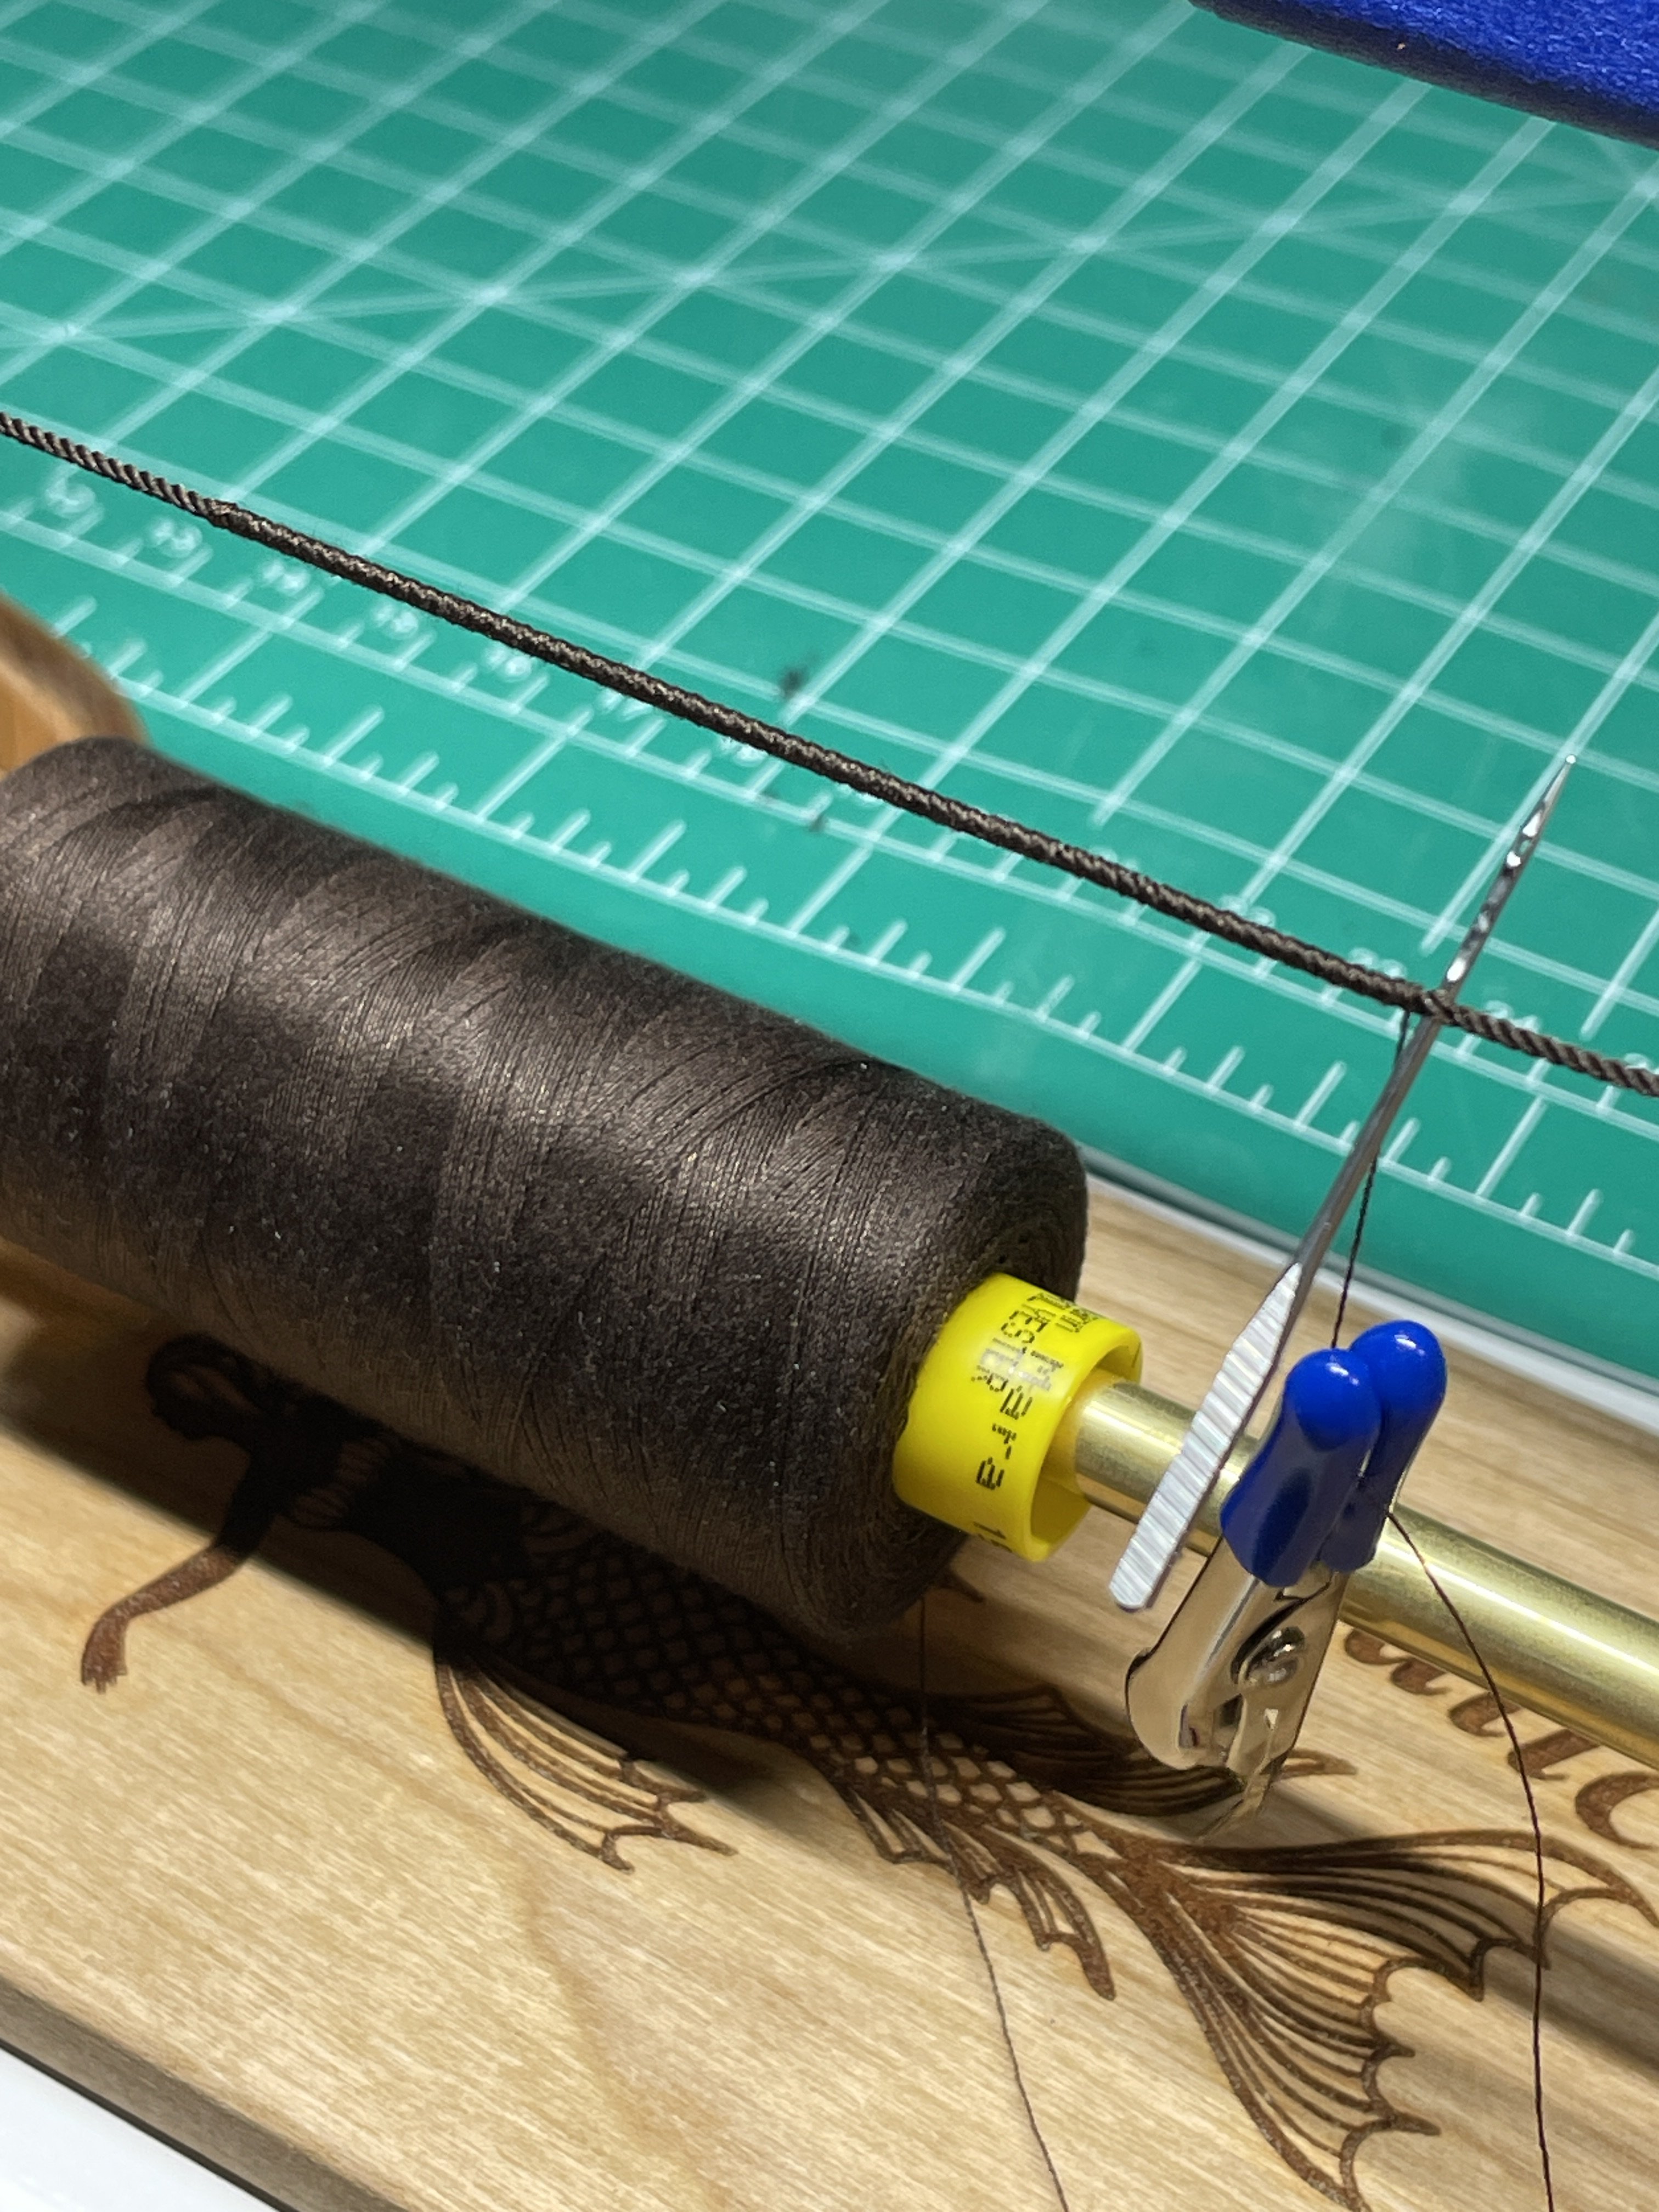
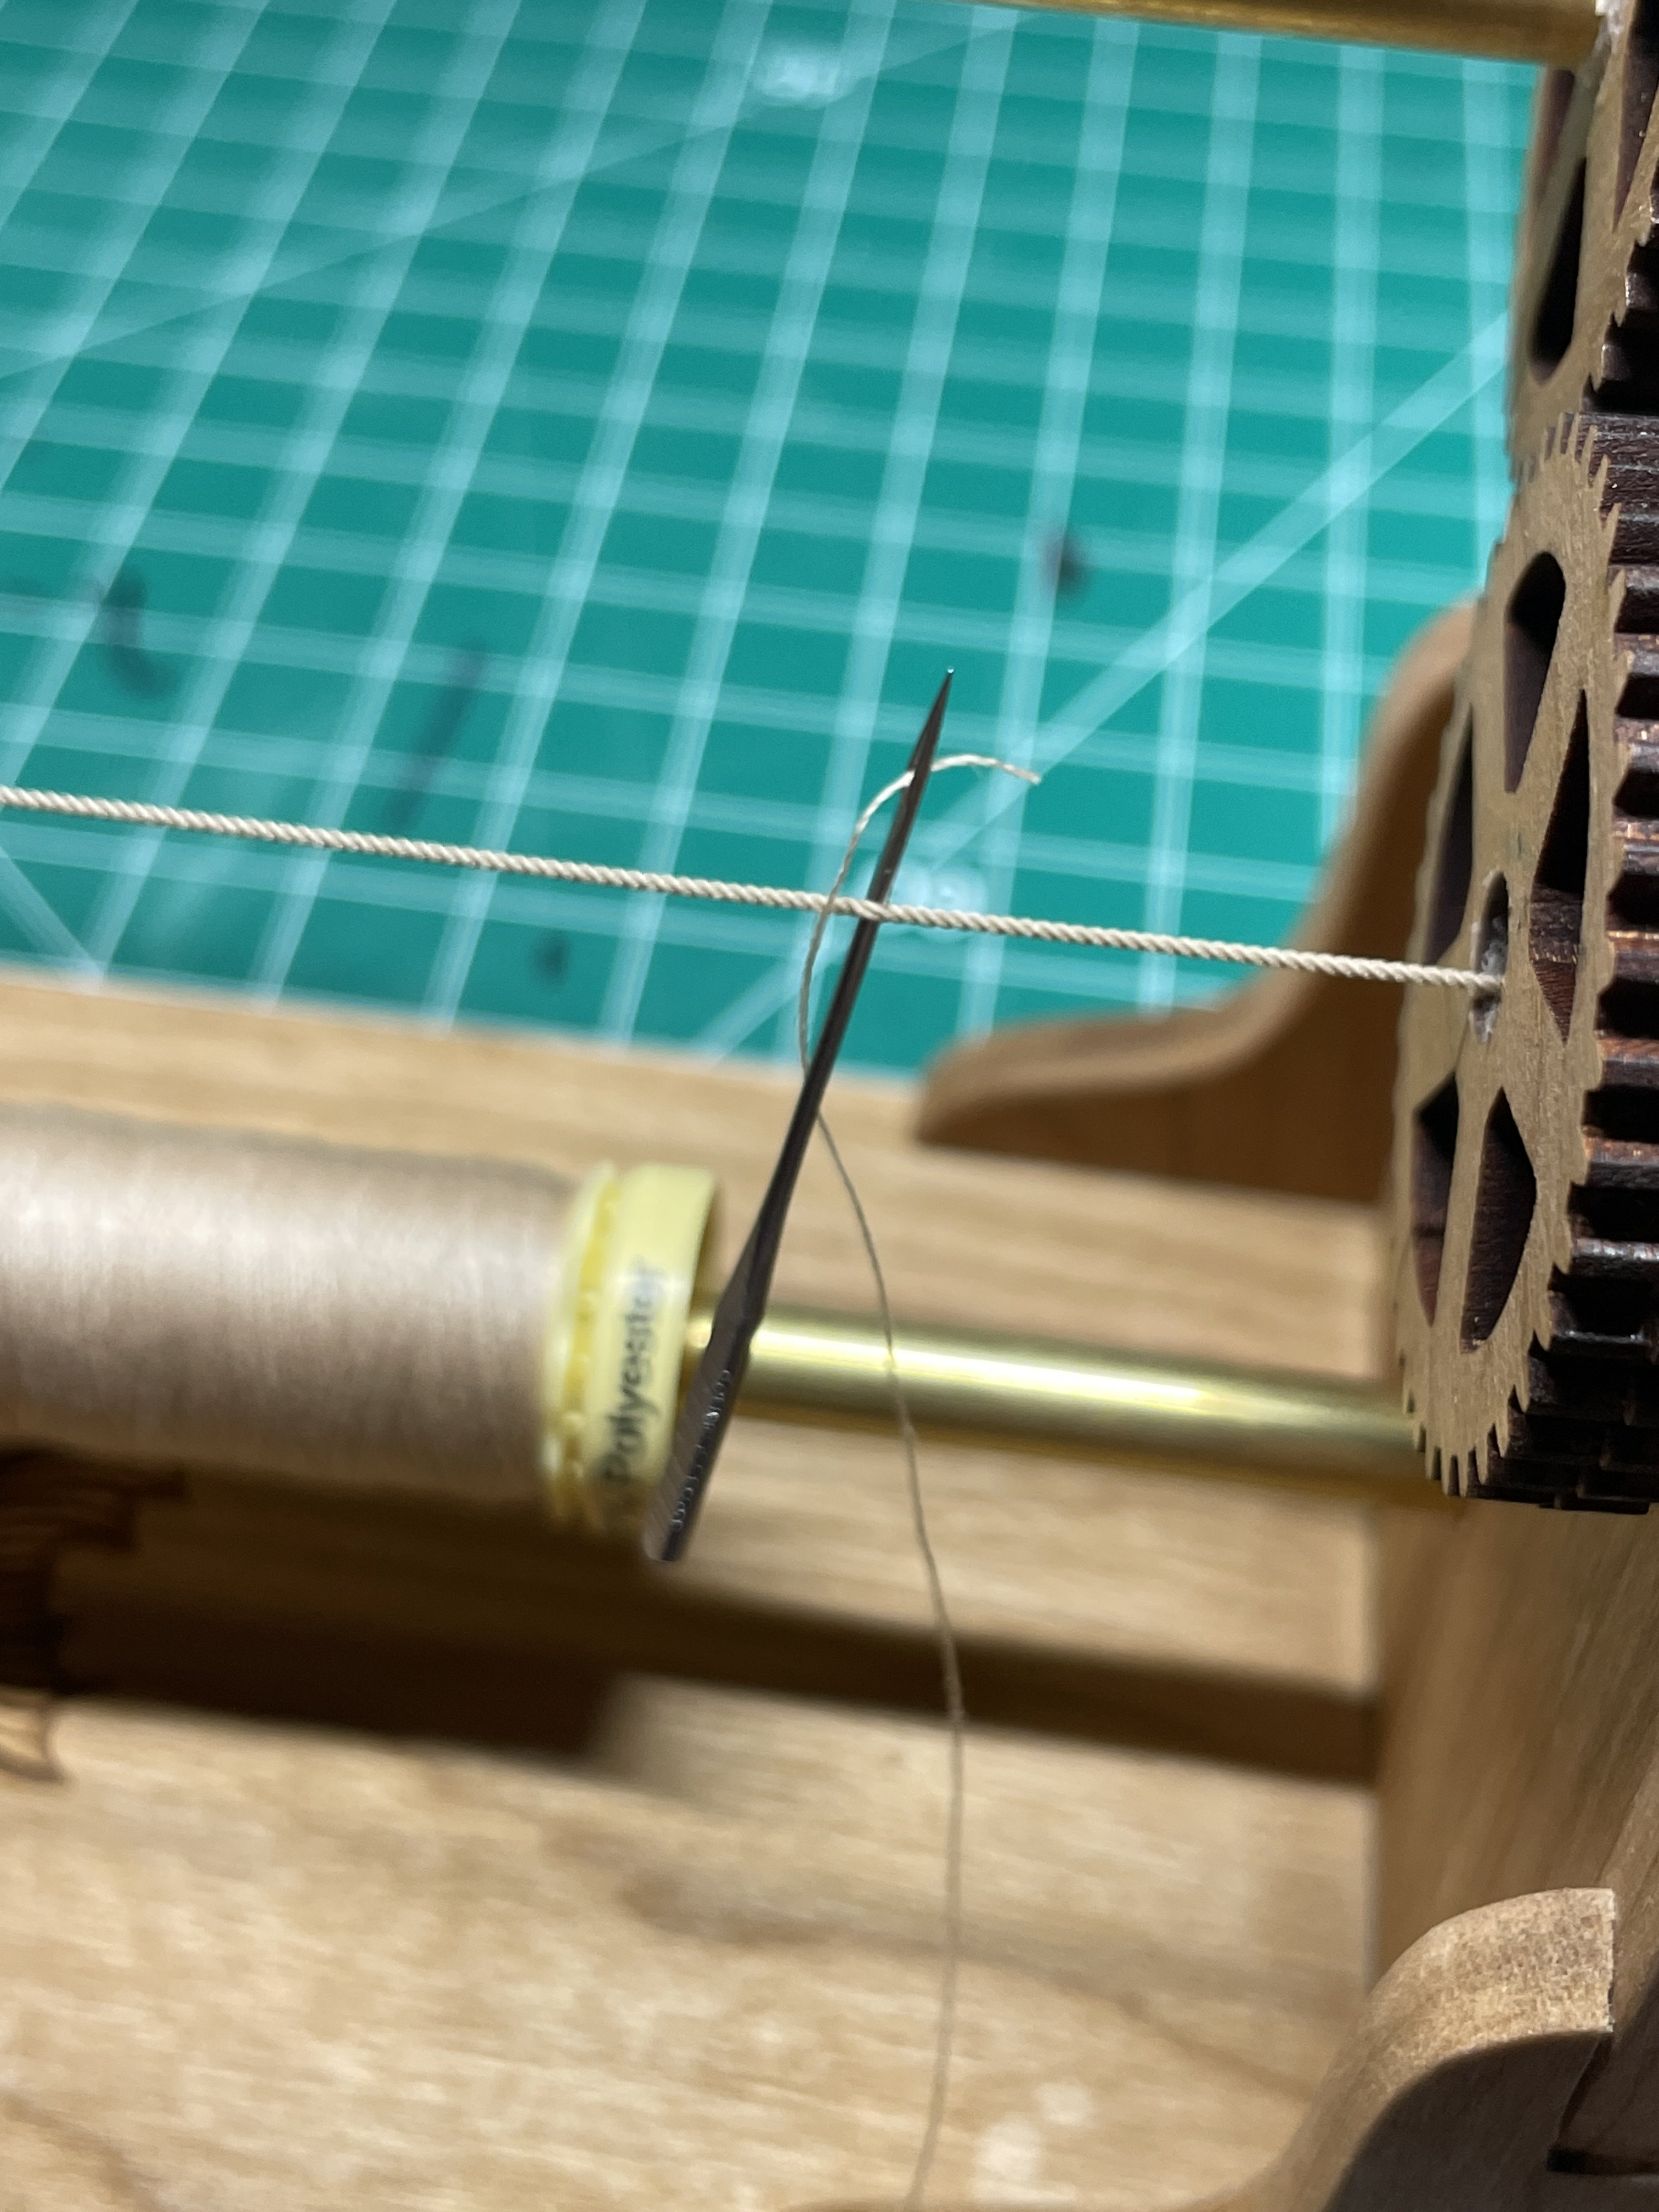
As my mast was complete I had to serve the shrouds in place. I leaned my vice way over and had the mast mostly horizontal in order to do this.
Here are some photos of the serving of the ends of the shrouds.

This is how I spliced the ends of the thread in. I would pull the thread through twice. Then a dab of medium ca and a quick rub with my fingers.
Here is some of the manual serving done around the mast.

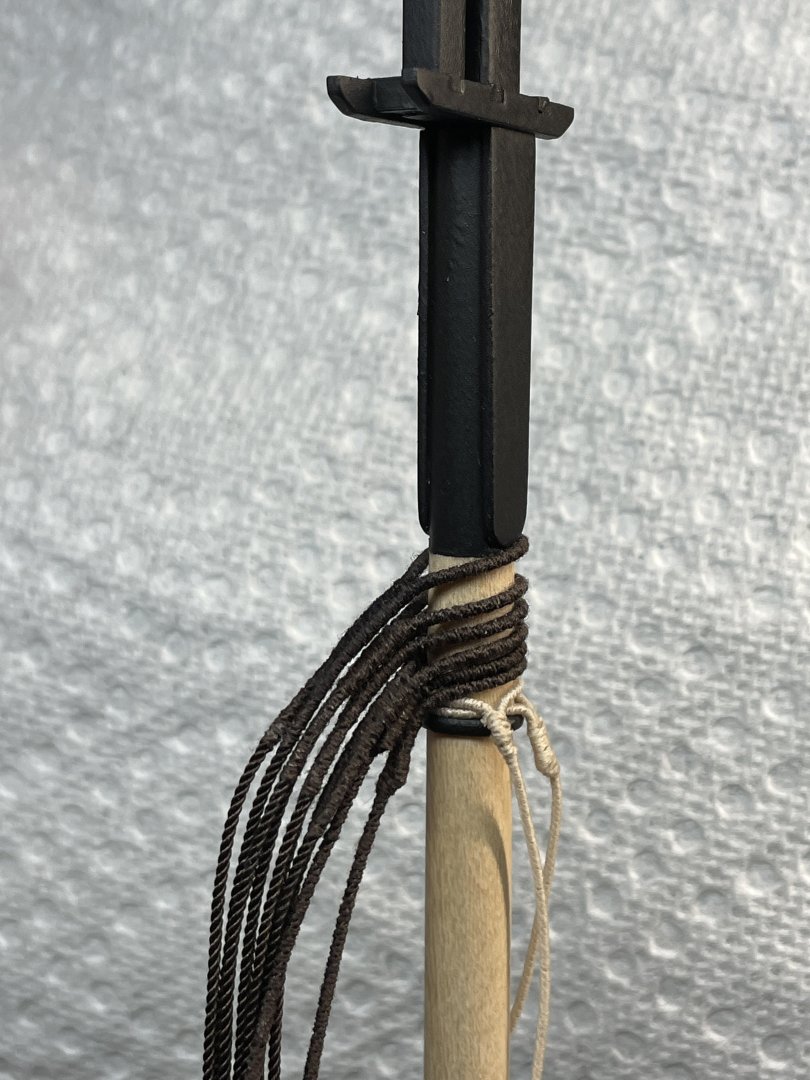
A little explanation about the white pendants. They were my practice pieces for both serving the length on the machine and serving around the mast while in place. They are not the best work, and they historically probably wouldn’t have looked like that. But they were my first tries and I want to always know that. So that is why they are there.
It was quite interesting to see the progression of the “quality” of the serving after only this many. I would sometimes try something a little different, like change the angle of the needle or such. Some things helped either in quality or being able to do it faster. Others not so much. LOL
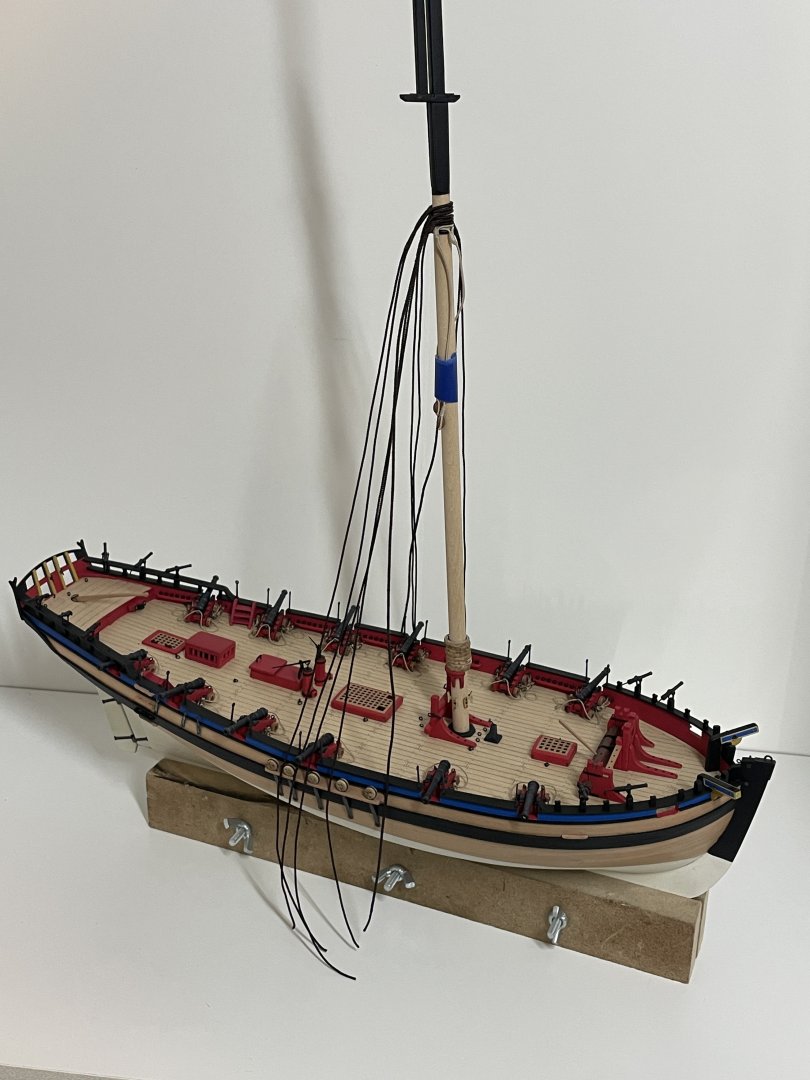
Finally, here is a glamour shot of her so far. I am quite happy with how she’s looking. She lives in an Ikea cabinet to keep dust at bay, once the bowsprit is on I don’t think she’s going to fit.
Thank you all for checking in!

- KARAVOKIRIS, AJohnson, chris watton and 5 others
-
8
-
You and Maggie are in my thoughts. Best of luck with these issues!
Chris- Canute, Keith Black and Knocklouder
-
2
-
1
-
I certainly can’t help with your questions.
However I have to comment that your joints are very impressive. That truly is cutting close to the line straight from the saw! Nice work!
Chris- Thukydides, Glen McGuire, jpalmer1970 and 1 other
-
3
-
1
-
-
That is an excellent idea that I completely missed out on!
The funniest part is I have a desk like that in my office!
That will definitely be added to the room. That makes a lot of sense as assembly, light woodworking table.
Chris- Mike Y, Paul Le Wol and Nirvana
-
3
-
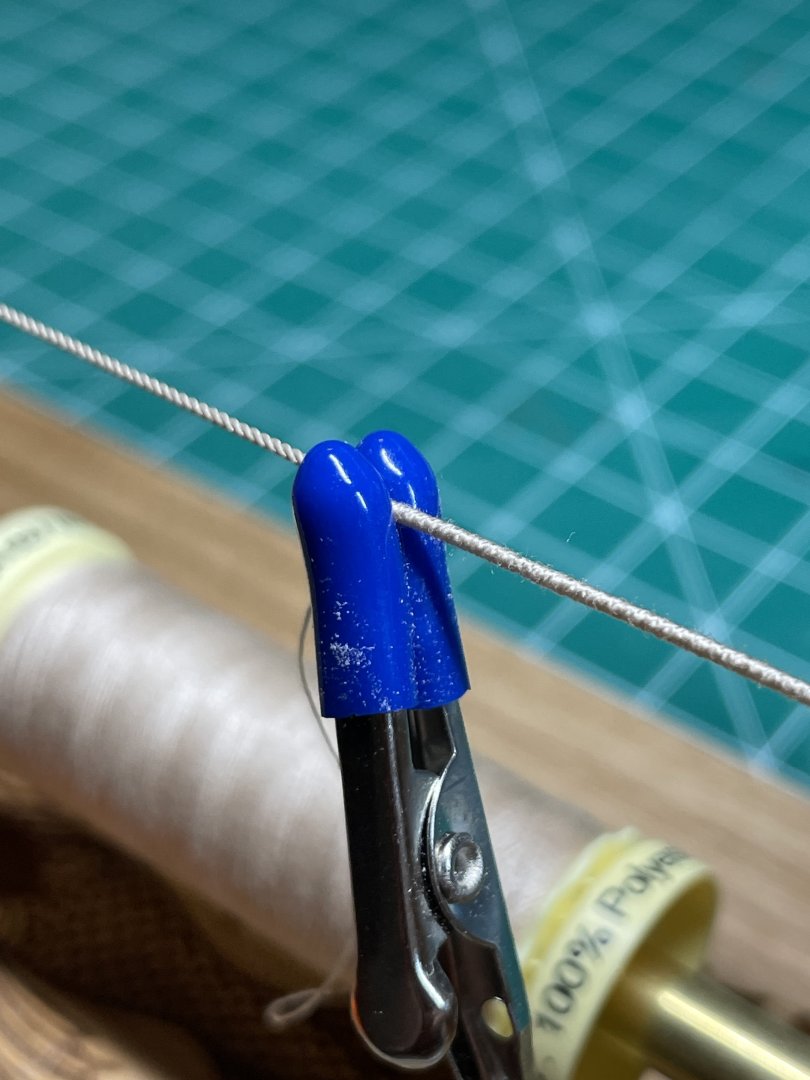
So time to learn to serve! I decided I’d set up the machine and try it. It worked really well, not a surprise. I served up what could be a pendant if it’s usable. After playing around I watched a video and learned I should have done it left to right, while I did it right to left.
The mast is together but not secured in the deck. I needed to come up with a plan to serve the shrouds on the ship. I again tried with the same pendant. I looks ok to me. We’ll revisit those later.

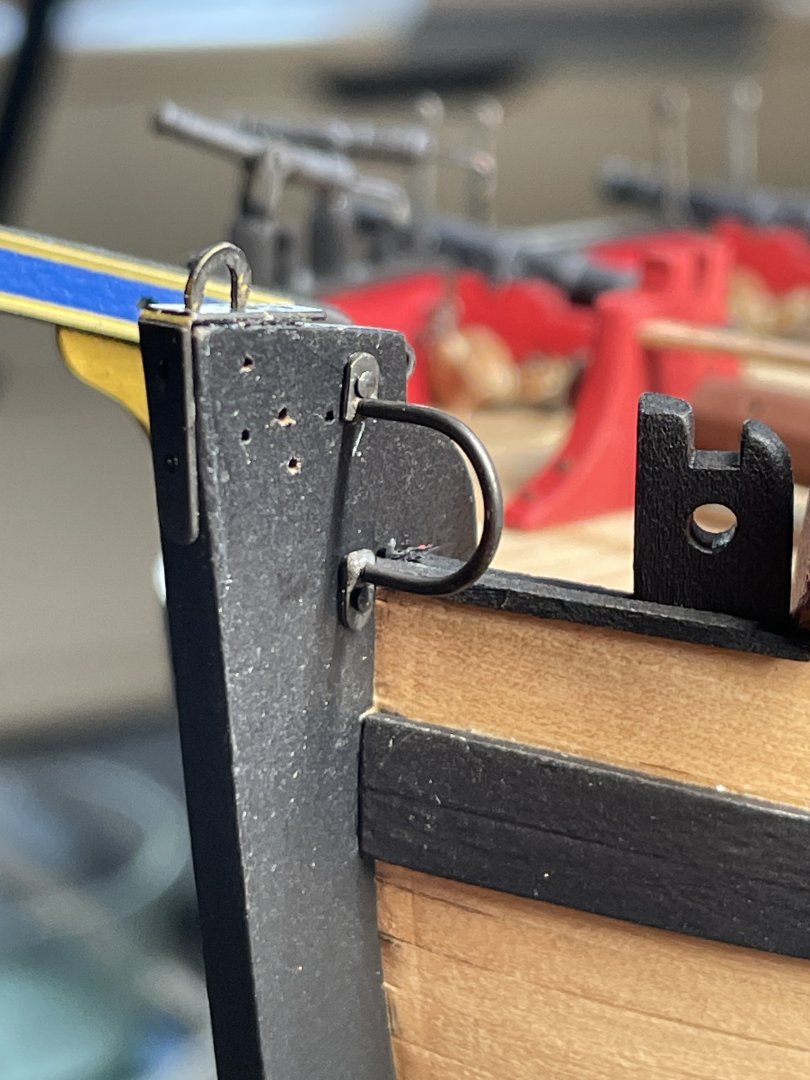
I next wanted to make a band with the rings on the tip of the bowsprit. I used some brass tubing that happed to be a perfect fit and some photo etch eye bolts.
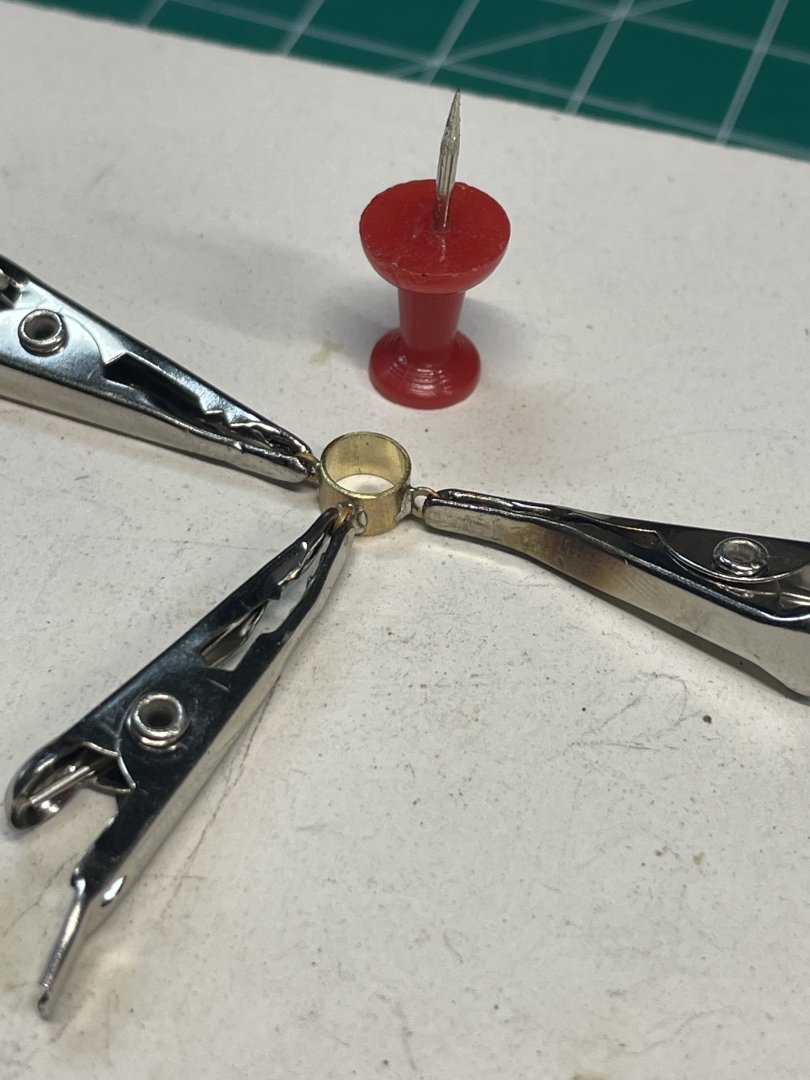
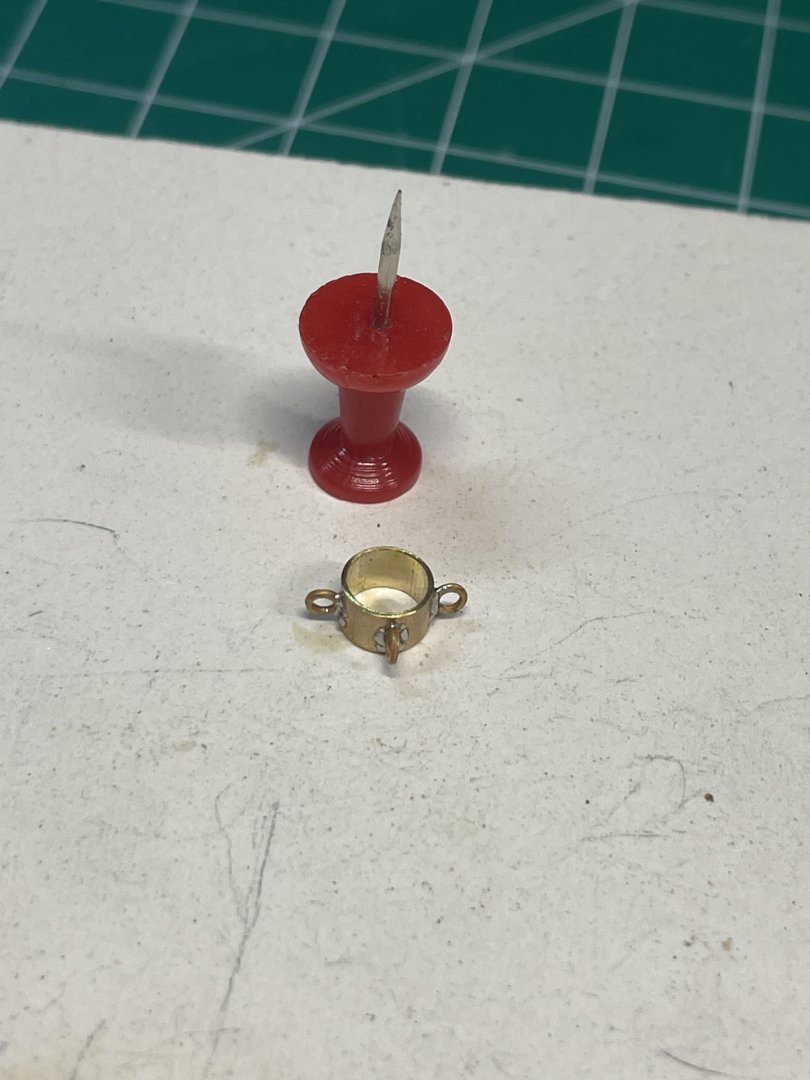
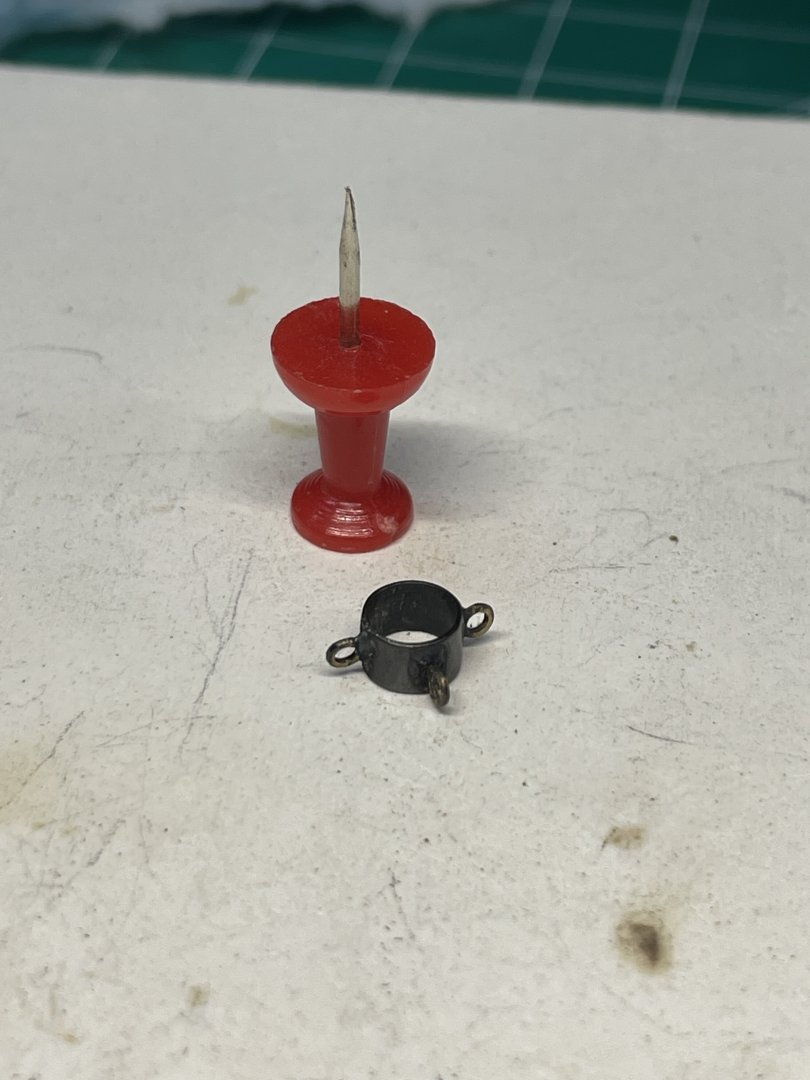
I also made the bracket for the bowsprit from scratch.
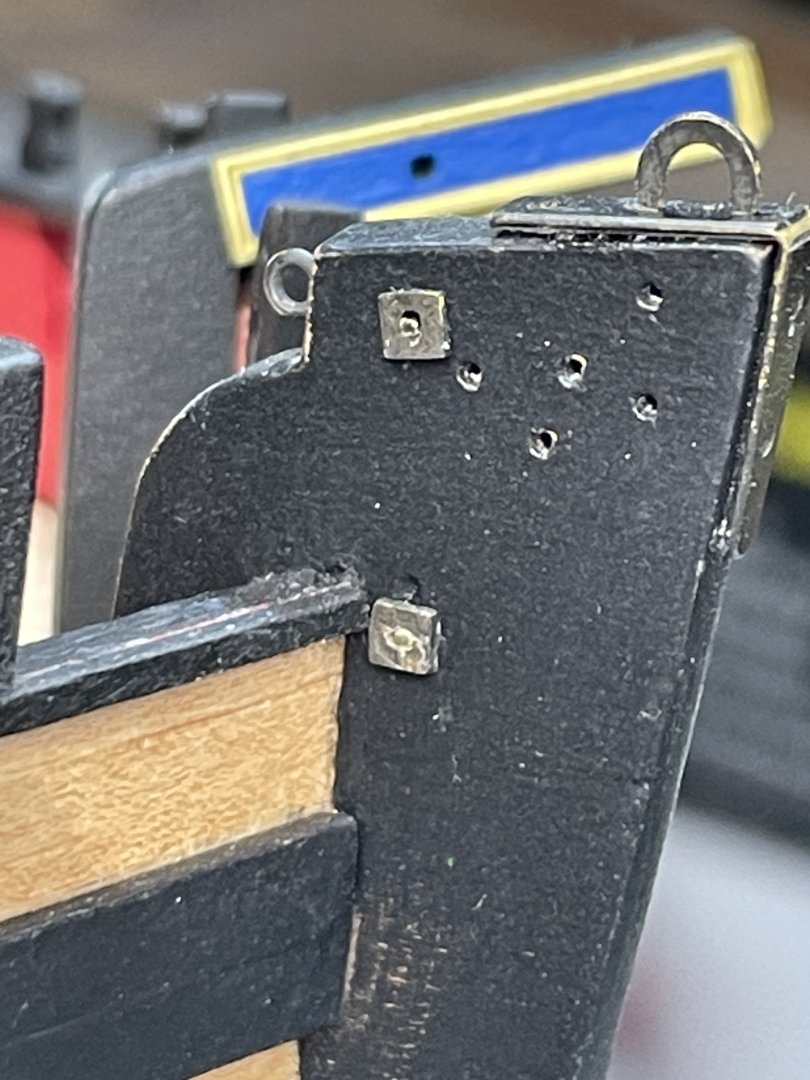
I can never get over how brutal close up photos are!
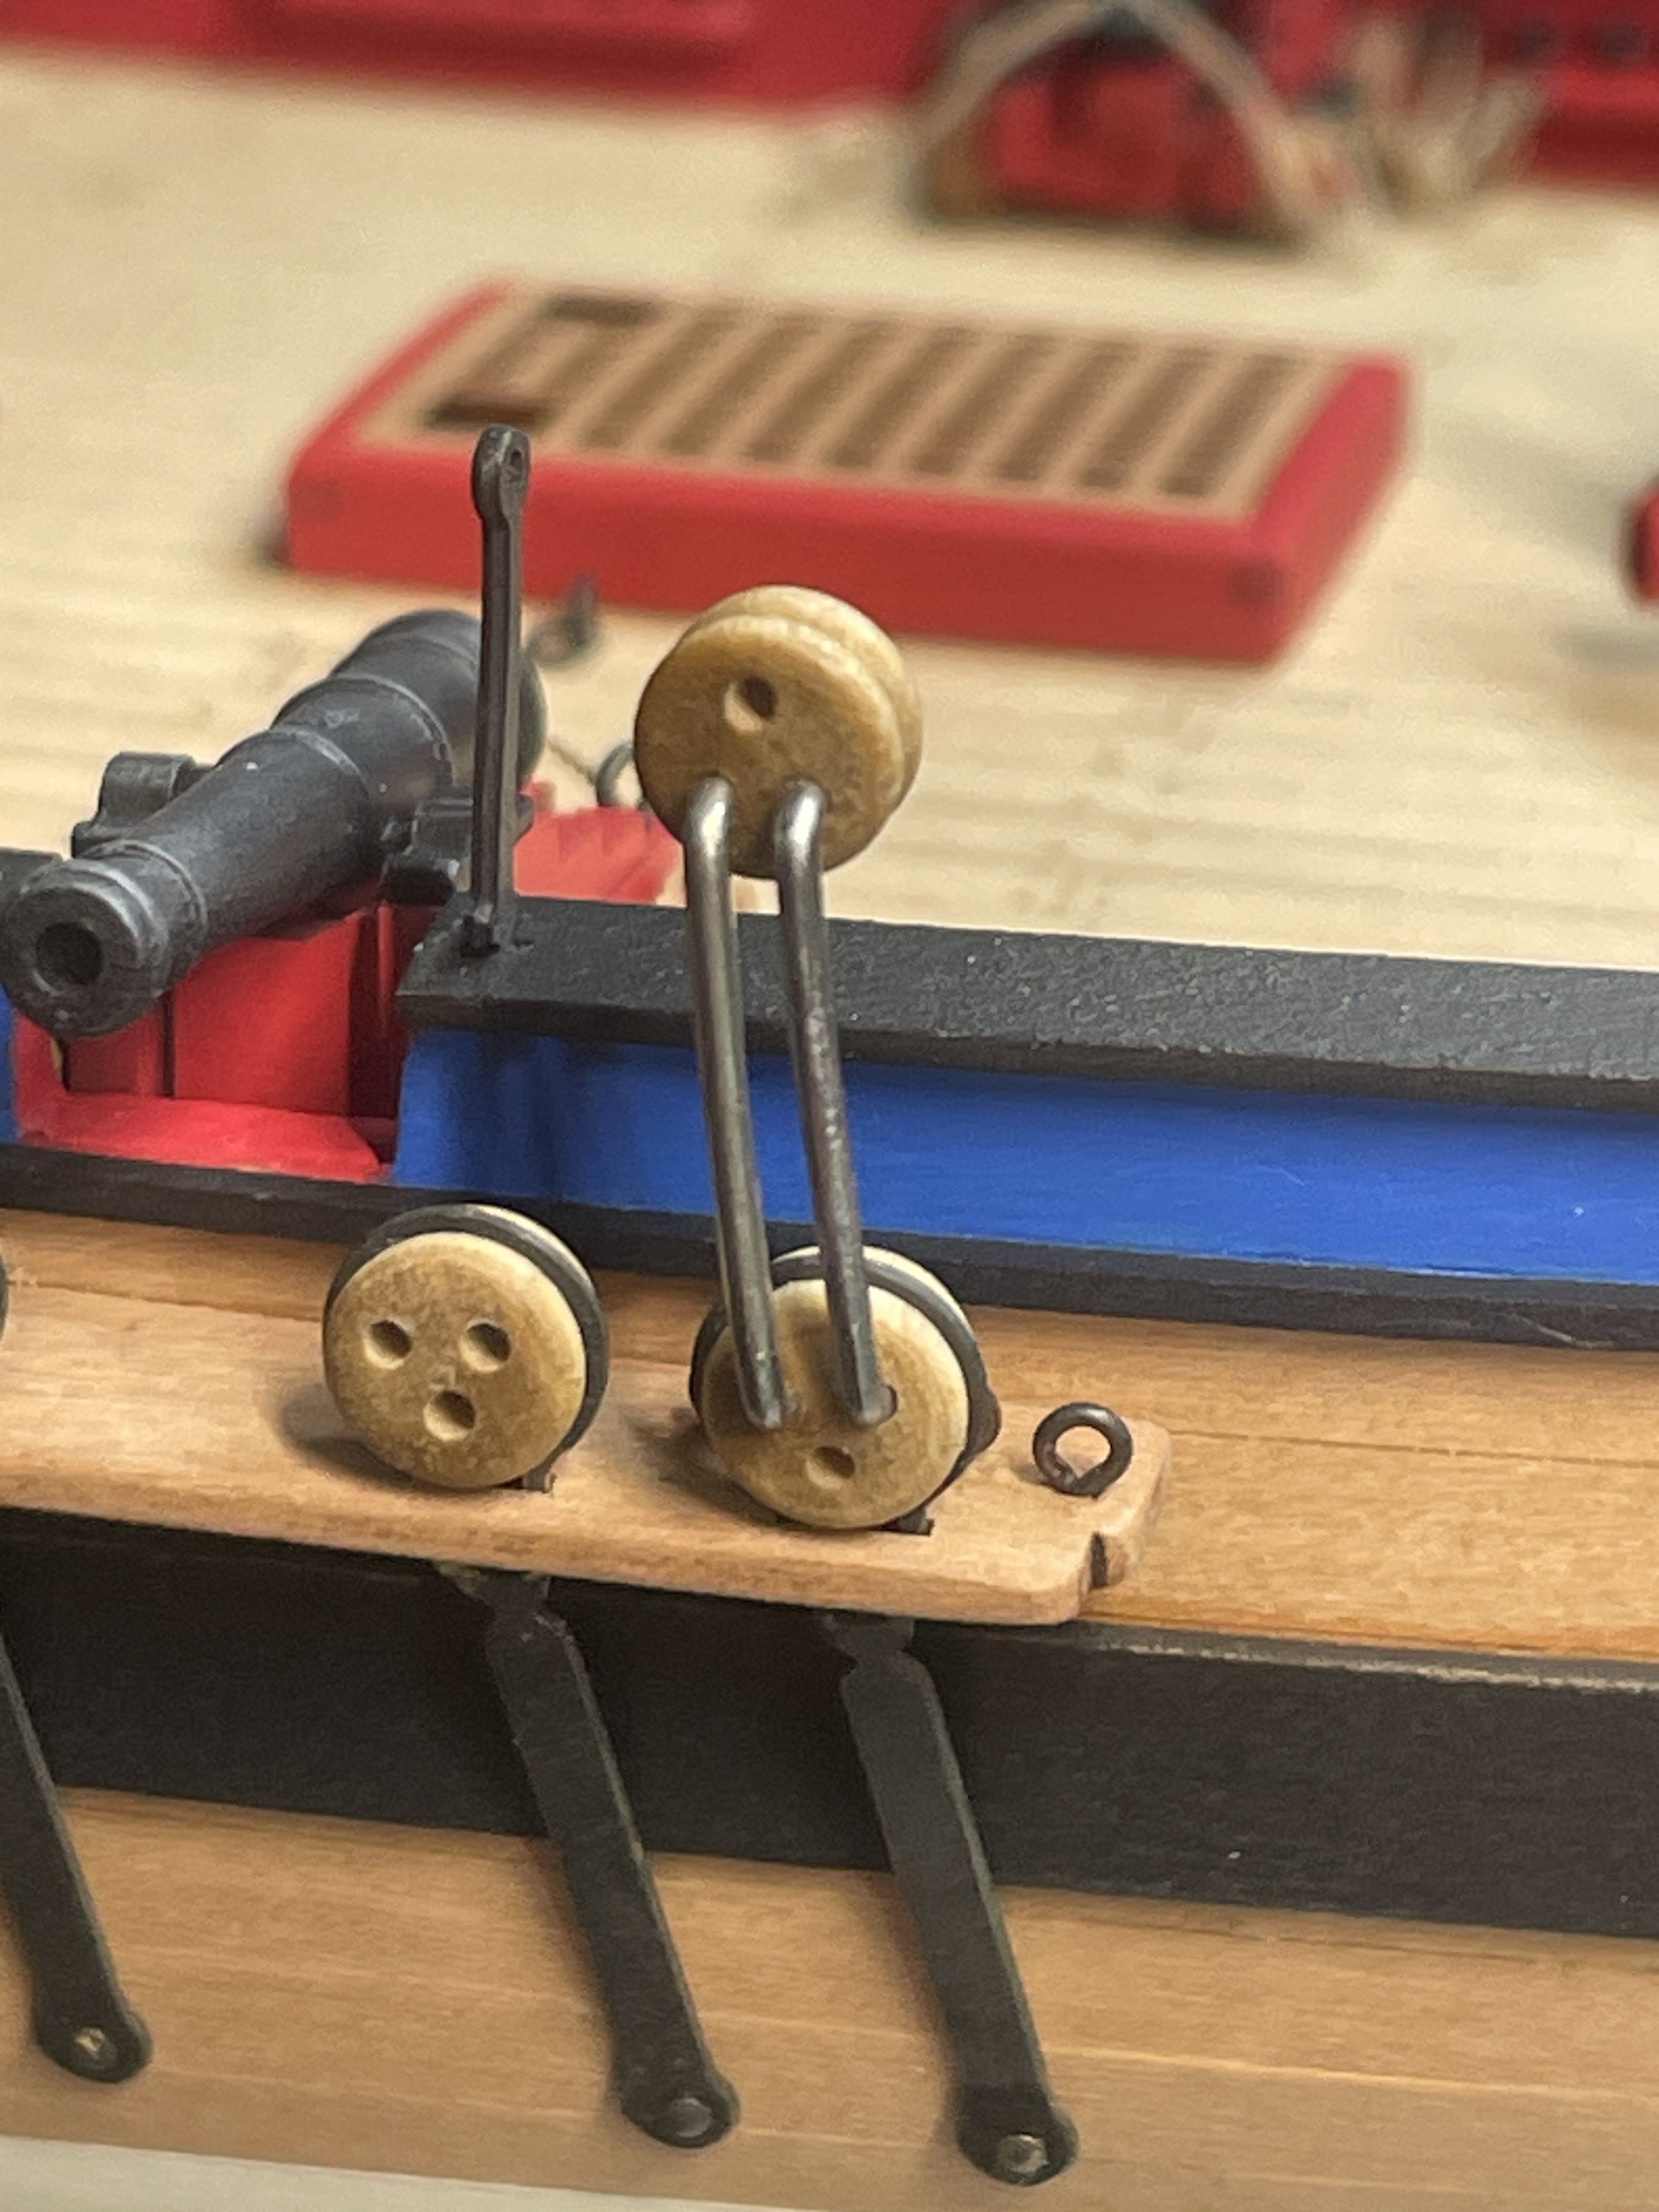
Now I was faced with a dilemma. I didn’t add any sheeves to the catheads and I am pretty sure I want one of the anchors hanging as in other build logs. So I simply decided to get going on them. Mask the rest of the ship and see what happens.
I drilled them and then used a scroll saw blade held in my fingers. I pretty much used that to shape the slots and then used a strip of 220 sandpaper to clean them up.


I used some round plastic stock and after drilling I sliced off several discs until I got 4 I could work with. Squared them up but sanding under my fingertip.

I inserted them and pinned them in place.

Then some Vallejo flat black paint.

I am pretty happy how these turned out. I will find out how they work when I get to the anchors.
So that’s it for now. A lot more serving in my future!
Chris
- Thukydides, brunnels, KARAVOKIRIS and 10 others
-
13
-
Those are some great points. Thanks!
The room also abuts the garage so I will probably be based on that wall. That will allow me to put dust collection and run air for the airbrush from outside the room.
I am really liking the idea you guys have brought up about mobile tables. 👍Chris
-


HM Cutter Alert by Desertanimal - FINISHED - Vanguard Models - 1:64 scale
in - Kit build logs for subjects built from 1751 - 1800
Posted
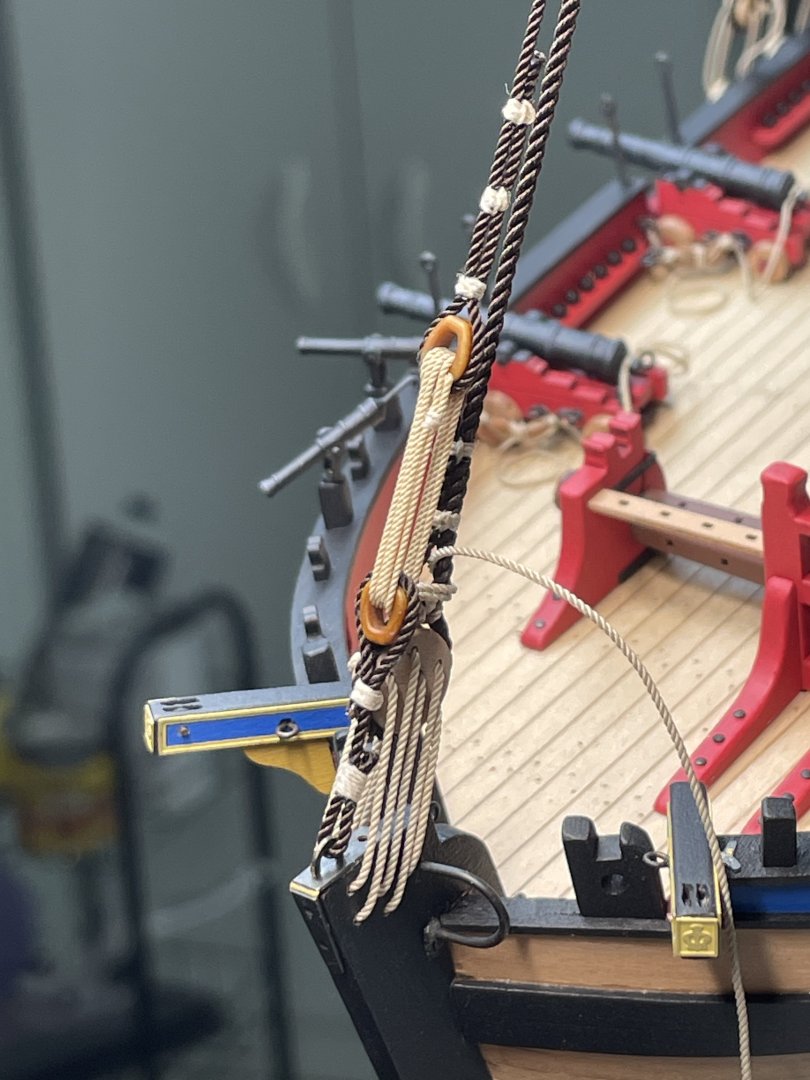
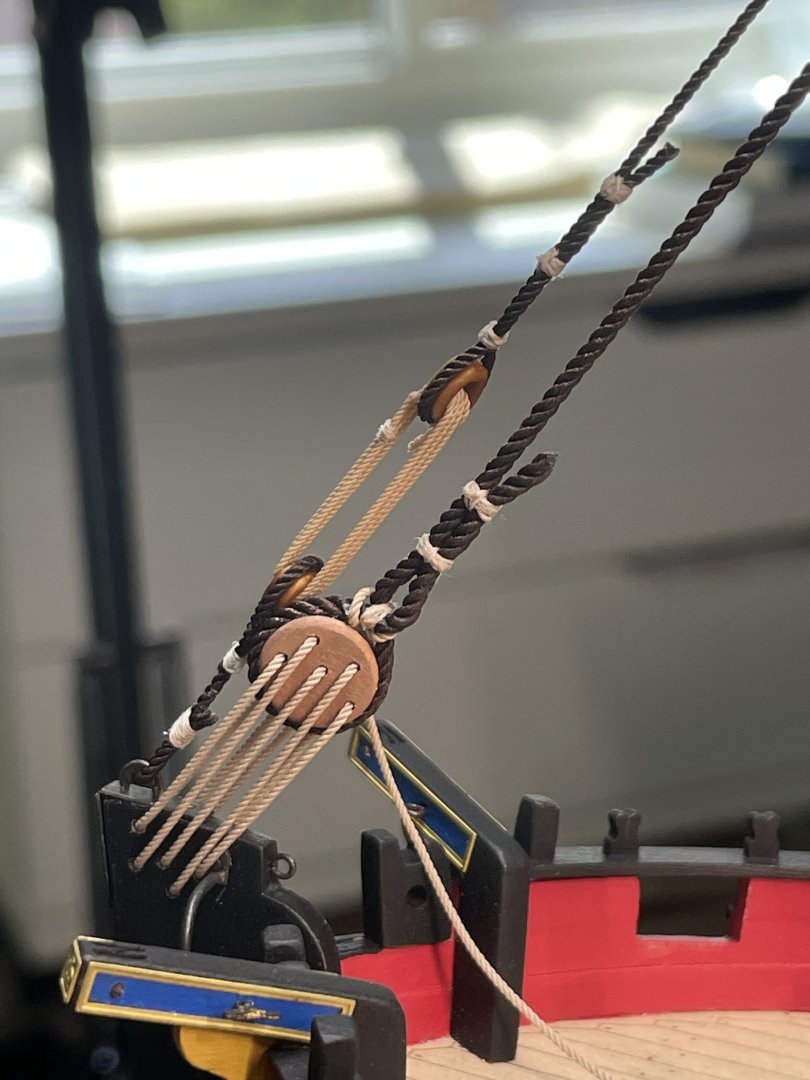
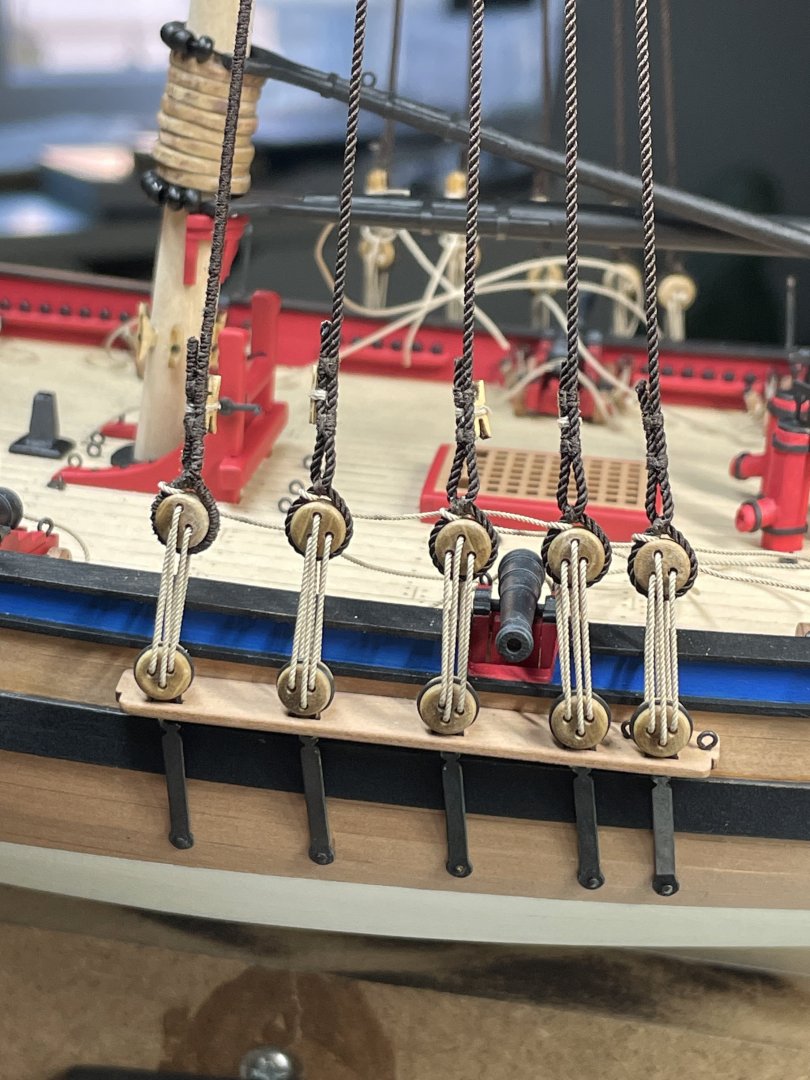
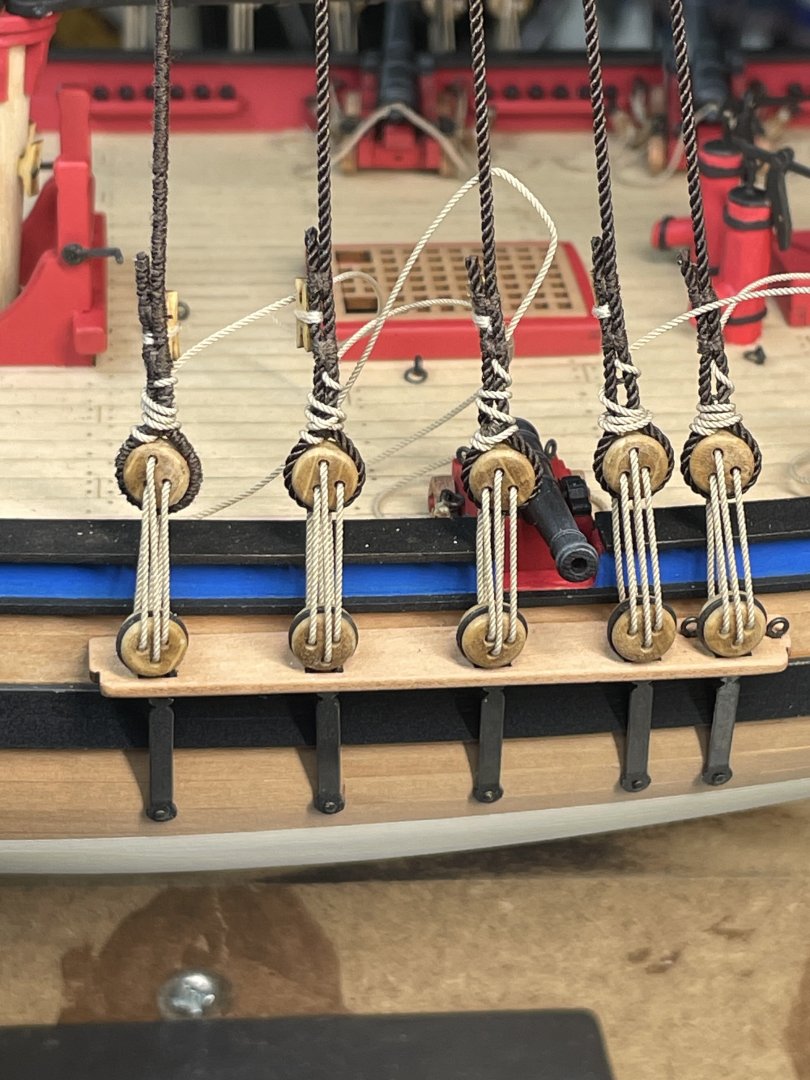
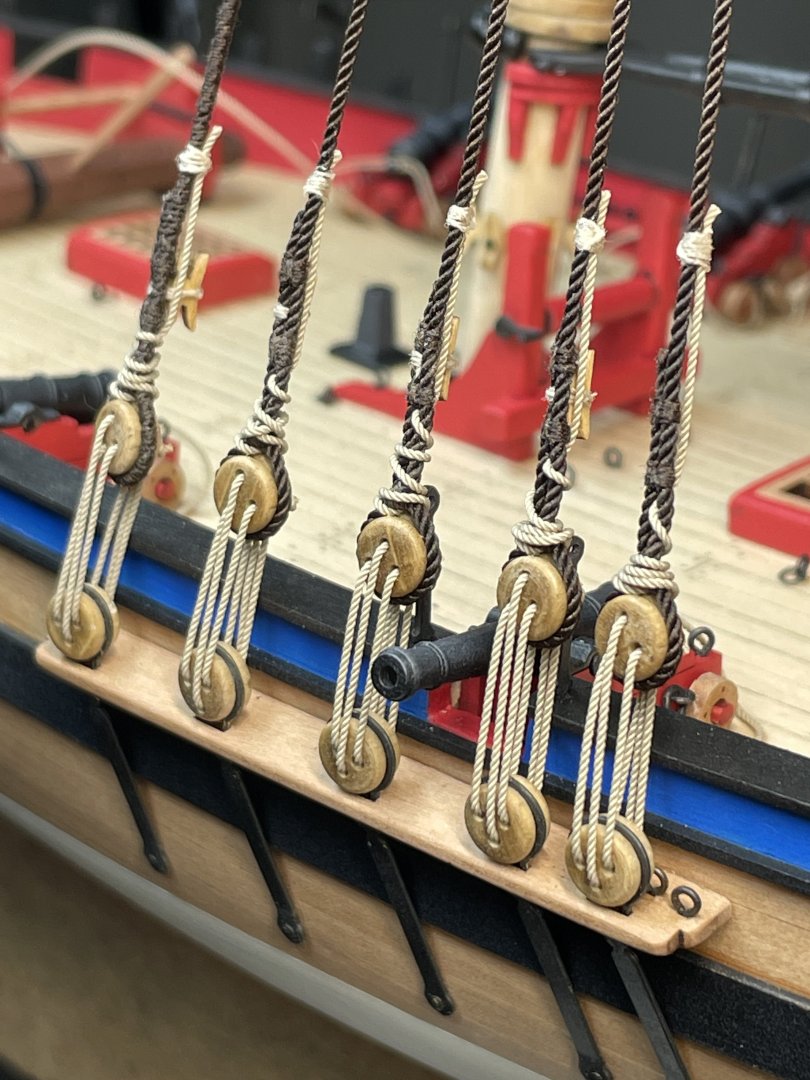
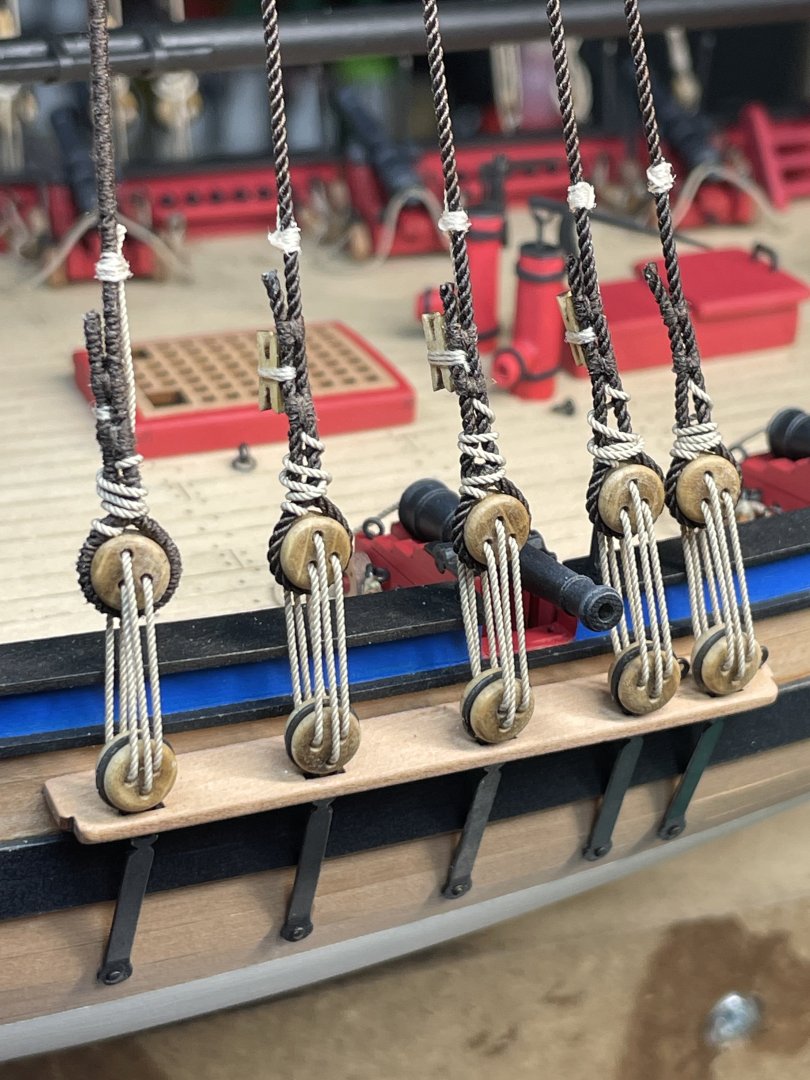
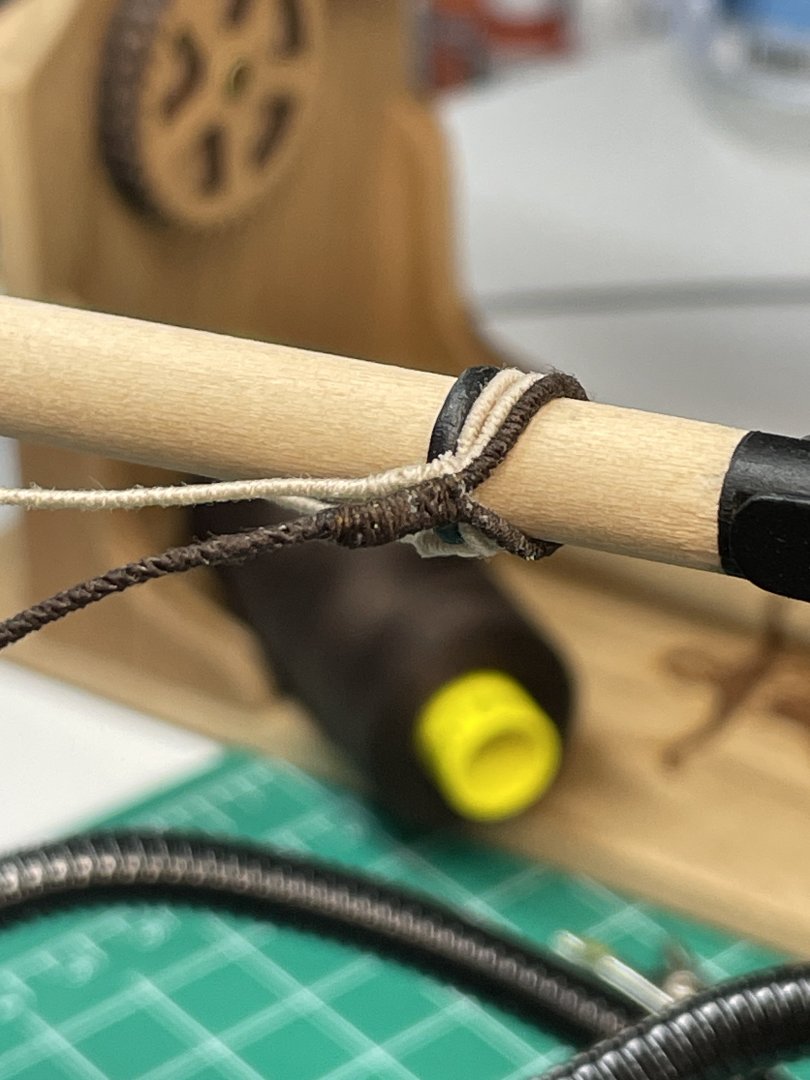
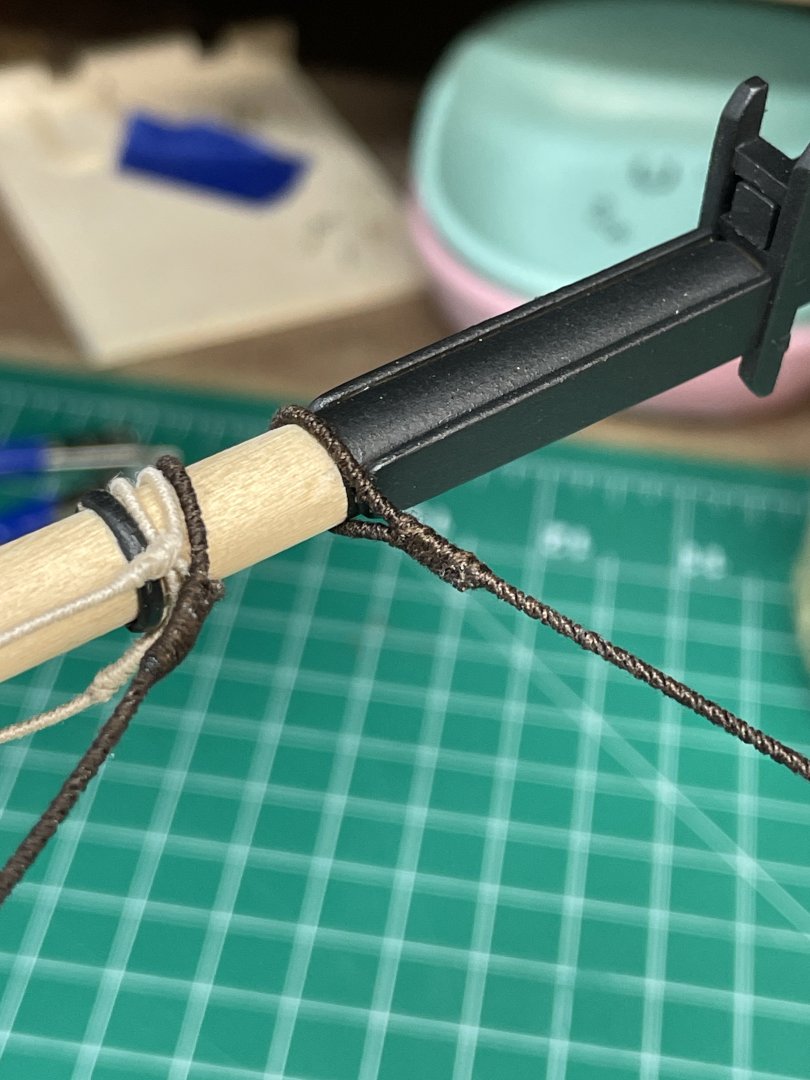
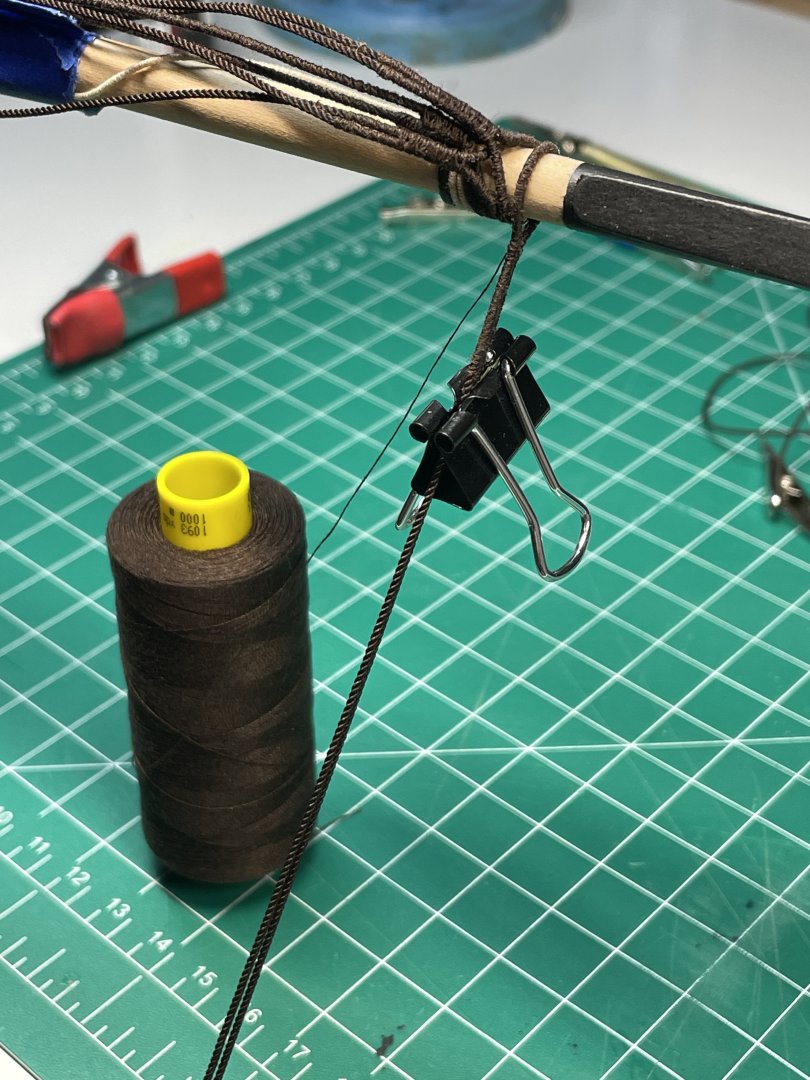
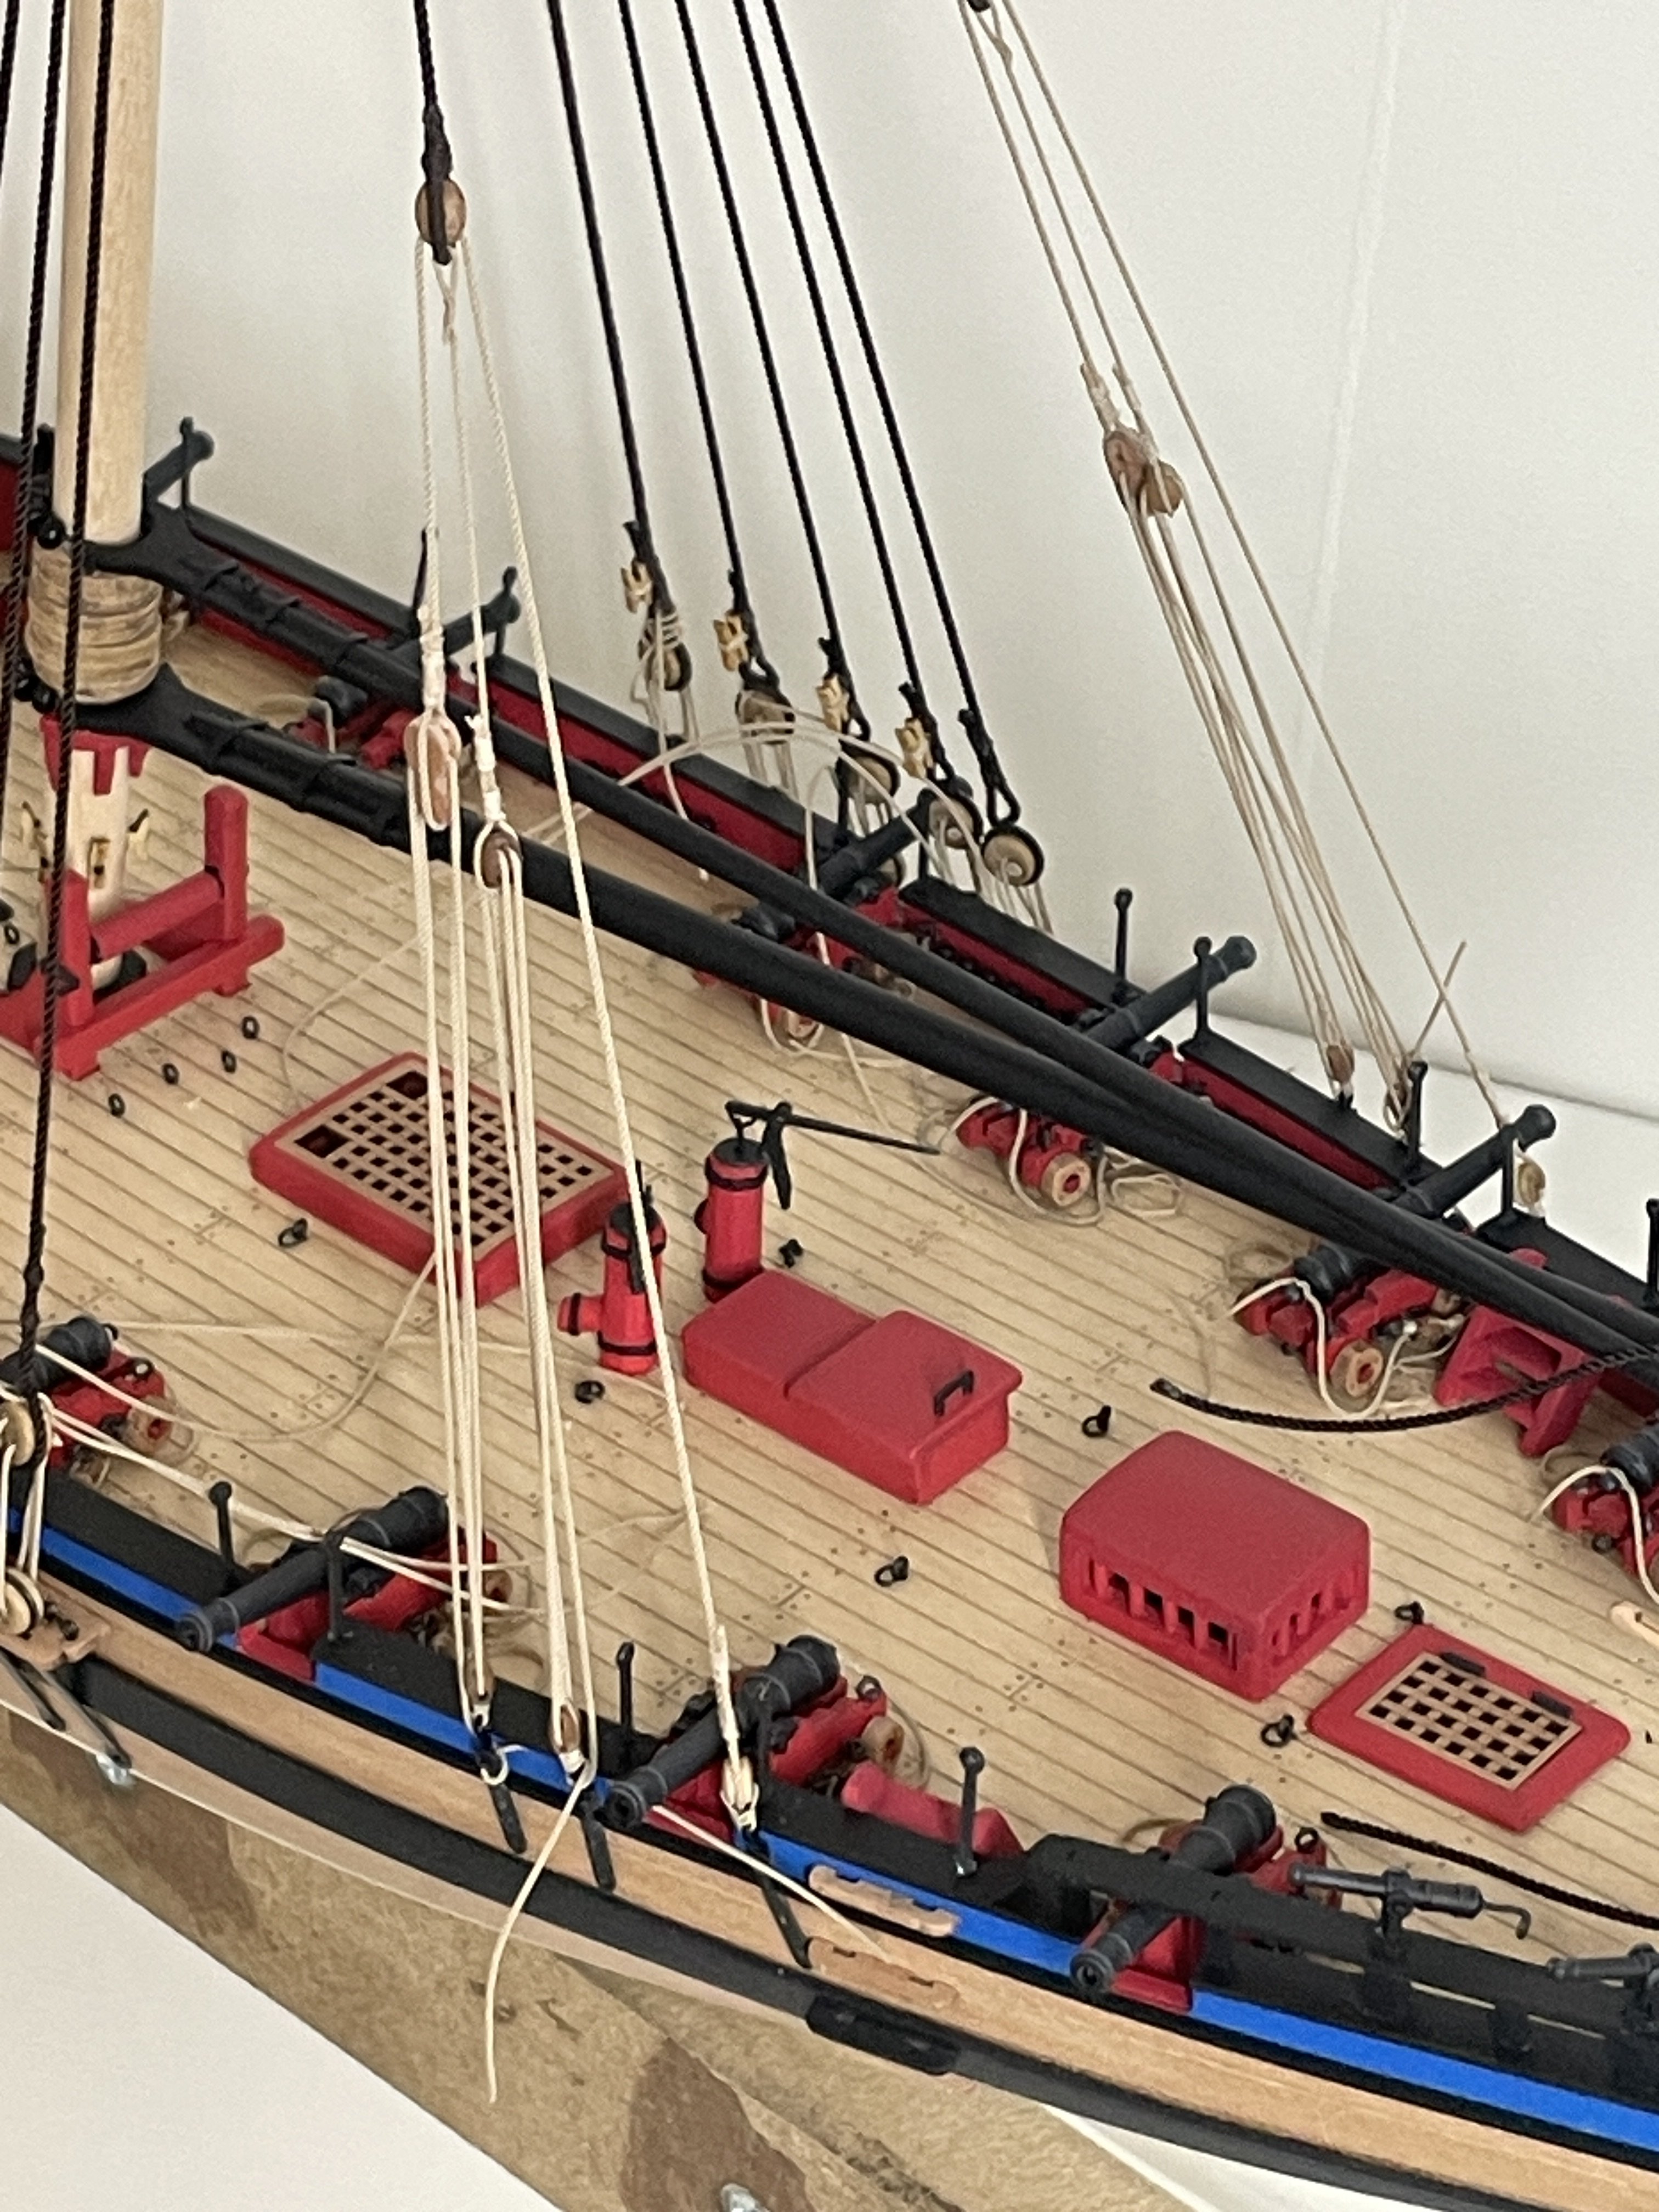
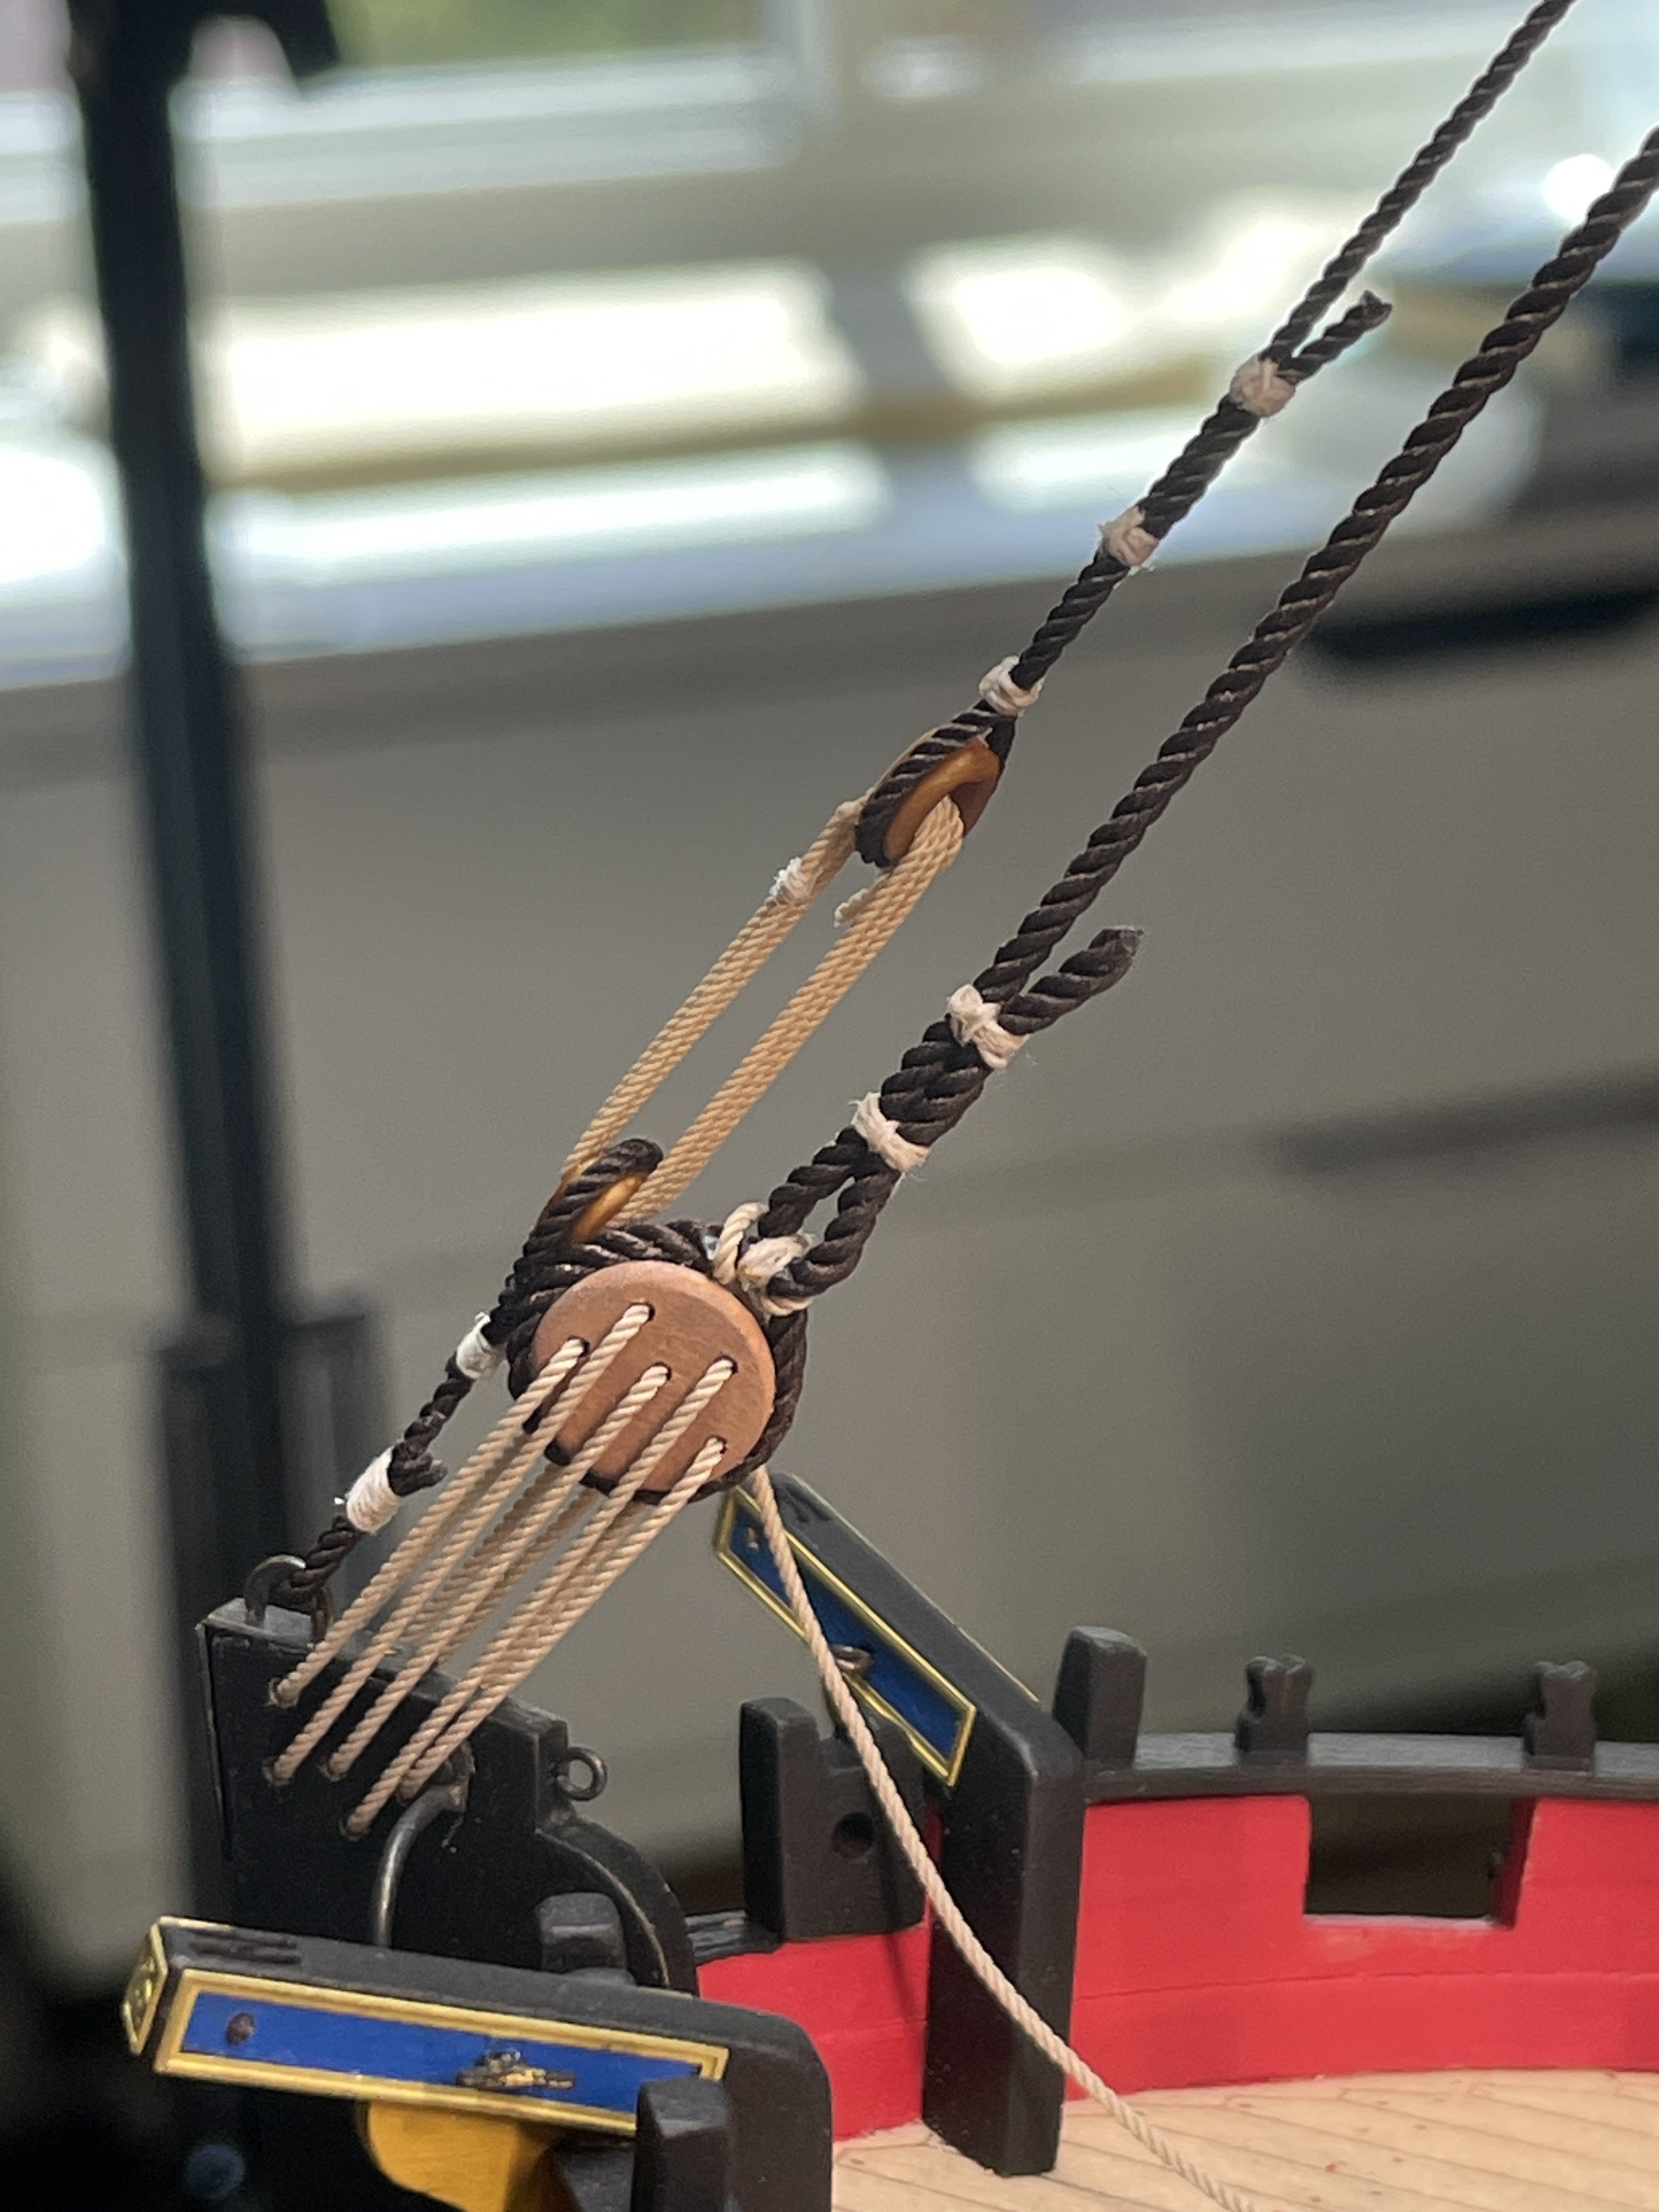
Moving right along we’re continuing with rigging and now it’s time to raise the gaff and the boom.
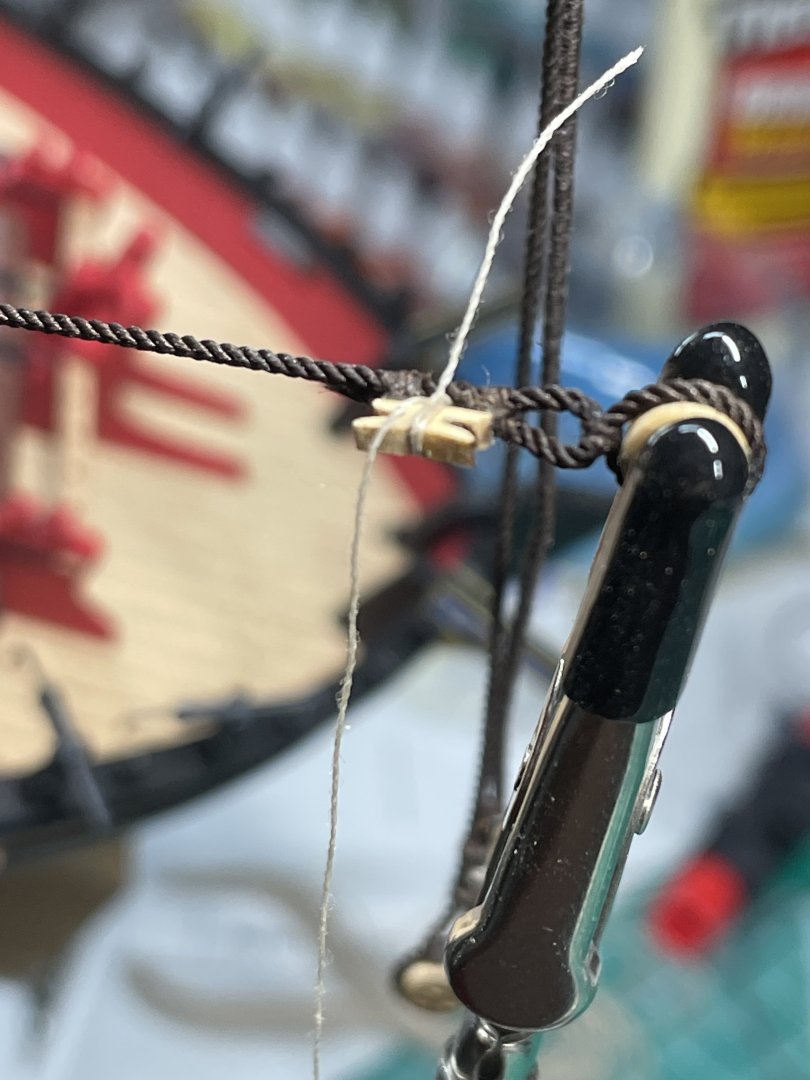
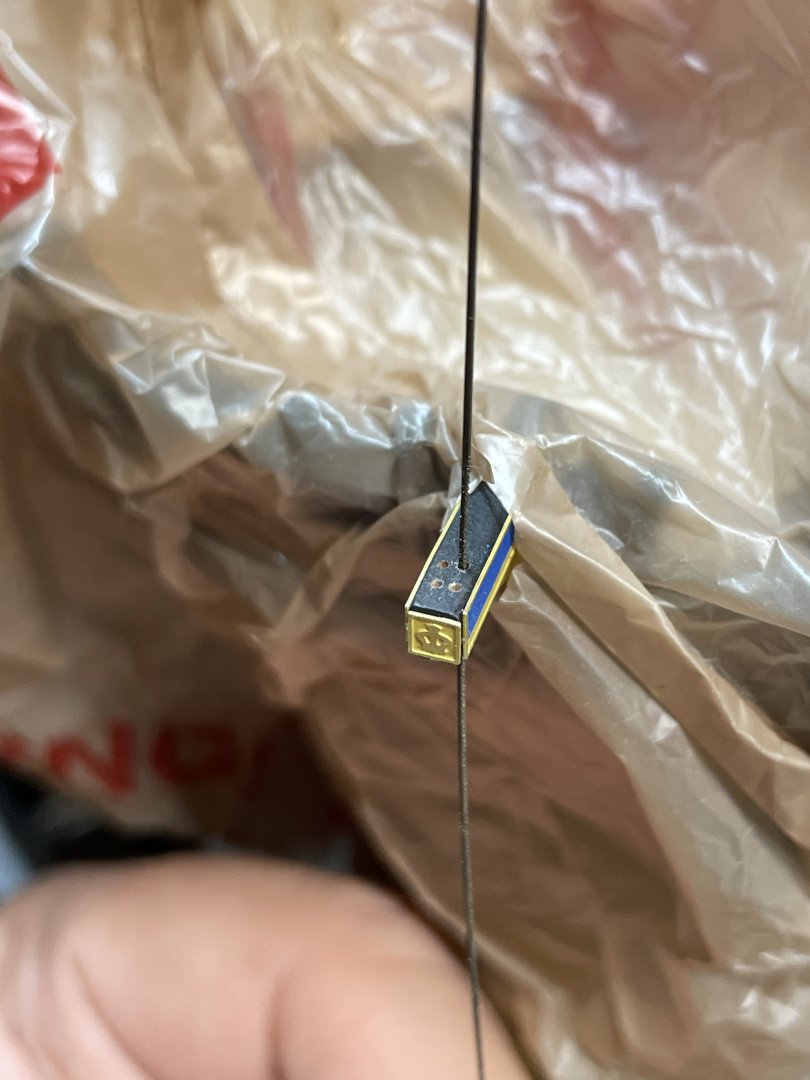
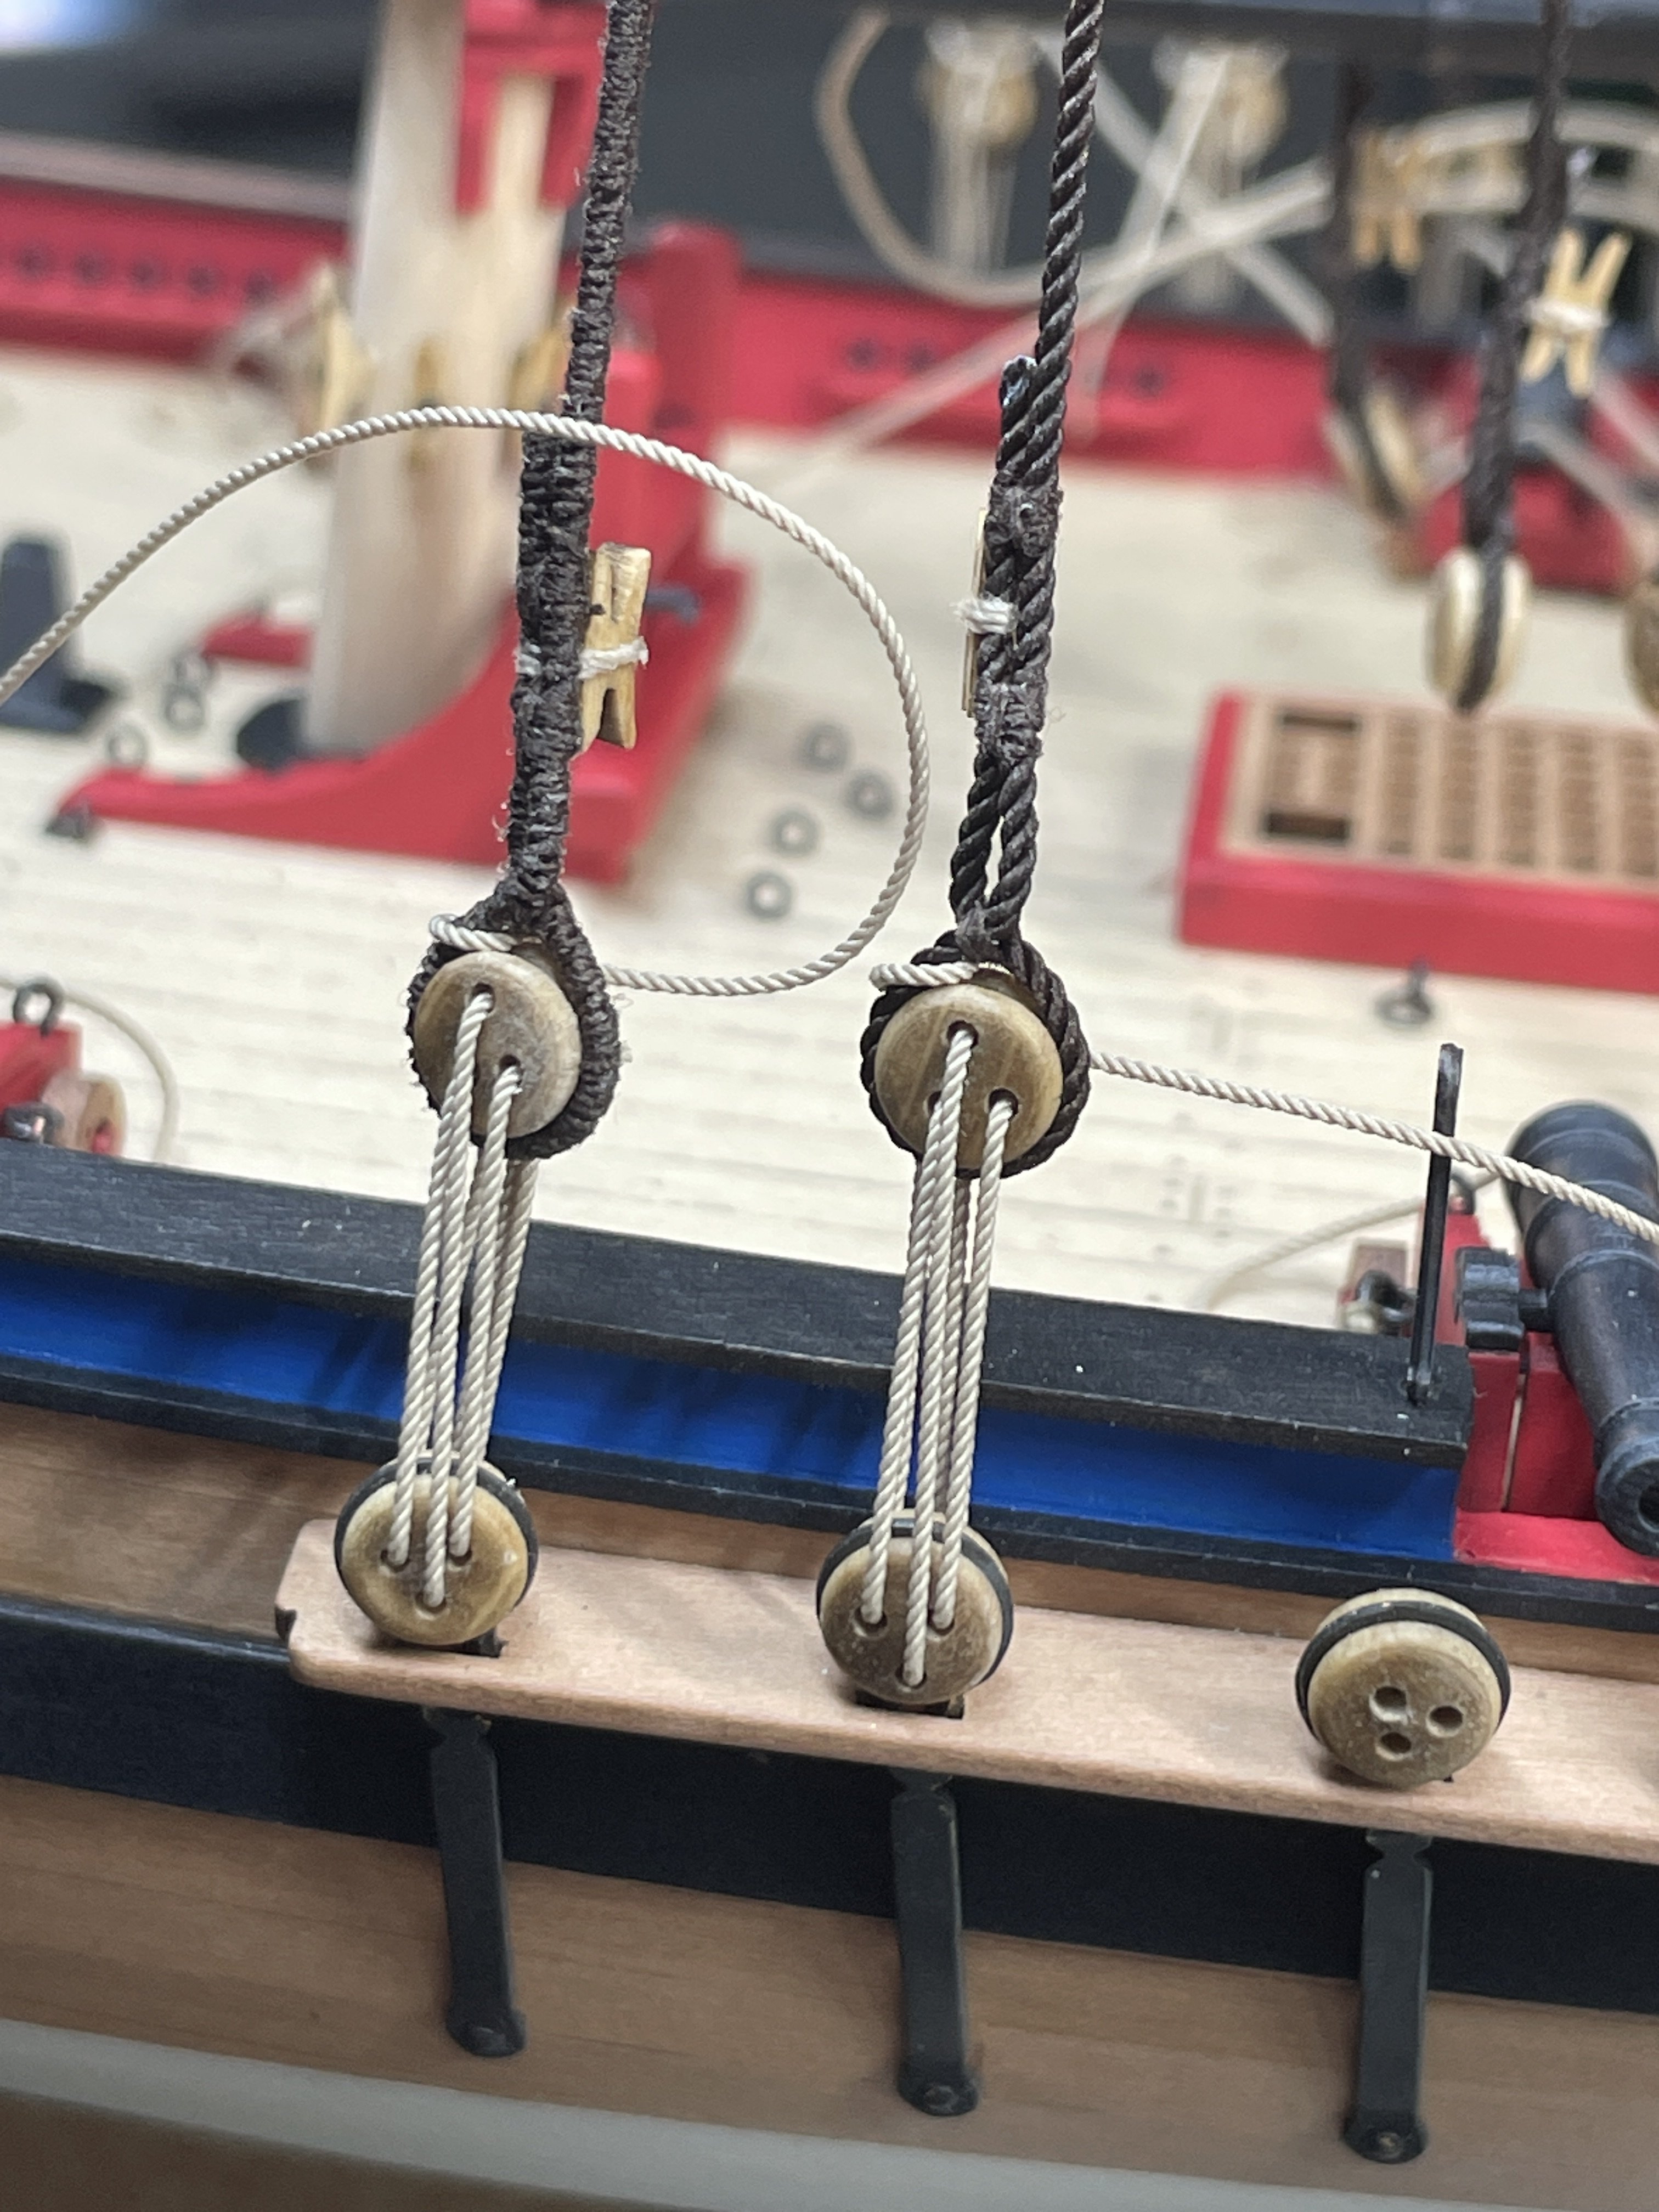
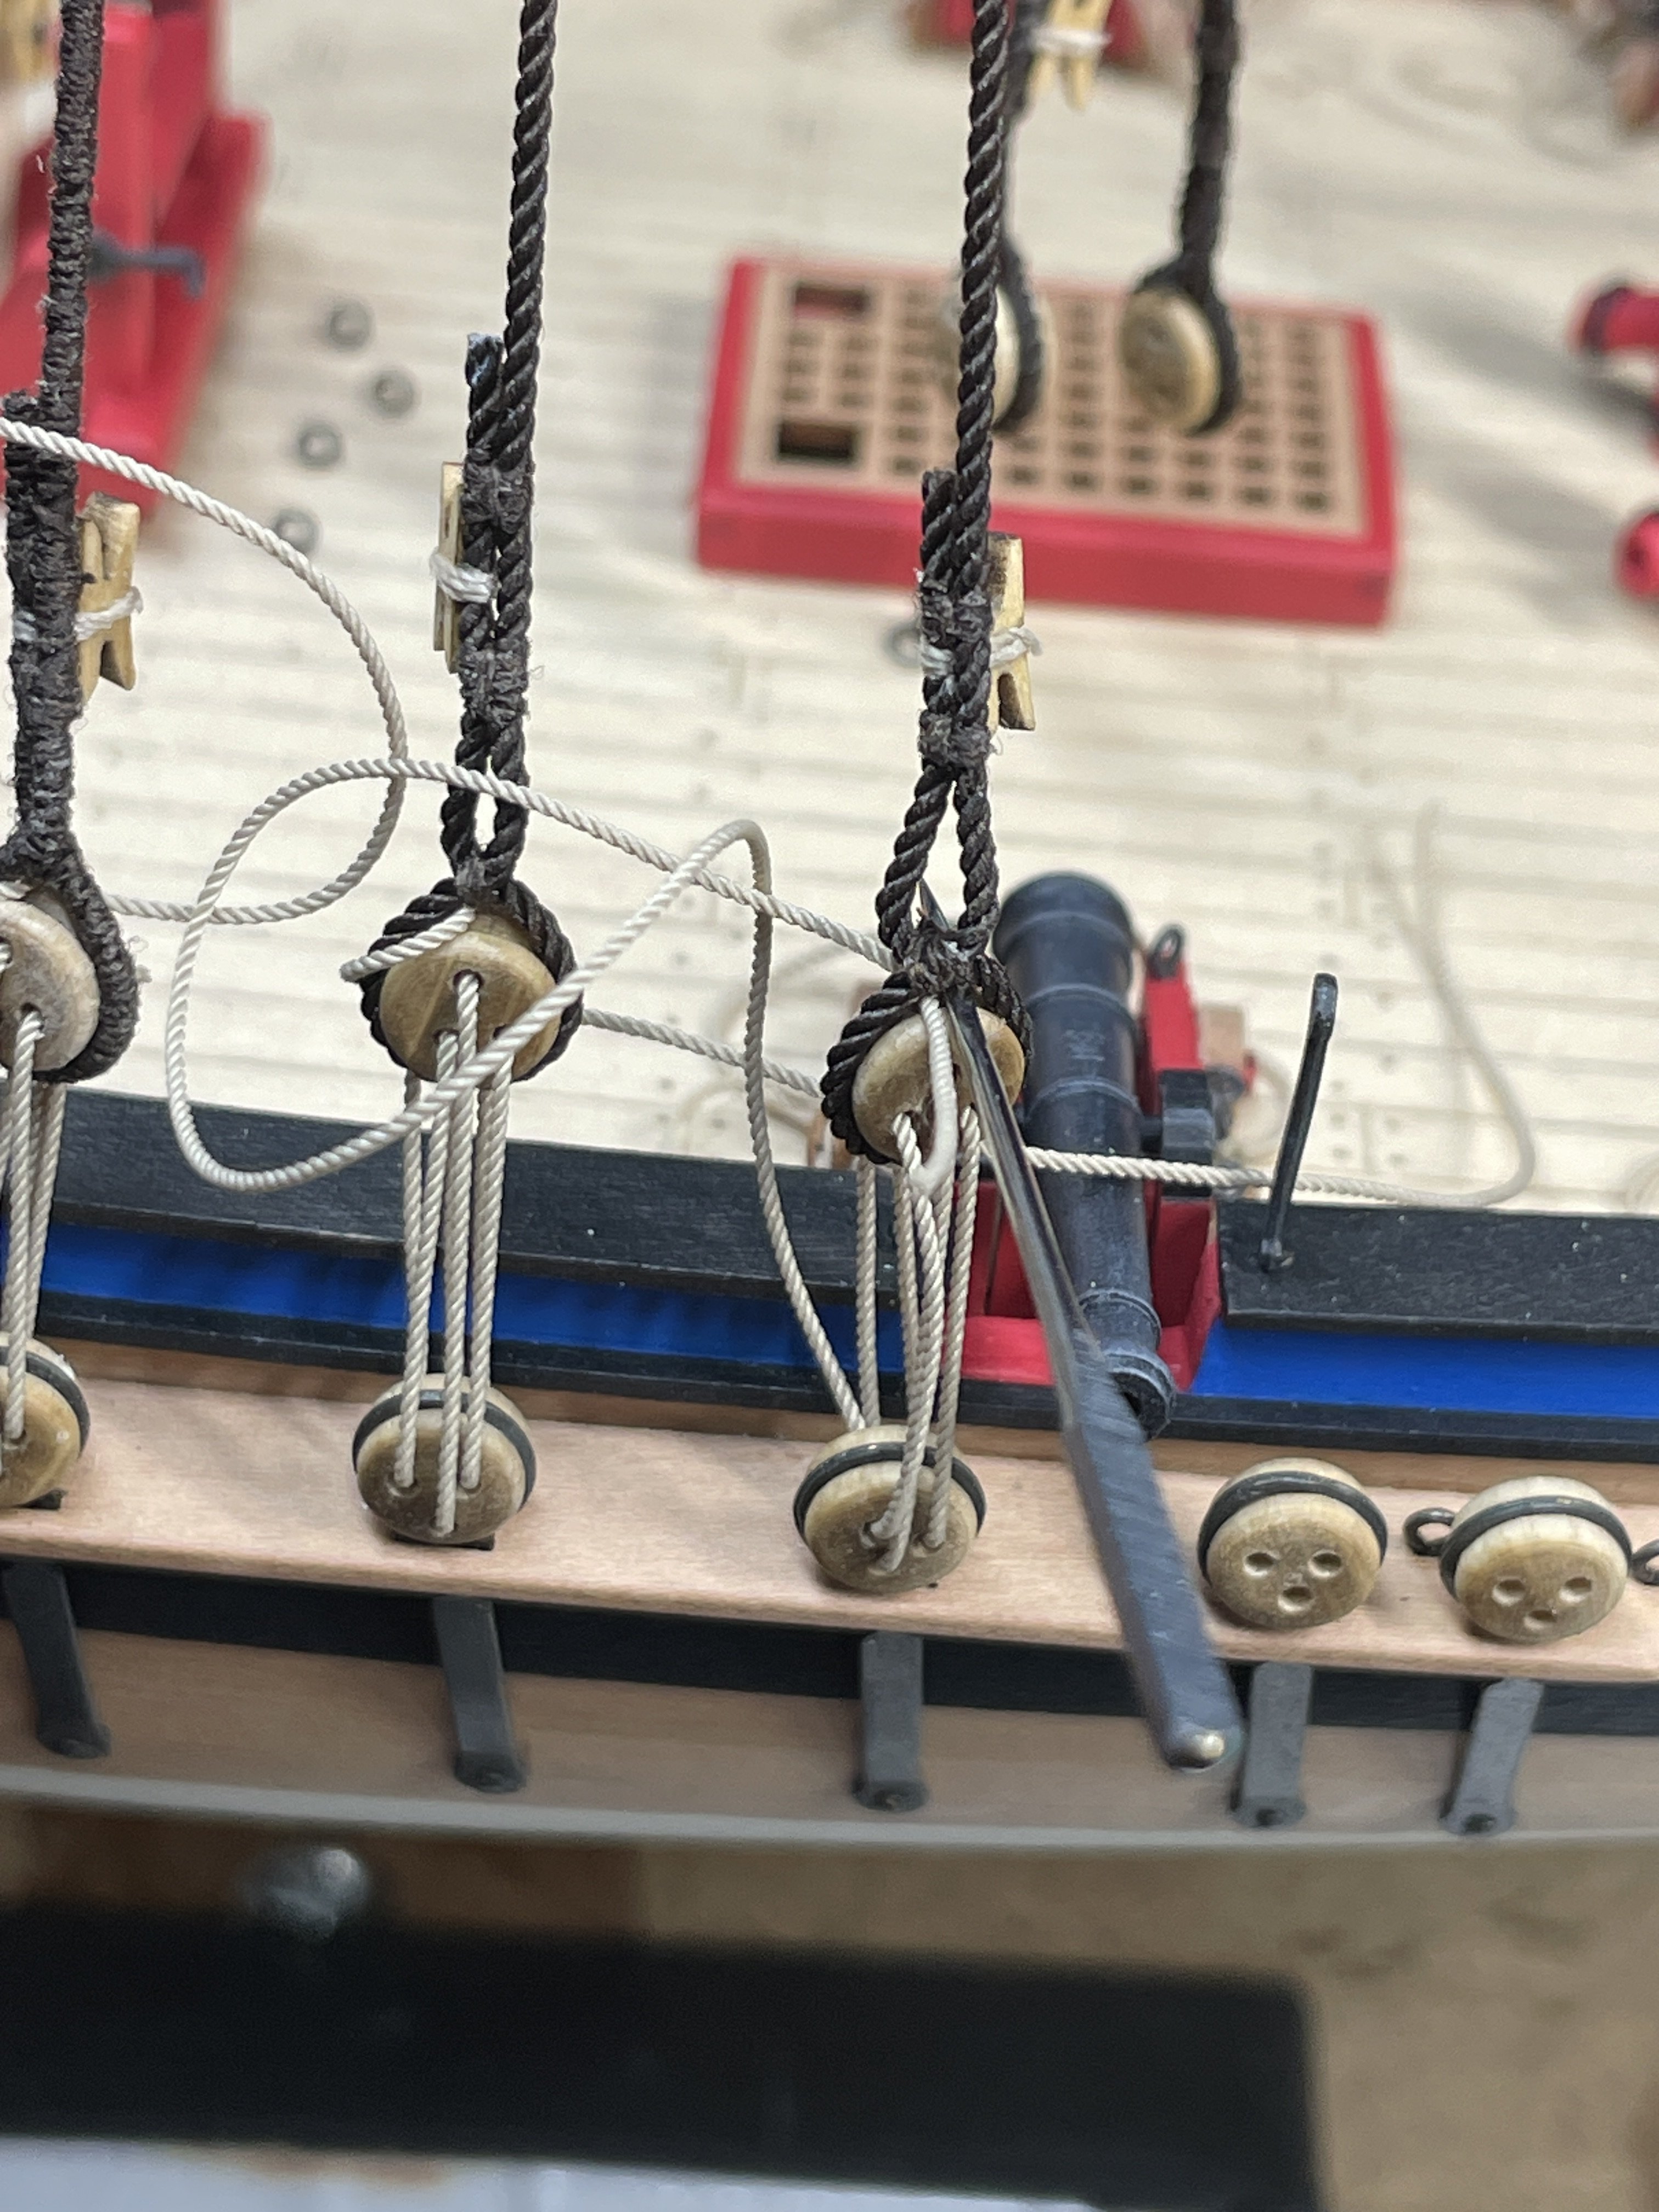
I had to first make some seized blocks to hang stiff on.
Again, these had to be served on the mast, not fun. Luckily I can tilt my vise and lean the ship over which helps.
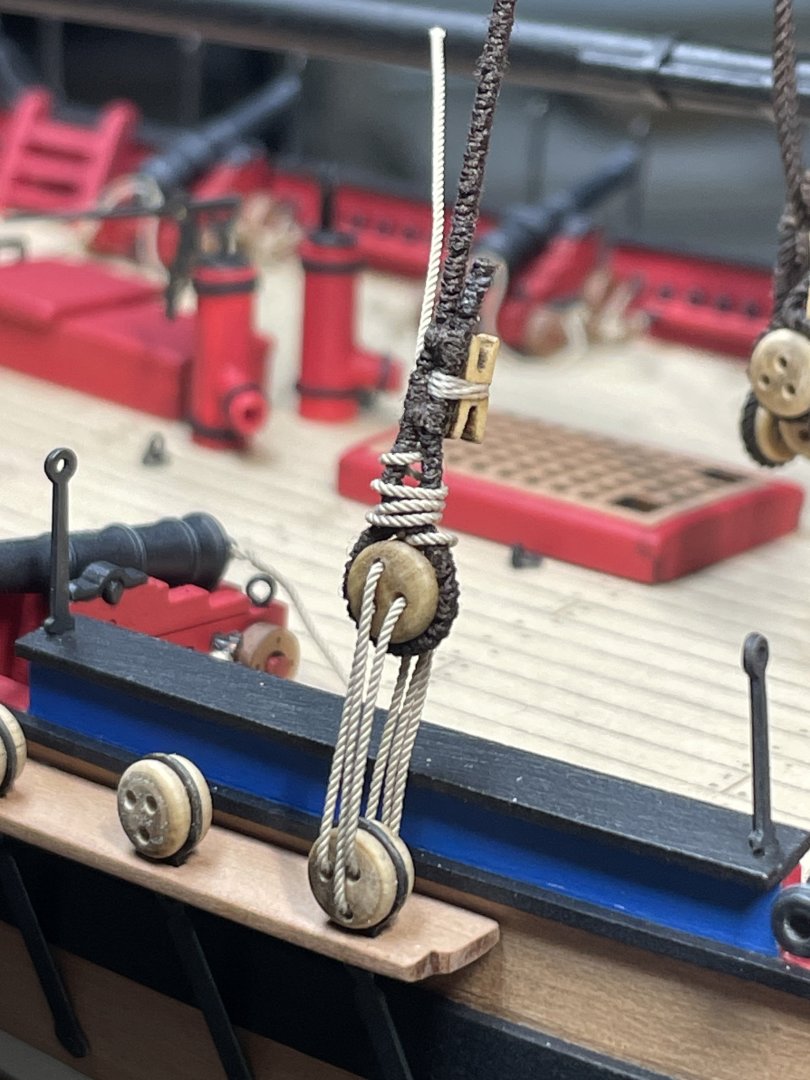
Here are the tackles for the gaff.
And the boom..
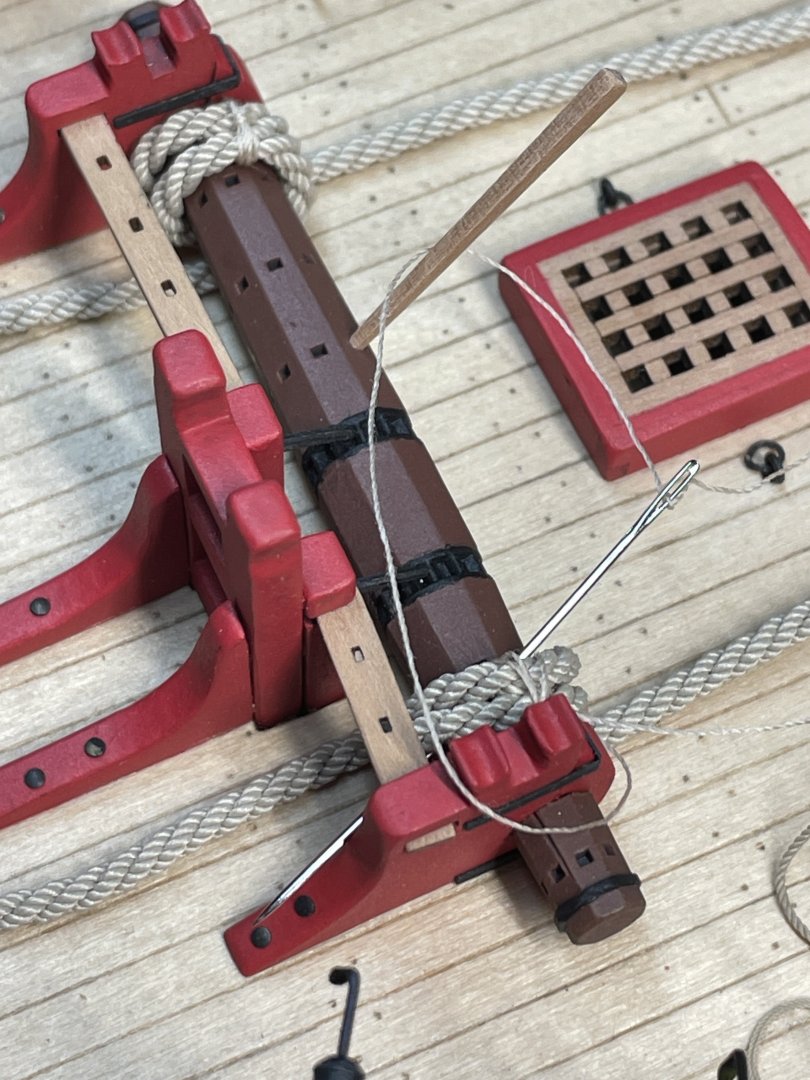
I had to relocate the cleat on the boom.
Time for the ratlines. First time for me and I’ve been putting them off long enough. I used a method I saw @mtbediz post on another log. That is to use two small boards and clamp the shrouds to keep them from moving. Worked pretty well for me. I will not be taking pictures against any graph paper anytime soon either.
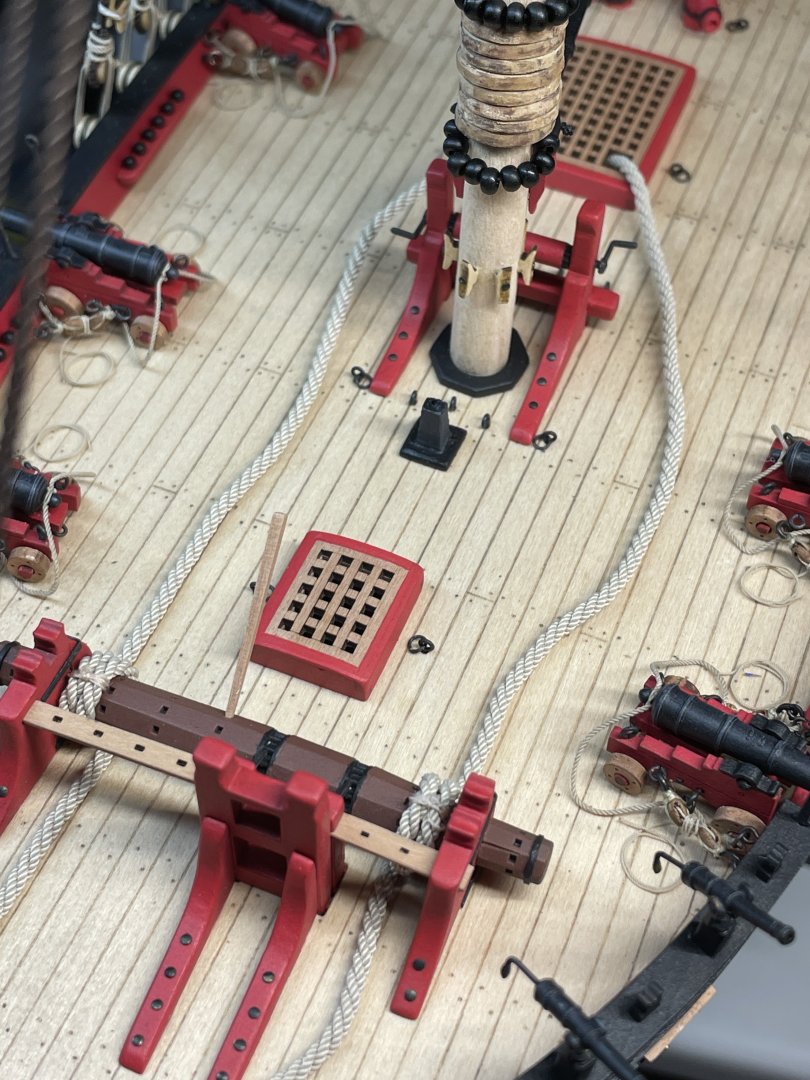
Made a traveler for the bowsprit.
Again following @Thukydides log I decided to make the blocks for the spreadsail yard sheet the same way. Make some tiny eyelets and then bind them around the yard with rose lashings.
Here are the pictures.
Raised the squaresail yard and the topsail yard. Couldn’t bring myself to try the rose lashings up here. I don’t think I have the thread needed. It’s getting really tiny!
Starting to get really crowded up here!
I’m really still on the fence with rigging; I’m not sure if it was designed by the devil or if it’s fun. It’s not easy to do, added to the fact that I could have made things easier with more planning and it can be quite confusing. It sure does add a look to the model that can’t be beat though.
And a final glamor shot of how she sits…
She’s really starting to come together.
Thank you all for checking out my log.
Chris