HOLIDAY DONATION DRIVE - SUPPORT MSW - DO YOUR PART TO KEEP THIS GREAT FORUM GOING! (Only 13 donations so far - C'mon guys!)
×


Desertanimal
-
Posts
236 -
Joined
-
Last visited
Content Type
Profiles
Forums
Gallery
Events
Everything posted by Desertanimal
-
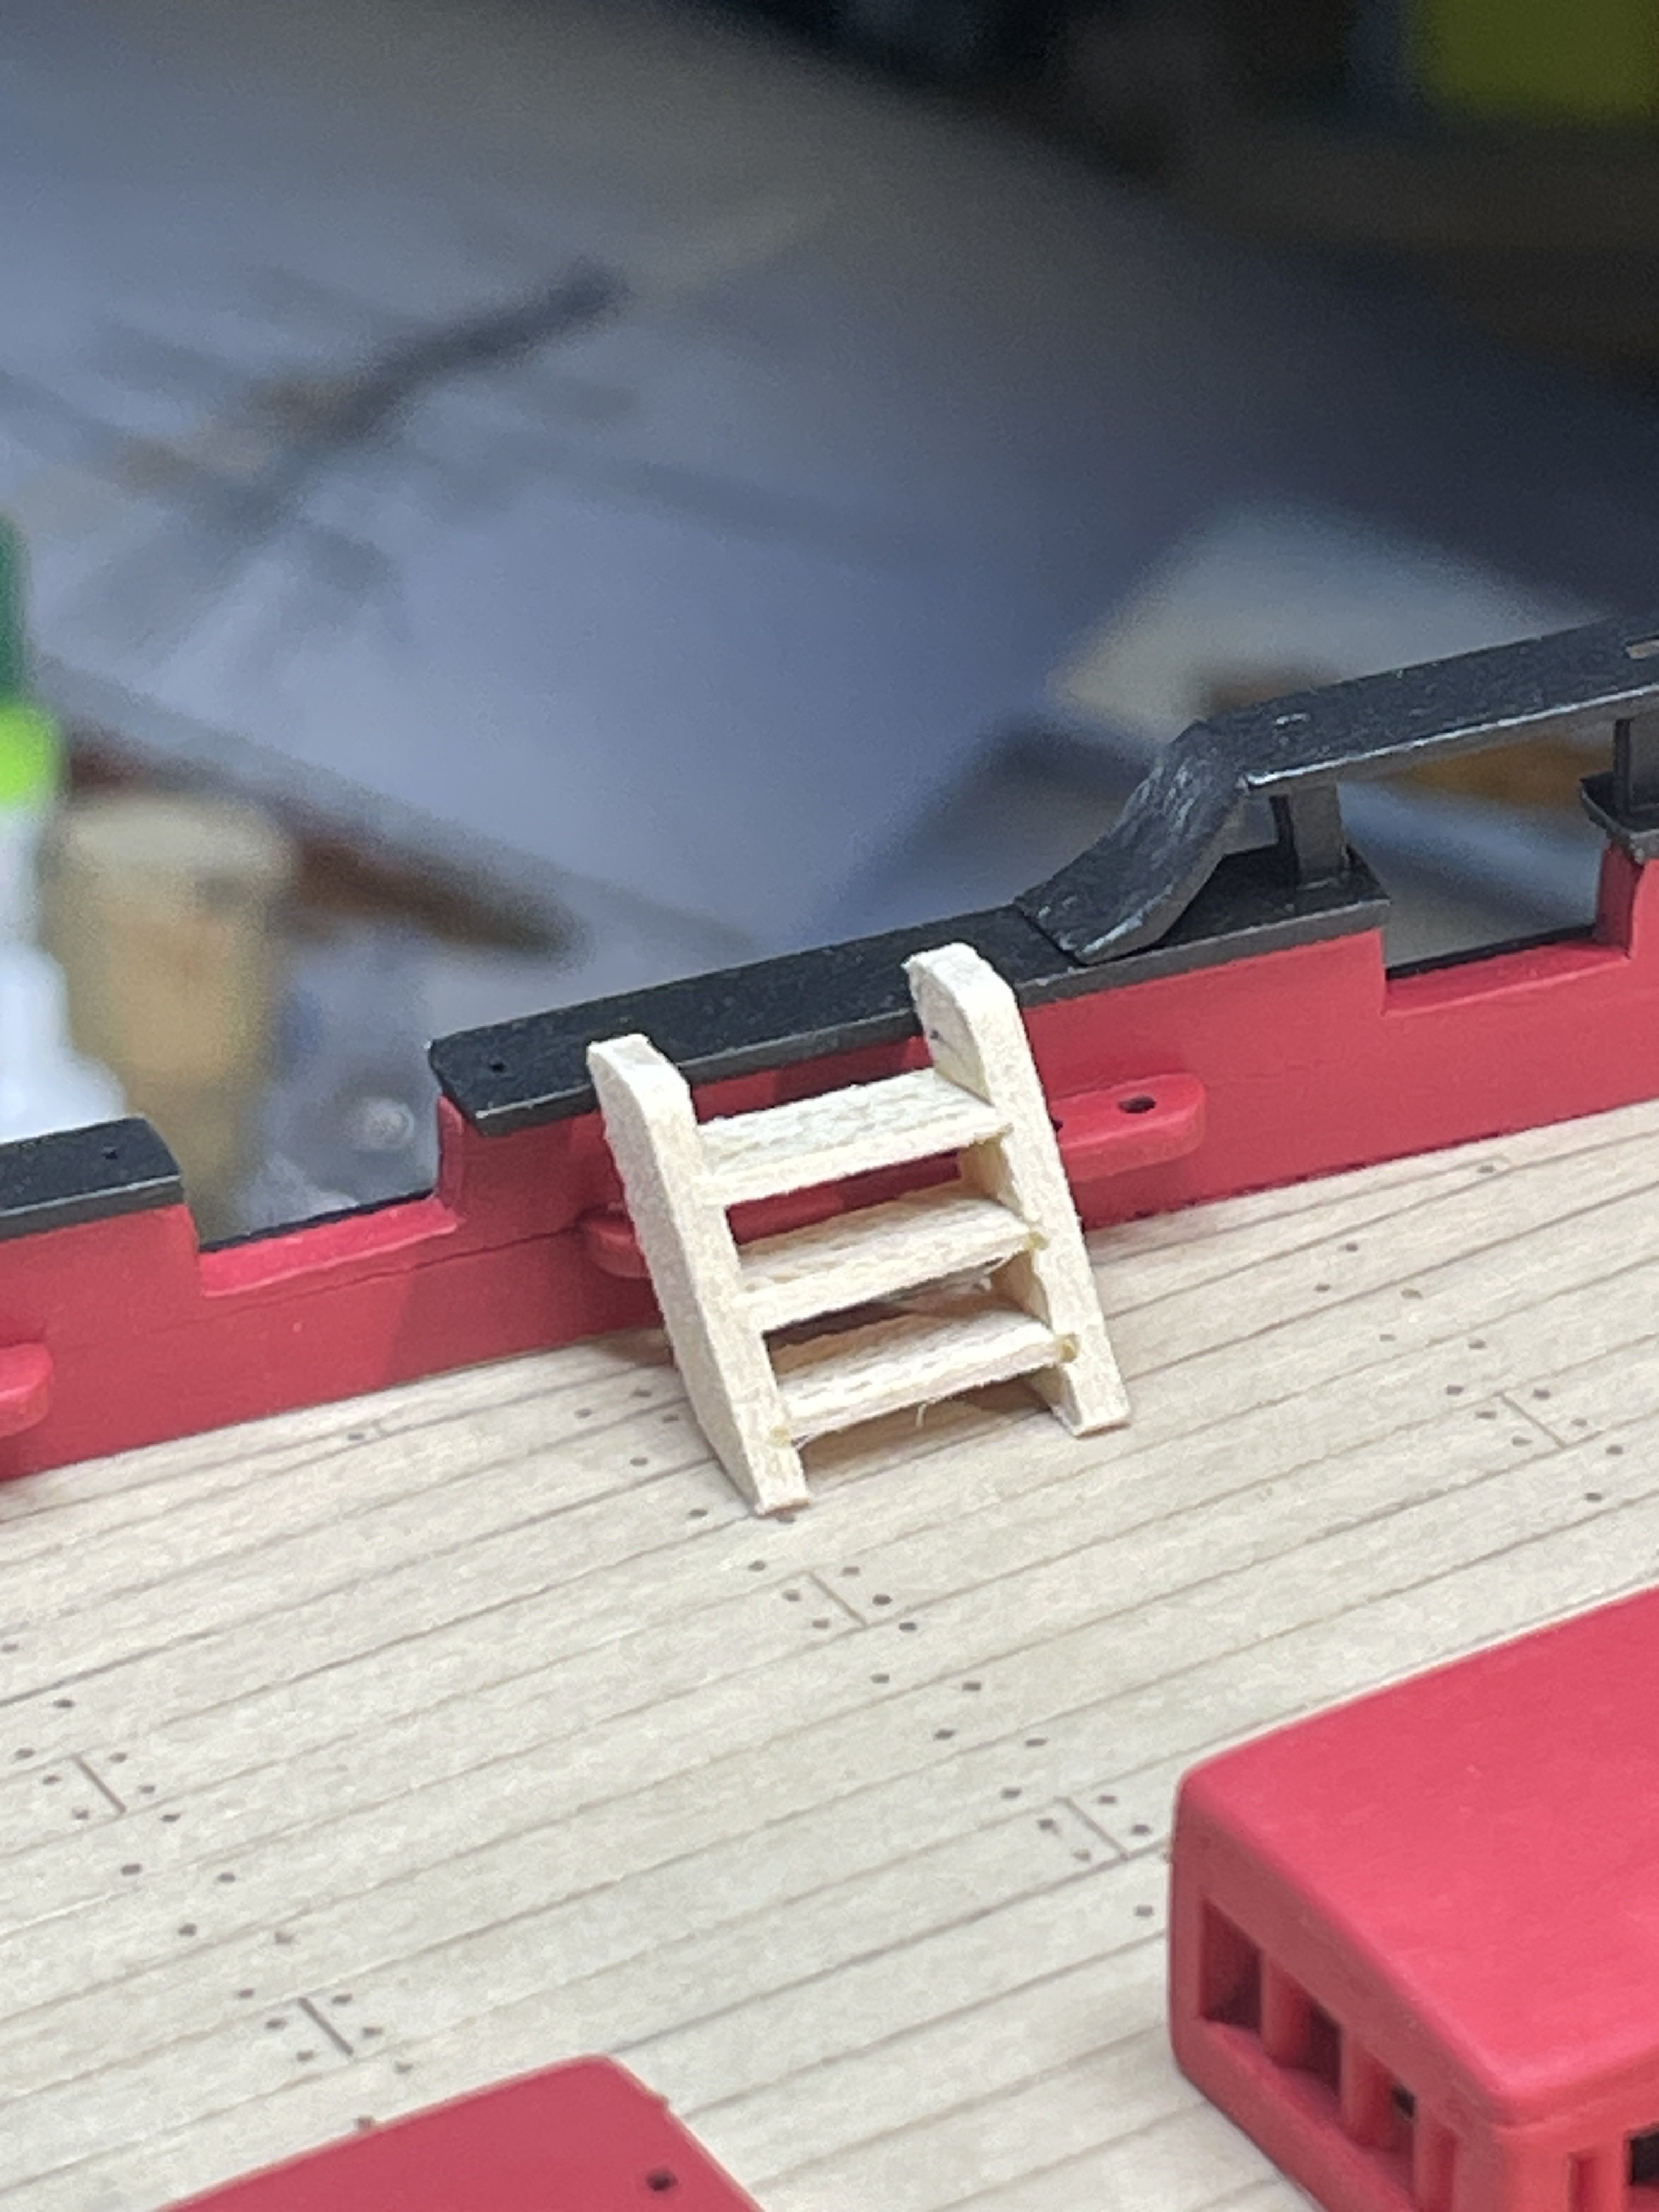
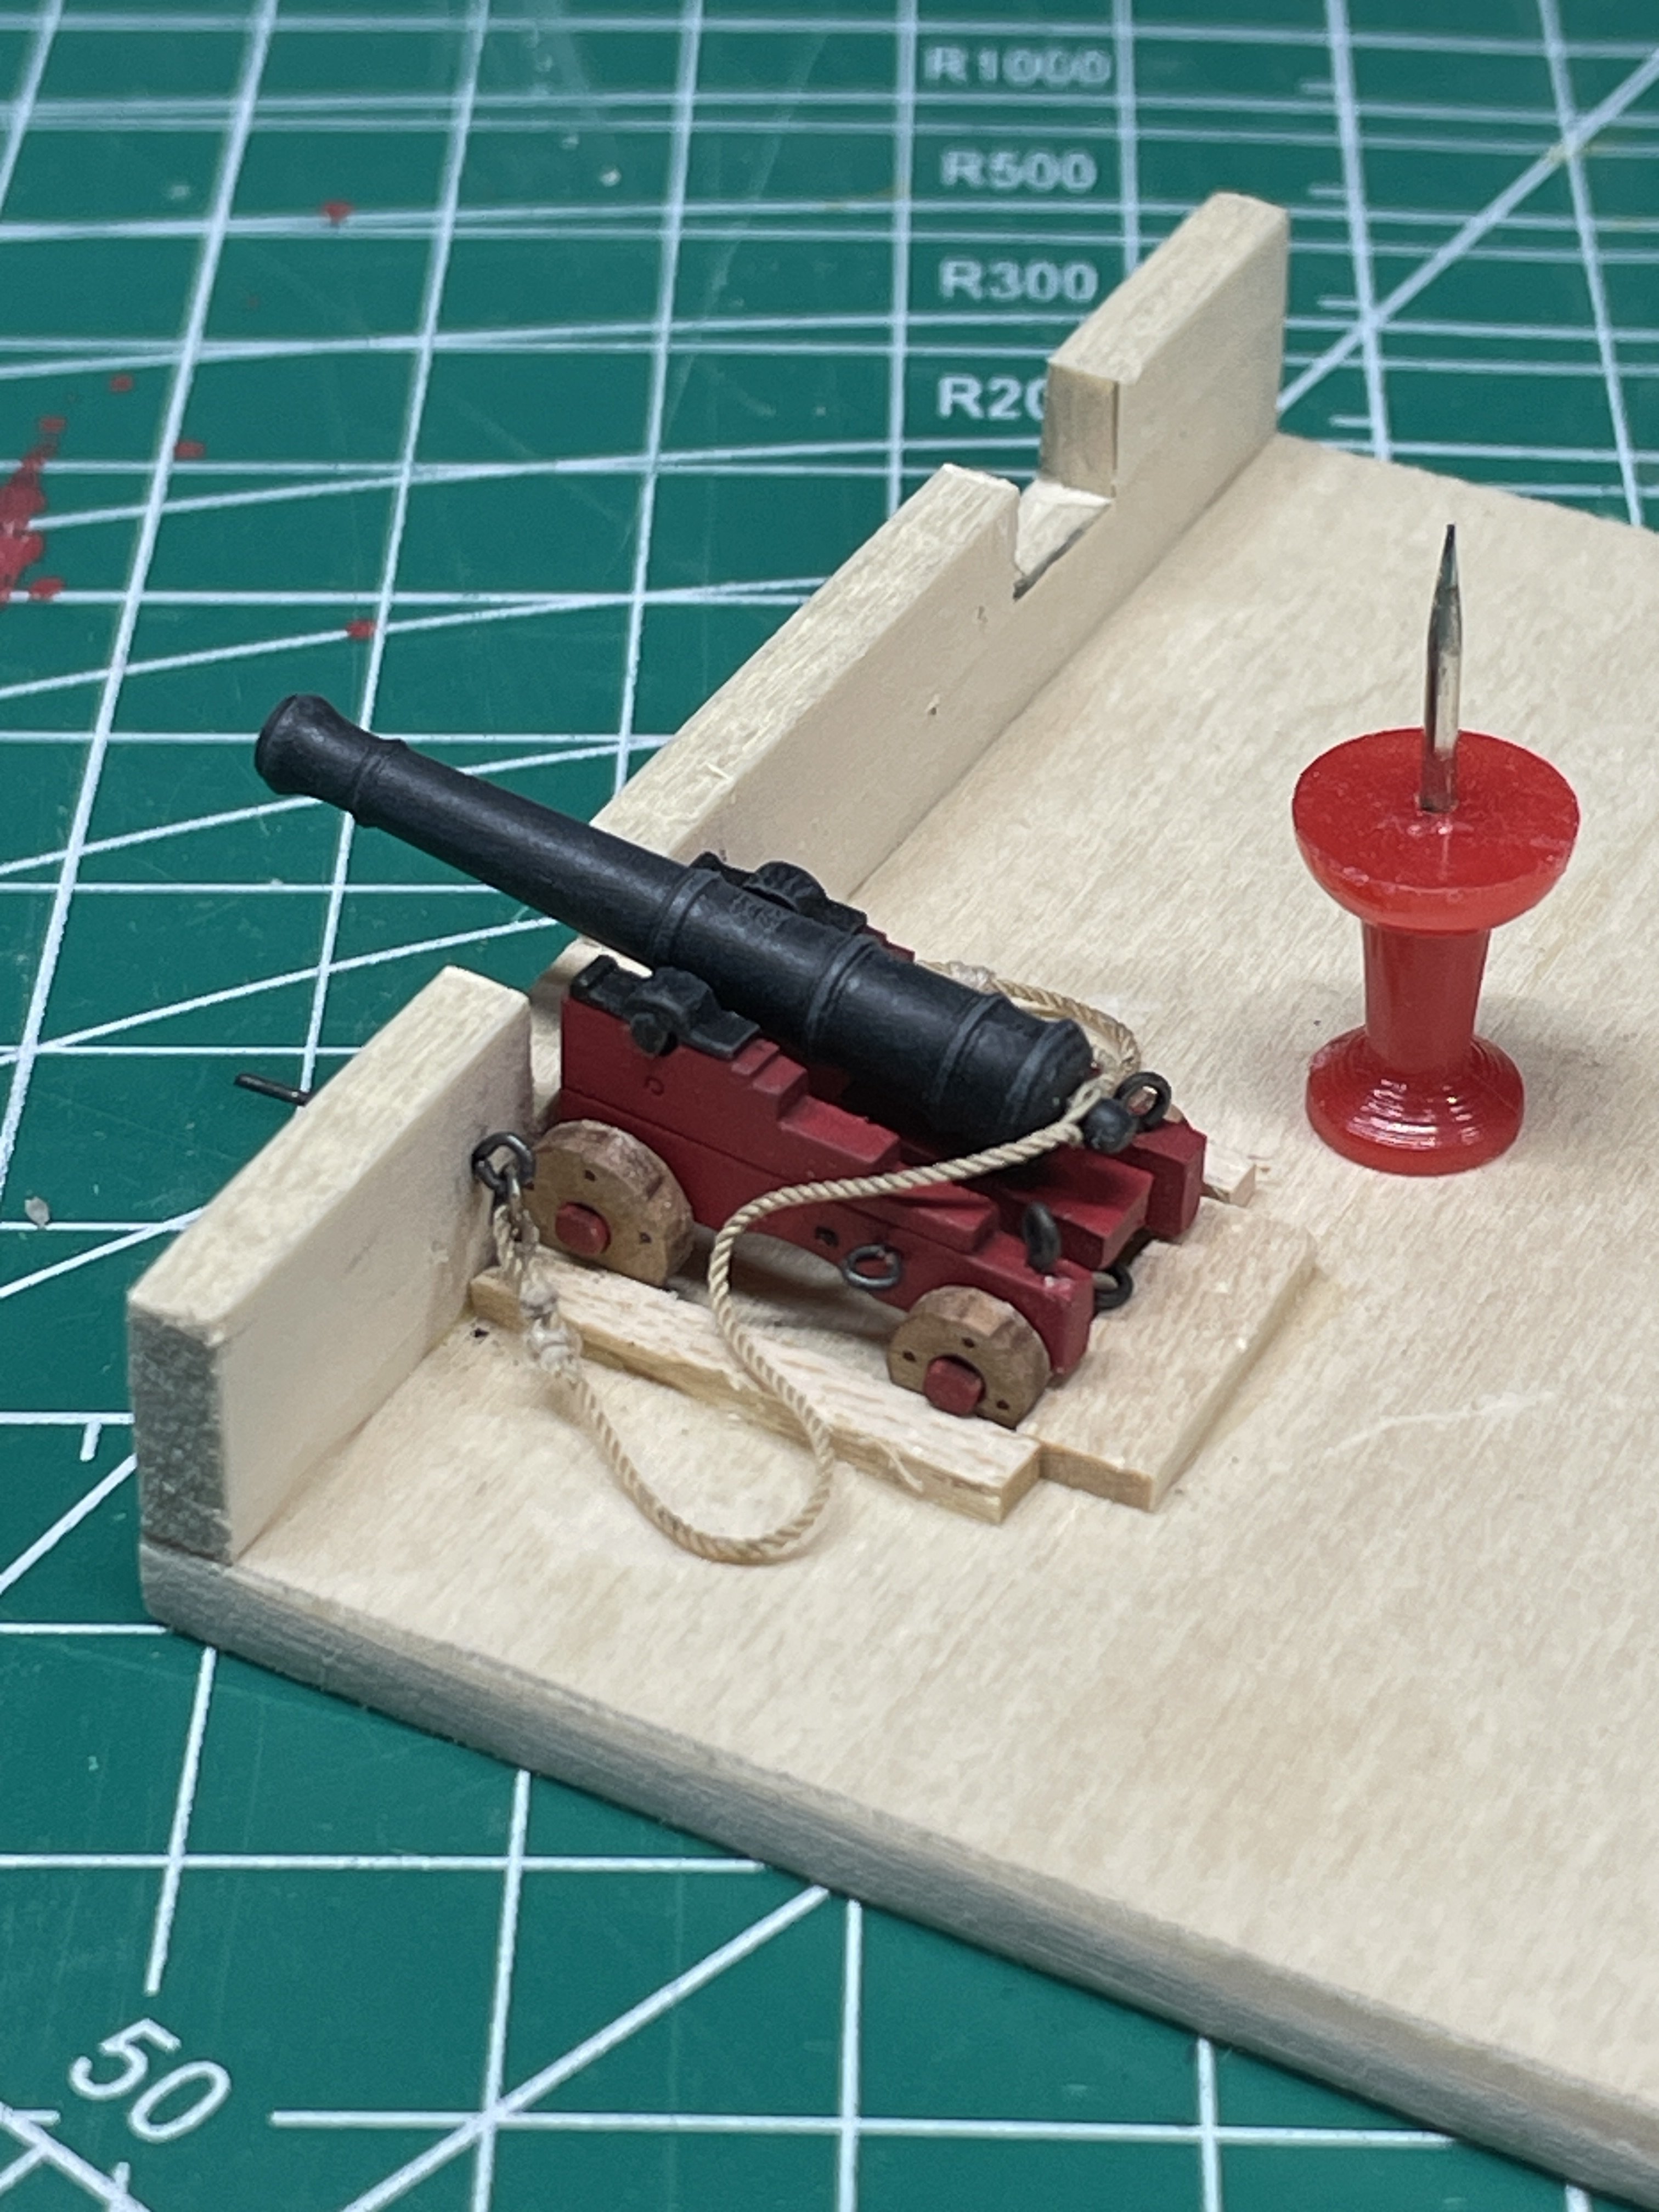
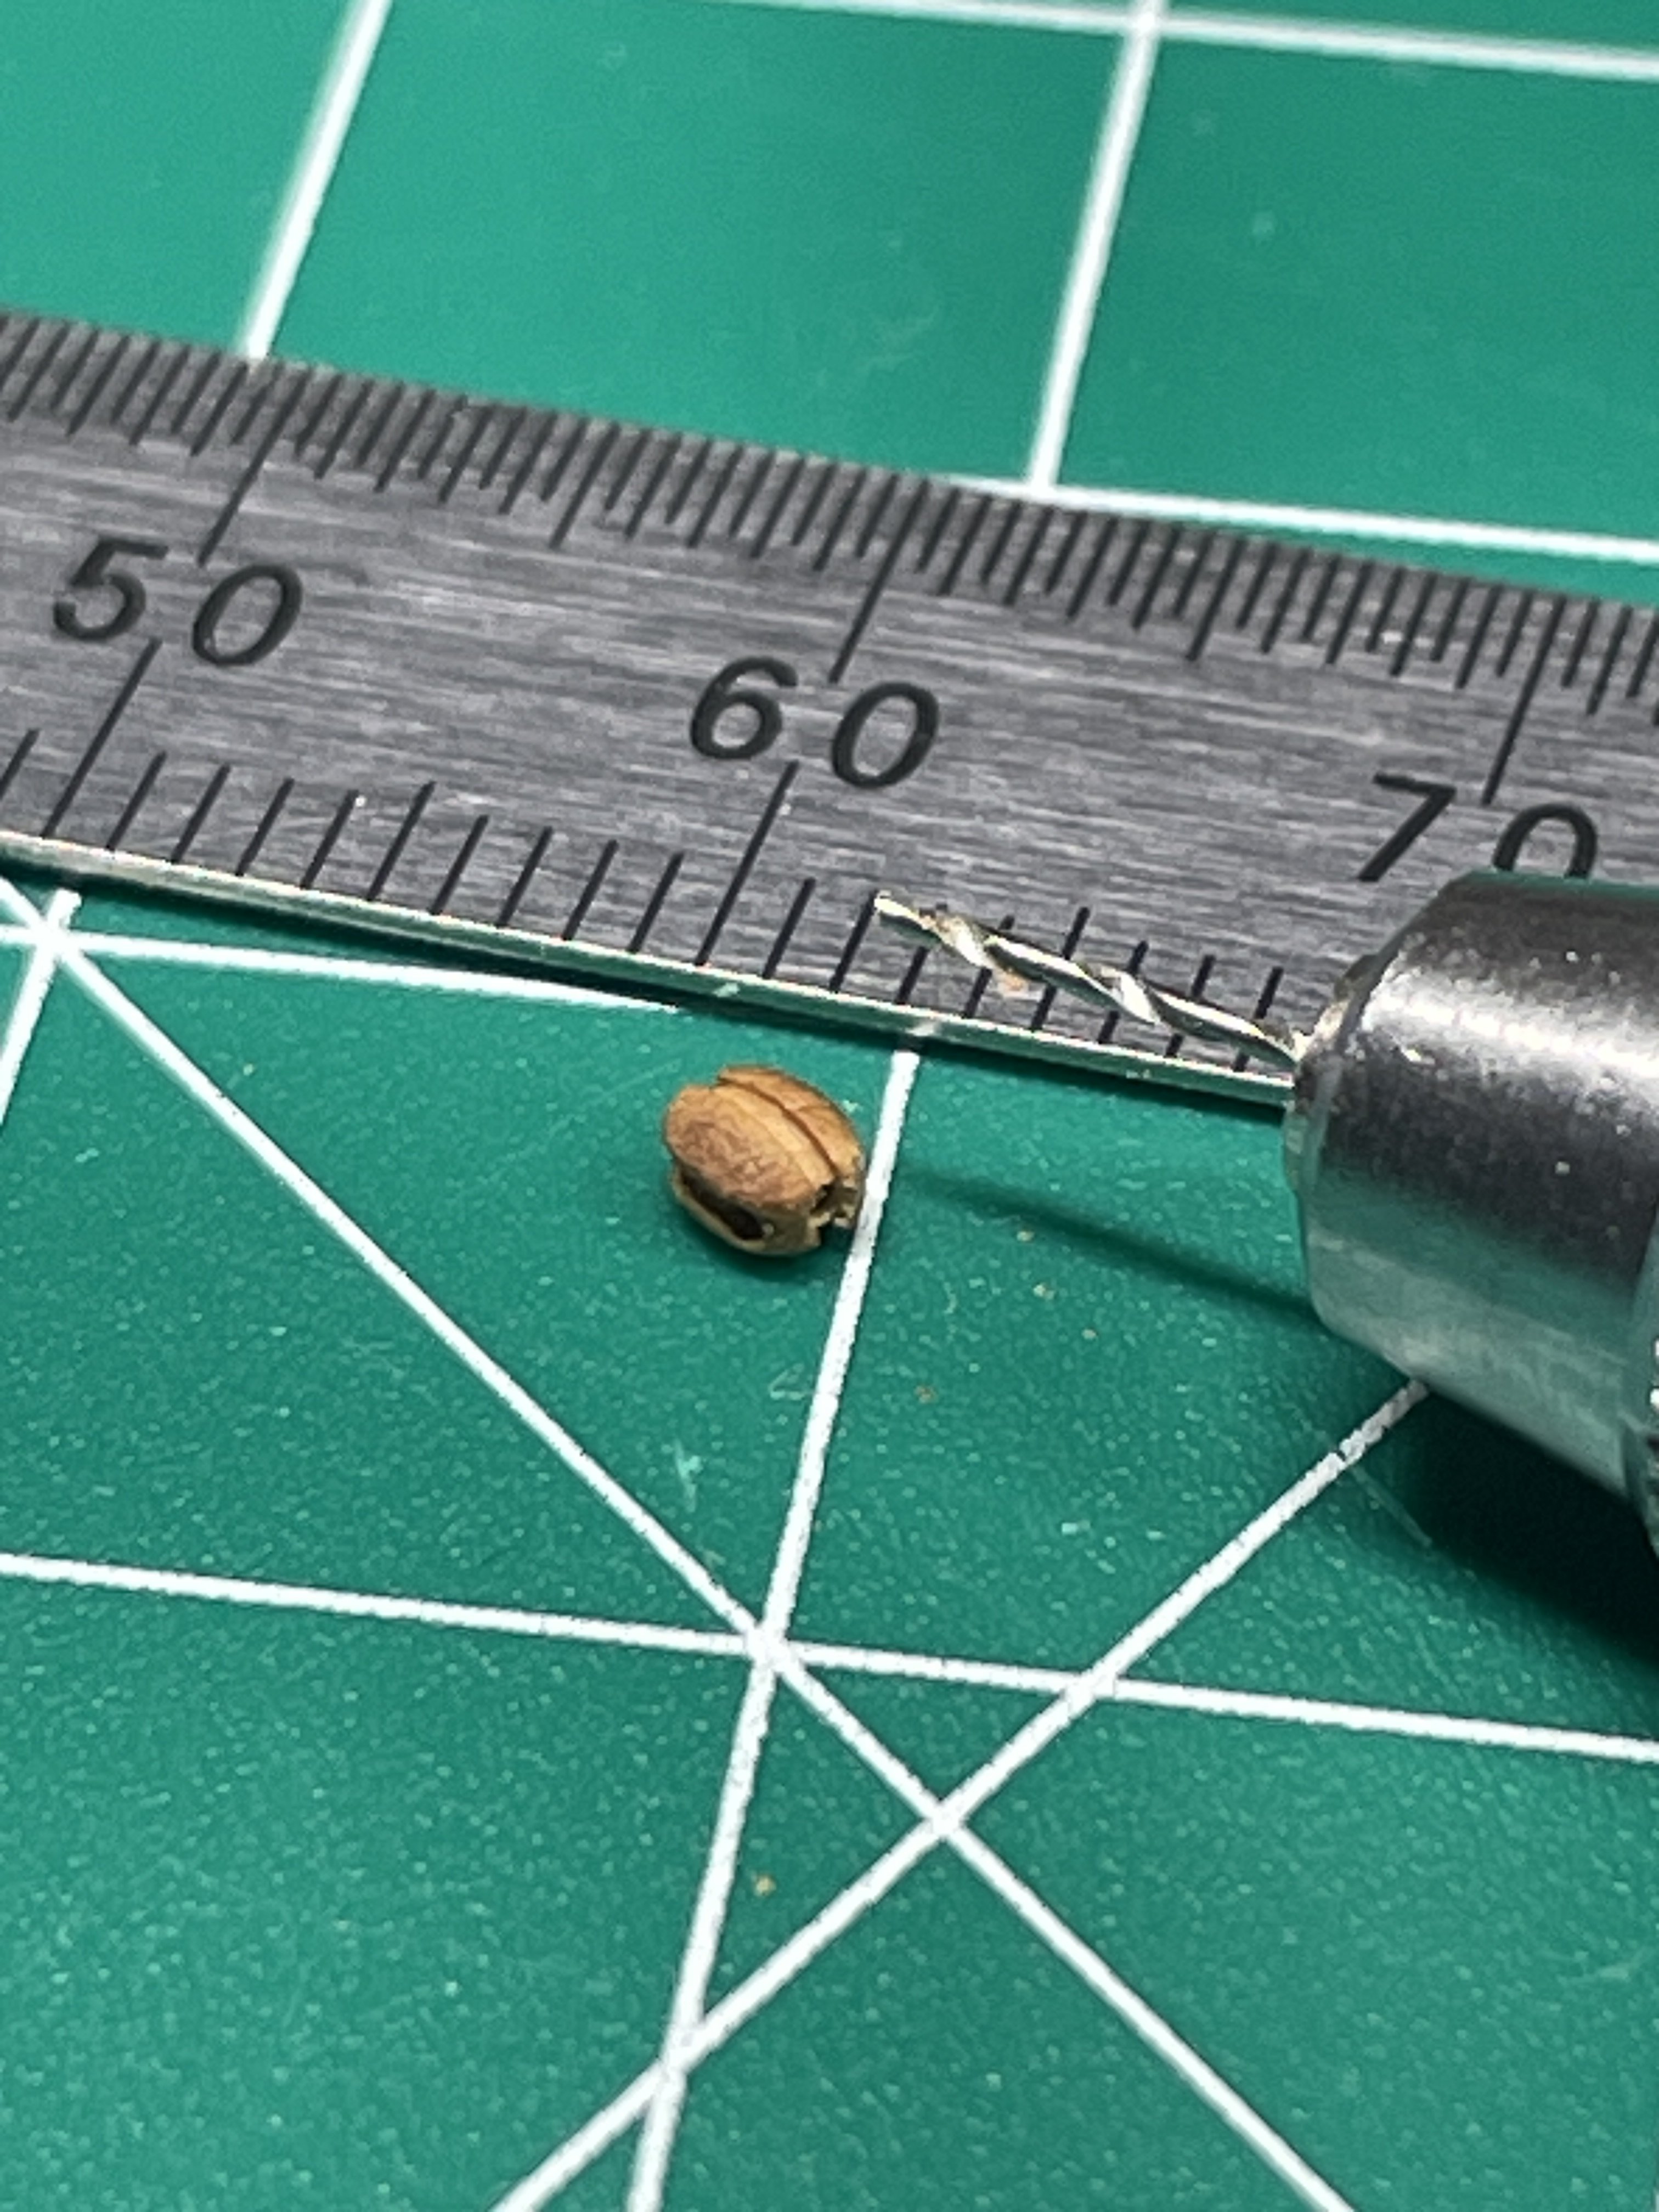
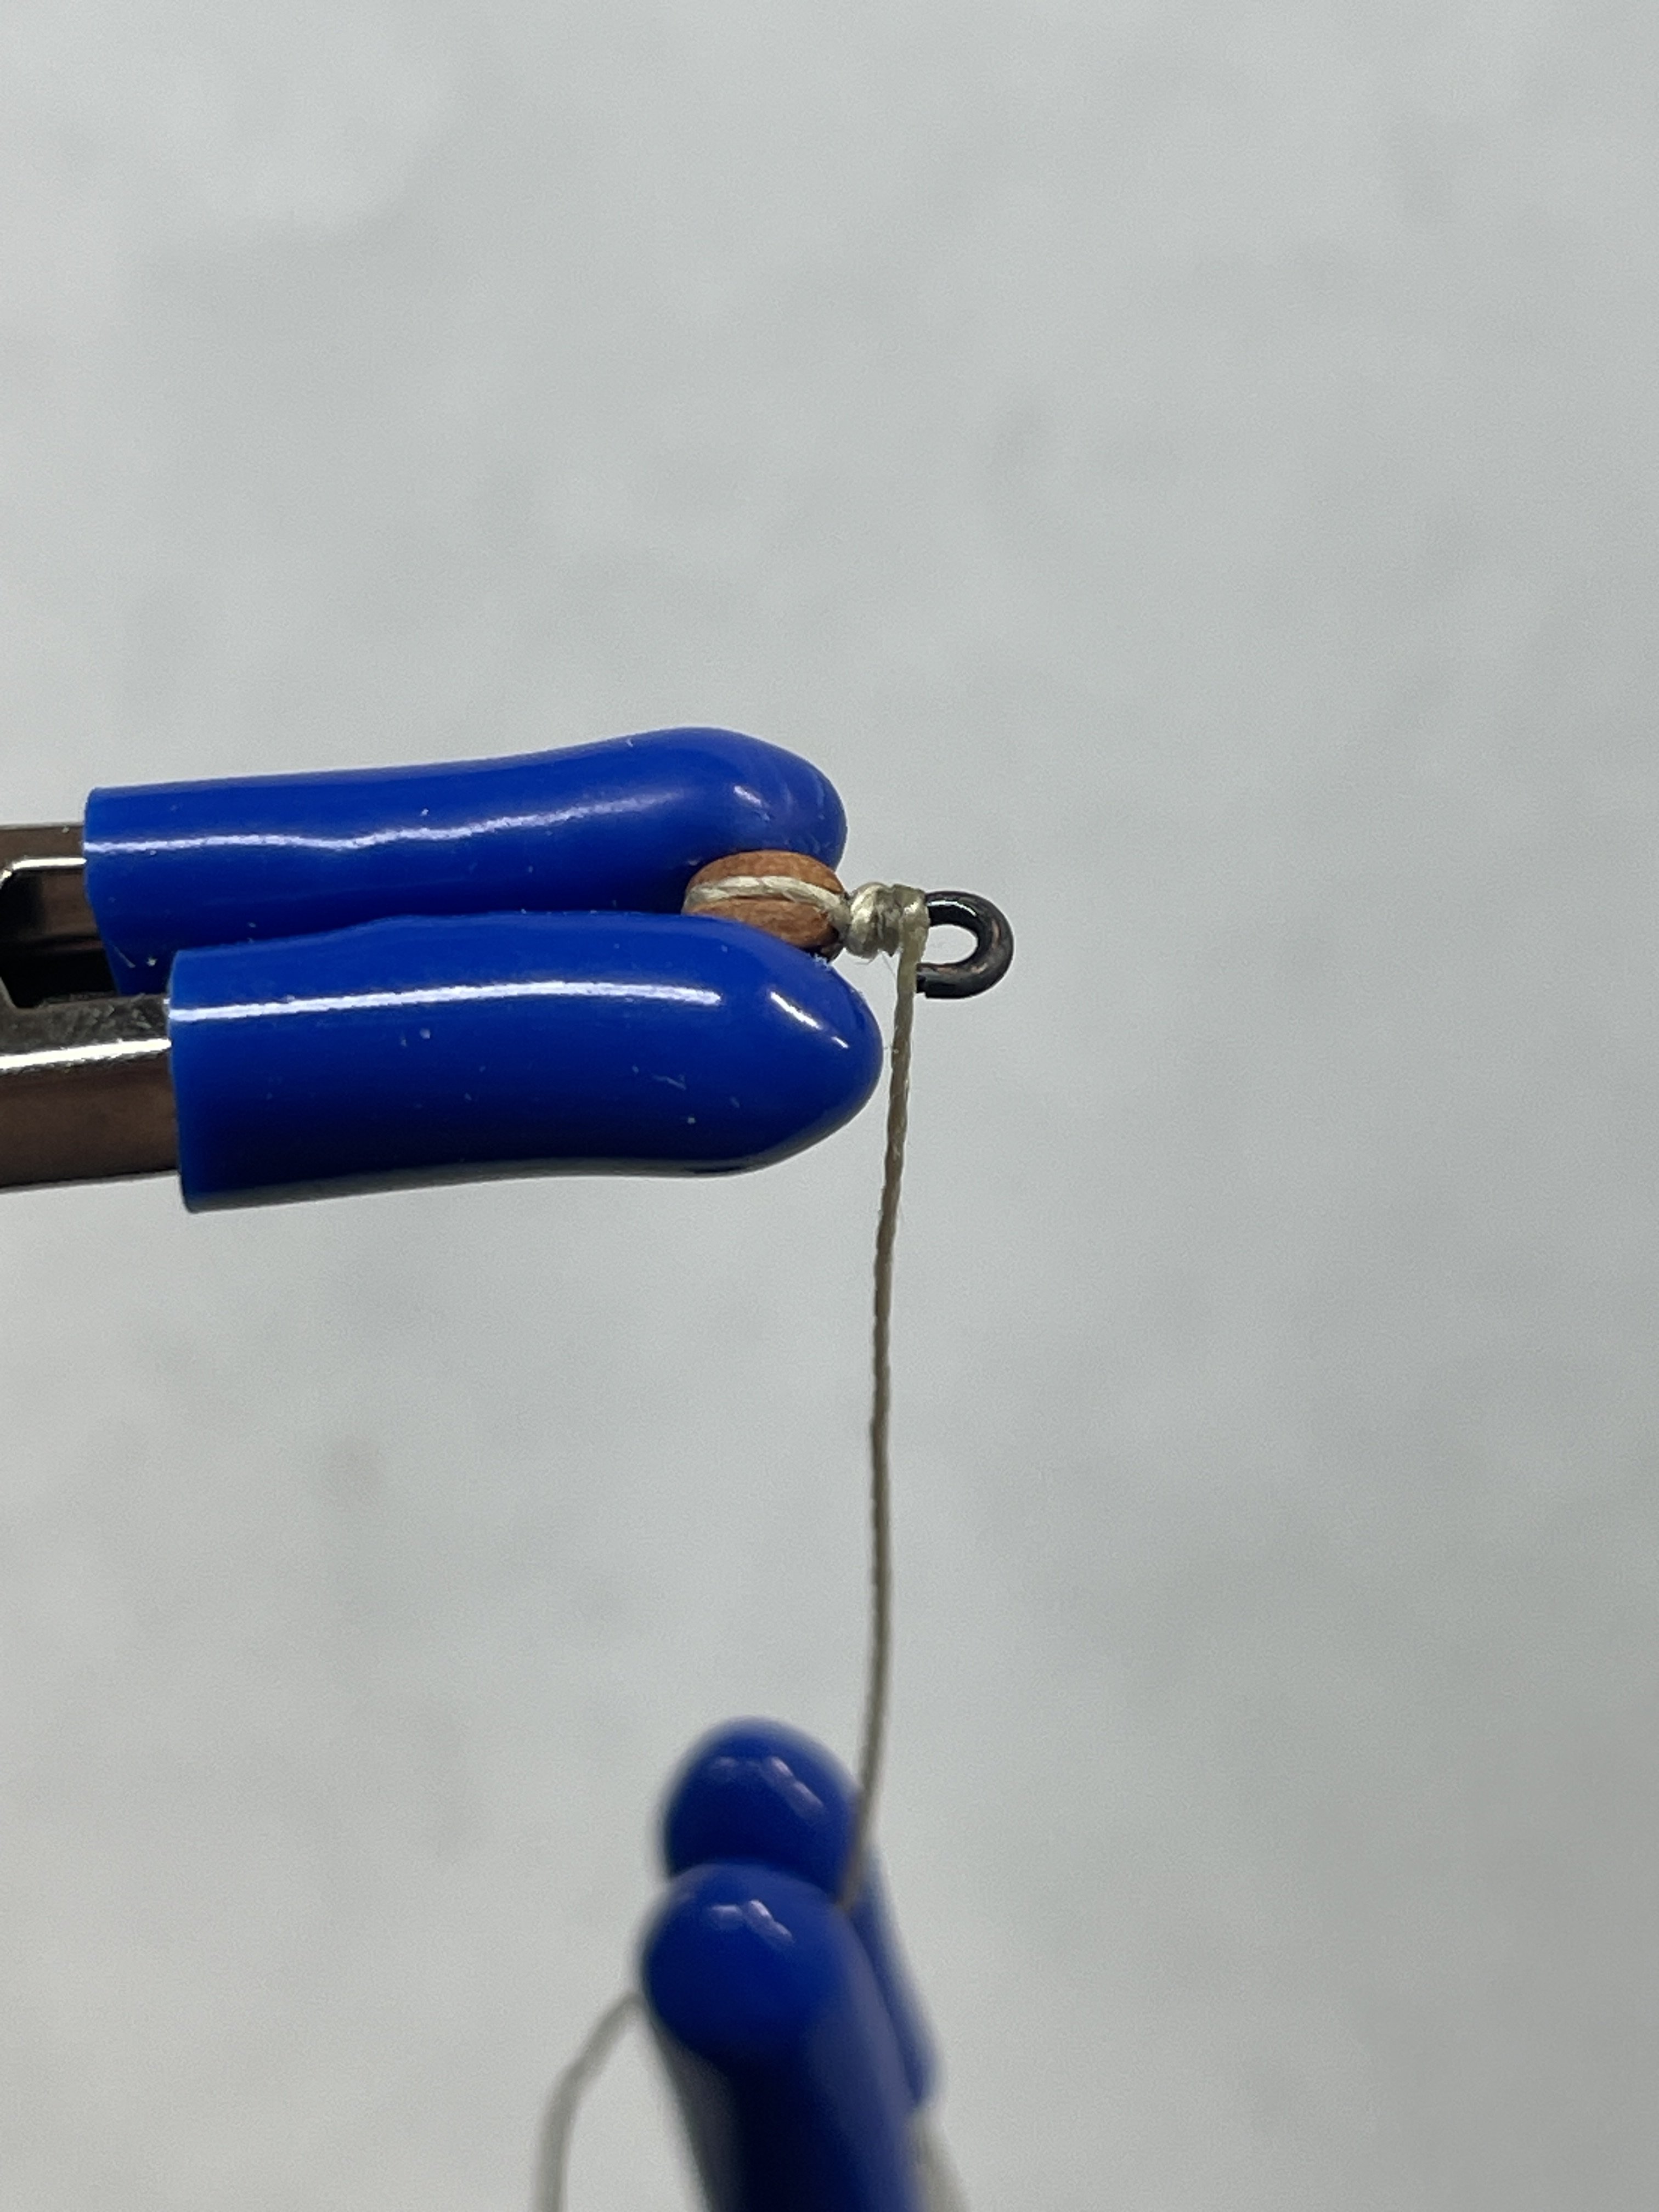
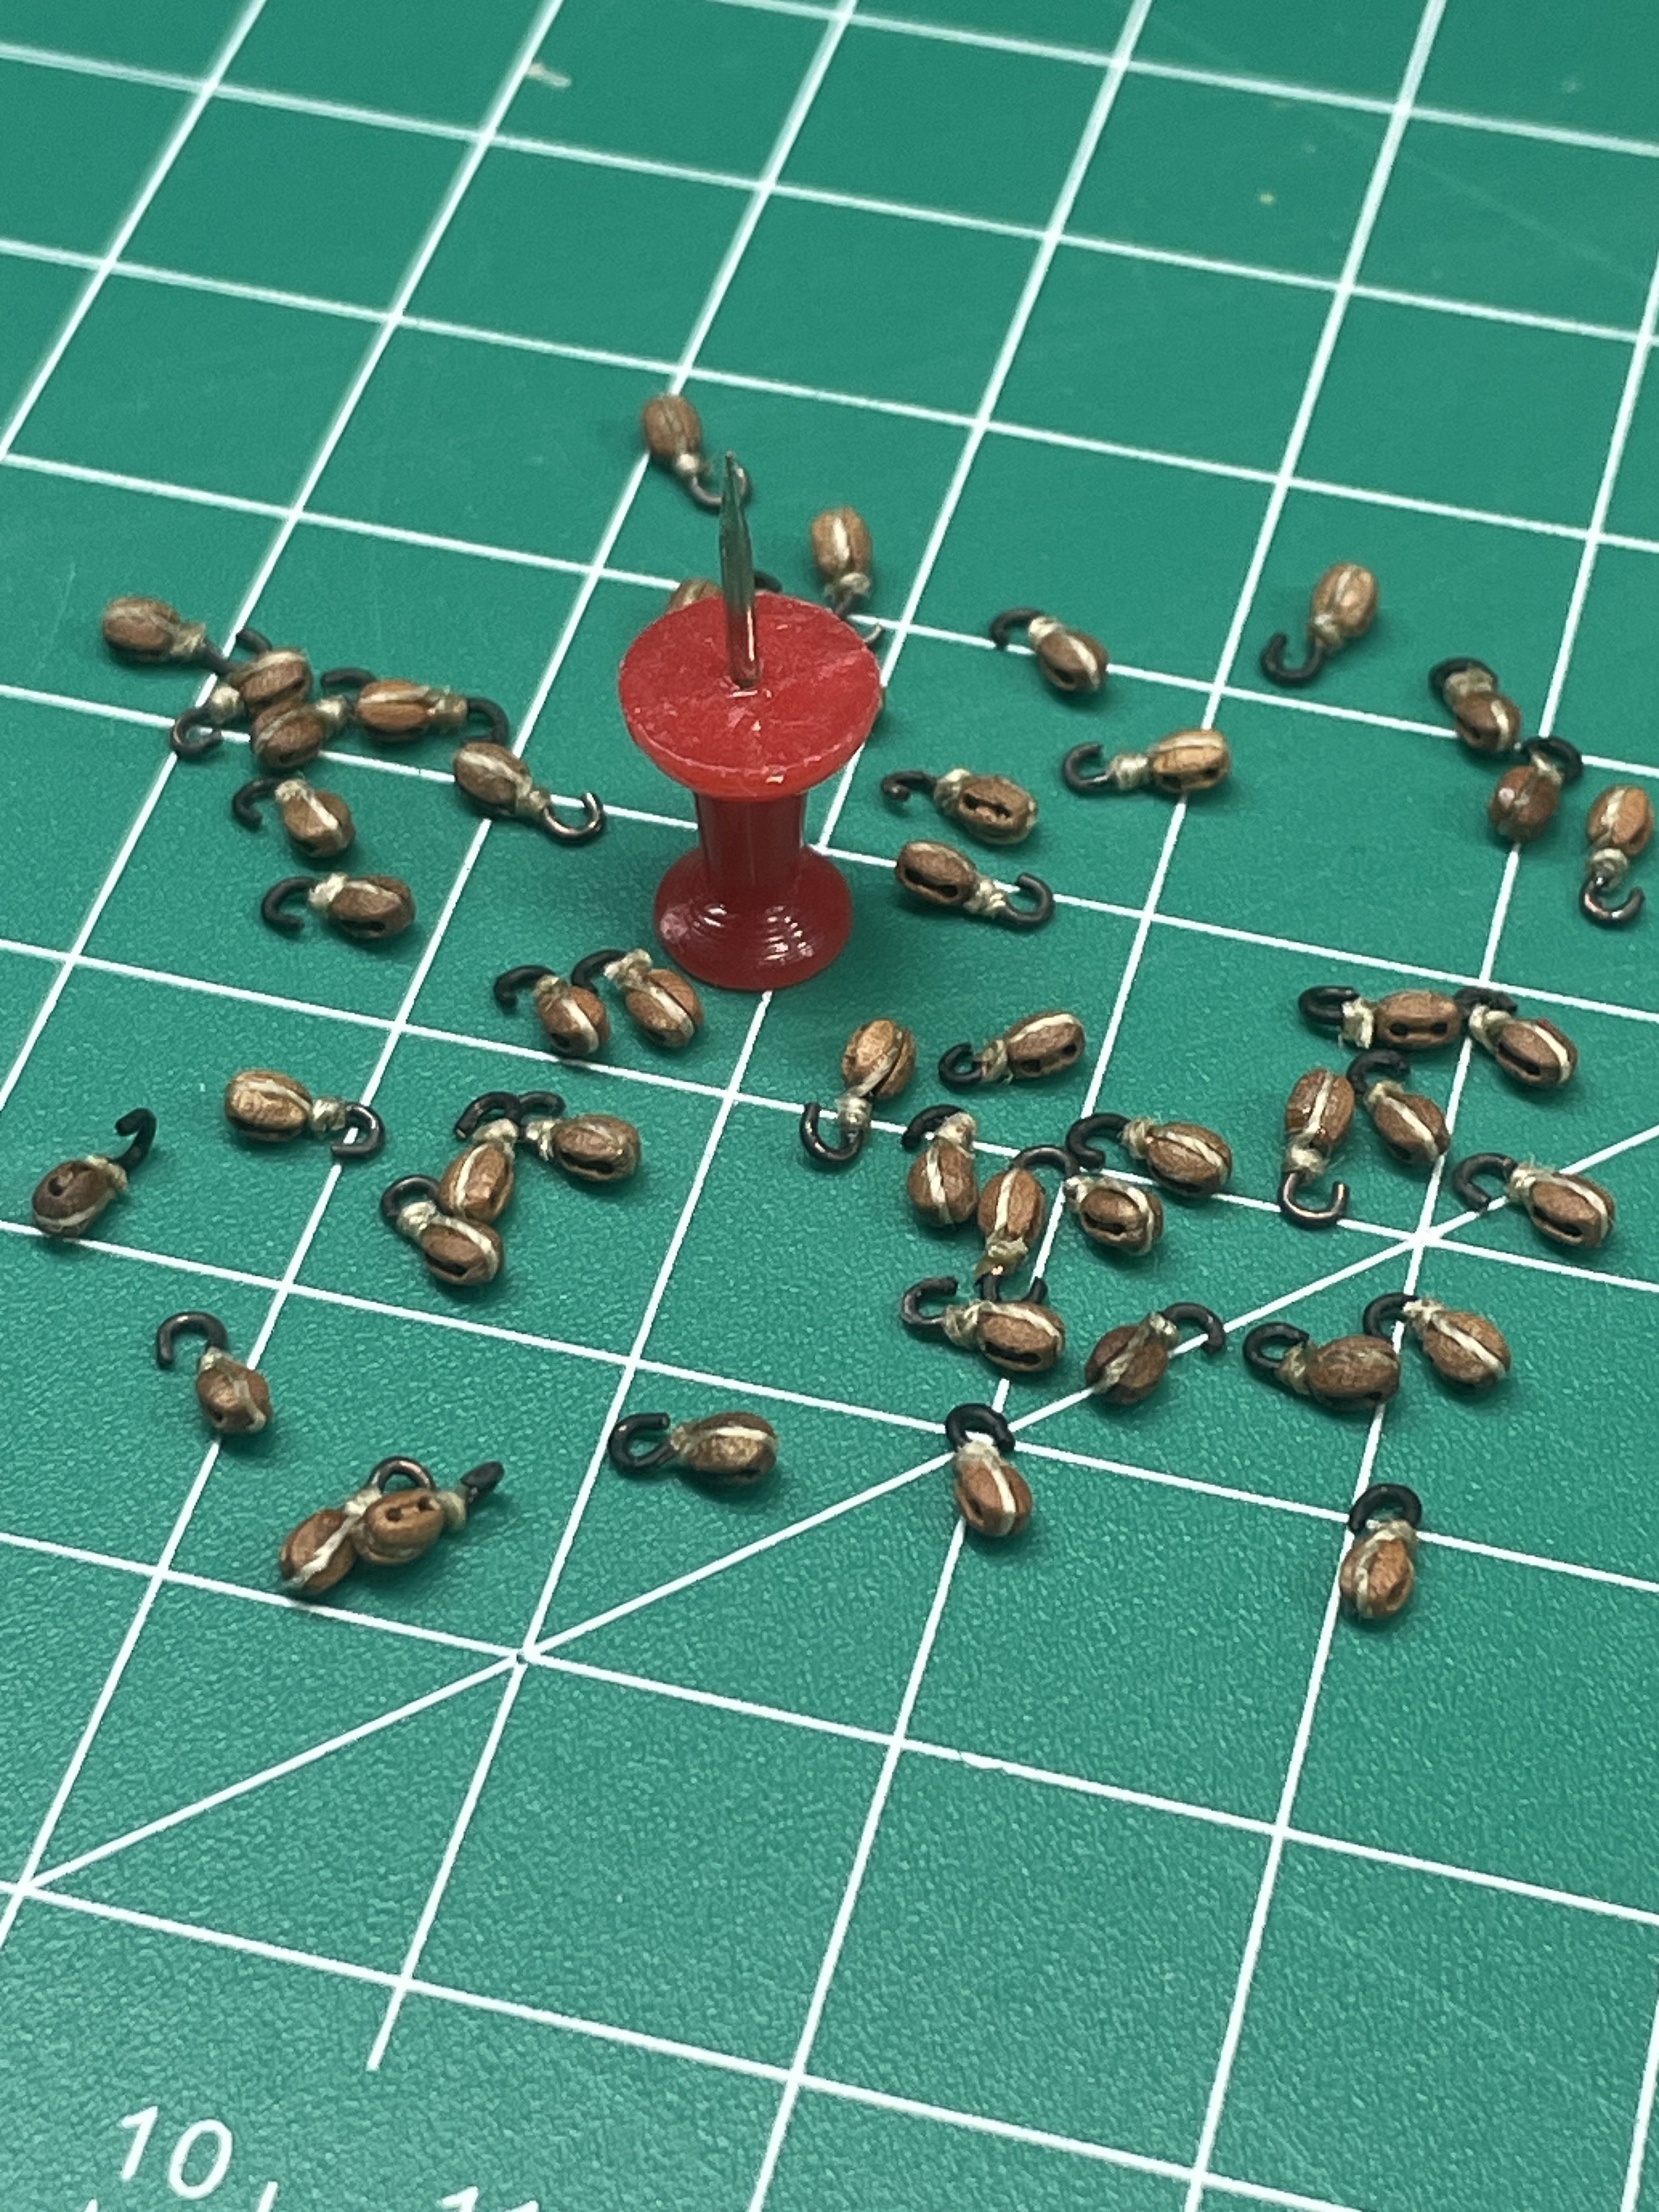
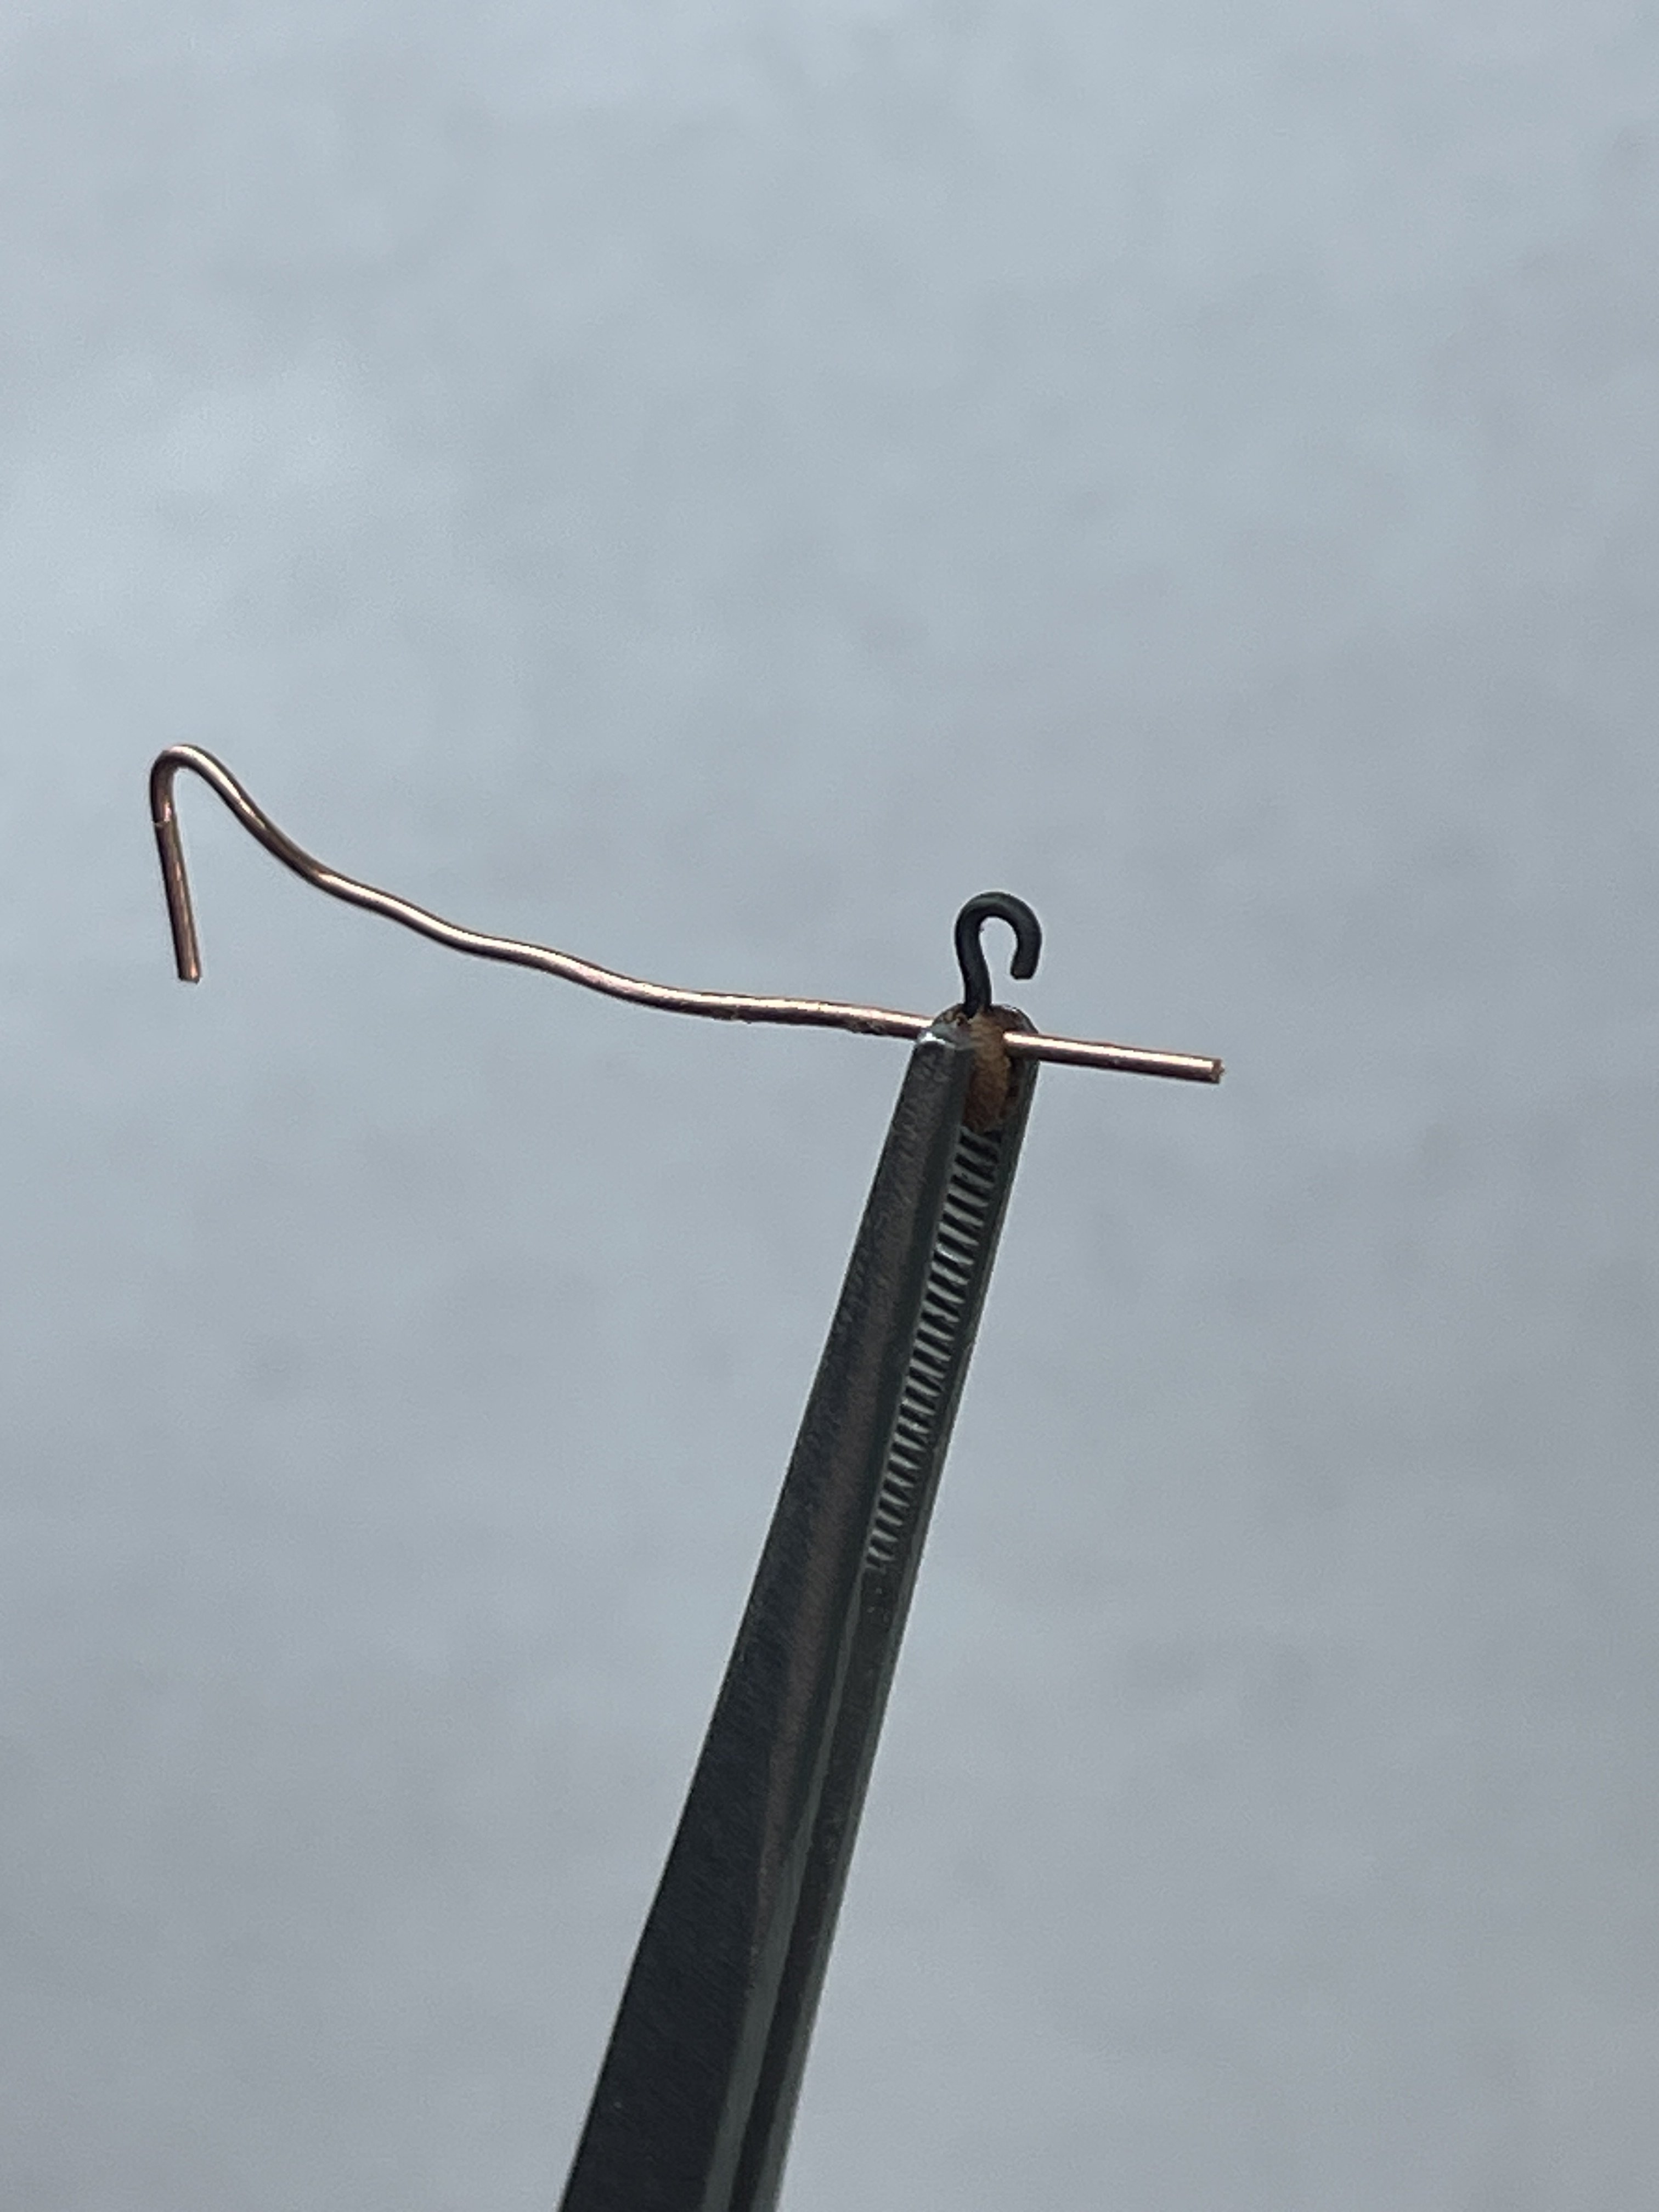
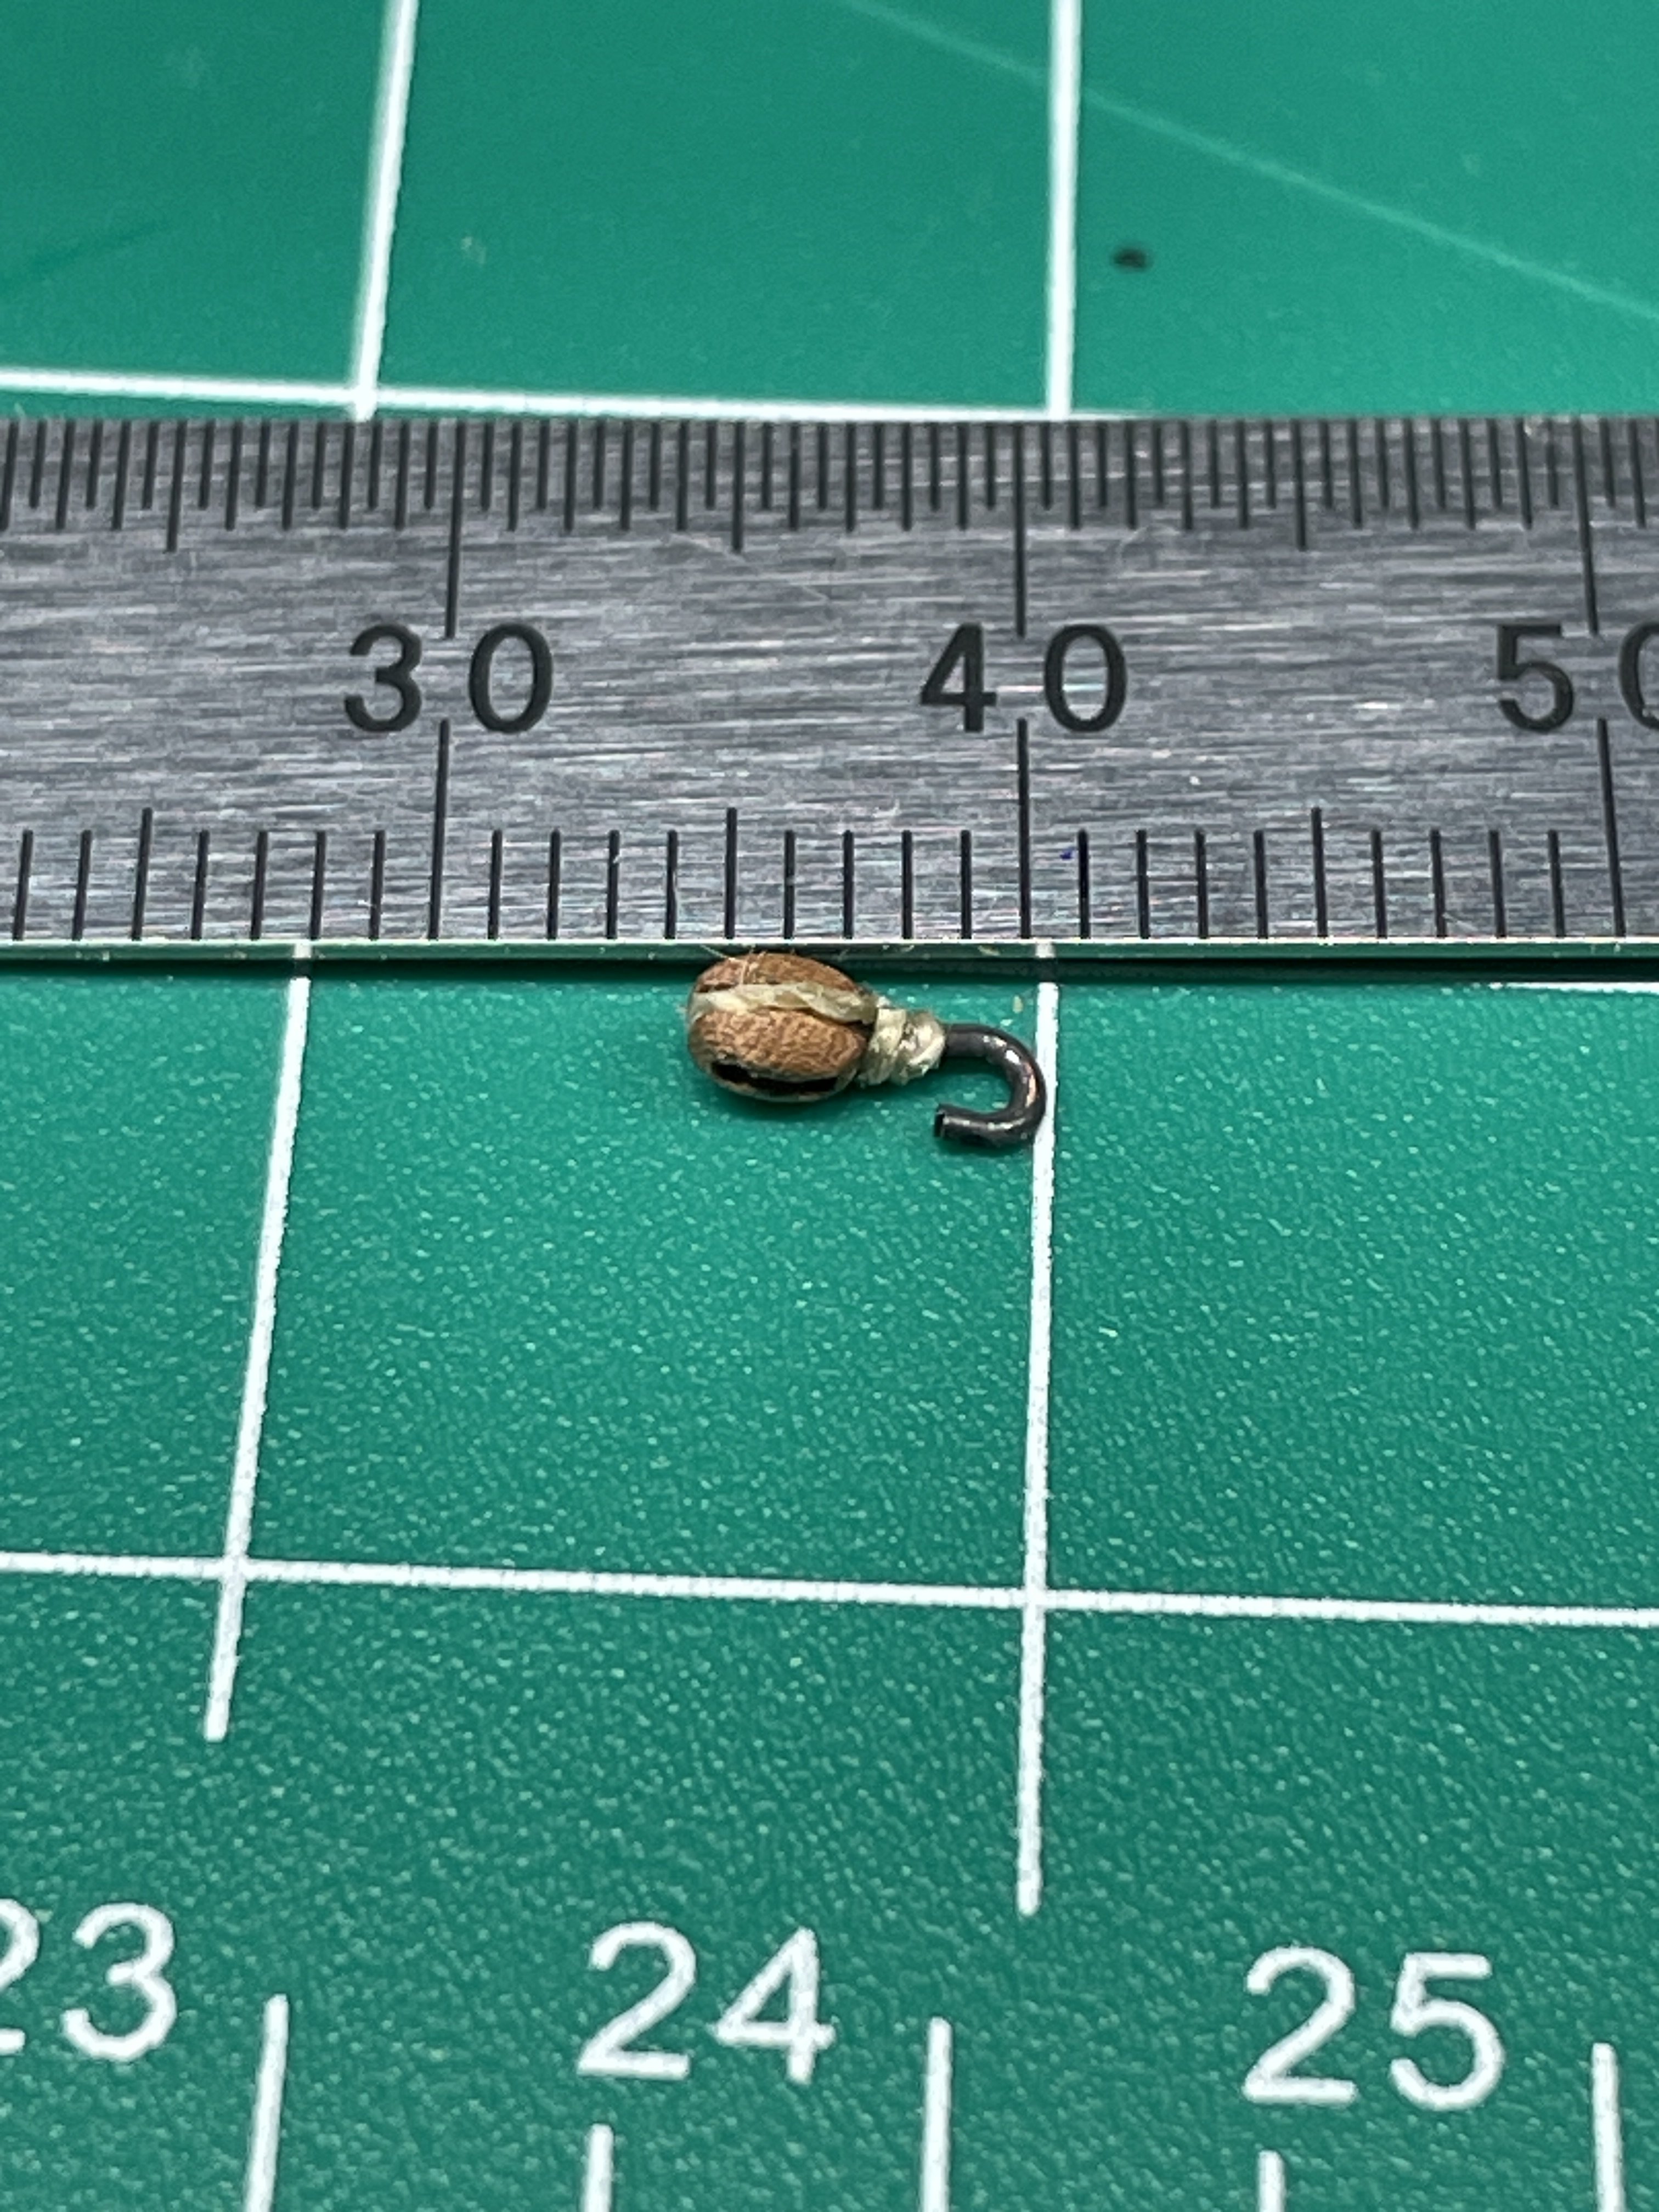
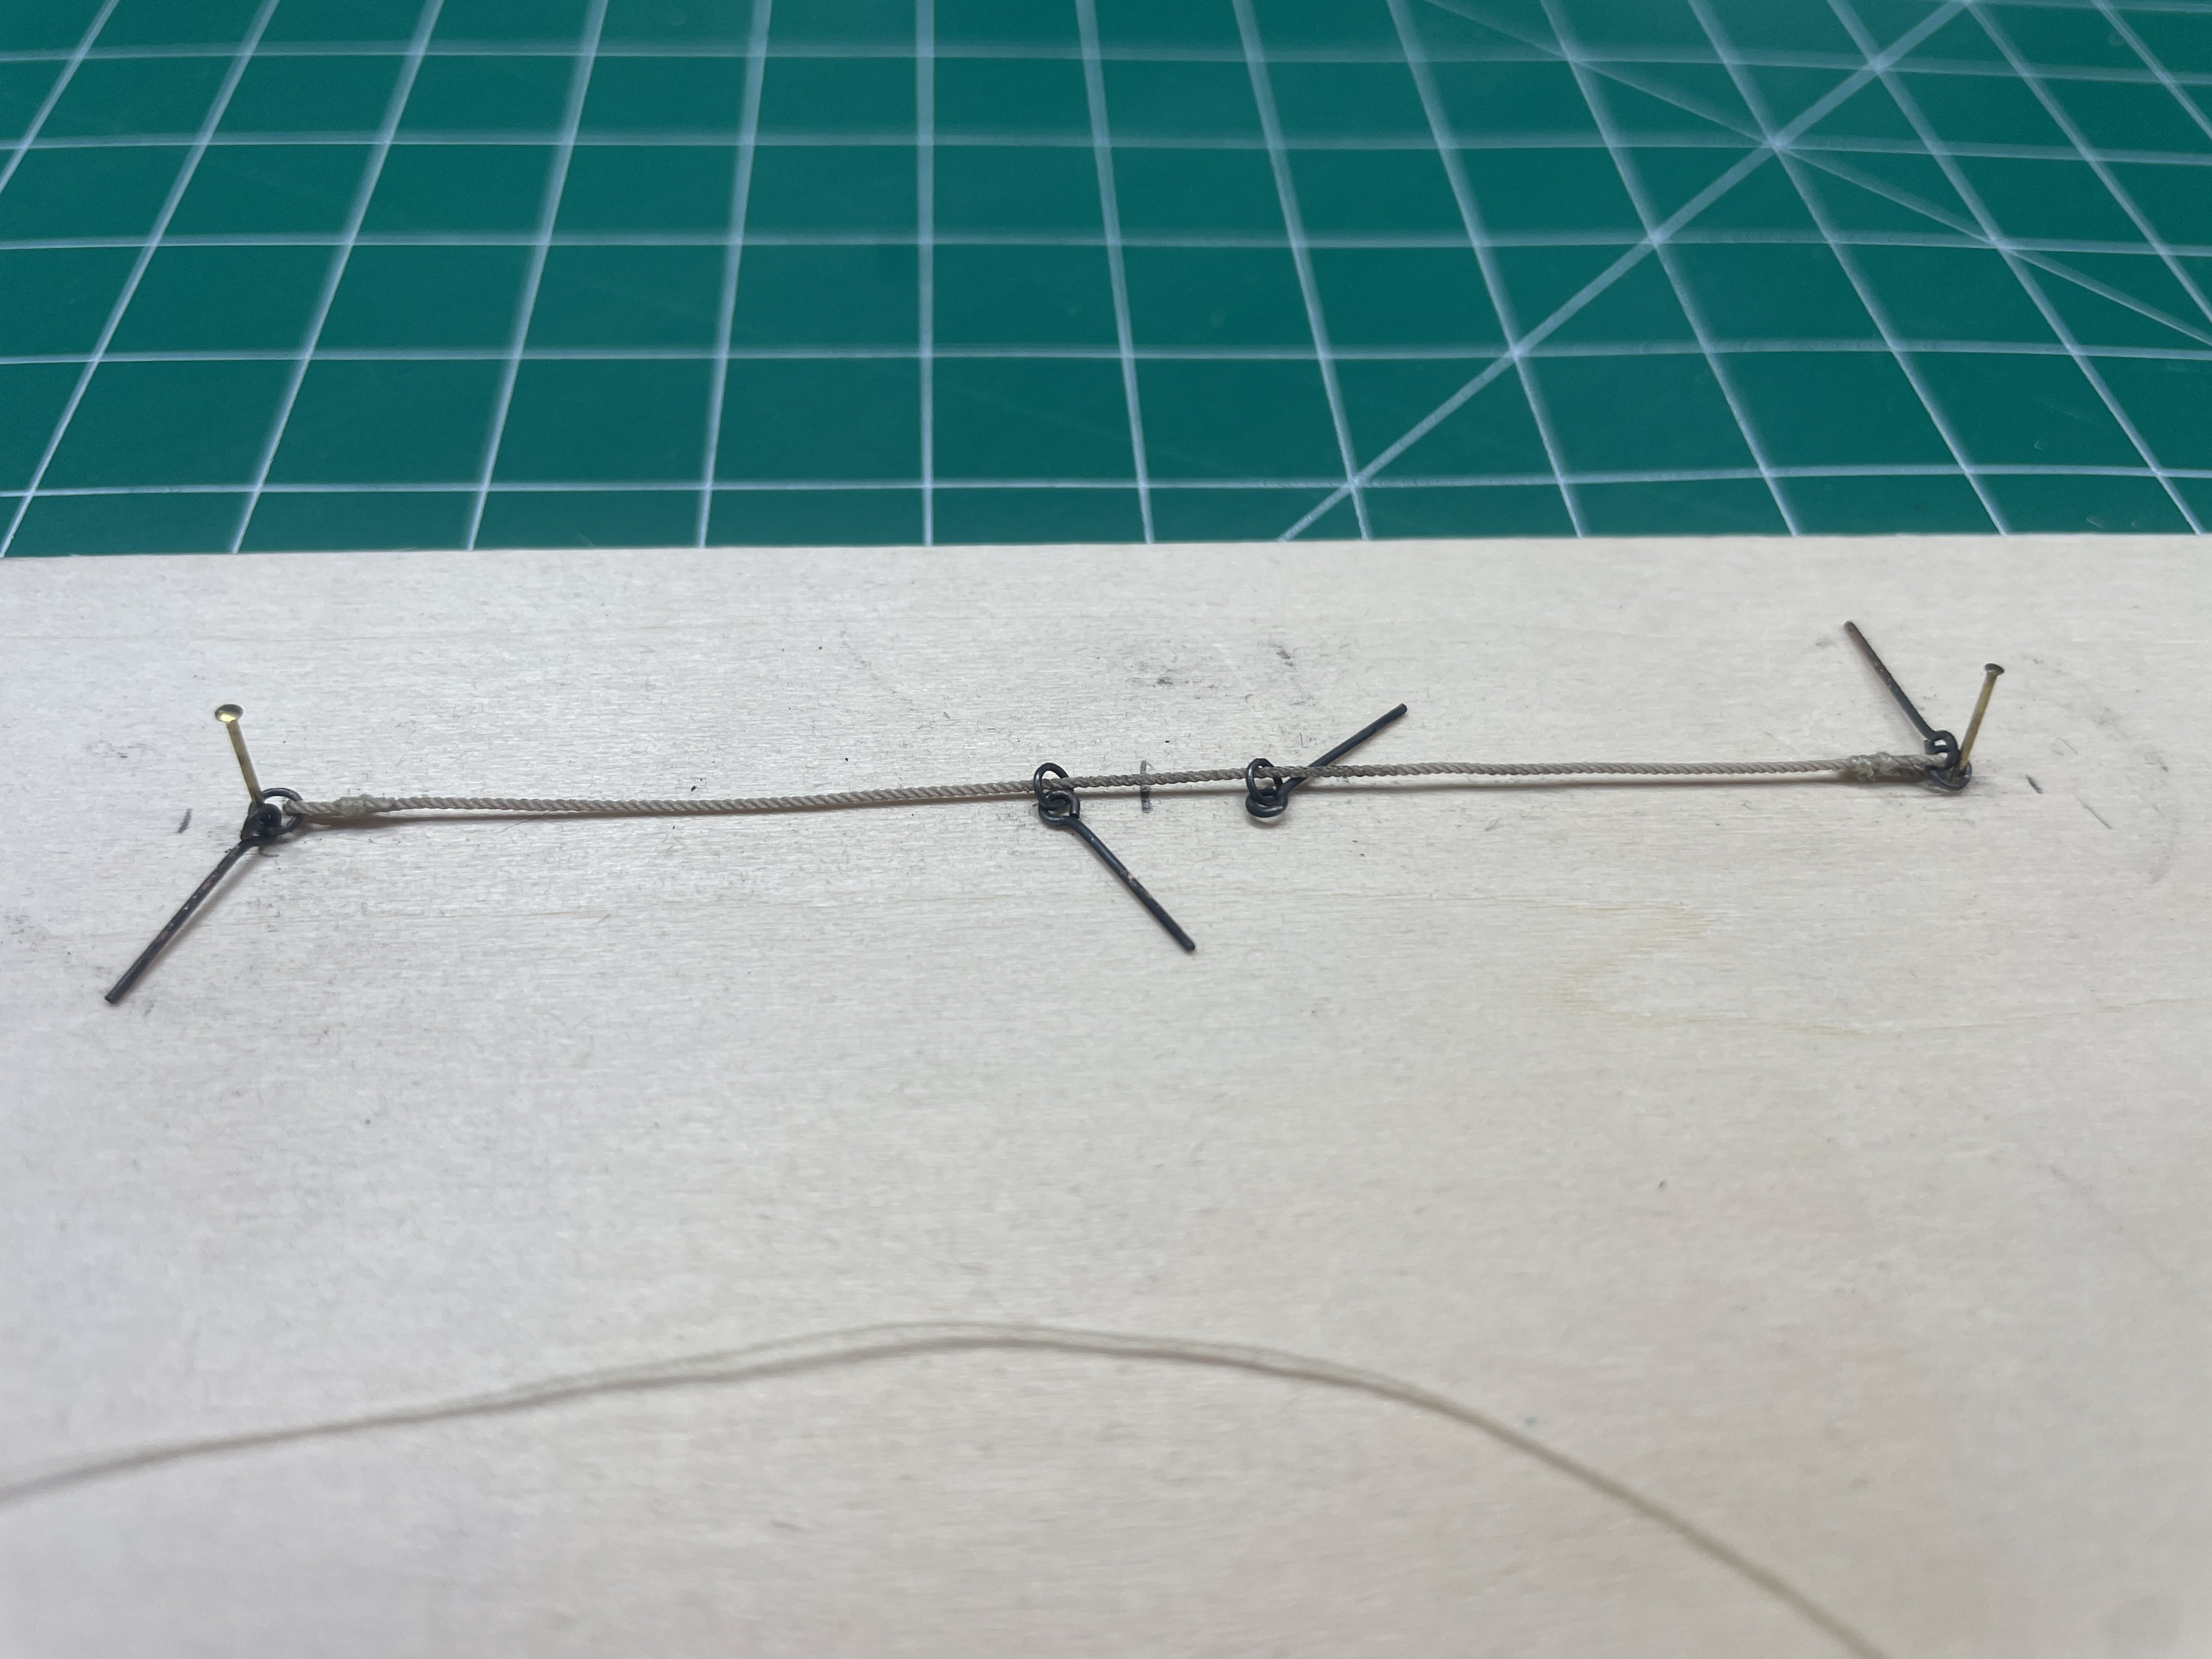
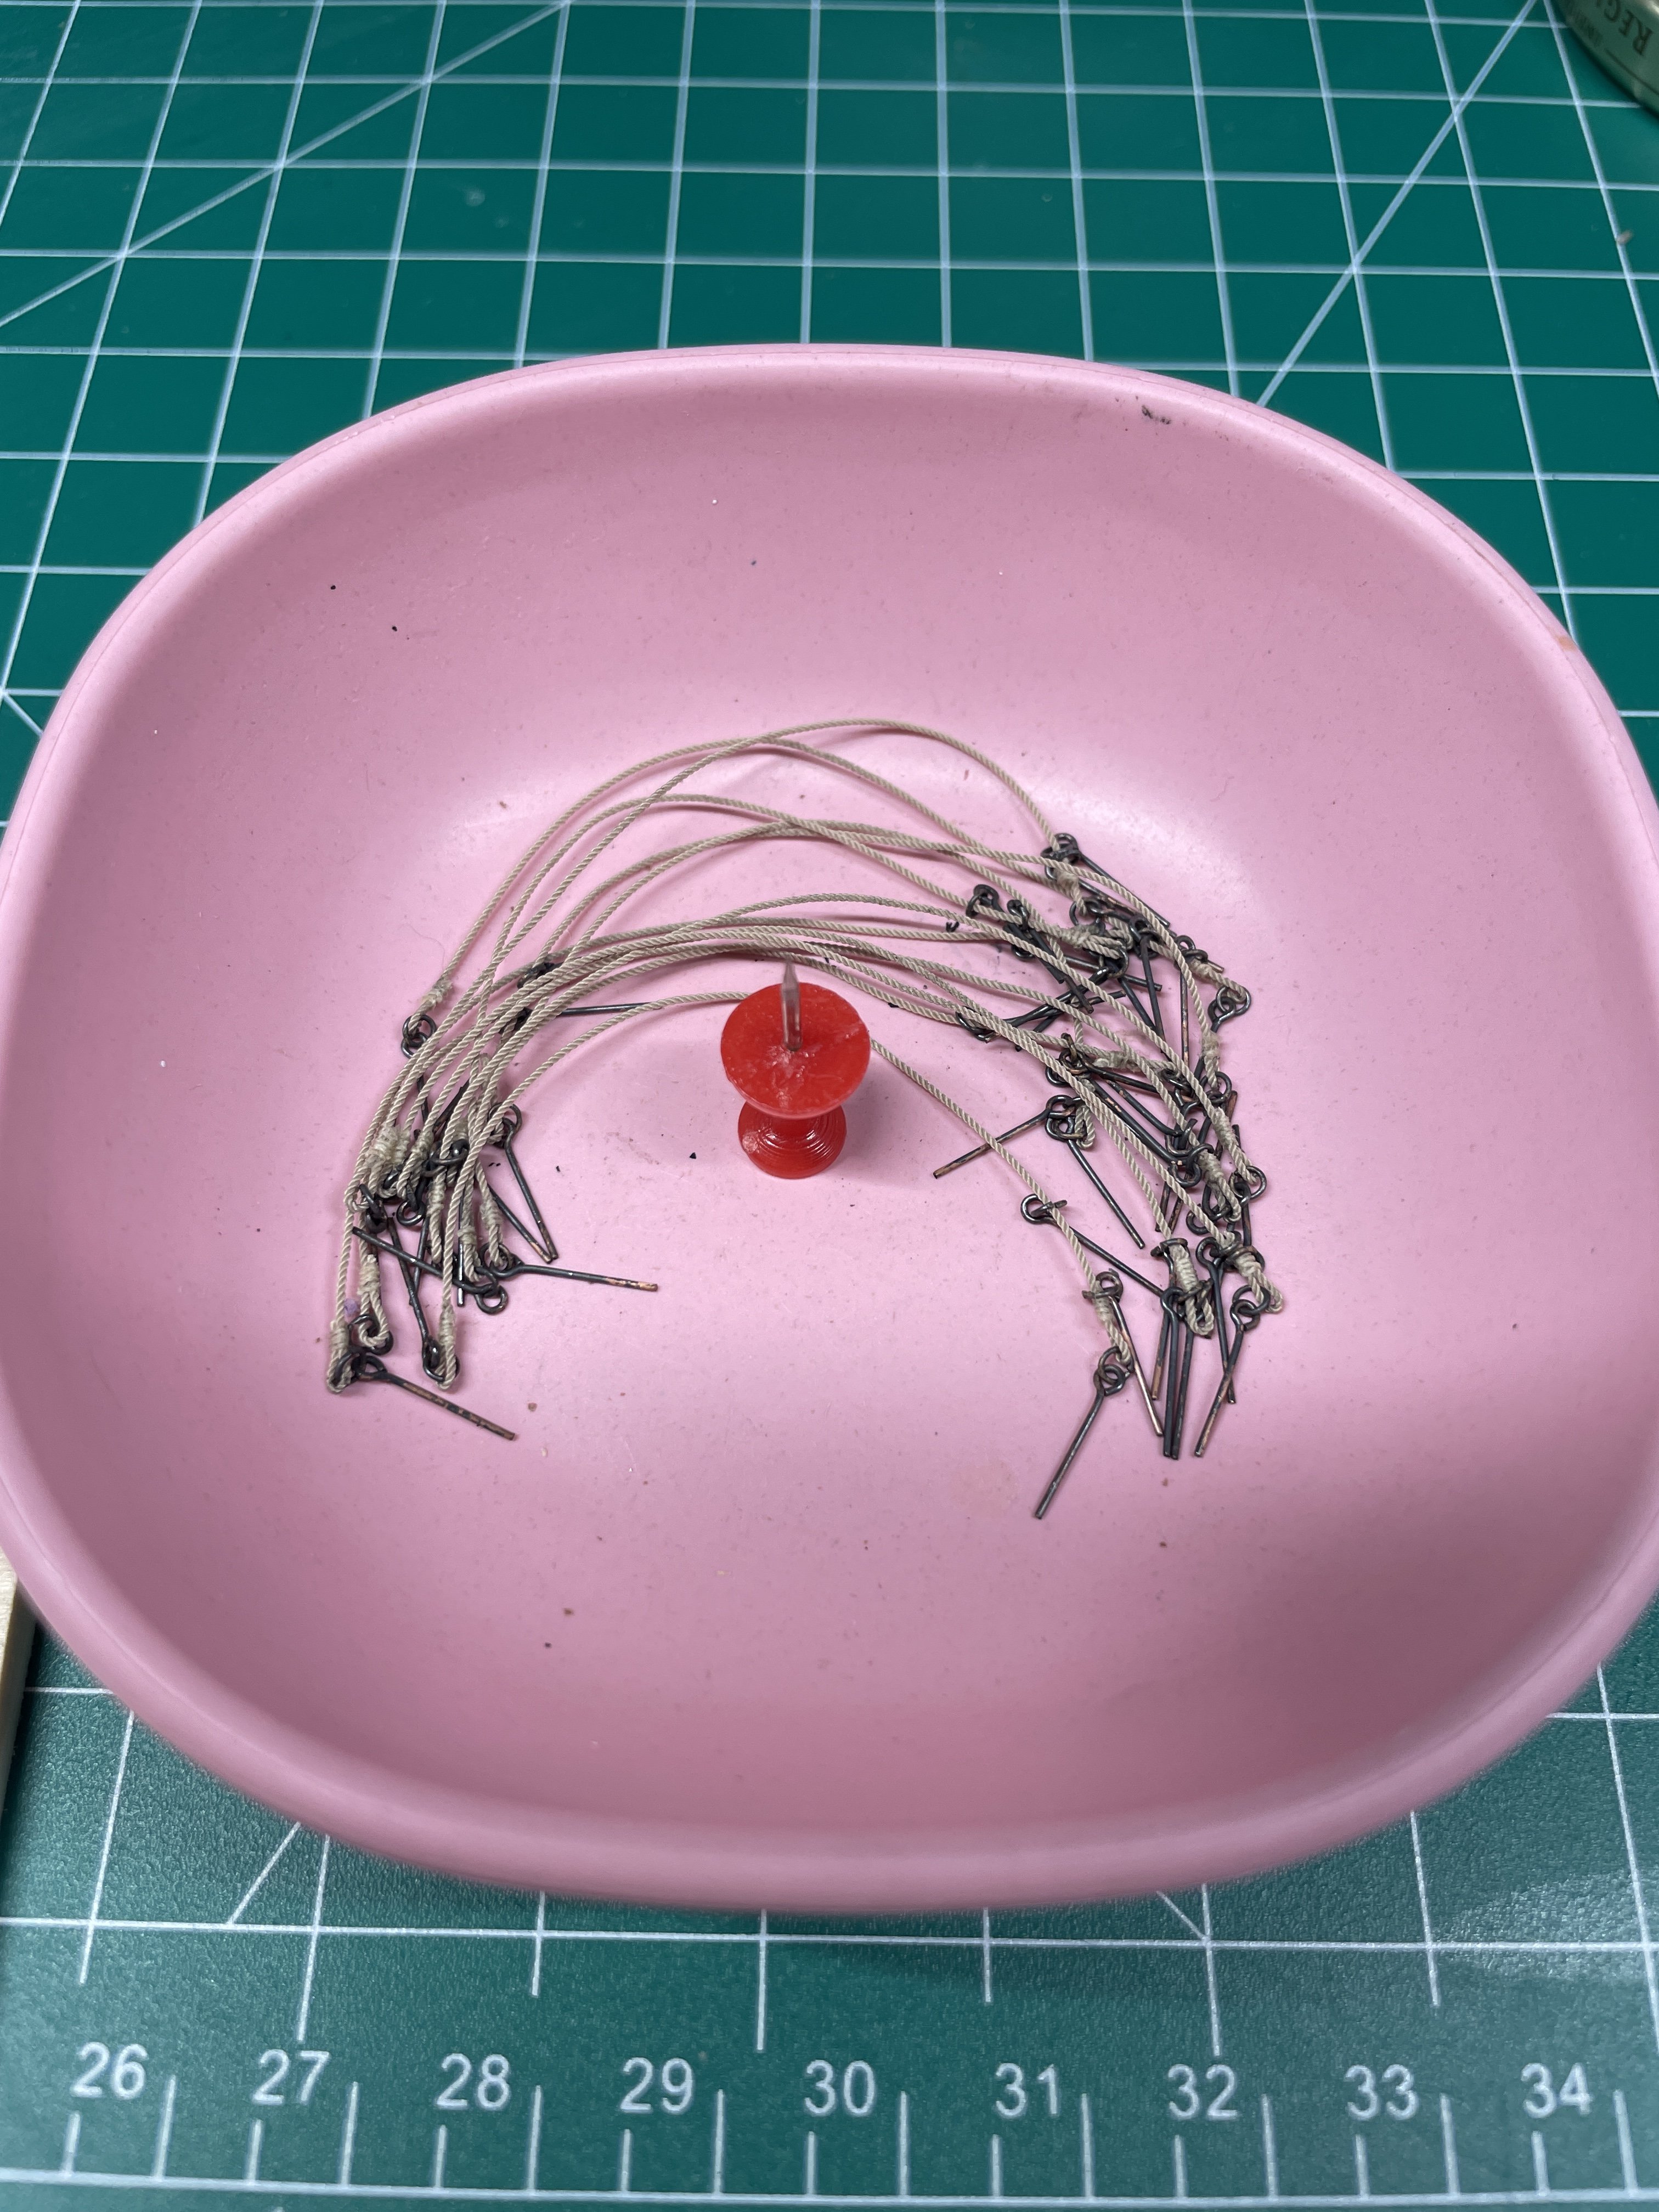
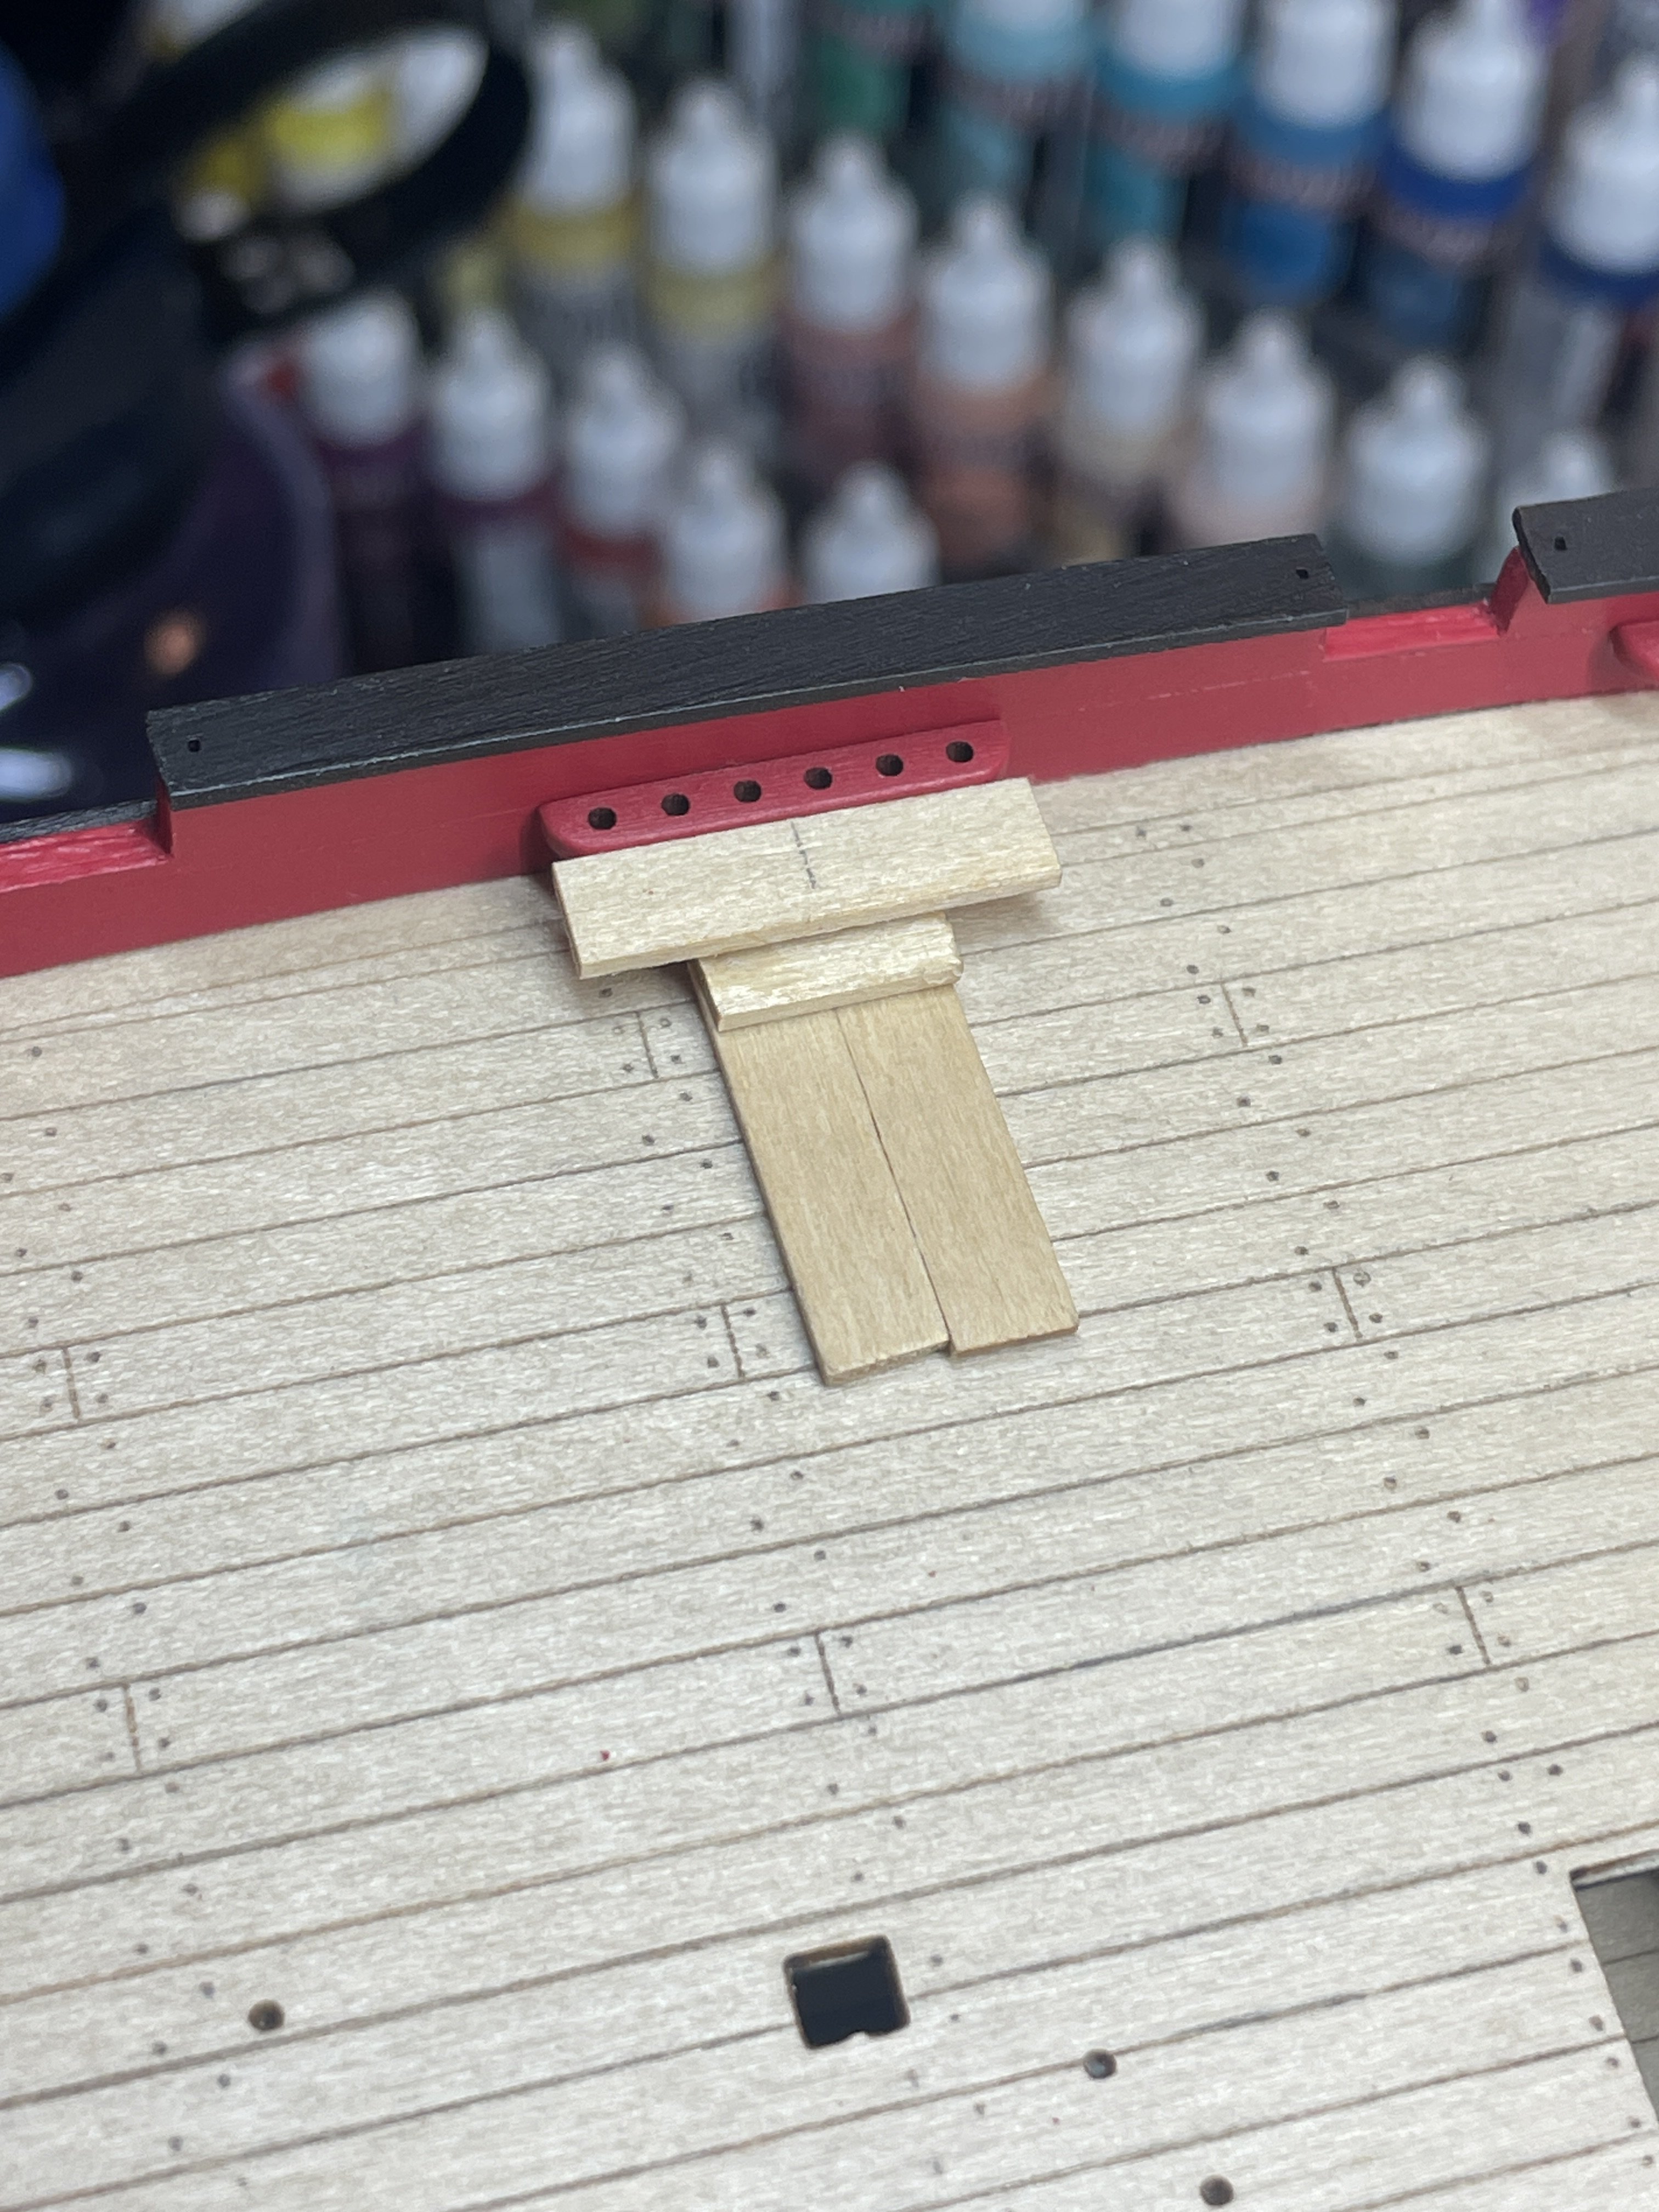
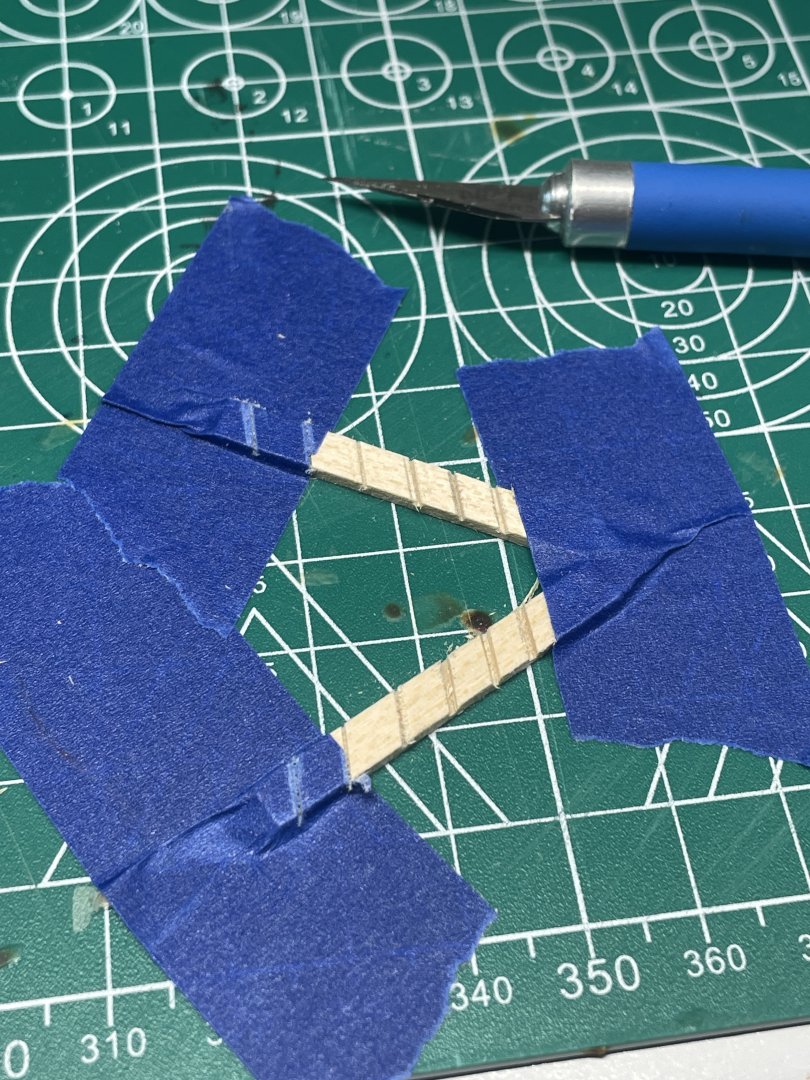
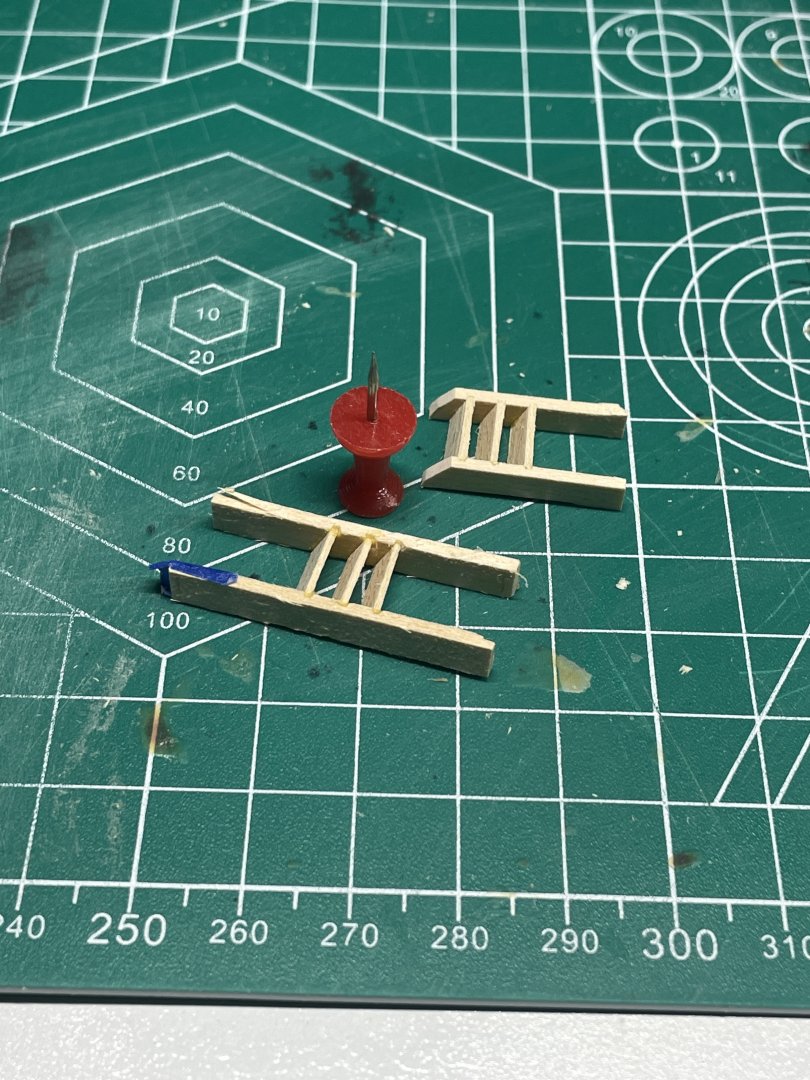
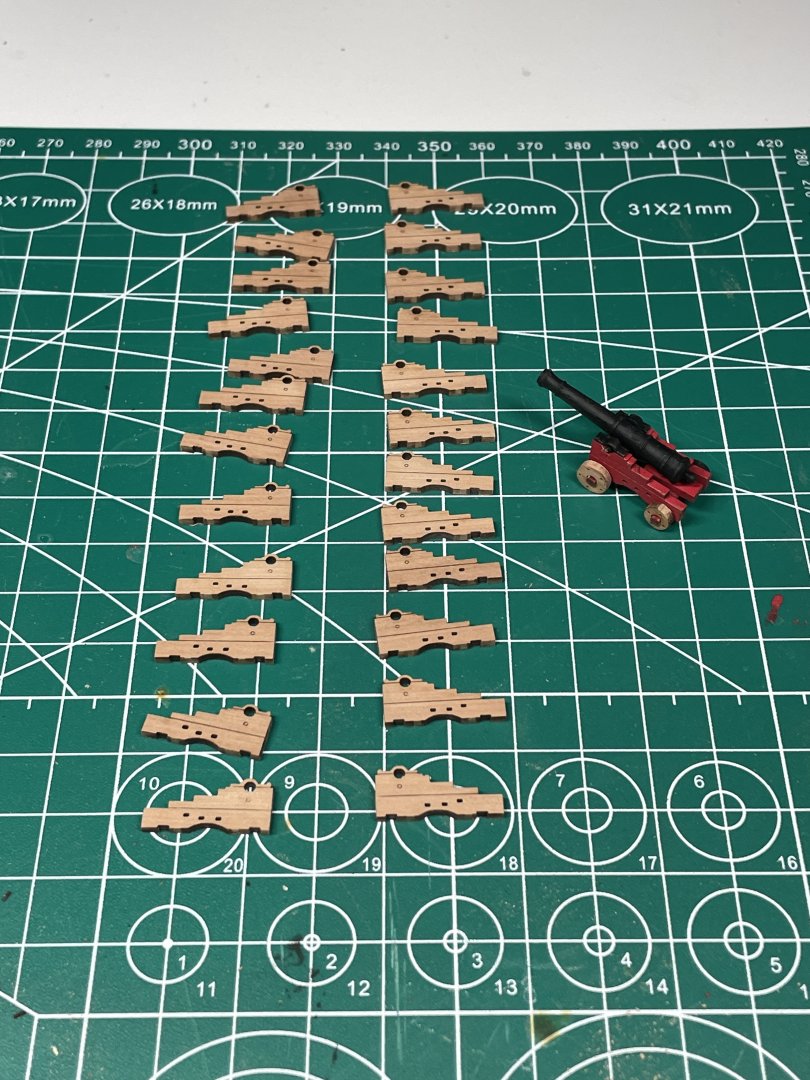
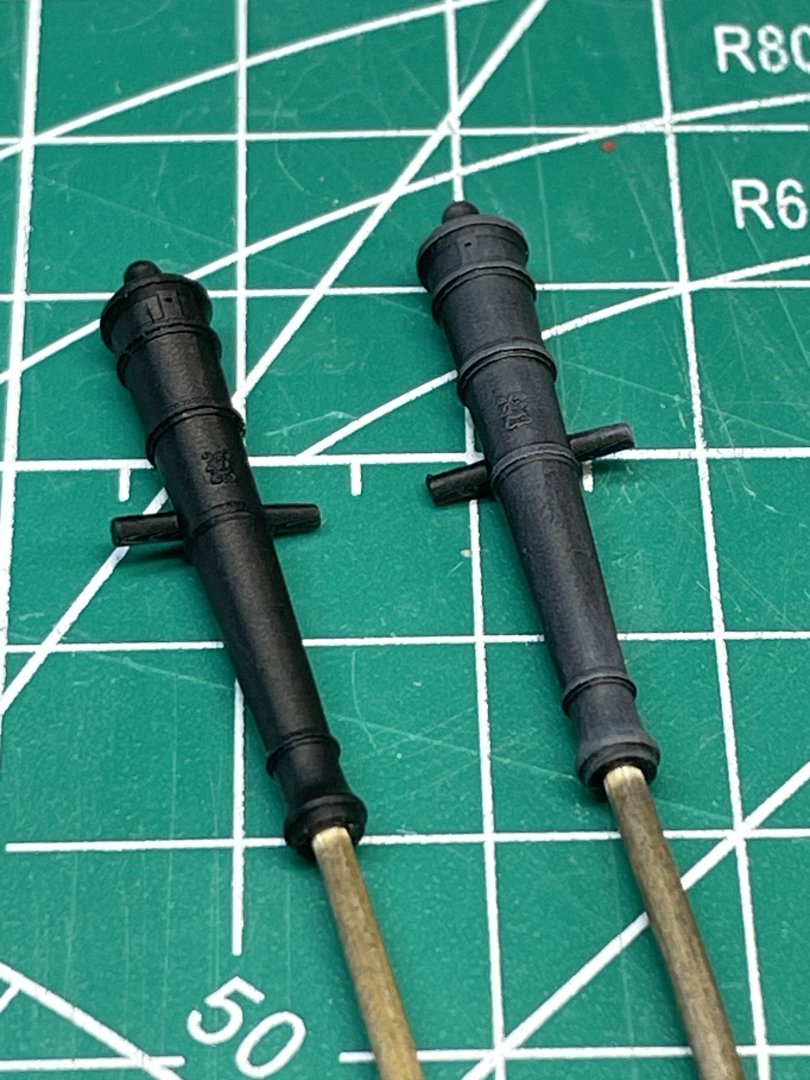
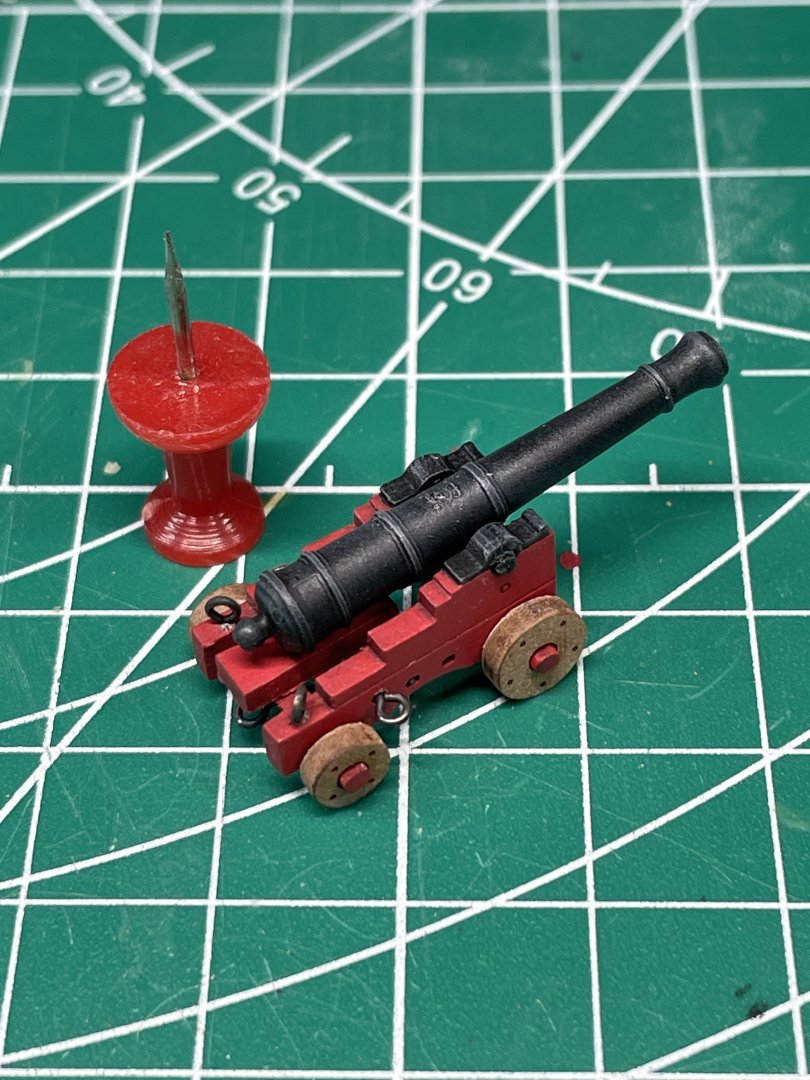
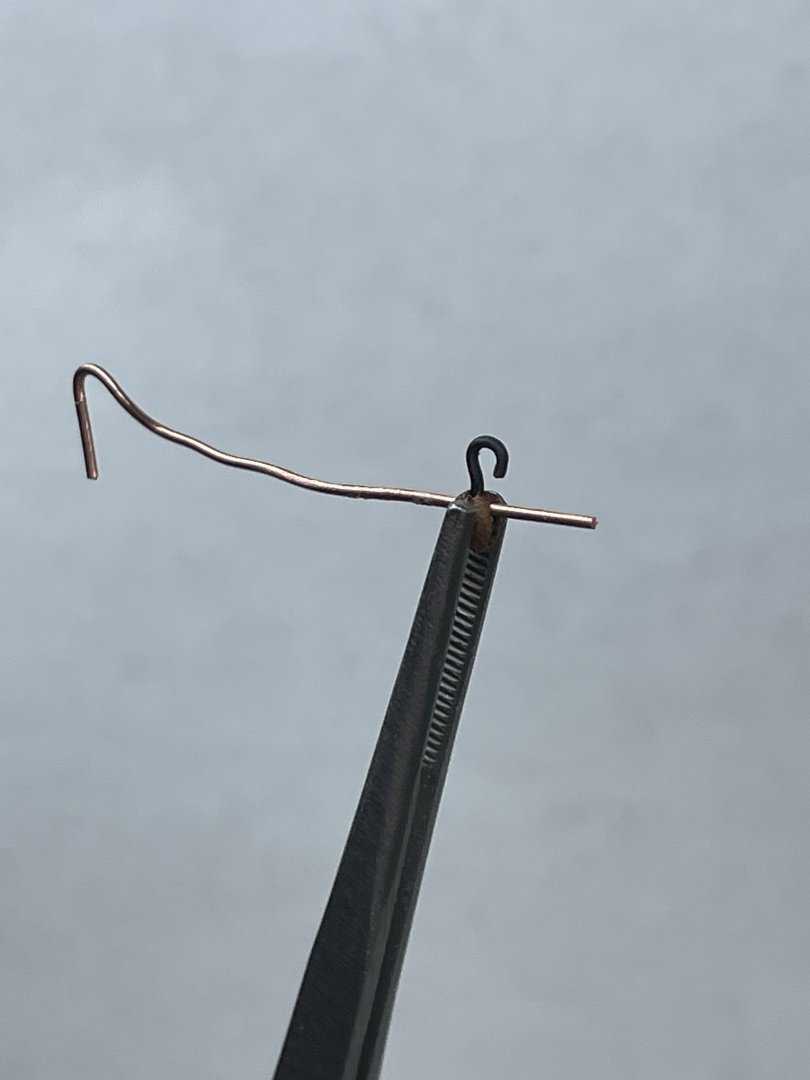
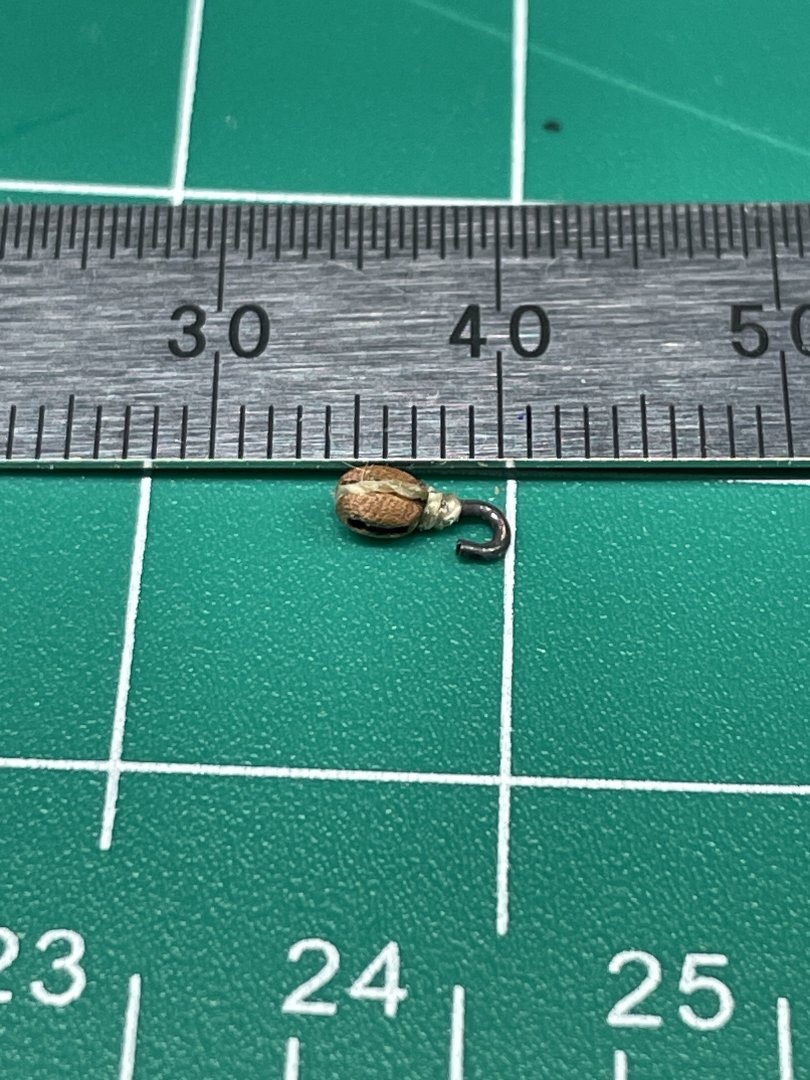
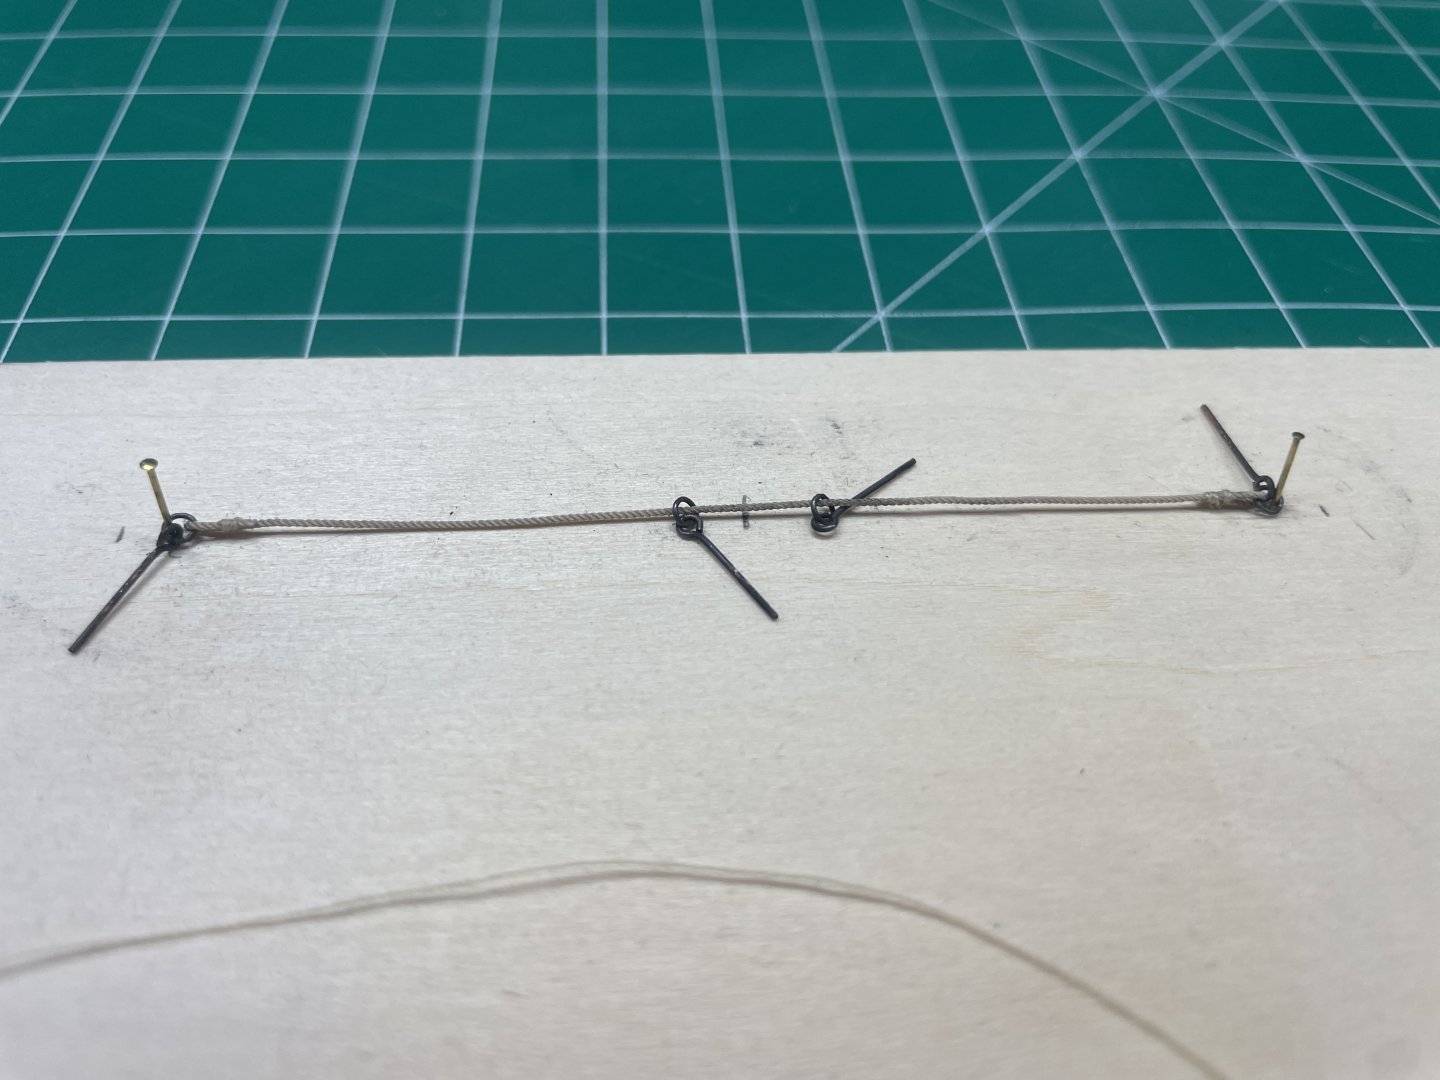
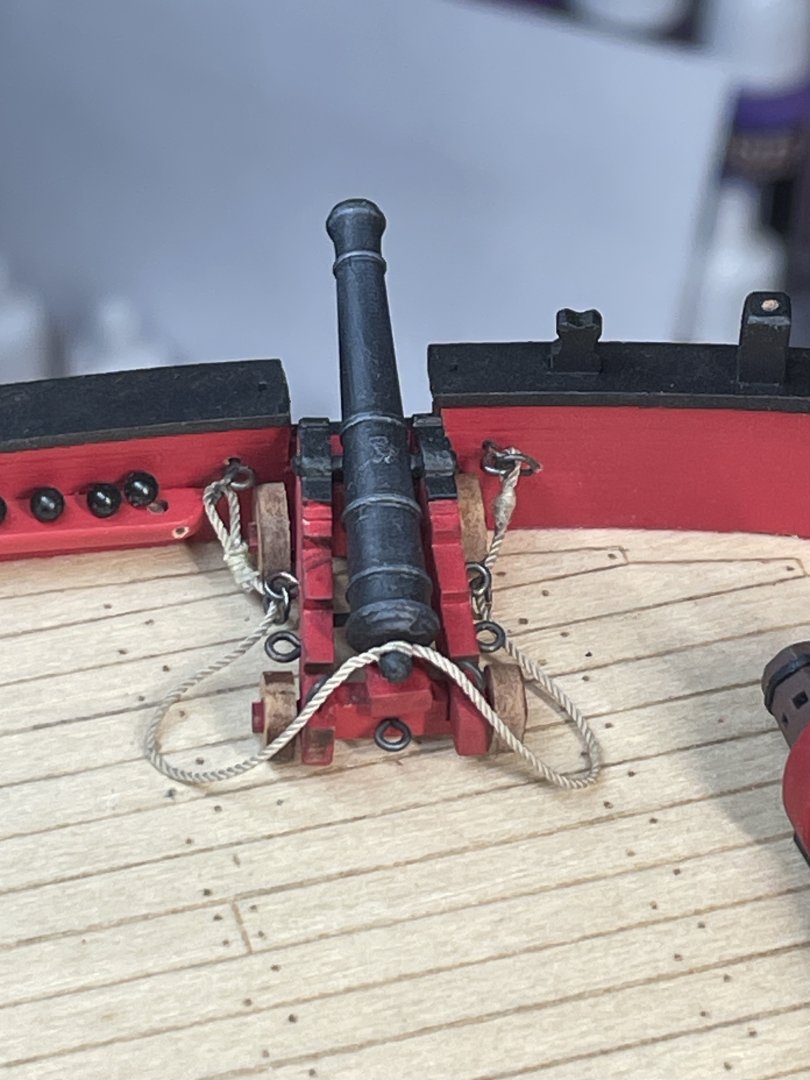
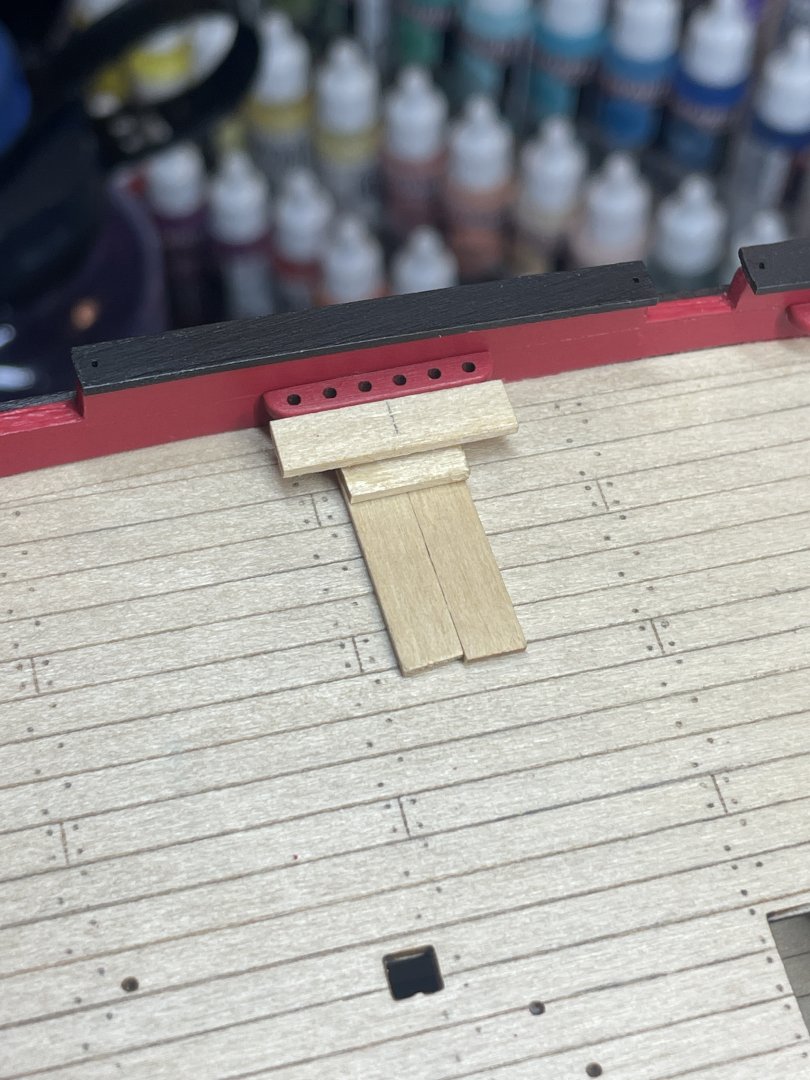
 Thank you all for the likes and such! So now we’re working on some more details, first up is the rudder and the pintals/gudgeons. I cut them out sanded any rough edges and blackened them. Attached with epoxy. Next I wanted to try to make some ladders as Blue Ensign did. Lined up some basswood after making some guesses at the angle and went to town with a #11 blade. I think they turned out ok. One thing I did experience that I had to fix later was the different color they turned out because of the lighter base wood. Now on to cannon production. I was both looking forward and dreading these because I was worried about the tediousness of it all. It was actually fine. I airbrushed the cannon flat black and then dry brushed them with a couple colors of gray. Thanks Thukydides for the idea! I decided I would be fully rigging them so I drilled and installed the appropriate rings and eyes. I guess this picture is missing a couple. I made a mock up as I’ve seen done on here to facilitate the rigging. These seizings are really large. I don’t think this was the final design, but it’s the picture I’ve got handy. For the main breech rope I think I went with 100 mm length. All the rope is from Ropes of Scale. After getting the length decided I went into production. Here you can see the much smaller seizings. It’s really interesting to see how the later ones look so much better than the first few. Let’s just say a few at the beginning of the batch got recycled. Here is what it ended up looking like before the tackle. Even though I was only using three strand rope I decided I would spit the rope over the cascabel because it’s really difficult to see there is only one strand below. In the absence of available hooks, decided to make my own. Since I was worried they would not be small enough and be too long overall I decided to insert the hooks into the blocks and wrap the base with thread to make the seizing. First I drilled all the blocks on one end then inserted a wire to ensure I didn’t fill the cross holes with glue. Glued the hook with CA. These are 3mm blocks. I did these in two batches, the first batch I didn’t blacken first. That was a mistake. But I learned. **BTW** Chuck @ Syren now has 3d printed hooks available again! I got some but they will have to be for the next one… I think it was on Blue Ensign’s build log where he mentioned to try to keep them under 6mm overall. This is what I ended up with. I’ll leave it there for now. Let me know any thoughts you have. Next up are the cannon tackles. Chris
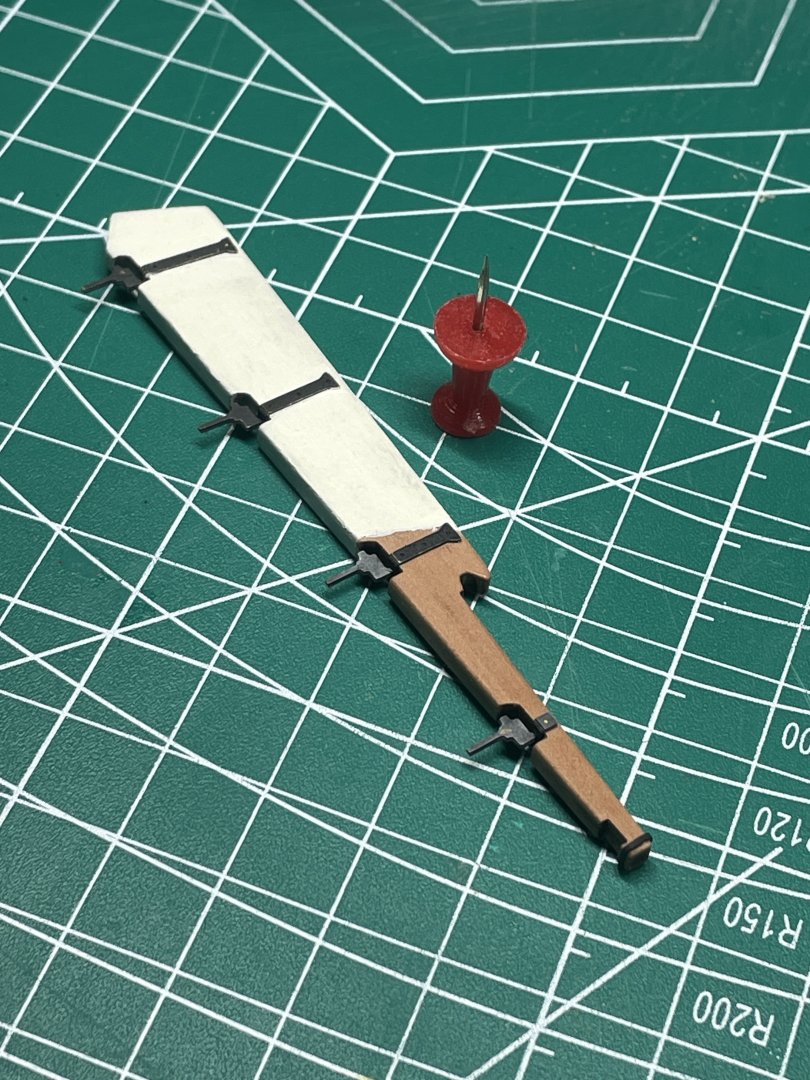


- 38 replies
-
- 12
-

-
- Alert
- Vanguard Models
- (and 1 more)
-
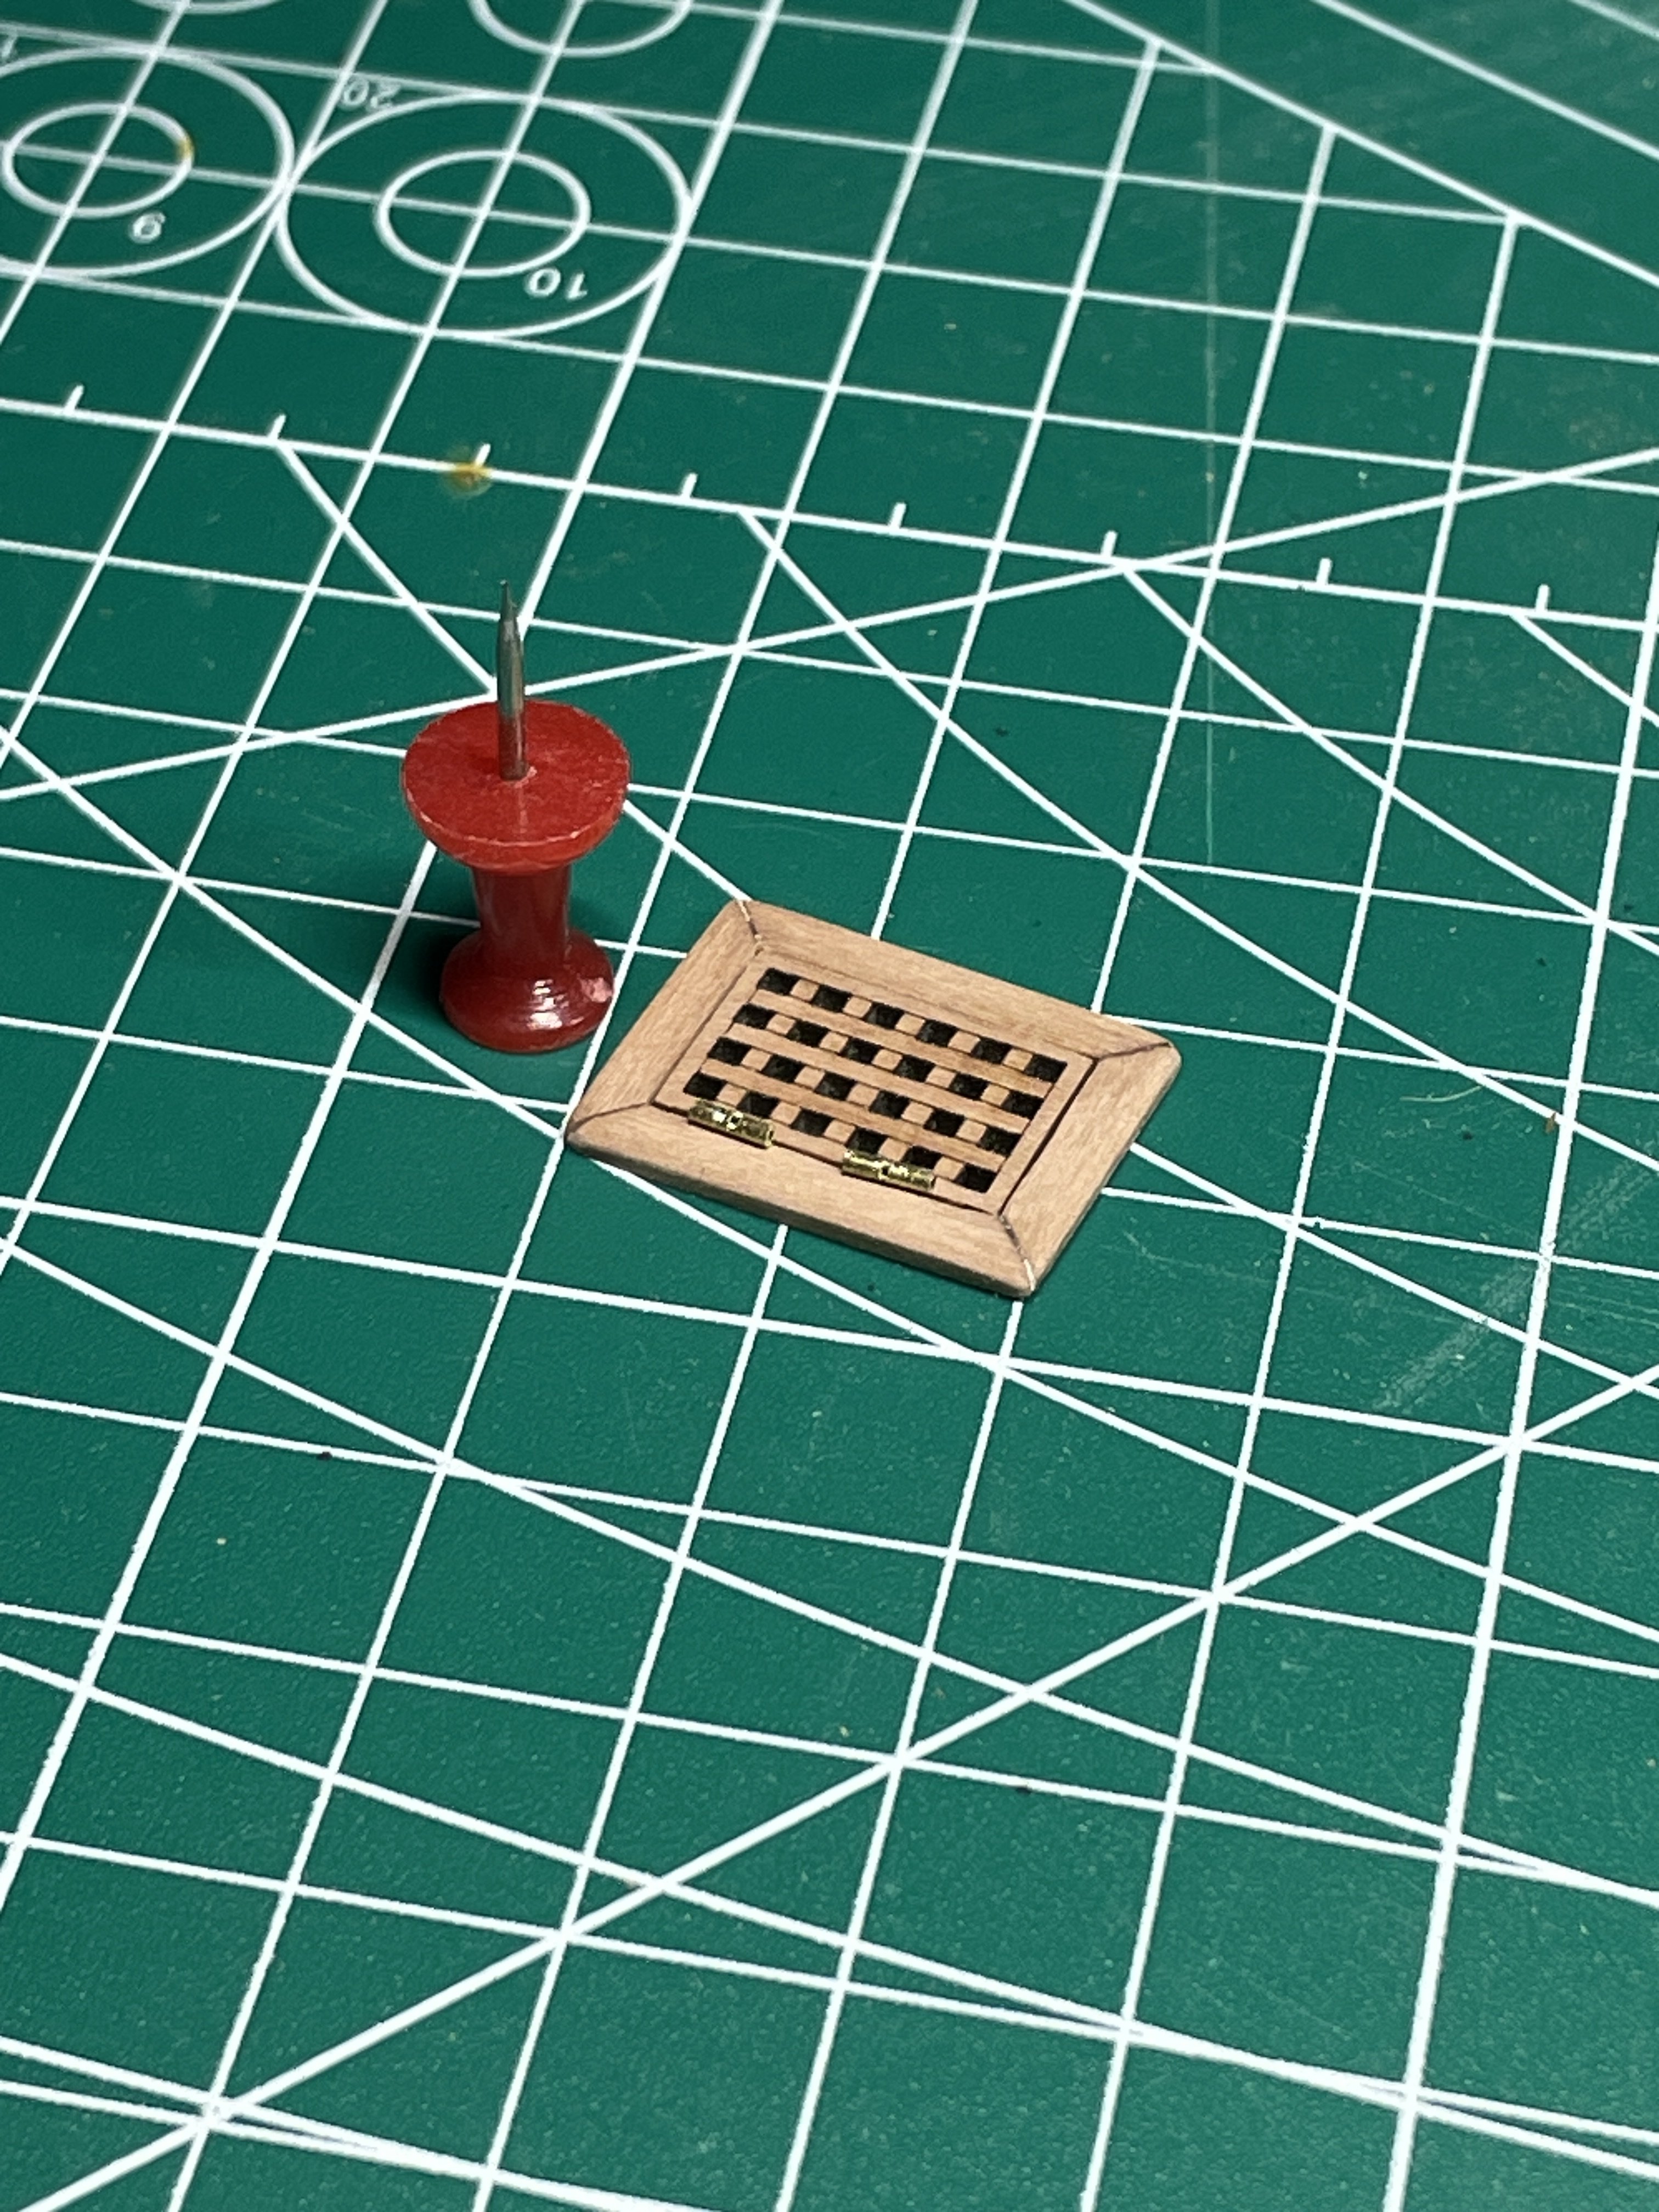
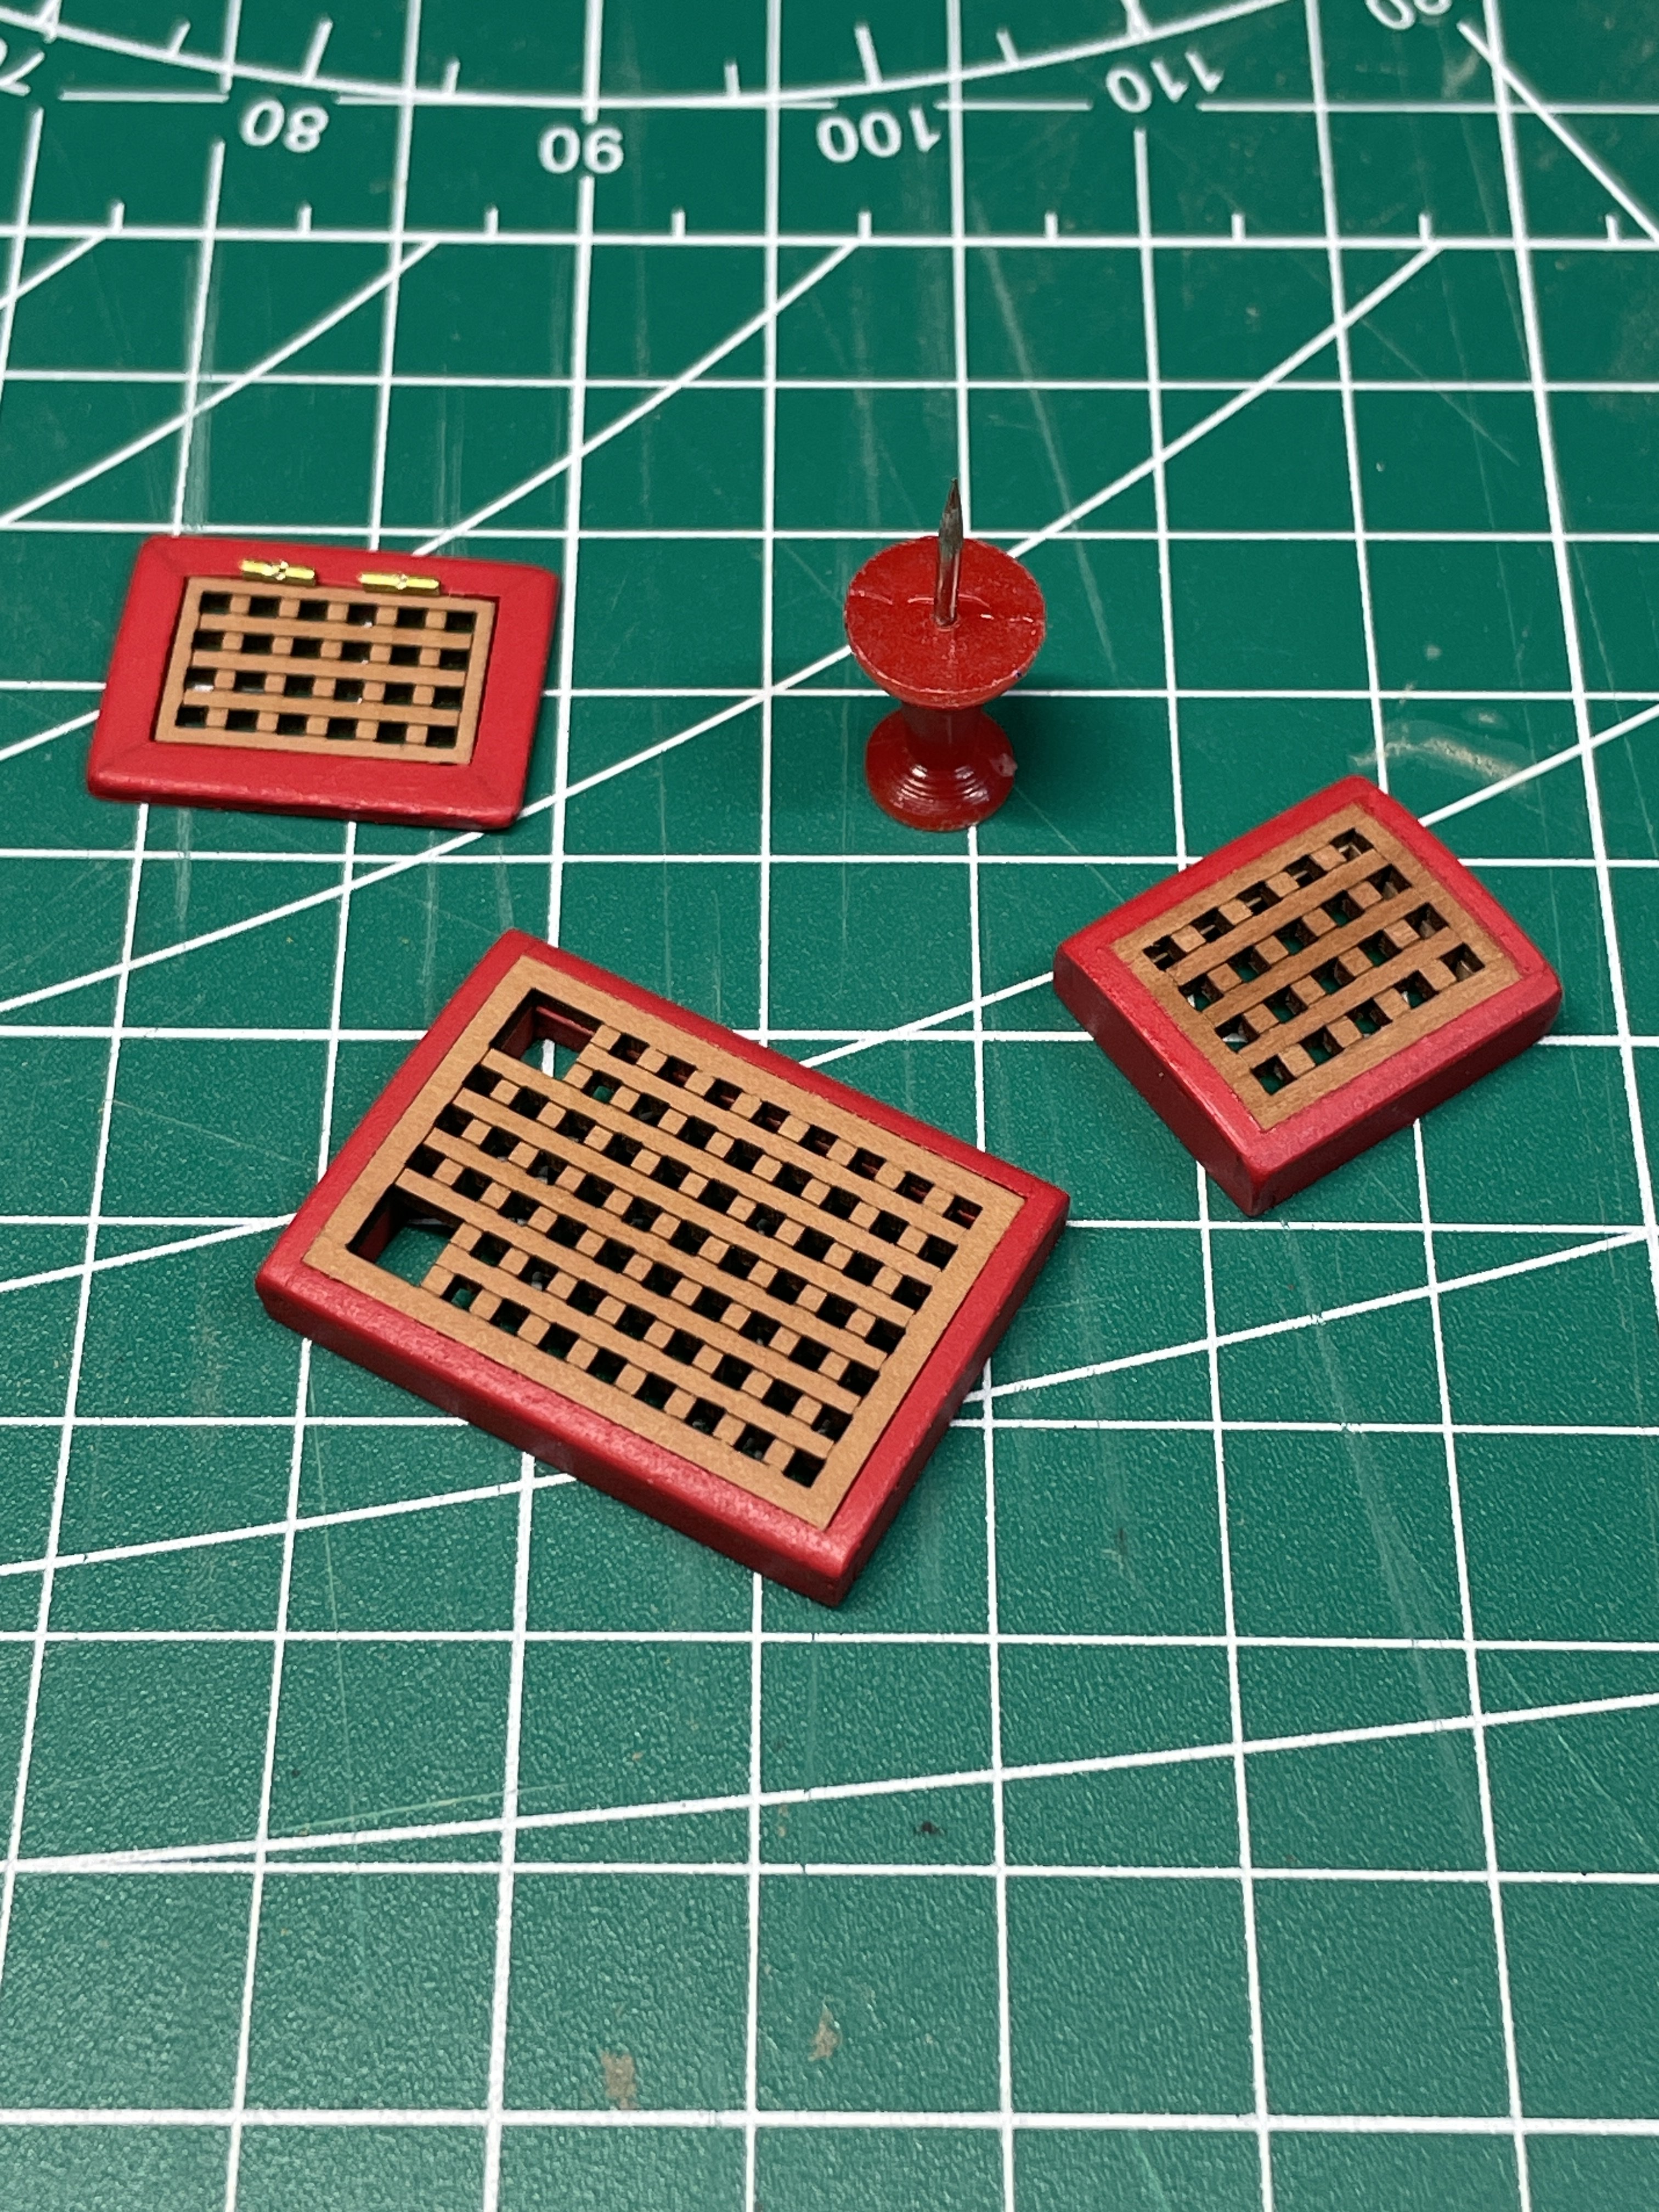
The little hinges are just pieces of brass tubing that I filed a little notch into for some visual interest. I later gave them a blackening treatment. A fixed them with a tiny dab of epoxy. Thanks for checking in! Chris
- 38 replies
-
- 3
-
-
- Alert
- Vanguard Models
- (and 1 more)
-
I was able to grab my copy before they went out of stock again! HAHAHAHA Thank you Mary for all you do! Chris
-
Congratulations on her completion! She is beautiful. You’ve done a wonderful job! That’s a very impressive display case! Chris
- 422 replies
-
- 2
-
-
- Vanguard Models
- Sphinx
- (and 1 more)
-
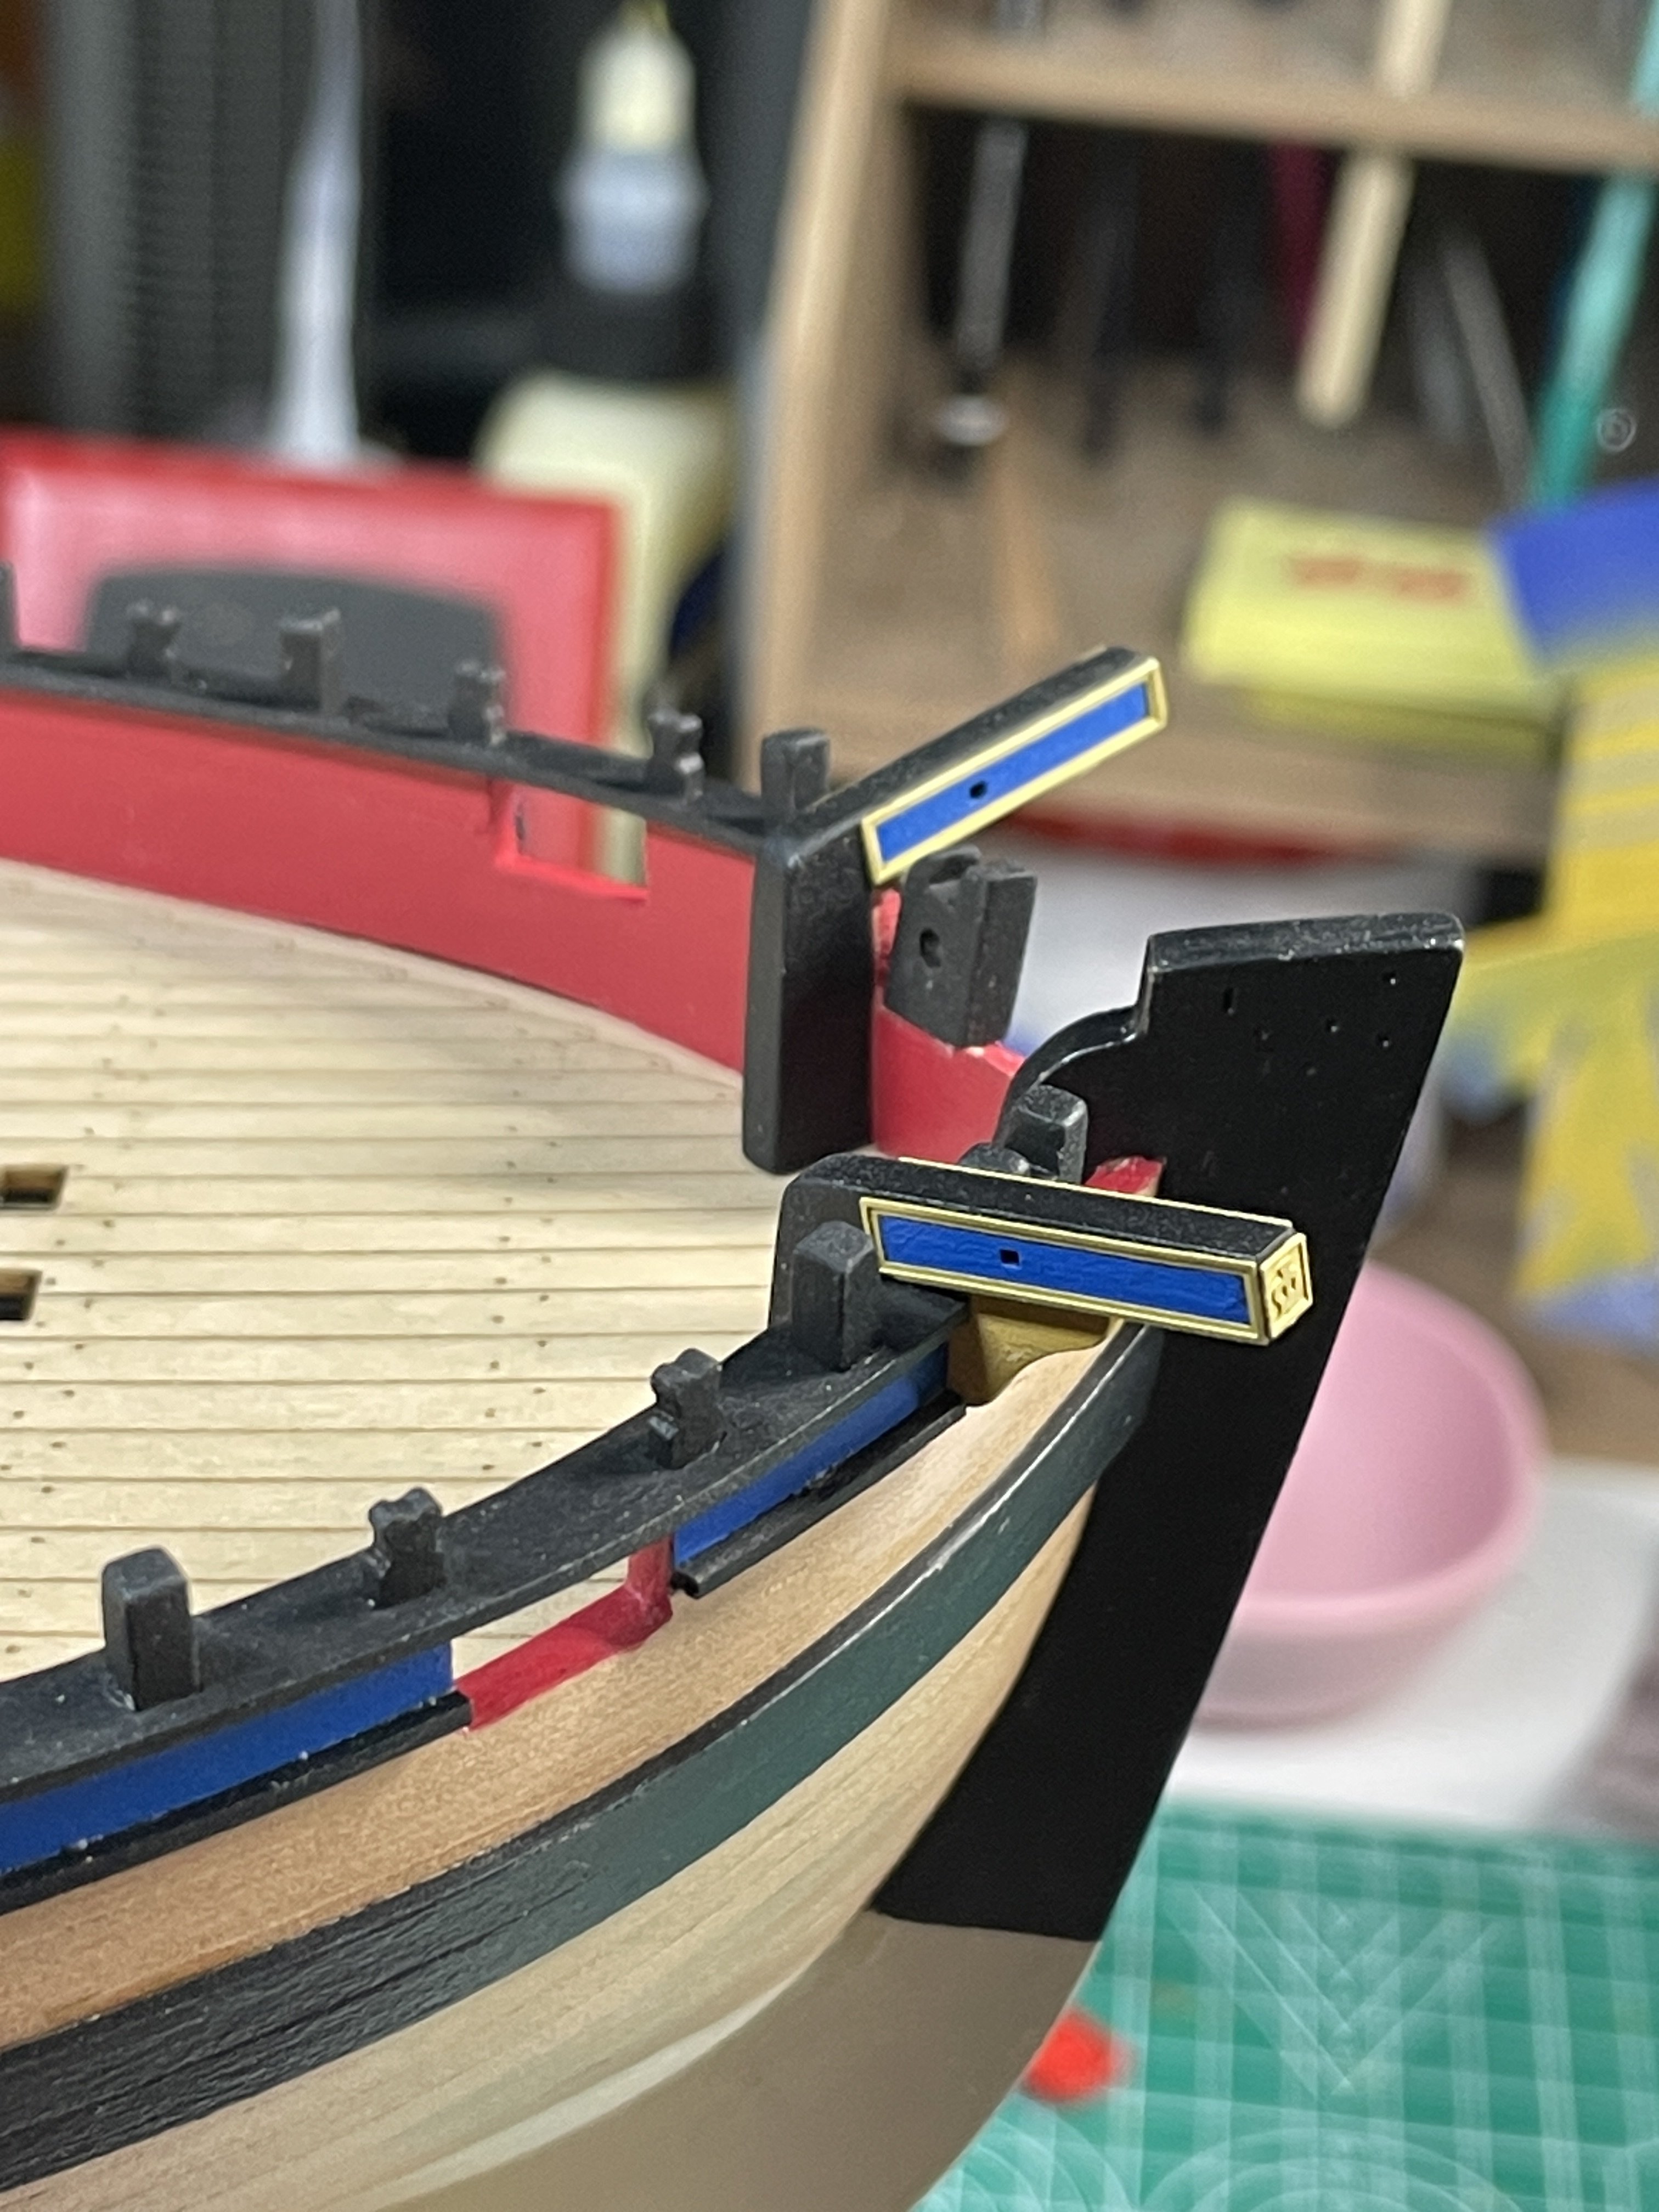
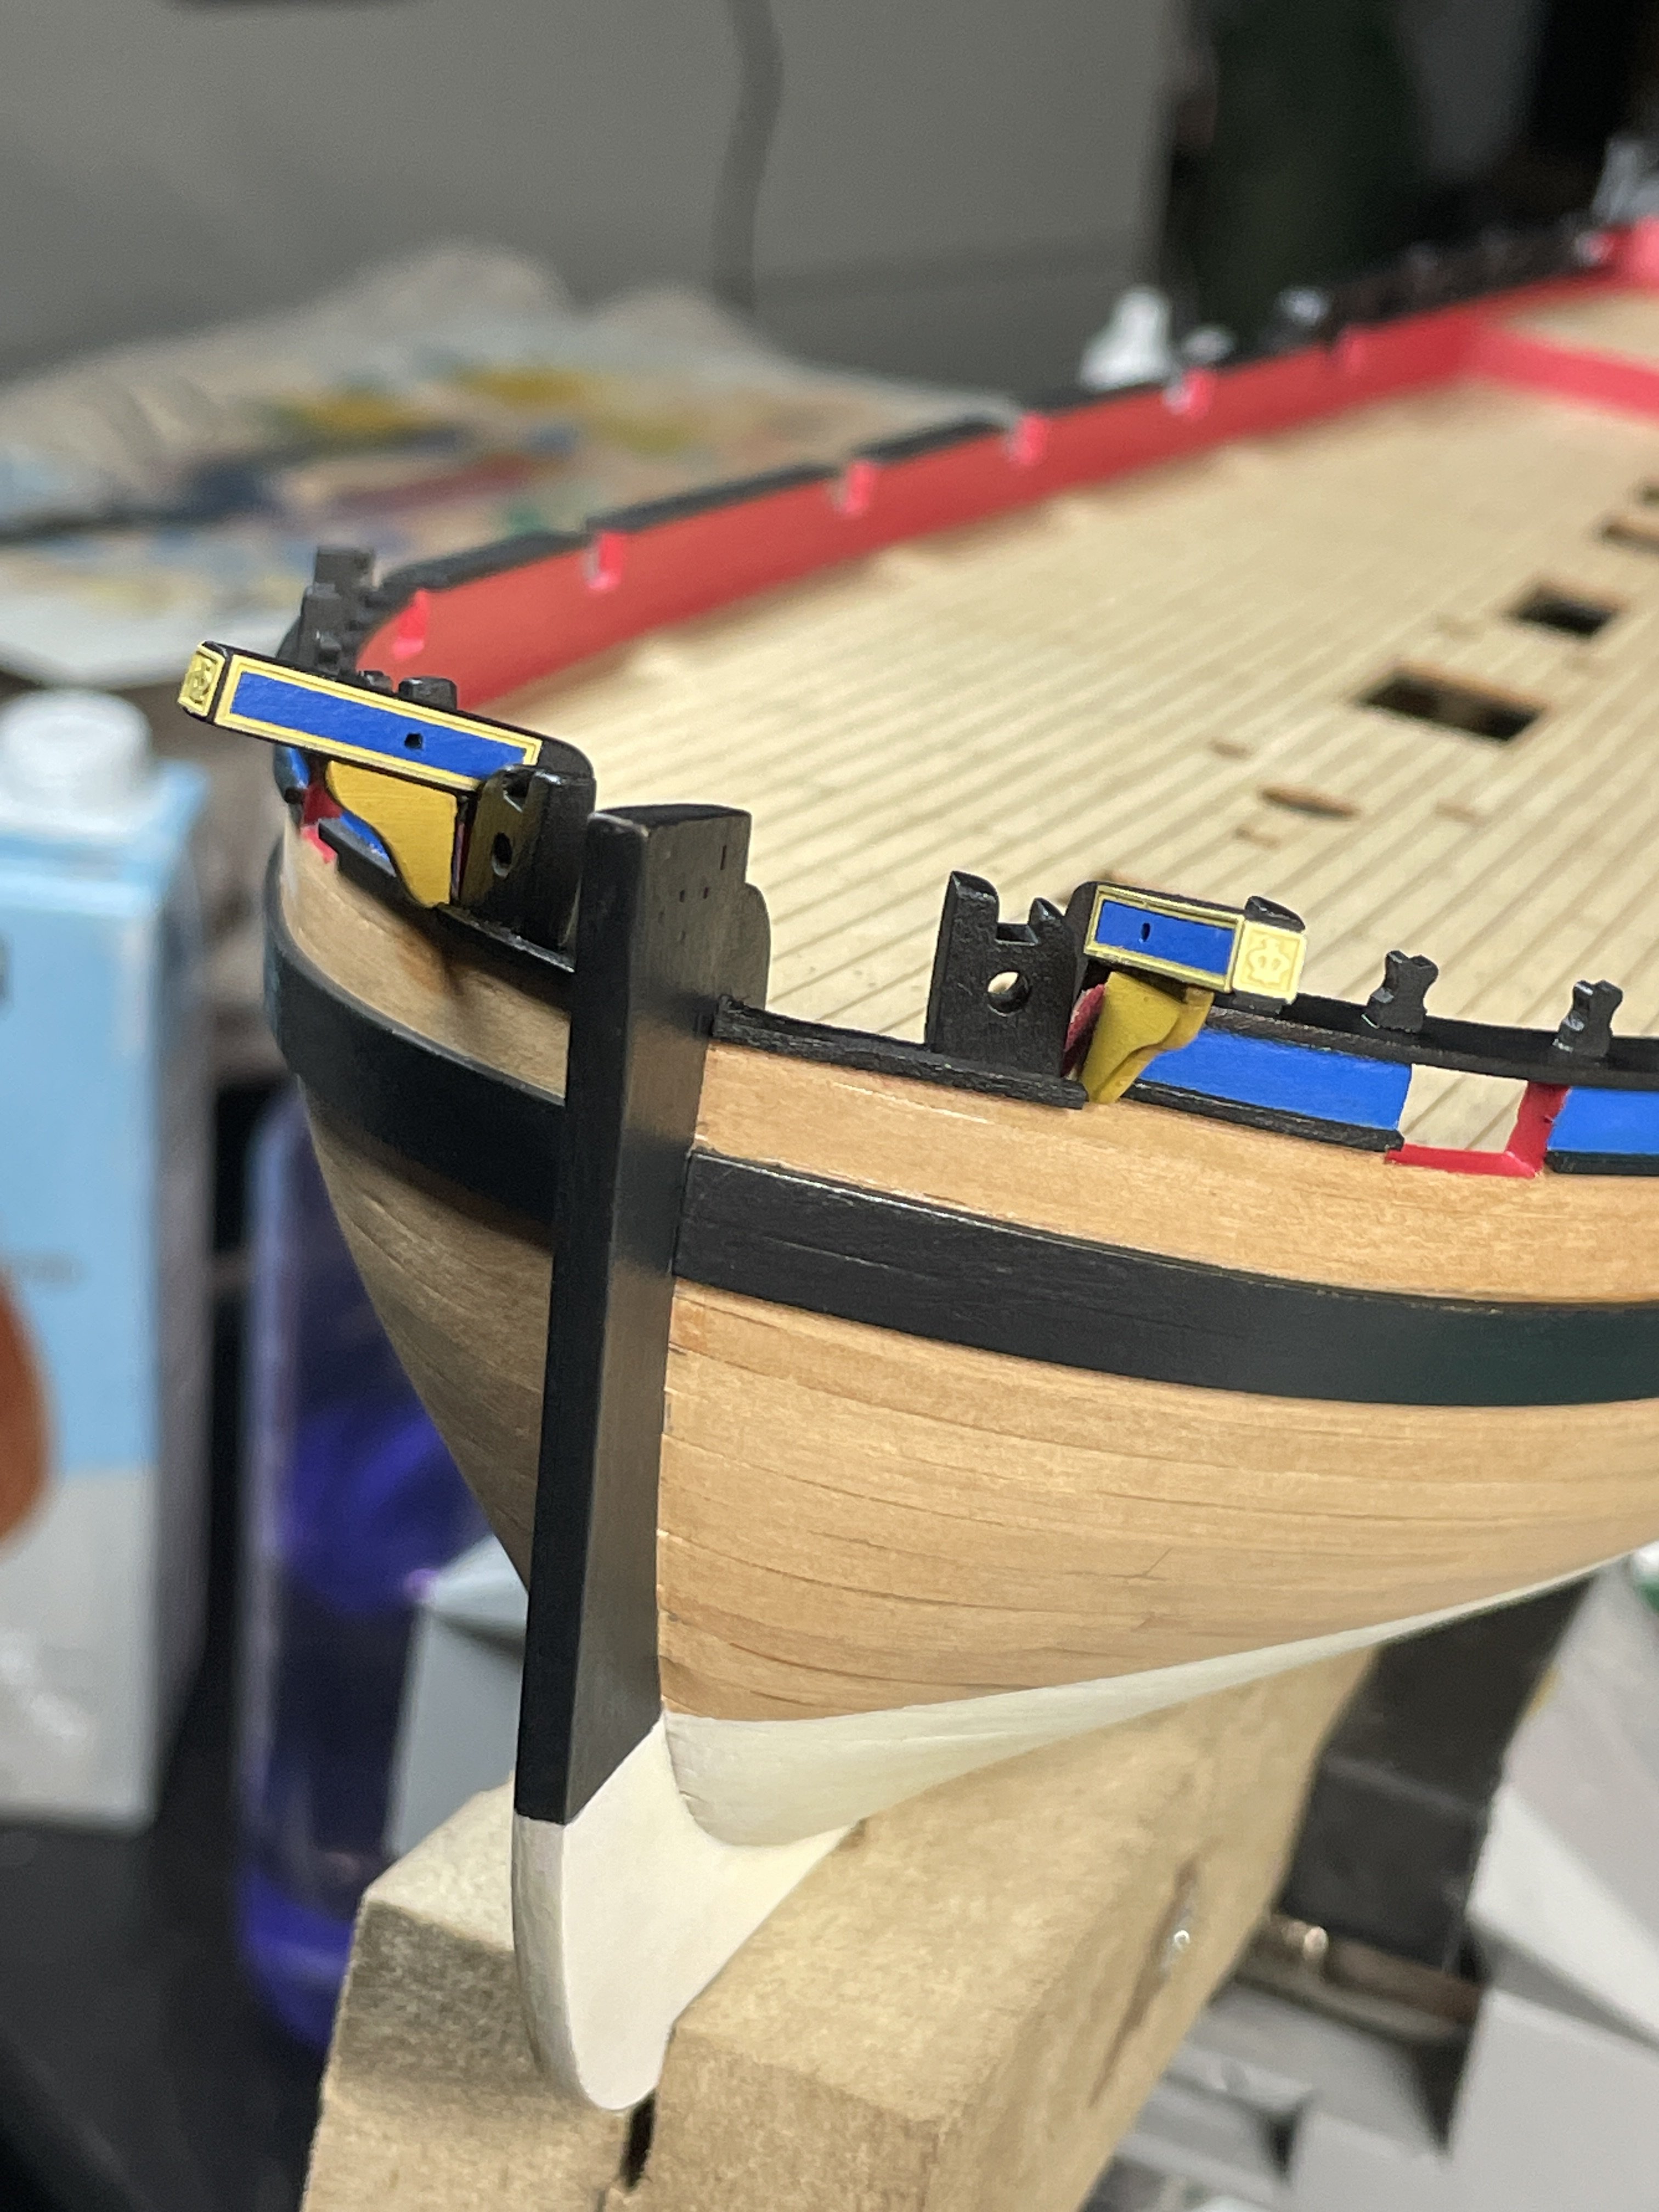
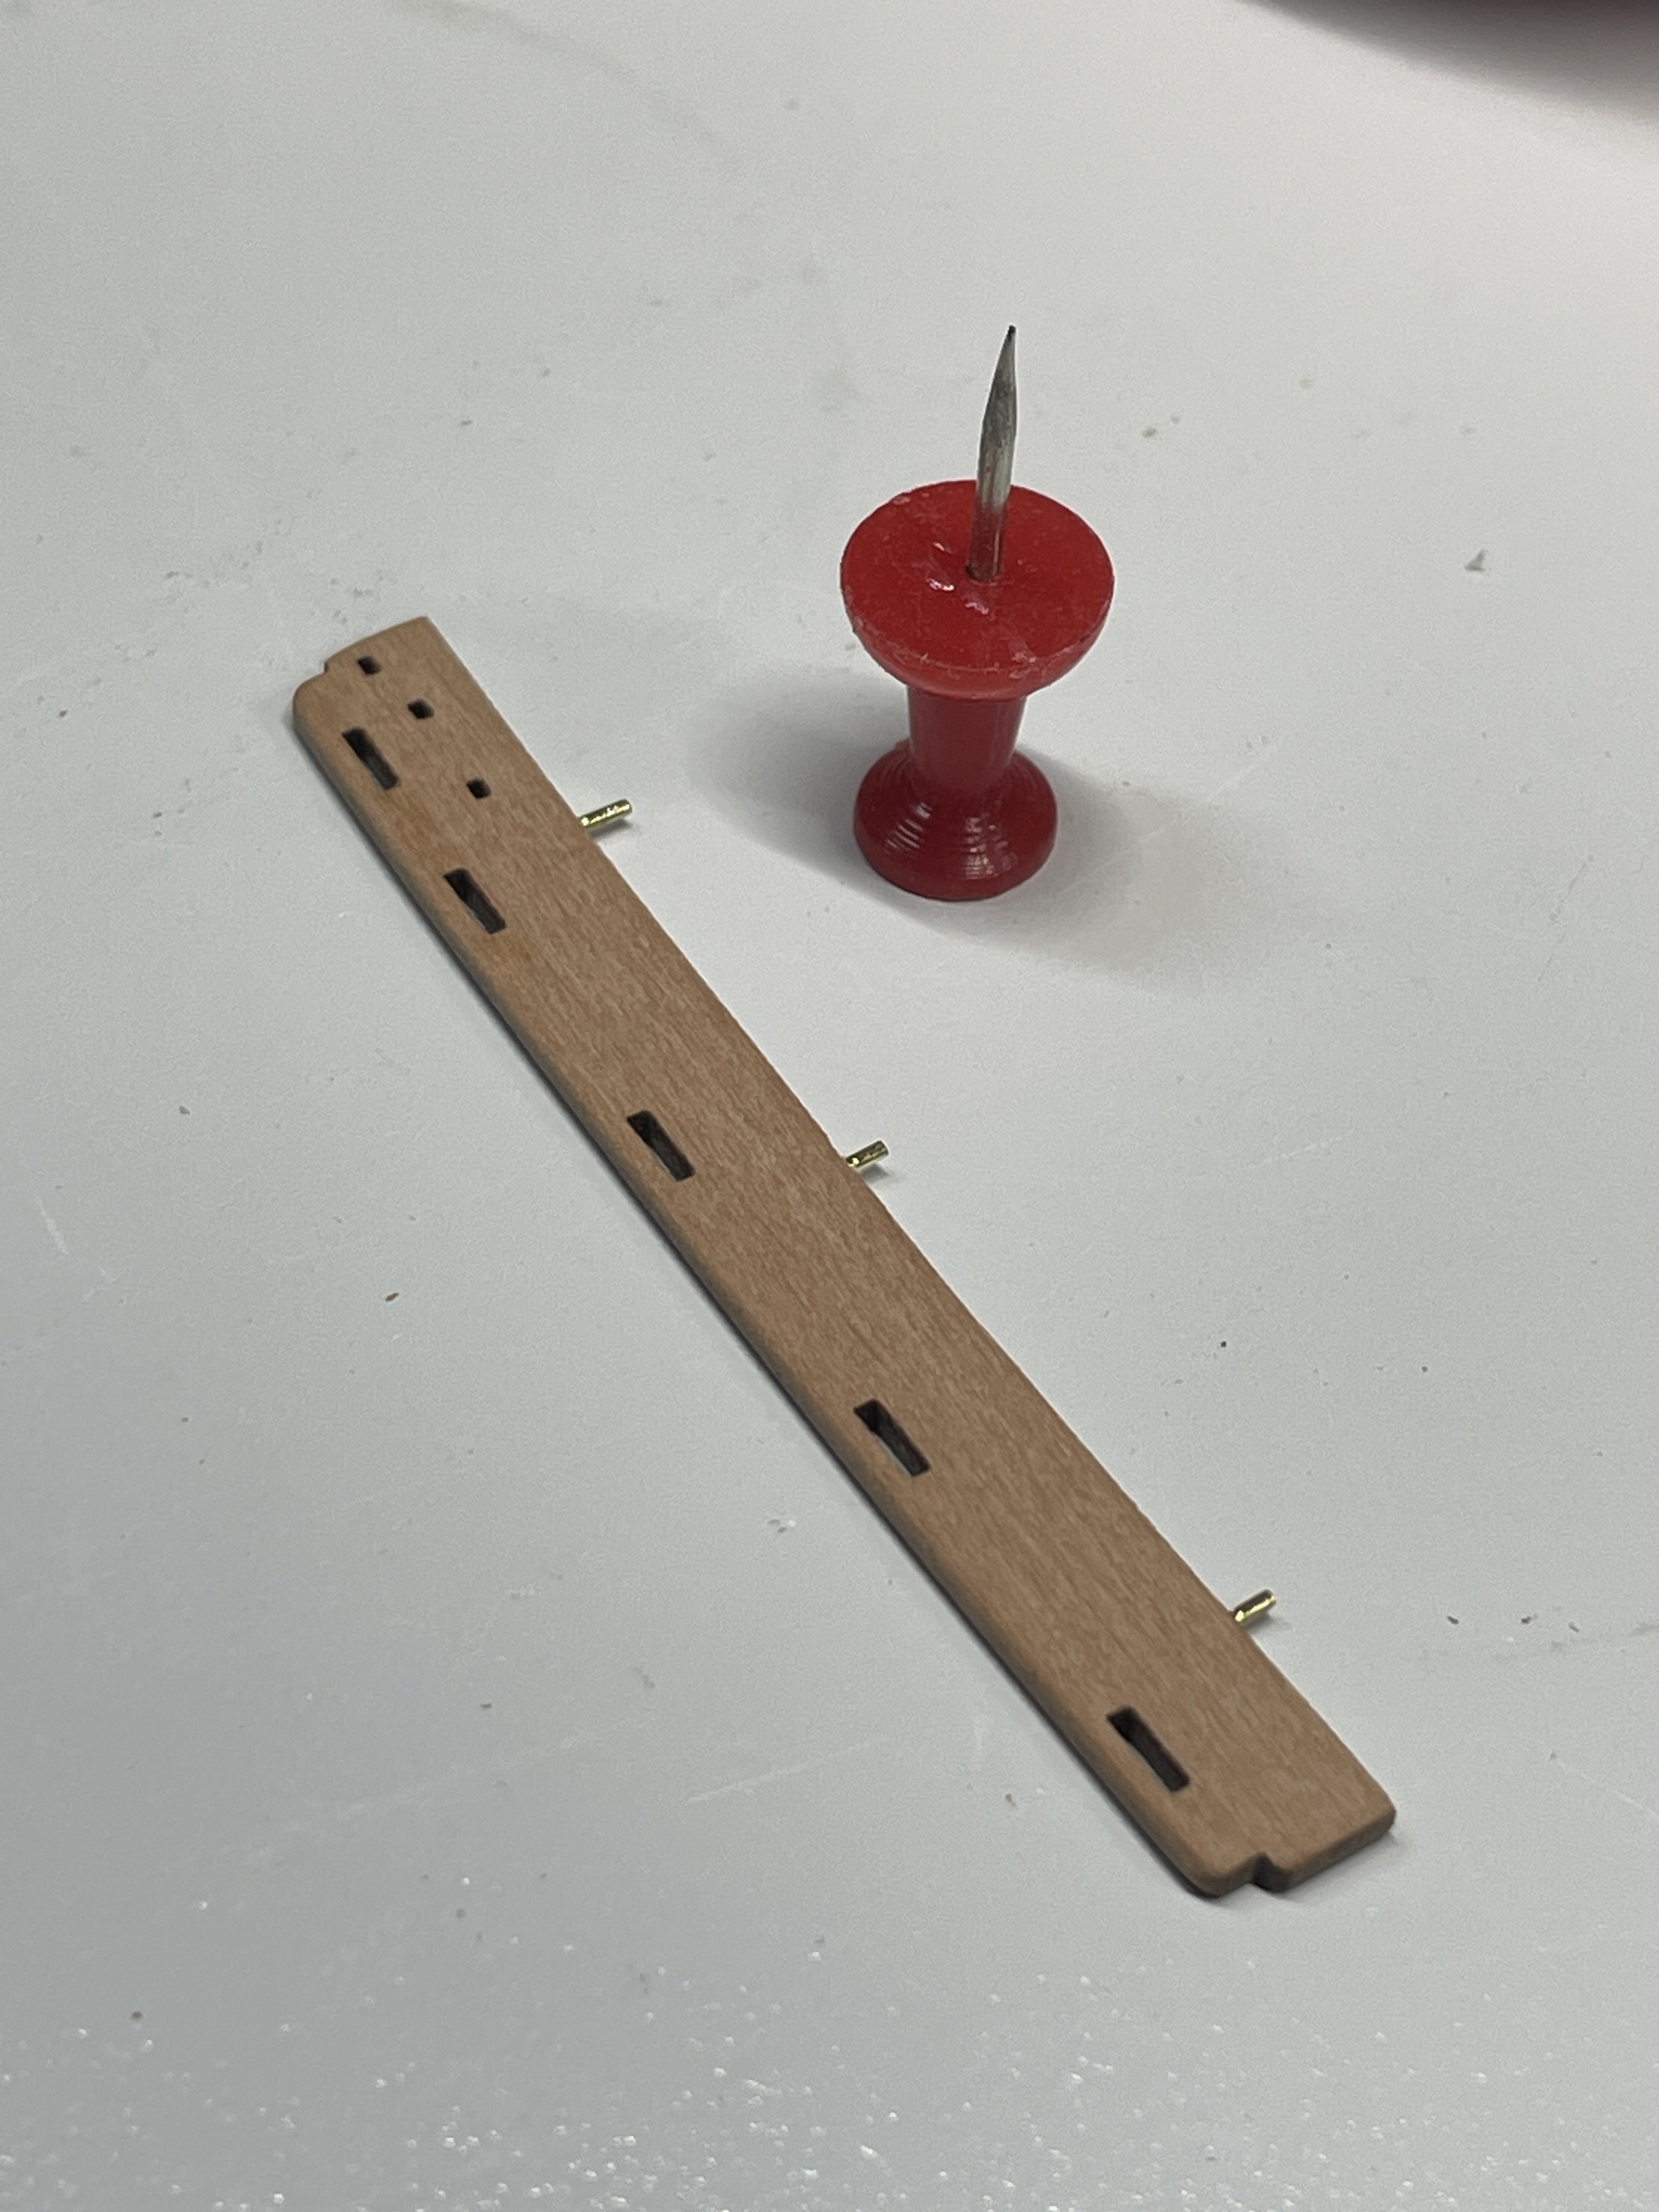
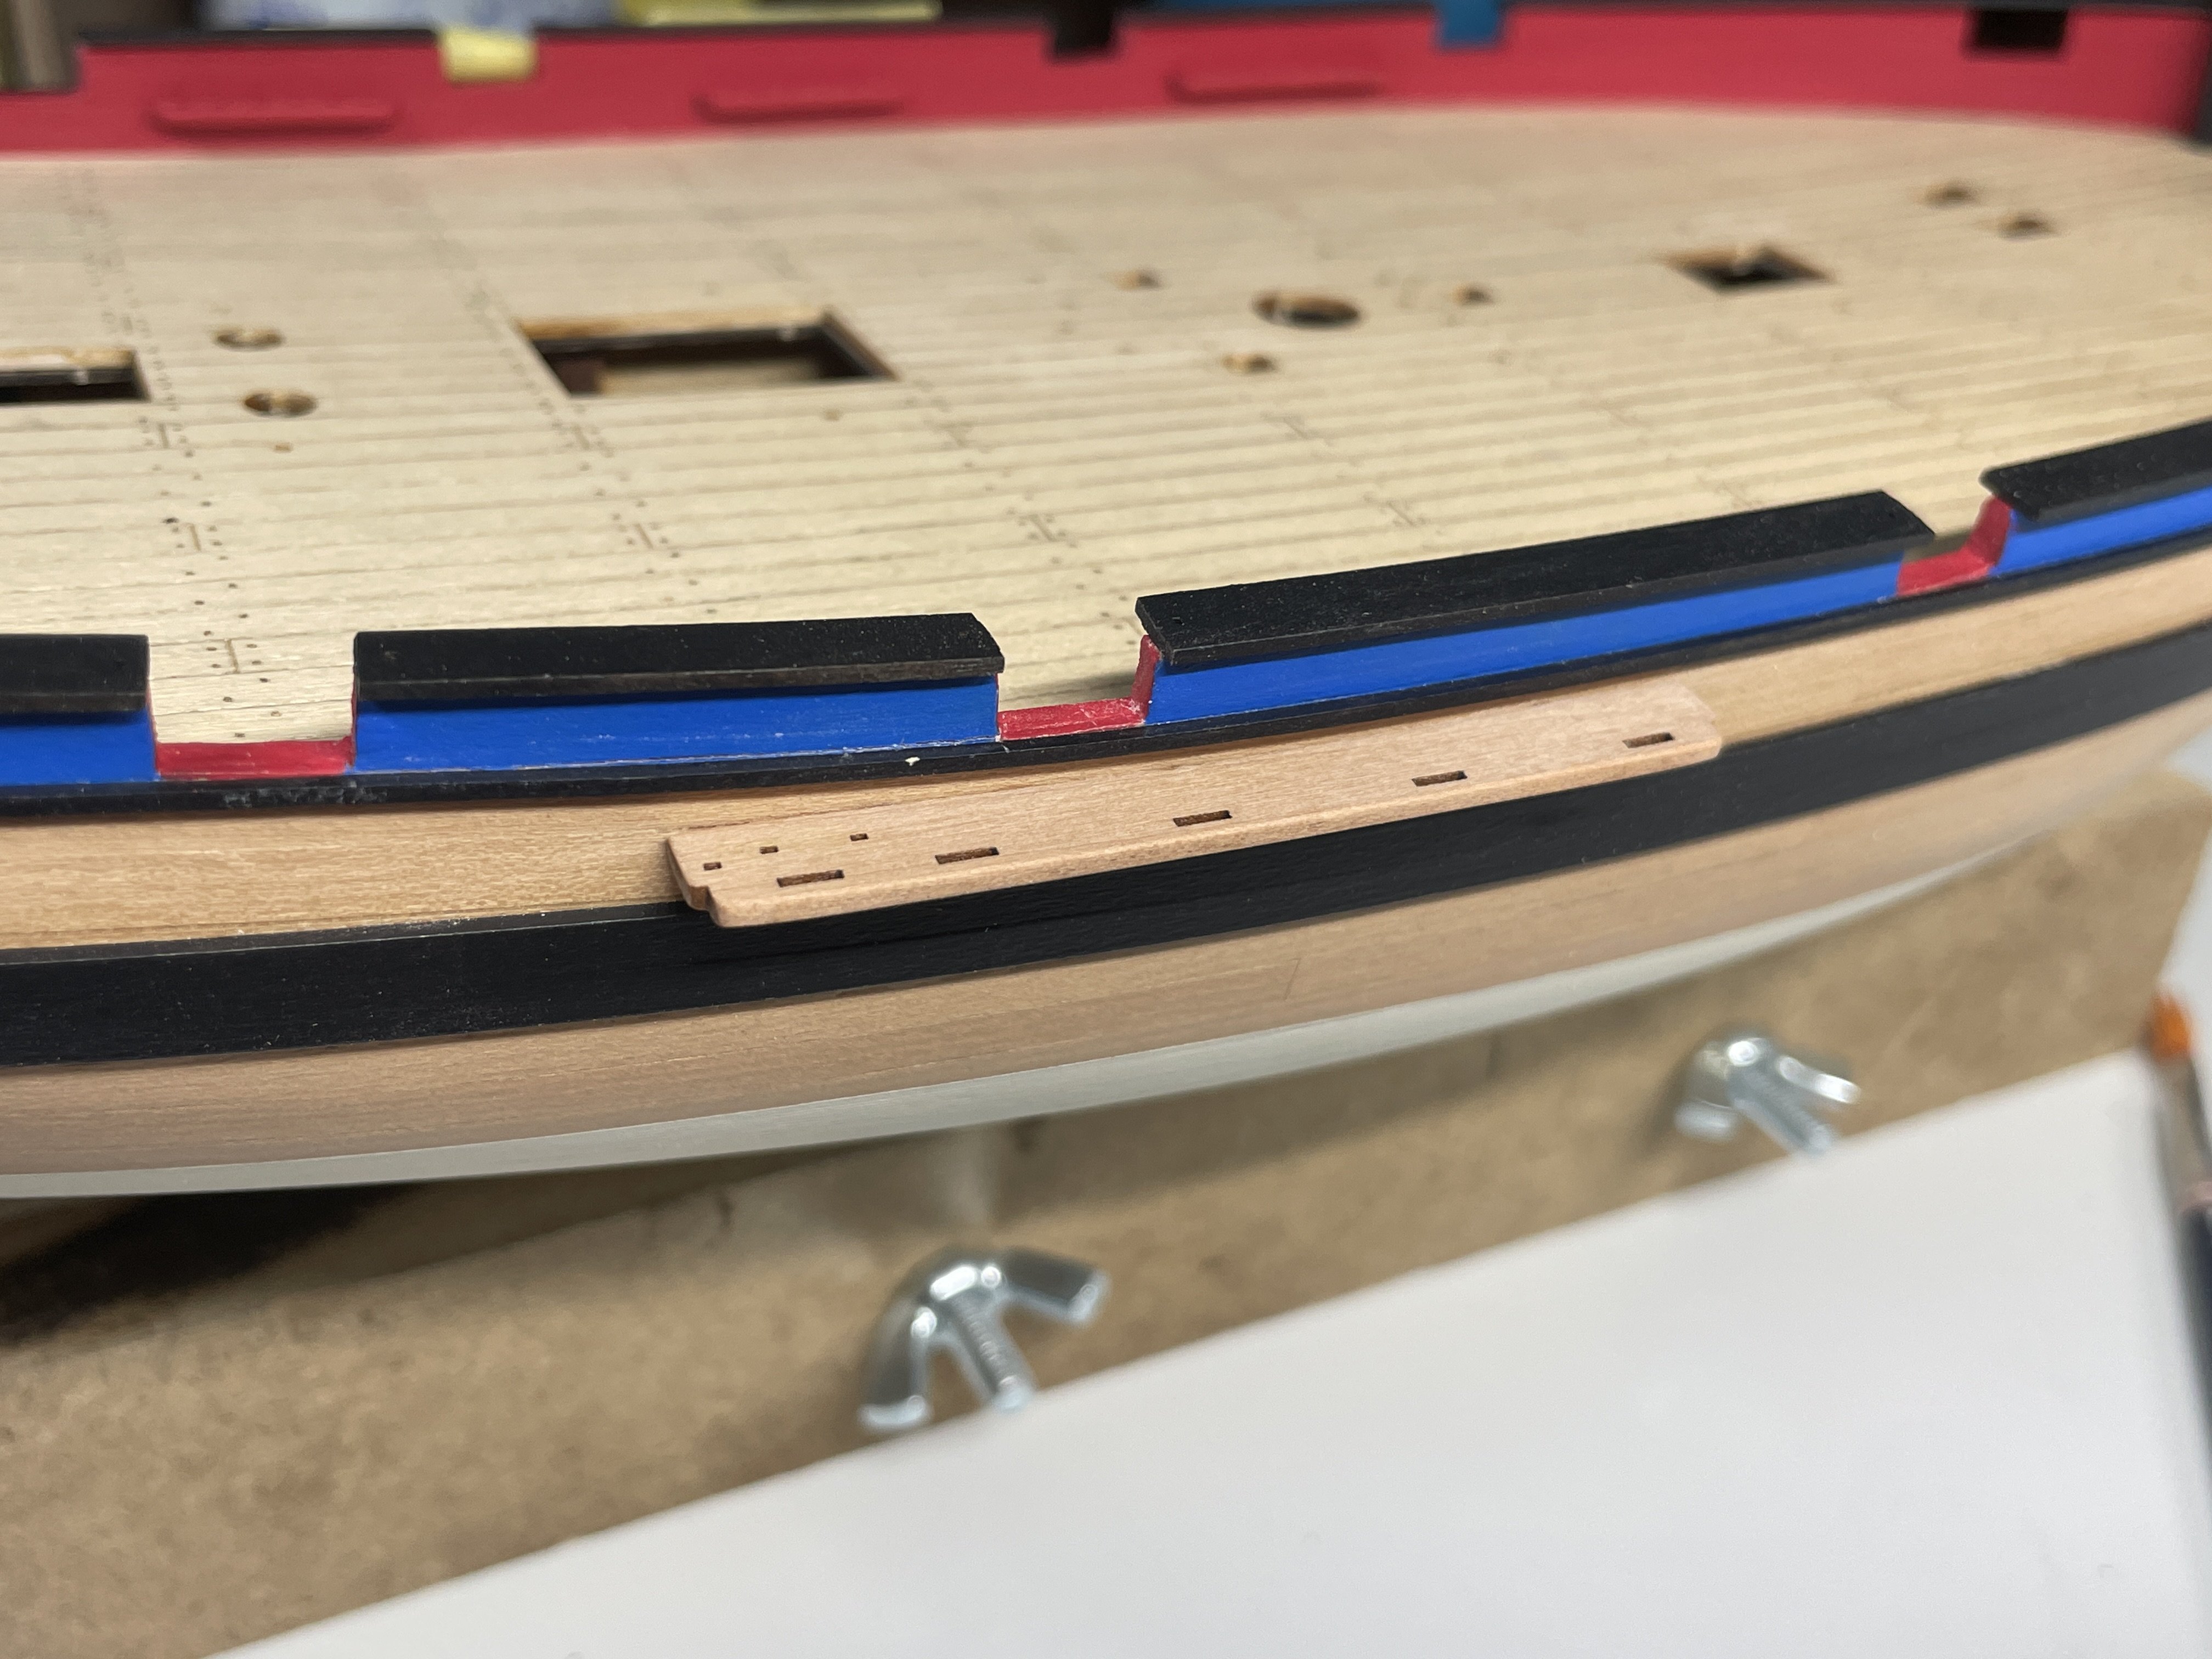
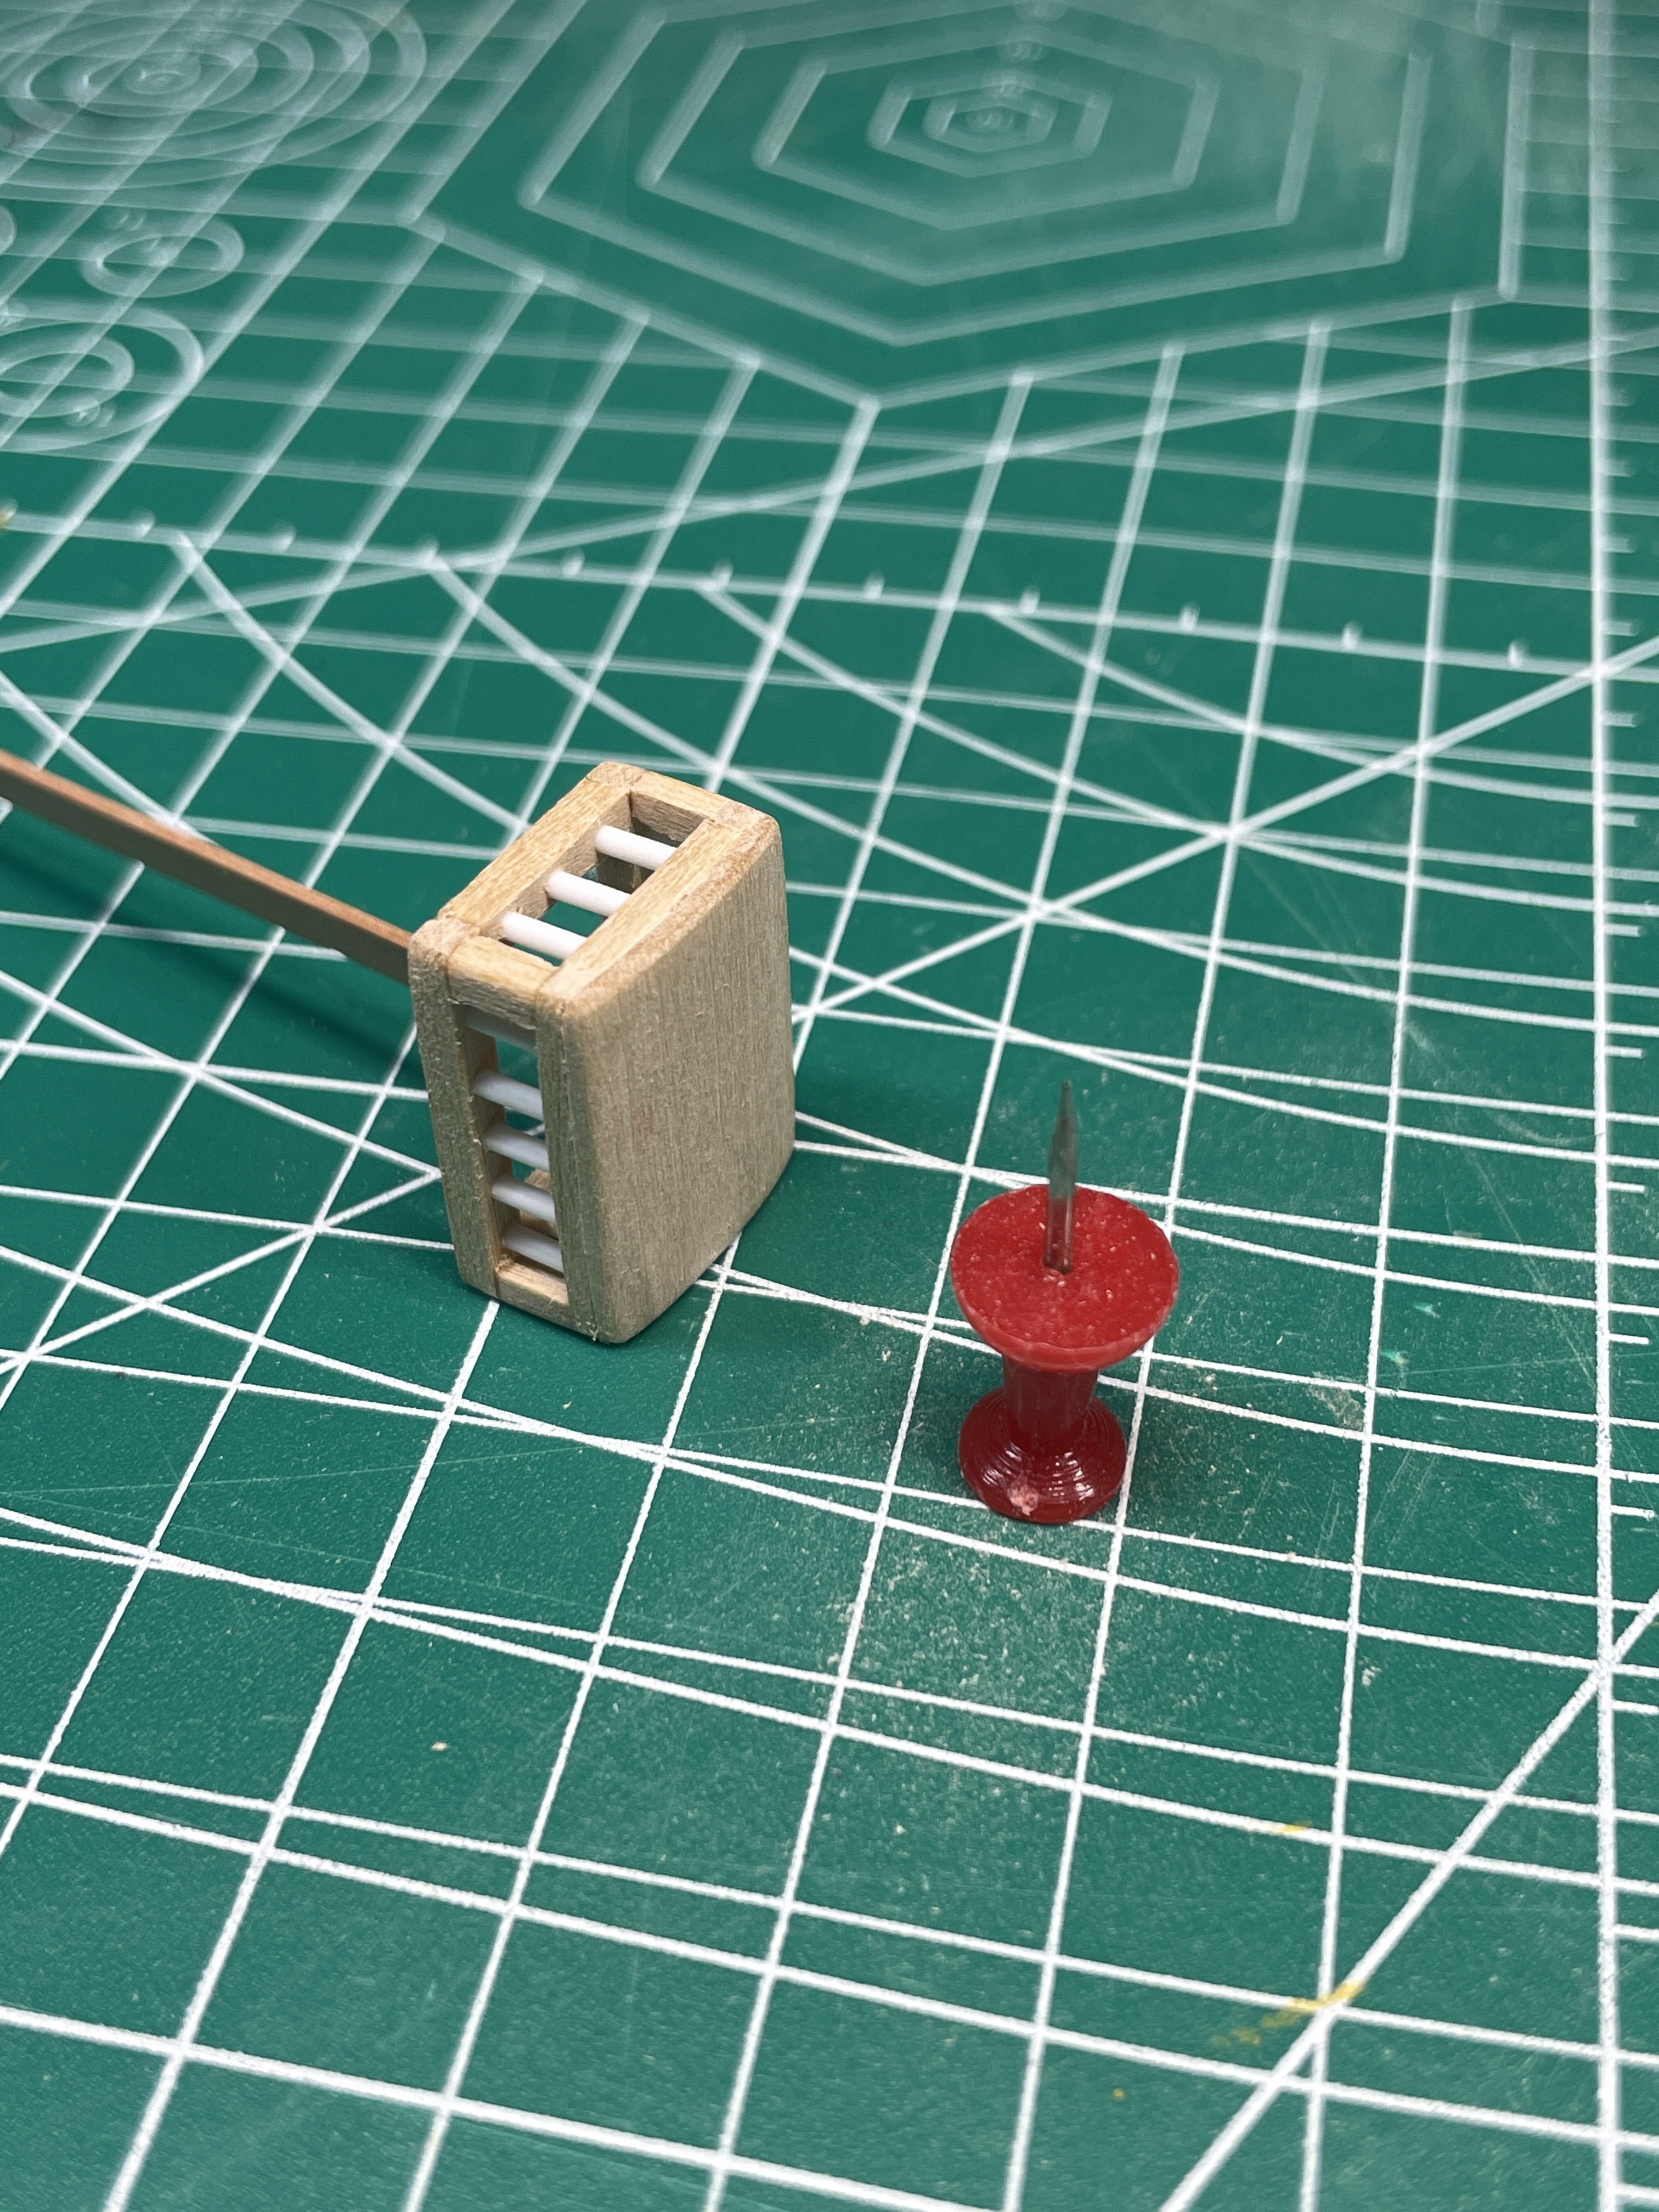
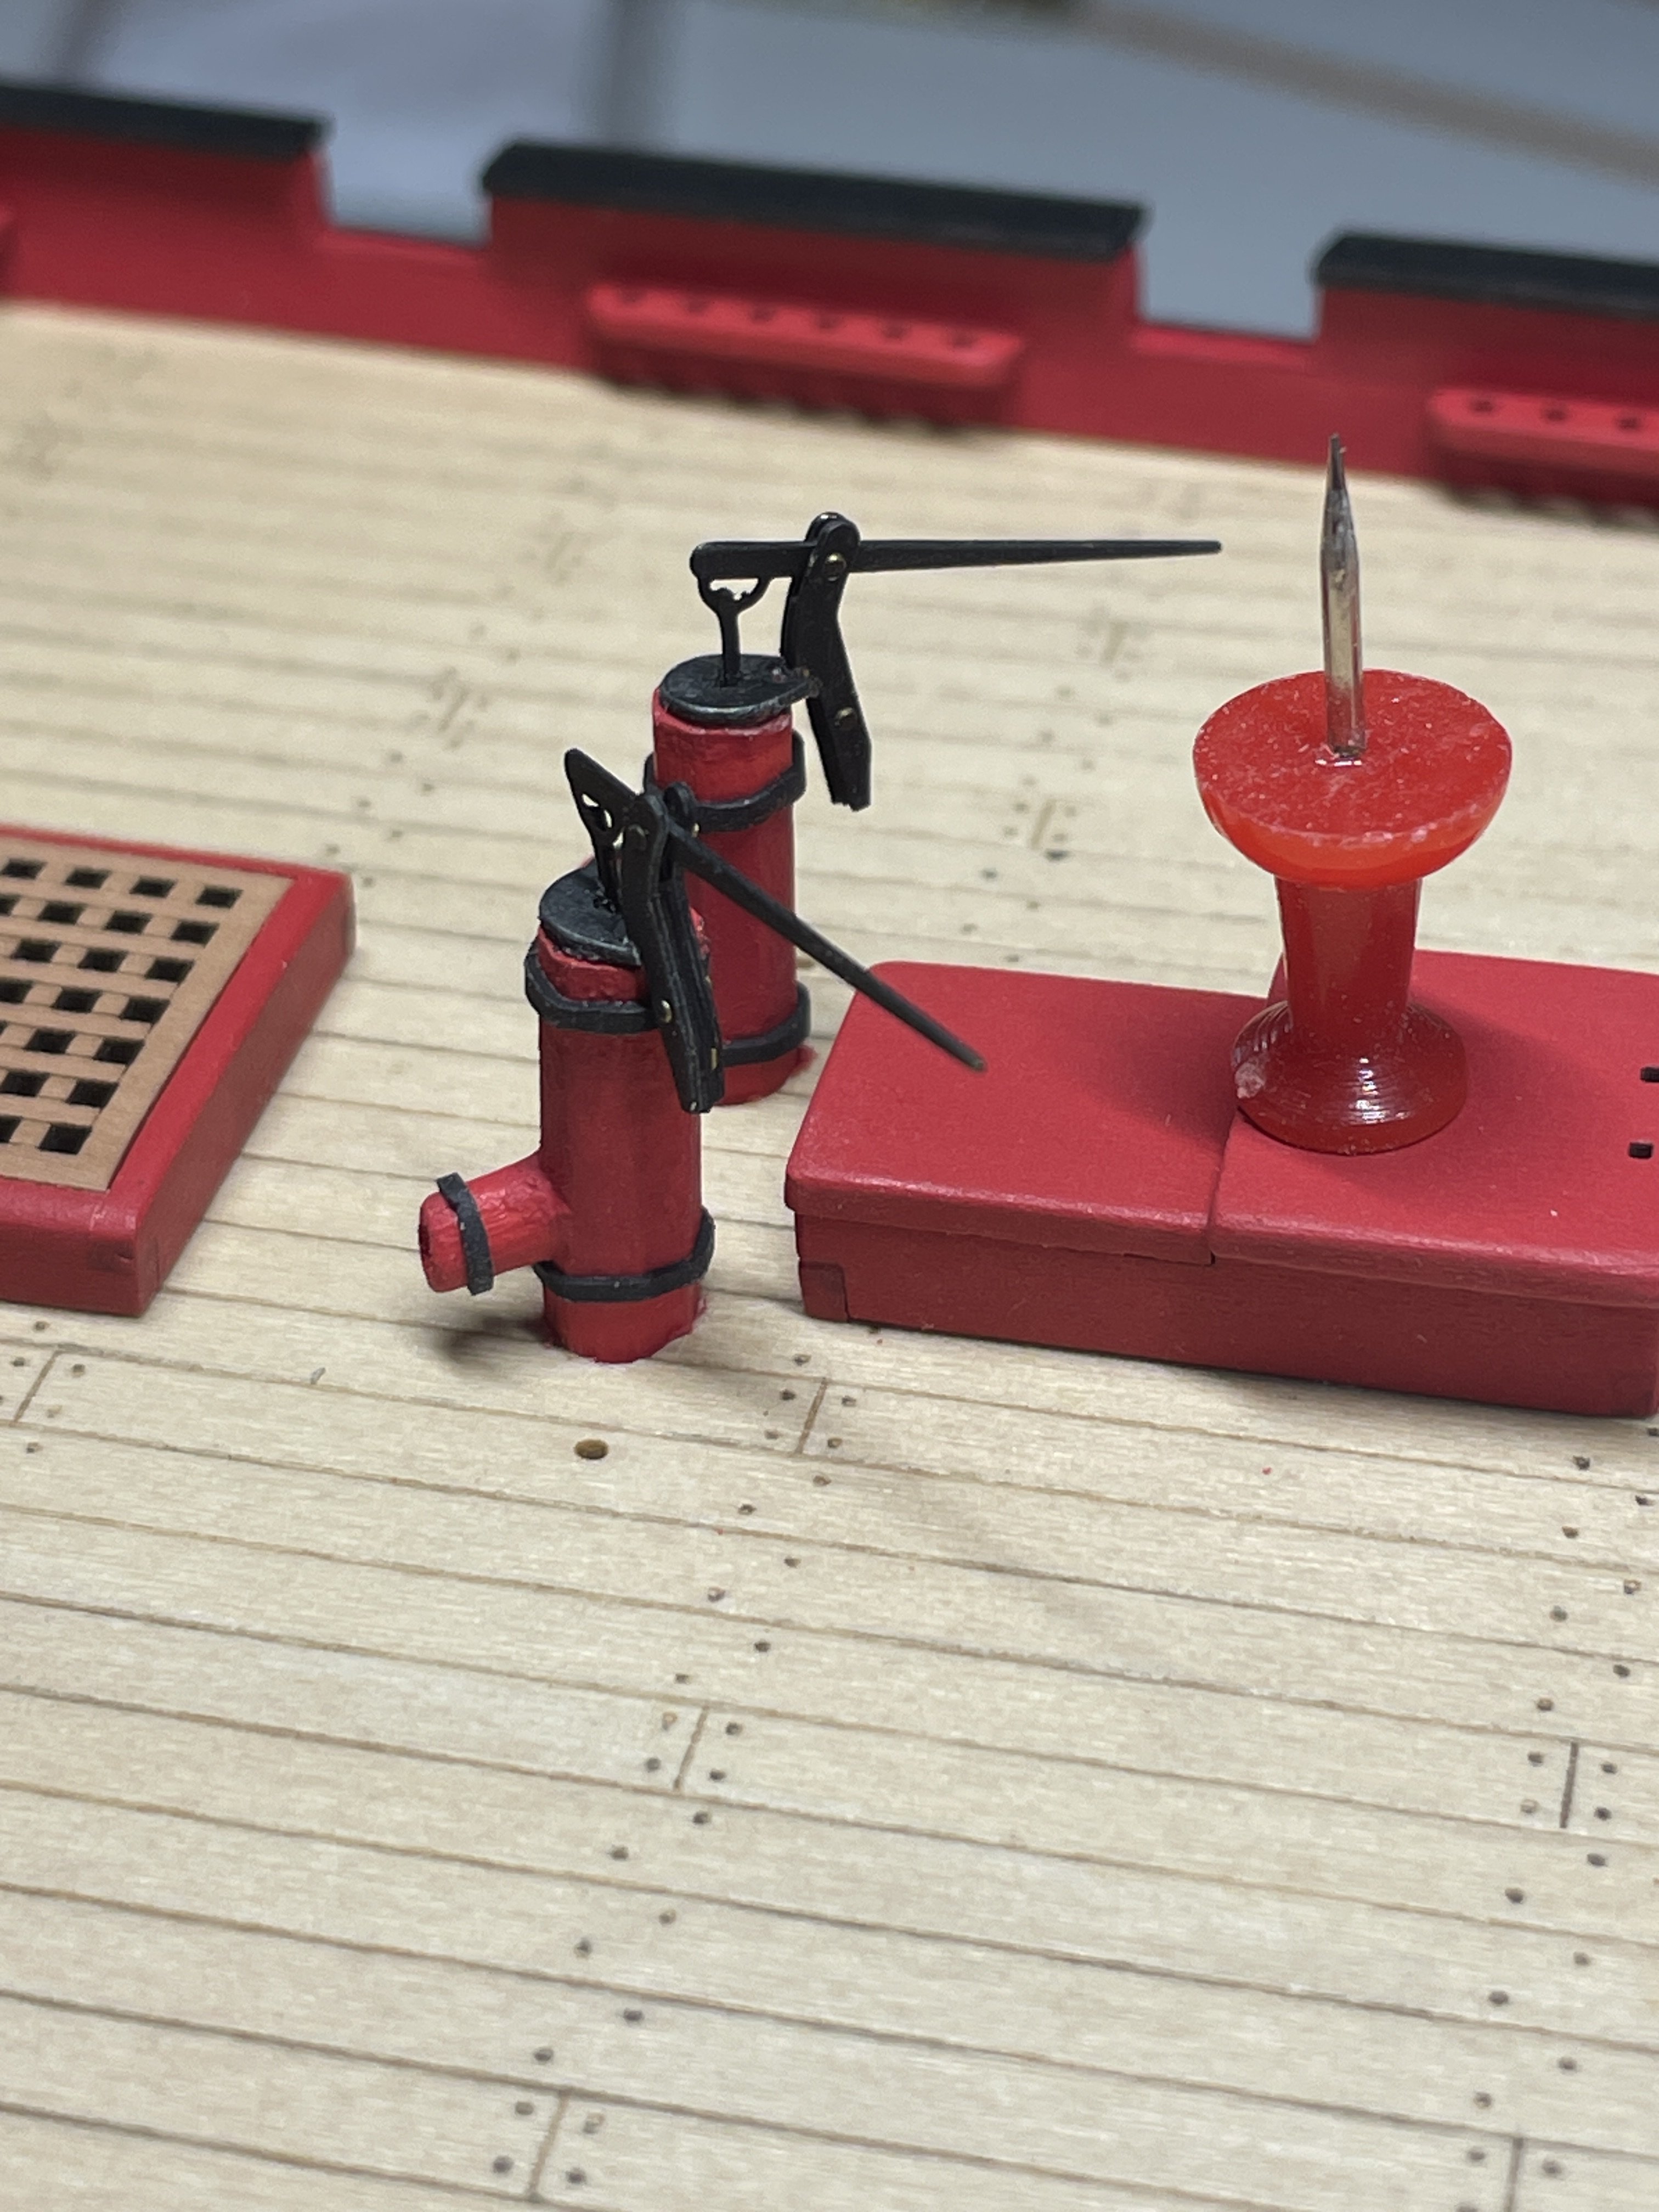
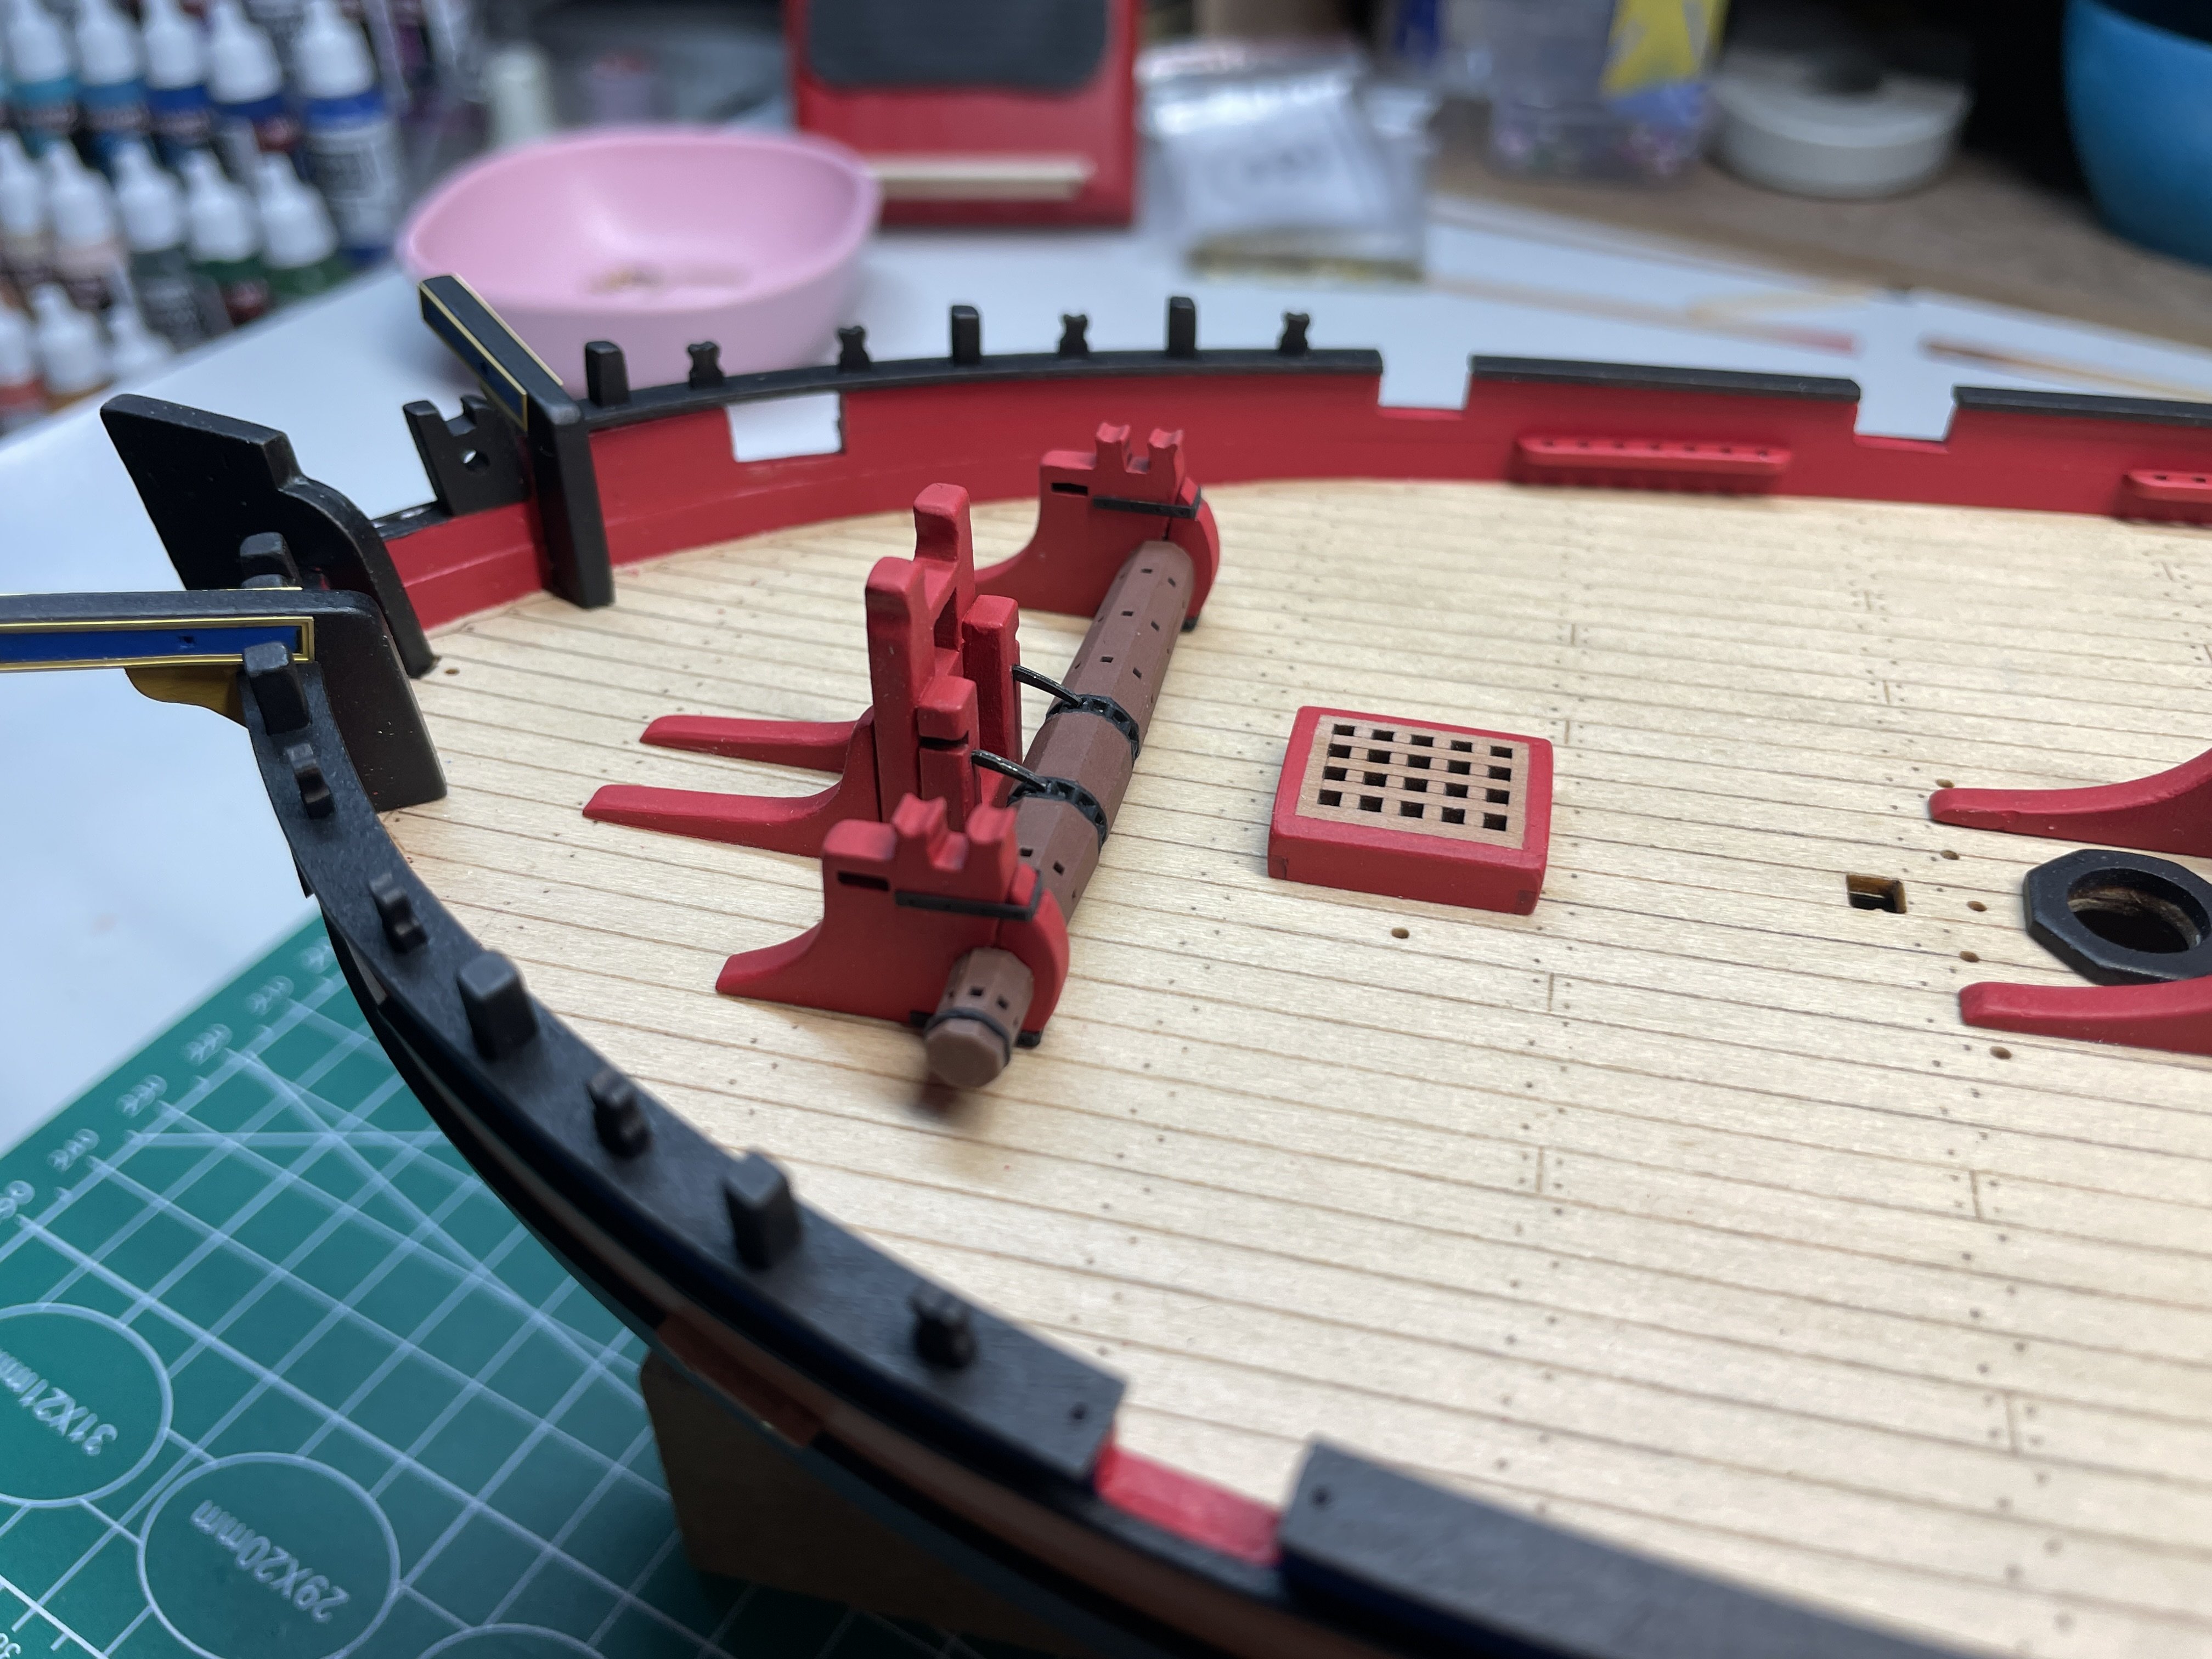
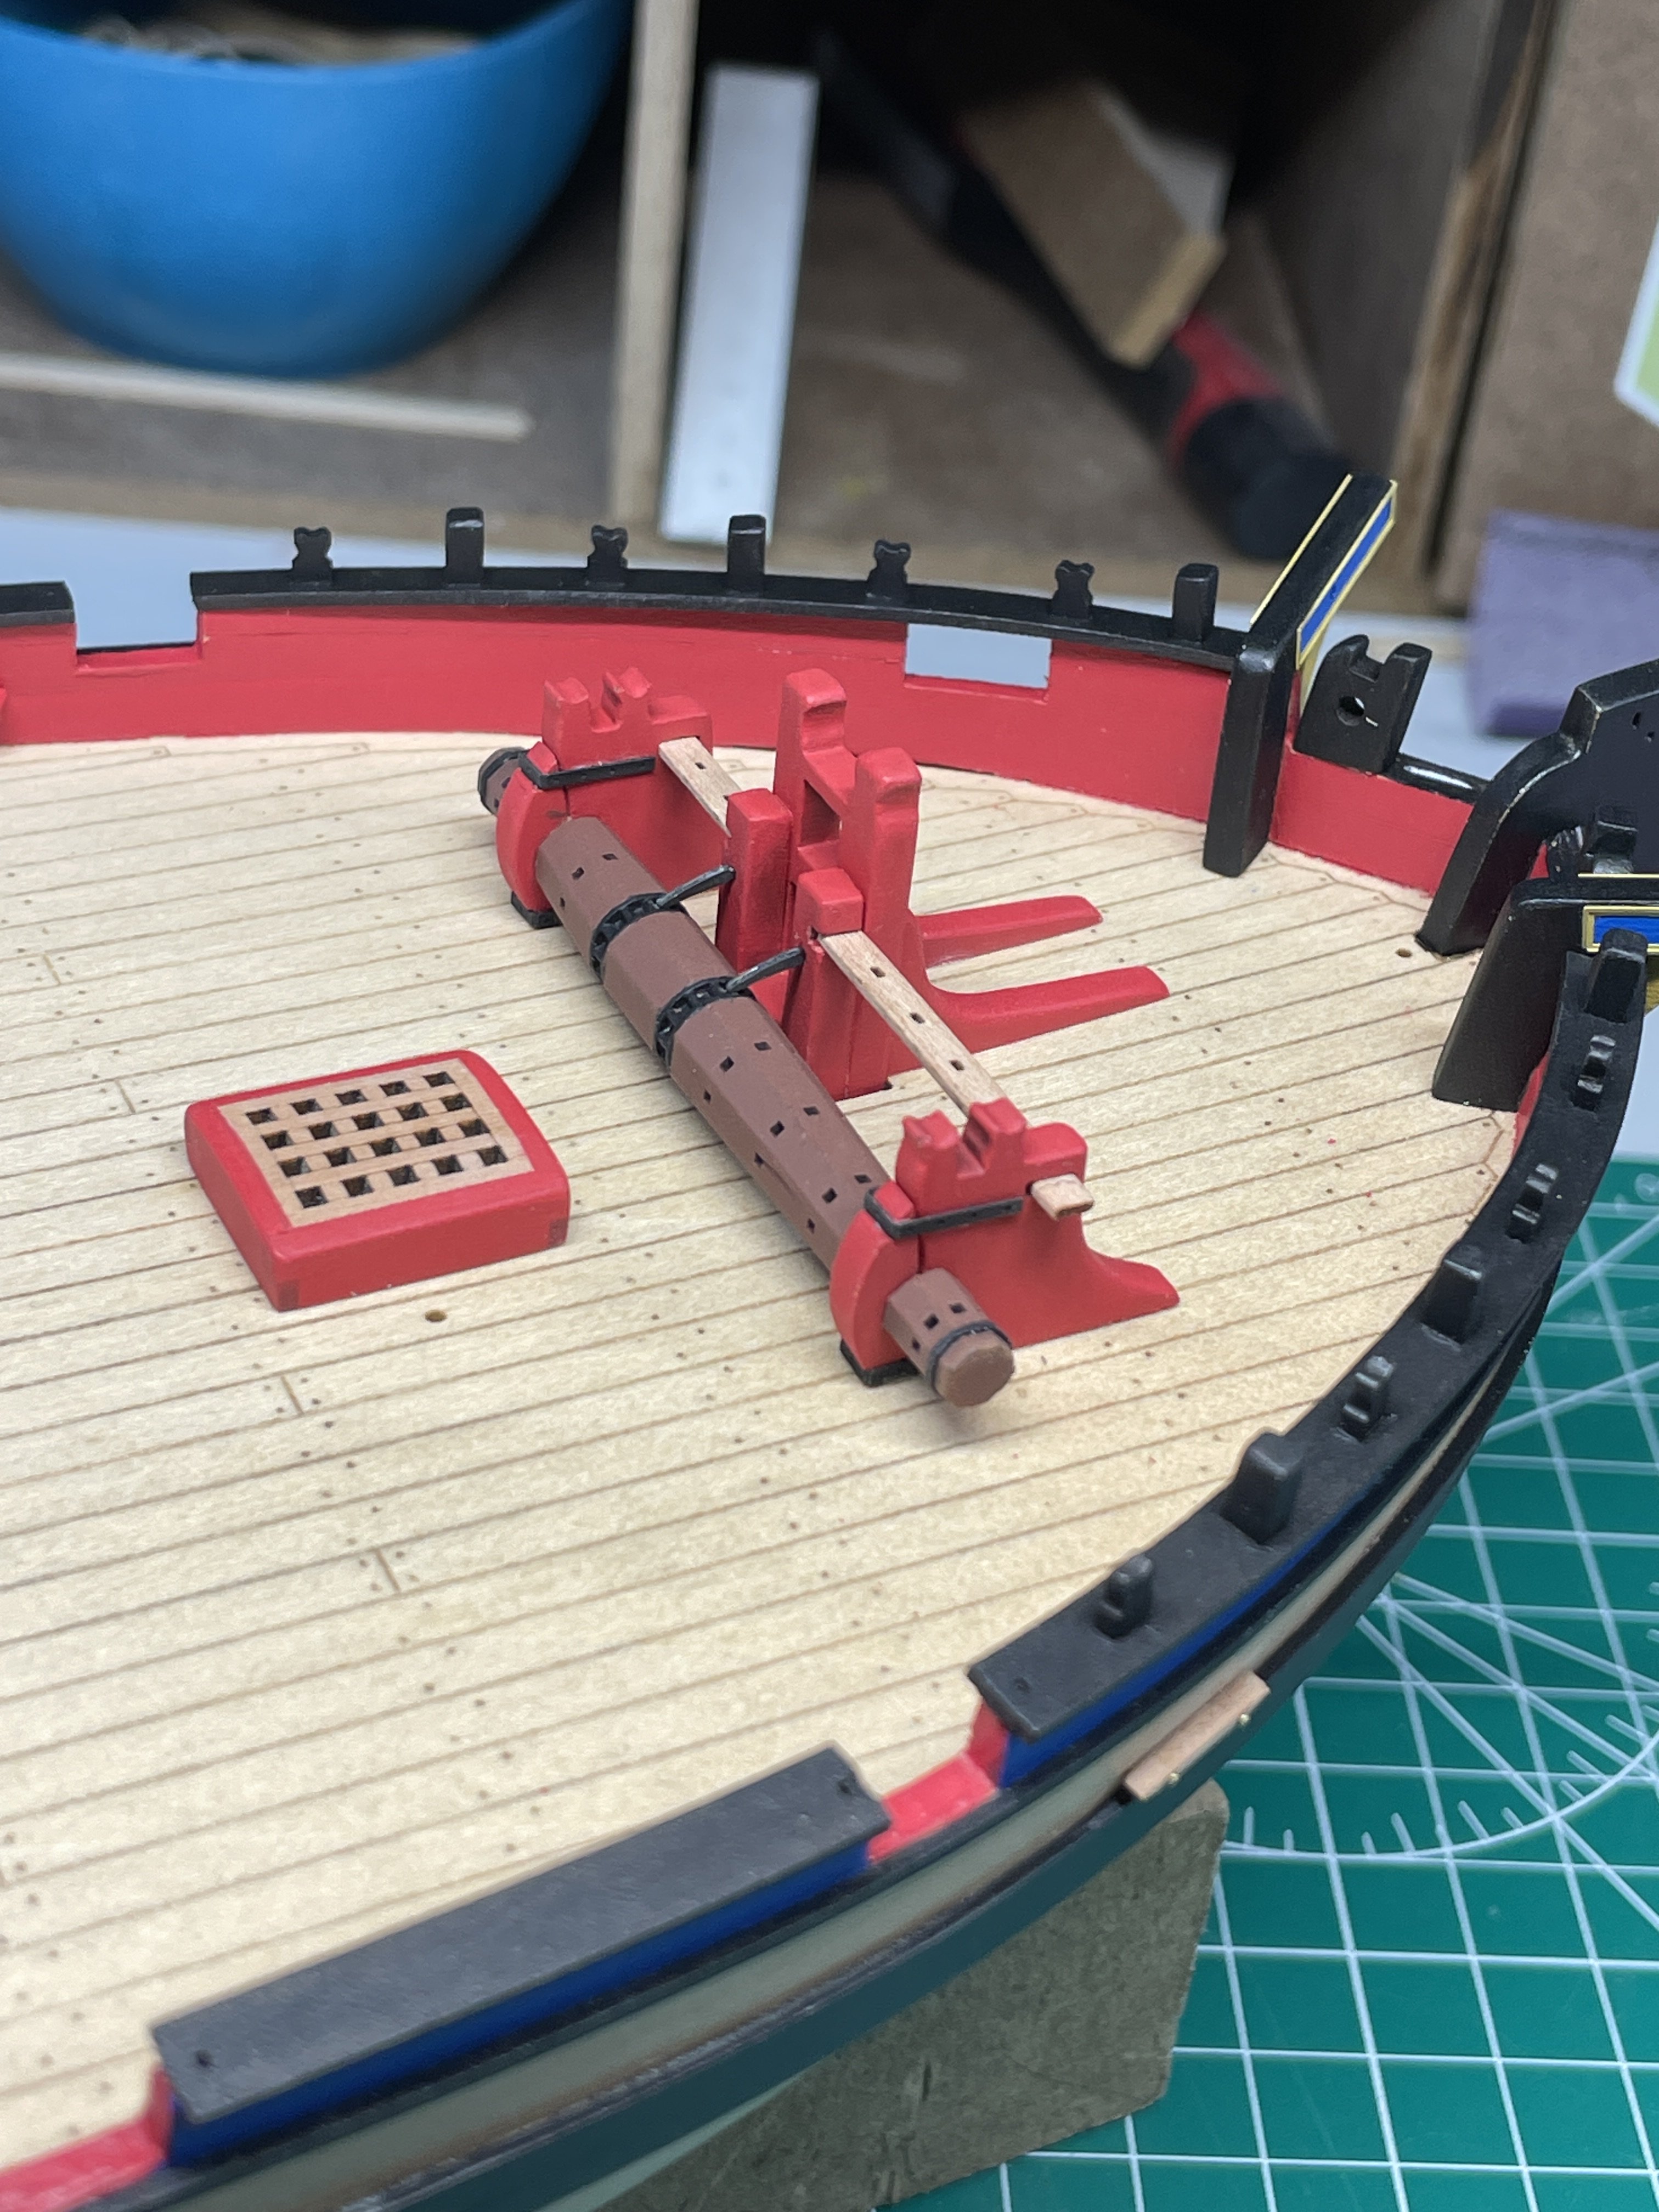
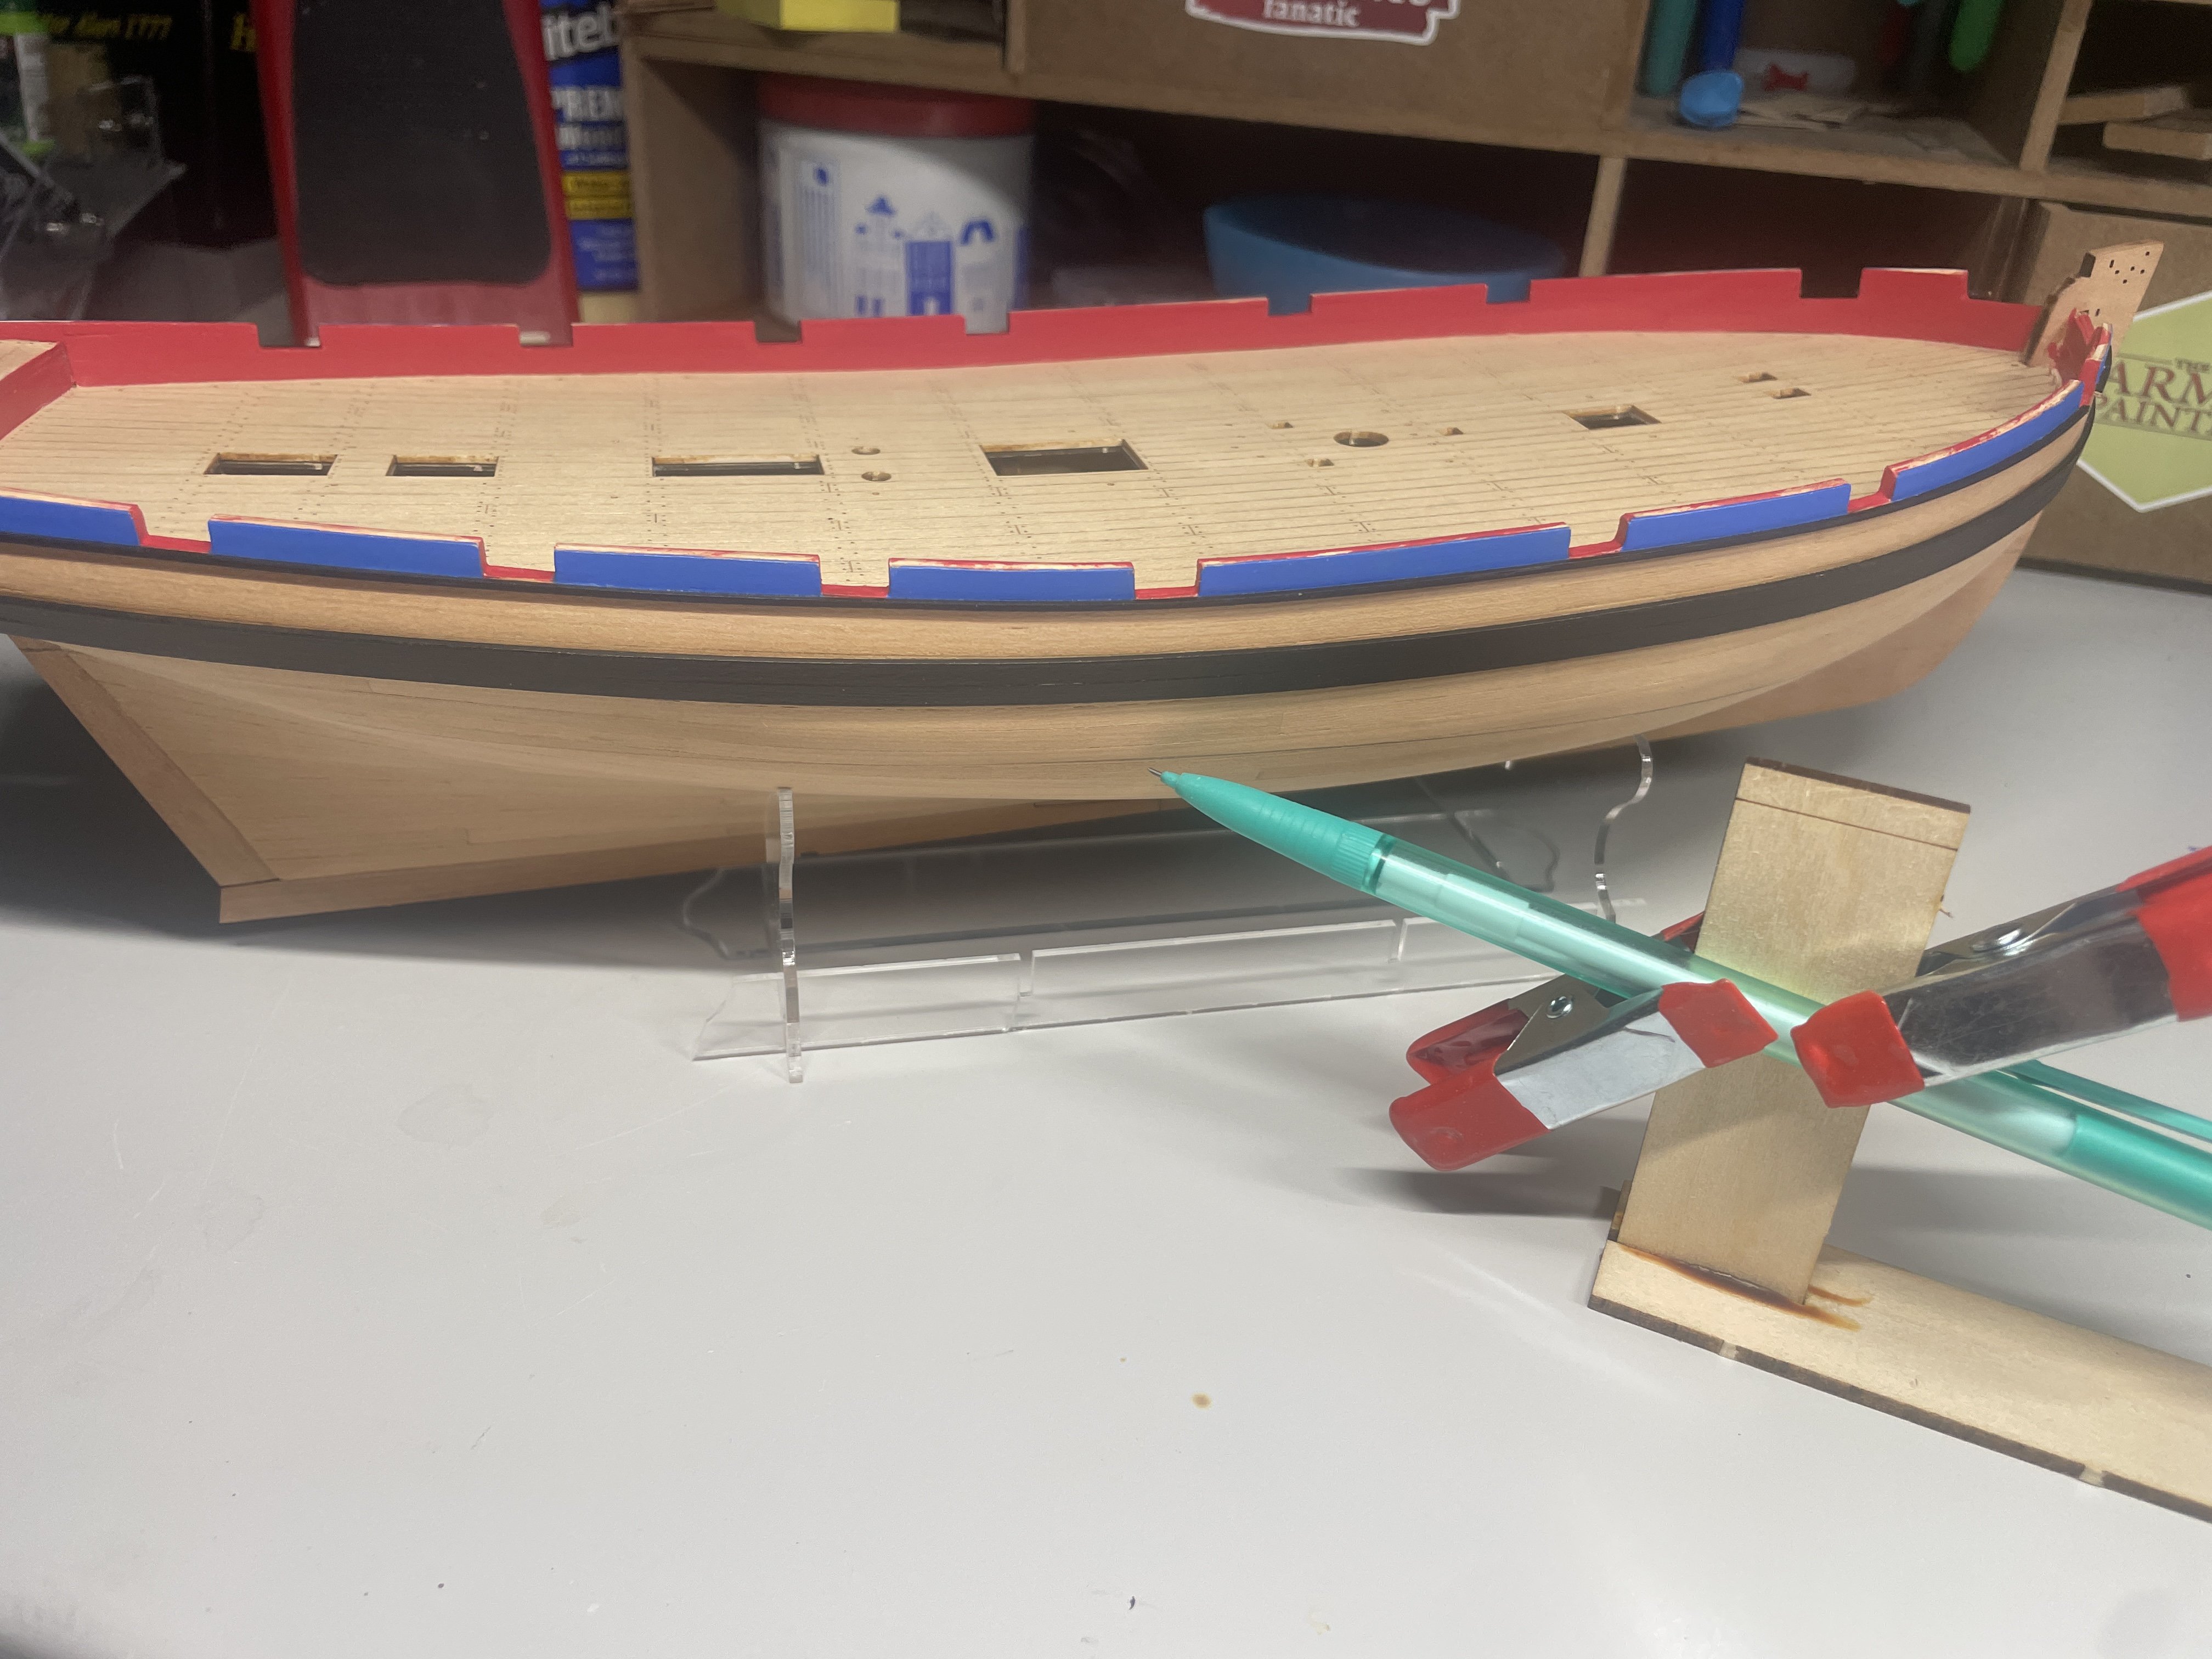
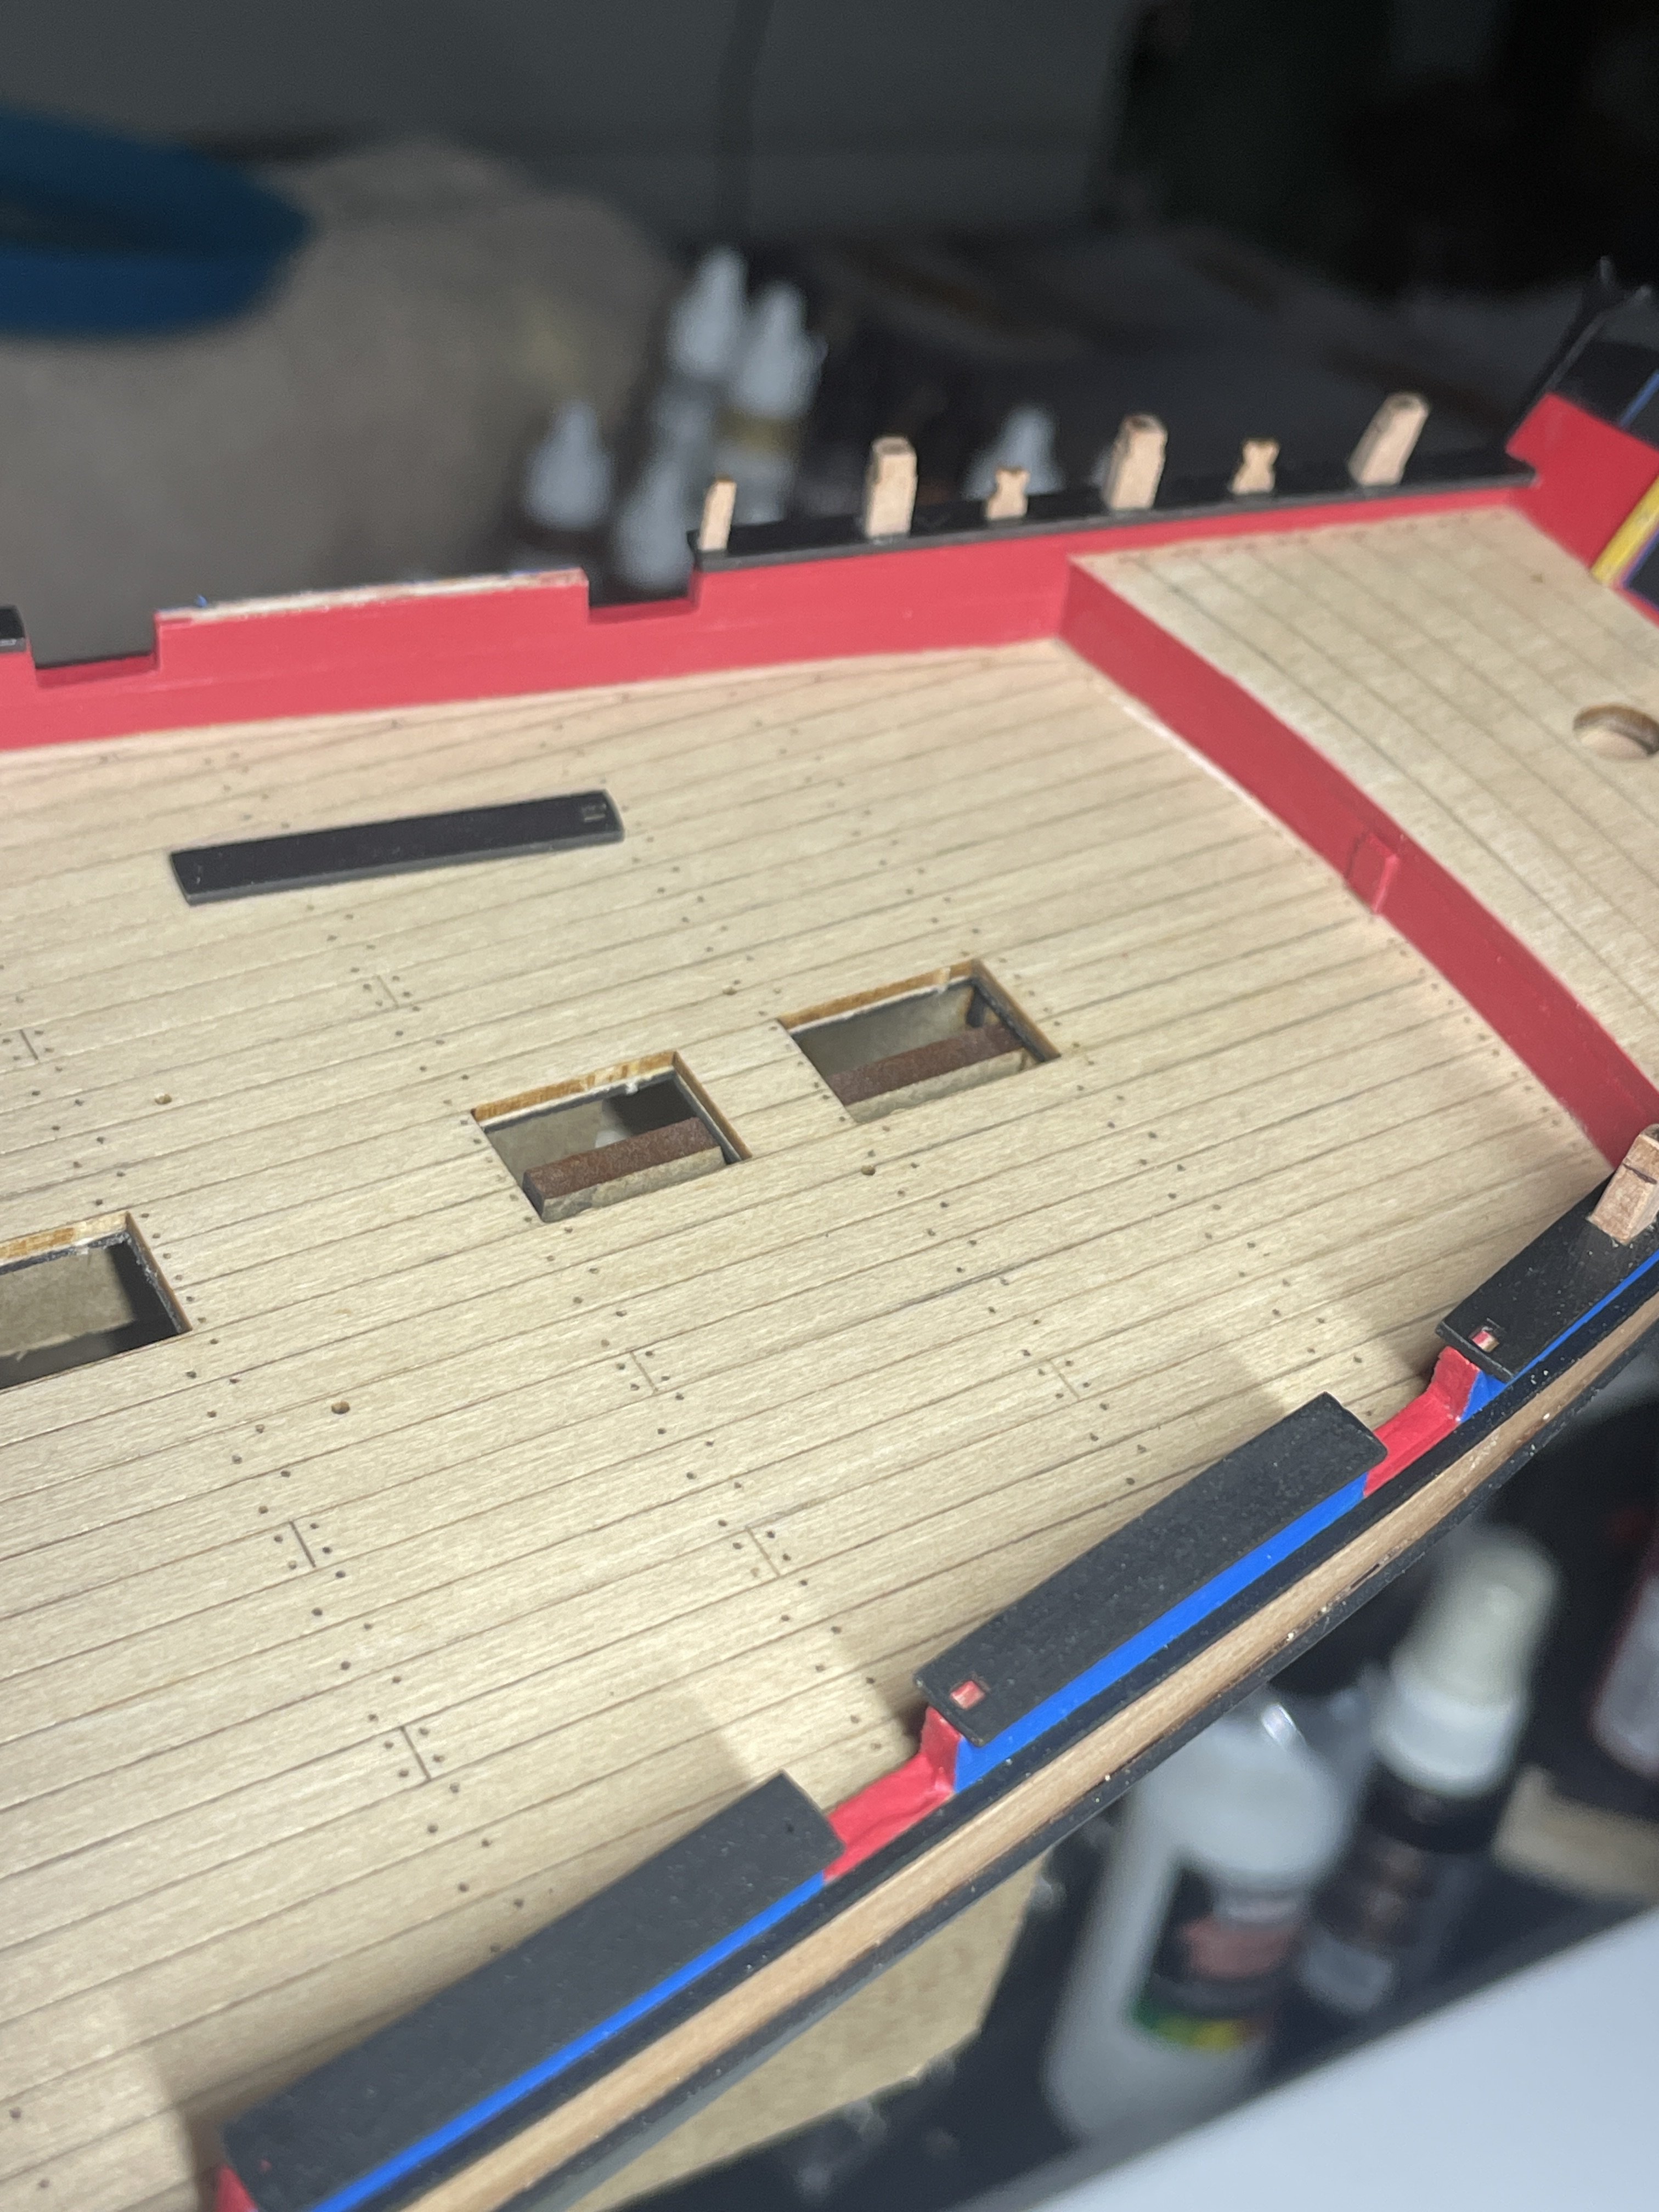
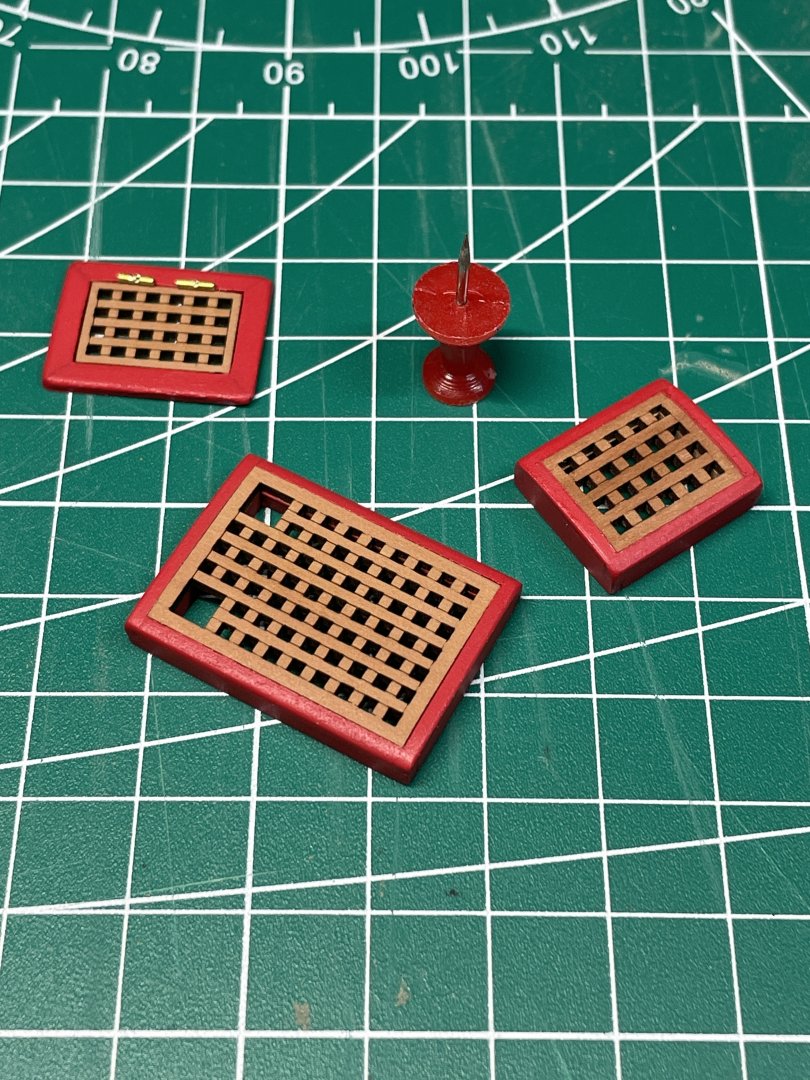
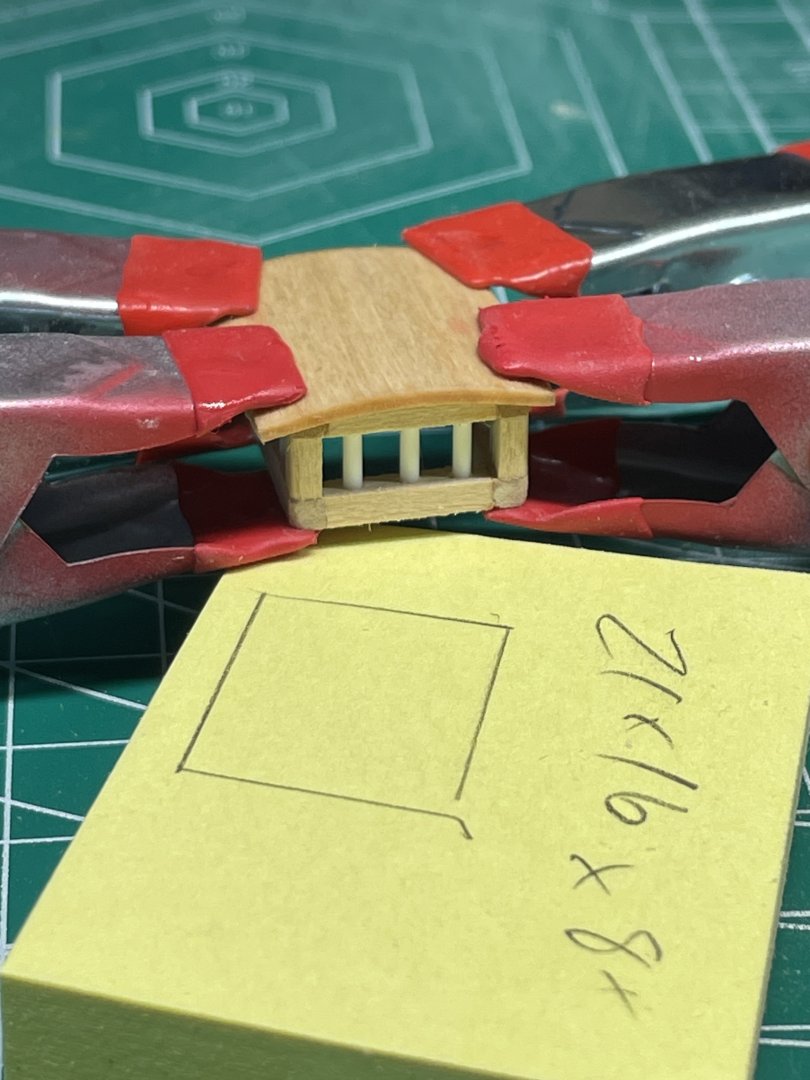
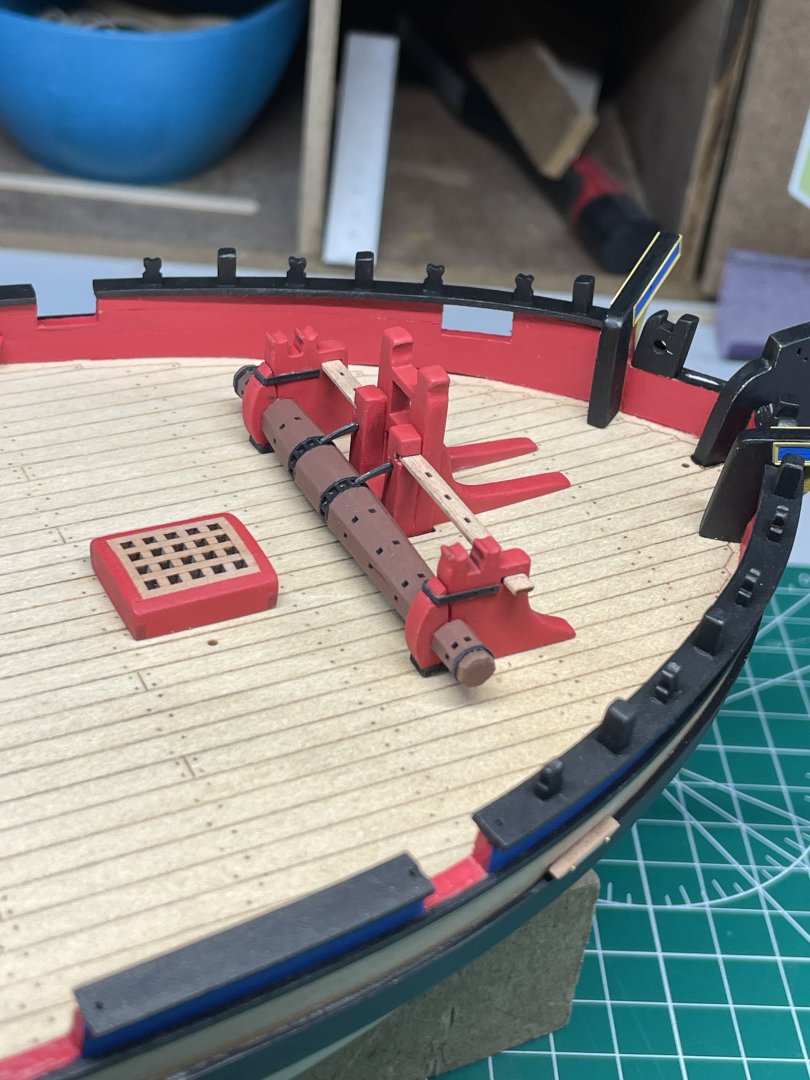
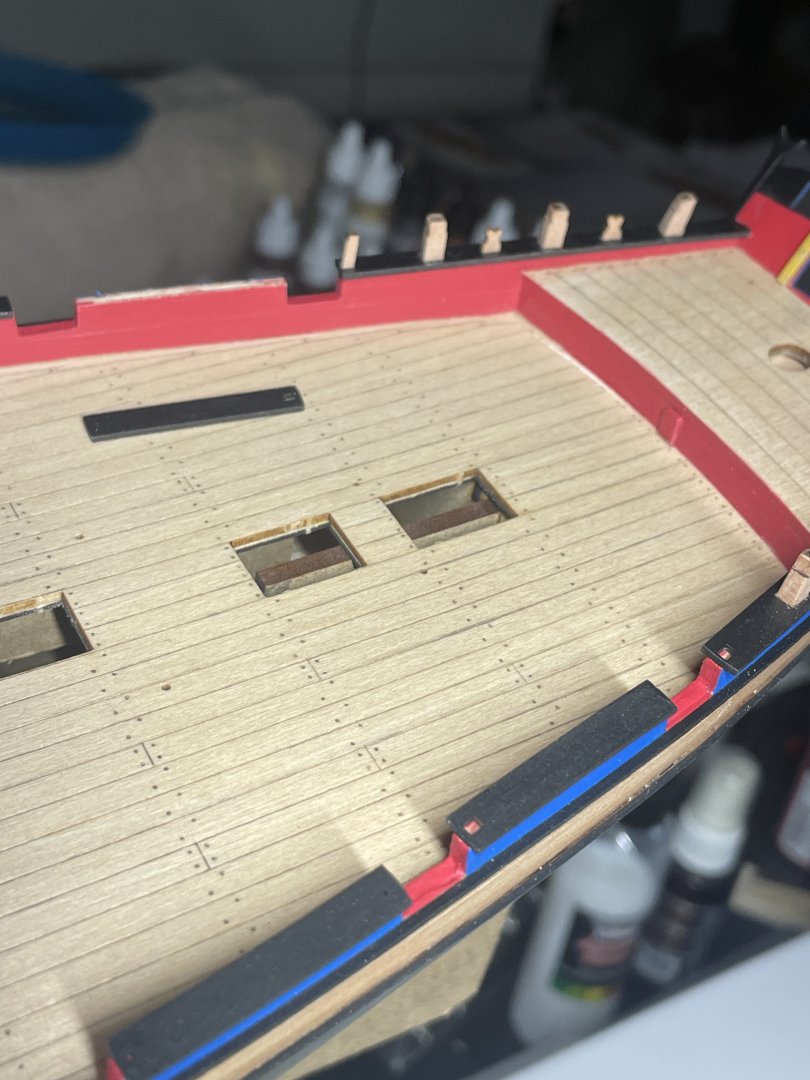
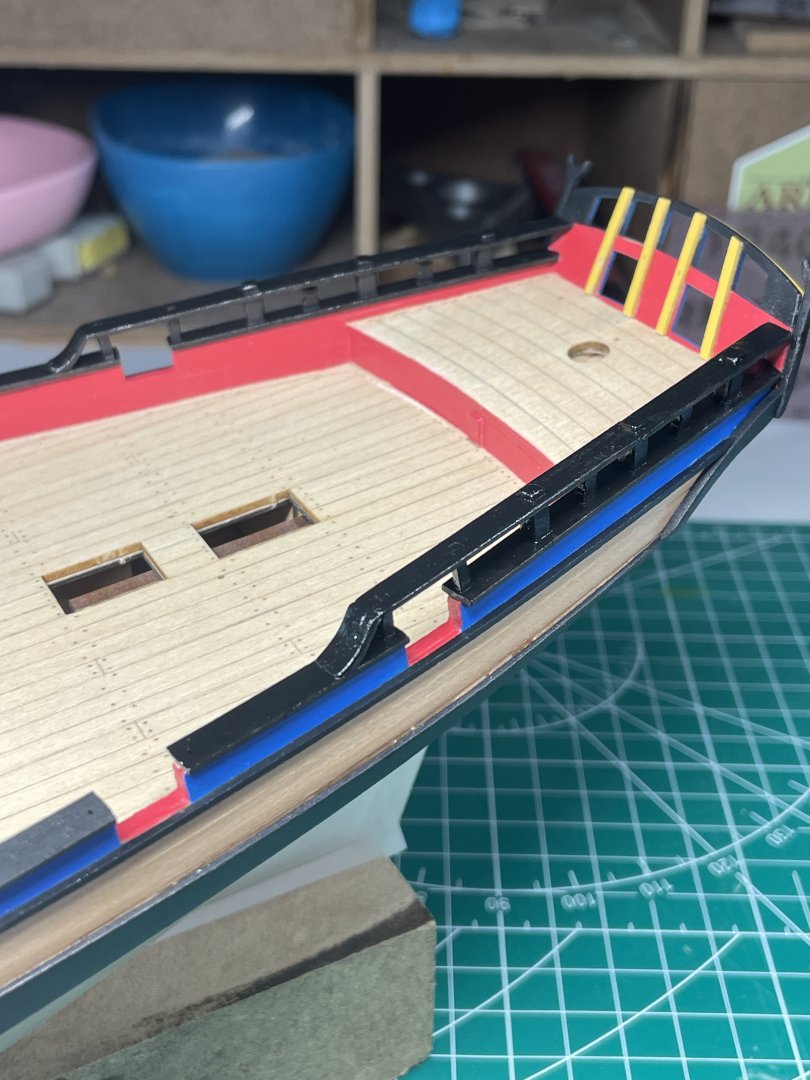
OK it’s time we get some details worked on. I worked on the catheads, they took a little shaping so that they were sitting flat and square. I painted and added the PE to them. I opted not to cut sheaves into them. A price I’m currently paying and deciding if I want to add them at this stage. I most likely will, but we’ll get to that when the log catches up. I decided it was time to install the cannon ball racks. I decided I would paint them red. I copied a little jig I saw here in order to keep them at a consistent height of 3mm above the deck. I worked on the rails and pinned them like the instructions said. I don’t remember seeing too many details about this part. Here are the results. At this point I did not check that the shrouds would interfere with the gun ports. I read that I should have done that, but it was after the fact. I located them purely based on the instruction book. Later on I did check them for interference and I was happy there was none. I took a little artistic license with the other deck fittings. I don’t know if the one is supposed to be a hatch, but mine is. I also made an additional one as I saw in the other builds mentioned. I blackened the hinges later. I made pumps from scratch and used the PE from the kit. I added shrink tubing for the bands. The metal parts were quite enjoyable to make. The pins holding them together are peened. The winch was fun to make, several pieces that need to fit together nicely. I had a good time getting these together then adding the PE iron bands to it. (As B.E. did, I have since added nails (?) going down into the deck. I think those were a good addition that you will see in later photos.) I will leave you there for now. I hope you enjoy the photos. More to come! Chris


- 38 replies
-
- 12
-
-
- Alert
- Vanguard Models
- (and 1 more)
-
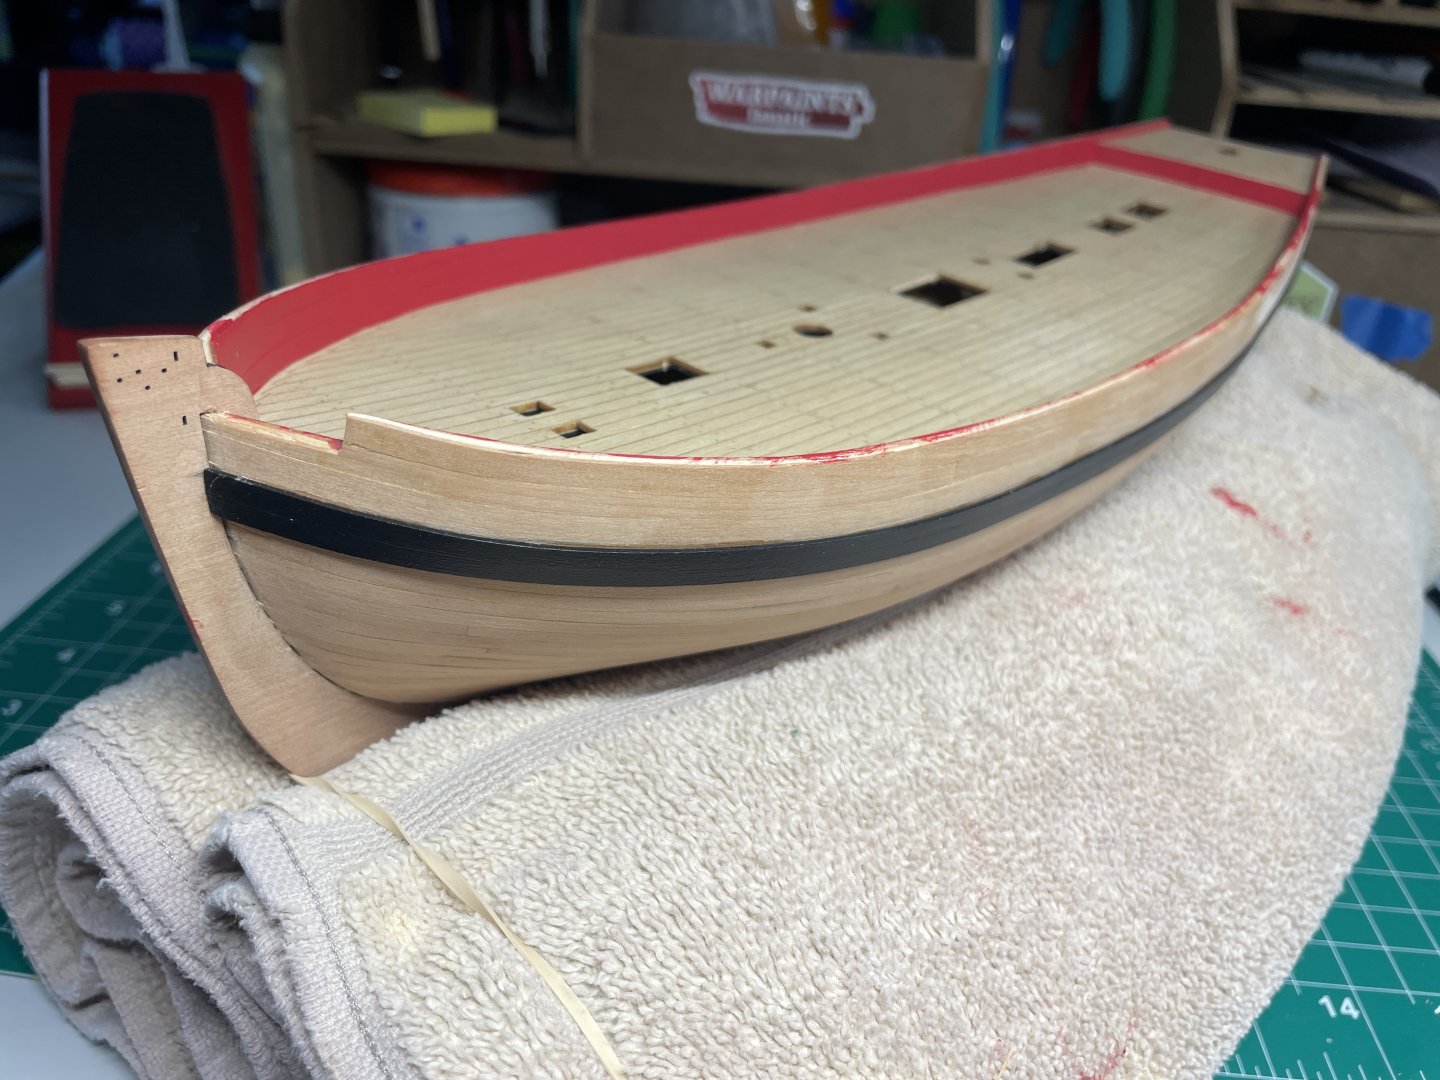
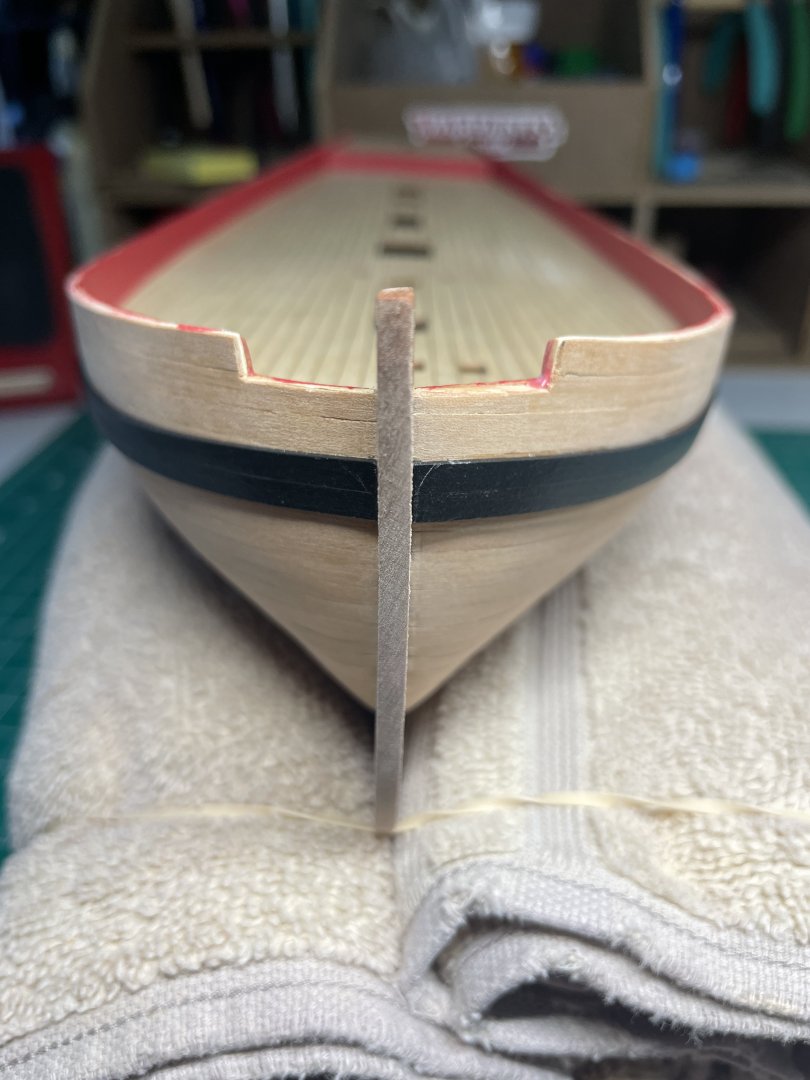
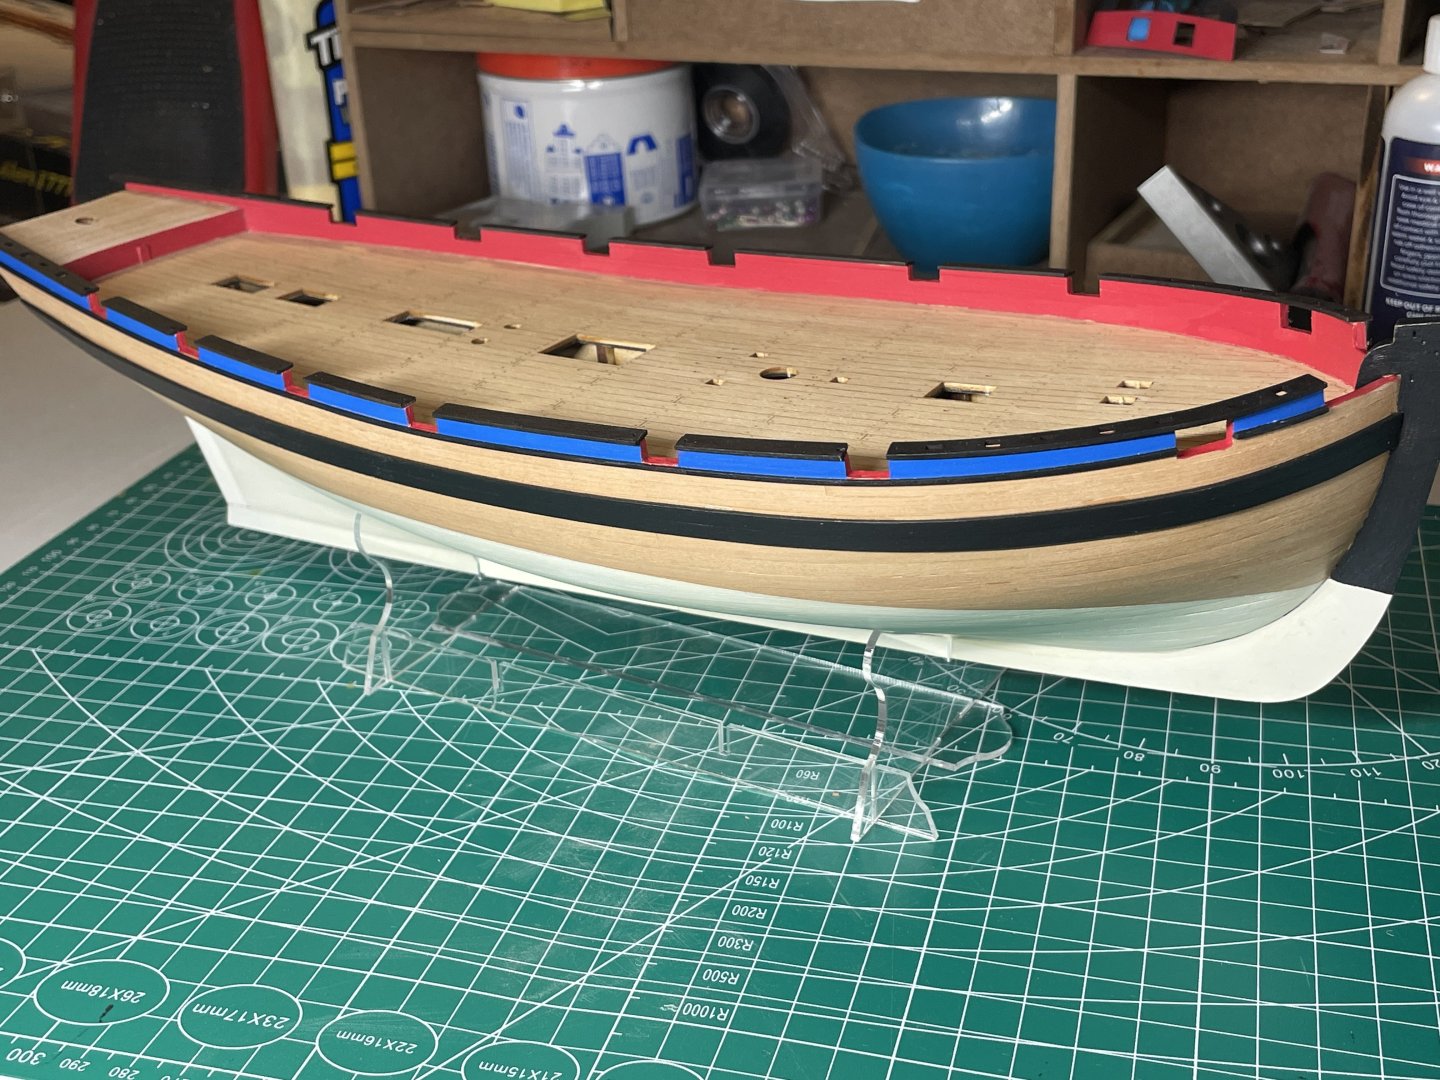
Thanks for the likes and stuff! Here I was getting excited because it was time to add some paint. I like to paint. 🙂 I next cut out for the cannon. Marked and painted the waterline. Cap rails painted and attached. Now we start to get into the fiddly bits. Those tiny blocks between the rails were fun to sand and shape. Had to make sure to keep them in the correct locations too as they are different. Here’s the completed rail and transom. I’ll leave it there for now. Next are the catheads, and starting to make some deck fittings. Thank you for following along! Chris


- 38 replies
-
- 10
-
-
- Alert
- Vanguard Models
- (and 1 more)
-
The amount of glue to use is certainly a learned skill. You need enough to attach the part but limit squeeze out so that clean up is easy or not necessary. Don’t sweat it, you’ll get a feel for it as you do more. Way until you start using different glues, the amount you need to use will change, hahaha. Looking good, keep at it! Chris
-
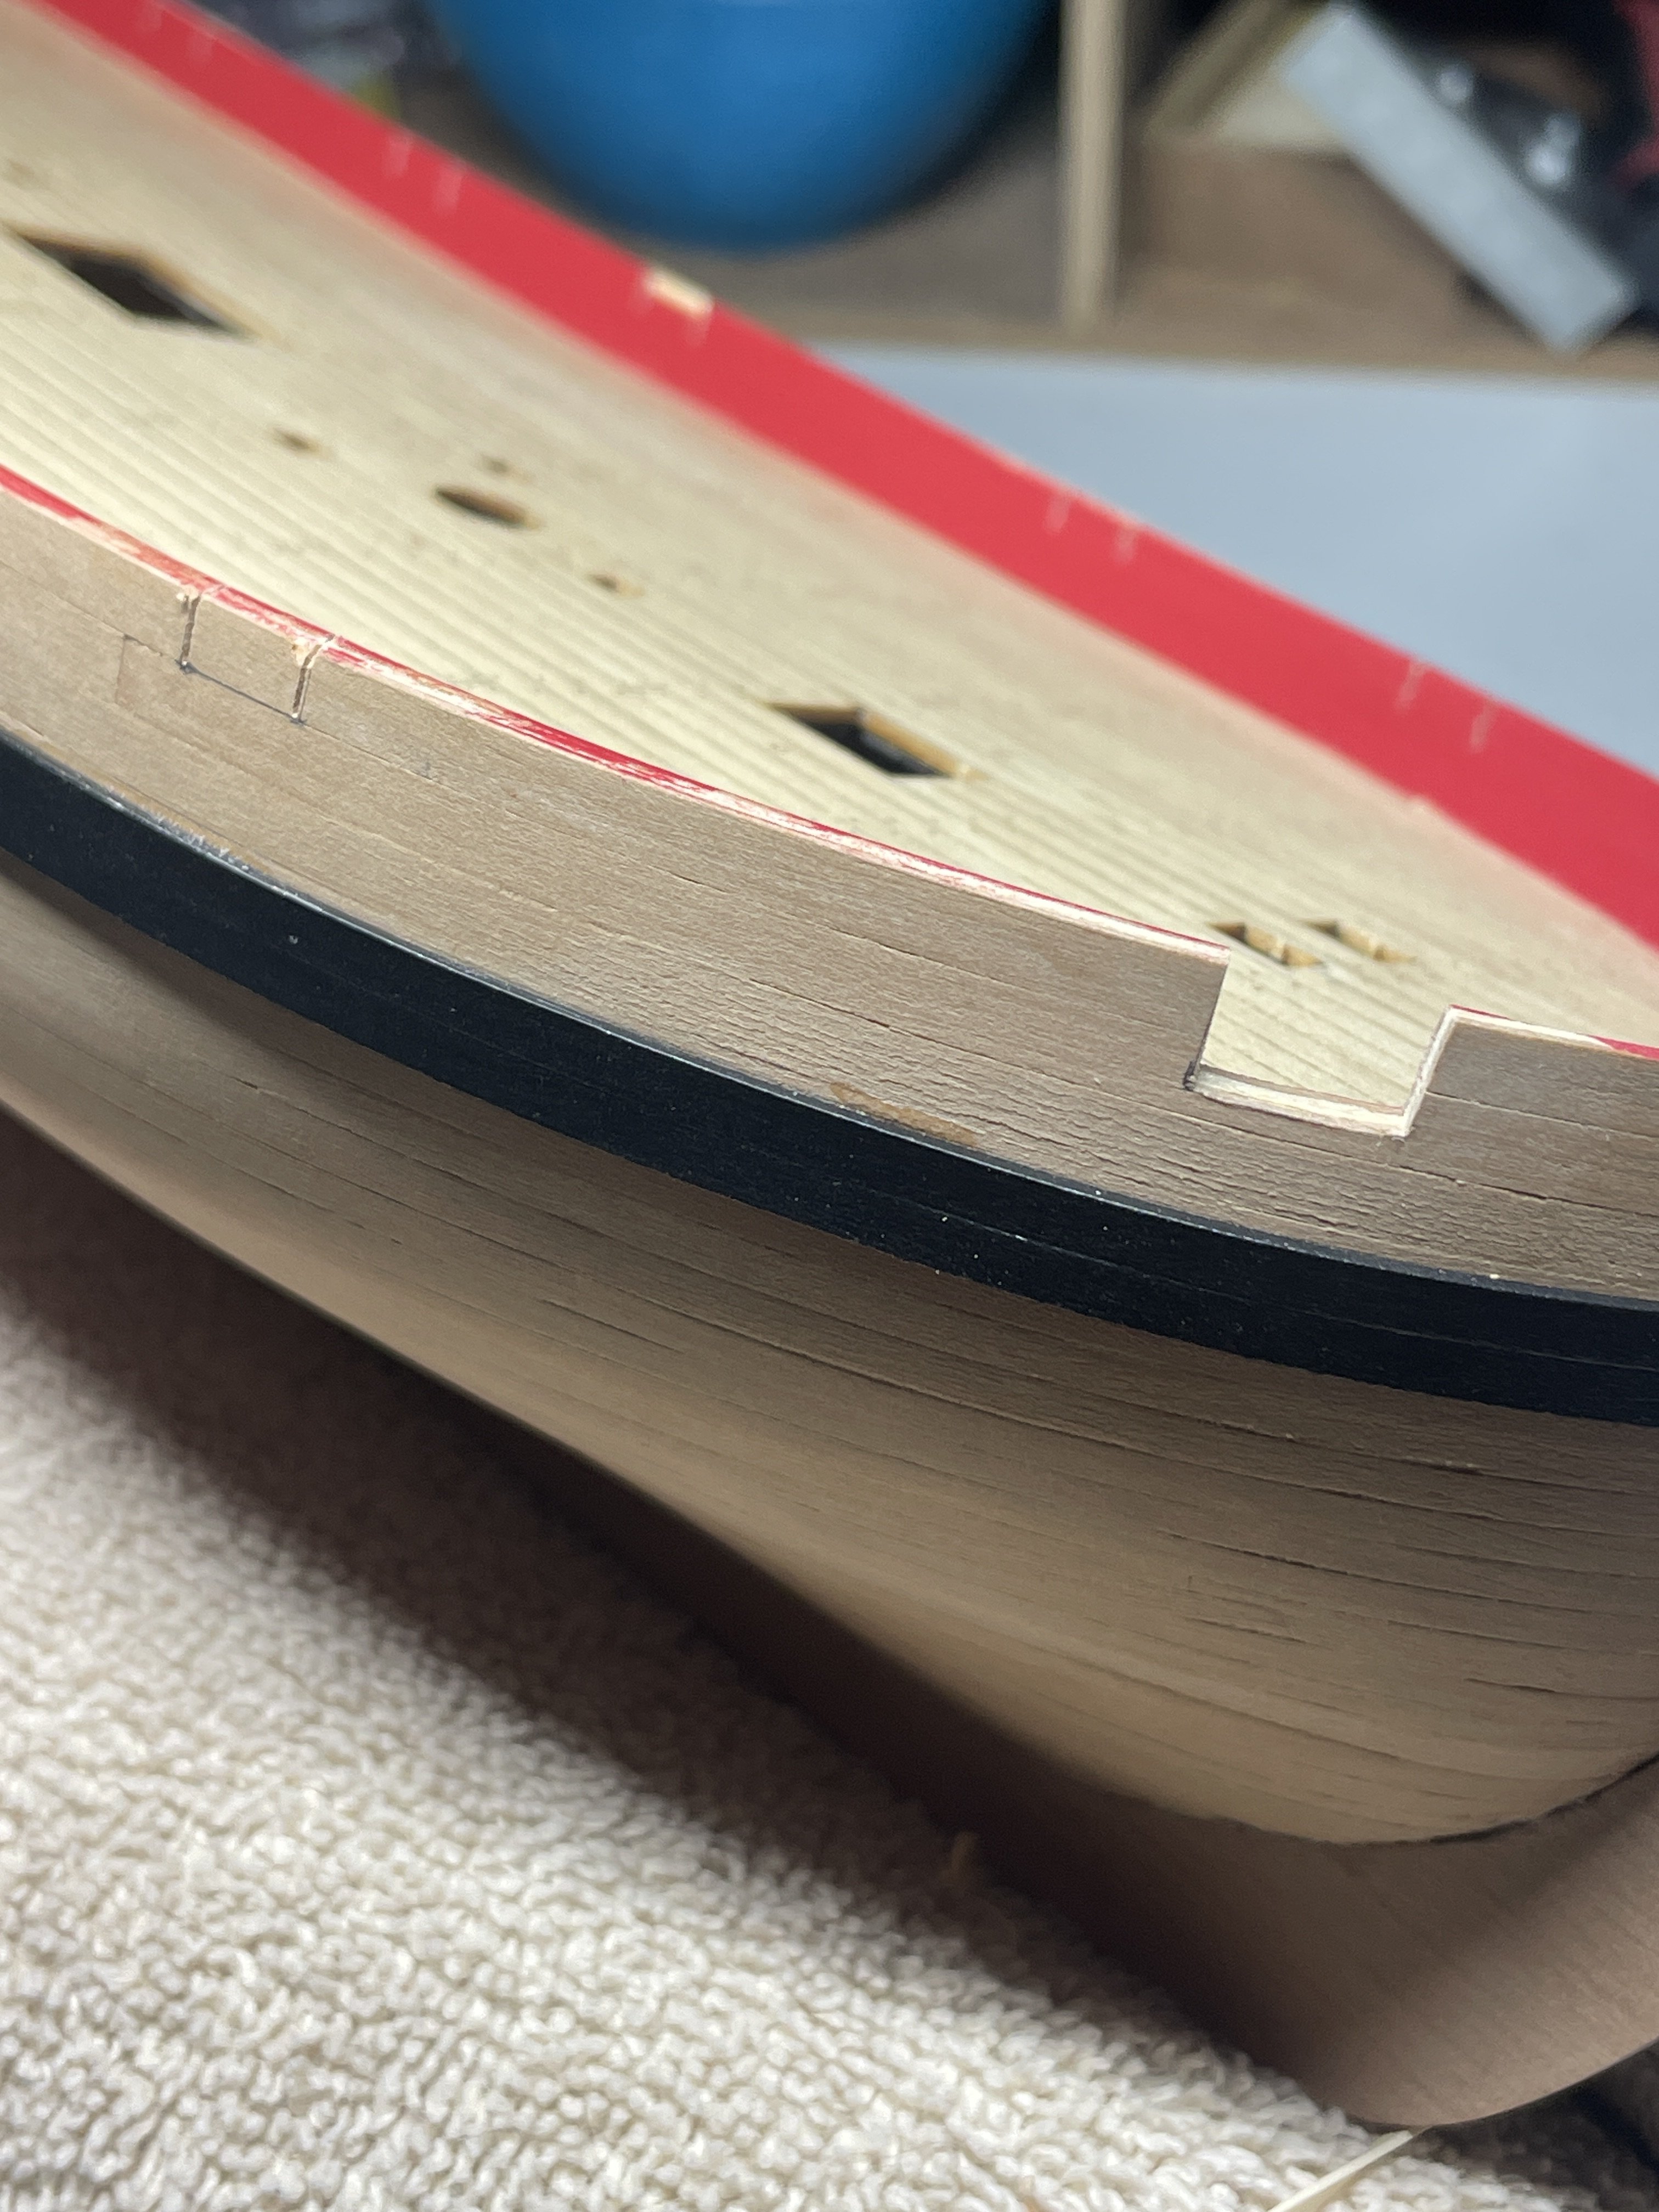
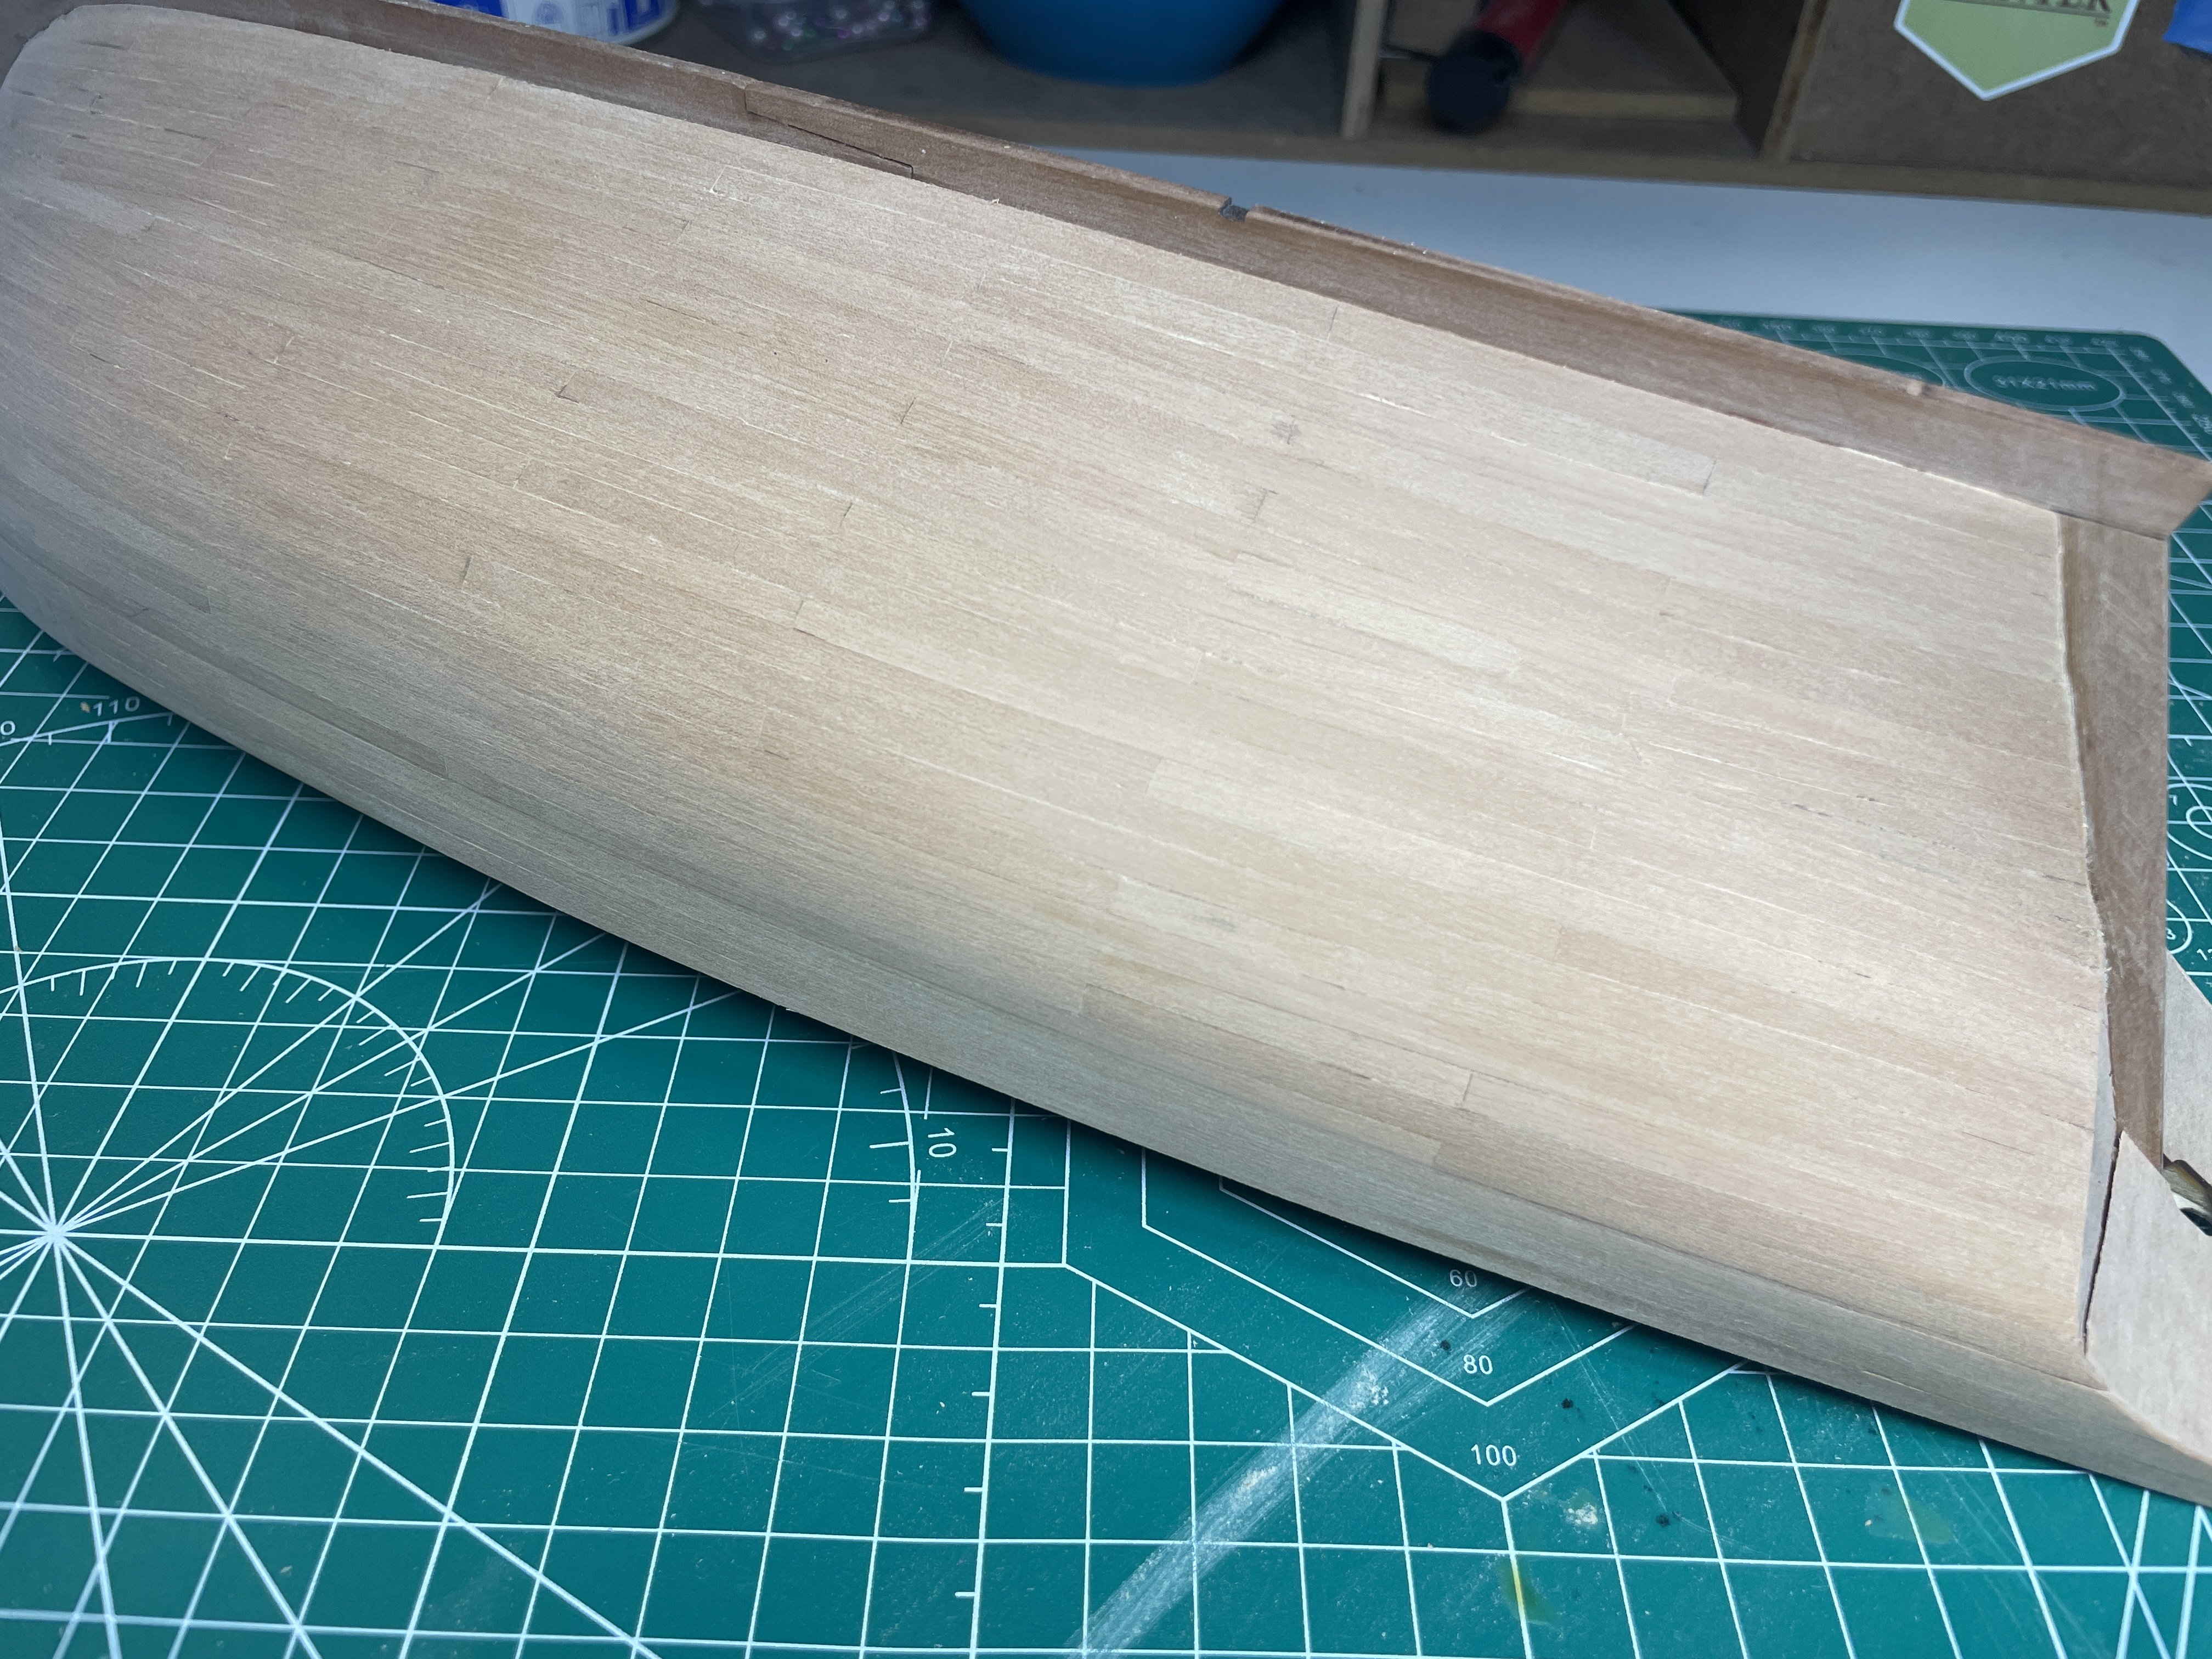
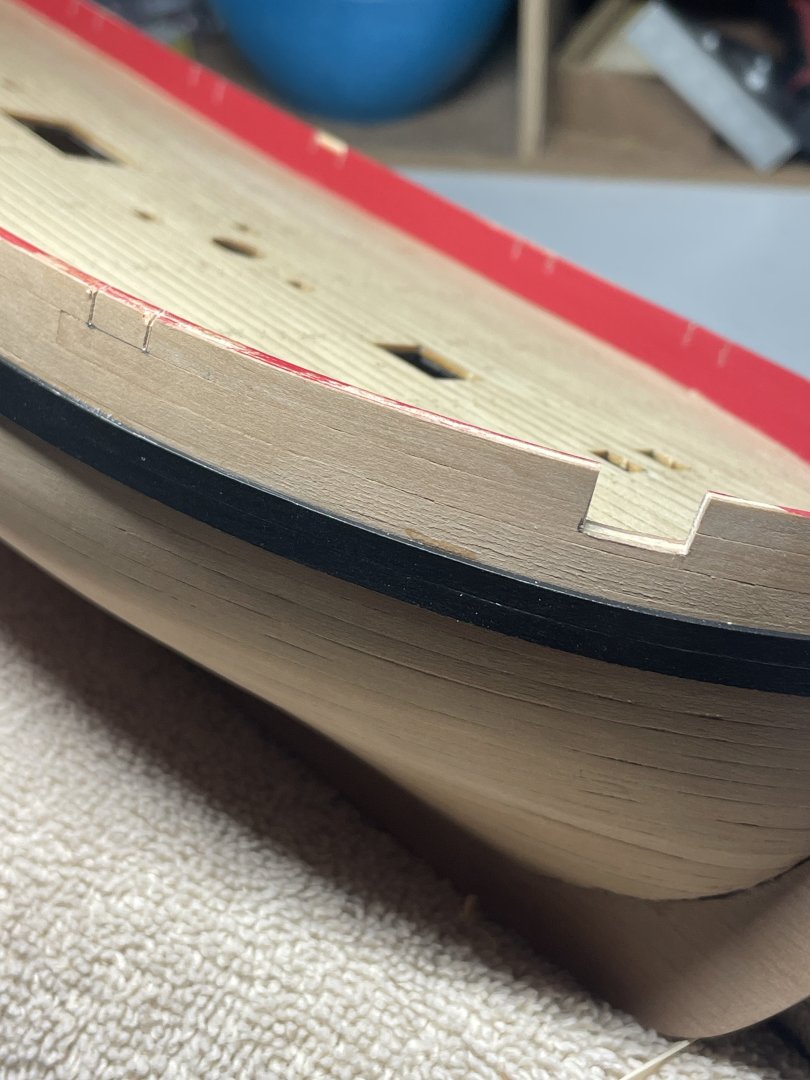
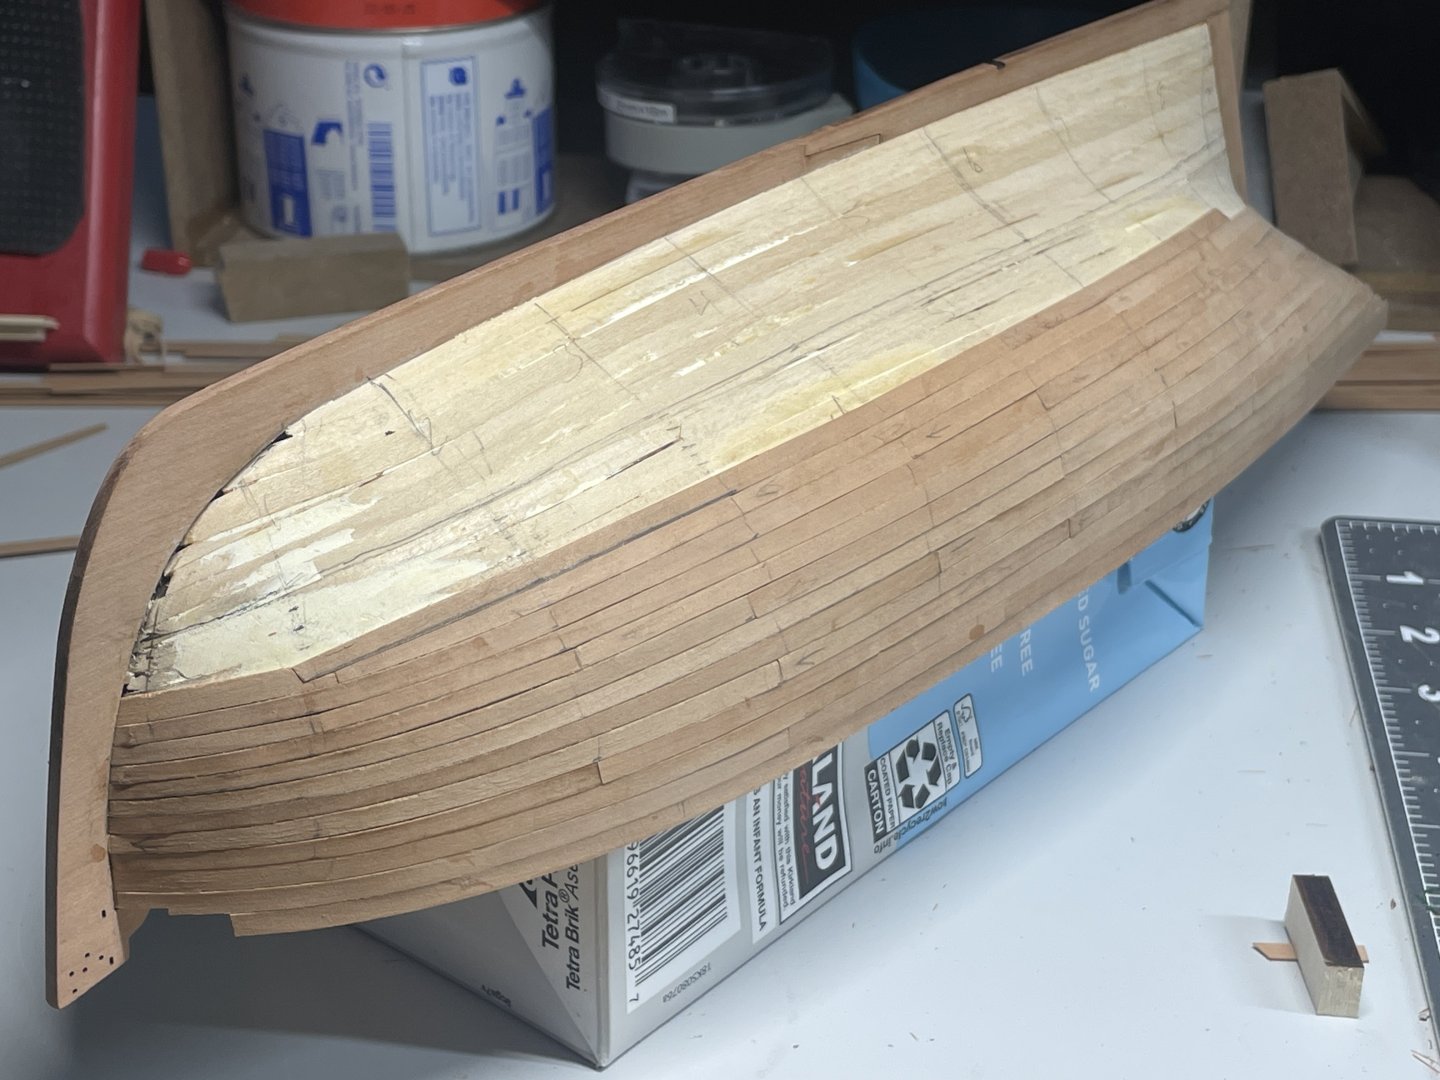
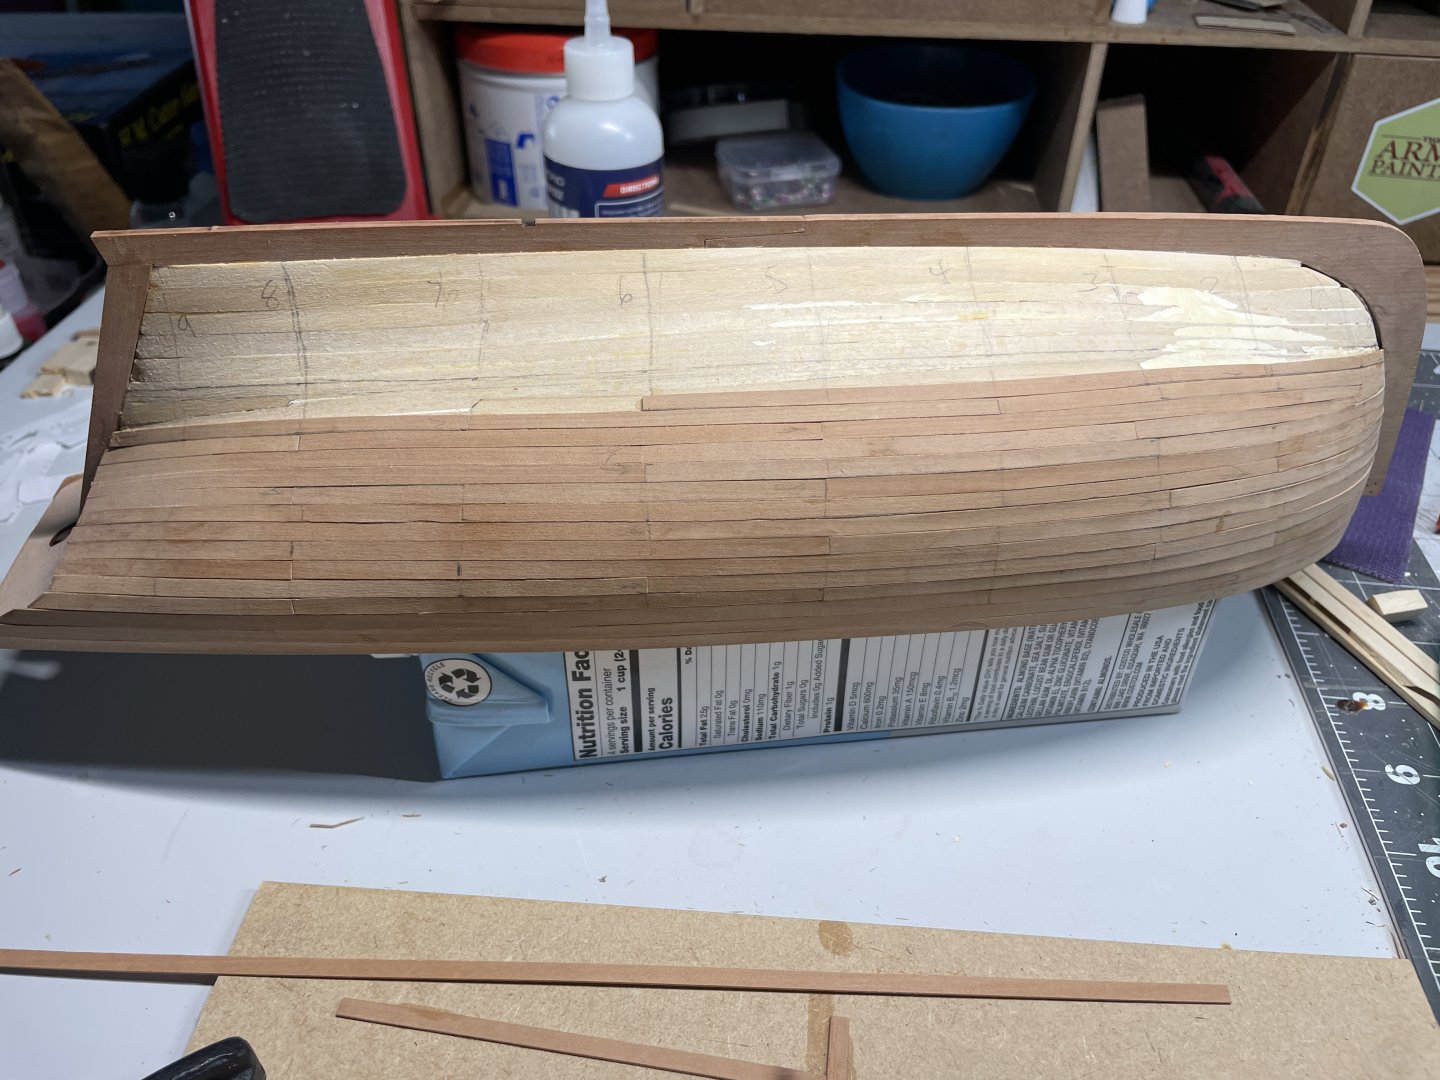
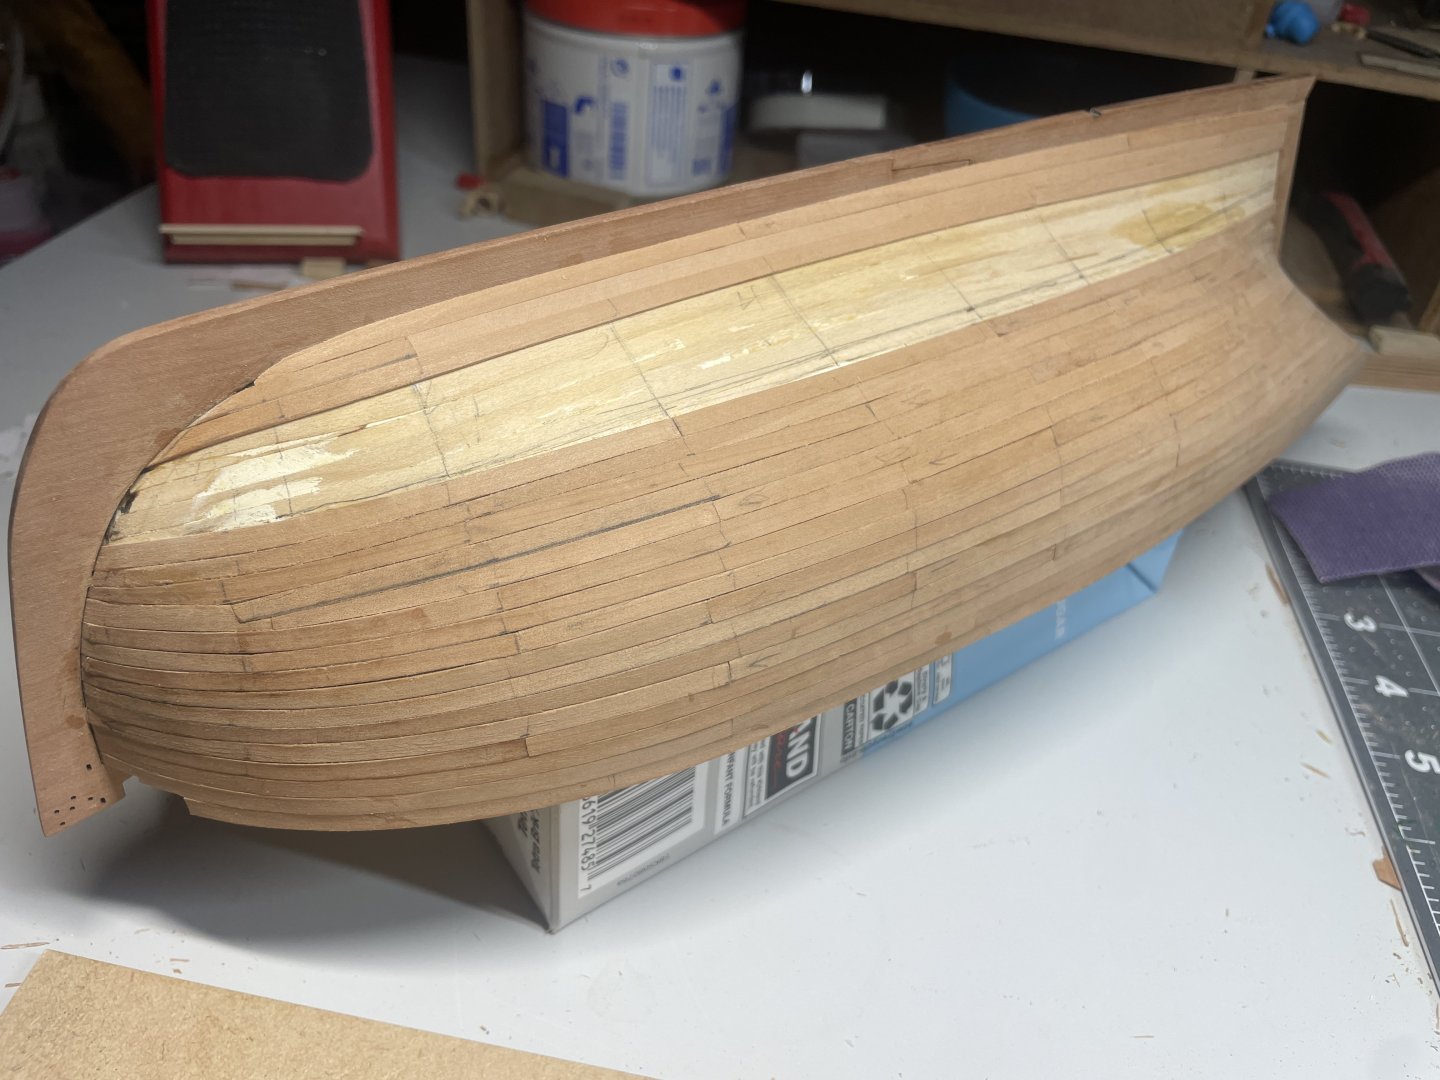
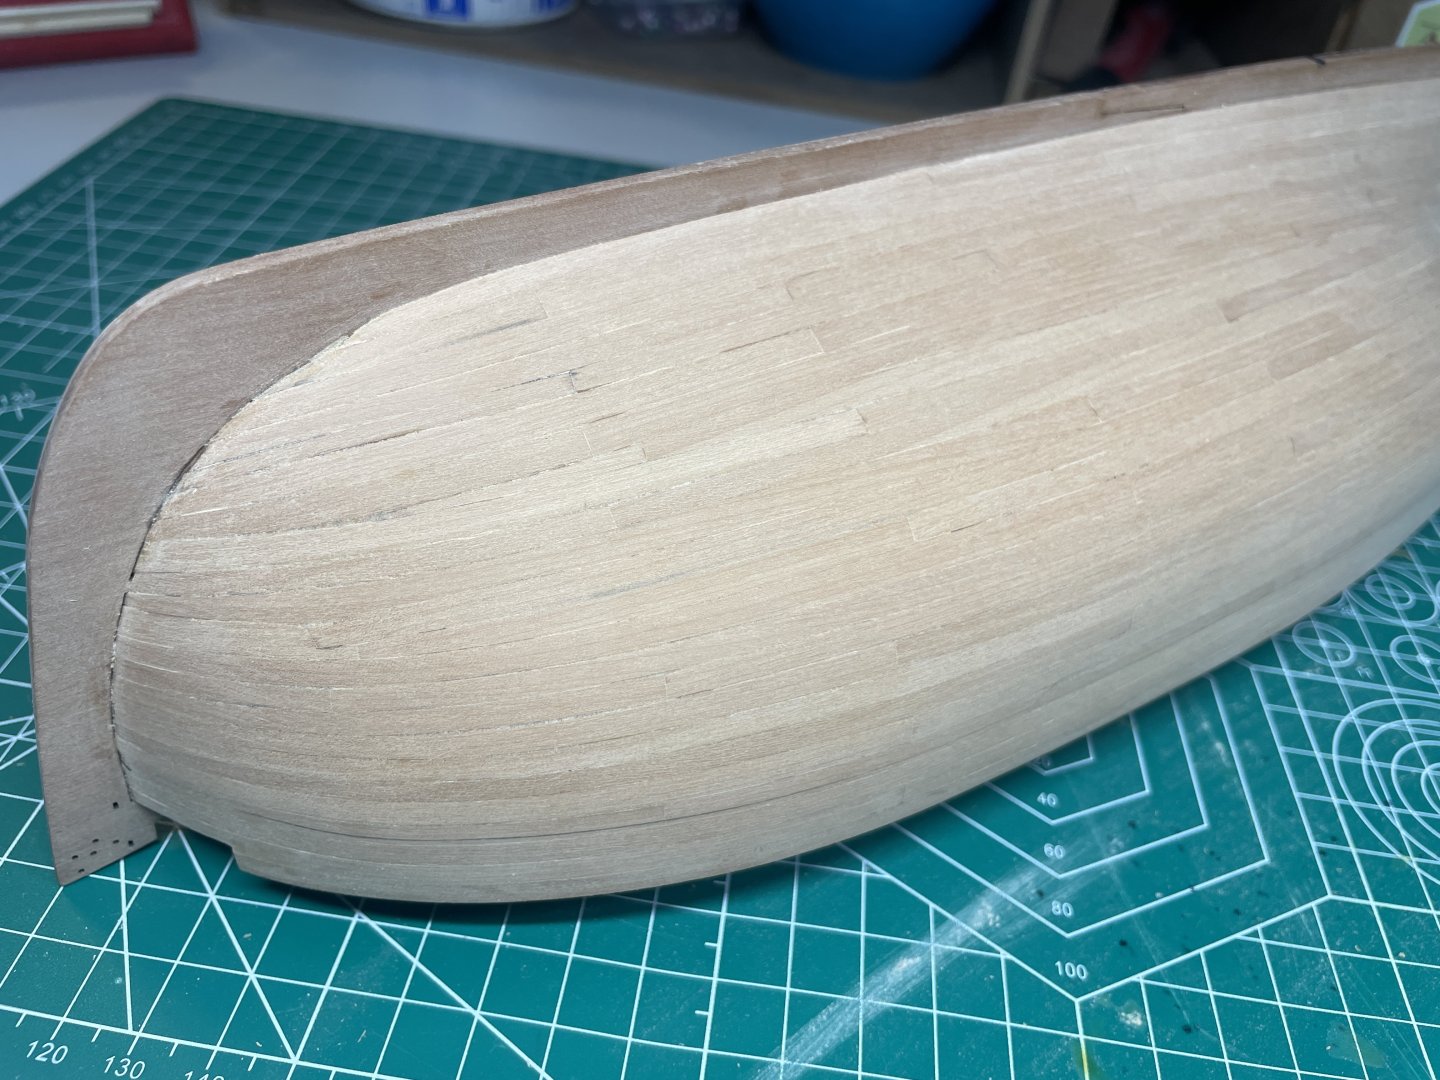
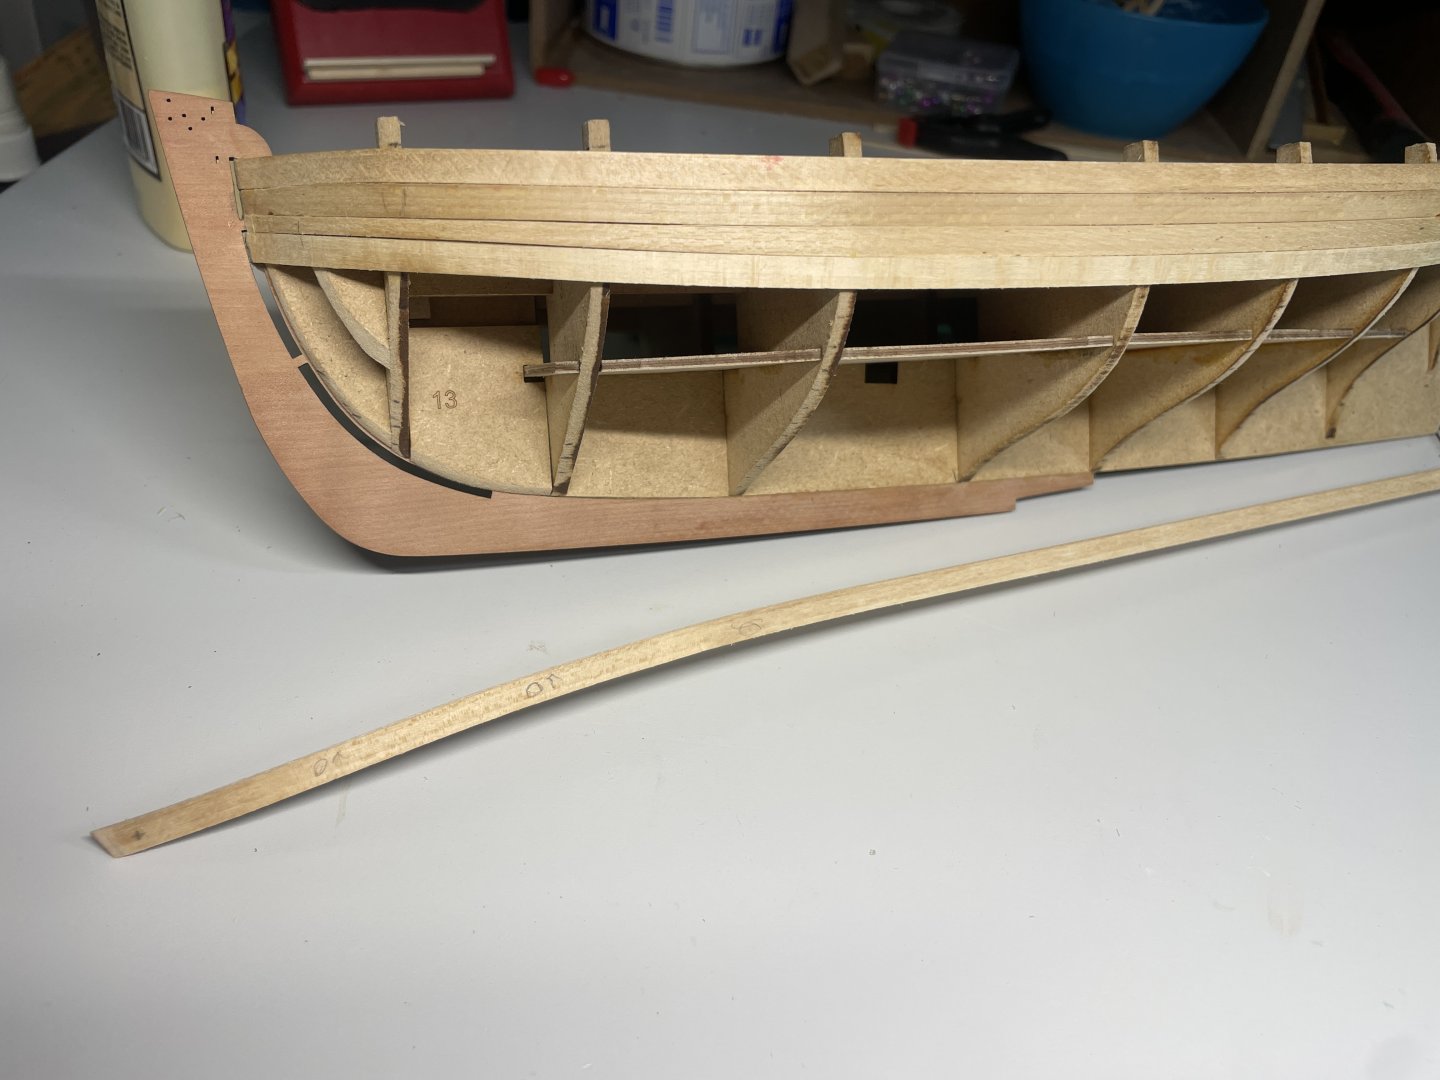
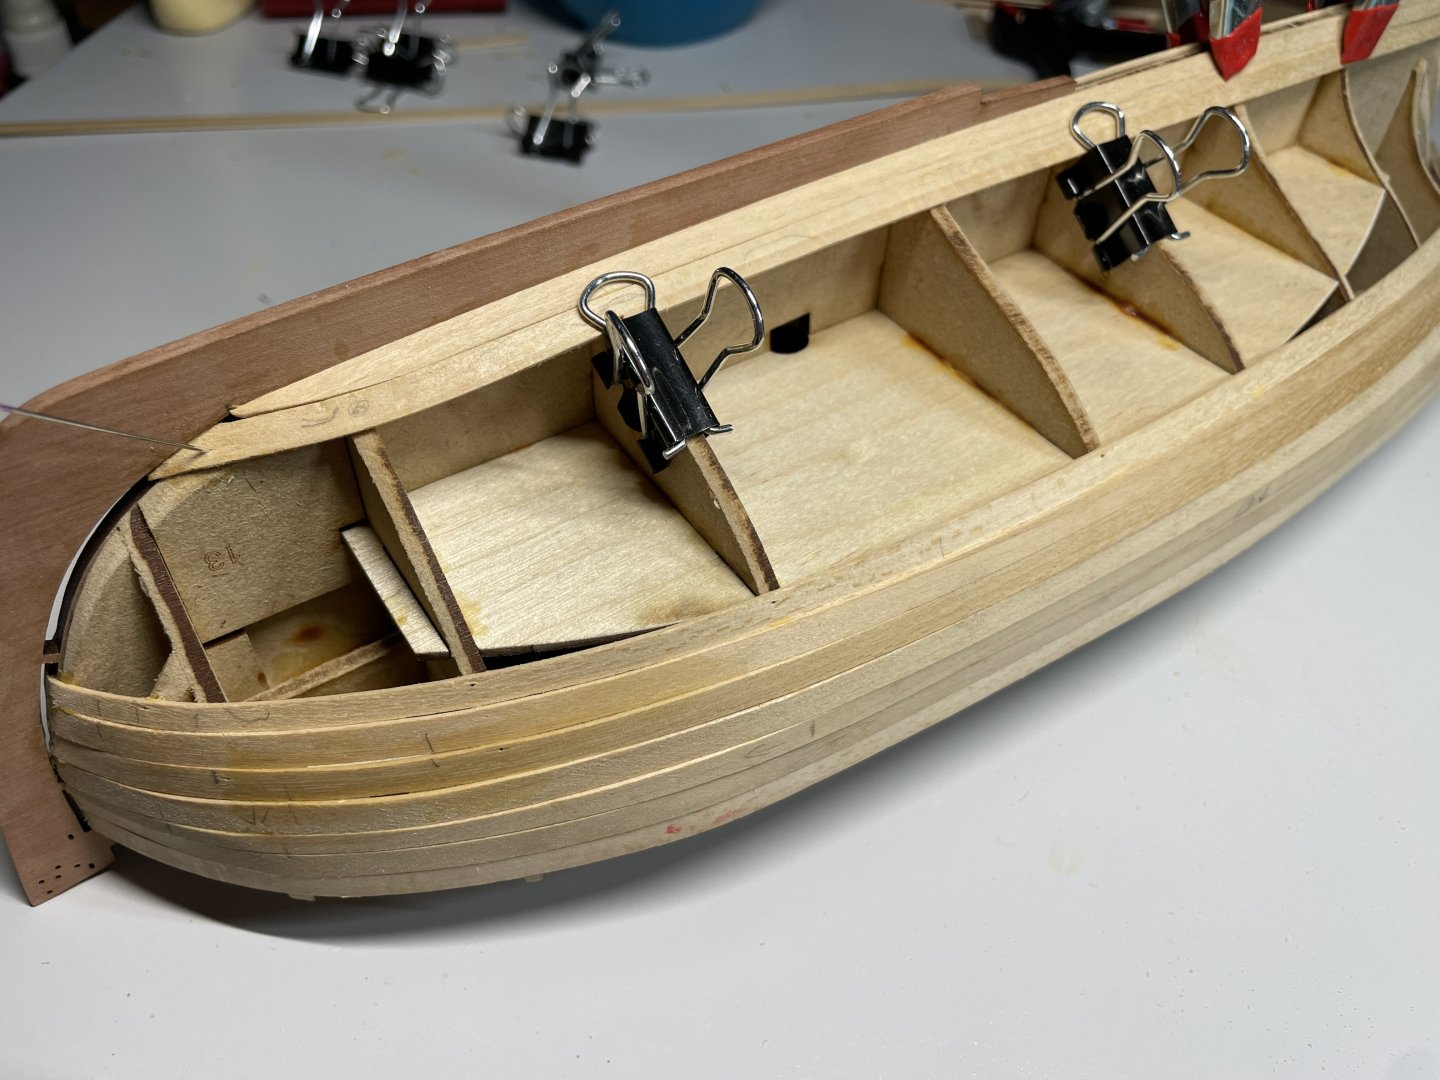
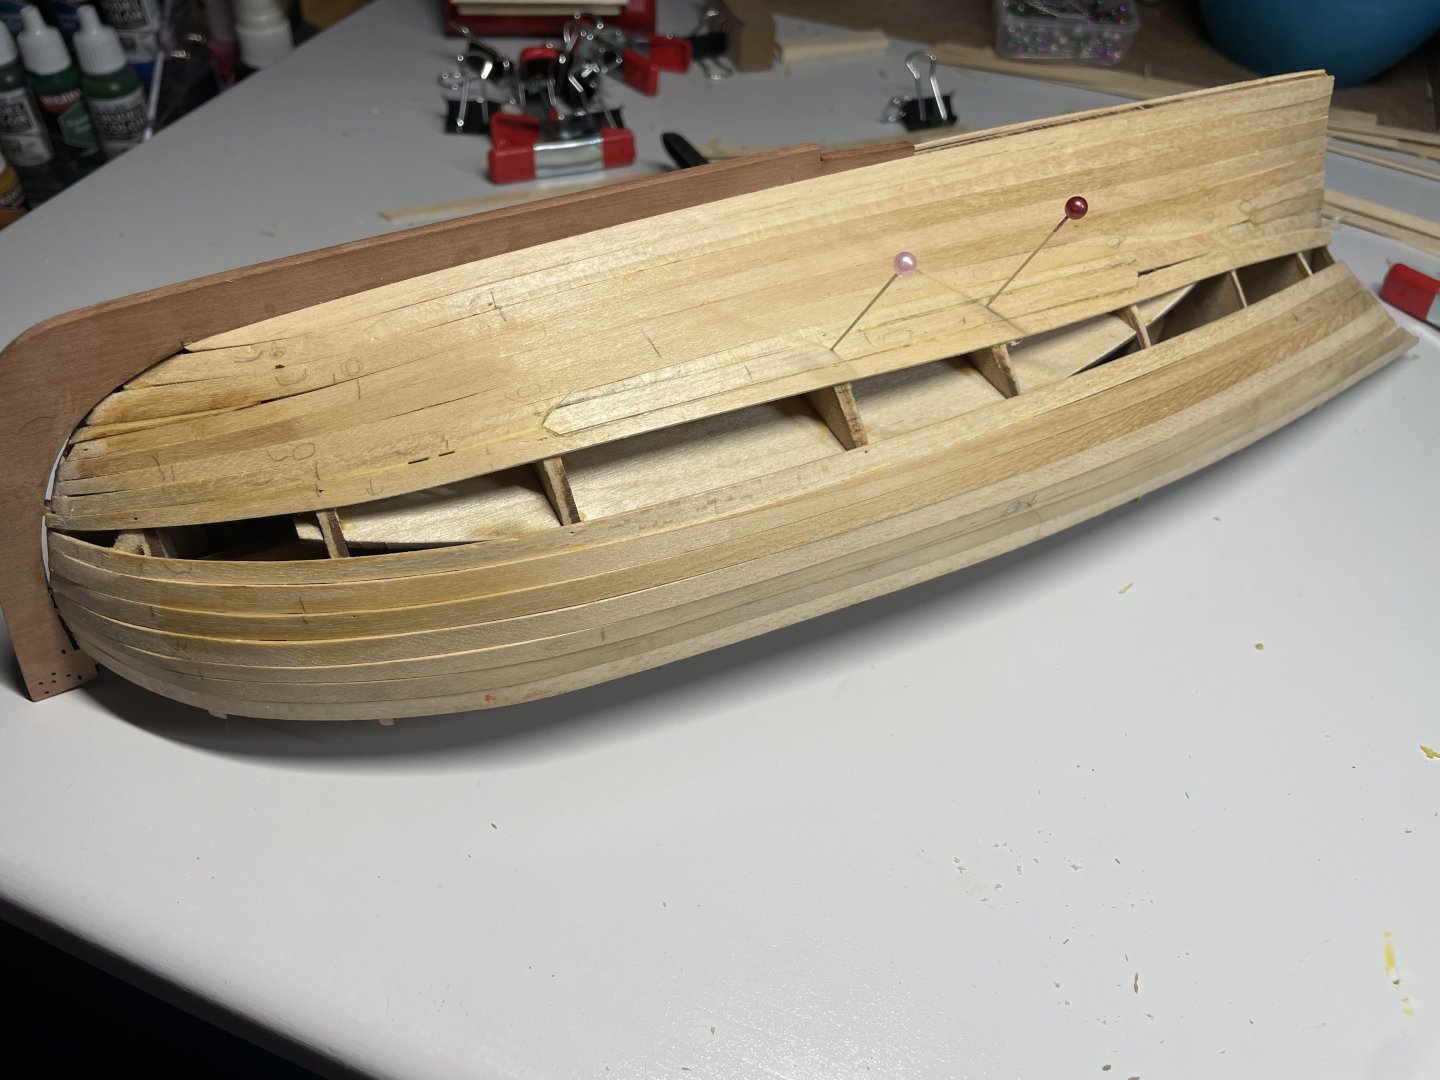
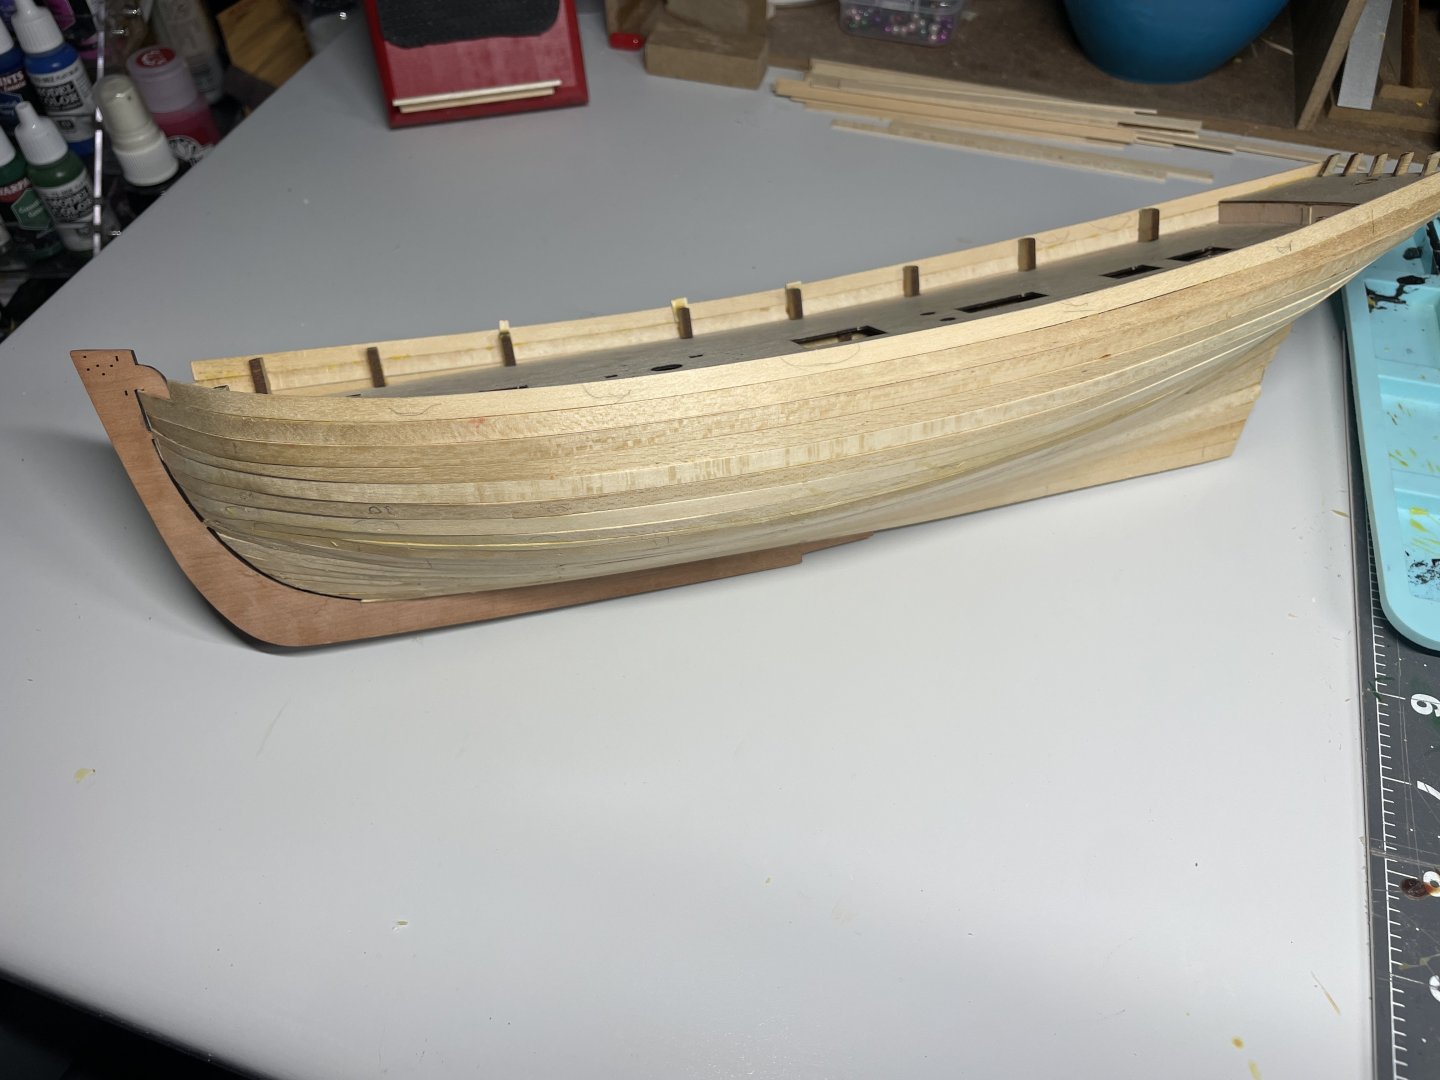
So now I’m on to the second layer of planks. Again I went through soooo many build logs to try to get a handle on what to do. This step really had me nervous. Someone directed me to an older PDF on planking that was a big help in illustrating things for me. I definitely learn best visually. Anyway after filling and sanding the first layer a couple of times, not sure why I have no pictures of those steps, I’ve got what I hope is a smooth well shaped hull. Getting the bend around the bow is certainly a challenge. I didn’t have much breakage but I did a few. Not so much from forcing the wood onto the boat but trying to rush the tight bend with the water and the iron then bending it over too quickly. After much thought I did use CA for the glueing. I made a tiny glue applicator by heating a needle and cutting off half the eye to form a fork to pick up glue. I used that and the tiny glue applicator tips also. I was very judicious in the amount of glue to use as I did not want to deal the mess of squeeze out. I made a hard effort to get the plank bent to fit before it was on the boat. That way the glue is not fighting the wood, just holding it in place. I experienced about the same amount of differences in the planks as other’s have mentioned, some being a little thinner and such. I would consider it well in tolerable levels and I never felt I was going to be short. I made a poor man’s keel clamp. It’s mdf with a 1mm rabbet in each side then I glued in some screws and added wing nuts to the other side. Works great. When it was time to turn it over I used rubber cement and glued it to an almond milk container, yes I washed it out. Now that I think about it a full one would have been way more stable but I think I would have had to fess up when I heard “What happened to the almond milk?!!!” From the other room. I had some issues with a weird angle showing up near the bow as seen in the second photo. Below is after it’s been fixed. Is this OK? Is there something better I could have done? Planking complete. I’ll tell you what, that was a relief. There were plenty of times I was sweating hope it was going to look good in the end. I know filler can hide a lot but I was really trying to get tight joints. Here she is pre sanding. The pattern of the planks is off somewhere and the two sides don’t match on 1 row I think. I’m good with it though. Warts and all, she’s mine. (Not sure why the lighting in a few shots had the wood so light colored. Actually it’s the colors in the above photos.) Sanded and ready for some next steps! I was quite happy with the planking. I’m glad they all tucked into the rabbet nicely and my joints were ok to me. I’d love any feedback as I’d like to improve my skills all the time. Thank you for checking in! Next she starts to get some color. Chris


- 38 replies
-
- 8
-
-
- Alert
- Vanguard Models
- (and 1 more)
-
Kind of along the line that Jacques said. The smack is very good preparation for other larger ships. The pram in my opinion is excellent for absolute beginners, after the dory. However, if you have some experience in this area “jumping” ahead to the smack is not a problem. Personally I enjoyed it quite a bit more than the pram. Of course there are other manufacturers to confuse you further. 😉
-
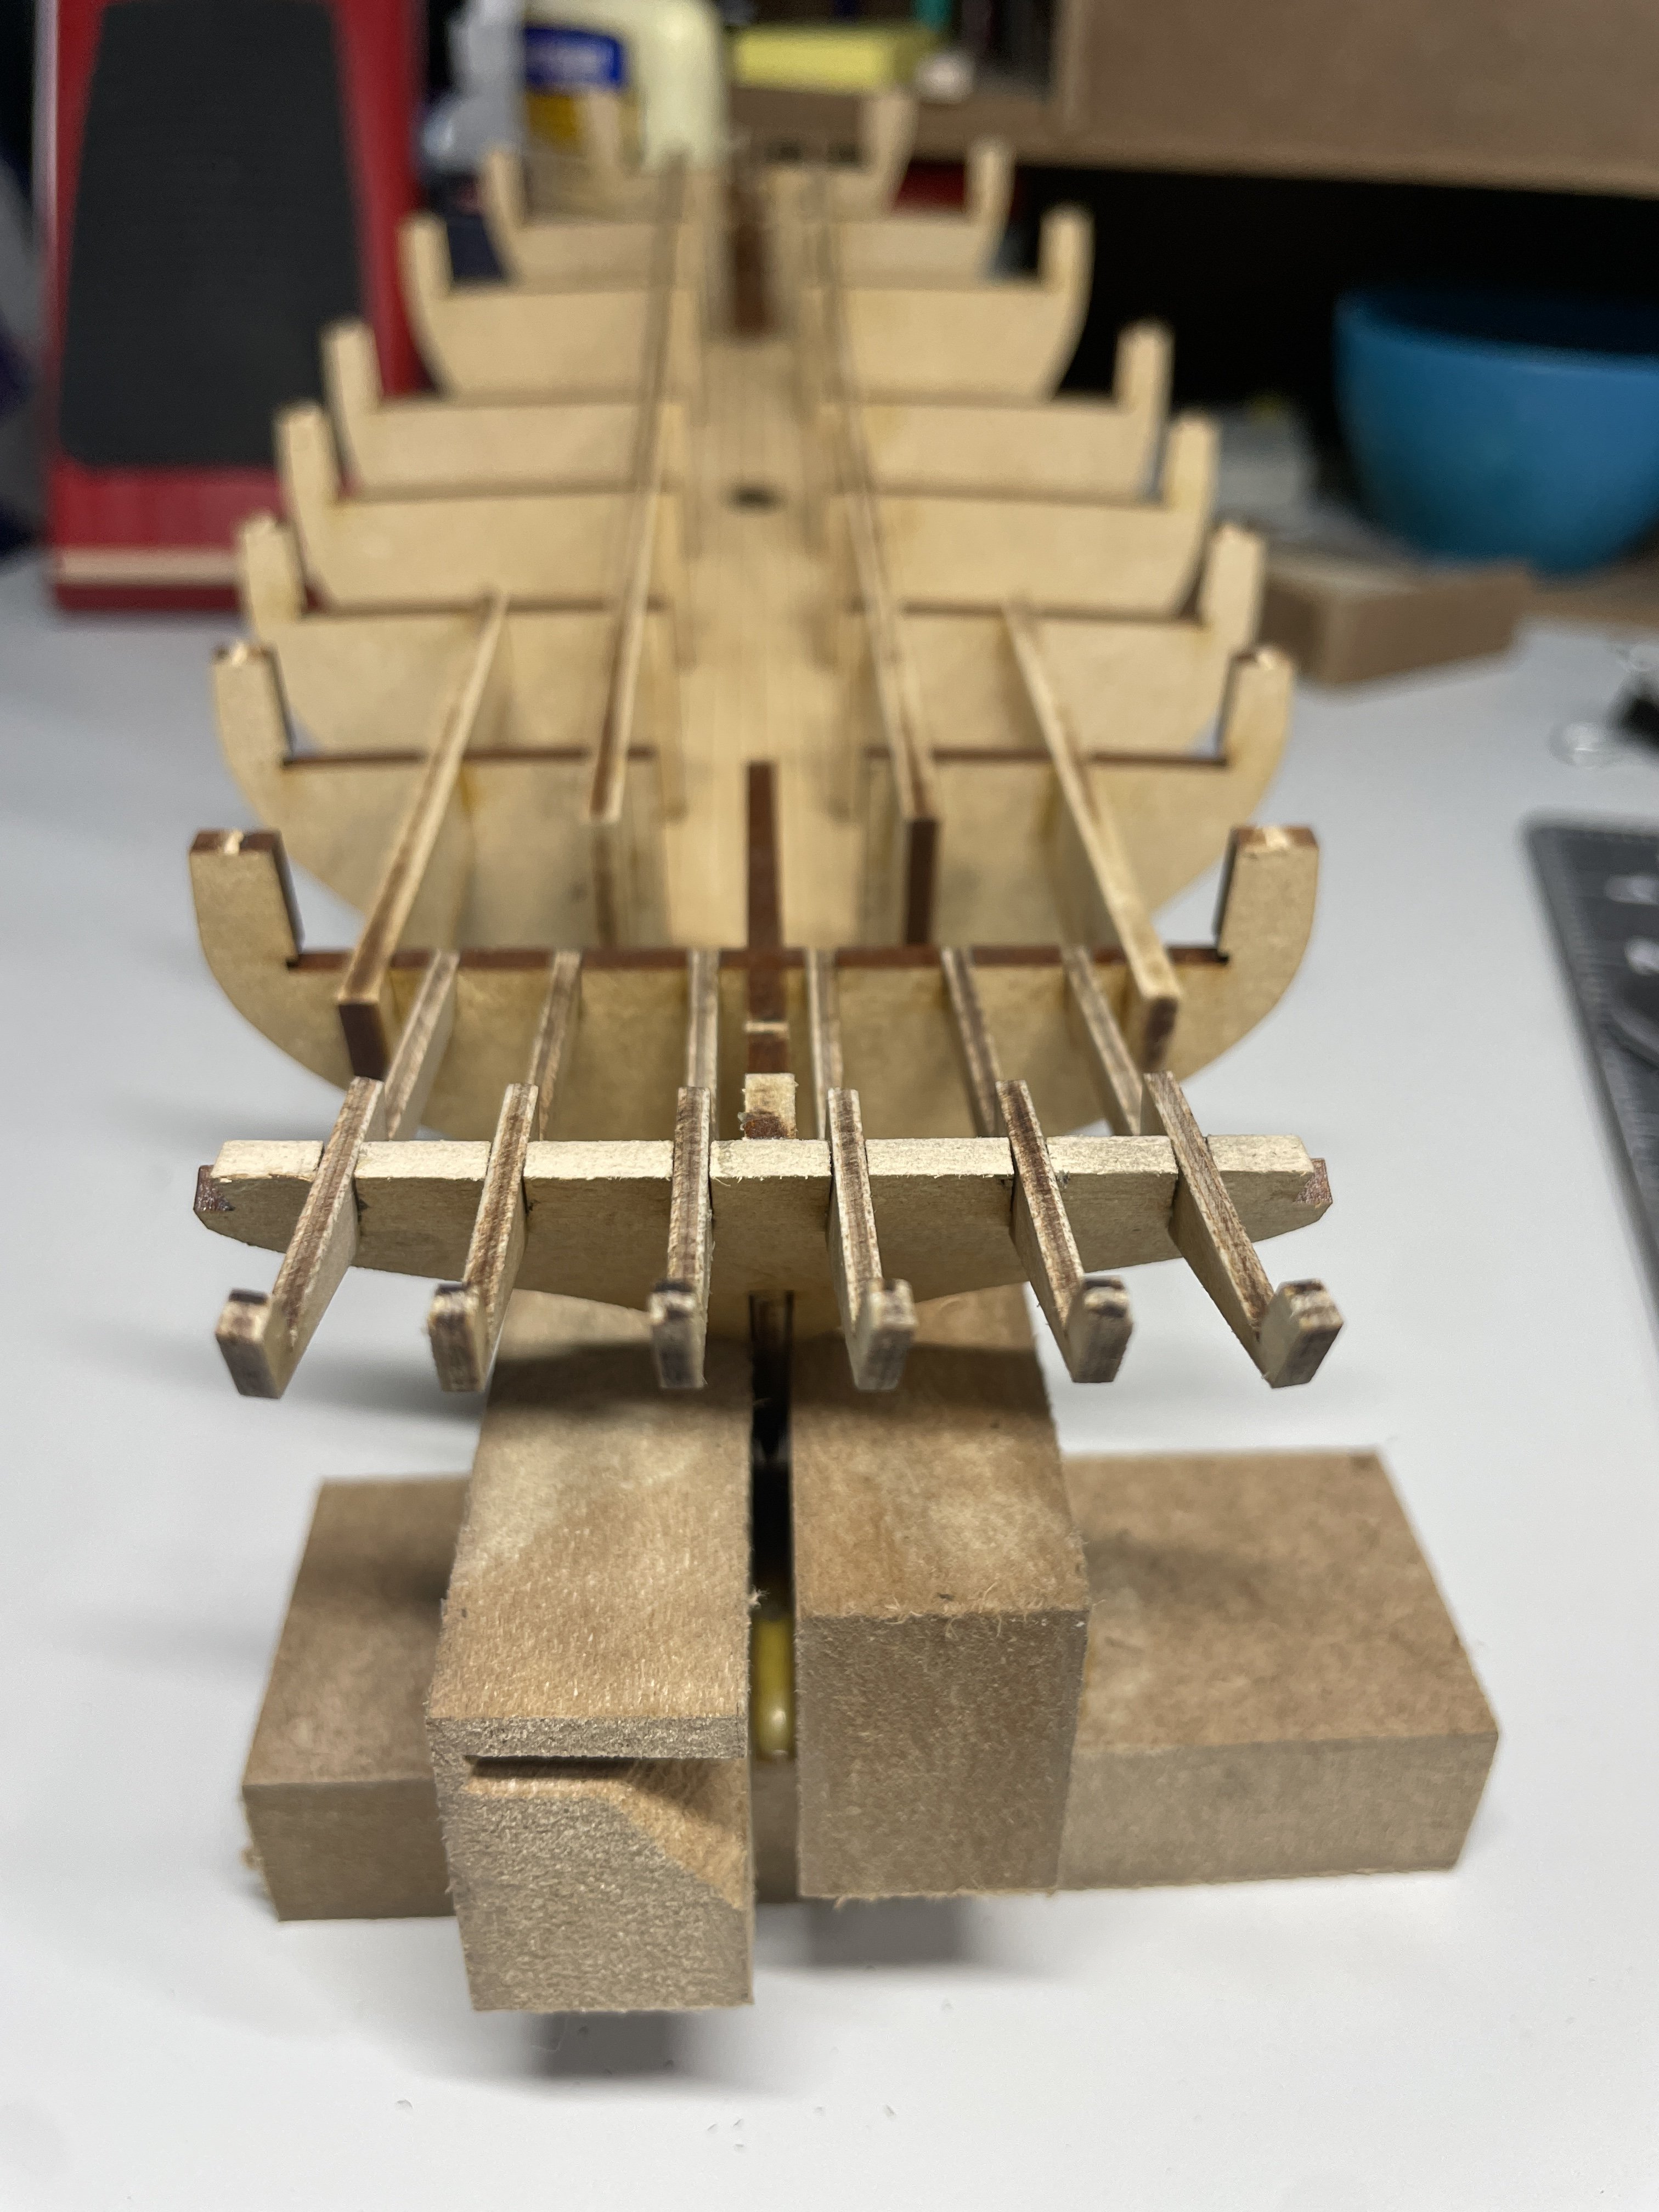
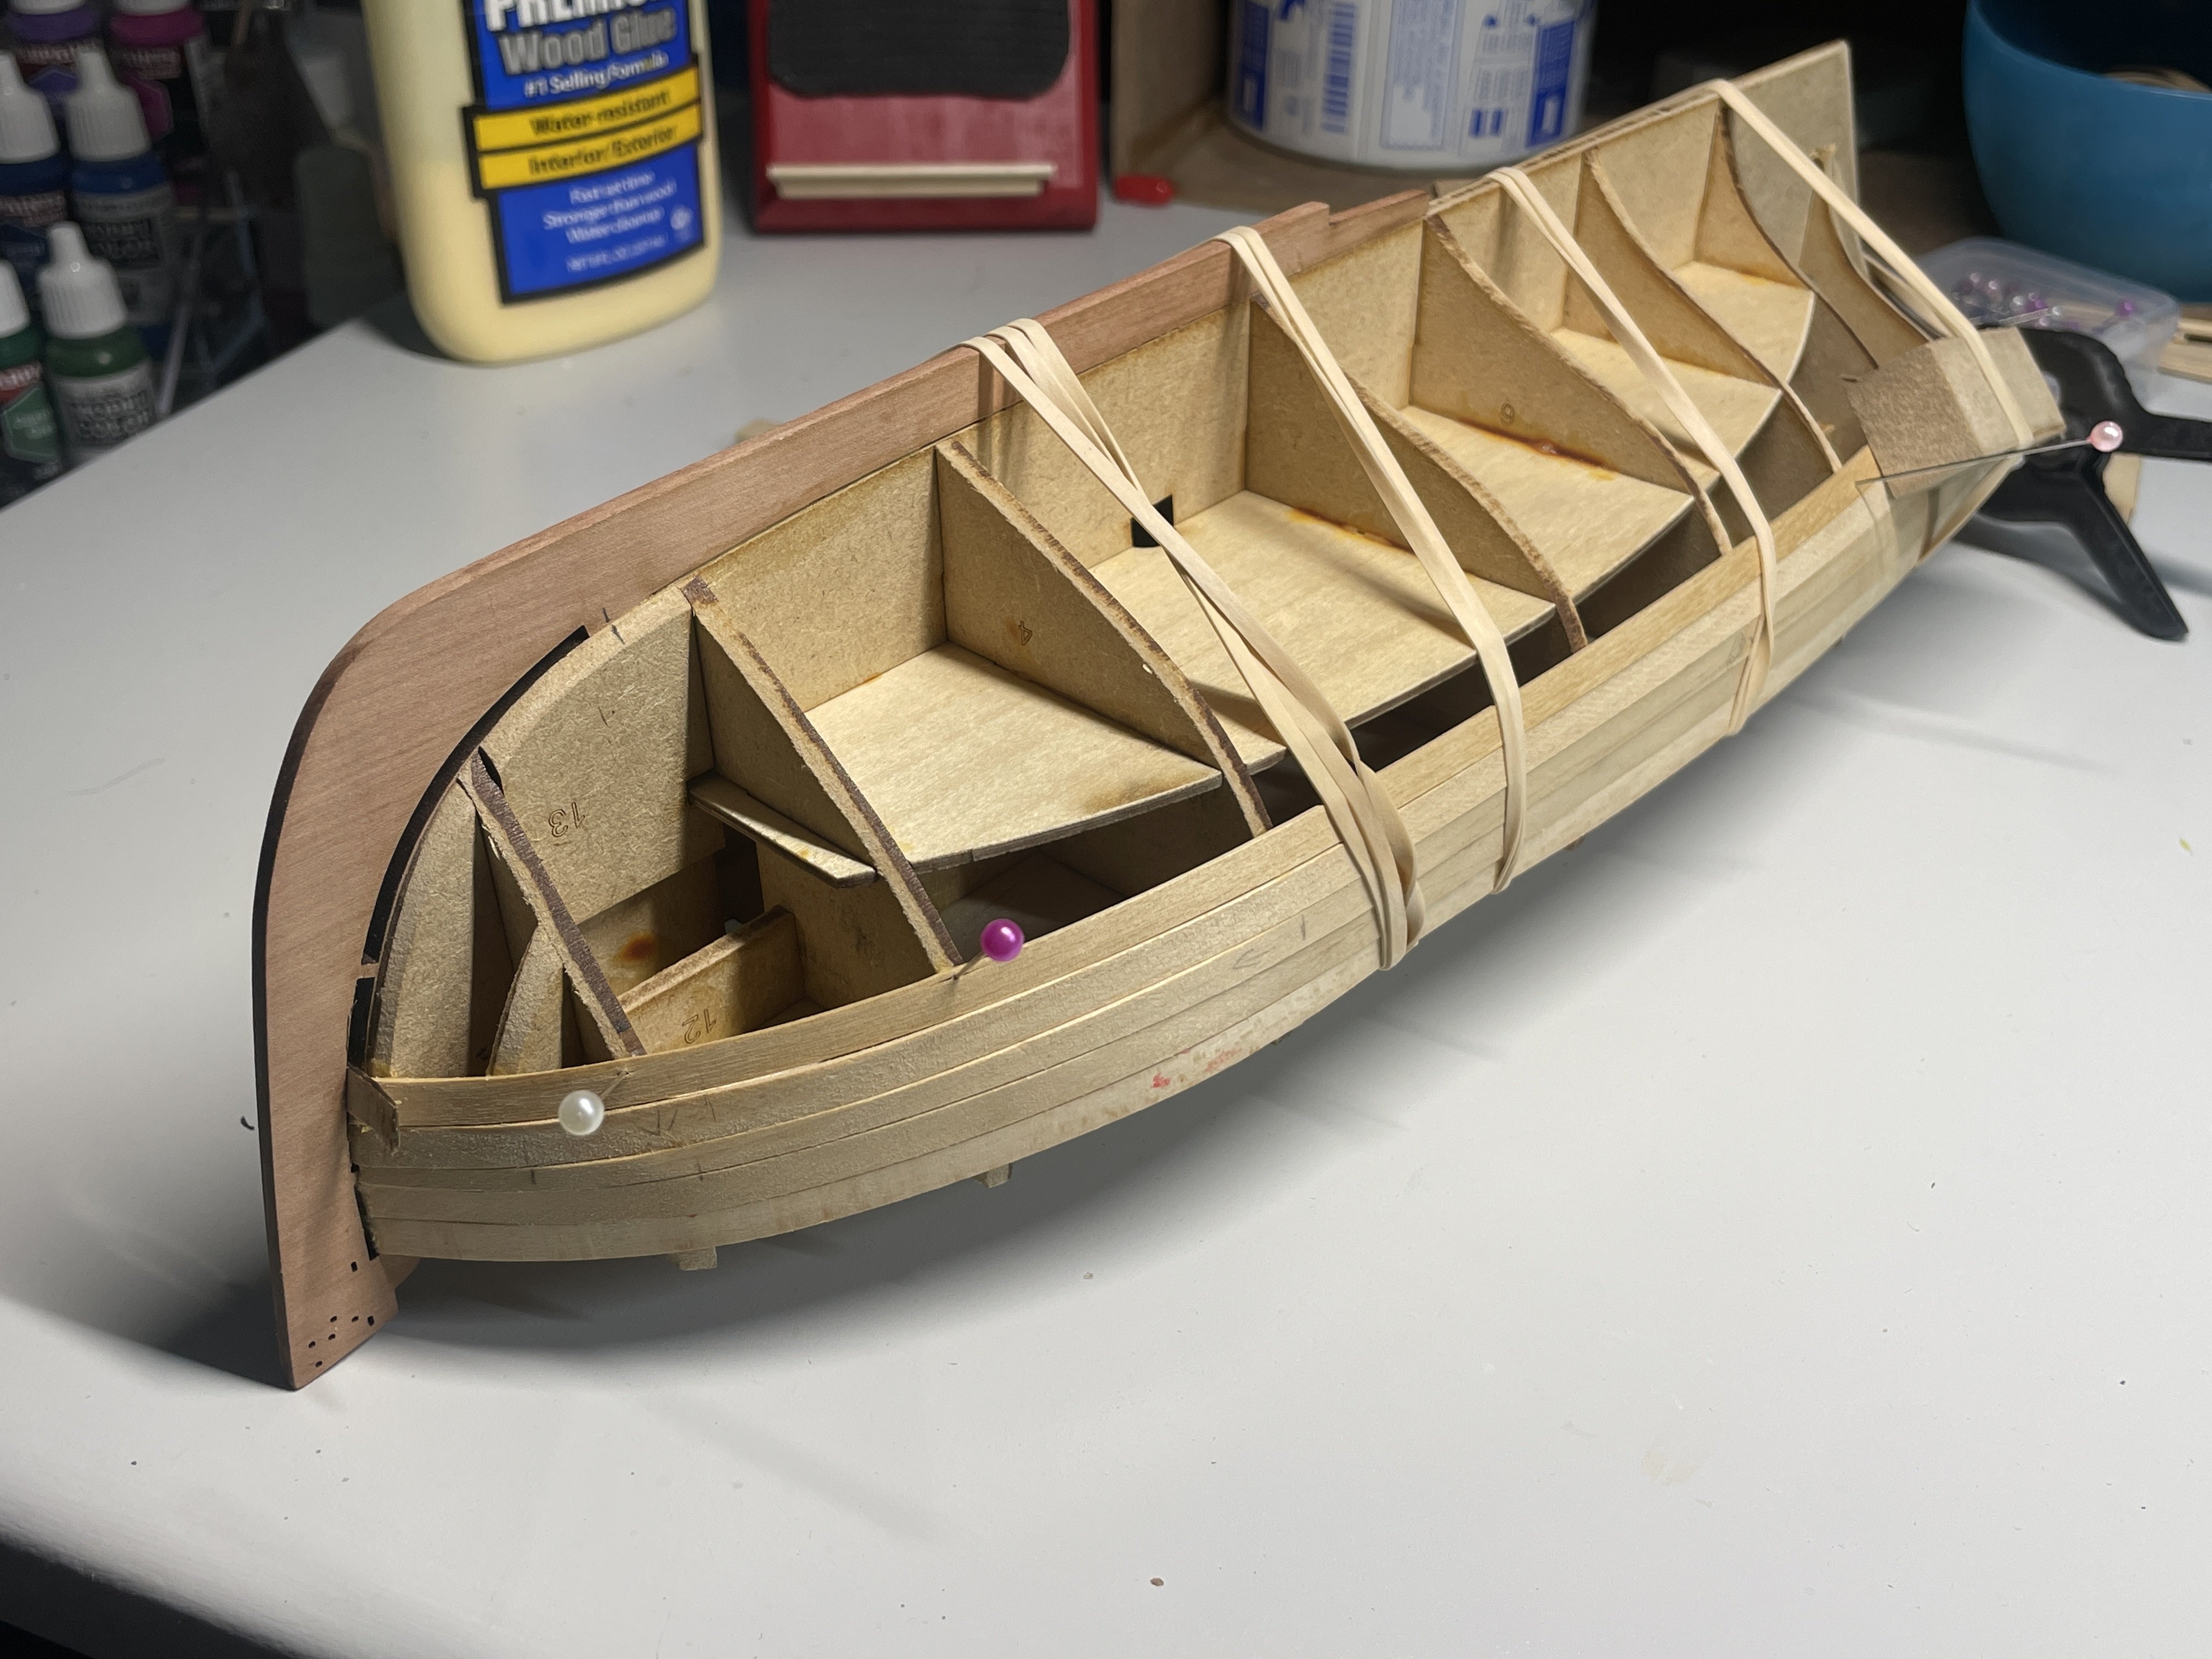
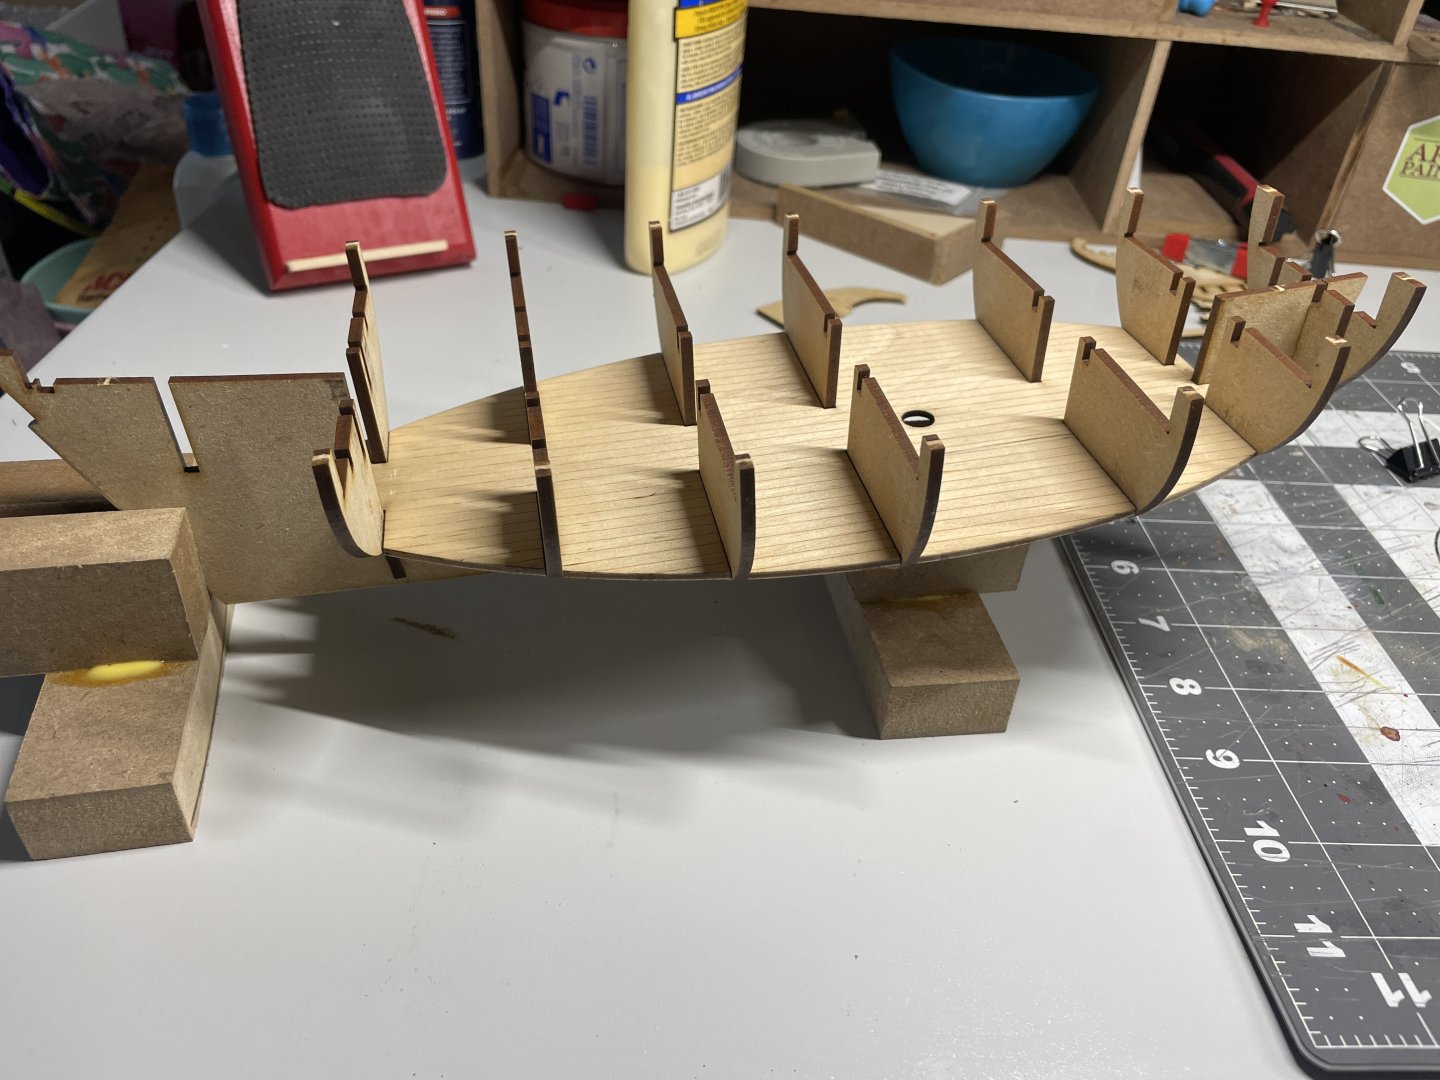
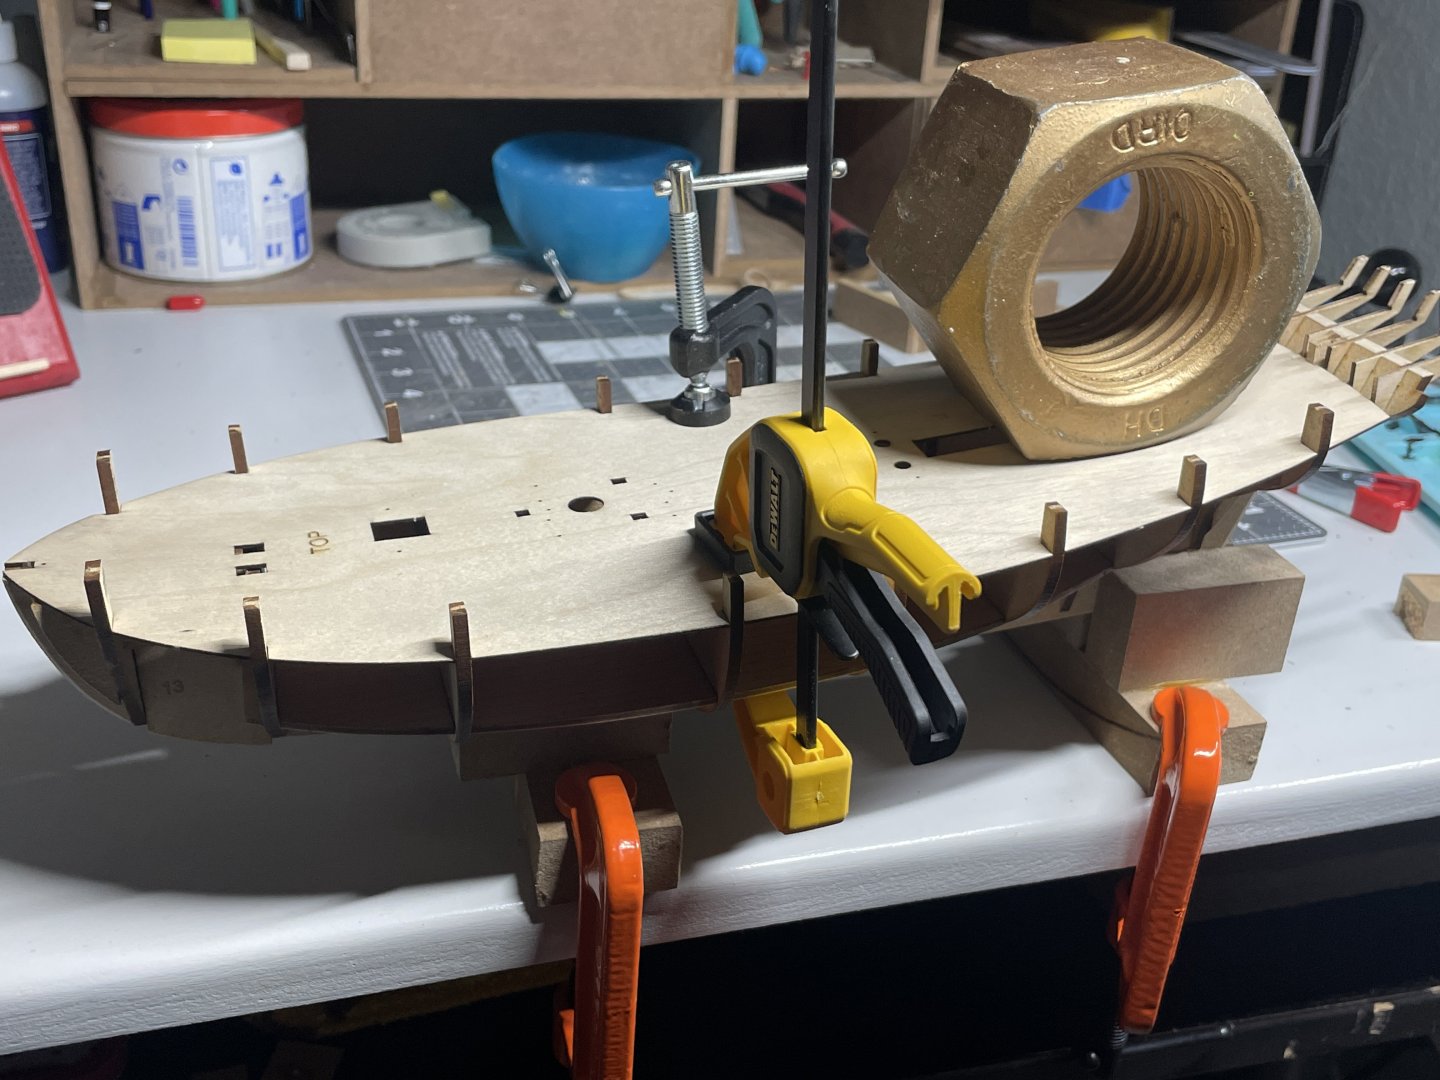
This is my fourth build after completing the Dory, Pram and Lobster Smack. I’ve been looking forward to this build for a while. In real time I actually started the build on November 28th 2024. I’ve been worried about starting a log as it’s just one more thing to keep up on. Now that I have a head start I think it’s safe and I can keep it updated. Most of my build is based on build logs by @Thukydides and @Blue Ensign. I am very appreciative of the work they shared in their very detailed logs. There were many others also and I will call you out when I use a particular technique I learned. The beginning is pretty straightforward and has been covered very well before now so I will kind of speed through this part. The kit is very well made and went together very nicely. I did make up some little slotted blocks to hold her upright. There has been plenty of discussion about these parts not lining up on some build logs. I’ll be honest, they had me little concerned. Mine lined up fine. False deck going on. Now the fun really begins. Time to plank. I had decided early on that I was going to attempt this build at as high a level as possible. With that in mind and being new to planking a boat this size I had planned on the first planking to be a trial run for the second layer. I referred to many logs about planking both the Alert and others. I used @Chuck’s method of plank bending with water heat and a jig to make the lateral bends. I bought a little quilting iron with a tiny little foot. I saw someone on here use it. It is great. So here I go… ** One tip I will share regarding the little iron. I bought a timed outlet on amazon for about $12 and plug the iron into that. It has multiple settings for hours to be on. I usually set it for 2 hours, after that time it shuts off. So later I’m not wondering if I turned off the iron. I put a small piece of the pear planking in the rabbet to make sure I would have room to tuck that layer into the rabbet nice and cleanly. You can see I had to put a little skinny plank in there. By this point I’m just going by the seat of my pants. Best laid plans and all… I’m definitely going to need some filler, but overall I am quite happy with this layer. I couldn’t have done it without all the great logs and information about bending planks out there. That will about do for now. Next up, second layer planking! Chris


- 38 replies
-
- 9
-
-
- Alert
- Vanguard Models
- (and 1 more)
-
It’s not really that old. Maybe several months. I’ve been woodworking for many years. I’ve got older glue. Haha Titebond lists the dry film color as translucent yellow. My original glue dish looked the same (same bottle of glue when new) after some time. I’m thinking maybe because it’s so thick on the dish…? No freezing conditions here, although it’s listed as stable in freeze thaw conditions. I find that quite interesting. I don’t know how many times I would let it freeze and keep using it. 🤣 I appreciate all the responses!! Anyway, I’ve replaced it today with original Titebond. First thing I did was squeeze a big blob into my dish so I can see what it looks like tomorrow. Original Titebond is an aliphilatic resin emulsion. II is PVA. 🤷 we’ll see how it does. I’m sure it will be fine, it’s wood glue. Just learning about some of the minutiae. I’d still like to try Super Phatic but can’t seem to find a source besides Amazon and it’s $20 for 50 ml. 😱 Thanks Chris
-
I’ve been using this bottle of glue on four models now. When dry it turns this dark red/brown color you see on my glue dish. I am pretty careful about cleaning up glue squeeze out but I did missed a few spots on my first build, the dory, that I could see later. Of course it was painted so it was ok. Moving forward does your glue do this? Is it normal? I’m thinking of changing to the aliphatic resin I’ve seen some builders use. Thanks for your input! Chris

-
Jacques, your work is always so precise. Excellent! Chris
- 312 replies
-
- 5
-

-
-
- Chile
- Latin America
- (and 6 more)
-
Beautiful work. Congratulations on completing her! Truly wonderful build log. Chris
- 207 replies
-
- 2
-
-
-
- vanguard models
- Duchess of Kingston
- (and 1 more)
-
Finally catching up on your build. Amazing work as always Maurice. I’m currently about half way through the second planking on my Alert. I’ve been referring to your builds among others. It’s great to be able to see the detail to help new guys like me get a grip on this planking thing! Looking forward to seeing this come together. Chris
- 332 replies
-
- 2
-
-
- Harpy
- Vanguard Models
- (and 1 more)
-
Congratulations on completion! She looks great. Looking forward to following your Harpy build.
- 43 replies
-
- 2
-
-
-
- Vanguard Models
- Sherbourne
- (and 1 more)
-
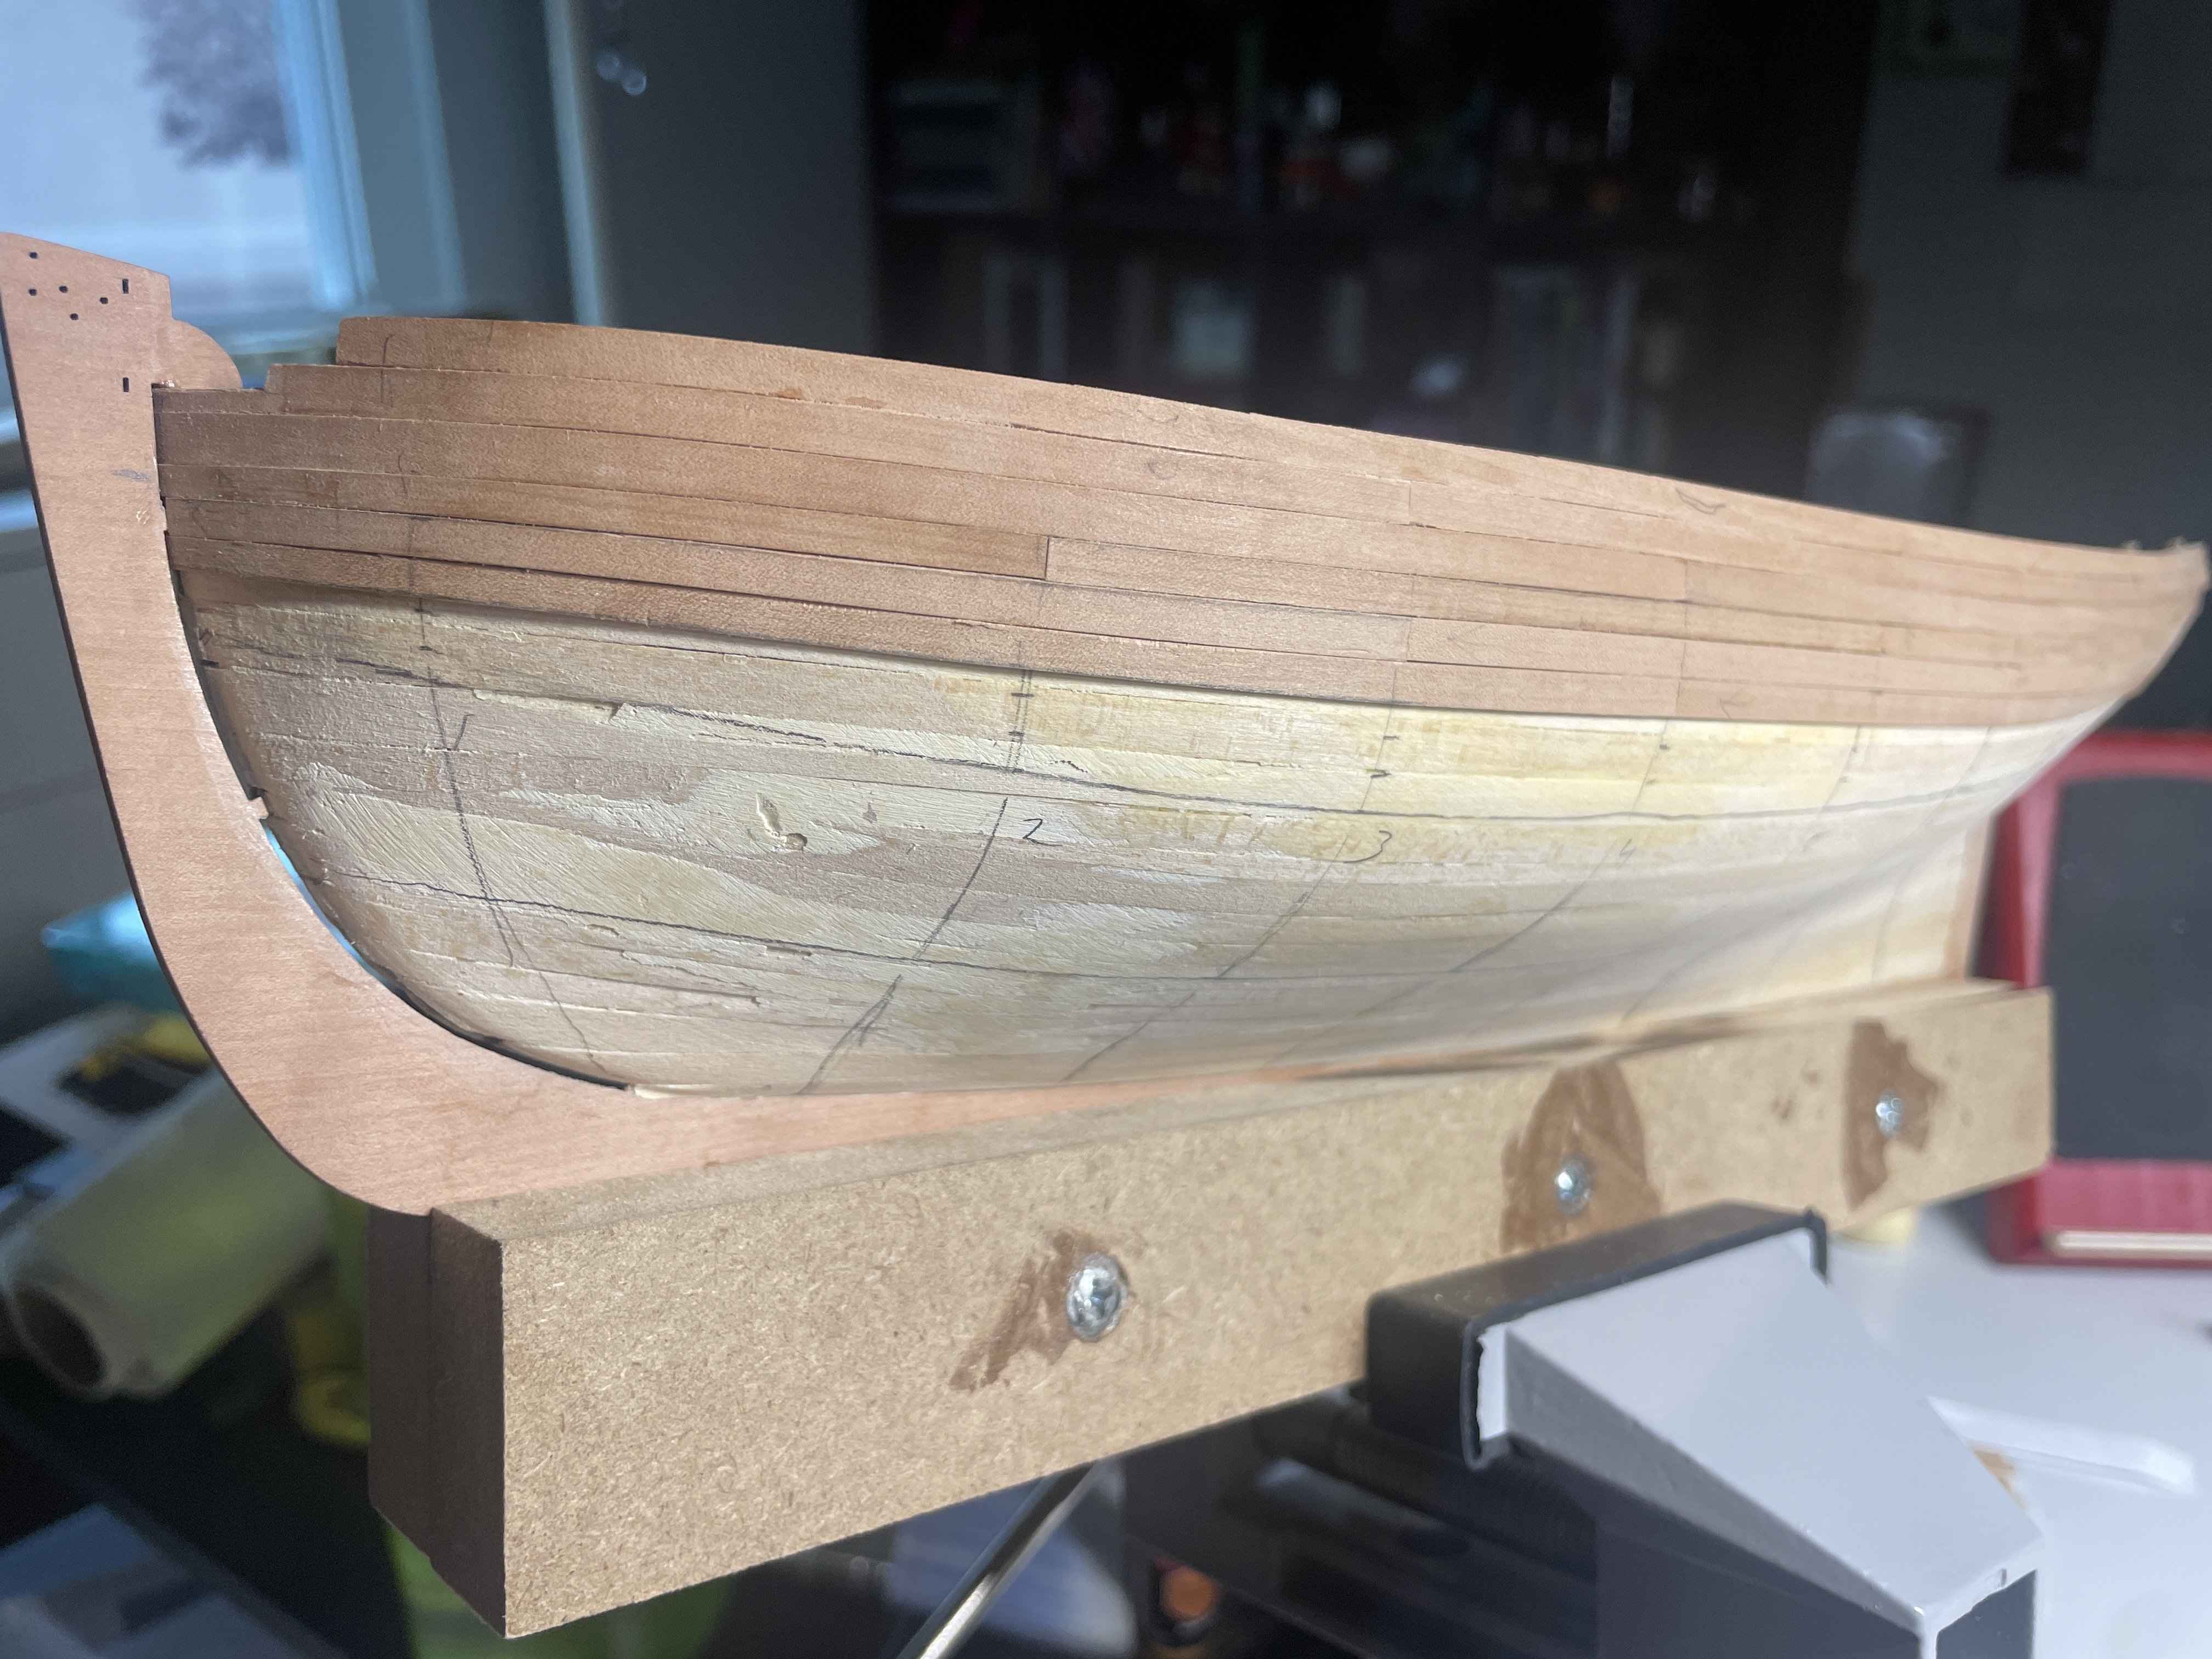
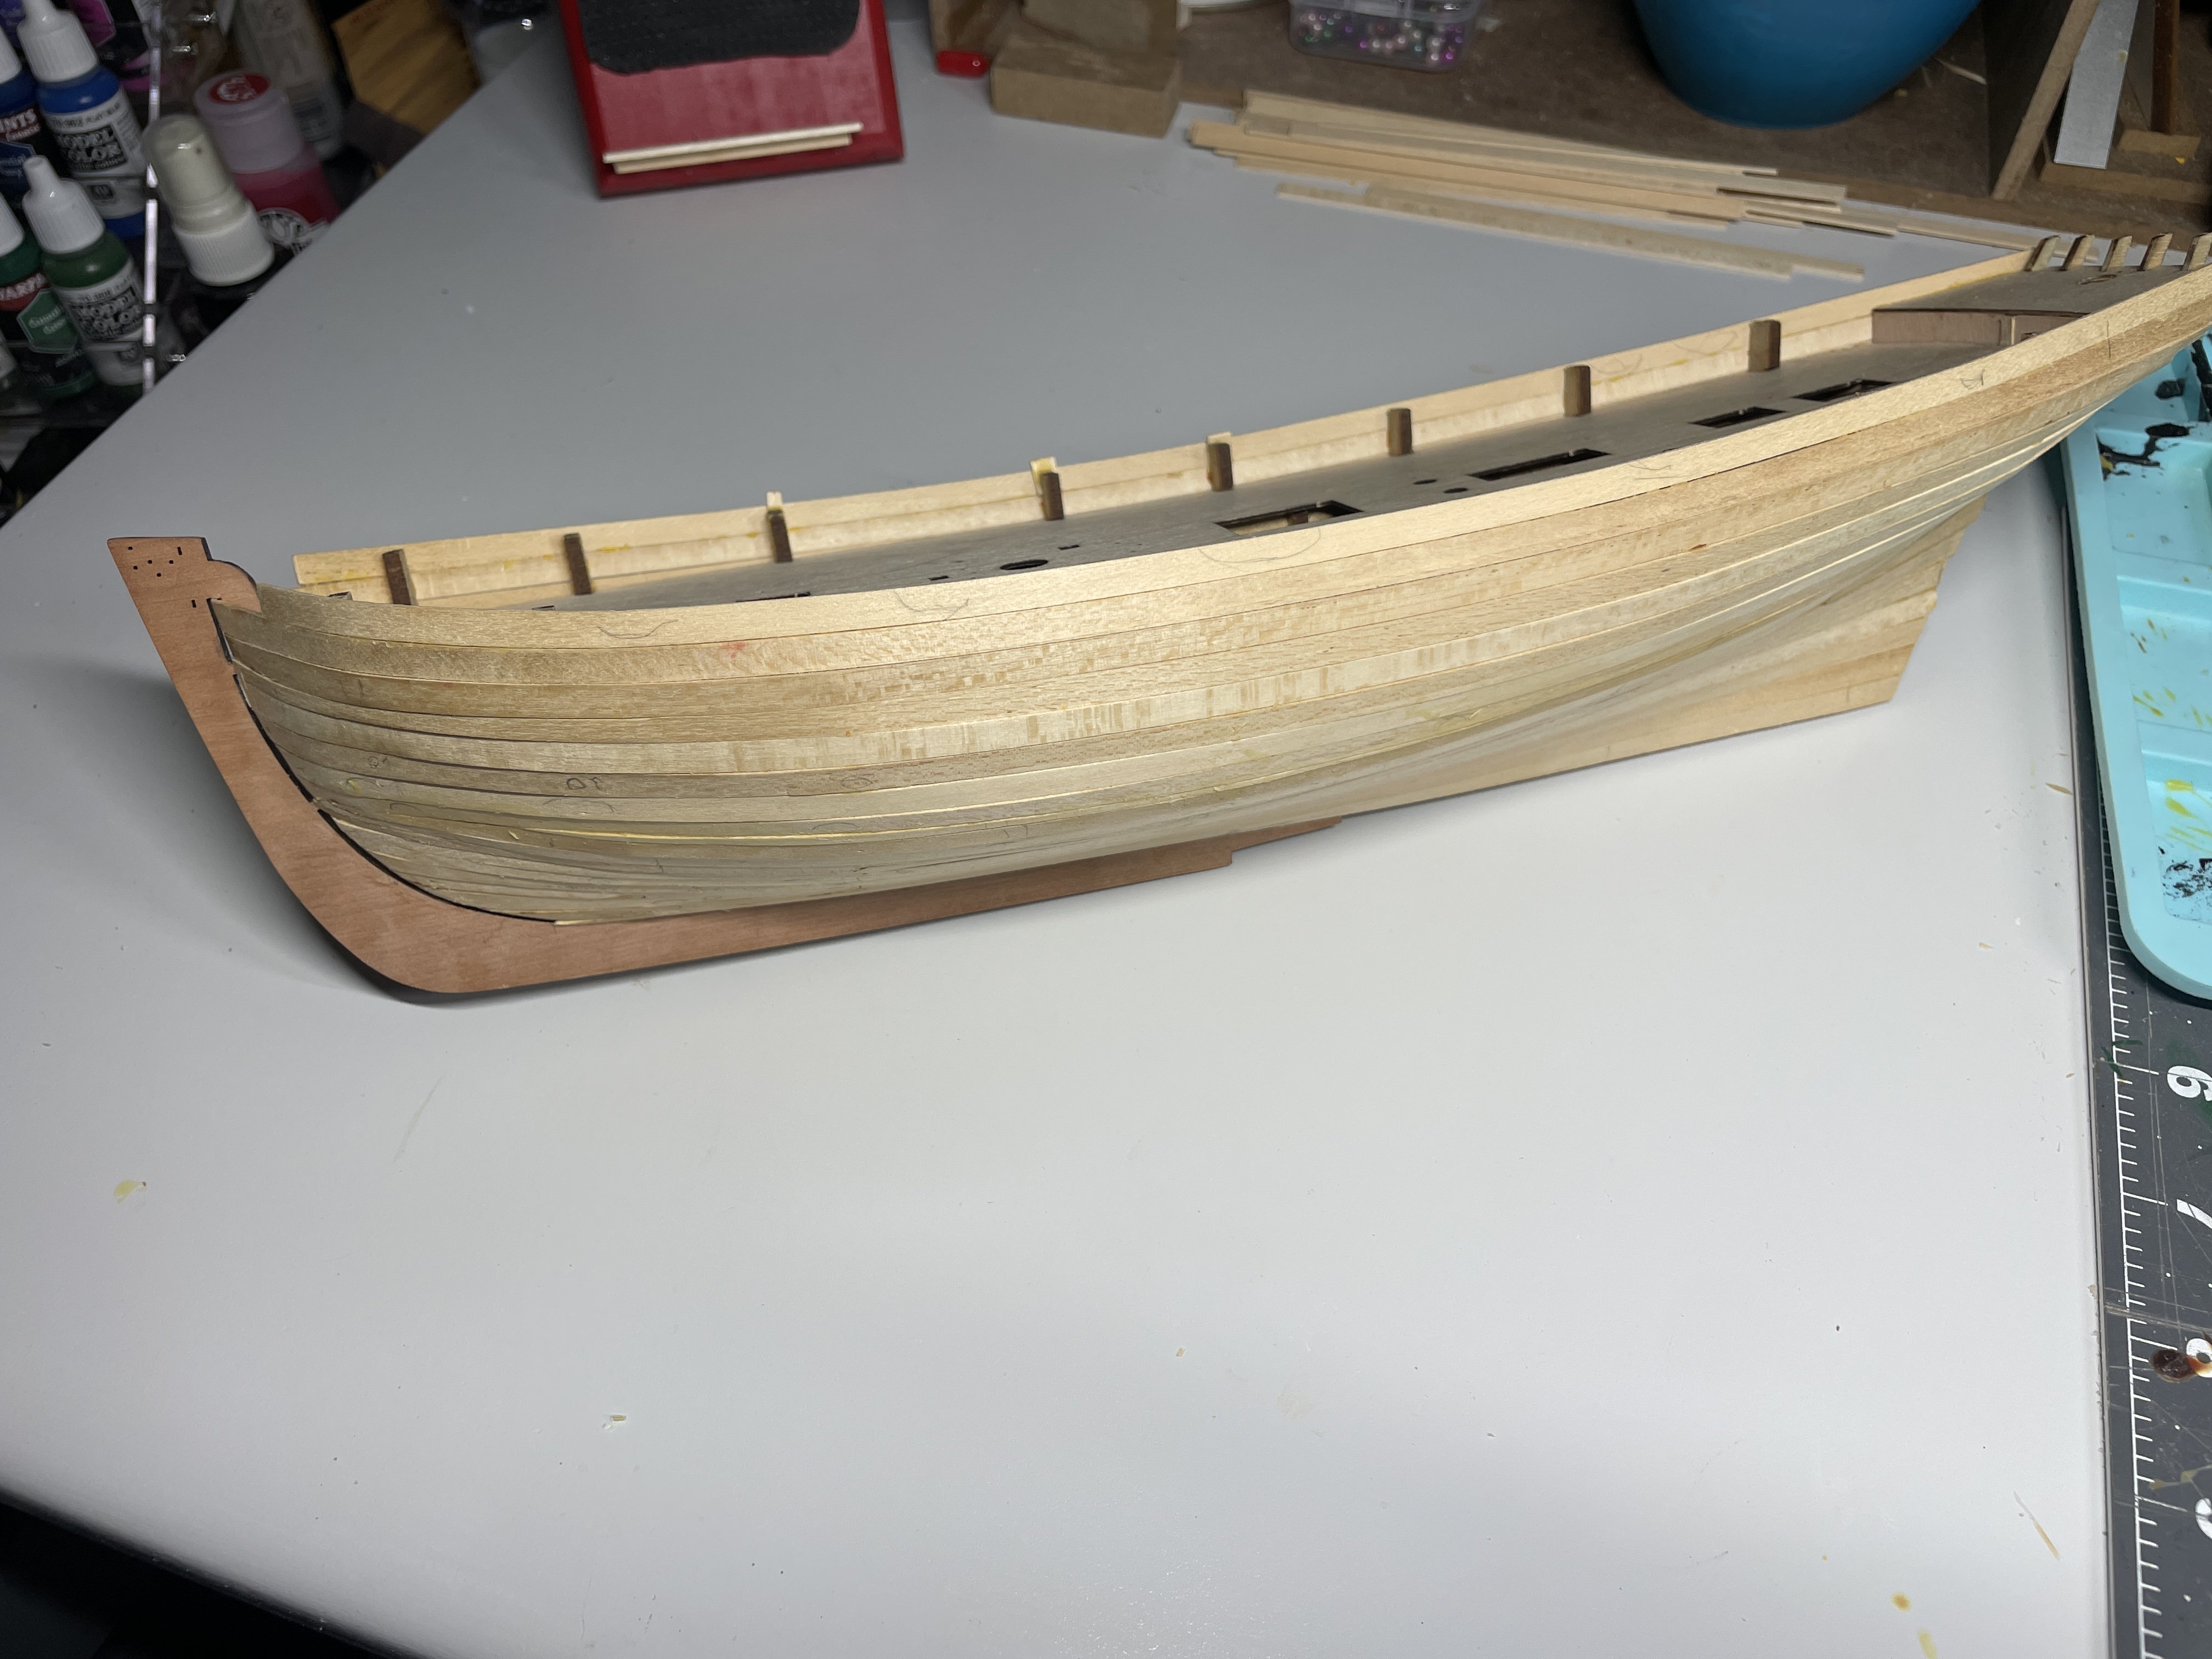
I ended up, not that I’m done, putting in a stealer plank around midship. I think it will look ok. Even though I’m covering it I’ll still be taking photos and they live forever. The pdf helped Fritz! Barkeater I think I’ll basically do that with the second layer. 👍
-
So, I realize this is the first planking and how it looks isn’t that important as long as it’s smooth at the end. I’m trying to avoid any issues on the second layer. As you can see from the picture I didn’t taper the planks well and now I have a small area at the bow to place 4 planks. What would you do here and how do I avoid this on the final layer? I’ve looked at a few “lining off” videos and they are kind of confusing. When making the initial lines to make “sections” I’m just not sure where to put them as I can put them anywhere. I started lining off the first layer but I made it way more complicated than necessary. Thanks for your help! Chris.

-
Great job Chris! I really want to try a card model myself soon.
-
Truly a beautiful model. Congratulations on the completion.
- 840 replies
-
- 4
-
-
- winchelsea
- Syren Ship Model Company
- (and 1 more)
-
I made a raised “desk” that goes on top of my desk. Like a watchmakers setup. I can put tools under it that I’m currently using. But to be honest, I usually reach around…