HOLIDAY DONATION DRIVE - SUPPORT MSW - DO YOUR PART TO KEEP THIS GREAT FORUM GOING! (Only 75 donations so far out of 49,000 members - C'mon guys!)
×


yvesvidal
-
Posts
3,607 -
Joined
-
Last visited
Content Type
Profiles
Forums
Gallery
Events
Everything posted by yvesvidal
-
 Great project. Everybody loves these paddle boats. Yves
 -
Bugatti Type 35b by kpnuts - Italeri - 1/12
yvesvidal replied to kpnuts's topic in Non-ship/categorised builds
Alright, now you need to find a few chickens in 1/12 scale and some straw to finalize your barn diorama. I can see them laying eggs on the seats. Yves -
I like the interior with the room for the crew in the rear, and the luggage/freight compartment in the front. You can tell that this was better designed than modern airliners which are solely equipped for greed and maximum profit. Yves
- 112 replies
-
- 12
-

-

-
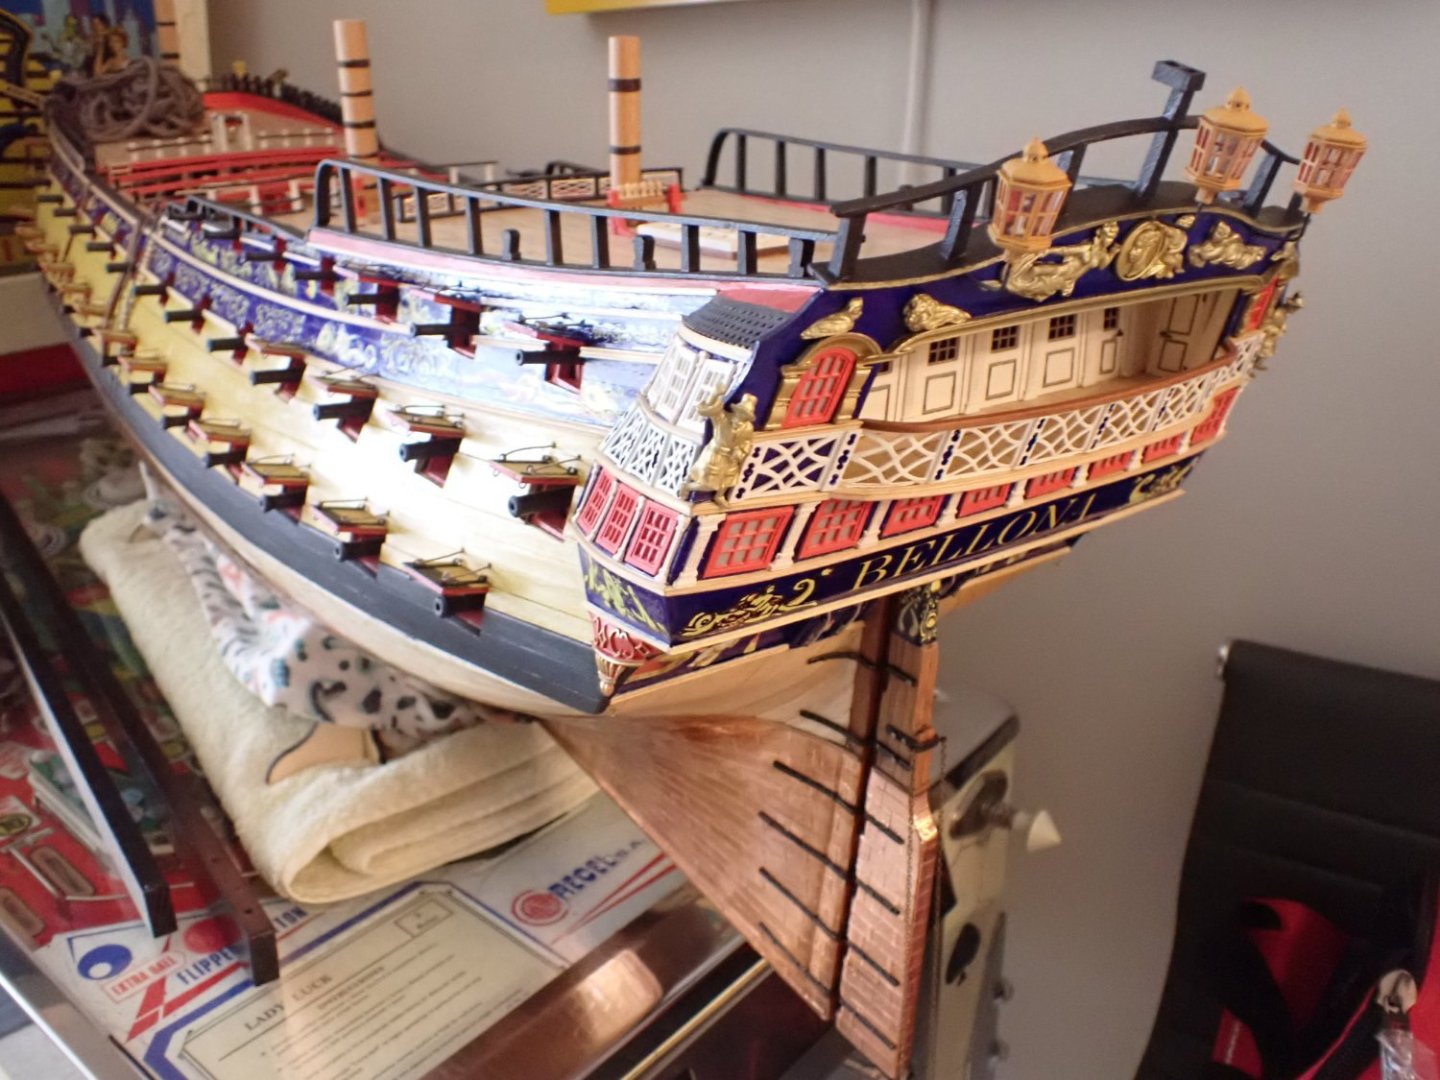
Mark, That is a fantastic study, analysis and attempt at re-creating what could have been the stern of Bellona. Personally, I like the second and more modern interpretation and that is probably because it is what is provided with the CAF Model kit, that I recently (almost) completed. I hope you do not mind the picture below: However, I have to say that I really like your drawing as it combines elements of both interpretations and may result in a fantastic and beautiful stern. And nobody will ever be able to contradict what you did, as we simply don't know. Yves

-
I am wondering what was stored exactly in these bench lockers? They probably were only accessible by officers. Yves
-
This is superb work and it has this special and unmistakable signature of RGL masterpieces. Yves
-
After the 1/48th 3D printed model, this kit must be minuscule, by comparison. You truly have a love for these Corvettes and I understand and share your obsession, too. Yves
-
Another Museum quality piece being birthed. Between Jeff59 and you building this ship, we are touching Perfection !!! Yves
- 203 replies
-
- 4
-
-
-
- Russo-Japanese War
- Mikasa
- (and 2 more)
-
What a gorgeous collection !!! The keyword here is: "wife was away...." I see there is plenty or room for additional ships..... Yves
-
Super dashboard. So realistic. Yves
-
We knew it would not take long.... Yves
-
Nils, Another exciting and very unusual project. I am with you. Yves
- 299 replies
-
- 4
-
-
- lightship
- Feuerschiff Elbe 1
- (and 1 more)
-
What a great model !!! As other experts have mentioned, for soldering the key, is cleanness, flux and proper heat. Once you get the gist of it, it works really well and is super solid. You can then file with emery tape, the extra blobs of solder and after painting, it will look like the real thing. Your wood work is amazing. I love that A/C unit on the side of the cabin wall, so realistic. It truly helps to have your own laser cutting machine. What instrument/equipment do you use? How about the software to draw the parts? Yves
-
Fantastic work Kevin. I admire your patience...to do all this rigging. Yves
- 443 replies
-
- 3
-
-
- Indefatigable
- Vanguard Models
- (and 1 more)
-
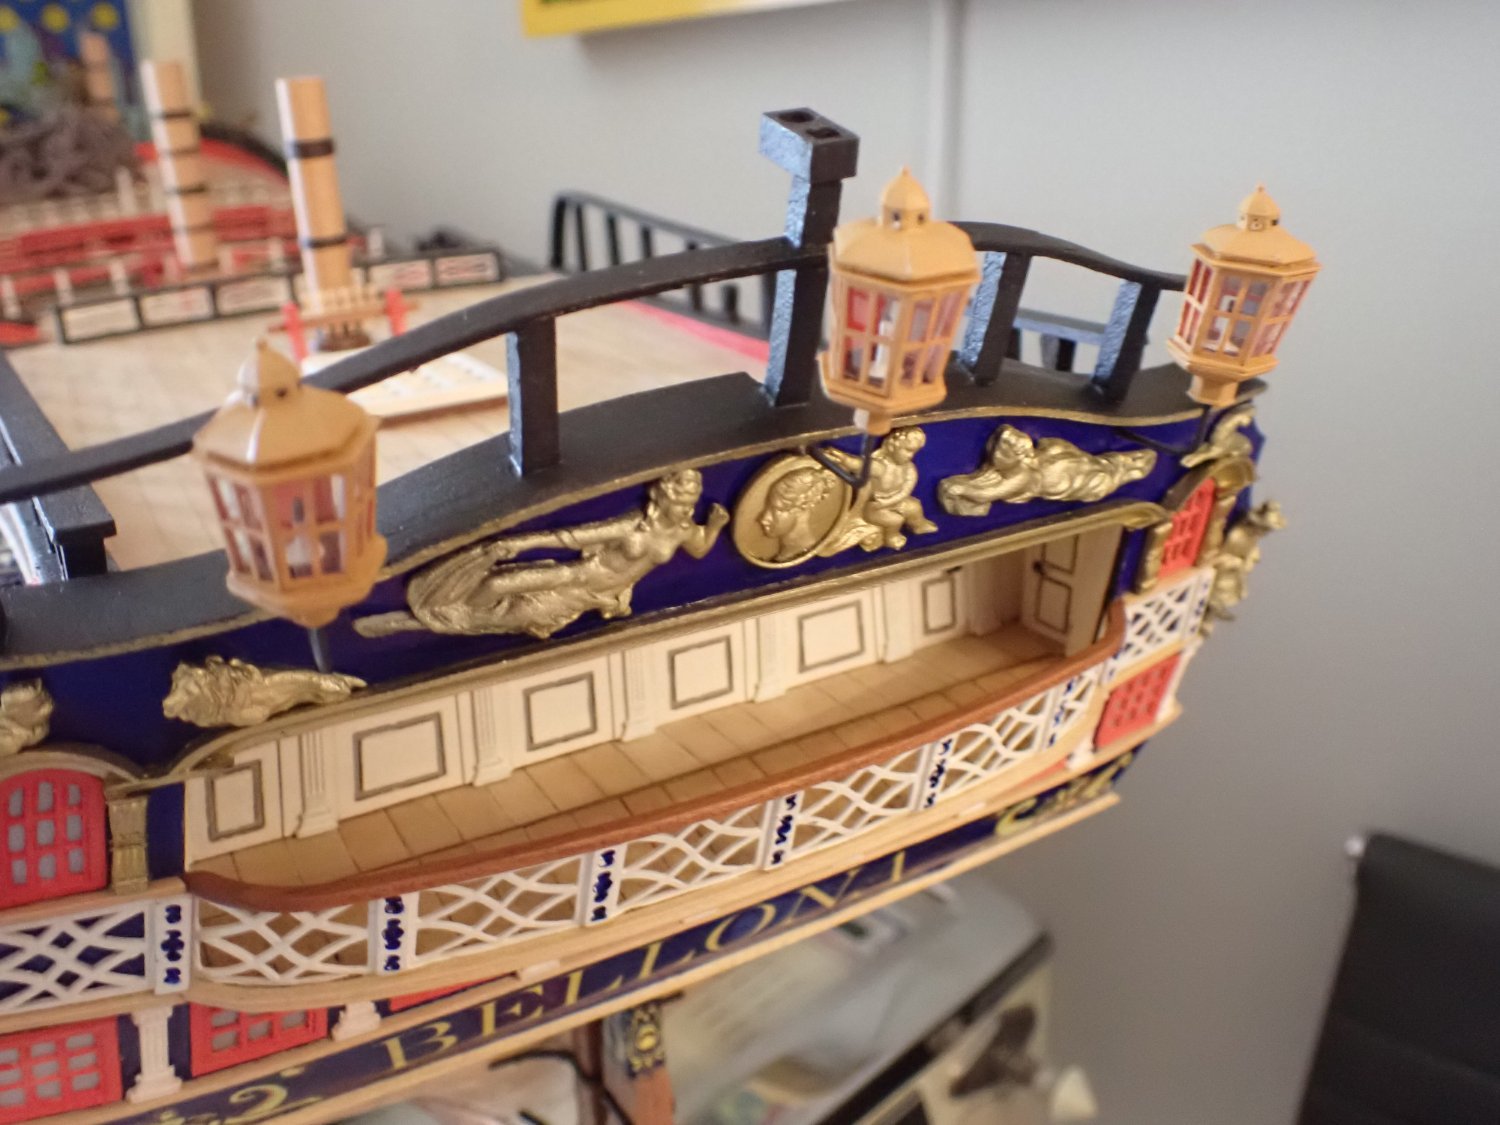
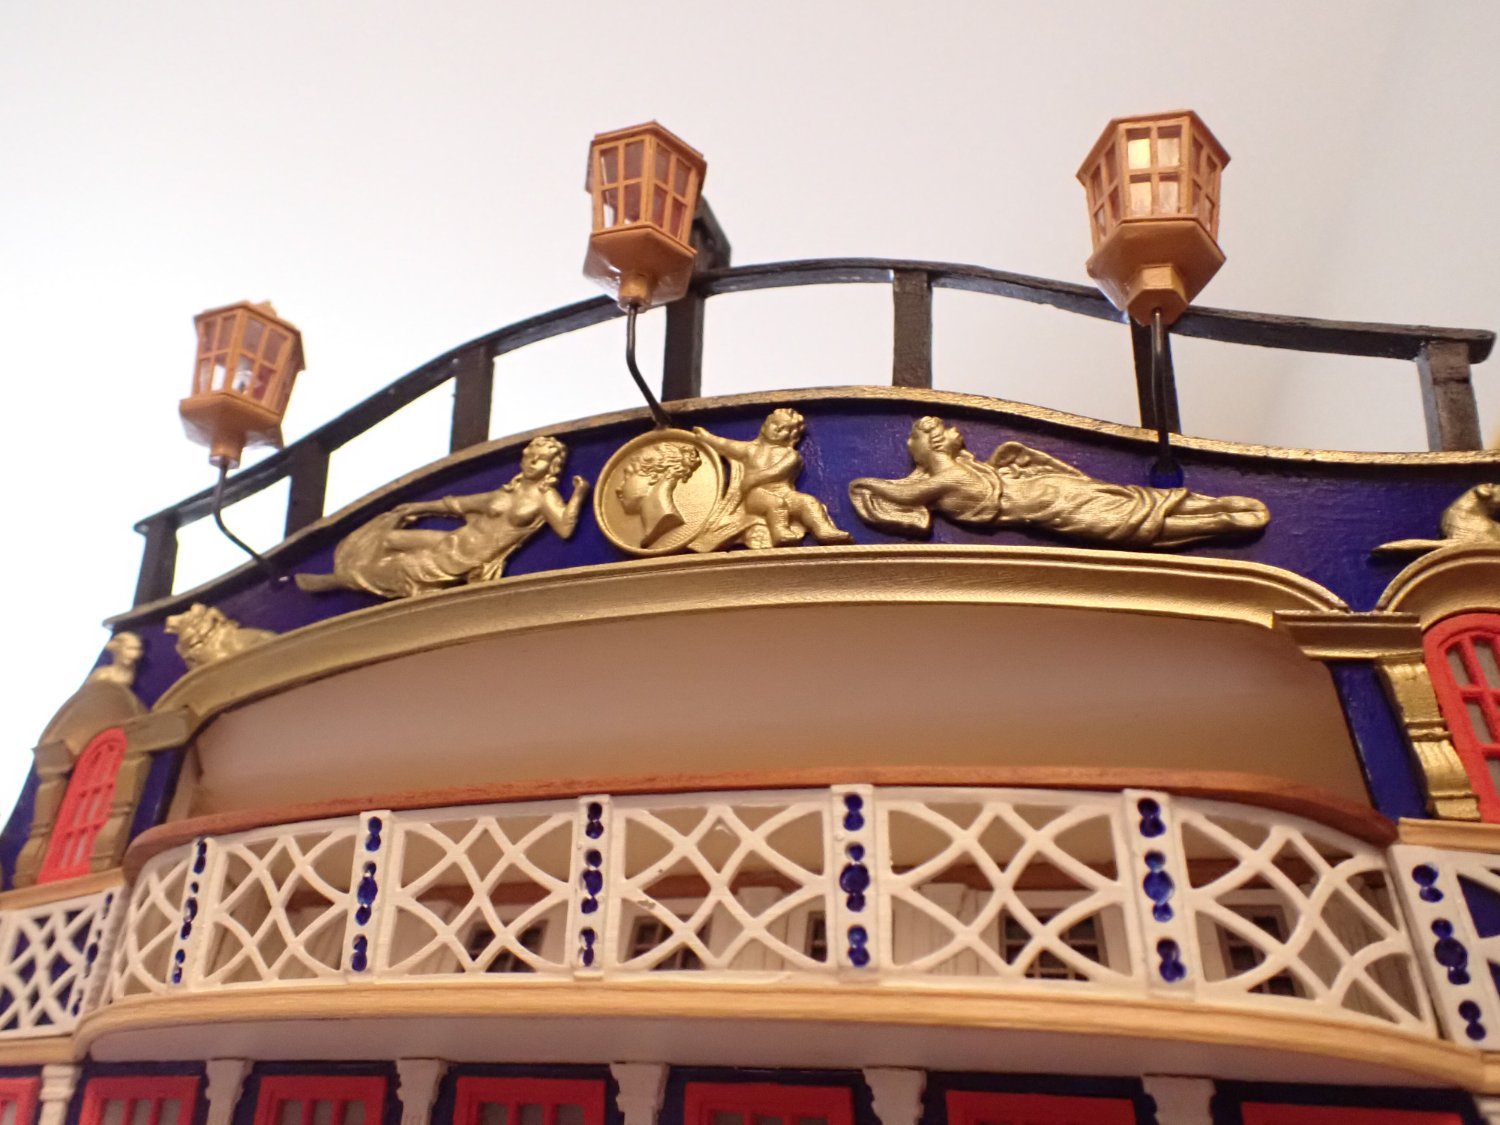
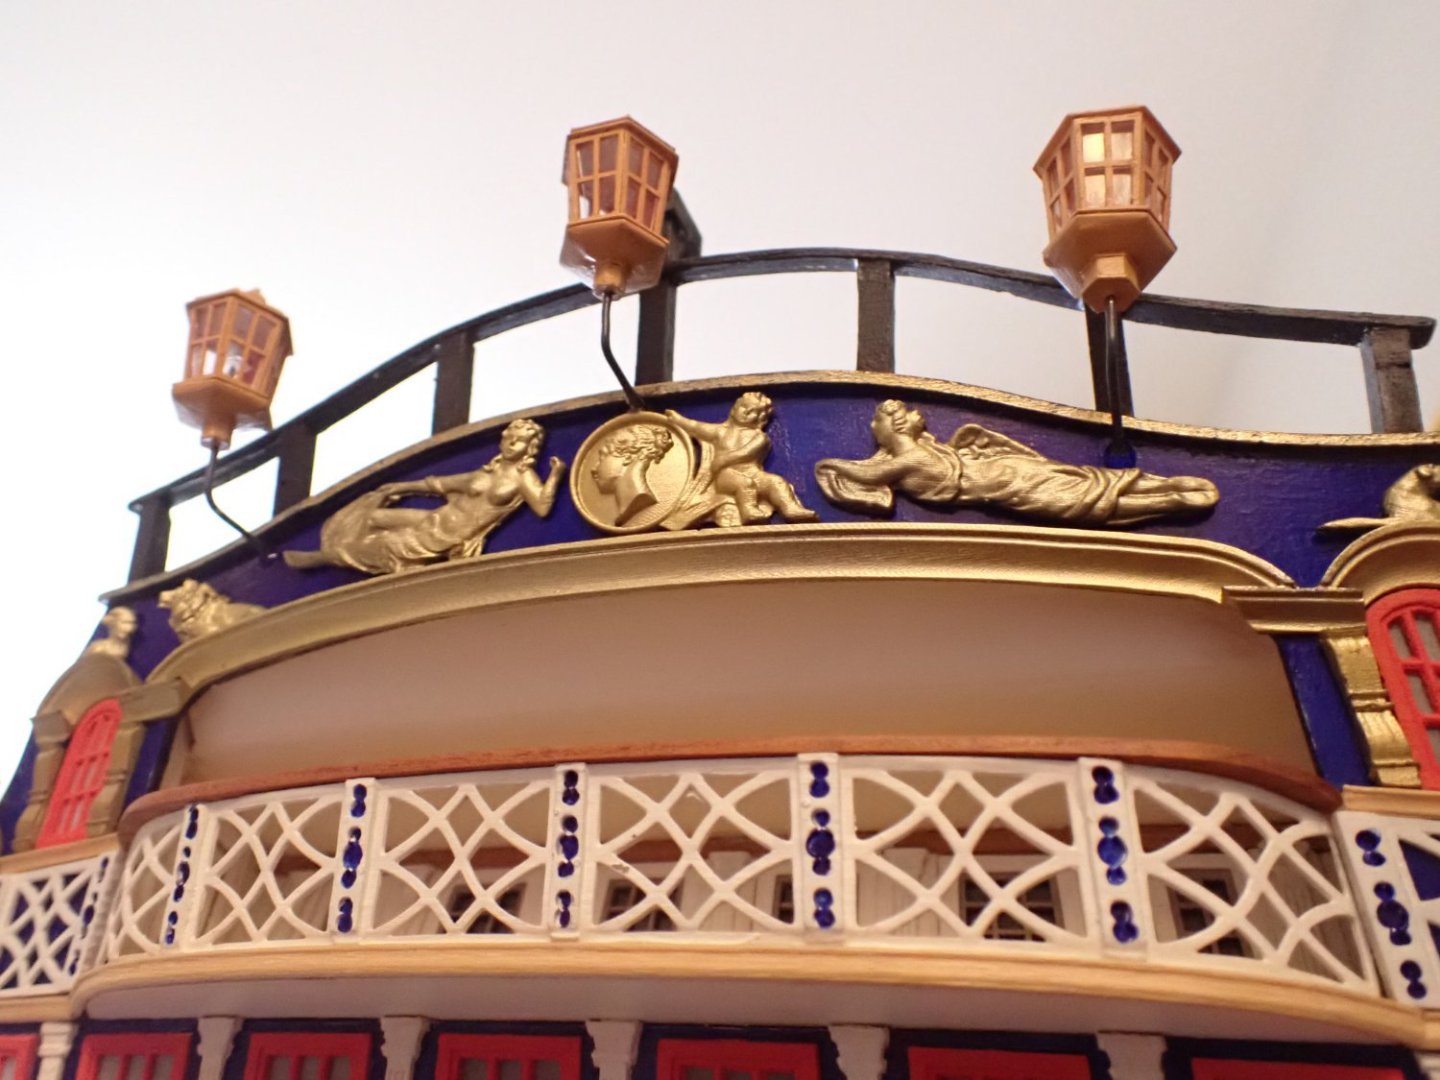
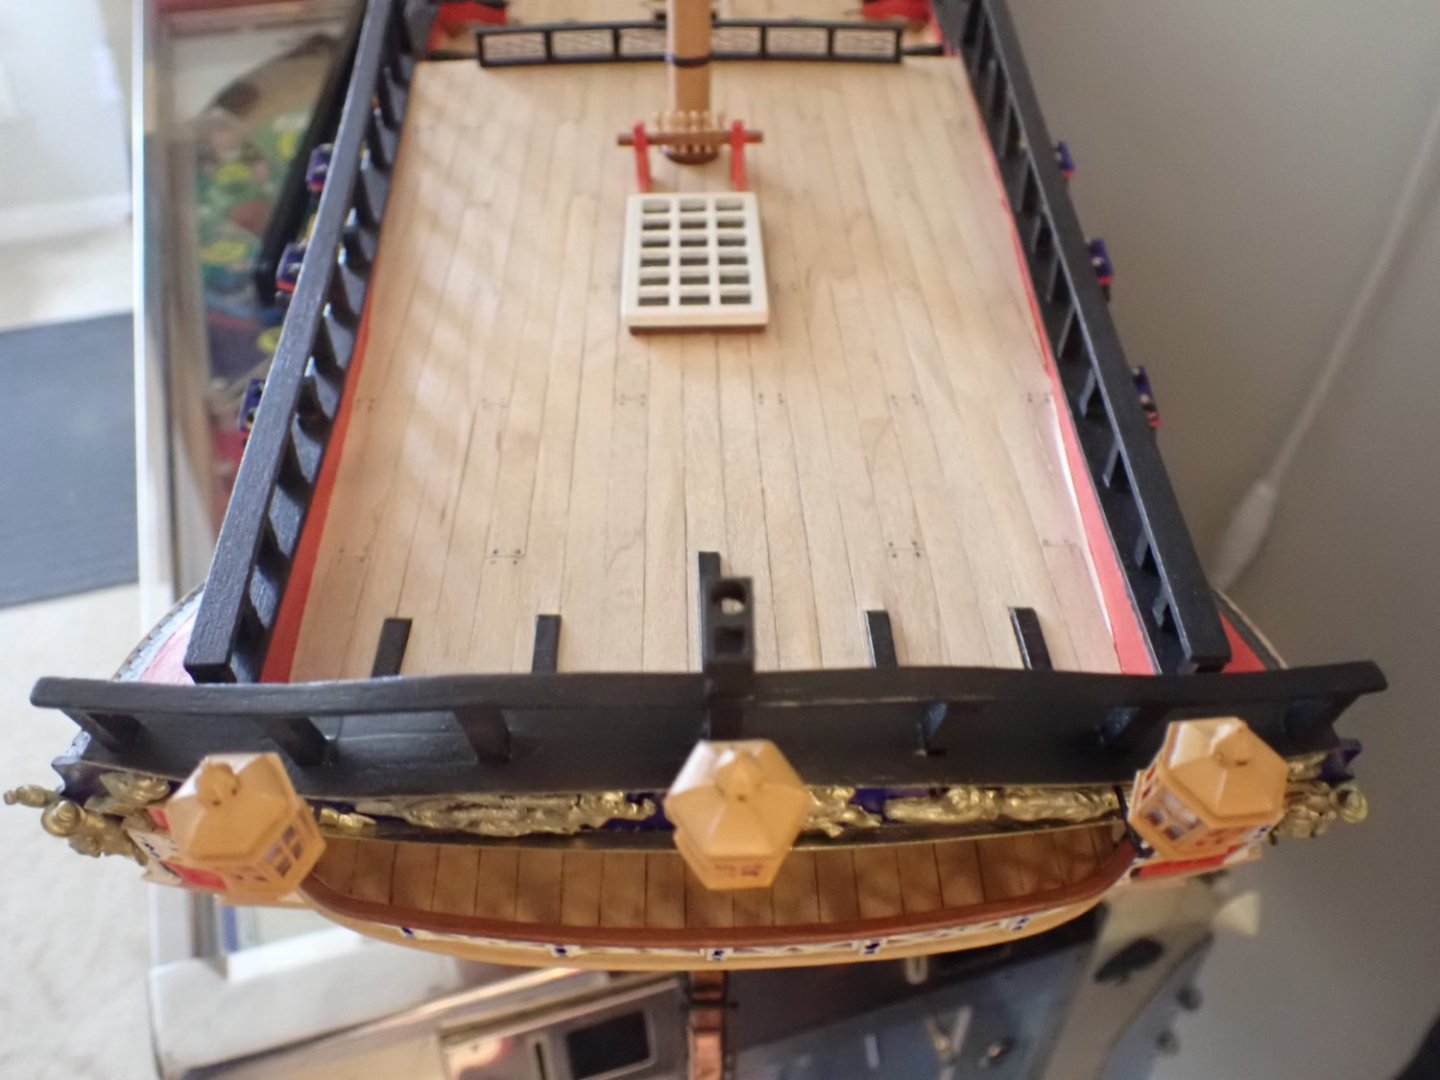
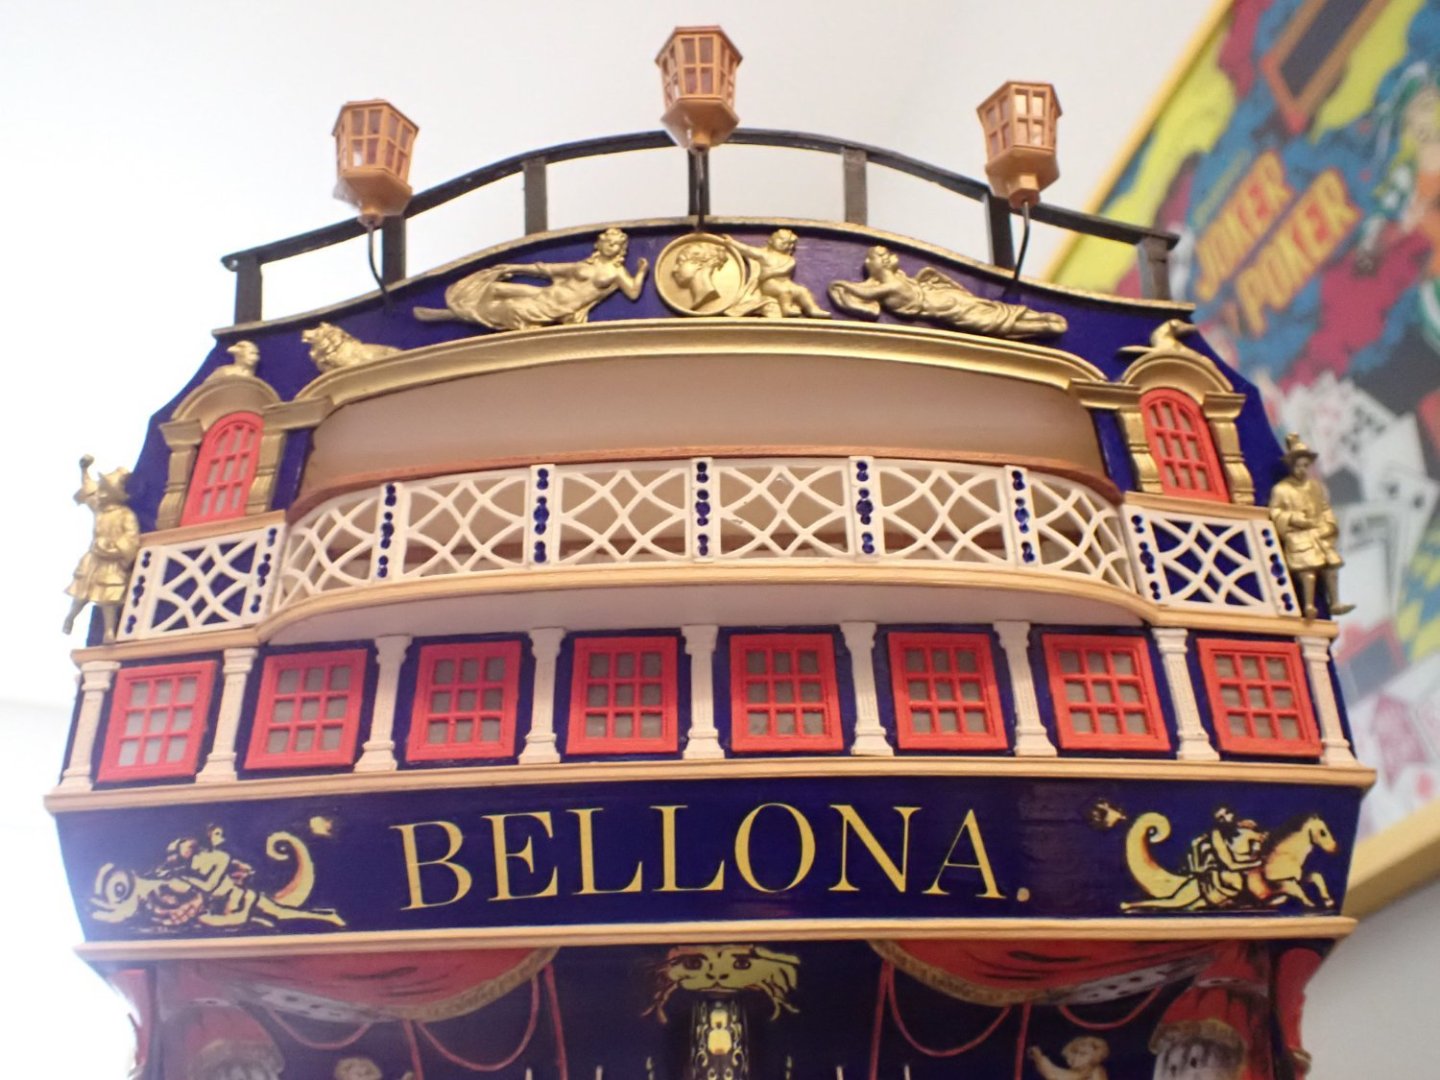
Lamps are finally finished. These kits (from Syren) are little projects in themselves and take some time to be completed. Again, as mentioned before, the lamps are made of 80% Syren and 20% CAF Model parts. Through the glasses of the lamps, you can see the main candle, a blob of wax on the base and the black candlewick. A small maintenance door facing the stern, allows access inside the lamp. Overall view of the stern: Now, I have to find a solution for the staff. Then, we will move to the bow.... Yves

- 507 replies
-
- 23
-
-

-
It looks like this is going to be another master piece of the Mikasa. Yves
- 203 replies
-
- 4
-
-
-
- Russo-Japanese War
- Mikasa
- (and 2 more)
-
I can't believe AIRFIX would not have drilled the holes in the bulkheads. At that scale, it makes no sense to not do it. Yves
-
That is a big piece and a very coveted model. I will be following. Yves
-
Gorgeous Planking. A pleasure to watch and probably even more to touch.... Yves
-
Very interesting and unusual subject. I like the two scales approach, too. Yves
- 110 replies
-
- 4
-
-
-
- Paddlewheeler
- Ballarat
- (and 3 more)