yvesvidal
-
Posts
3,637 -
Joined
-
Last visited
Content Type
Profiles
Forums
Gallery
Events
Everything posted by yvesvidal
-
 Glad to see another BENSWORX virtual kit being built. And another type of Corvette on top of that..... Yves
 -
I concur completely... especially, when you have to rig 70 cannons. 😉 Yves
- 488 replies
-
- 8
-

-
- Indefatigable
- Vanguard Models
- (and 1 more)
-
You are doing great. This hull is not easy to plank with its voluptuous shapes. It is like a period ship in many regards. Yves
-
This diagonal planking is interesting and intriguing. I will have to do one hull with this technique, one day. Yves
-
Valeriy, I think you described perfectly what can be done at 1/45th scale or 1/48th scale. Is this model also commissioned by a collector? Yves
-
Ted, You are turning this crude Nichimo model into a masterpiece. Congratulations. Yves
-
I am amazed how fast you are moving forward with this kit. The creativity and engineering that has been developed for this kit is absolutely incredible. It seems almost easier to put together, than a LEGO kit ... 😁 Yves
- 443 replies
-
- 4
-
-
- Indefatigable
- Vanguard Models
- (and 1 more)
-
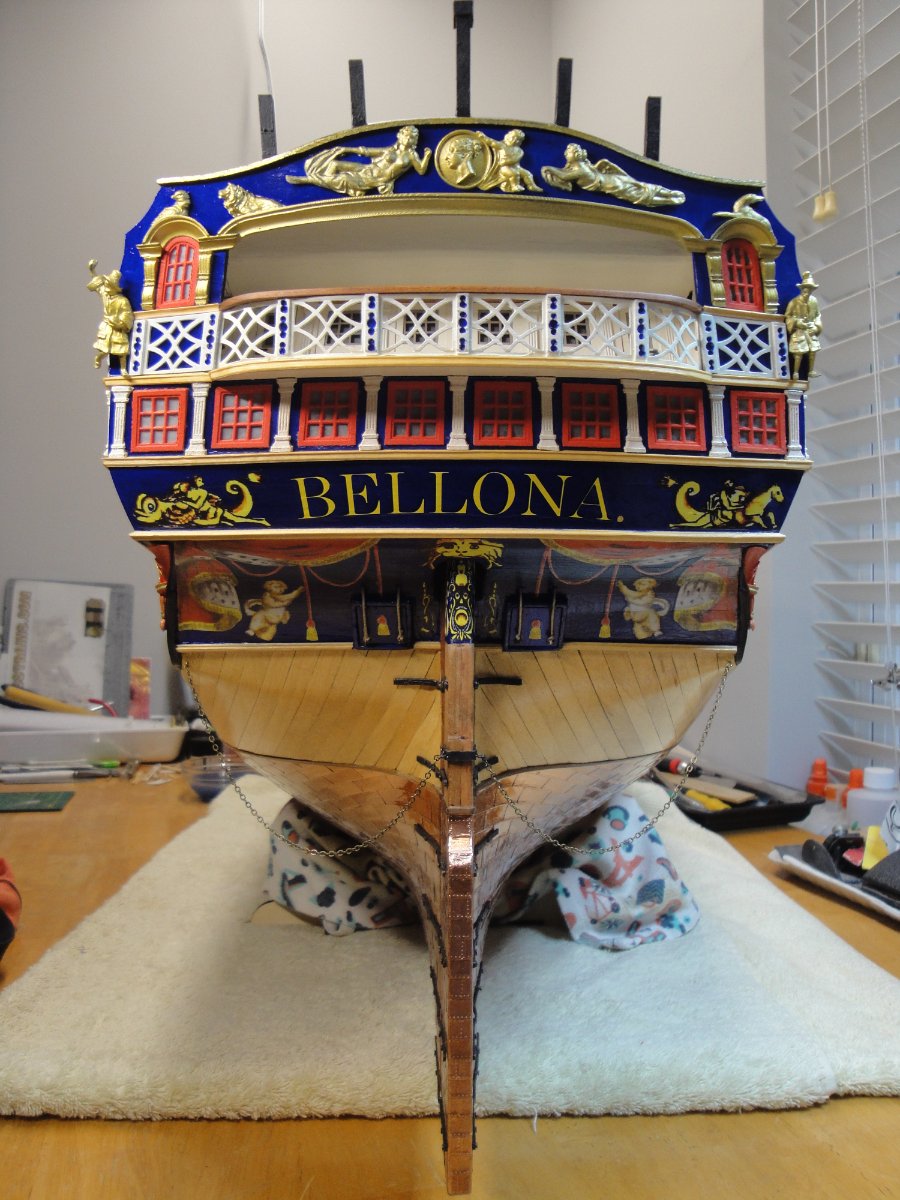
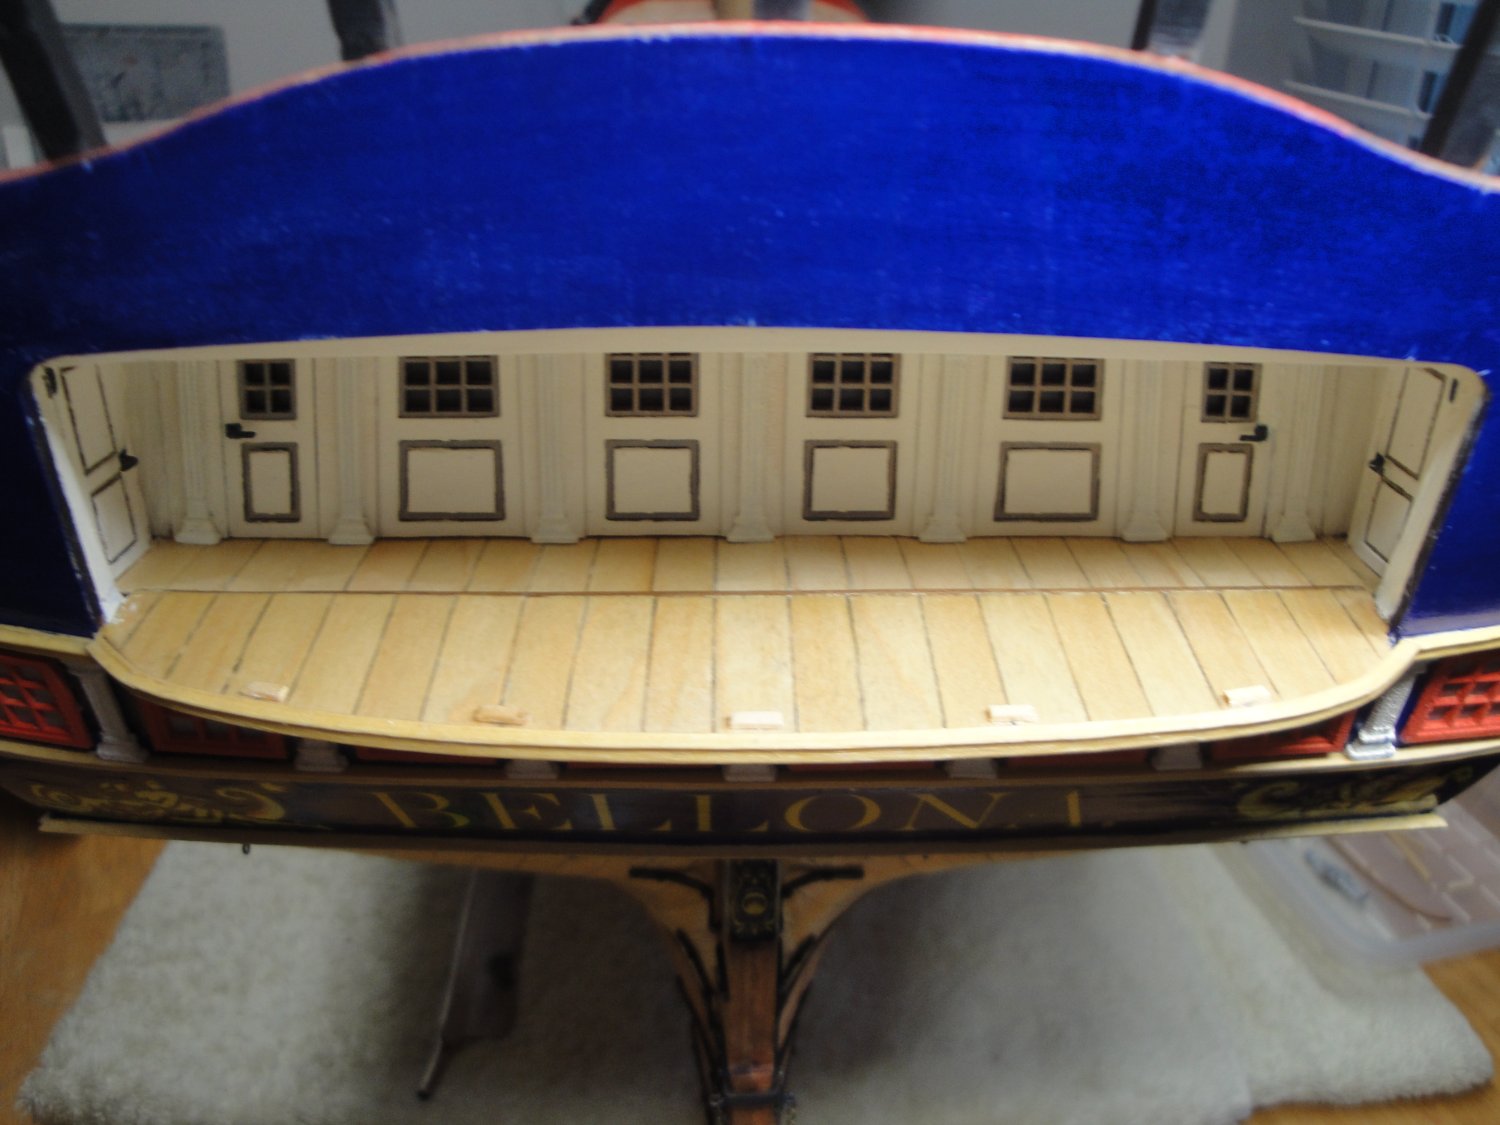
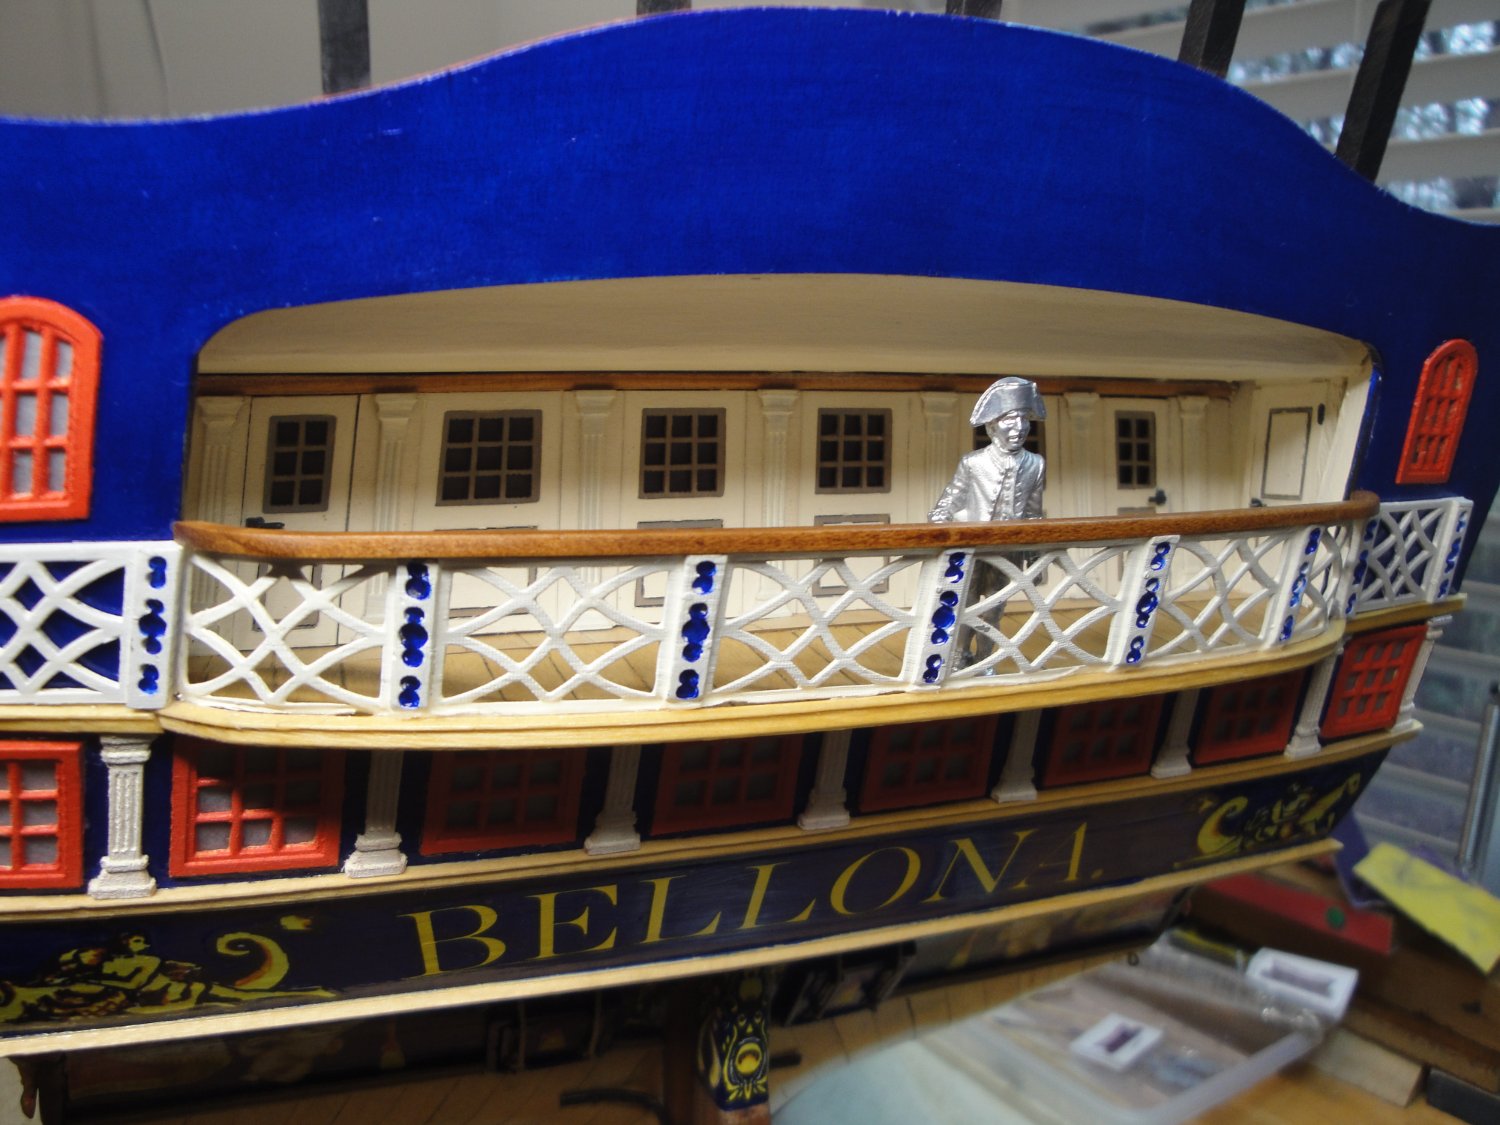
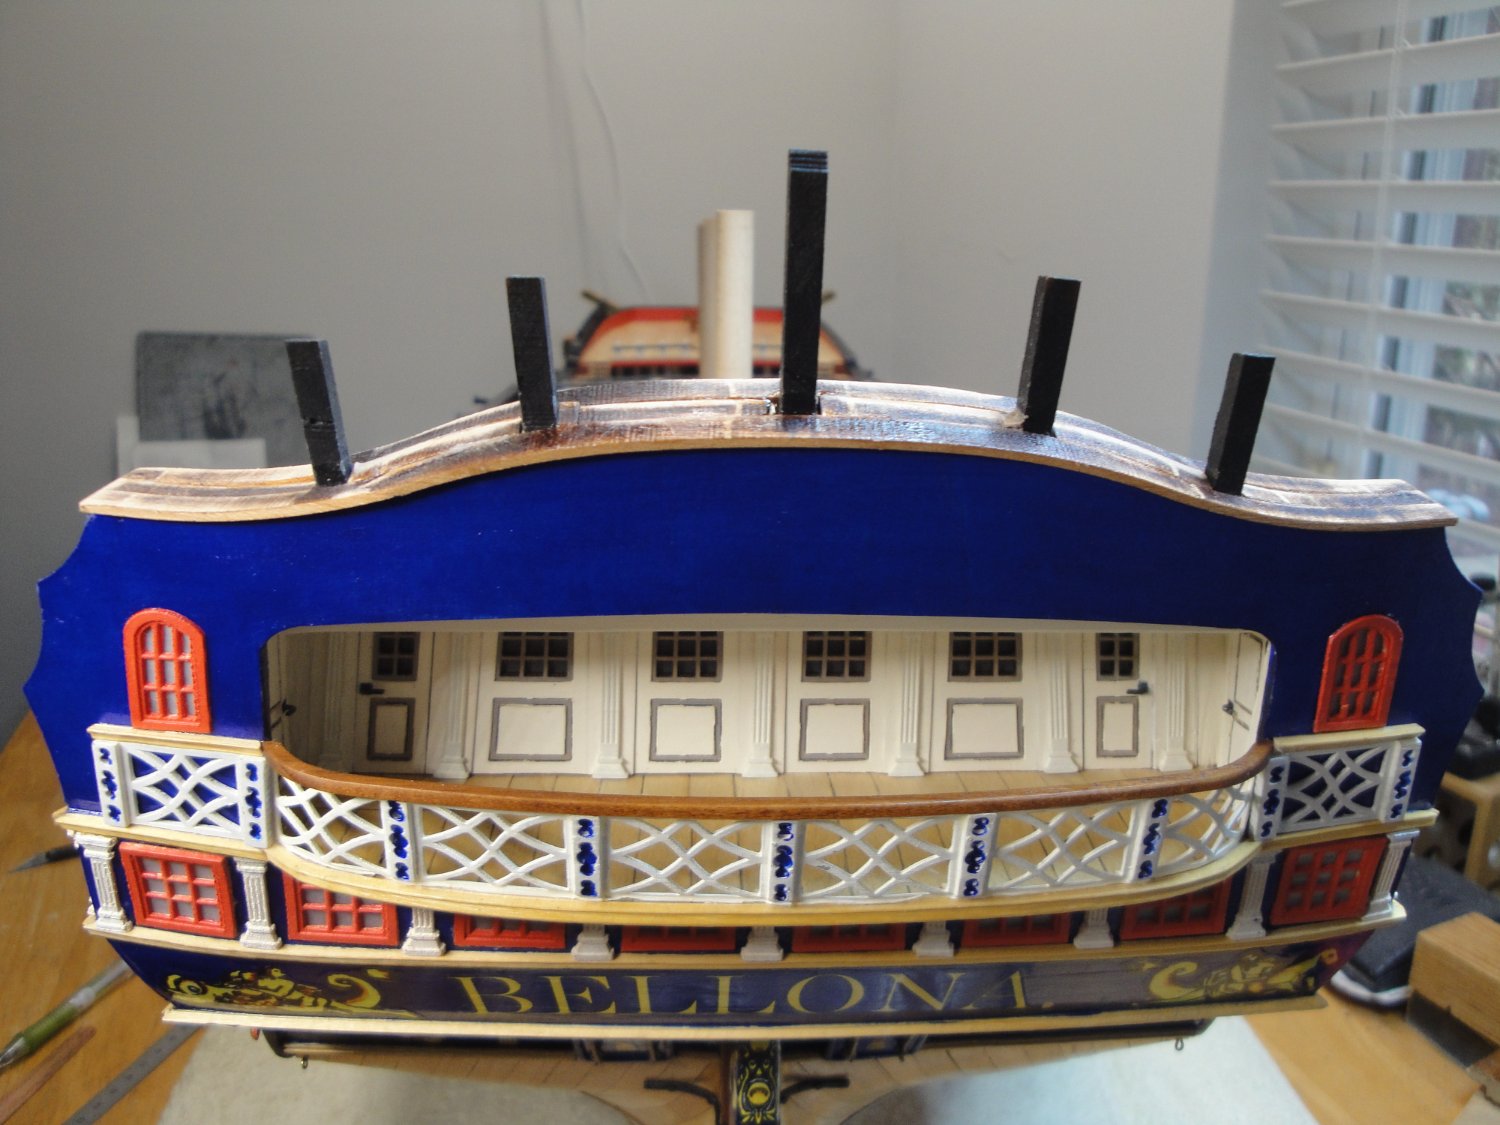
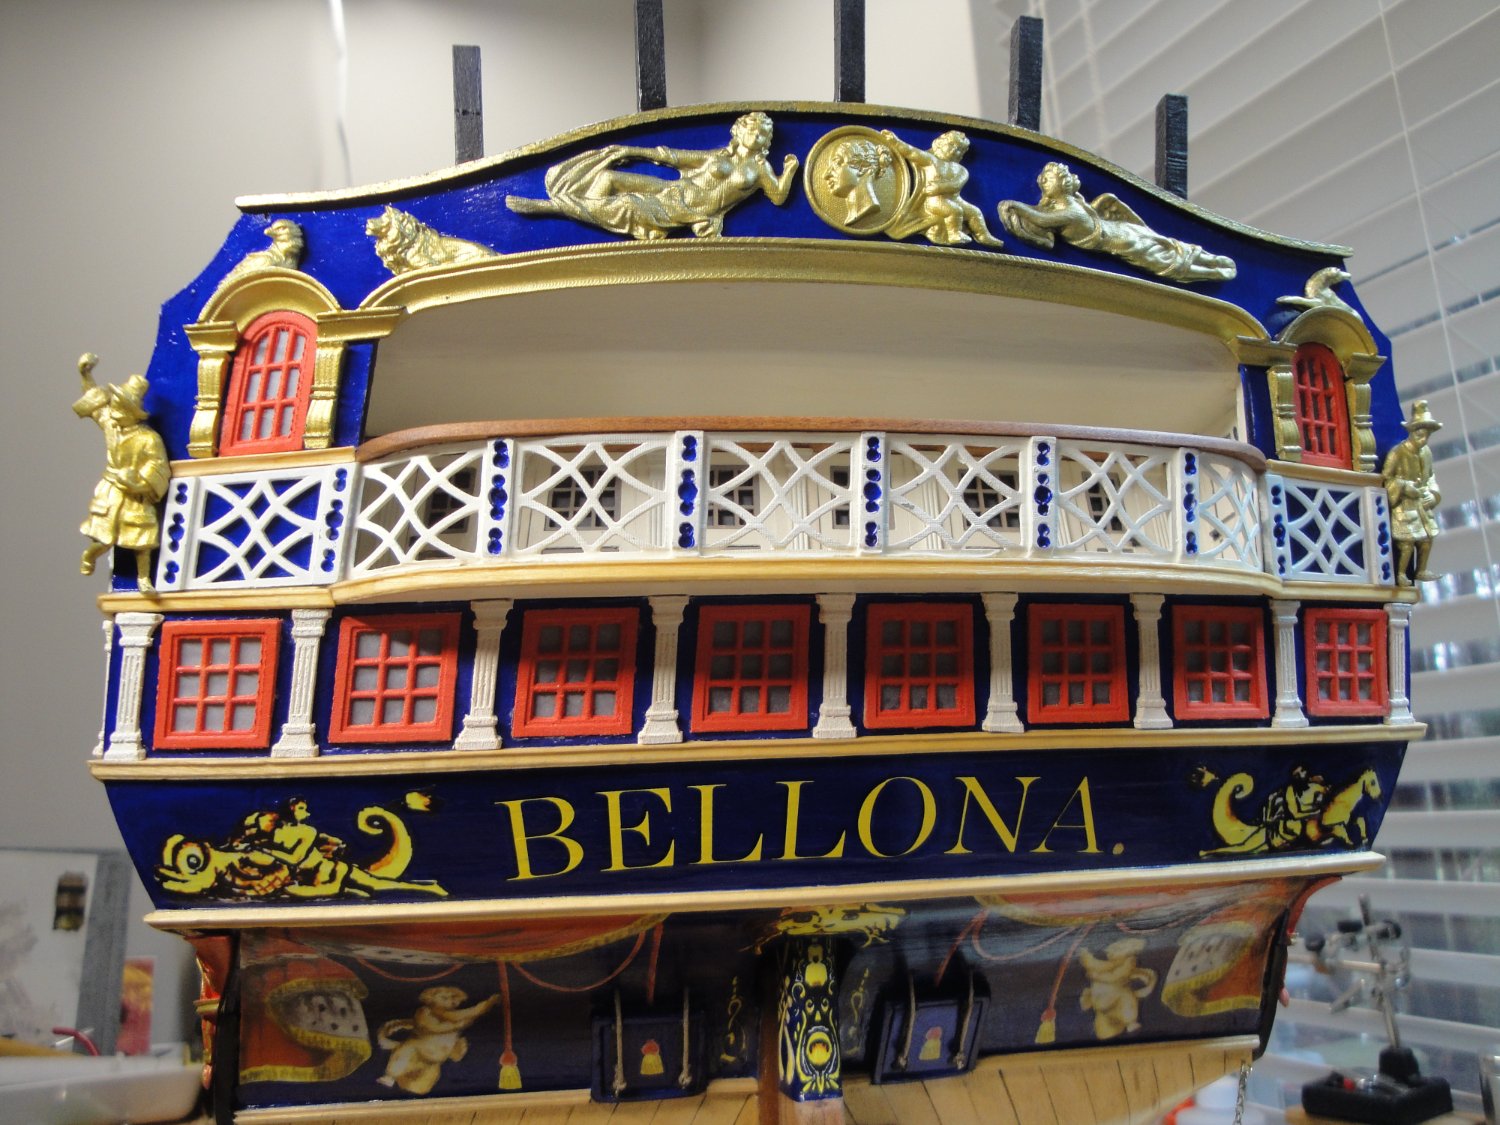
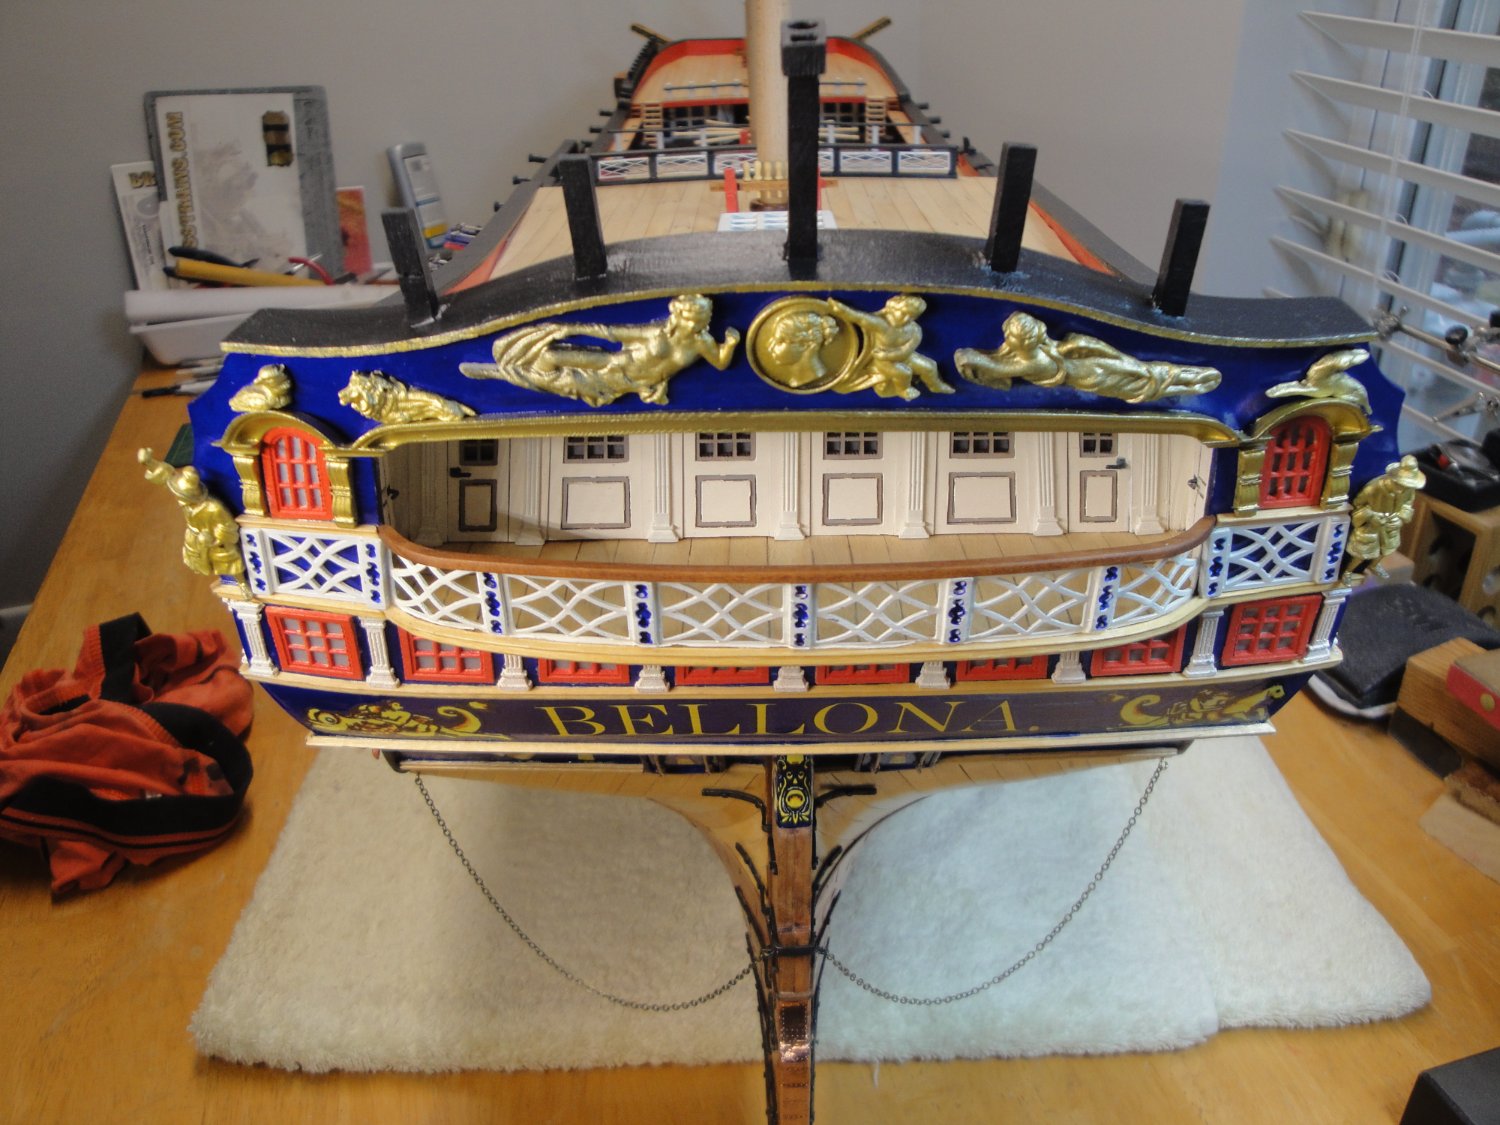
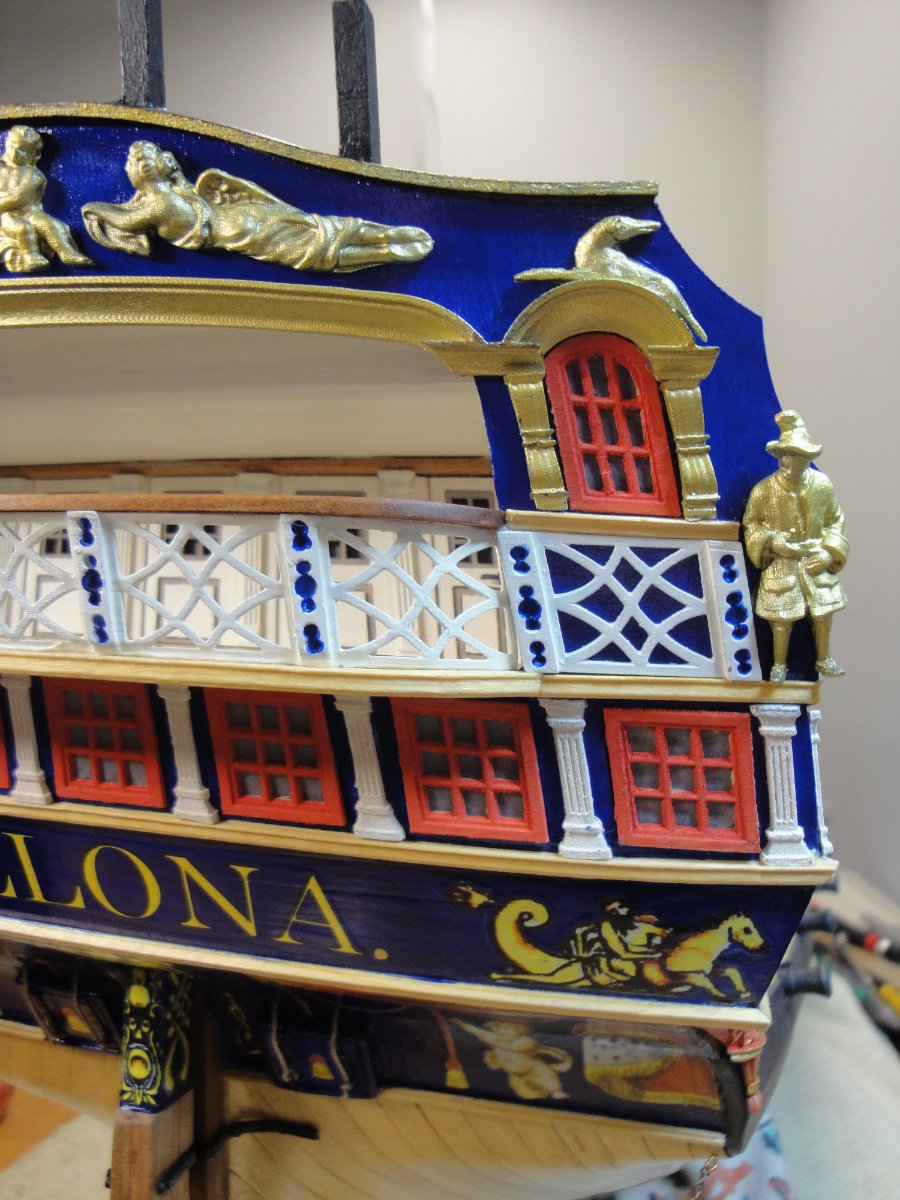
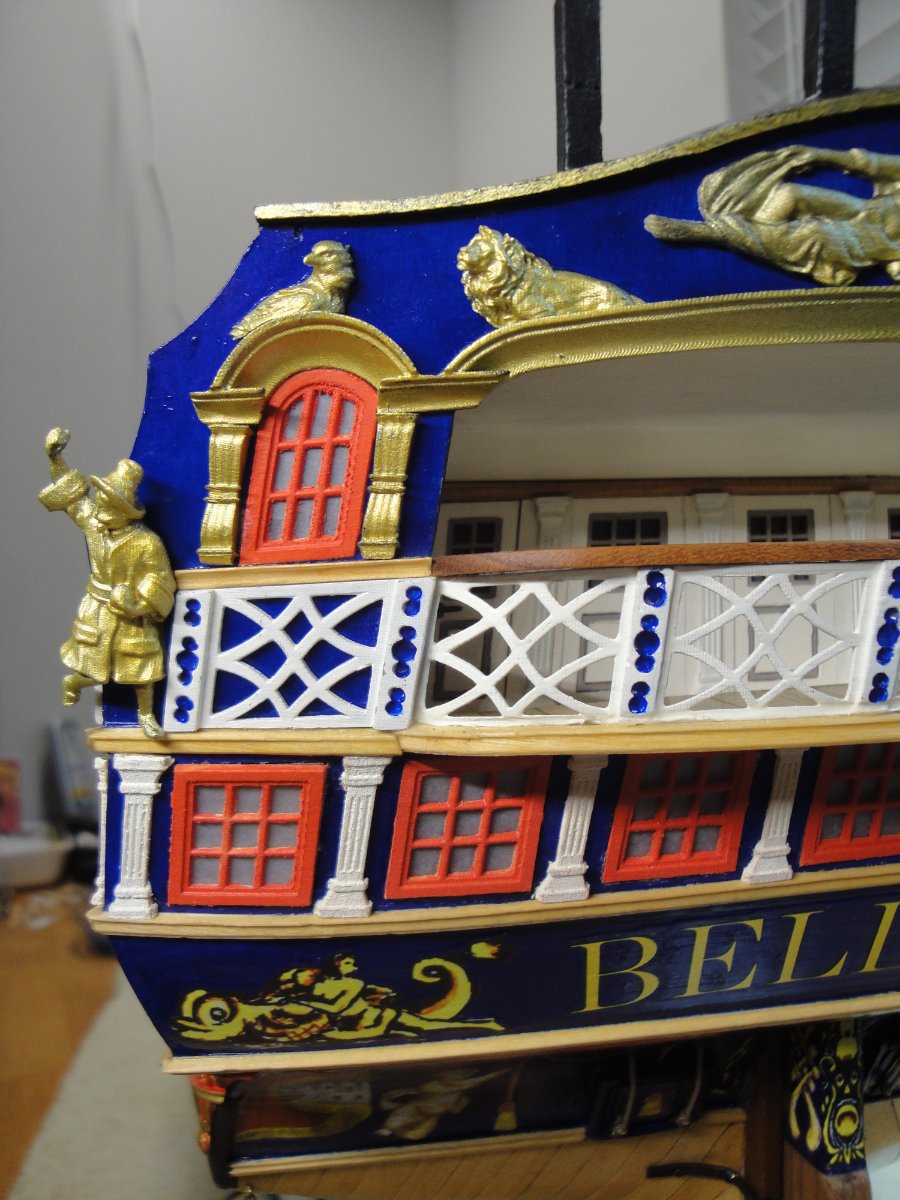
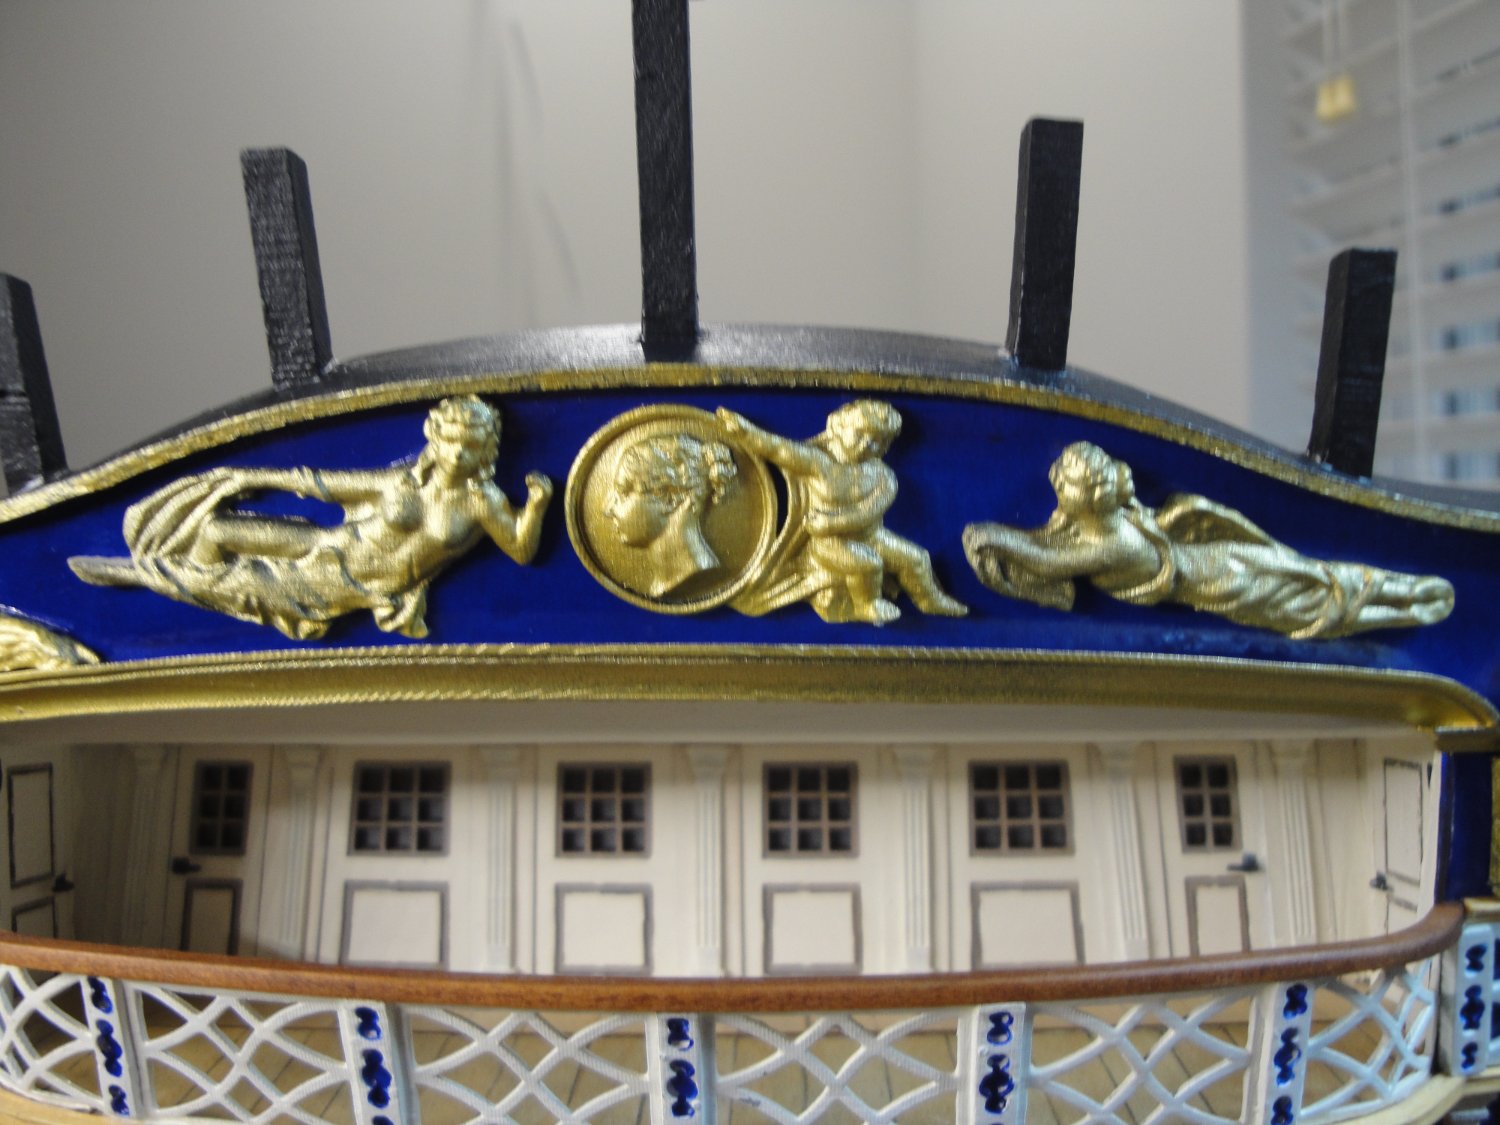
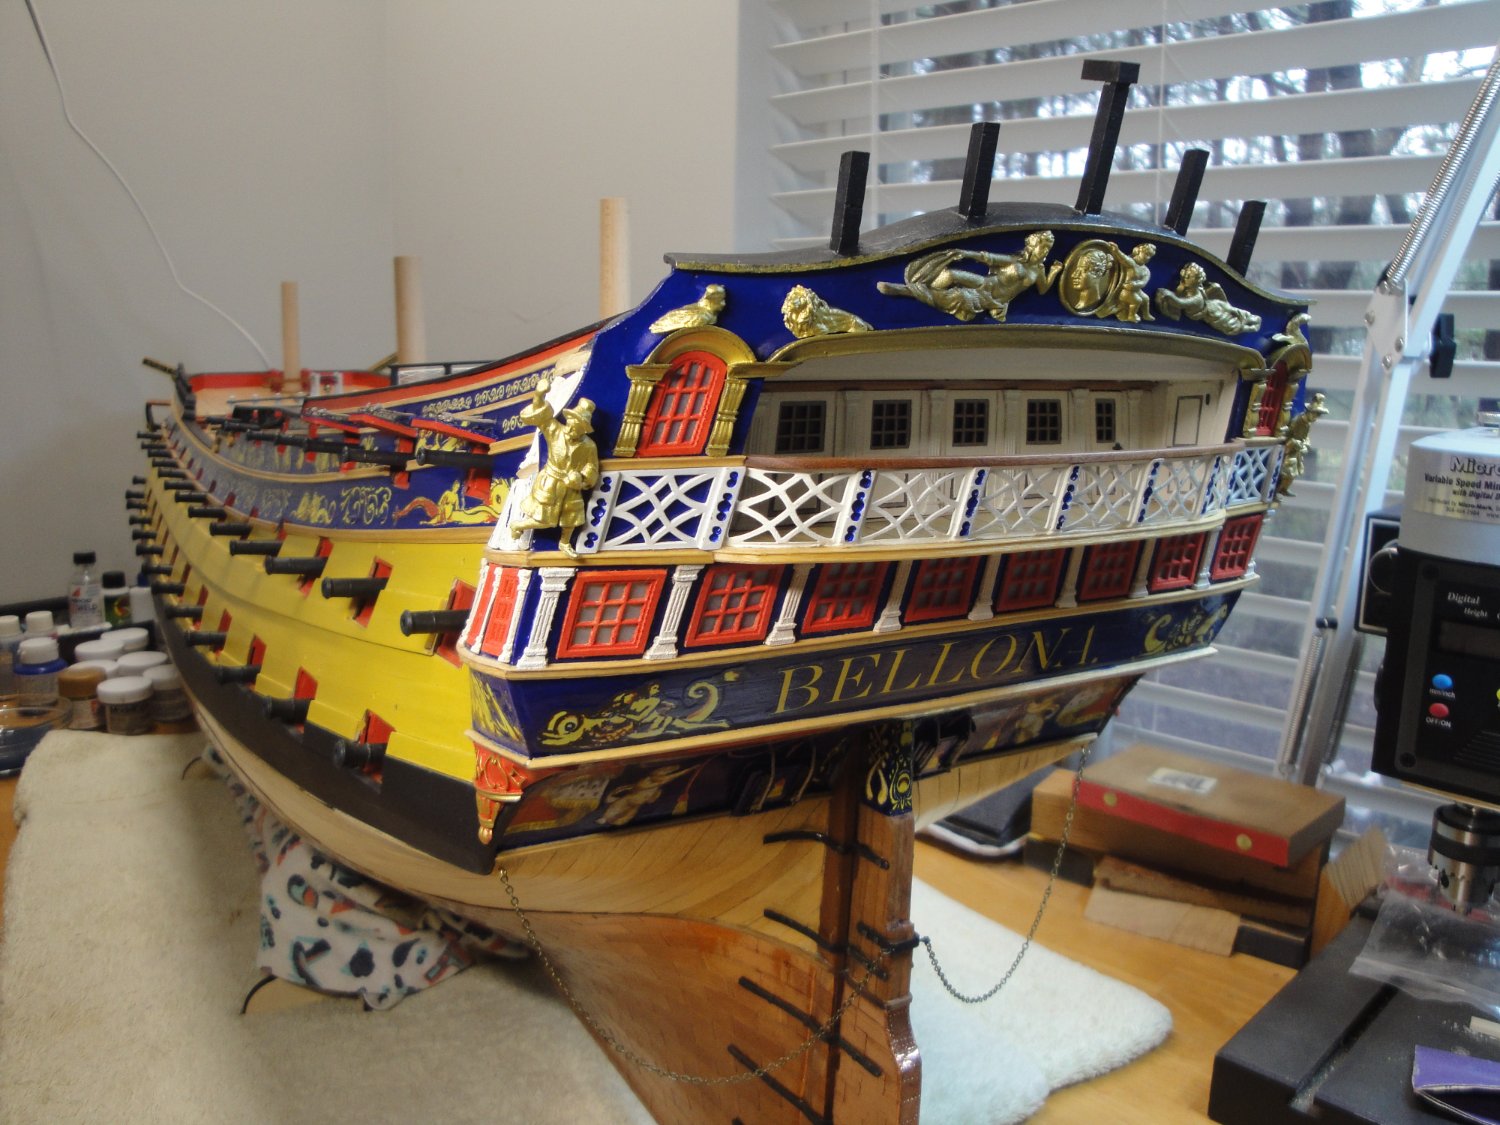
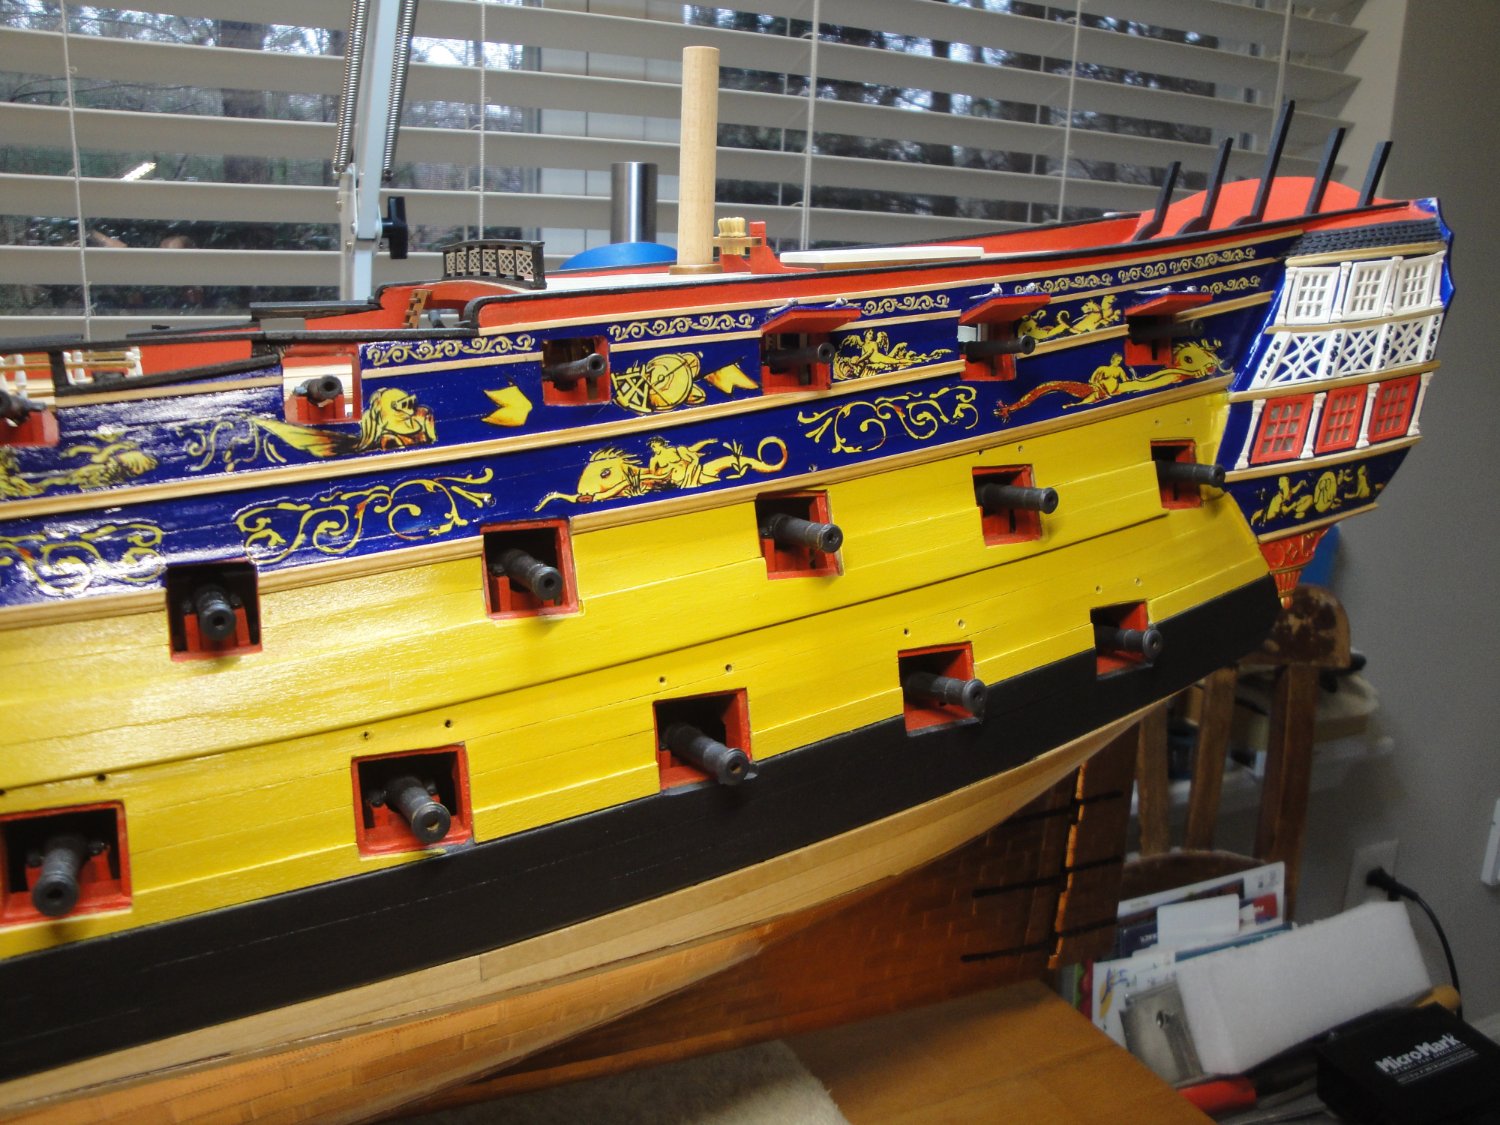
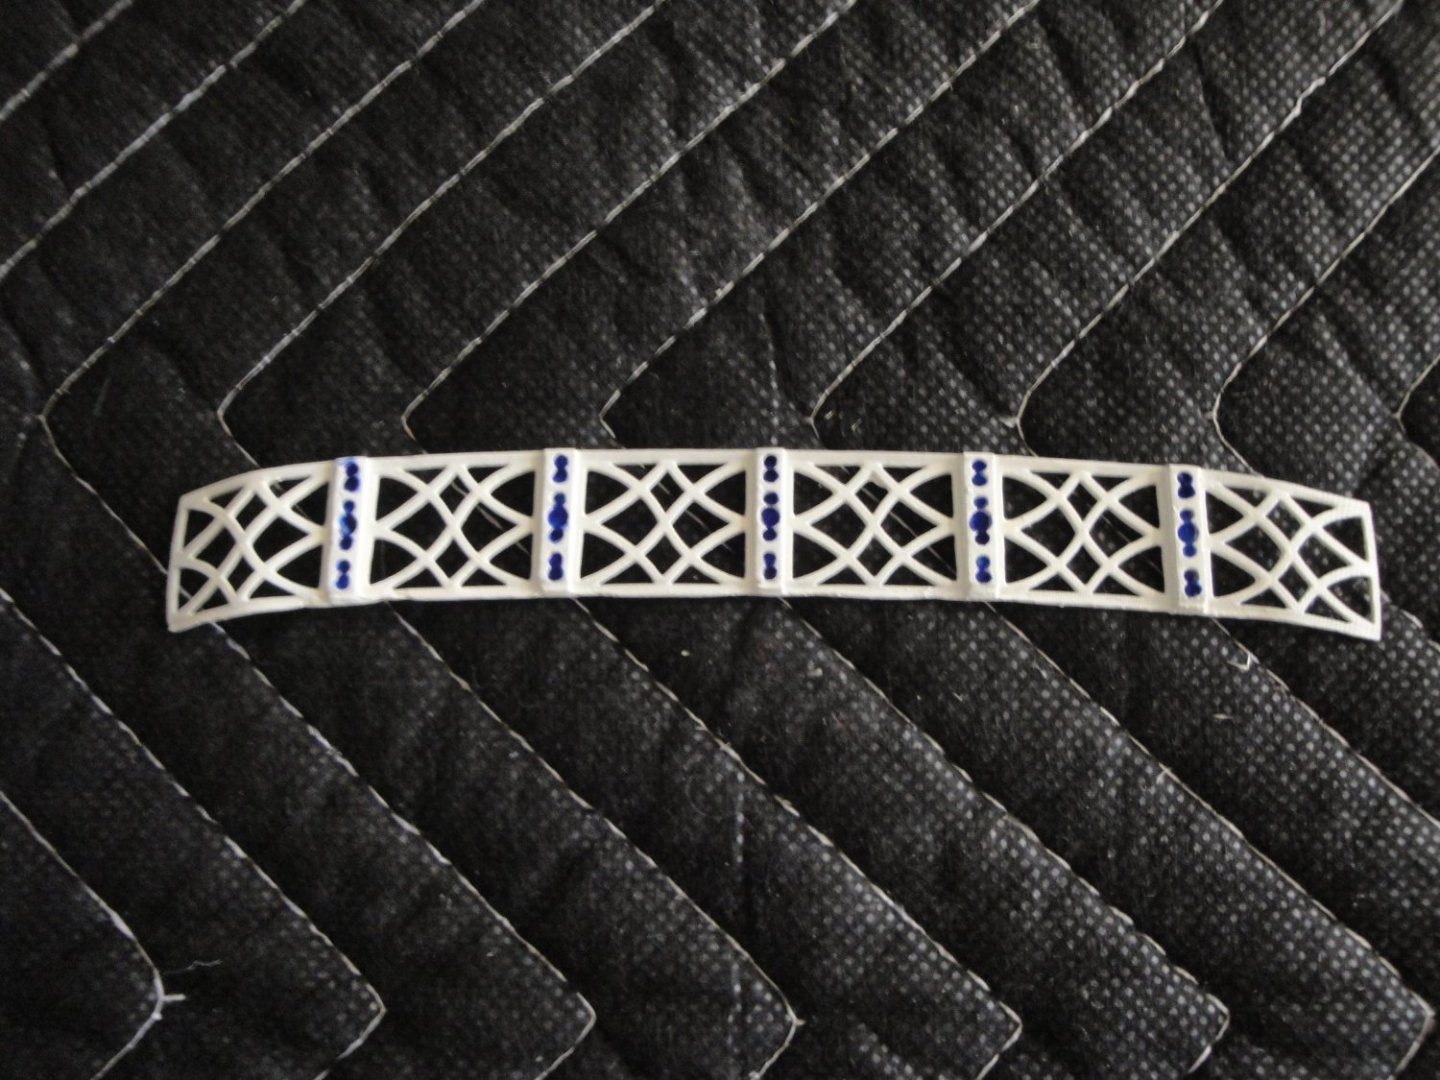
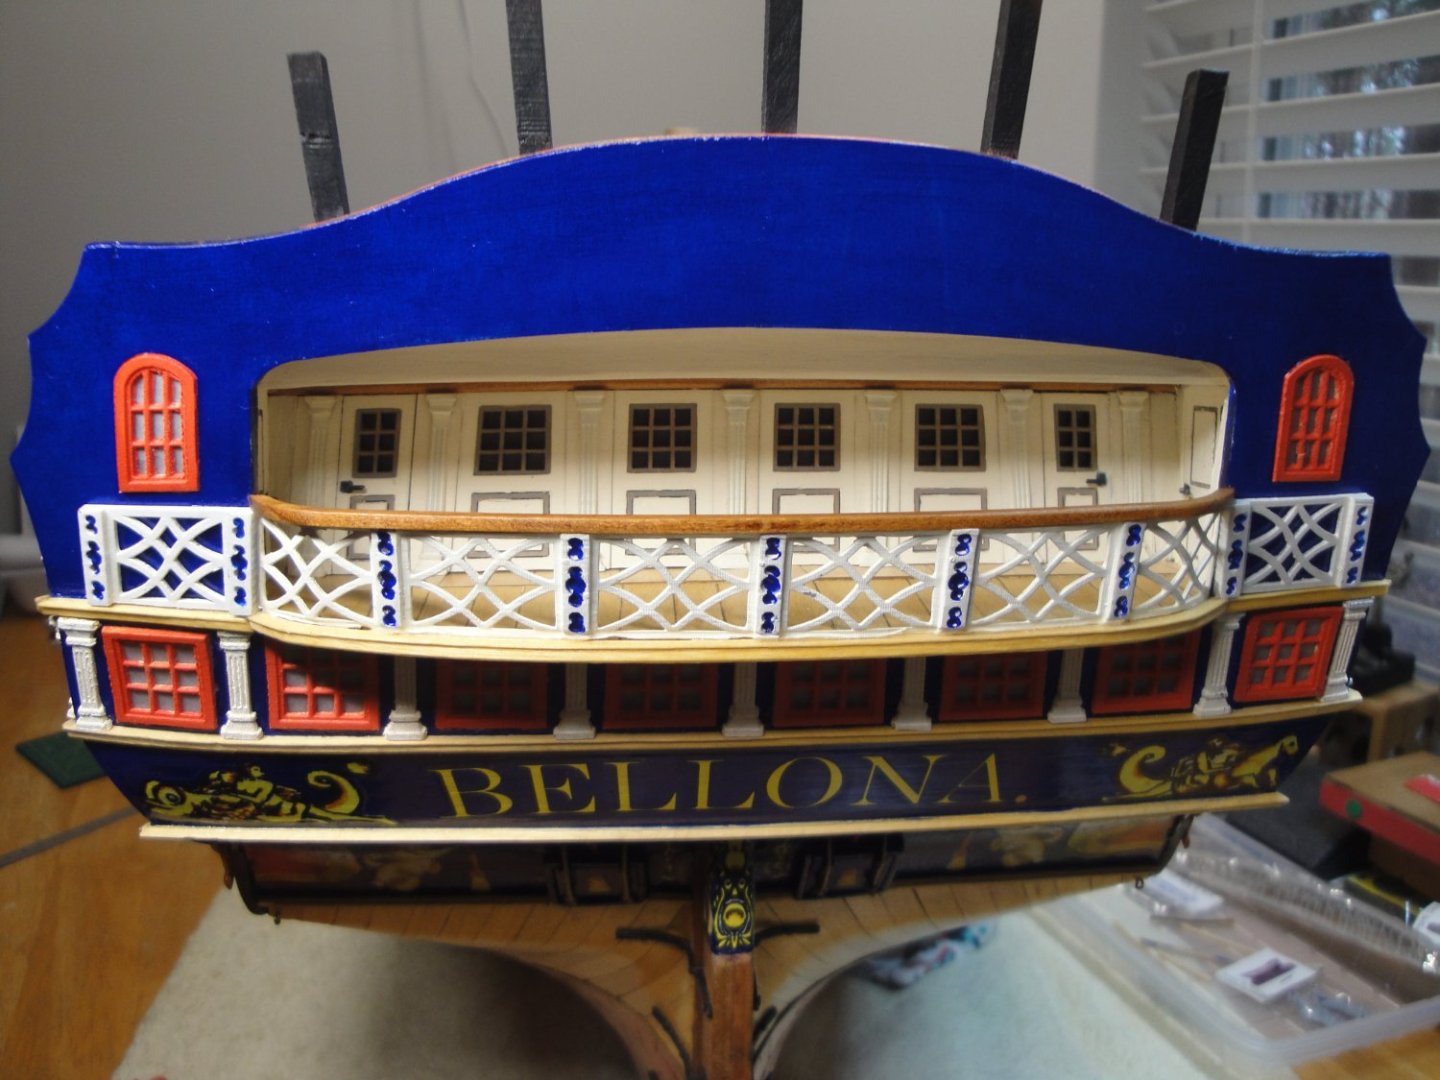
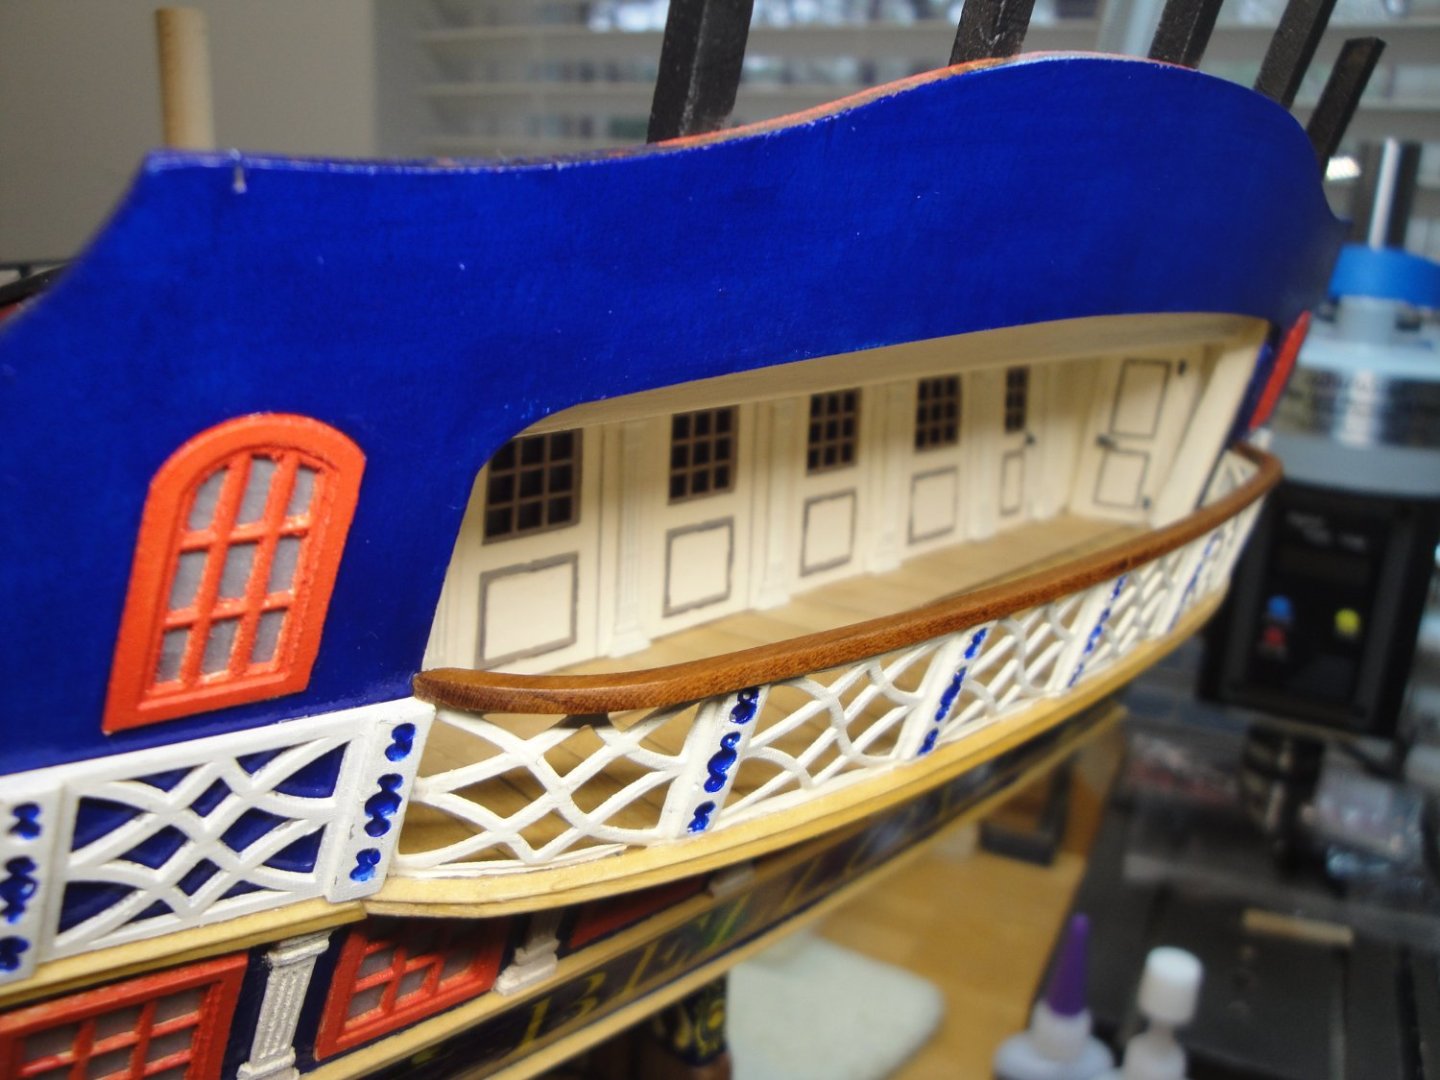
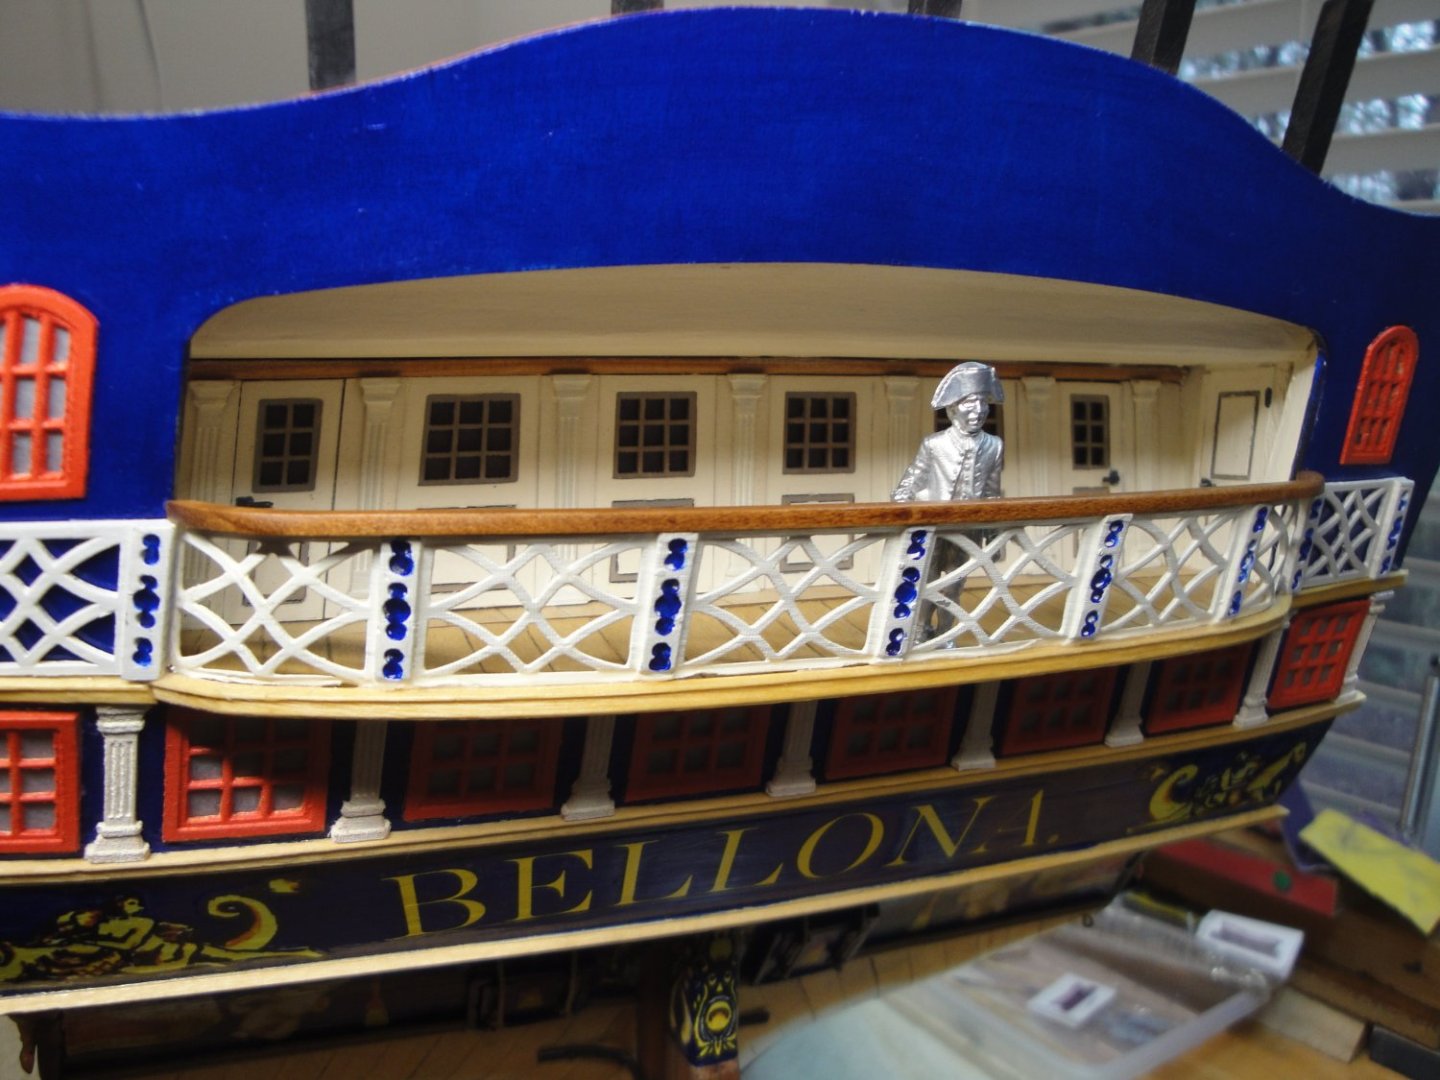
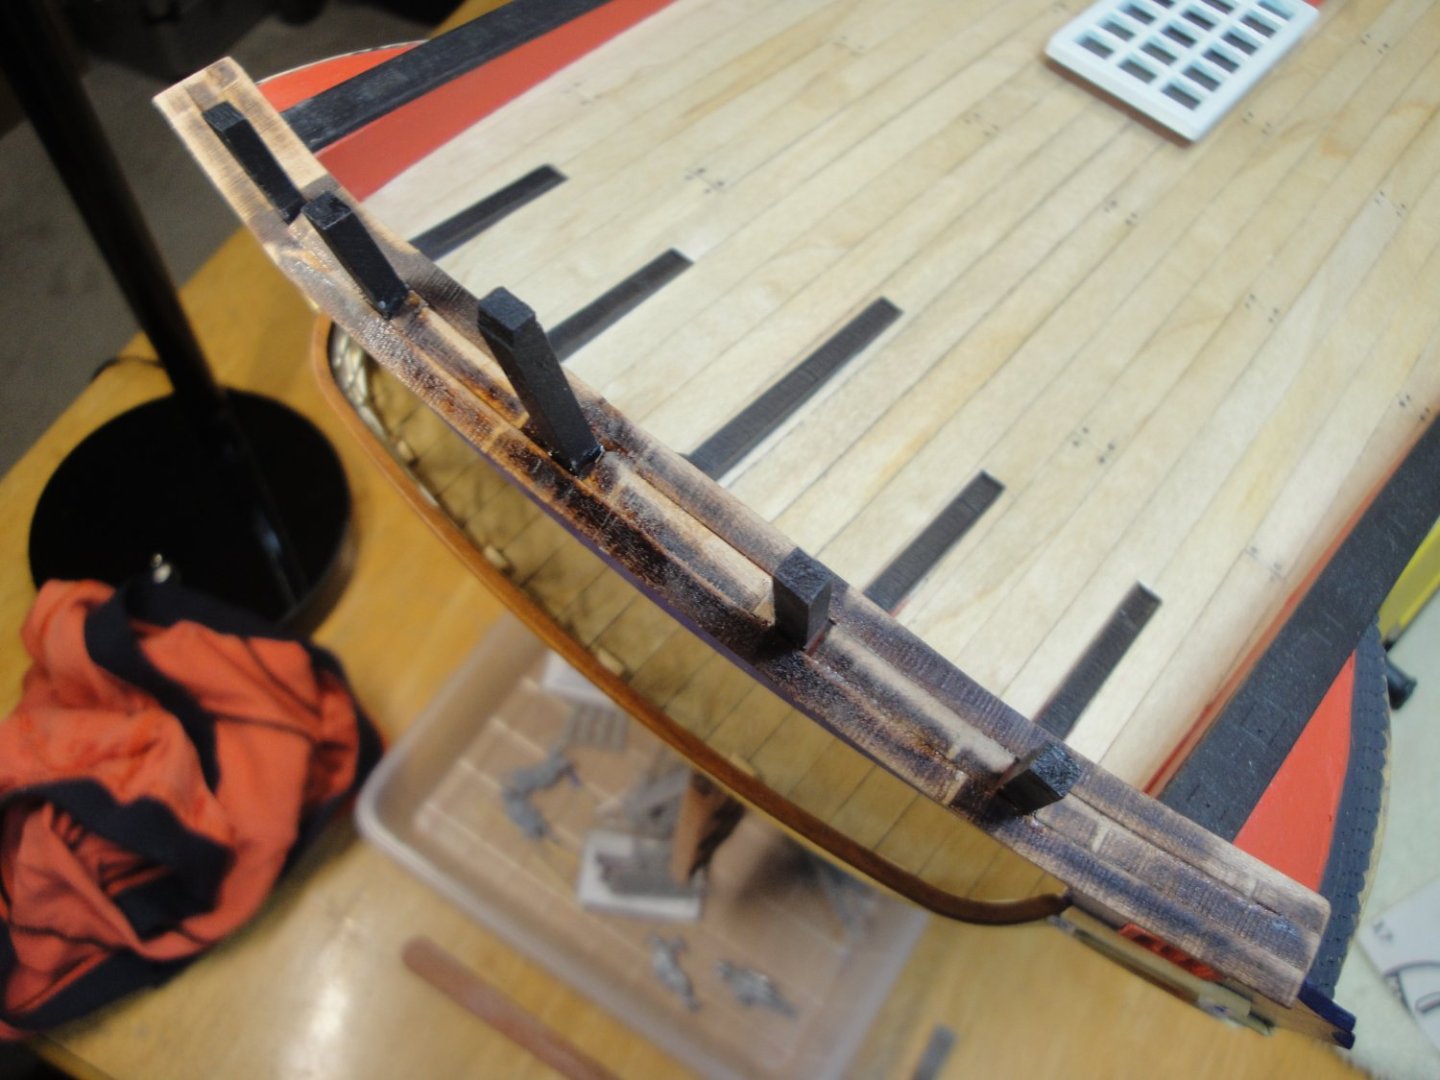
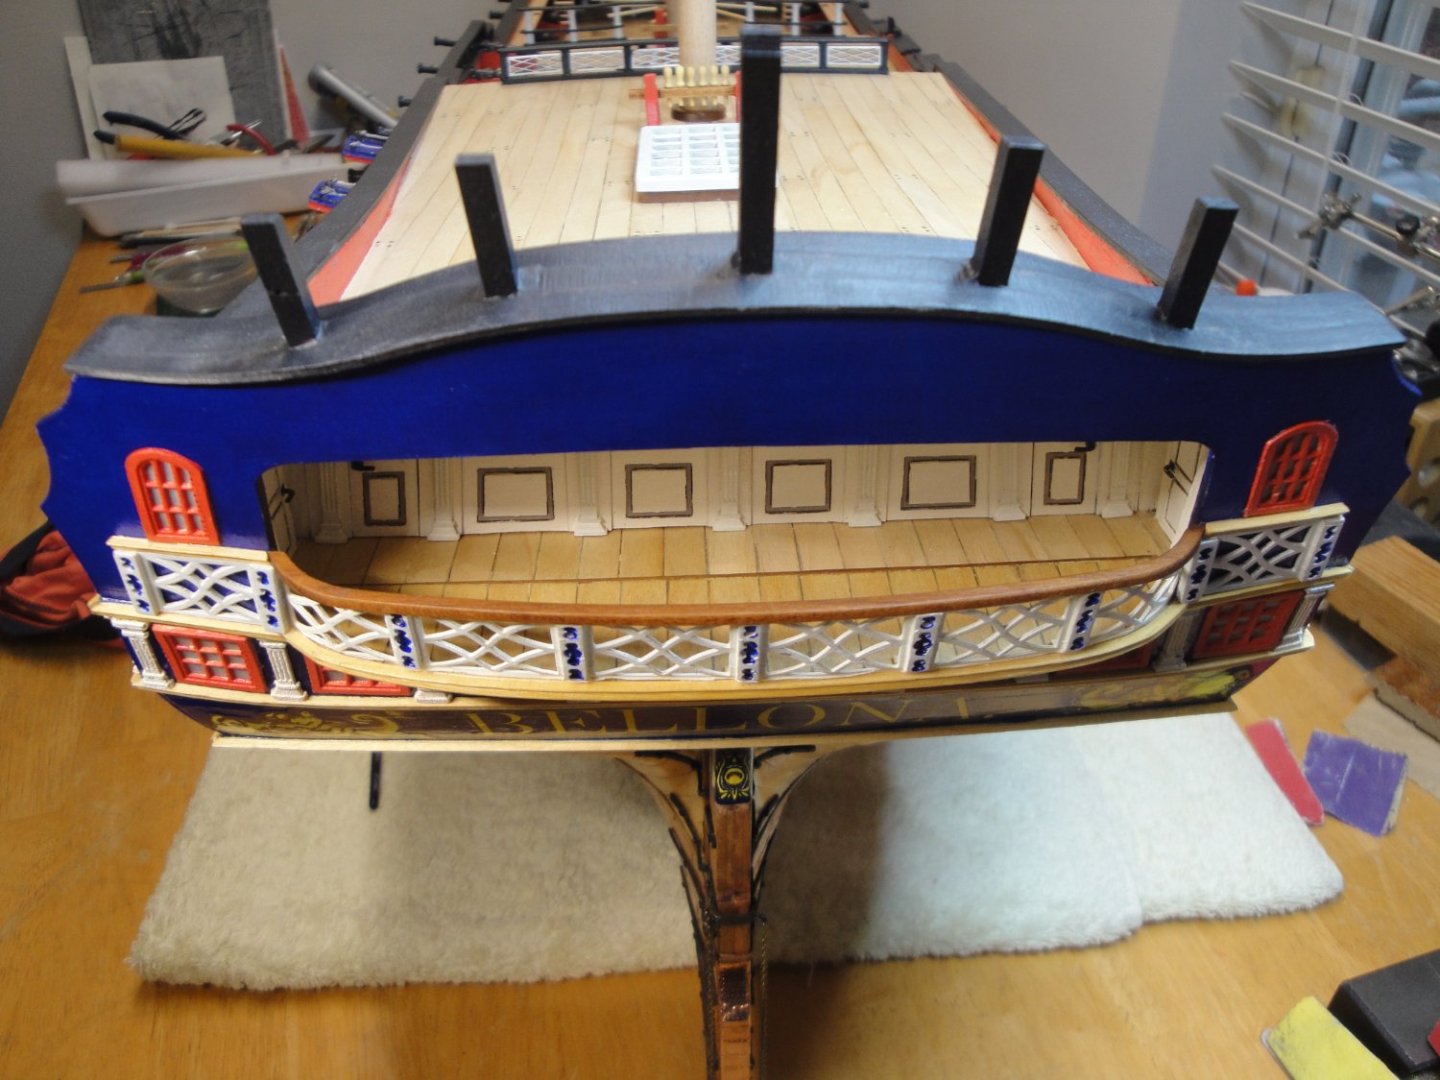
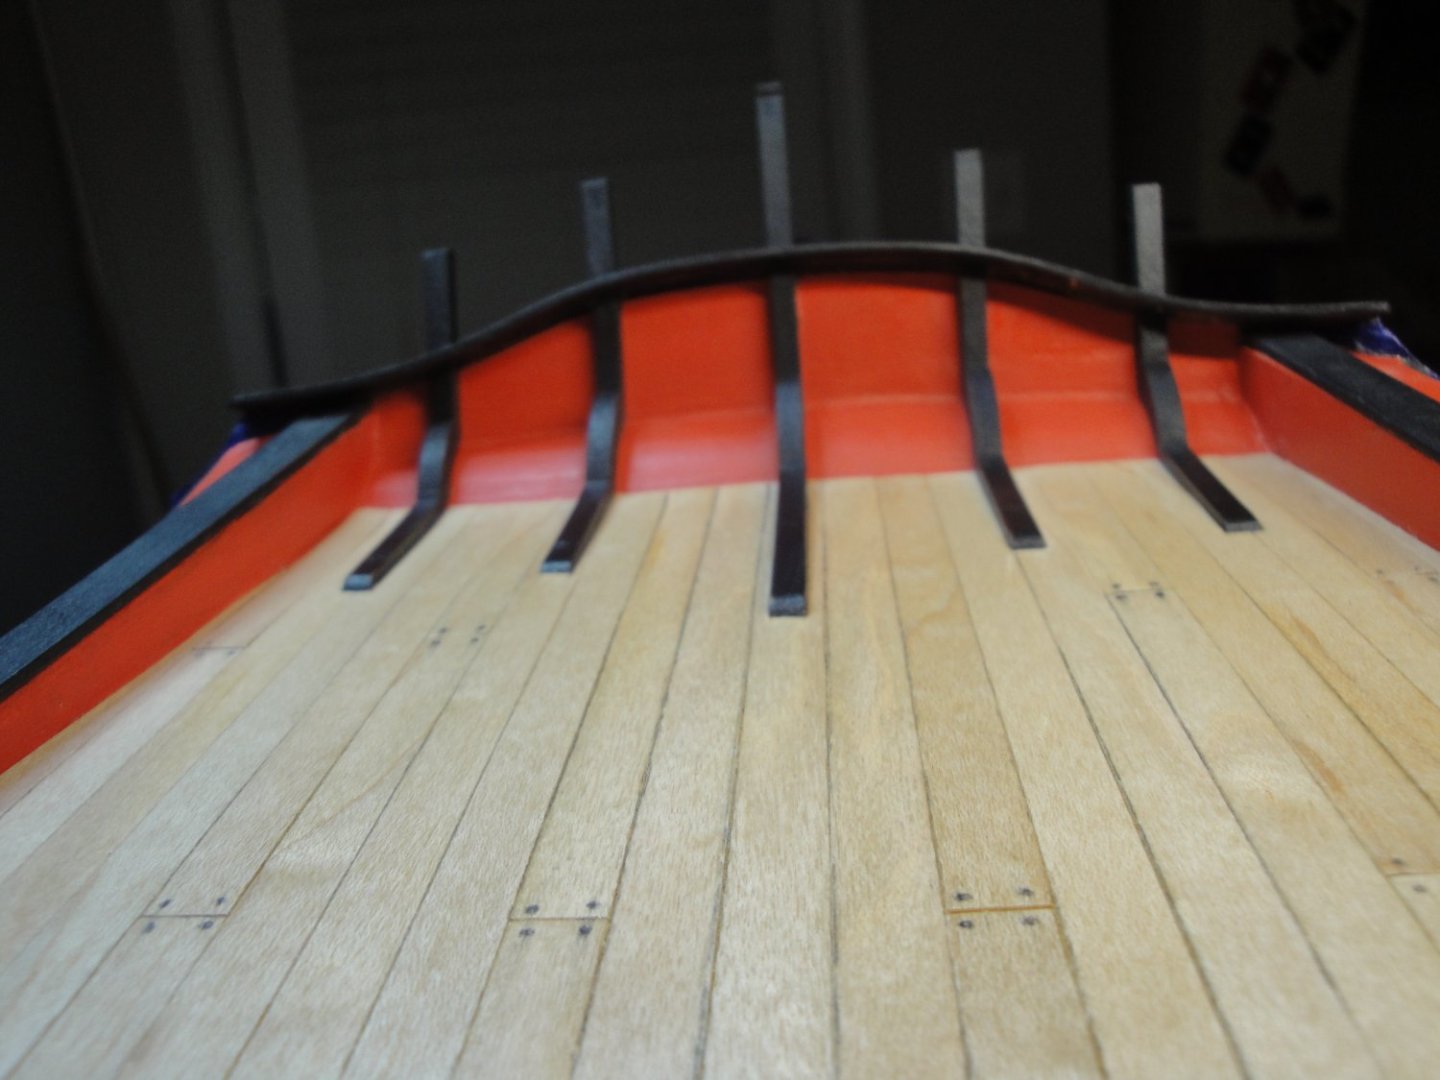
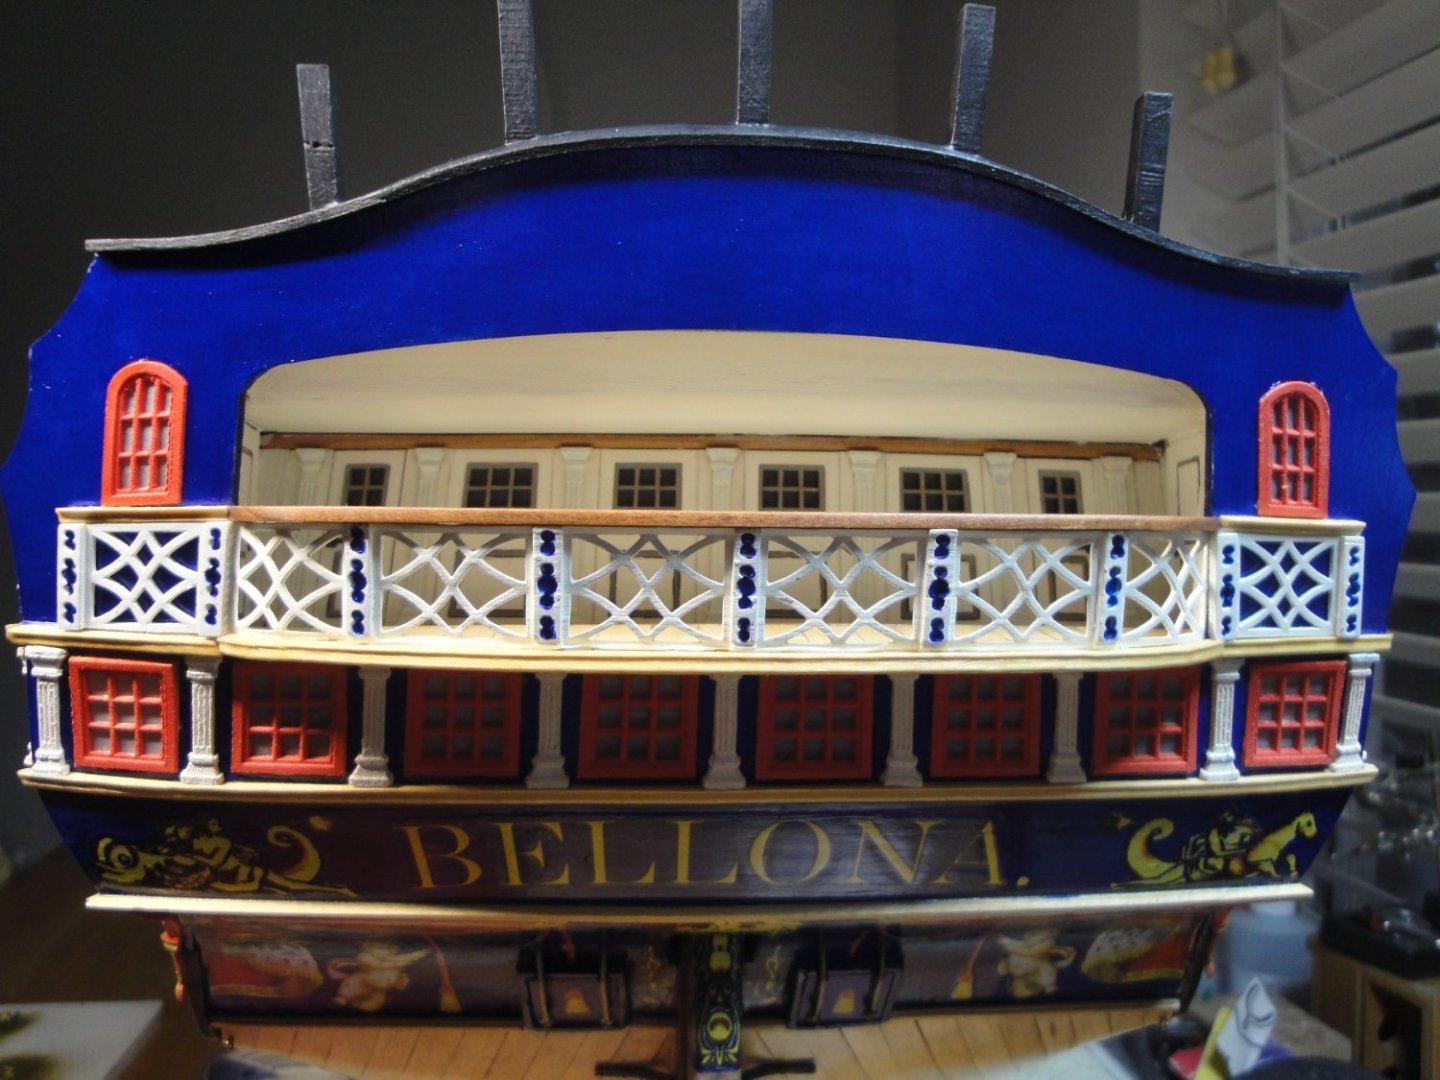
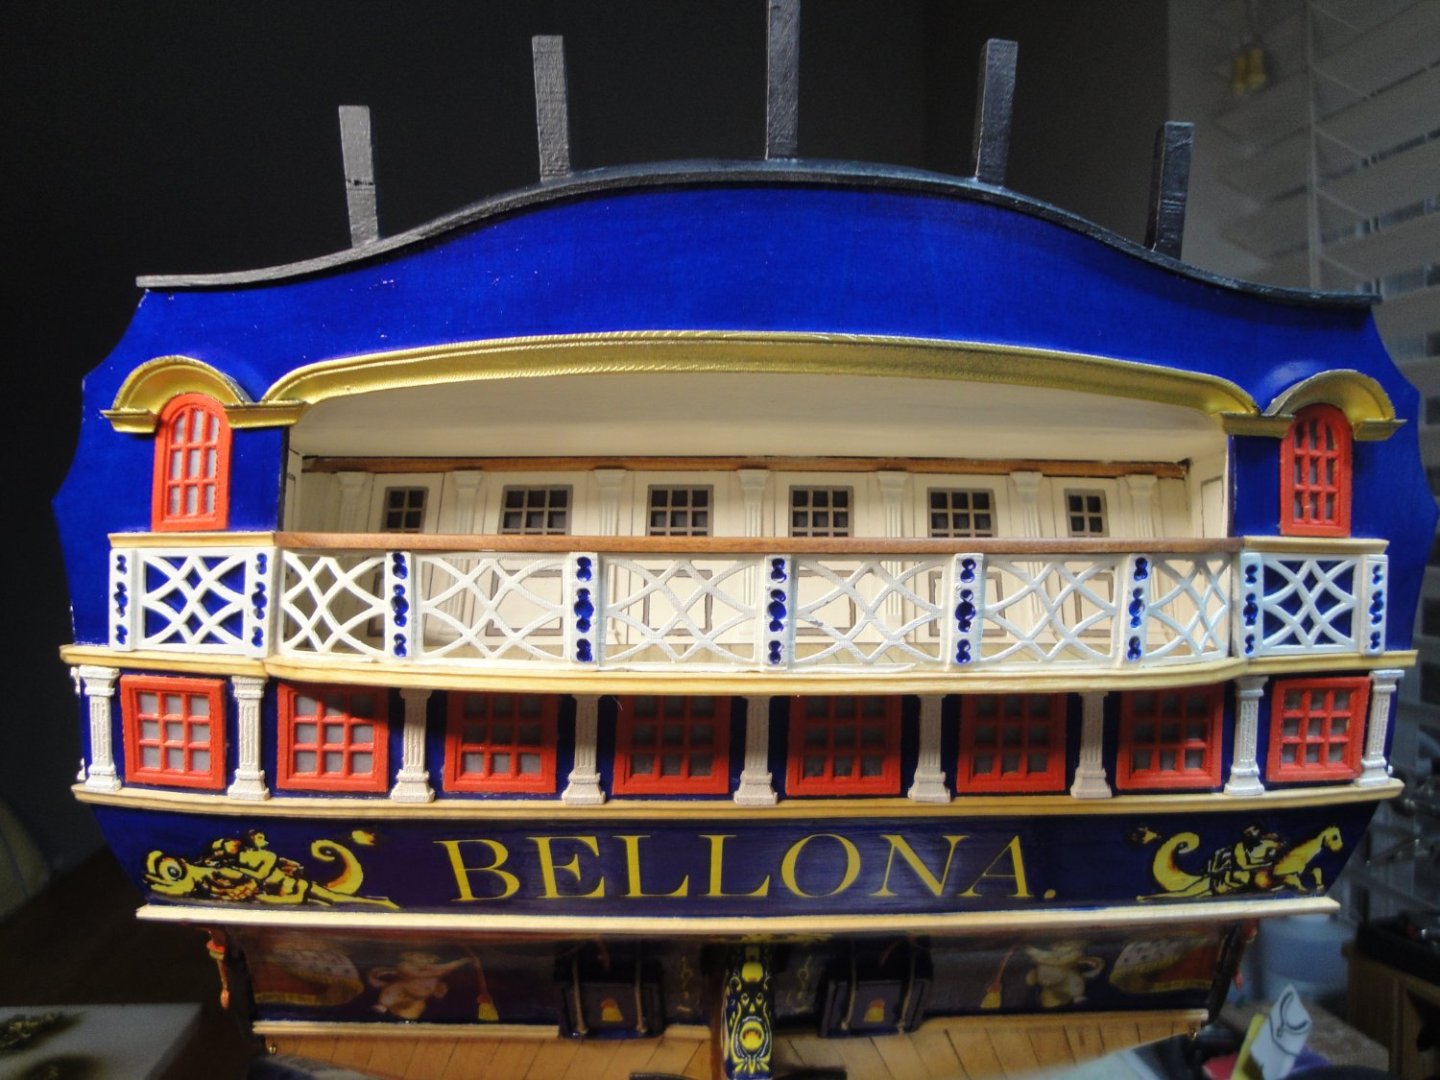
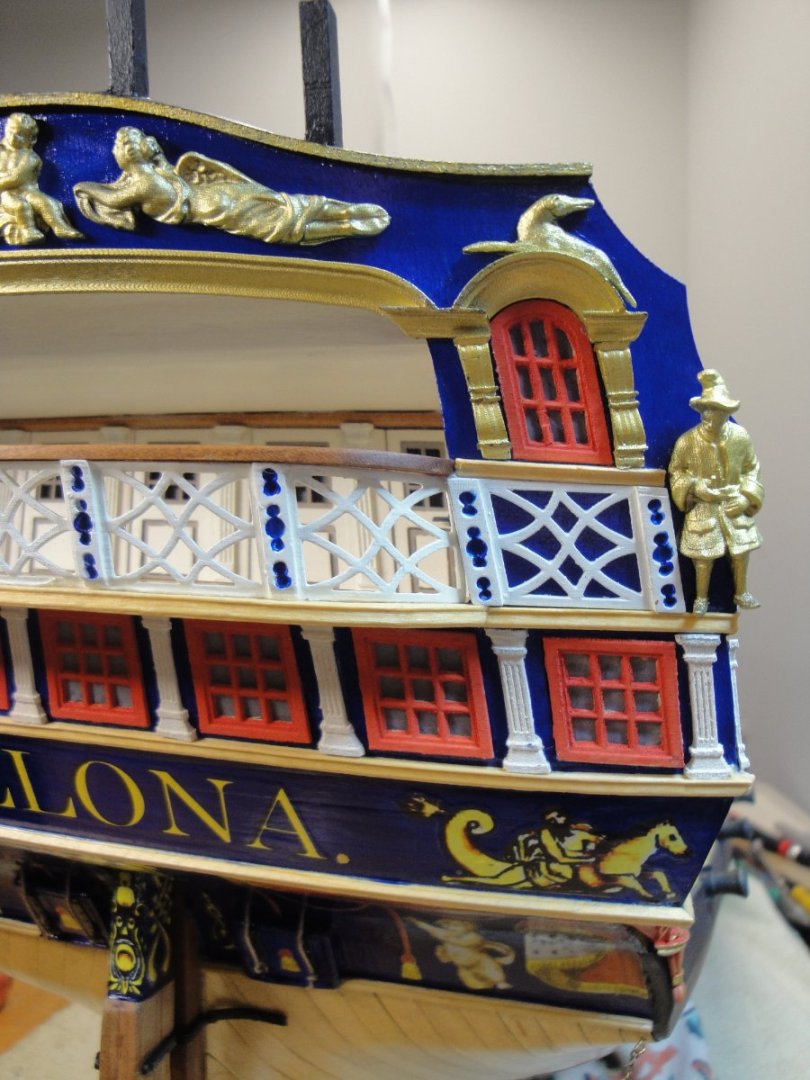
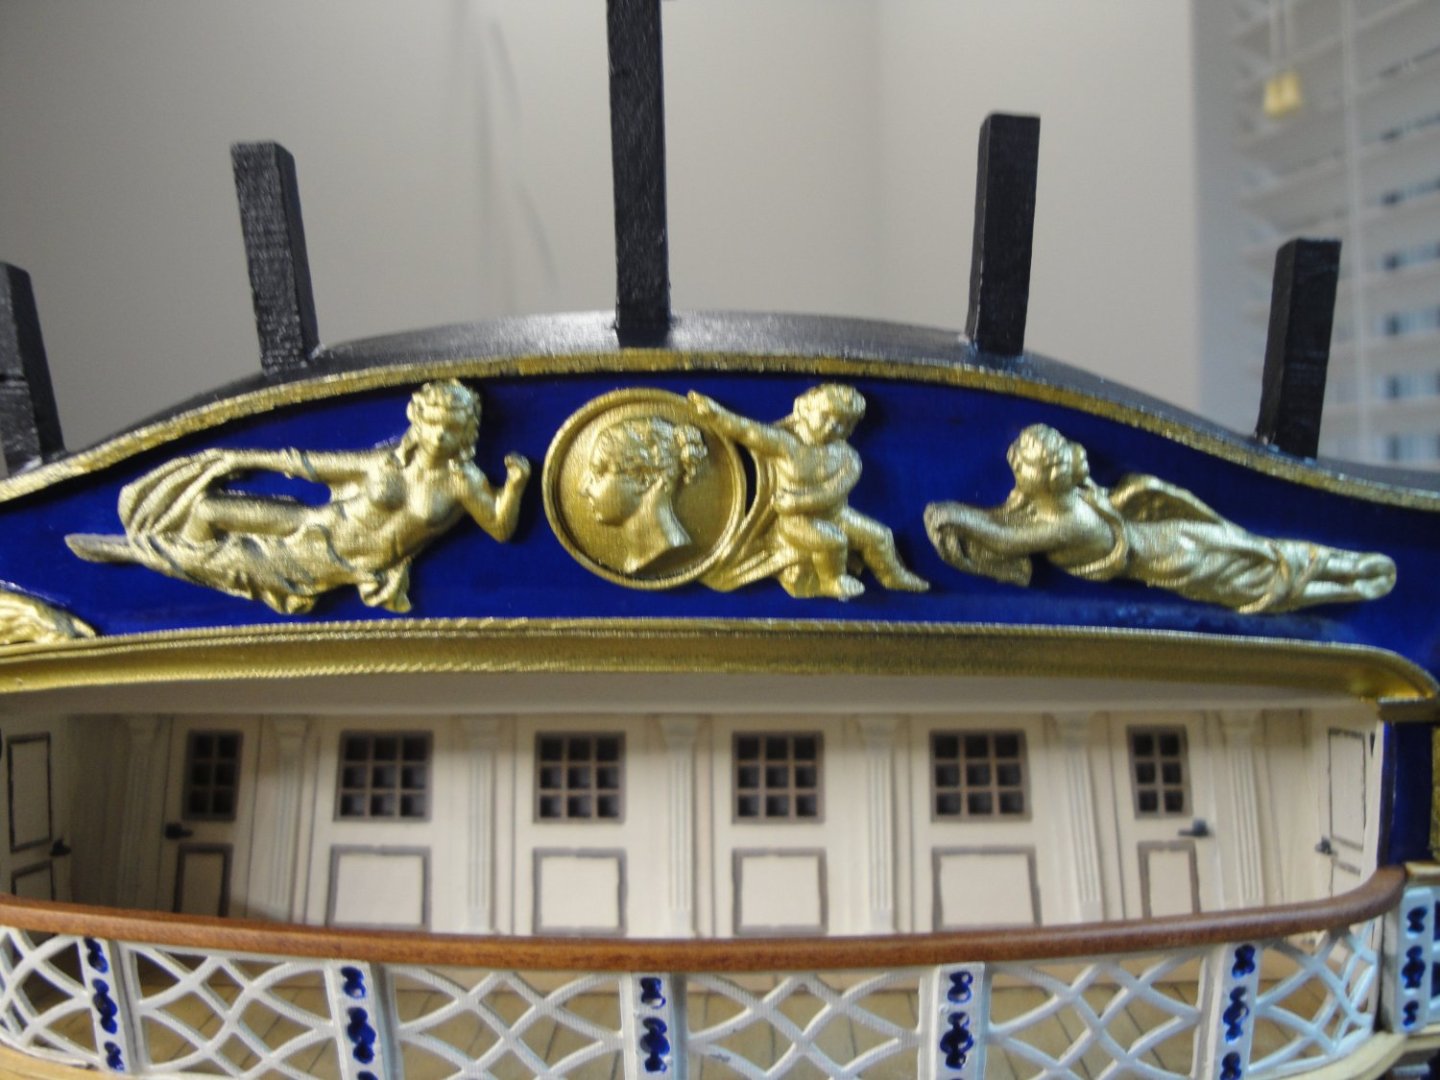
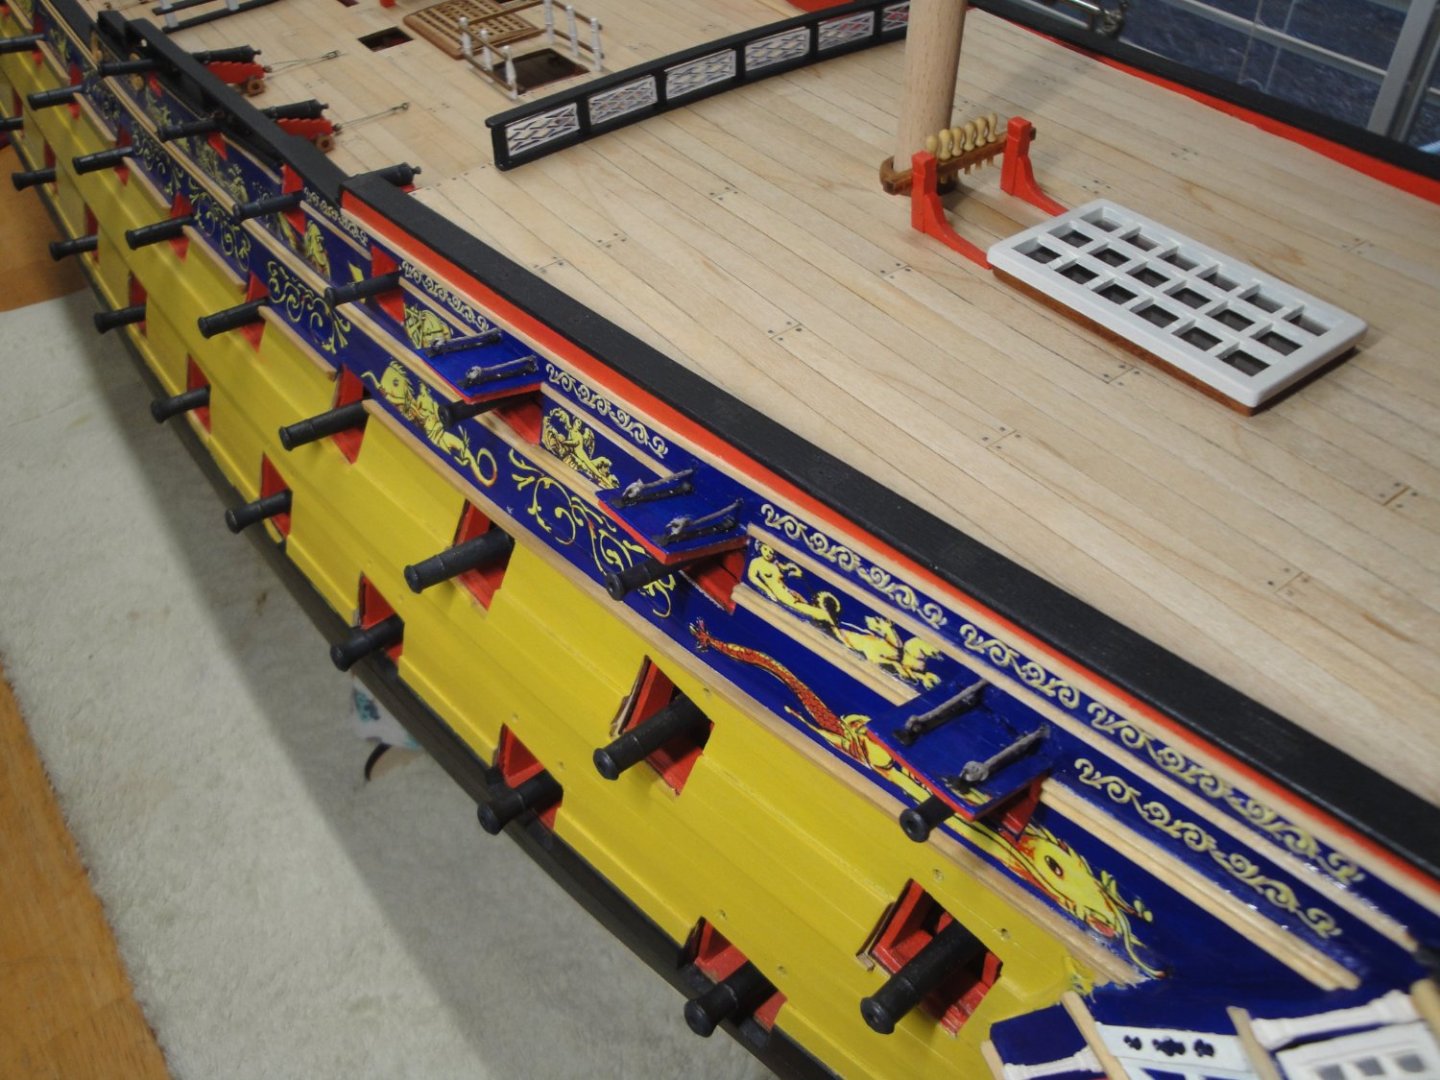
The poop of the ship is almost completed: Lots of small details went into it. The assembly is done bottom to top, starting with the rear balcony: First, the foot space rail is glued all around the platform (above). The curve is obtained after soaking it in the alcohol and bending carefully with some heat. To prevent the decorative railing from going in all directions, I have placed five tiny strips of wood, to retain it. These helps immensely the positioning and gluing of that delicate and wild resin part: Gluing is done carefully, one side at a time, using slow curing CA glue, to keep a hand in the position of that delicate and reluctant part. The breast rail is then placed and that strengthen considerably the railing, overall. The breat rail is treated with some oil, to give it that nice dark and deep color. Next is the complex assembly of the taffrail going on top of the stern. This part is a royal pain in the **** as we need to bend cherry wood (which is never easy). The taffrail is made of three layers of strips to be glued with two curved planes. Not an easy thing to do. Again, CA glue is your best friend. A little bit of paint: We can move on with the decorative gold leafed parts on the stern. All parts are fist painted matte black (Tamiya) and then airbrushed with Gold Leaf (Tamiya). All the parts are made of resin. The first part to be positioned is the "necking of the taffrail" if I am not mistaken. Then we assemble the pilasters on each side of the rear windows. And we can then place all the decorative sculptures, munnions and carvings. Overall view of the PORT side: Of course, I still have to do the starboard side: It looks quite bare in comparison..... That's all for today, folks. Yves


- 507 replies
-
- 19
-
-

-
DKM U-Boat Conning Tower by yvesvidal - Border - 1/35
yvesvidal replied to yvesvidal's topic in REVIEWS: Model kits
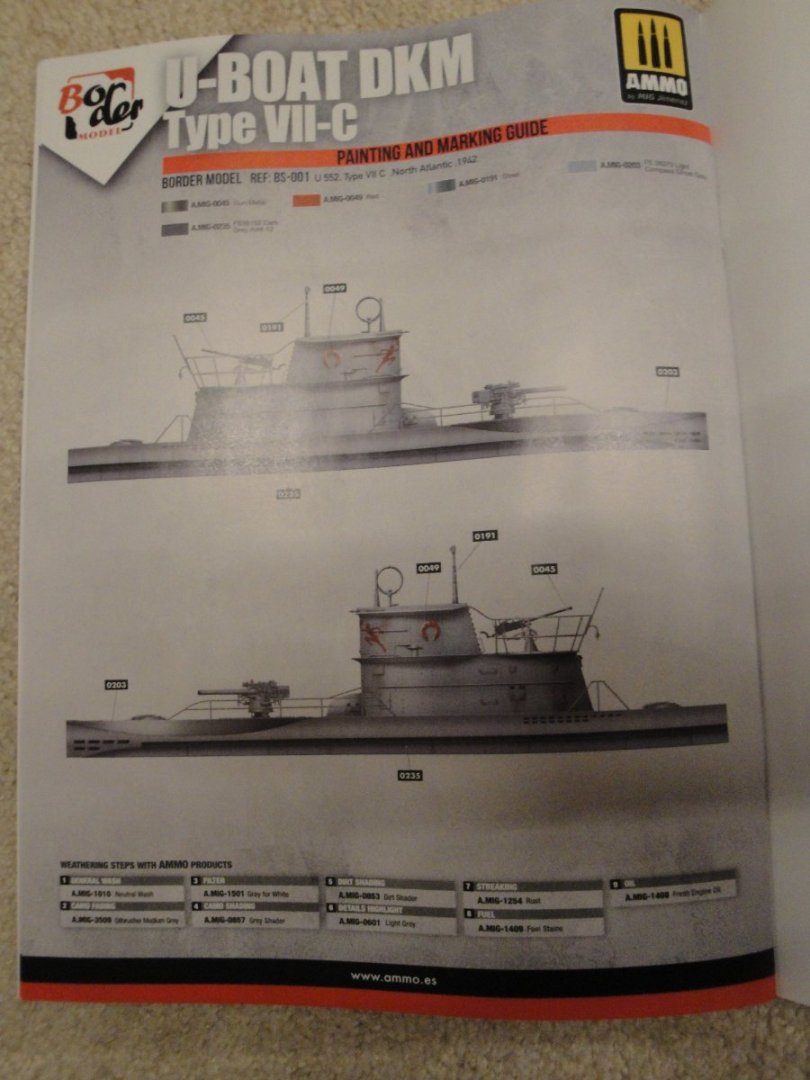
Great find RGL. I used RCSubs (CZ Subs) for my Trumpeter Type VII-C in 1/48 and I could not have been happier with their products. It looks like there will be plenty of add-ons and money to spend..... https://www.rcsubs.cz/index.php/photo-etched-sets/75-sets-for-viic-1-35-border-bs-001 Yves- 6 replies
-
- 3
-
-
- U-boat
- Type VII Submarine
- (and 1 more)
-
Incredible project for a lovely liner. I will be following your progress. Yves
-
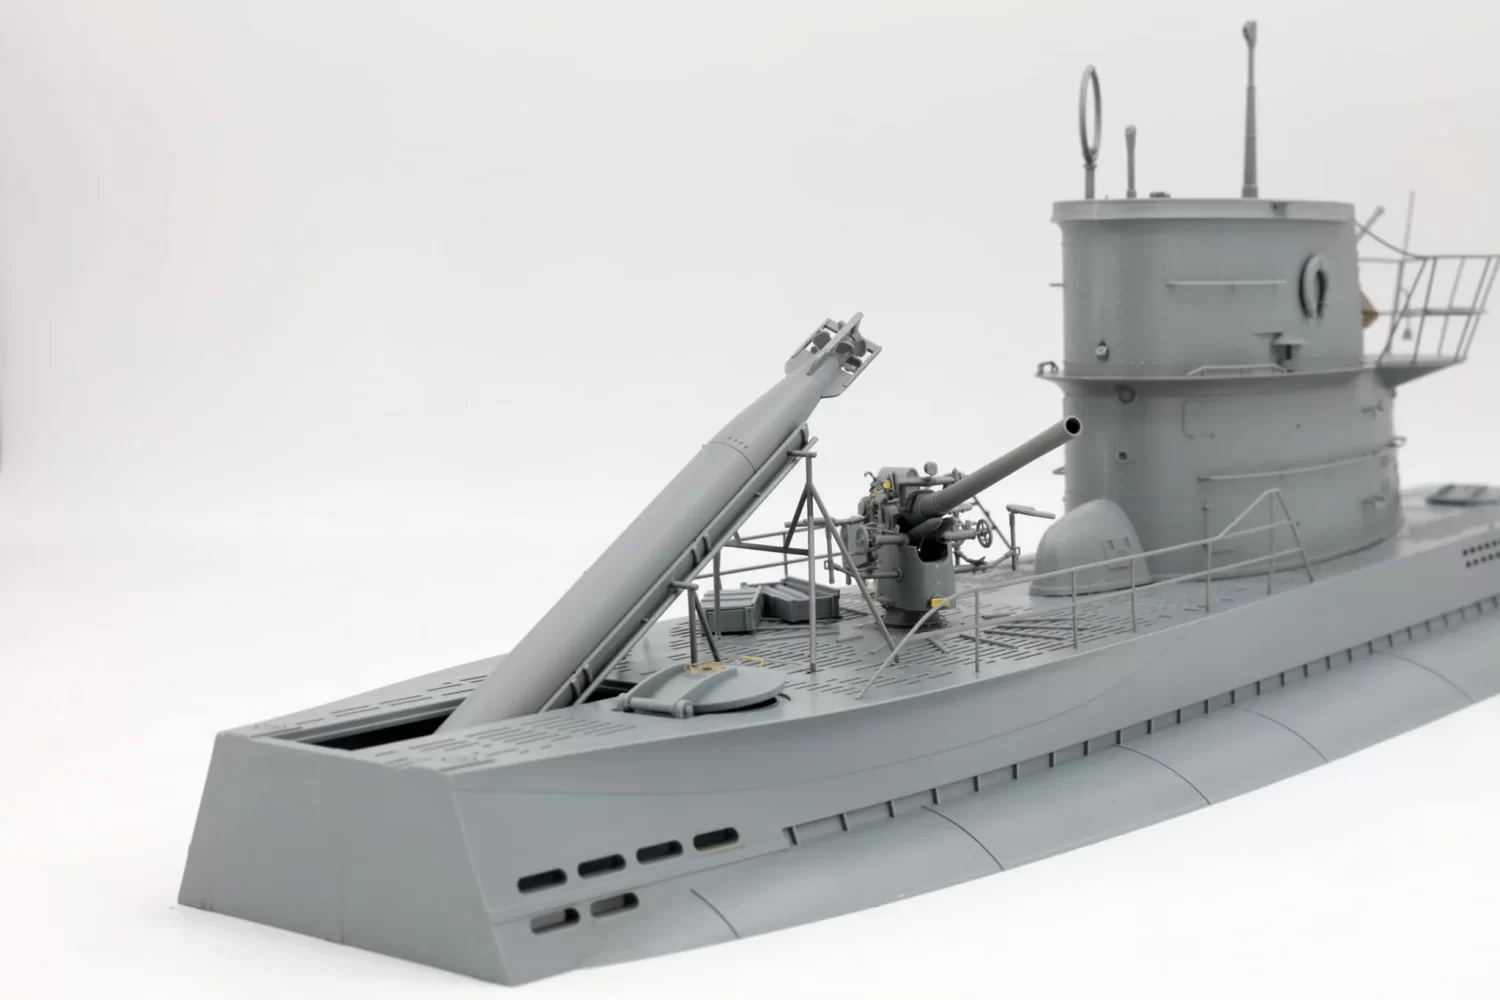
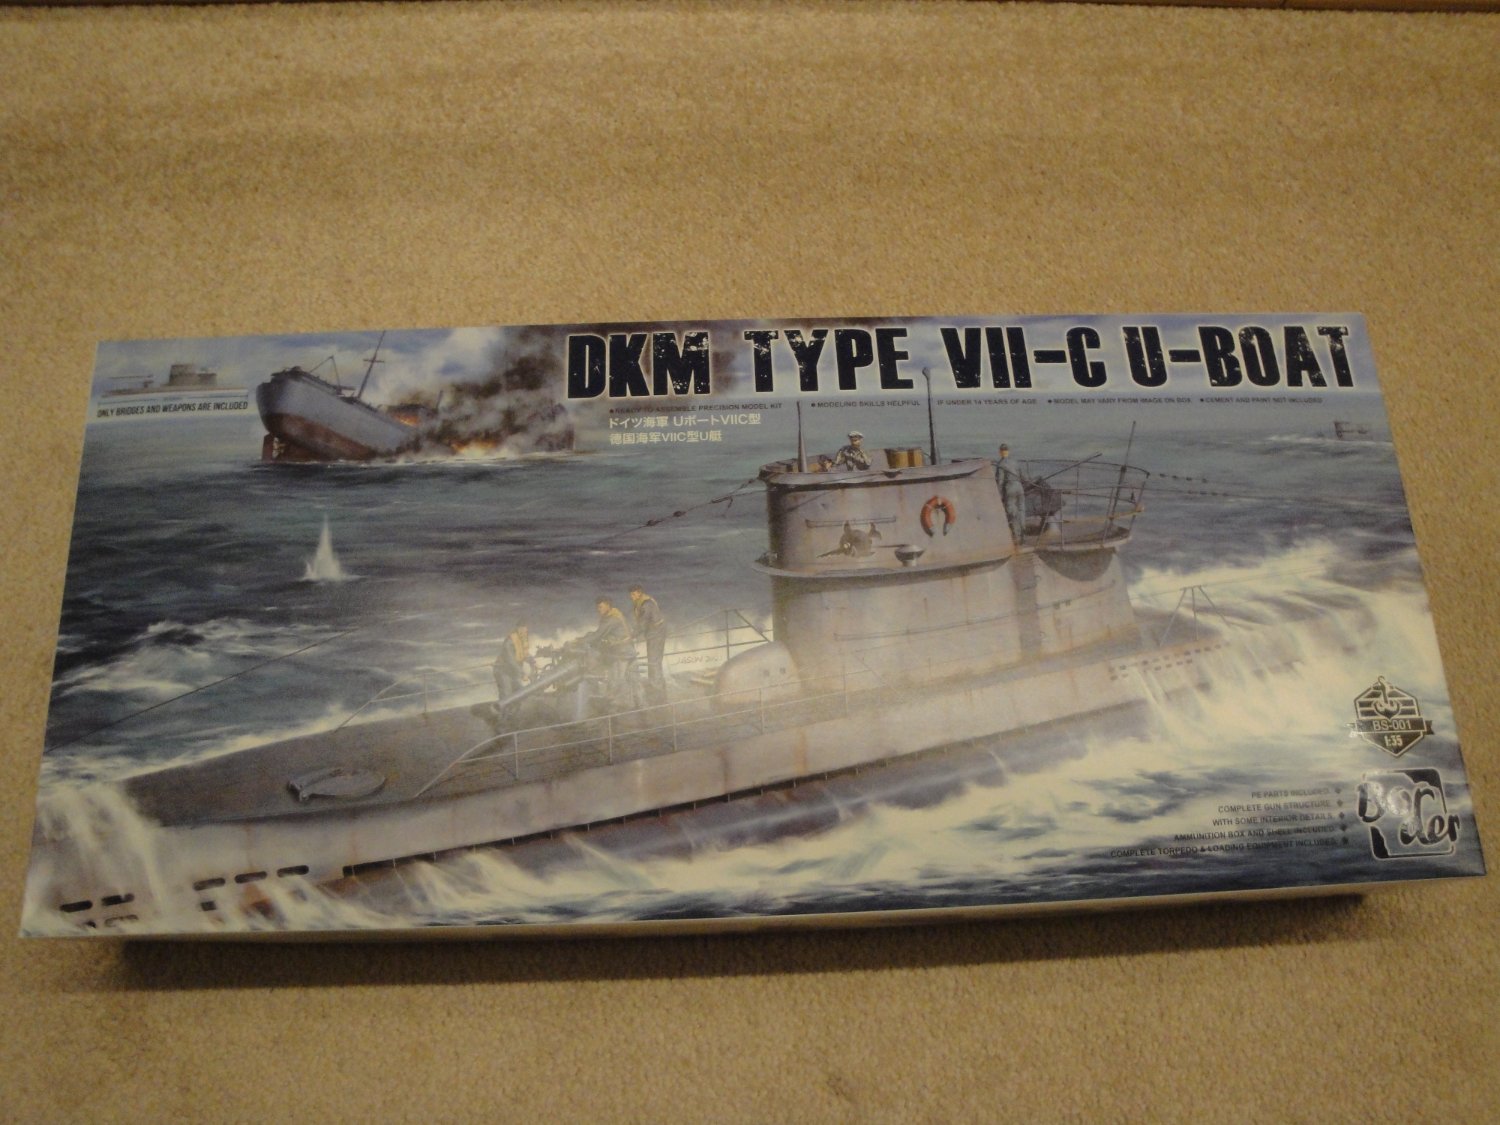
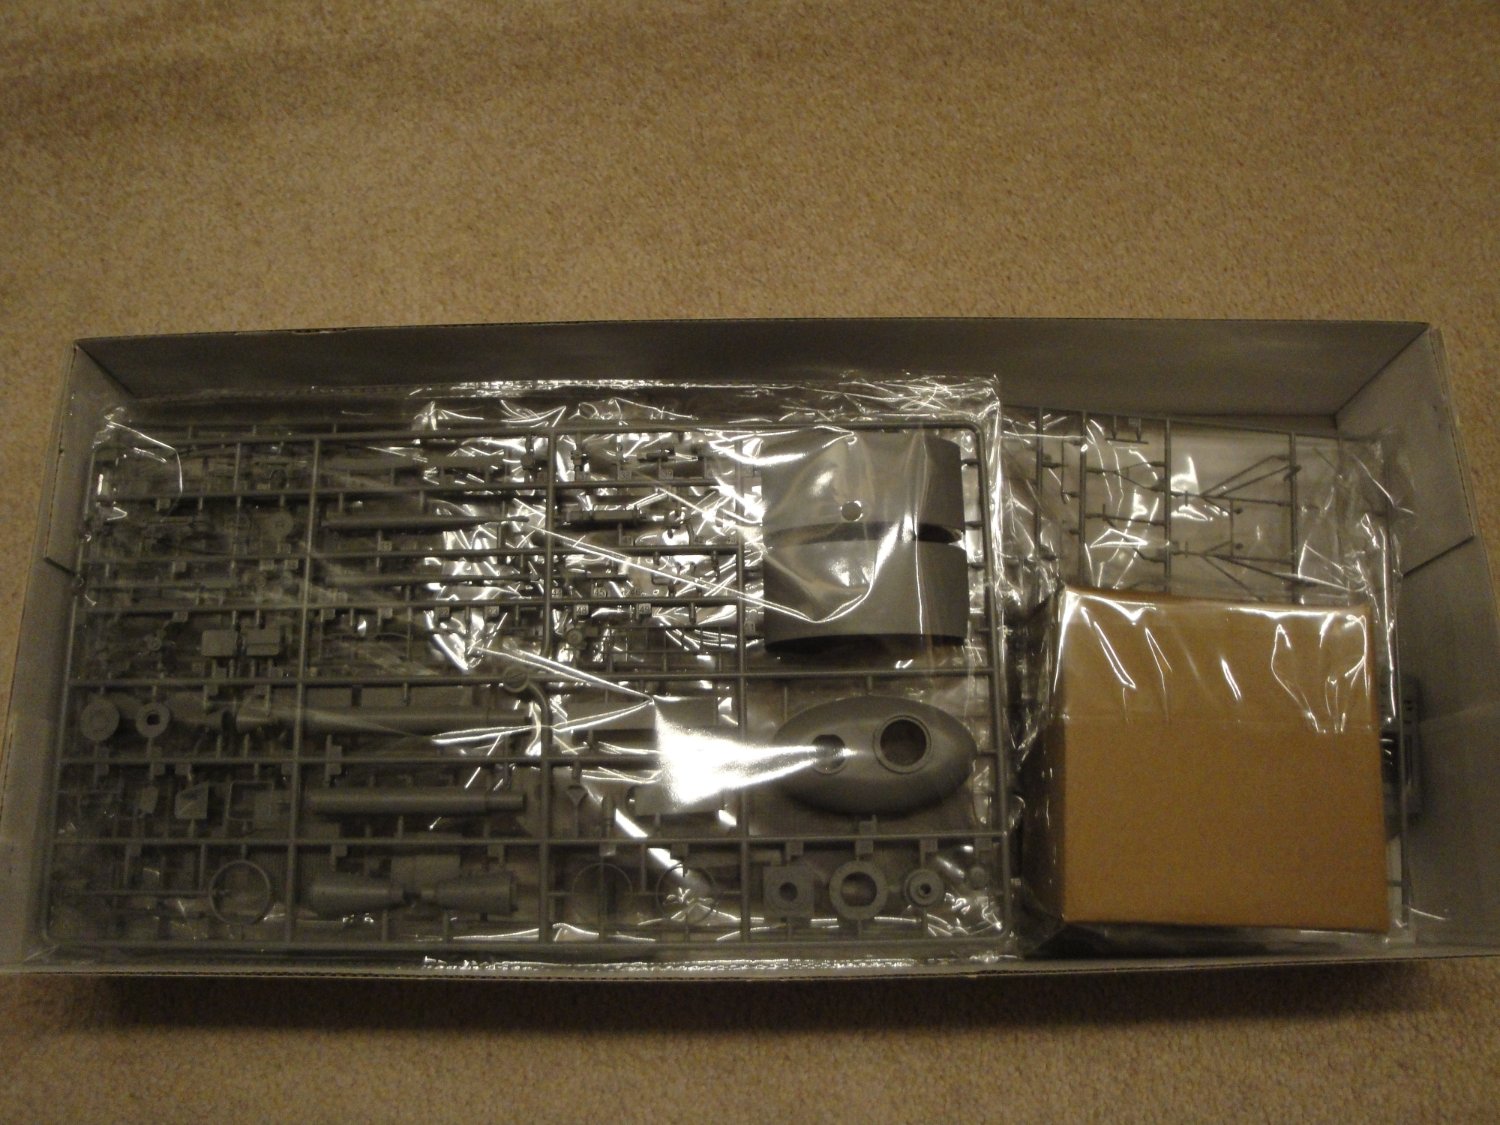
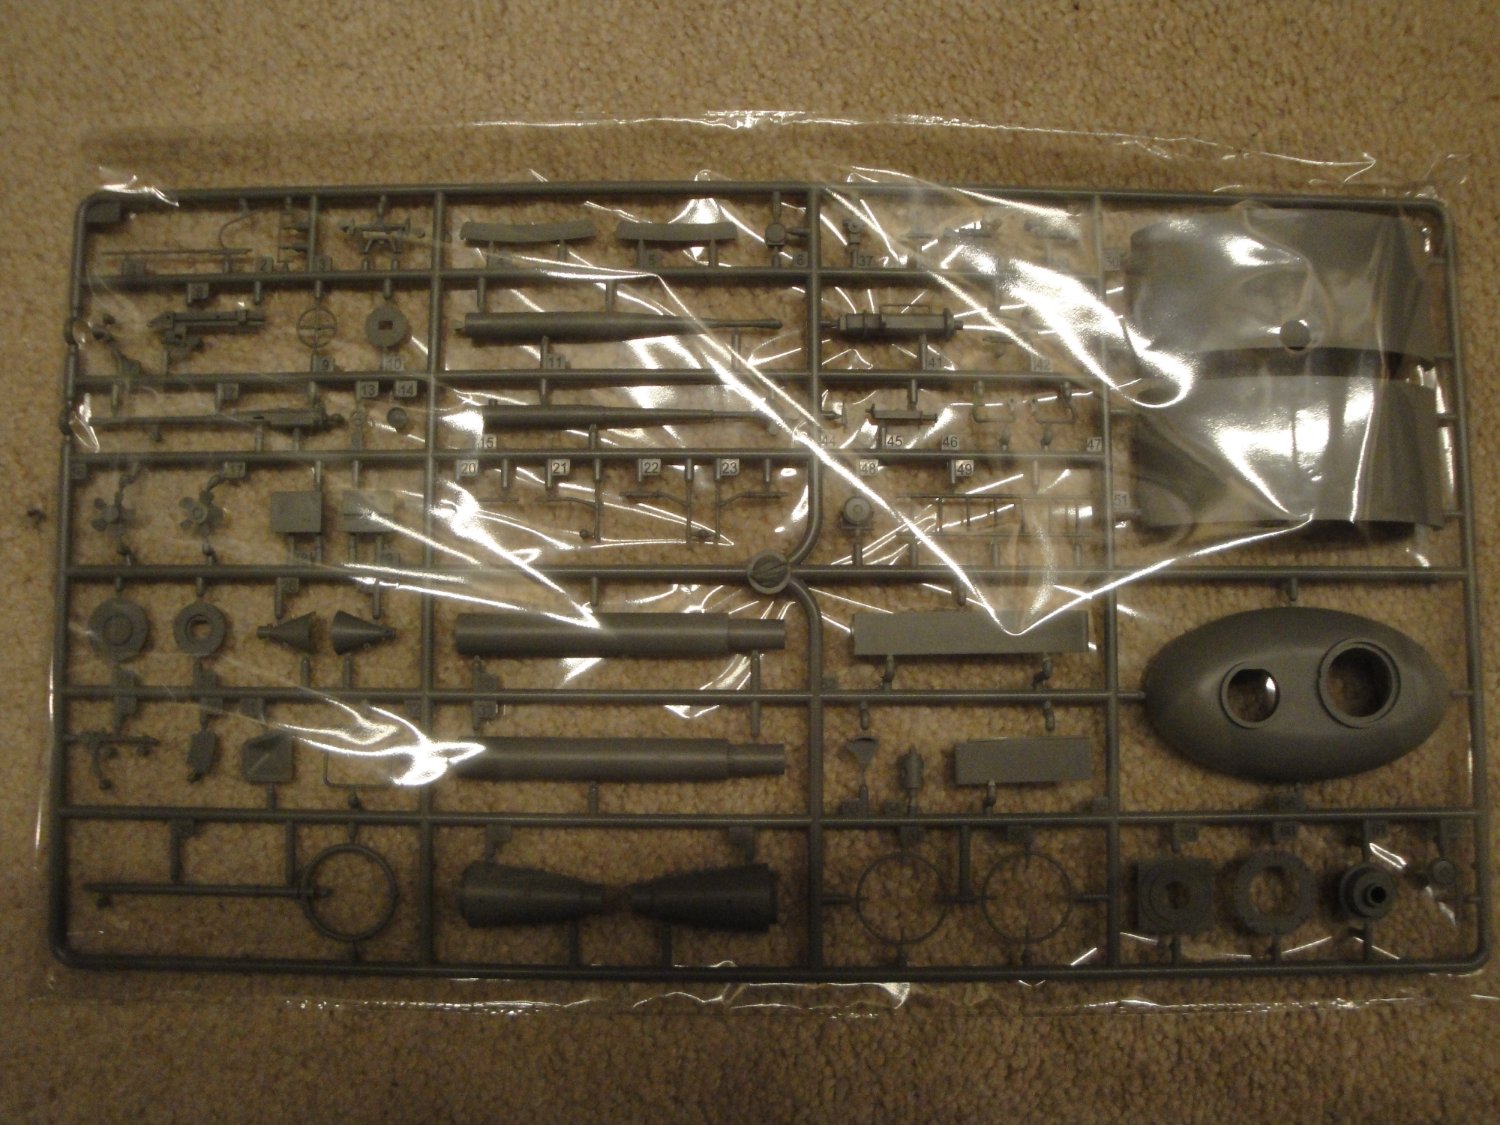
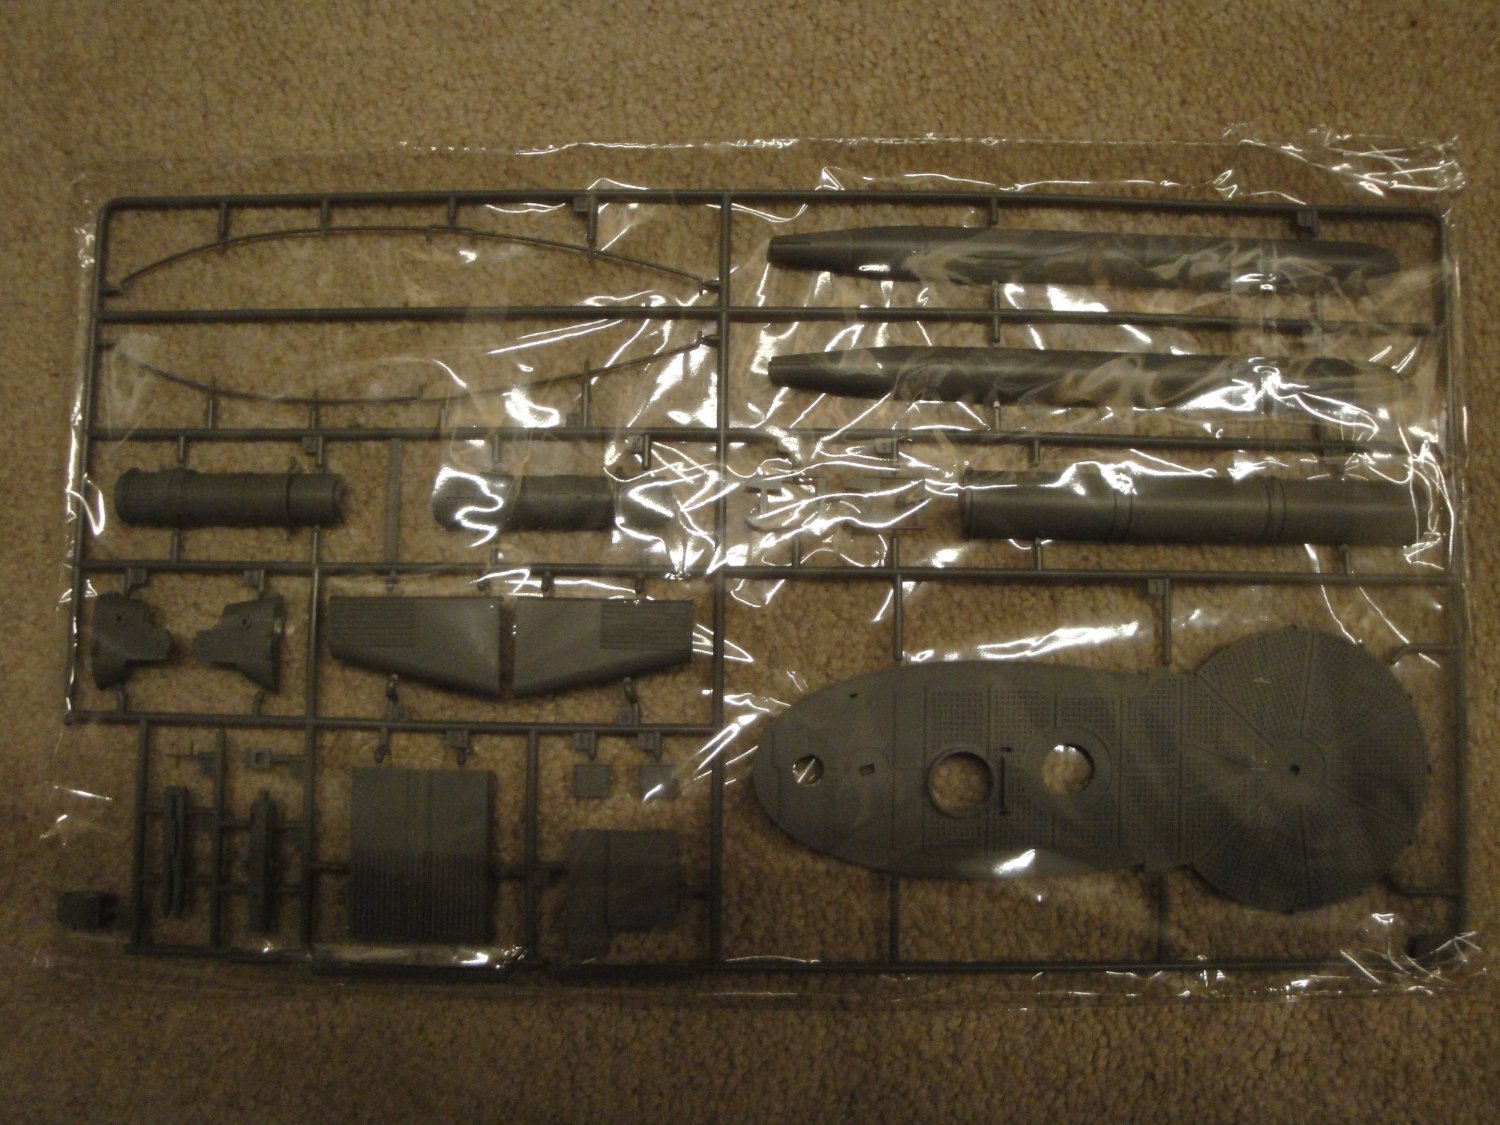
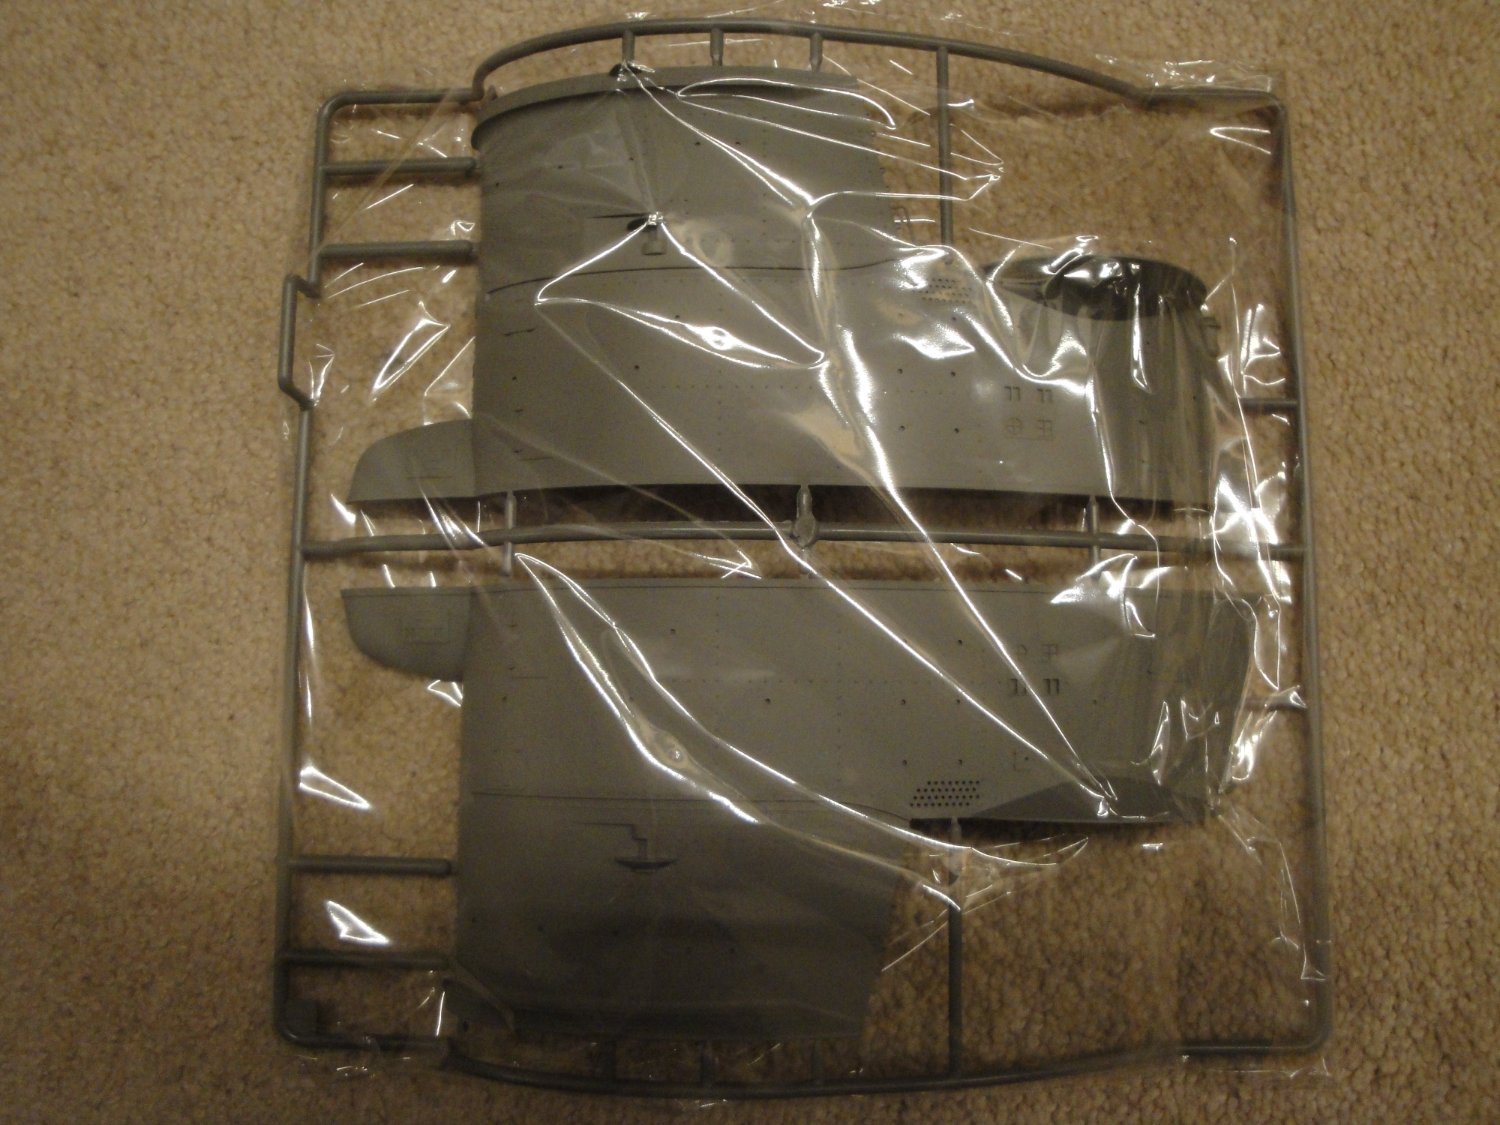
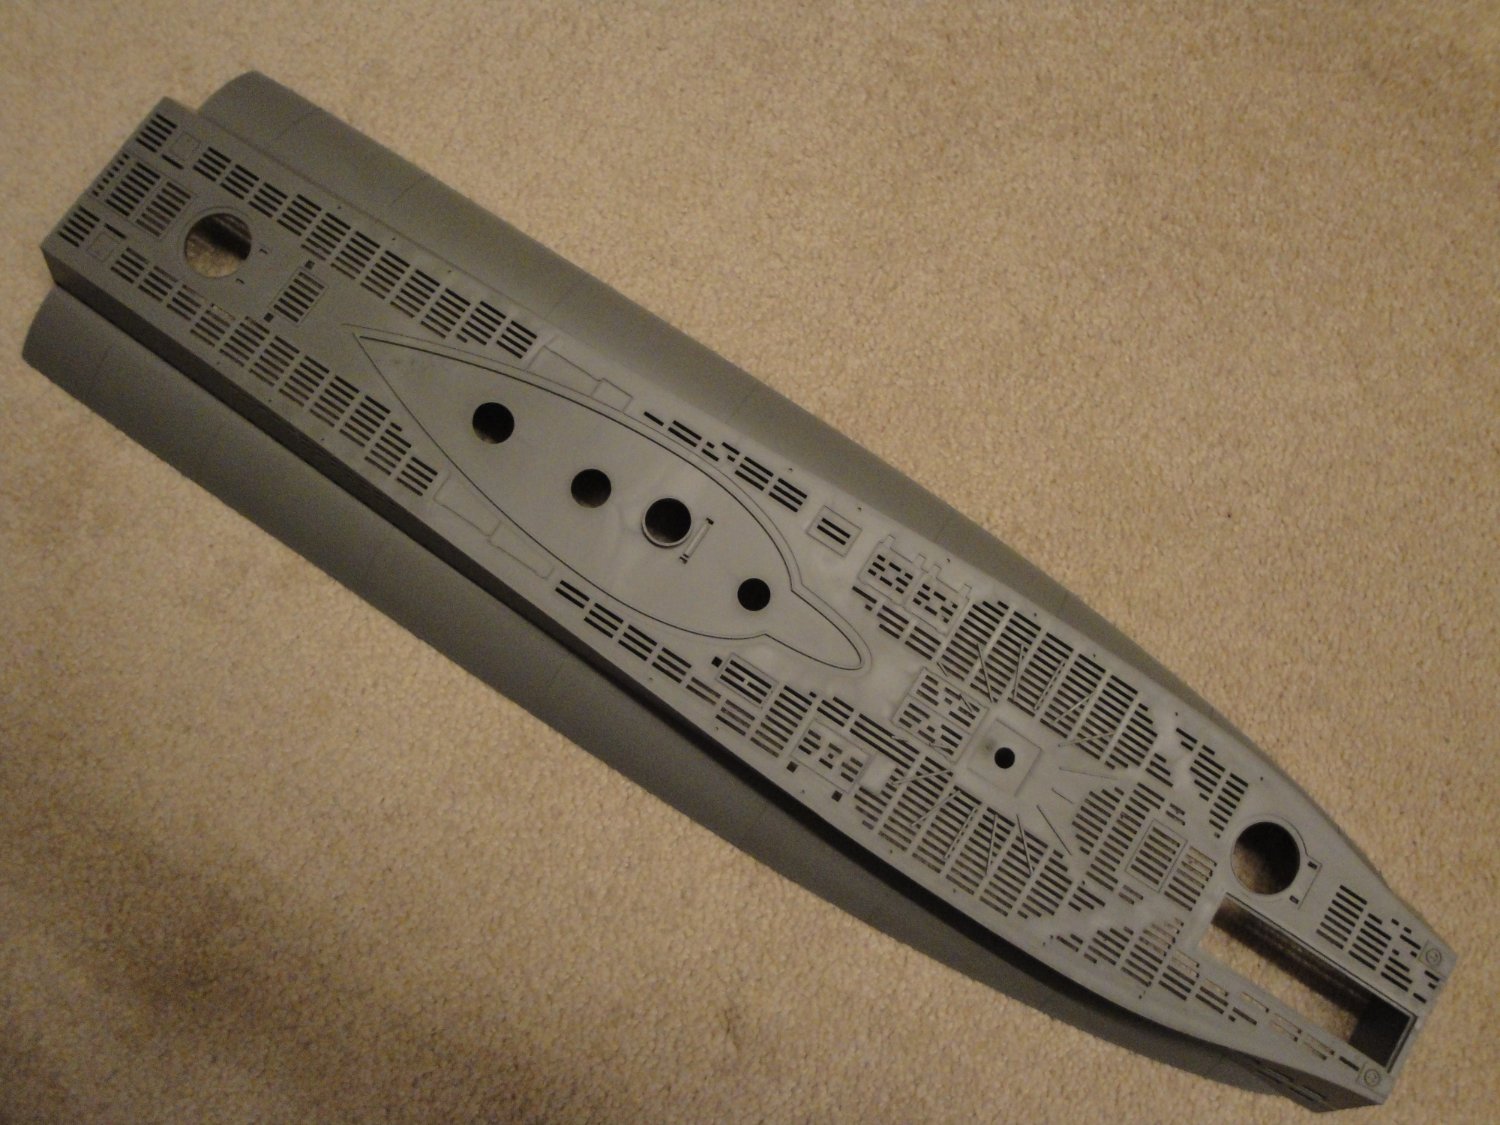
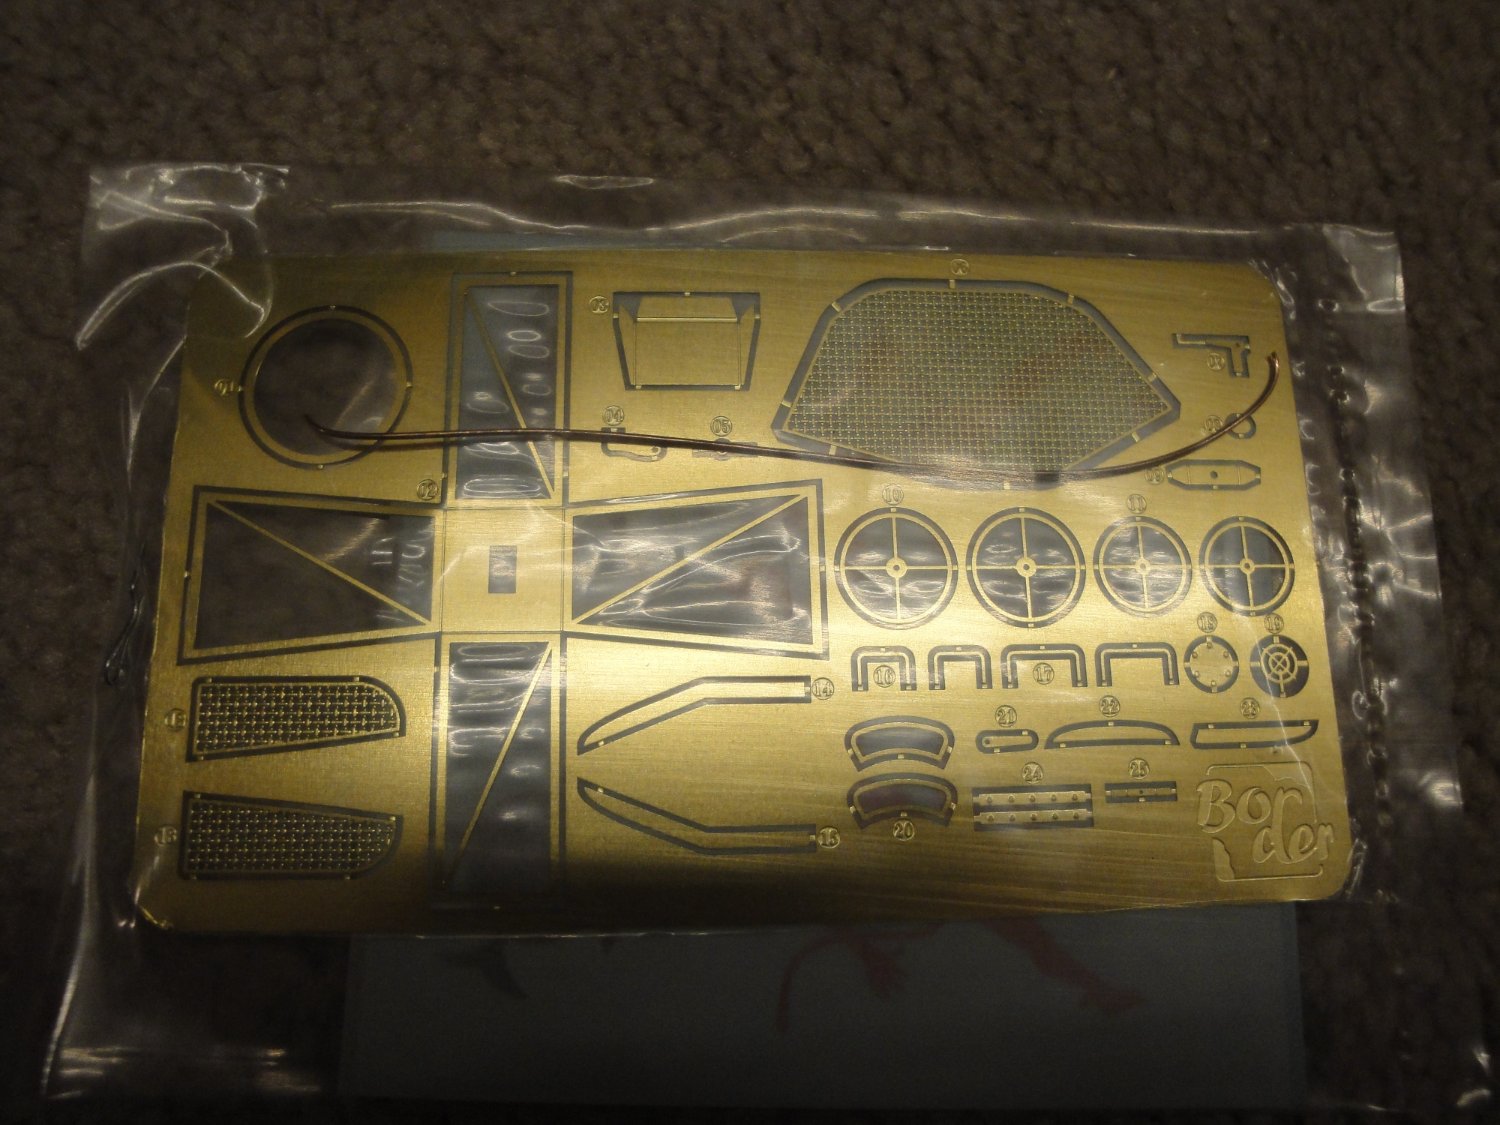
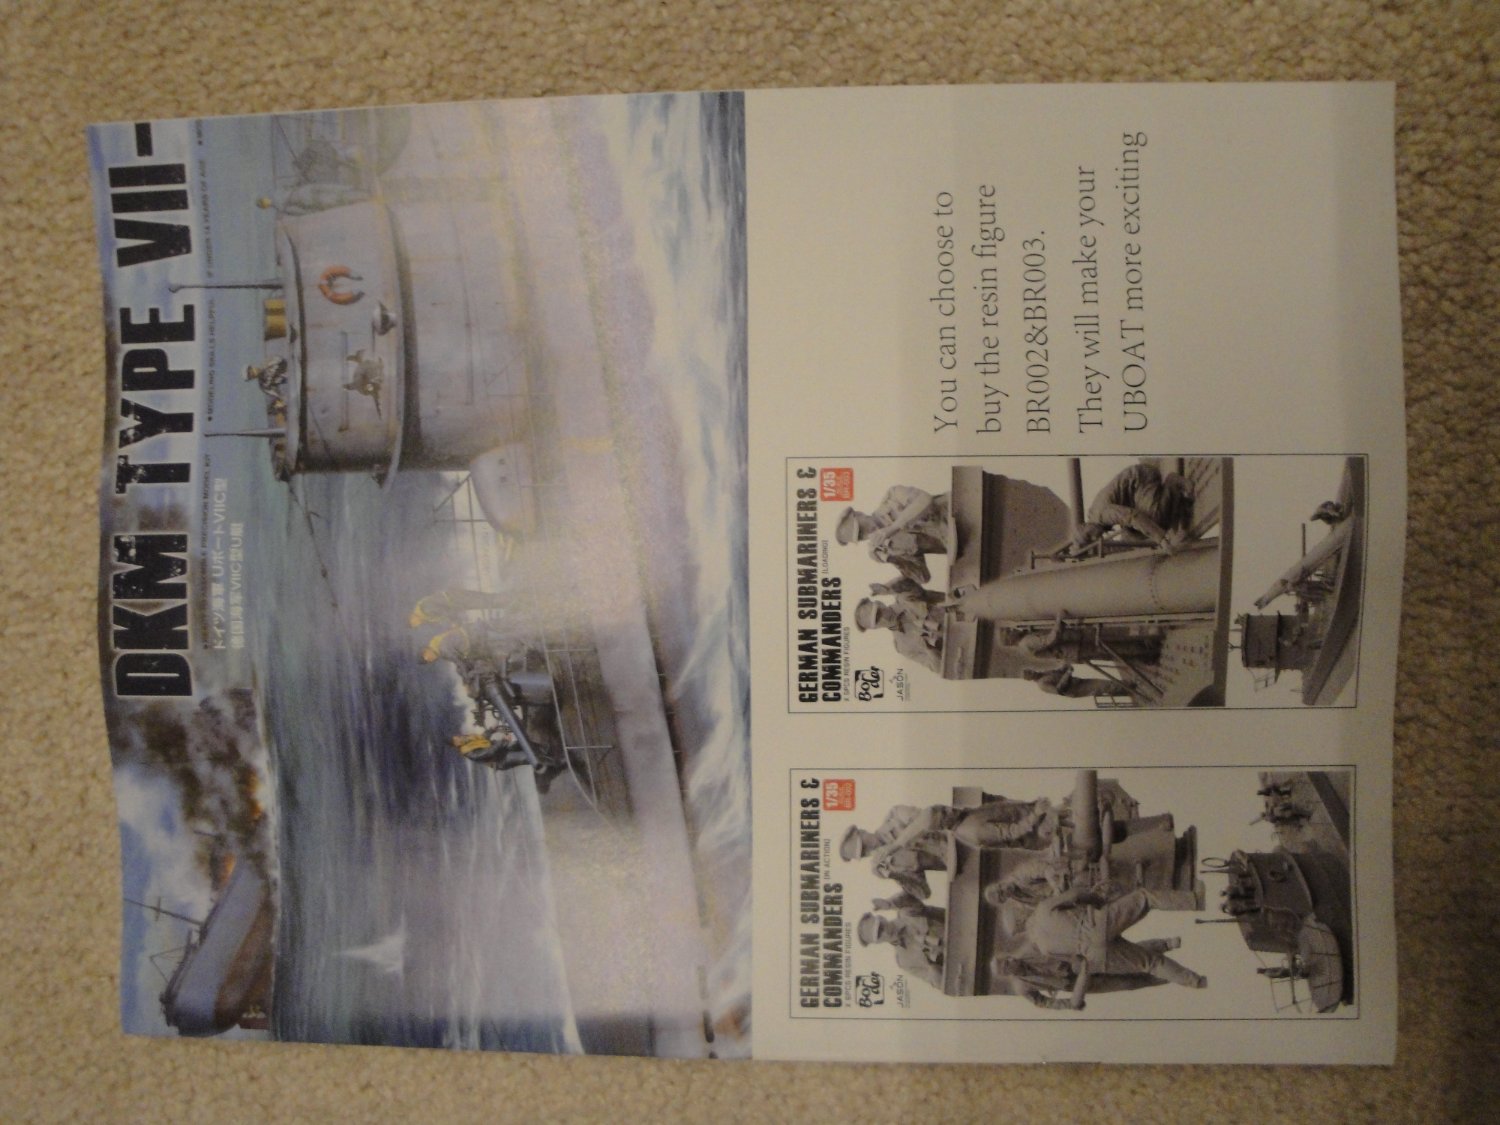
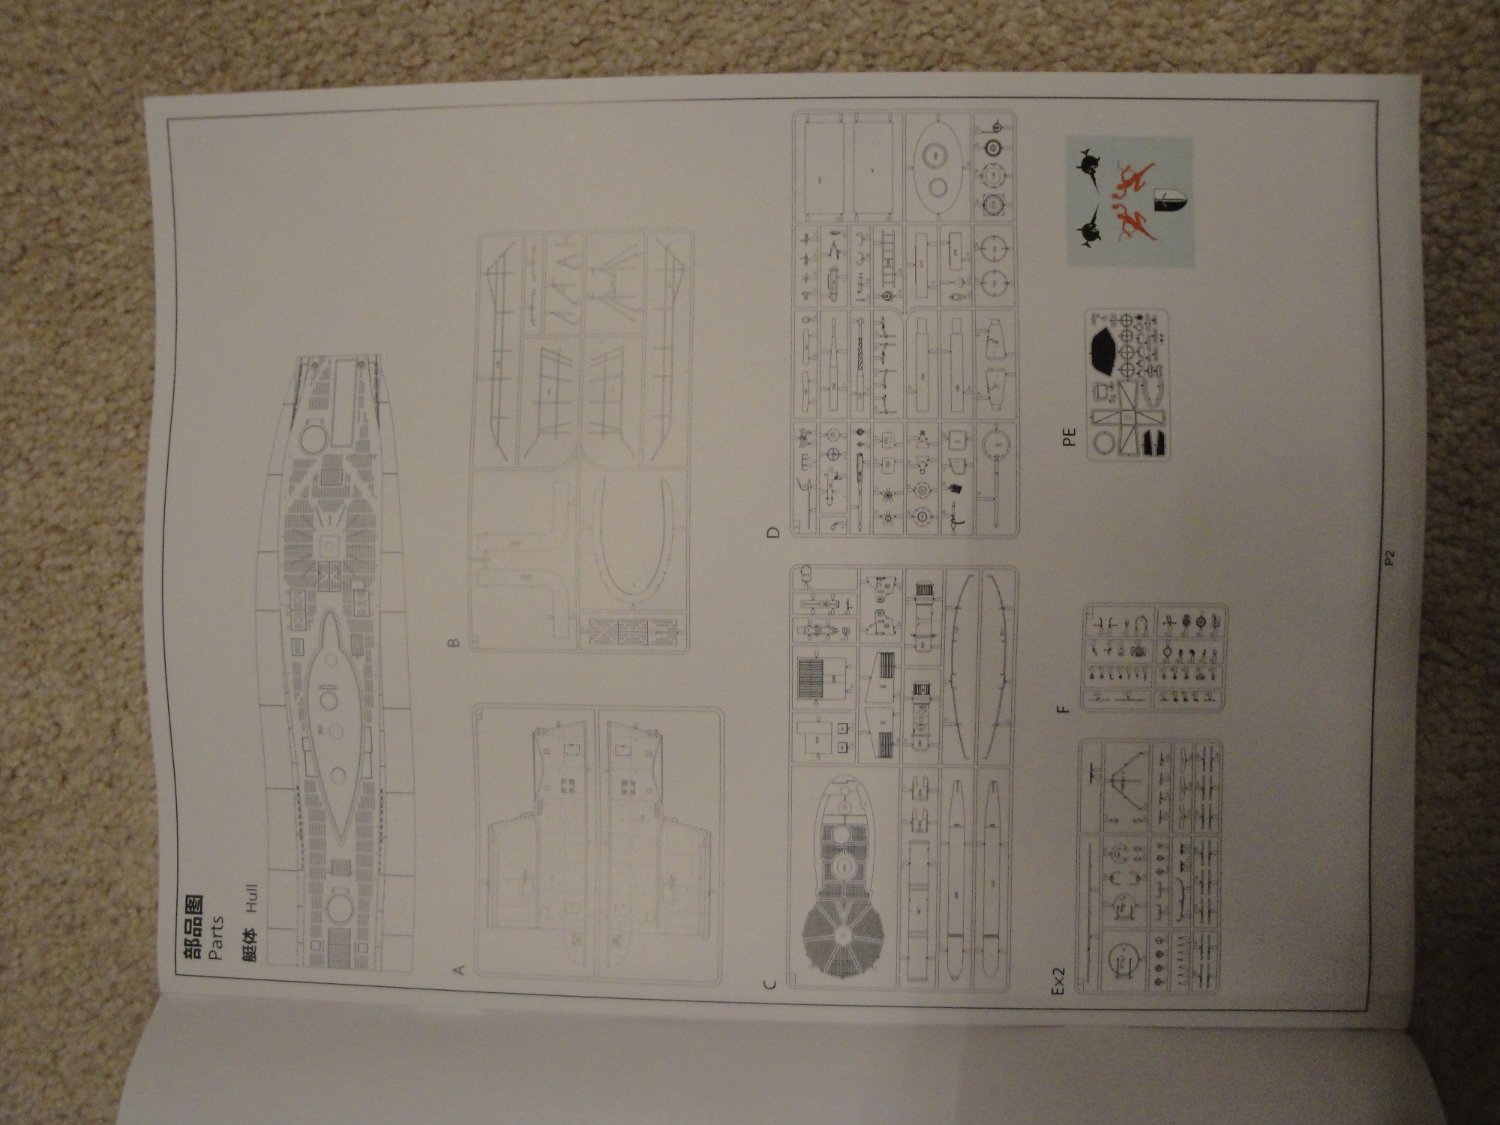
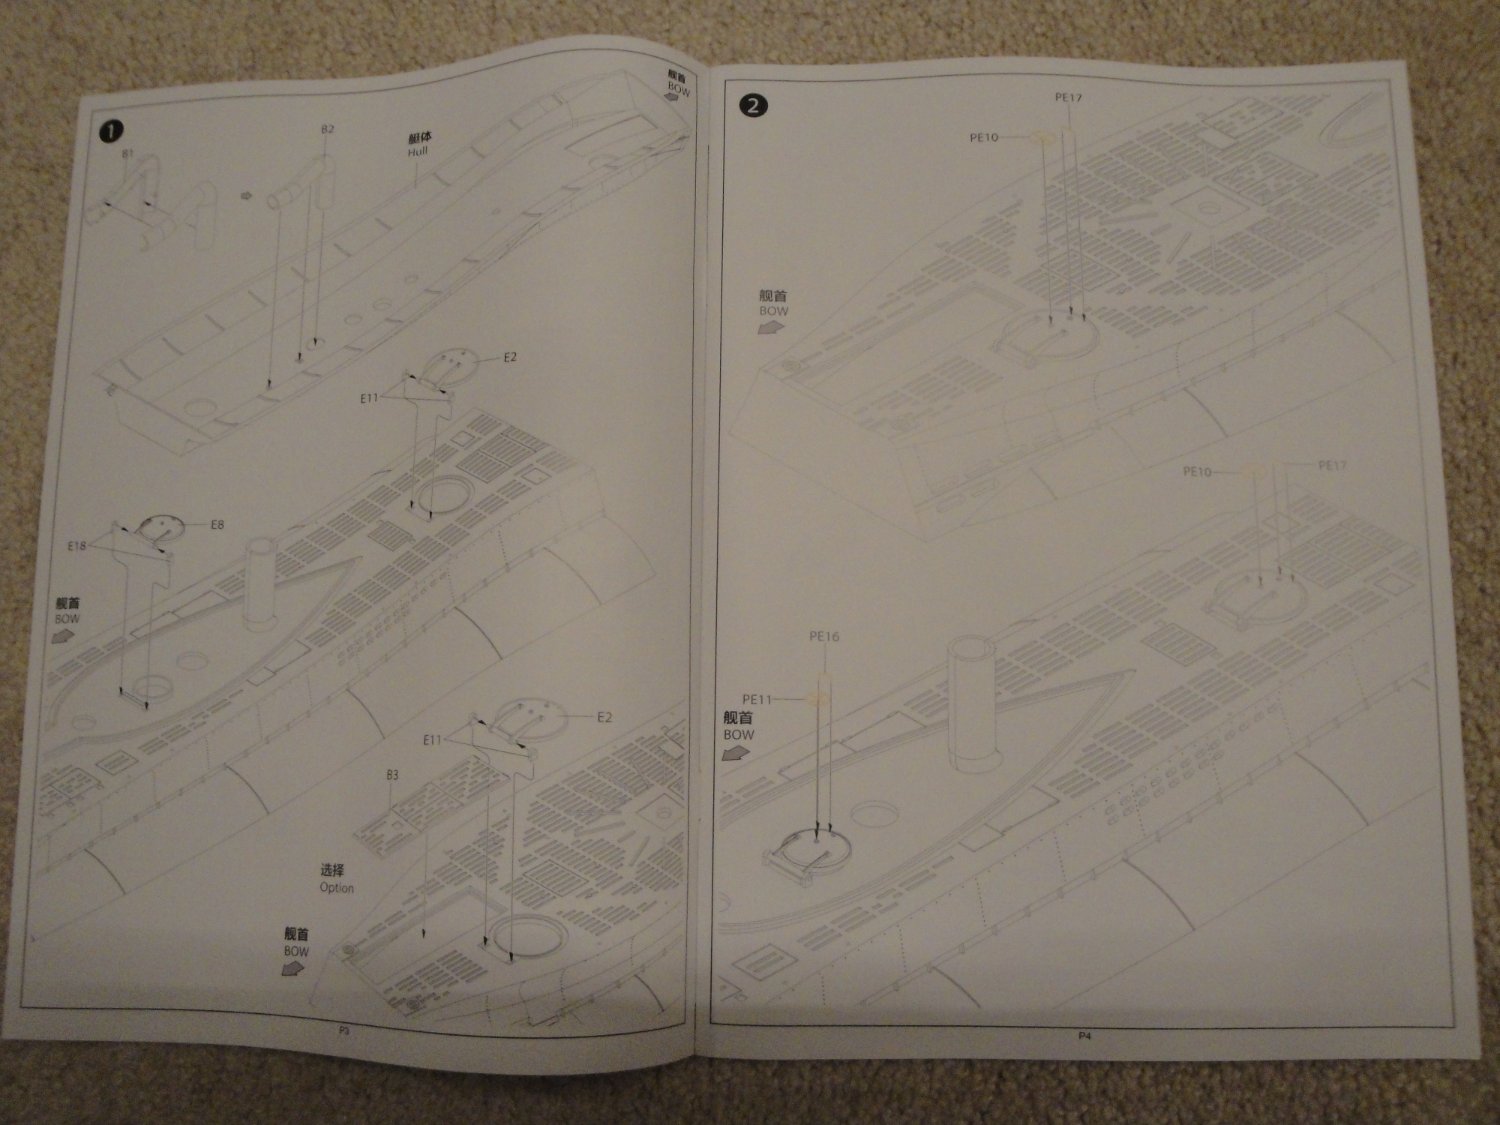
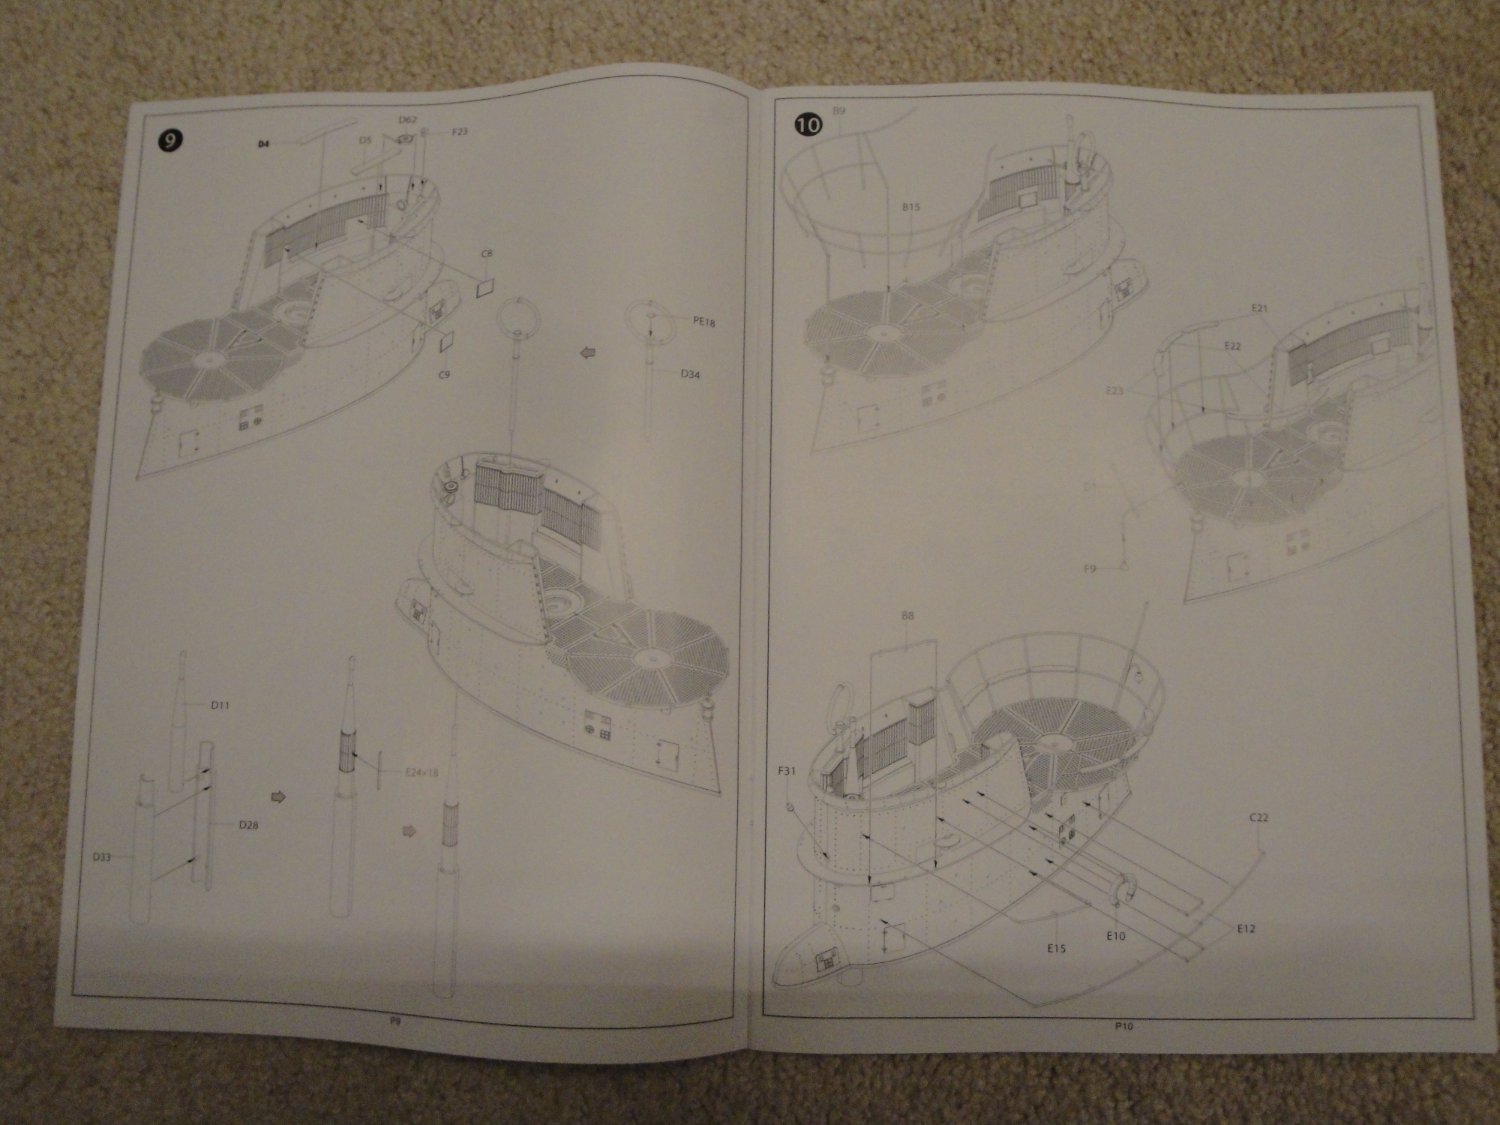
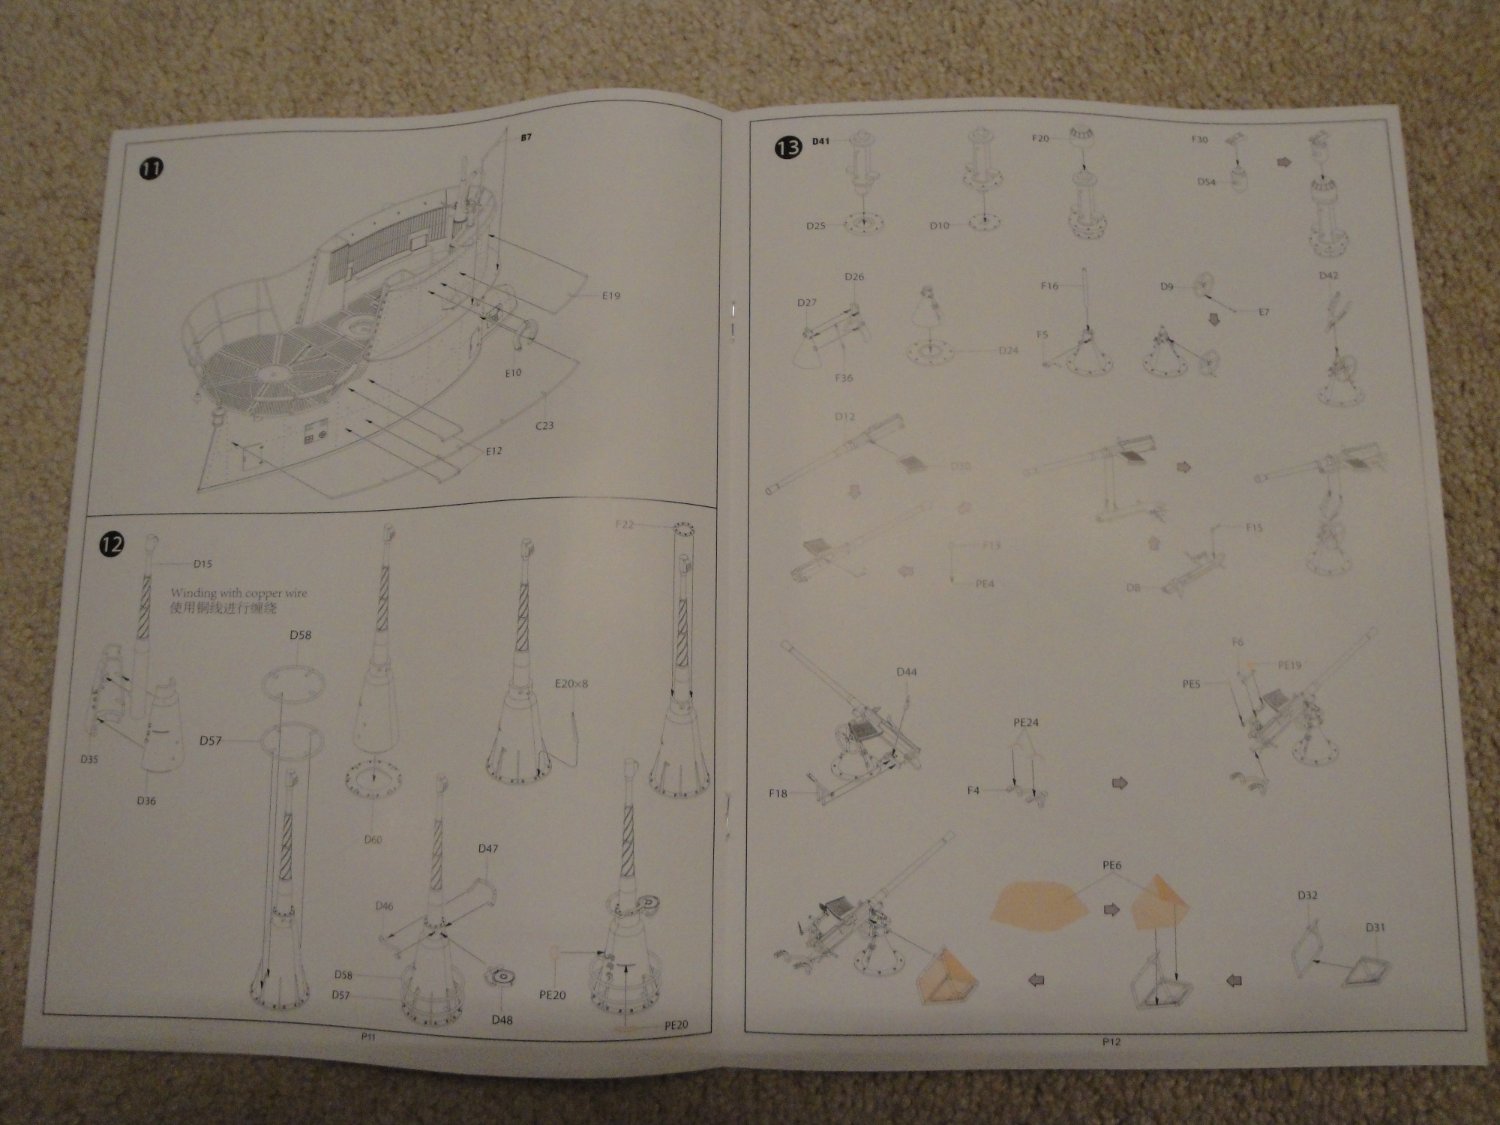
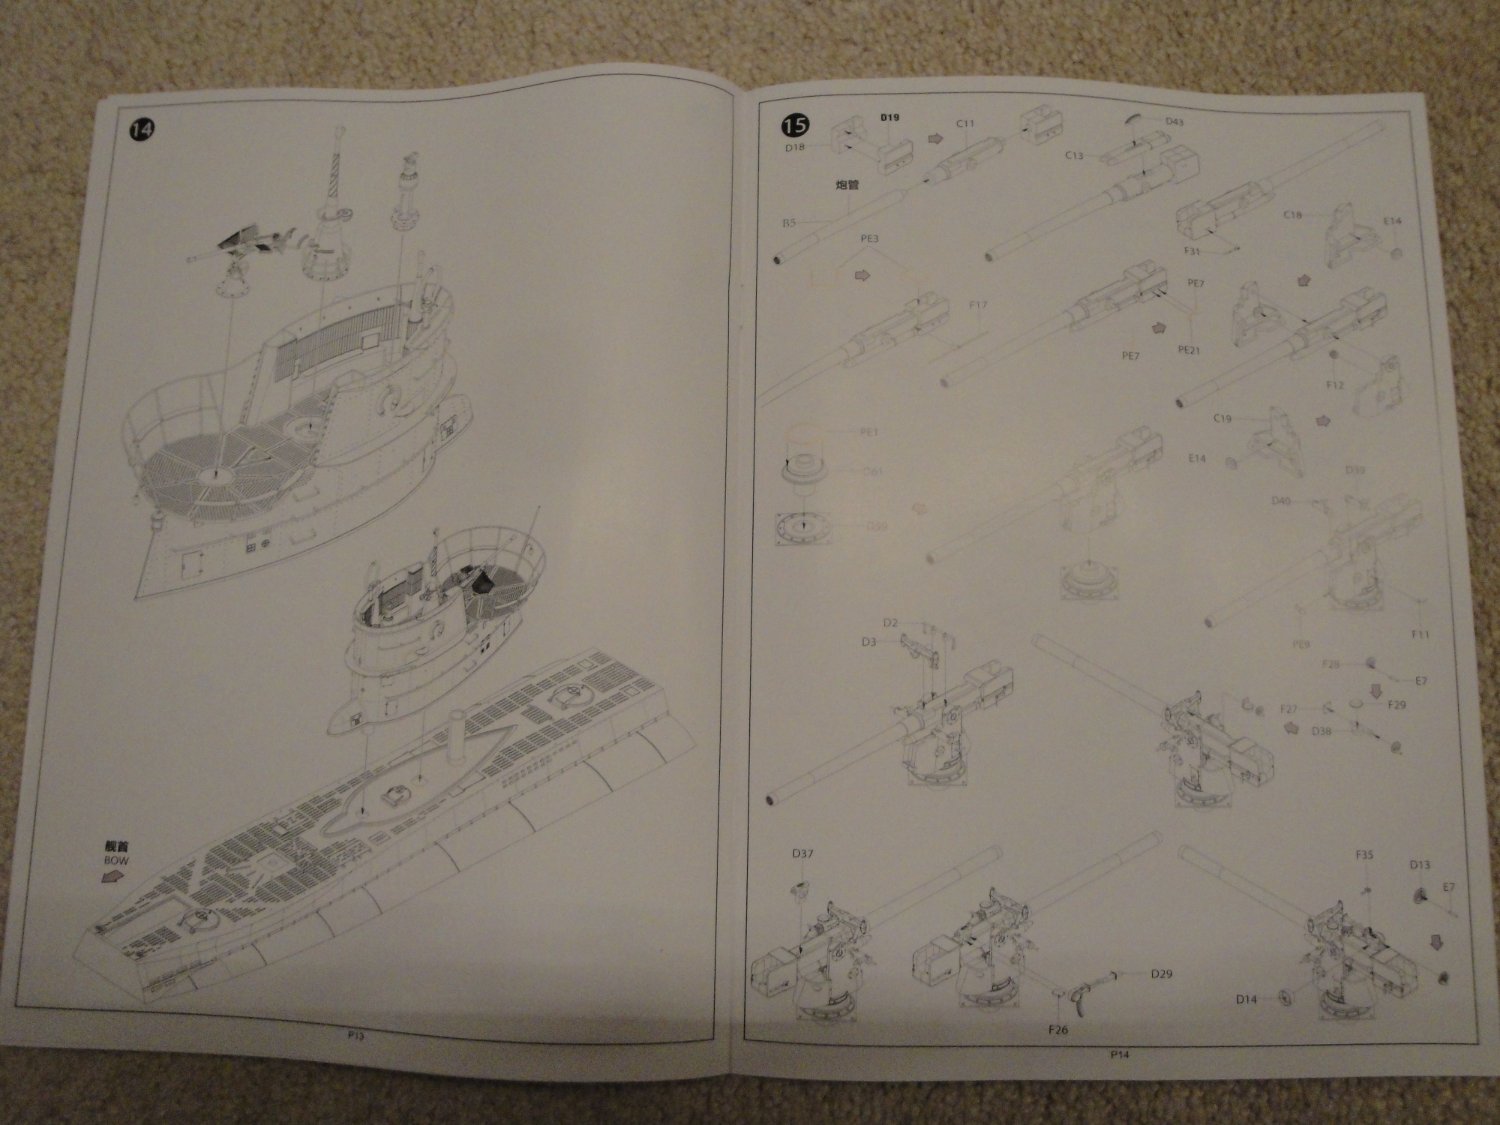
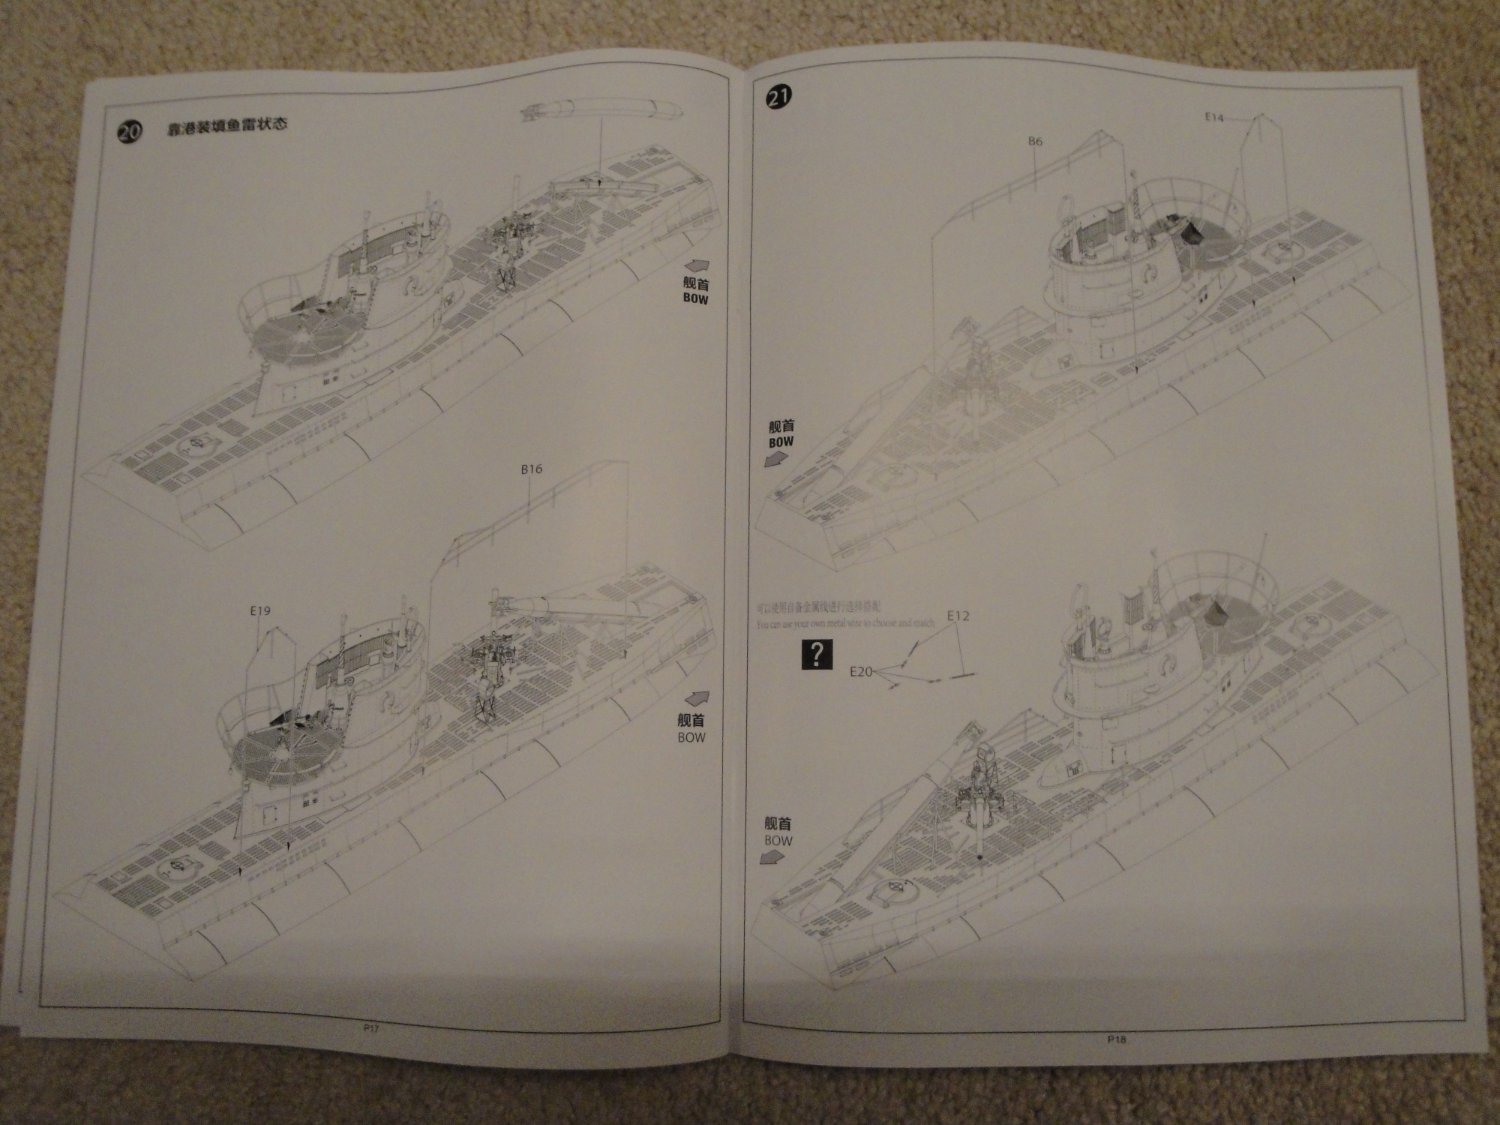
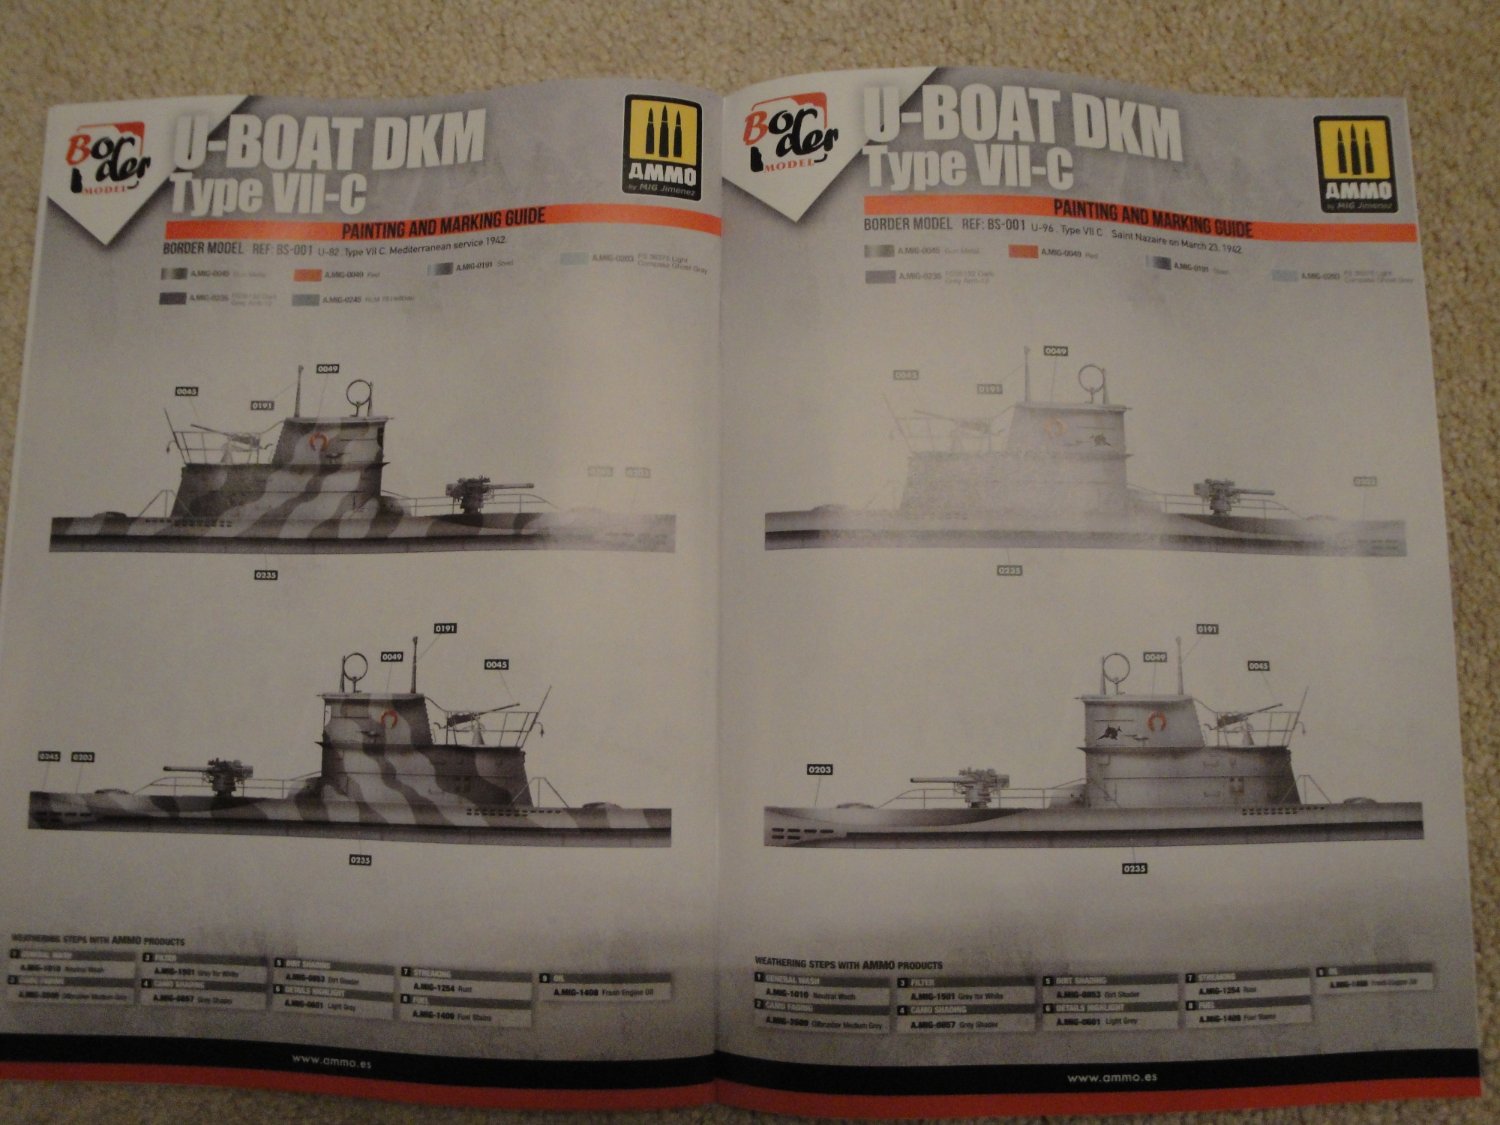
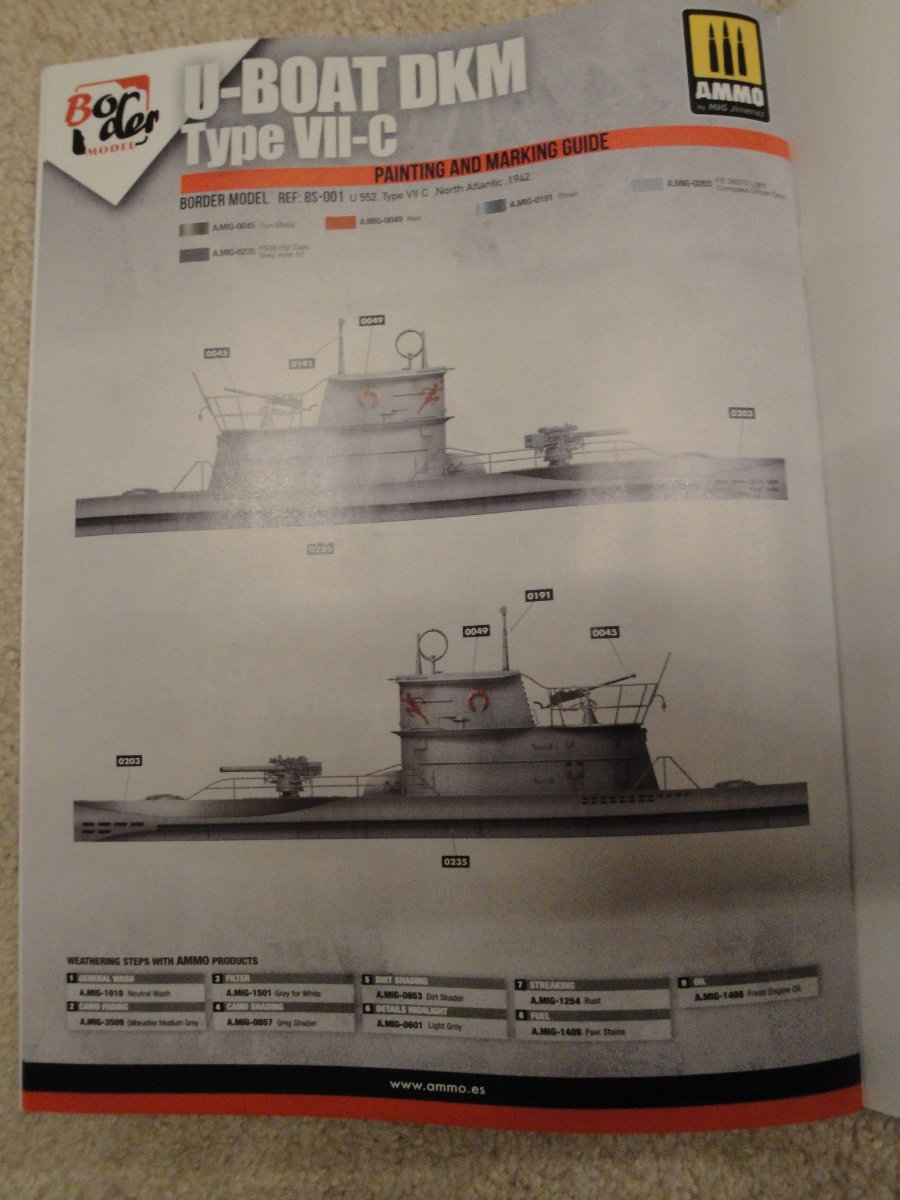
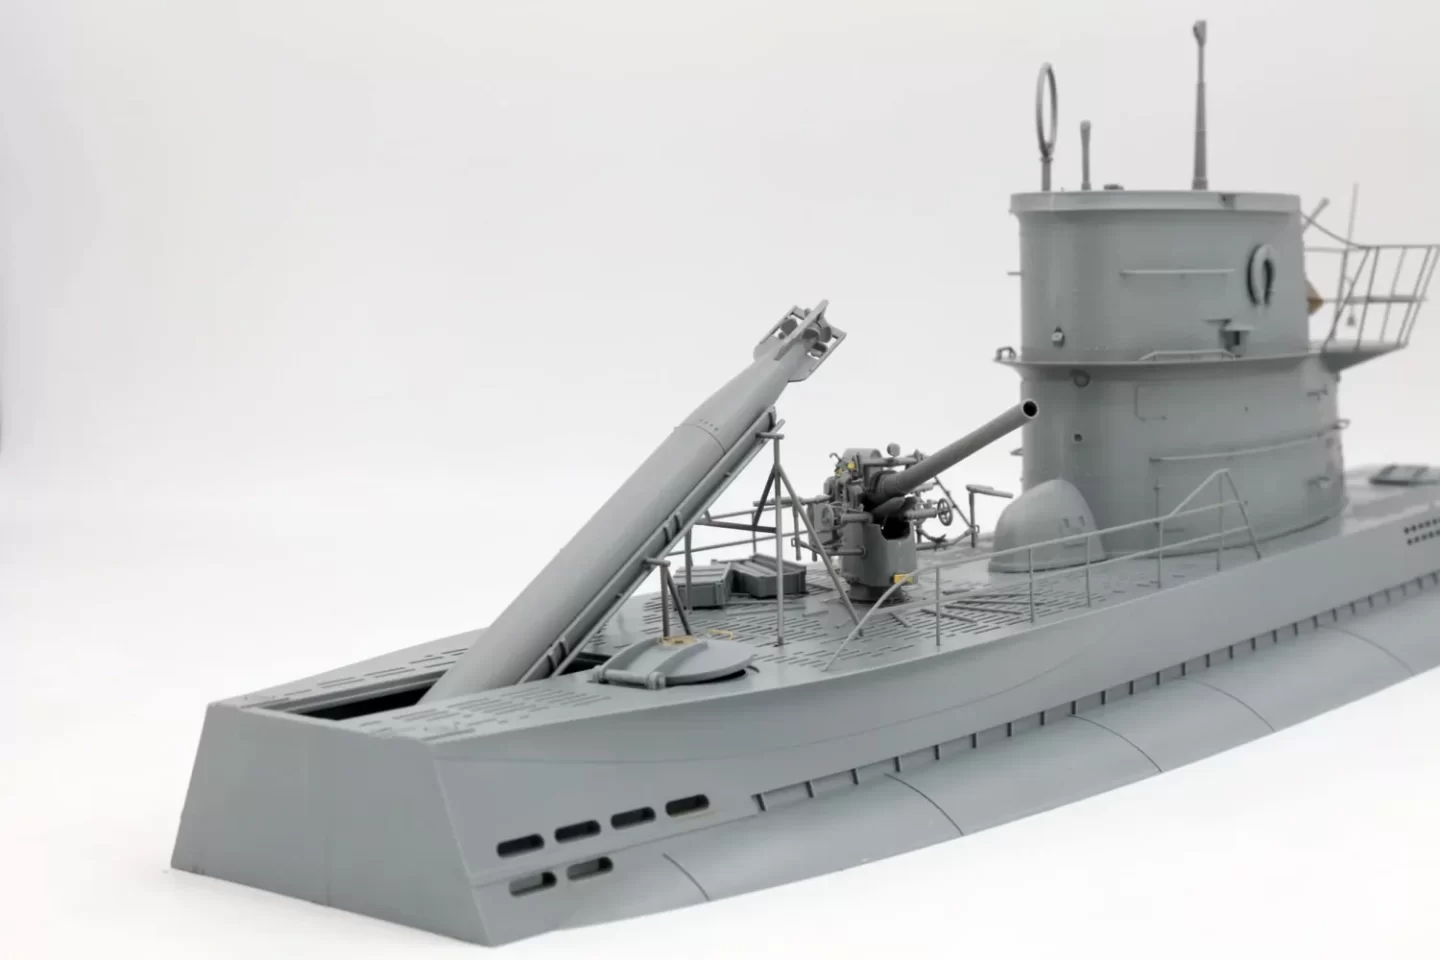
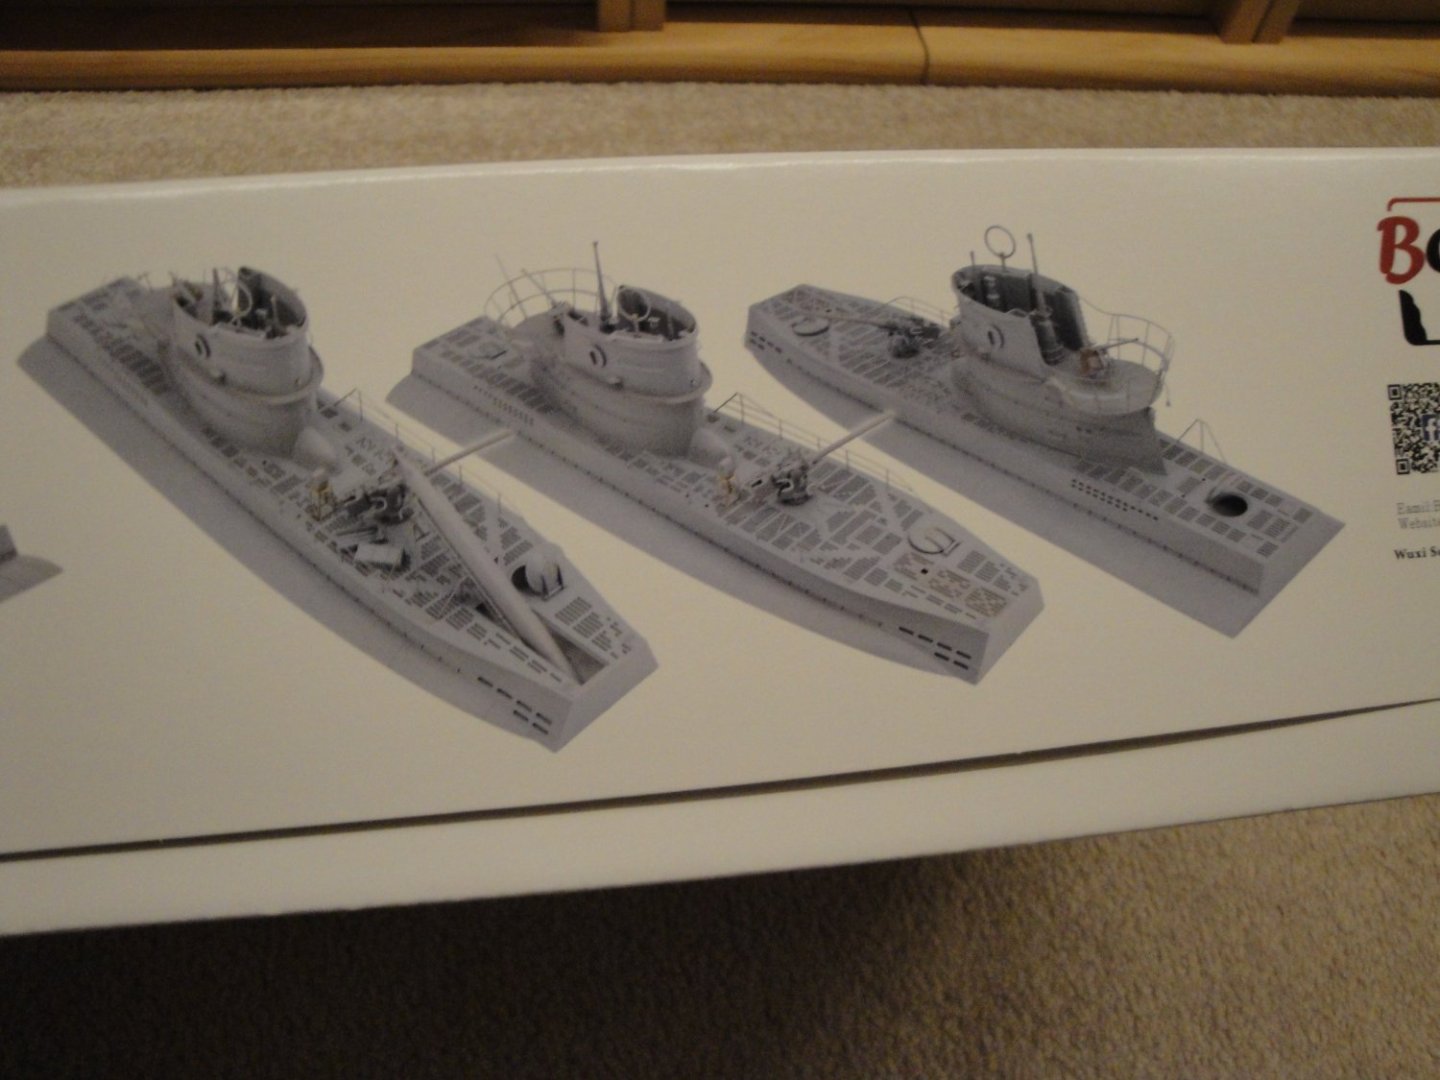
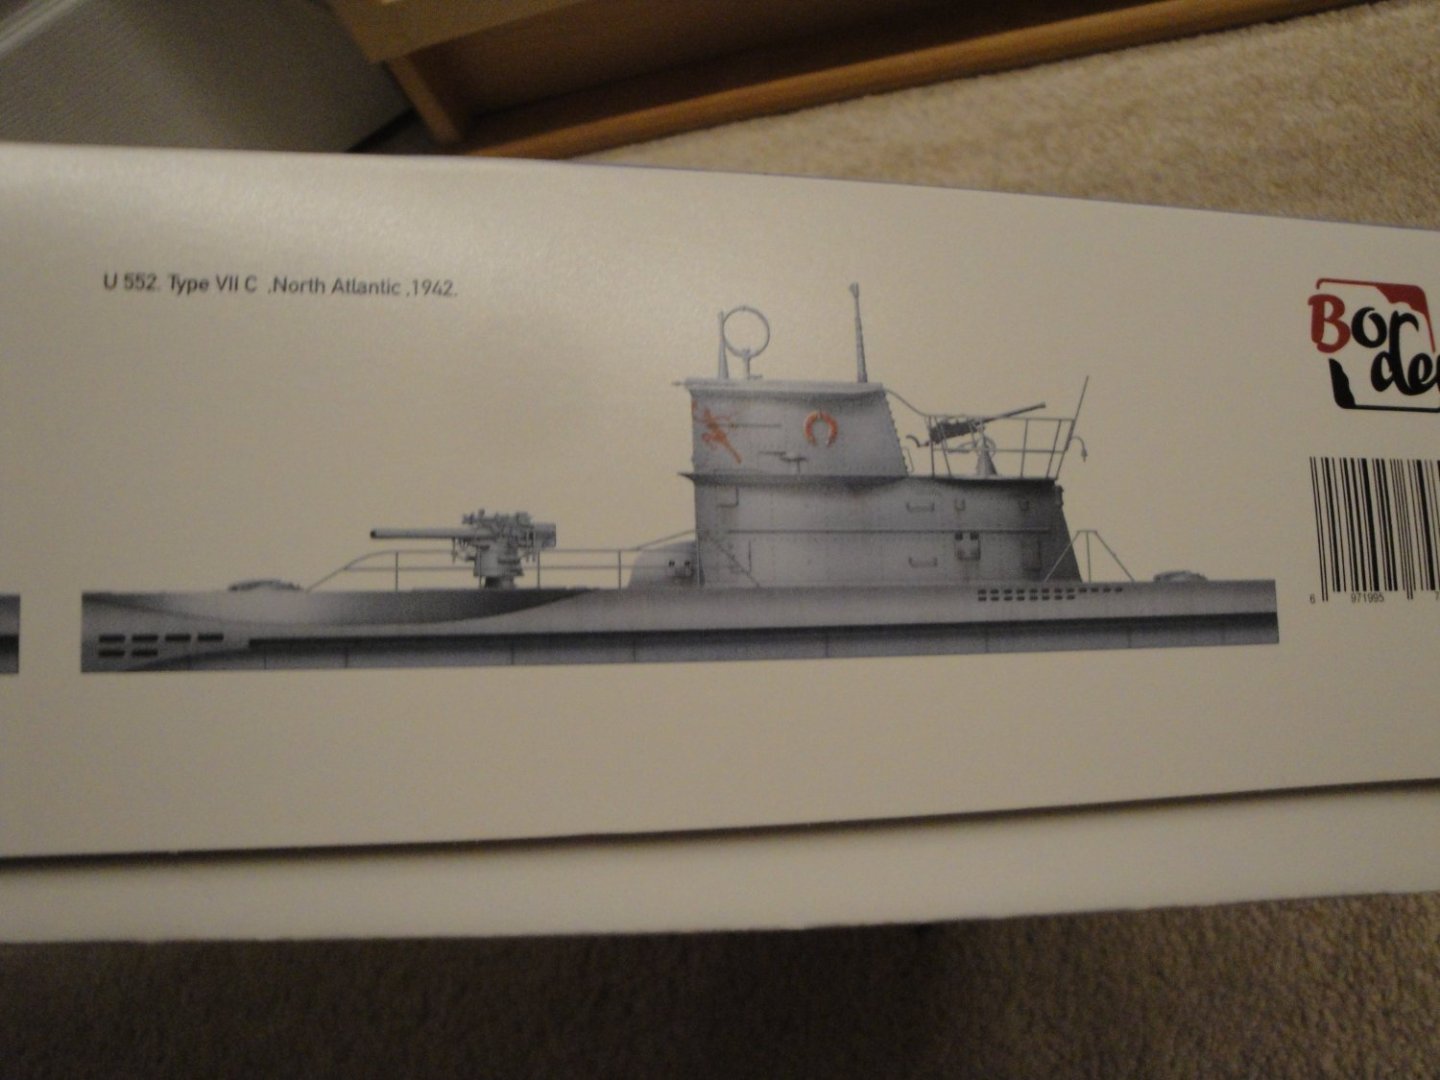
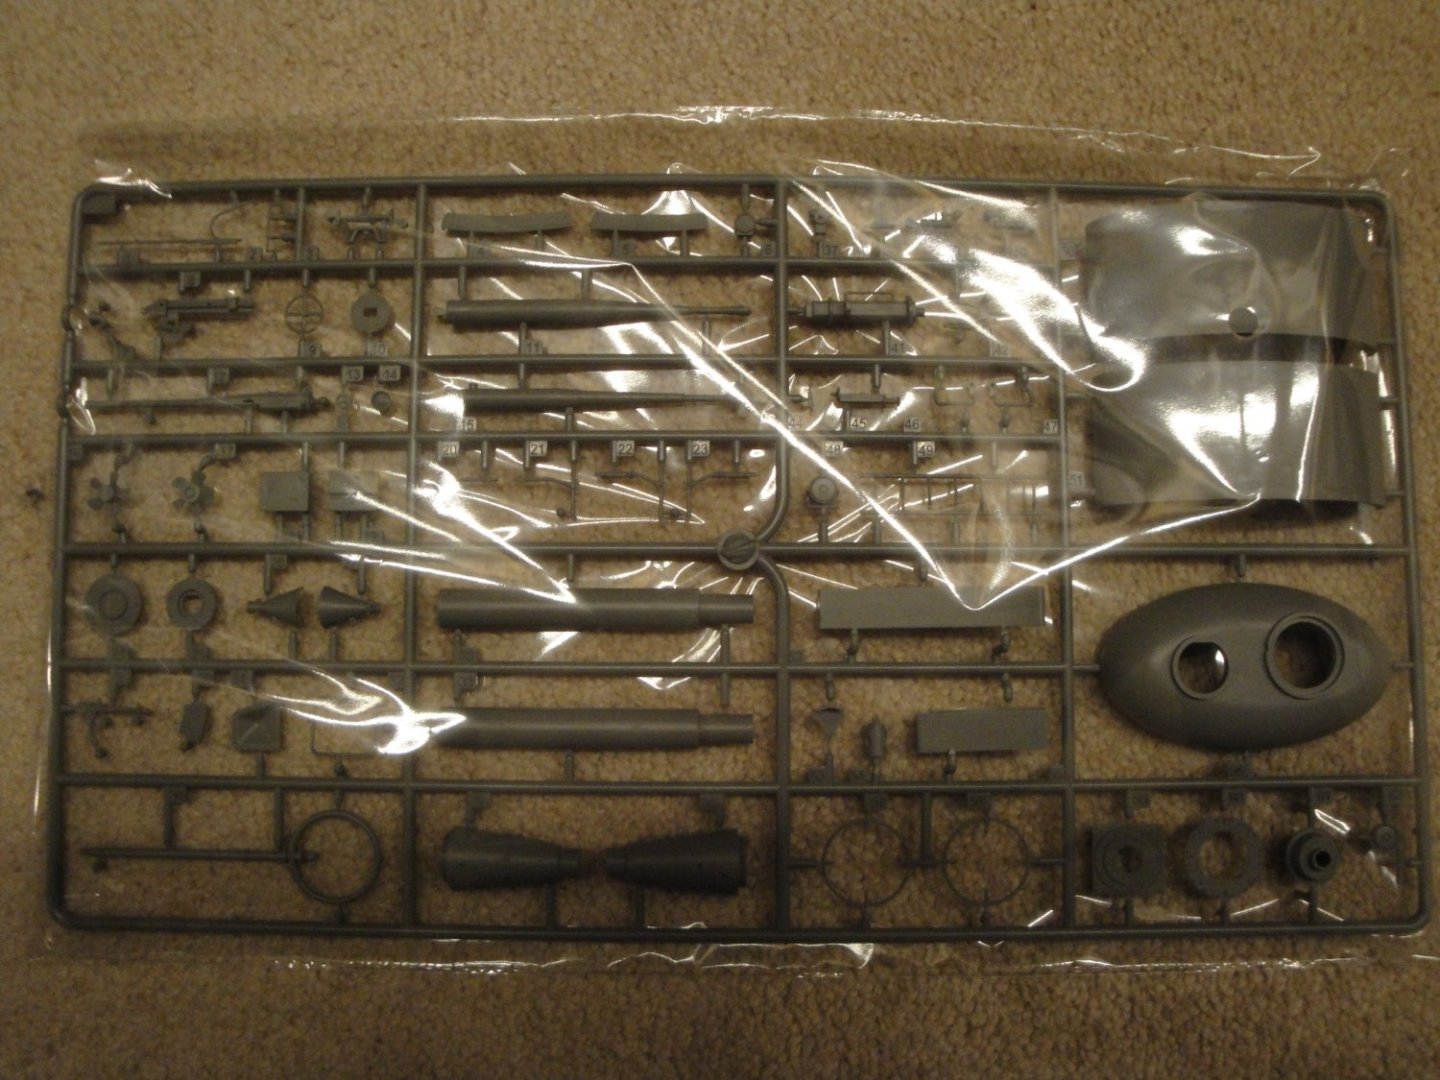
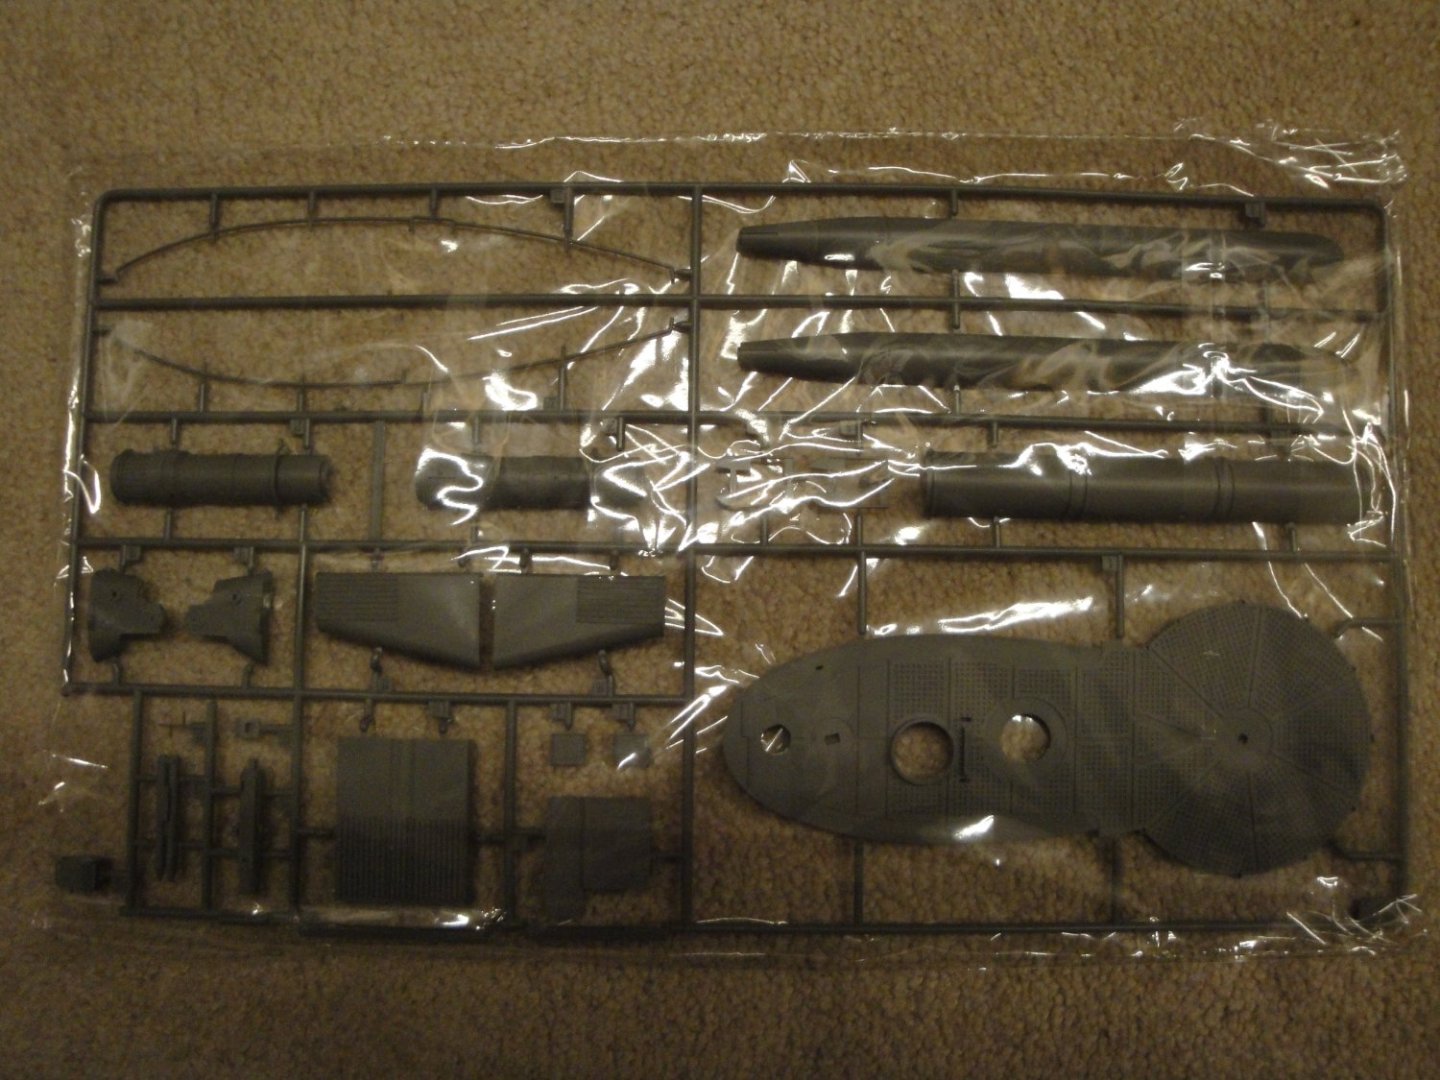
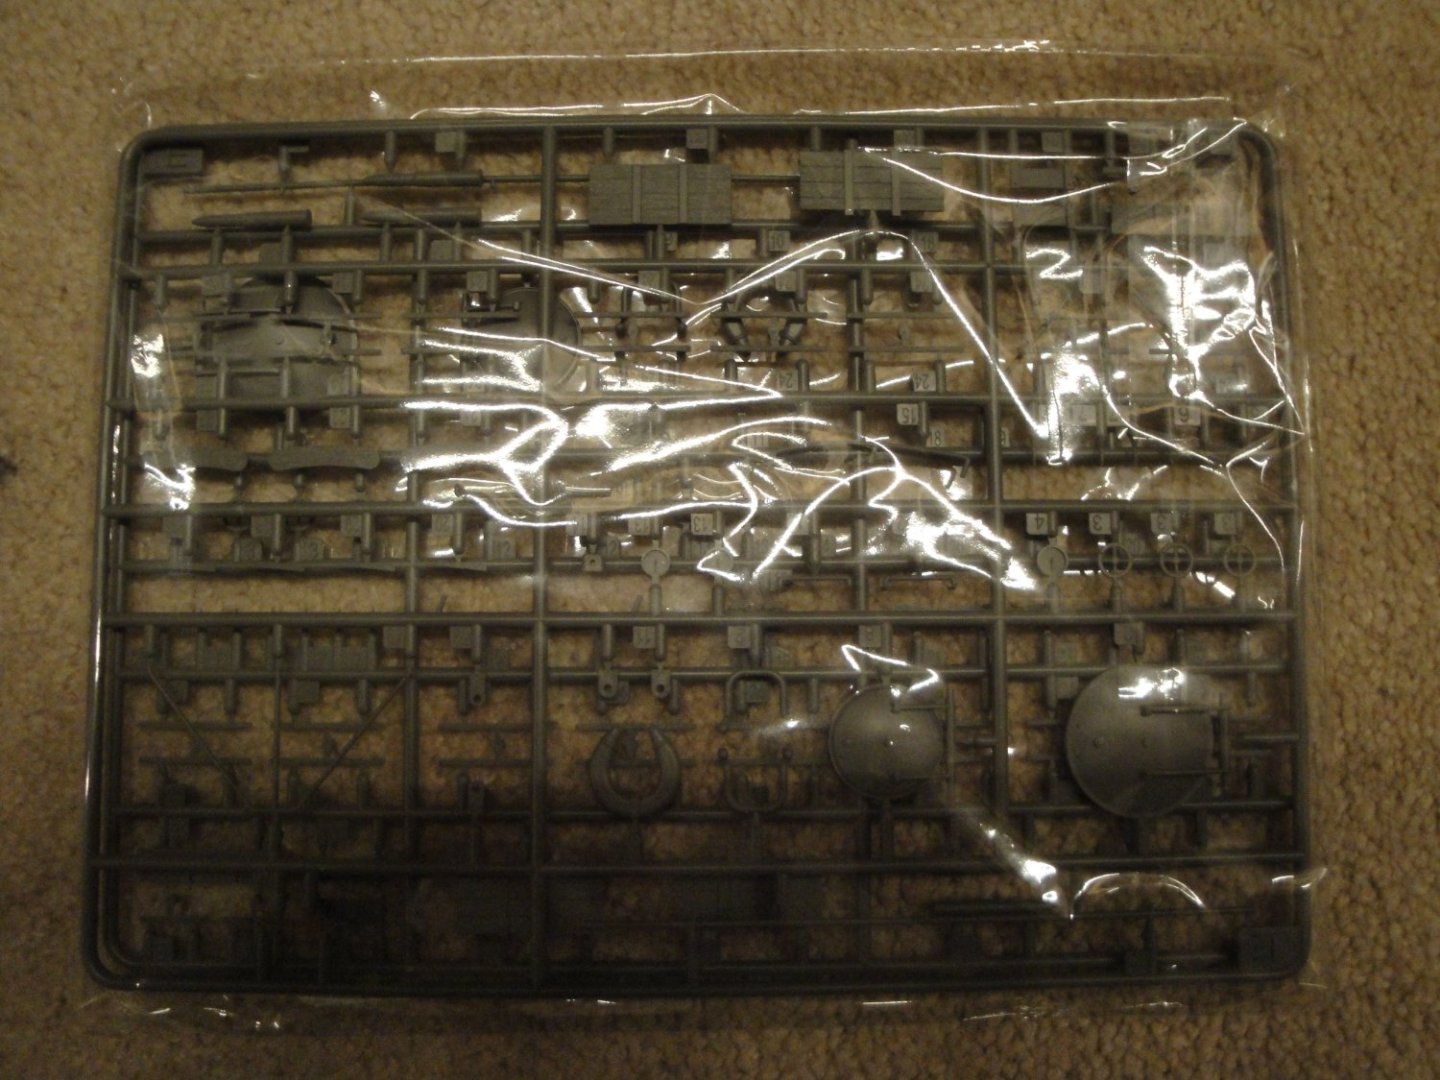
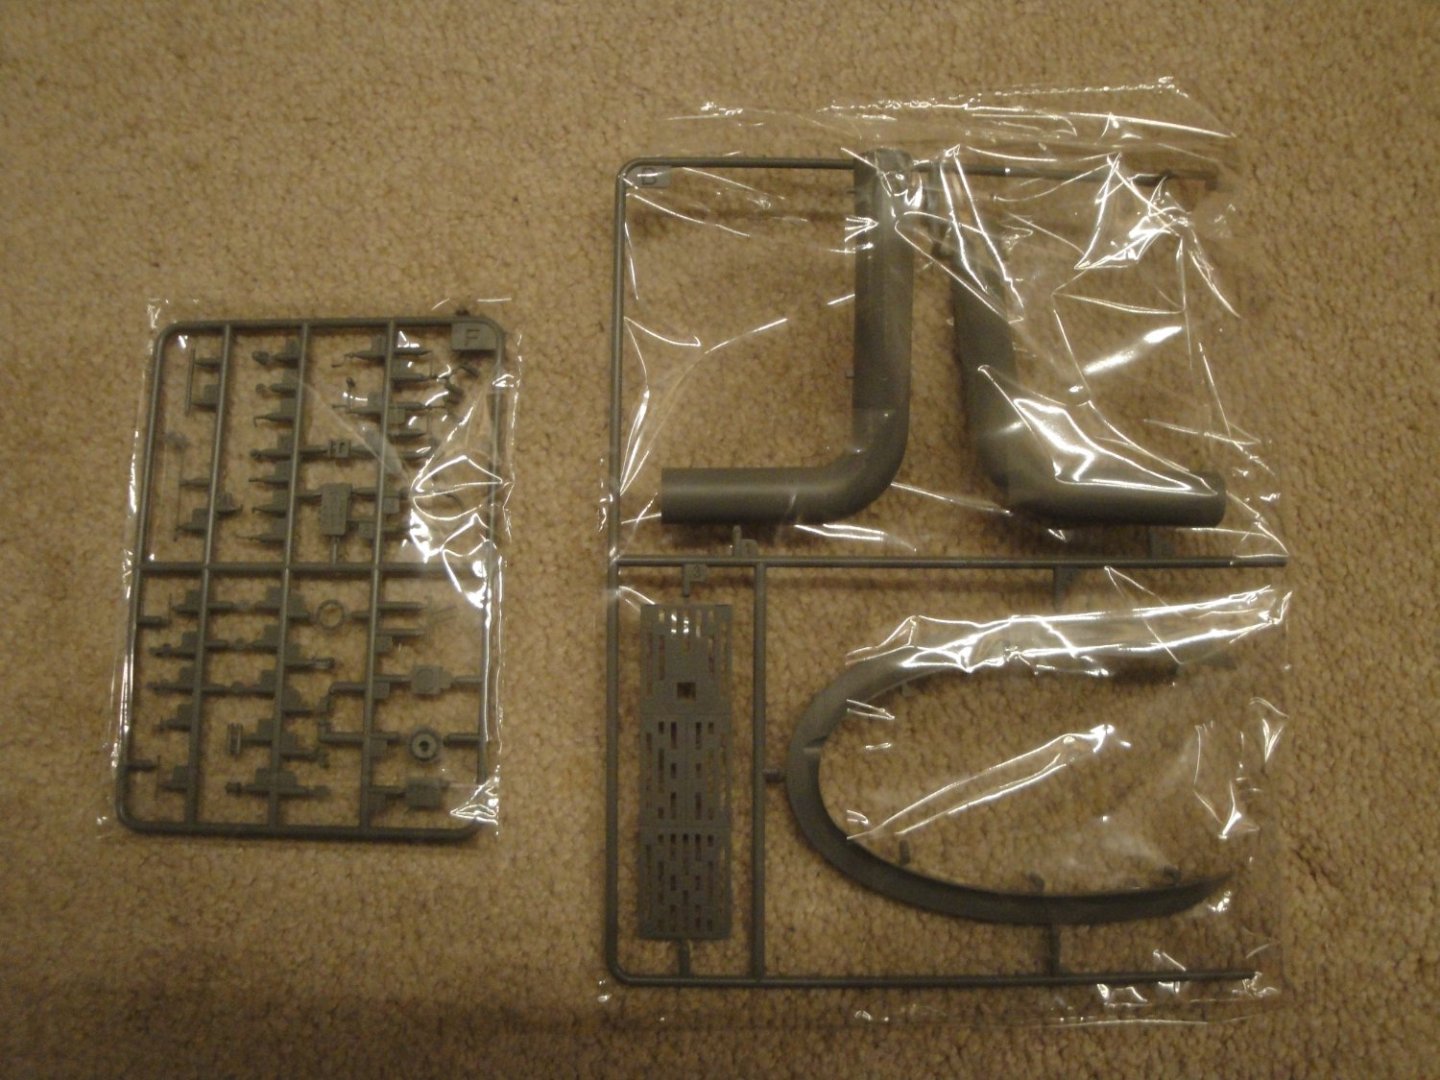
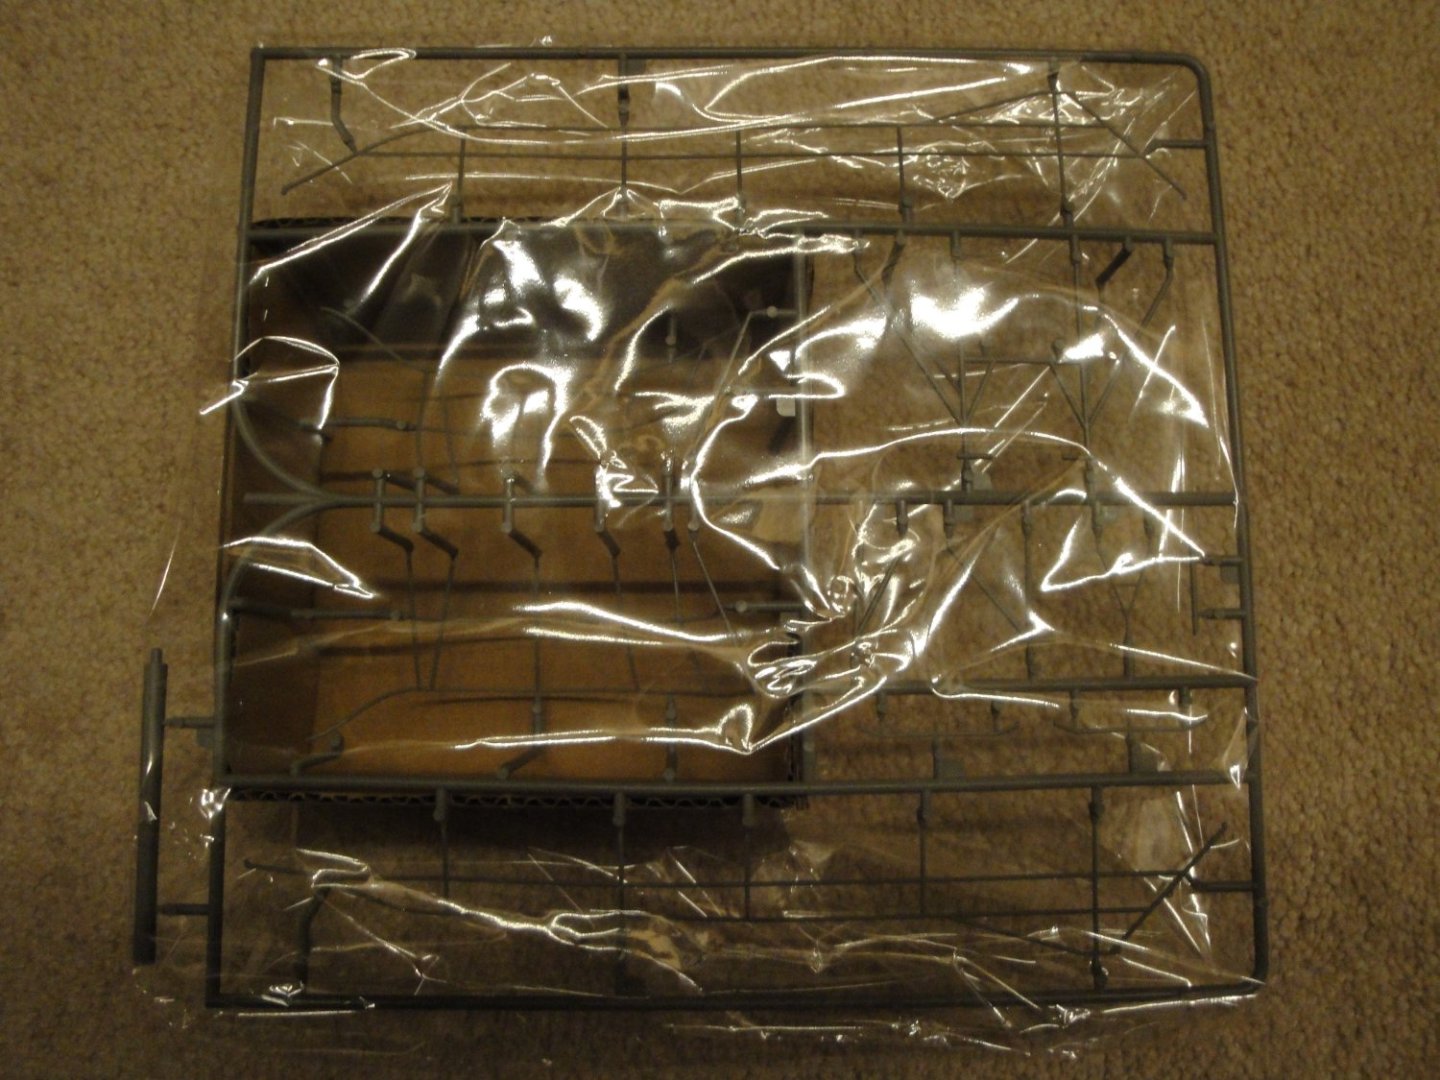
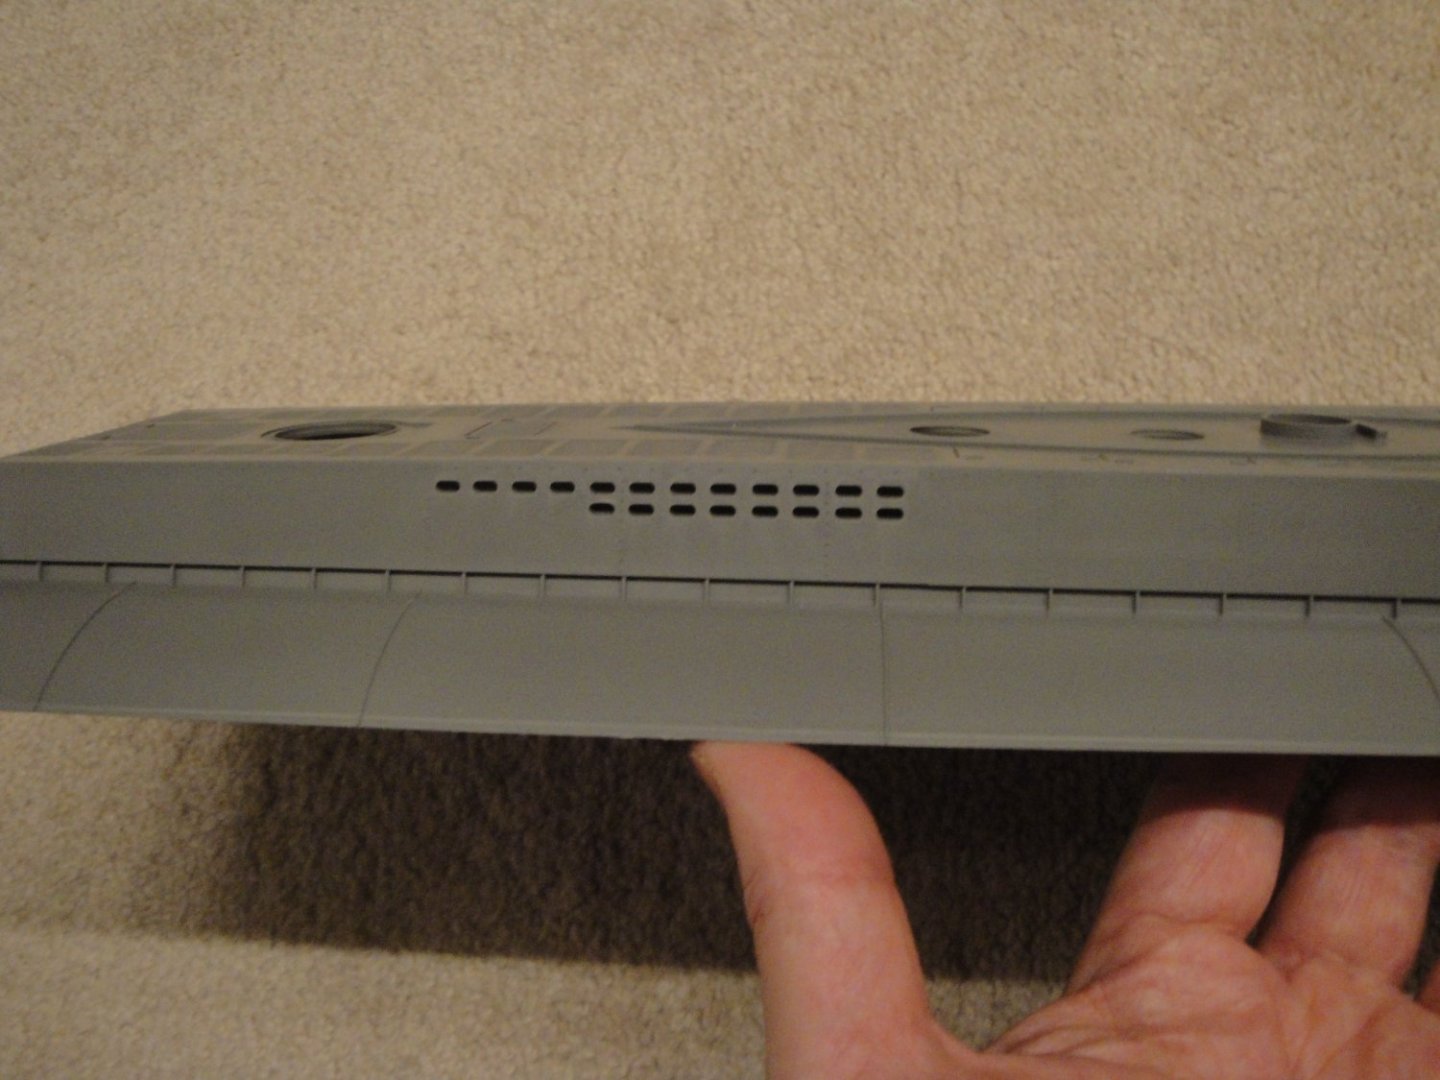
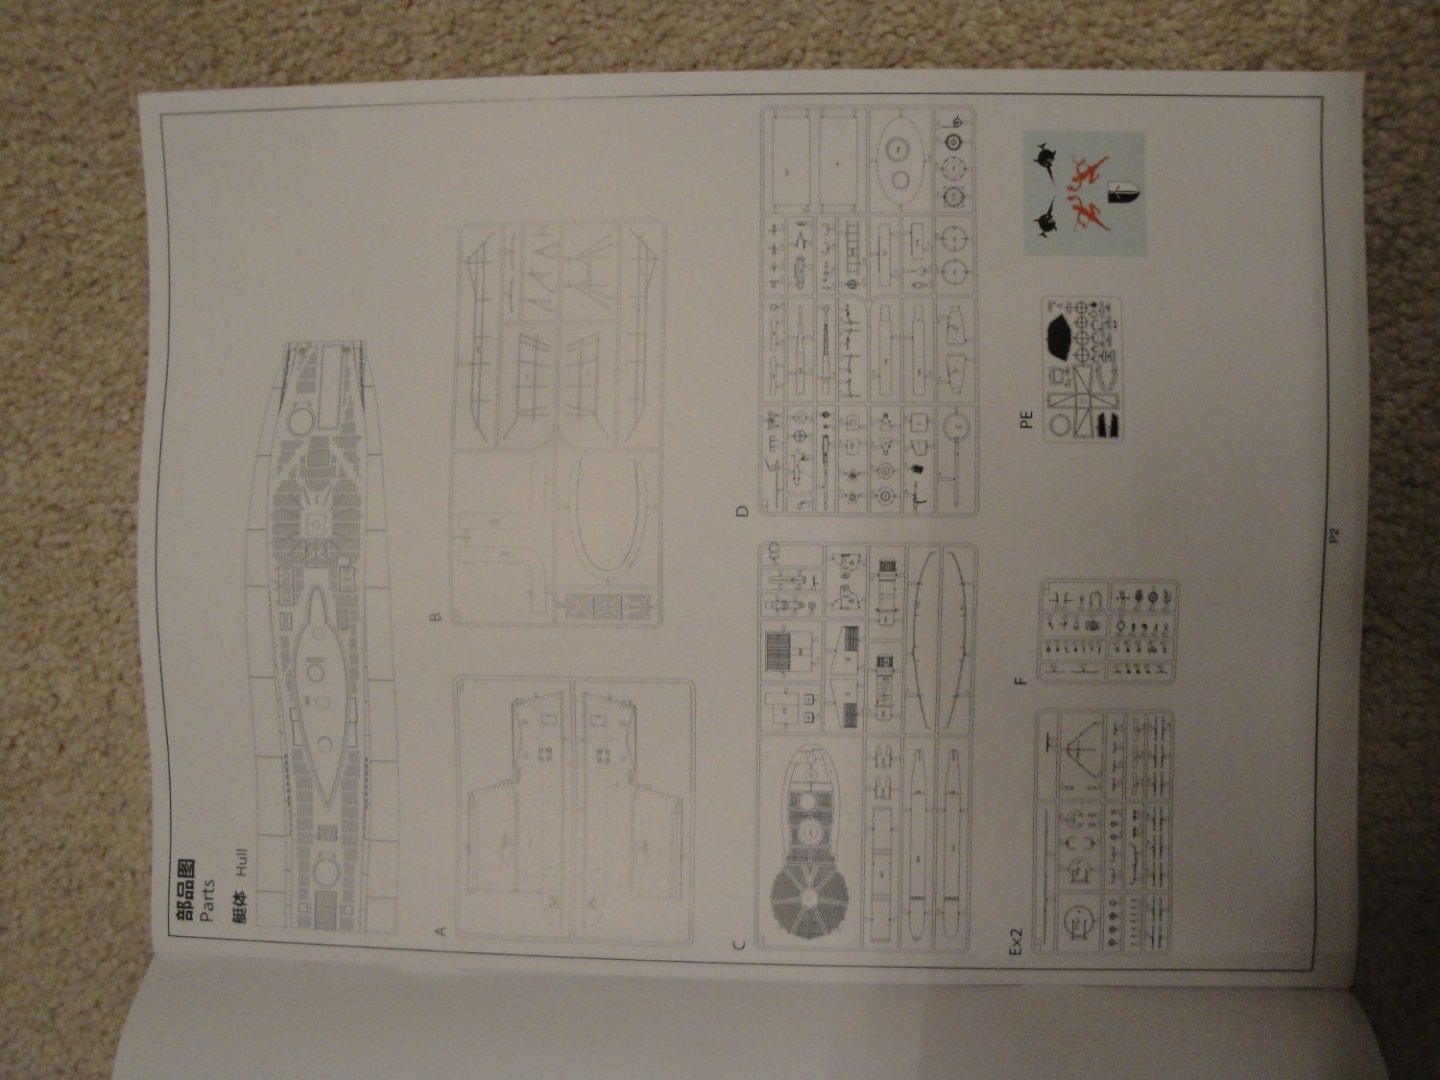
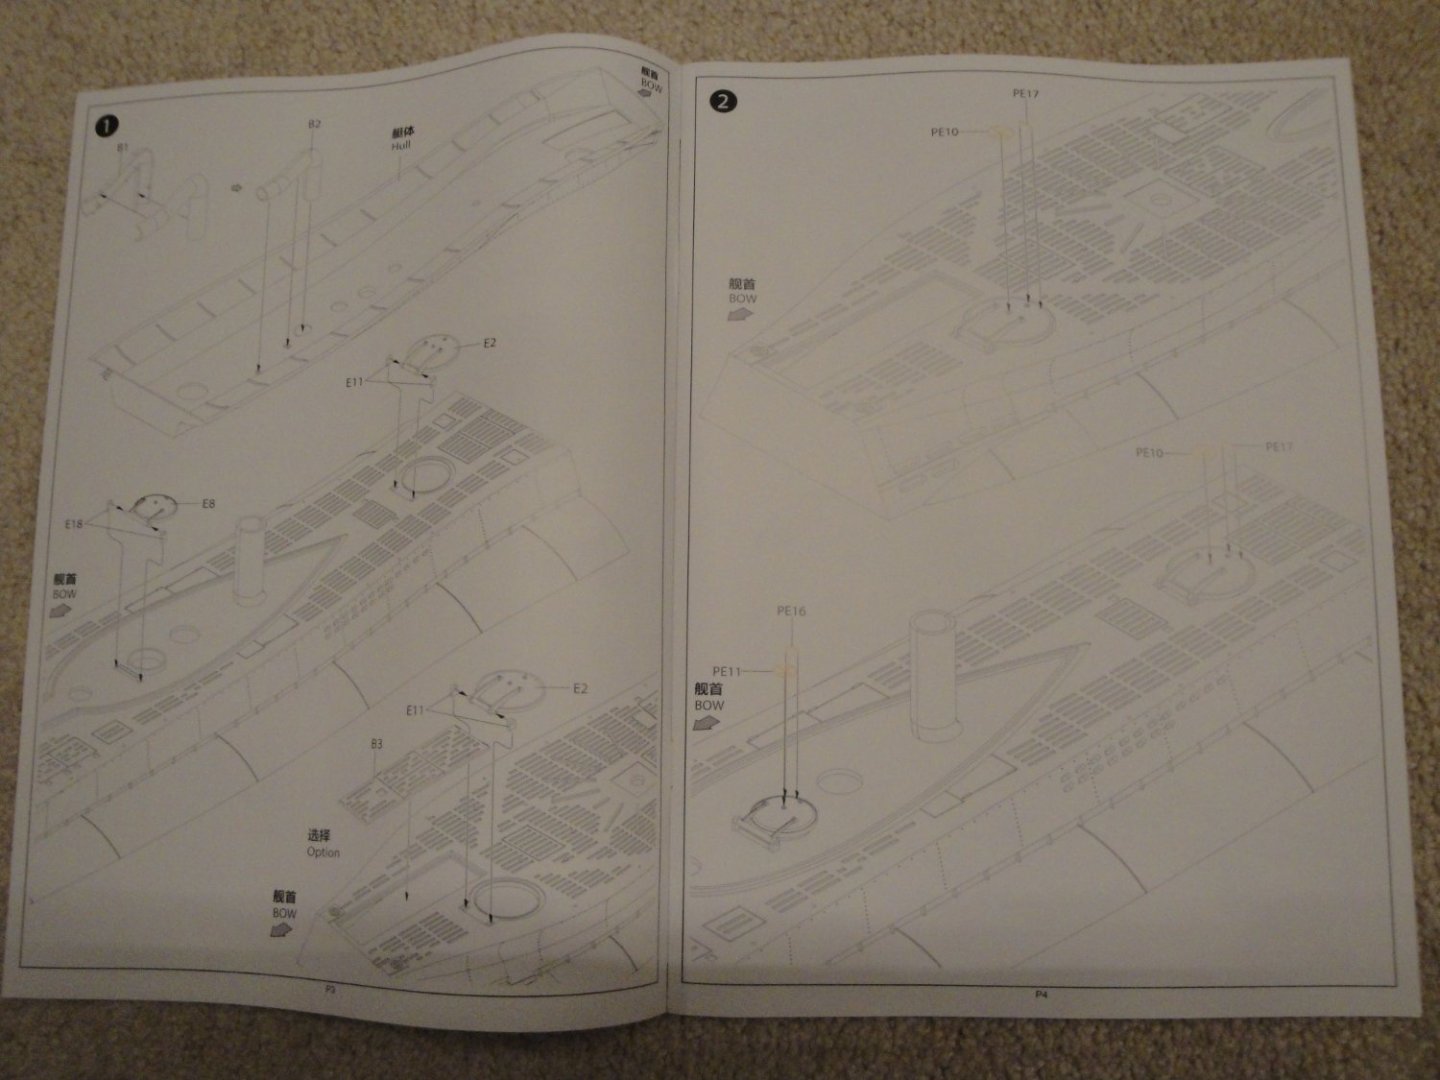
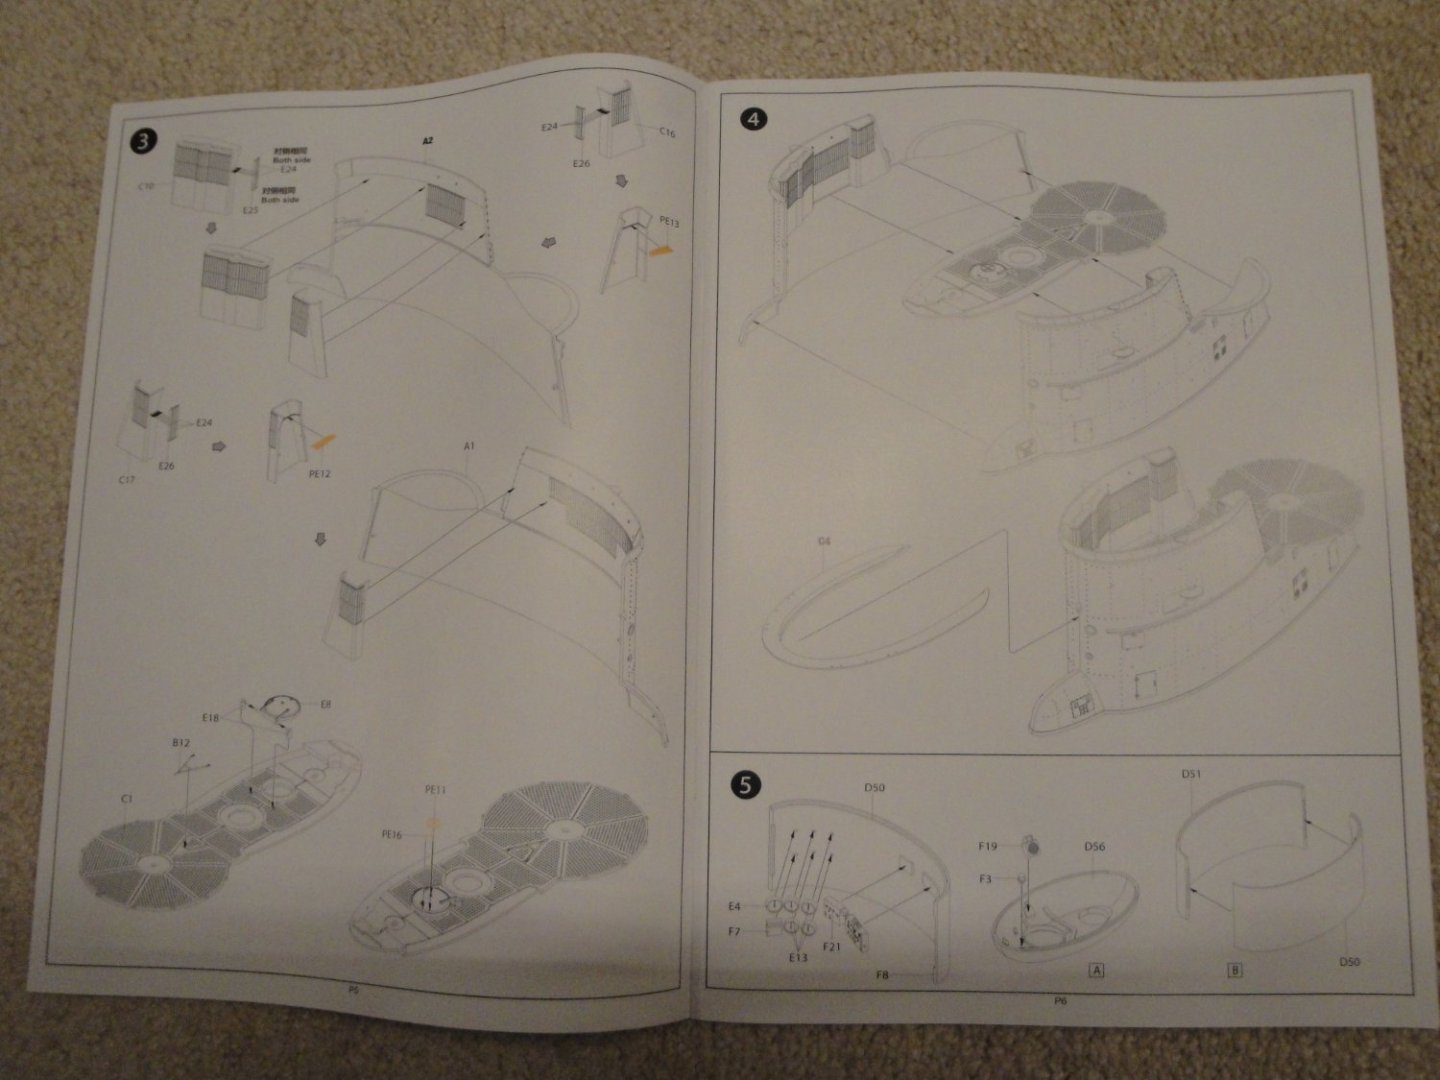
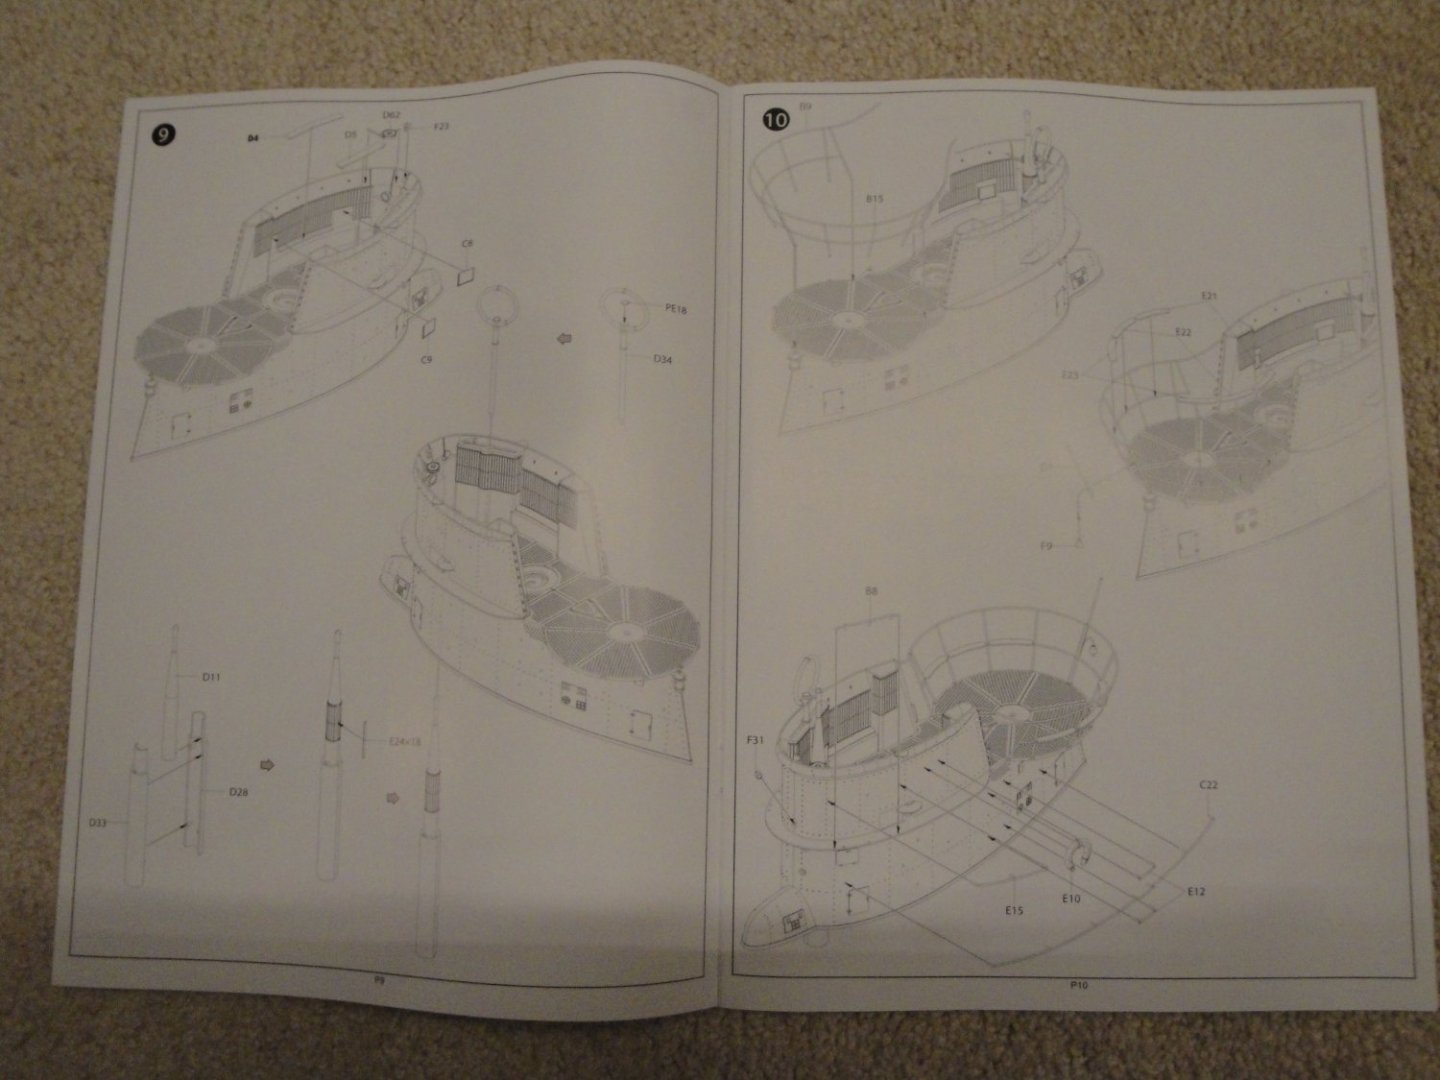
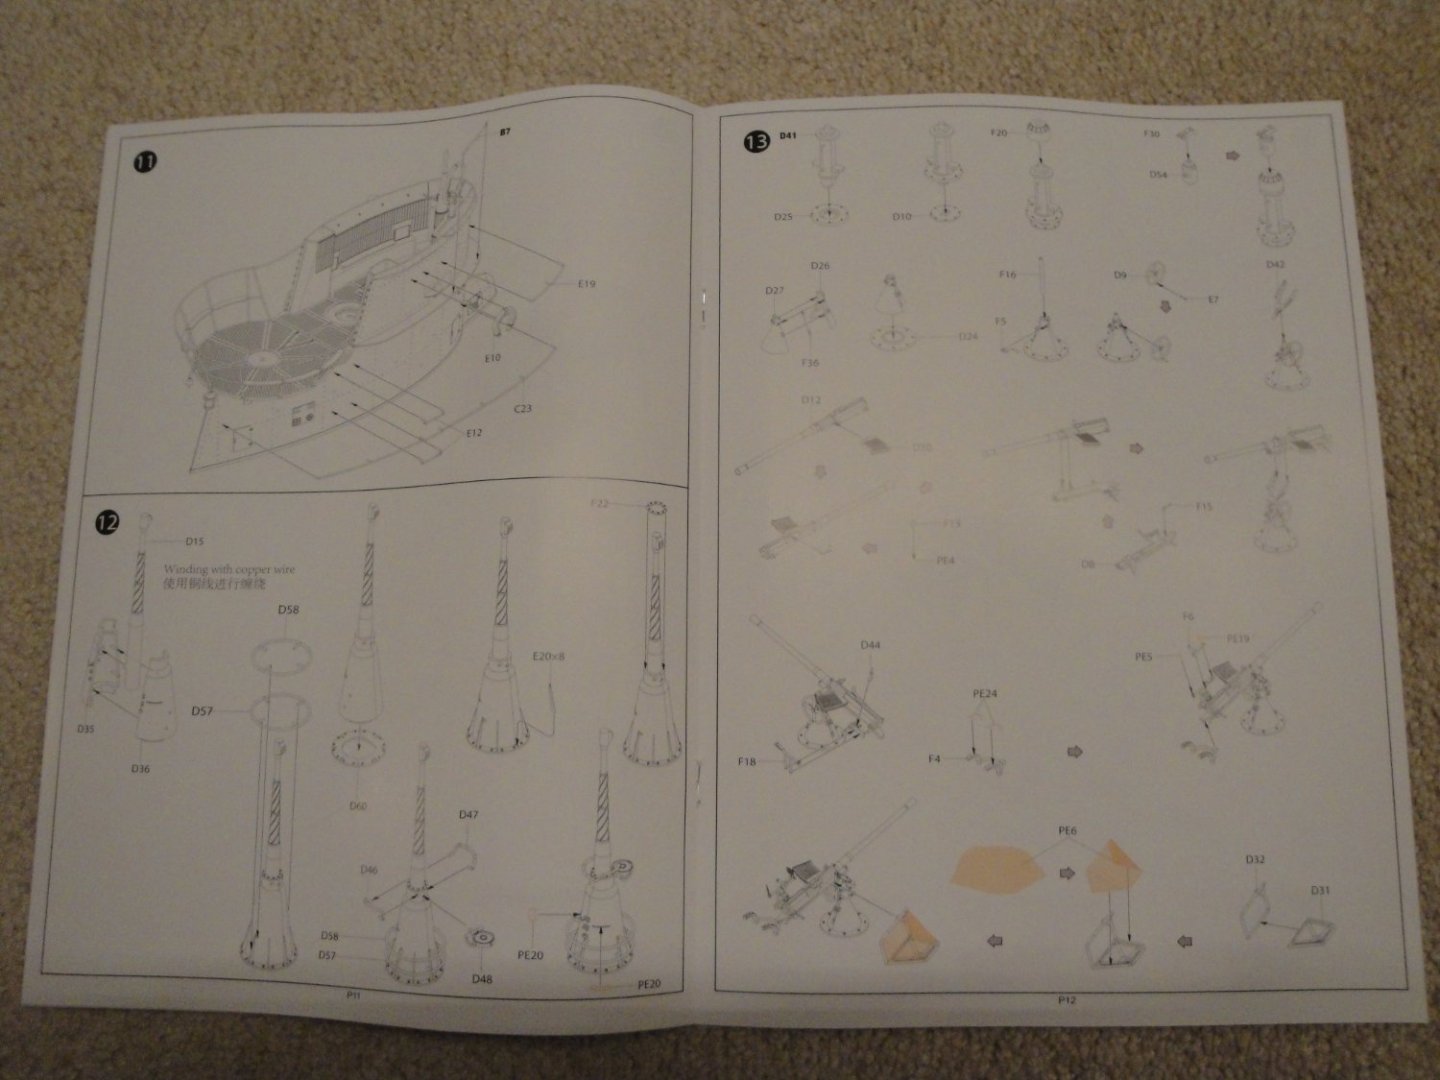
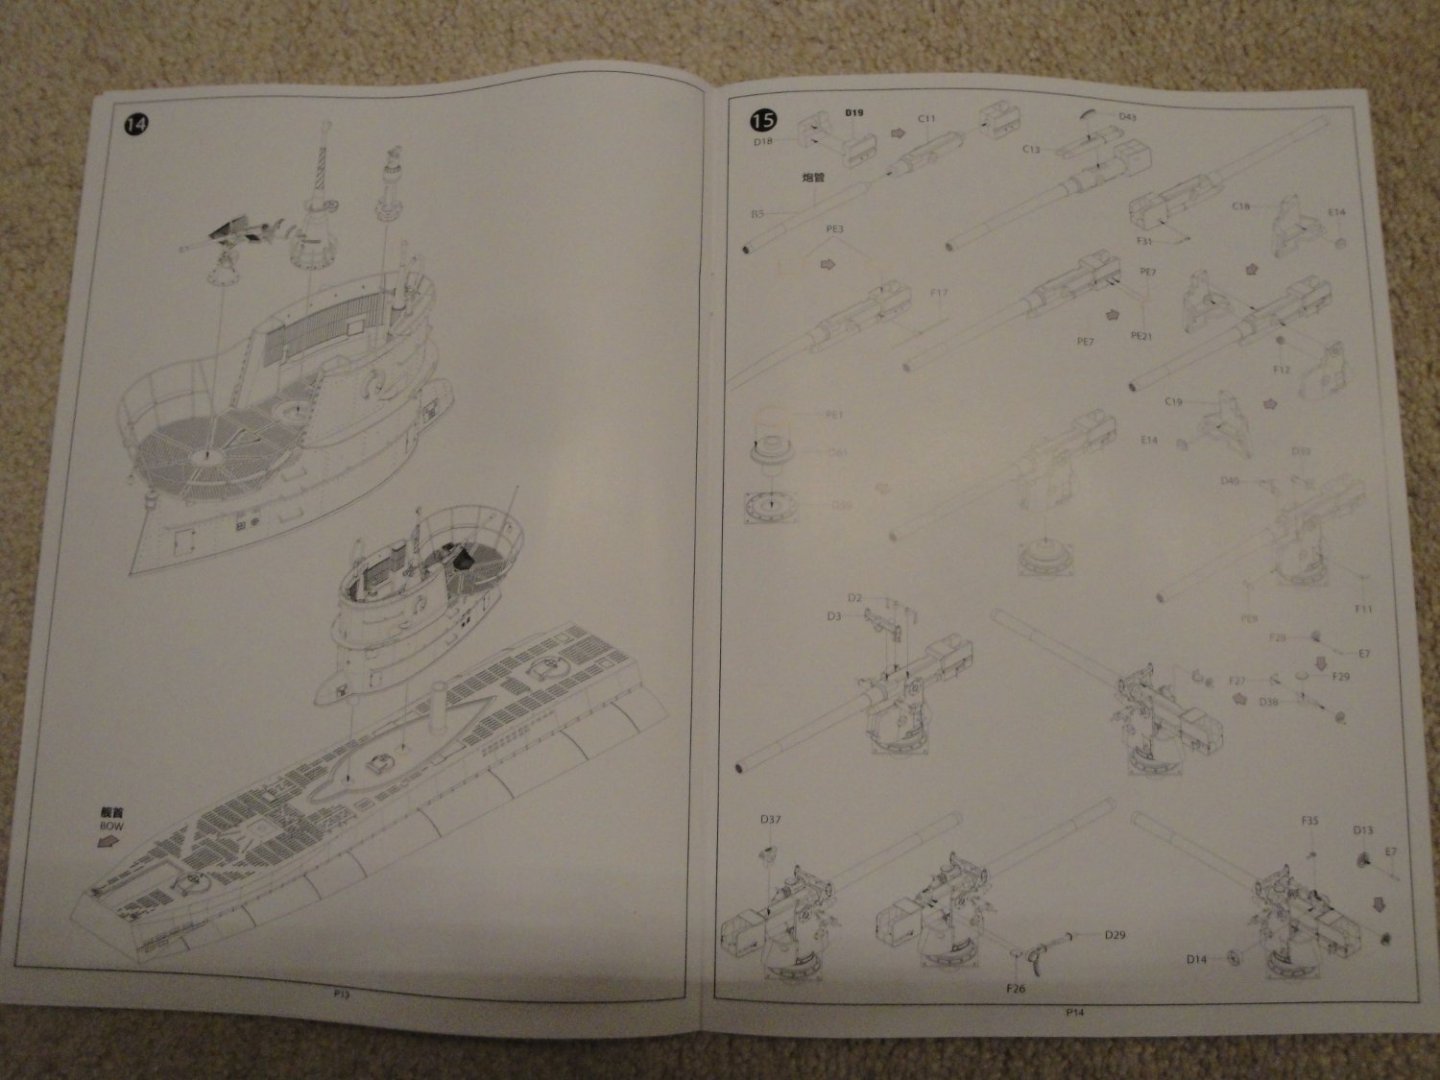
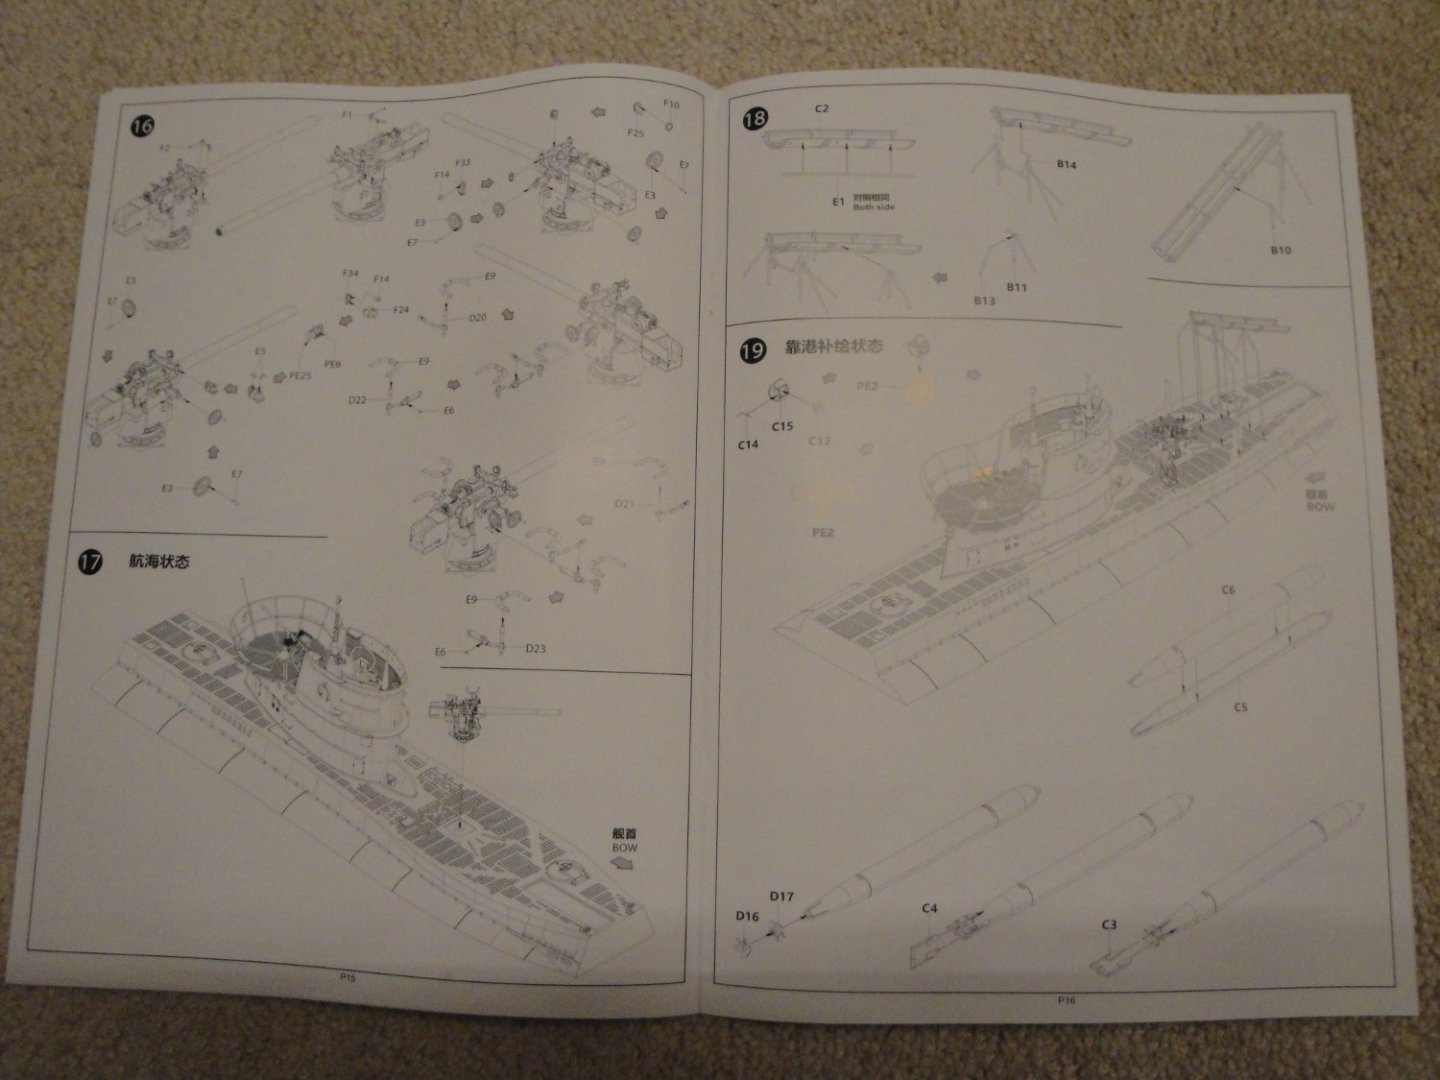
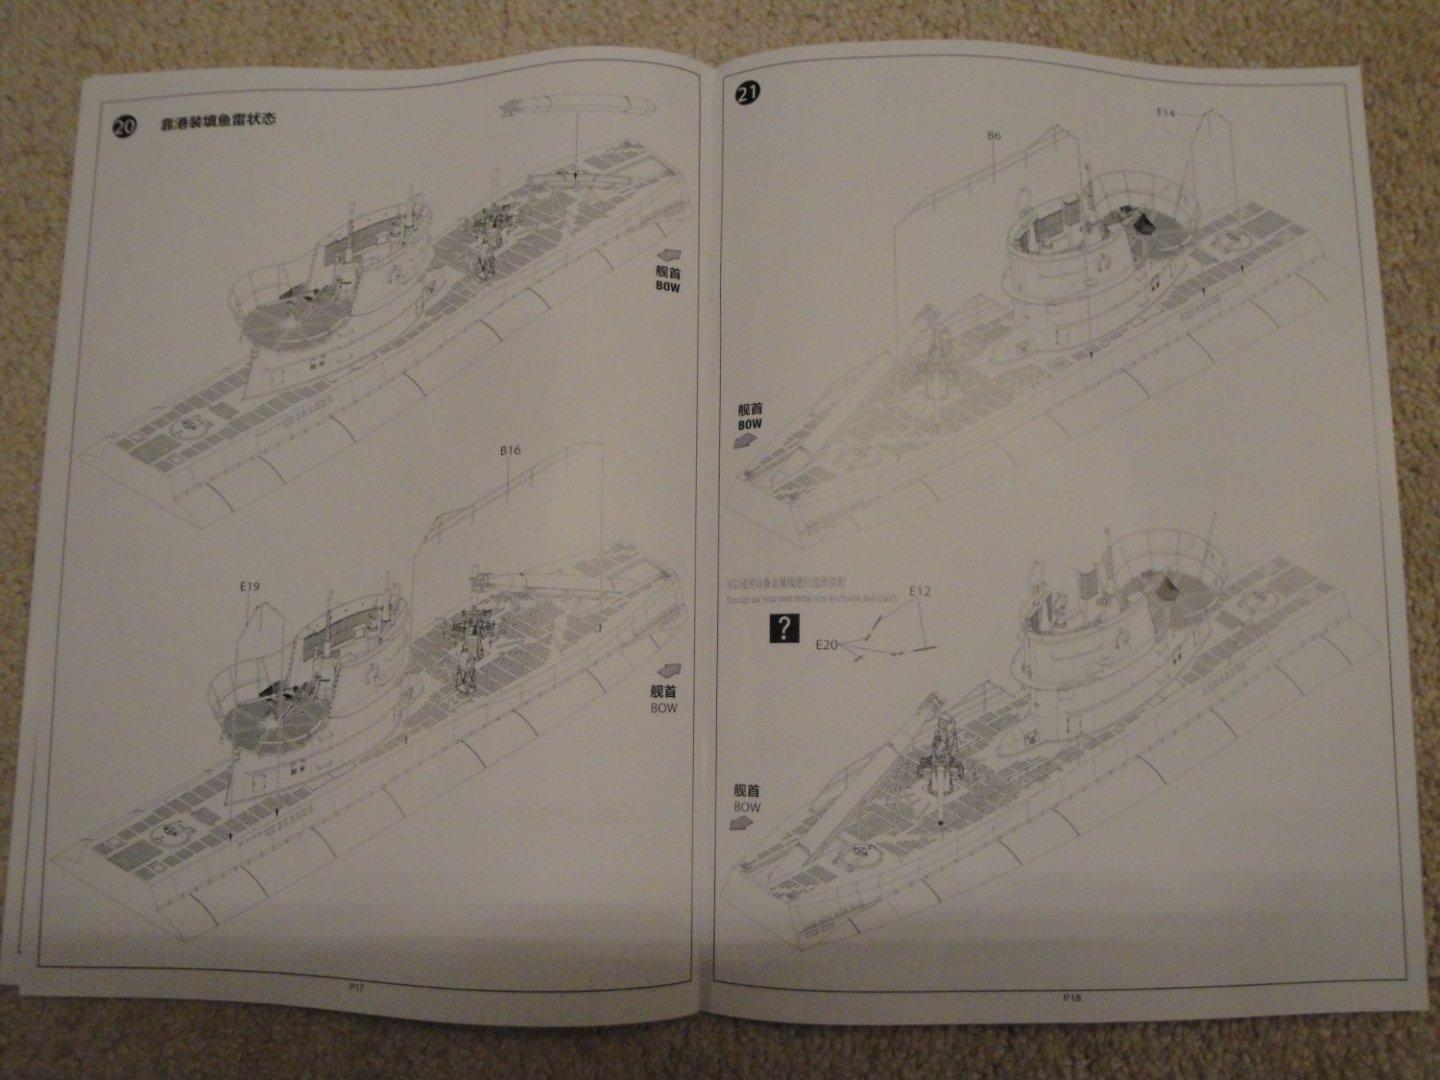
I announced that new kit a few months ago. It is now becoming available and I just received the Box ordered from Sprues Brothers. The final result is targeted to people who wish to build a diorama in the 1/35th scale and combine the conning tower and deck of the U-Boot with some other numerous 1/35th accessories and details. The box allows you to build the following: Note that no crew members are included in the kit. The box is quite large (two feet long) and packed with a lot of parts: Multiple decorations and themes are offered and BORDER offers some decals, to cover most suggestions: Inside the box, multiple sprues are included: All the railings are protected by a paper box: The main deck section is molded in a single impressive part of two feet long (60 cm). All the holes, vents and openings are already drilled and molded perfectly. A small plate of Photo-etched parts is also included, with some decals. Instructions are well presented in a booklet in full colors: The kit is relatively expensive for what it is ($80-100) and the time of affordable kits is long gone. It seems to be of high quality and the molding is very well done with no ejection marks. A kit for submarine enthusiasts mostly.... Yves


- 6 replies
-
- 7
-
-

-
- U-boat
- Type VII Submarine
- (and 1 more)
-
These Protar kits are so expensive, nowadays. I wish Italeri would re-issue all of them, as they did with the most famous motorcycles (e.g. Norton Manx). Yves
-
Ras, You found a gem. I love these old PROTAR kits and have a couple to build in my stash. When I was a kid, my family went to Italy (Bologna) and that is where I discovered PROTAR motorcycle kits. My father bought me the Moto Guzzi 4 in line with fairing and I enjoyed every minute of assembling this model. The engine was working internally, when the rear wheel was spun. I will be following with a lot of interest. Yves
-
It always does 🙂 Yves
-
I am sorry you had to find out the hard way. I realized that with horror, while building my large 1/48 U-Boot. The Vallejo Primer on all PE parts, had to be carefully scratched with a nail and then some brushes. I ended up using Tamiya primer or automotive primer and it worked like a charm. Yves
- 166 replies
-
- 4
-
-
- Maine
- BlueJacket Shipcrafters
- (and 1 more)
-
That is so true. Building out of paper cards adds a considerable level of difficulty to the model. It is unfortunate because of lot of very interesting and rare models are available in cards only. Yves
- 9 replies
-
- 3
-
-
- Japan
- Wind-Class
- (and 4 more)
-
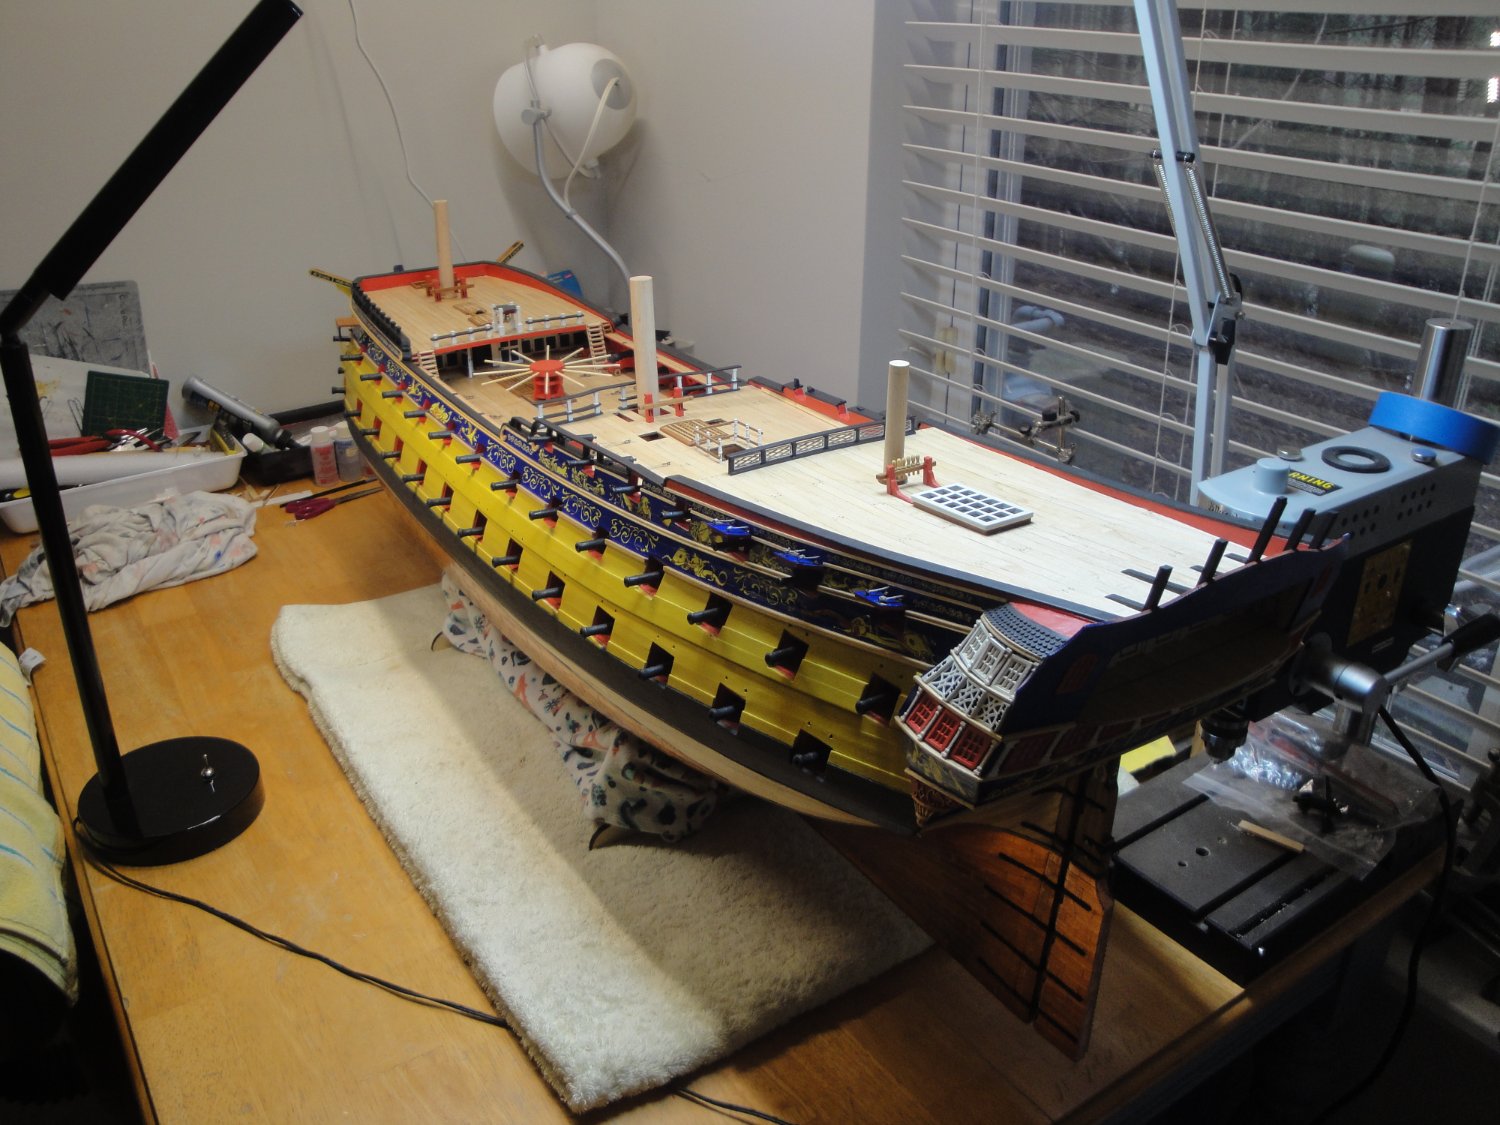
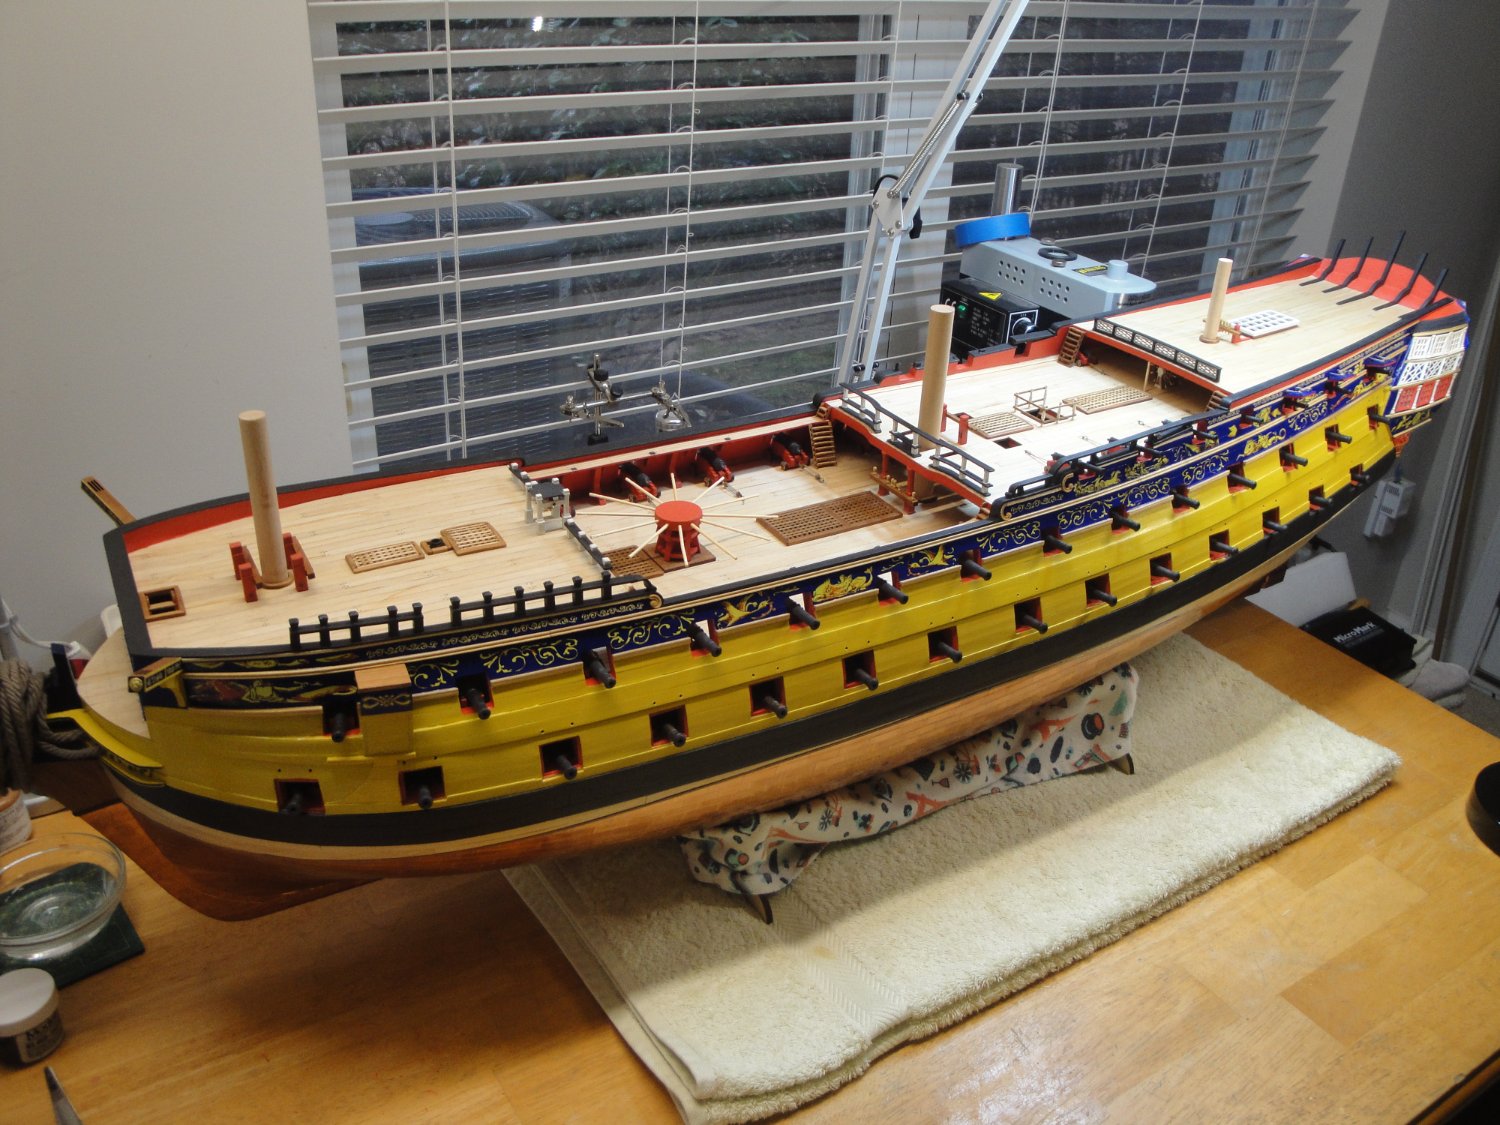
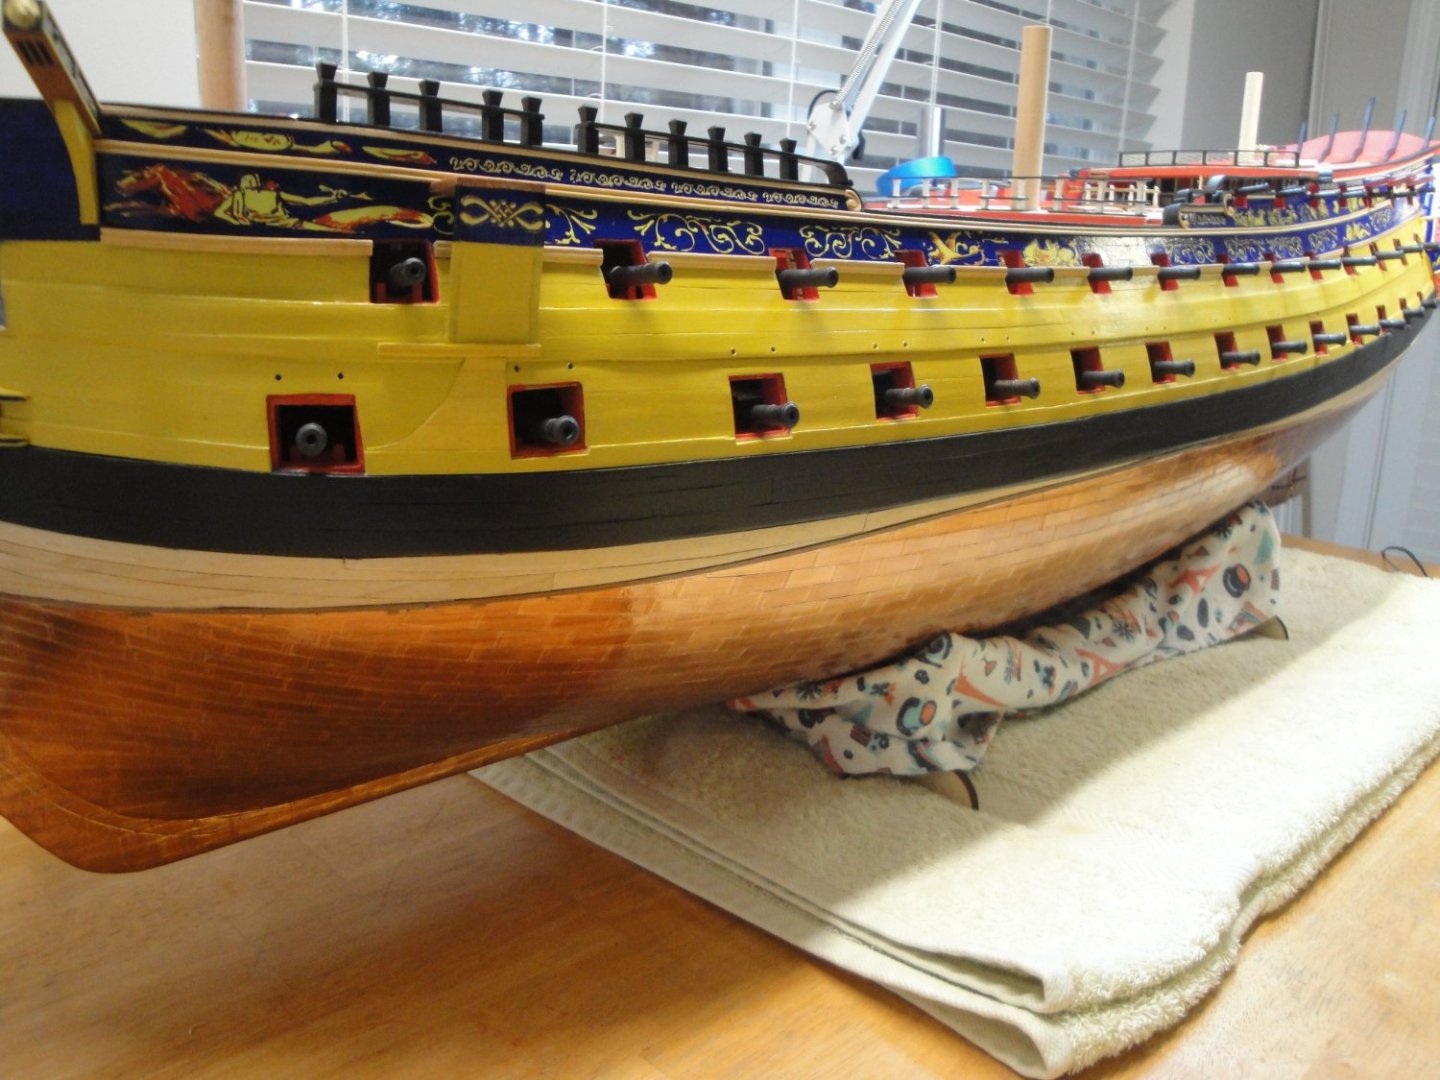
Oh, I forgot to mention it, but the model weights about 19 pounds at this stage. It may reach 20 pounds, when all is said and done but most of the parts left are made of light wood and should not contribute much to the mass of the model. Not exactly easy to move around.... Yves
-
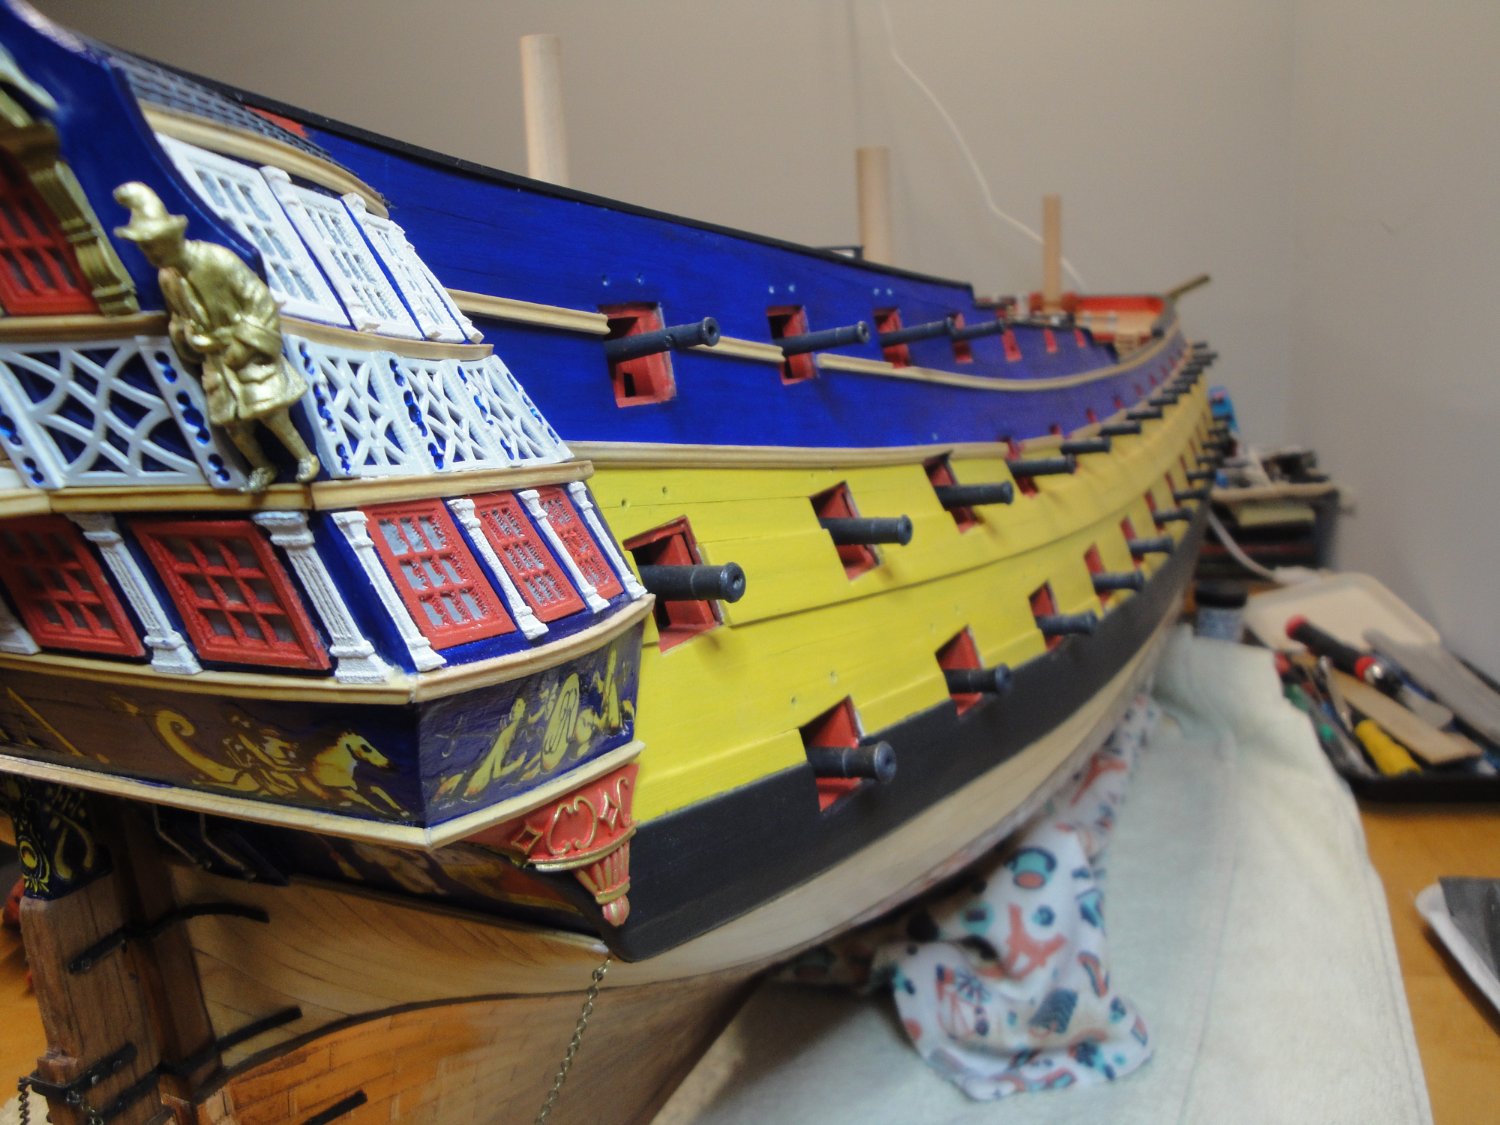
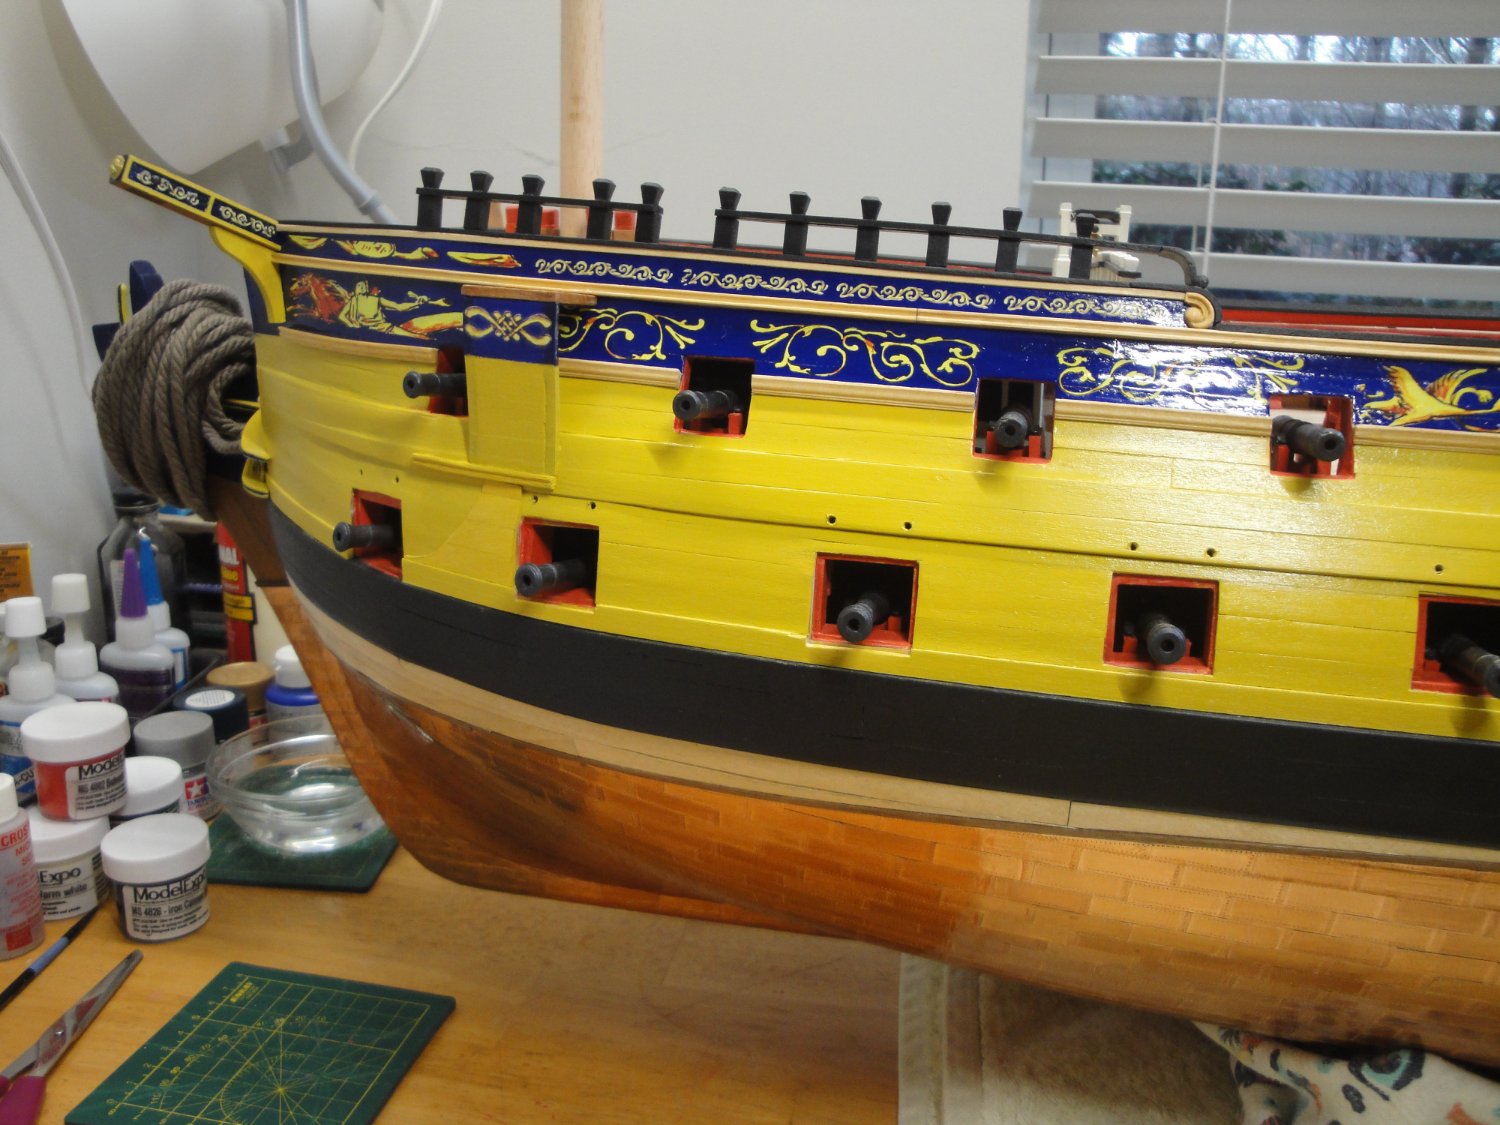
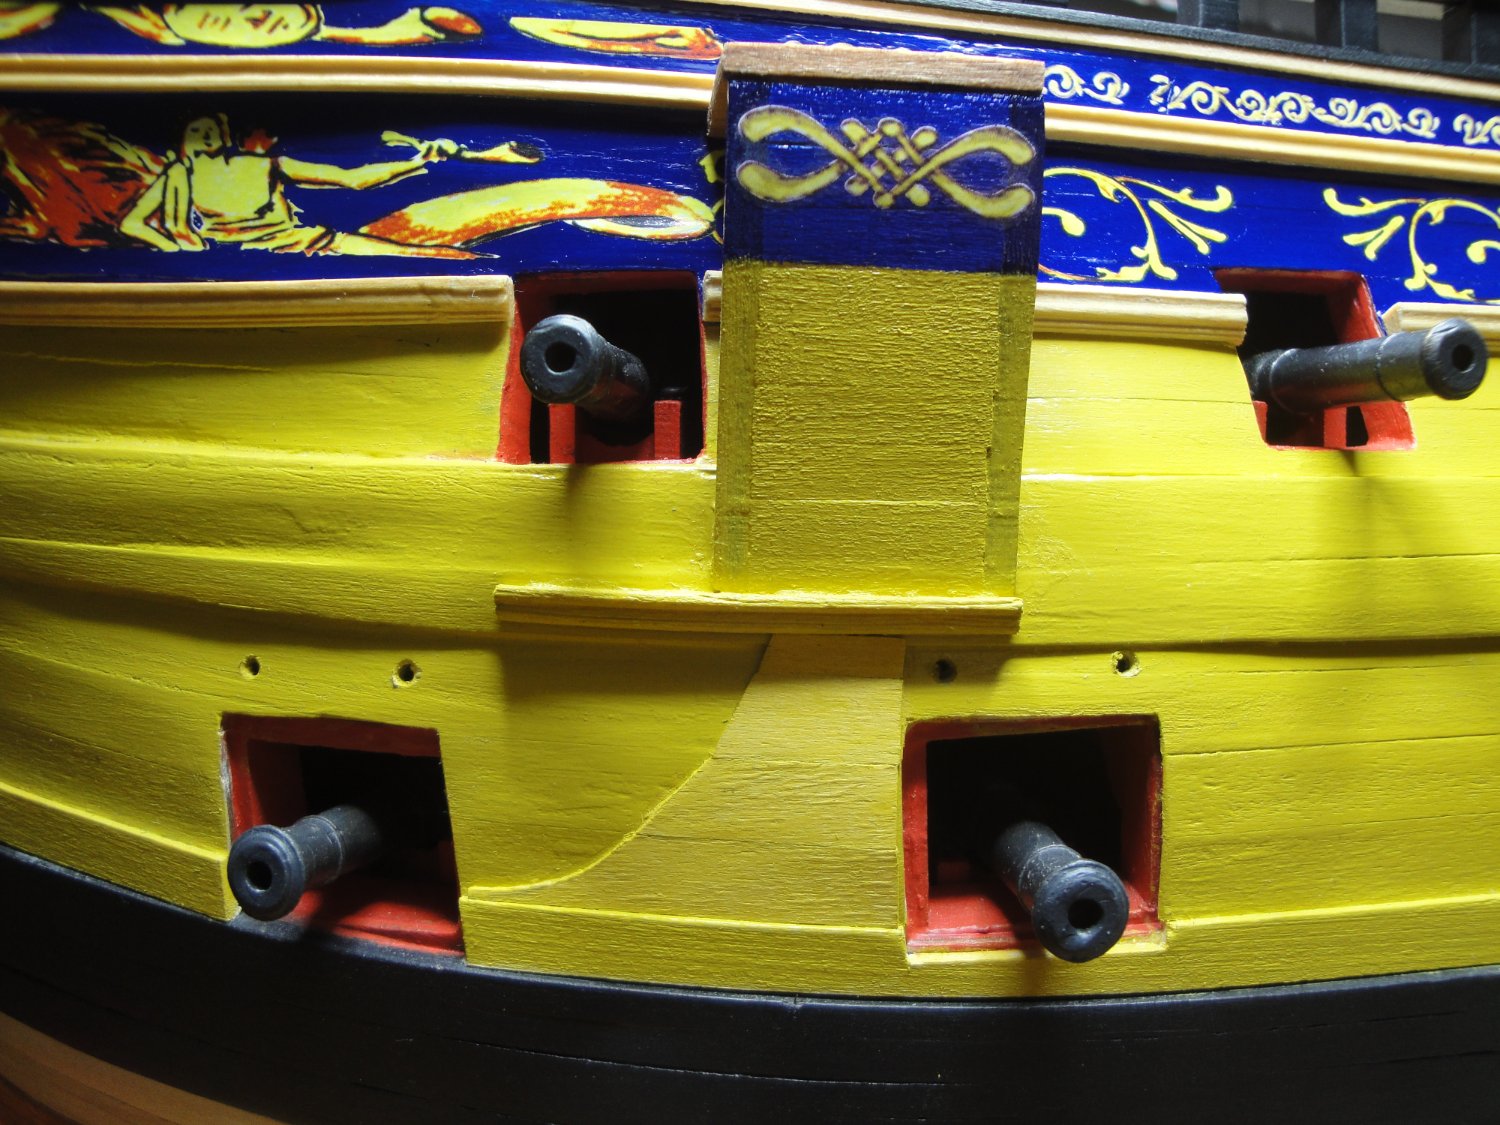
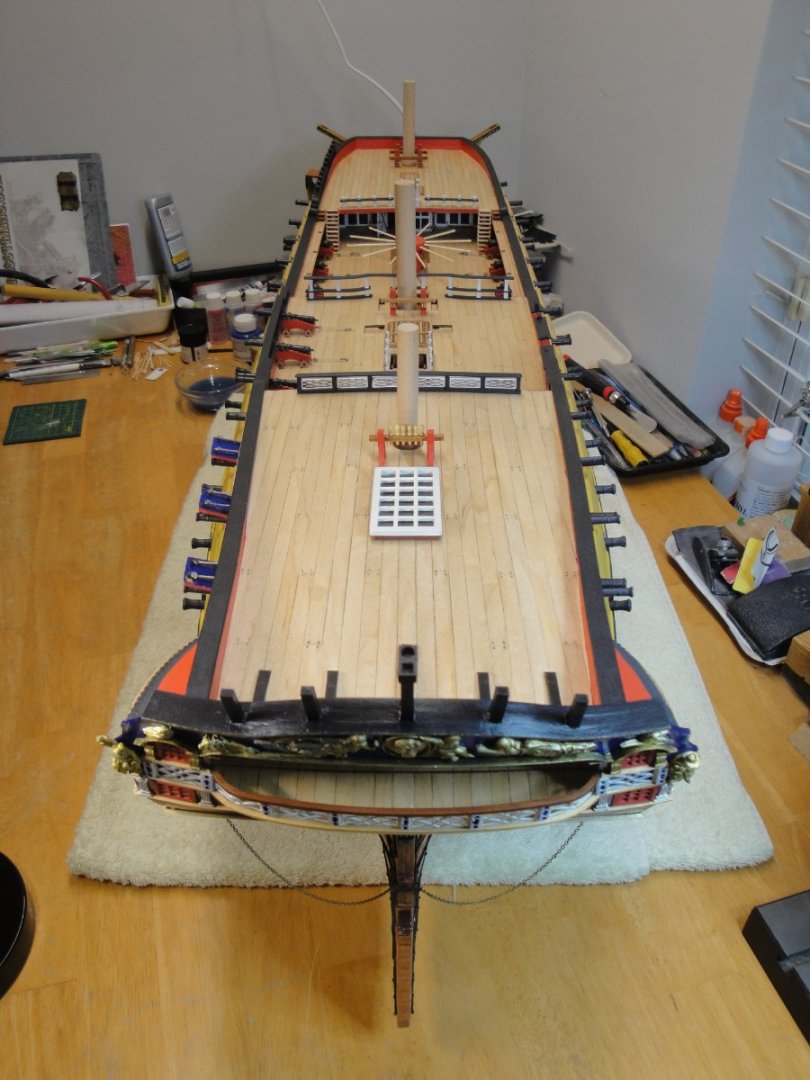
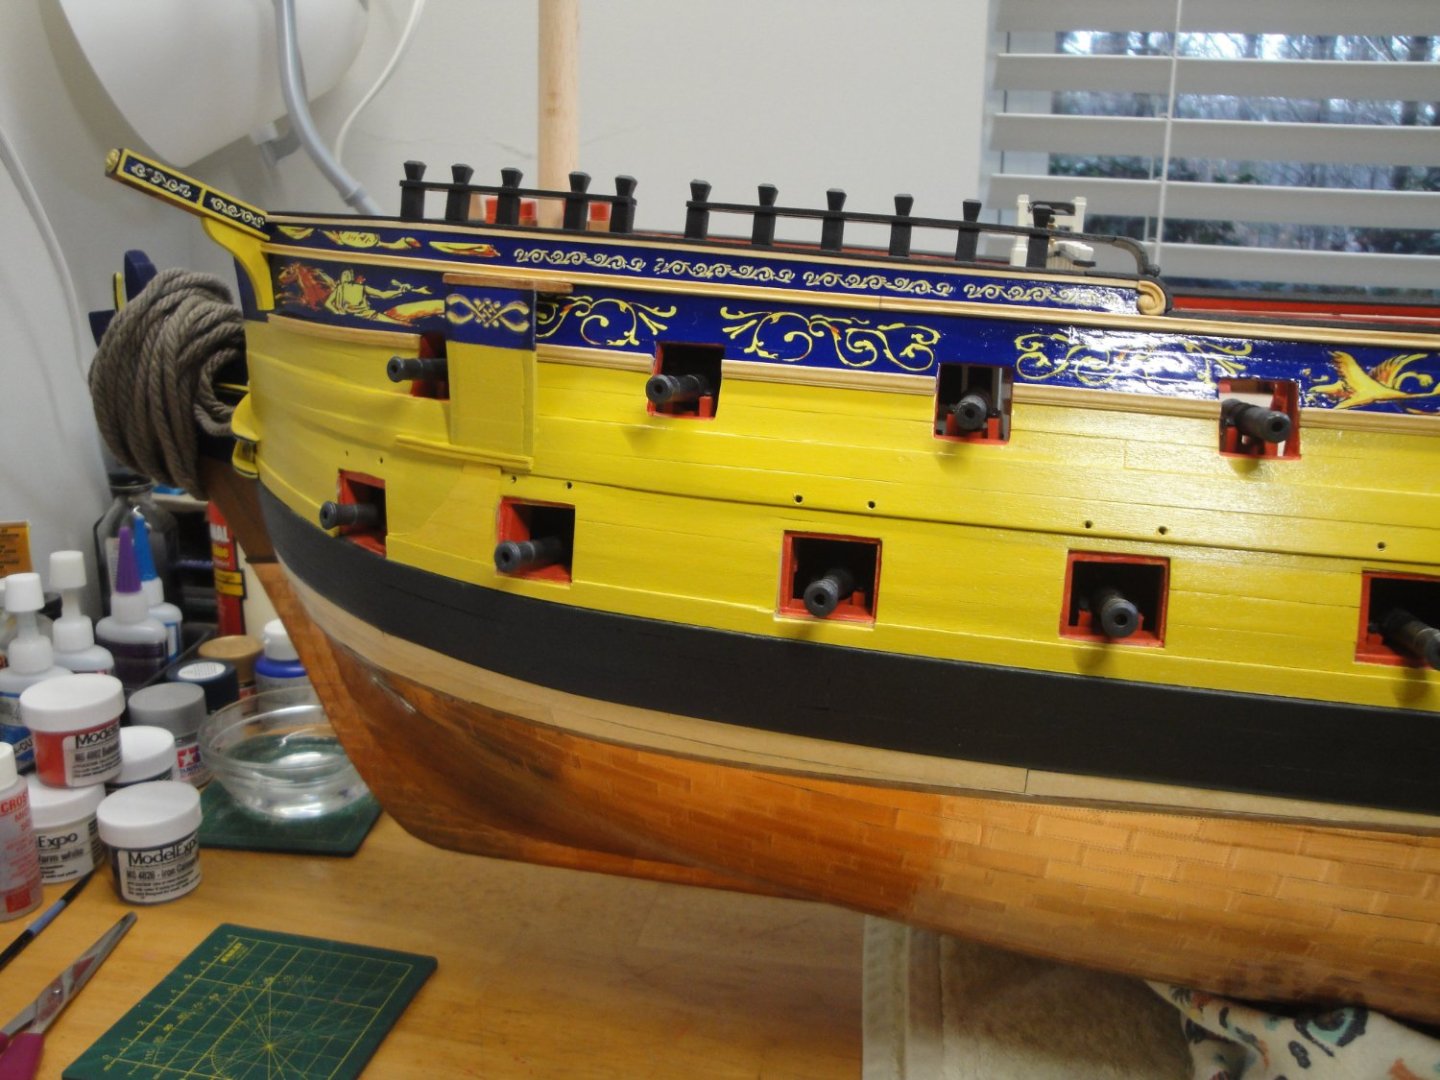
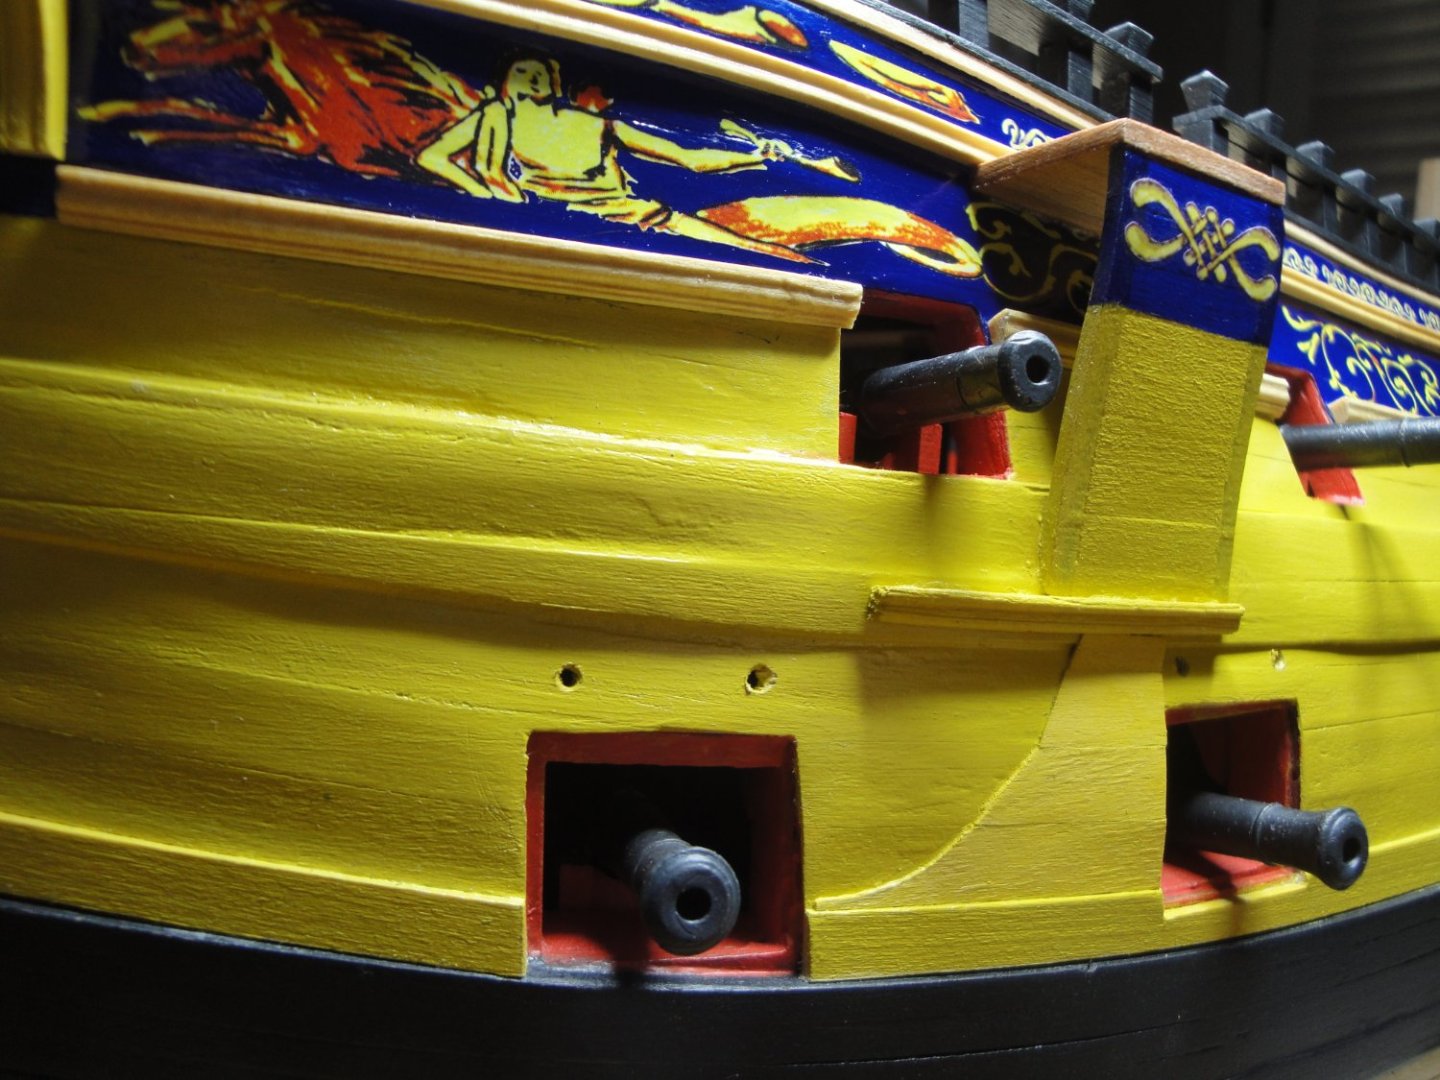
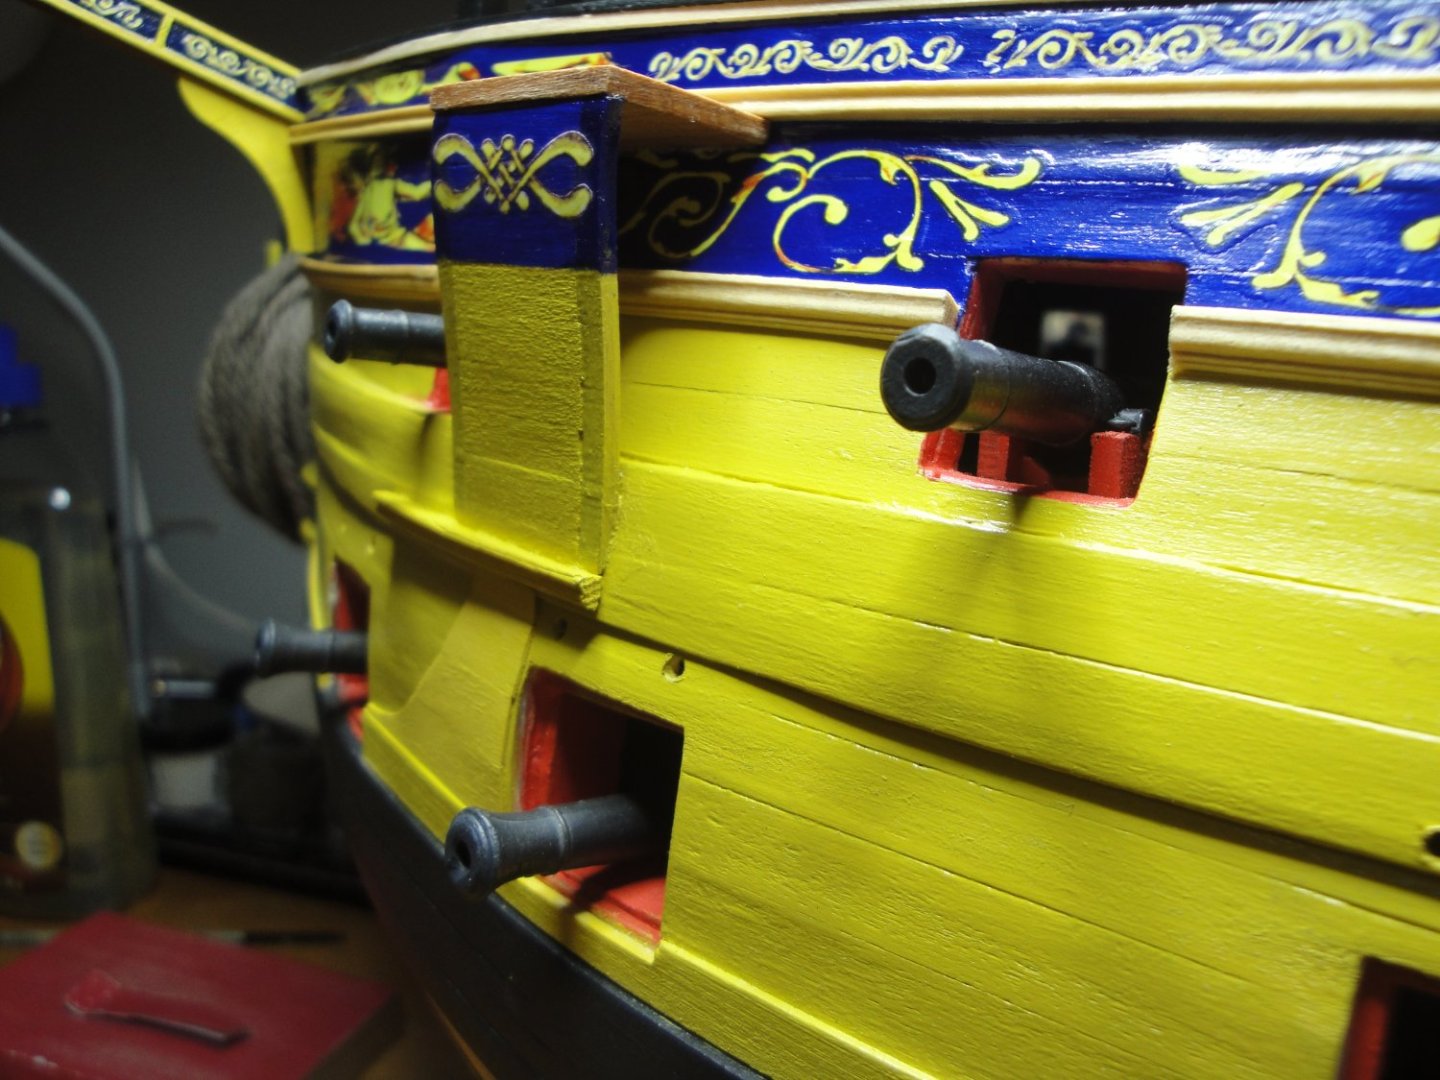
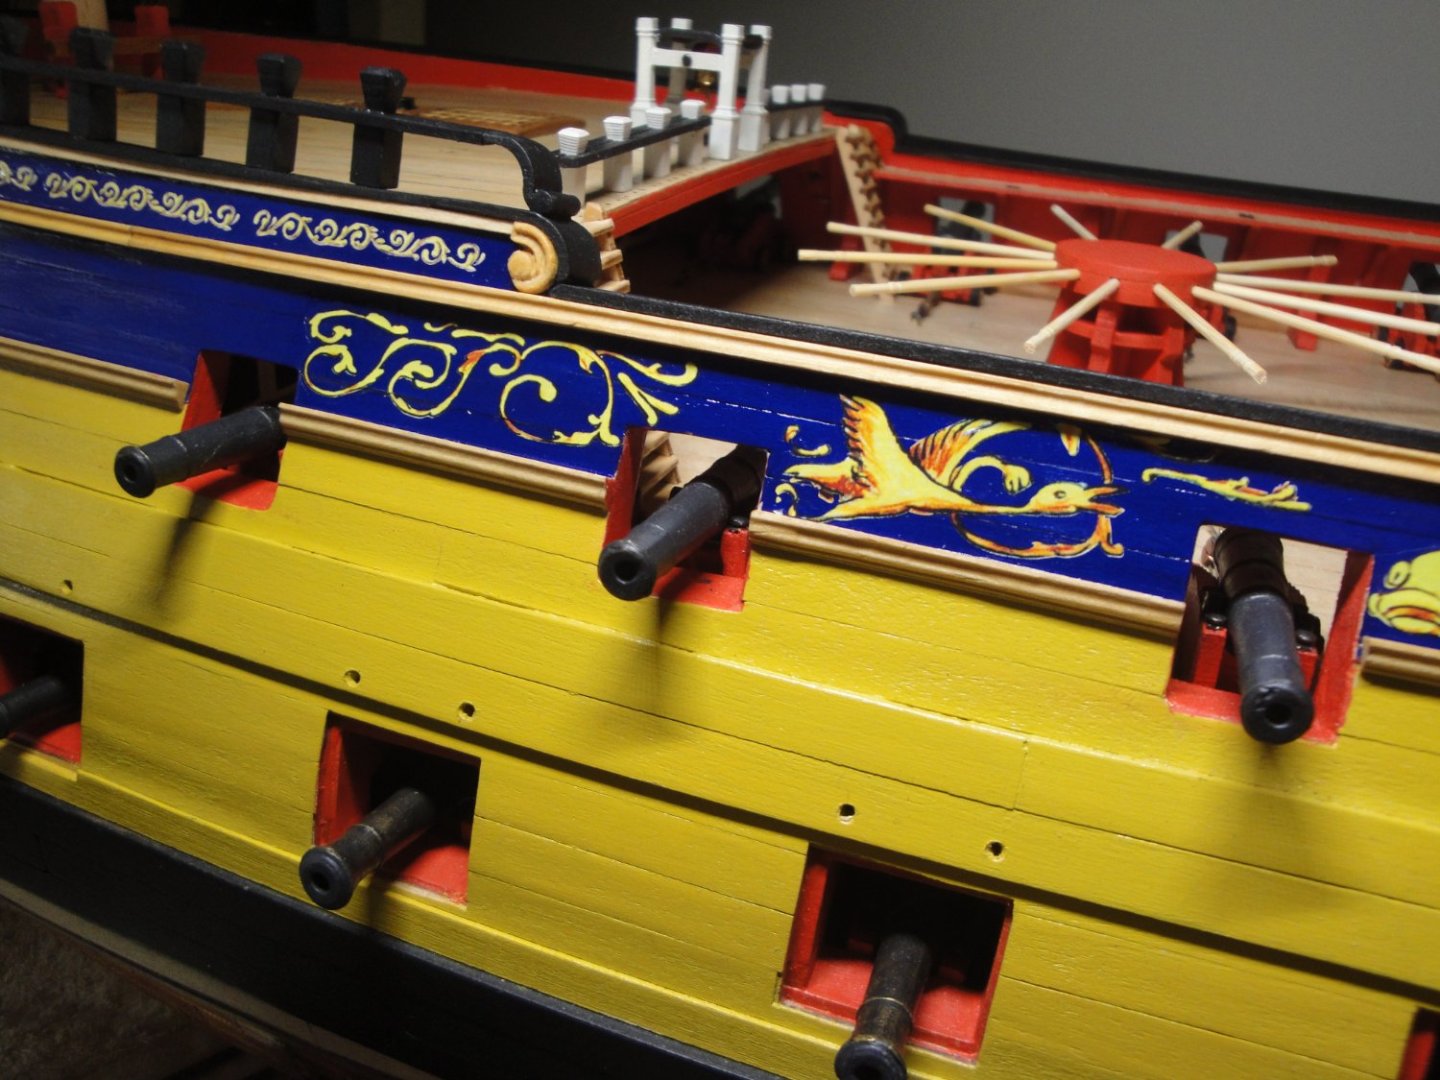
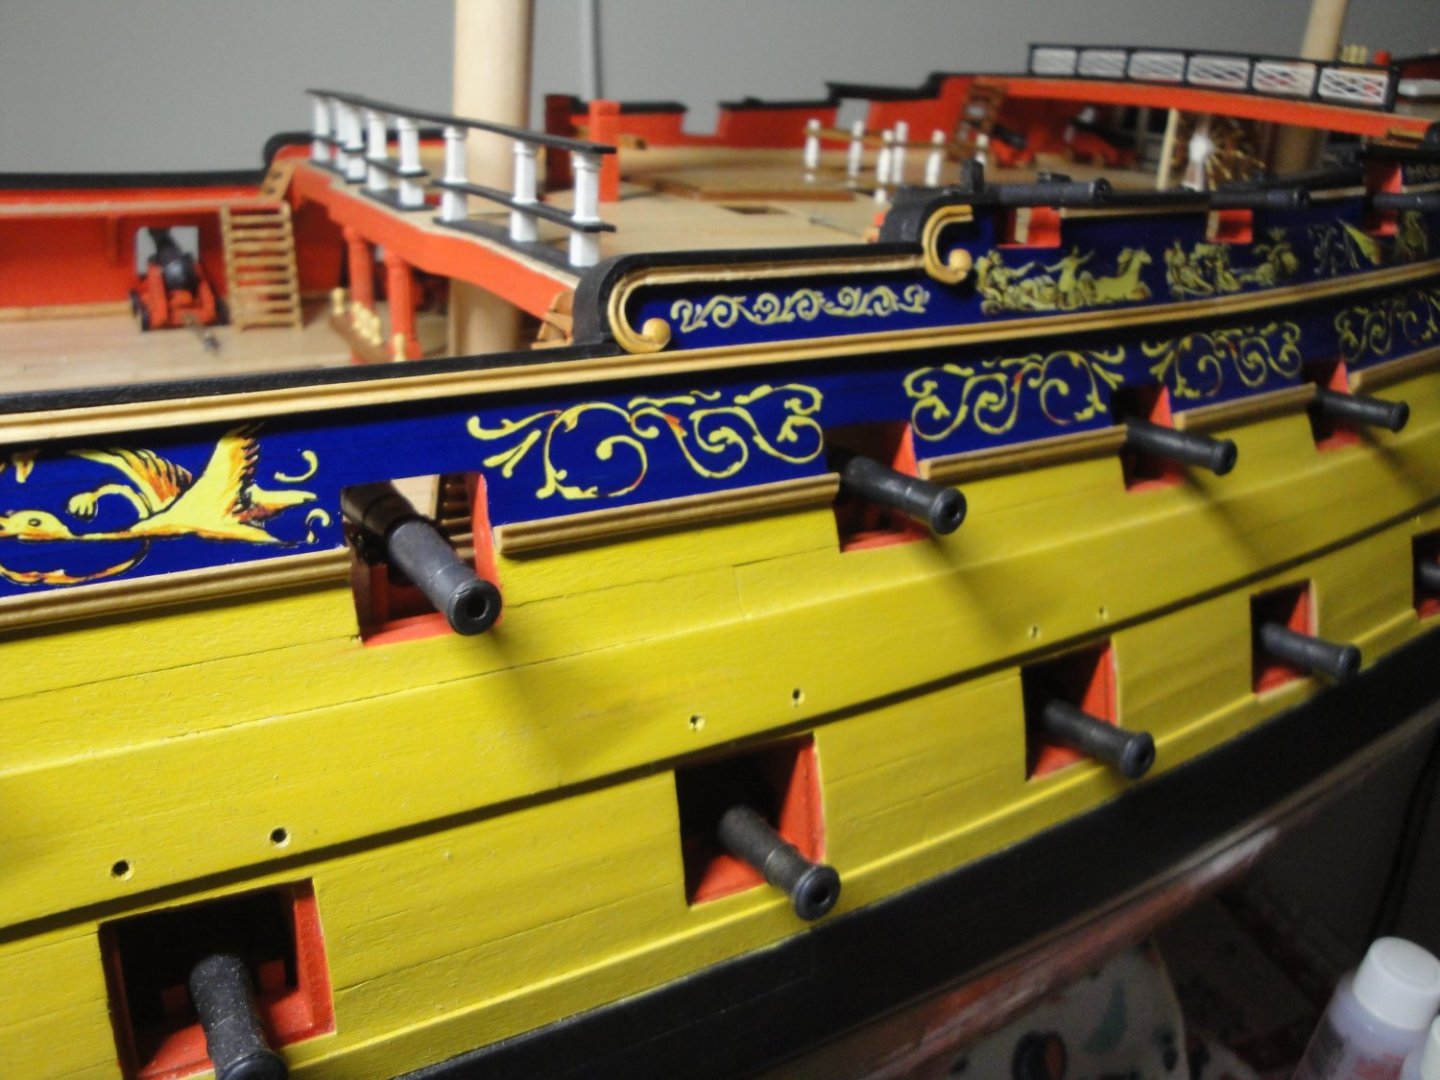
So after a few weeks of work, the port side is pretty much completed. I still have some wood joinery to do and correct some painting mishaps, as well as installing the 18 gun port lids that are still missing. The upper gun port lids have been built and installed: what a royal pain in the ****, to build them and install them correctly. Overall view of the Port side of Bellona: Now, the same has to be done on the starboard side..... Wish me luck !!! Yves


- 507 replies
-
- 17
-
-
-
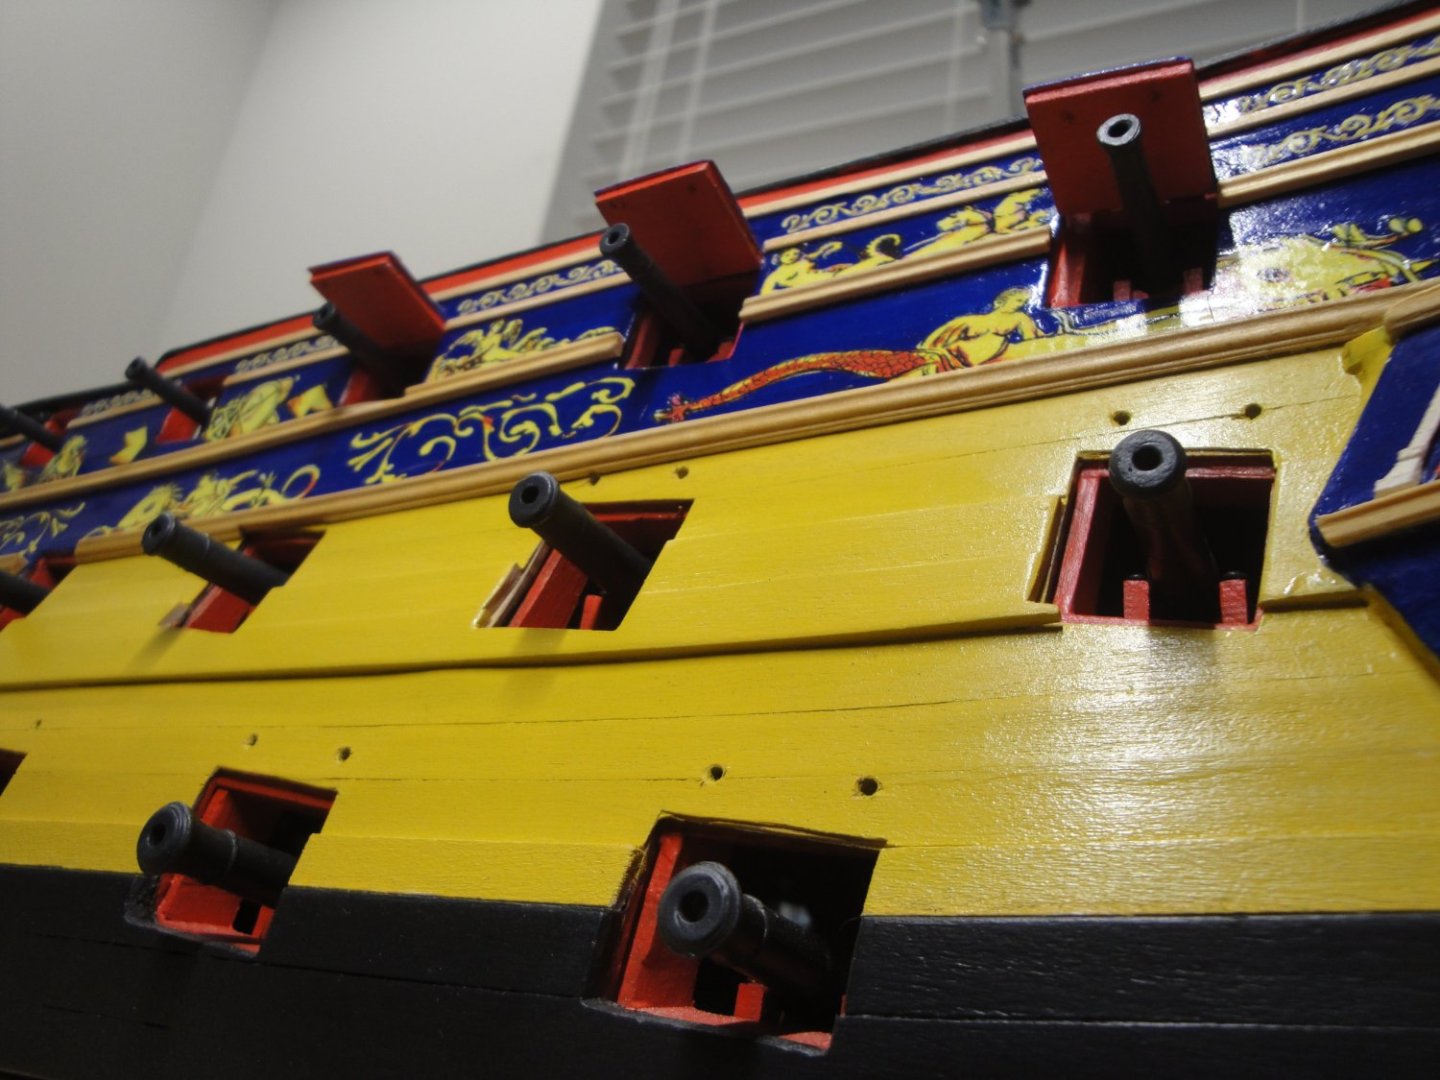
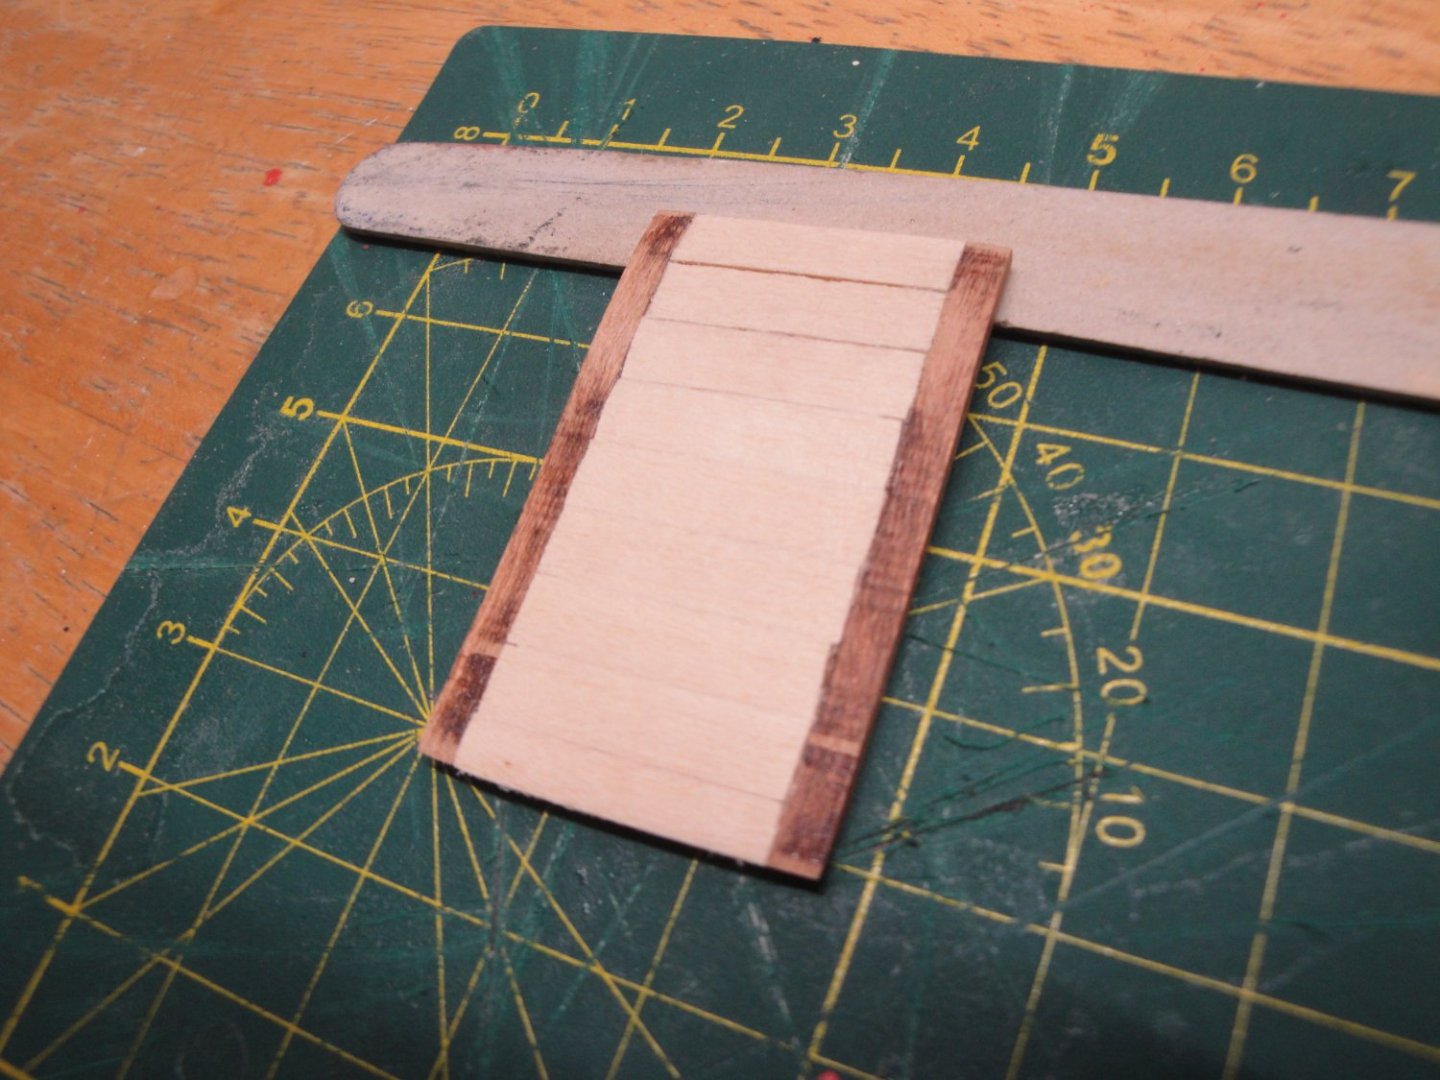
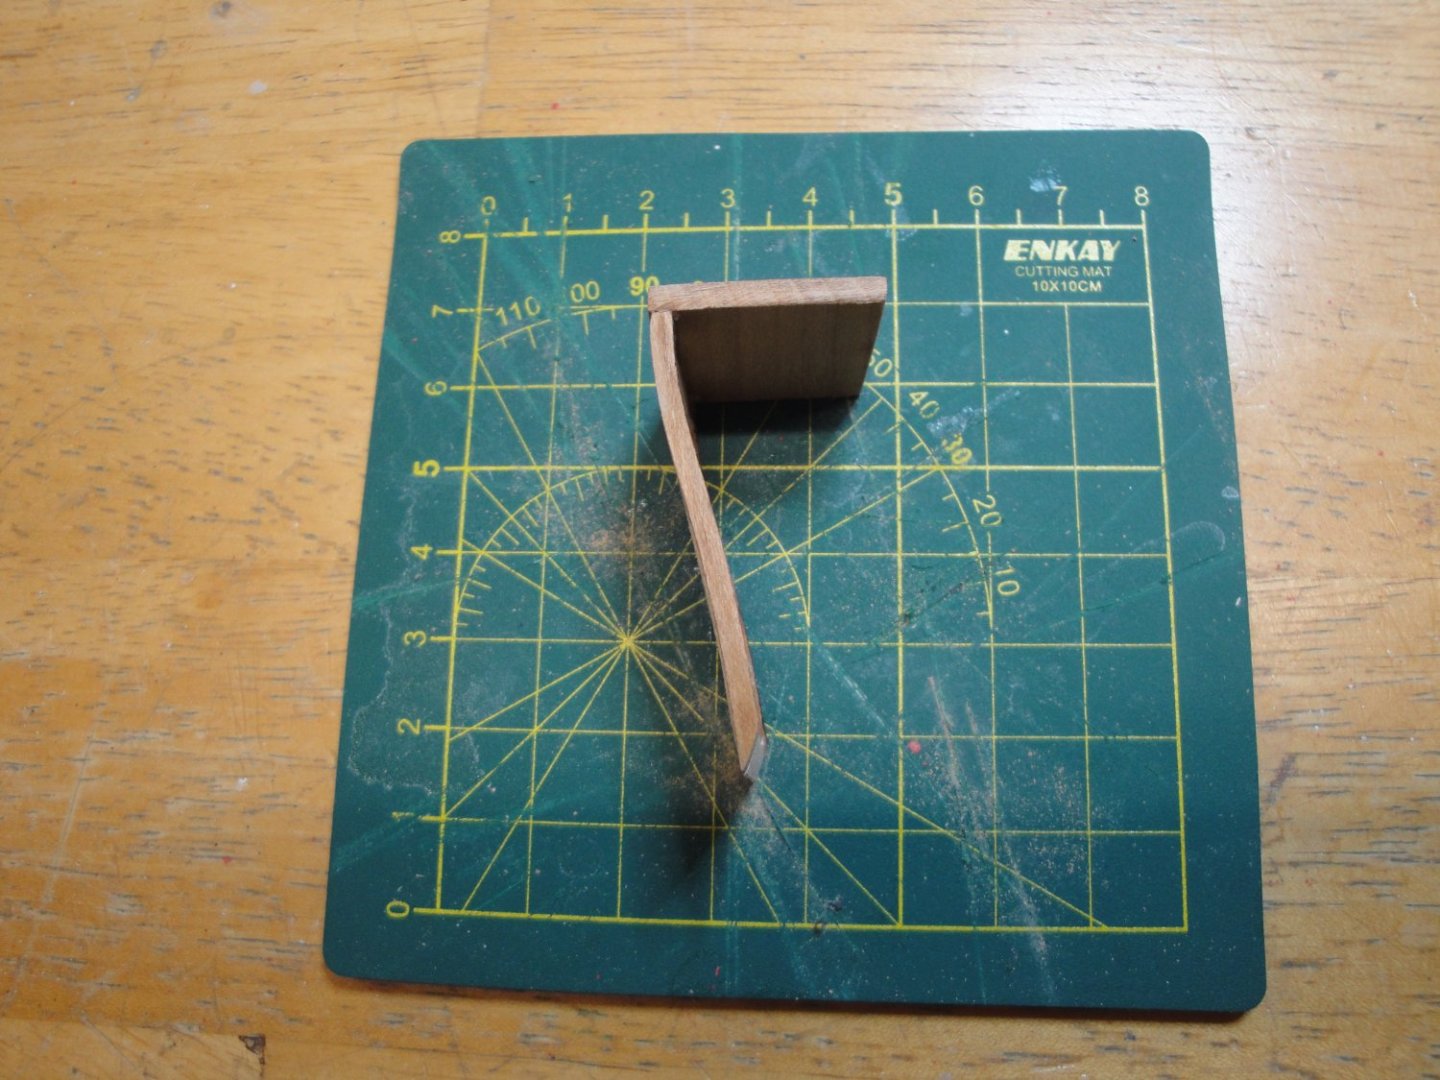
The bolster to protect the hull from the damaging effect of the flukes of the anchors, is not very well defined in the kit. A piece of plywood is provided to be glued between the two curved cherry parts, but it is not realistic and plywood does not bend easily, at least in my world. Instead I created the bolster by gluing 2 x 3 mm basswood strips cut at 20 mm long. The top part of the bolster is a section of the channel, cut from the main front channel. I will not be representing the channels on my model, since they are not equipped with holes and the kit does not offer any bolts, chains and deadeyes. Besides, I really like the smooth shape of the hull and do not want to compromise it with additional and poorly depicted features. The kit only provides instructions and parts for the upper section of the bolsters. However, using the Anatomy of the Ship, one can see that there is more to it: Yves

- 507 replies
-
- 10
-
-
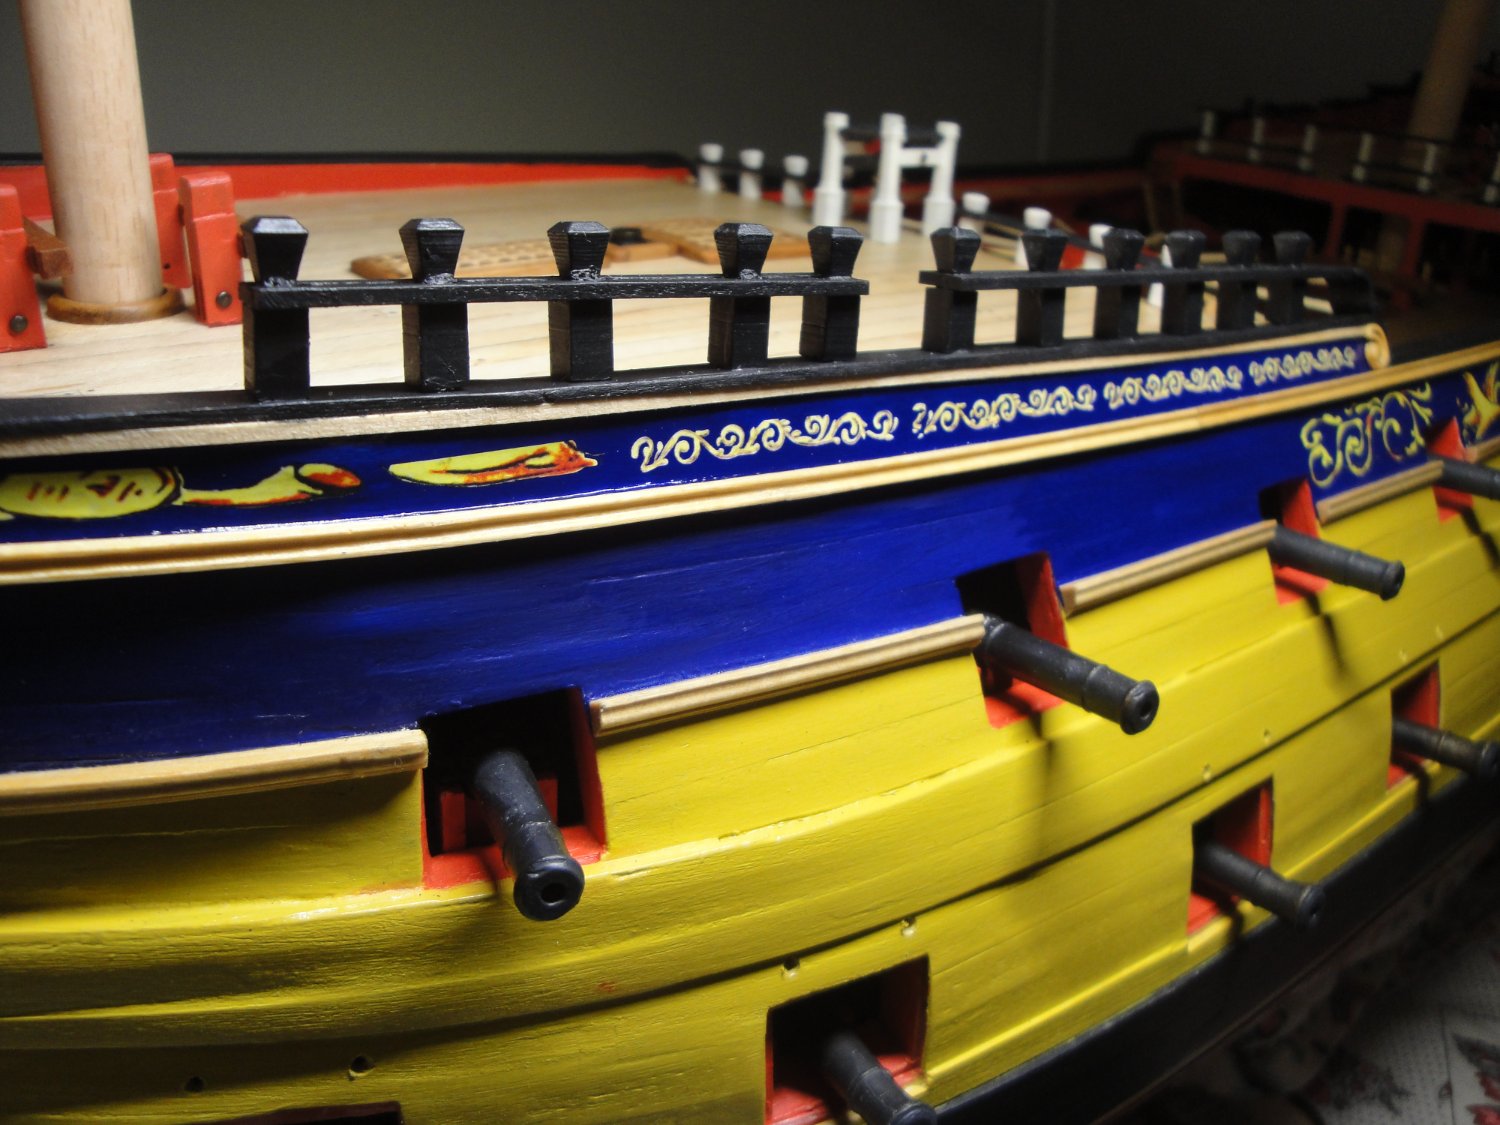
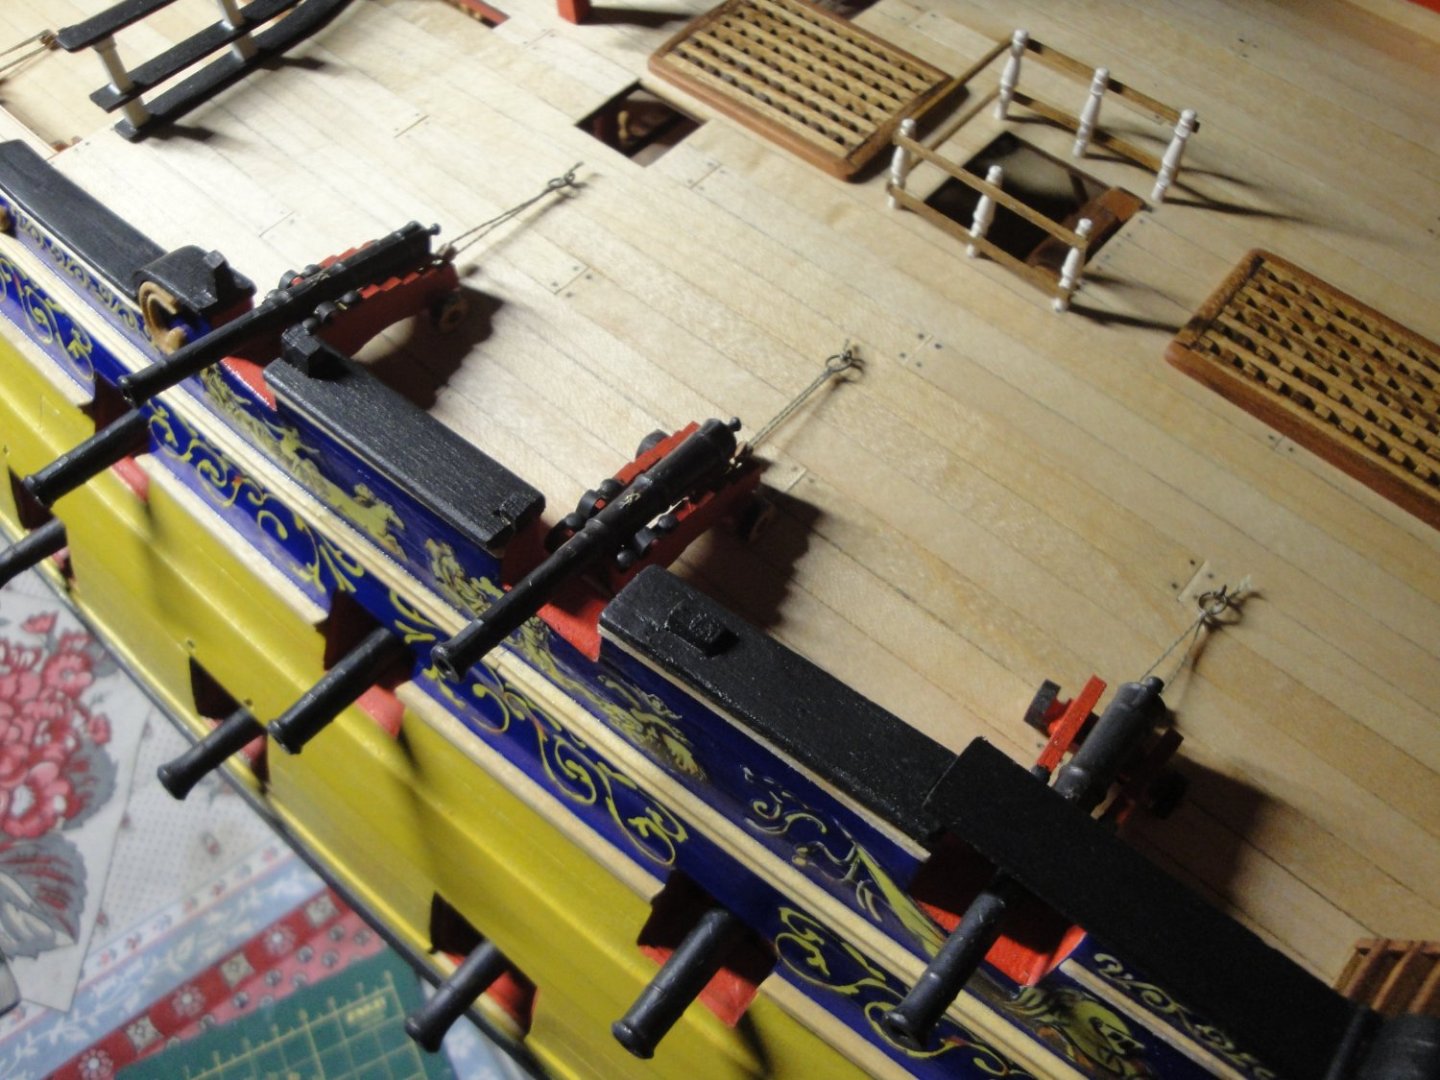
Wow, times flies. It has been a month already. I have not worked much and was distracted by various things. However, I managed to make some progress on the Port side of the hull: There are quite a few decals to install, after finishing all the woodwork with various small strips of wood (not provided in the kit). I debated using the 2 x 3 mm strips (included in the kit) and decided against them, as they are too large and too thick for some of the wood rails. Instead I went with 1.5 x 1 mm strips. The decals are placed using MICROSCALE SET and SOL chemicals. Then, a couple of coats of Future Floor is brushed to seal the decals and to protect them from handling. The surface is treated with Future Floor before applying the decals, since we need to have a glossy surface for optimal adhesion of the decals. Above, the Forecastle railing has almost been completed on the port side. I will work on the bow, before finishing the railing in the front. The small pounder guns have been completed. A total of 70 guns were put together: it was quite tedious and there is no room for mistakes or losses. In fact, CAF Model does not provide a single spare parts for these guns: 280 wheels, 140 axles, 70 brass barrels and numerous other parts with absolutely zero spare parts. If you loose a wheel, you are on your own. If you break an axle while sanding them to make them fit into the wheels, you are on your own again. It is regrettable that on such kit, there is no room for errors. Yves


- 507 replies
-
- 11
-
-
-
Jeff, It is funny you mentioned the Bismarck waiting in the queue.... I do have the Mikasa, Bismarck and now Yamato in my queue. I think I need a couple more lives to finish them all. YVes