yvesvidal
-
Posts
3,622 -
Joined
-
Last visited
Content Type
Profiles
Forums
Gallery
Events
Everything posted by yvesvidal
-
 So, Valeriy, who is the lucky (and wealthy) recipient of your model ? I suspect you built that model as a commission. Yves
 -
What a nerve wracking story !!! Maybe the primer did not react correctly with the paint you used.... Overall, you saved the day and a few blemishes make the model more realistic. Yves
- 114 replies
-
- 1
-

-
- Pride of Baltimore II
- Model Shipways
- (and 1 more)
-
Allan, I just used the first picture of Post #362 and tried to represent the beam located above the wheels. I think it is a nicer way to end the poop deck. I also went back for the past two pages and made some corrections to the vocabulary. Thank you Allan for being thorough and forcing me to look up the right terms to describe the various parts of that ship. The lack of description and technical terms in the provided instructions does not help to learn all these new terms. Yves
-
Allan, you are correct: Dinghies was an extremely poor choice of vocabulary. I should have said Long Boat, Pinnaces and Cutters. Thank you for the correction. Yves
-
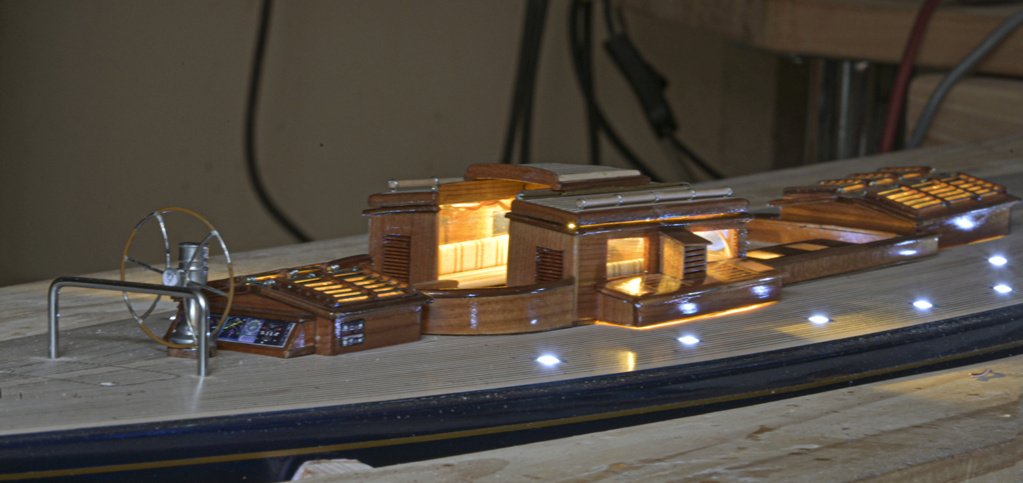
You could have used small 3 mm or 2 mm White LED. It is probably too late to wire the inside of the hull and I am not exactly sure what these prisms are for: Light tunnels to bring sunlight in the lower decks or Display light when the vessel is in a port. A French modeler used that technique on his superb 1/32 Amati Endeavor Class-J: Yves
-
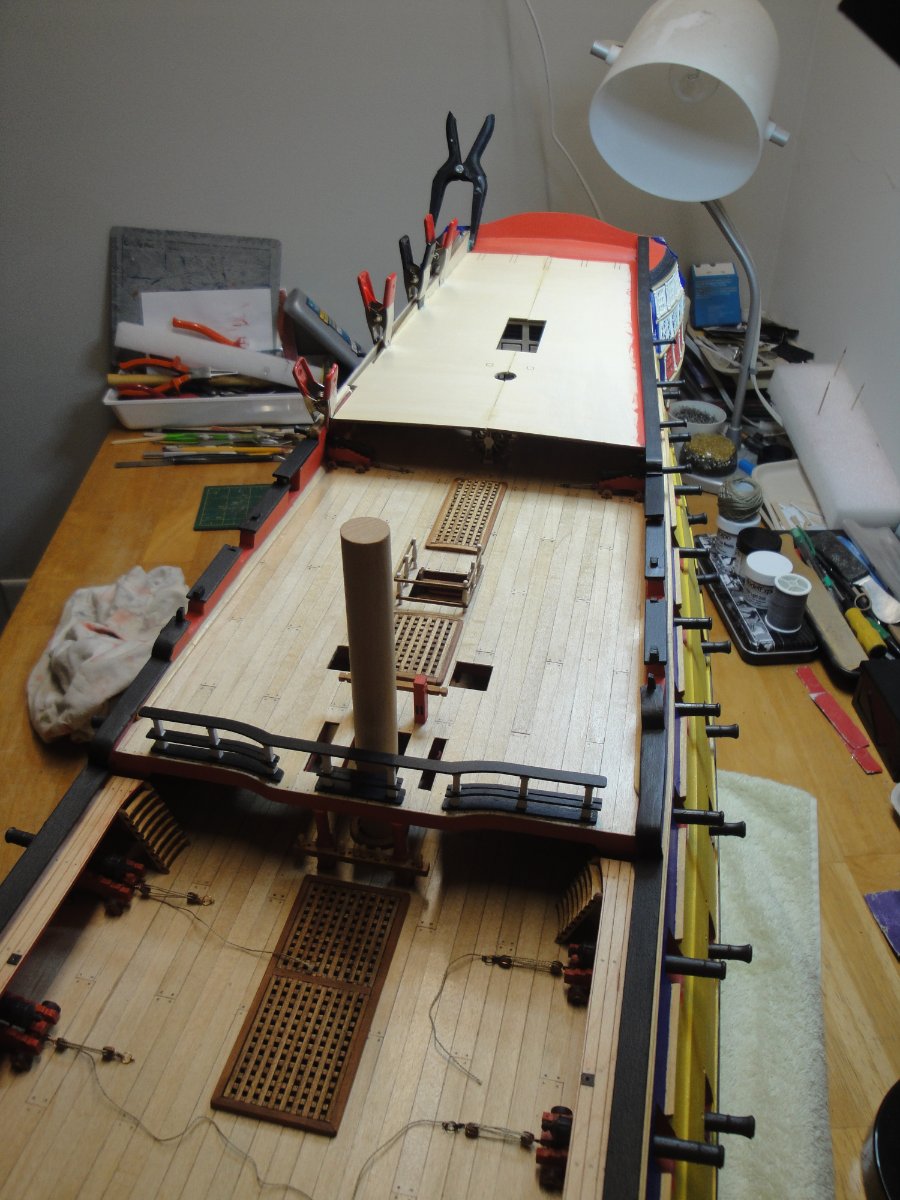
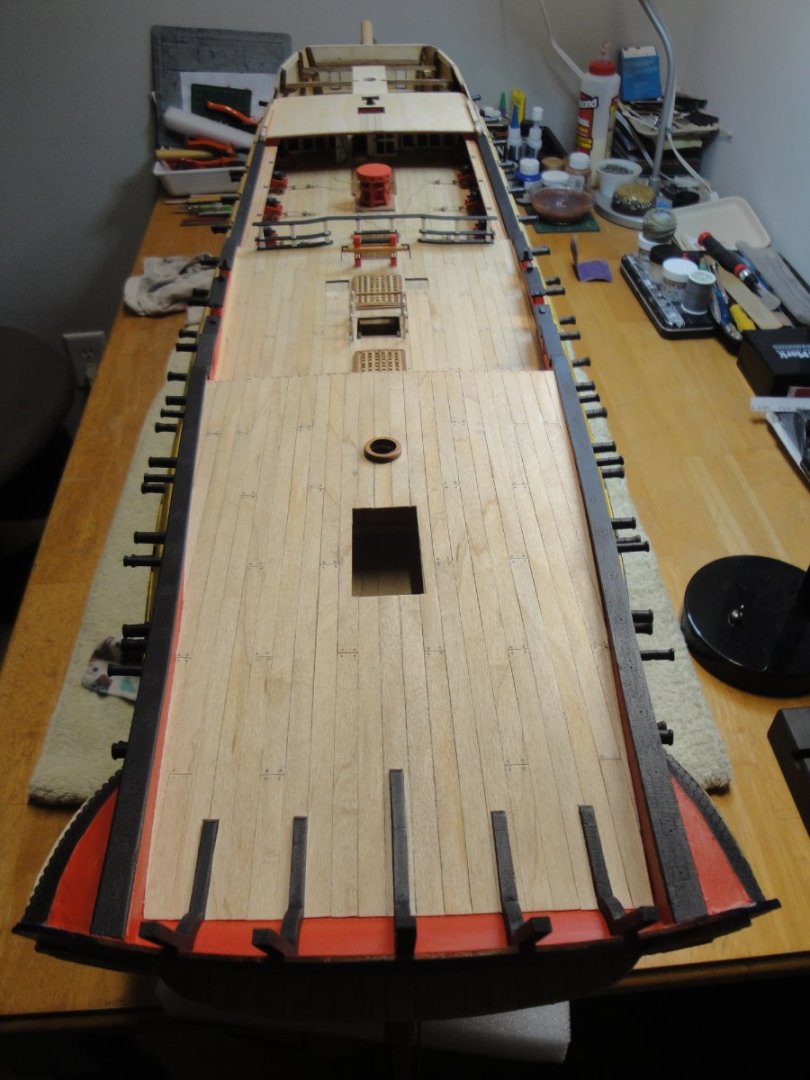
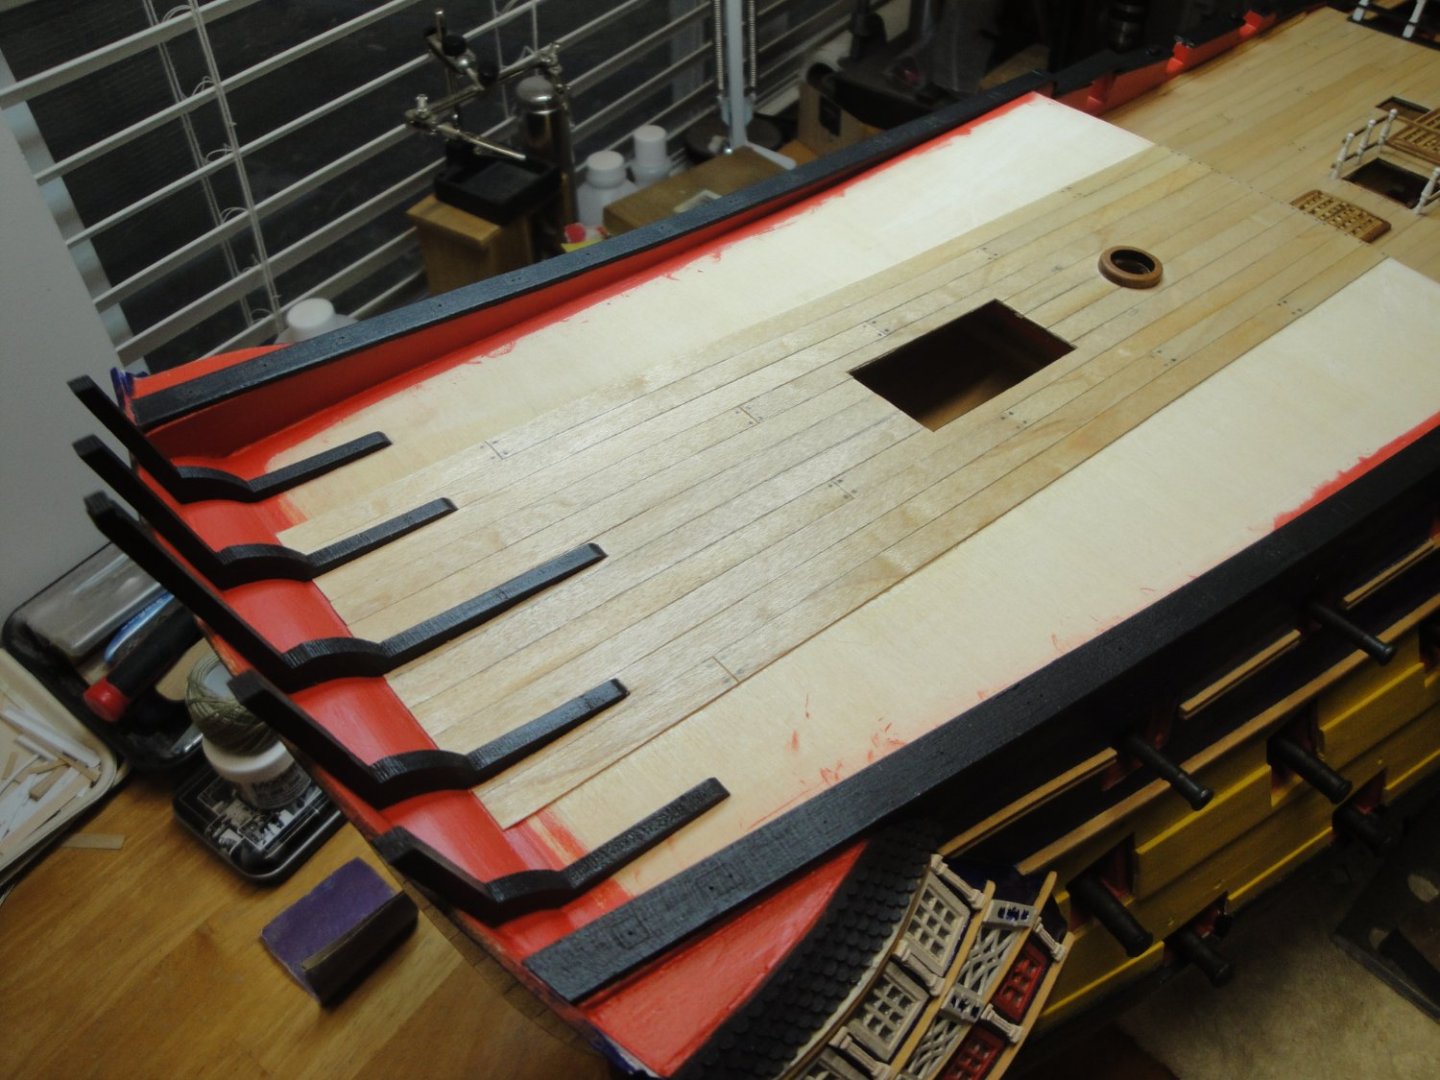
The planking of the poop deck is finished. A few more coats of Wipe-On-Poly and it will be perfect (at least in my eyes): Various pictures showing the implementation: Finished: Merry Christmas to all members of MSW !!! Yves


- 507 replies
-
- 16
-
-

-
With such jig, you are ready for mass production 🙂 Great work, it looks sharp and neat. Yves
- 57 replies
-
- 2
-
-
- marisstella
- batelina
- (and 1 more)
-
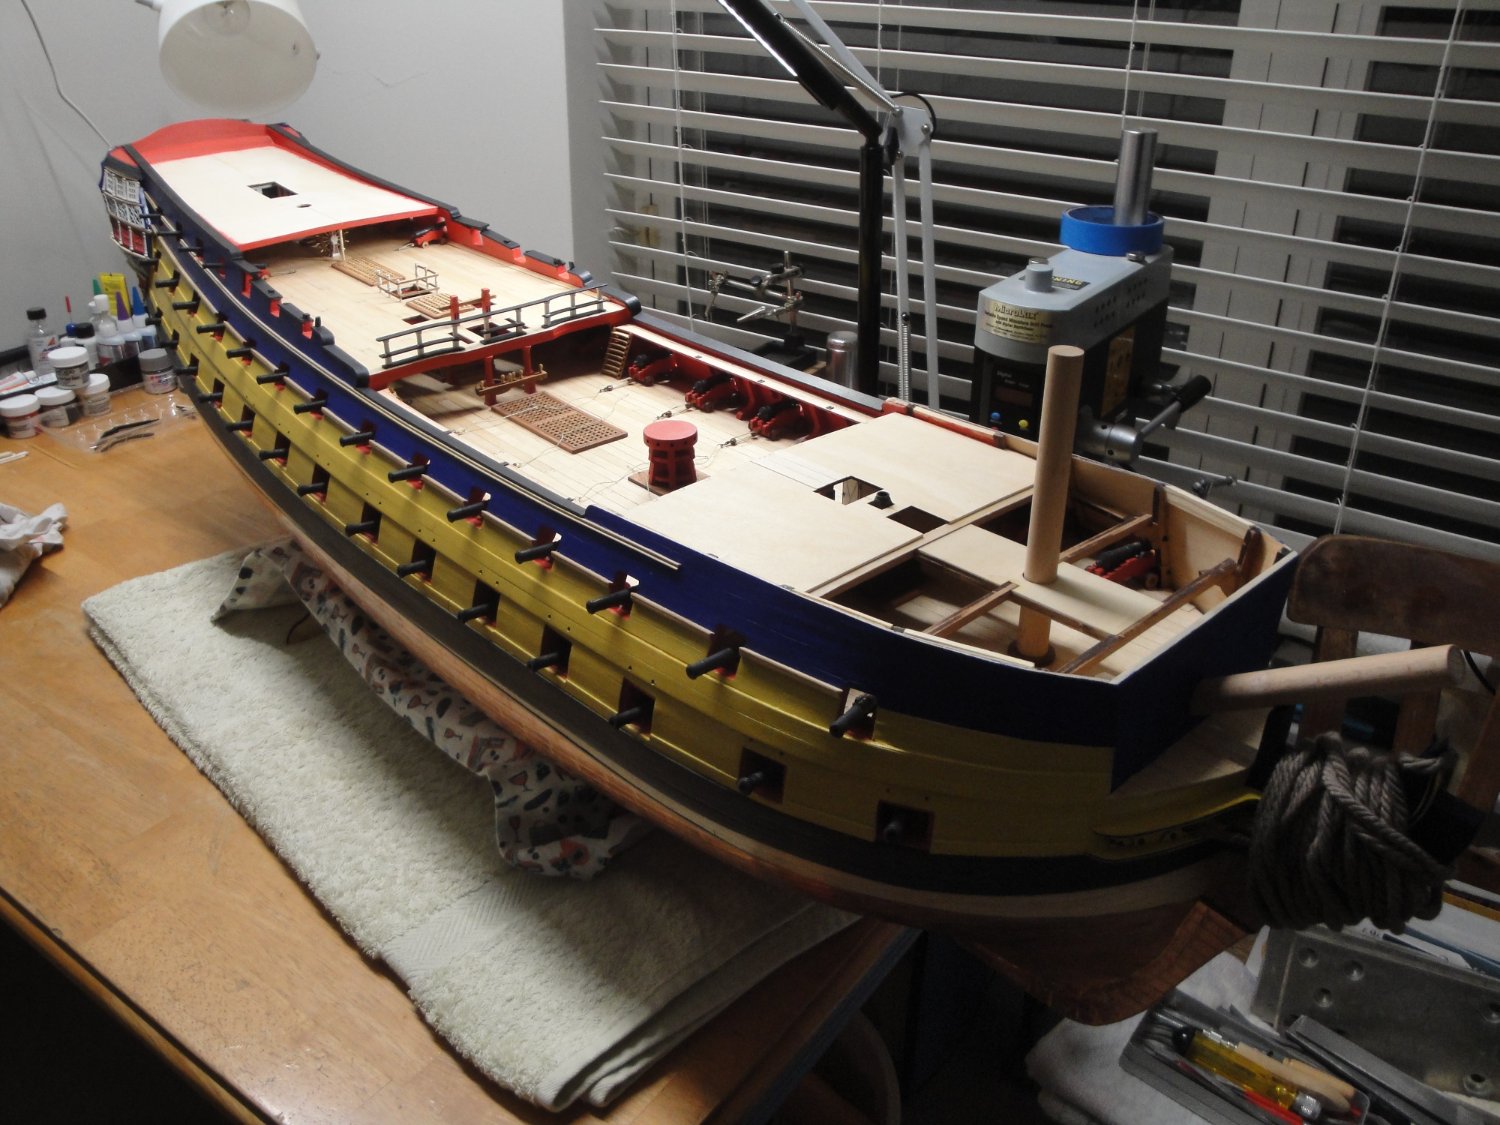
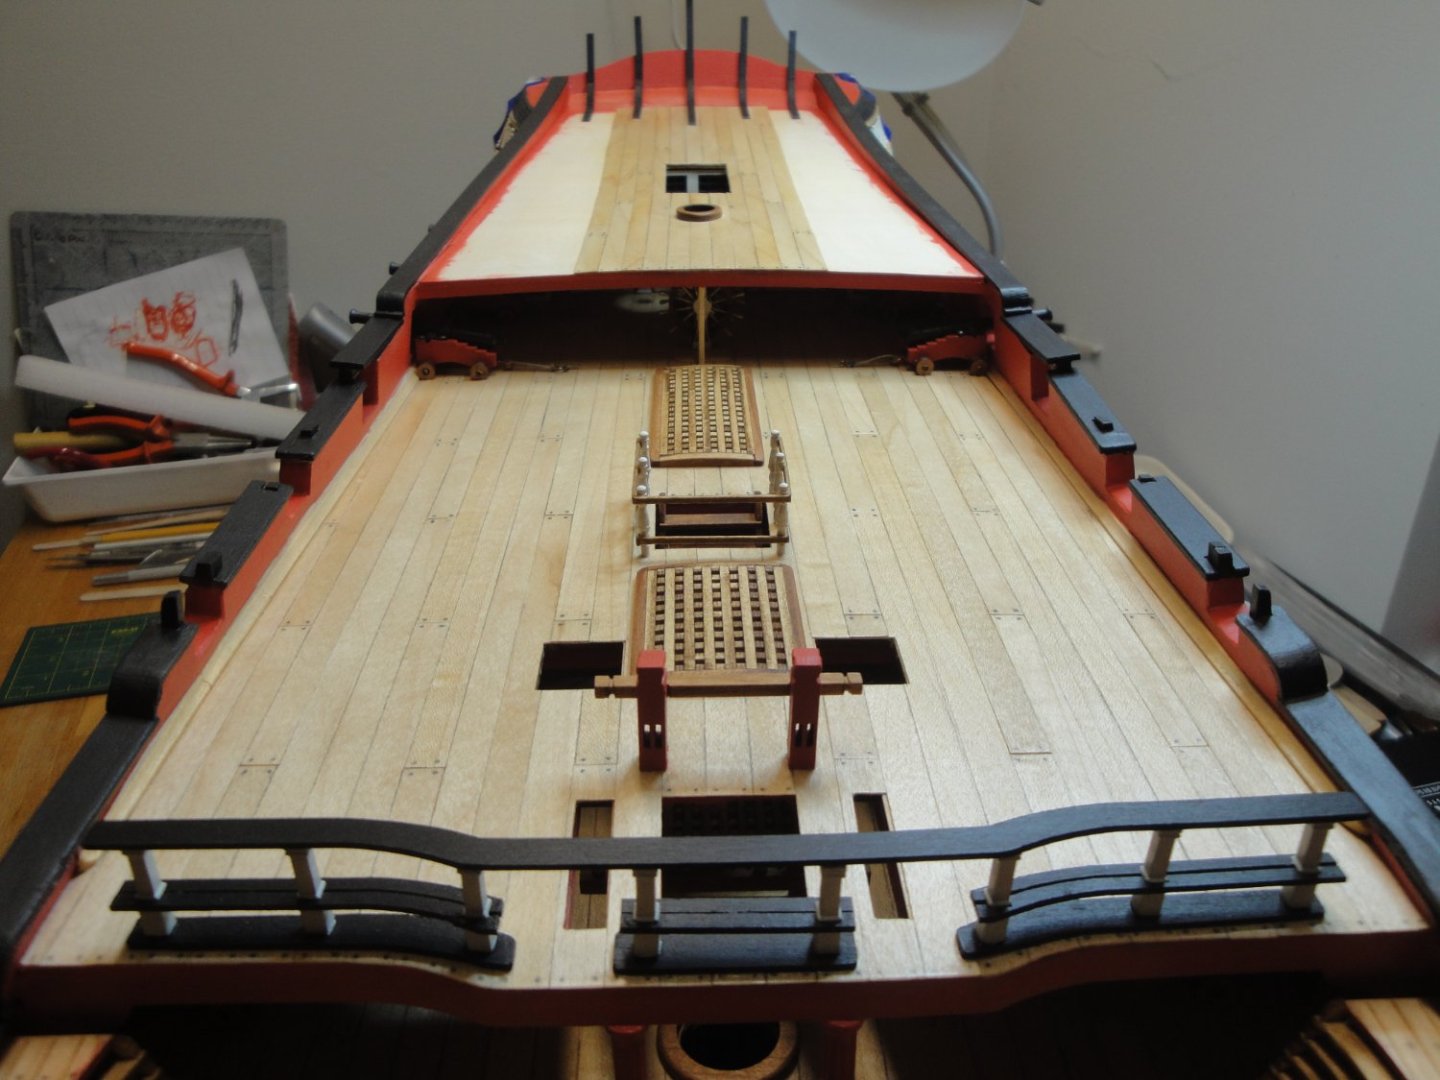
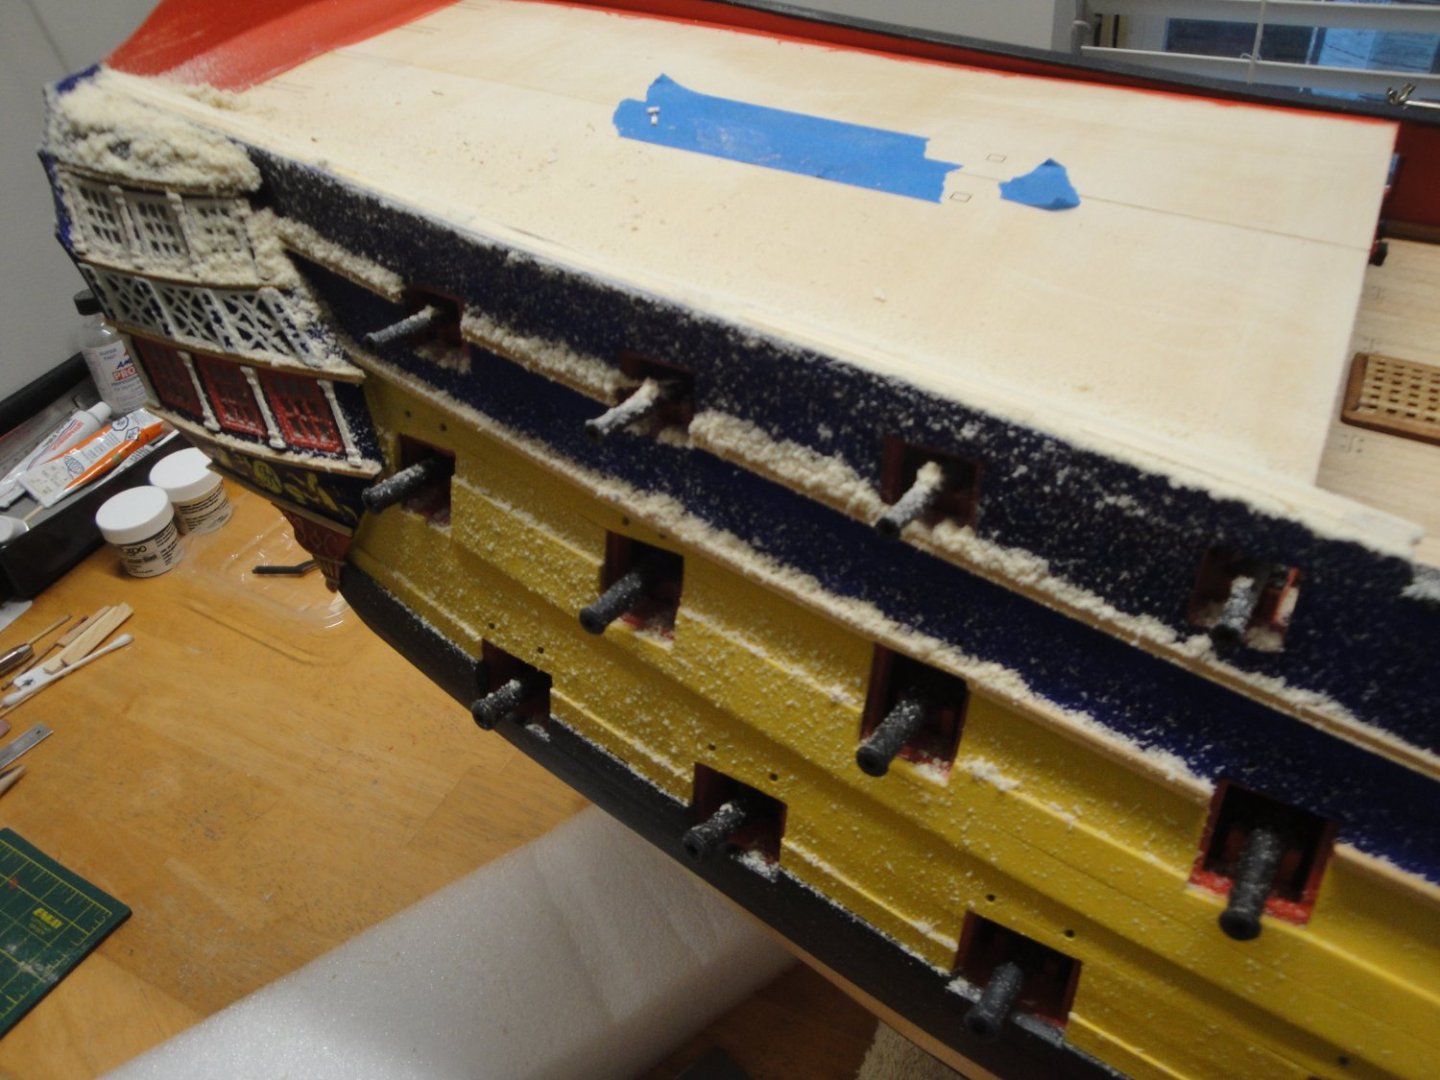
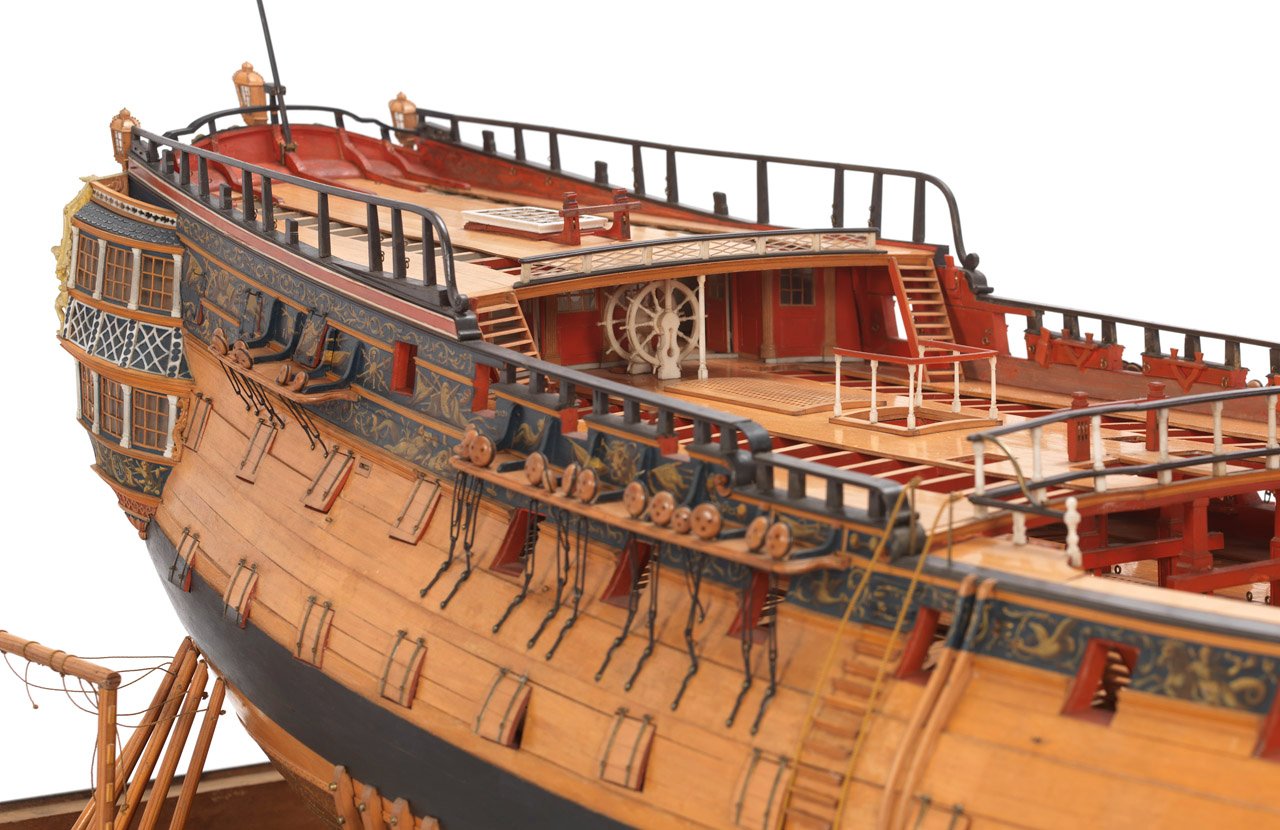
One of the new parts that I ordered from Tom (CAF Model) was an extended set of beams to support the Longboat, Cutters and other Pinnaces. In addition, when you look at a picture of the Model in the National Maritime Museum, the upper deck is presented with a small beam in the front. That detail is missing from the kit and I decided to use one of the the short boats stowing beams, as a substitute for that missing poop deck beam. This is where we are: The beam is glued under the poop deck sub-floor: It finishes the poop deck in a much more realistic way: Now is the time to build the starboard bulwark and to do a lot of dust: The main railings are glued: And this is where we are: Ready for planking: Yves


- 507 replies
-
- 16
-
-
-
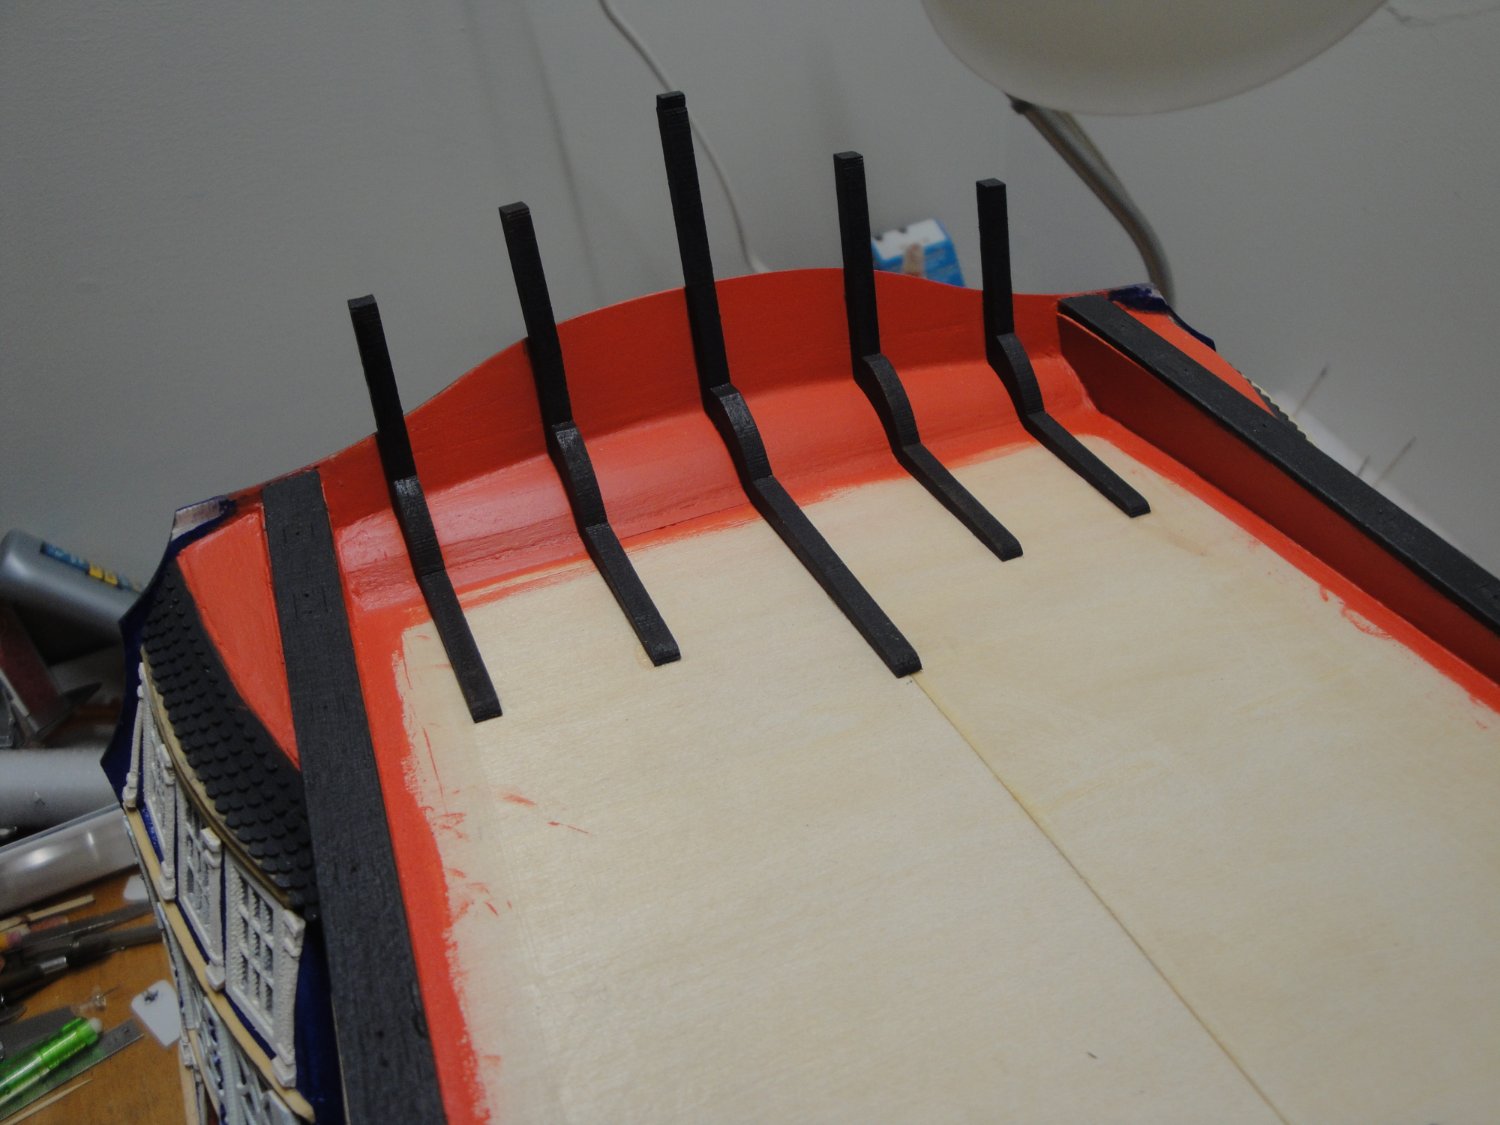
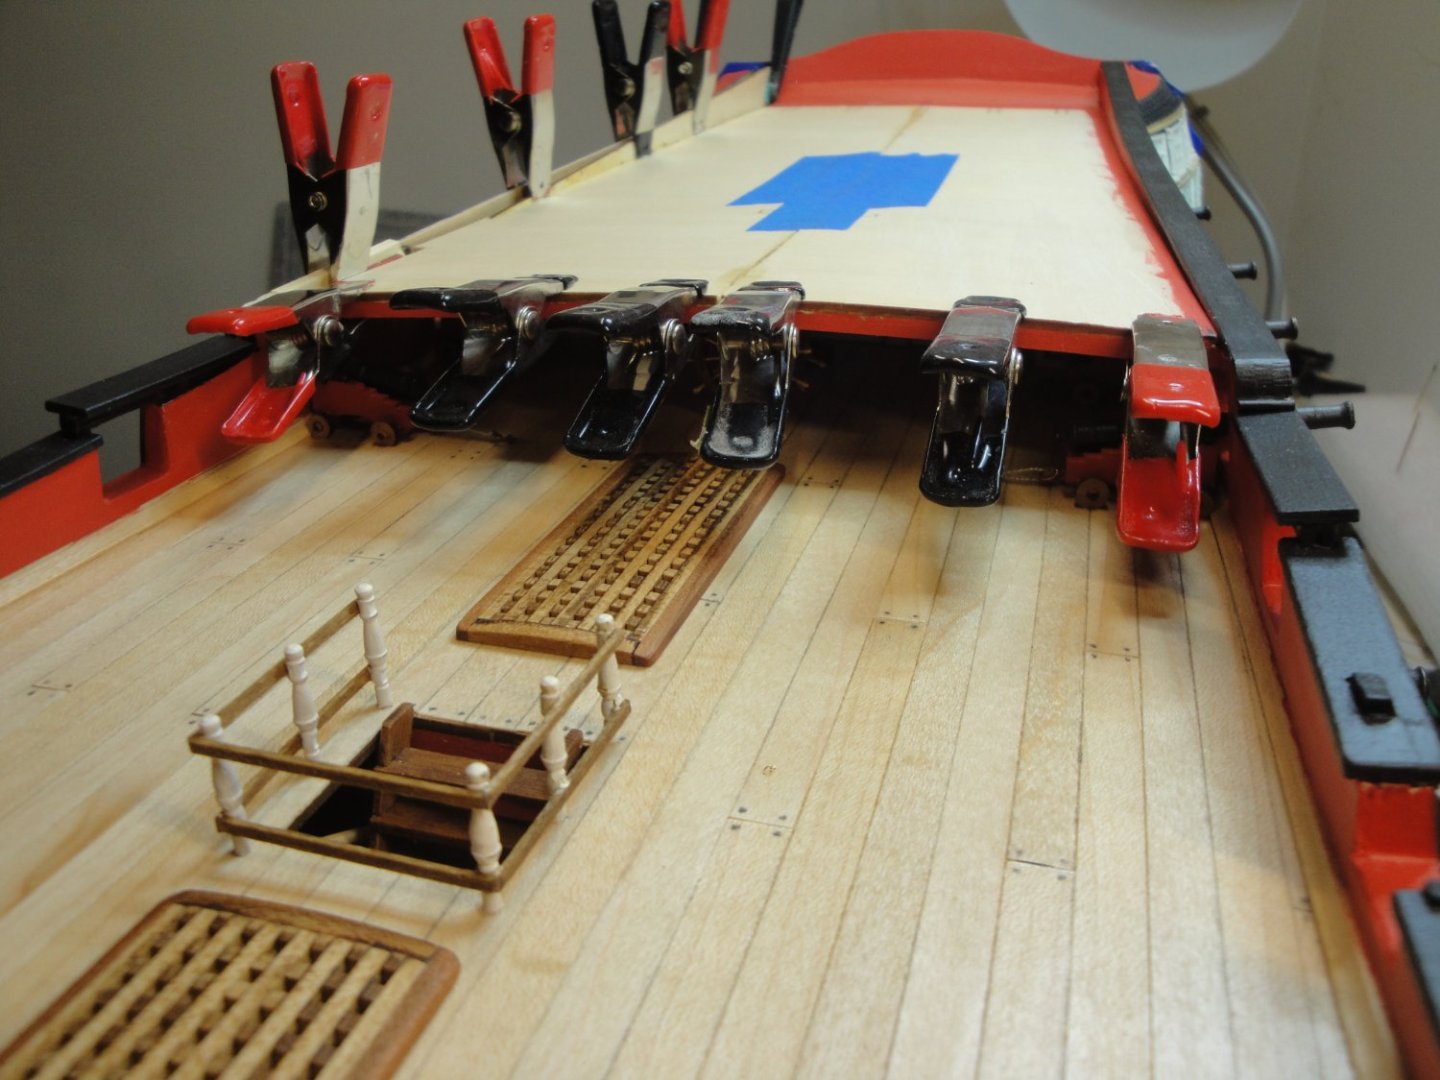
Before closing the second half of the poop deck, it was necessary to assemble four more 9 pounder guns: Again, the bulwark is built and strengthened with pieces of wood. Note that the triangular sides of the bulwarks provided in the kit are not large enough and need to be extended for a full coverage of the poop deck. Yves


- 507 replies
-
- 12
-
-
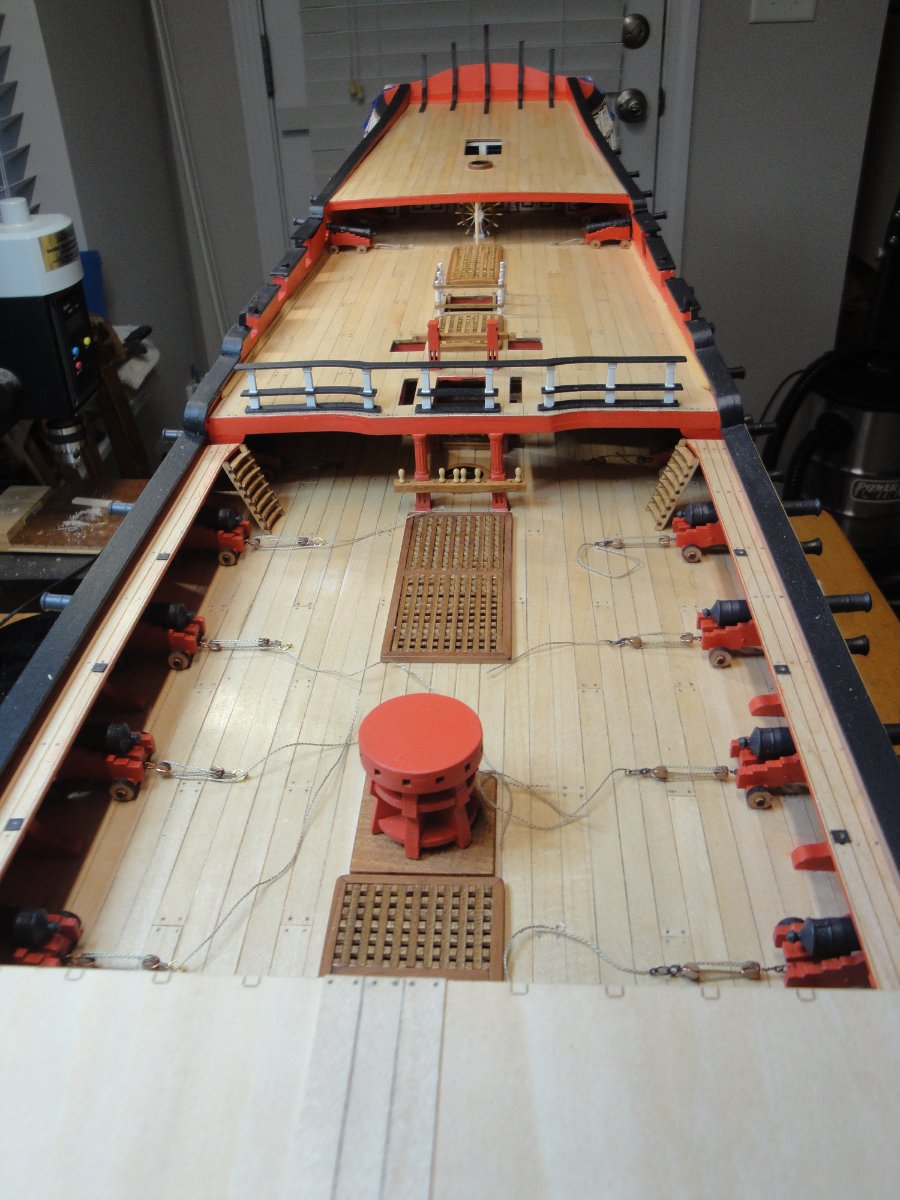
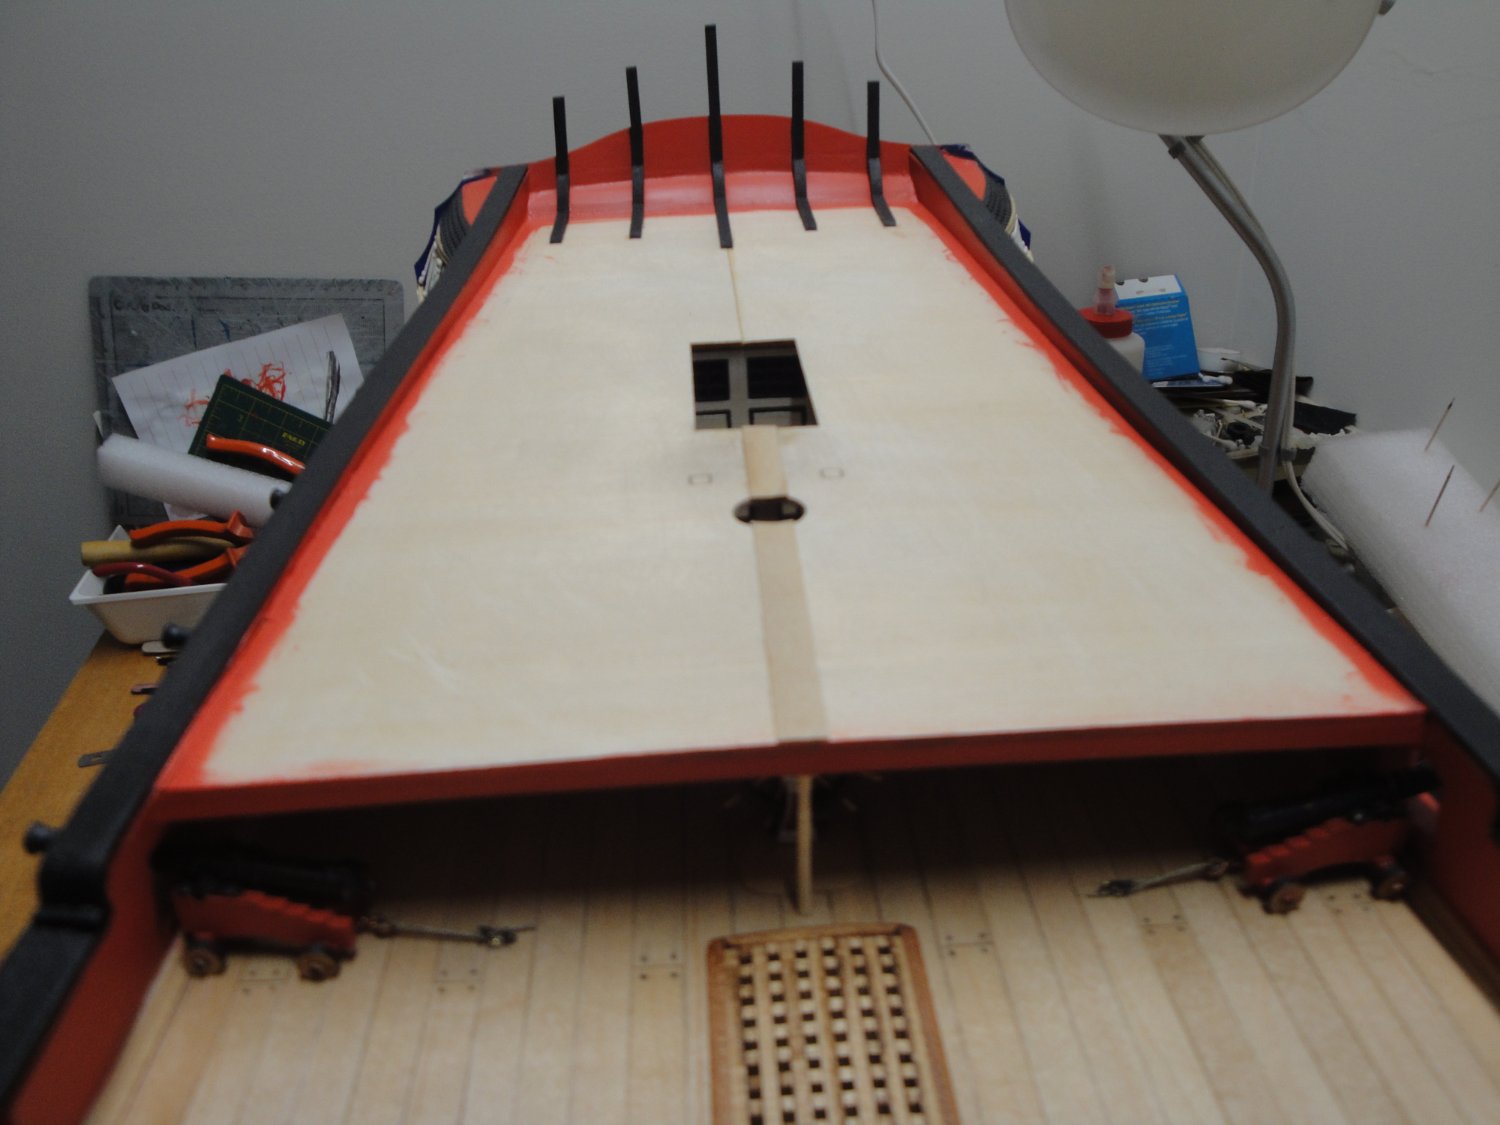
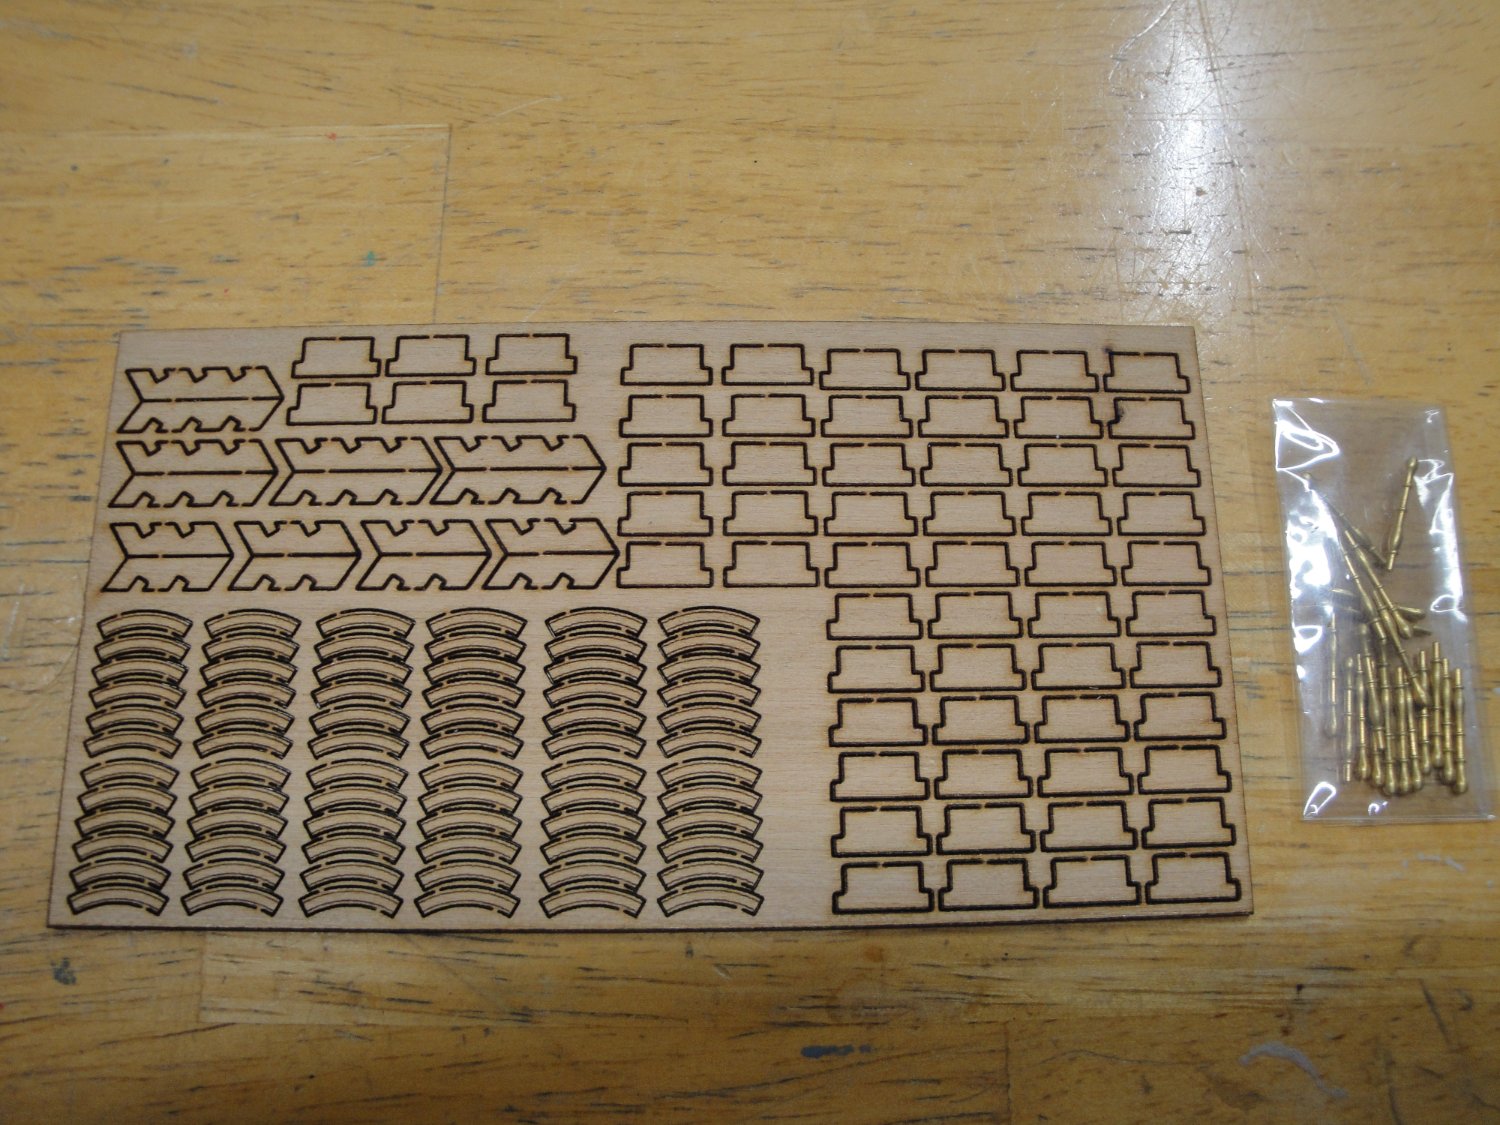
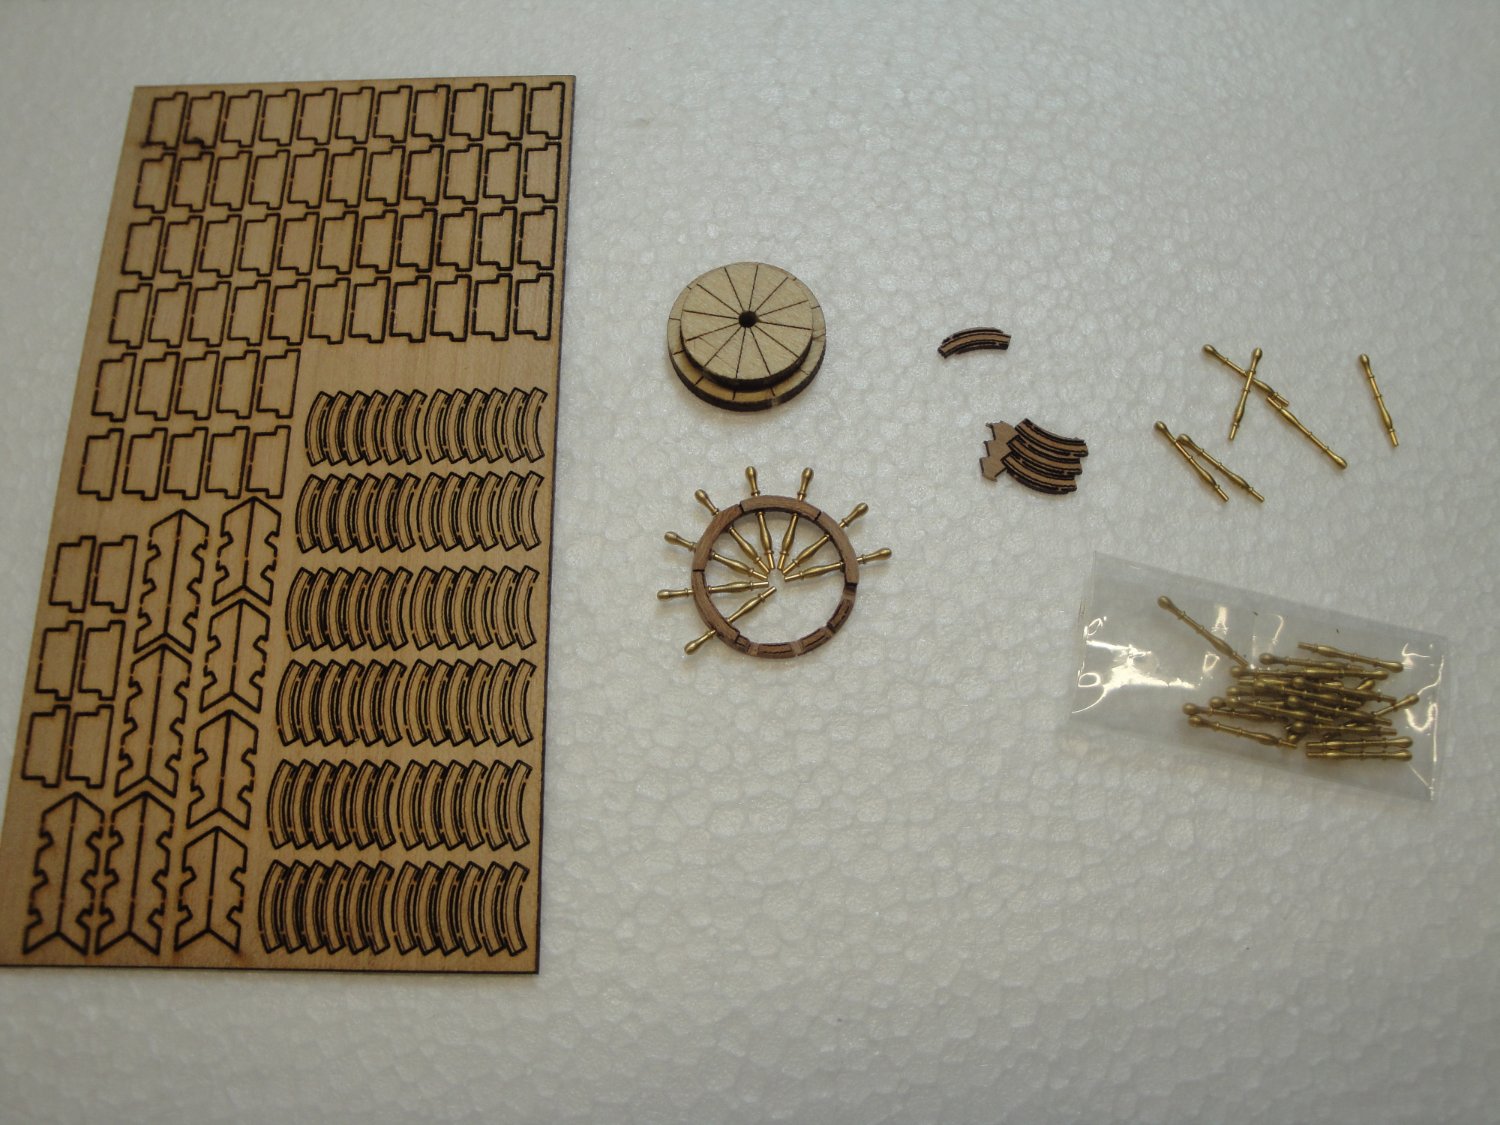
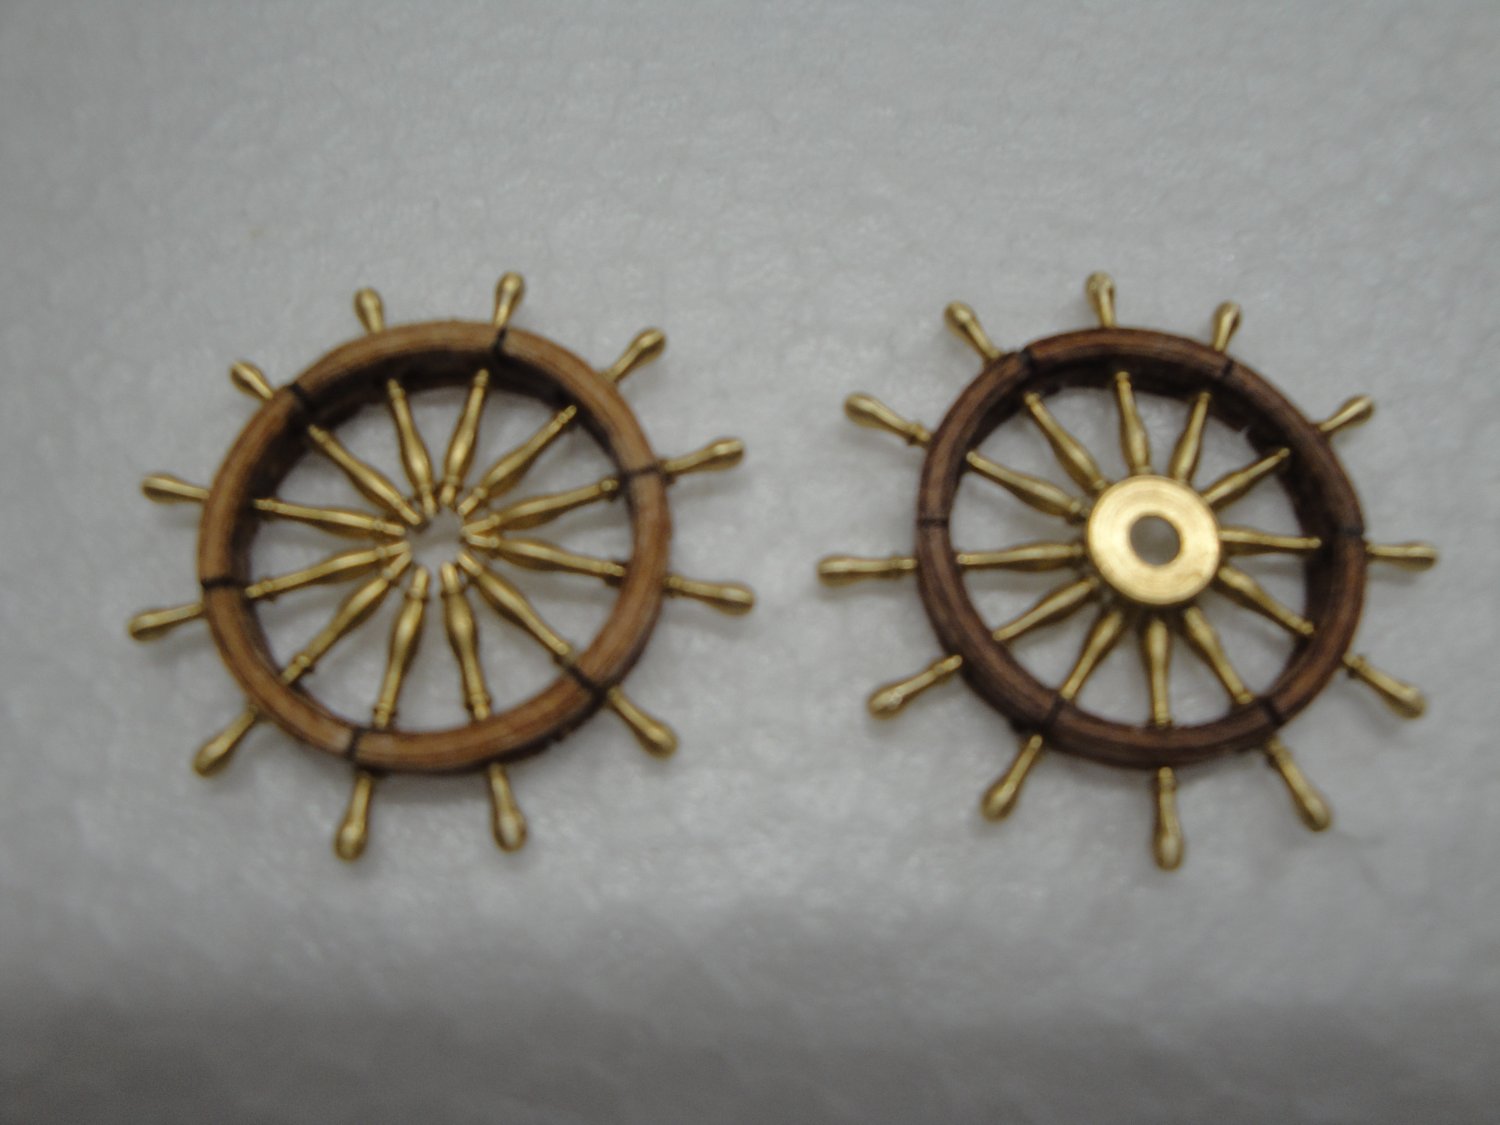
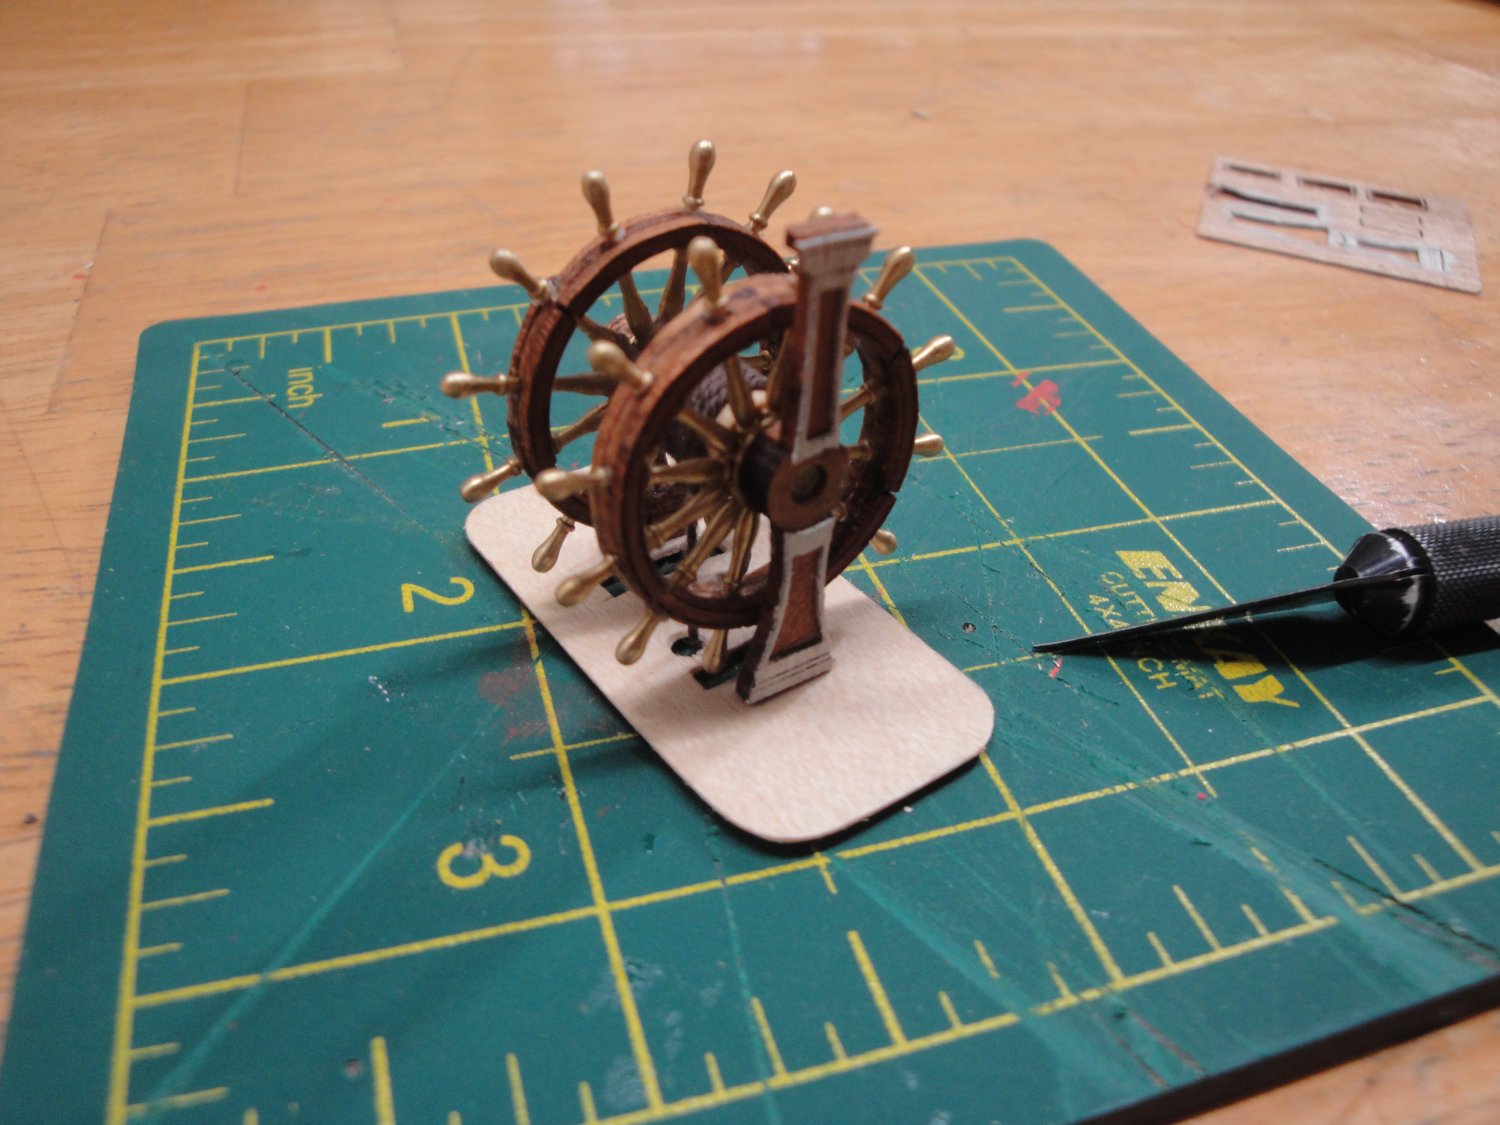
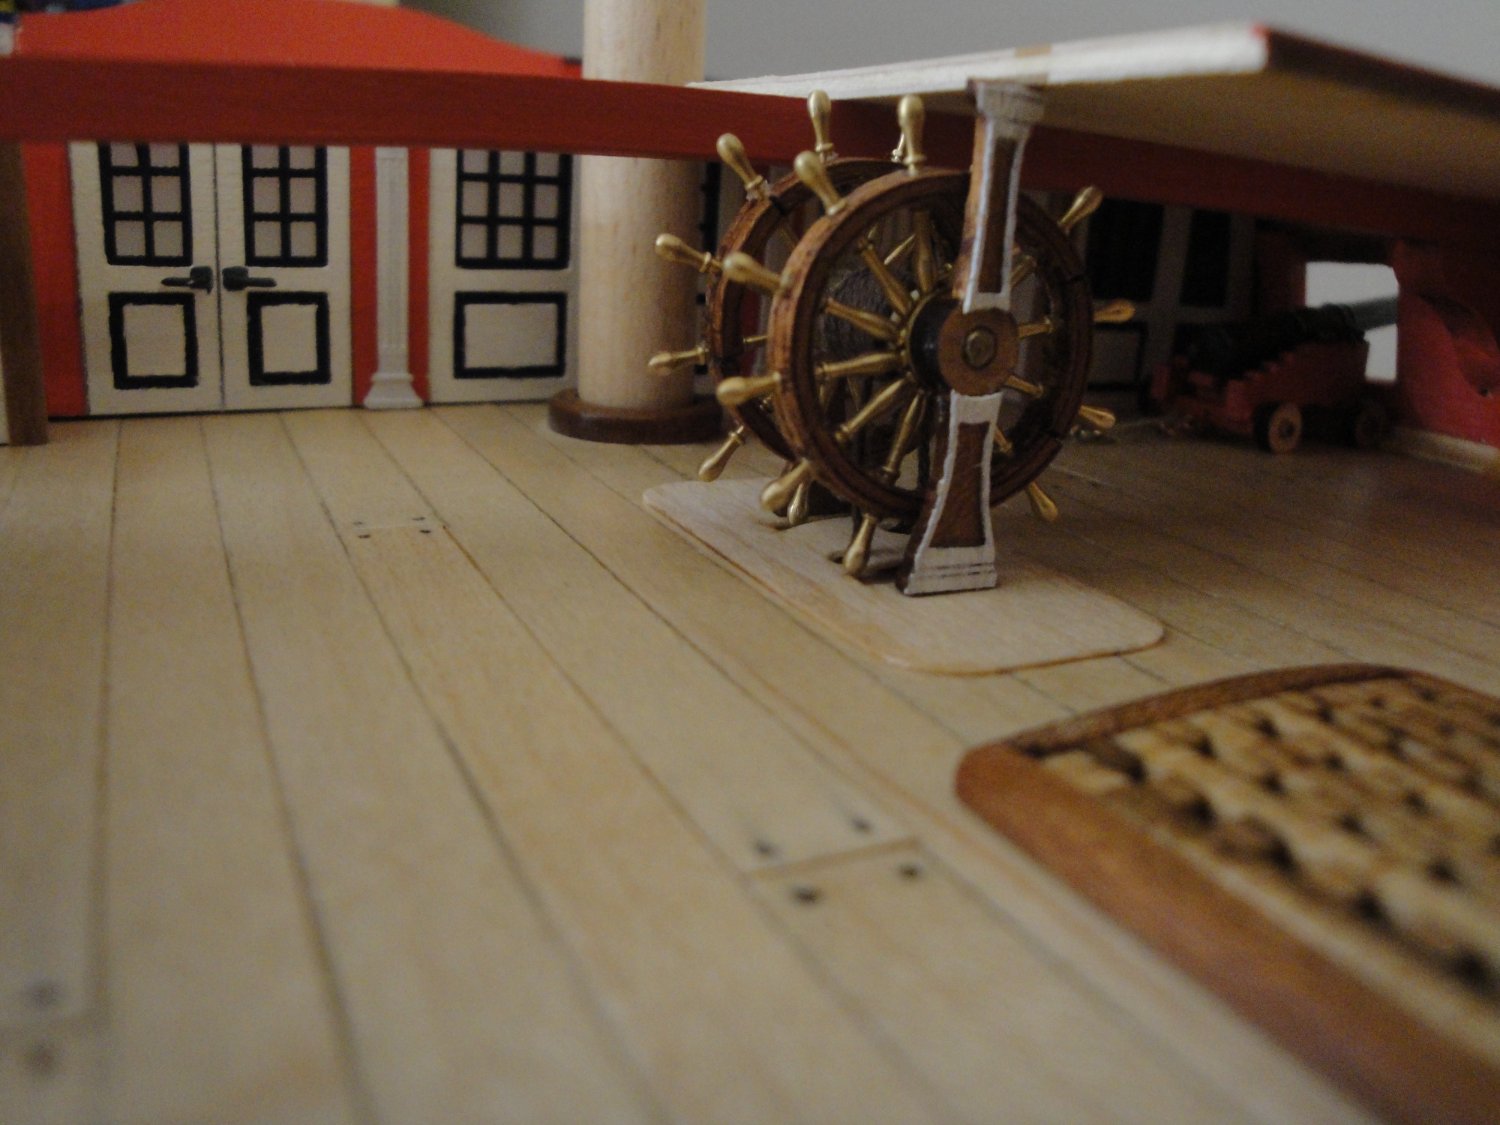
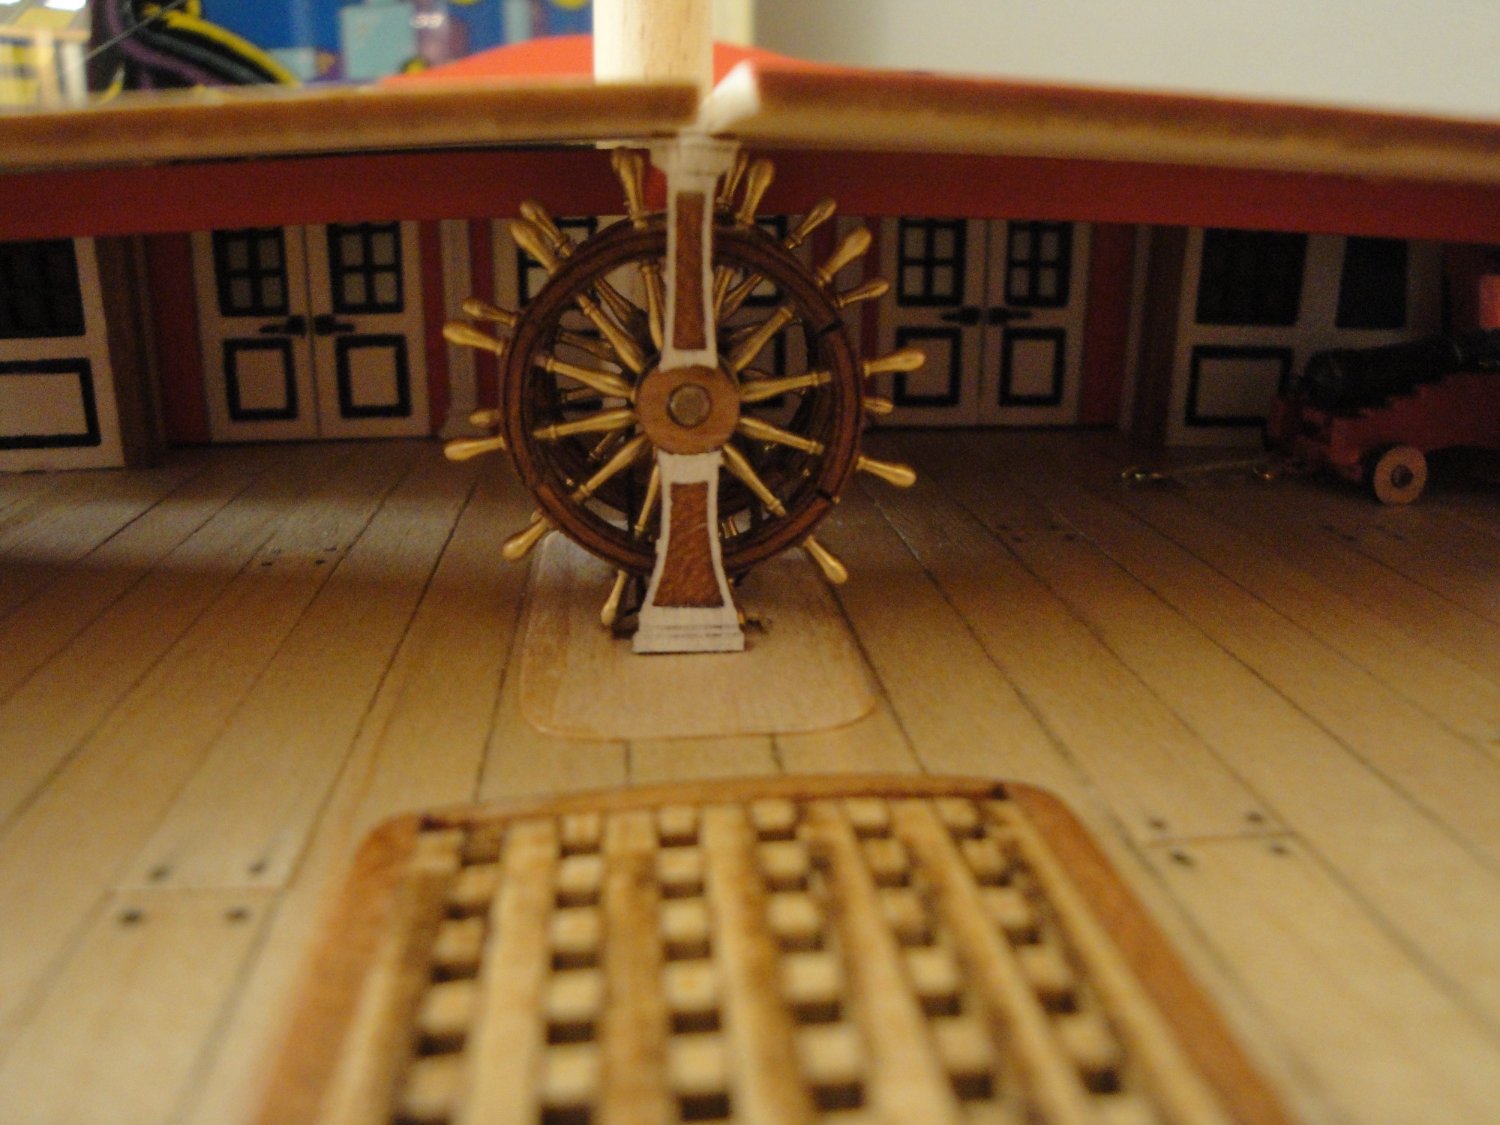
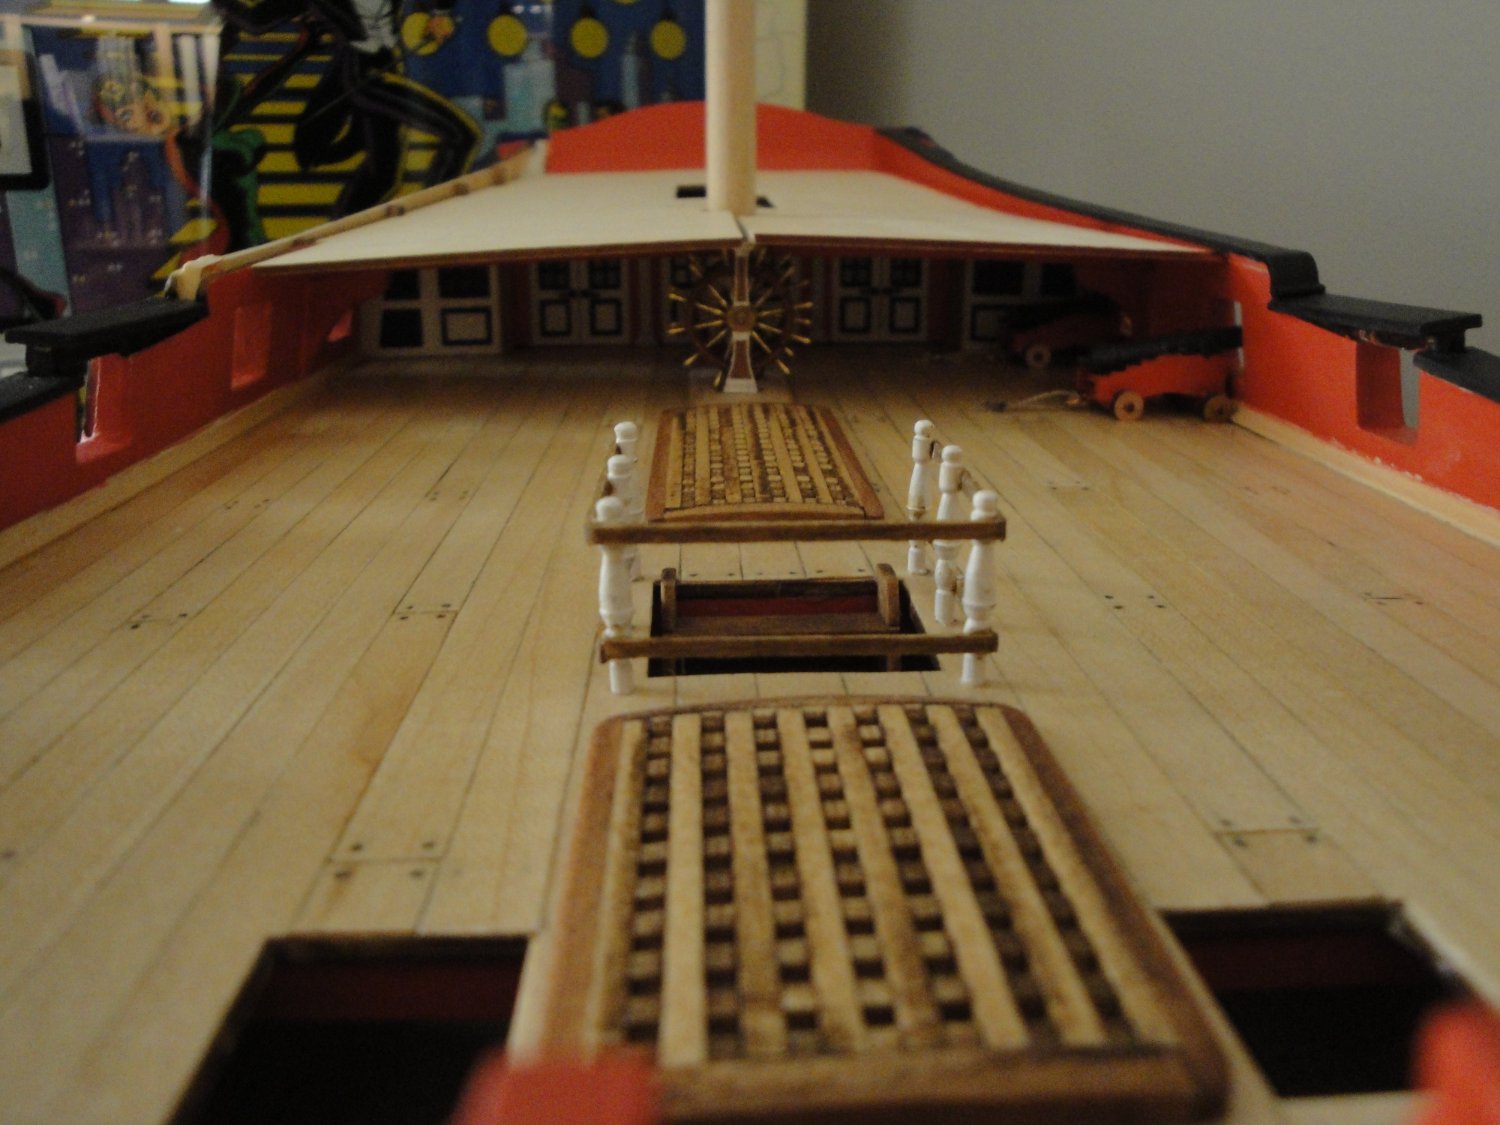
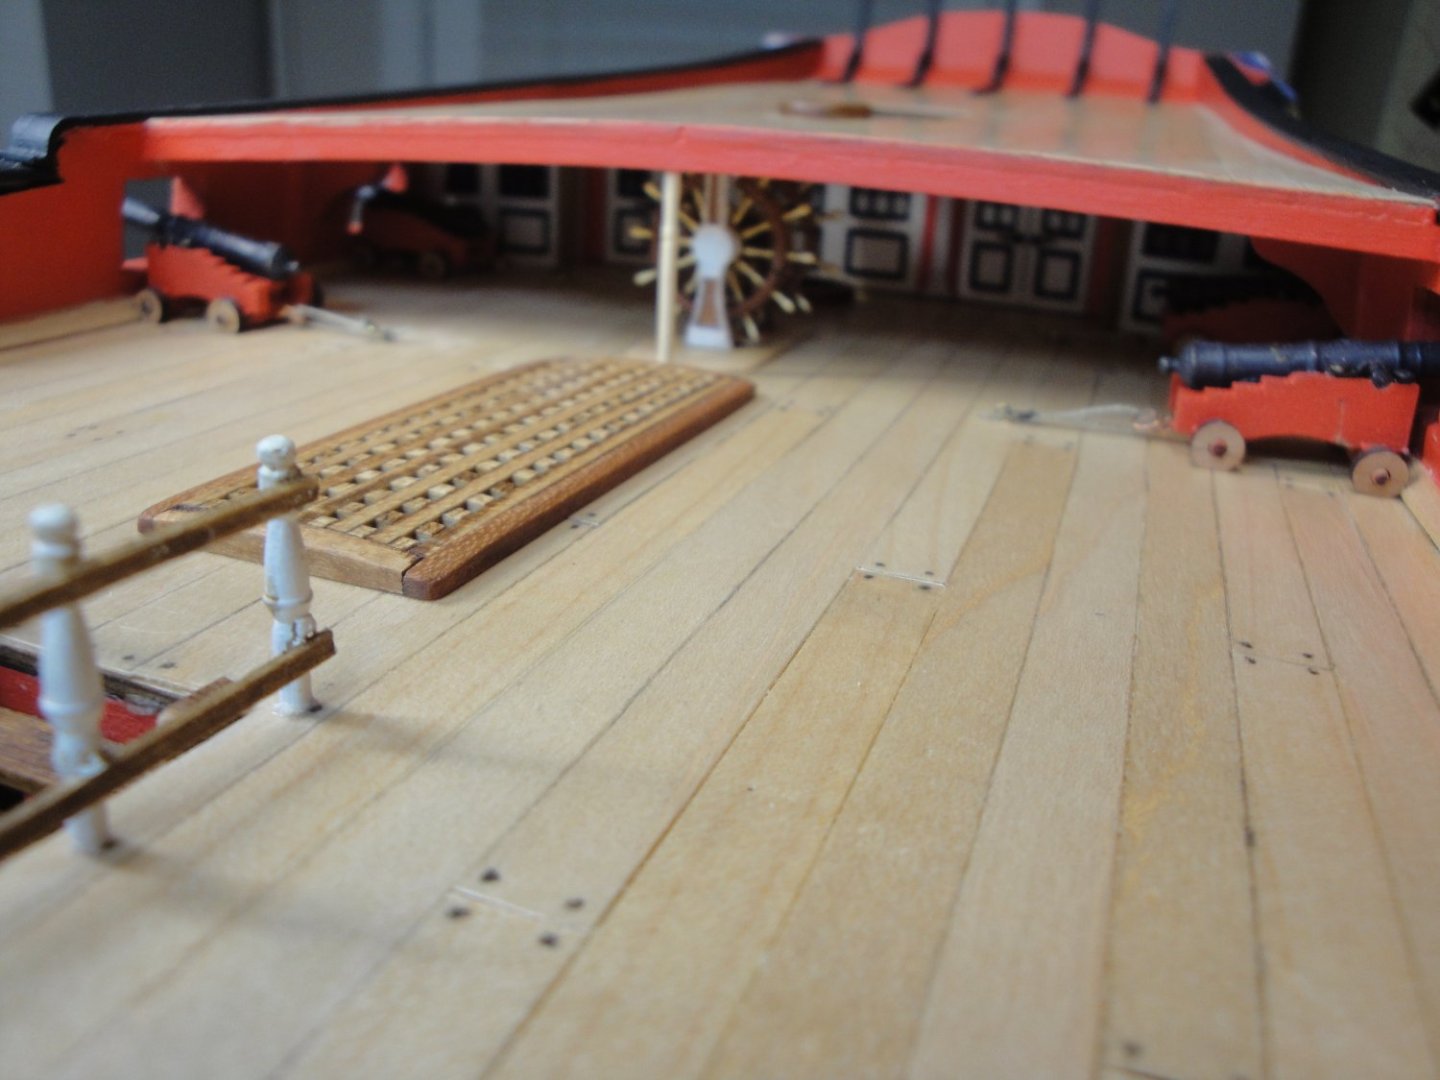
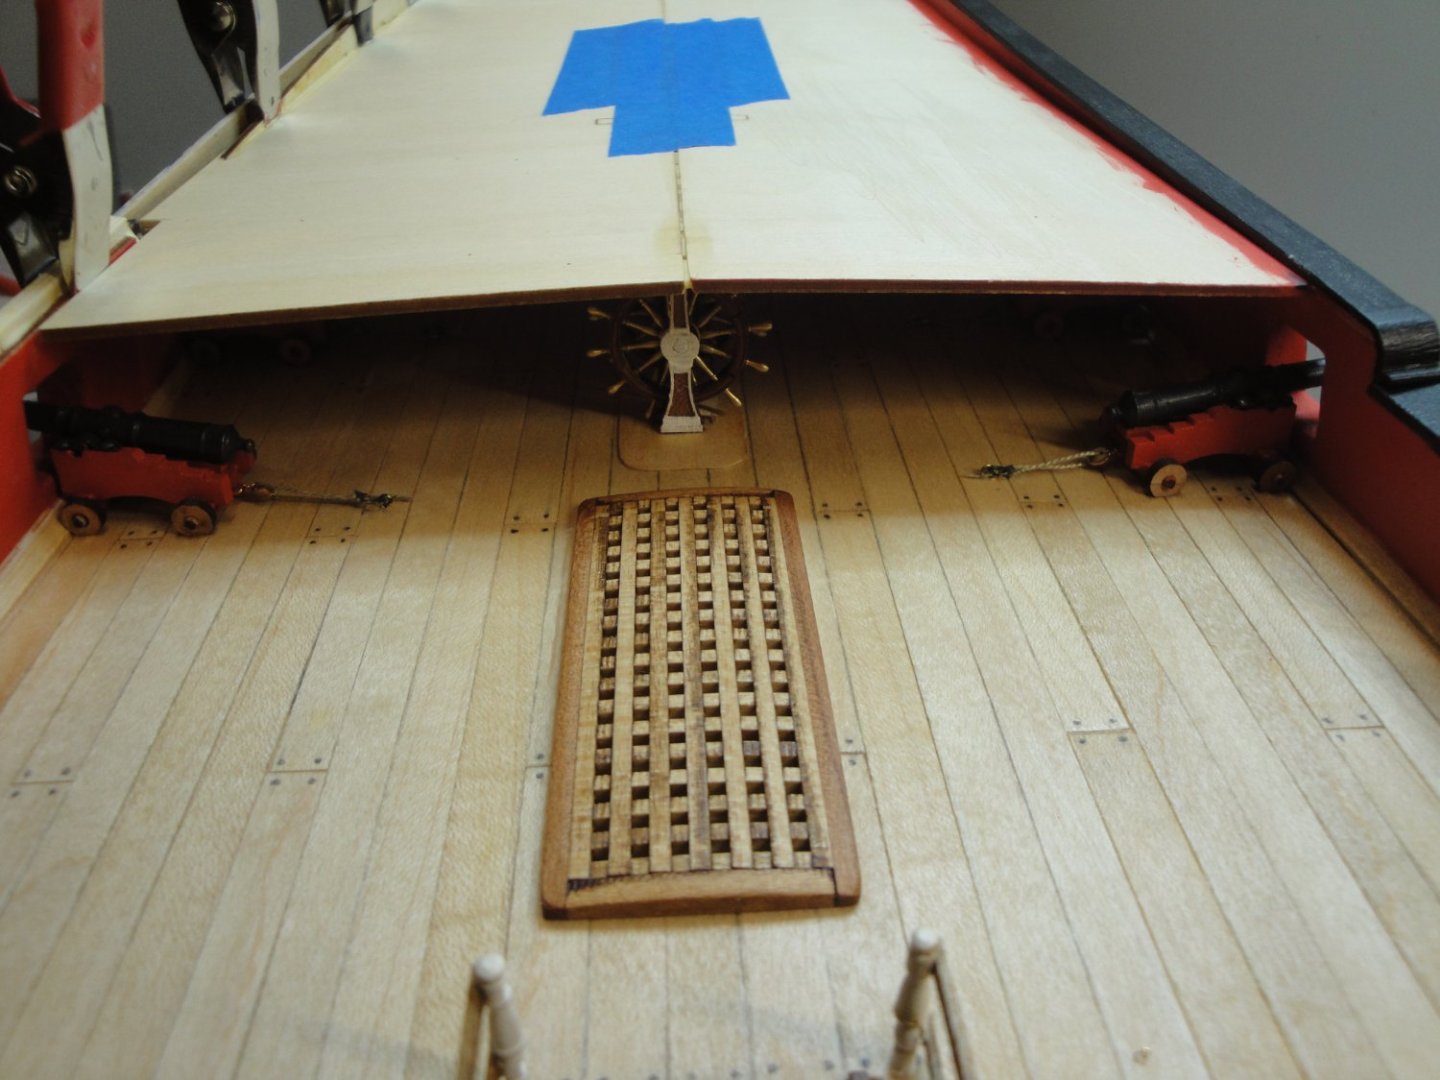
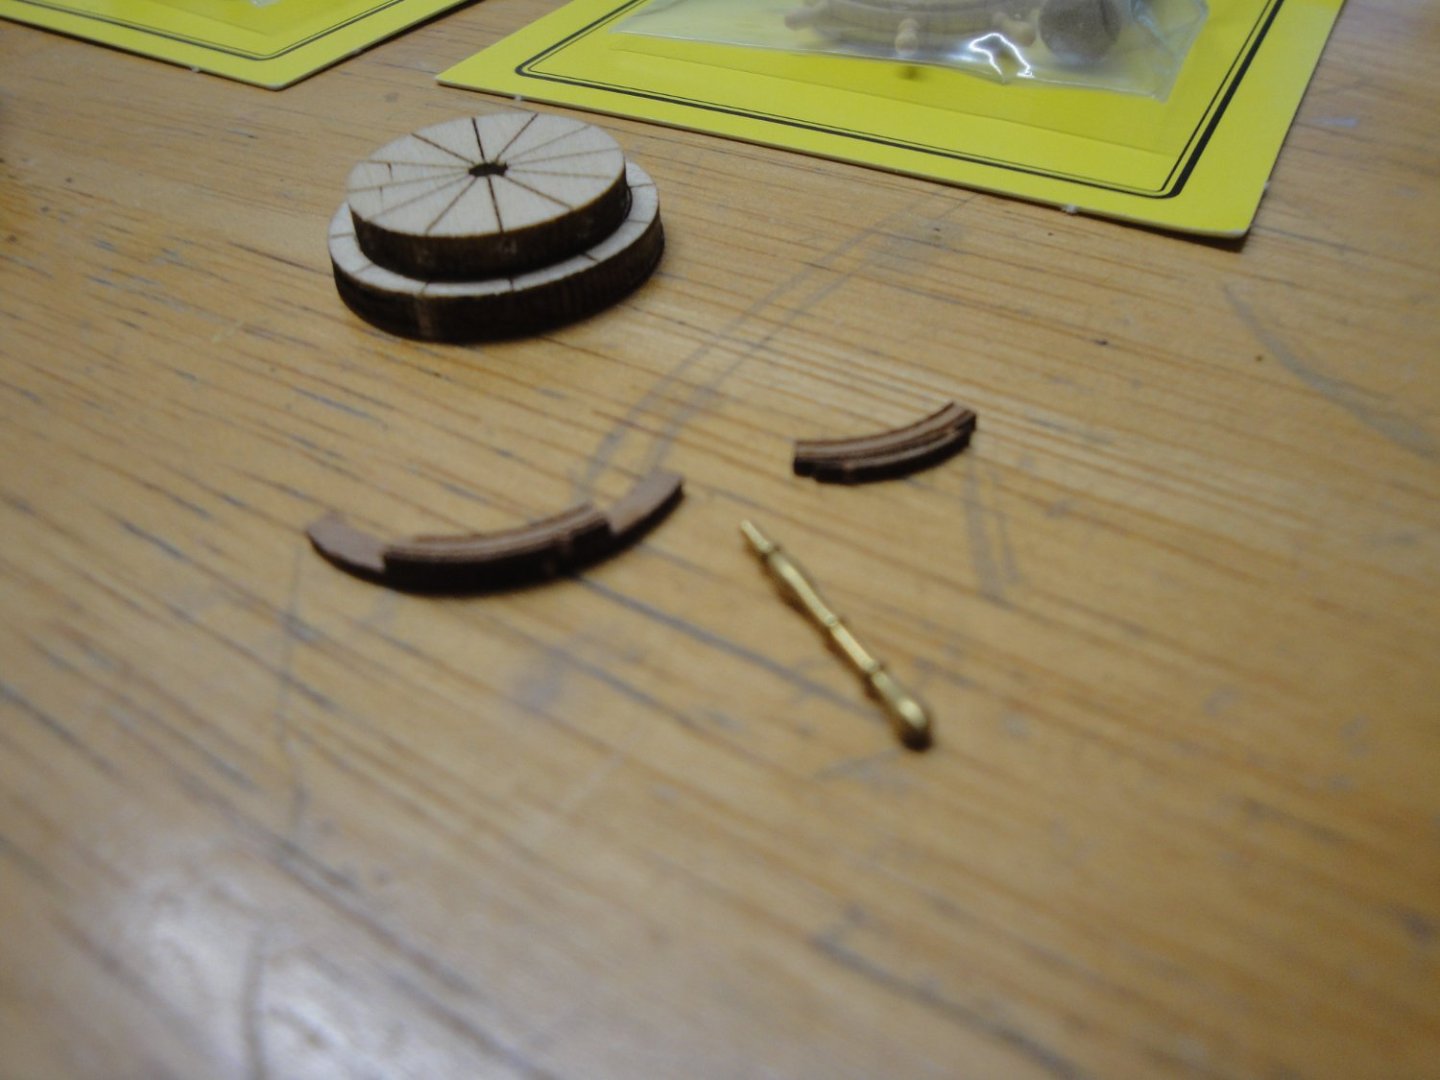
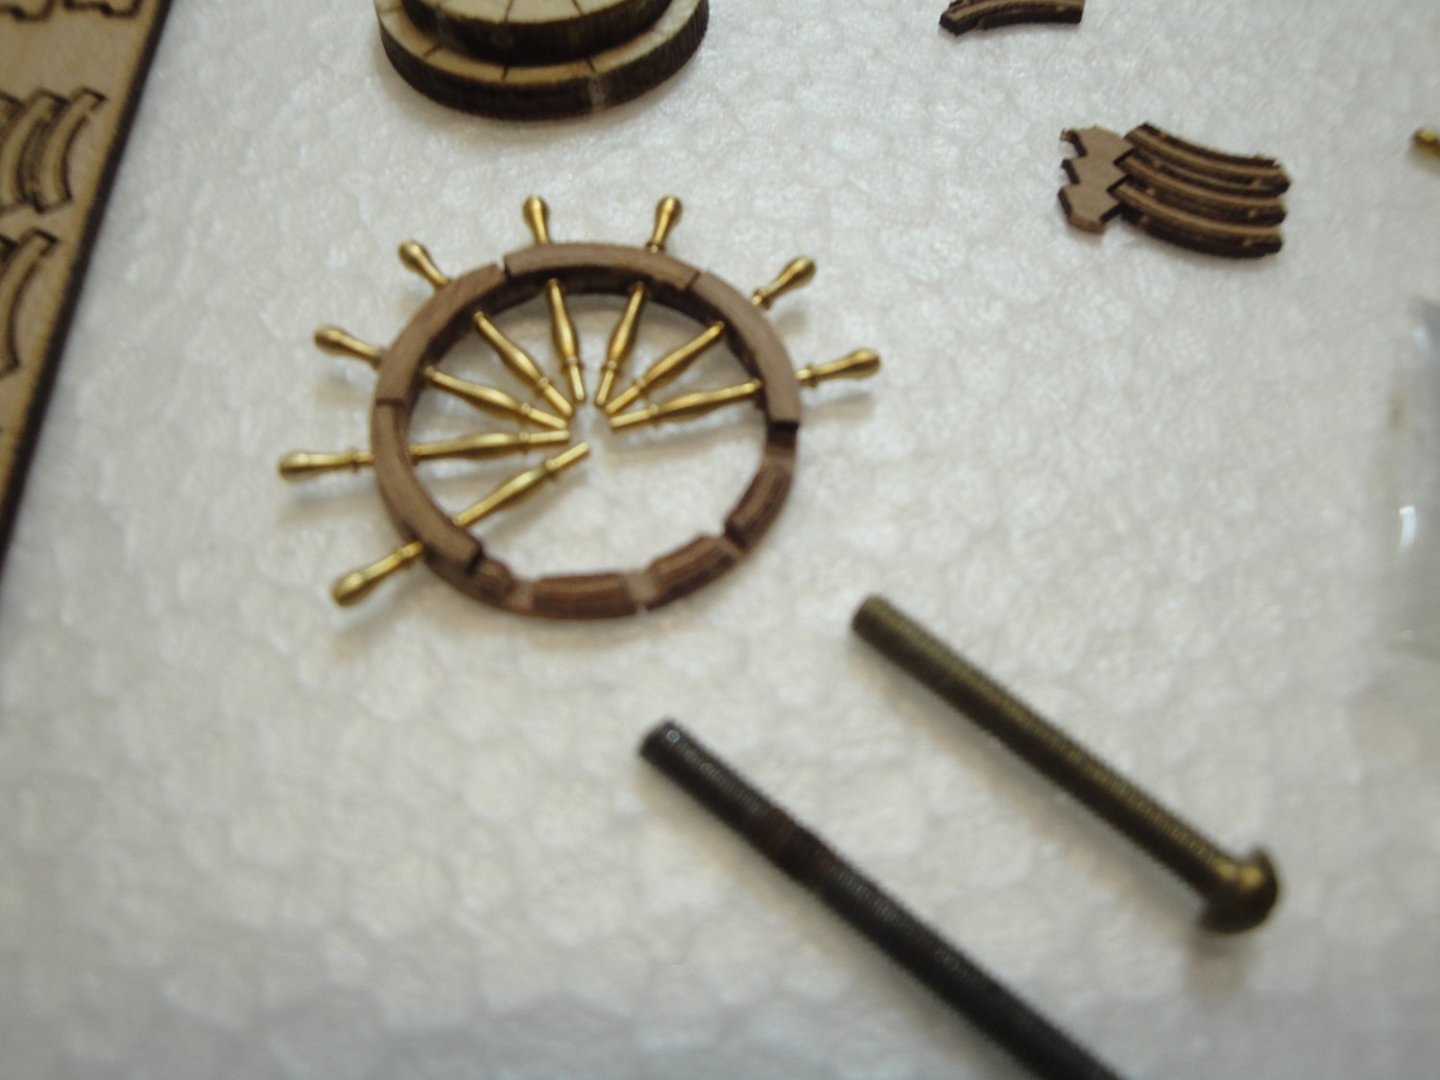
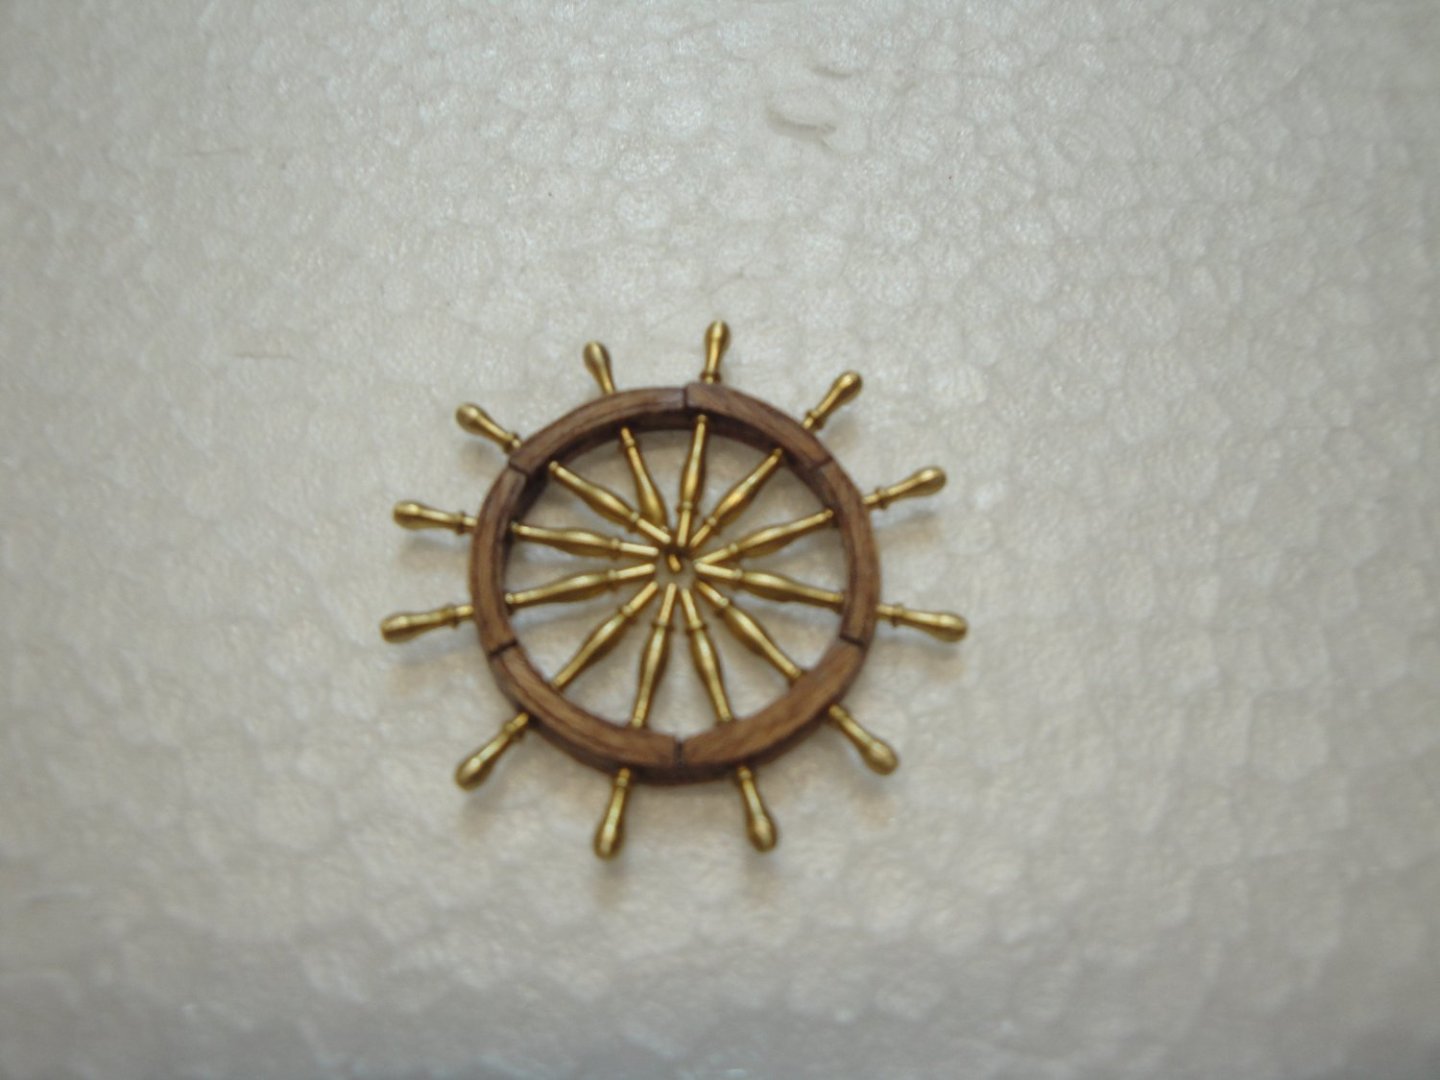
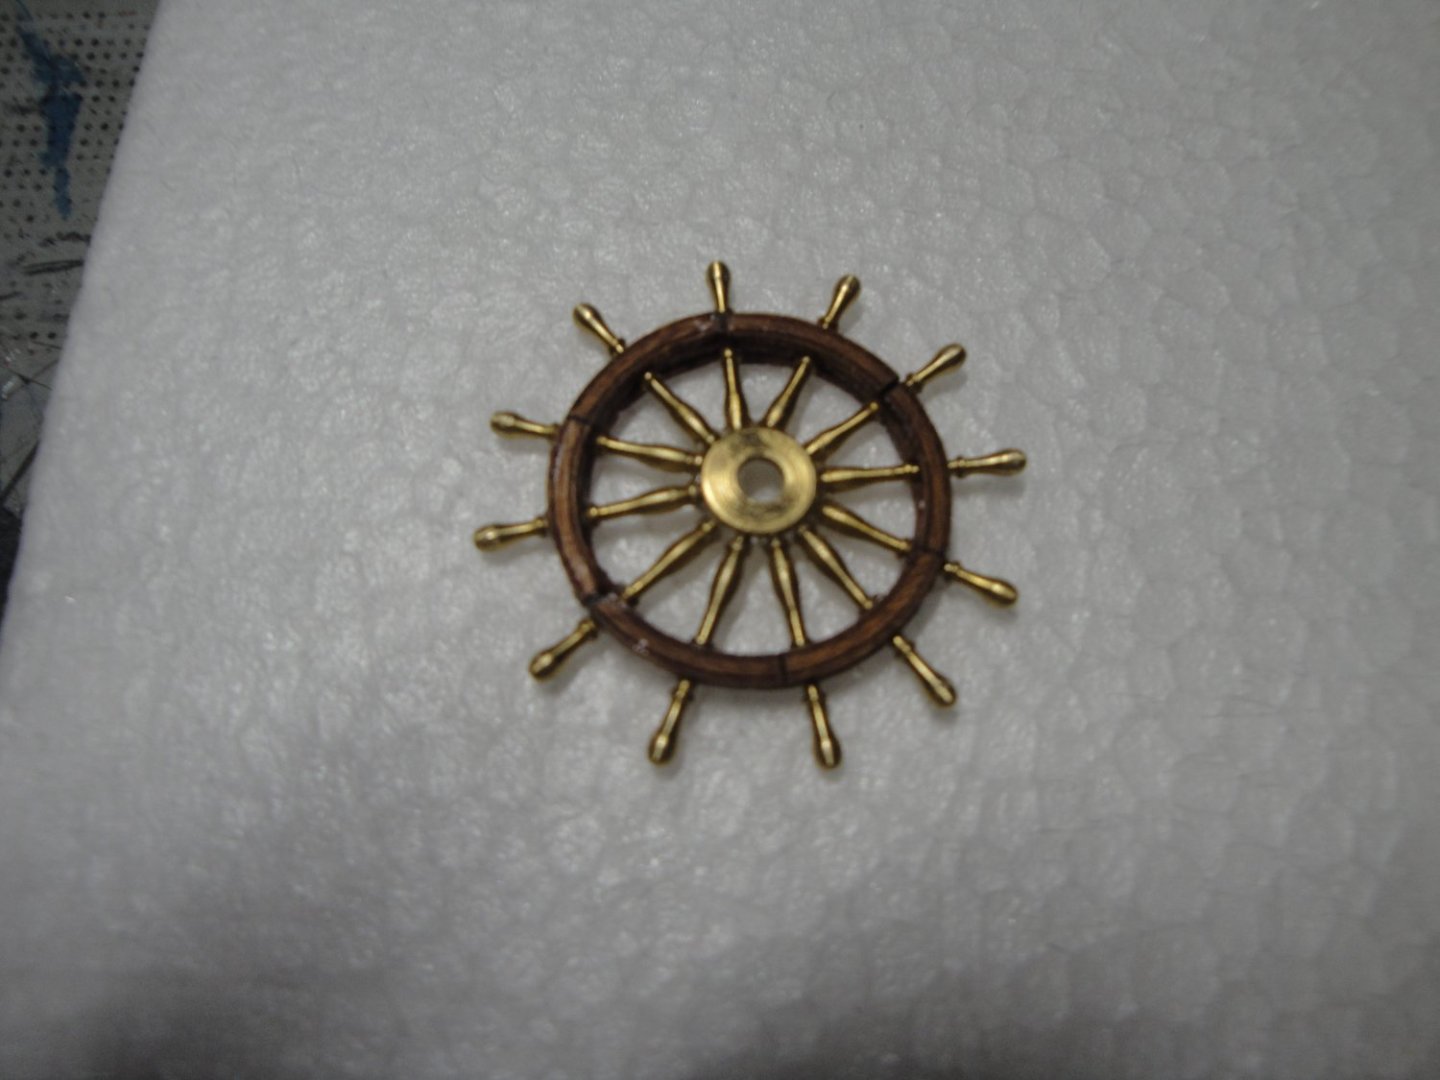
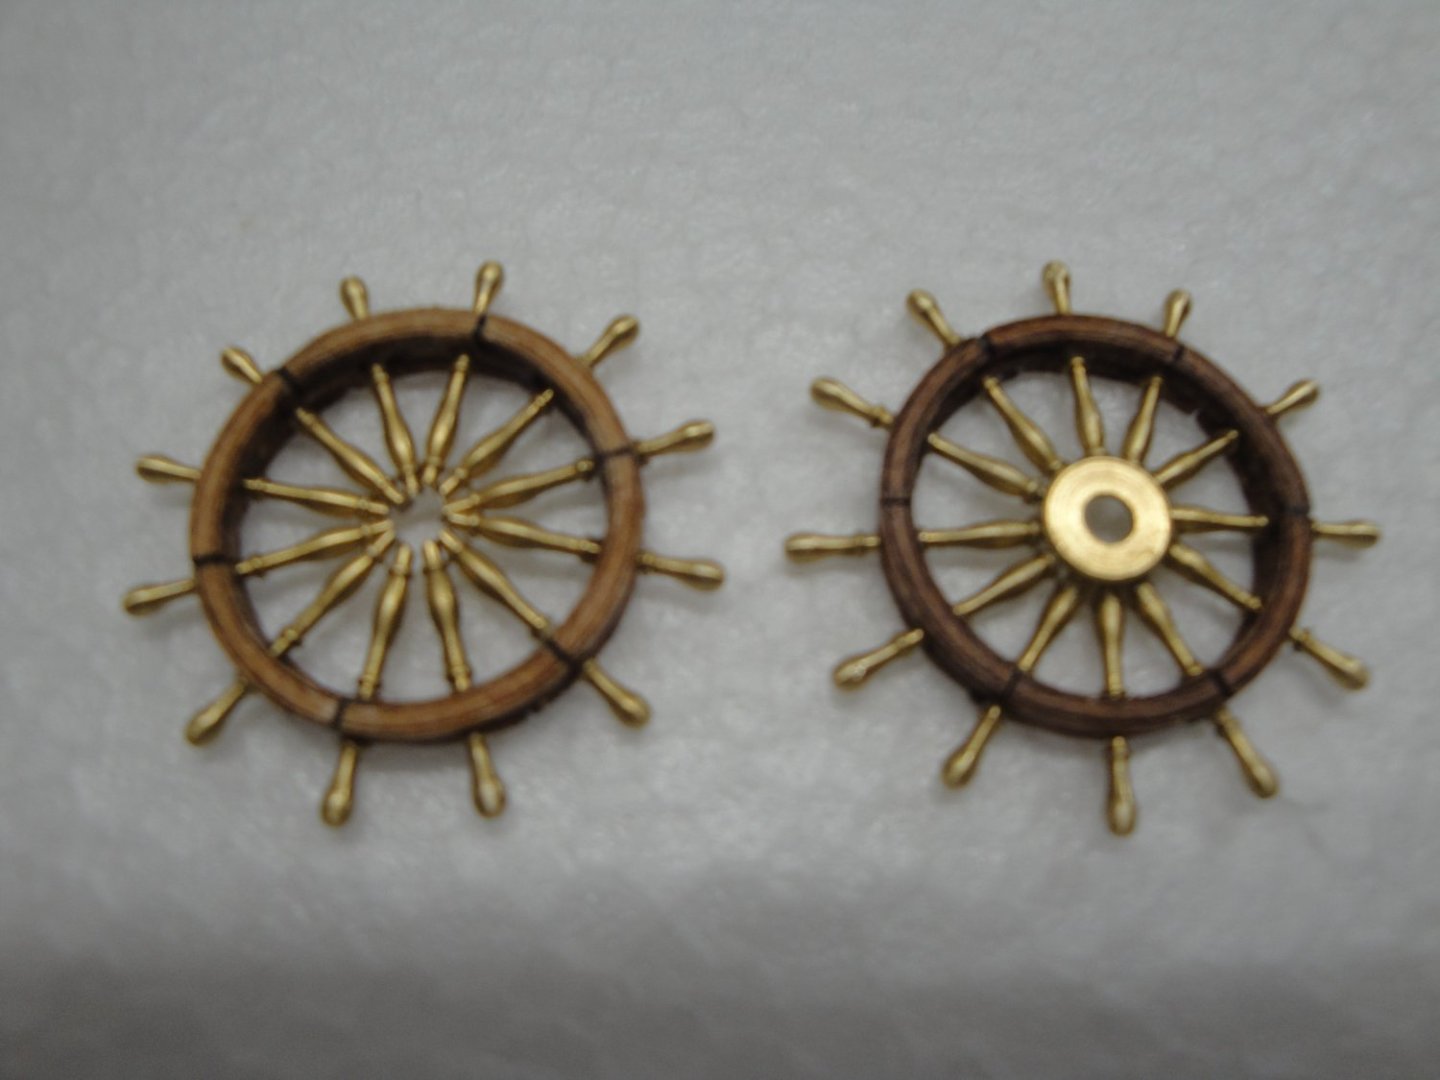
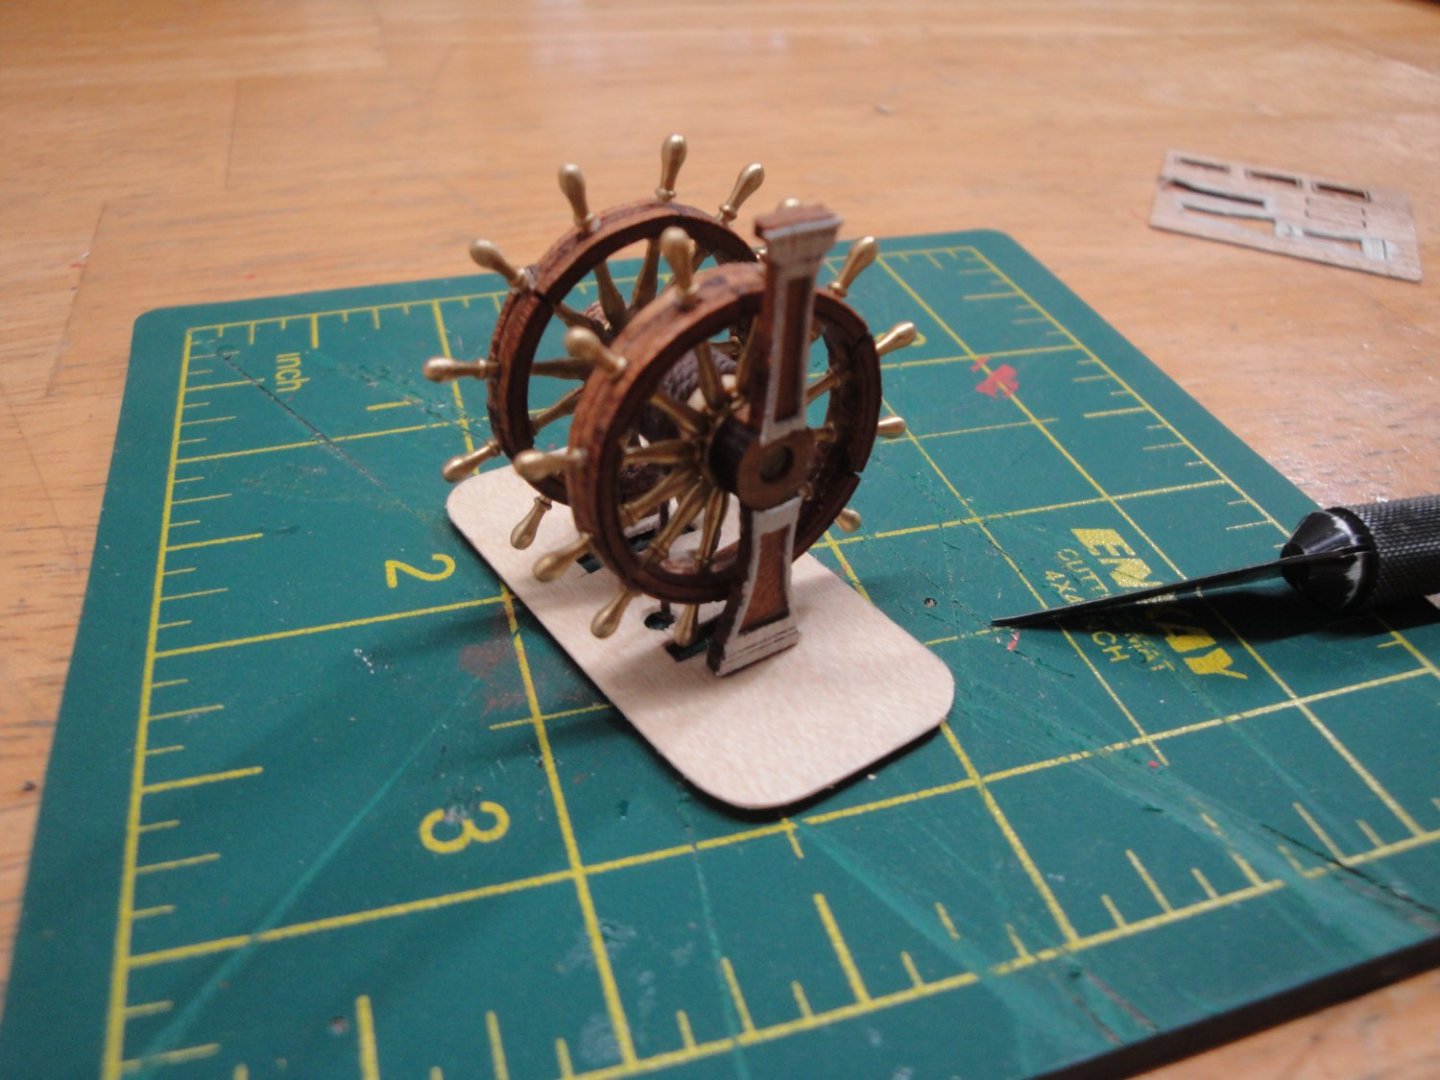
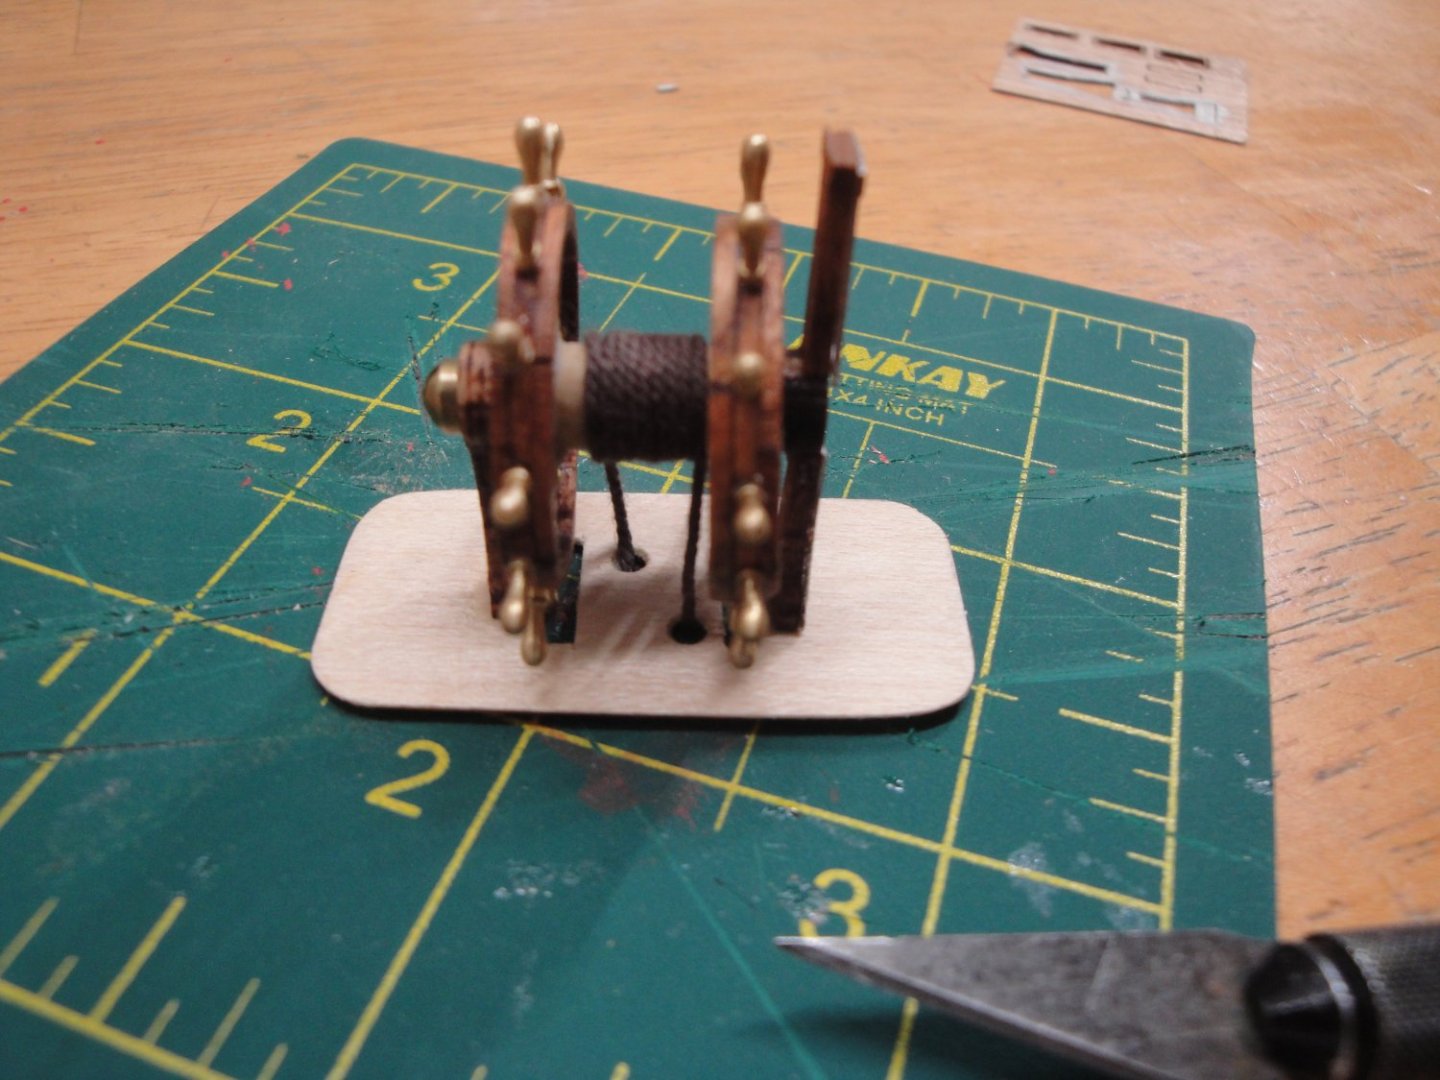
Before being able to close the second half of the poop deck sub-floor, I needed to assemble the wheels. The kit provides two axial circles to help you put together this very delicate part of the kit: To be honest, I could not put it together as designed: it did not make sense. In my opinion, you need three layers to sandwich the brass bars and make it possible. The kit only provides 24 circular sections for two wheels and that is not enough. Thus, I decided to contact Tom of CAF Model and ask him for extra parts (I also needed extra parts for other locations and that will be described later on). In a very quick time, Tom designed all the parts I needed, cut them on his laser machines and sent me everything for $23 plus $20 for postage. I was truly impressed by the speed and small price to pay to get all the extra parts and I sincerely hope these additional parts will be included in the future Session #5 contents. Below is the new sheet, including enough circular sections to build multiple wheels, new ladders and a bag of 24 brass pins for the wheels. With these new parts, it is now possible to assemble delicately the wheels: Each wheel is comprised of 18 wood parts, 12 brass parts and the hub made with brass washers = 32 parts total. The above took me multiple days and is super tedious. By far, one of the most difficult step in this kit. To put everything together, I designed a small platform to install the wheel, the drum and the rope: The height under the sub-floor is very limited at 31 mm, and the fit is very ...very tight: Yves


- 507 replies
-
- 10
-
-
-
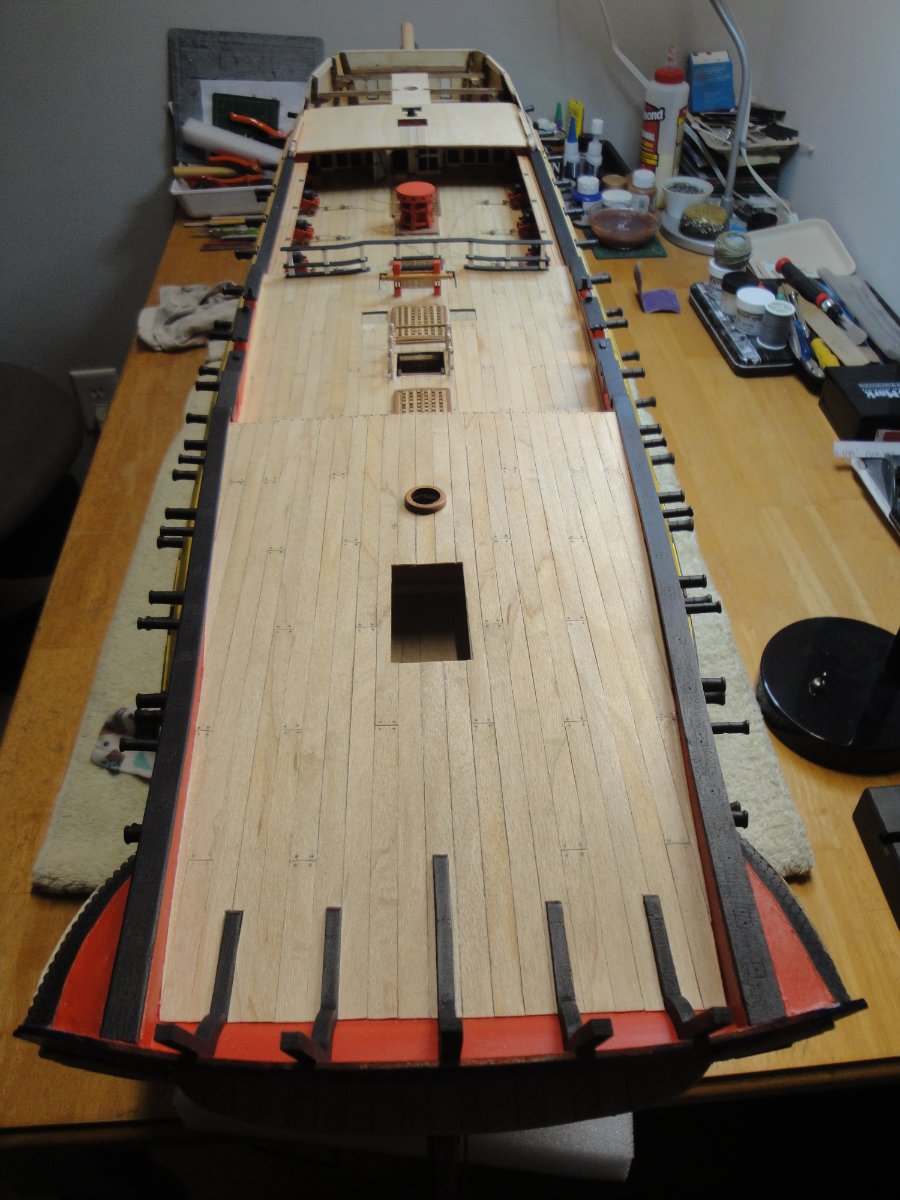
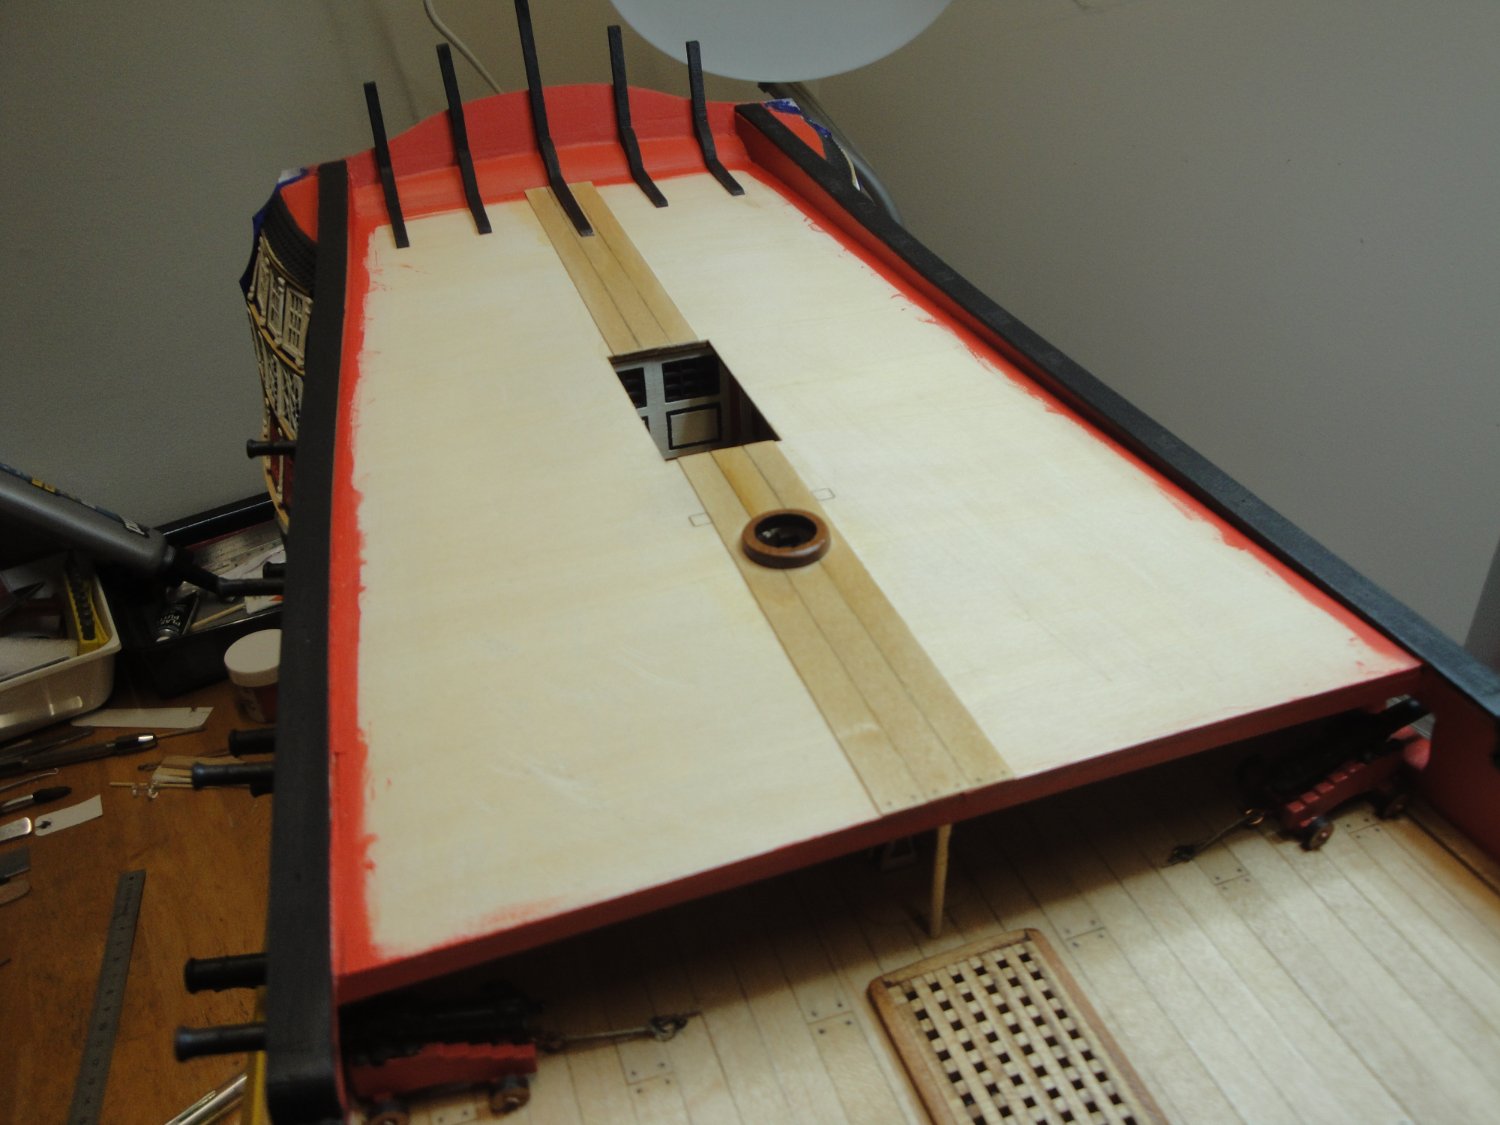
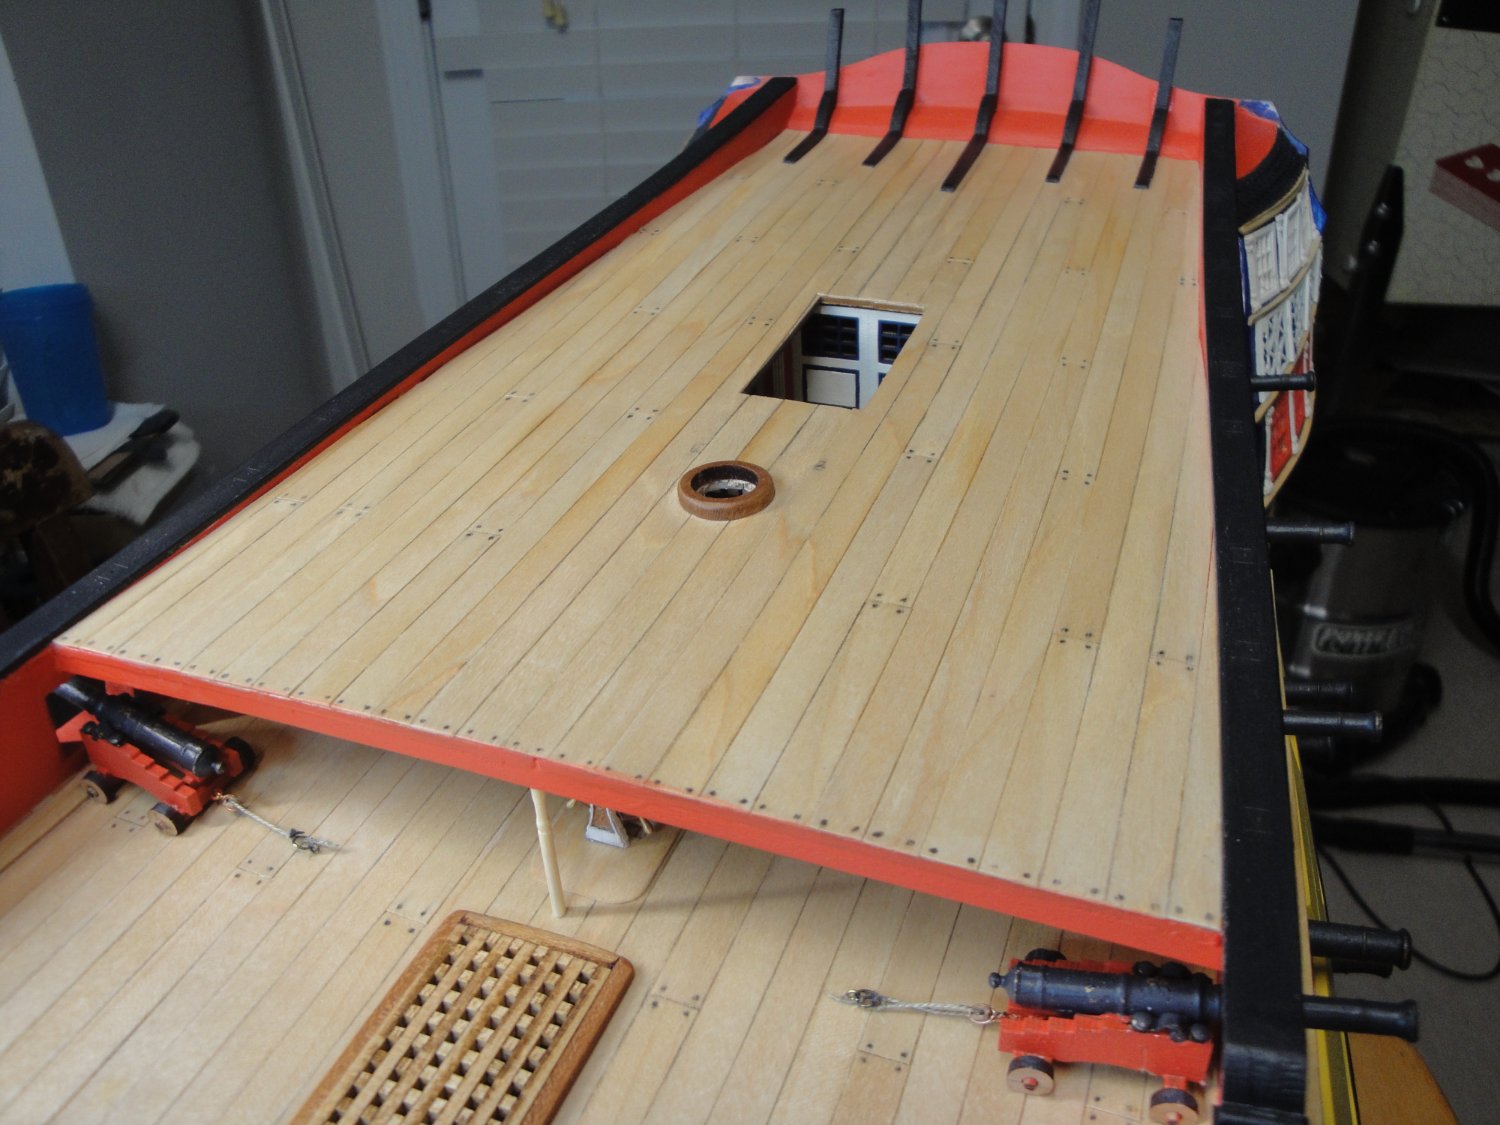
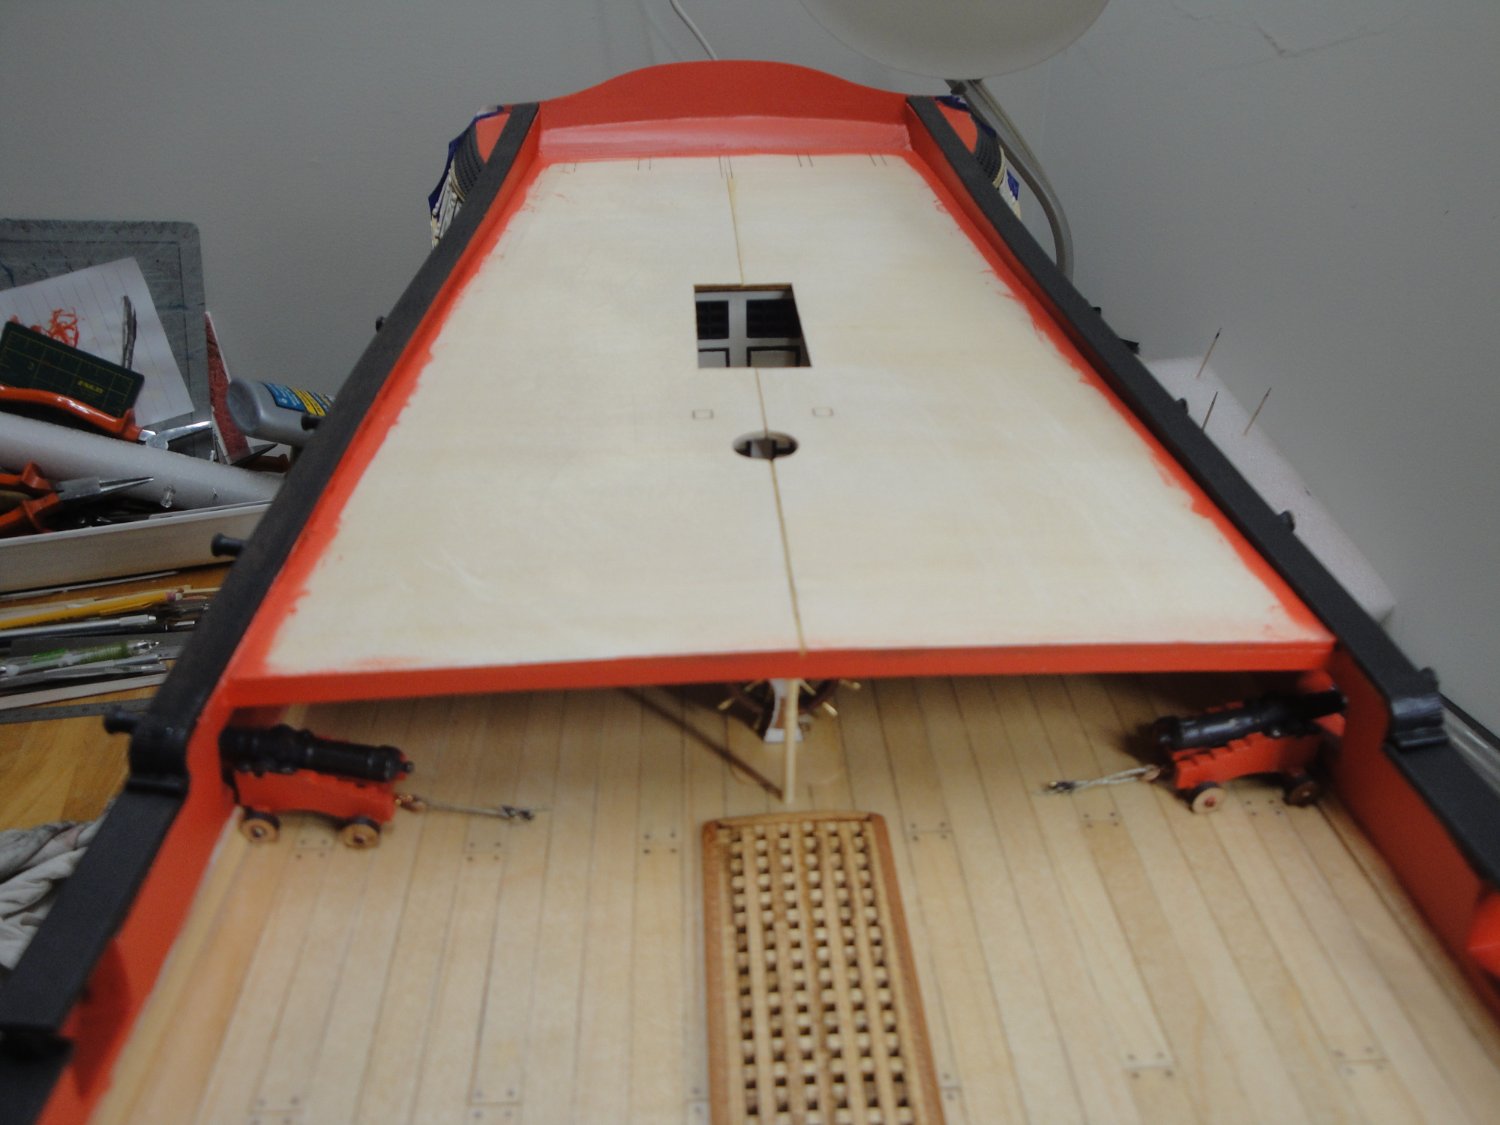
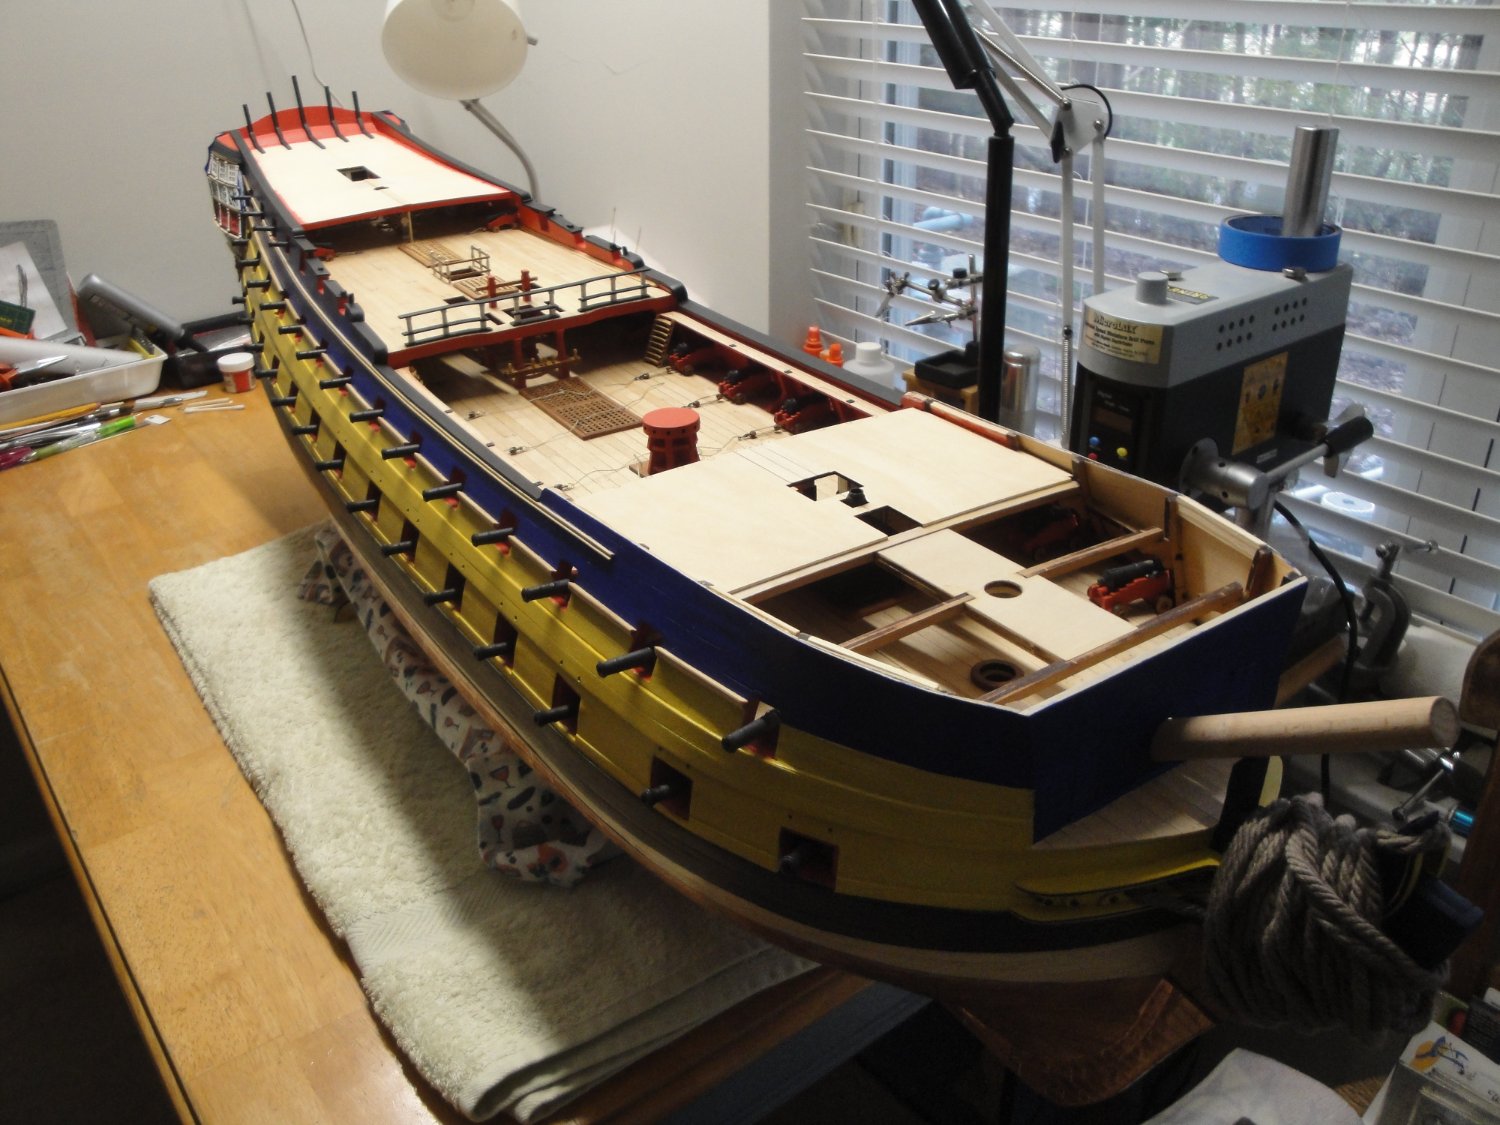
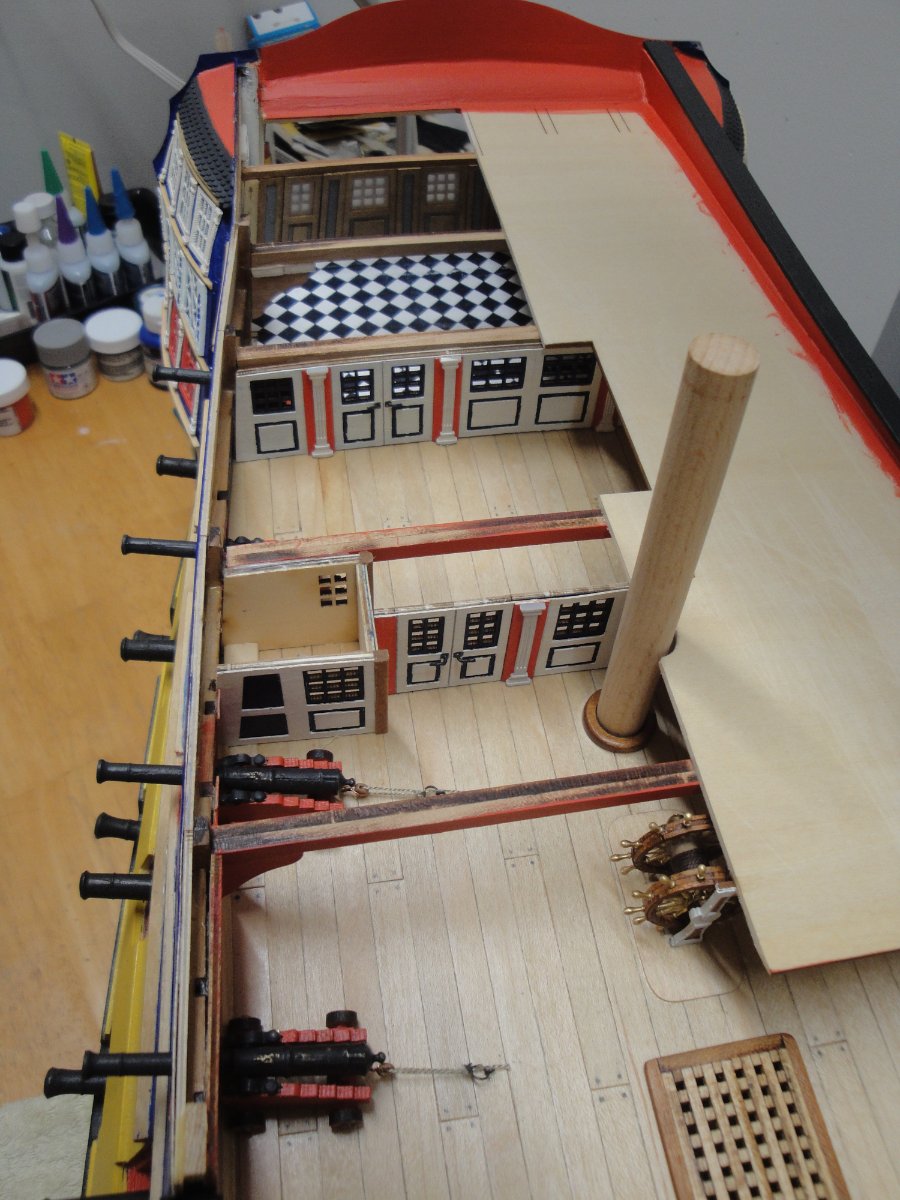
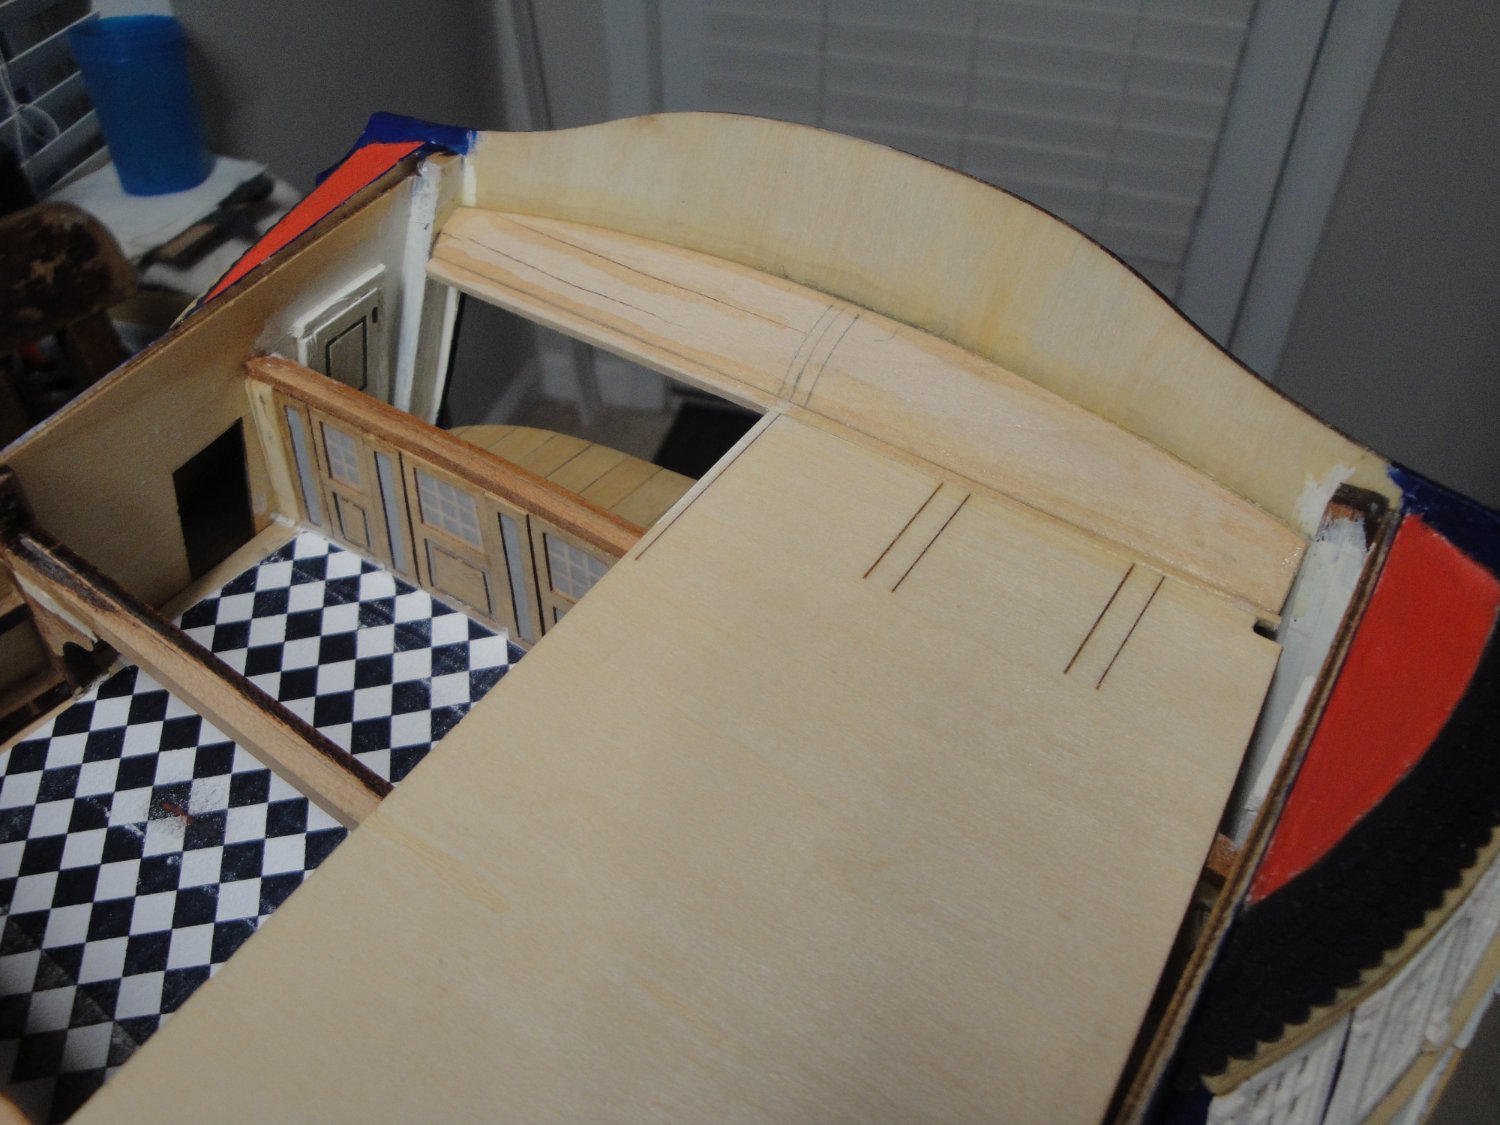
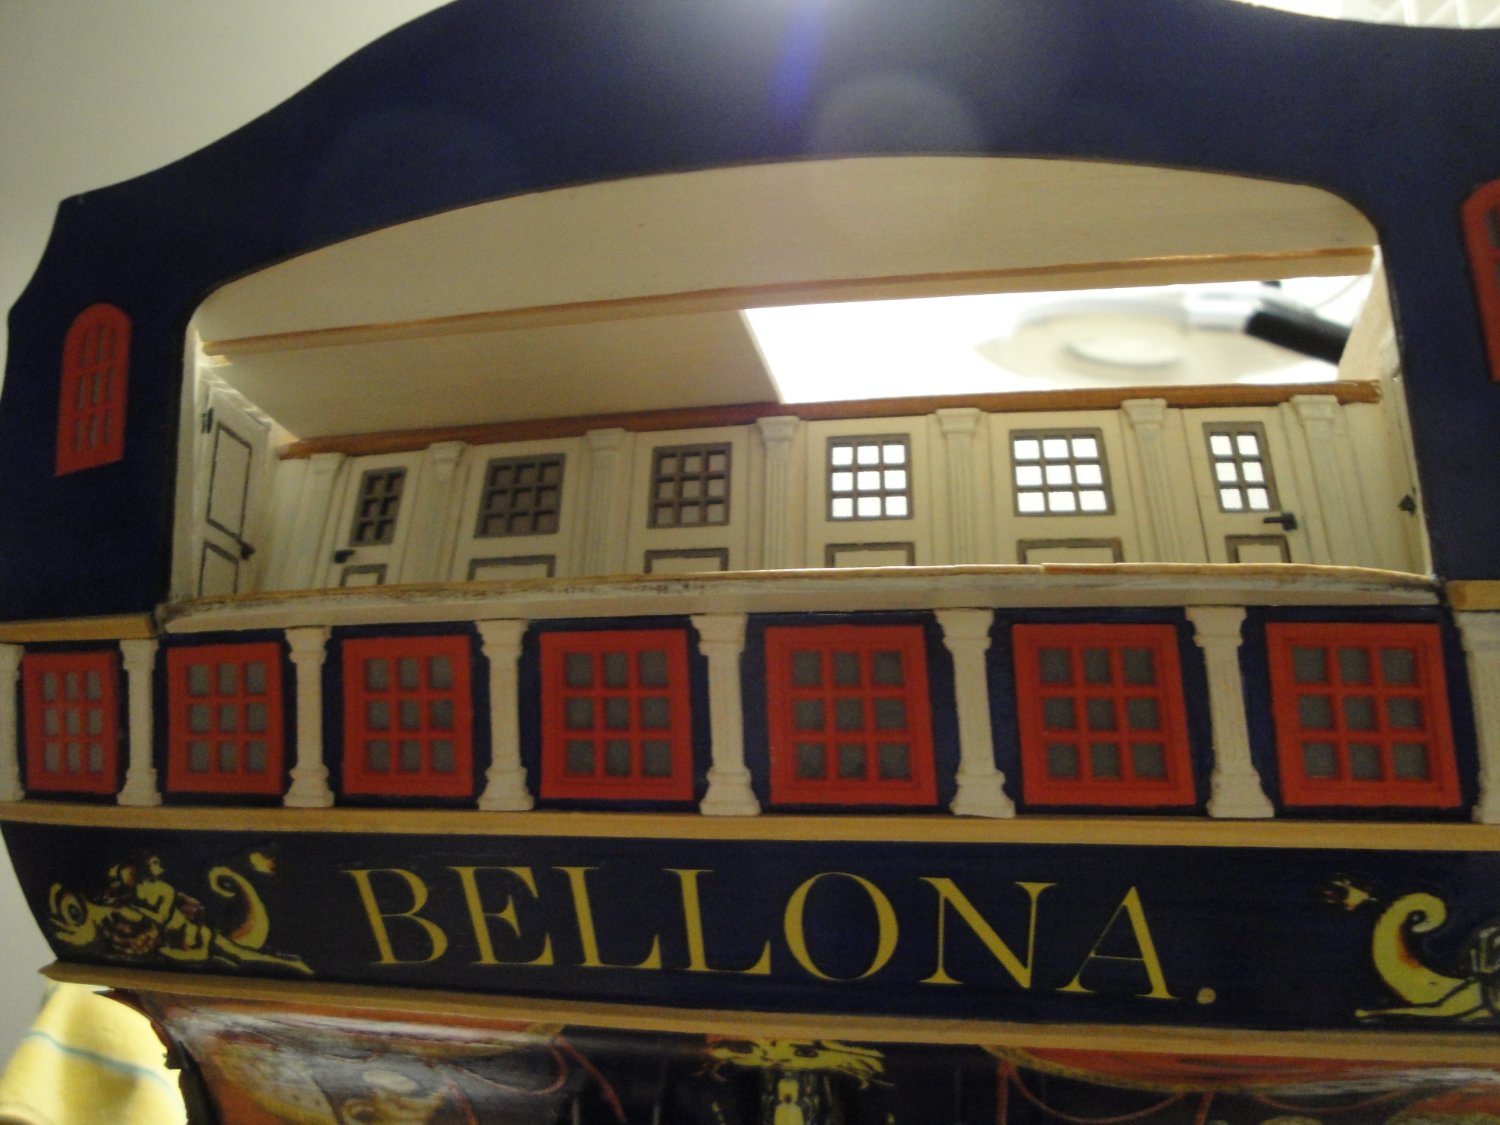
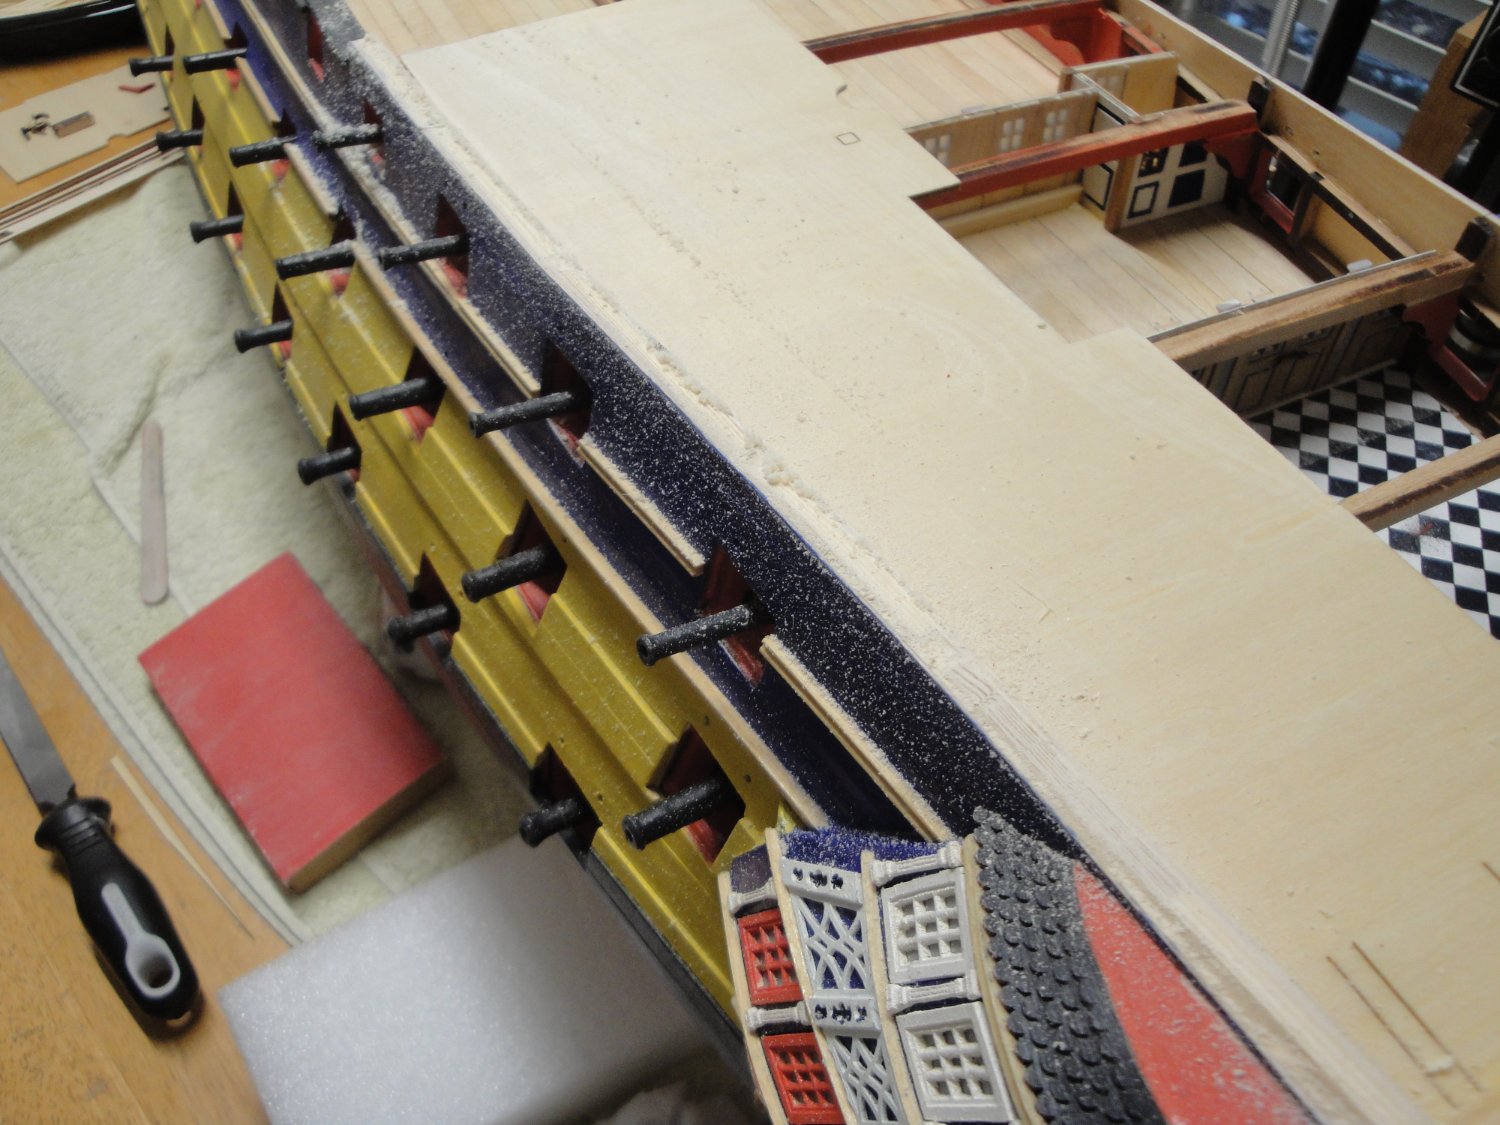
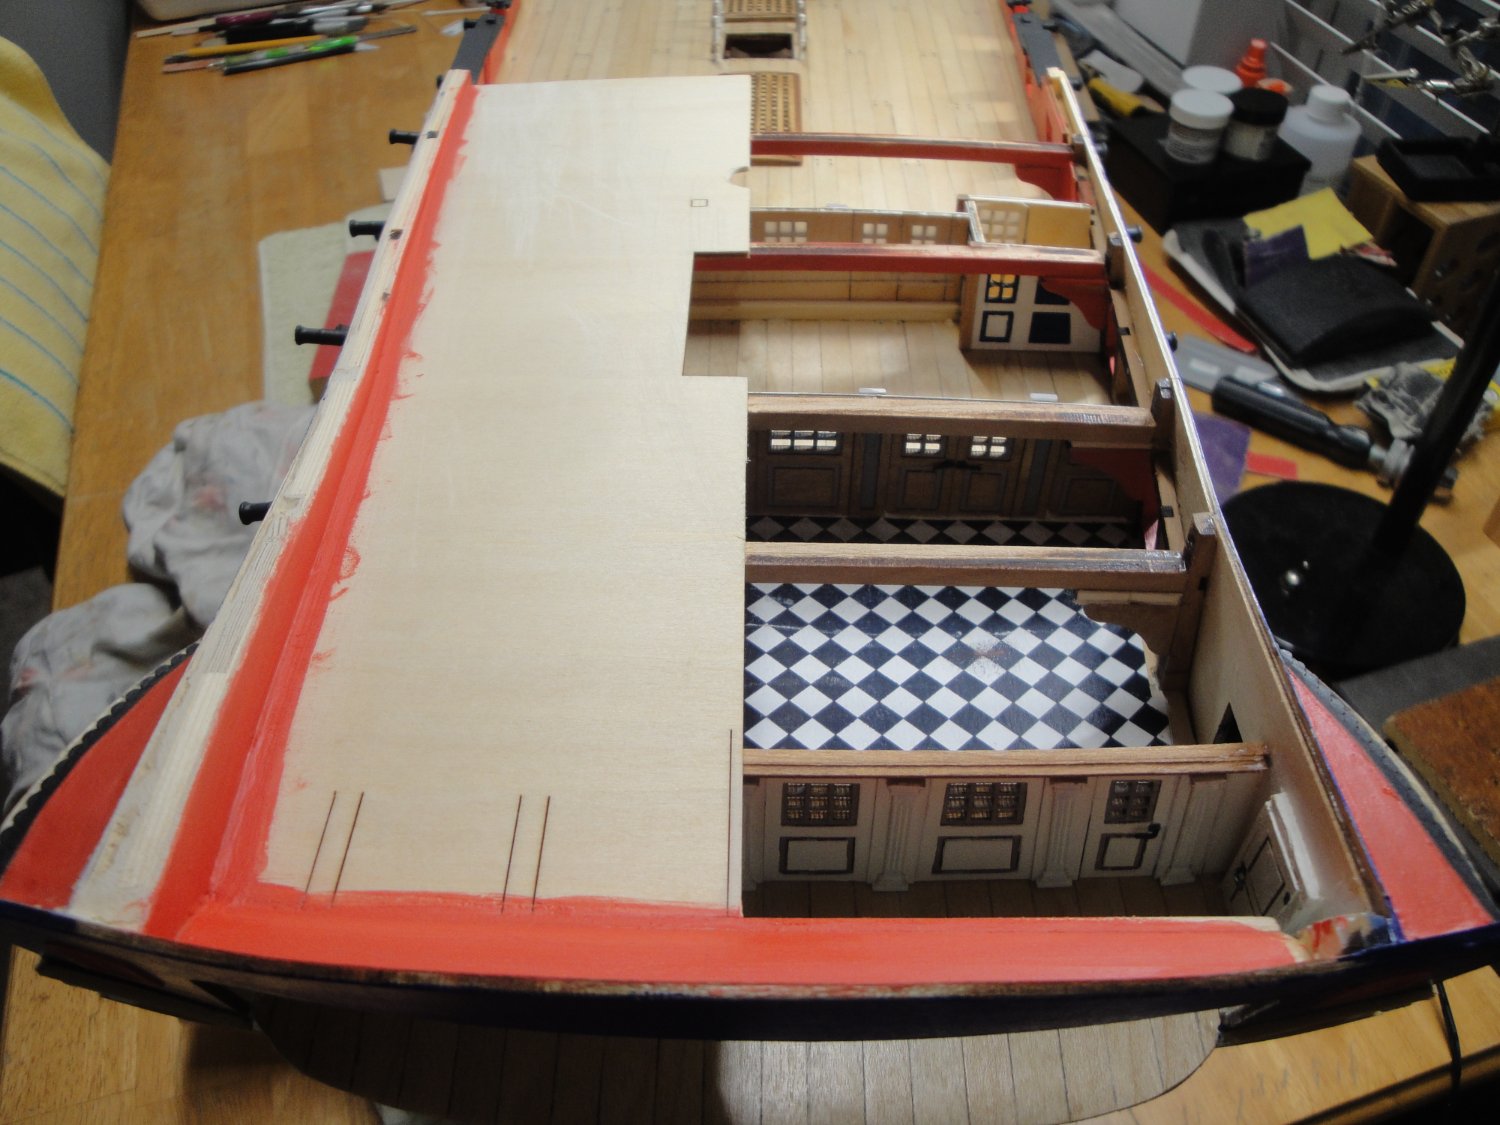
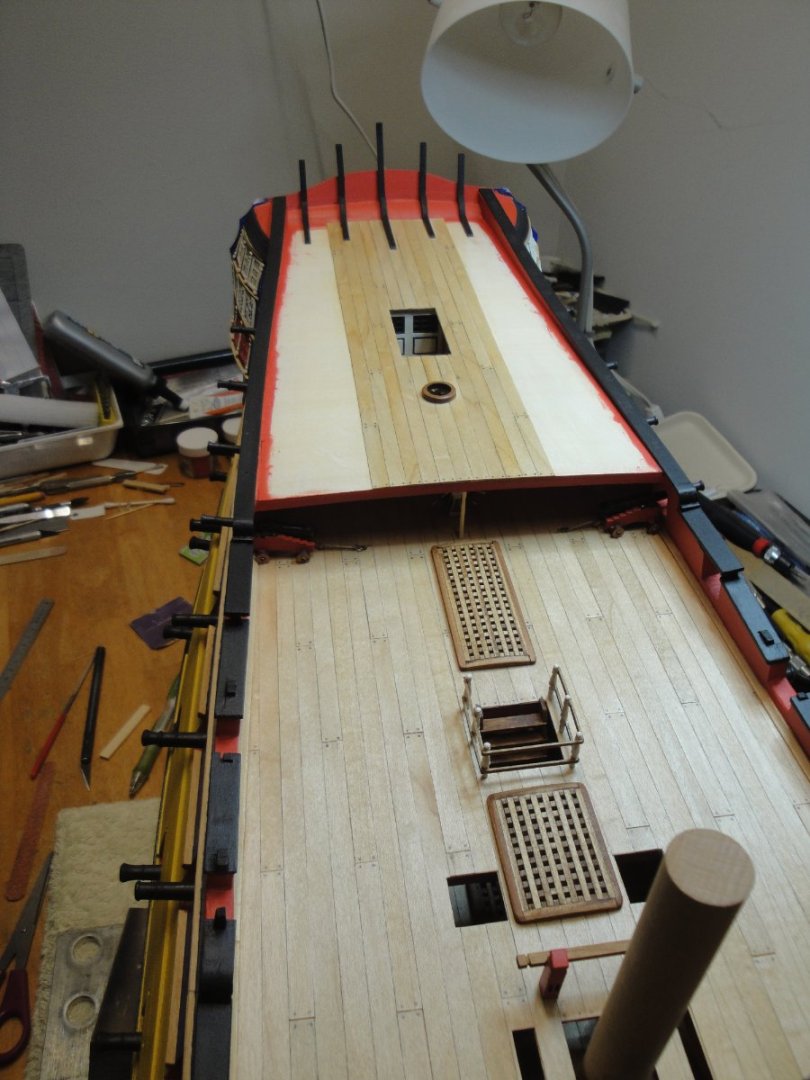
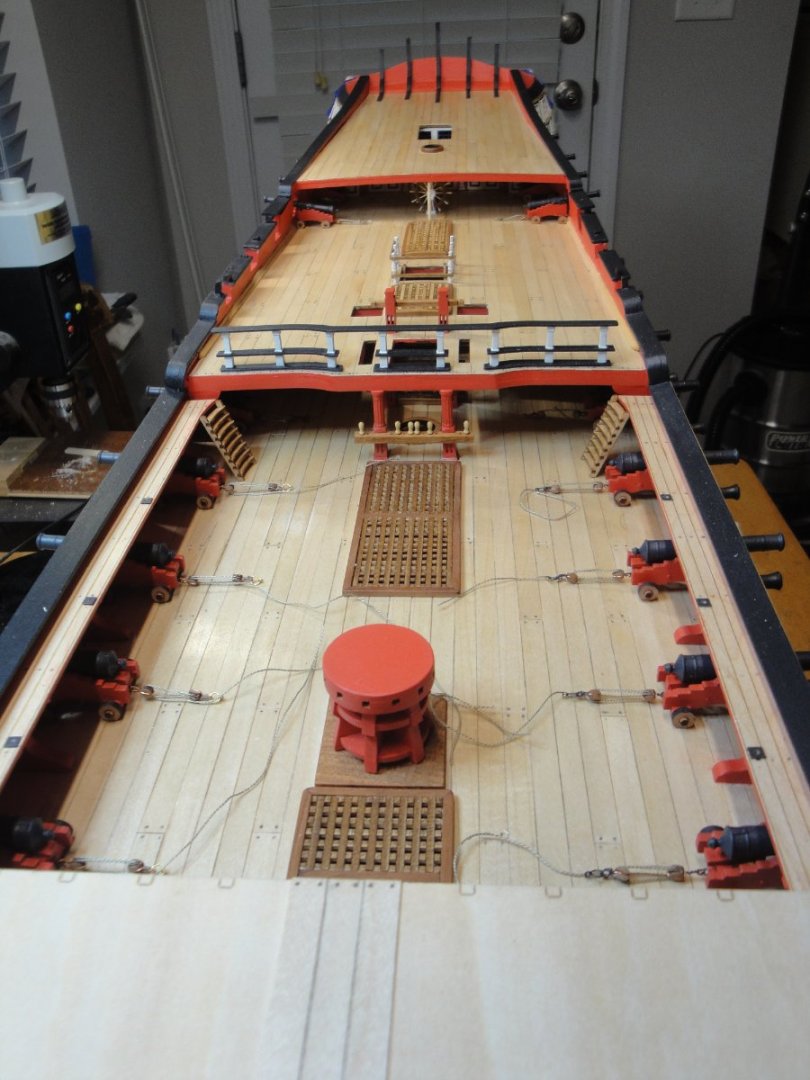
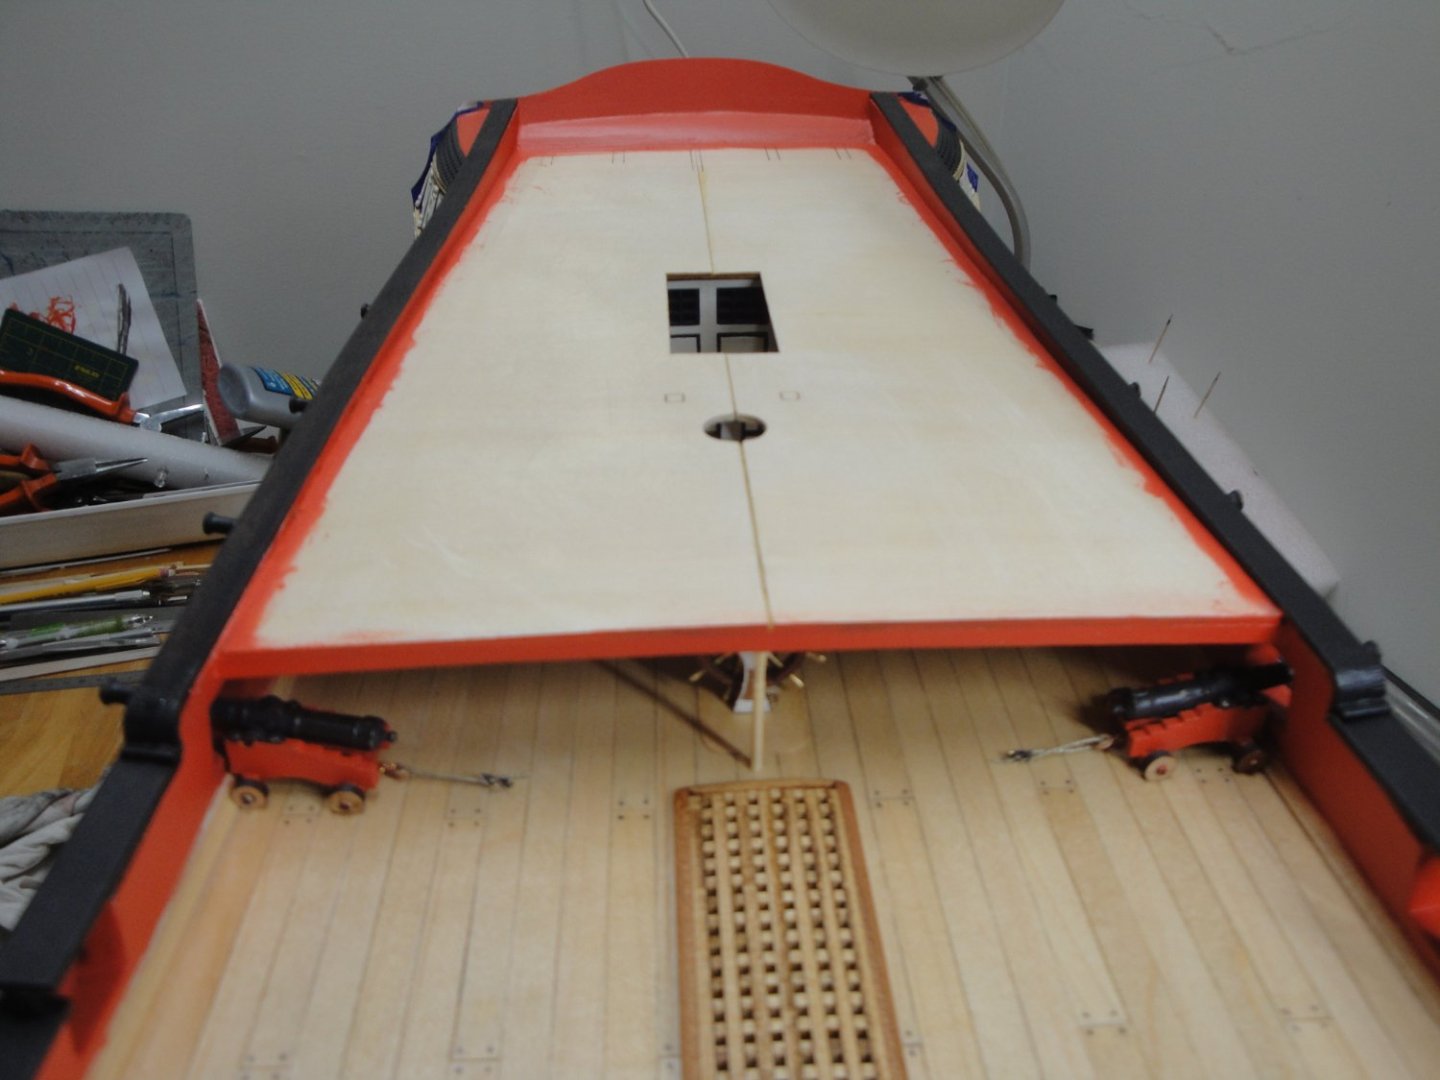
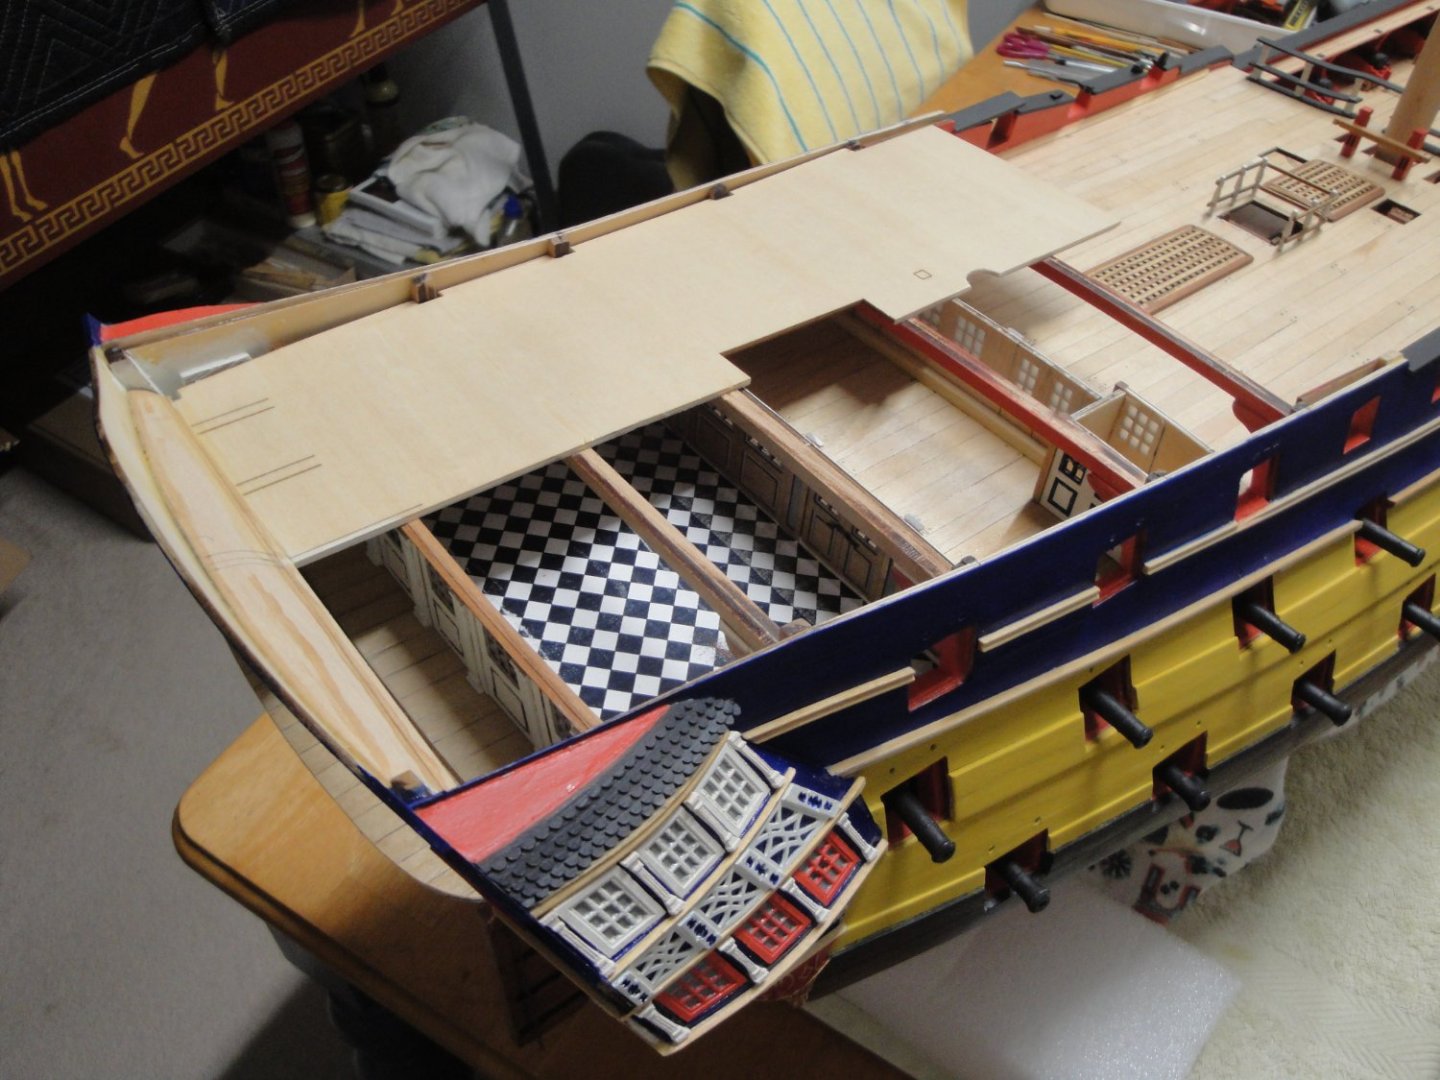
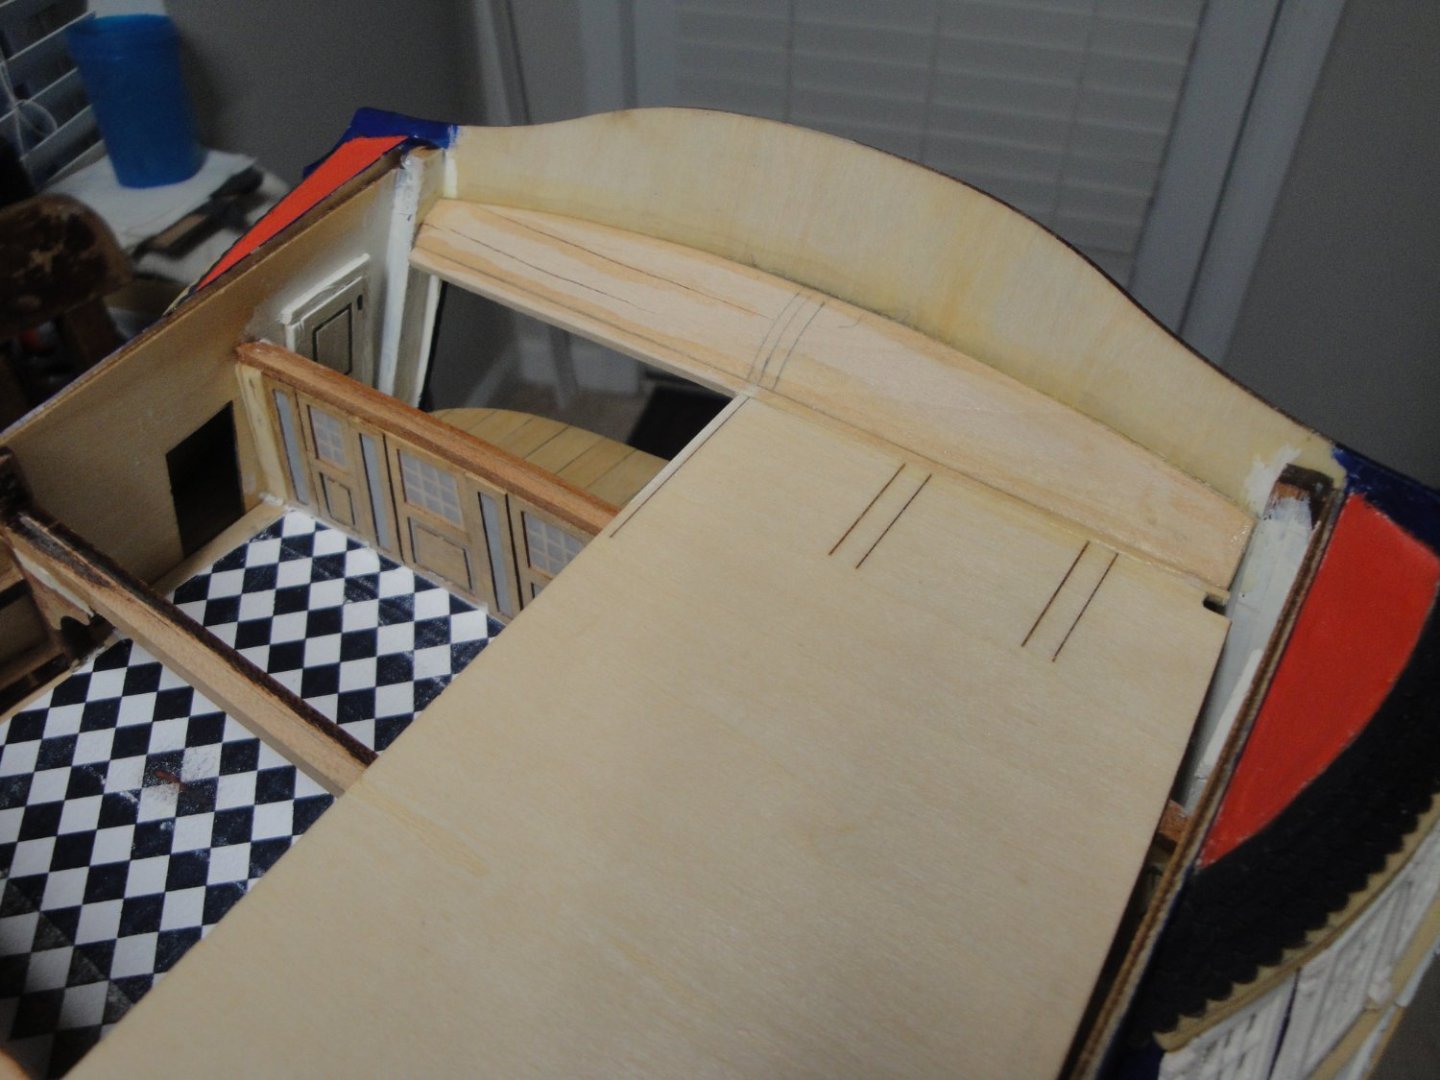
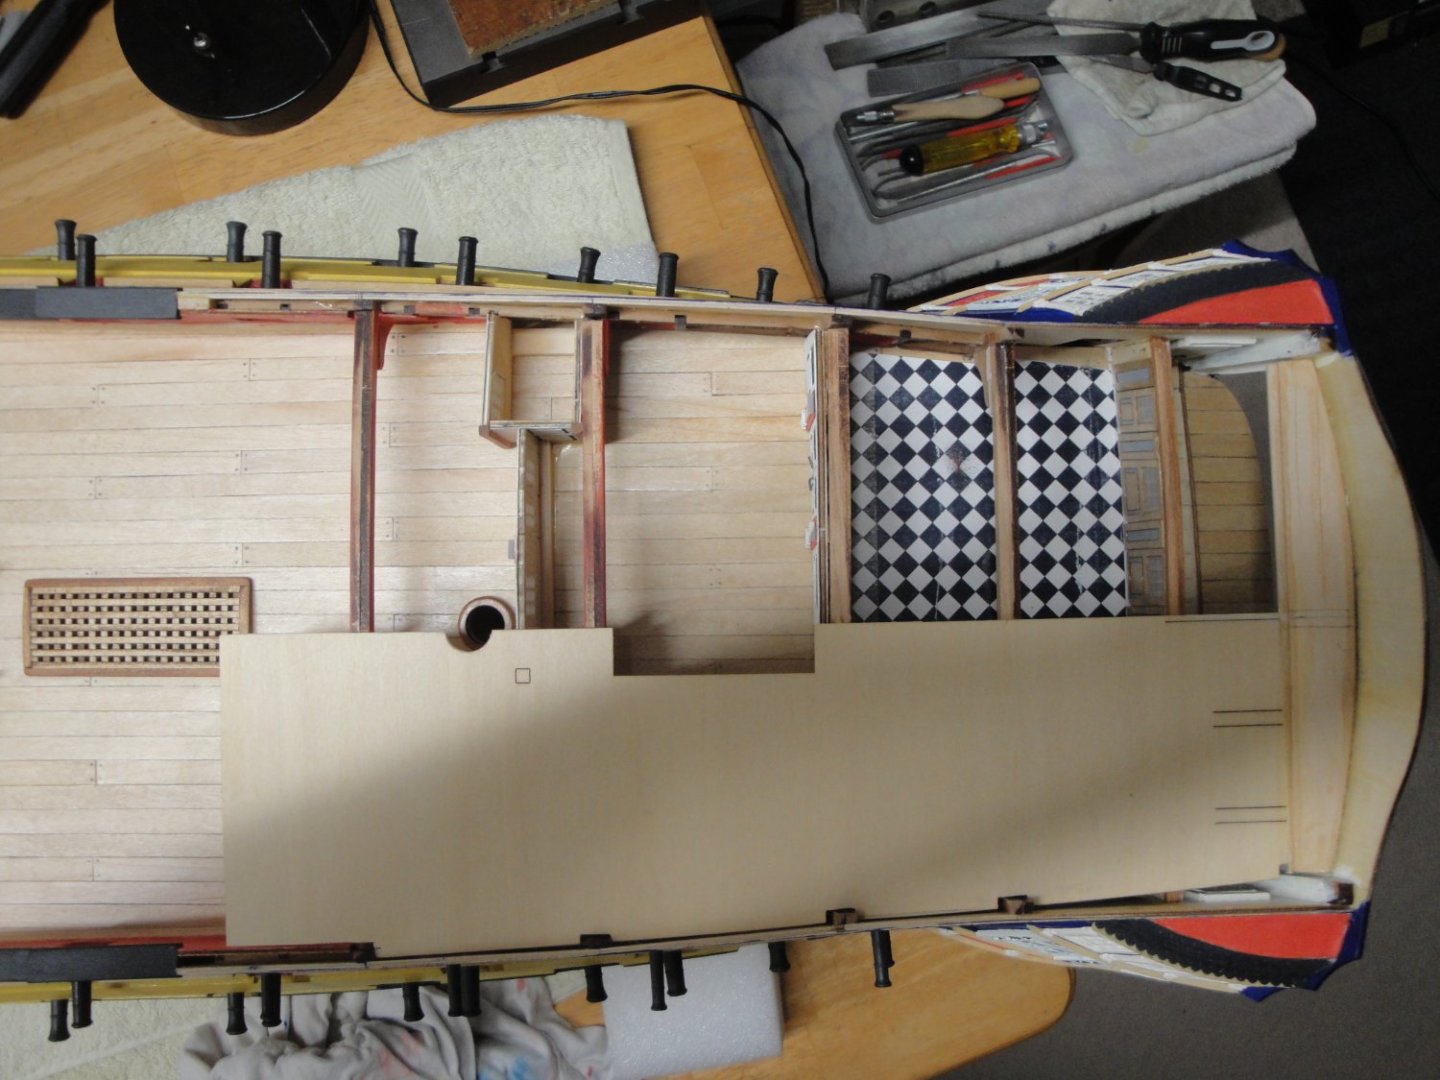
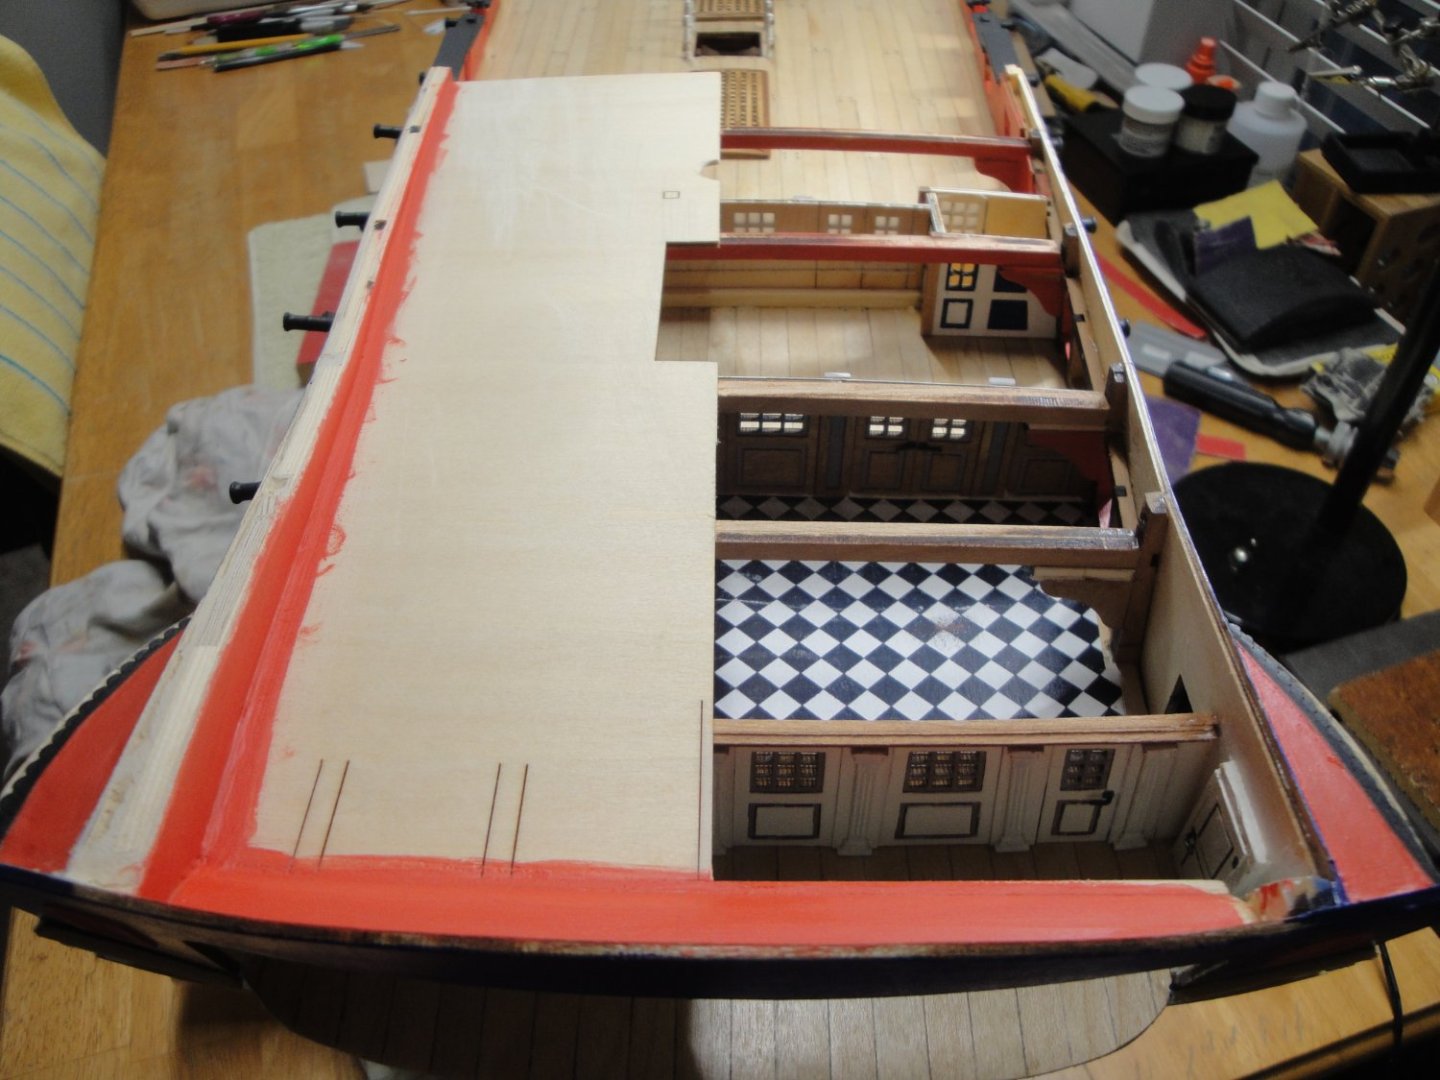
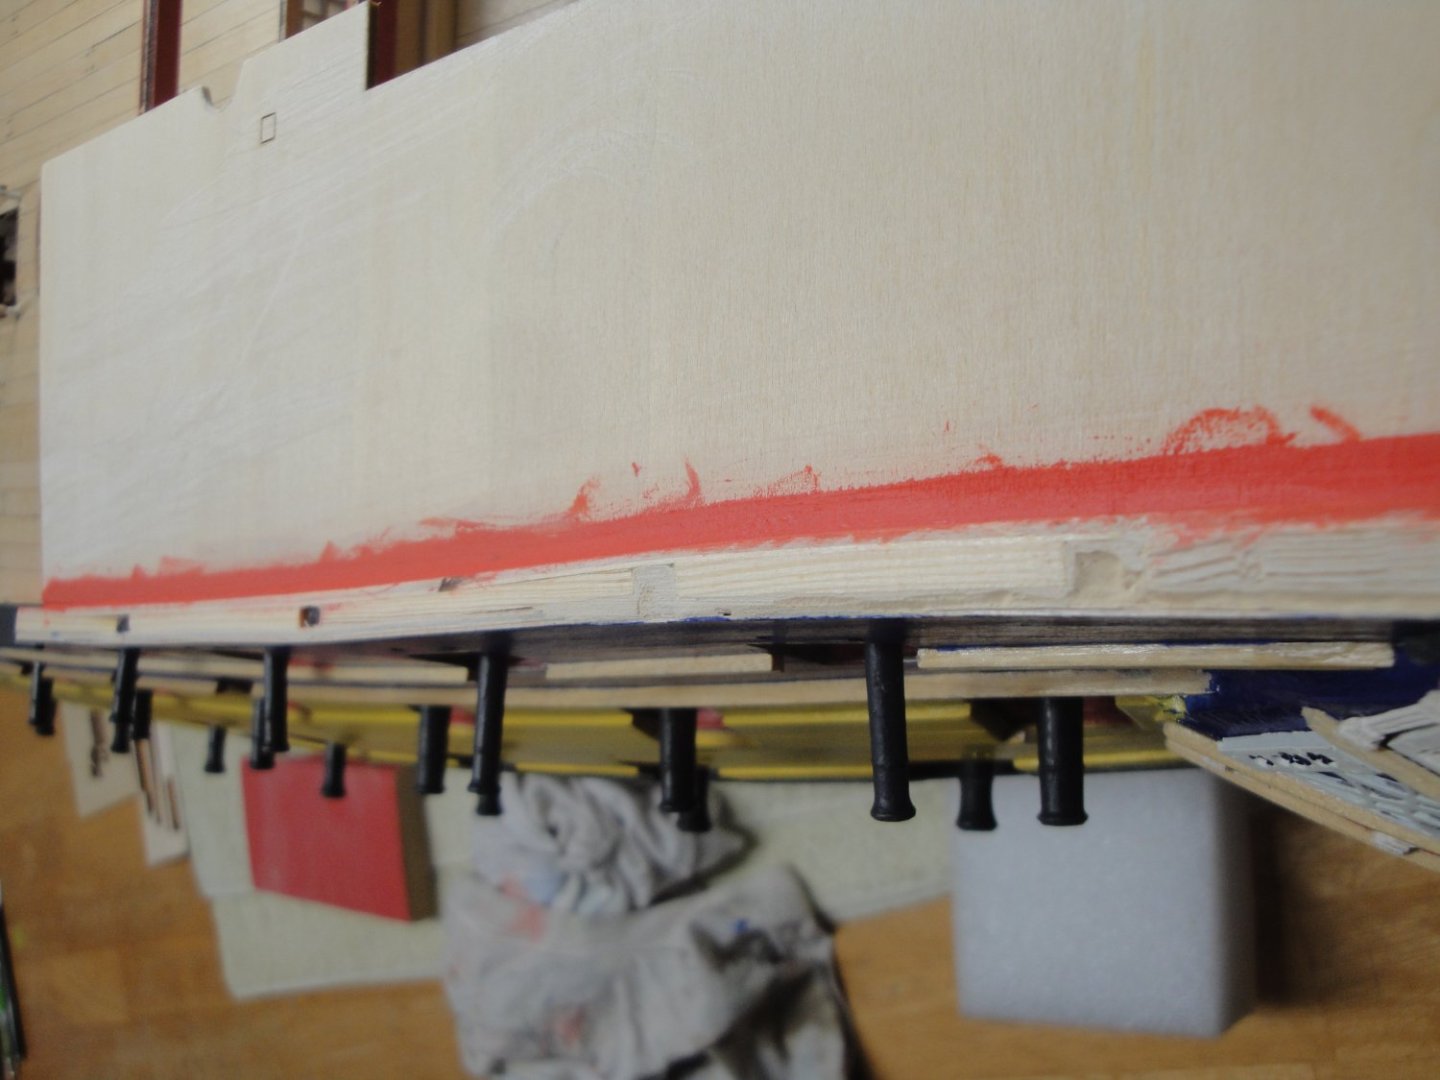
Moving on with the poop deck. Now is the time to place a lid on all the Officer's apartments. Again, I have broken free of the CAF Model sequence of instructions, as they do not make any sense to me. Therefore, I am describing how I managed to build that part of the model: As usual, I am proceeding with "halves" for a better control of the glue and more precise positioning of the decks. Before, gluing the poop sub-floor, it is necessary to work and place the round cover above the rear balcony: That part is provided in plywood in the kit and not prone to bending, even heavily soaked. Therefore, I cut another similar part in a sheet of plain wood (3 mm thick) and after a copious soaking in alcohol, I managed to bend it round and adjust it accordingly. It is tedious but must be done carefully for optimal results. You can see below, how this section will look like: On the front side of the poop deck, it does not look too bad: And a bird's view: The half poop deck is then glued and heavily pressed to make sure the thick plywood (2 mm) is installed correctly. Here again, I wish CAF Model would provide thinner sub-floors of 1.5 or even 1 mm thick. I have to say that once it is glued, that stuff is rock solid. The next step is to fill up with wood scraps the bulwark, after gluing the siding. A lot of dust is made in the process and your best friend remains the ashes vacuum cleaner. A little bit of red paint and things are already more pleasant: You can see (below) how thick and solid the bulwarks are. The railing will be glued directly on top: Yves


-
Superb work on the bulwarks. It is never easy to do them right. Yves
- 114 replies
-
- 1
-
-
- Pride of Baltimore II
- Model Shipways
- (and 1 more)
-
So pretty and realistic. It reminds me of some great days spent sailing on the local lakes or on the Pamlico bay. Yves
- 111 replies
-
- 3
-
-
- Nonsuch 30
- Model Shipways
- (and 1 more)
-
We all love a nice mahogany runabout. My favorites are of course the Chris Craft and the Italian RIVA. Yves
-
Beautiful deck. You are making very good progress. Yves
-
Kevin, you have so much imagination for getting new kits: frozen fingers, need to get back in shape on wooden models.... How about something for the dog to chew on? 🙂 Yves
- 38 replies
-
- 4
-
-

-
- Lady Eleanor
- Vanguard Models
- (and 1 more)
-
I love the contrast of colors in the wood. Fantastic details on the deck. Yves
-
Yes, on the CAF model Bellona, it is presented as a two layers parts, made of thin plywood. I first glued one against the hull and when dry I glued the second one after dipping them in alcohol and bending them with my fingers. So far, they have not come loose..... 🙂 Yves
-
Great model. I am currently building the Bellona from CAF Model and can see the similarities between the two kits (Bellona is POB, not POF). Apparently, the instructions are better in your kit than they are in the Bellona. Tom is excellent and answers very quickly to all your needs and request for help. He is a great asset to this company. Yves
-
Amazing !!!! Yves
-
What an incredible model. It is stunning. Thank you for putting together that very rare and complex model, for our visual and intellectual pleasures. Yves
- 238 replies
-
- 3
-
-

-
- Robert E Lee
- steamboat
- (and 3 more)
-
I suppose this kit calls for single planking (not double). You have done a terrific job and the symmetry between each side is excellent. Yves
-
Another beautiful project. I love it as it reminds me of Dorade, one of my favorite boats. I know you will turn that one into a beauty and museum piece. Yves
- 84 replies
-
- 1
-
-
- Corsaro II
- Corel
- (and 1 more)