


yvesvidal
-
Posts
3,497 -
Joined
-
Last visited
Content Type
Profiles
Forums
Gallery
Events
Posts posted by yvesvidal
-
-
Wonderful Alan, I think you are now on good tracks. Do not touch the leveling wheels anymore, if you are happy with their settings.
Consumption:
- One spool gave me sections 1,2,3,7,8,9B and 9T.
- Another spool gave me sections 4,5,6
- There was some spare on both.
- I think the kit can be entirely printed with 3 spools ($69). You may need a little extra for the brims and it is not even sure.
Yves
-
-
23 hours ago, captain_hook said:
And … you won‘t find me buying any chinese kit in the future, have learned my lesson well. Well I do not blame CAF (except for quality control), maybe I just don‘t have the skill yet to build this properly or my standard how I would like to build it is just not compatible with the supplied kit.
I will keep some weeks away from ship modeling and will return to the Badger after that. Thank you all for following this build so far.
Andreas
Andreas,
I am really sorry to hear about your disappointment with this kit. I hope you will find the strength and motivation to resurrect it.
I am also concerned by the quality as you are describing it, as I wanted to procure two of their kits that I find absolutely magnificent: The Bellona (1/48) and the Chebec (1/48). The first one is plank on bulkheads (traditional), whereas the second one if POF. After reading your comments, I am not sure I want to spend twice $1200-1400 for these kits. This is really disappointing and I hope the CAF support group is able to do something for you.
Yves
-
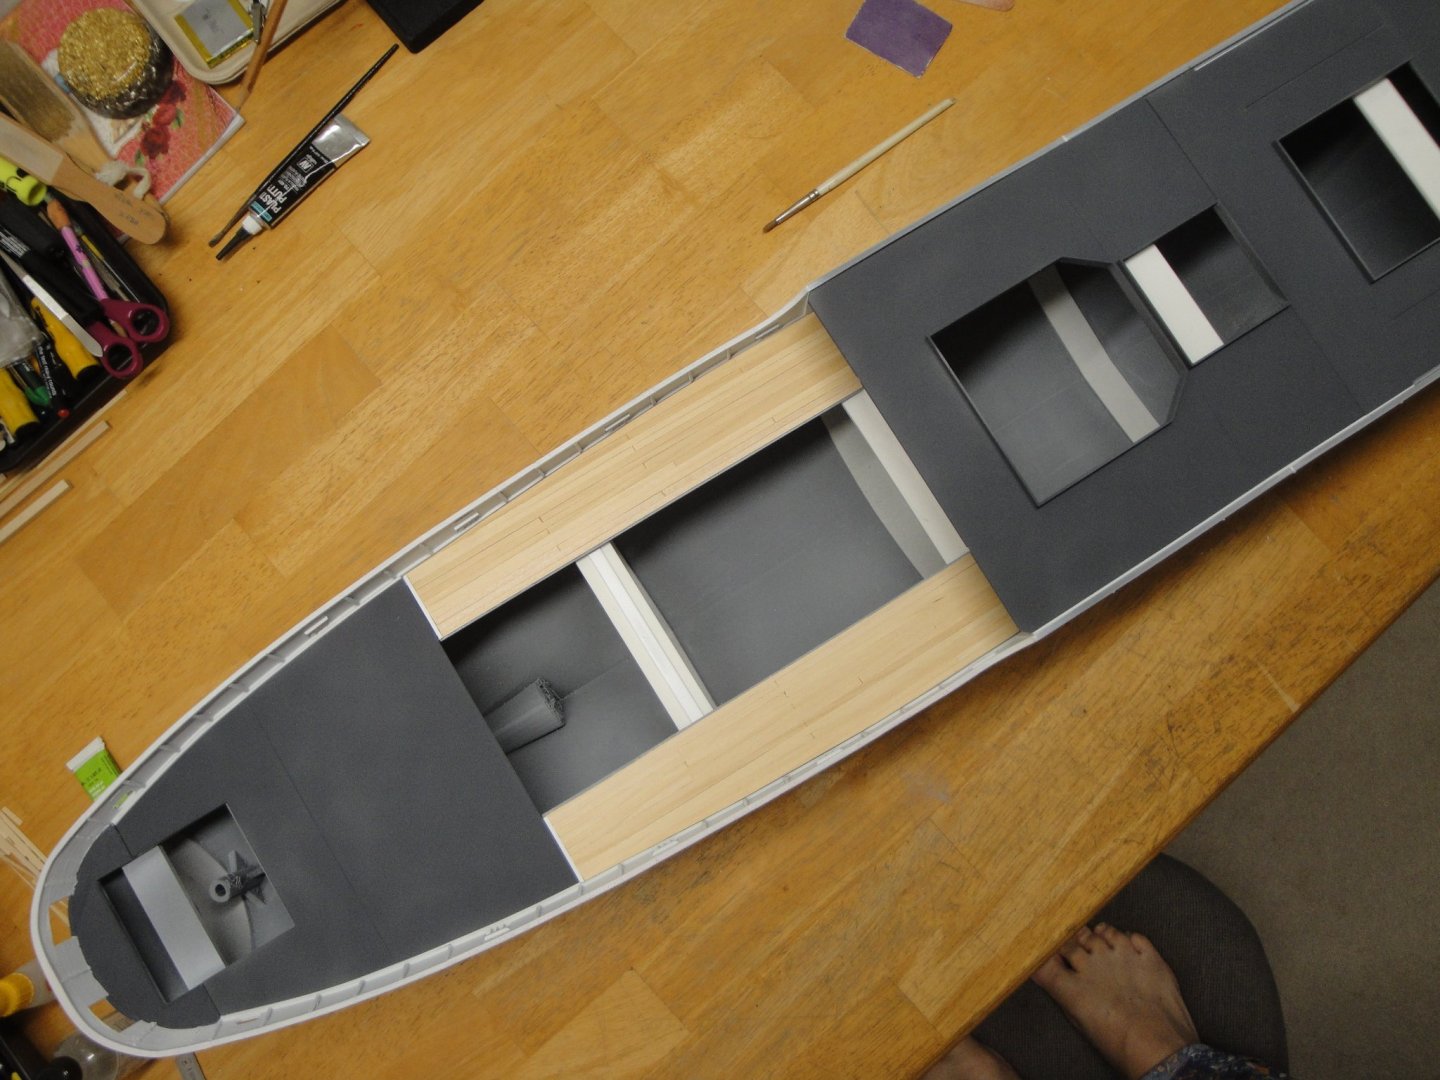
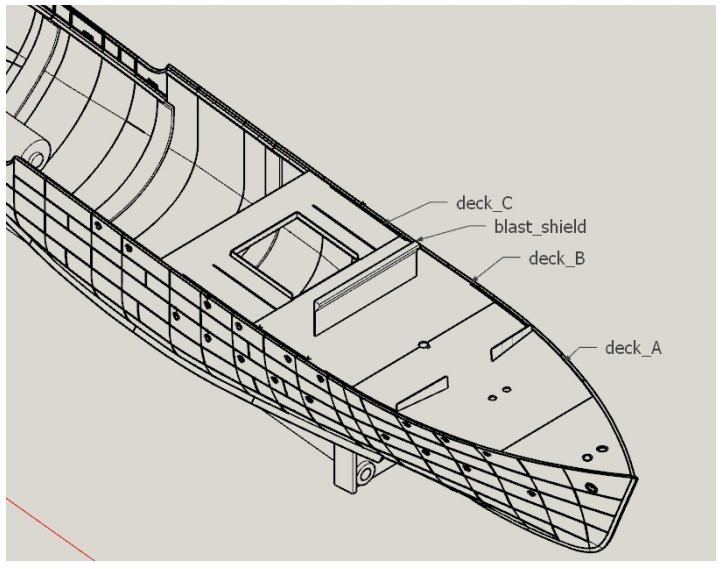
A bird's eye view of the decks system:


Yves
- king derelict, gjdale, AON and 14 others
-
 17
17
-
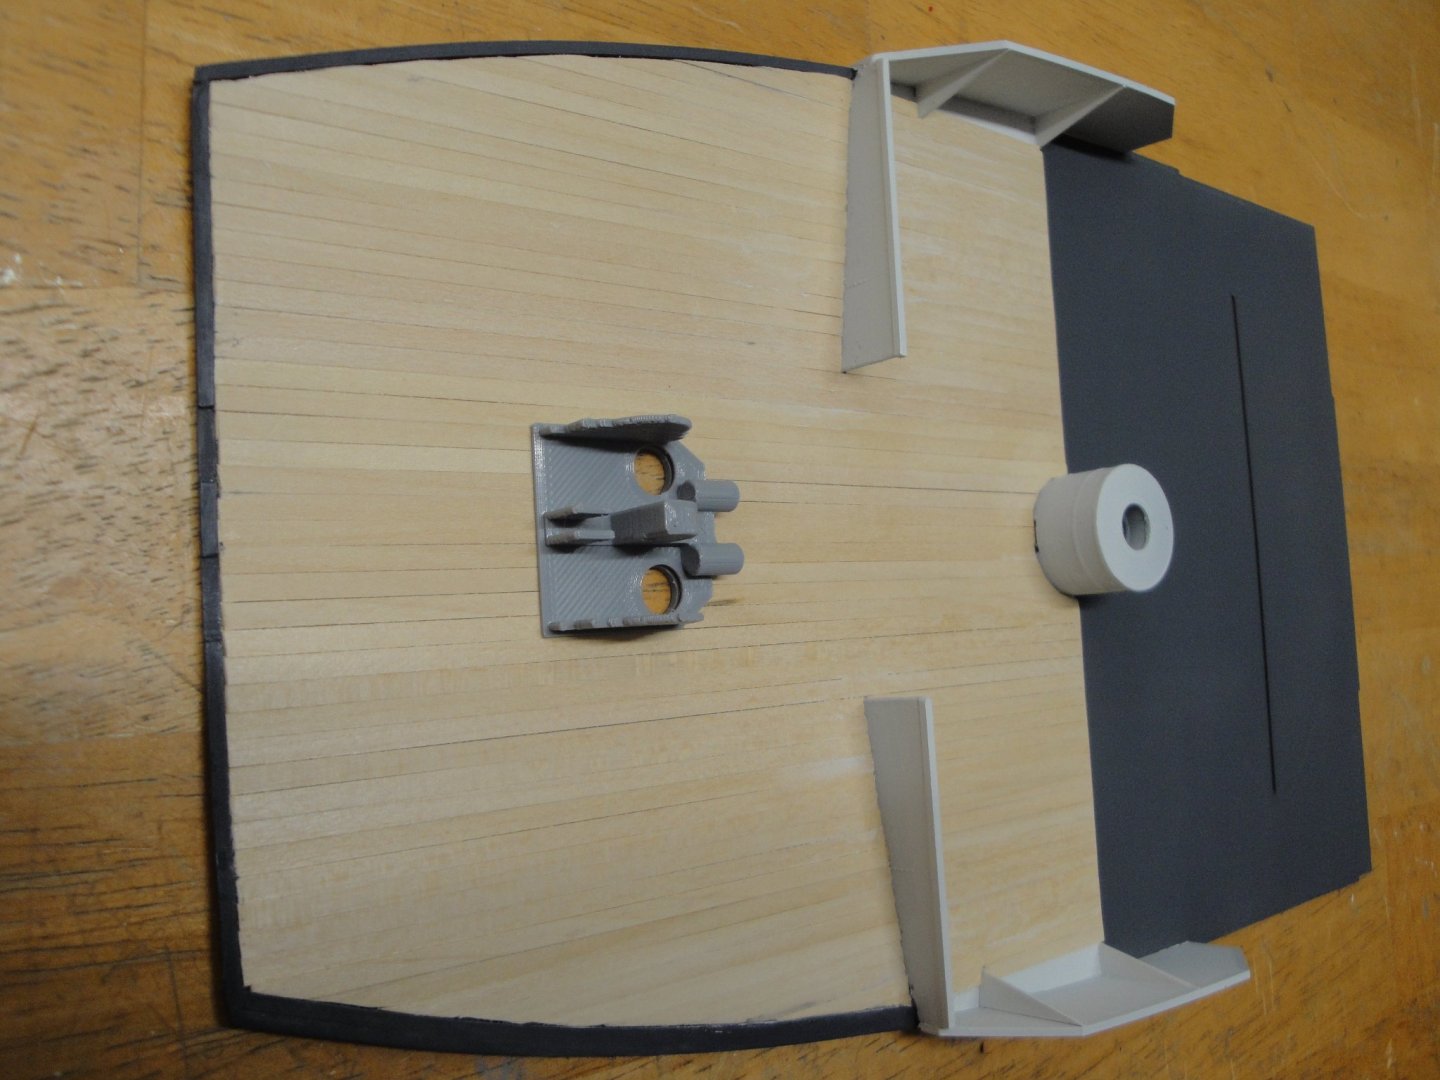
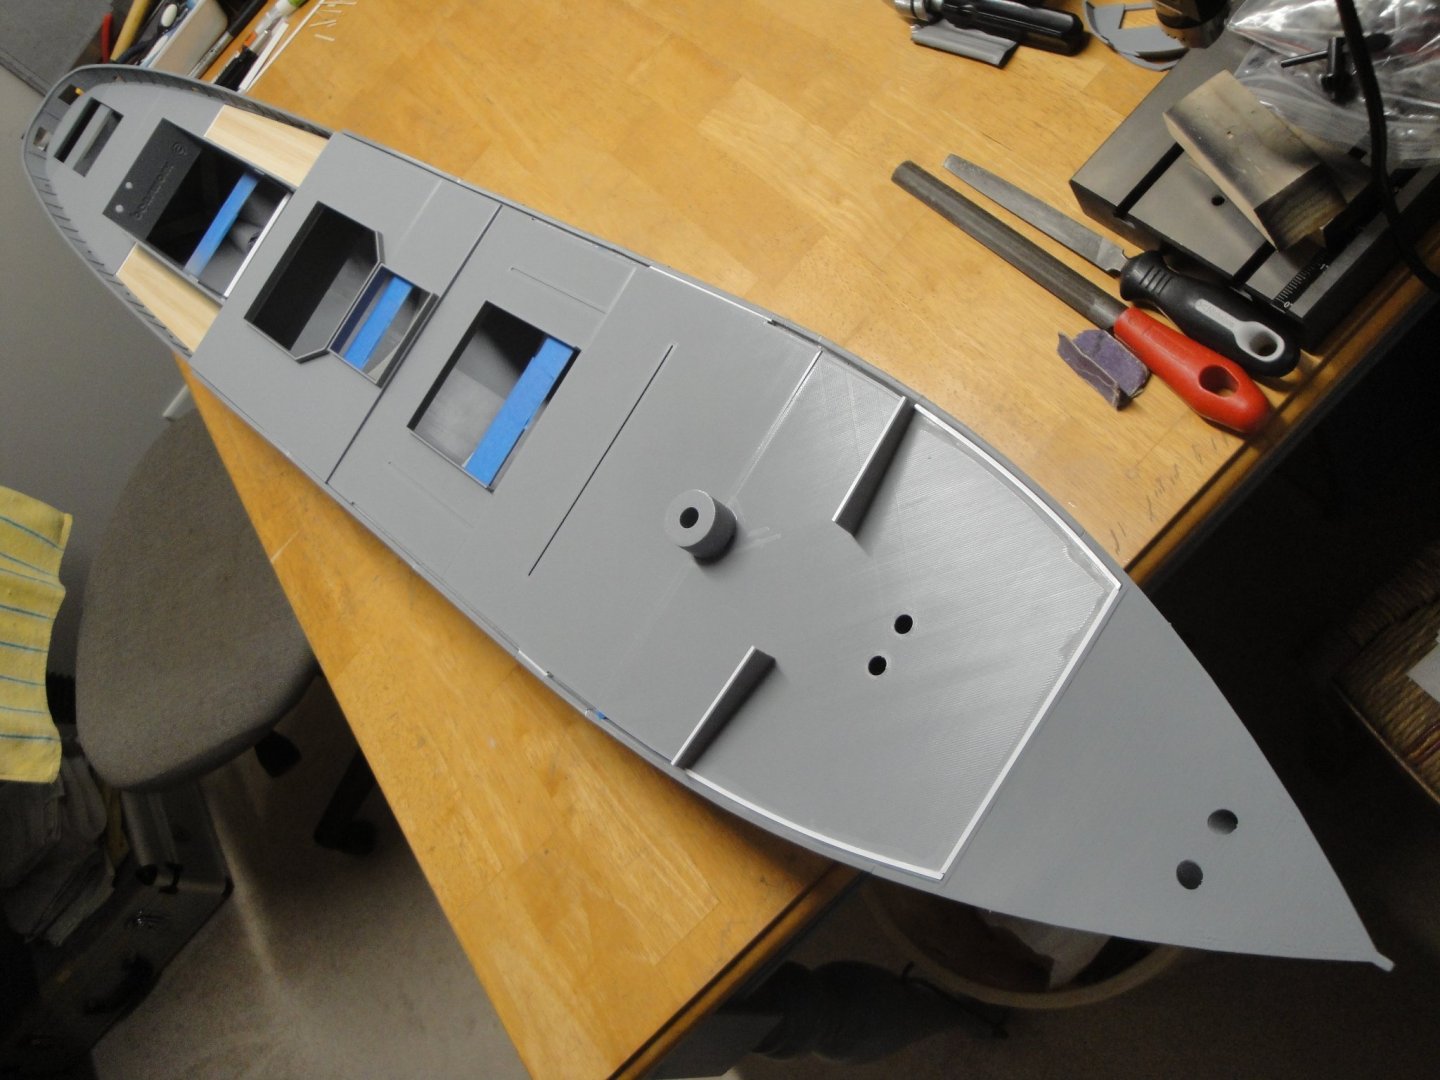
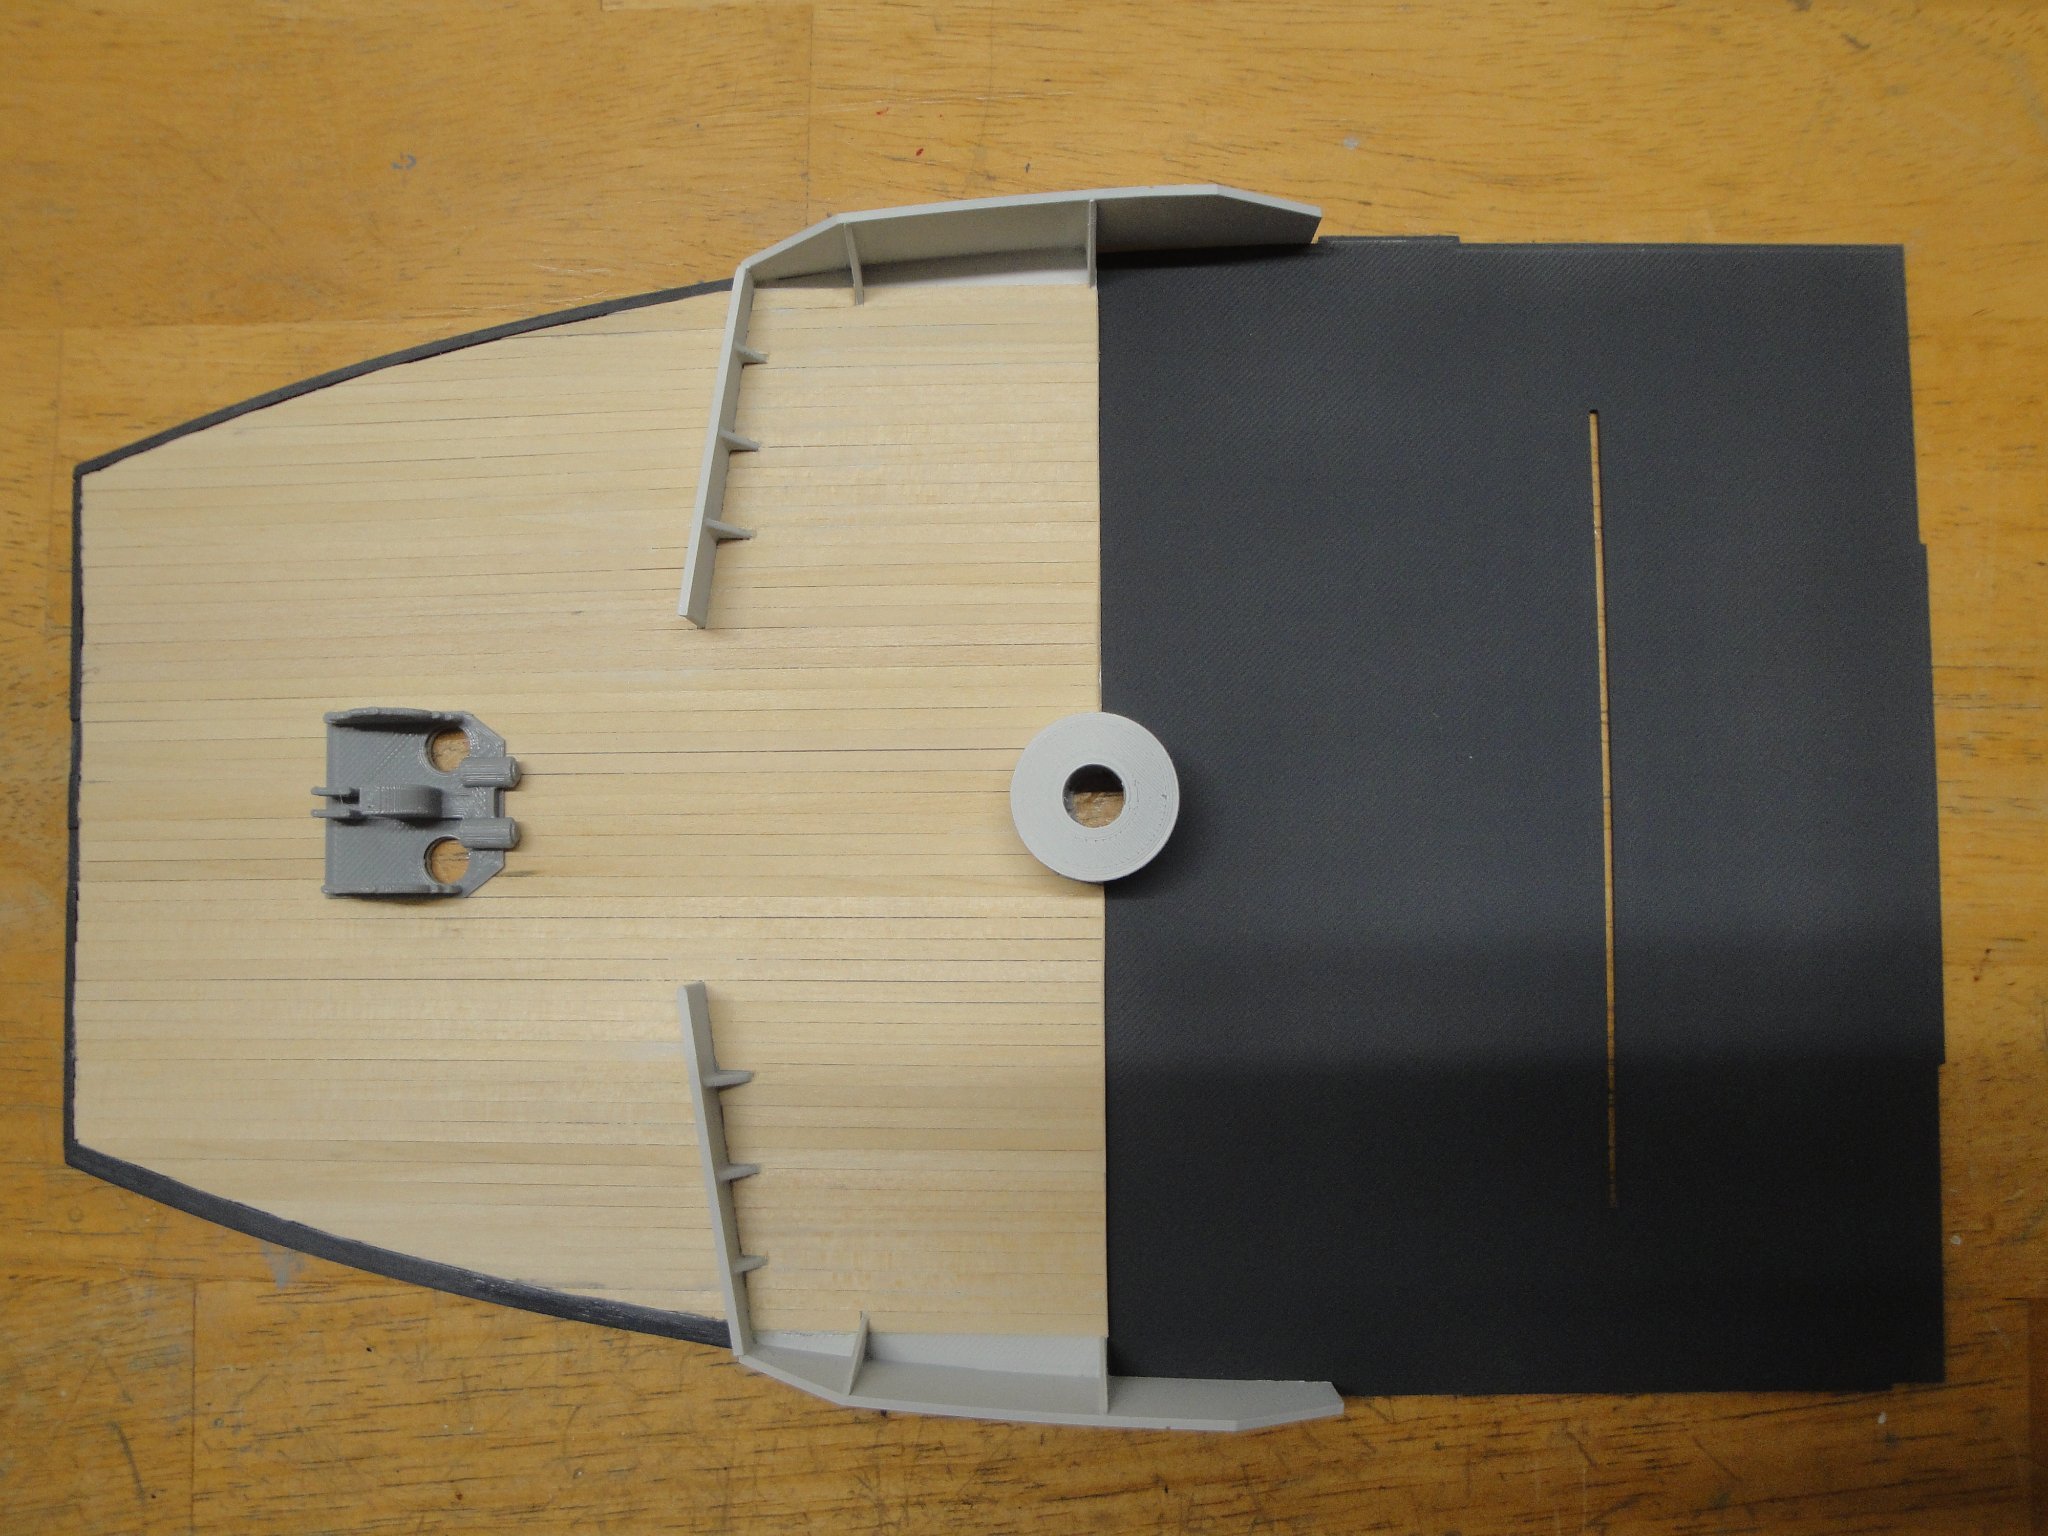
All the decks are fitting perfectly, where I want them to be, and this is what it takes in terms of styrene strips to get to the expected results:
With this "calibration", the transition from planked wood decks and metal decks is smooth and nobody will stumble, during some action.
Yves
-
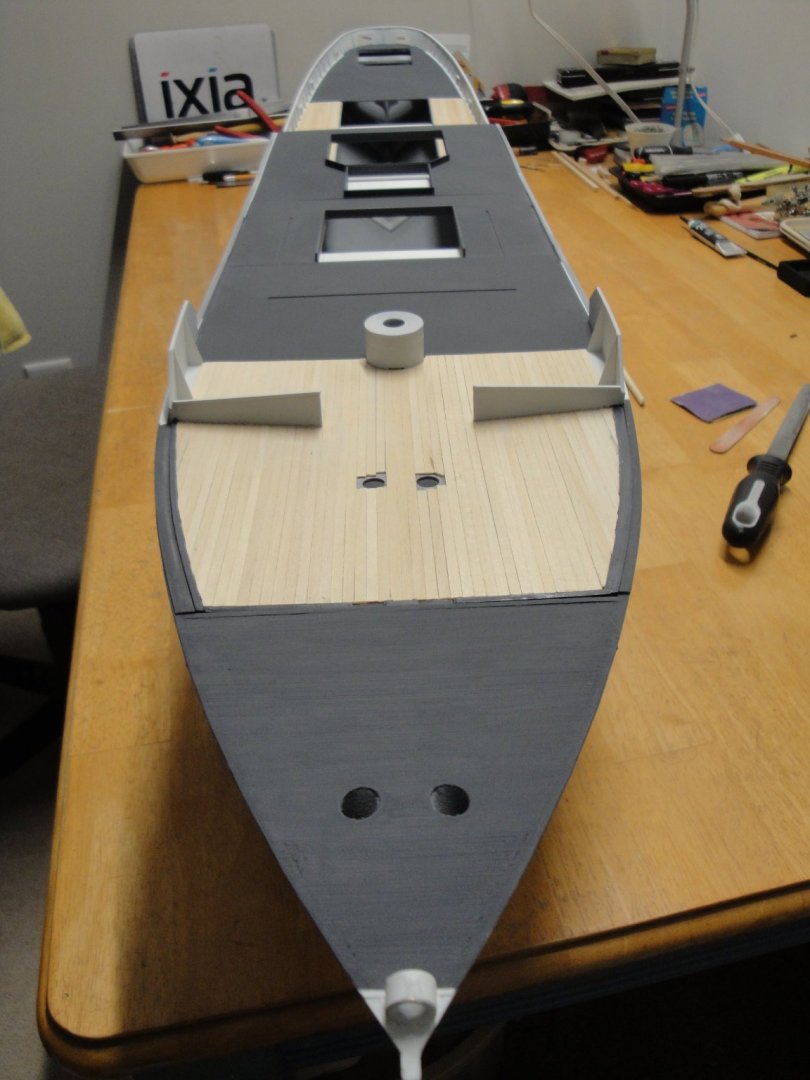
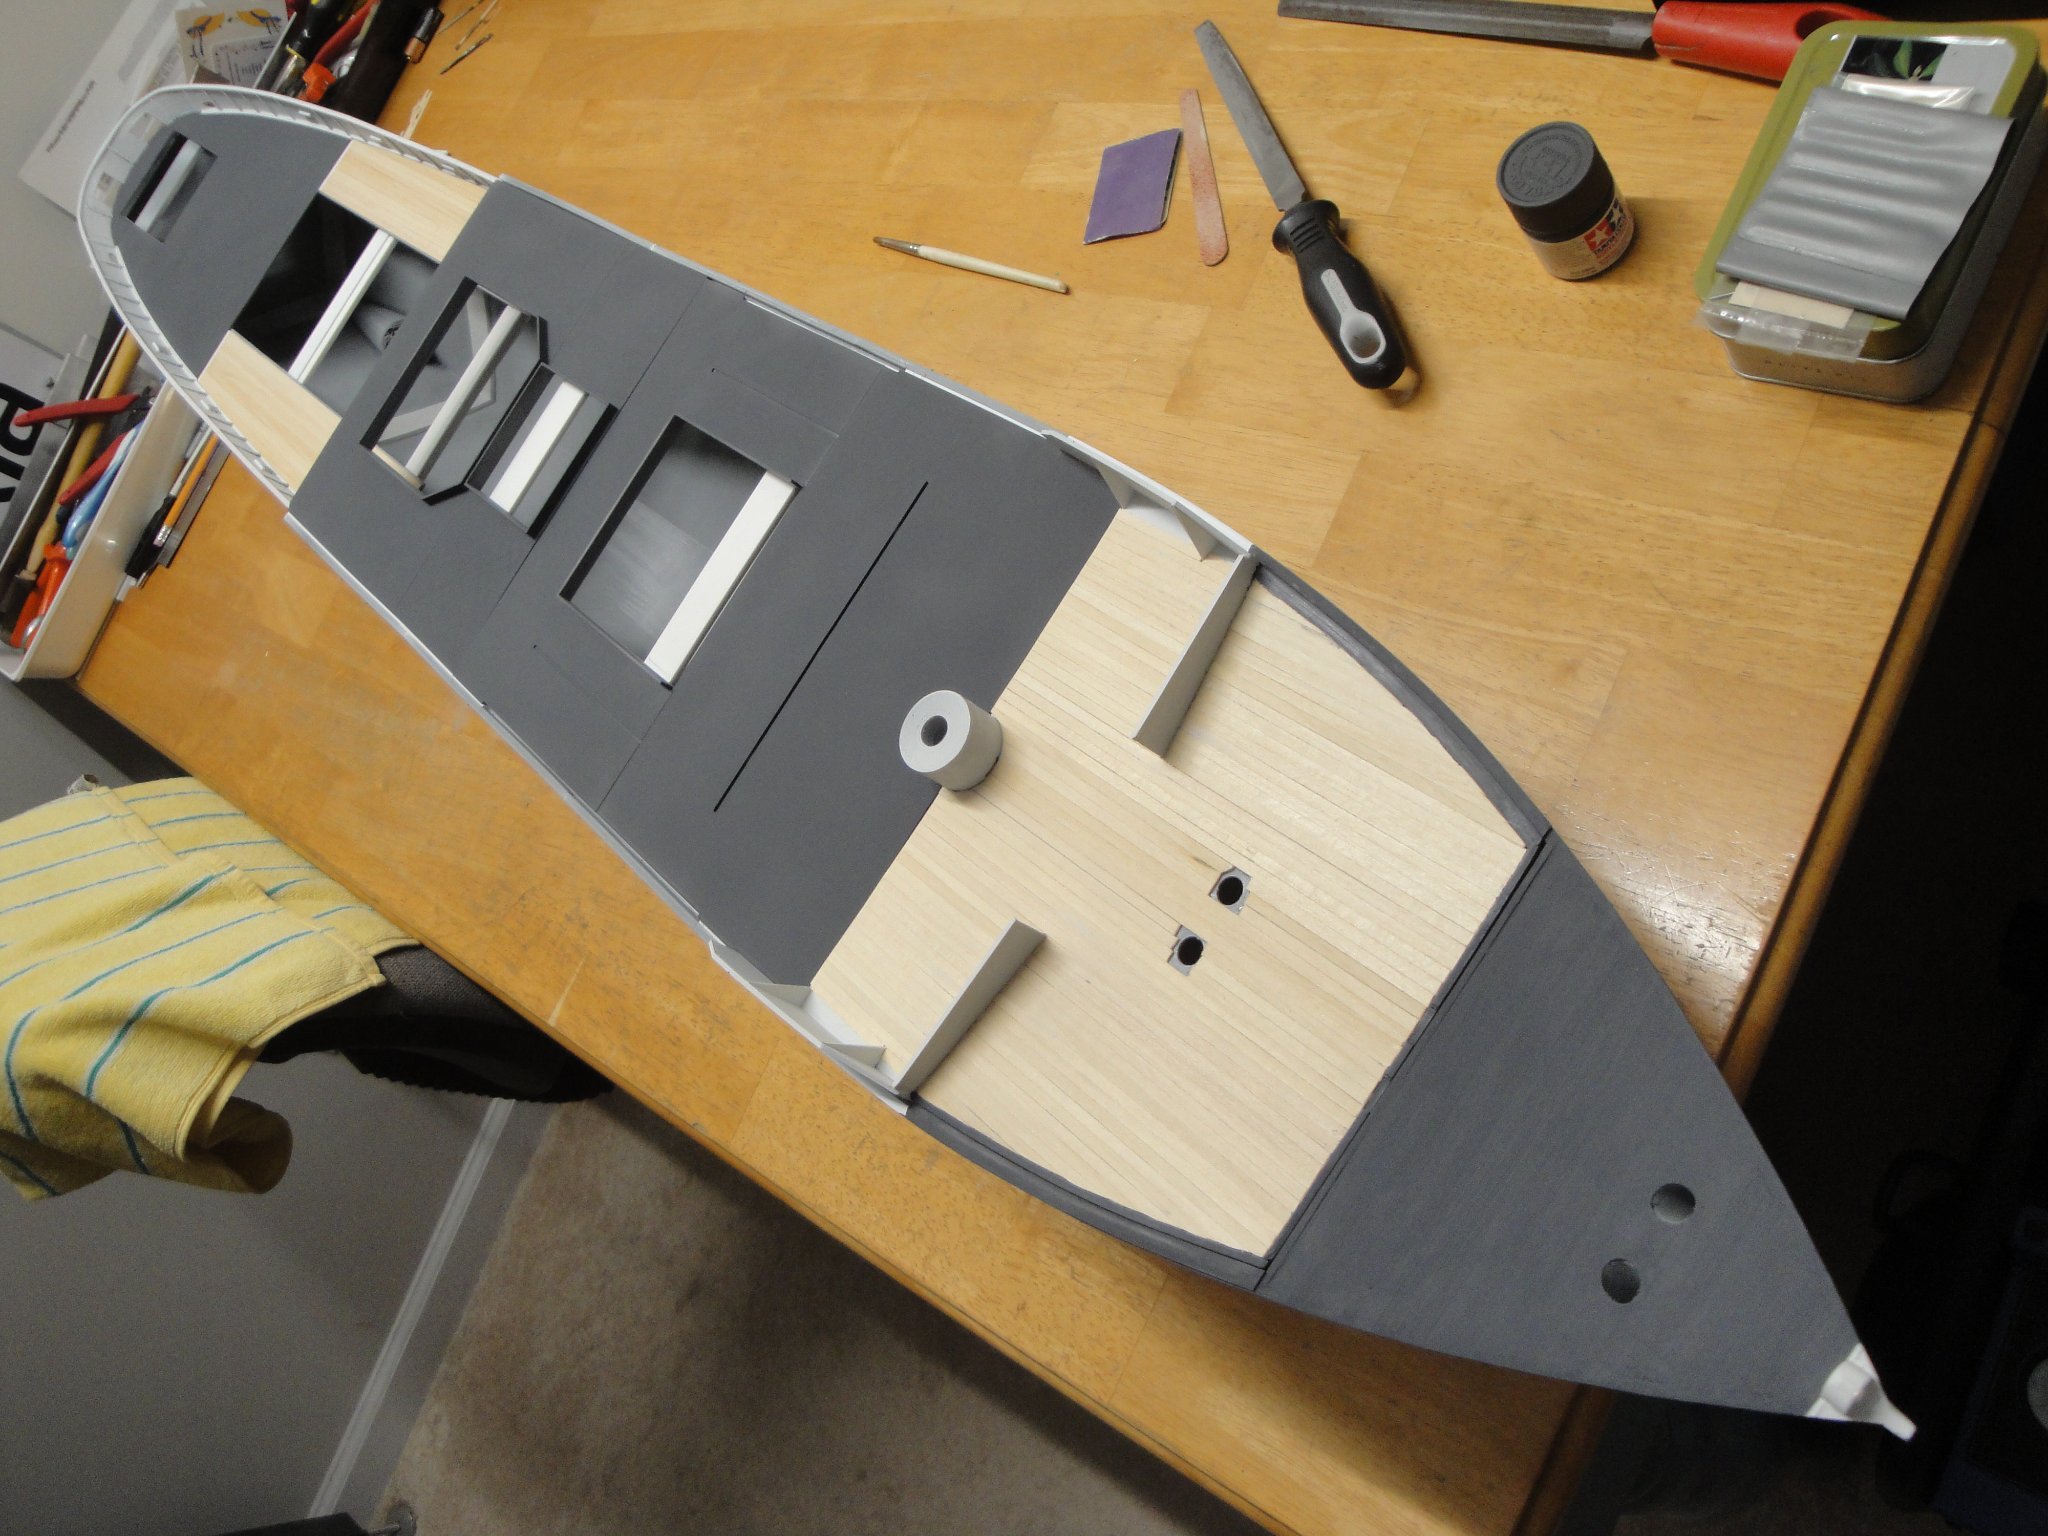
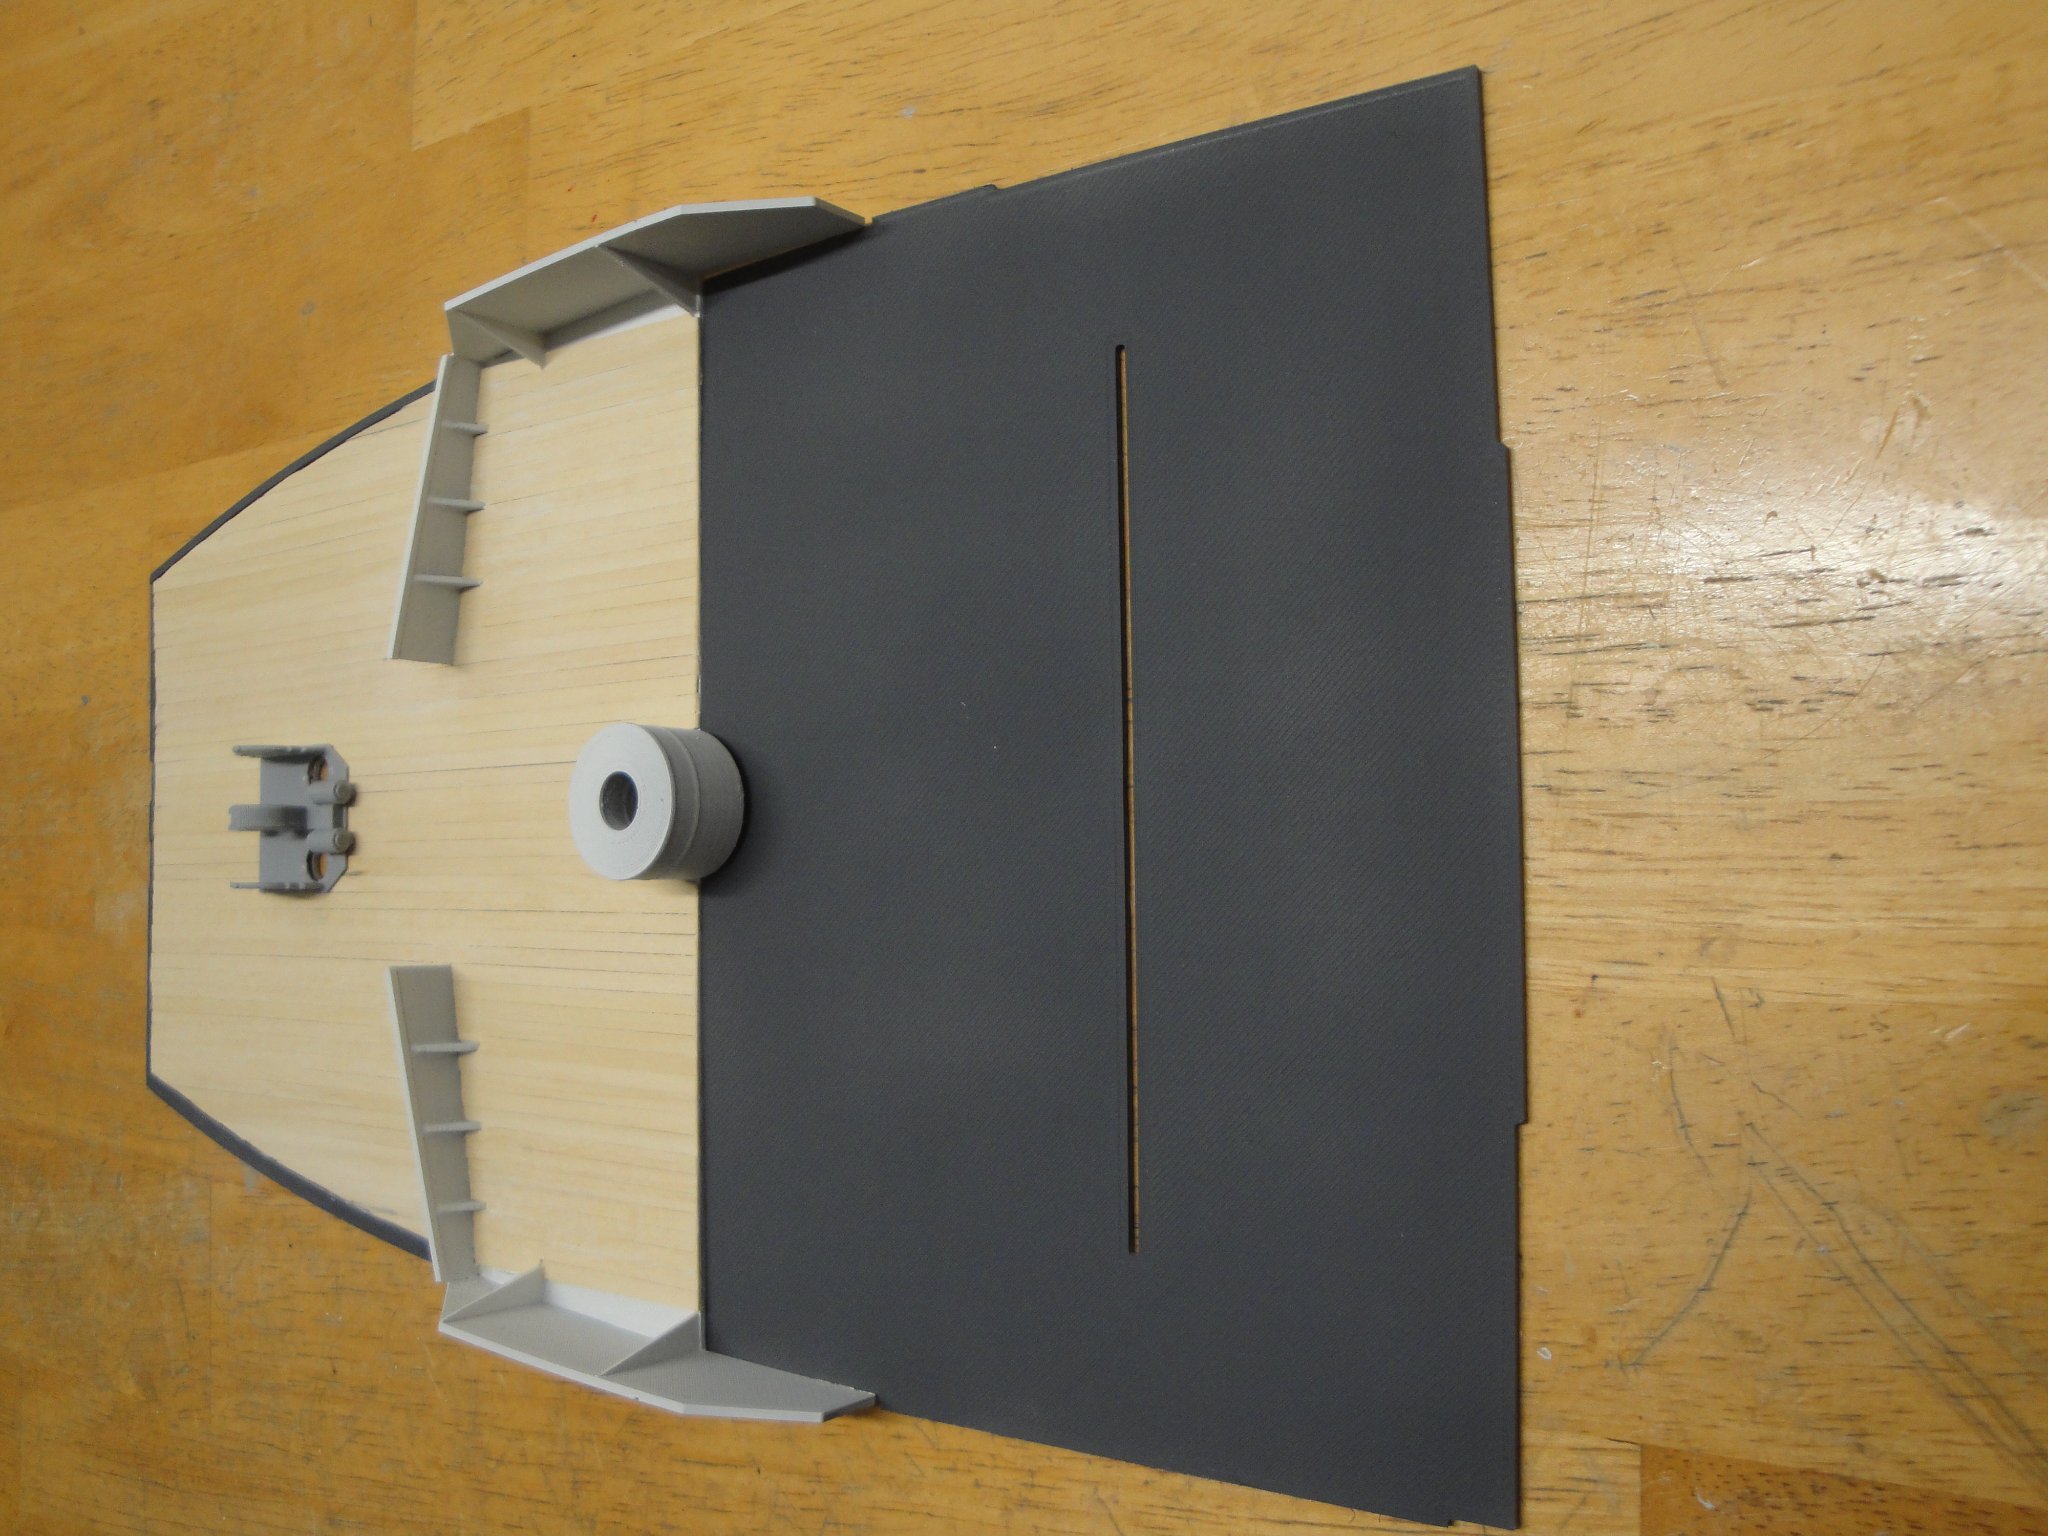
A little change of pace with some wood planking. It is always nice to go back to the softness and smoothness of basswood wood.
The planking is done with Model Shipways 1/32 x 1/8 strips, carefully cut and fit around the bow breaker. The second deck (Deck #B) is painted with Tamiya Dark Grey. The "wave shield" is painted with Tamiya Flat White with 60 drops of light gray and 20 drops of IJN gray. Strange recipe, but I like it....

From the color of the breakwater, one can derive easily which Corvette I will be trying to model....
Yves
-
21 hours ago, king derelict said:
When I imported the Hull #2 stl file into Cura I got model error messages. Did you get the same thing and just ignore them or fix them somehow?
Your photo shows hull section 2 printing with a skirt I think. When I tried to do that it wouldn't slice the model; I assume because there wasn't enough room on the plate for the skirt? How did you do that?
Sorry for the detours to your log. I am solidly in awe of your progress.
Alan
Alan, I had no software issues importing whichever file. Note that I am using the CURA program that came with the Creality machine, not the base CURA that you can download for free:

Not sure if it makes any differences. Also, the Profile is set for ENDER-3, but I am sure you have that already.
Yves
-
Alan,
I am pleased to see that you started this Build Log and went full ahead with the building of this 3D printed model. I am also sad that you ran into so many frustrations with this printer.
My first attempt was with the QIDI IMate S printer which was a pure disaster at $500. It printed for exactly 1 hour and 30 minutes and stopped forever, feeding the filament. This unit was quickly returned to Amazon and I went with the Creality Ender-3 V2. After the initial debacle (QIDI), the little Ender-3 was a breath of fresh air. I suspect, I may have been lucky as I have not touched the levelling since day one.
Have you tried printing a piece of deck? That should stick very well to your bed.
Yves
- Canute, mtaylor, Old Collingwood and 3 others
-
6
-
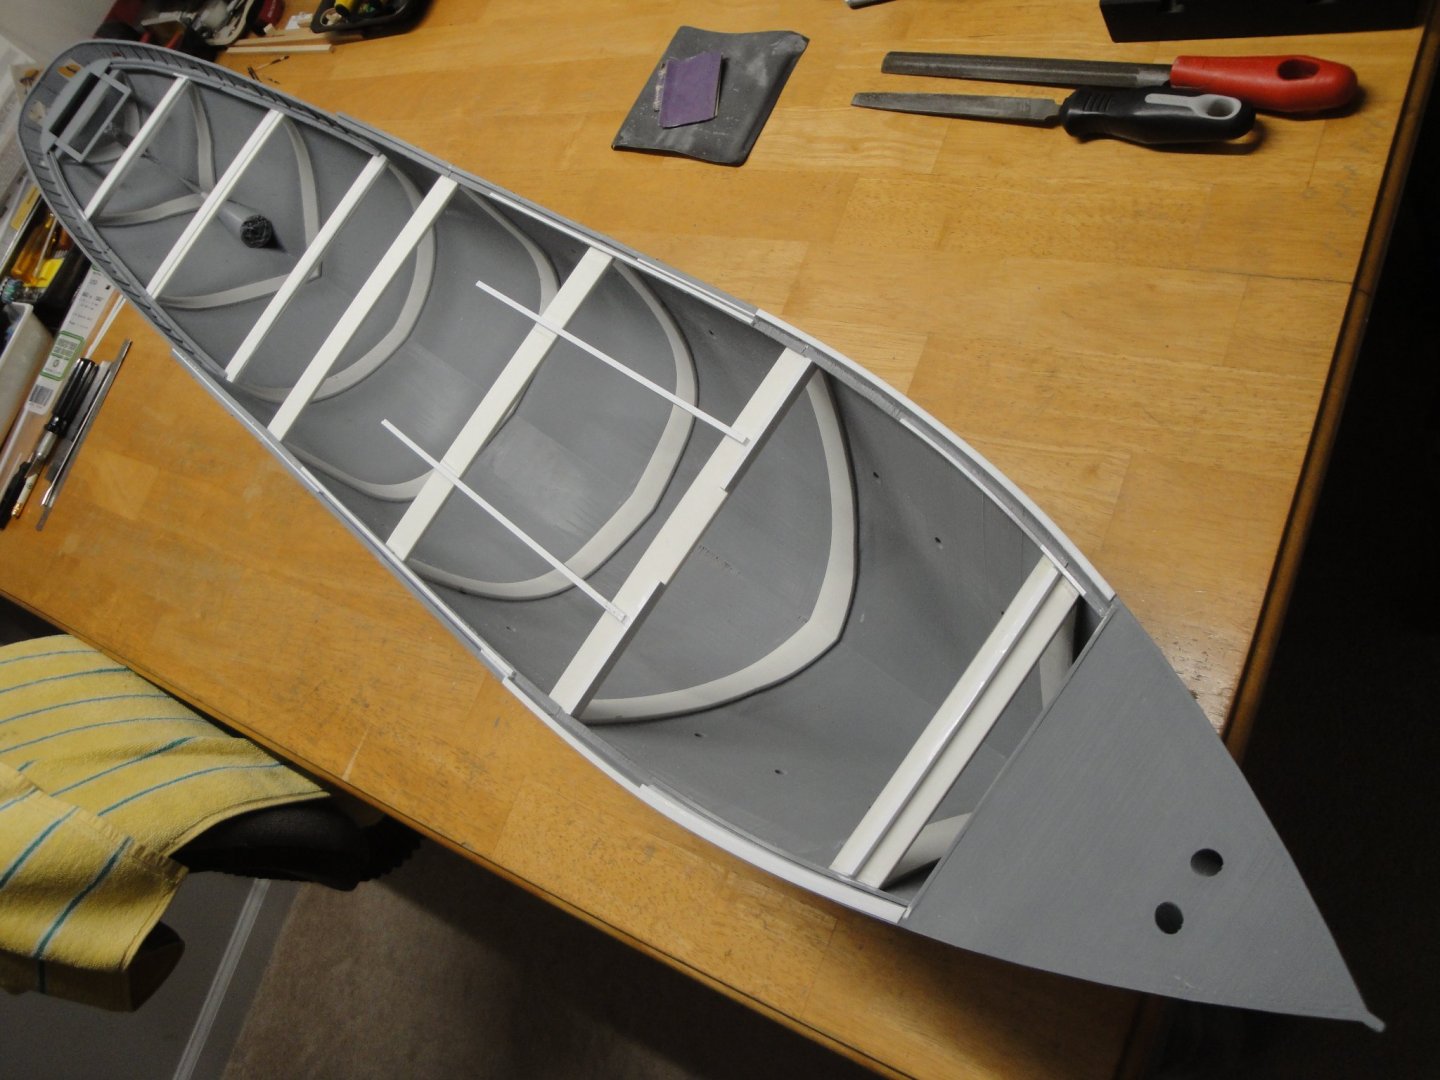
Super skeleton. Great job.
Yves
- lmagna, Old Collingwood and mtaylor
-
3
-
12 hours ago, king derelict said:
.jpg.465eac10c0c8f2deeb22a44bb75cdd63.jpg)
Very nice results. One done, 8 more to go ..... 🙂
Yves
- Old Collingwood, Ras Ambrioso, Canute and 3 others
-
5
-
 1
1
-
This is incredible. This diorama is going to be huge.
Yves
- Egilman, Old Collingwood, Canute and 3 others
-
6
-
Impressive of details. Beautifully made.
Yves
- lmagna, mtaylor, Old Collingwood and 2 others
-
5
-
11 hours ago, king derelict said:
Yves
You are working masterfully on this.
I set up my newCreality printer and downloaded the Flower corvette files and so far have failed to print anything. Eight attempts failed to adhere to the bed and either created a ball of spaghetti as the filament detached or quickly deformed the hull section as part of the print moved on the bed. I have gone to using a brim around the part which may give me dimensional issues later but that has stuck to the bed at last but then nine hours into the print the filament snapped; looks like an air bubble in the filament. Attempt number ten is three hours in and we shall see what happens. 😄
Thanks for the inspiration to try this
Alan
Alan,
Please, do the following:
1-To prevent the spaghetti ball, I would look at the leveling of the glass bed. Again, use the small flyer (with a QR code printed on it) provided in the plastic bag with the documentation. Do that on all four corners, and make sure that there is a slight resistance when pulling on the sheet of paper. Once happy, go around all four corners one more time. And do it a third time....
2-Clean your glass bed with isopropyl alcohol. There may be finger grease on it and that will prevent adhesion of the PLA.
3-Make sure the bed is at 60 degrees and the nozzle at 200 C.
4-Use good quality and new filament. I am happy with Overture and the spool costs $23 from Amazon.
5-Unwind the spool slightly to help with the feeding of the PLA filament. During a long print, you may want to monitor the spool and make sure that the filament comes out freely, by spinning and unwinding the filament from time to time.
6-Watch Just-Vlad video again on how to set up your printer.
7-Wait for the parts to cool down before attempting to remove it from the glass bed. In my case, large parts (i.e. decks) are so stuck, I just cannot remove them until it is perfectly cold.
Once you get the leveling right, there won't be any spaghetti balls. Also, for large parts. make sure you remove the cleaning track/string (on the left side) by pulling the string from the back of the printer, before it starts printing. You have to be quick but it helps.
Good luck.
Yves
-
-
Beautiful Syren in the background.
Yves
- Canute, Baker, Old Collingwood and 4 others
-
7
-
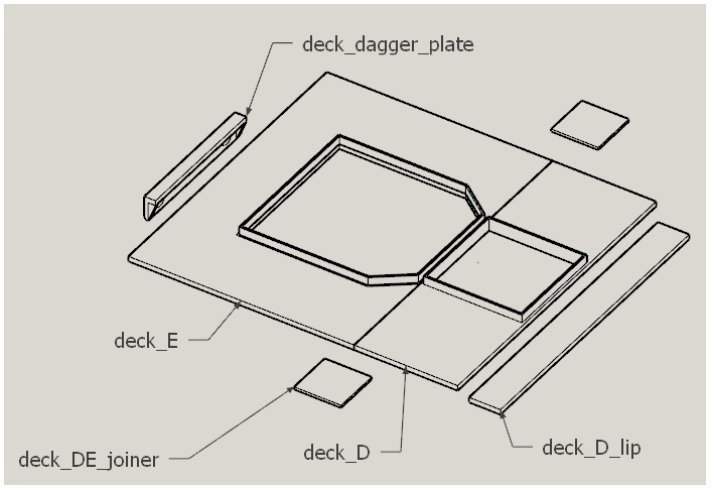
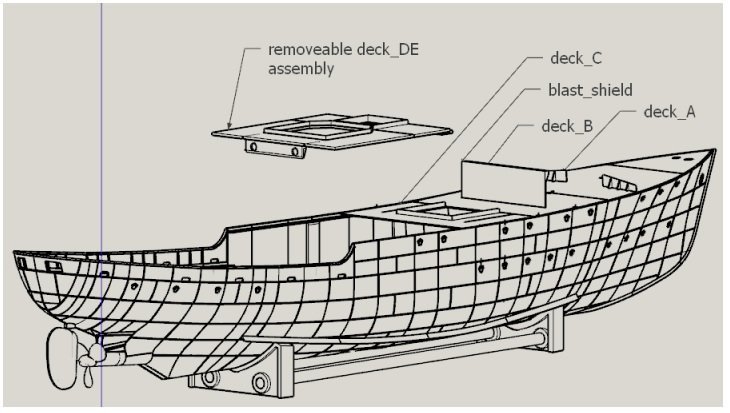
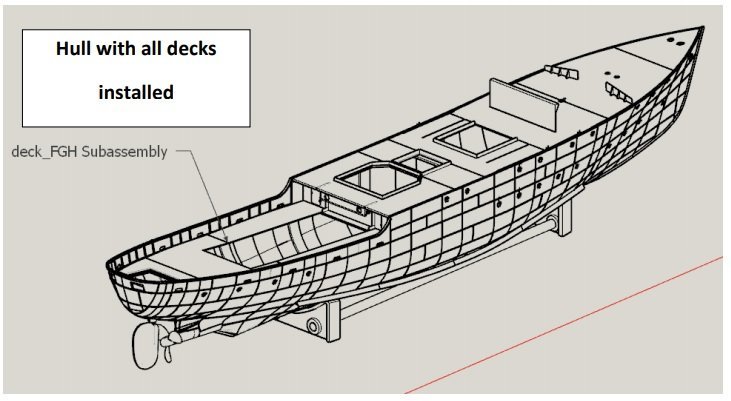
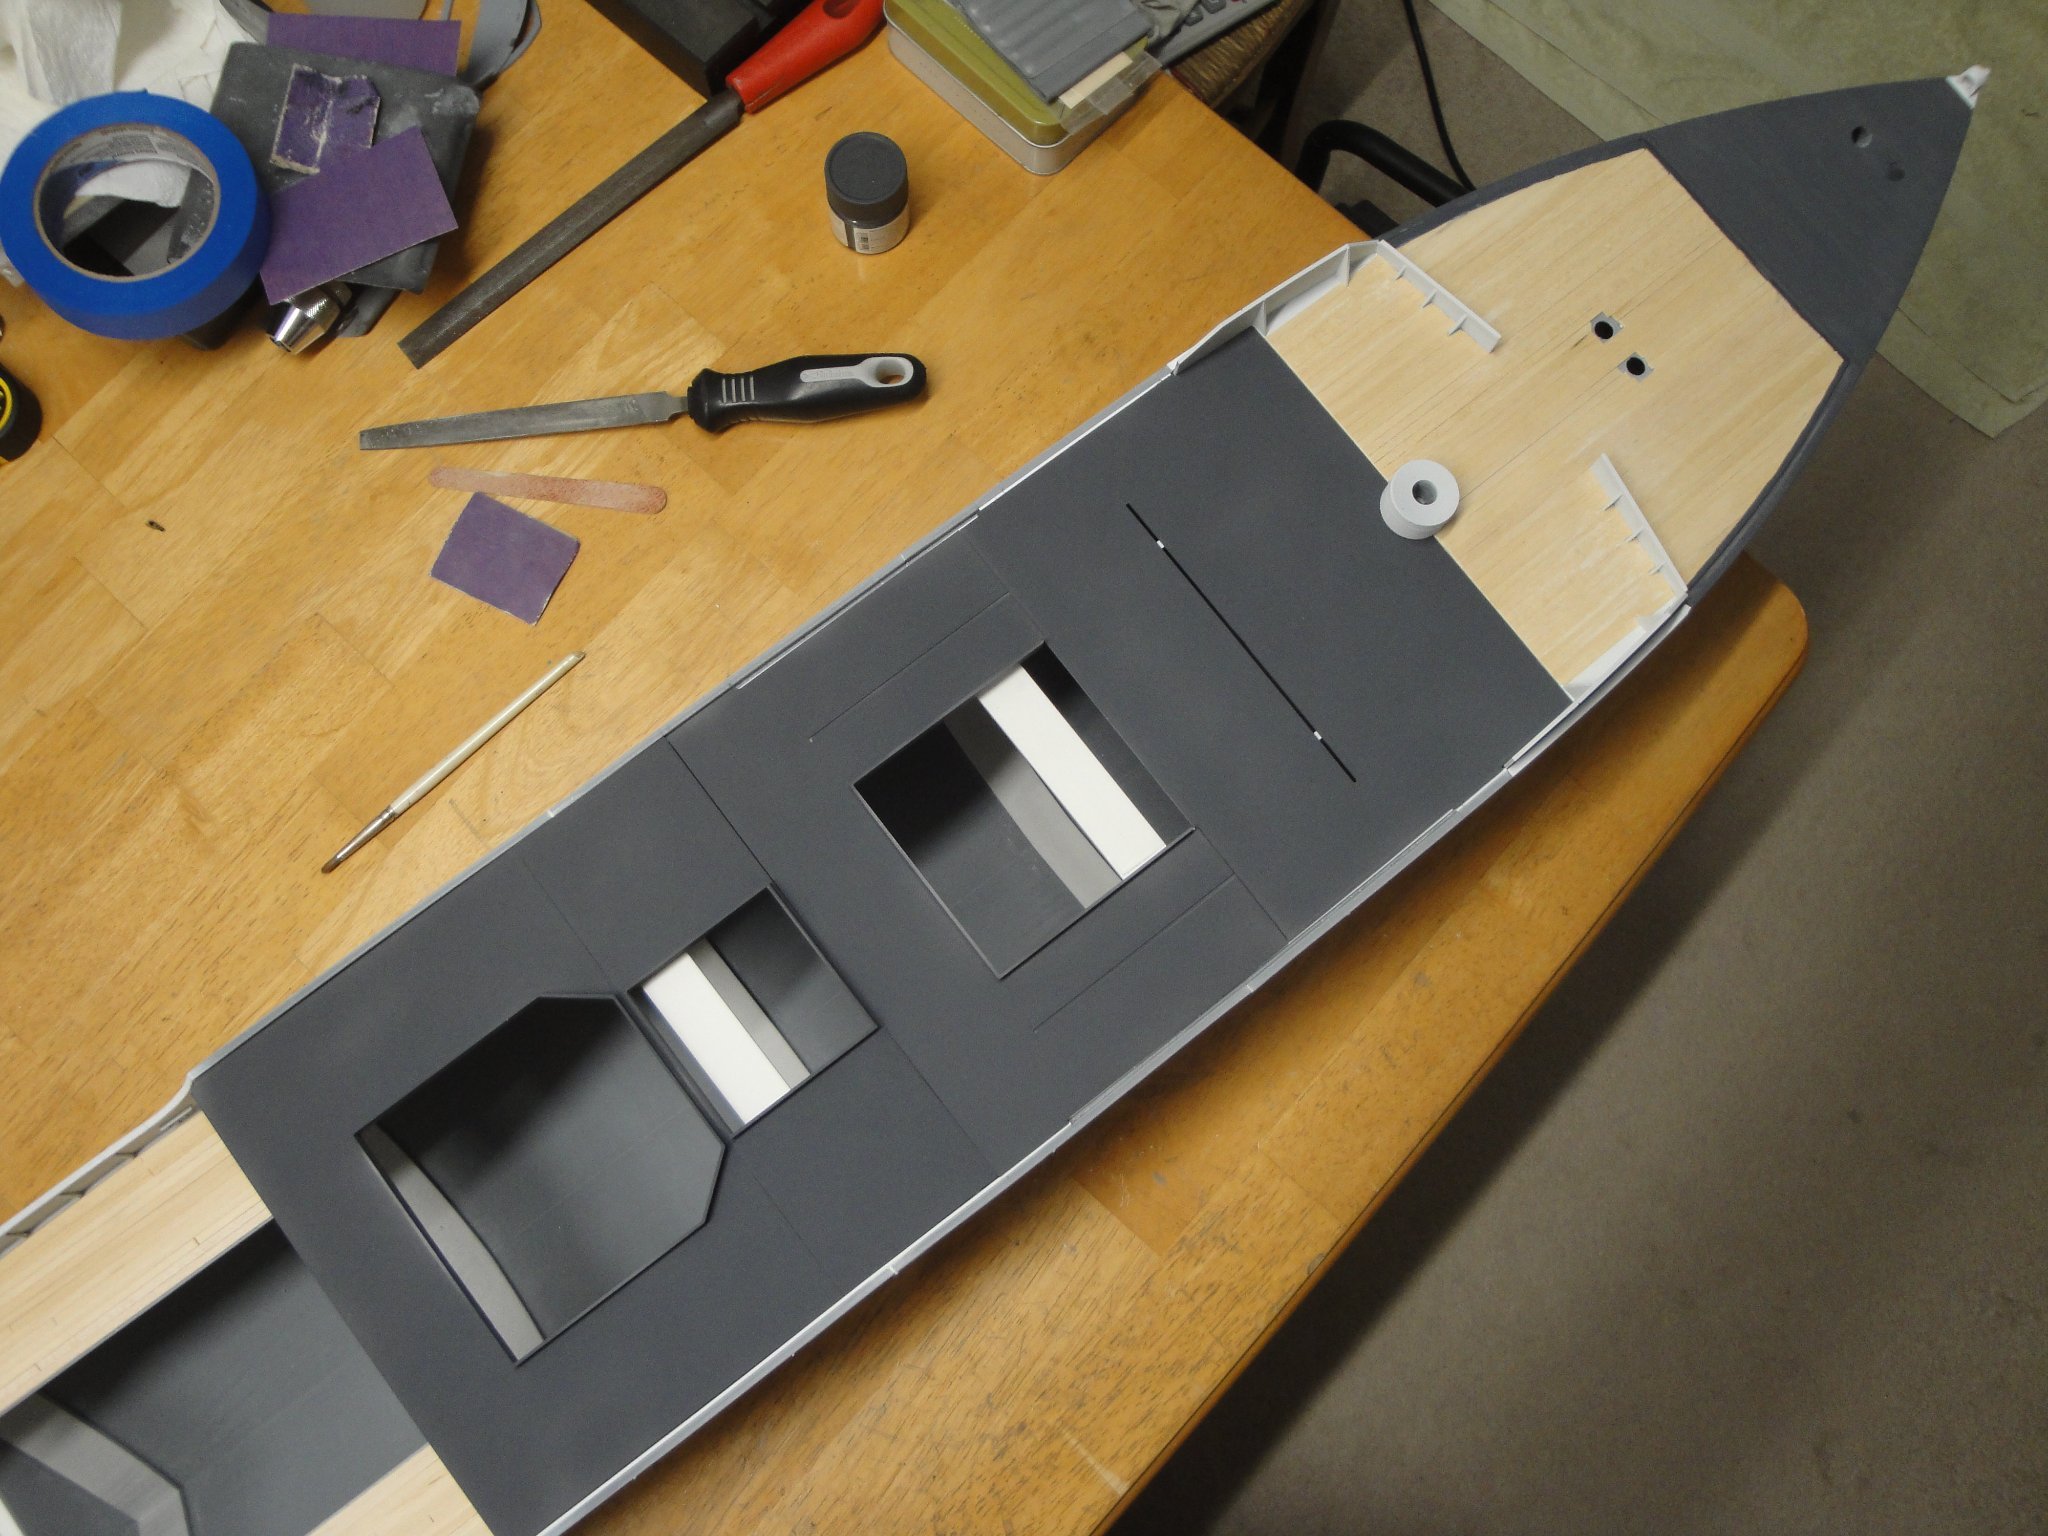
More progress on the decks:

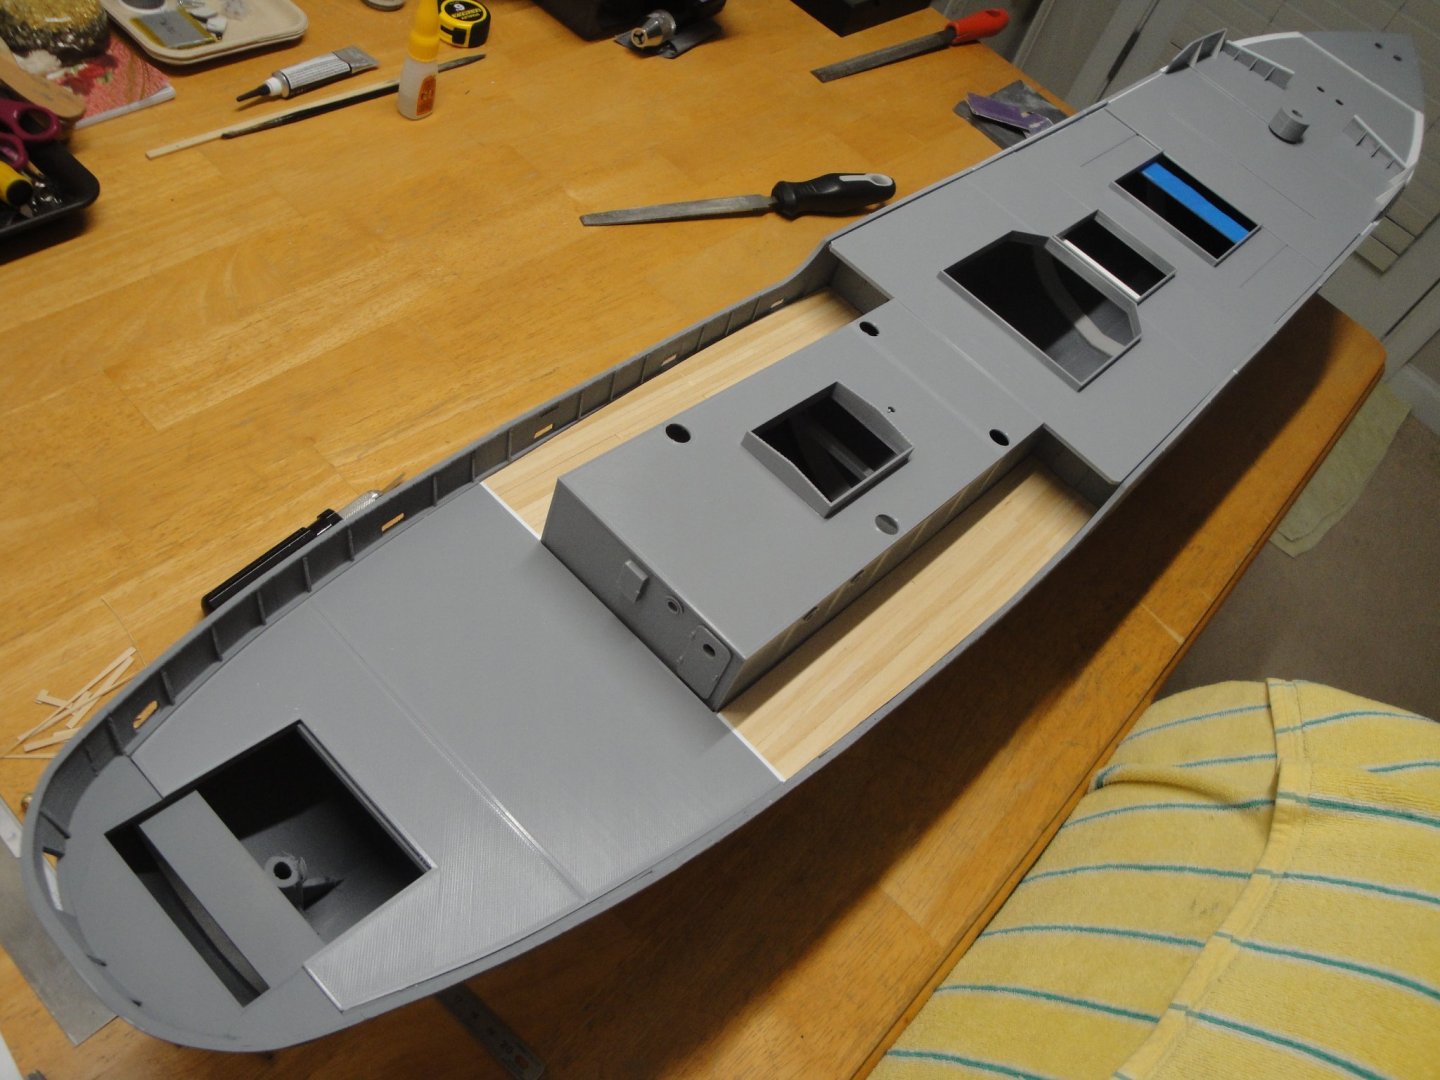
I still have to raise and position Decks C, D-E (now glued together) in the hull. Deck F is the vertical wall of the engine room. The goal is to have a perfect fit for each of these decks, and be able to work on them as separate module, paint them independently and minimize the masking of such a large model.
Then it will be time to pull out the airbrush, with the large nozzle....
Yves
-
-
Very well summarized, Craig. Yes, very few CAD drawings can be converted to 3D Printing candidates. And then, you have to cut them in small pieces suitable for your printer. Not an easy task.
Yves
- lmagna, popeye the sailor, mtaylor and 6 others
-
9
-
Mike,
You will find most answers to your questions in the previous posts. The license depicts a typical "Generic" Corvette (after retrofitting = long Forecastle). The designer also created another type of Corvette: The Castle Corvette (see picture below). No, I am not planning to show any inside. My goal is just to finish the hull.
Yves
- GrandpaPhil, mtaylor, lmagna and 8 others
-
11
-
Kevin, this is a superb model and a very nice coffin.
Yves
- Egilman, Old Collingwood, bruce d and 8 others
-
11
-
13 minutes ago, Landlubber Mike said:
I have the Revell 1/72 kit in the stash, which is a pretty big hull. How big is this going to be at 1/48? Do you need a special sized printer to be able to print the larger pieces?
Thank you Mike for the compliments. Yes, this technology opens the door to incredible horizons and should allow us to embrace unusual and rare model, and build them in a fraction of the time it takes for traditional wood models. I also like the fact that you can re-print parts if you damage them or that you can build a flotilla of ships, once you have acquired the license for a specific model.
Also, and of prime importance is the cost. Once you have a printer of decent size (mine is 220 x 220 x 250 mm), you can apparently build model for a very low price. In this case, I have printed ALL the parts for the hull and decks, as well as a plethora of smaller parts and the engine room, with only two spools of filament !!! That amounts to about $45 plus the glue (You use a lot and that is why MEK is the way to go). In contrast, the small strip of wood that I am using for planking the decks, are costing me more than the filament spools !!! I suspect that this Corvette can be built with 4 spools of filament and perhaps less, if you are careful and use a filling ratio of 20%.
Another incredible feature of these 3D printed model is that you can change the scale of the model, before printing. For instance, I can increase the size of parts by two and turn it into a 1/24th scale or I can reduce them and build a 1/200 scale mini Corvette. You can do what you want....
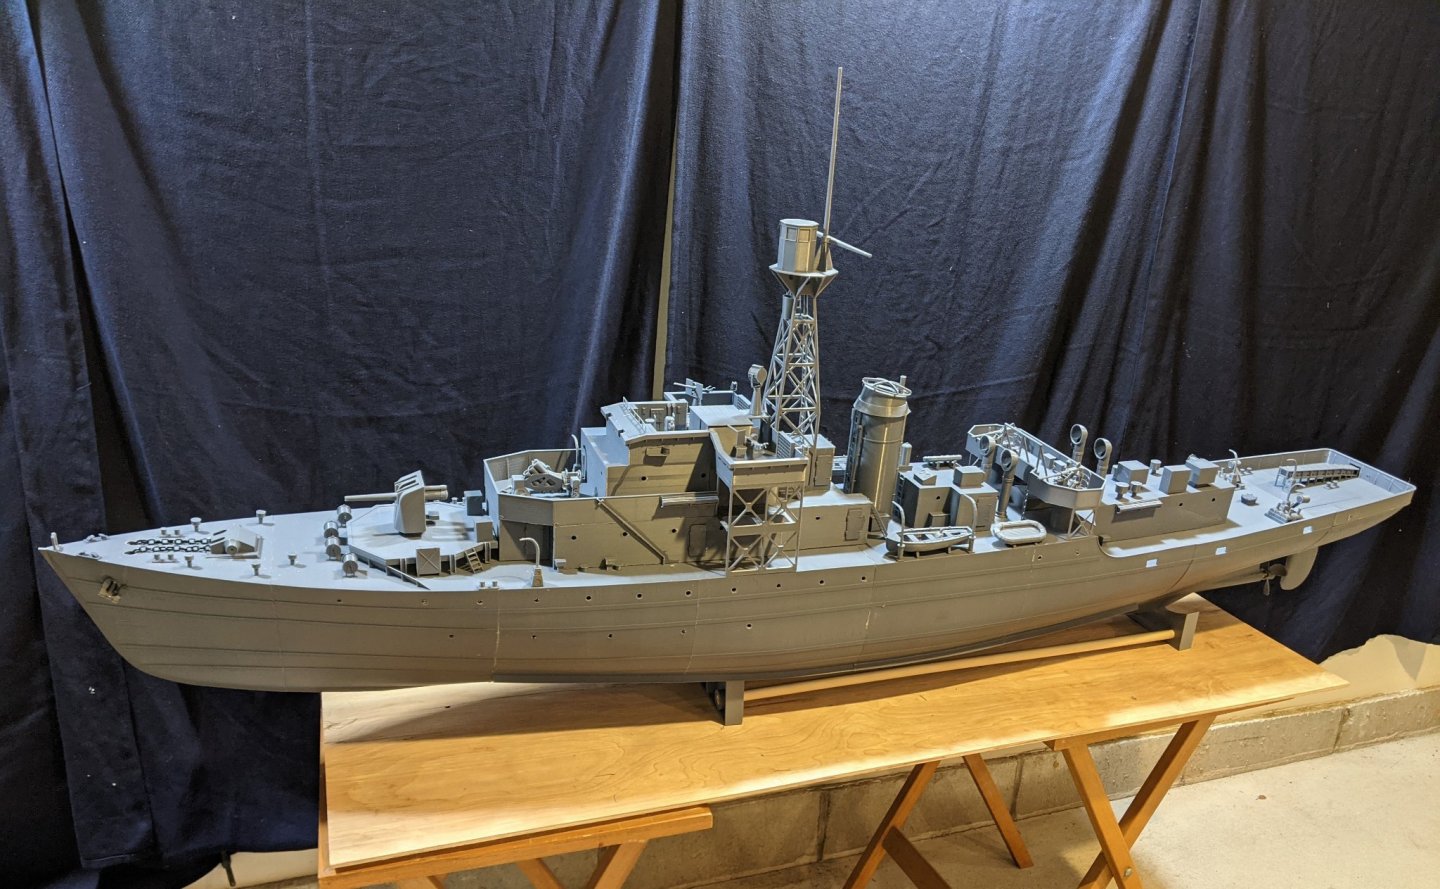
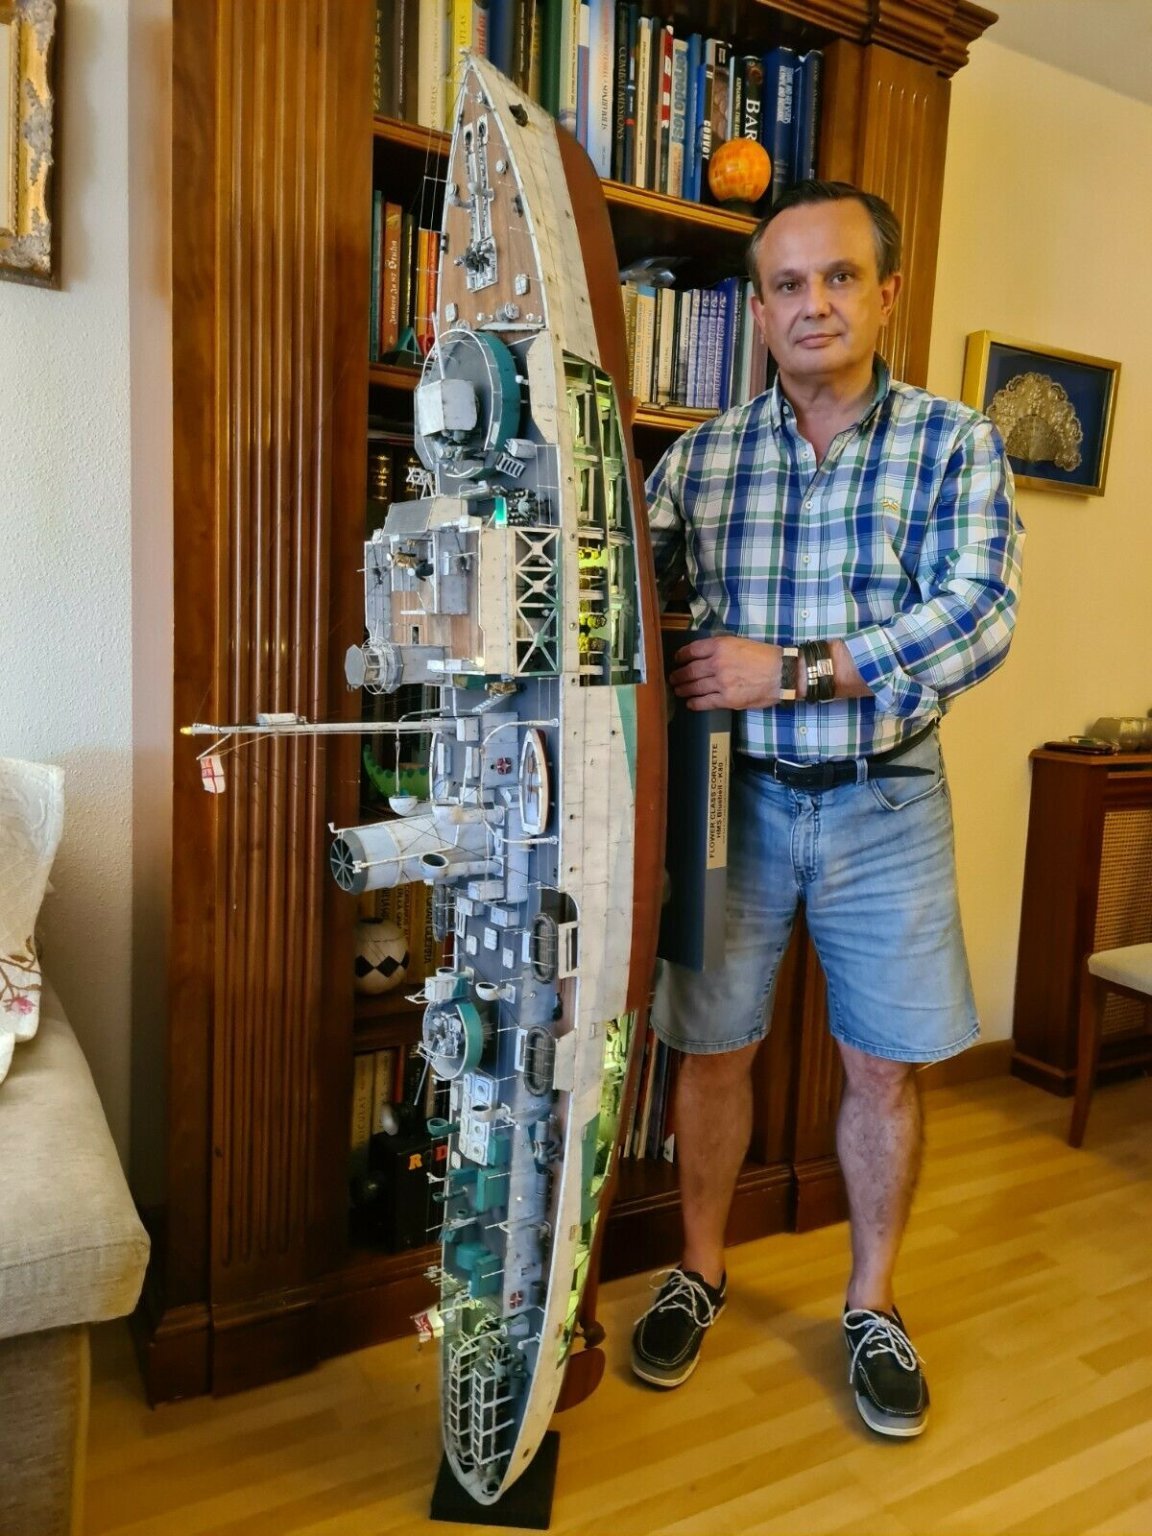
Now, regarding your question about the size, it is large, massive and will be relatively heavy: So far 2 kilogrammes of plastic. To give you an idea, here are a couple of pictures from a Spanish modeler that builds these Corvettes on commission. The front model is the Matchbox/Revell in 1/72nd scale, and the model next to him is in 1/32th scale. The model I am building will be somewhat in between.
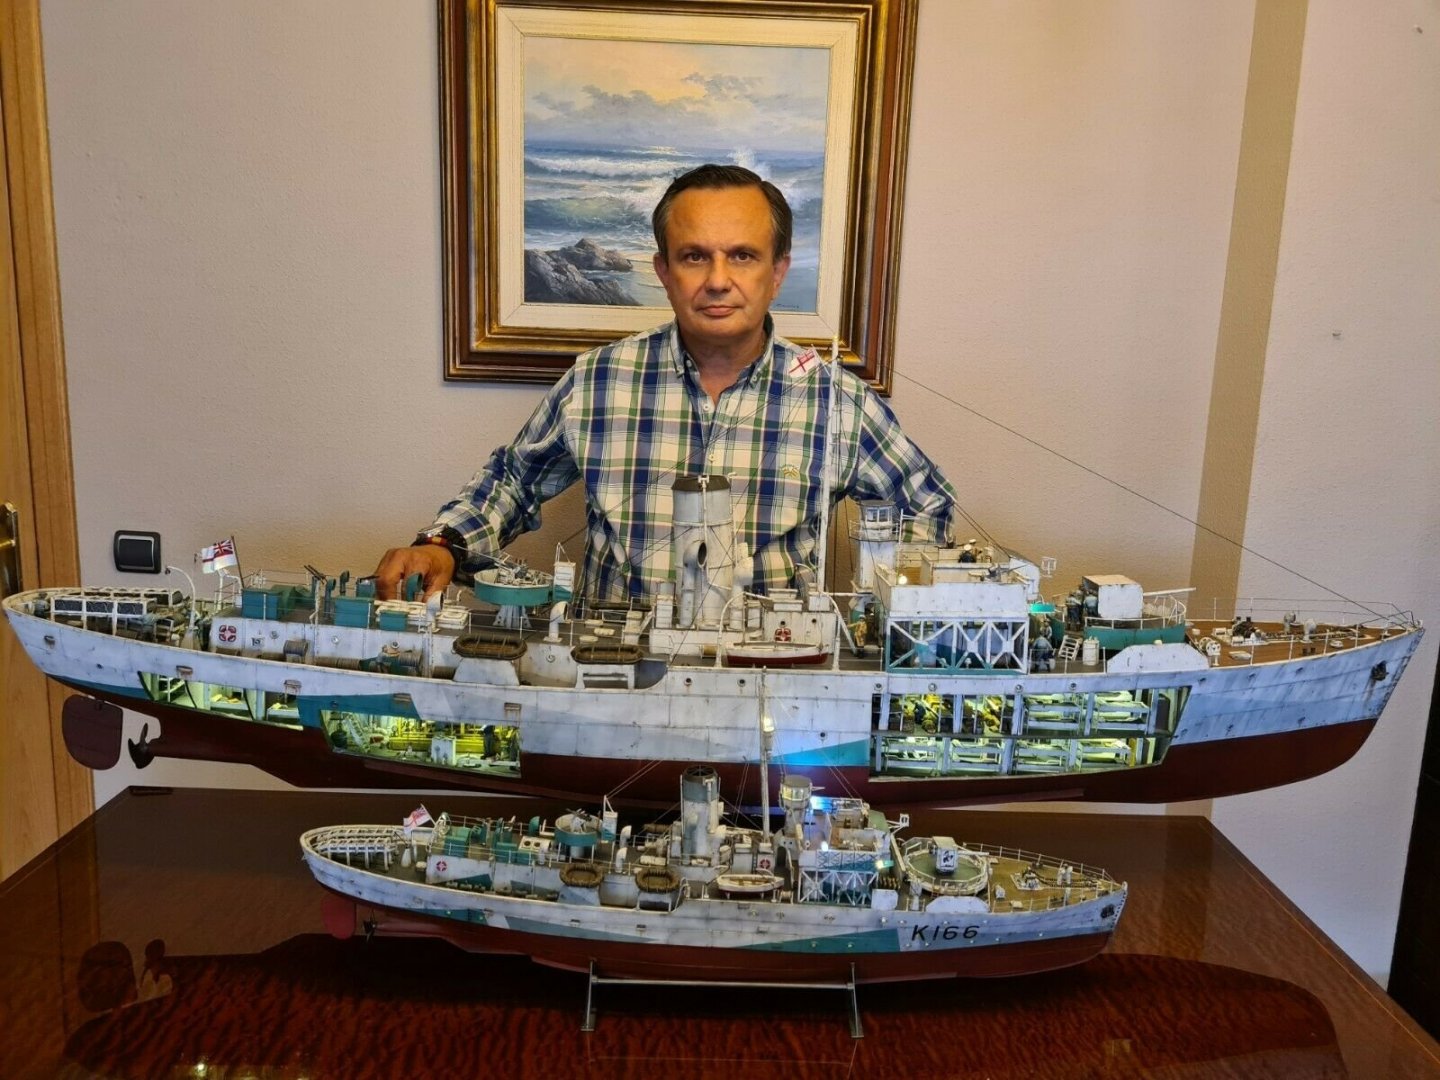
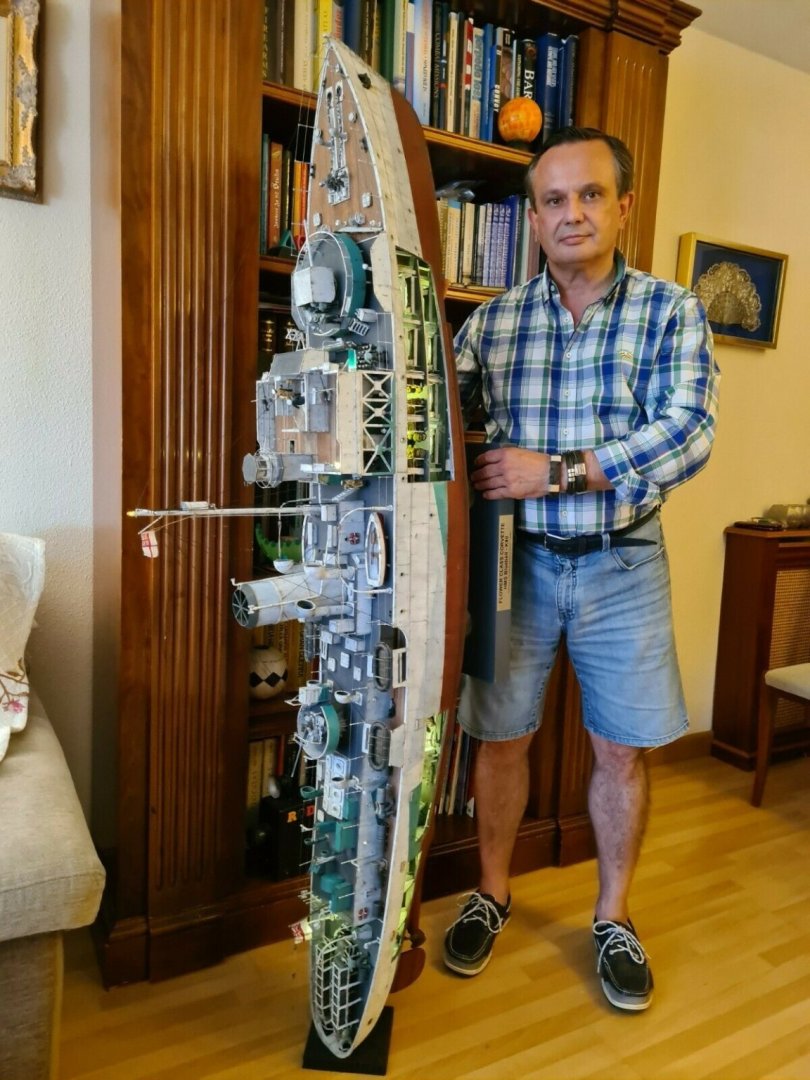
1/32th makes for a giant model..... In 1/48th, the hull is 1.25 meter long.
Yves
-
These parts are definitely pimping up the original Italeri model.
Yves
- thibaultron, CDW, Old Collingwood and 2 others
-
5
-
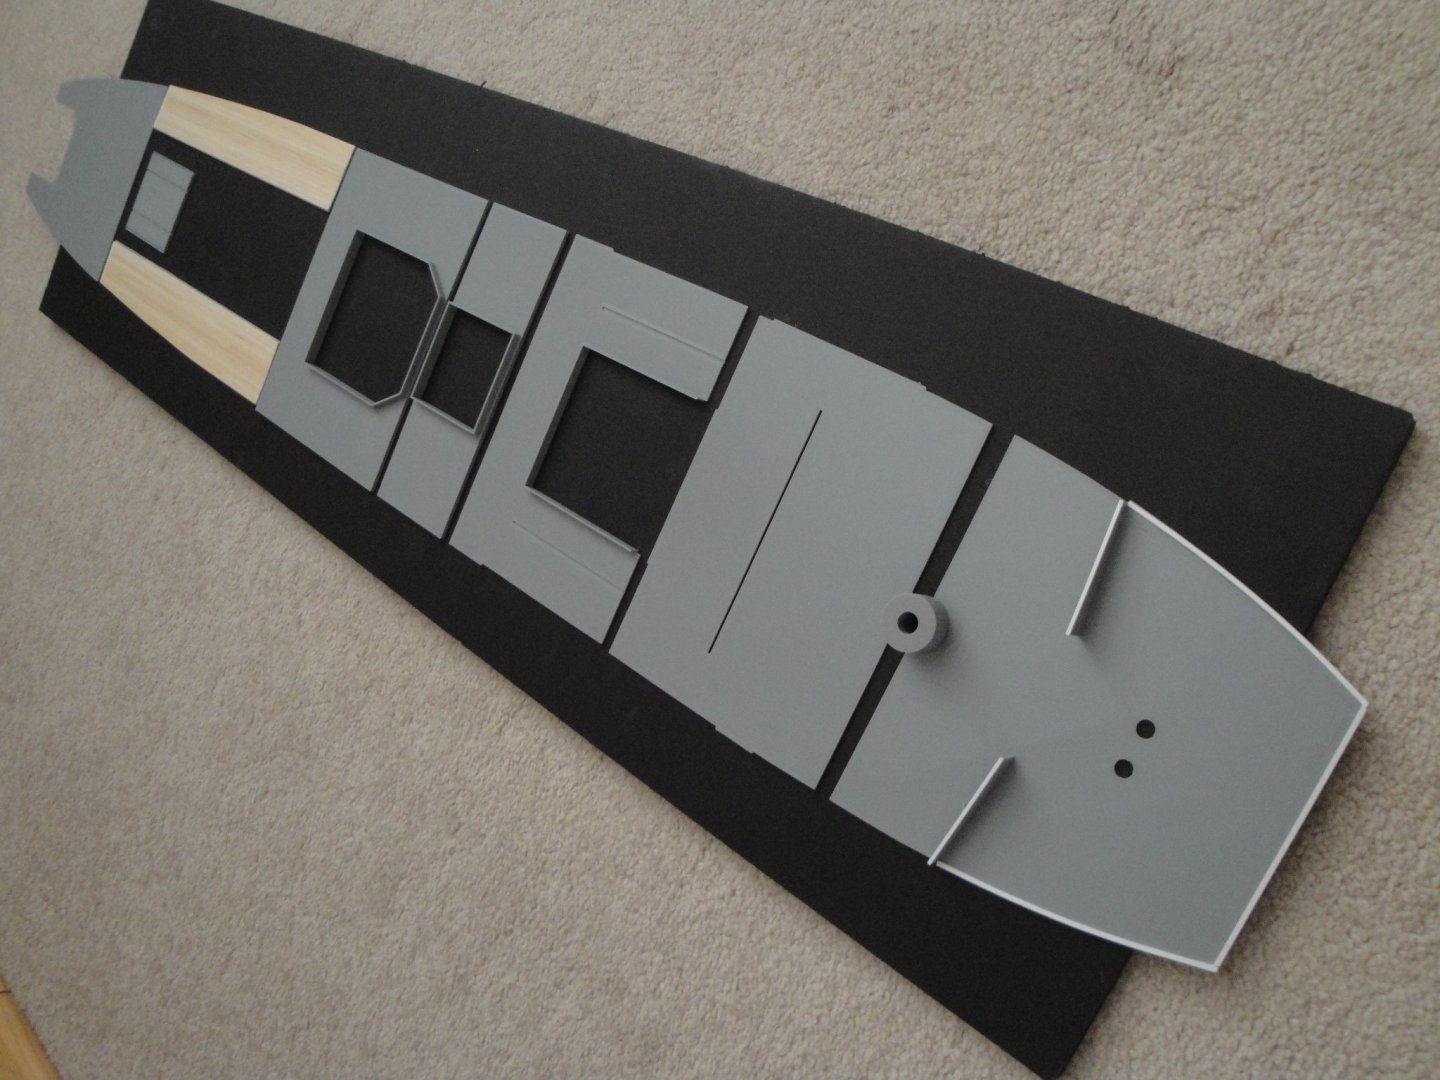
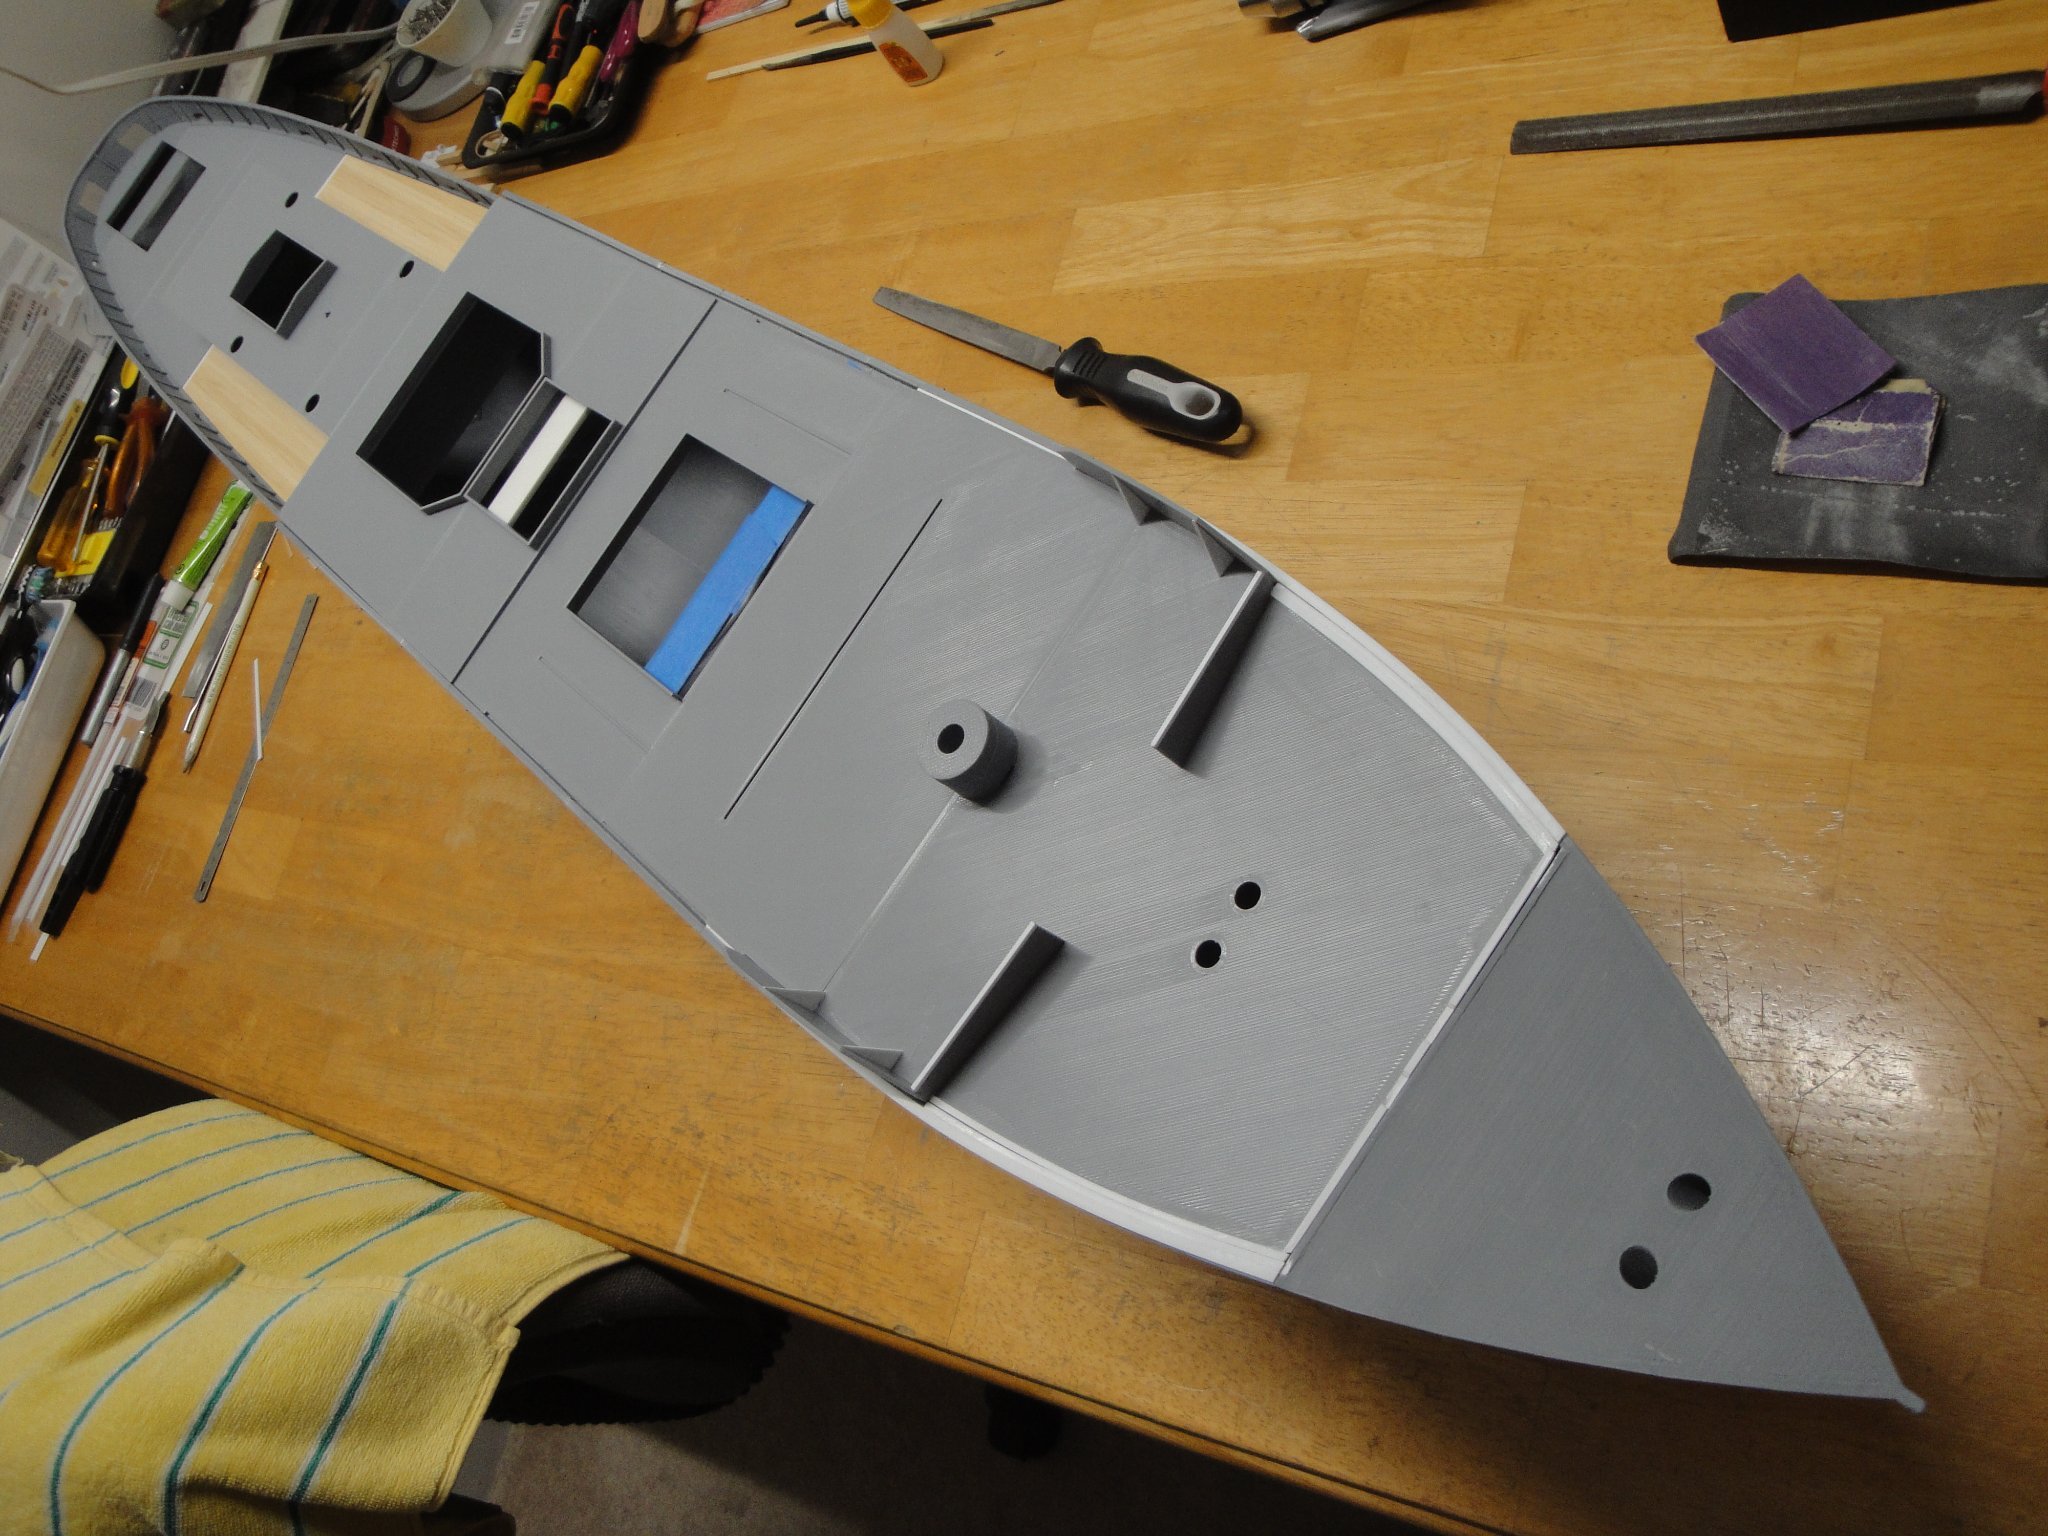
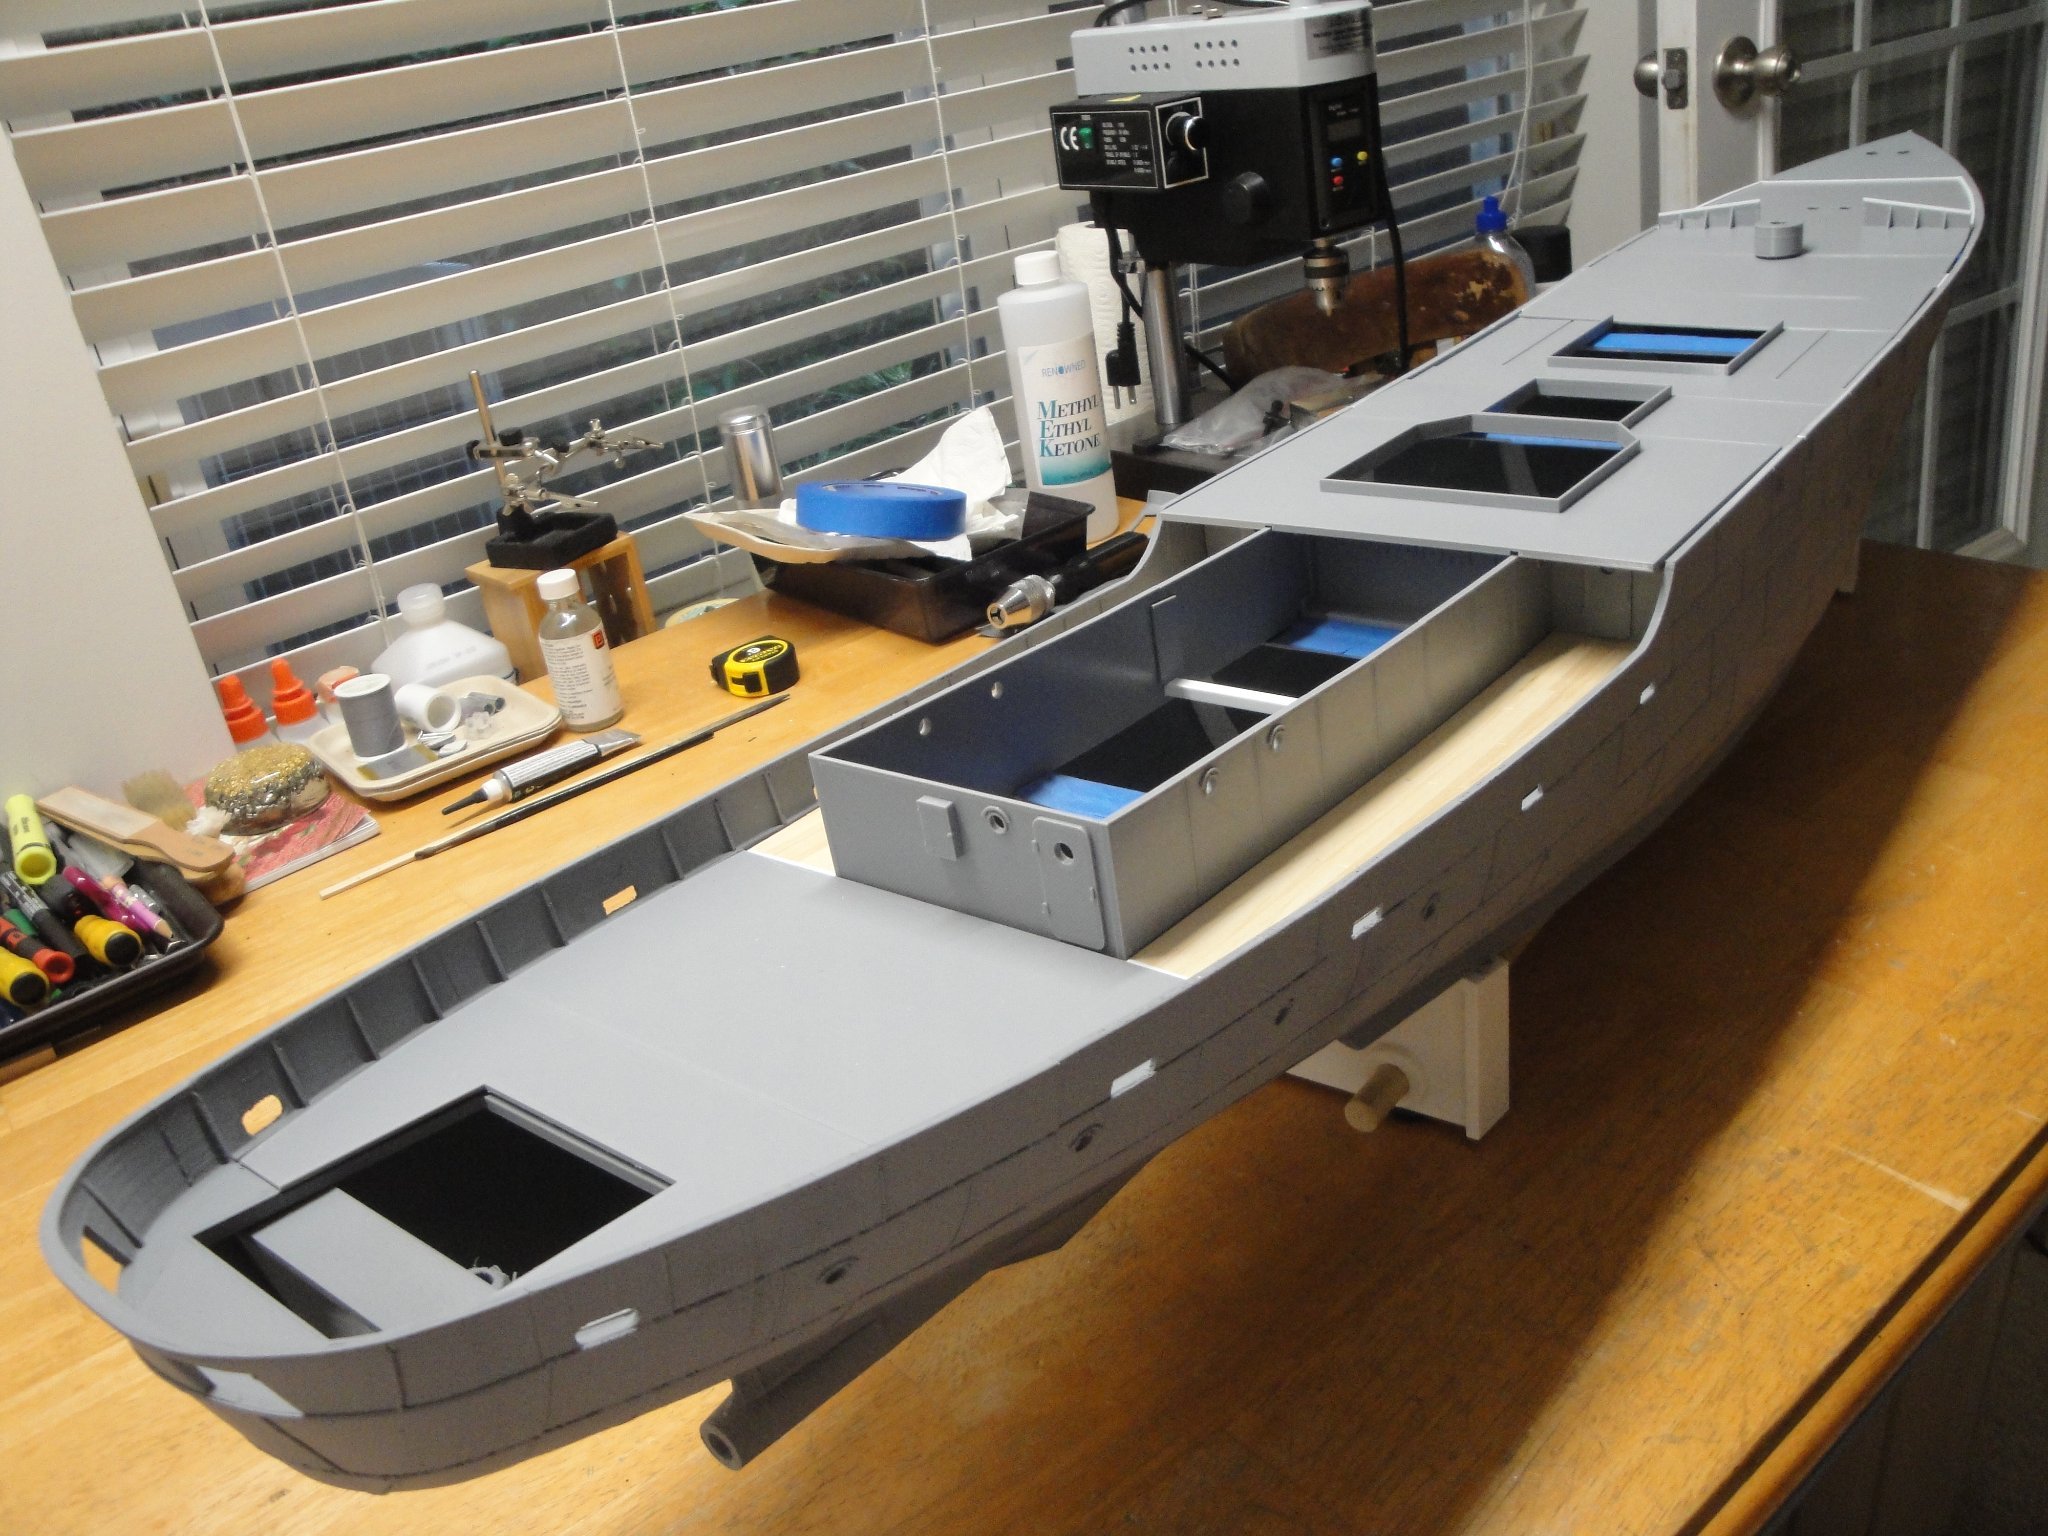
A quick update on the hull and decks:
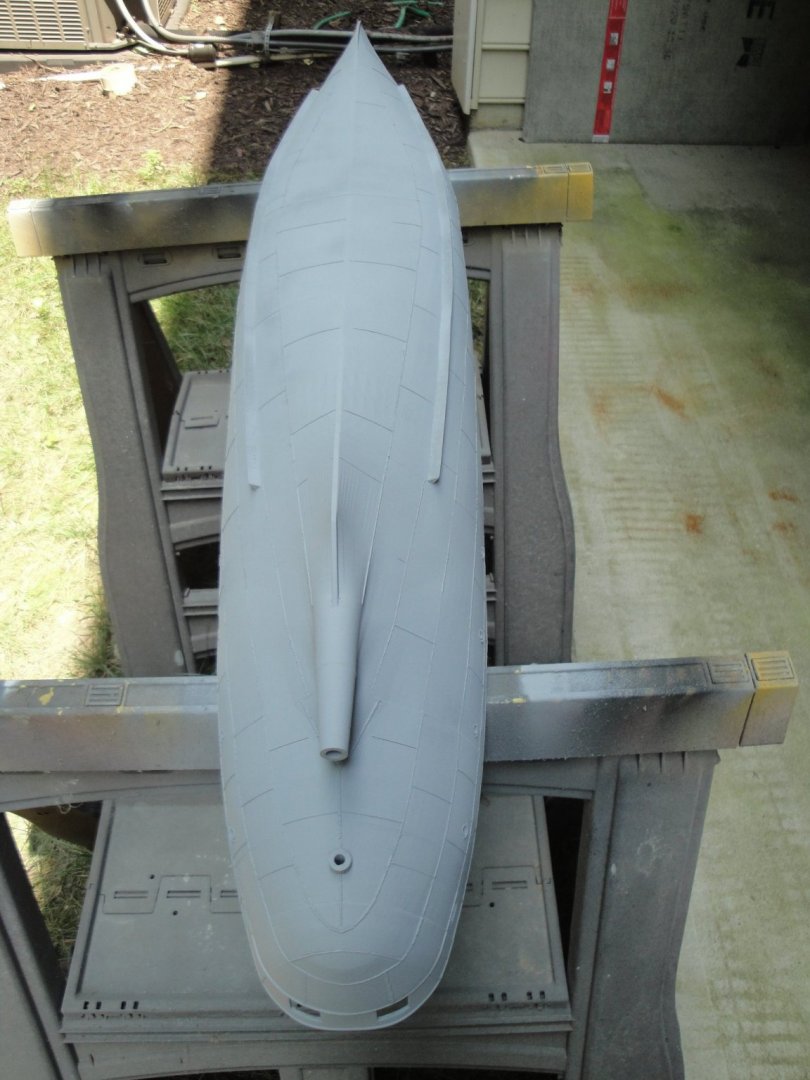
Hull has been puttied and primed. There will be more sanding, before the first coat of paint.
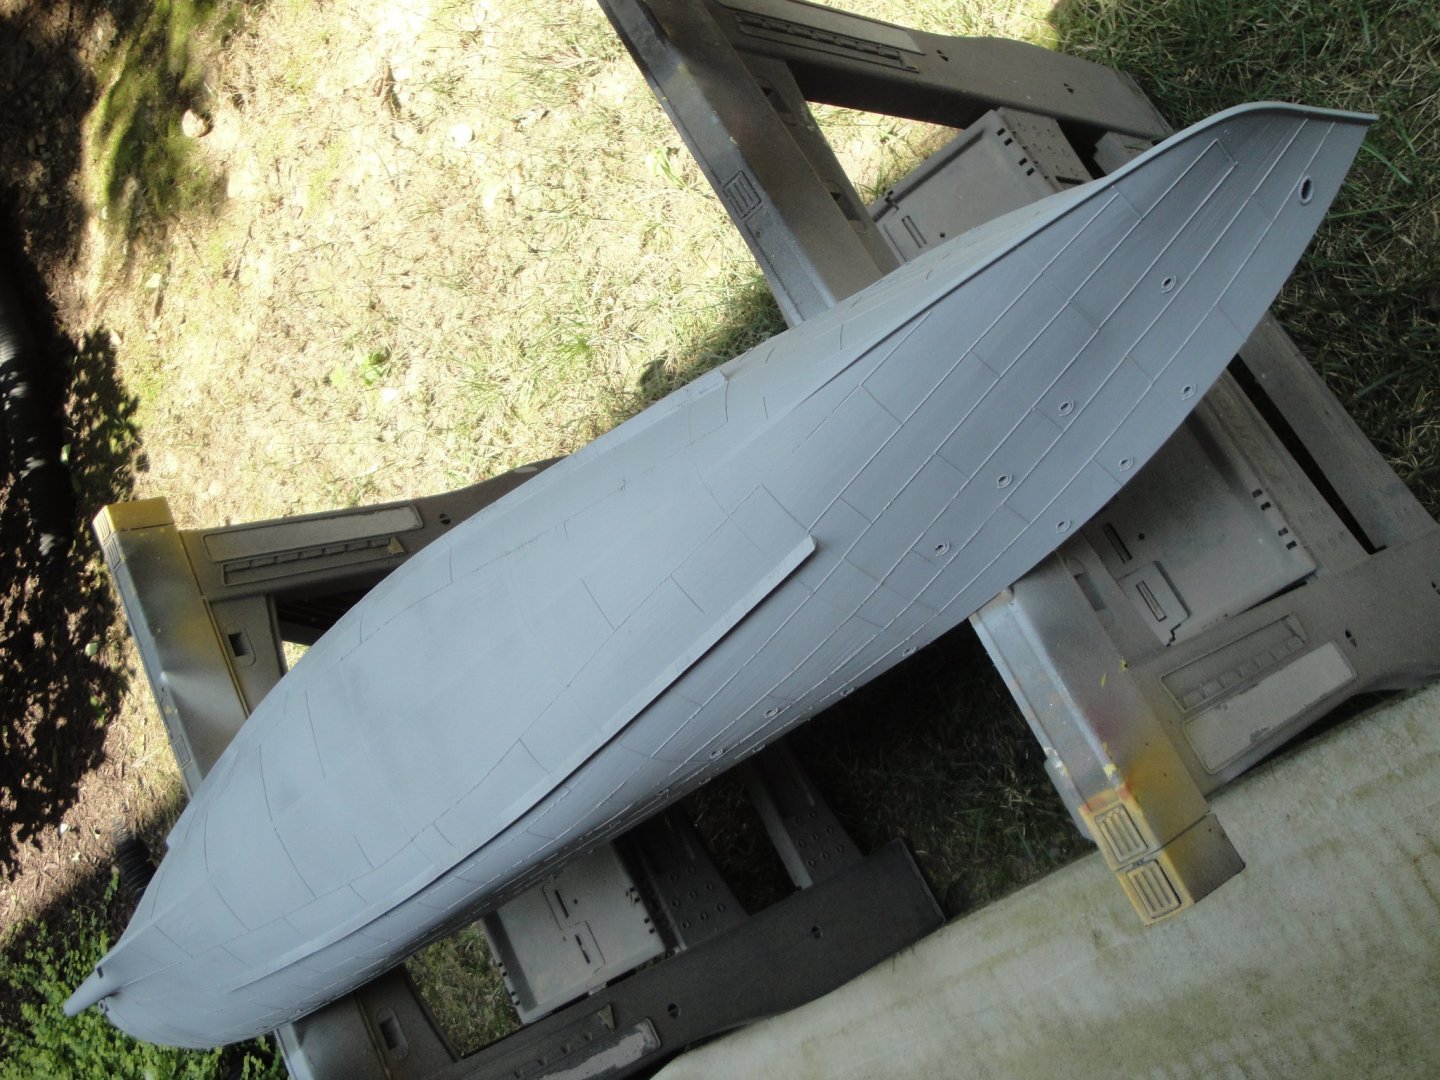
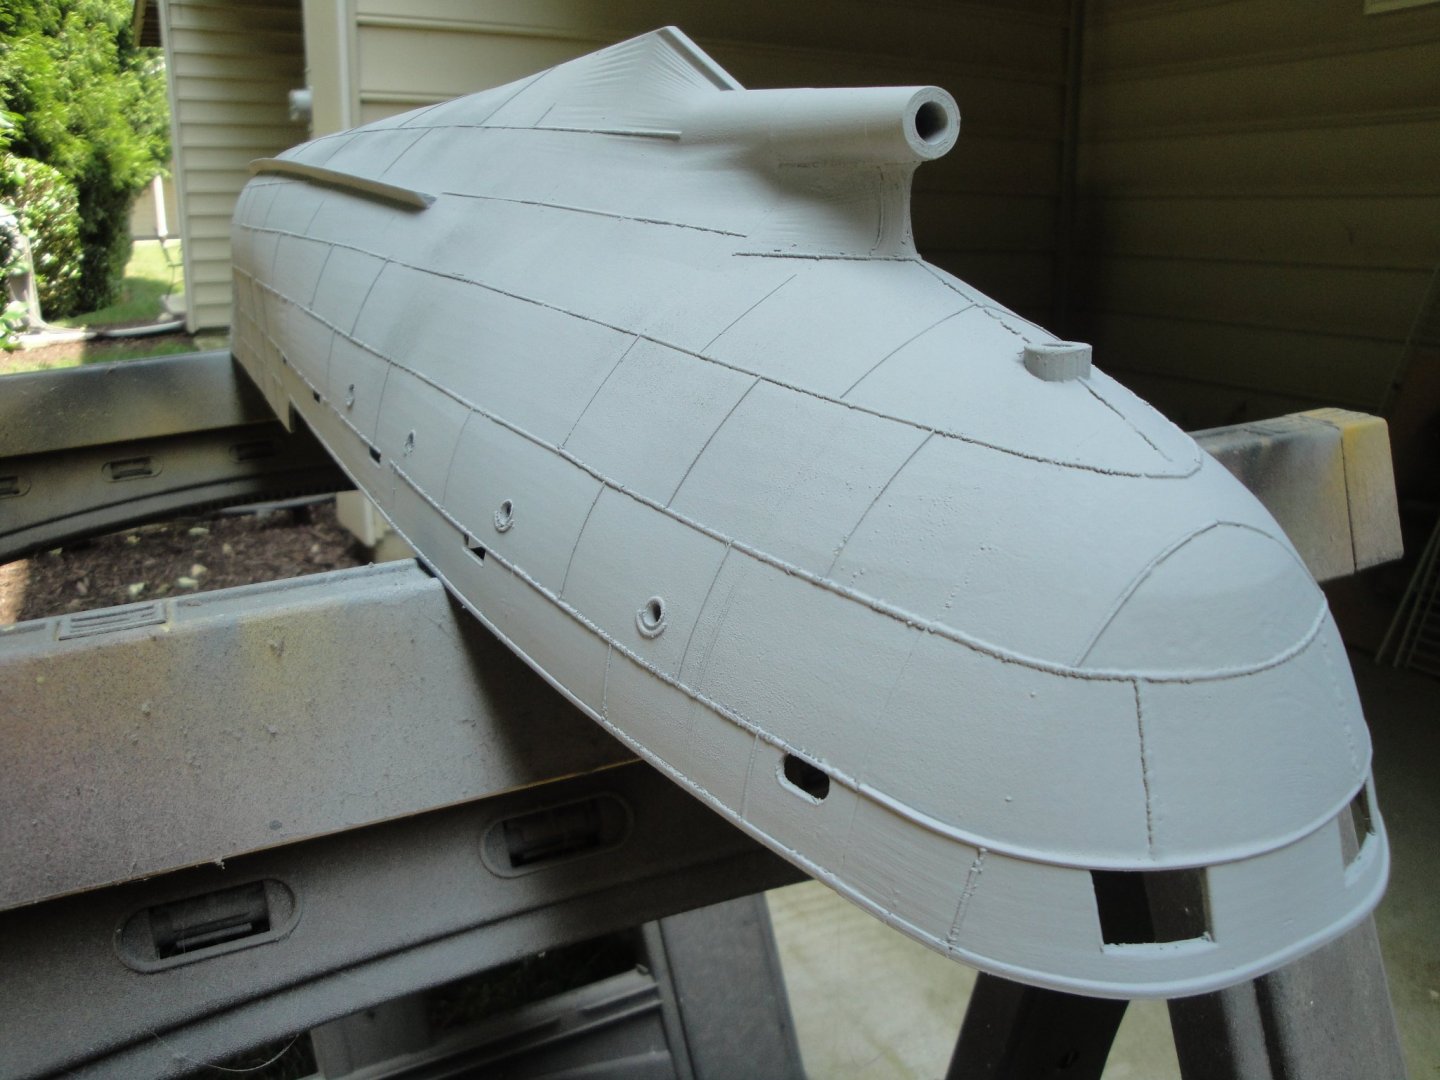
Also working on the printing of the deck sections. Following are a few excerpts from the instructions manual:
And the printed parts:

Yves
- G.L., AON, GrandpaPhil and 17 others
-
20
-
Unusual ship. I will follow your build log.
Yves
- Canute, Old Collingwood, lmagna and 1 other
-
4


Flower-Class Corvette by Yves Vidal - FINISHED - 1/48 - Bensworx Virtual Kit - 3D printed
in - Kit build logs for subjects built from 1901 - Present Day
Posted
Alan, I ran into the same issue. My first download was on WIN 7 and it did not work. After installing it on WIN 10, it went fine.
Yves