SaltyScot
-
Posts
867 -
Joined
-
Last visited
Content Type
Profiles
Forums
Gallery
Events
Everything posted by SaltyScot
-
 Thanks, Steve. I could not put that book down last night. It is due back at the library at the end of this month and I couldn't bear the thought of not having it here on my shelf. I think I am becoming a schooner junkie
 -
Scratch building eh.... Good for you buddy. That can only be beneficial for your future builds! Those mockups look great and are a good idea to get dimensions correct before moving on with the actual build. Good call.
-
Update on the shipyard..... (not so much on the build). I have decided to dedicate at the very least one day a week to my build. Although I enjoy being outdoors in this fine weather fishing, I find I am missing the serenity of my shipyard more than just a little. I was reading Marquardt's book "The Global Schooner" last evening, a book that I had borrowed from our local library but have since gone ahead and purchased for myself. The decision was made to not demote ship building to a bad weather or winter pastime, I enjoy it just too much. That and the fact that the CEO wants some more ships on shelves around the house
-
I like the setup you have going on there, particularly that mini drill you had in a couple of the images. What make is that? I am slowly coming to the realization that I do need some mini power tools (sander, perhaps a mill.... but definitely a drill press). The quality of your work inspires me anew, sir
-
Ladies and Gentlemen, Fishing season is pretty much upon us here in the Northern Neck of Virginia. This does not mean that I will be stopping my build, not at all. But, the time spent in the shipyard will be reduced when the weather is nice and I can get down to my dock (or out on the boat) and fish (I love this sport!!). I got my rods out after the long winter off season this afternoon and got them all rigged up for the upcoming fun:

-
Oh my, and I though that the quality of the plywood was a bit rough in my kit - this one wins hands down!! That material looks very much like pressed paper or something......
-
It would be advisable to change the iPhone HEIC format of your images to JPEG. Just send them to yourself in an email and download them to your desktop (if you have a computer). If not, change the photo settings on your phone. As it is, anyone viewing you blog needs to download the image before they can view it. Just a tip for future reference. I am certainly interested in seeing how this build goes, I am fast becoming a schooner fan and like the look of tis one. Did you research the history at all? I will be following along on this one!
- 8 replies
-
- 2
-

-
- America
- Model Shipways
- (and 1 more)
-
Brig Le FAVORI 1806 by KORTES - 1:55
SaltyScot replied to KORTES's topic in - Build logs for subjects built 1801 - 1850
That hull is immaculate! -
A fine looking deck, Jo. Your patience and determination certainly paid off on this one buddy.
-
All 3 points are obviously very valid ones, Phil, and this third one even more so. Although it seems obvious, I would not have thought of it myself (until I saw the end result where the shrouds and backstays were off center!). Note taken oh master
-
I guess it is better to ask for forgiveness rather than for permission. As @gjdale just said, you are a brave man, sir!
- 332 replies
-
- 2
-

-
- Harpy
- Vanguard Models
- (and 1 more)
-
Good point, Steve. Going down this rabbit hole obviously opens up all sorts of questions (like @Kenchington so rightly pointed out) and one has to ask where does historical accuracy end and artistic freedom begin? In my humble and inexperienced opinion, at the end of the day I guess it is really up to the ship builder him/herself how they outfit their build and how far they want to go to make it either how they want it to look or how history dictates it should look. Just my 2 cents worth folks 😆
-
@Keith Black & @Dr PR Good morning, gentlemen, Thank you for your valuable insights. Phil, what you said makes a lot of sense regarding measuring the angles at the waterline. Keith, your graphics confirmed what Phil was talking about. After reading (and hastily replying) to your post last night, Keith, the matter of the rake angles was the only thing going through my mind, pretty much all night because I was doubting what I had done. You good fellows have a whole lot more experience at this than I do. Phil, I like your solution regarding the rakes, very simple but incredibly effective. I guess my engineering brain was working overtime on my solution and I overthought the whole thing I am going to re-check those angles again, taking what you both said into consideration. I am going to steal Phil's idea and let's see if I can get it right this time around THANK YOU BOTH for bearing with me!
-
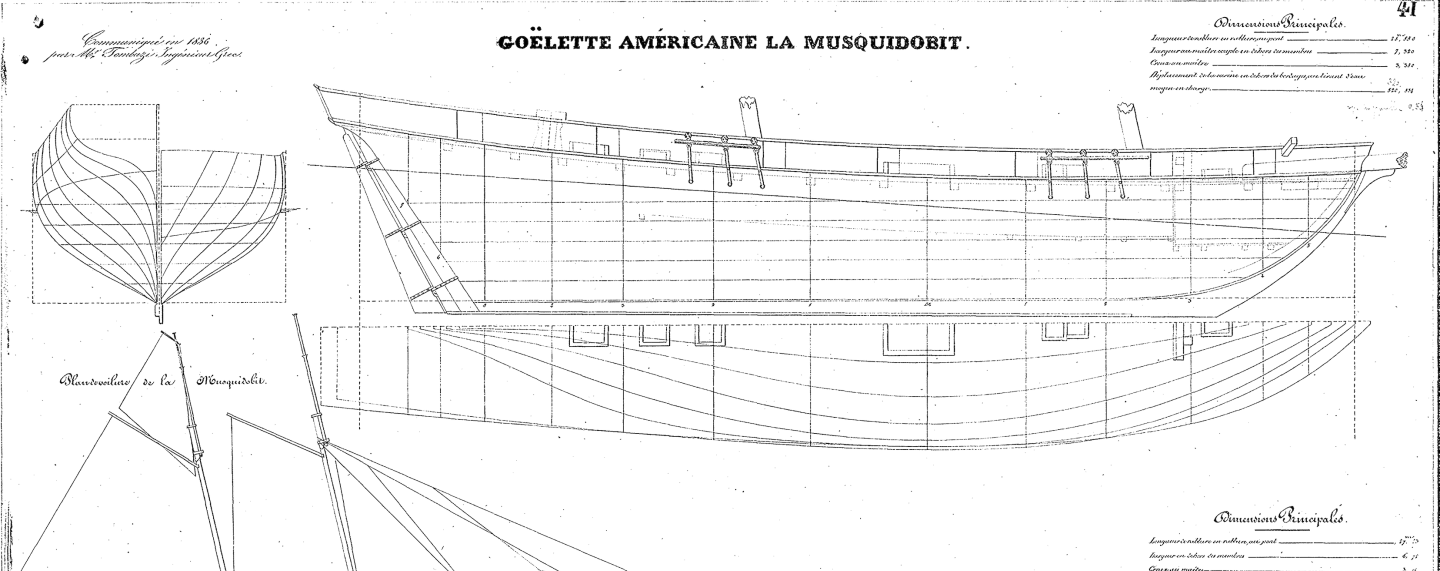
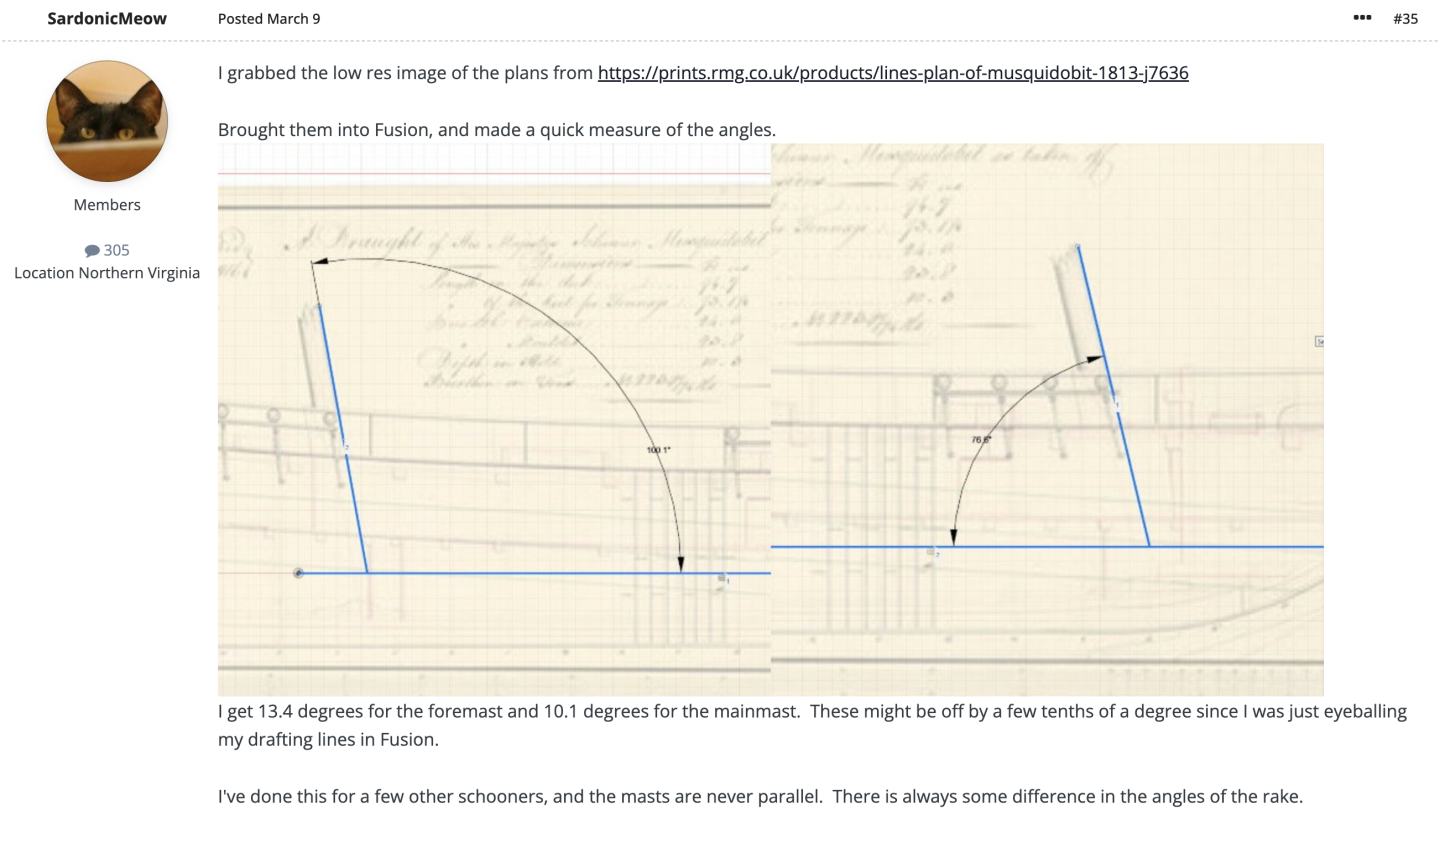
Keith, After quite a bit of research and lots of different opinions, I did not base the rake angles on any current builds. As you are aware, I am building this schooner as the Musquidobit. The plans that I have show this: I was fortunate enough that Peter ( @SardonicMeow ) could work out the rake angles in Fusion (I wasn't au fait with that software at the time). He posted the results earlier on in the build log: So, as you can see, I am basing the rake angles on "hard evidence" from existing plans of the vessel I have chosen to build. The image I found and posted at the beginning of my build log was a very nice one of the Lynx, put there long before I started concerning myself with rake angles I apologize most heartedly, sir, for any confusion.
-
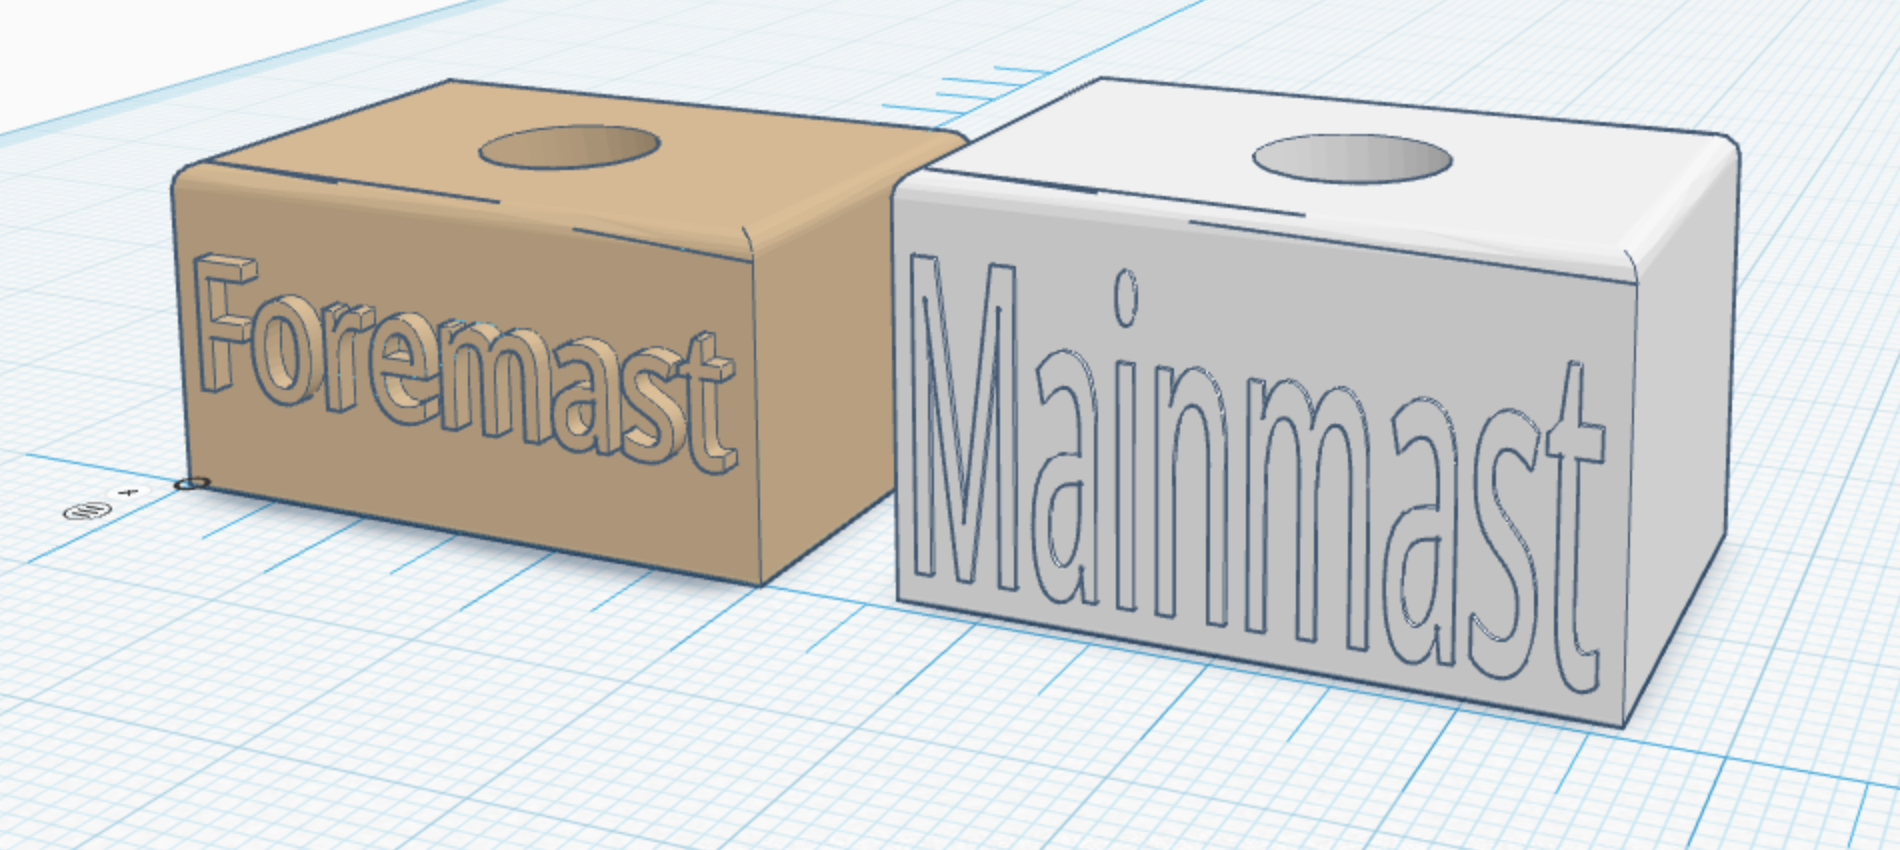
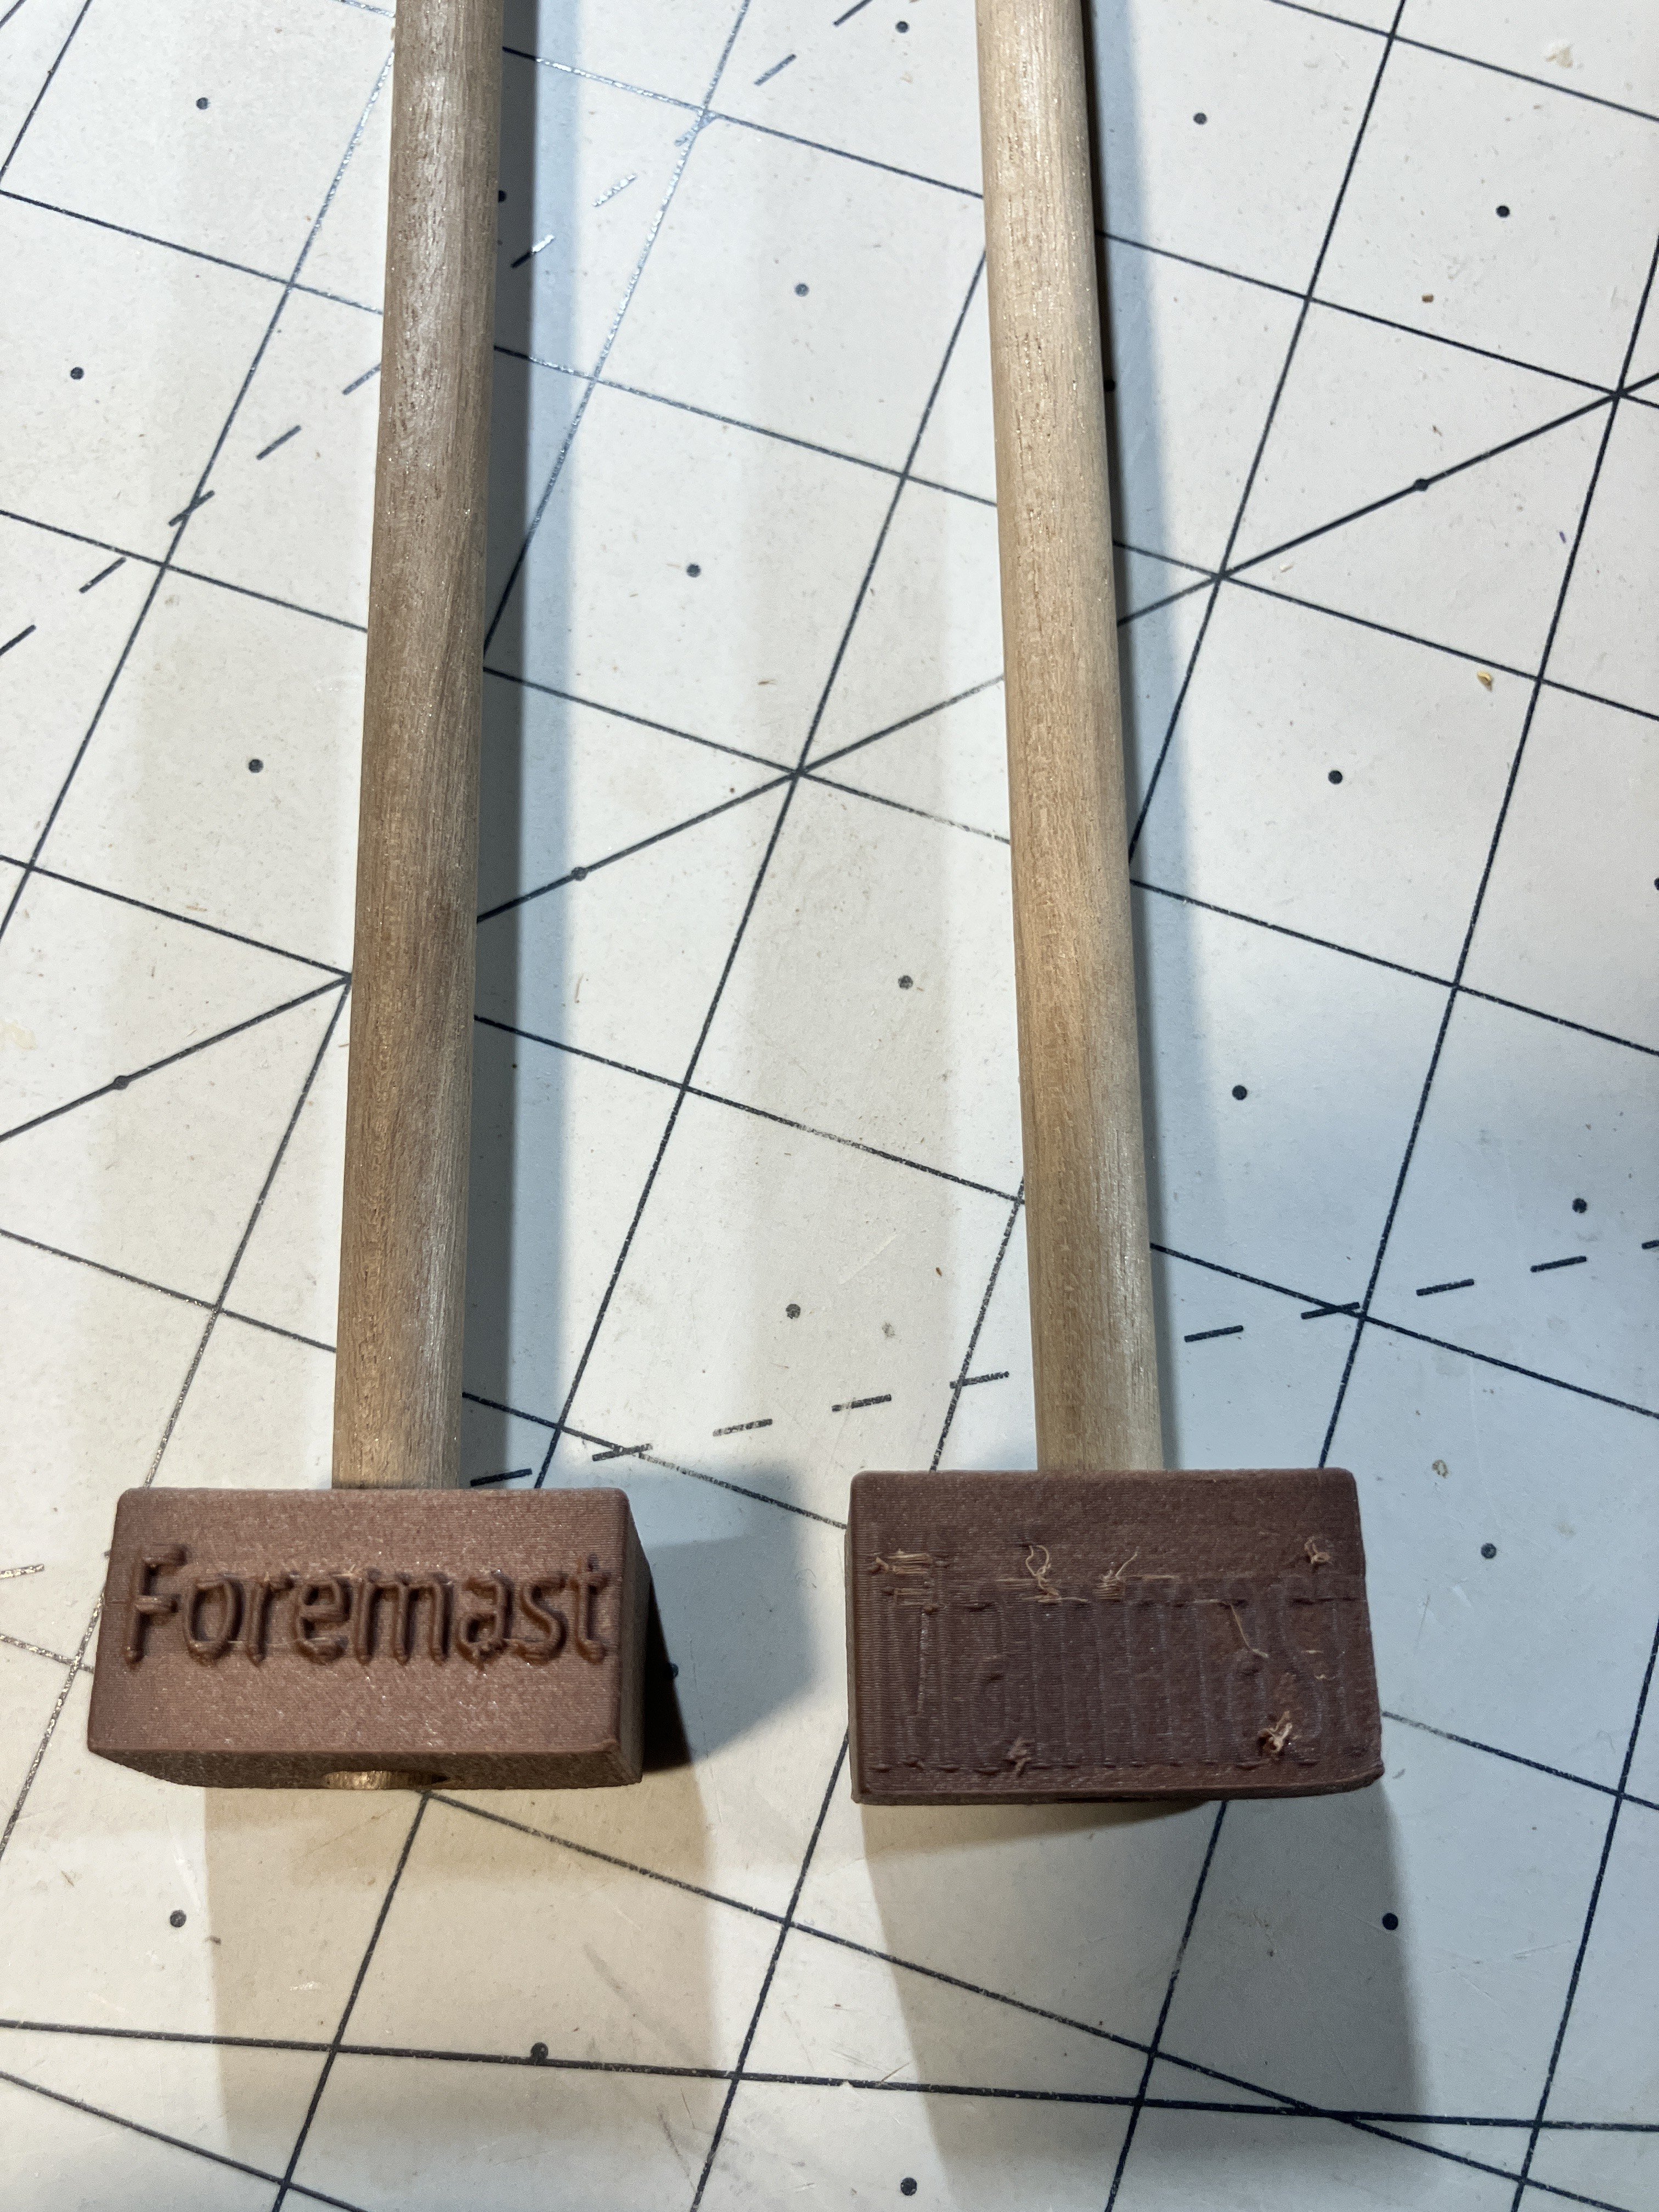
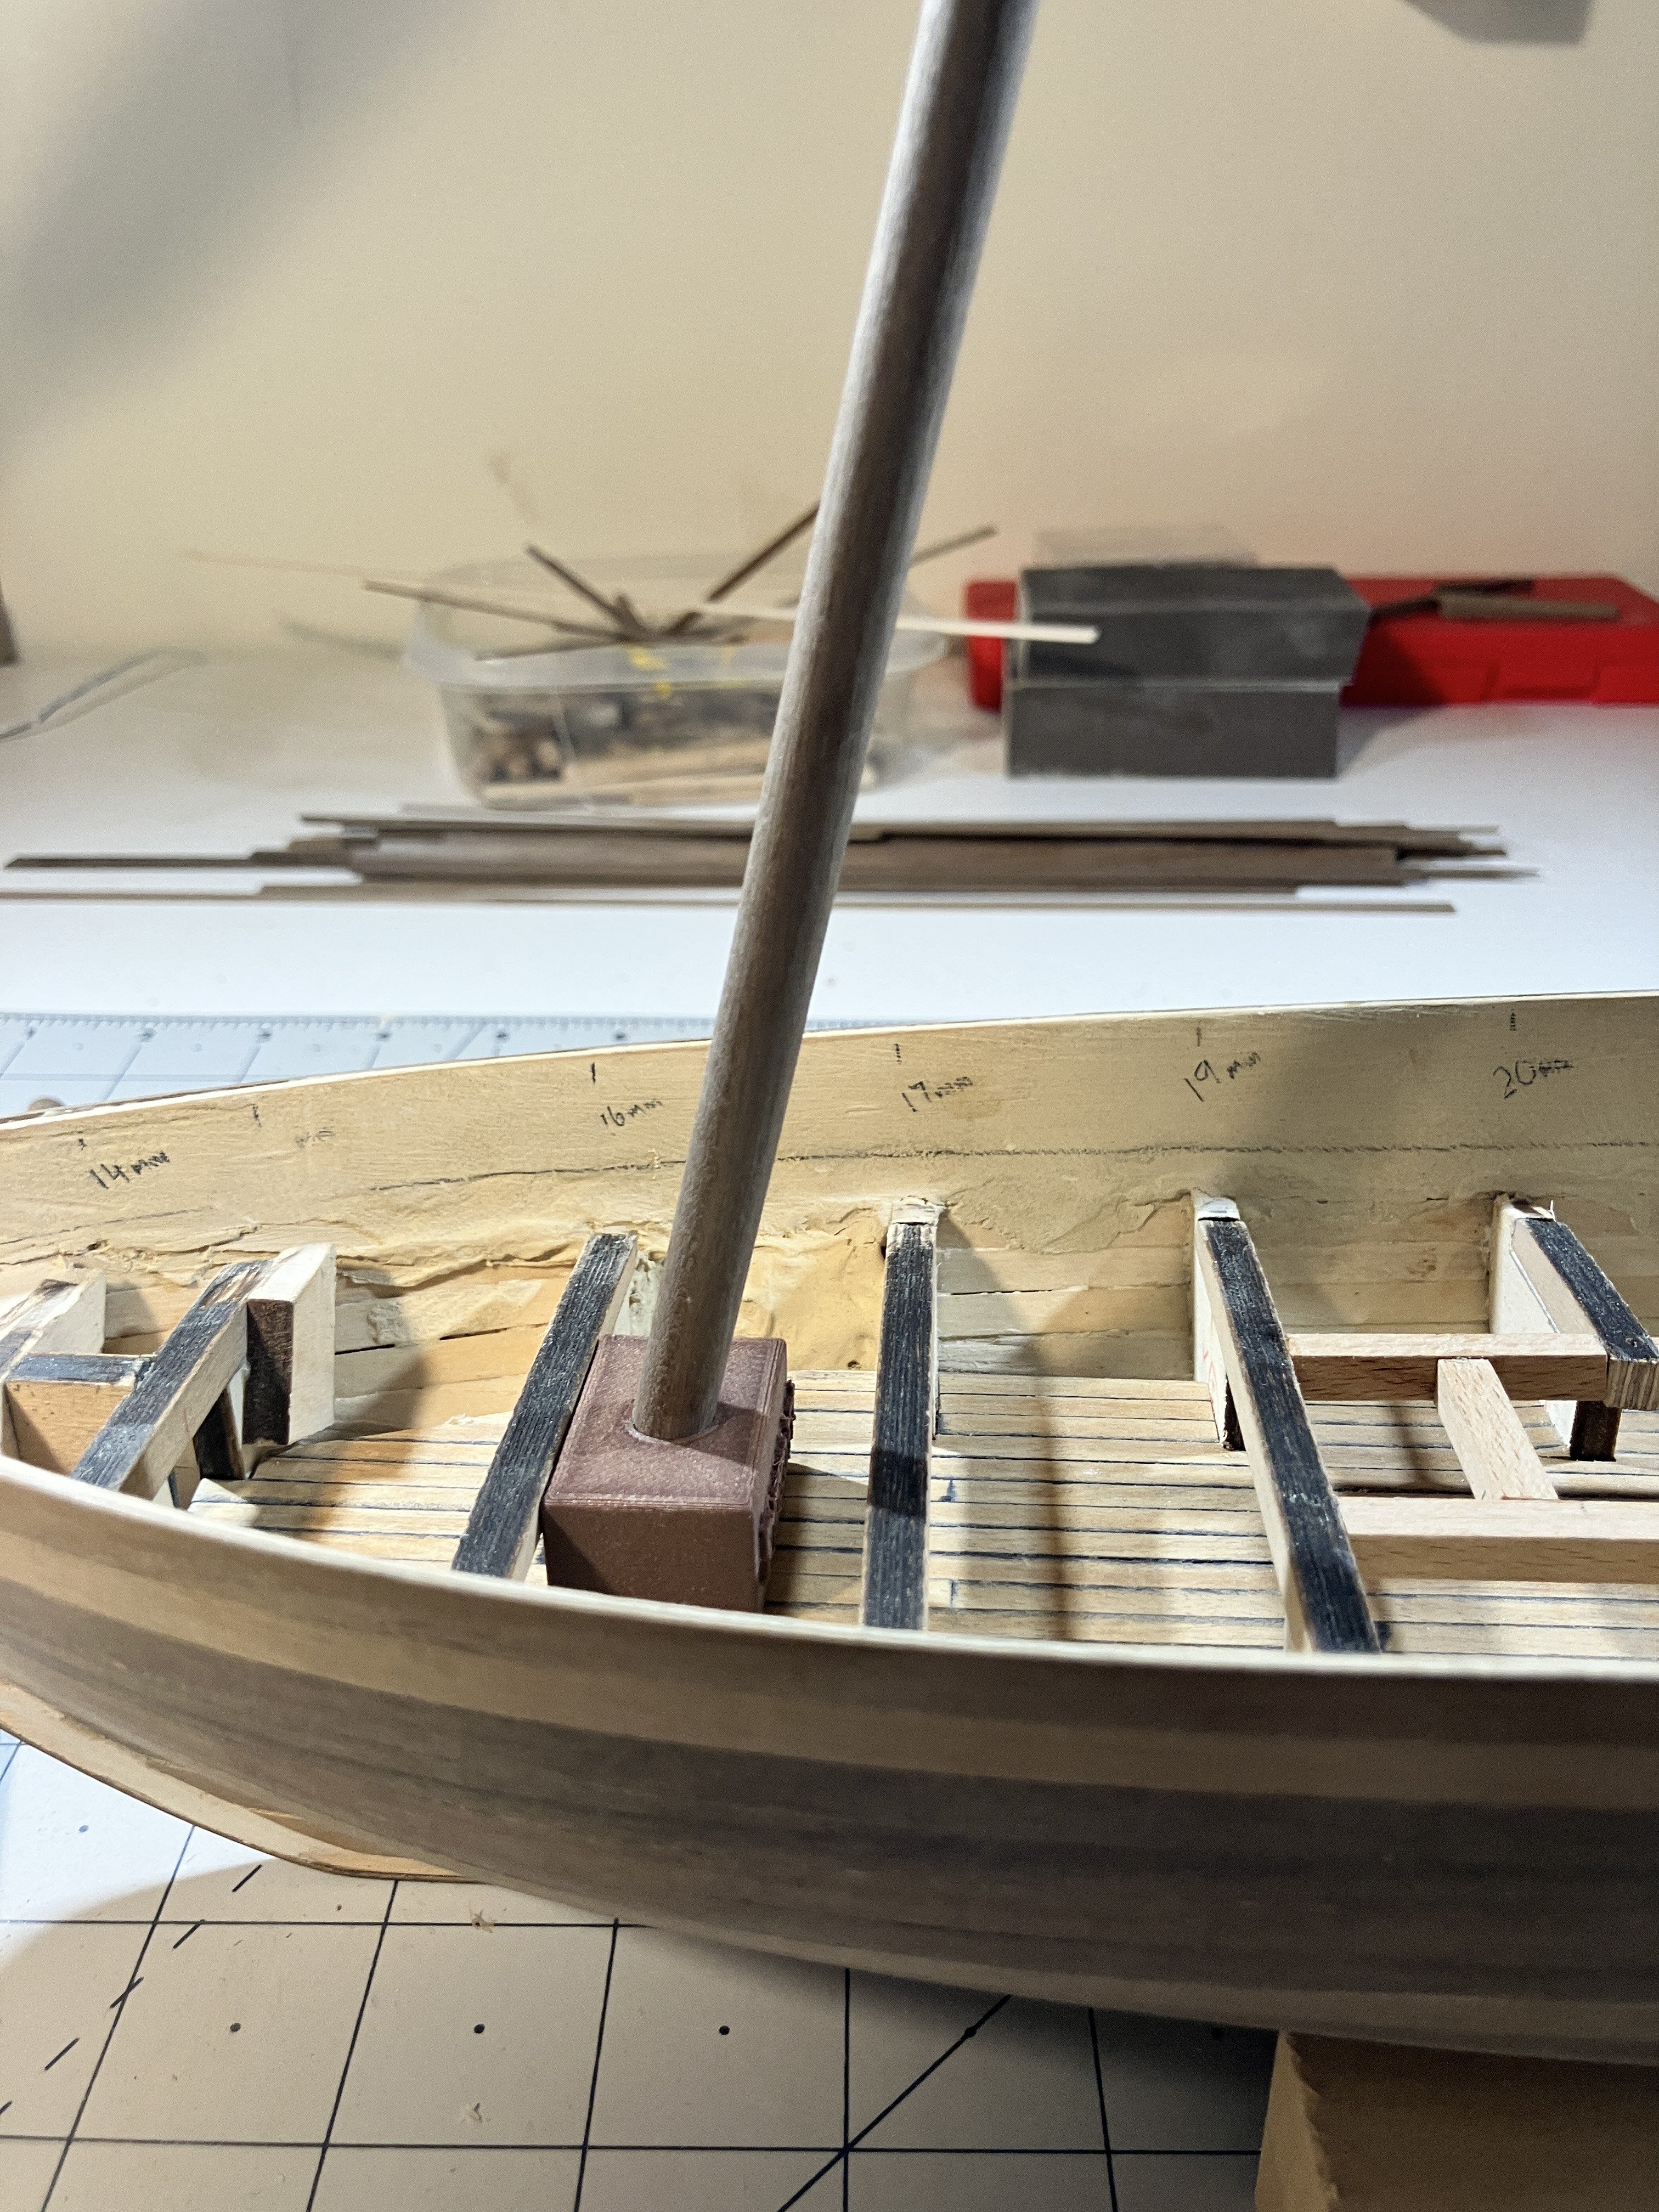
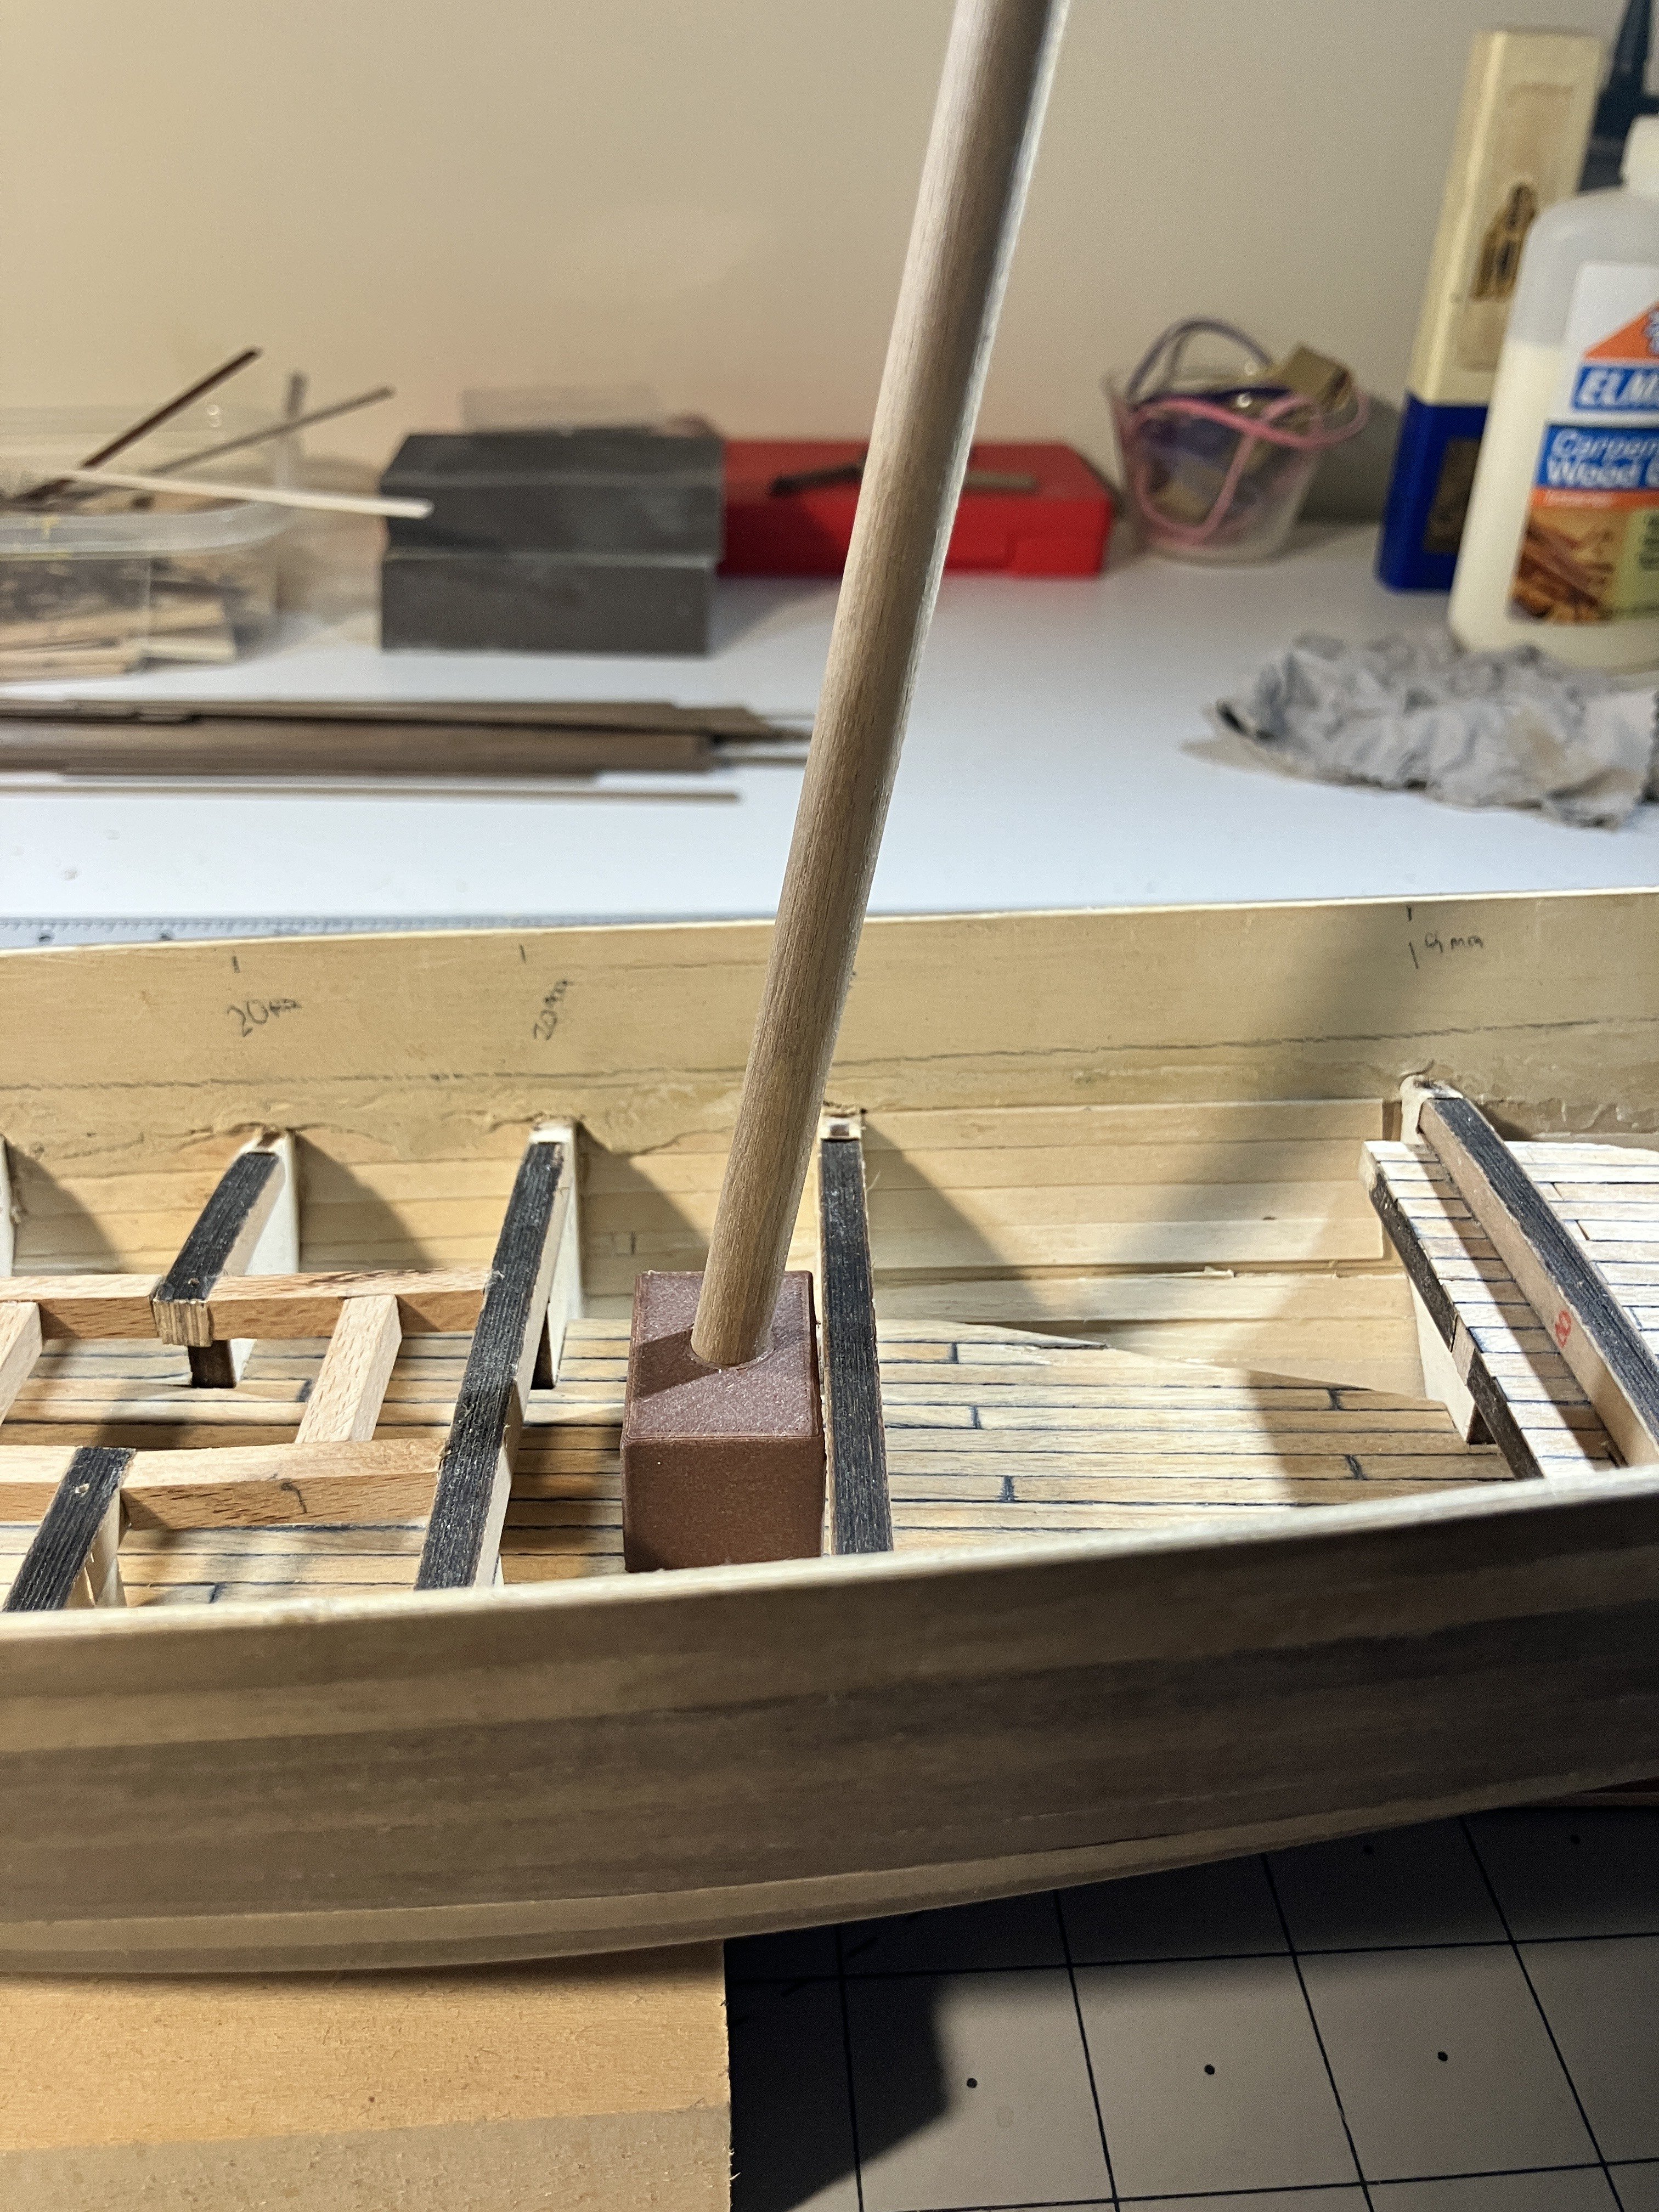
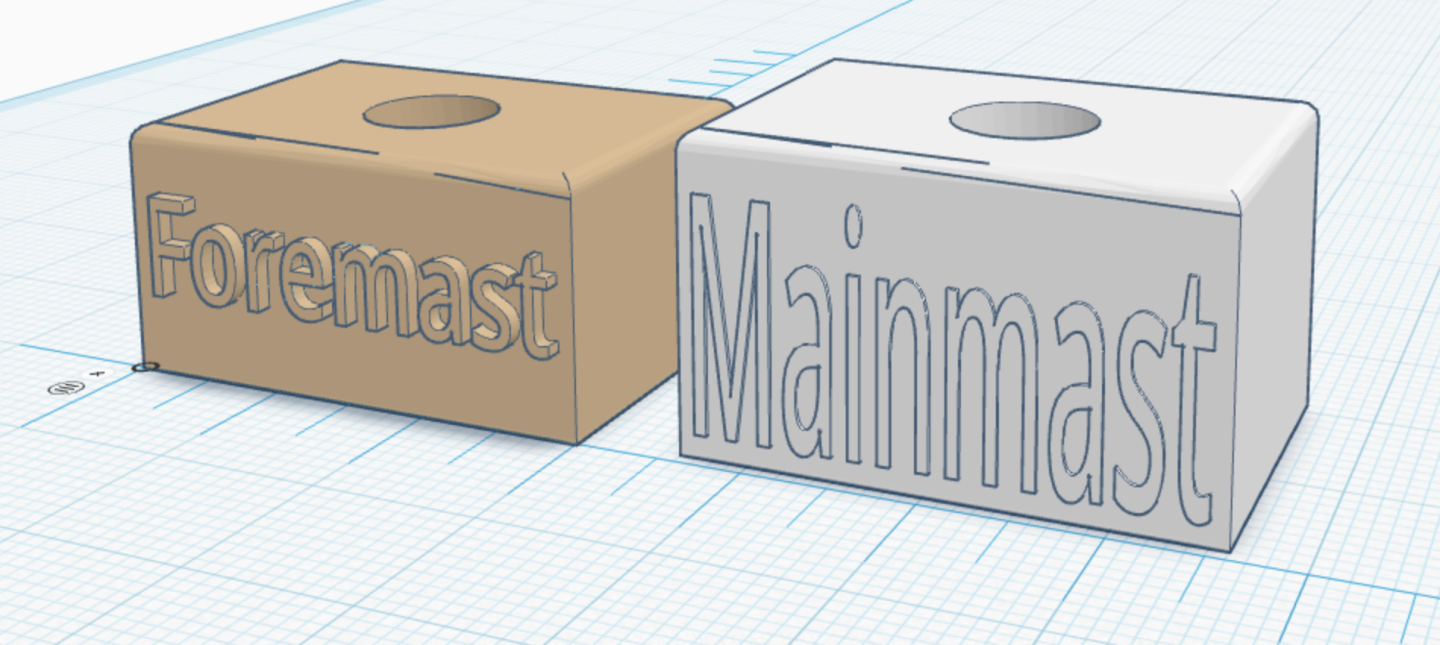
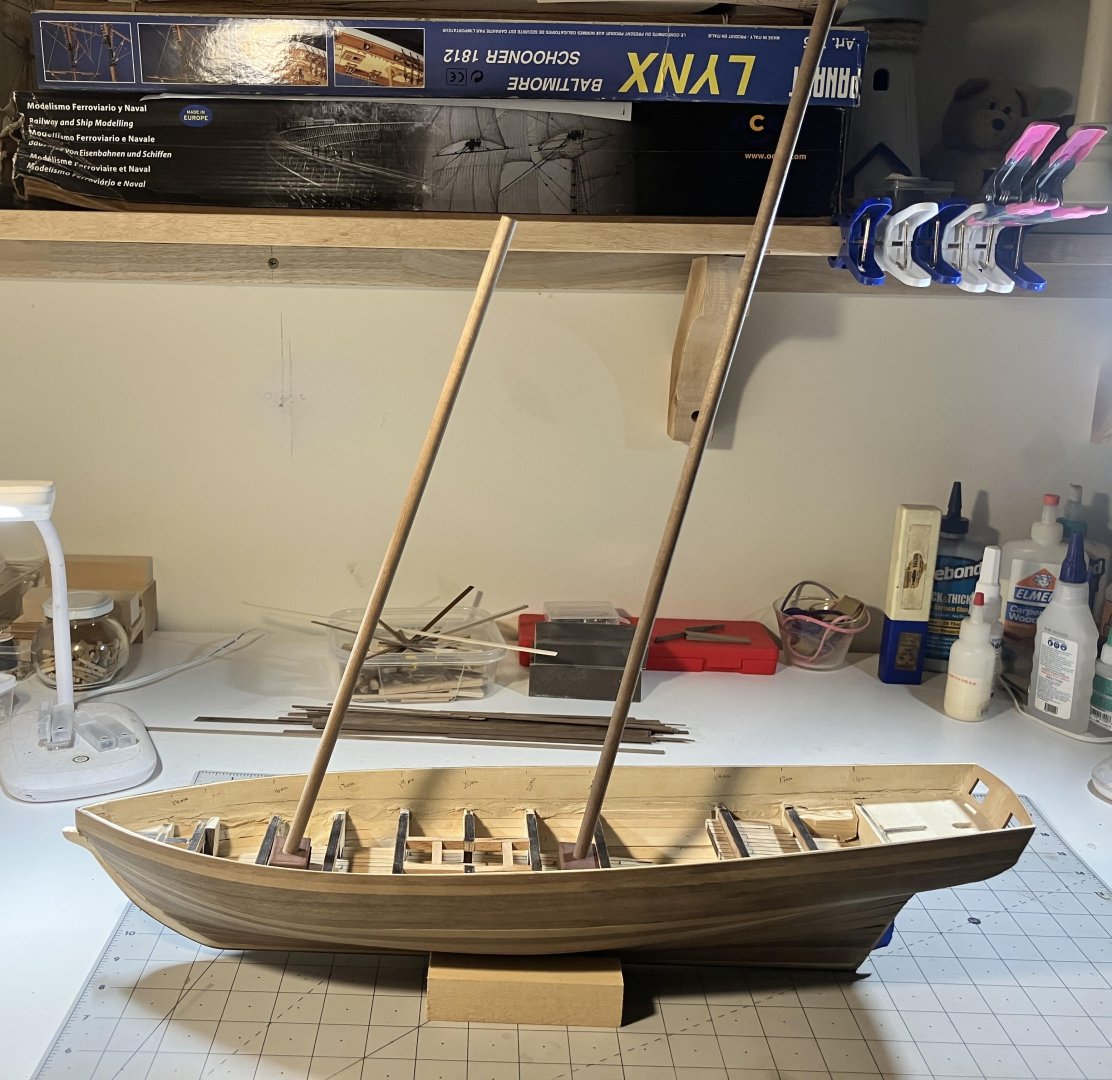
Now that the hull is as good as done I wanted to address the mast rakes. Before the deck goes on I needed to have something in place that would take the guesswork out of getting the correct rake angles for both masts (foremast 13.5° - mainmast 10°, as discussed at length earlier on in the build log). I hopped on over to Fusion 360 and did a very quick design. The holes go all the way through so that I can slot the butt end of the mast in the existing hole in the hull: It is basically a small block with the hole angled appropriately. The height of both boxes was determined by the cross beam height at that part of the bulkhead. I tried to position the hole in such a way that the mast would not interfere with the crossbeams when it was seated in the block. So that I wouldn't mix the blocks up (and I knew I would at some point), I took the designs over to Tinkercad and named them both: Once that was done I printed them and tried them out for size: They both sit nice and flat on the lower deck but the mainmast block needs to move aft a little, my efforts to get the hole exactly right were a bit off on that one. I will probably just add a backer to the crossbeam there and sand the front of it away a little so that the box can slide. It really doesn't have to move all that much. Onwards


-
I have read that that is a very good idea, Tom. You will certainly have more room available to work in by doing it that way.
- 206 replies
-
- 1
-

-
- Endurance
- Shackleton
- (and 2 more)
-
I had to smile at the expressions on a couple of those sailors' faces, Steve. They look ready for a fist fight! I used to paint fantasy figures way back when, a very rewarding task once the job is done. I found it amazing the difference it made to the figure, bought it to life really. Perhaps paint one or two and see how they look on your fine model then....?
-
Now that both stacks are on she looks quite imposing, Phil. Coming along very nicely there.
- 288 replies
-
- 8
-
-
-
- Card
- Pre-Dreadnought
- (and 3 more)
-
That makes perfect sense sir.
-
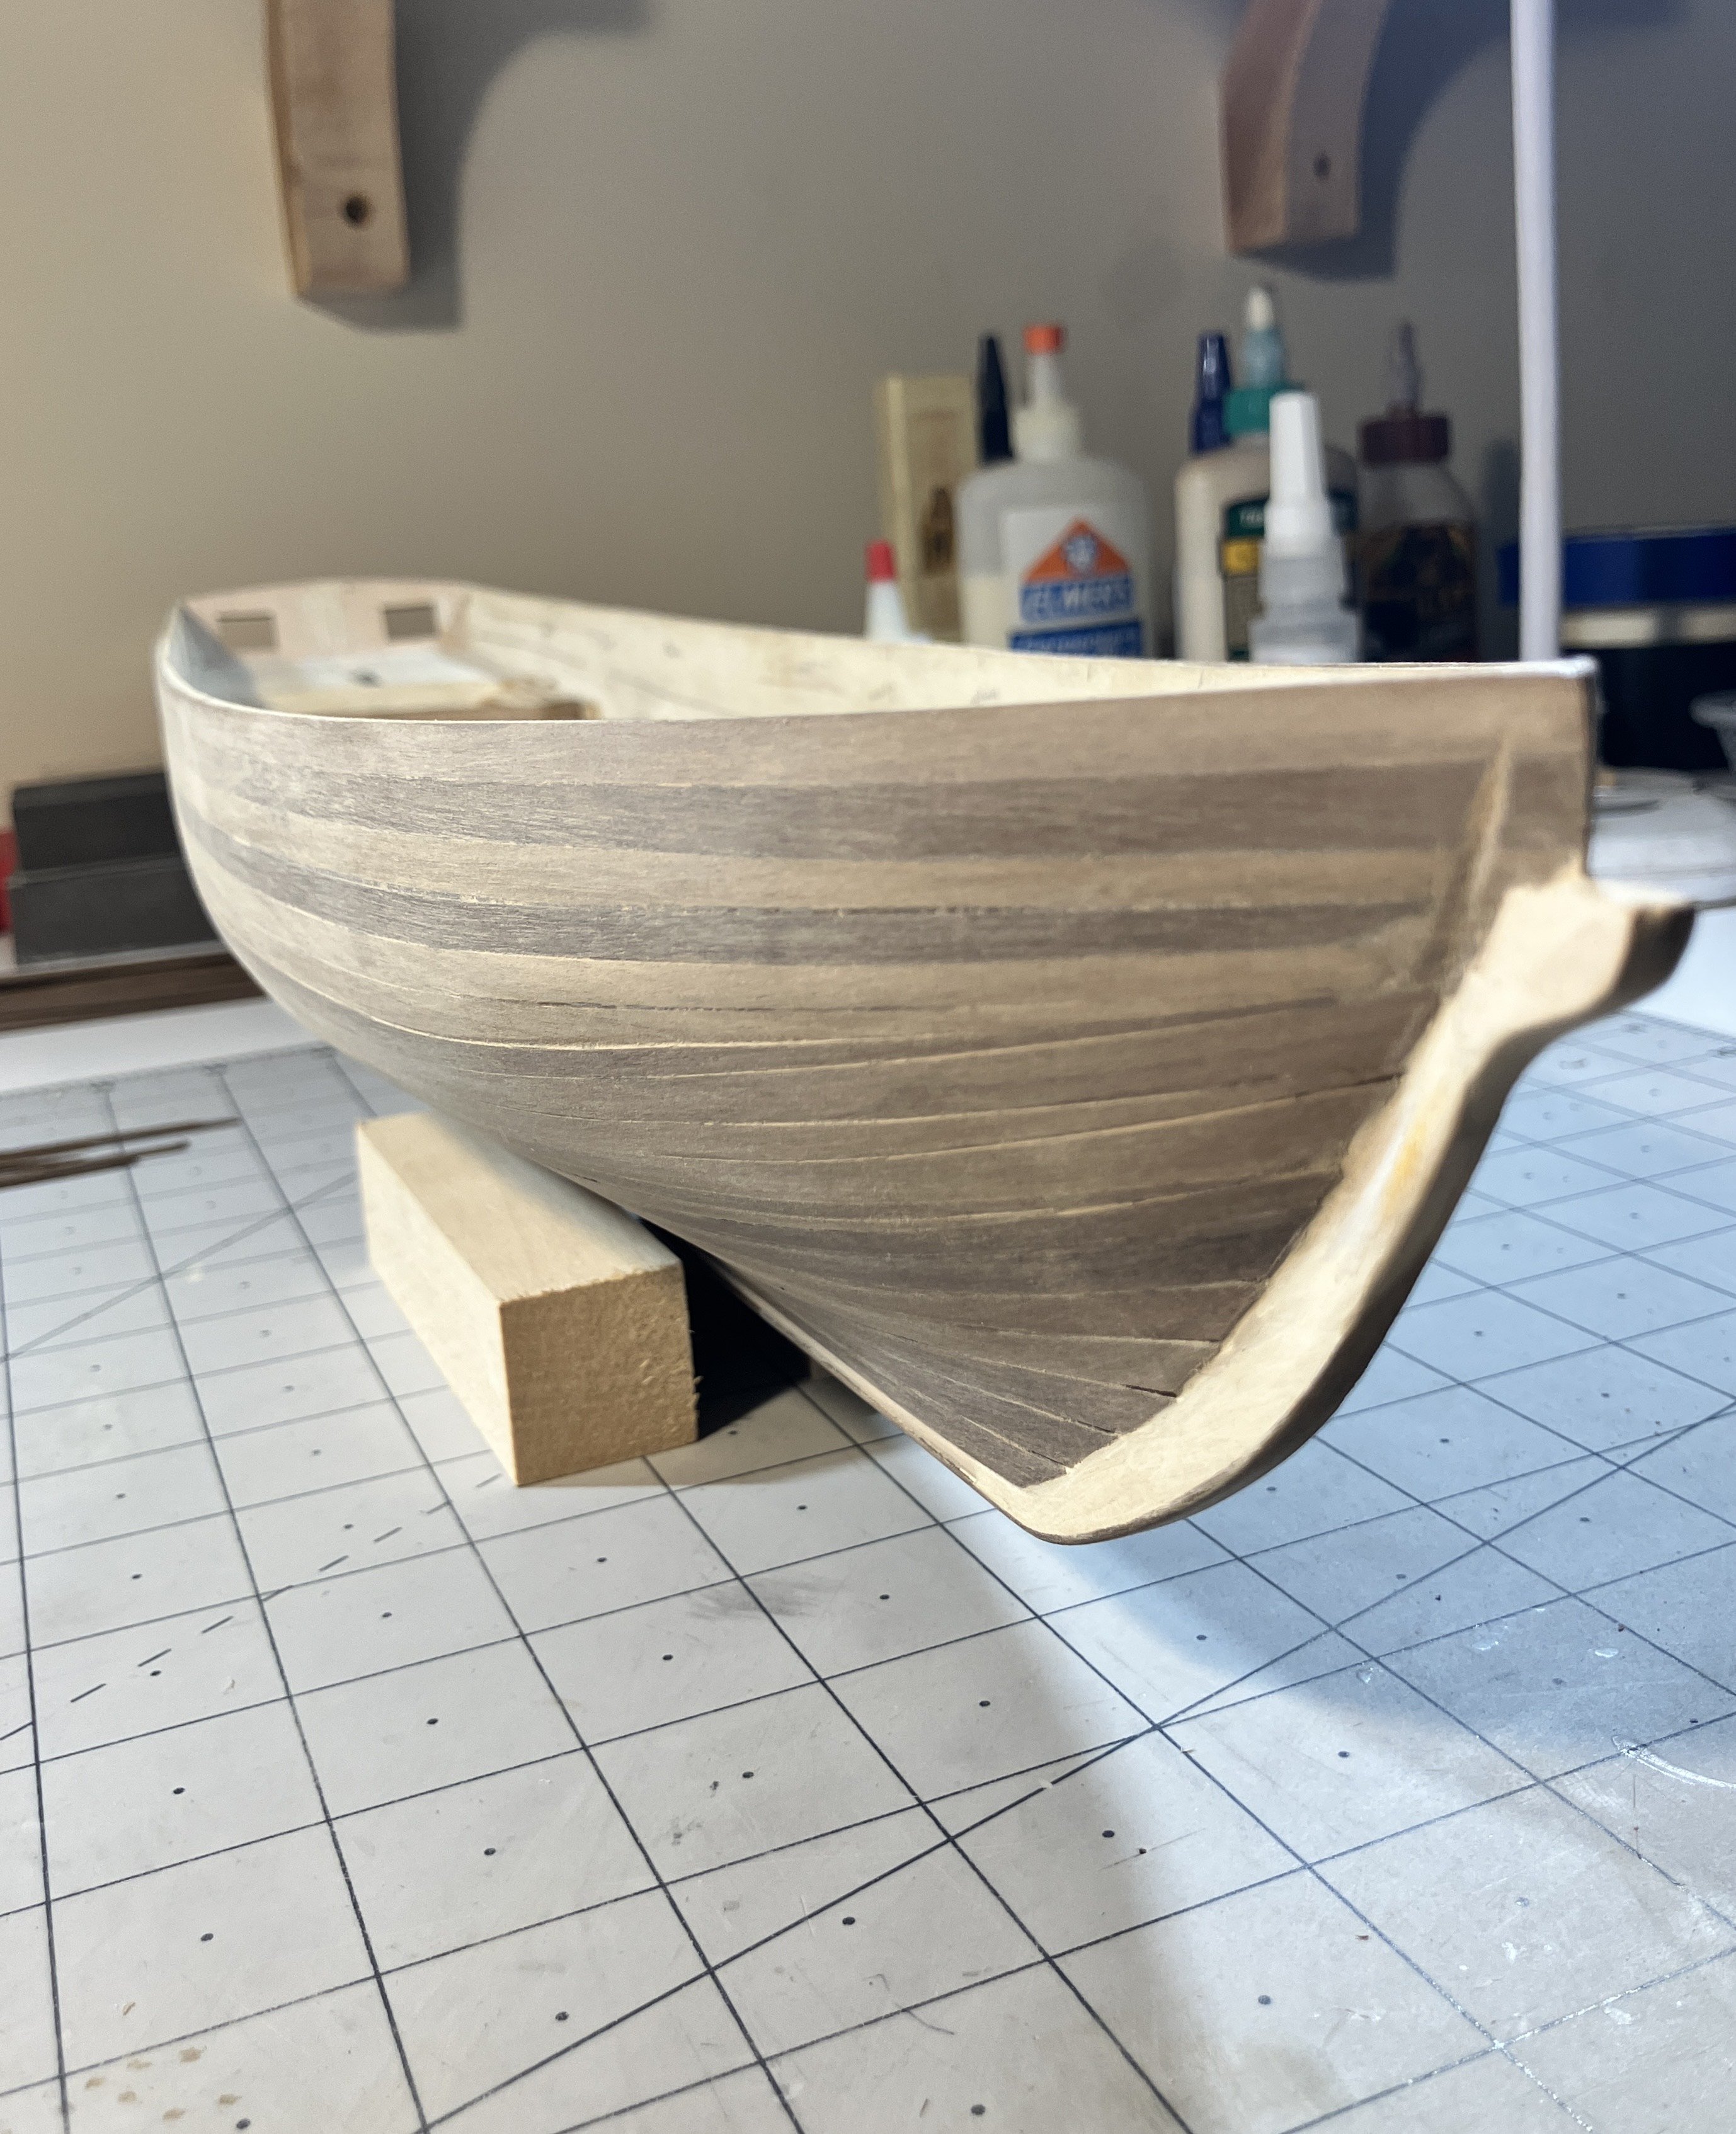
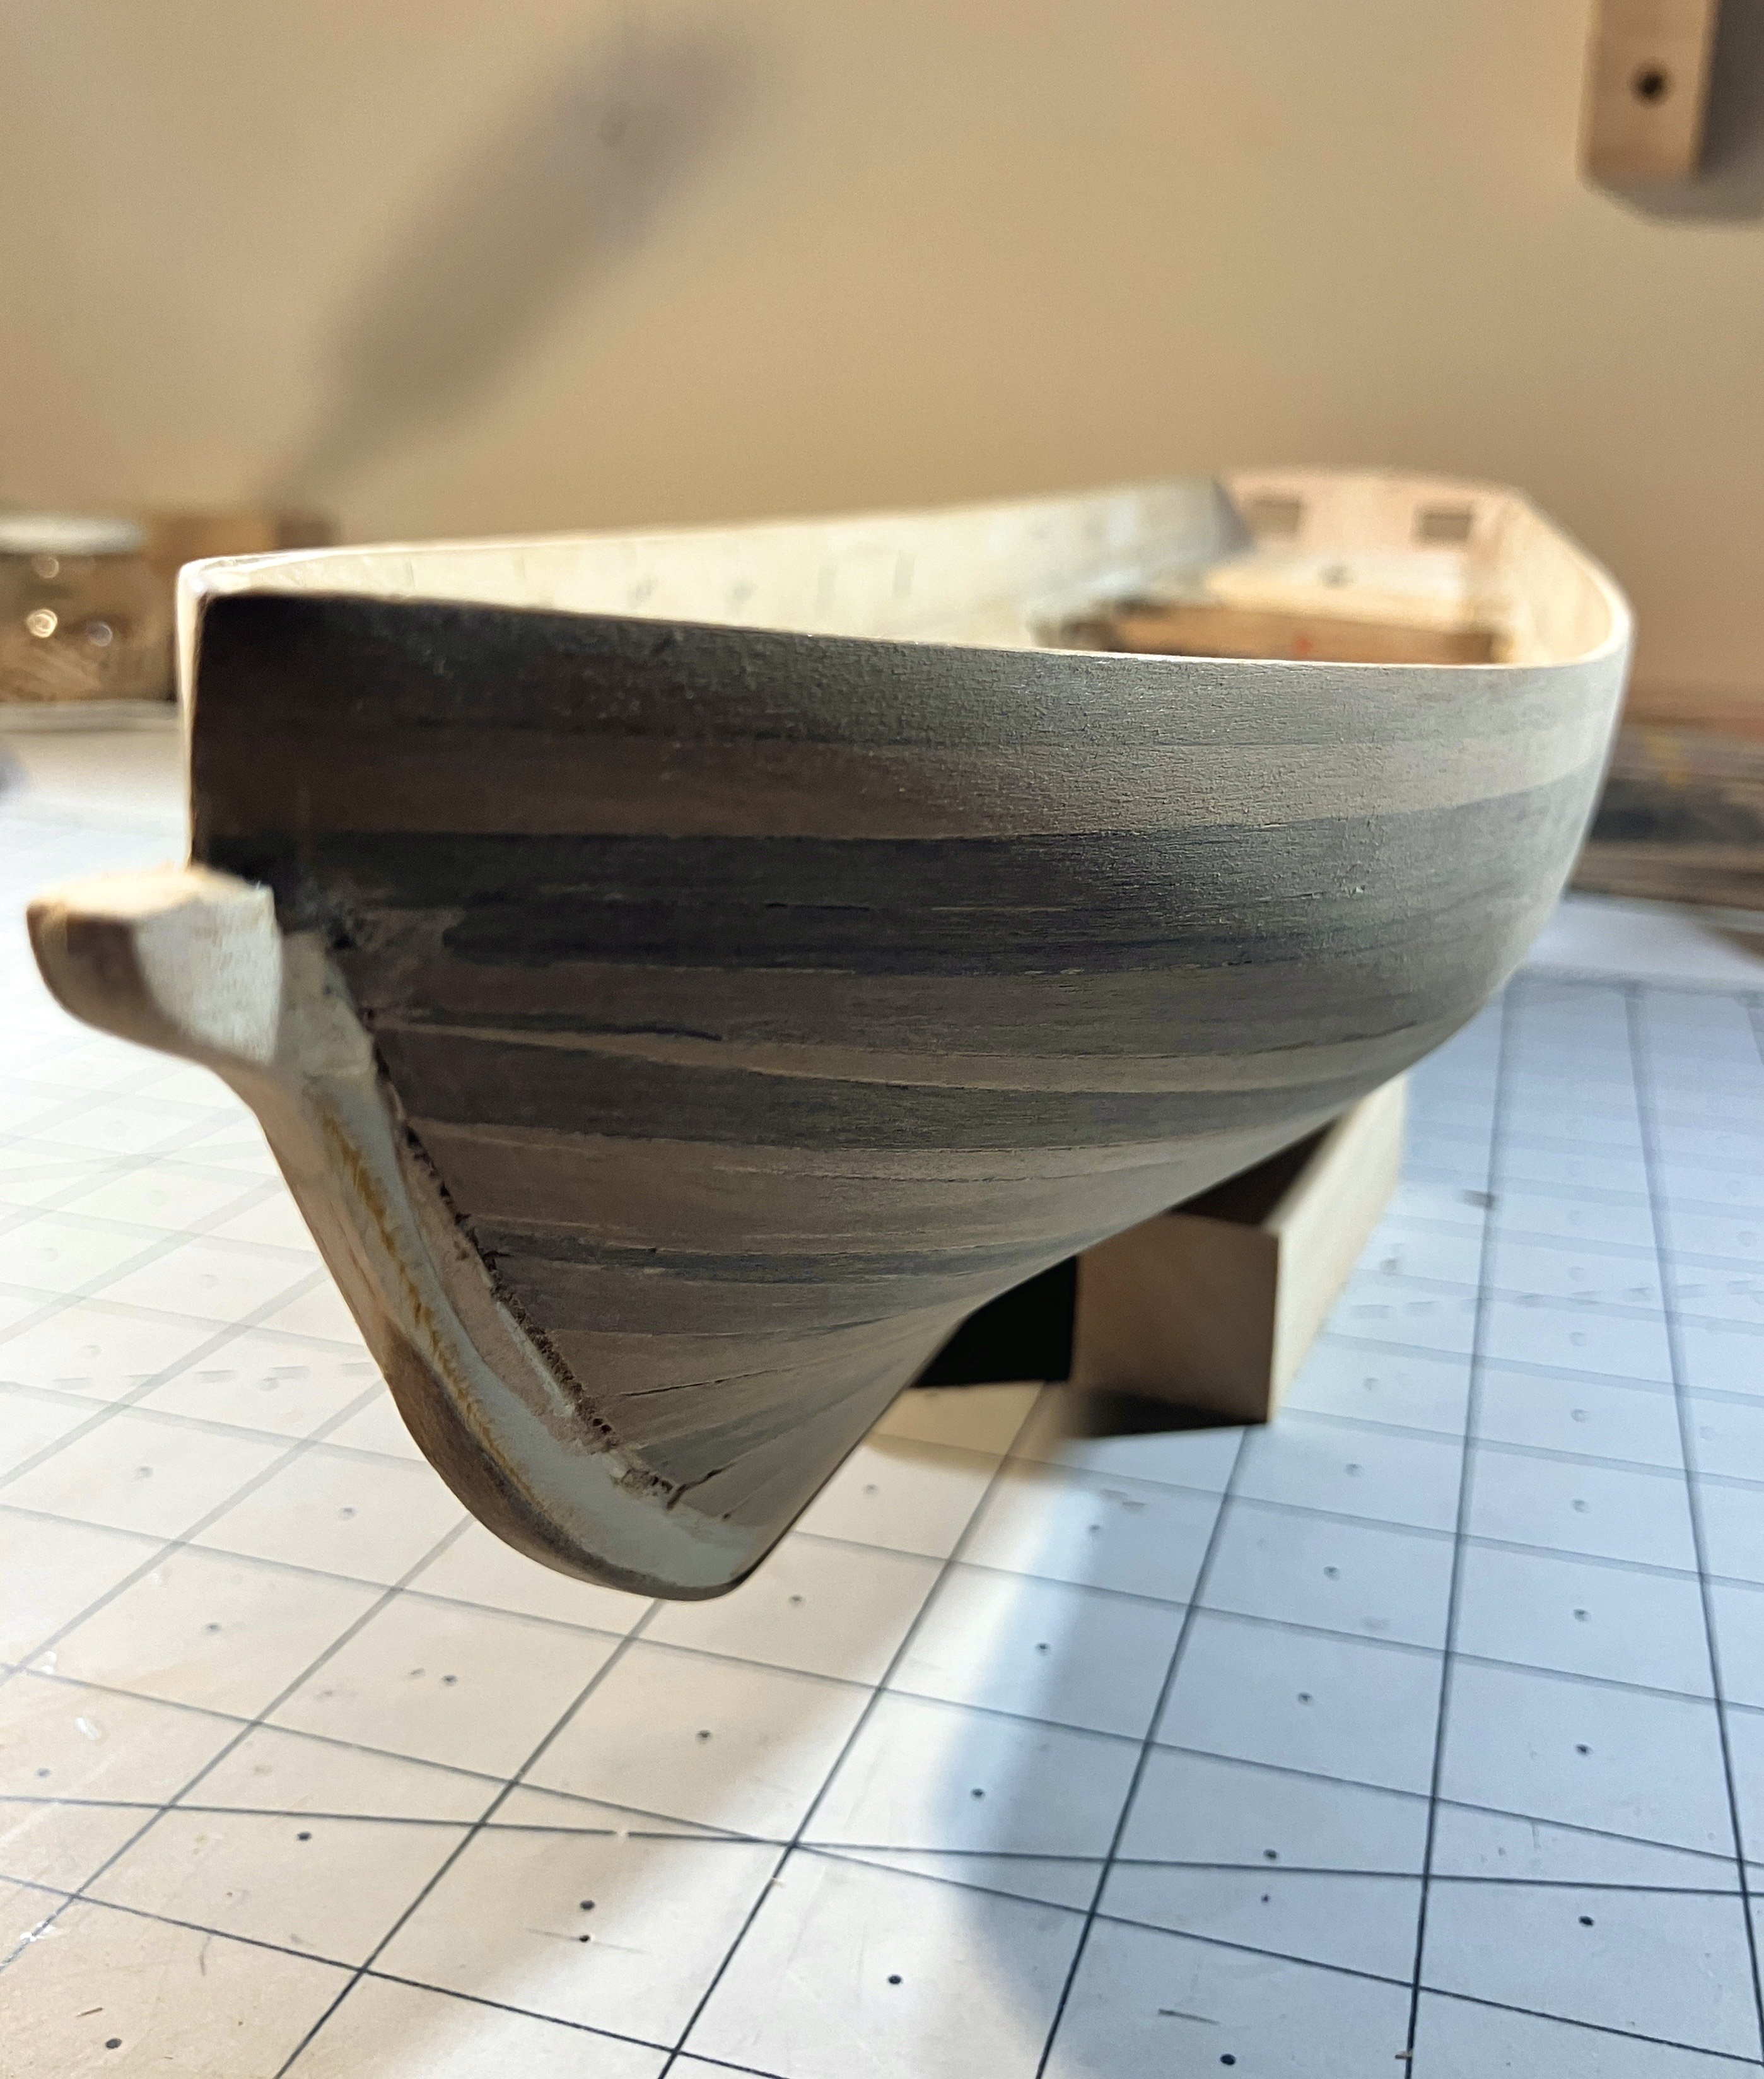
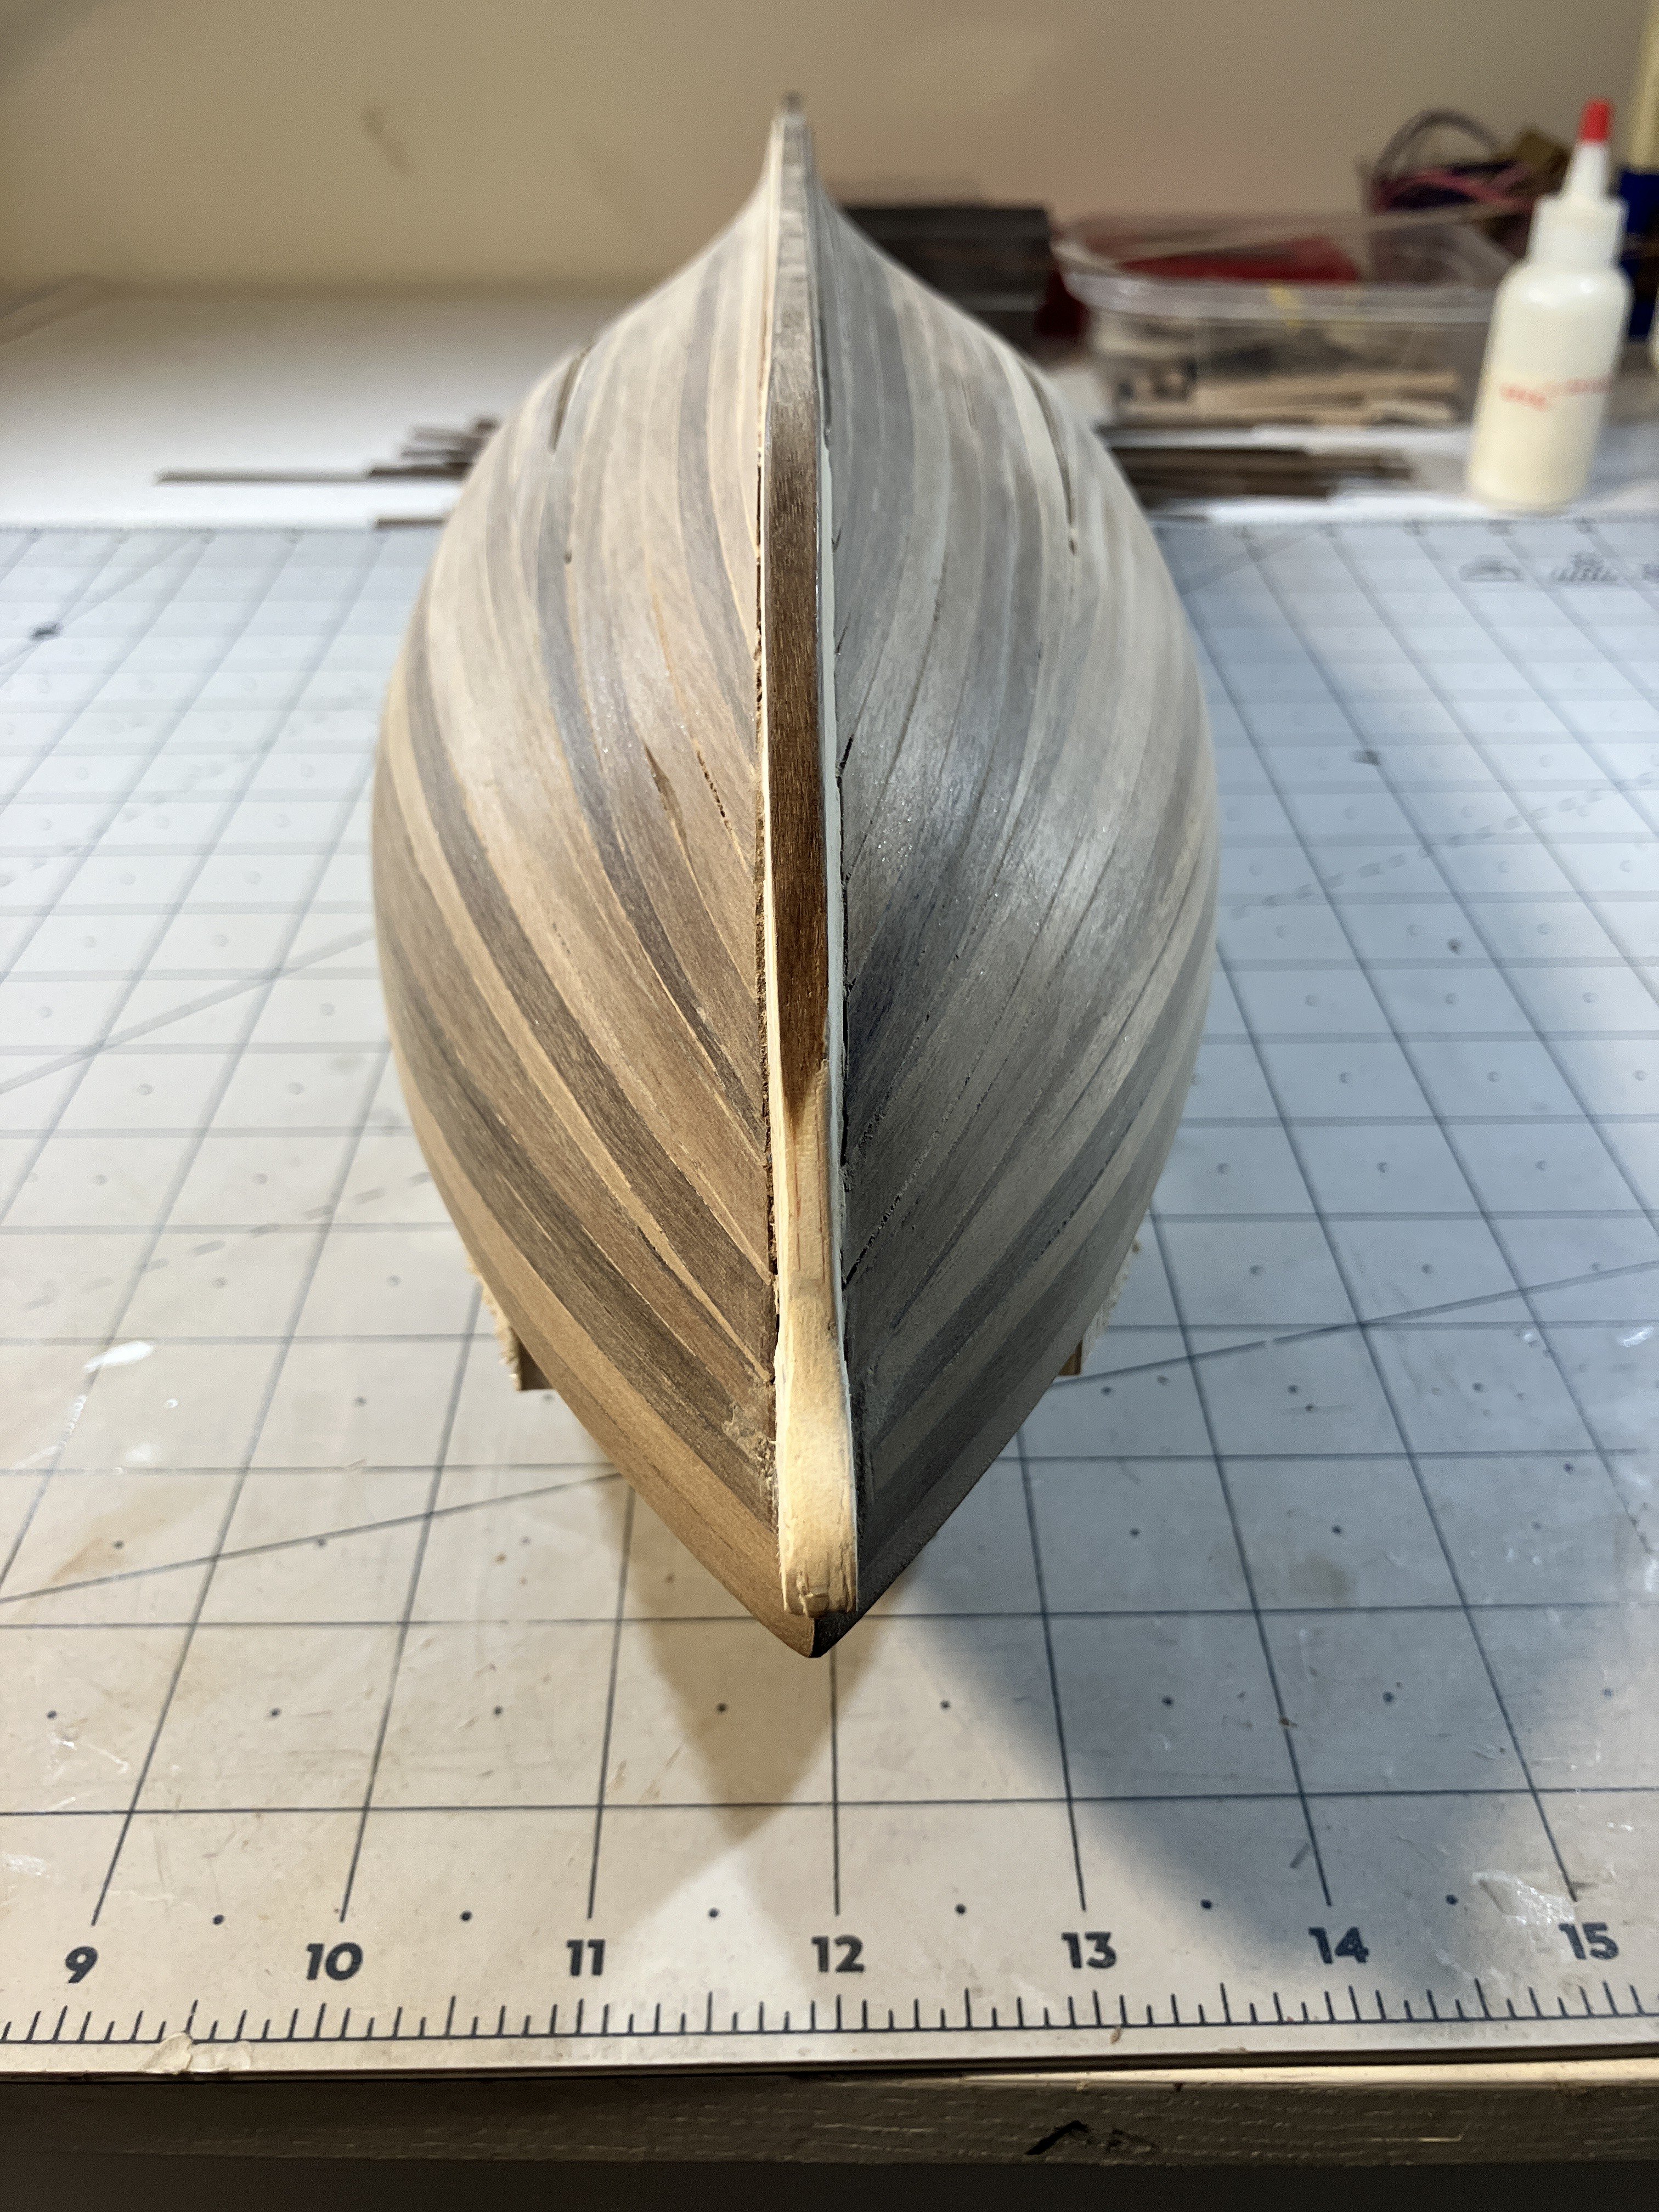
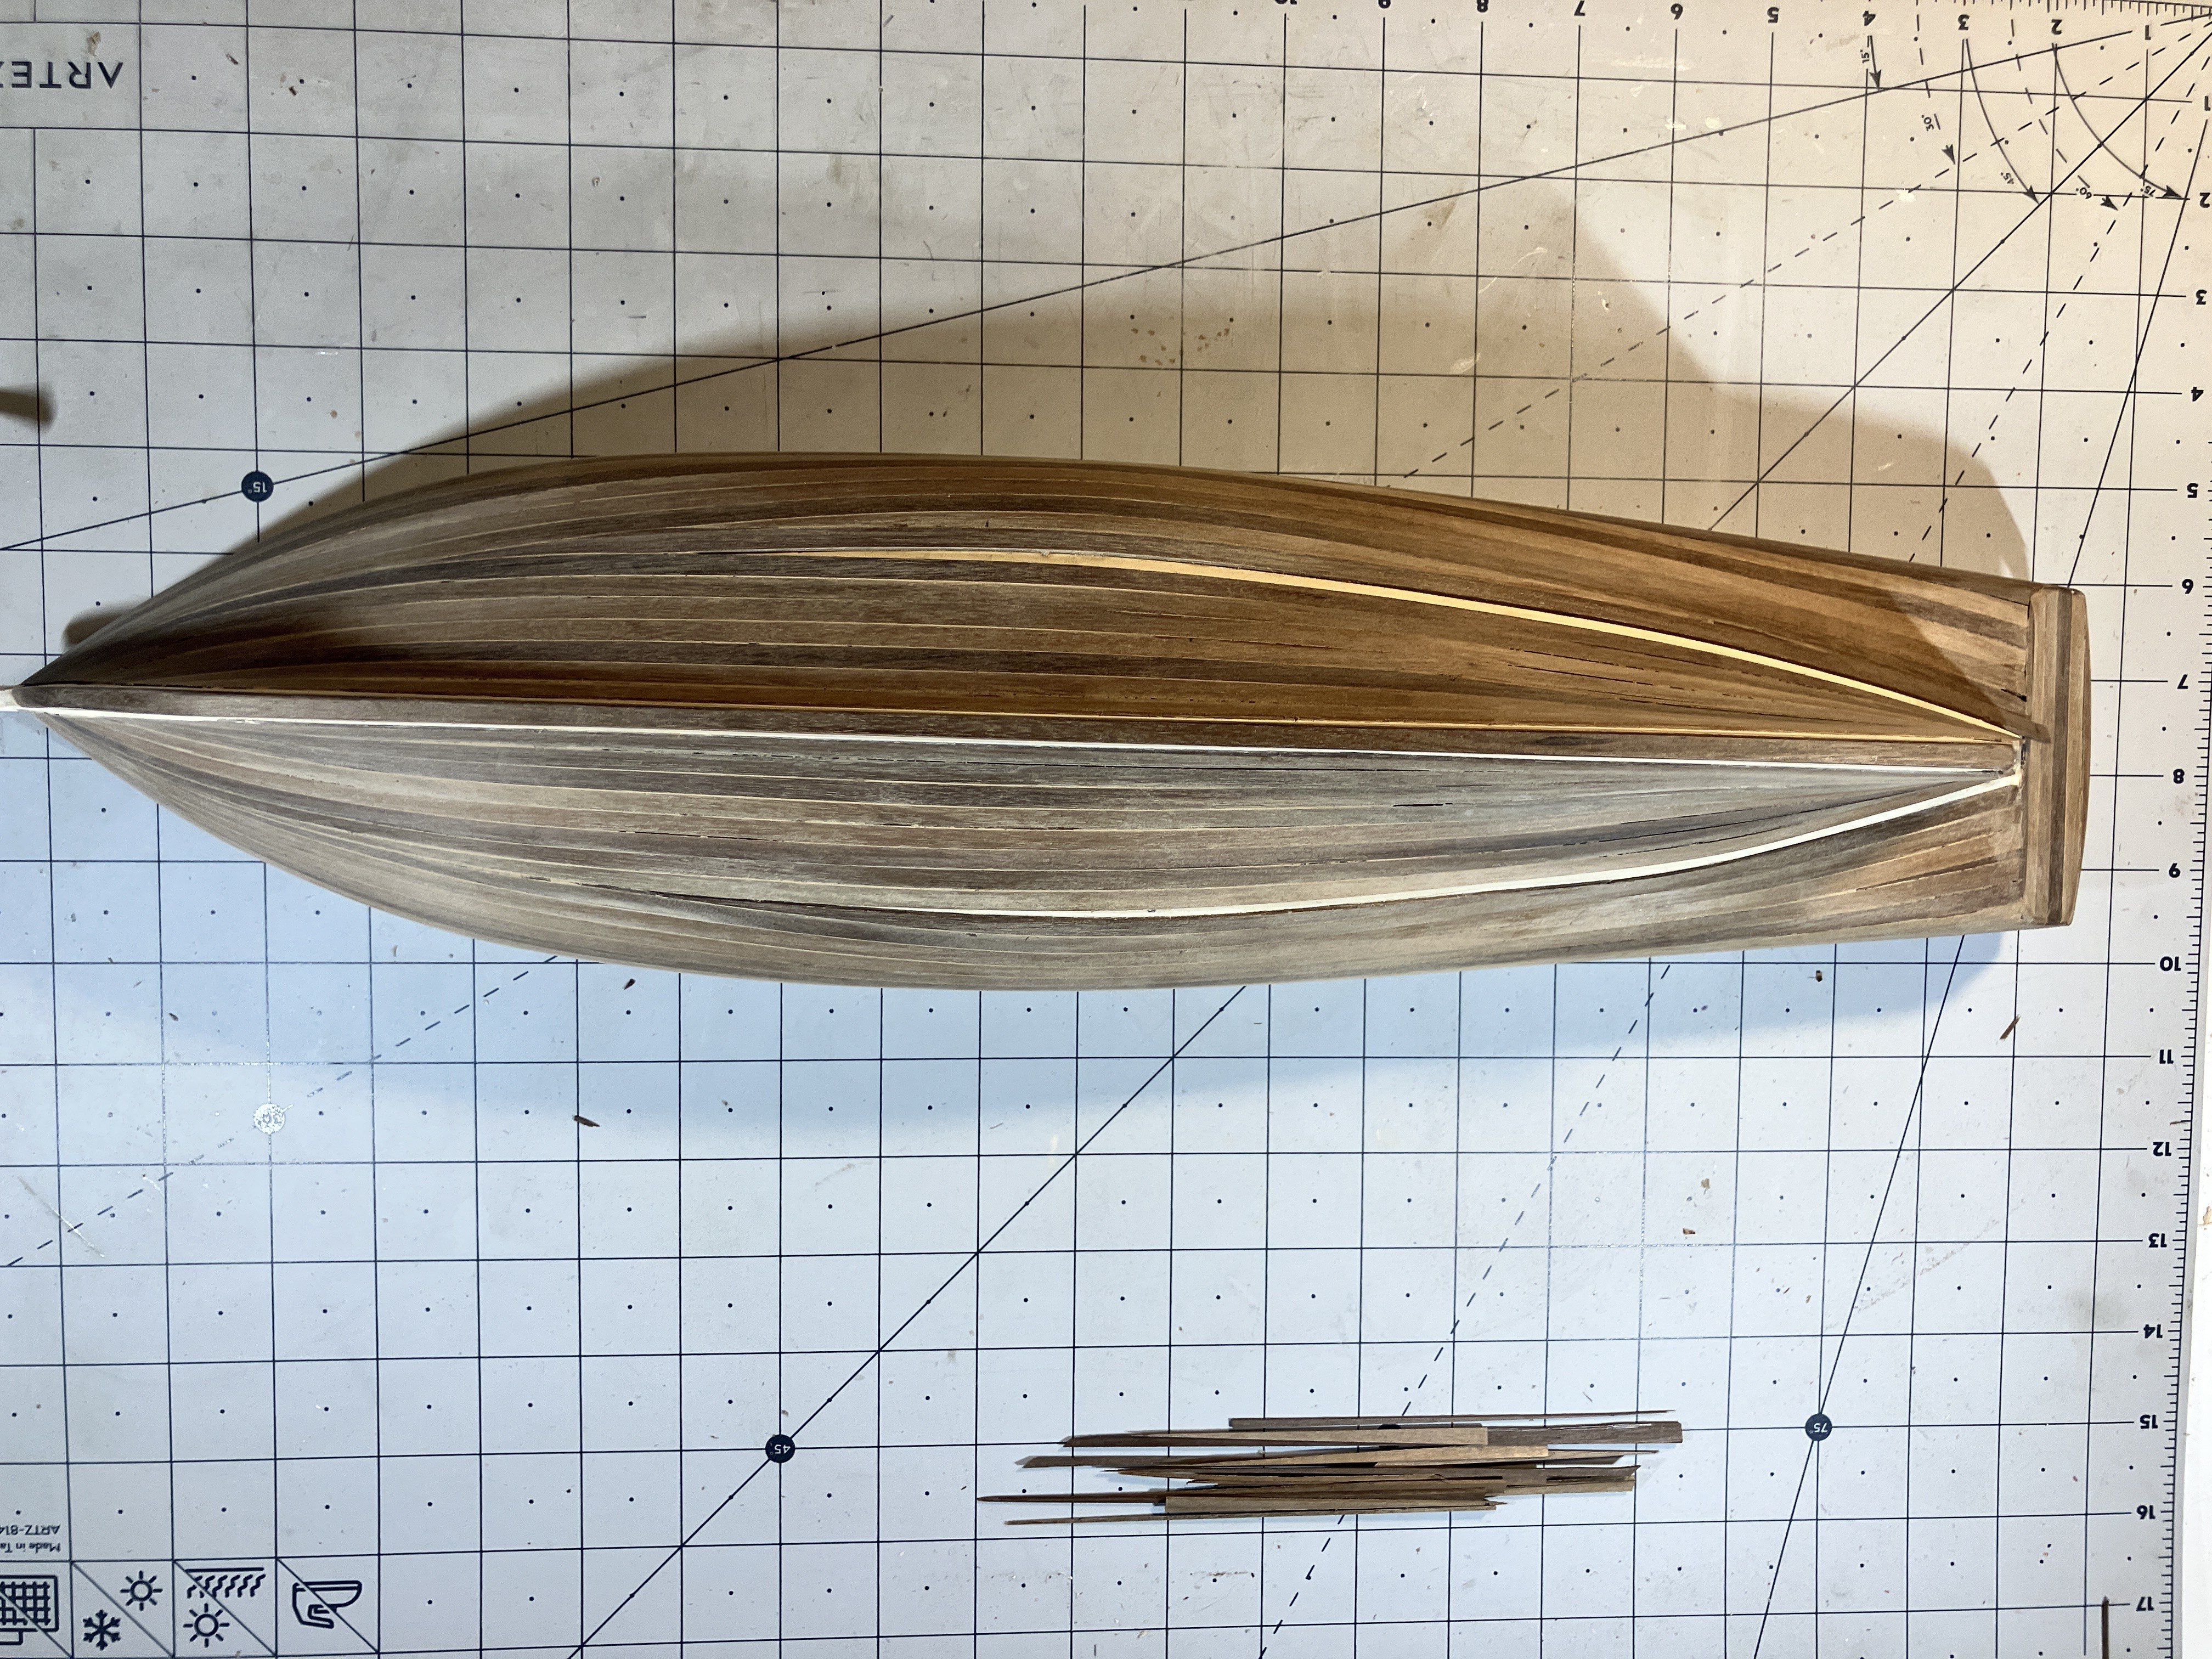
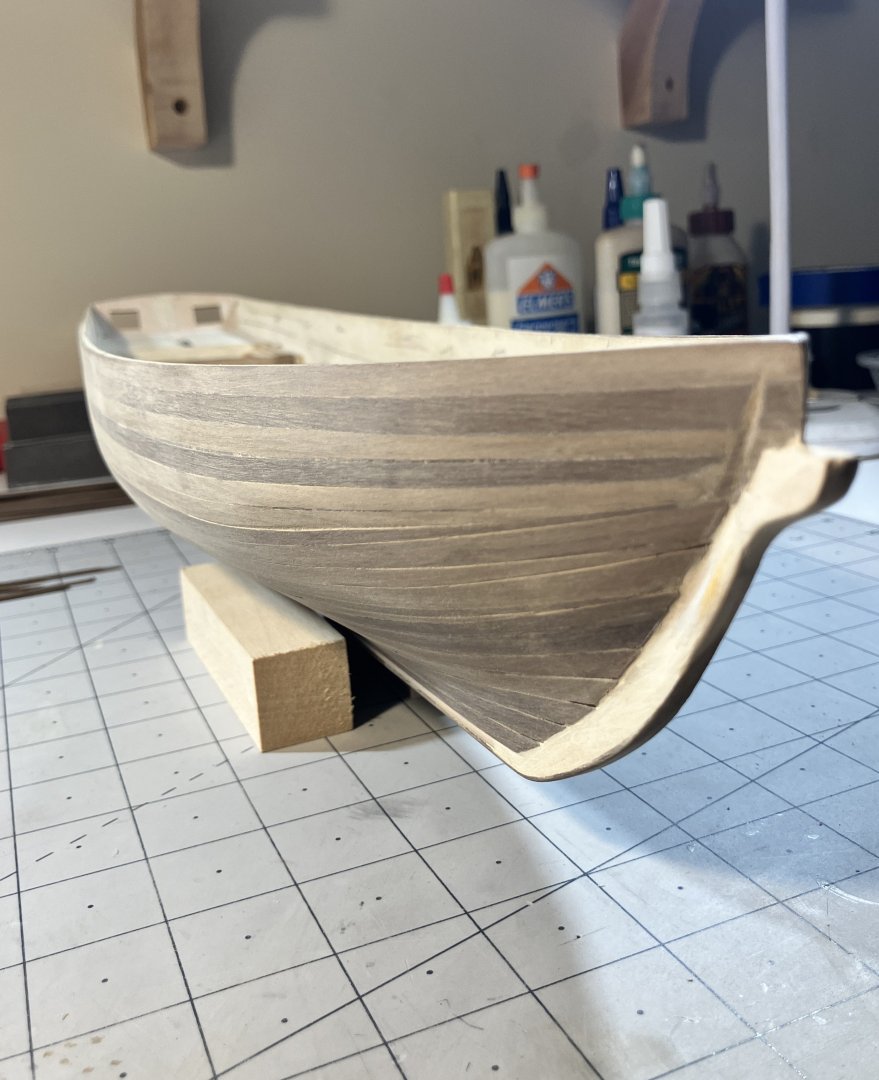
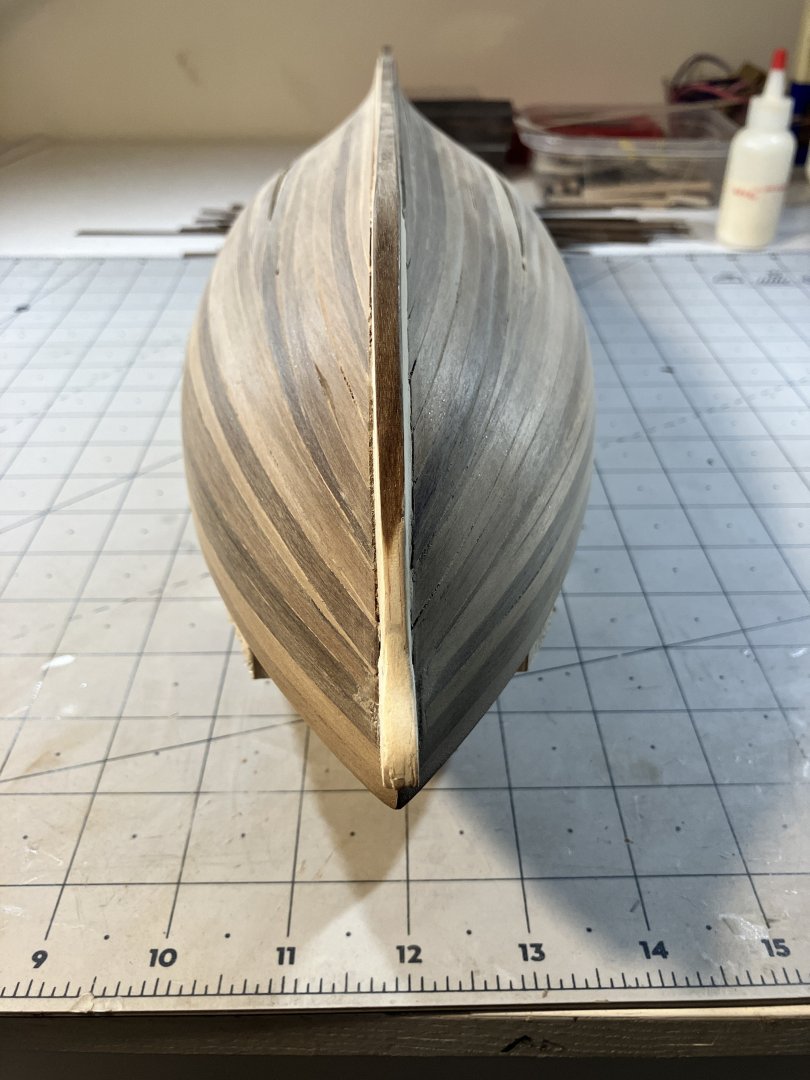
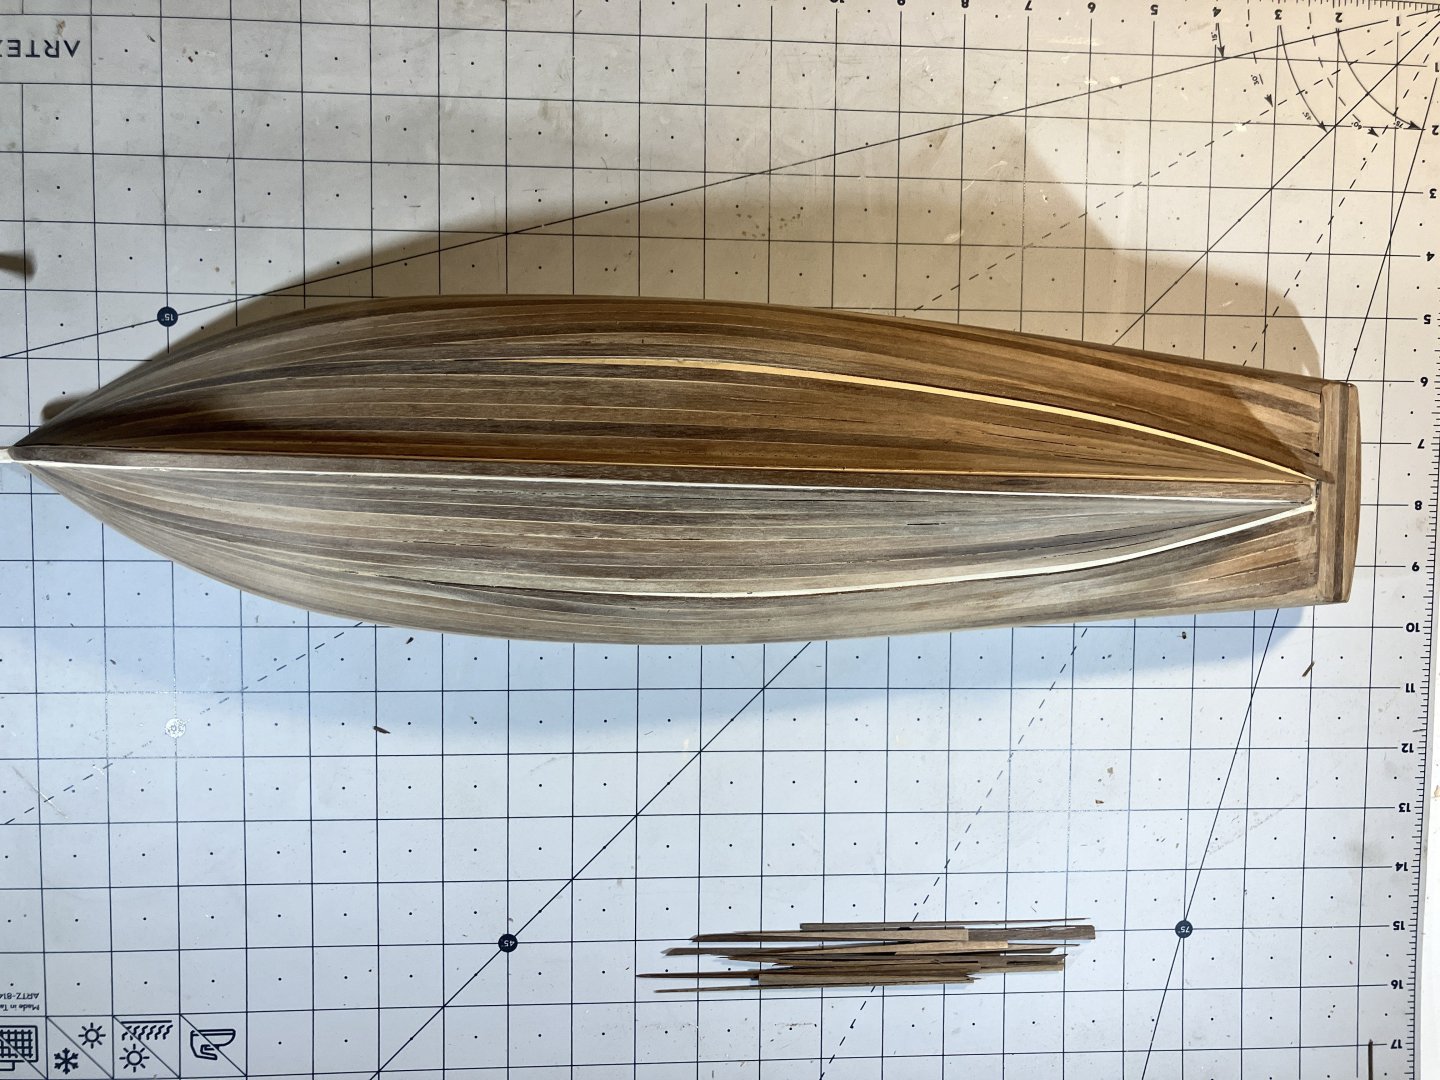
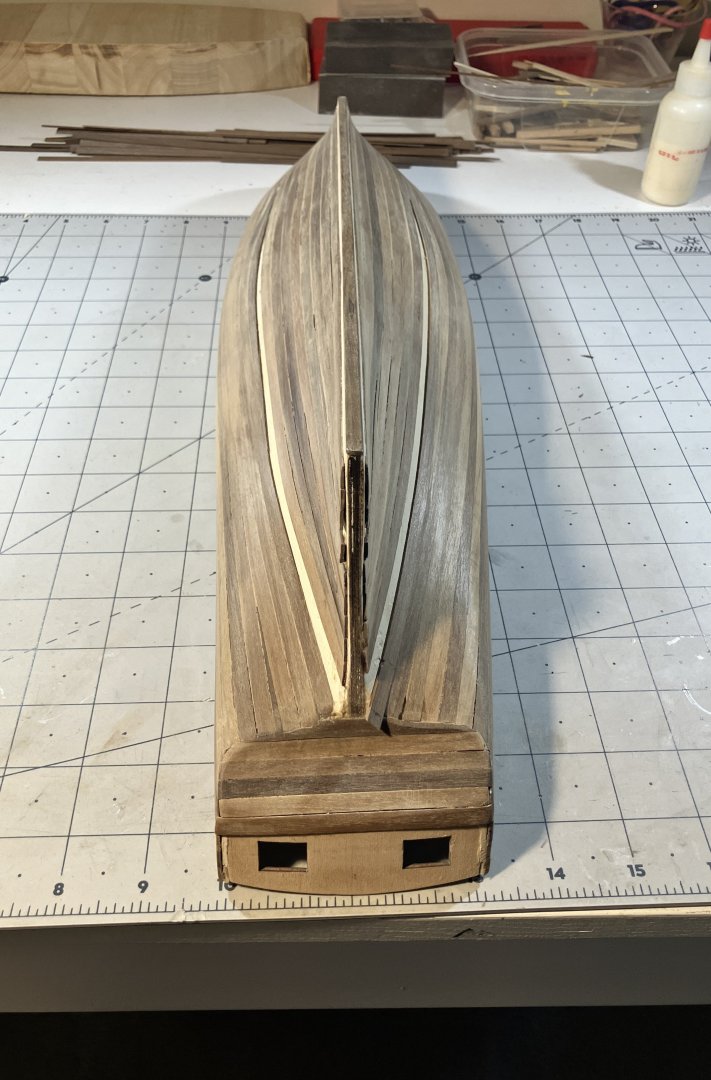
Almost there ........ The end is in sight with regards to the second planking. Although the hull will be painted I wanted to make it look as nice as possible, and it's good practice. I still have a few fillers at the stern to add and the transom still needs a few strakes also. Once that is done she will get a final sanding, some fine tuning to fill in any small gaps and tie up some loose ends and the hull is complete. I decided to do some surgery on the gammoning knee after all. I was just not happy with the way it looked (size does matter in this case folks). I made it longer and added the shaped strake I had prepared earlier on in the build to the keel. That plywood looked just awful!

-
I just sat here and read through your build log, Jerry. What a fantastic project!
-
That is one fine build sir. Very inspiring to say the least.
- 79 replies
-
- 1
-
-
- pride of baltimore
- privateer
- (and 3 more)
-
It does look good, Jo. Just a point on painting the bulwarks instead of planking them though - I was always under the impression that putting those inside planks on the bulwarks strengthened them somewhat and that gave the gun ports a little more stability, structurally. This is not based on fact buddy, just my opinion.
-
Nice work, Glenn. I am researching the masts and booms for my build also, it is a nice break from the task of finishing the second planking. Have fun with those blocks!
- 241 replies
-
- 2
-
-
-
- Vanguarrd Models
- Harpy
- (and 1 more)