dvm27
-
Posts
2,468 -
Joined
-
Last visited
Content Type
Profiles
Forums
Gallery
Events
Everything posted by dvm27
-
 I can indeed confirm that Ropes of Scale is adding the tariff to their prices. But it's not Ben's fault and he has no choice but to pass on the tariff to customers. As for Chucks products I believe, like most artists, he is amazingly talented but a crappy businessman. I think we all know the value we are getting with his products. I bet things would change if his wife ran the business!
 -
Congratulations, Henry, on the completion of your Swan class model. I believe you have incorporated every element included in our four volume series and, that in itself, is an amazing feat. Look forward to those final photos. Greg
- 257 replies
-
- 1
-

-
- pegasus
- Swan-class
- (and 1 more)
-
Mark, what I do on the unplanked side is insert a small filets of boxwood (or holly in this case) under the gudgeons that are the same width so that the gap is filled.

-
Just curious Vaddoc, but have you every tried to contact Leo? As a patron of his channel he sent me a personal thank you and, as well, very much enjoyed seeing some of my ship models. He really is as nice as he seems in his videos. If you were to inform him of your project I suspect he would find it of interest and maybe even help you with problem areas. After all, he has the real thing.
-
I believe that 90% of milling is getting the correct setup. Congratulations on mastering both aspects of woodworking. I hadn't notice that you changed your name from "No Idea" to "Some Idea". I believe you're ready for another change to "Many Idea(s)".
-
Congratulations on the completion of your beautiful decade-plus model. I'd venture a guess that many have started building Cutty Sark but few have finished.
- 42 replies
-
- 1
-
-
- Cutty Sark
- Sergal
- (and 1 more)
-
Looks fantastic Cisco! For forming very small eyes or squeezing those brass rings together in your jig check out https://www.lindstromtools.com/us_en/round-nose-tipped-pliers-with-synthetic-handle-pb_7590-7591_.html These tapered round nosed long tip pliers should be in every modelers workshop. You can also purchase acrylic markers which are perfect for painting nail heads and other touch ups. For example on Amazon https://www.amazon.com/Arrtx-Black-Acrylic-Paint-Pens/dp/B0BNNBLPYC/ref=sr_1_6_pp?crid=PG14ZMY19NK8&dib=eyJ2IjoiMSJ9.V6hDpXydVSevtUk2GHUhRarGzI-spNScCnP4DIbkwf40k_T46pel4IisxFZnRlsdj_yCx_QPo-uWjqC5Iz7EbMdsDmf6jEMDkiPxhzi2onEh0EknNBFMJraonquMdZKAr7pUjwD9BP_ZJYLcP6-EeDqENkcXA8QMjujhorxzYonrSZBWg_CvORqGzmv-tZ5H2-VO_9zWL_8IDXt52jlDqSyroXzkHPOtXRRvEenVrygCy47Vitid2GL8id9oIFcBWxm29mXSPxeAGGkhsciY6bQ32oS3_NuSuAPkzI5ando.df48nI2iAEzWBf8AWD5nW8tP6orYYf_xnEs_vUwuAbg&dib_tag=se&keywords=acrylic%2Bpaint%2Bmarkers&qid=1758409515&sprefix=acrylic%2Caps%2C114&sr=8-6&th=1
- 27 replies
-
- 6
-
-
- Speedwell
- battle station
- (and 1 more)
-
Mara thread - what colors do you use for fabricating ropes
dvm27 replied to Sterling59's topic in Masting, rigging and sails
In French Navy Board ship models I've noted that approach as well Chuck. I actually like the way it looks. According to M. Delacroix, the noted French naval scholar: "In the French Navy, all ropes are tarred, whether standing or running. This color is reddish-brown. The color then changes with use: - The color of the standing rigging dont change and even tends to darken with the successive layers of tar it periodically receives, turning a dark brown close to black. - The color of the running rigging does exactly the opposite; the ropes lighten as they pass through the blocks, as they rub against other elements in the mast, and of course at the mooring points. The color of these ropes then becomes slightly lighter, towards a light brown. The vast majority of models in French museums were re-rigged by people with limited knowledge. It is therefore not surprising to find beige ropes in museums." -
Welcome aboard Willi. It's rare to see a museum quality model such as your Swedish yacht actually under sail. Well done!
-
Mara thread - what colors do you use for fabricating ropes
dvm27 replied to Sterling59's topic in Masting, rigging and sails
With regards to color, what often begins as Manila hemp starts to deteriorate as soon as it is hit by sunlight, rain and salt water. As well, rope is constantly replaced on on a ship over time so it would not be wrong to show several shades of tan and gray. Standing rigging was usually tarred so darkish brown would be appropriate. If you're wish to be super technical regarding your rope, note the worming of the shrouds in the first picture. Even at 1:48 scale, wormed roped that is then served is smoother that non-served rope. But Archfoto is the only builder I've seen do that and it's way above my pay grade! -
Really? 3D printed, when it took me several attempts over three days to shape, solder and blacken mine? Your excellent model is just as scratch built as mine but has taken 1/5th as long to make it. Your bulldog is very well designed. A close up of his face shows normally sized nostrils so the classic brachycephalic syndrome common to this breed appears to have been averted. Well done, Doc!
-
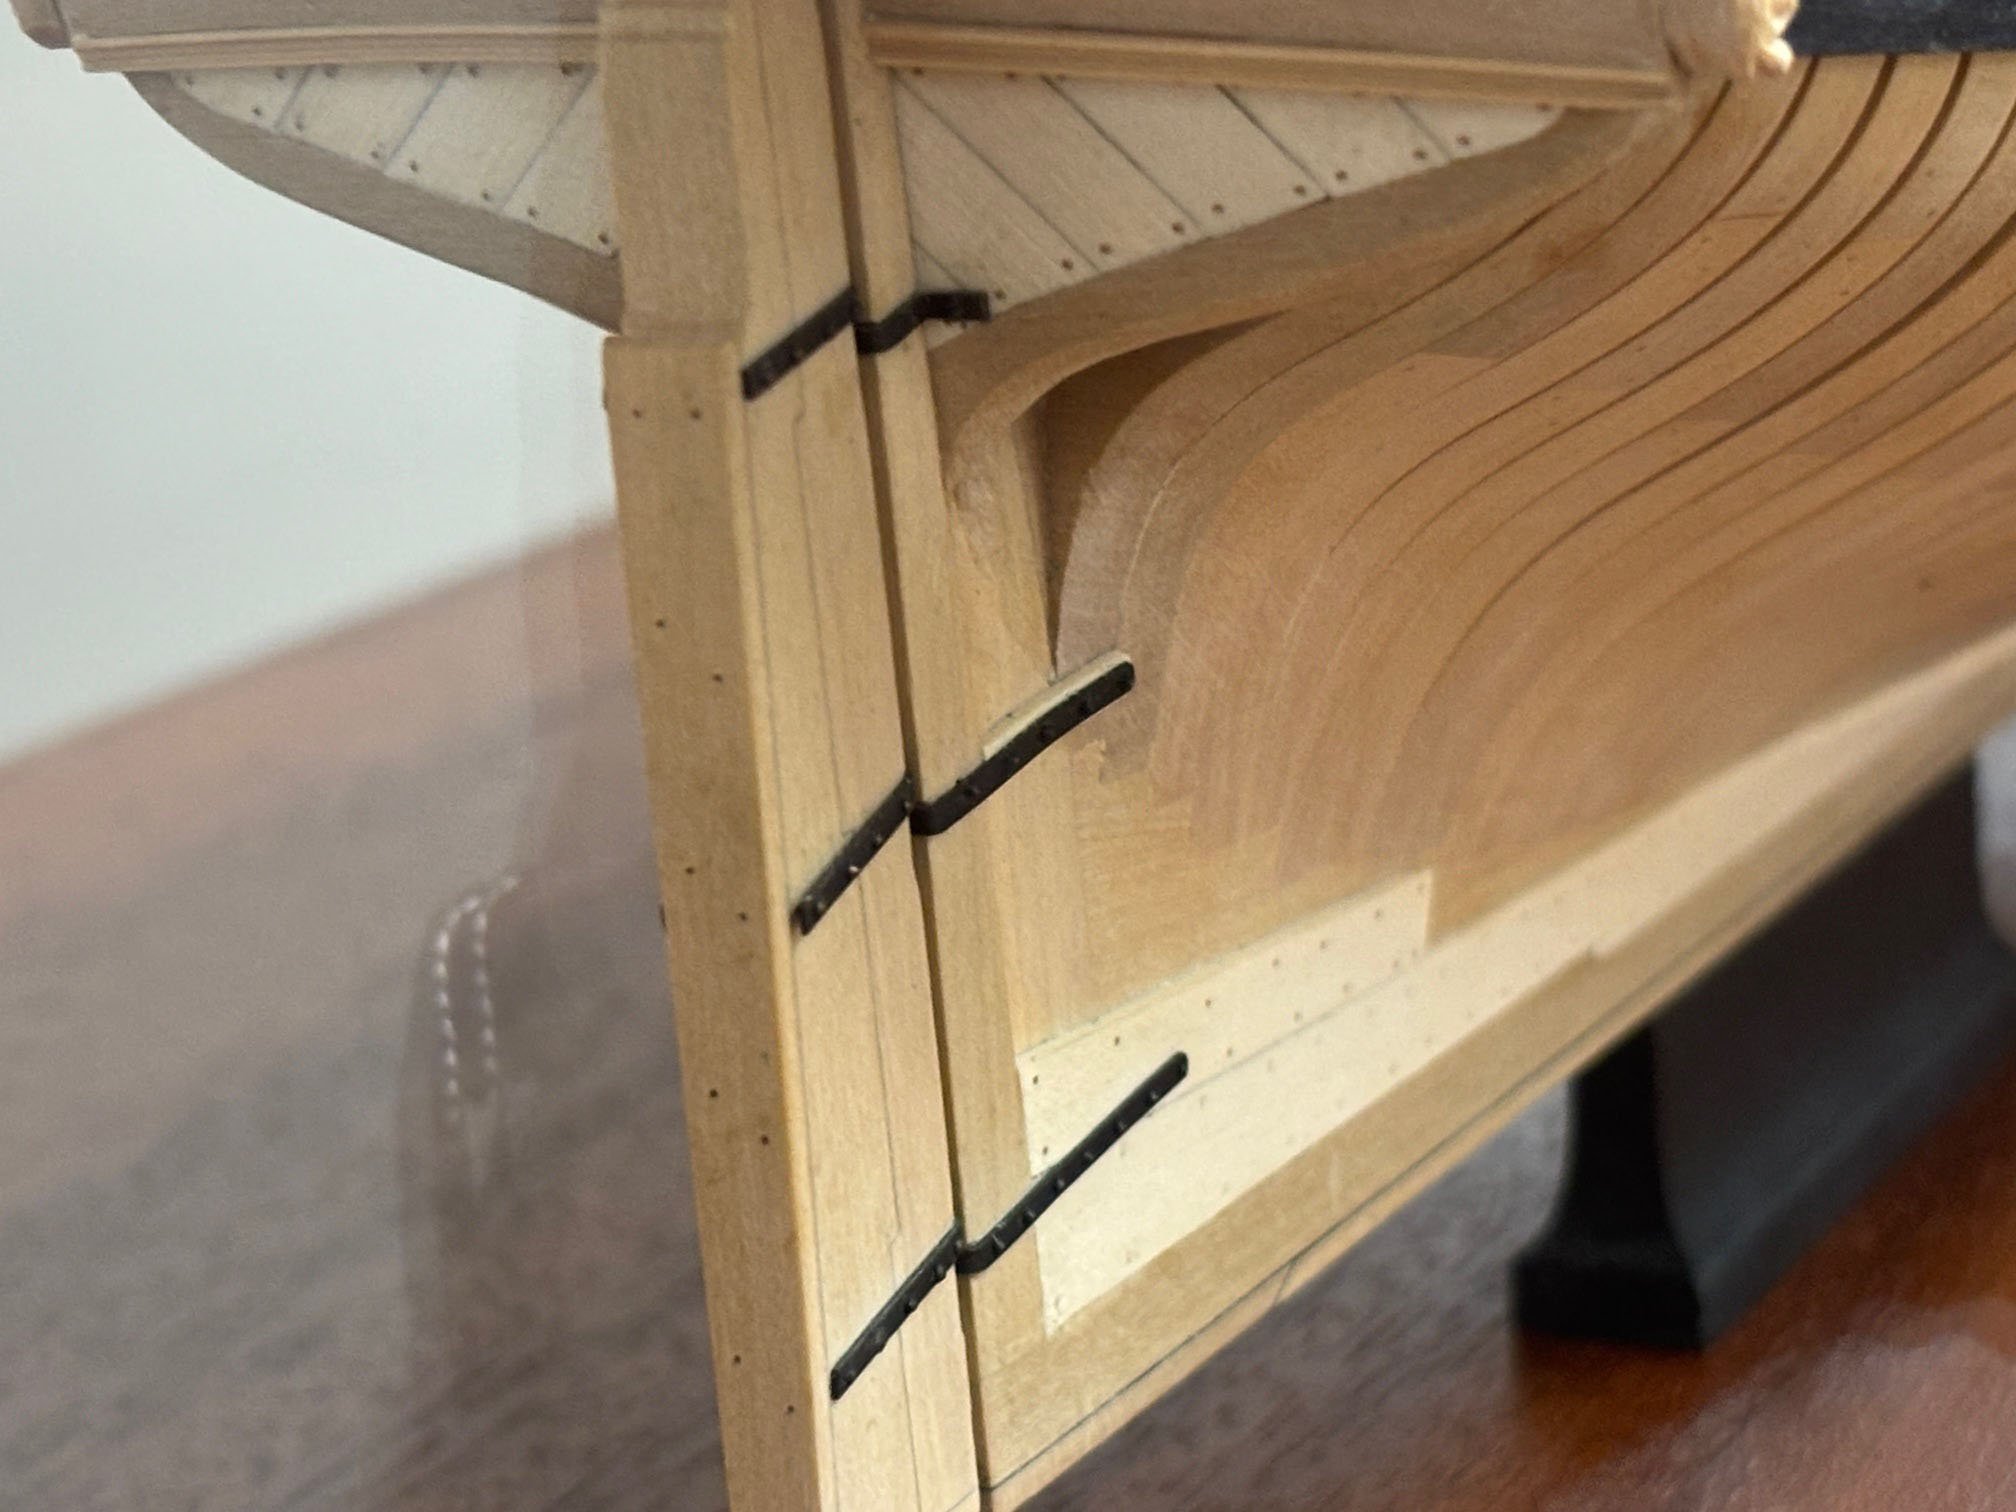
Looks like you had a great trip. My last time to england (in the 1980's) there were a hundred or so Navy Board ship models in the Science and National Maritime Museums. Now, I believe 90% of them are in storage. Nice work on the deadeye strops/ Probably the best place for the joint is along the side just under the deadeye. Less pressure on the joint and it is hidden in the channel.
- 27 replies
-
- 5
-
-
- Speedwell
- battle station
- (and 1 more)
-
Just curious - is this model commissioned for a private individual or a museum? You have a very talented team of craftsmen.
-
Good observation! You actually cut your rigging by about 50% by not including sails.
-
Those are fantastic upgrades Jason. The appearance of the rigging is greatly enhanced by the upgrade in blocks. For the fuzz, try flicking a Bic lighter over them very them briefly. The fuzz will quickly melt away. Do some practice ones off the model first though. After a while you'll get comfortable enough to do this on the model.
-
If I'd taken the time to blog in addition to building the prototype Swan class model I'd still be building her! Not only have Kevin's modeling skills improved dramatically but his video work has progressed from amateur to pro.
-
Good luck with those wales Alan. Oddly, I've seen models where these joints were so well done that, after staining or painting, they were no longer visible. Their solution was to lightly chamfer the outer edges
-
Chuck in a tux? Or will it be a Hawaiian shirt?
-
Congratulations on the completion of yet another fine build, B.E. A very clever presentation as well, saving you a lot of vertical space!
- 332 replies
-
- 3
-
-

-
- Harpy
- Vanguard Models
- (and 1 more)
-
When in doubt, do it over. Took me three times to get my hawse timbers to where I was happy with them. But each version went quicker. Having ruined a prior model with an electric sander I stopped using it. 80 grit paper will keep you from getting into trouble.
-
For anyone else enchanted by this lovely model feel free to check out this video on YouTube https://www.youtube.com/watch?v=GPCAArQ7APY. It depicts both of the Phil Reed's Speedwell models (Chuck's version and a Speedwell on a roiling sea). Notice the lovely catenary of the rigging, something I believe you can only do with wire rigging.
-
That model inspired me as well Chuck. I look forward to your take on furling sails. Are you going to add that cutter? I believe I'm going to retrofit one after my current project is over. It's sitting on a couple spare topmasts I believe.
-
Tenoning those transom timbers into the fashion pieces and aft cants requires a tremendous amount of skill. Hats off to both designer and builder here!
-
I rarely see the breast hooks fitted at this stage but it is a great idea!
-
Lovely capstan Chuck. Personally, I'd go for the red. The natural color ghosts out against the background. The red would pop like the other fittings along the centerline of the ship.