-
Posts
2,468 -
Joined
-
Last visited
Content Type
Profiles
Forums
Gallery
Events
Everything posted by dvm27
-
I have no dust collection system either Shawn so I typically do my fairing ourdoors. Obviously not ideal for your Nebraska winters but anything above 50 degrees was fine with me. If you're using cedar I think 40 grit is a bit aggressive and I'd start with 80. Repeatedly applying pencil marks to the frames will show you the low spots. Ultimately, the sound of the fine paper (220 grit) and running your hands over the surface will tell you when you are done. Start by fairing the midships frames then proceed to the fore and aft frames. If one frame still has pencil marks while those fore and aft of it are faired then re-evaluate the frame. If it was installed with an inward cant then all the other frames could be affected. In my Speedwell model I had to replace a fore frame for this reason during the fairing process.
-

Sovereign of the Seas 1637 by Tuvok - 1:78
dvm27 replied to Tuvok's topic in - Build logs for subjects built 1501 - 1750
That's fifteen years well spent Alessio! Welcome aboard and I look forward to future updates. -
I know what you mean Mike. Looking over the framing, knees, etc of Constitution and Constellation I am awed by both the size and fit of the massive timbers. That they were able to piece these timbers together with hand tools and simple rigging makes me marvel at their craftsmenship.
- 969 replies
-
- hahn
- oliver cromwell
-
(and 1 more)
Tagged with:
-
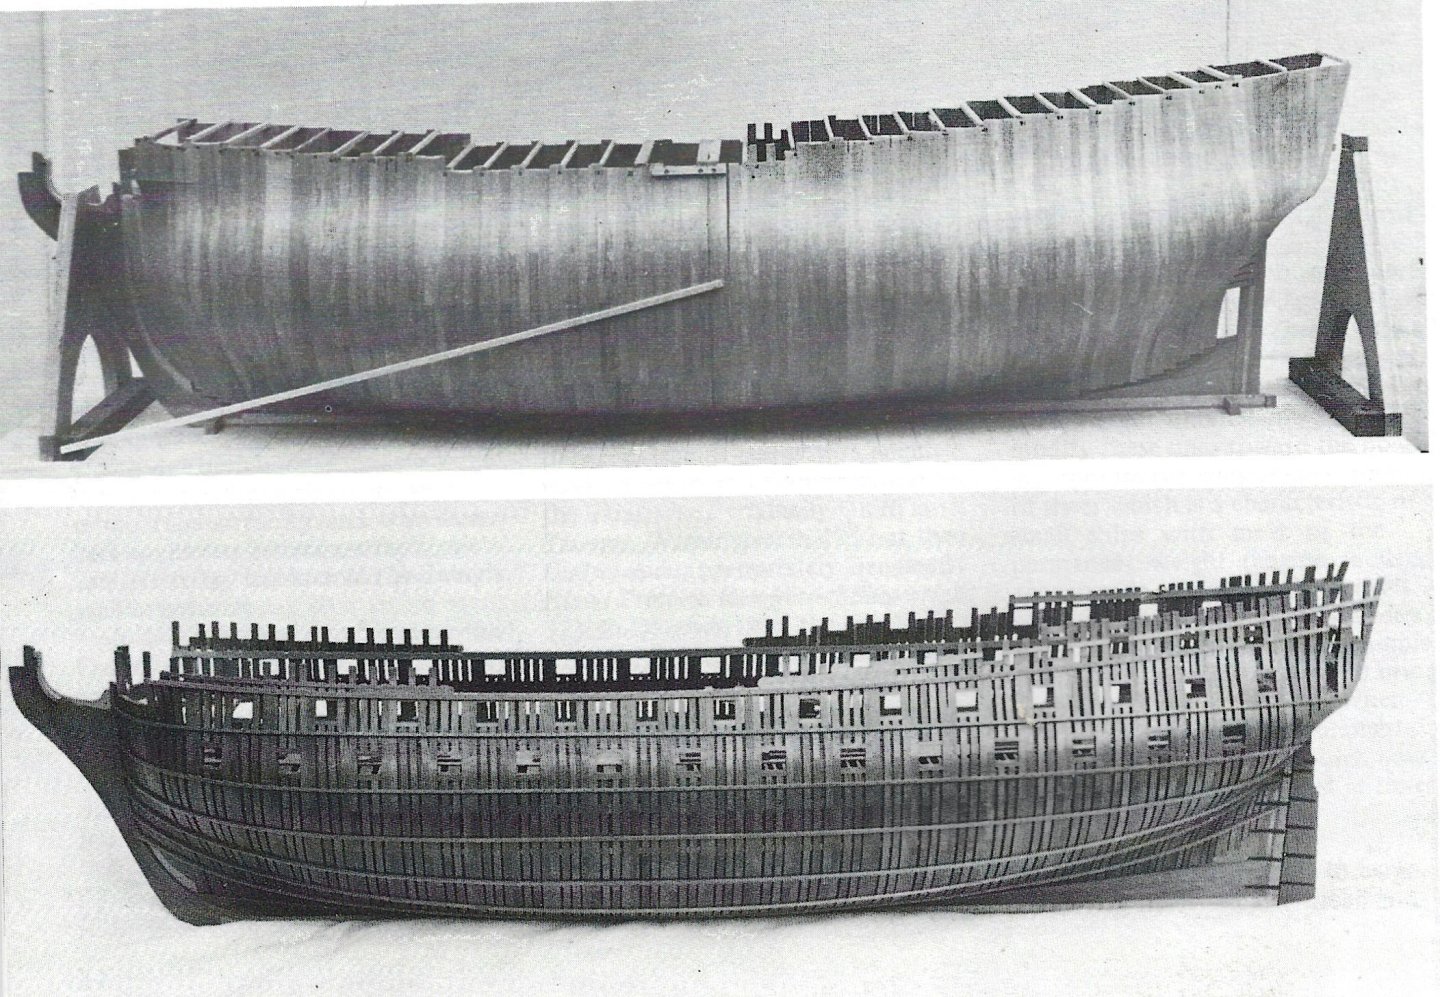
Great job Chris! It looks like those frames should fair in nicely. Your photograph reminds me of the famous Egmont model by John Franklin (Model Shipwright series) in which he assembles, fairs then separates the solid hull and reduces the frames to achieve the Navy Board appearance. His method is not commonly used (except by miniaturists) but seems to have many advantages over the way we currently build them.
-

ancre La Belle 1684 by Oliver1973 - 1/36
dvm27 replied to Oliver1973's topic in - Build logs for subjects built 1501 - 1750
Very nice rudder! I'm always surprised how small the French rudders were compared to English warships of the era. I wonder how much (if any) the steering capabilities were affected? -
It's looking great Clare. I found her sister, Speedwell, very easy to rig. As I recall the Wolf rigging plan provided was very good. As well, you can find excellent rigging instructions in our Speedwell, Vol. 2. She does have a rather nice lofty rig so your display space will need to double perhaps.
-
I think silk rigging looks beautiful and I know many of the Navy Board models were rigged this way. I have also seen silken robes from previous centuries and they look fine (perhaps because they are preserved in a museum). But I now read that while silk can survive decades they start to deteriorate through a process called "shattering" (the short cross threads become unwoven) at around 60 years. Perhaps this appears in garments only and not laid up rope? But I am fairly certain that no restorer in 2300 will be able to replicate Johann's magnificent work here if the rigging starts to deteriorate.
-
What a delight it was for David Antscherl and myself to stumble upon this model after the NE Ship Modelers Conference. I have his books but the model in person is even more impressive. I wonder what Ed is up to now?
- 3,618 replies
-
- young america
- clipper
-
(and 1 more)
Tagged with:
-
Nice video on blackening Kevin. Some random thoughts - I use either alcohol or acetone as a degreaser. Also, keep in mind that brass is an alloy and, depending on the composition, some brass is much more difficult to blacken. For large groups of pieces I find that pickling first makes a difference in the blackening and uniformity of the finish. For small pieces you can use a paint brush to polish them in a deep tupperware piece so they don't fly away. Polishing prevents the finish from transfering to surrounding pieces and evens out the finish. Finally, while it's easier to blacken the Swan PE sheet whole don't you find that you still have to blacken the cut edges after removal from the sheet?
- 1,134 replies
-
Here's a jig that can be made out of heavy card or aircraft ply. It's not my design but solves the spacing problem between the deadeyes.
-
These belaying pins are fabulous! The 1/4" ones are perfectly proportioned and fit a #66 hole. Note - most commercially available belaying pins have very fat handles. Chuck has just saved me hours of work. And adding thimbles to his store would be equally amazing as the commercially made brass ones are no longer available (Crafty Sailor).
-
Your model is very lovely so far. Your concept of rigging the lower yards only with the top masts lowered and mostly derigged is reminiscent of illustrations I’ve seen off these ships in their winter configurations. Perhaps consider not gluing in the masts. Once you’ve added the shrouds, stays and back stays they are almost impossible to move but minor adjustments may be made by adjusting the standing rigging (just like the real vessel).
- 332 replies
-
- Harpy
- Vanguard Models
-
(and 1 more)
Tagged with:
-
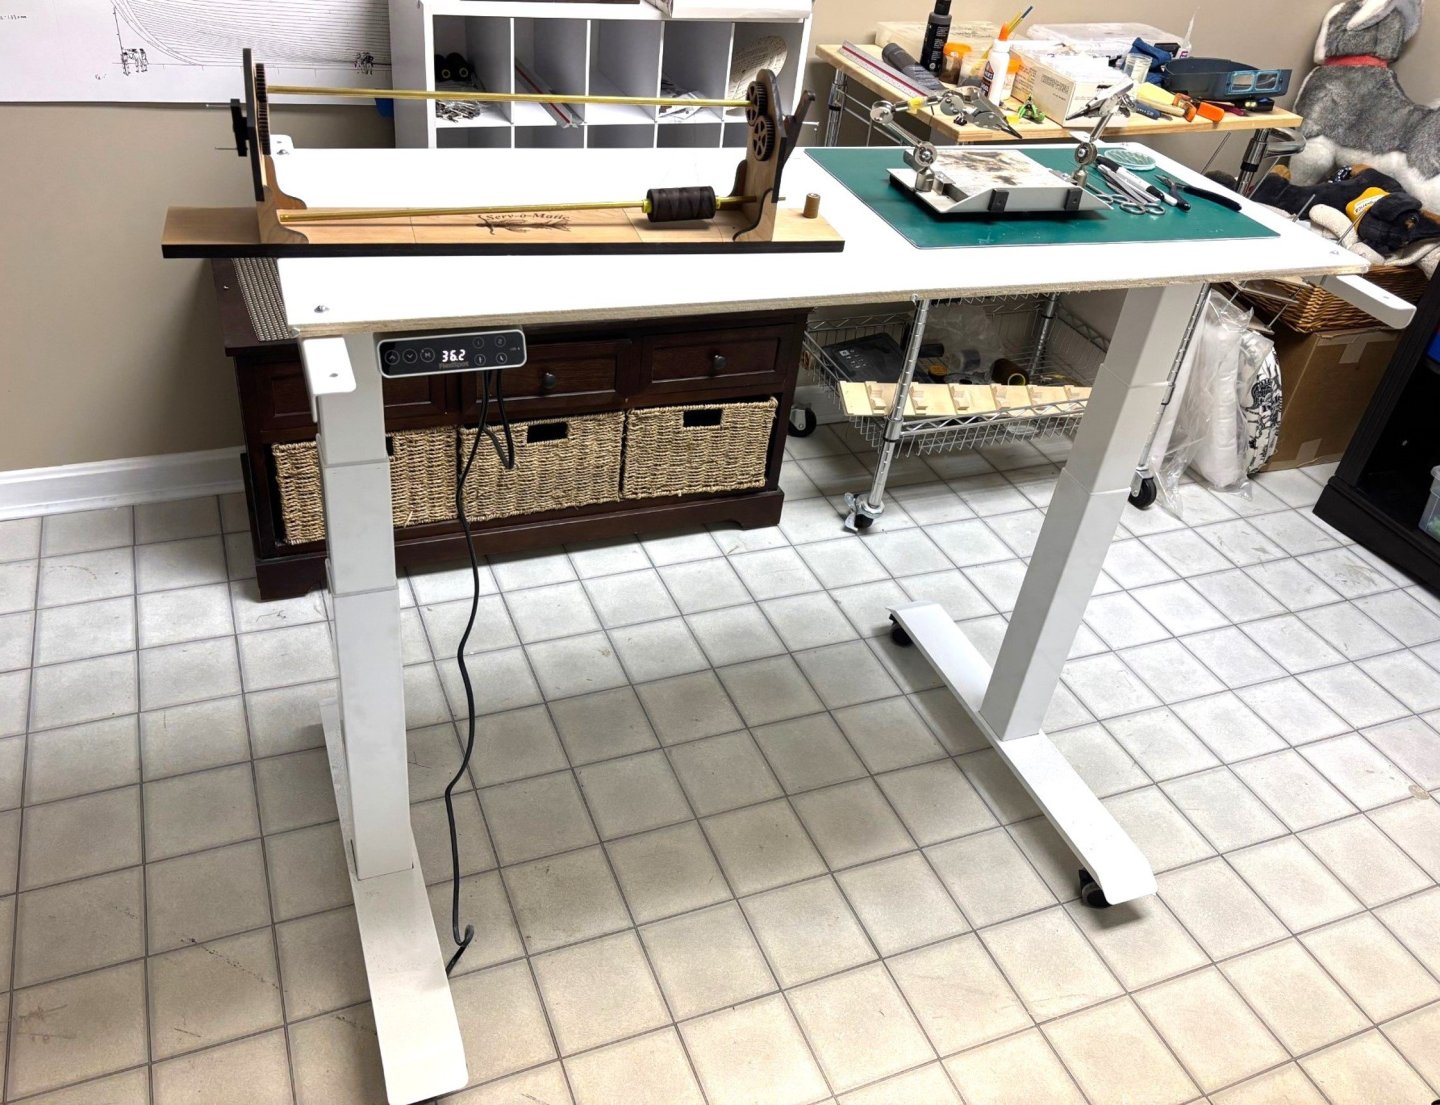
Mine goes from 23" to 50". You can set the high and low with a memory button. This will prevent me from impailing my mainmast into a ceiling tile.
-
Very sorry to hear of your recent losses Ab. If we live long enough this becomes inevitable I suppose. Your model is quite lovely. You have a very discernable style which produces simple elegant models.
- 77 replies
-
- Royal Yacht
- card
-
(and 1 more)
Tagged with:
-
I just bought this FlexiSpot E7 and it's phenomenol. I bought the cheaper version and applied my own top. It is motorized and smooth as silk.
-

ROYAL CAROLINE 1749 by Doris - 1:40 - CARD
dvm27 replied to DORIS's topic in - Build logs for subjects built 1501 - 1750
I'm happy that you've created a new view of Doris's work. Though I suspect shee is done with ship model making her work deserves to be preserved gere forever as a resource. I would hate to lose it if some sort of crash occured.- 883 replies
-
- royal caroline
- ship of the line
-
(and 1 more)
Tagged with:
About us
Modelshipworld - Advancing Ship Modeling through Research
SSL Secured
Your security is important for us so this Website is SSL-Secured
NRG Mailing Address
Nautical Research Guild
237 South Lincoln Street
Westmont IL, 60559-1917
Model Ship World ® and the MSW logo are Registered Trademarks, and belong to the Nautical Research Guild (United States Patent and Trademark Office: No. 6,929,264 & No. 6,929,274, registered Dec. 20, 2022)
Helpful Links
About the NRG
If you enjoy building ship models that are historically accurate as well as beautiful, then The Nautical Research Guild (NRG) is just right for you.
The Guild is a non-profit educational organization whose mission is to “Advance Ship Modeling Through Research”. We provide support to our members in their efforts to raise the quality of their model ships.
The Nautical Research Guild has published our world-renowned quarterly magazine, The Nautical Research Journal, since 1955. The pages of the Journal are full of articles by accomplished ship modelers who show you how they create those exquisite details on their models, and by maritime historians who show you the correct details to build. The Journal is available in both print and digital editions. Go to the NRG web site (www.thenrg.org) to download a complimentary digital copy of the Journal. The NRG also publishes plan sets, books and compilations of back issues of the Journal and the former Ships in Scale and Model Ship Builder magazines.


