dvm27
-
Posts
2,468 -
Joined
-
Last visited
Content Type
Profiles
Forums
Gallery
Events
Everything posted by dvm27
-
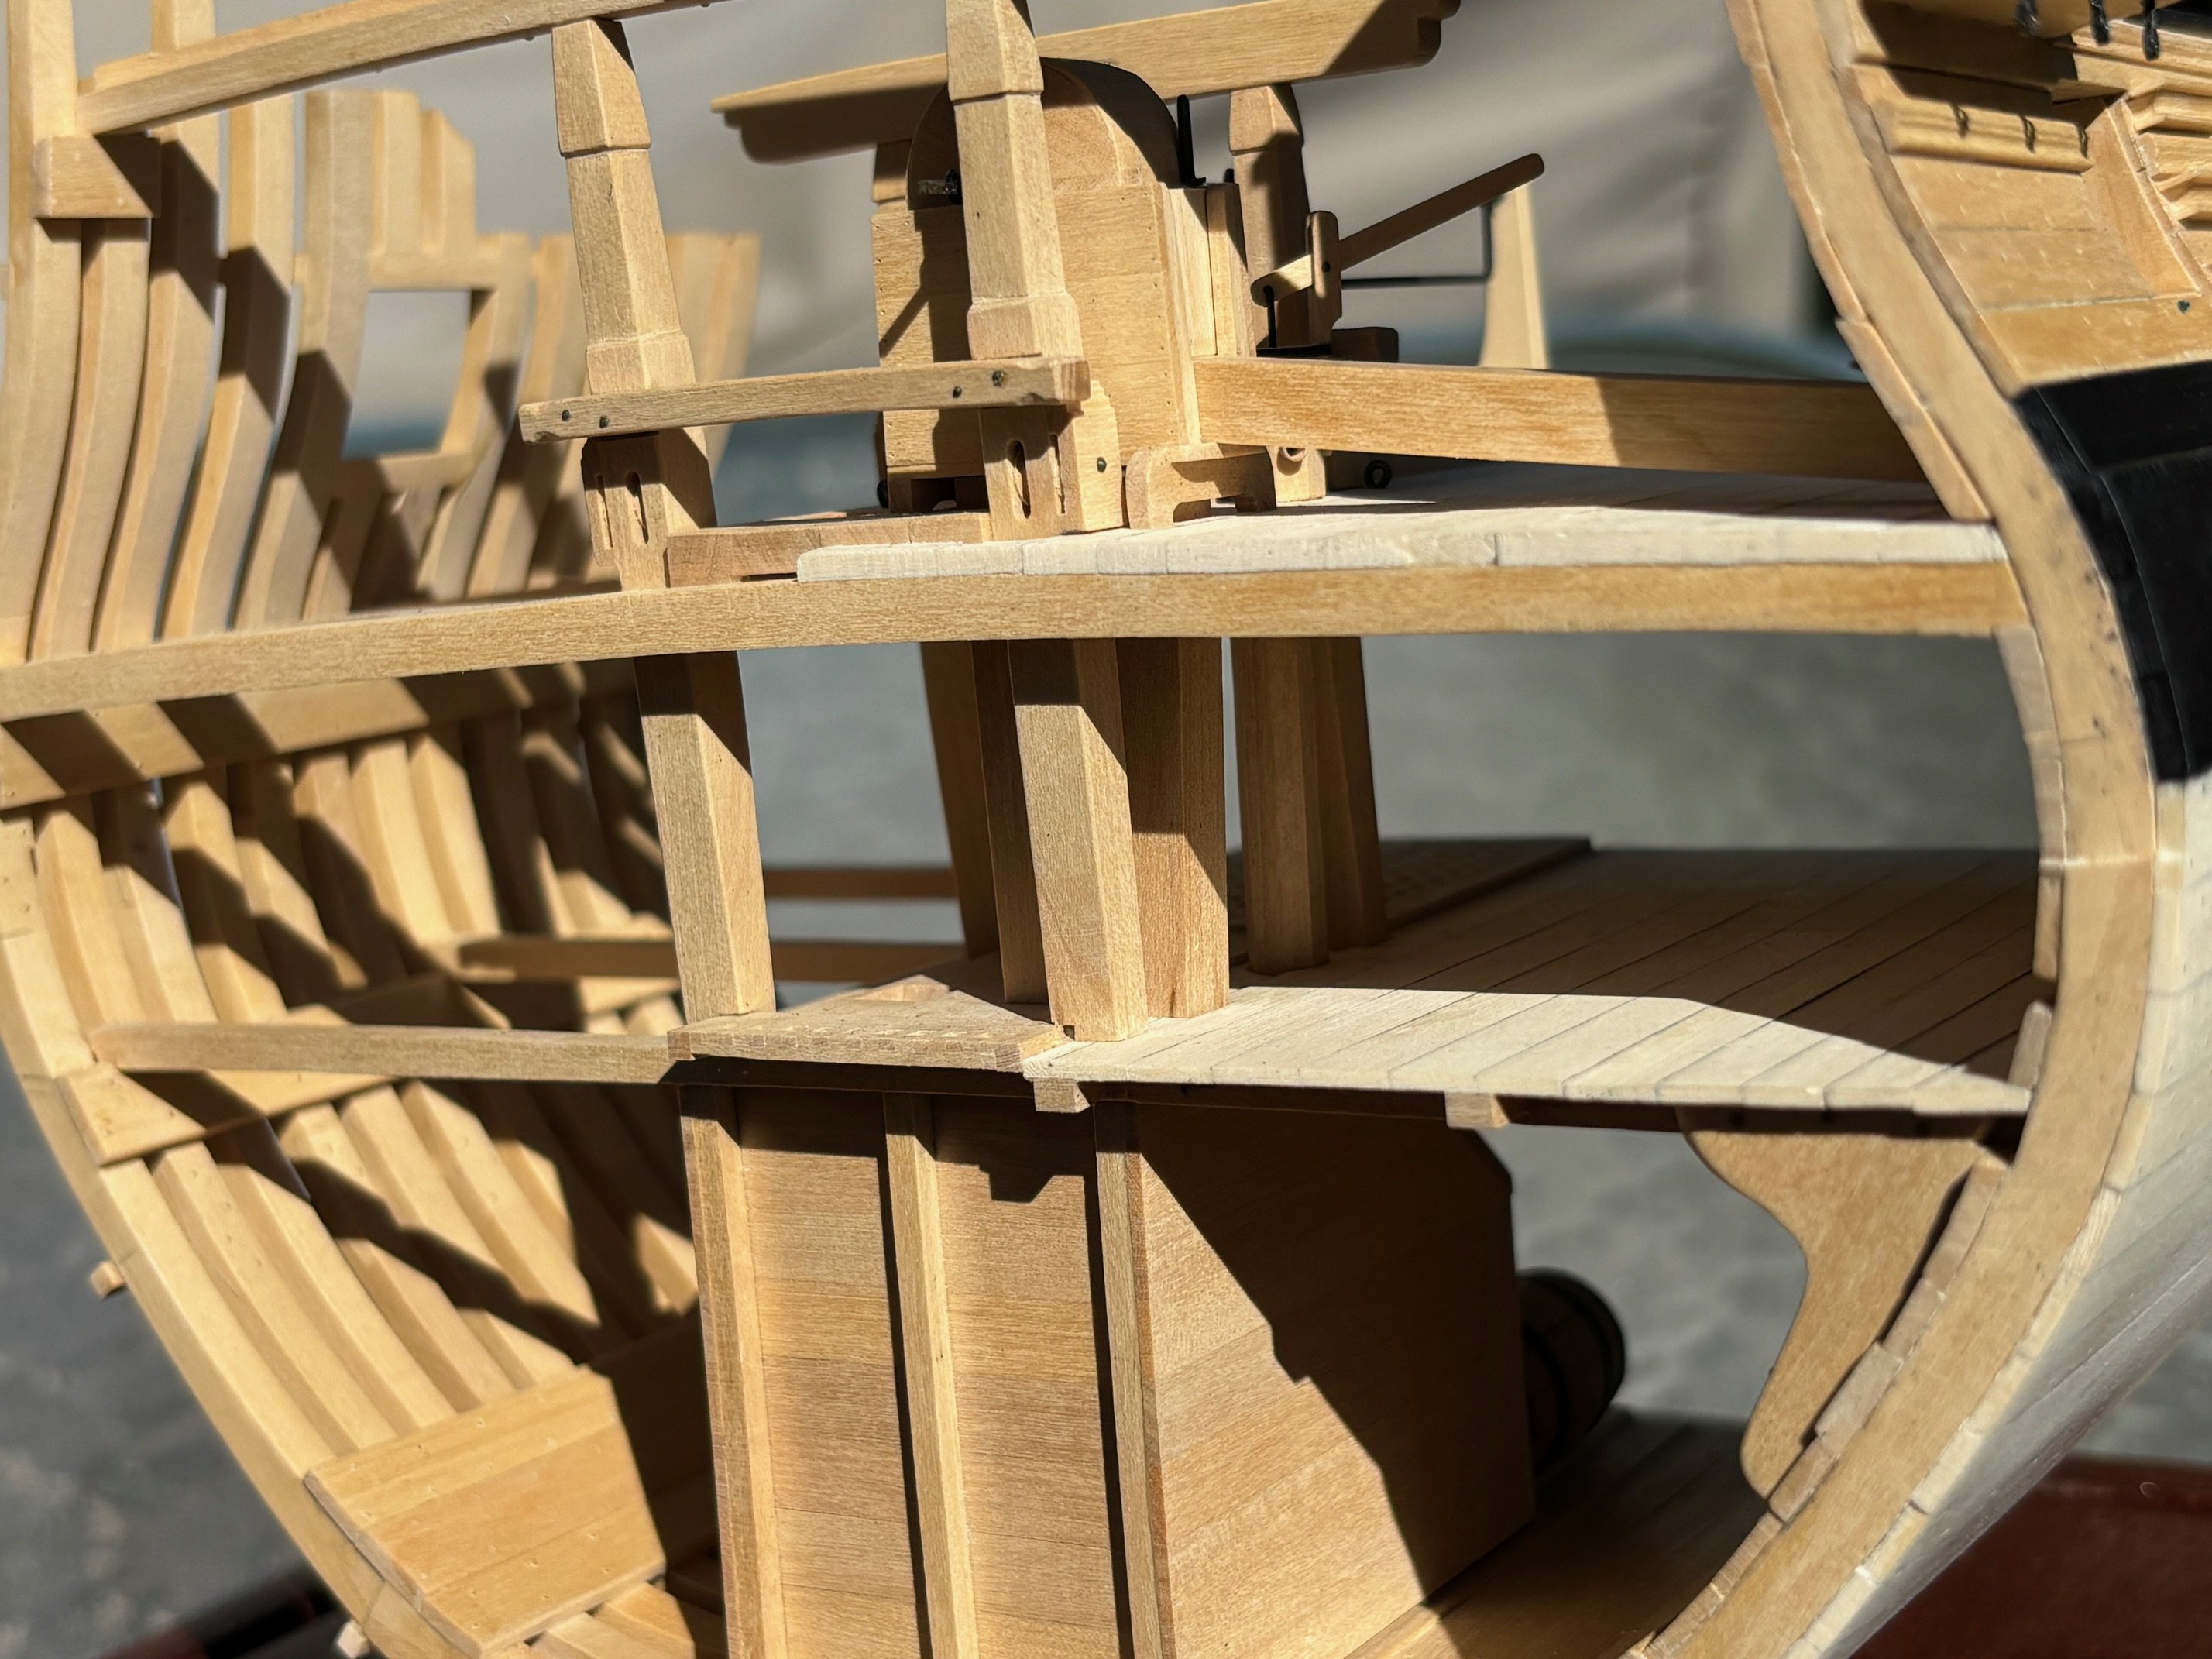
 I looked into my cross section to see if I had the same problem but my pumps appear to have the proper clearance. If not, I would adjust the carlings by moving them a bit and or mortising to accommodate the pumps.
-
I always rig from the front to back and bottom to top.
-
Congratulations on this significant milestone Johann. Having the discipline to fully rig all the yards will be paid back by rapid rigging of the rest of the model.
-
Bravissimo, Giampiero! That's the cherry on the ice cream sundae.
-
The key to these plank on frame models is planning ahead. In this case it's planning for the uppermost deck. By using the extended bitt pins you saved yourself a lot of aggravation later. Exceptional work Mike!
-
Make sure to apply pencil marks to the inside and outside of every frame. It is very easy to identify the low spots this way. Once they start to disappear switch to 150 or 180 grit paper and sand with the grain. When all the pencil marks are gone your hull is faired. I usually start at the bottom and work my way up. You should really have the upper sill in place when fairing.
-
You know, you could just scarph that keel joint and add the midsection and, if that goes well...
- 99 replies
-
- 4
-

-

-
- ancre
- La Mahonesa
- (and 1 more)
-
Your meticulous research and execution really shows up in the above photo. Not a waver can be seen on any of the runs of planking or moldings. Such a pleasure to watch this model come together!
-
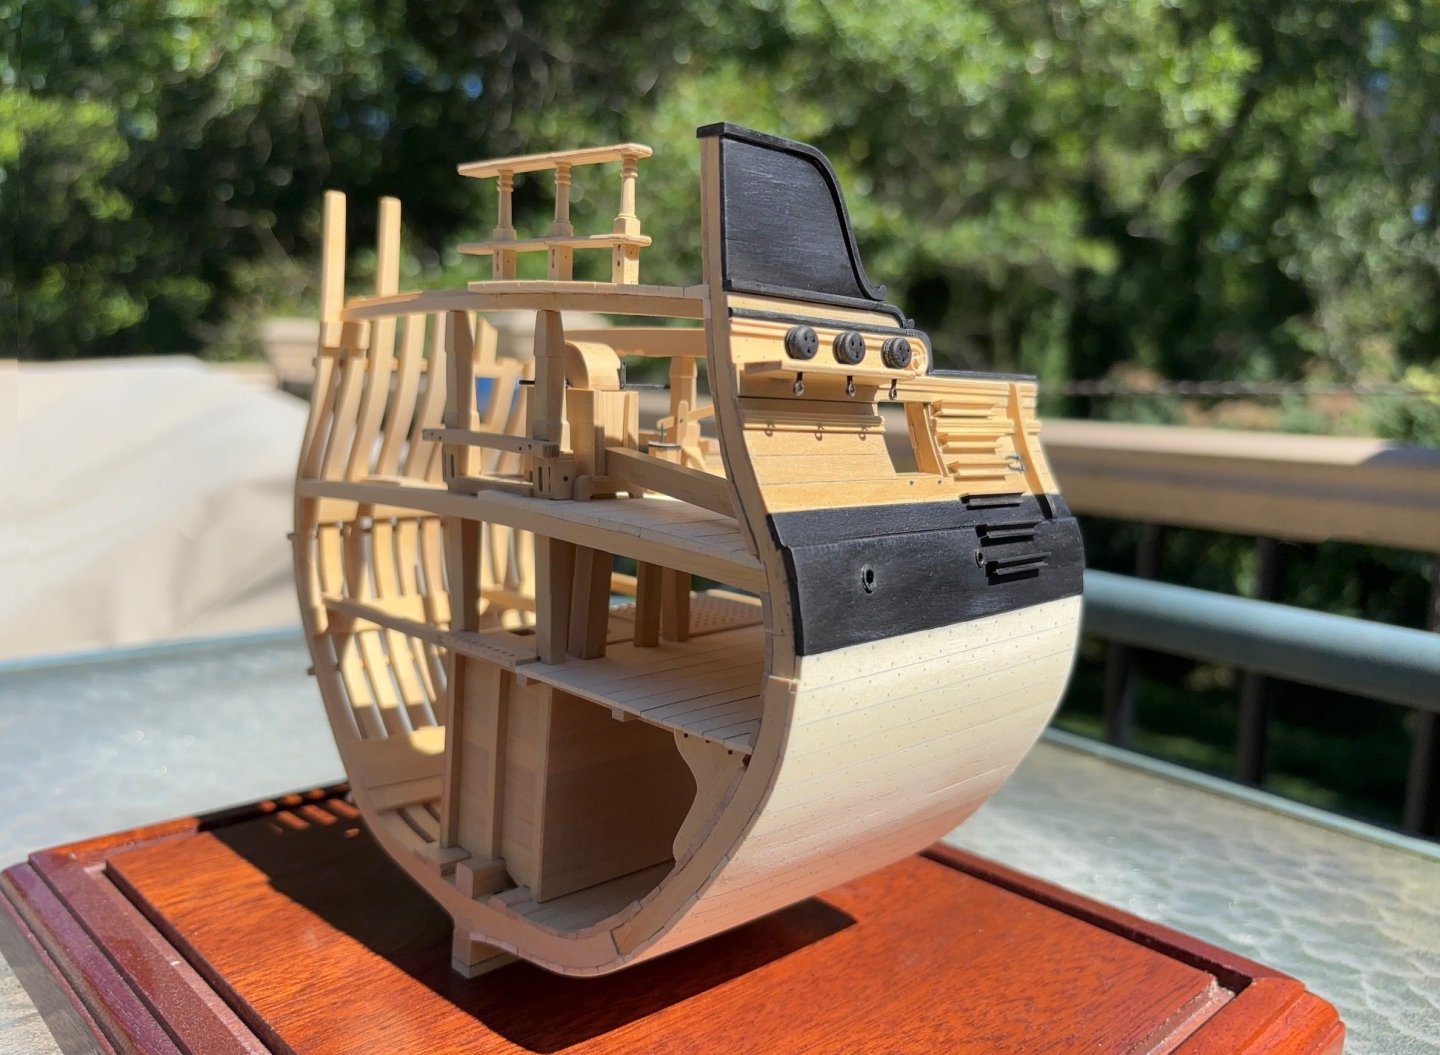
Congratulations on a beautiful model! I'm stunned that you have made her into a coffee table. That wouldn't survive the weekend here after a grandchildren visit.
-
Research in the HMS Ulysses 1797, a Roebuck class ship
dvm27 replied to Kevin Kenny's topic in Nautical/Naval History
Nice video Kevin. I wasn't aware of the Hahn CDs. Perhaps they were put together by Dave Stevens? At any rate you need to consider whether you will rig her or not. David and I are making a model of a similar size ship for a Yacht Club and I can attest that, with rigging, she will barely fit through the doorframe of my workshop. I will need to purchase a lift to rig her! I'm sure your wife is very supportive of your hobby but is she willing to have a room dominated by a ship model and its case of this size? Will she be pleased with the cost of the glazing for this case? If she's to be unrigged her real estate imprint will be much more manageable (hallway). Hahn's 1/8"-1ft scale model of Roebuck is beautiful but I find it harder to work at the smaller 1/8" scale. Besides the vision difficulties it is much harder to make scale fittings at this scale. As well, there are those lovely carvings. Perhaps you should try a couple at this scale to make sure you'll be happy with them? Having built several Hahn style ship models I think you will enjoy the challenge. It's a bit more wasteful with the wood but you seem to have plenty. And there's nothing like the thrill of cutting the model from the jig. Do Hahn's plans have a scale on each frame? I've had no end of problems having plans reproduced at different scales without distortion in the X or Y axises. At any rate you will be busy for the next five years or so with this model! -
I'm super stoked with the new deadeyes and sister blocks Chuck. They're beautifully proportioned and the details are much finer than the wood versions. I used the wipe on Poly satin finish and they look just like boxwood. Can't wait to see the other blocks as they are developed.
-
Looks very natural and tidy Chuck. Love the little faux splice over the cascabel. I tried seizing it on each side and found this quite difficult to do and with a much bulkier look.
-
One strategy you might consider is making the stem joint first but leaving it slightly oversized over the mating surface with the apron. Once happy with your scarph joint overlay the apron on it and trace out the curve. This way you don't need to deal with the complexities of cutting and fitting the scarph joint over the apron. Also, if you are in this for the long term, consider purchasing an oscillating spindle sander and buy the finer grit sleeves. I can't tell you how much my accuracy improved following the purchase on mine twenty years ago.
-
I'm so glad you removed those hooding planks. The rabbet/stem joint is one of the hardest to plank but a clean line makes the model.
-
Your model looks like it belongs in the Naval Academy Museum. Well done!
-
A first model you can be very proud of Matt!
- 69 replies
-
- 1
-
-
- Lowell Grand Banks Dory
- Model Shipways
- (and 2 more)
-
Perfect little replicas of both the one pounders and swivel hardware!
-
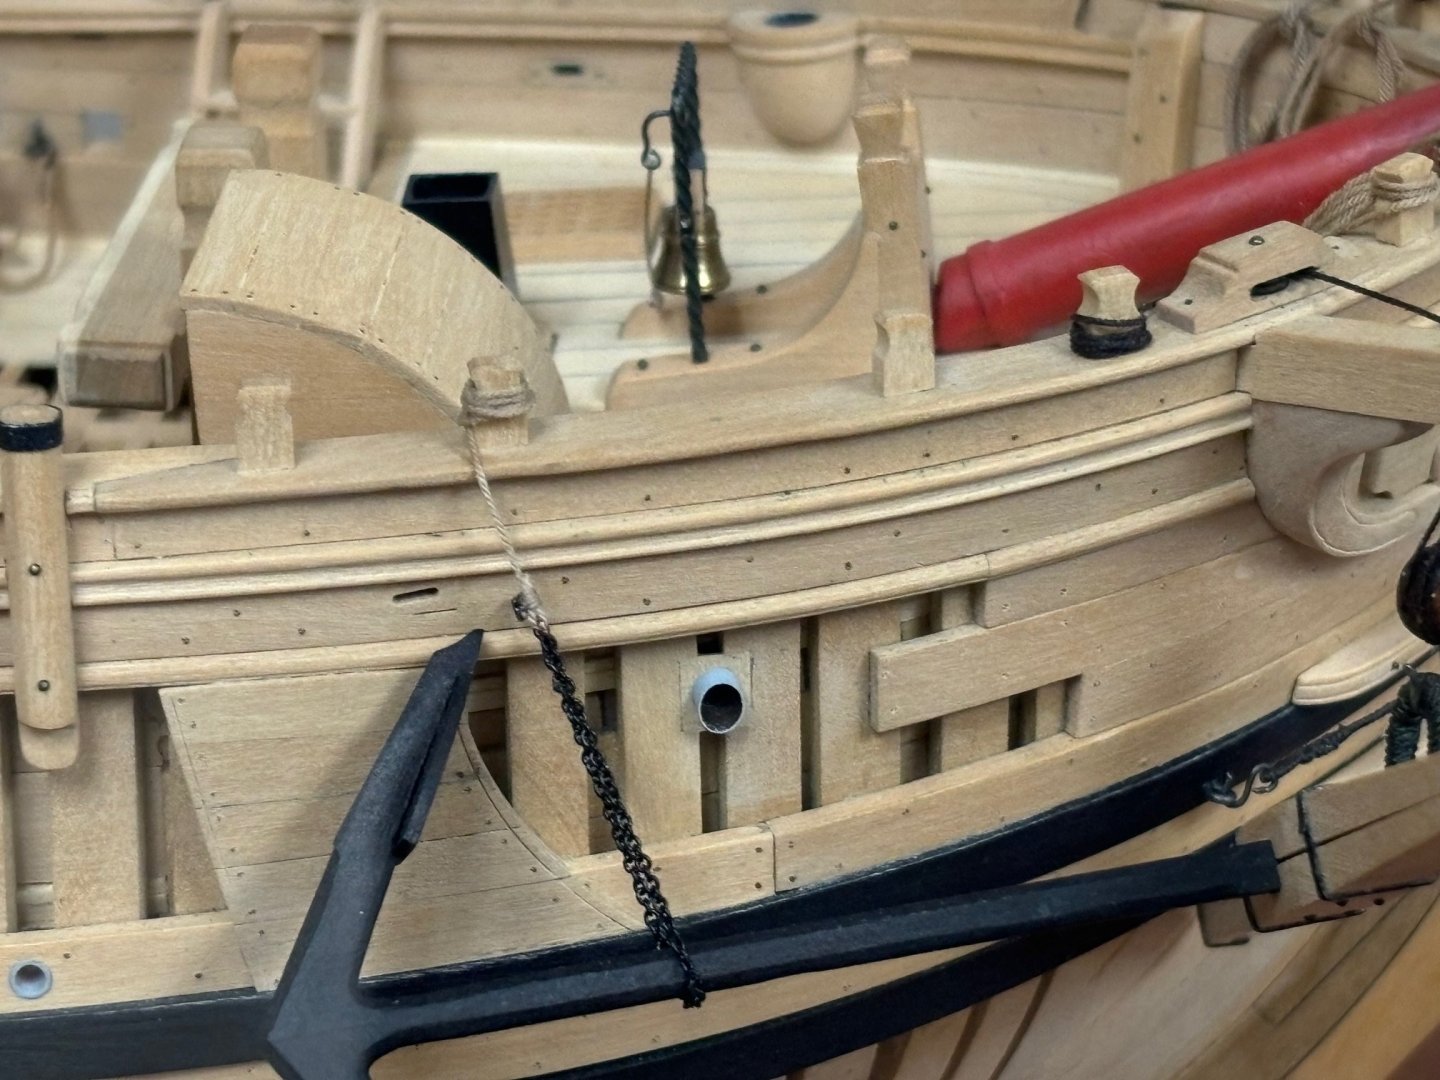
I completely forgot I included them on my model Chuck. At any rate some research shows that the pissdales were made of lead, copper or occasionally wood. There was a lead small discharge tube directly under the pissdale. This 1.4" tube would exit through a small scupper in the waterway. My discharge tubes are comically large. They should only be about twice the diameter of a treenail. The pissdale discharge scupper holes on my model would be more appropriate for a herd of horses. They were discontinued after 1765. I'm going to have to fix that now damn you!
-
Lovely and understated work Chuck. Nothing screams out "look at me" but the entire effect is extraordinary. I look forward to your take on those troublesome pissdales! I didn't add a relief hole in the external hull and I don't believe the original did either. But otherwise why not just pee directly on the deck?
-
British Pathe film: Model Boat Building, 1956.
dvm27 replied to uss frolick's topic in Nautical/Naval History
I've seen this a couple times over the years and have come to the conclusion that he is clearly a bachelor! -
Sometimes the rubber cement leaves a residue on my wood. I may be using a different brand than Druxey. Lately I have been using those white glue sticks that young kids use. It goes on purple and dries clear in a few seconds. It also peels off cleanly. I love the spindle sander for curves but I found that using a higher grit makes a cleaner and more accurate cut without causing the divits the 80-120 grit paper can cause.
-
Frayed lines
dvm27 replied to Dindsy's topic in Building, Framing, Planking and plating a ships hull and deck
I'm afraid you're in a world of hurt Dindsy. I would treat one of the lift lines with a 50% white glue/water solution and see what it looks like after it dries. But I'm not optimistic. Being a cross-section, re-rigging it should not take much time at all and I would use the opportunity to upgrade the blocks and rigging line to Syren Models products. Your second effort will look far better and you'll be much happier in the long term. Now, take a scissors and cut the main shrouds across the middle and you're committed to ship modelling excellence! -
First off, congratulations on you wonderful carpentry. Your joinery would pass inspection if enlarged to full size. It'll look beautiful whatever you do but personally I would opt for the natural wood with a varnish.
-
Well, practice does indeed make perfect. It's super important to make sure the ends of the futtocks are the same width and flat over their mating surface with no gaps between them. If you have a Byrnes disk sander this is easy. If not you'll need to get good with a super sharp chisel. I wouldn't use the printed pattern to make the chock as the joint may vary slightly from the pattern. My process is to glue the two futtocks together on top of the pattern and allow to dry. Then place an index card under the joint and trace out the actual chock shape using a mechanical clutch pencil sharpened to a super fine point. Don't worry about the inboard shape for now. Now transfer the card pattern to the properly oriented wood and cut out. The chock should now fit snugly into the joint. Then you can glue it in place. Finally, after dry, trim the inboard face. If you are planning to build several wooden models in the future I can't stress enough how much the Byrnes disk sander (or Proxxon) will improve your work. It's an investment that pays off in accuracy and time saved over the years. Staetler Mars Technical pencil 2mm (780) and Sharpener (502)