-
Posts
1,557 -
Joined
-
Last visited
Content Type
Profiles
Forums
Gallery
Events
Everything posted by Mike Y
-
Hjx, it is mostly "swiss pear" - european pear tree that gets is pink/brown colour after kiln drying. If your wood is rough - pass it through the planer or thickness sander first, otherwise sanding will take a lot of time. Nothing special for polishing - just sanding with Mirka sandpaper, grits 220 -> 400 -> 600 -> 1200, sometimes up to 2000. Different brands and kinds of paper leave slighly diferent finish, so your grits may be slightly different. Sanding on a flat surface (paper clamped to the table, moving the wooden part on the paper, not vice versa), or with a cork sanding blocks of various shapes. Never sanding freehand. That is all to avoid rounding the edges, which is unavoidable if the paper has a soft backing (fingers, foam, etc). quite frequently I scrape the wood after sanding with 220 or 220 -> 400, using heavy duty xacto blades for scraping (holding the blade with fingers, without a handle. This helps the blade to follow the lines of the wooden part). Do not forget to round the sharp corners of the blade to avoid scratches. It is also very handy for curved surfaces, where sanding block might not be convenient. I use an optivisor to check the surface and see if I sanded enough, or there are still some scratch marks after the previous grit. frankly, I never checked if what I am doing is an overkill. The difference between grits is quite visible when the wood is not finished, but after finishing - not sure if it is possible to see a difference between 600 and 2000 grit. But fine grits take very little time, so I do it anyway Sanding is a very important - few min of sanding each part makes a big difference to its look and feel.
- 969 replies
-
- hahn
- oliver cromwell
-
(and 1 more)
Tagged with:
-
There is definitely a market for benchtop air filters that could be just put on the back side of the workbench, pulling air through the filter. The main problem is getting a powerful enough, but quiet motors and propellers.
-
It looks great and built in such a short timeframe! Looking forward for the next log, hope it would be full of interesting jigs, fixtures and methods. Sharing them is fun!
- 132 replies
-
- triton cross-section
- cross-section
-
(and 1 more)
Tagged with:
-
Belt sander proxxon 28 536
Mike Y replied to michael101's topic in Modeling tools and Workshop Equipment
Isn't it easier to use the disk sander for tapering? -
Tony, it is a pretty quick and simple jig, but gives you a very different control. No movement at all, much simpler! It is like riding the bicycle with two hands instead of one
- 969 replies
-
- hahn
- oliver cromwell
-
(and 1 more)
Tagged with:
-
Still procrastinating, spending modelling time on things like handmade gifts to close family And when not - playing with tools. Built a crosscut and miter sled for the Proxxon FET saw. They are more precise and safer than the miter guide on the saw. Helping to keep fingers further from the blade and have a quick and consistent 90deg and 45deg angles.
- 969 replies
-
- hahn
- oliver cromwell
-
(and 1 more)
Tagged with:
-
Proxxon Micro MBS 240/E Band Saw Review
Mike Y replied to Blue Ensign's topic in Modeling tools and Workshop Equipment
Small update: finally got around to replacing the stock ball bearings on the top wheel. Luckily they are a pretty standard size, so I ordered SKF 608-2RSL http://www.skf.com/group/products/bearings-units-housings/ball-bearings/deep-groove-ball-bearings/single-row-deep-groove-ball-bearings/deep-groove-ball-bearings/index.html?designation=608-2RSL Works like a charm! The nasty noise is gone! Should have done it from the very beginning, especially since these bearings are quite cheap (even SKF ones). Got fooled by Proxxon support who claimed that everything is fine and the bearings are fine, even after watching the video with the noise captured on it. Replacing the bearings was easy, no temperature fit required - just gently bump out the old bearings with a hammer, and squeeze in new ones using a clamp for the even pressure without any stress. -
Is it really a drill press? Looks like a mill, if the bearings are good enough to handle some lateral forces? And it is a damn nice mill! There is something charming in a hand-made tools (not DIY level, but this work-of-a-true-craftsman level). There is always some story behind it, one looks on that drill/mill and visualises a man with a glass of whiskey, sitting next to the fireplace and drafting the sketches of the machine Cheers!
-
Seems like you had a busy weekend cutting all that blanks! The speed is truly impressive! Sorry for commenting every second update... But you might want to consider not cutting the paper in the center of the patterns, to prevent distortion and an incorrect frame width (for the midship frames where both sides of a frame are joined in the bottom). Like this:
-
Miniature Russian carving tools
Mike Y replied to druxey's topic in Modeling tools and Workshop Equipment
It is really nice to see that tools in action! -
SS Mariefred by captainbob - 1:96
Mike Y replied to captainbob's topic in - Build logs for subjects built 1901 - Present Day
Yes, I was on that island a few times, and was impressed by the view on the docks from top of the hill. But, as usual, you can't get to the boats without breaking in. Though my favourite place is Skeppsholmen, especially its eastern part. Lots of wooden boats and ships, boatbuilding club, blacksmith workshop, smell of tar, drying lumber, etc... Really feels like a shipyard! -
SS Mariefred by captainbob - 1:96
Mike Y replied to captainbob's topic in - Build logs for subjects built 1901 - Present Day
Matle, thanks for the info! Beckholmen is a bit tricky to stroll, it is mostly docks and just a little bit is open to the public. Or you know the right hole in the fence? -
SS Mariefred by captainbob - 1:96
Mike Y replied to captainbob's topic in - Build logs for subjects built 1901 - Present Day
Bob: got it, will photo. However, seems like we need to wait a bit. Here is the official schedule of SS Mariefred for 2017: So the first time it would be available to public is on 27th May. So before that it is probably in some dock somewhere. I checked the facebook group, no clear info there. But there are some interesting photos and videos! https://sv-se.facebook.com/steamshipmariefred/ While waiting - please check if there are some other areas that you want to check. Especially if there is something that you need that could be only observed onboard - in this case I will need to pay the entrance fee, which is ok, but then I better be a good spy and make all the photos you need! -
SS Mariefred by captainbob - 1:96
Mike Y replied to captainbob's topic in - Build logs for subjects built 1901 - Present Day
Hi Bob, What part exactly? There are many windows on that ship To avoid confusion, it would be nice if you can highlight the relevant part using some other photo. Is it something on a side or a front of the ship? It is typically moored diagonally, so can't make a photo of the rear part without paying for the entrance ticket. It is moored in the morning next to the city hall, so should be easy to photo! -
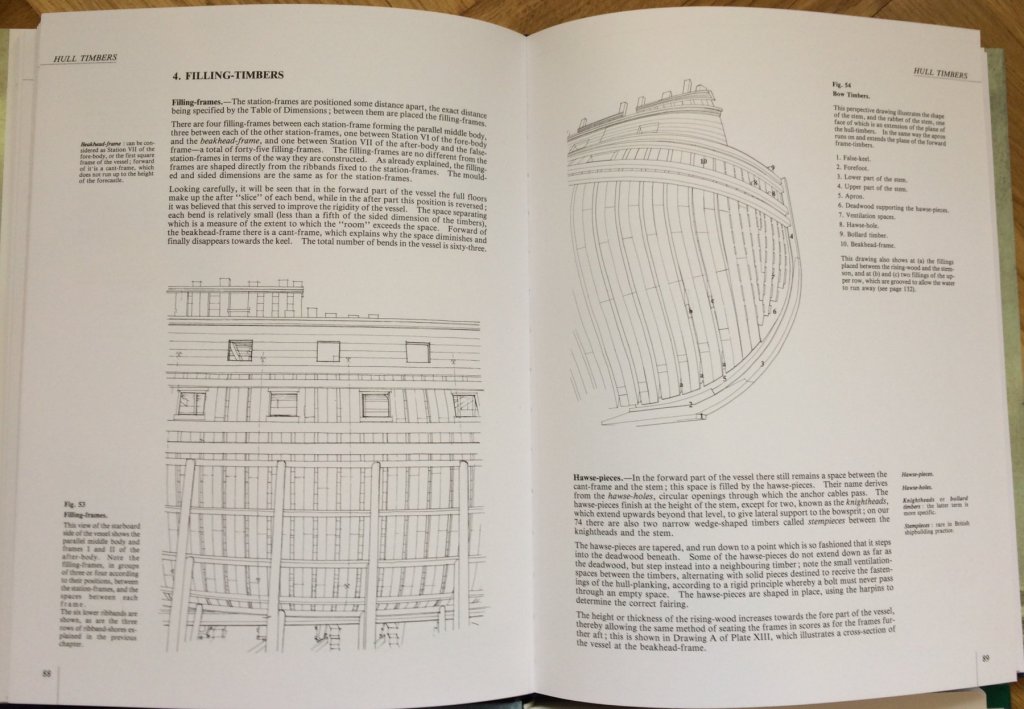
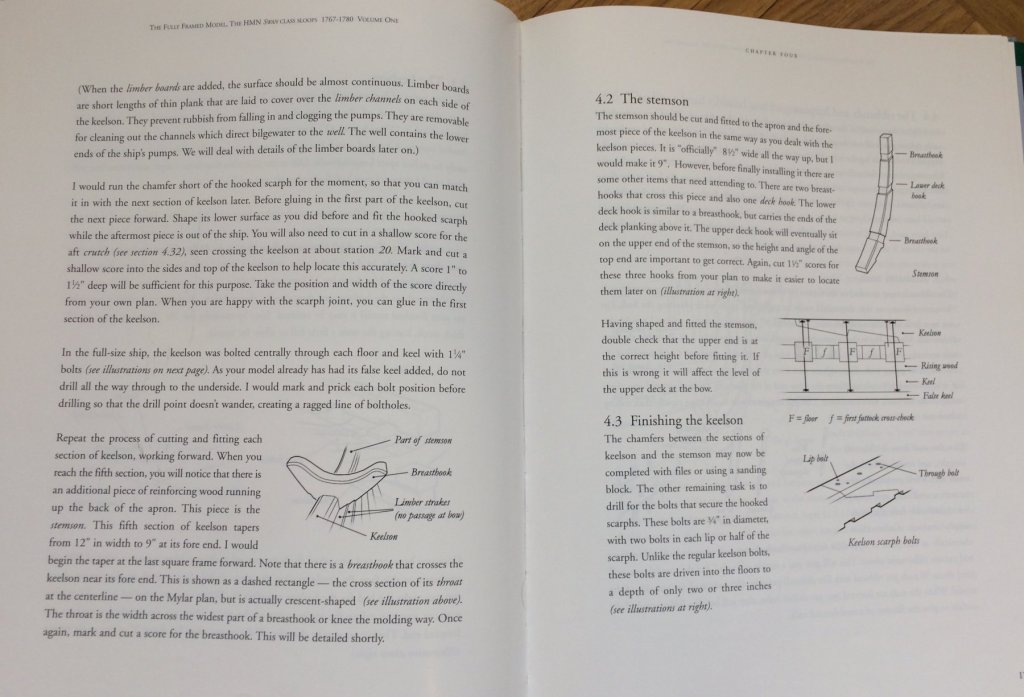
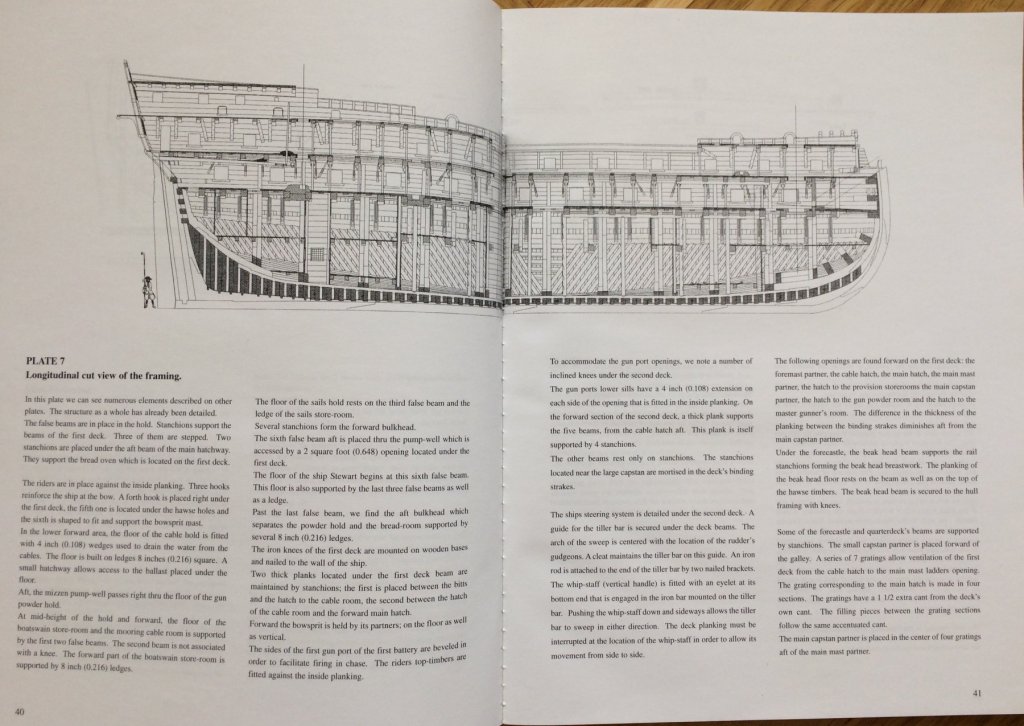
The monograph assume that you already know the way the ships were built at that period, and they only cover specifics and nuances of a particular vessel. Also, it assumes you are already familiar with the terminology. They are very condensed and detailed descriptions of a very specific ship, basically a set of plans with a very detailed comments. That would be impossible to understand without reading some more fundamental book first. For a better background, one probably need to start with the 74 gun ship books, that are fairly costly: https://ancre.fr/en/ouvrages-de-base-en/9-vaisseau-de-74-canons-1780-traite-pratique-d-art-naval-1780-en-quatre-volumes-base-de-la-collection.html#/tome-the_74_gun_ship_1_english Also, they only talk about the construction practice and history, no useful advices or hints for modellers. It simply describes how the real ships were built, and does not cover "how to build it with the tools we have in a small scale". For the better "entry" into the historically accurate construction it would be probably better to start with TFFM or Naiad books - they cover it step-by-step, with a lot of tricks and great illustrations. They also cover the nuances of modelling such ships in a great detail. Of course, there were quite some differences between the way French and British ships were built, so for the first fully framed model it would be better to start with that books and a British ship. Simply because these books are more friendly than the French ones. TFFM: vol1: https://www.seawatchbooks.com/ItemDisplay.php?sku=109004 vol2: https://www.seawatchbooks.com/ItemDisplay.php?sku=109001 Naiad: vol1: https://www.seawatchbooks.com/ItemDisplay.php?sku=112002 vol2: https://www.seawatchbooks.com/ItemDisplay.php?sku=113006 So far TFFM is my main point of reference and the first book I open if I have some question. I read that you already ordered one - you will not be disappointed
-
Eric, I actually never used the instruction text (it is written in a very formal way, hard to translate). But the pictures in the instructions are quite detailed, so text is not really needed. There is a longitudinal filler block that looks enough. They are all spiled. Seems to hold fairly well, there is enough surface for a proper glue adhesion.
-
Found a very good video review - for the ones who have a number of questions about the internals of the saw and how various accessories actually work.
- 11 replies
-
- miniature table saw
- Byrnes model machines
- (and 2 more)
-
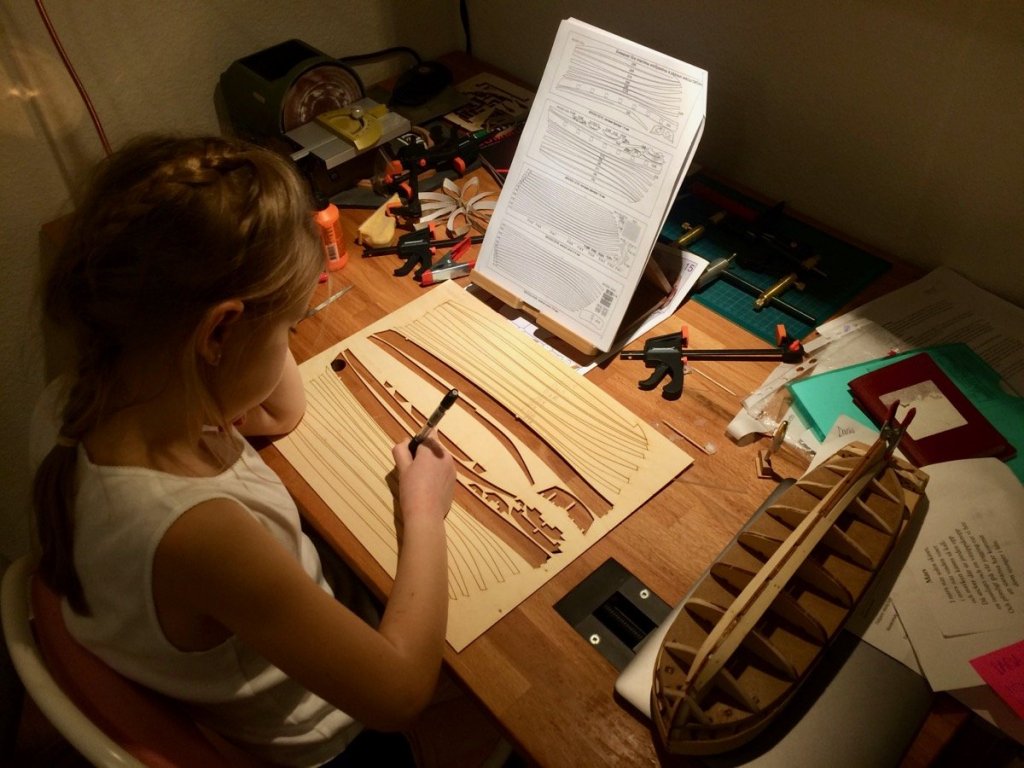
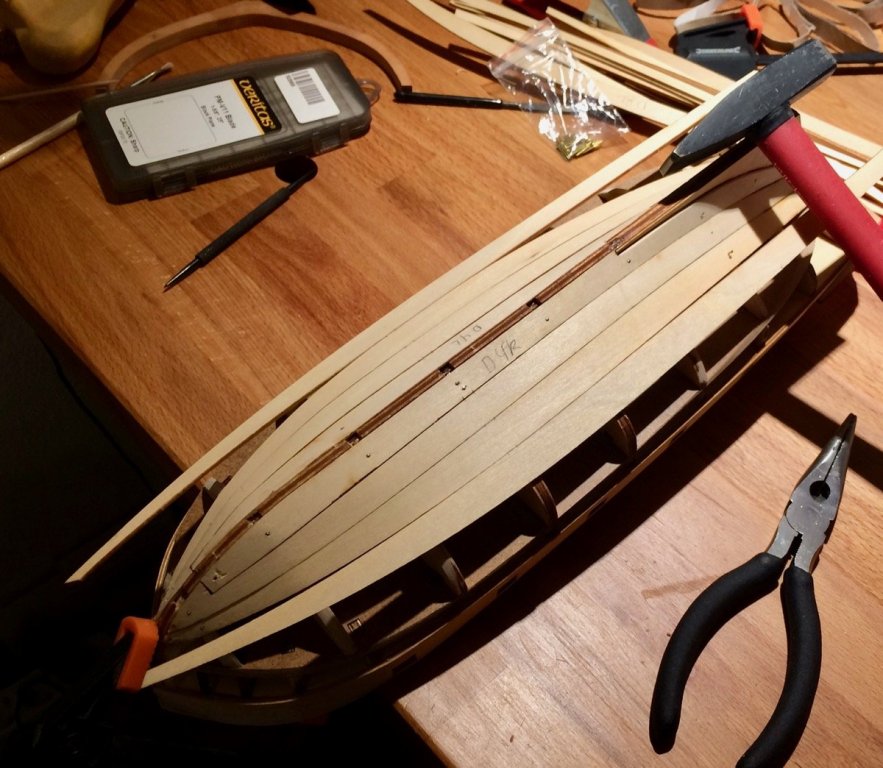
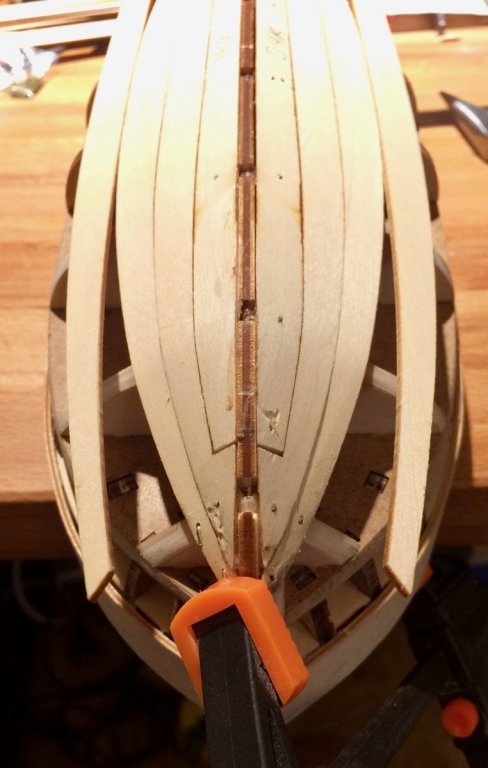
Thanks for comments! The planking is slowly progressing. Daria is taking some boring tasks, like marking the planks according to the manual (to avoid mixing them), sanding the plank edges, etc. And she even nailed that planks in place! Typically, I was holding the nail with pliers, and she was carefully hammering it. Hard to do it alone, so this time her help was really crucial. We are going the easy route and not steaming the planks, just nail them to the hull and remove most of the nails later on. This is the way the manual recommends it as well. As a result, it looks quite ugly in some places, but it is a first layer of planking - so would not be a problem after fairing
-
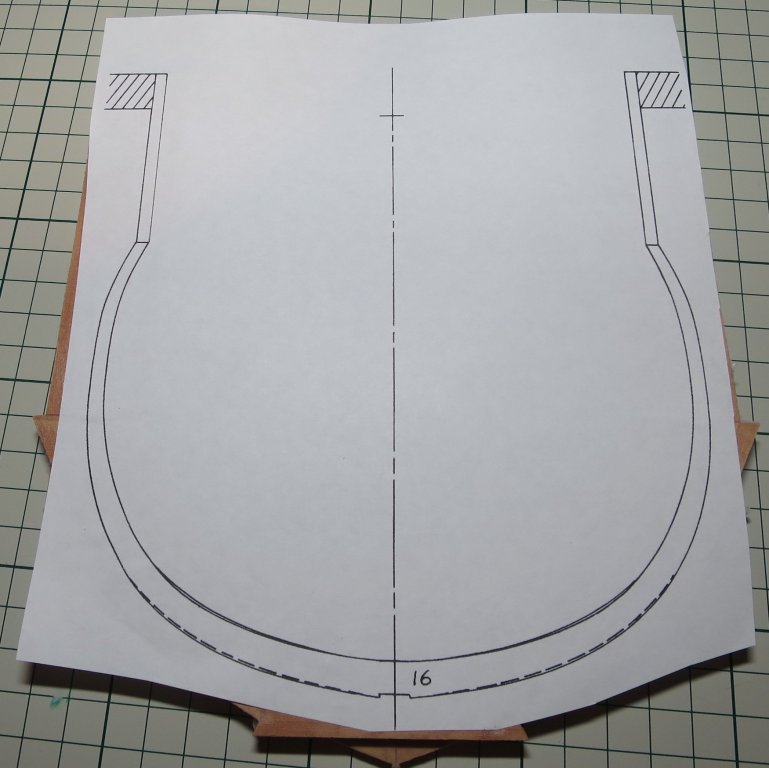
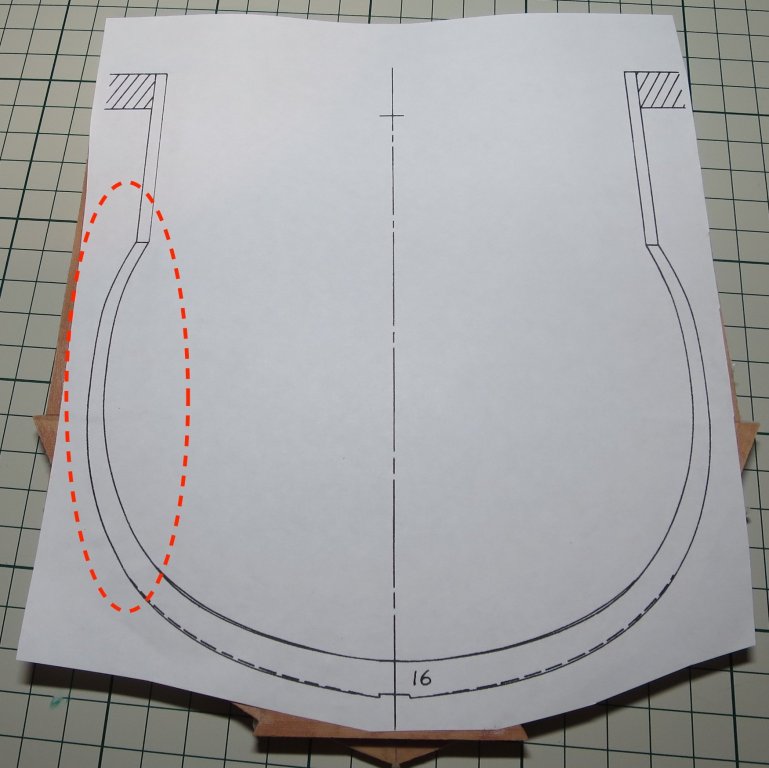
Or you can simply take that decision later, after the hull fairing. Chances are that in a year or so, when the framing is finished and the hull is smooth and fair - you will fall in love with it and refuse to put any planks on it One warning with the Hahn method - it mentally tricks you into focusing on the alignment of the bottom part of the frames (where the keel is), but when you flip the model - it is the top of the frames that are important. Be really careful with their alignment, and leave more meat on the thin parts of the frames when cutting them (marked red here): As soon as you flip the hull into the normal position - these areas will become the center of attention. Do not get tricked! Re-check the frame alignment with a wood strip while you go, to avoid big problems when fairing it later on. Especially with the scale you selected - it would be fairly easy to sand away extra material on the outside of the hull than to end up with not enough material.
-
Your timbering set already had pre-cut frame blanks? That is something new! you might want to consider using some glass / acrylic plates when laminating the frame blanks - that will help to keep them flat, distribute the clamping pressure evenly and prevent warping due to the moisture in the glue. P.S.: there is something magical in a fully framed builds of small scale, hope it will end up a beauty!
About us
Modelshipworld - Advancing Ship Modeling through Research
SSL Secured
Your security is important for us so this Website is SSL-Secured
NRG Mailing Address
Nautical Research Guild
237 South Lincoln Street
Westmont IL, 60559-1917
Model Ship World ® and the MSW logo are Registered Trademarks, and belong to the Nautical Research Guild (United States Patent and Trademark Office: No. 6,929,264 & No. 6,929,274, registered Dec. 20, 2022)
Helpful Links
About the NRG
If you enjoy building ship models that are historically accurate as well as beautiful, then The Nautical Research Guild (NRG) is just right for you.
The Guild is a non-profit educational organization whose mission is to “Advance Ship Modeling Through Research”. We provide support to our members in their efforts to raise the quality of their model ships.
The Nautical Research Guild has published our world-renowned quarterly magazine, The Nautical Research Journal, since 1955. The pages of the Journal are full of articles by accomplished ship modelers who show you how they create those exquisite details on their models, and by maritime historians who show you the correct details to build. The Journal is available in both print and digital editions. Go to the NRG web site (www.thenrg.org) to download a complimentary digital copy of the Journal. The NRG also publishes plan sets, books and compilations of back issues of the Journal and the former Ships in Scale and Model Ship Builder magazines.


.thumb.jpg.6783f376f73d1457a6d9ff7567c0afdf.jpg)
.thumb.jpg.69b340e8cefe631f73802b61b25262a0.jpg)
