HOLIDAY DONATION DRIVE - SUPPORT MSW - DO YOUR PART TO KEEP THIS GREAT FORUM GOING! (Only 13 donations so far - C'mon guys!)
×


Mike Y
-
Posts
1,550 -
Joined
-
Last visited
Content Type
Profiles
Forums
Gallery
Events
Everything posted by Mike Y
-
 Jeff, thanks for stepping in! All clear, the last question: do you recommend to store sheets in a plastic sleeve (like the one you ship the wood orders in), or it is better to store it without plastic? Gut feeling is that plastic wrap can cause some condensation and bad ventilation, which might lead to rot or grey spots, but just want to confirm
 -
Dremel 8050 Rotary Tool Recall
Mike Y replied to jhearl's topic in Modeling tools and Workshop Equipment
Thanks a lot, John! Turns out mine is affected... Contacted local service center, hope they will replace it -
what is the ideal modelling table?
Mike Y replied to AON's topic in Modeling tools and Workshop Equipment
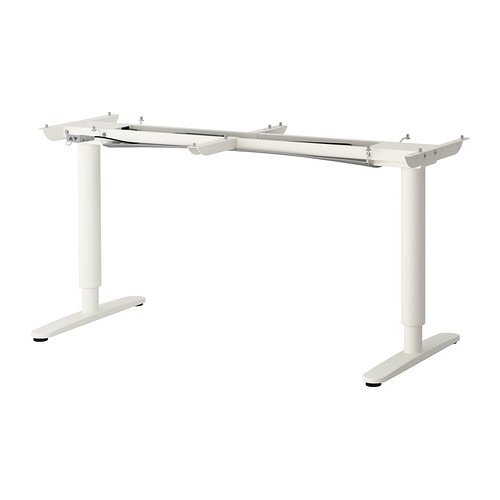
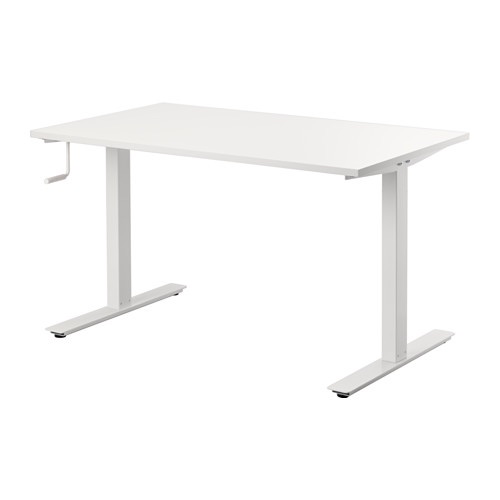
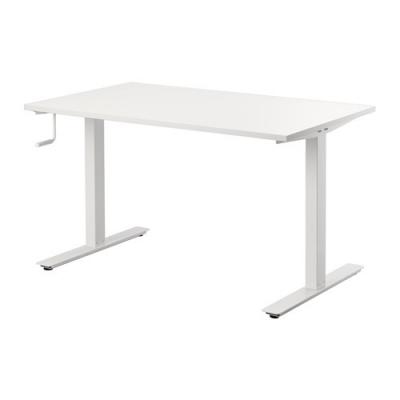
Interesting news about a lifting tables. IKEA lowered the price bar, they offer electrical lifting table mechanism (frame, legs, motors, everything, just add a tabletop) for just $400: http://www.ikea.com/us/en/catalog/products/50263225/ And they also offer a hand-cranked table, same thing but not electrical - $229! http://www.ikea.com/us/en/catalog/products/S49084965/ Looks like it is the cheapest way to have a height-adjusted table in your workshop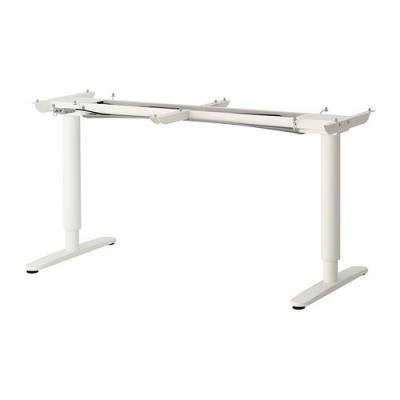
-
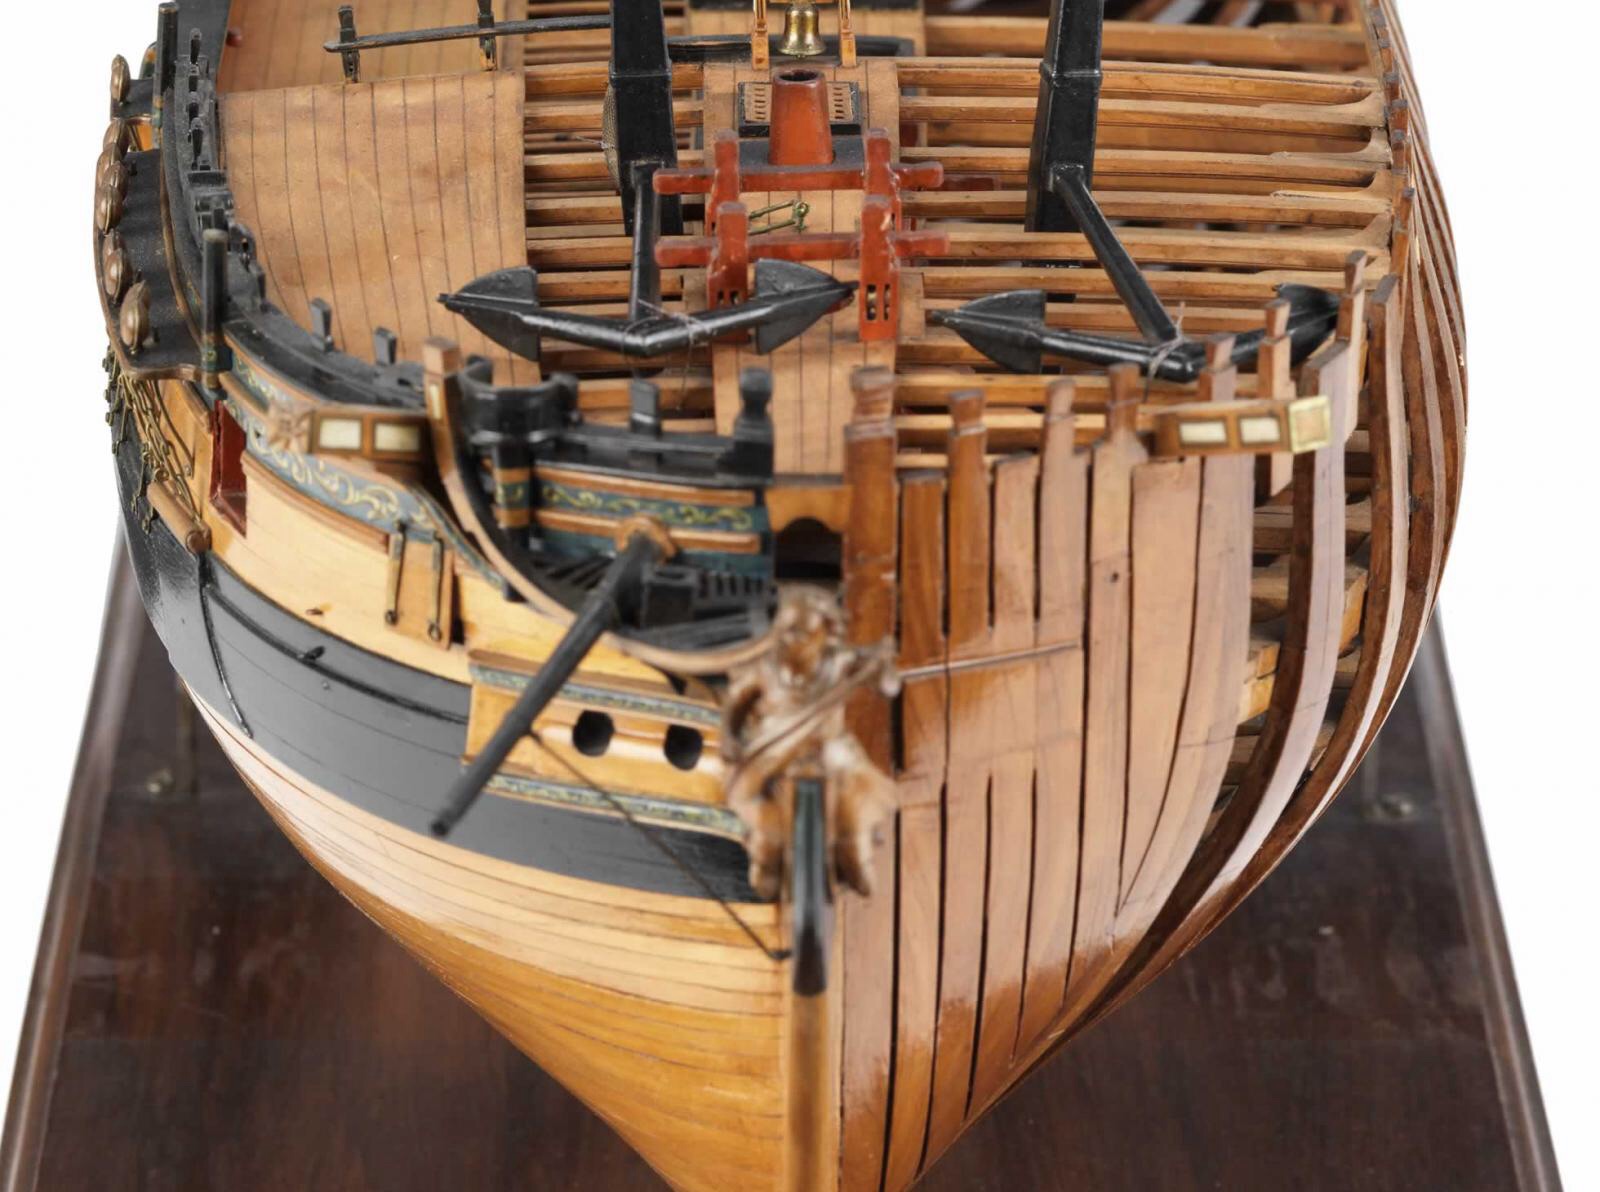
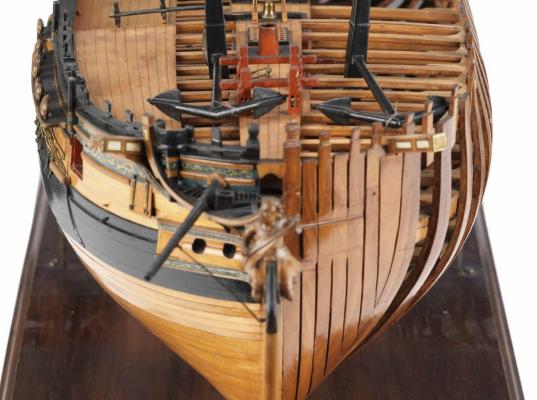
Mark, it would be fully planked from one side (no poly there) and fully opened from another side (even no wales). This is the model that I used as a reference:
- 968 replies
-
- 10
-

-
- hahn
- oliver cromwell
- (and 1 more)
-
I know I am an overthinker... What things to keep in mind when storing some milled wood (mostly sheets) indoors, room temperature? To avoid rot, insects infection, turning grey, etc? The wood in question is a standard shipmodelling hardwood - pear, castello boxwood, holly, ebony. Obviously, it is good to keep a semi-constant humidity and temperature, and I found a place matching that criterias. 1) What about insects? 2) Maybe it would be good to put some silica gel to absorb extra moisture if the humidity level will go up? Or it will suck moisture from the wood, making it too dry? 3) Better keep it sealed in plastic bags or without plastic? 4) Anything special that I should know about storage of holly? To make sure it will not change its colour and will remain bright white? I know it sounds like paranoia, but really do not want to find that my wood stash is eaten, rotten and holly turned grey. brrr. Nightmare!
-
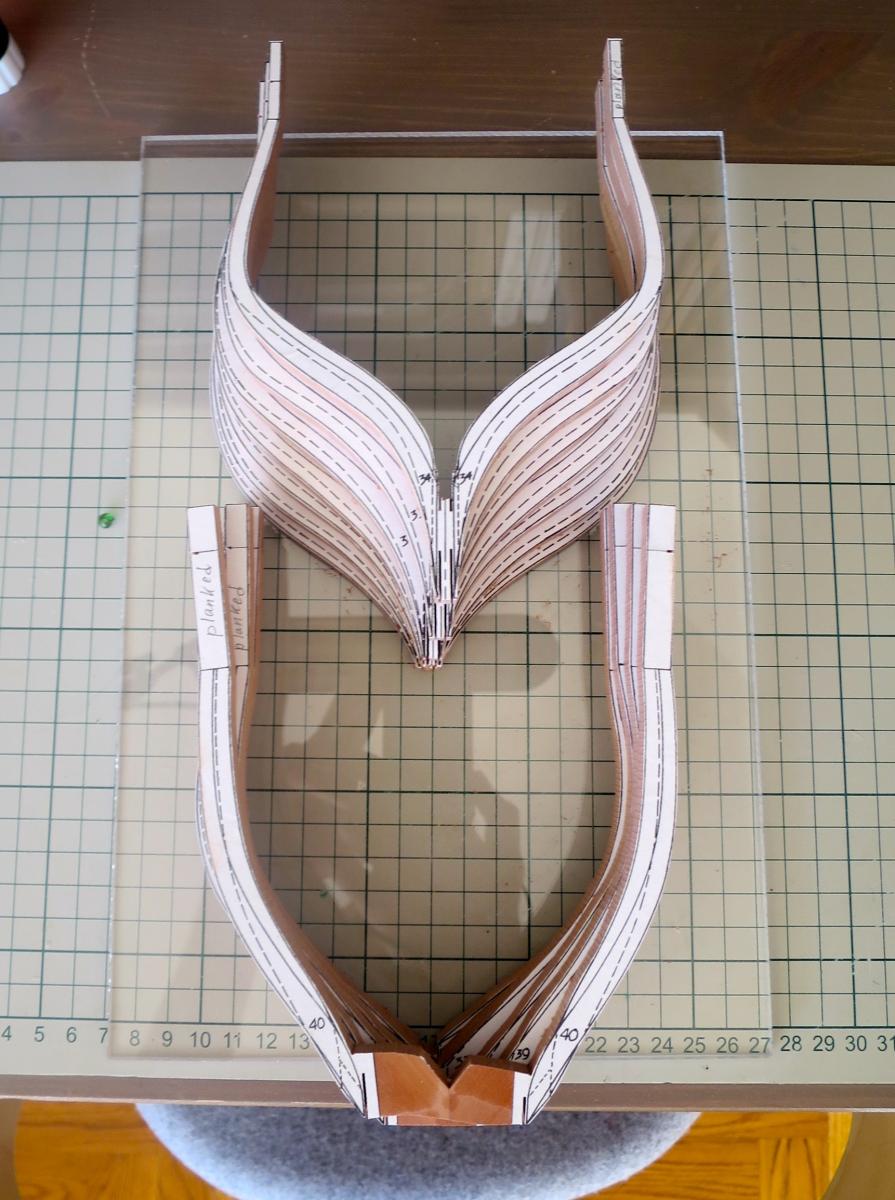
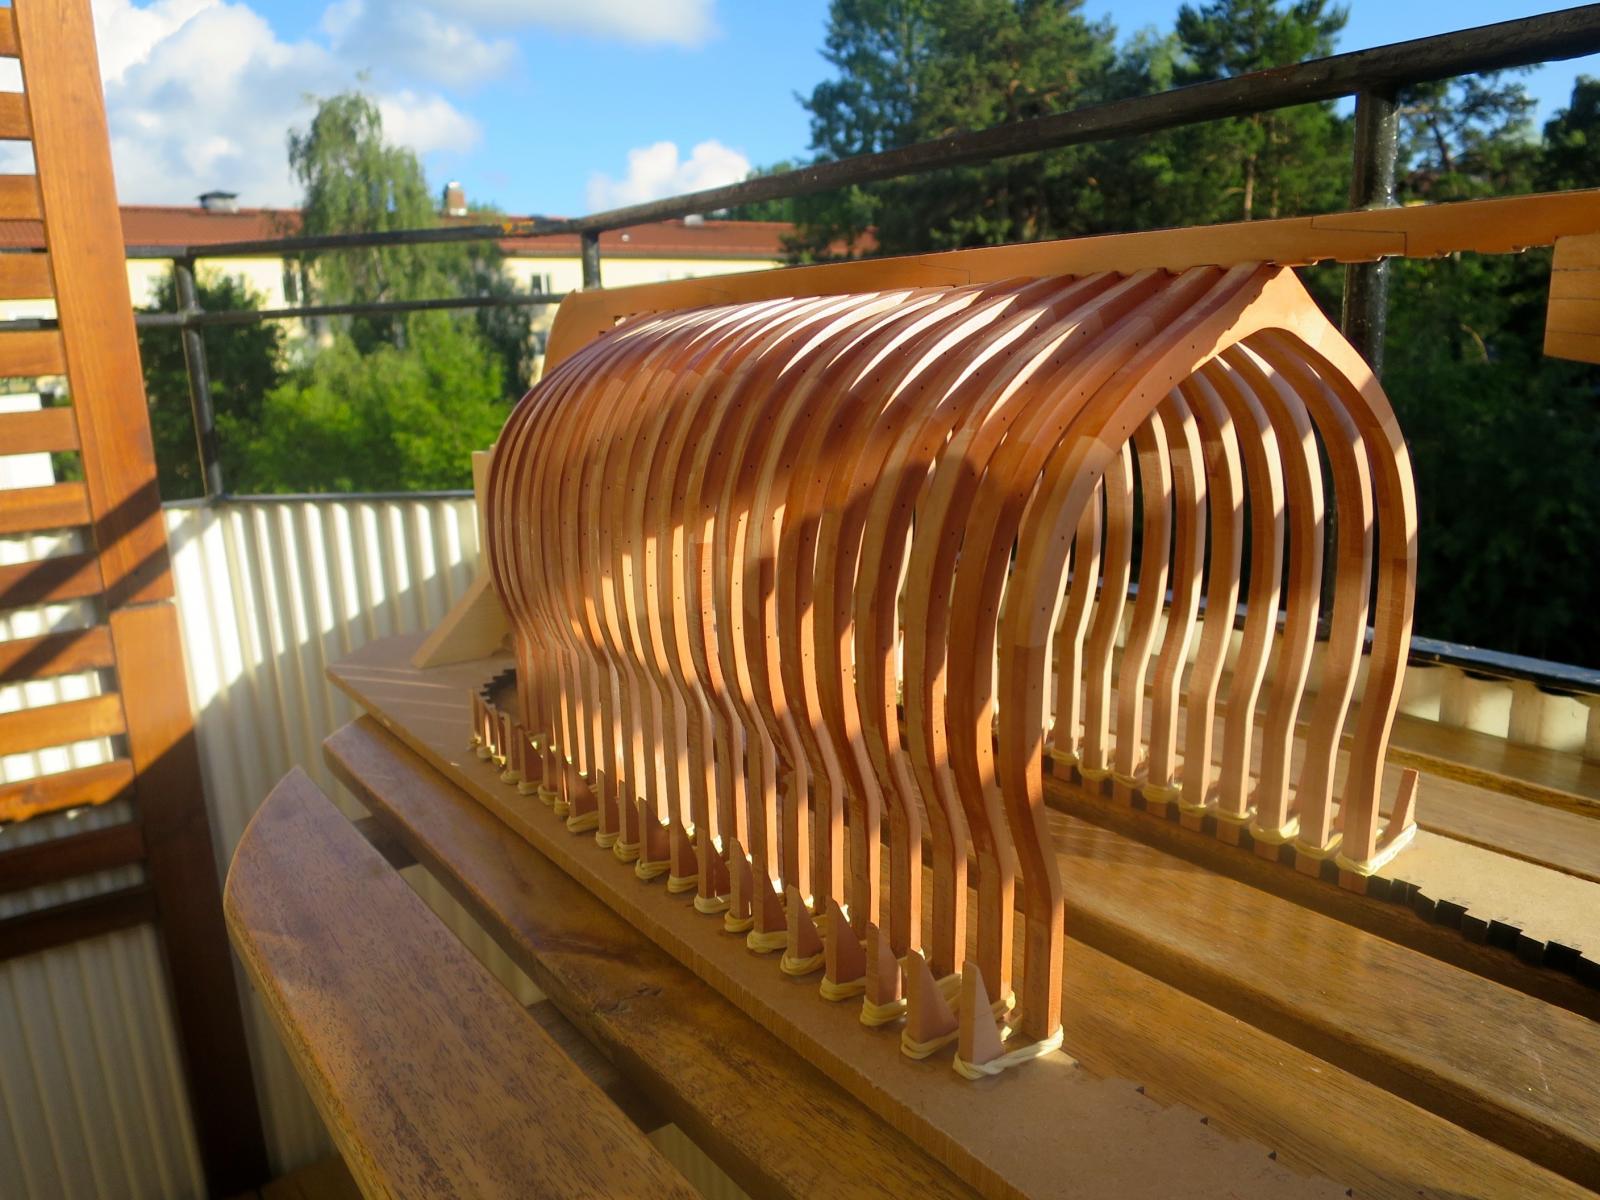
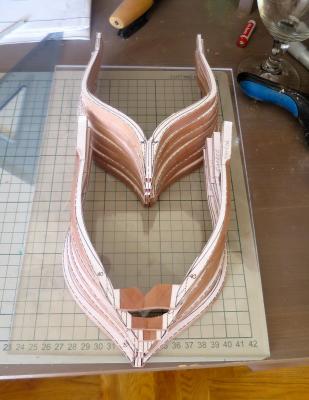
Midship frames were easy, now I am in the area of extreme bevels: Thanks to Mr. Hollom, who built his Oliver Cromwell from Hahn's plans and confirmed that these bevels are correct and could be trusted. If you missed his build log and fantastic model - it is here: http://modelshipworld.com/index.php/topic/1883-oliver-cromwellbeavers-prize-by-peter-mr-hollom-148/ After pre-beveling frames already look neat! Current status: 20 frames installed, 20 frames produced and drying from the wipe-on-poly right now. Oh, Oliver Cromell have just 40 frames, so I do not need to produce any more, whoo-hoo!

- 968 replies
-
- 13
-
-
- hahn
- oliver cromwell
- (and 1 more)
-
Congratulations! It is not just an exceptional model, but also a great build log - thanks for all the time you spent sharing your experience, methods, ups and downs with us. Small rant: such a model, and such a small and blurry pictures! If you will ever get a good camera, so we can look on that piece of art in a high definition, in details... Ah
-
Proxxon Micro MBS 240/E Band Saw Review
Mike Y replied to Blue Ensign's topic in Modeling tools and Workshop Equipment
Keith, frankly - never tried. Guess that thin brass does not really count as "metal". But I read a number of reviews by modellers who cut aluminum, etc - they say it works fine, especially with a metal blade Proxxon advertises it as capable or cutting metals and offers blade for it - doubt that it is a lie. Saw is powerful enough, so it is only a question of picking the right blade. There is also an optional watercooling kit -
Proxxon Micro MBS 240/E Band Saw Review
Mike Y replied to Blue Ensign's topic in Modeling tools and Workshop Equipment
Small update: I dramatically reduced the noise by removing both wheels and applying tri-flow silicone lubricant to the internal sides of the ball bearings. They do not take any lube from the outside, but quite open from the inside. Now the bandsaw is running very smooth! I can use it without forcing my family to run away -
Proxxon EF vs. Dremel 7700
Mike Y replied to rtropp's topic in Modeling tools and Workshop Equipment
Just measured Dremel 8050 - its weight is 250gr. However, it is also a question of balance - all battery tools have the heaviest part in the bottom (batteries), while this one have a lipo accumulator which is located somewhere in the middle. I am using it a lot to drill tiny holes freehand, and that balance is quite important when you do it. -
Proxxon EF vs. Dremel 7700
Mike Y replied to rtropp's topic in Modeling tools and Workshop Equipment
John, light is turned off by going to lowest speed and clicking minus button again But yes, speed and light settings are not saved when you turn it off -
Proxxon EF vs. Dremel 7700
Mike Y replied to rtropp's topic in Modeling tools and Workshop Equipment
Actually, check out new cordless dremel - 8050 micro: http://www.dremel.com/en-us/Tools/Pages/ToolDetail.aspx?pid=8050#.VaaAyXBXeK0 It have a better accumulator (lipo), very well balanced and quiet. I use it for a few months very actively. Still have a regular dremel with the cord on my table, but never used it since I got 8050
-
ancre La Belle 1684 by Nenseth - 1:36 scale
Mike Y replied to Nenseth's topic in - Build logs for subjects built 1501 - 1750
Hej Hans, How is your build going? Any new photos to share? -
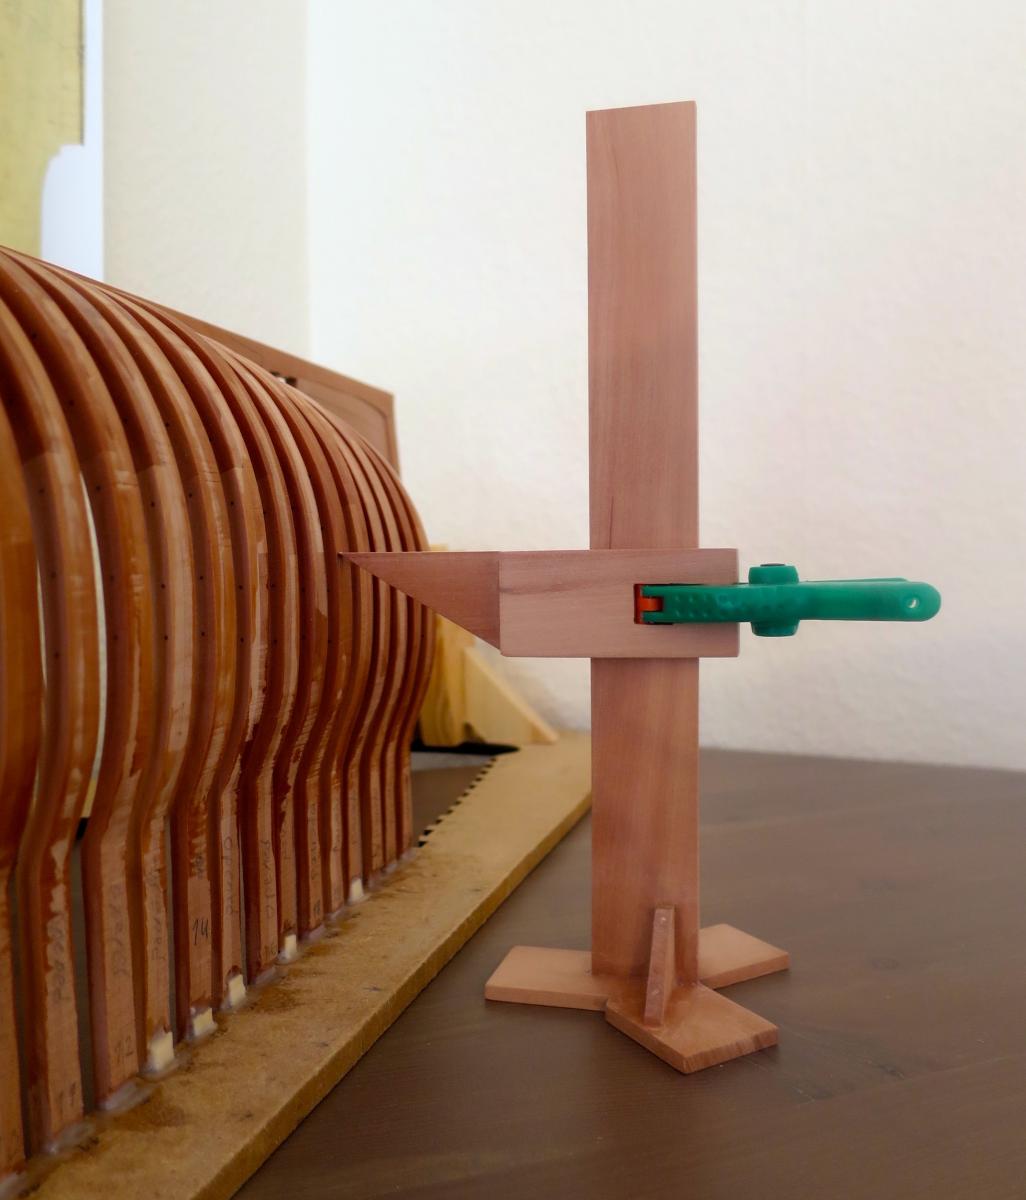
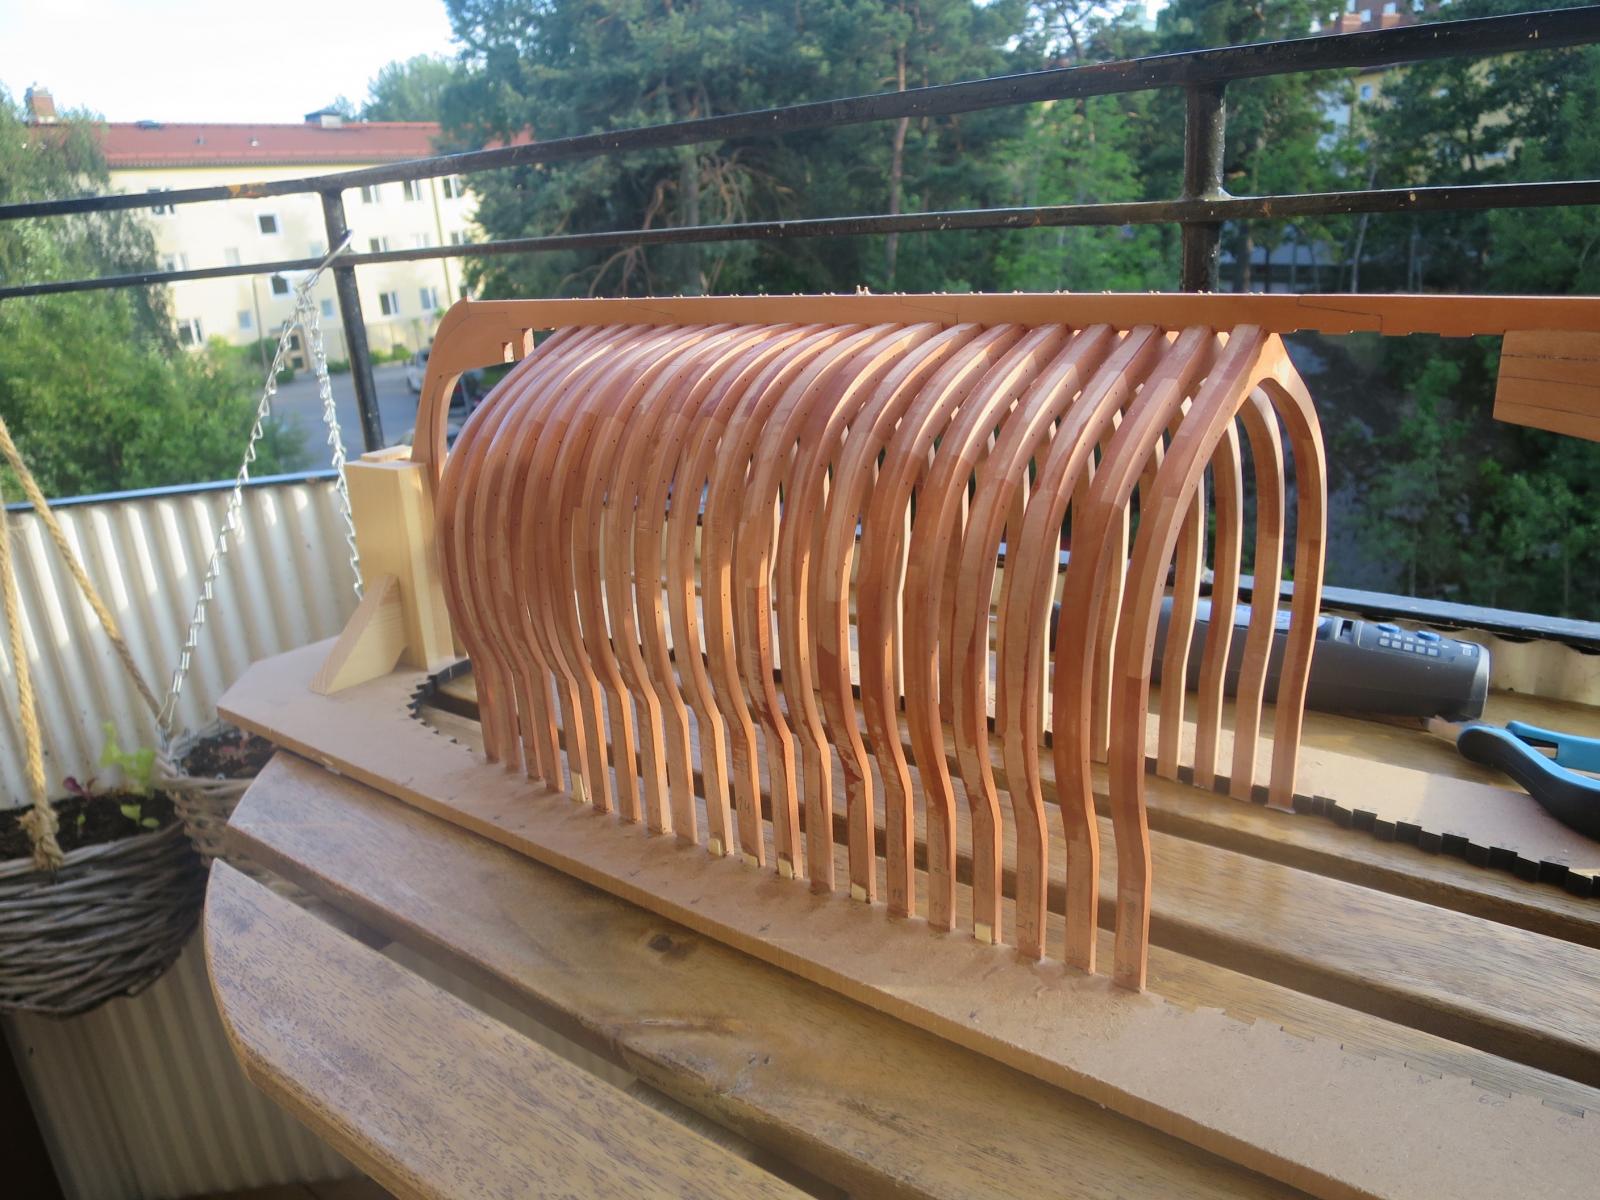
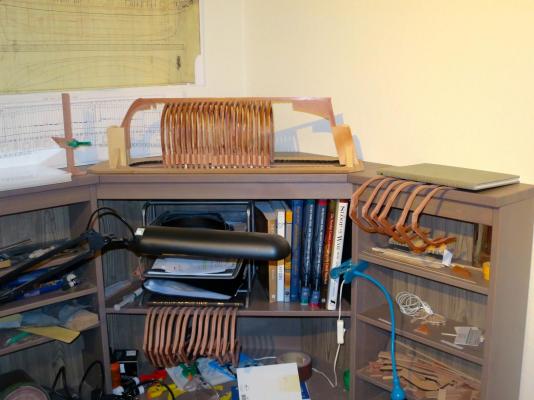
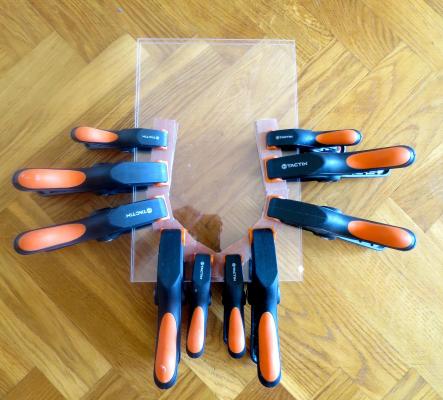
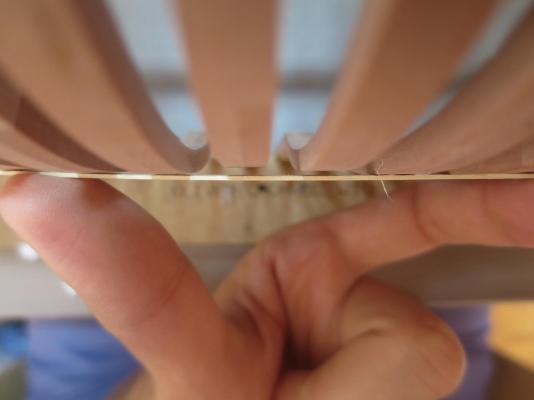
Frame mass-production in progress... Boring, once the process is stable - it becomes just a matter of time that spring clamps I am using for lamination are actually big and strong. The benefit comparing to regular clamps - you get an even and continuous pressure at all points, no way to over-tighten one clamp and under-tighten another. In a meanwhile, used my "training model" to cut the gunports. Turned out to be harder than I expected, swiss files are not strong enough - so most of the wood is removed with knife and chisel, which is kind of scary. Ordered Xacto micro blade, #15, to help with gunport cutting: http://xacto.com/products/cutting-solutions/blades/classic-blades/Keyhole-Saw-Blade-15.aspx Built the height transferring device. Height gauges are too expensive, and it is a pleasure to build a small cute tools out of wood. Using clamp instead of a brass knob - looks weird, but will not damage the wood. And clamp is a bit easier to use


- 968 replies
-
- 11
-
-
- hahn
- oliver cromwell
- (and 1 more)
-
Straight and accurate, beauty! As for the wood - with your level of accuracy, think about switching to boxwood (I guess Crown Timberyard have a replacement package). It is such a pleasure to work with and plank with it. You can check pictures in my longboat build log, planked with boxwood (castello). Basswood planks are soft and fluffy...
- 222 replies
-
- 1
-
-
- 18th century longboat
- model shipways
- (and 2 more)
-
Ben, very delicate framing!
-
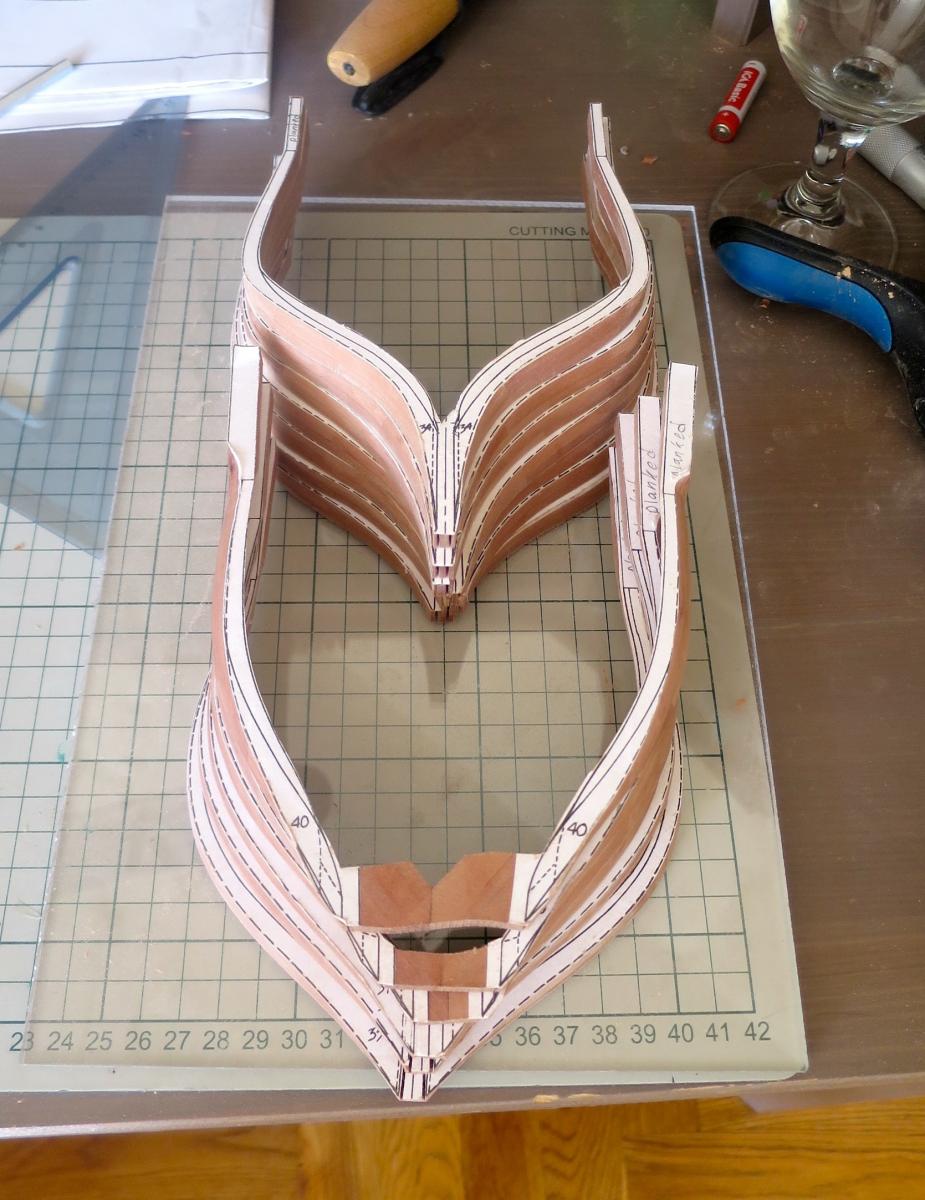
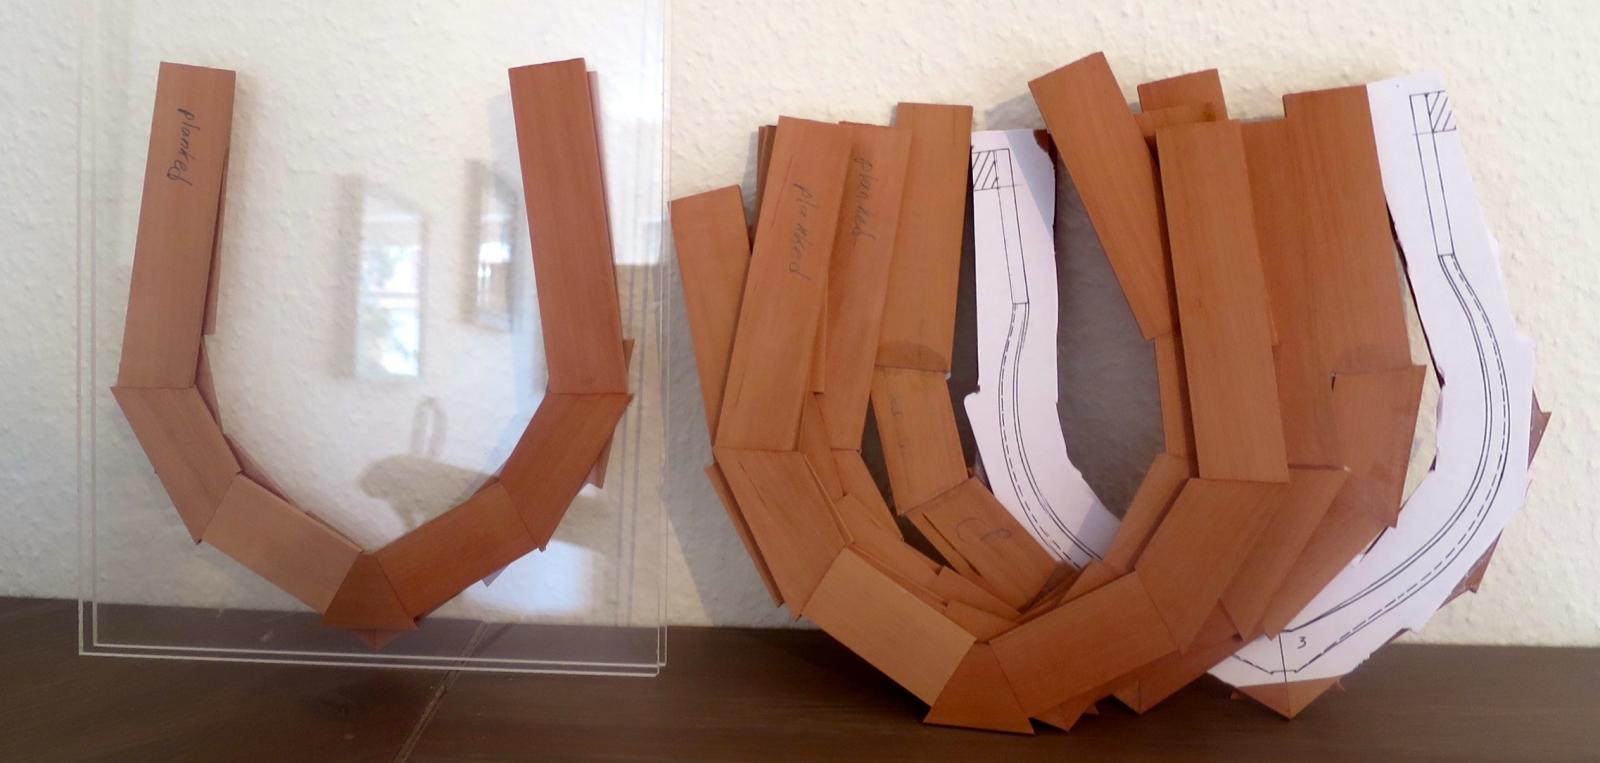
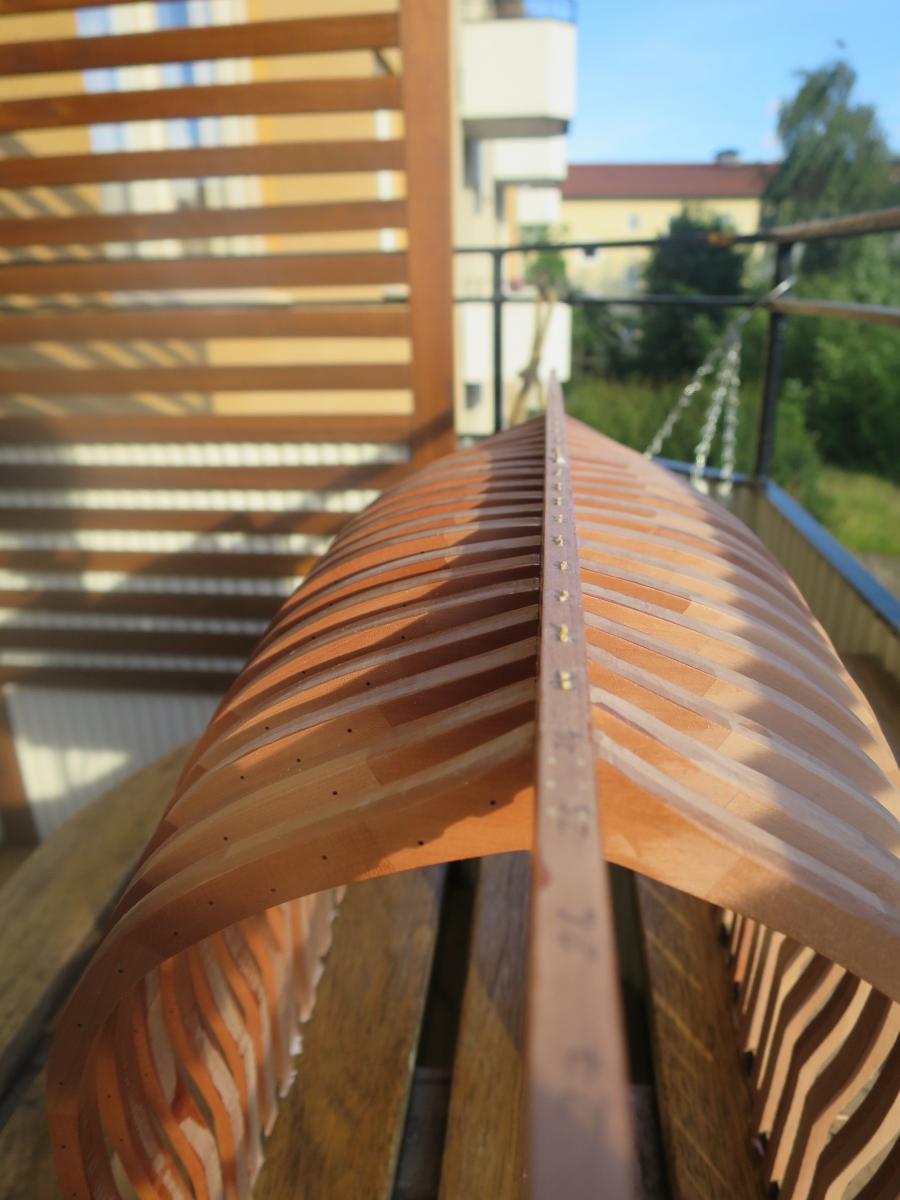
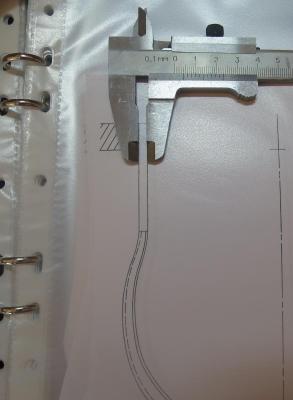
Learned a lesson about Hahn method - should be really careful with the width of the frame tips, the ones that are glued to the framing jig: I was cutting them very roughly (they are not a part of the model, would be cut off anyway). As a result, got some frames that are not in line with other frames: To fix it, reduced thickness of some frame tips and inserting spacers into the others: The good thing is that I will have one side fully planked - I do not care that much about consistency of that side. The other side, that would be opened - is now in line. All 20 midship frames are permanently glued in and fixed with Castello treenails:


- 968 replies
-
- 14
-
-
- hahn
- oliver cromwell
- (and 1 more)
-
Thanks for posting detailed photos of the process, that is quite useful to pick up some ideas. Good luck with the build! Looks very neat!
-
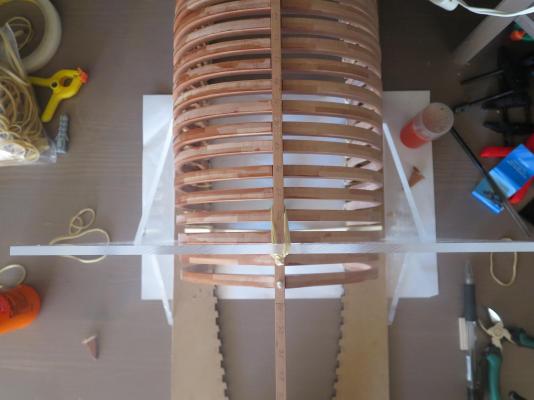
Made a very ugly jig made from plexiglass sheets, to get a straight 90 degrees for all dimensions when gluing the frames. Looks working, now I am trying not to rush things and go slowly, one-two frames a day - glue should set, so frame will not get skewed.
- 968 replies
-
- 12
-
-
- hahn
- oliver cromwell
- (and 1 more)
-
Pardon a stupid question, but how the hull will handle the changes in humidity, temperature, etc? If I understood correctly, it is a monolytic hull, all bulkheads and spacers are glued together. The ship is long and narrow. How do you save it from twisting? If humidity changes, how the stress would be reliefed without a hull deformation? P.S.: yes, I am a member of the Overthinkers club for years
- 191 replies
-
- 6
-
-
- young america
- clipper
- (and 1 more)
-
Very elegant! Hard to understand the scale - how long is the longboat?
-
Thanks Albert! Your Naiad is one of my unreachable targets, it is soo beautiful! Patrick, thanks, if only I can have enough time to build it as fast as I want! Life offers so many interesting things, and just a few hours a day when you can enjoy them...
- 968 replies
-
- 3
-
-
- hahn
- oliver cromwell
- (and 1 more)
-
Current state of things: not so much modelling, more of a summer activities, camping, etc. Ordered a set of engineering squares to glue the frames straight. Still waiting for the shipping... Will start cutting remaining frames in a meanwhile

- 968 replies
-
- 7
-
-
- hahn
- oliver cromwell
- (and 1 more)