


bhermann
-
Posts
535 -
Joined
-
Last visited
Content Type
Profiles
Forums
Gallery
Events
Posts posted by bhermann
-
-
Wow - planets AND asteroids - I like it!
Bob
-
My thought when I started on Bluenose was to use everything that came with the kit and replace nothing. I paid for it and I was going to use it all! The kit has a lot of stripwood and a fair amount of scratch building of components is required, so even though it is a kit, it is not just a collection of parts to be assembled. I have repurposed some stuff along the way, for example the walnut veneer that was supplied for the second planking became planks that I laminated and used for the main cabin roof and for hatch covers. After rigging around the bowsprit with the kit-supplied "rope", I have since purchased Chucks rope as replacement and I will finish the rigging with that. The sailcloth that comes with the kit is useless for the purpose and will also be pitched. I pestered some of my quilting friends to come up with something more suitable, and I may use their stuff instead.
At the moment I consider myself a kit builder, and will probably stay that way for the foreseeable future. My serious hobby money goes to my astrophotography addiction, and not for modeling tools. Having someone else provide a POB framework for the bones of the hull is attractive to me, and I can generally work with whatever else is in the box. I did pitch the dowels that came with the kit, but only because they were warped beyond salvation. Rather than get ME to replace them I thought it better to go to the LHS and buy some stuff I could see in person. Who knows, in the future I may laminate some square stock and shape the masts myself.
I feel that this hybrid approach gets me the best of both worlds - if what's in the box is OK, I will use it. If not, I won't. I get the joy of scratch building deck fixtures, with out the tedium (for me) of having to prepare a framework for the project from scratch.
Bob
-
Greg
I got mine from Micromark a few years ago. It came in handy for building squared-up deck fixtures, hatches, etc.
http://www.micromark.com/magnetic-gluing-jig-10-1and4-inch-square,7038.html
Thanks,
Bob
-
-
Bill
Grant Dale (expertly directed by Danny Vadas) did a rework of Victory's stern a few years ago. Unfortunately most of the details were lost with the great MSW crash of 2013, but he did post a short photo summary of the job on the first page of his resurrected log. That log can he found here:
http://modelshipworld.com/index.php/topic/163-hms-victory-by-grant-dale-mamoli-scale-190/?hl=victory
The photos may give some inspiration for process, or maybe someone saved the details of the re-build and will post them as a result of seeing this.
Bob
-
Thanks for the clear and detailed explanations of your process Ken - and the good size photos. I will be following along with this build - and I'm going go back and read through the Niagra log. I probably won't add too many comments here (how many ways can you say "great Job"?) but will be checking in regularly.
Bob
-
-
-
Thanks, Dimitris. It was a fun little build. I like the level of detail they managed to pack into such a small replica.
Bob
- Dimitris71 and mtaylor
-
 2
2
-
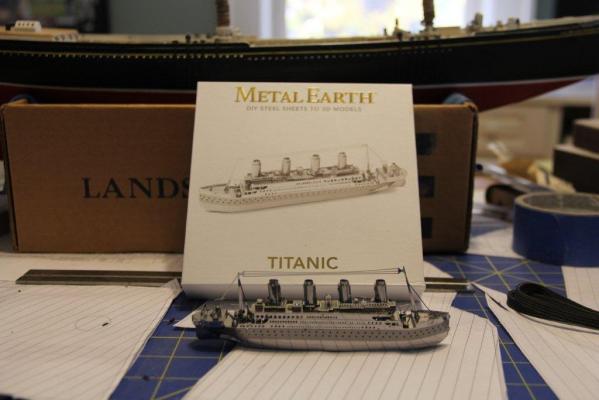
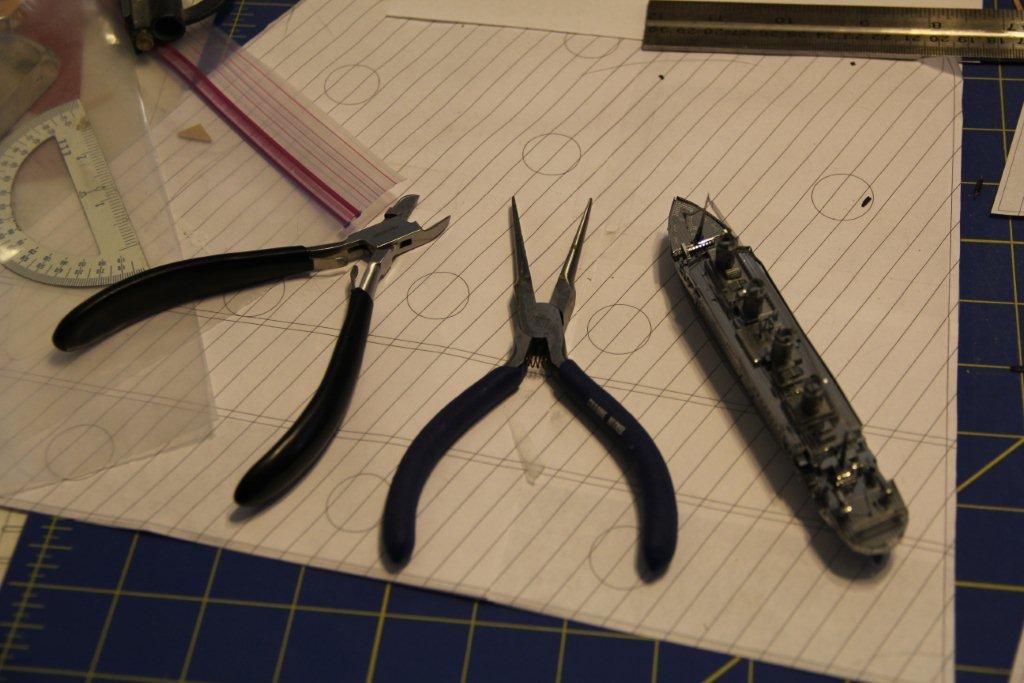
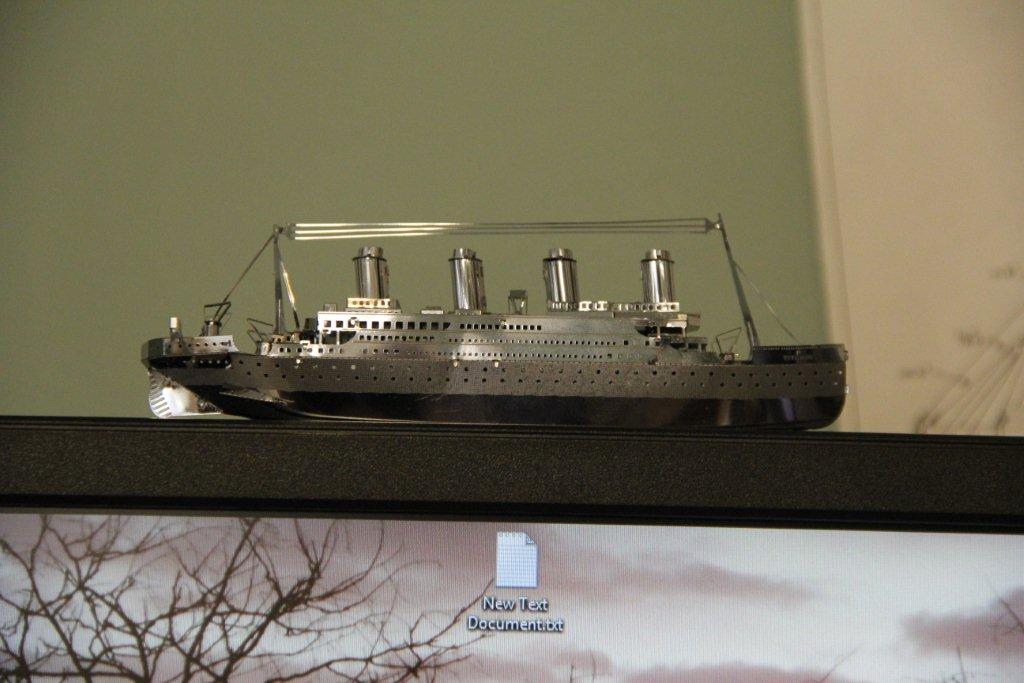
I received this as a Christmas gift last year and recently decided to give it a shot. The model comes packaged in a 6"x6" box and works up into a 5 1/2" model stem to stern.
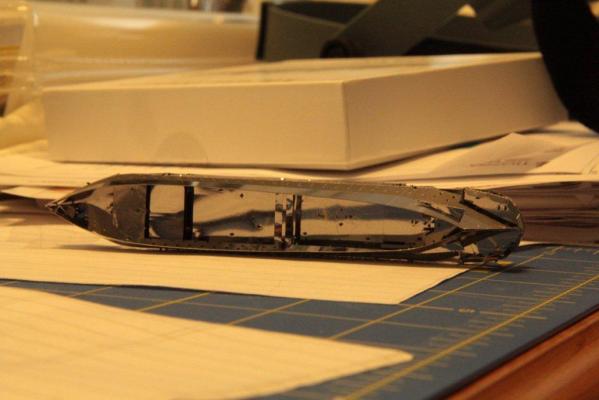
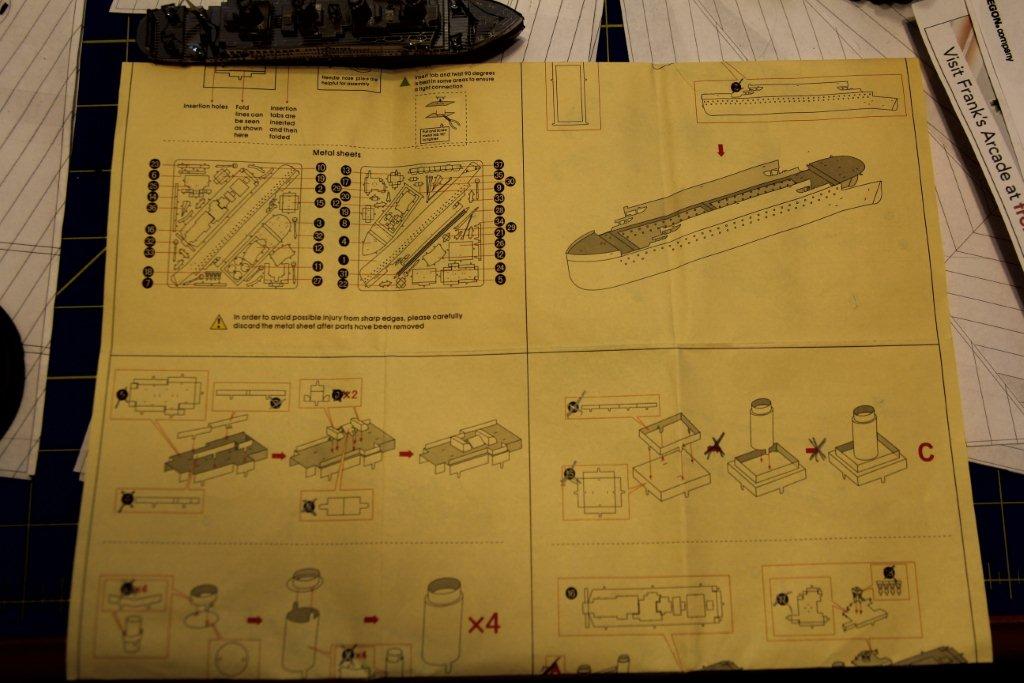
The materials consist of two steel sheets with all parts attached via sprues. Construction is of the "insert tab a in slot b" type. The tabs can be folded over or twisted 90 degrees to lock the parts together. Steps are laid out in a series of diagrams - no text here.

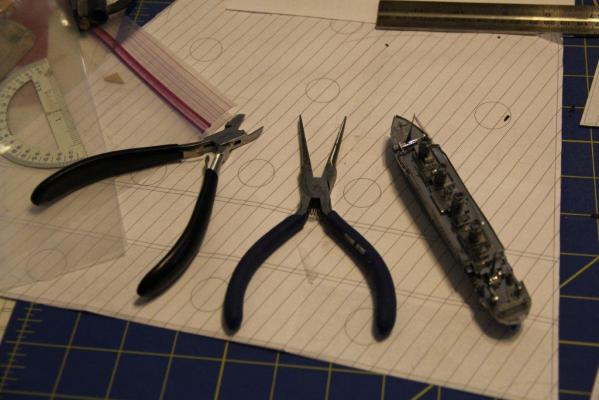
Tools used for construction - a wire cutter to cut parts loose (some have three attachment points and I cut one before twisting the parts loose) and a needlenose plier to fold or twist the tabs to lock in place.
The order of steps is logical and I was able to follow with no deviation. Here is a shot of the underside that shows several of the tabs twisted and locked in place.
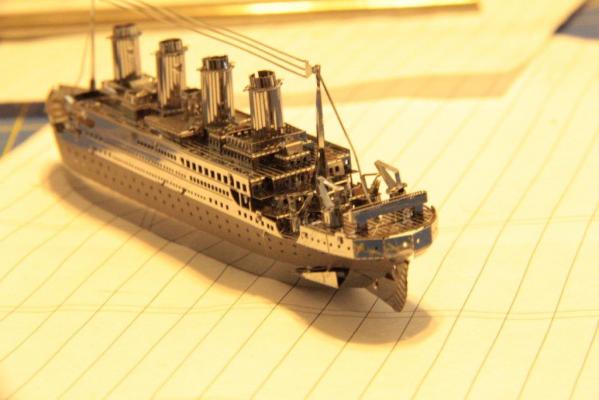
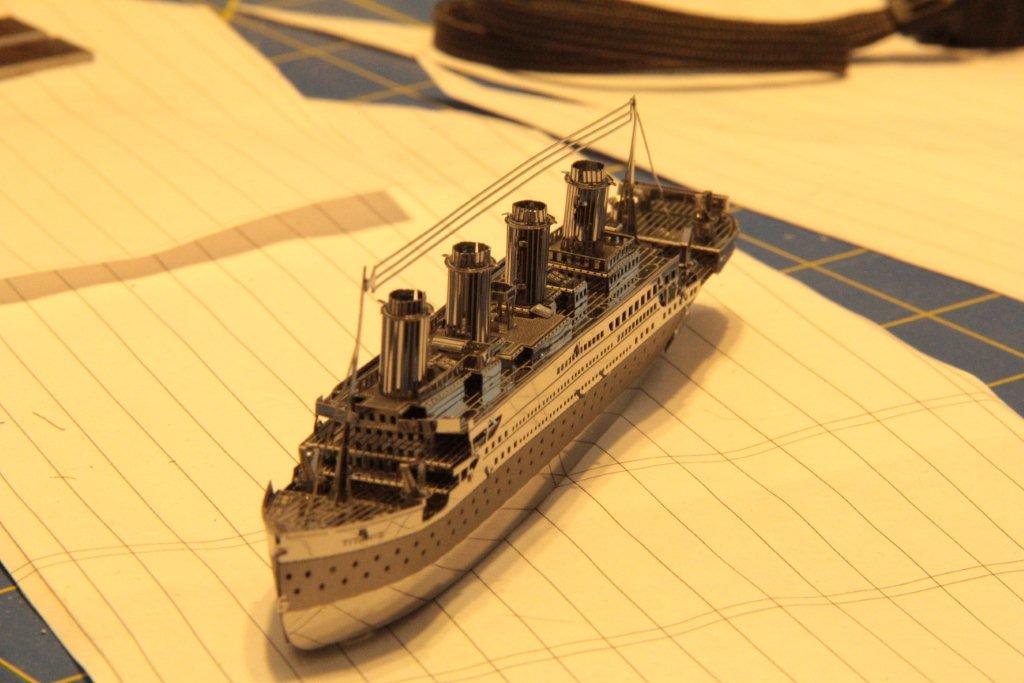
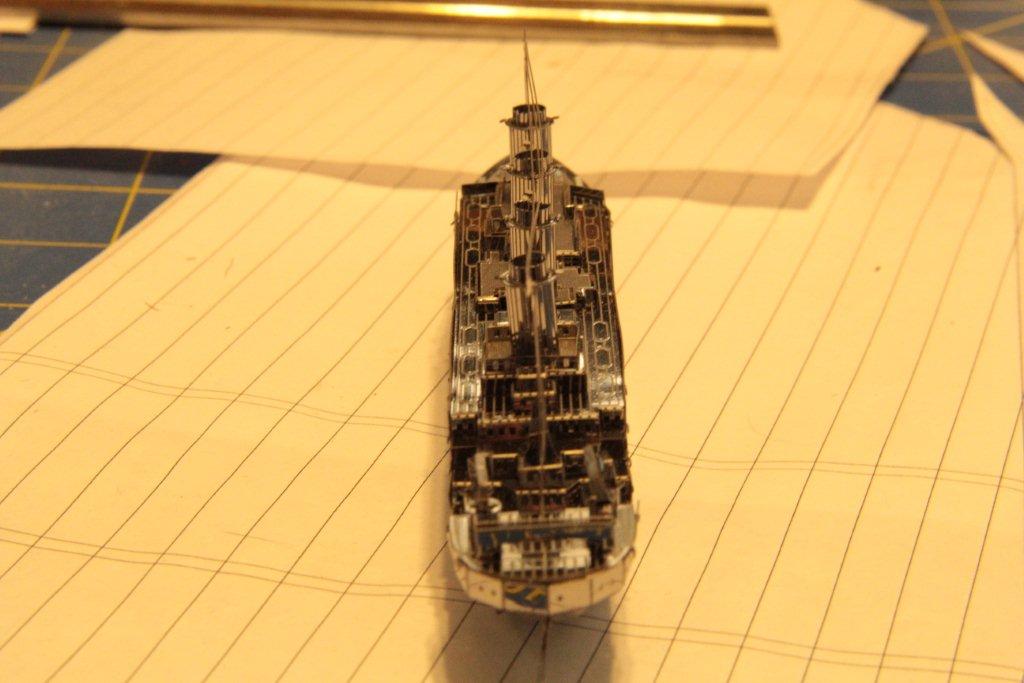
A few shots of the finished model follow. The pieces were not dangerously sharp, but I wouldn't recommend this for younger kids. I was thinking about getting one to build with my 7 year old granddaughter, but I think I'll hold off on that. I have a paper pirate ship I picked up a few years ago - we may start there.

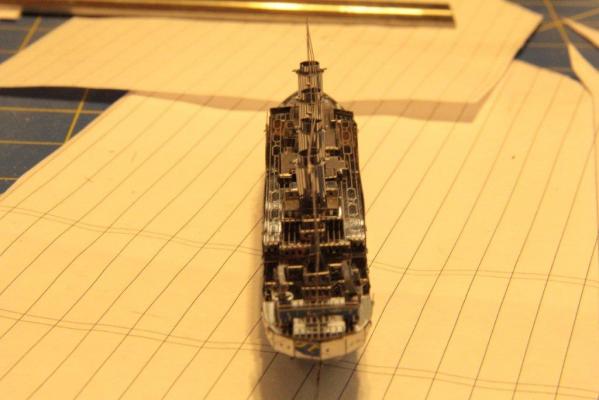
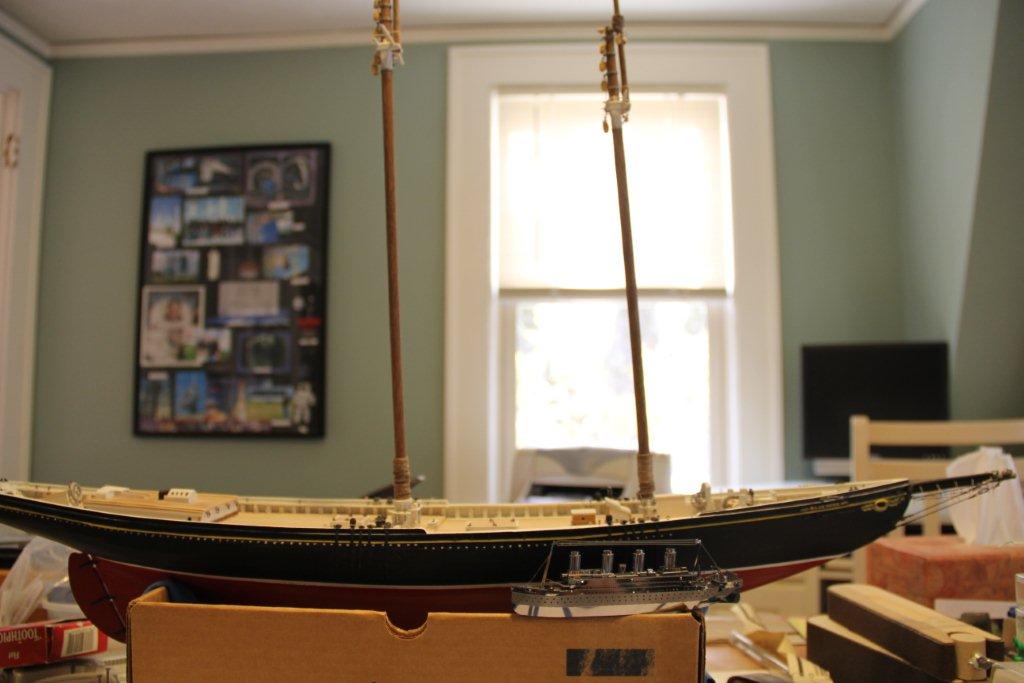
A size comparison with my Bluenose in progress

and the model in it's display location atop my monitor. We'll see if the cat allows that to continue.

Overall the model went together well. The pieces were strong enough to take some flexing, the assembly plan was logical (although a third hand would be useful at some points), and the completed model holds together well. In short it was just the thing to help me keep my hand in model building, while I continue in my Bluenose doldrums. It's a fun little project that takes a short amount of time and provides completion satisfaction quickly. Now I can say I have a completed build!
Bob
- thibaultron, GrandpaPhil, GuntherMT and 4 others
-
7
-
Jan- Willem
Thanks for the info on when wire standing rigging came into play for North American fishing schooners. I agree it comes down to what looks and feels right to the builder. I suspect our expectations of what looks right may be colored by seeing all those 18th and 19th warships with their heavy shrouds here on MSW and on replicas. I should pull up the photos I took of L A Dunton at Mystic and compare her shrouds to what the Charles Morgan is carrying on the other side of the yard

In the end, Julian should do whatever makes him most comfortable - he is the Captain for this voyage.
Bob
-
Julian
I finally got the chance to check the plans on the Model Shipways 1:64 model. They call for the lower shrouds to be .018 inches, which converts to about .45mm, which I believe is where you started, and thought small. One thing I am not clear on - were the shrouds originally rope or wire? If they were wire, would a thinner wire provide the same support as a thicker rope? Just some food for thought. I am blissfully ignorant enough to go with what the plans call out. BTW the MS plans call for .005" ratlines, .127 mm equivalent.
Thanks,
Bob
-
I think I'll avoid the Pluto flap, although I do have an opinion
I love the finish of Mercury! I didn't realize this sort of thing was available - I may need to look into one of these too! Thanks for sharing, Jim. I will be following along with great interest.Bob
-
Jan-Willem
Nice job on the ring bolts. I suspect your issue with the top left sample is the lack of variation in the thickness of the eye-bolt and the ring wire. I like the diameter of the ring in that sample, but you might like it better if you were able to use a thinner wire for the eye-bolt. The relative size of the eye and ring somehow 'feels' right to me in that sample.
The hinges look very nice as well. Keep up the fine work!
Bob
-
-
You know, the irony is that I live about 5 miles from the Peabody museum but have never been in it. I have been meaning to go for ever and have just never gotten around to it.
Tom -
If you plan on going soon, you may want to wait until after August, but before October. Salem tends to wind up a lot for the summer and around Halloween. I haven't been to the PEM in years, but it is certainly worth the trip.
BTW, what you are doing here is making me think I may have to actually build a warship at some point in the future - I love the attention to detail you are putting into her!
Bob
- usedtosail, GLakie and thomaslambo
-
3
-
I was thinking about "borrowing" the Admirals cutter for sail material - as long as I use things for the same purpose she does, she is usually very understanding. If I were to try that with wood veneer, however - watch out!
Bob
-
-
Looks like some very nice work, John. Congratulations on getting through her - not bad for a practice model
Bob
-
Richard -
I like the idea. I stared a spreadsheet for Bluenose when I was working on the head rigging. It was more of a historical documentation item at that point than a planning tool, but as I ponder moving forward someday, it would be nice to have everything laid out in a manner that would allow for manipulation of the order, and to mark each line complete as you go through the process.
Bob
-
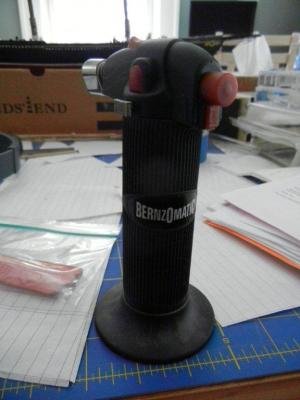
those are approximately the temperatures of the solder I was trying. I guess the blazer just doesn't reach the temperature it advertises. One of the members of my ship club loaned by a torch that used oxygen and fuel. I am going to give it a try. Then, I may just try the Bernzomatic which should be easily available from one of the hardware stores in town.
Bob, does yours still have a model number on it to help with the search?
Thanks all,
Richard
Richard
I looked all over the torch and I don't see a model number anywhere. I recall that I picked it up at Home Depot and the price was in the $40-60 range (I think). Sorry i don't have any better detail than that. I bought this one after trying a couple of pencil torches. They worked OK, but I had a lot of trouble trying to refill them.
Bob
-
Bob,
what is the melting temperature of the solder you use?
Thanks,
Richard
Richard - the supplier (SRA) reports the melting point at 1205 degrees Fahrenheit. The product is described as "Solder Paste with Flux Silver Easy" There is a medium version that melts at 1325 and a hard that melts at 1435.
Bob
-
Richard - I use this Berzomatic torch for silver soldering. It runs on butane and is hot enough for the silver soldering I have done to date. I use the silver soldering paste with flux premixed. The torch has an adjustable flame. I picked this up at Home Depot a couple or three years ago and it has been fine for me. If I am not careful, it is capable of melting and evaporating the brass pieces I am working on.
Bob
-
Tadeusz
Thanks for outlining the step by step process you use. In my opinion, the thermal transfer is brilliant. I have been hesitating to start my sails for quite a while because I don't want to sew the seam lines (I think they would look too bulky) and I don't trust myself to be able to draw them evenly using pencil. You have certainly given me something to think about! I imagine transfer will be more durable than pencil - another plus for the technique.
Thanks,
Bob


Choice of paint
in Painting, finishing and weathering products and techniques
Posted
Robbe33
I too use a brush to apply paint. I have had good results using Testors Model Master acrylics. They go on smoothly and I haven't had any issues with brush strokes showing at all. The key for me has been to do multiple thin coats. You can check my build log for photos of the finish I have gotten, and judge for yourself if it meets what you are looking for.
Bob