

paul carruthers
-
Posts
129 -
Joined
-
Last visited
Content Type
Profiles
Forums
Gallery
Events
Posts posted by paul carruthers
-
-
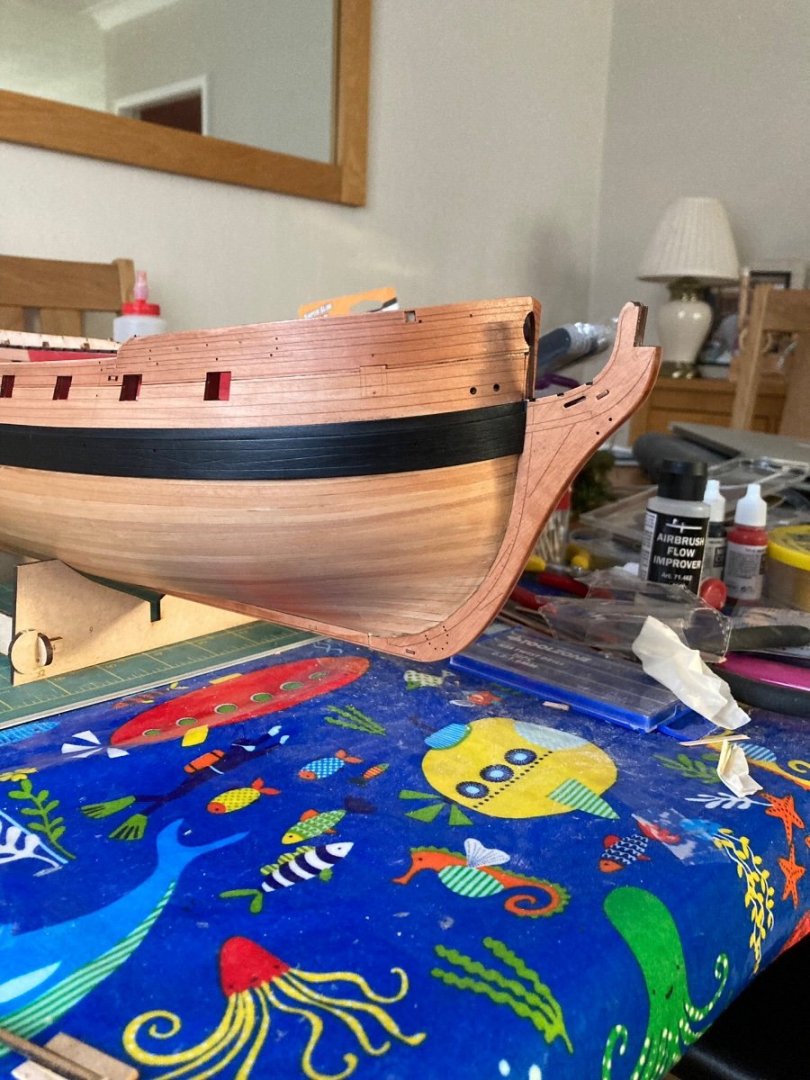
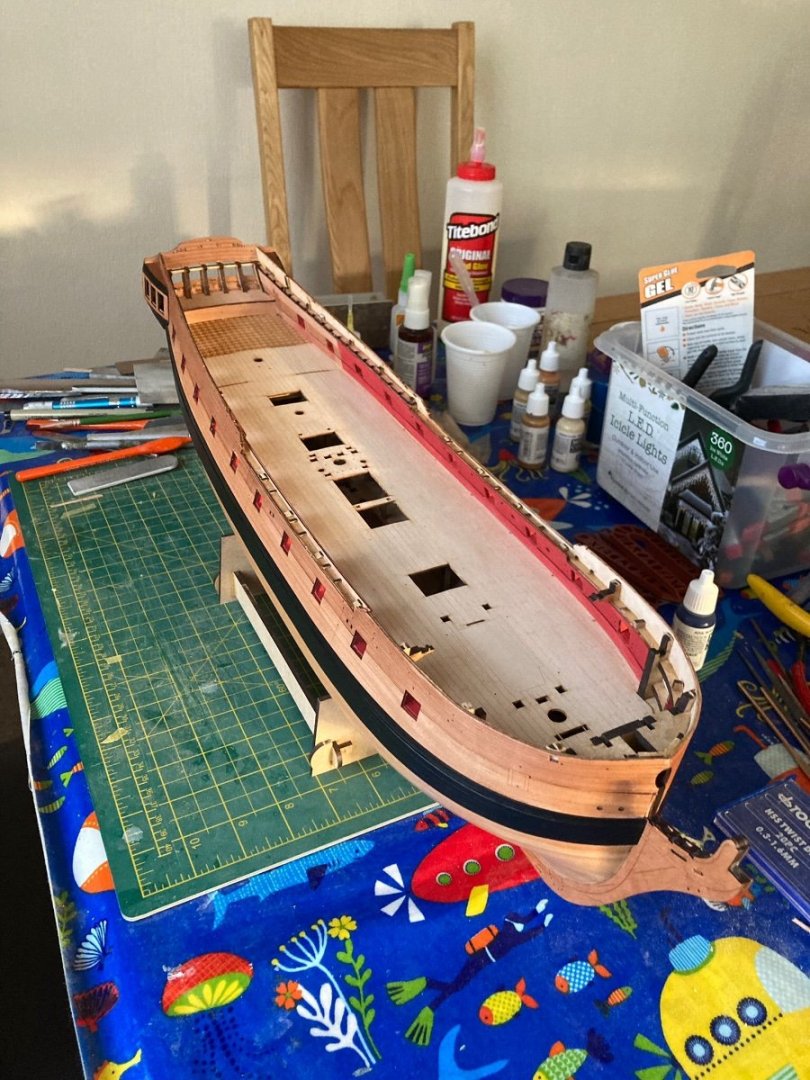
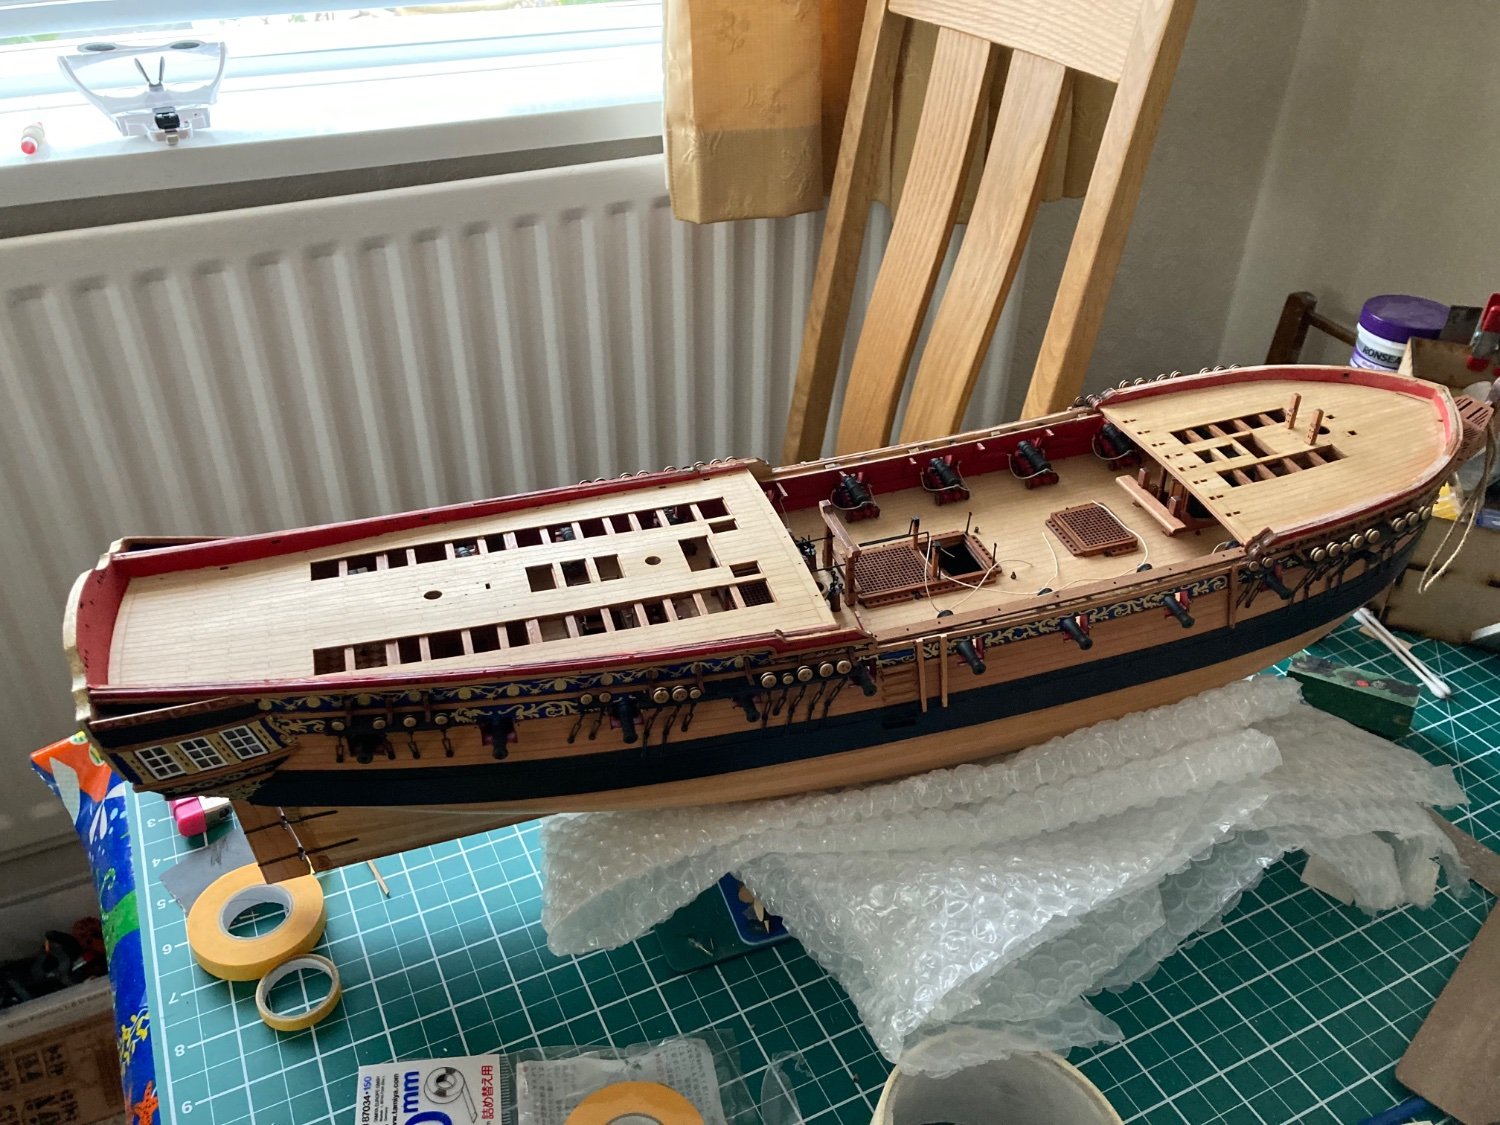
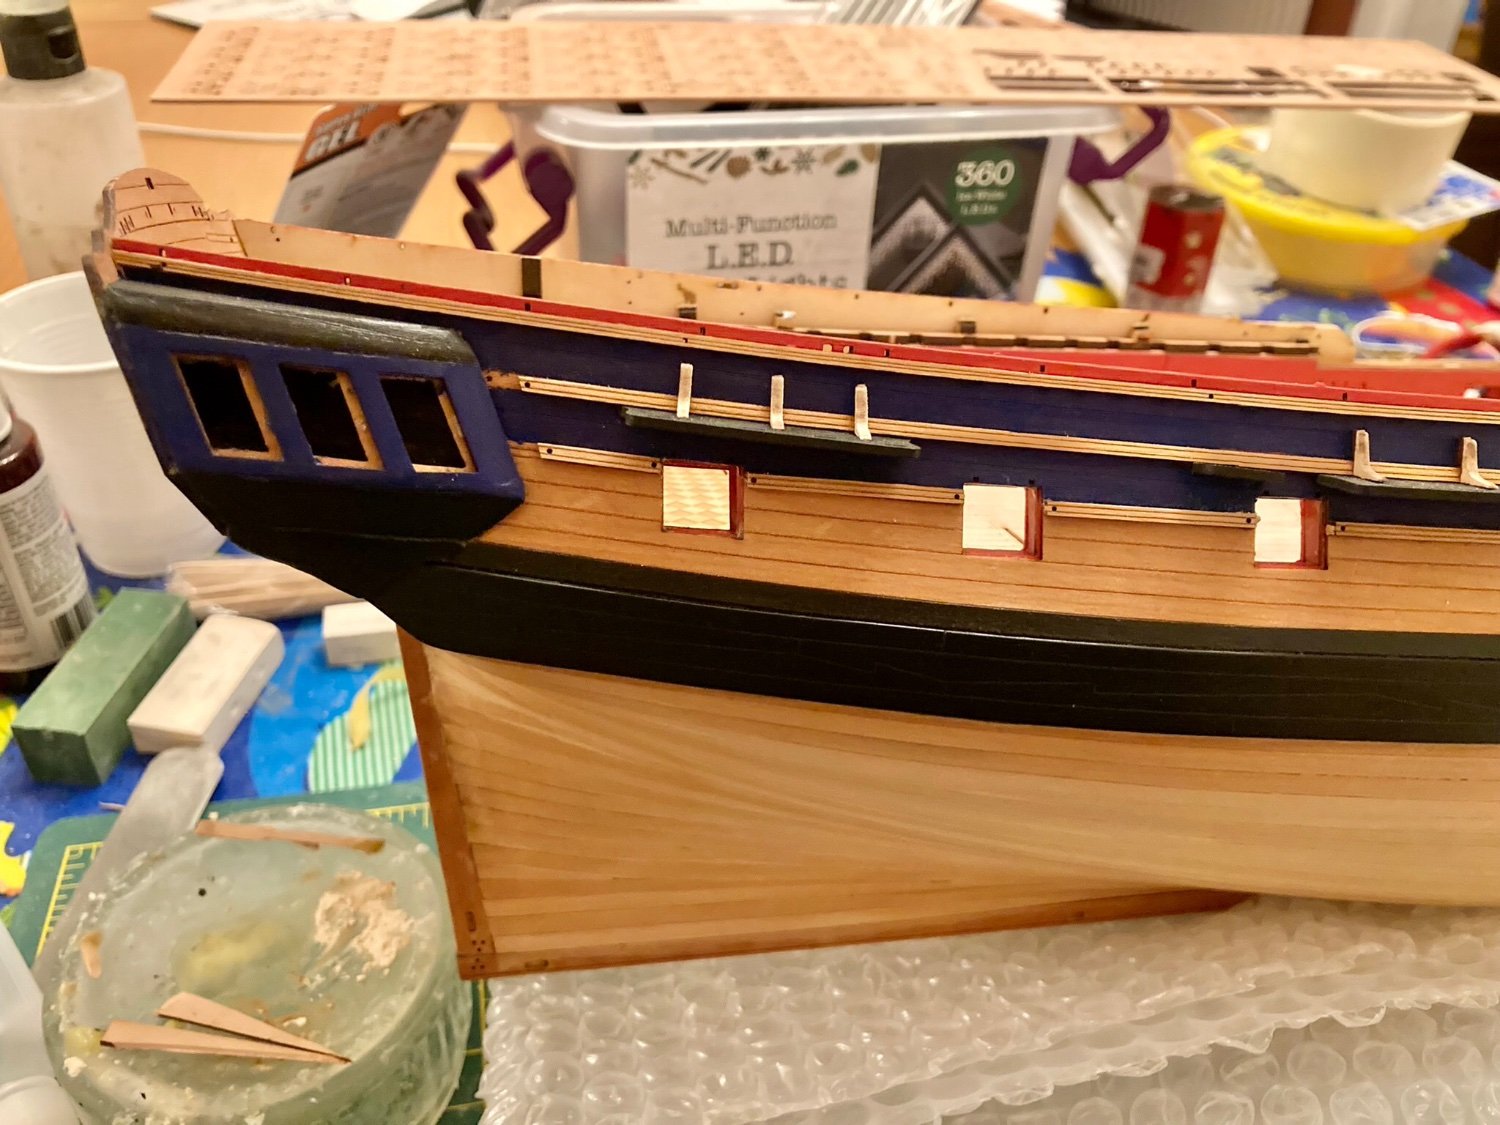
Decks on, only partially rigged the cannon as I didn’t think I could make a realistic job of the blocks.
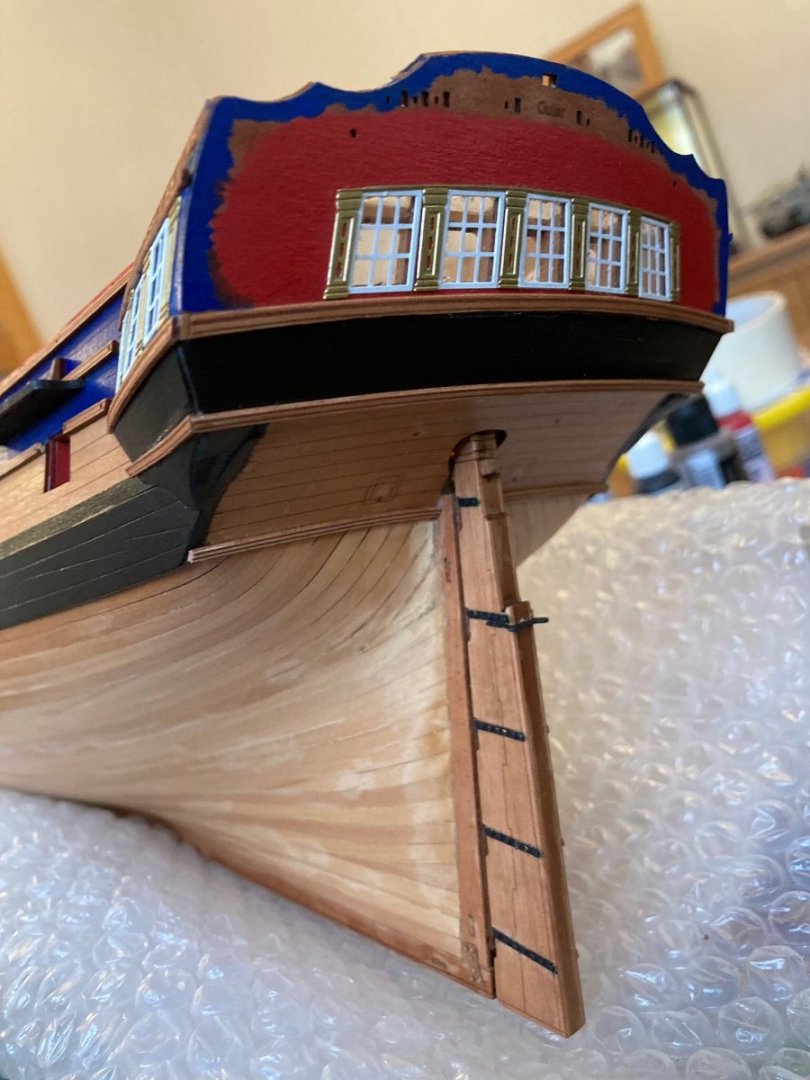
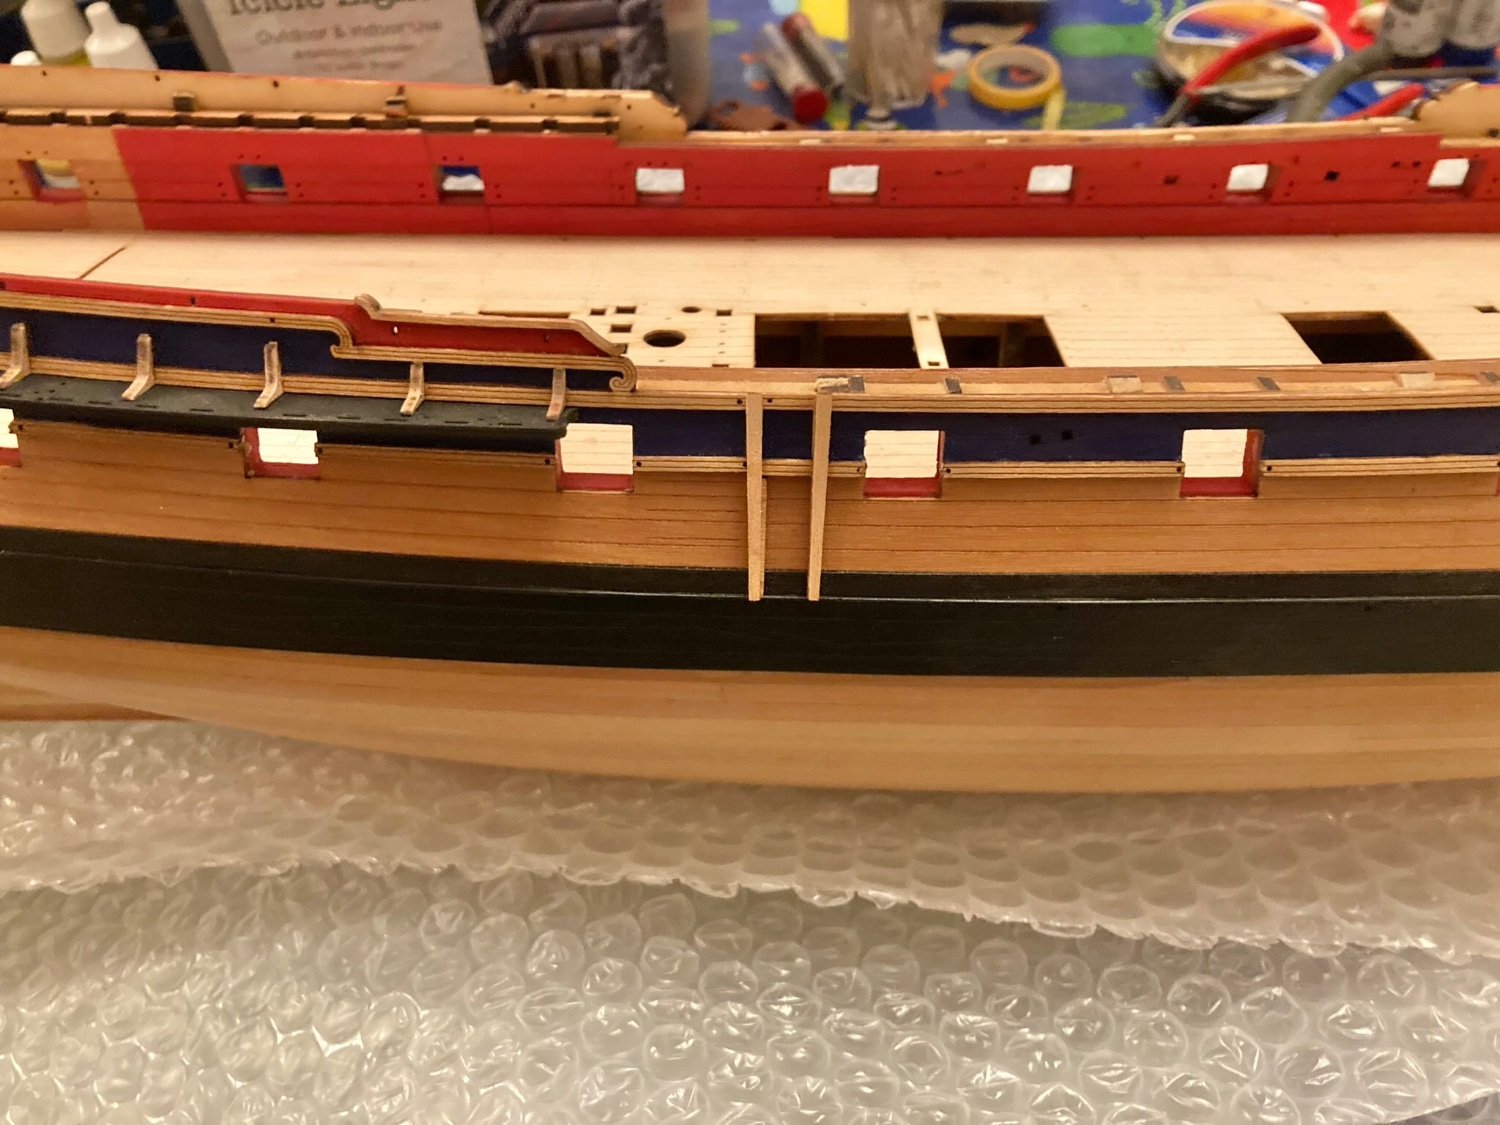
had a slight gap on the bow deck so I removed part of the remaining deck maple and covered it with this, a bit of artistic license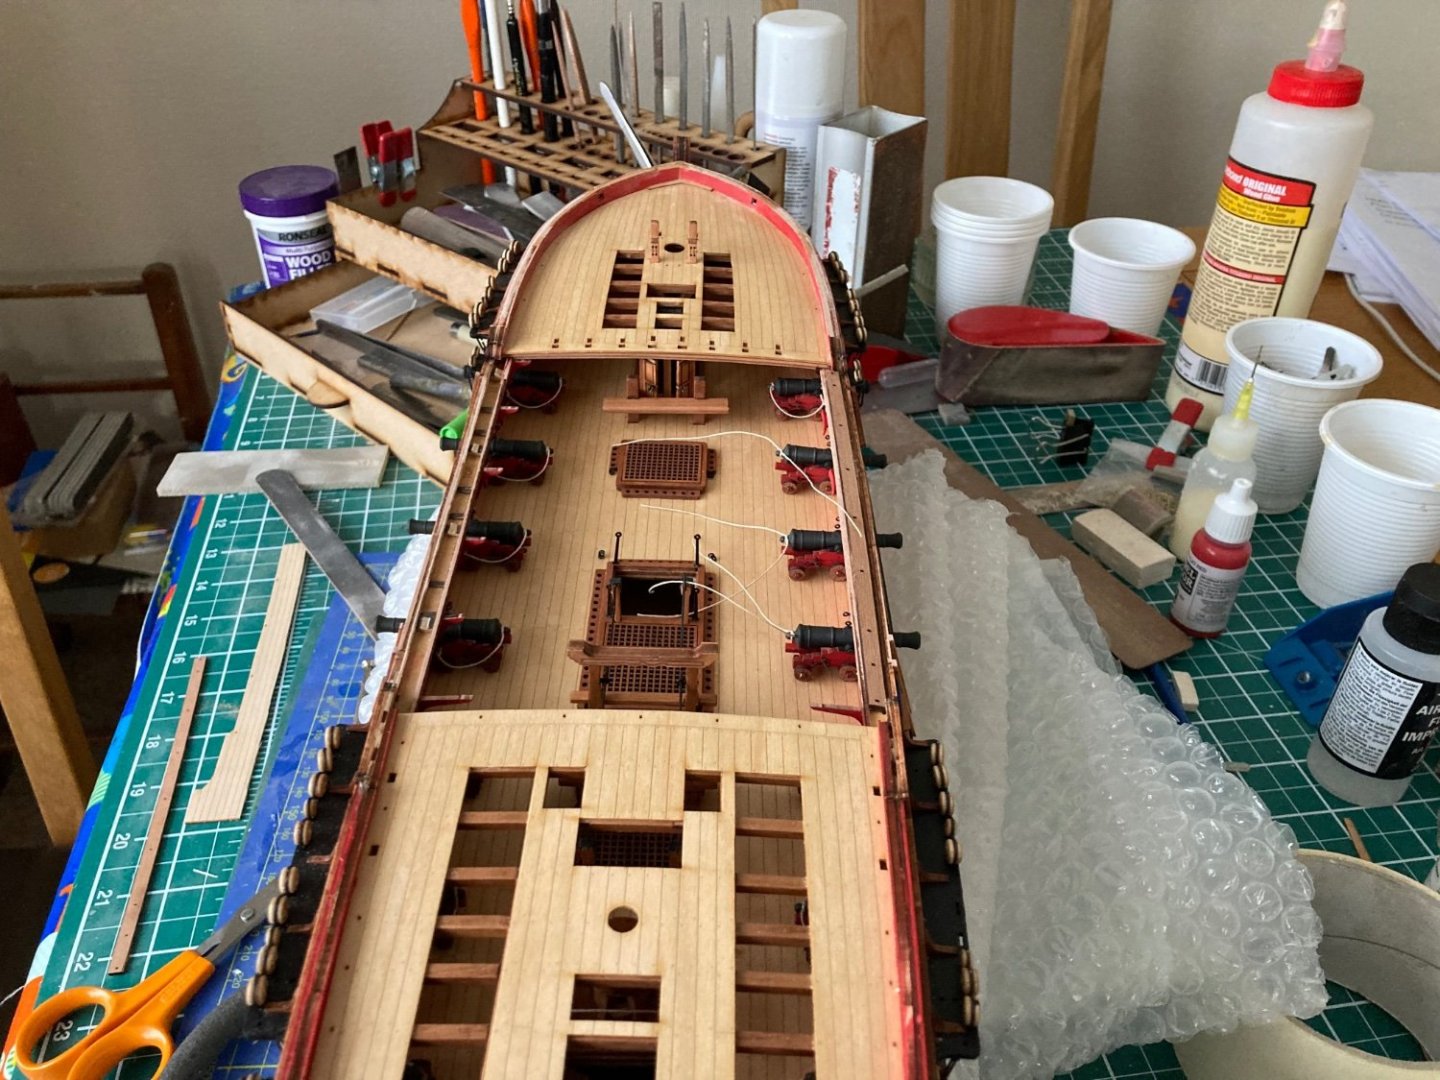

- bruce d, hollowneck, mtaylor and 11 others
-
 14
14
-
On 2/2/2022 at 12:46 PM, DavidG said:
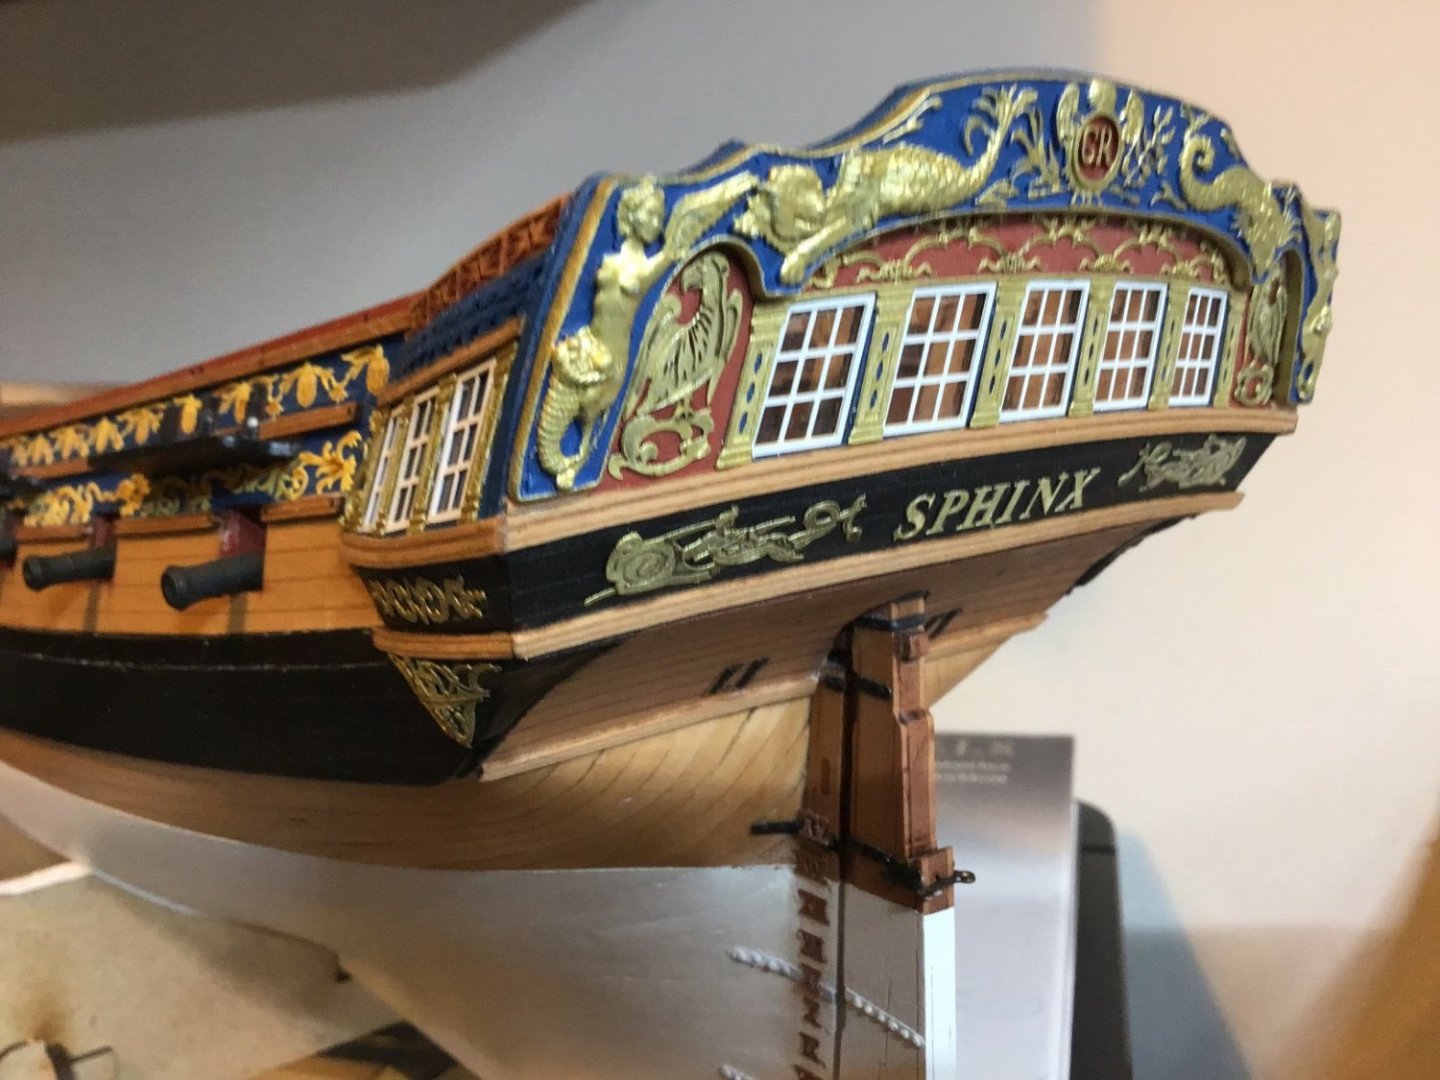
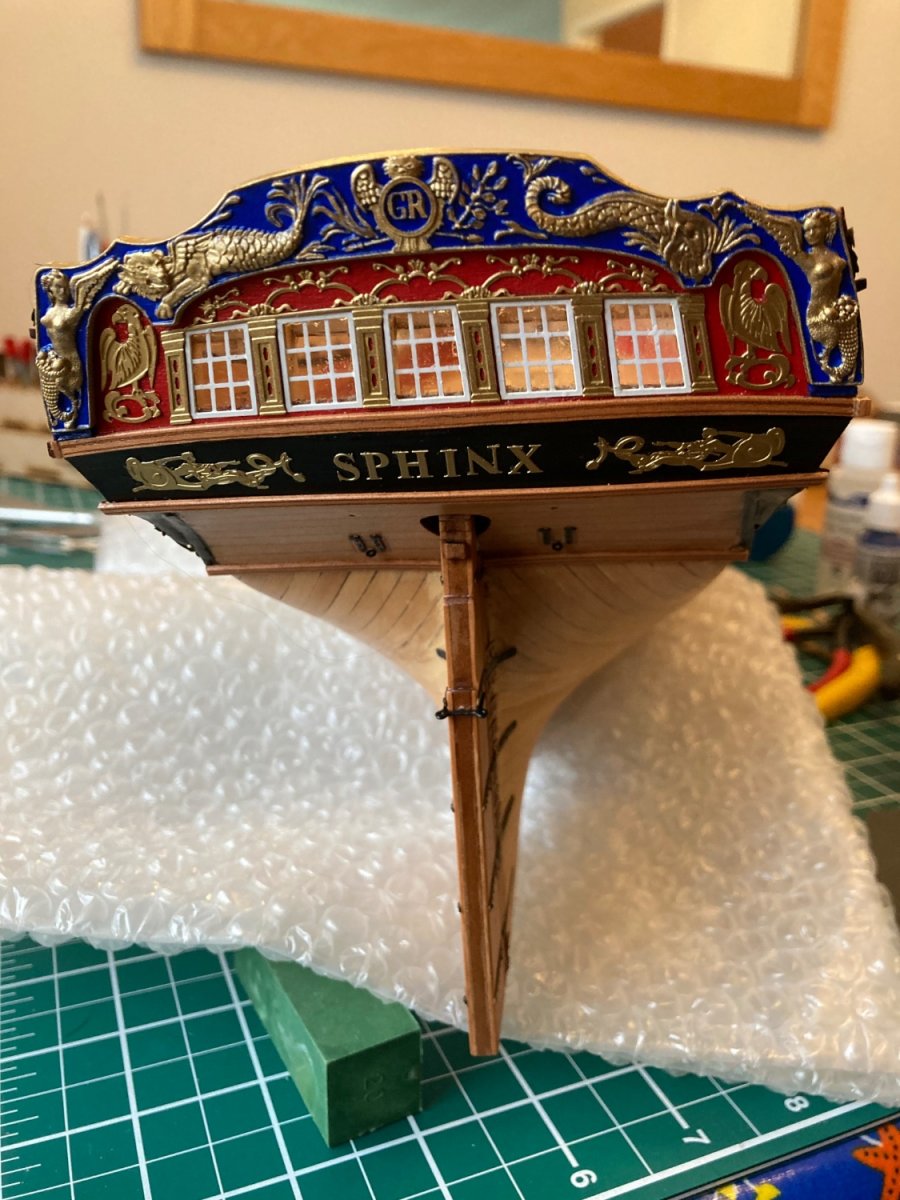
Paul, your model looks excellent. Is it just me, or the letter "N" on the transom is upside down?
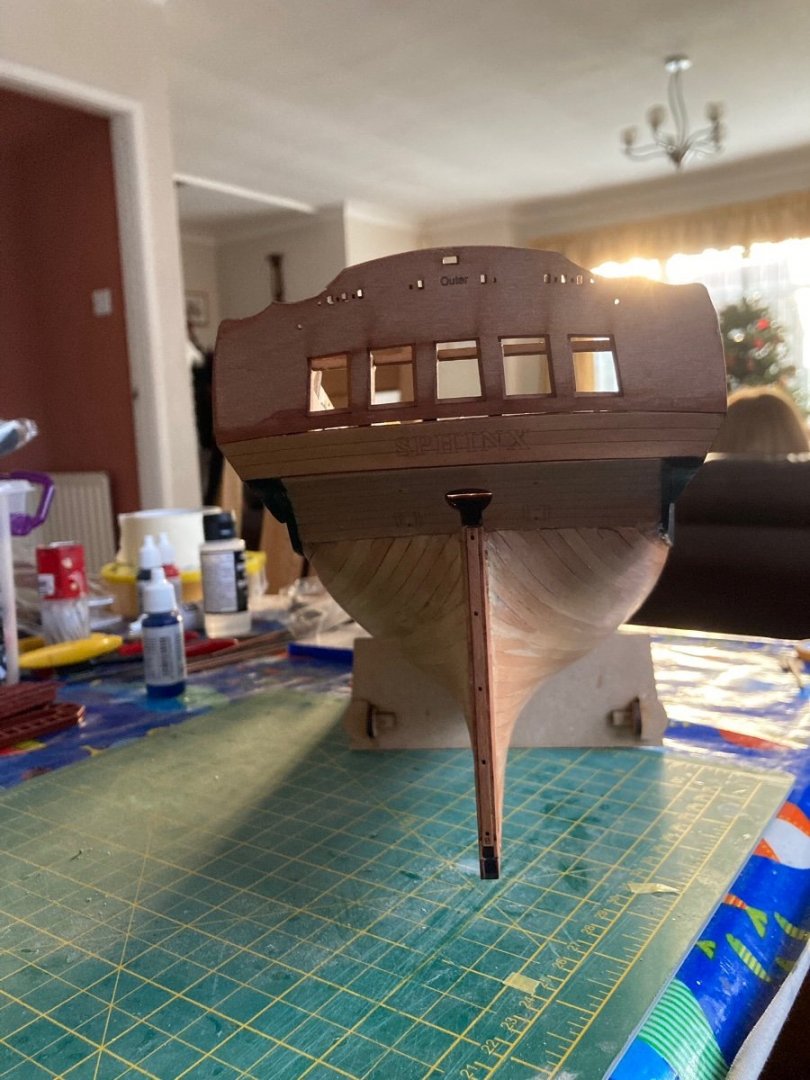
Your correct, the N is wrong, but the X is OK, I’ve corrected this, another positive aspect of the Mig acrylic glue is that removal is easy. Thanks for the catch.
-
47 minutes ago, Blue Ensign said:
I like that idea of the Pearwood strips with the the brass etch profile cutter included, but that would up the cost of a kit and the line has to be drawn somewhere. The Sphinx laser cut rail sets are I think designed to be put into place without messing with them, that way if soaked and pre-bent they are not likely to become a problem.
I've always made profile cutters from an old single edged safety razor blade, altho' cutting the profiles for a 2mm x 1mm strip would prove testy.
I do have a set of micro scrapers made by Artesania Latina, but they are designed for larger profiles, the smallest is 1x3mm.
Back to soft hands and gentle strokes.
B.E.
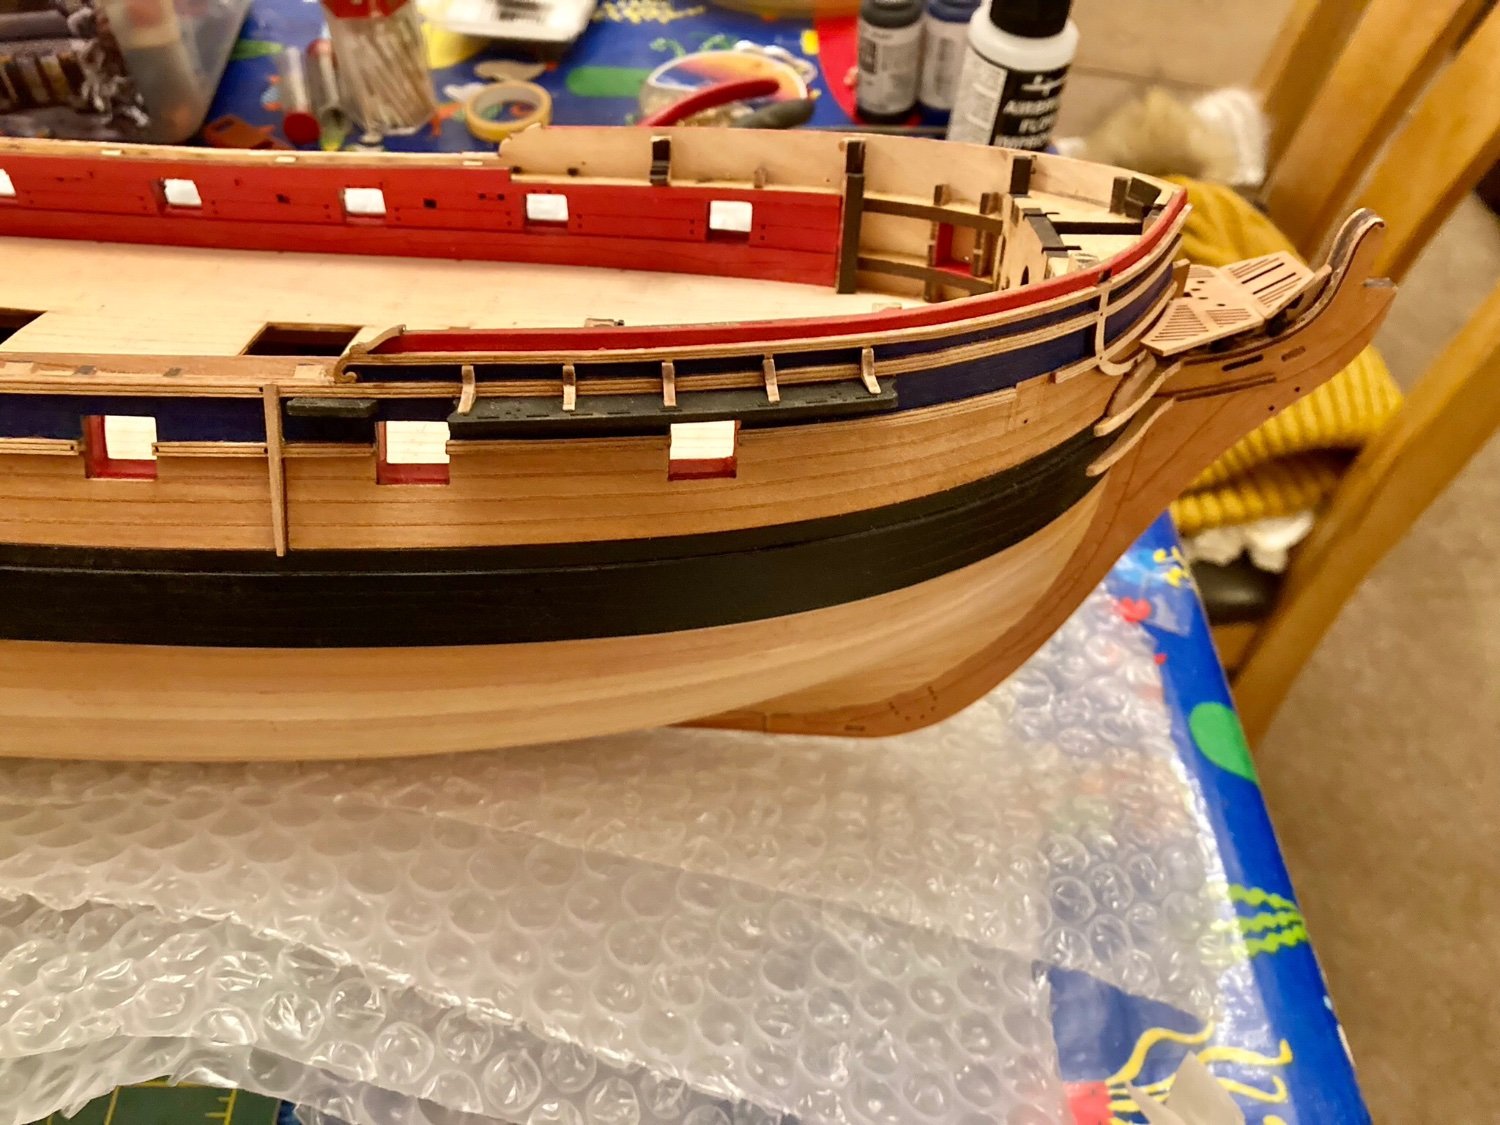
I just took my time and was pragmatic about how clean I could get them, I also took less off the bottom and it creates a good shadow line, it doesn’t look too bad.
- mtaylor and hollowneck
-
2
-
26 minutes ago, chris watton said:
You are doing a fine job, Paul!
Thanks, it’s my second ship model so I’ve followed the manual exactly, it’s a great kit. I have built many RCA’s aircraft tho many years ago.
is there a hard copy of mast instructions available?
- hollowneck and mtaylor
-
2
-
-
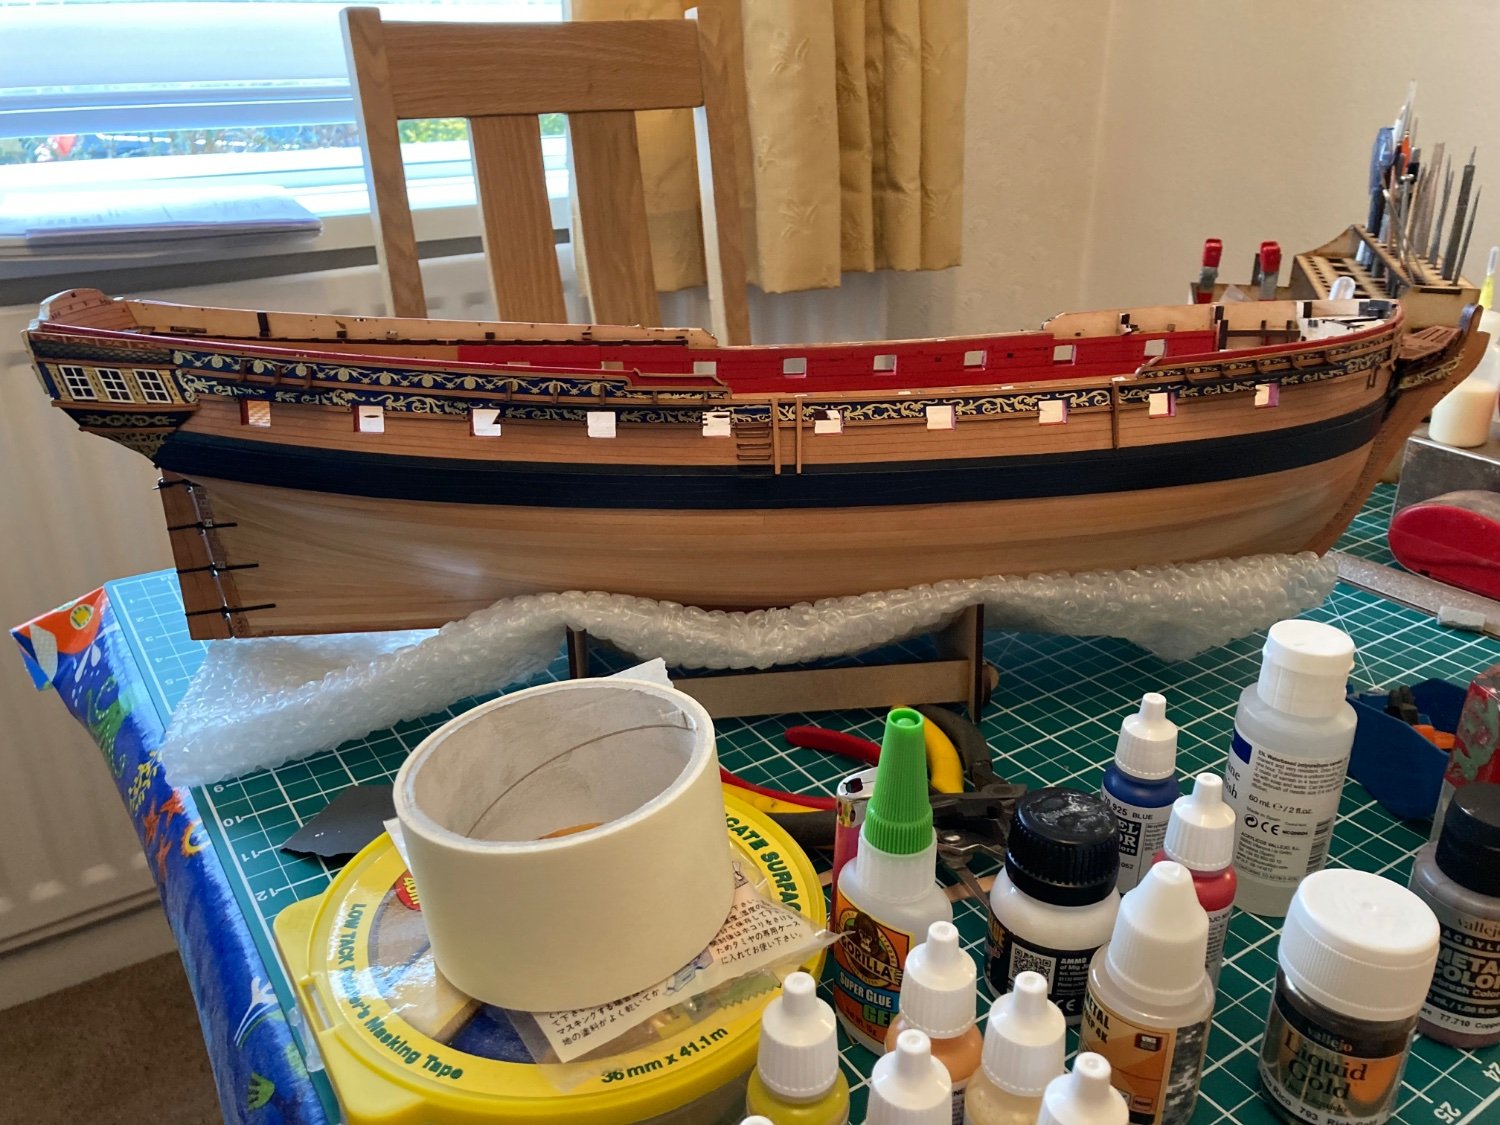
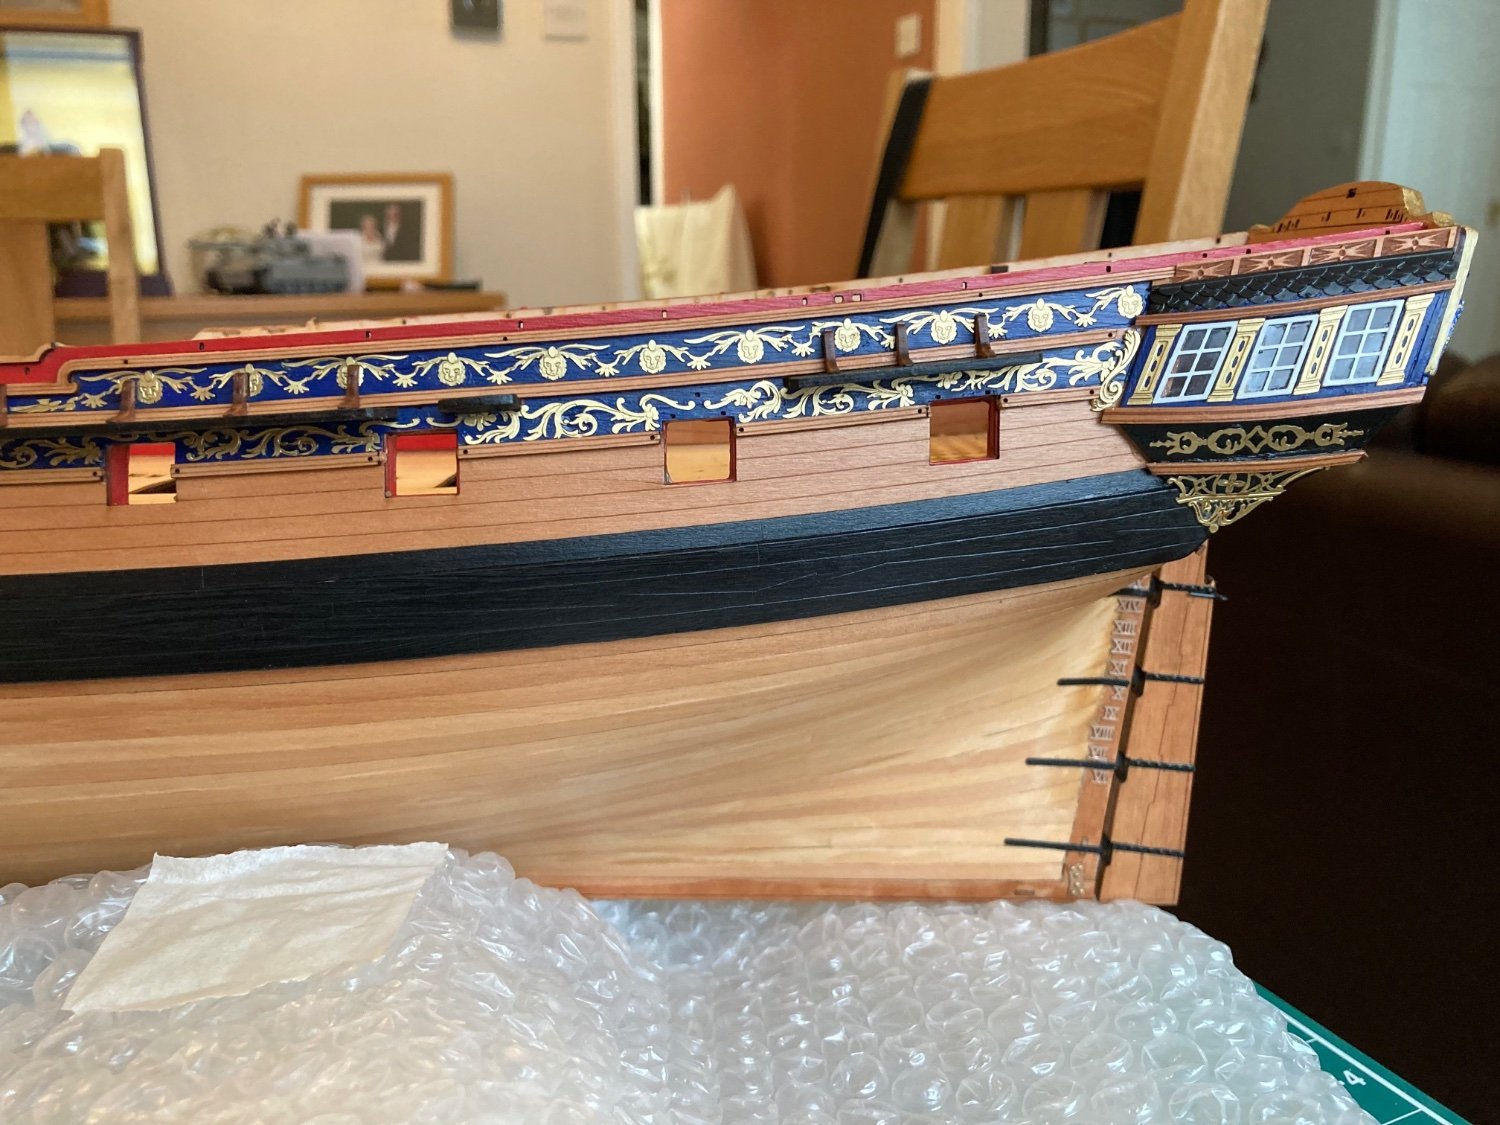
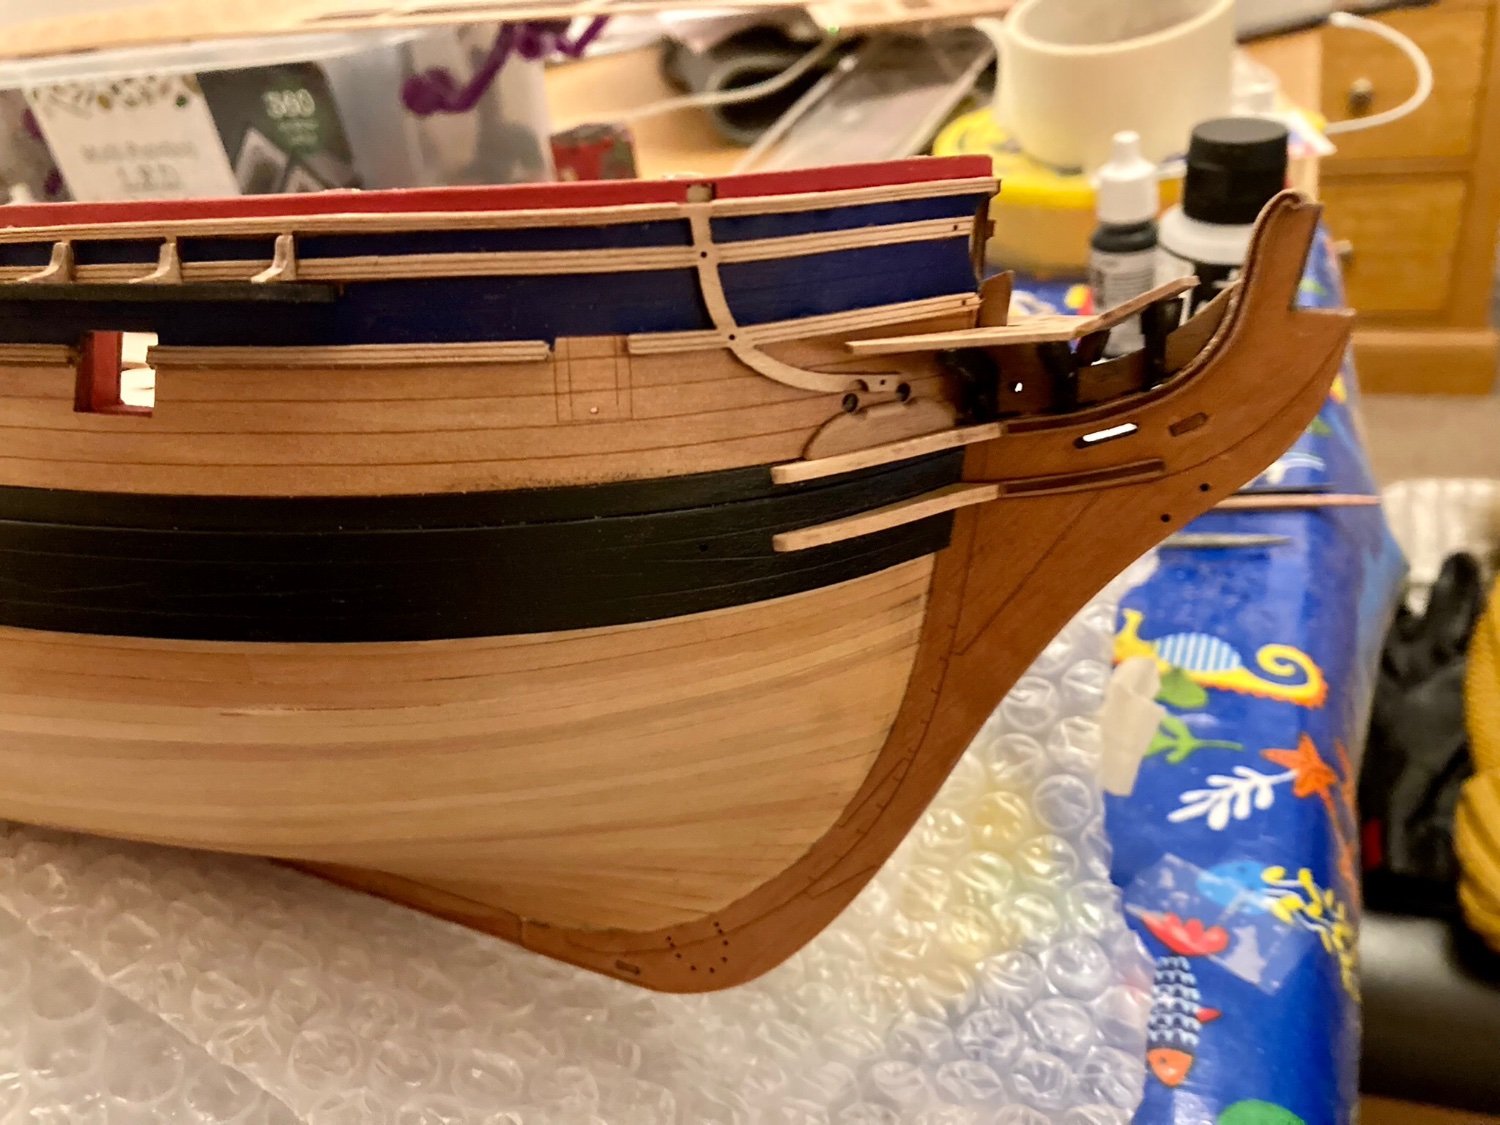
Slow week, found the deadeyes very taxing and wasn’t able to replicate the angles of the iron work to the drwgs. accurately.
- chris watton, BenD, AJohnson and 7 others
-
10
-
-
-
28 minutes ago, Tankerman said:
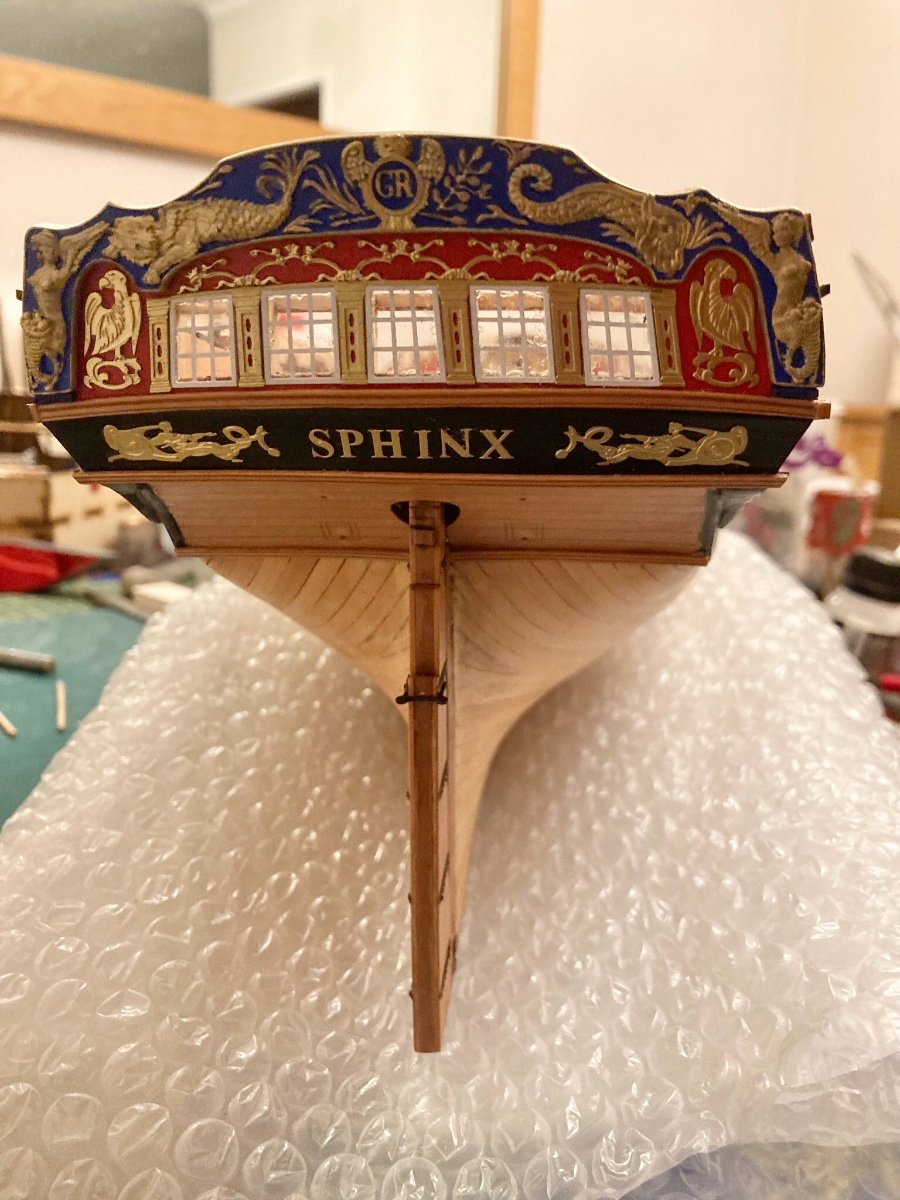
Having bought a jar of this to try I wouldn't be without it now, such a versatile glue. Not only the windows but all the PE and resin decoration on the stern of my Sphinx are securely attached with it.
Nice Workmanship
- hollowneck, mtaylor, Keith Black and 1 other
-
4
-
10 hours ago, myxyzptlyk2003 said:
What I did for my windows was to place a very tiny drop of a thick superglue on 2 opposite edges of the window. Worked beautifully. As the think glue stayed completely on the edge of the window there was no fogging of the window.
13 hours ago, mtaylor said:Thanks, B.E. It definitely is a small space with many tiny, fiddly parts. I'm glad I'm finished with that area for now.
I'm at the point of adding the stern and galley windows. More fiddly bits like sizing the "glass" and fitting into place. I had hoped the wax "sticks" would help on this but alas, they don't hold the windows long enough to get into position. Time to re-think and find other options.
Ammo Mig Ultra glue, good for small pe parts too, or use Vallejo polyurethane varnish
- mtaylor, Canute and Keith Black
-
3
-
-
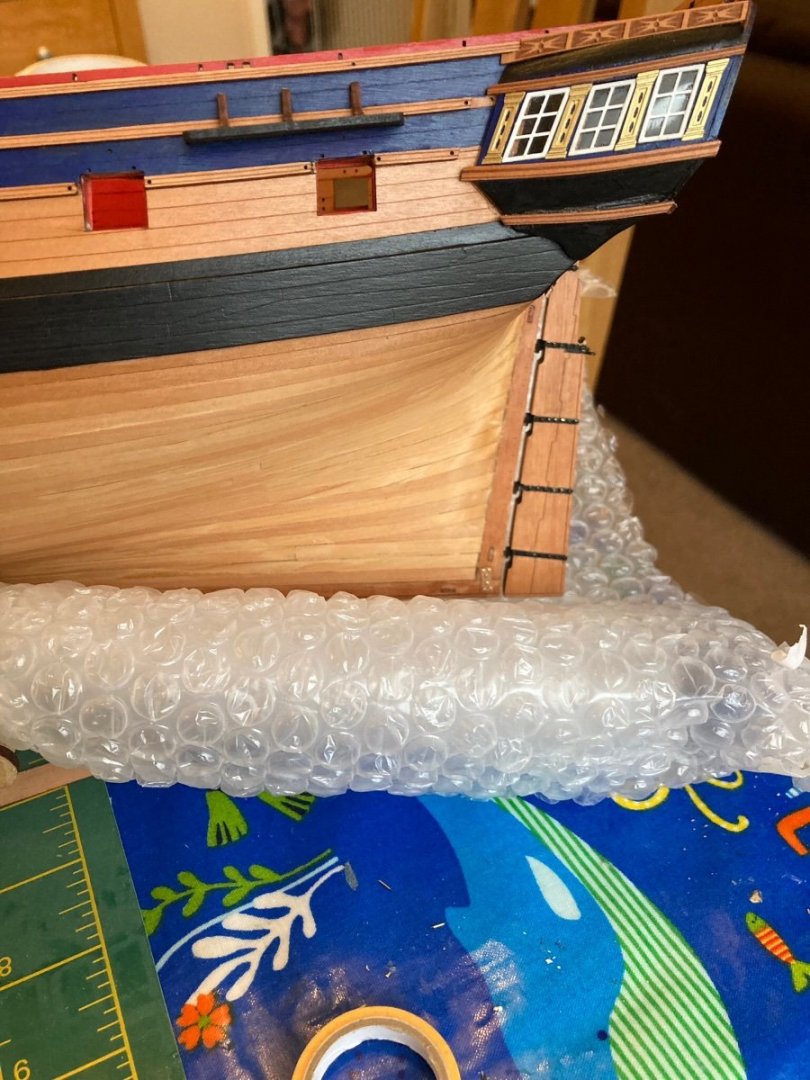
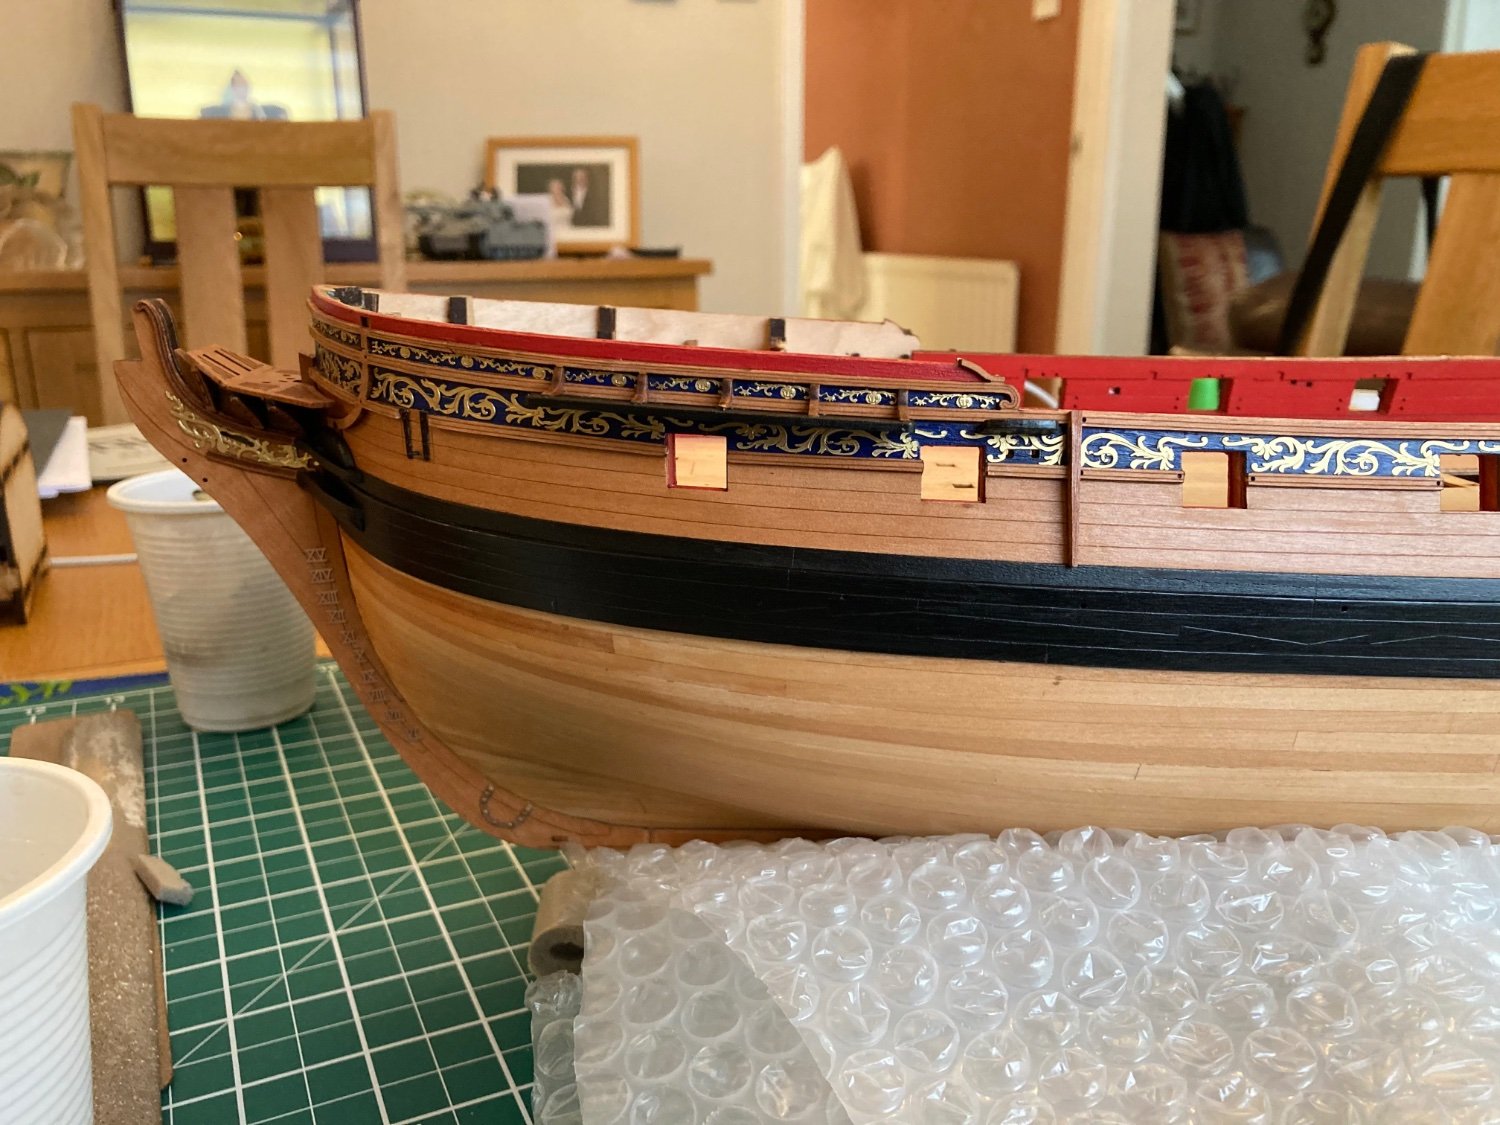
More bling, the resin detail was the hardest part to fit to this point. Need a bit of clean up around the lettering.
my wax photo etch pencil proved invaluable.

-
Added a little bit of the bling, decided not to go white or coppered.
- hollowneck, BenD, yvesvidal and 7 others
-
10
-
-
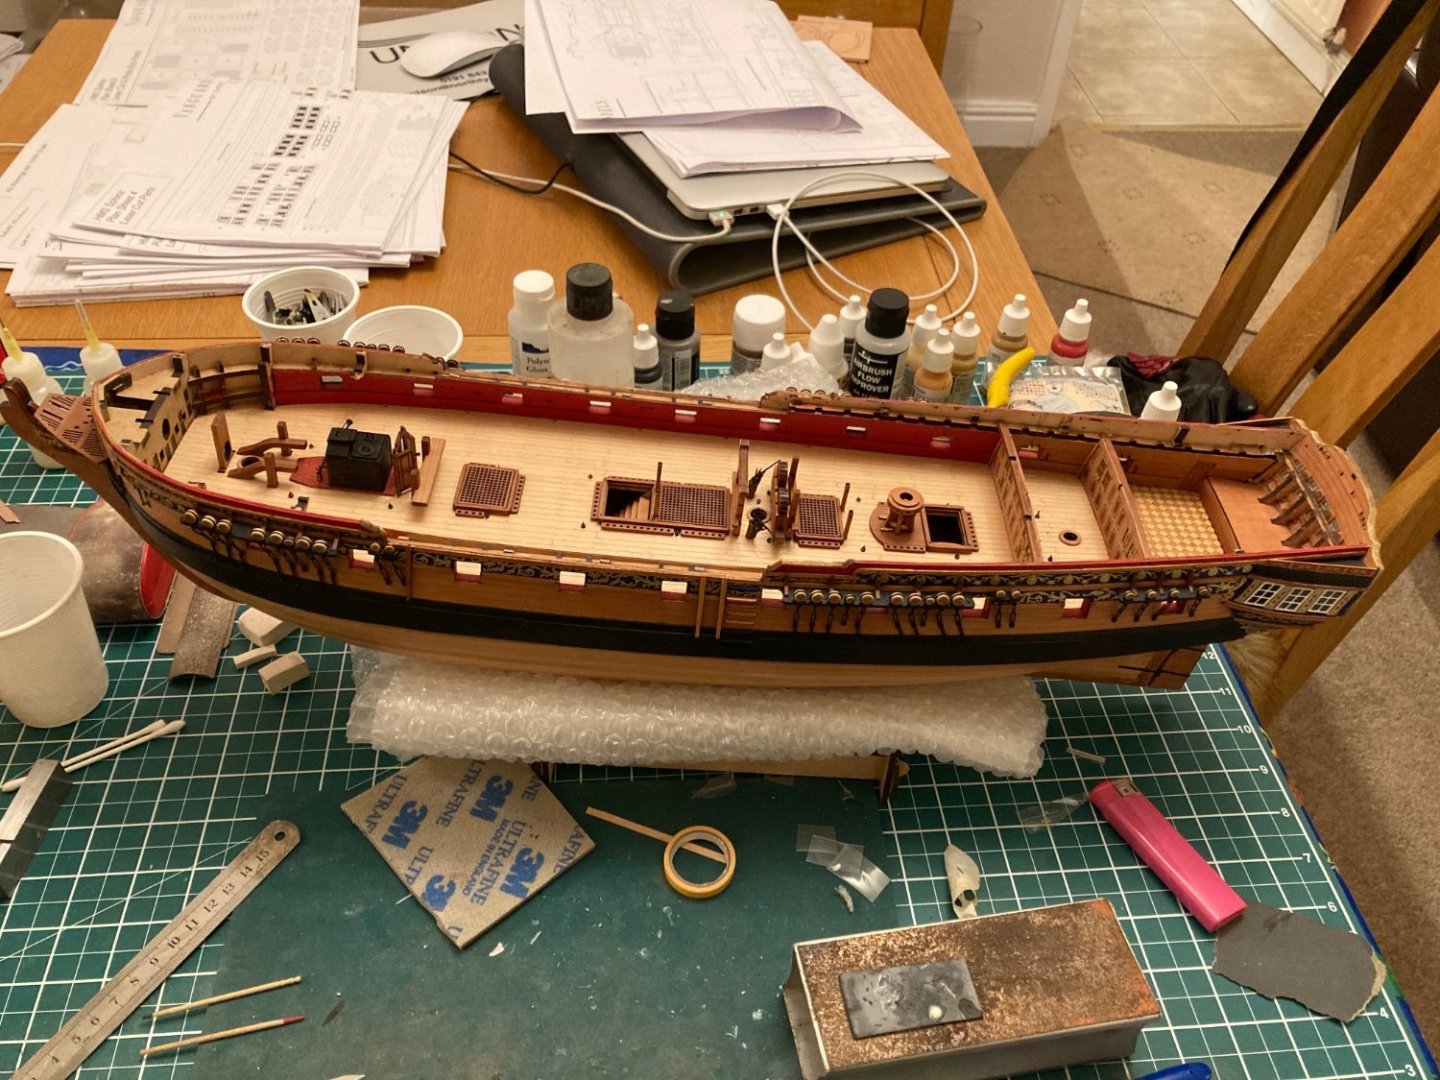
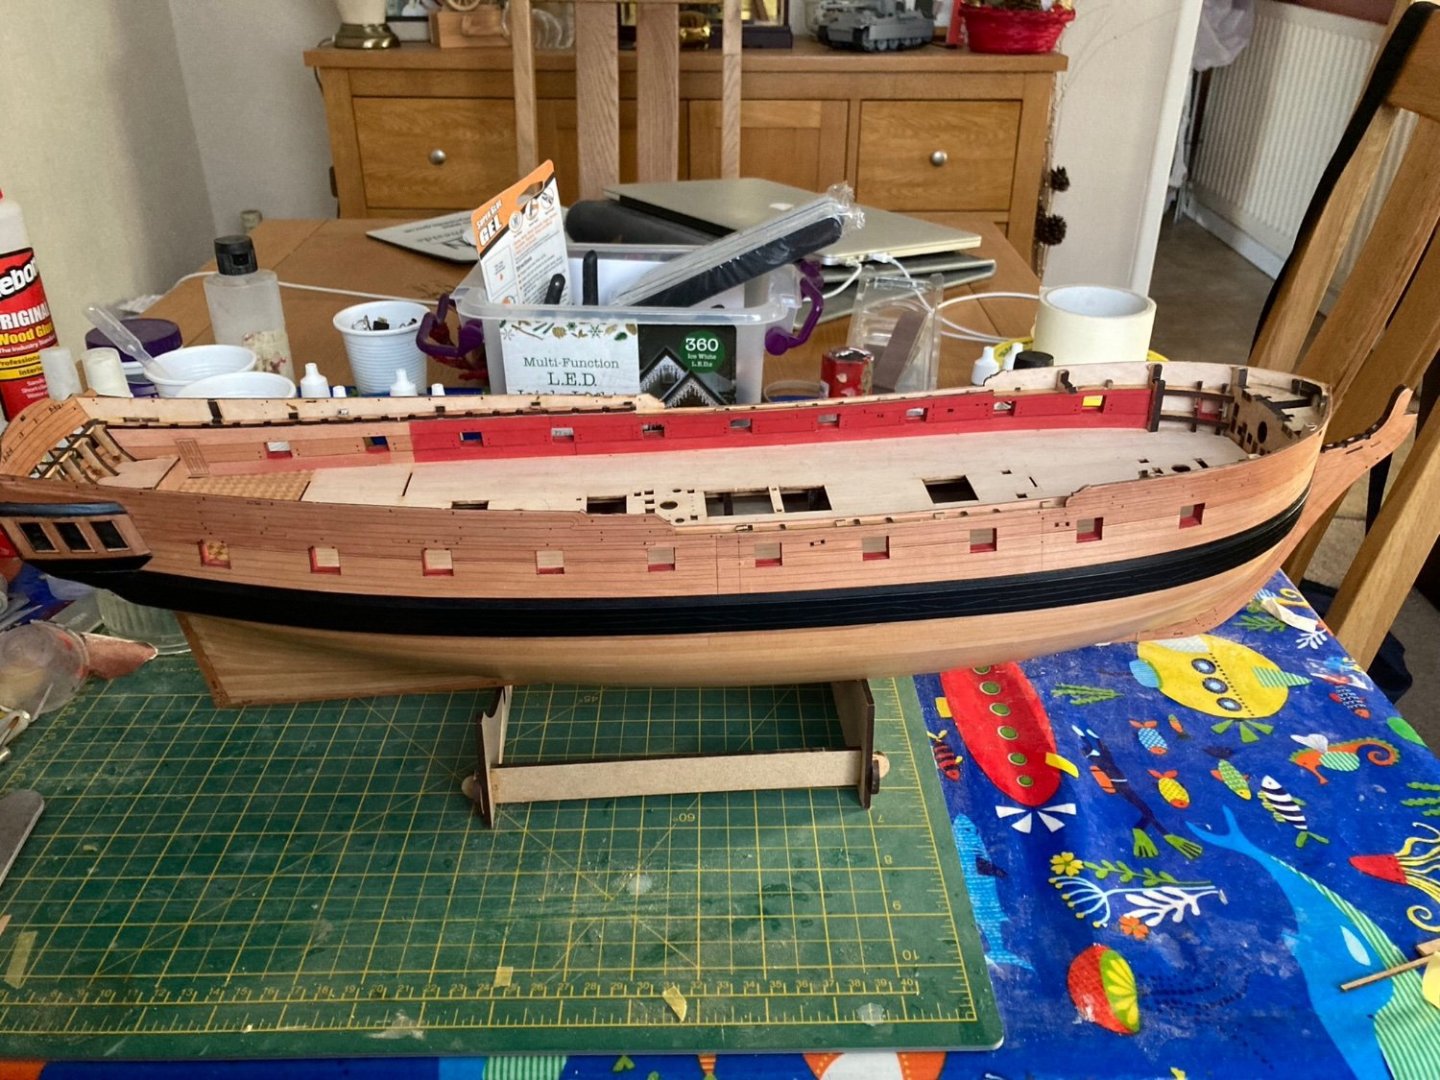
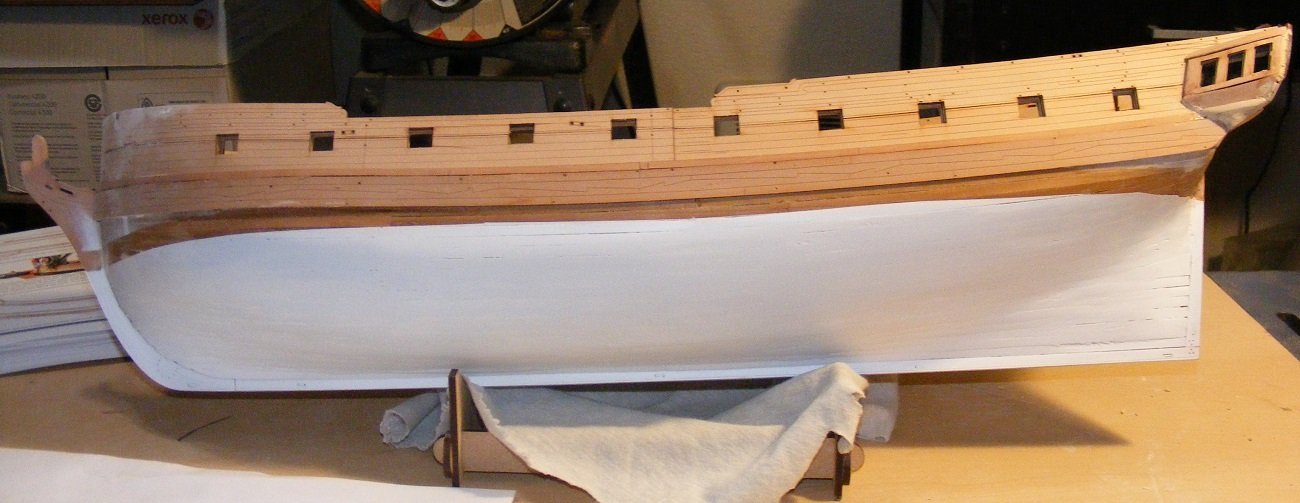
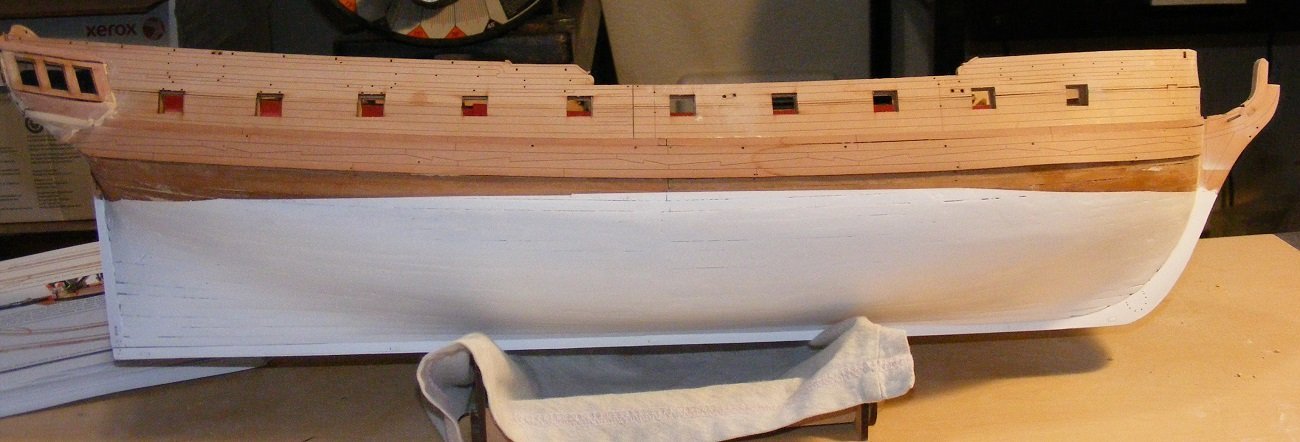
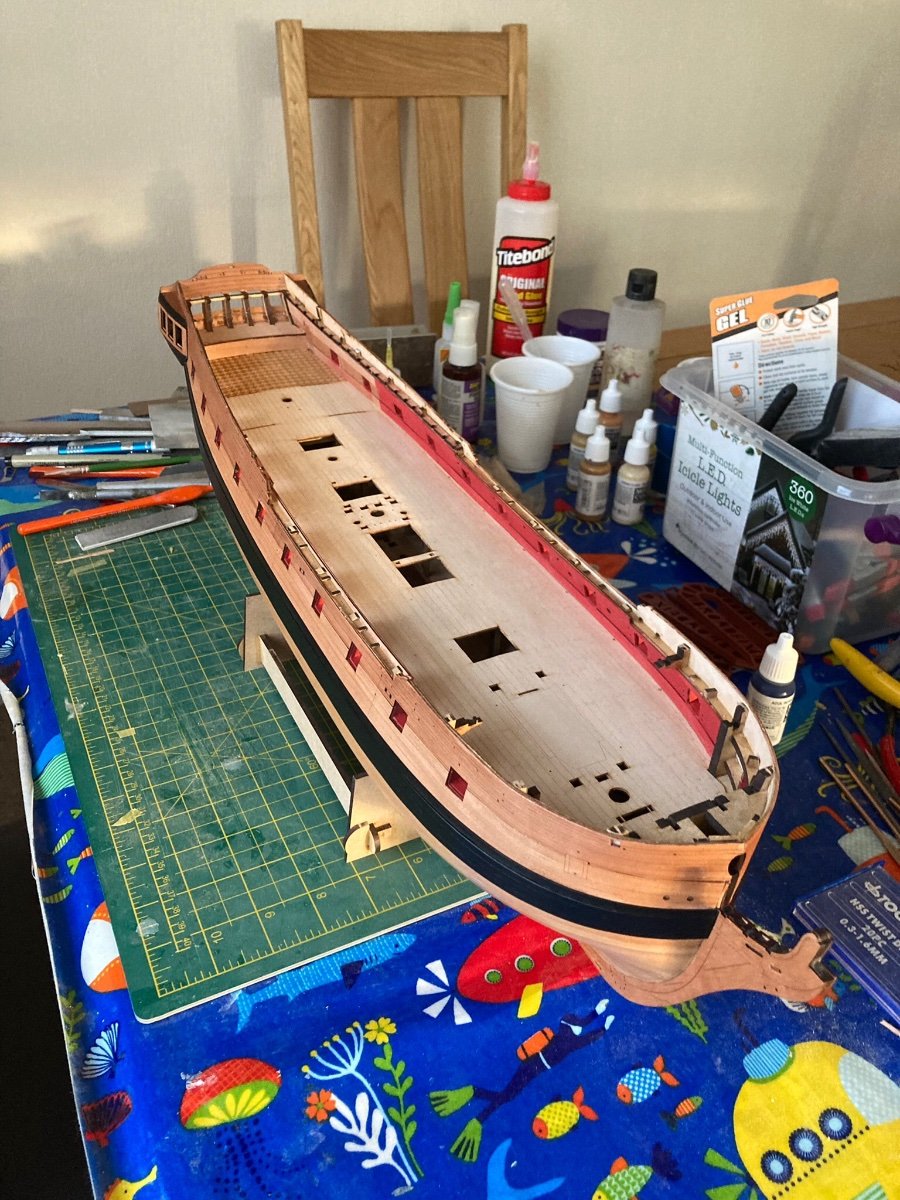
I’m commencing from completion of second planking as much has been covered in other posts. This is my second model and I’ve tried to follow the build manual verbatim, nevertheless a few mistakes have been made.
Glad for any feedback
- hollowneck, BenD, oneslim and 16 others
-
19
-
-
10 hours ago, mtaylor said:
Humidity seems stabilized and I've filling, sanding, checking, rinse and repeat seemingly forever. But, the white is done. and coated with two coats of flat clear. Needs a bit of touch up in a few places but that will wait until I'm done with the black just in case some gets pulled up with the tape removal. I did notice some areas where the tape didn't fully seal and one where the tape dipped a bit low... I'll fix when I do touch ups.
 So, I'm taking the rest of the day off to let everything sit and then attack the black wales and down to the waterline. I'll probably do the blue on the gallery windows but I may hold off on that.
When masking I always add a coat of varnish over the tape before applying the colour, it helps prevent bleeding.
-
1 hour ago, Chuck said:
I was hopeful that because this log by your own account was going to serve as a teaching tool that we could really make it a teaching tool. The char can absolutely be removed from most pieces. There are techniques and methods to accomplish this.
I thought you wanted to improve things on your second attempt especially after spending my guess is $1800 on Sphinx up to this point …
I thought this would prompt questions of “This part is fragile, how can I safely remove the char”. Then we can discuss the methods.
I think the group would like to know how to do so. But its fine I will refrain from posting or encouraging you to try. Its fine if you want to simply “assemble” your second attempt as well. Its just a hobby. I just thought you wanted to do more the second time around.
The laser does not leave a smooth surface at all. If you look closely at the cut edge you will see rough lines where the laser cuts through the wood. Smoothing these out greatly enhances the finish even after painting them black.
Black has a tendency to reflect the light in a way that actually makes these laser cut marks more noticeable. Especially if a shinier finish is applied afterwards which I would try to avoid if no attempt to clean the char is made before painting.
If you decide you want to try a technique to do so please dont hesitate to ask.
I’m asking, please can you advise, it may obviously be a new post or a private message to myself,thank you.
-
Very neat, taking time pays dividends.
- Blue Ensign and mtaylor
-
2
-
19 hours ago, James H said:
I usually dilute about 50:50, depending on glue/varnish type.
James did you varnish all the non painted wood as you built?
We’re the etched decks varnished?
thanks
- Keith Black and mtaylor
-
2
-
UPS notifications received........
- Canute, mtaylor and chris watton
-
3
-
James H, Re step 15 in the manual, is there more information regarding the sanding angles, also for the other bevelled filler Hull parts?
- thibaultron, Canute and KentM
-
3
-
-


HMS Sphinx 1775 by paul carruthers - Vanguard Models - 1:64 scale
in - Kit build logs for subjects built from 1751 - 1800
Posted
Thanks for the kind comments.