


Wintergreen
-
Posts
993 -
Joined
-
Last visited
Content Type
Profiles
Forums
Gallery
Events
Posts posted by Wintergreen
-
-
Thank you guys!
Yes Keith, heating is a real plus (pun intended) during the dark, damp and cold season. And the space is convenient as well. I could of course do with a smaller space, but then all the big machinery would have to go and be replaced by more appropriate sized ditos. But, it's the Parkinsons law in effect, all available space/time/money is used up to its respective limit. (Check it out, it is a real thing).
Than you Michael! I try to take it slow and progress thoughtfully. It makes for fewer re-do's... right now I am contemplating how to lay the deck so that it looks gracefully with a slight inwards bend at both ends.
- Mike Y, Keith Black, FriedClams and 1 other
-
 3
3
-
 1
1
-
30 minutes ago, Jim Lad said:
I think it still qualifies
Thank you John ❤️
- Jim Lad and Keith Black
-
2
-
So, fighting my deamons, both real and imaginary, takes time.
But a quick update on the joinery I can give you (hopefully it still qualifies as "delightful", I guess John will be the judge of that).
Note though, that the aft three pieces are not glued in at this photo.
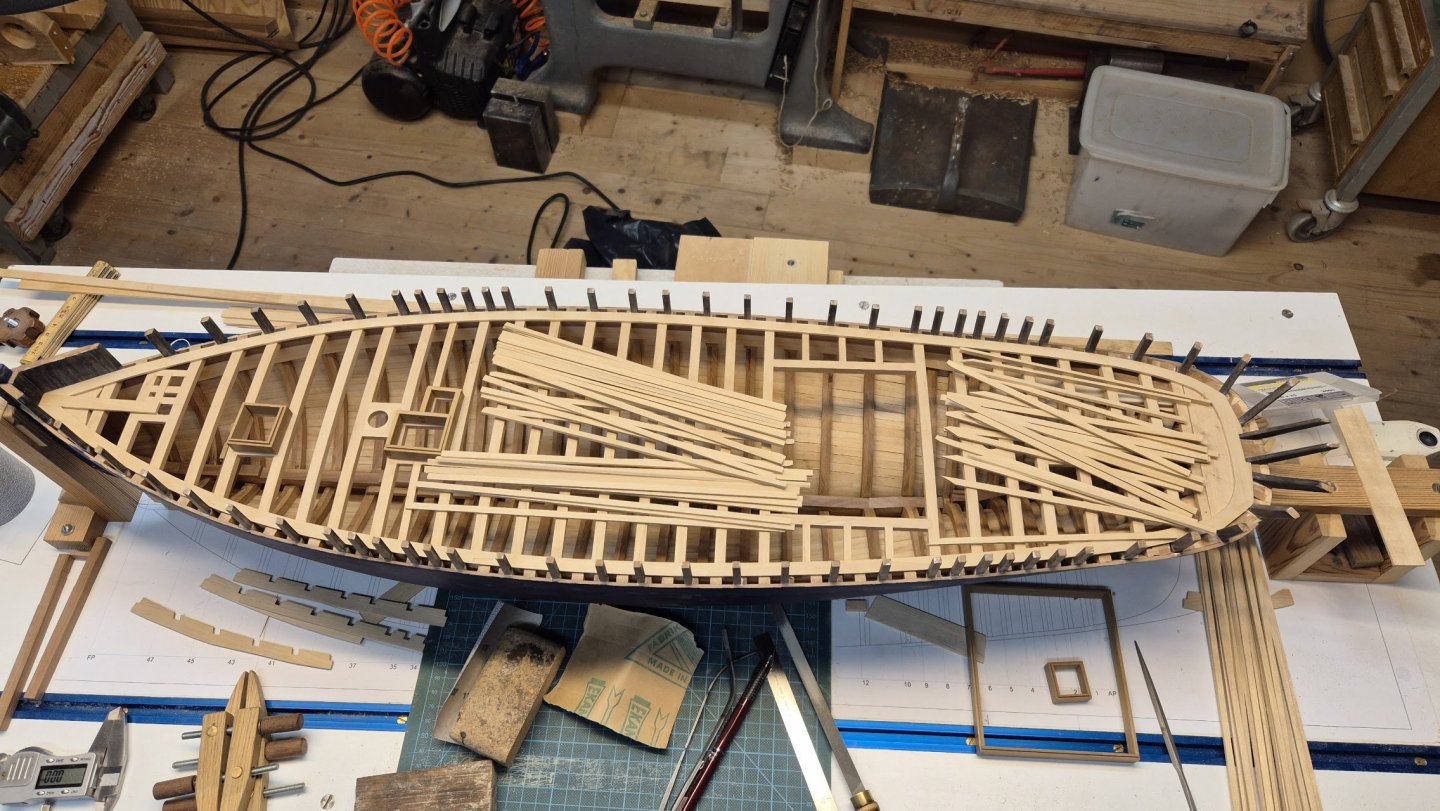
Then I got me a puzzle.
However there are some drawbacks in comparison to a regular "off the shelf" puzzle.
1. It doesn't state on the box how many pieces it is. In fact, I didn't even get a box for it.
2. The instructions are "sparse", and that is stretching it a bit. It only says, "Start outwards and work you way towards the middle". Not very meny clues in that statement.
3. There is not even a clear picture of what the end result should look like! No box art or anything. As Whitney sang "how should I know???"
Whish me luck guys!
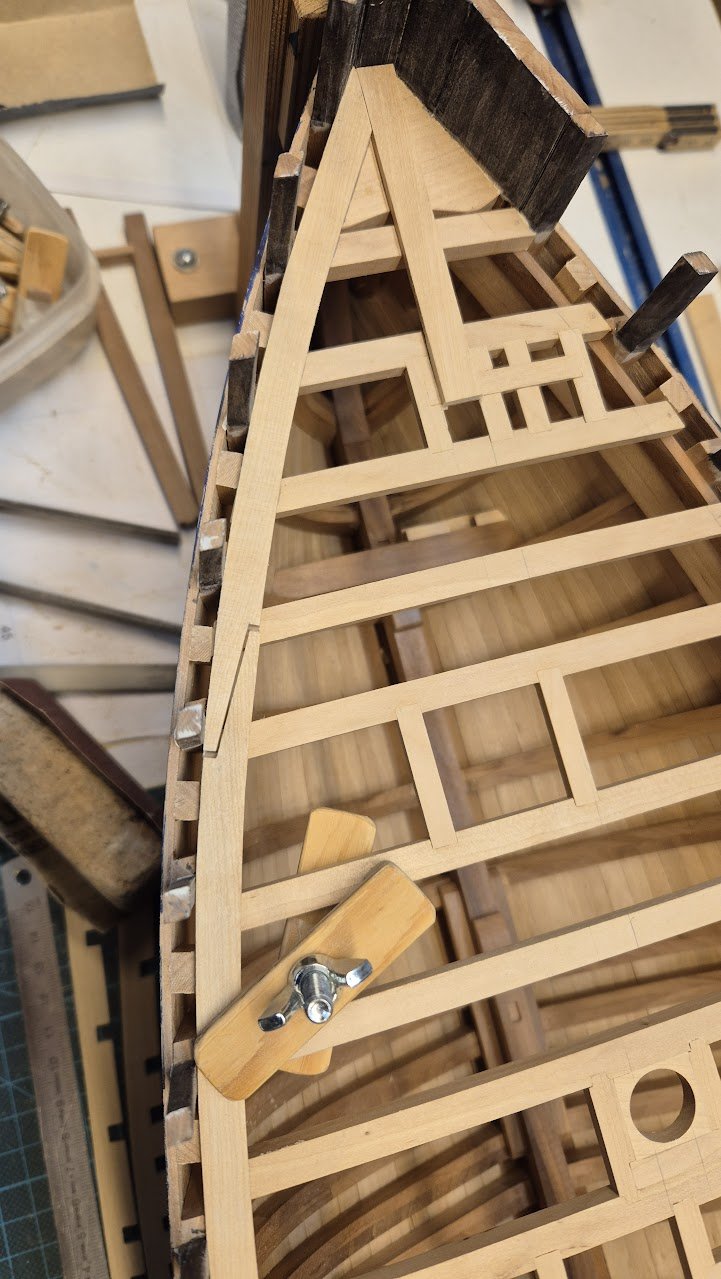
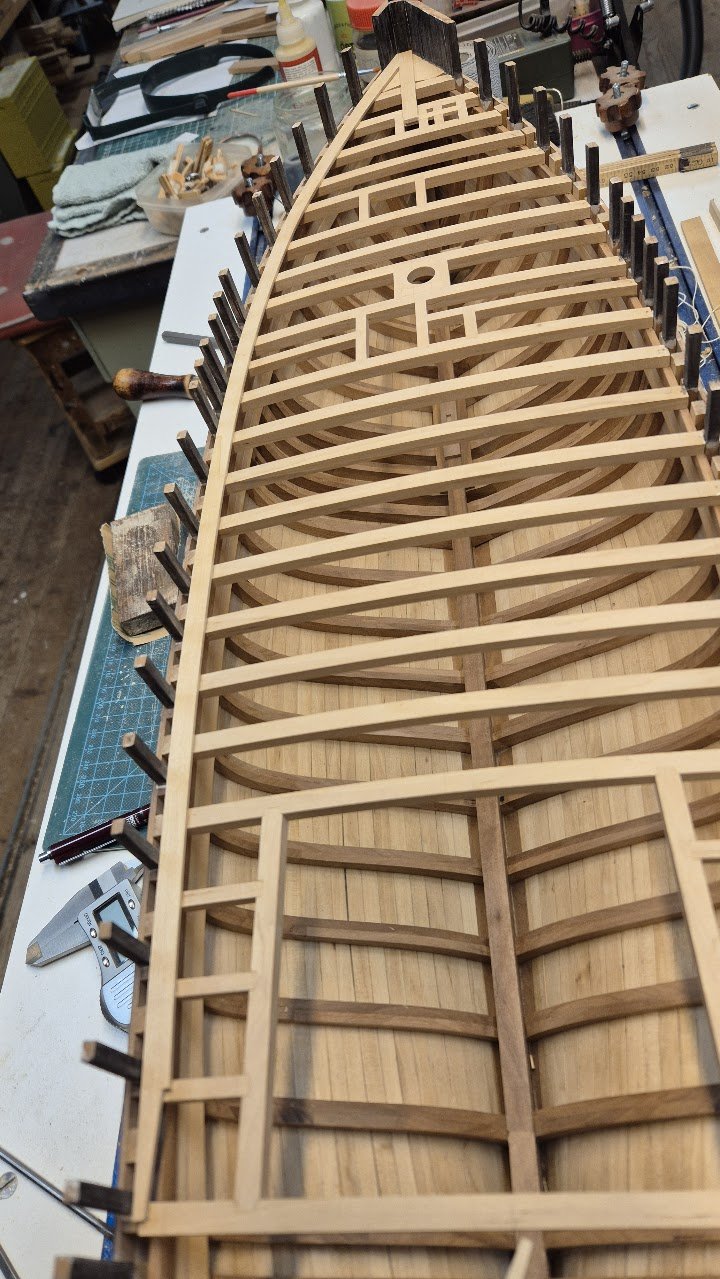
On a slightly more serious note, the deck is not laid workboat style, i.e. straight laid. Instead it is laid yacht style, meaning a slight curve for a more gracious appearance.
- KeithAug, Speedy, vossiewulf and 10 others
-
13
-
21 hours ago, Jim Lad said:
More delightful joinery for us, Håkan!
Working on it John, working on it.
Thanks Gary, I do my best (usually) 😄
- Nirvana, FriedClams, Jim Lad and 1 other
-
4
-
-
Thanks Keith! Much more rewarding than the outer boards with all their nothces for the stanchions.
- FriedClams and Keith Black
-
2
-
9 hours ago, Siggi52 said:
This morning I took the ship from the plug, to eliminate the glue remains from the inside. It was't so bad as I first exspected.
That is a relief really. It would be very stressing having to clean up glue residue on that delicate structure.
I do wonder though how you did those fine lines on the stems? Did you use scrapers?
- FriedClams, Keith Black and Siggi52
-
3
-
And then there is only, how many more to do?
I guess it becomes some kind of therapy once you work out a feasible step by step progress for them.
And it is true, the close up photos hides nothing. You can alway step back an arms length an shoot from there 😉
It looks really good Alan, keep it up!
- Mike Y and mort stoll
-
2
-
-
What Keith said. Looking ship shape John!
Keep it up!
- FriedClams and Keith Black
-
2
-
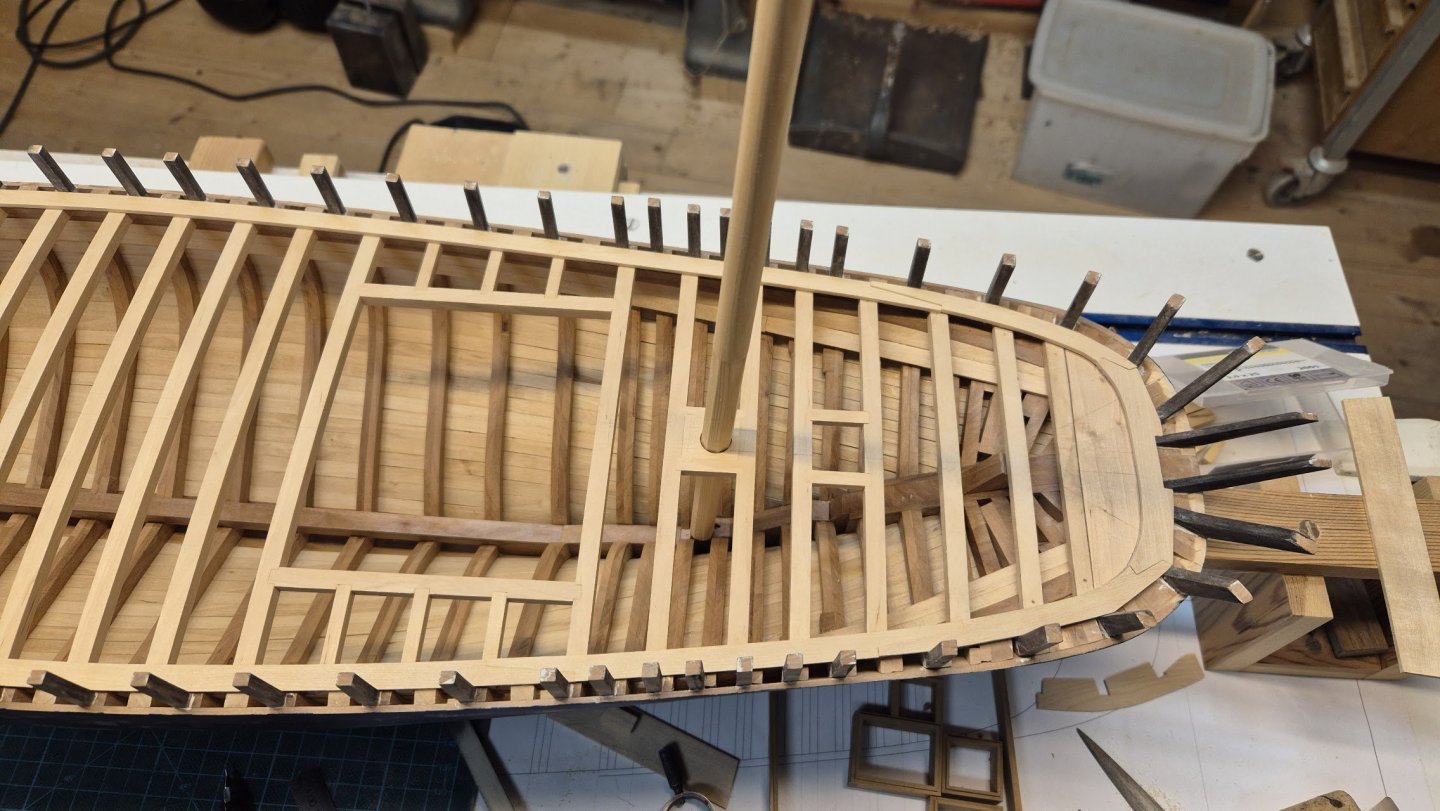
Thanks for likes and interest so far.
Something to report before the work week consumes most of the time again.
The covering boards are mainly done bar the rearmost ones. Those are a later headache.
Focus then is to get the perimeter of the deck in place.
I started with the short king plank to have the center all secured. Then it is a matter of more finicky filing and testing of scarph joints.
They came out not half bad, so I'm happy. First three boards on port side glued in place. I will then shift over to starboard side and attack the acute curve at the rear last.


And the overall shot. Apologies for the fuzzy focus, but it hides the little less than perfect second joint.

Til next time, ta!
-
That is not a very large model, to say the least.
13 plansk may not sound like much, but seeing the amount of detail you put into each plank I can see that it will take a while to do.
Very nice Siggi!
- Siggi52, Keith Black, FriedClams and 1 other
-
4
-
We will be waiting patiently Siggi. Take your time 🙂
- FriedClams, Siggi52 and Keith Black
-
3
-
"in theory" ahh, such beautiful words, then enter the human factor 😄
Jokes aside, I'm confident that you can cut an accurate rabbet on your Hercules Vaddoc.
Keep it up!
- Keith Black, KeithAug and FriedClams
-
3
-
Thanks John, I do my best to appear upper-class being a jenator to the heart haha 😉
- Keith Black, Jim Lad and FriedClams
-
2
-
1
-
Hi guys!
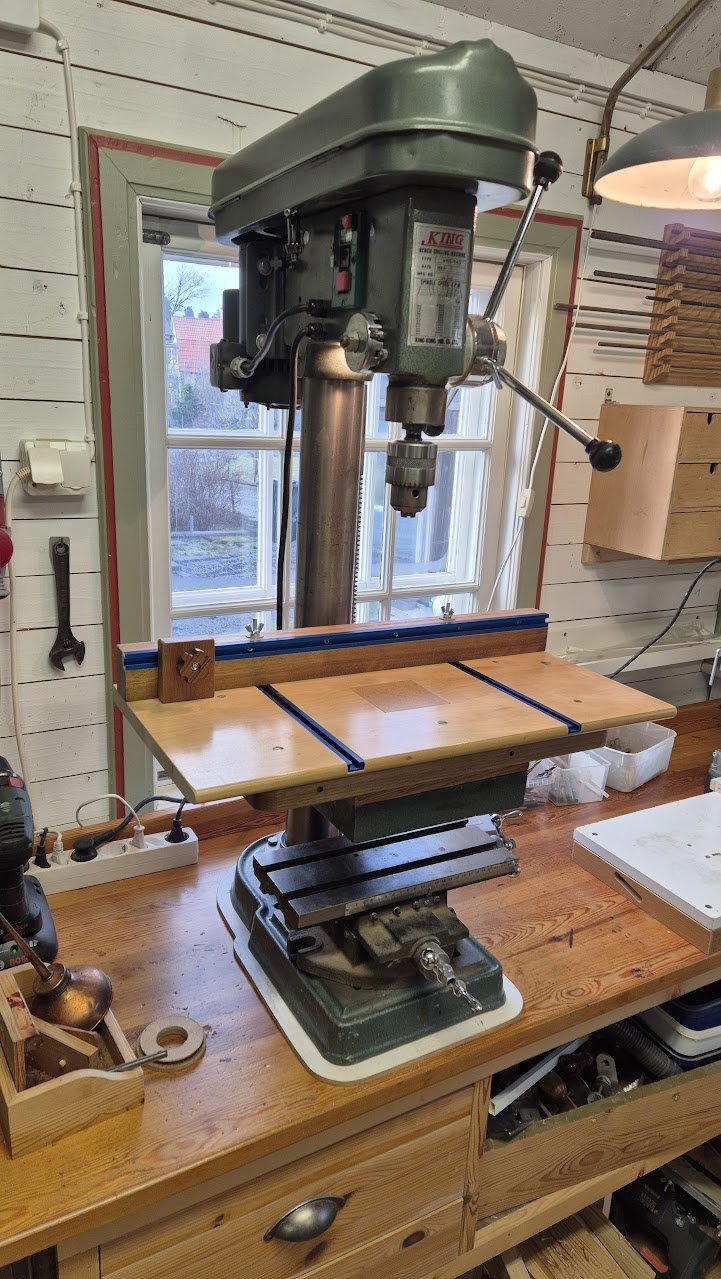
Well, filing on those covering boards had me thinking of another project that I've put up for too long time. So, I got a bit sidetracked from the Atlantica build and went all in.
A drill press table.
Some might argue that it is too pretty. But knowimg how I function, I know that the first quick-and-dirty ugly solution that I slap together will usually last a long time. So, doing it properly the item of focus will probably last me a lifetime. Hence, why not also make it pretty?
One litttle hickup about the finish of the fence though. The table had two coats of floor lack, very durable, but the fence I thought would look nice with the Osmo oil. Well, it does look nice, however the oil refused to harden. You see, the wood used in the fence is some quite oily species from central Africa (Zaire). My parents brought it back from their stay there a long time ago in the form of some crude looking furniture. So I planed it down to save some later project, and here we are. Anyway, I wiped the surface with acetone and that seems to take away the ickiness. All good.
I made the top table easy detachable with machine screws so I can switch it out for some other, unbuilt, auxillary item in the future. The sub support is from solid oak (sourced from old 60s church benches that also was given to me a long time ago).

Back to Atlantica.
Cheers!
- FlyingFish, davyboy, Mike Y and 10 others
-
13
-
8 hours ago, Mark Pearse said:
Best wishes Håkan
The mast is lovely timber - what species is that?
Thank you Mark!
The mast is of ordinary pine, very straight and fine grained.
- Nirvana, Mark Pearse, mtaylor and 2 others
-
5
-
18 hours ago, SJSoane said:
I might as well make it as good as I can!
Quality before quantity - that is always appealing. We like that.
Must say that I continue to be amazed of your build and your addiction to details. Could be affection, but I think addiction comes close 😉
Your Bellona is such an inspiration with its clean lines and flawless joinery.
Apart from praise I have nothing to add to the discussion.
But oh, is that a Tormek wet stone sharpener in the background? No wonder you can produce such fine joinery 😉
Keep it up!
- mtaylor, CiscoH and Hubac's Historian
-
3
-
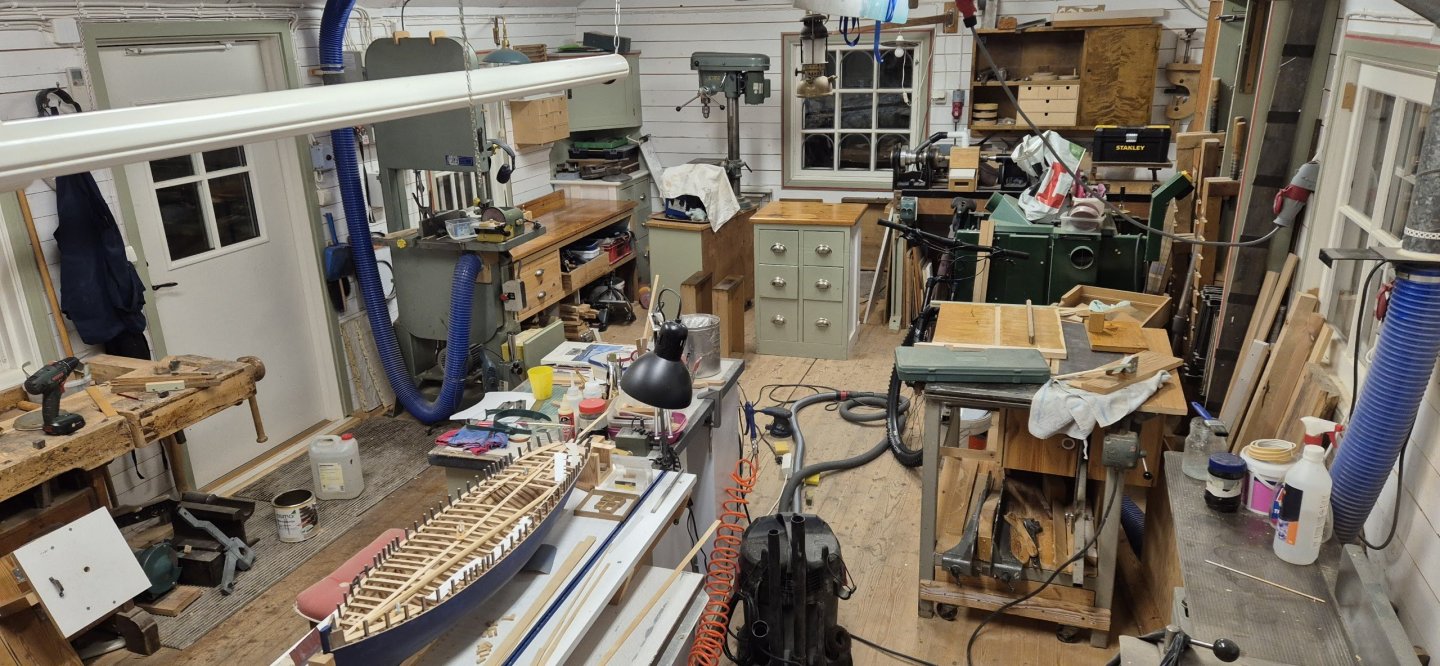
True @vaddoc, there is not so many peculiar items. The lamp is a kerosene lamp (I think it's called), the type you need to preheat before light it up. Bright as day when burning.
Above the lamp, the aft end of the rudder from my sailboat can be seen, hangs from the ceiling.
Then there is the mechanical tiller under the workbench that will get a couple of layers of rust proofing before going back into the boat.
But yes, it is a very nice workshop. And for every corner I tidy up it gets every so slightly even better. The plan is to stay here a loooong time. All the kids have suffered from been moved around too much during their early years, so our message to them is that grandpa and grandma stays here. They know where they will find us.
- FlyingFish, vaddoc, druxey and 2 others
-
5
-
42 minutes ago, Jim Lad said:
Is there anything you don't have in there?
Snow shovel?
Off course there is John! The equation is always like:
"the tools you need" = "the tools you have" + 1
Same with bikes for a cyclist 😄 (I have four, haha)
Jokes aside, I'm happy with how it turned out. Storage for sanding papers and belts in the drawers. Table saw discs on the side in the narrow compartment. Large shelf for Dremel or whatever I choose.
Lockable swivel wheels for easy moving around. In the background you can see the old stool with caster wheels, red cushion, that takes me to a perfect height for using the sanders.
Note though, I did take several years to reach this final state of the station. With a couple of repurposing done over time.
- FlyingFish, Keith Black, Jim Lad and 1 other
-
4
-
15 hours ago, Jim Lad said:
Plenty of space to work there, Håkan! Looks like you've got a nice supply of timber over there on the far right.
Thanks Keith and John 🙂
Yes John, I have. I am very fortunate to have an entire workshop to mess around in. About the supply of timber... you should see my garage... what is in the picture is only a fraction of the supply available to me.
Quite a lot of birch, however lot of it is curly grown. Decent amount of apple (own harvest) and then the common pine. Some fine/slow grown, which can be used to spars, I have salvaged from old furniture and railings and stuff.
Here is my organized sanding station. Shopvac is connected to the aft end of the box. I might redo the contraption witht the white top. At present it can hold a Dremel, but I'm contemplating using a power drill instead, that can take larger cylinder/drum sanders. Future will tell.
The two drawers came from a scrapped desk. I still have one door and a larger drawer at my disposal from that desk to use somewhere in my shop. Haven't figured out where just yet.
And the power outlet from the shopvac is used so it starts simultaniously as the tools.

Now back to the build.
Cheers!
- KeithAug, FriedClams, Elia and 4 others
-
7
-
17 hours ago, mcb said:
After viewing the latest pictures, I see more touch up, clean-up and corrections are needed
The devil is in the details, right?
I just want to add "what the others said" 😮
- Canute, Keith Black and FriedClams
-
3
-
2 hours ago, FriedClams said:
Beautiful exacting work as always, Håkan.
Well, thank you Gary! Most appreciated.
At the moment the build is somewhat stalled due to an sudden, unexptected bout of organizational frenzy energy that I got. (plus the fact that I noticed that my rediculously expensive Osmo oil had started going off in its can, had to find something to use it on). So I made a mess of the workshop in order to organize it. Makes sense, yes?
You can see the shiny benchtops in the background where I used some of the precious Osmo oil. Hint, the six drawer cupboard and the table behind the bandsaw. Still over a liter left so I poured it into a more suitable jar instead of the original 2.5 liter one it came in.
What is hiding is my newly organized sanding workstation. Picture to come tomorrow.
Also happy to answer any questions of peculiar, out-of-place items in my shop 😄
Cheers to all!
-
Slipping wiht a sharp chisel either makes a hole in the boat or in oneself. The latter is messier... pls avoid.
Good catch of the twisting structure and a sensible choise to rip out att correct. If not, it would haunt you later in the rebuild I think.
Keep it up!
- Ian_Grant, Keith Black and Canute
-
2
-
 1
1


Beavers Prize 1777 by Mike Y - 1:48 - POF - Hahn style
in - Build logs for subjects built 1751 - 1800
Posted
Maybe it is one of those AI rendered pictures where people have 13 fingers and three arms?