


popeye the sailor
-
Posts
16,007 -
Joined
-
Last visited
Content Type
Profiles
Forums
Gallery
Events
Everything posted by popeye the sailor
-
 what a big difference! very nice progress love what you did with the stern cabin! is that a gap at the top of the transom? will it cover with the stern decorations?
 -
scraping after sealing is not a good idea.....more of a chance to mar the wood.......then a second coat will make it look lumpy. I haven't scraped too many times, but I scrape it into a pile, and them 'dump' it......blow the rest off with air. I do like the effect of sanding......it will blend it in to some degree, and the added hue does look good when sealed over. the archive pen doesn't leave much of the hue, so it's not as noticeable. if your going to stain the deck, go back over it with the stain cloth after sanding or scraping, it will revive the color. steel wool should only be used after the first sealing, and even then wait at least a day before you do it.
-
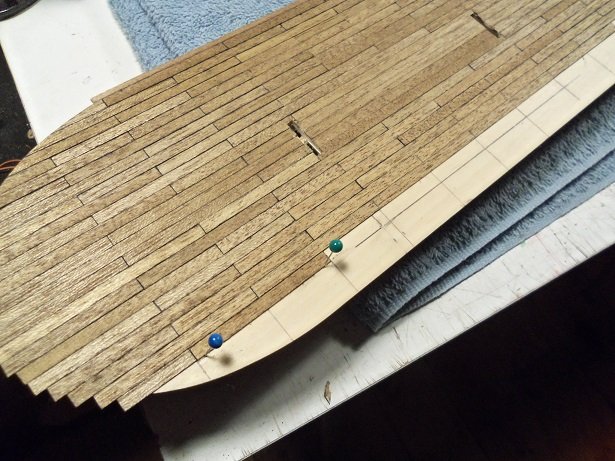
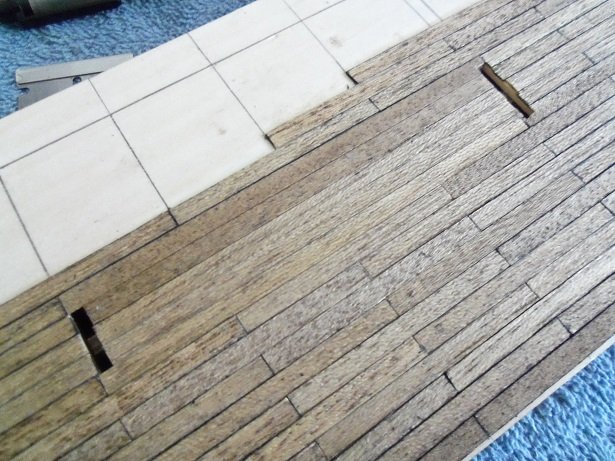
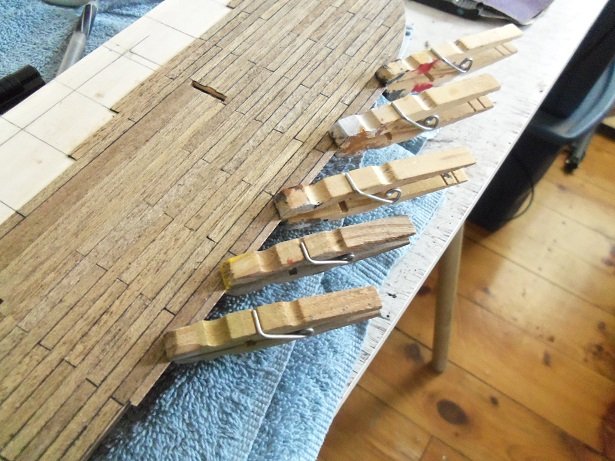
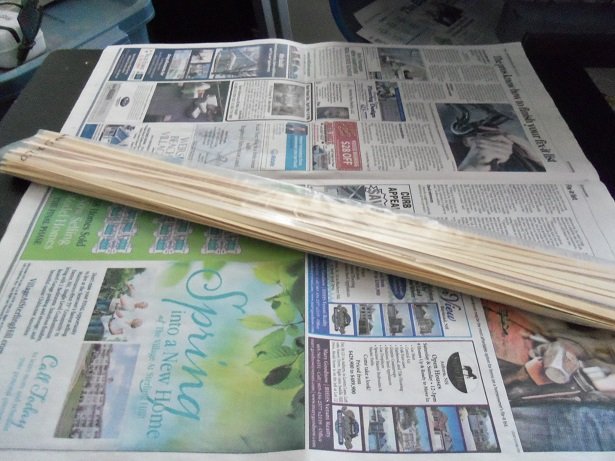
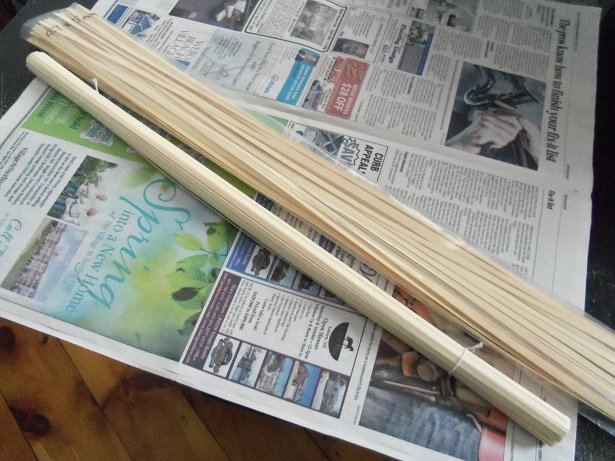
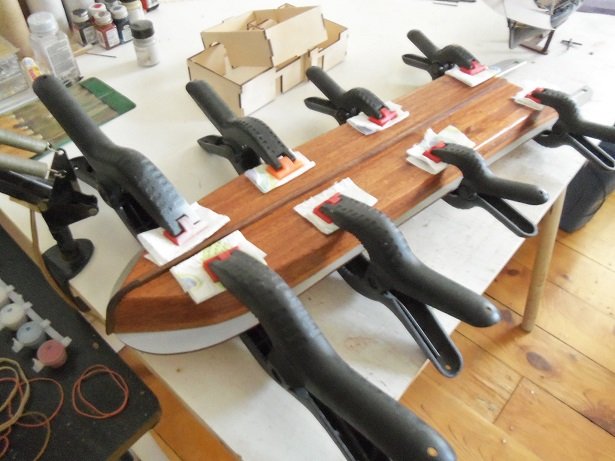
thanks Piet and Mark........OH yea! some of the strips are curved......if I was planking a sailing ship, they would be perfect good to find a way to use them up......I think they've aged long enough time for other wood to take their place. I've heard of that kit Ken........I've never done a solid hull model, although I do have that PT boat by Marine Models tucked away in the closet. {boy, when I start on that one, it's gonna need all new wood!} I finished planking the main deck last night.......after a few interruptions. at one point, I needed to go over to my son Kevin's house to help set up his new air compressor. I still need to refine the stern and sand around the edges, so the decorative strip can be glued on. I had worked on the port side for a short time, before I thought to snap the continuation picture. note that I have been drawing the butt staggers in where the structures lie, so I won't lose my place with them. before long, the bow section was planked, and proceeding aftward. when laying the sections inside the structure lines, I didn't bother cutting or calking, but only did what would go beyond the confines. when the bow had dried for a short time, the port side was trimmed and sanded. I really need to find the good pair of nail clippers....I have a habit of using them to cut brass rod, and it does tend to dull them. reaching the stern, I had to get a little creative on this side. the planking didn't align as well, as they did on the starboard side. the slots will need to be trimmed a lot more on the port side. a small piece of the 3 mm was fitted within the extension, and an even narrower piece needed to be fitted along the inside edge. I didn't have any blonde strip, so I used some Annegre strip I have on hand. the color being a bit off, it was sanded and then stained over, which made it blend in. the paddle wheel brackets will cover it though, so it may not be seen. the 3 mm that was patched along the fore section of the starboard side was trimmed and sanded, and some of the port side edge too. not much has been done with the port stern....I'll leave that for tomorrow. sanding and clear coating will be done then as well. the waste you see is what there is in total.......out of all the strips I stained, I'm left with the equivalent of 2 strips. I'll see what I can get done today

-
this will be the go to log for anyone building this vessel. it's a great log Michael, and I've enjoyed your progress immensely. the lantern your working with looks like a Billing Boats lantern......I have one in my inventory. how do you adhere the leaf to the part? do you glue it? I see this stuff at Hobby Lobby and have been tempted to buy some, but I'm not familiar with it's use.
-
your gonna have the helicopter in there anyways....it wouldn't do to have it closed
-
you've made some really great progress! did you need to get on a step ladder to take that one picture? absolutely splendid!
- 1,306 replies
-
- 6
-

-
- syren
- model shipways
- (and 1 more)
-
leave it to you to be resourceful Piet.....we've come to expect that your almost caught up.........and look'in great
- 378 replies
-
- 5
-
-
- java
- pacific crossroads
- (and 2 more)
-
boy.....really shows how much further you have to go, now don't it super photo!
-
sometimes sanding will blend the pencil. I used to use crayon......depending on the wood, sometimes it doesn't look half bad. I got turn on to the archive pen and haven't looked back. the capstans look great.....awesome work on 'em. good luck with the planking......the combinations you have there look really good, especially with the tree nails
-
the more you add, the better she looks! I agree....the vents look great.
-
thank you Michael and Mike........I'm just getting started with the planking, and the planking, and planking
-
hello Eric OK.......how about the Baton Rouge I haven't seen a kit for it welcome........glad to have you following along.
-
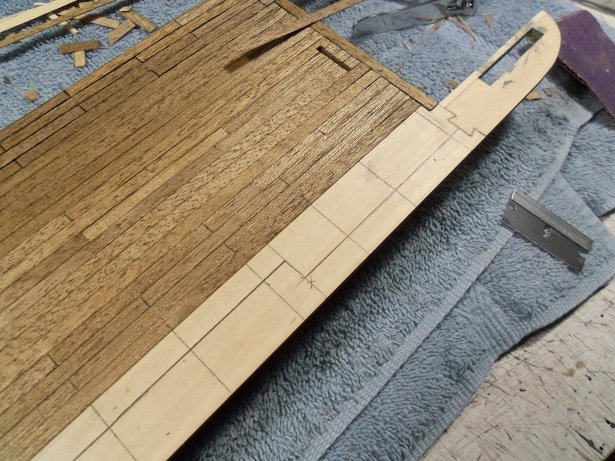
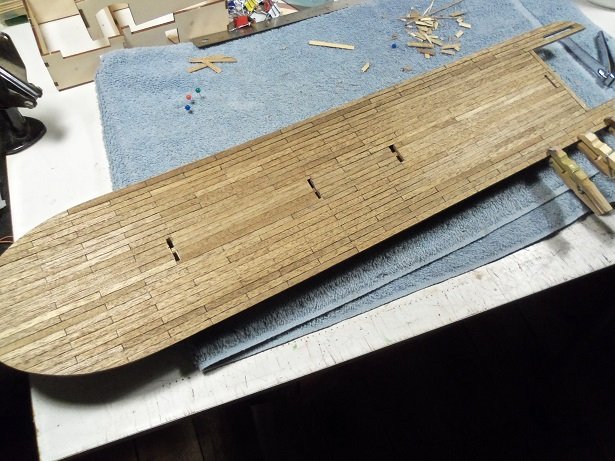
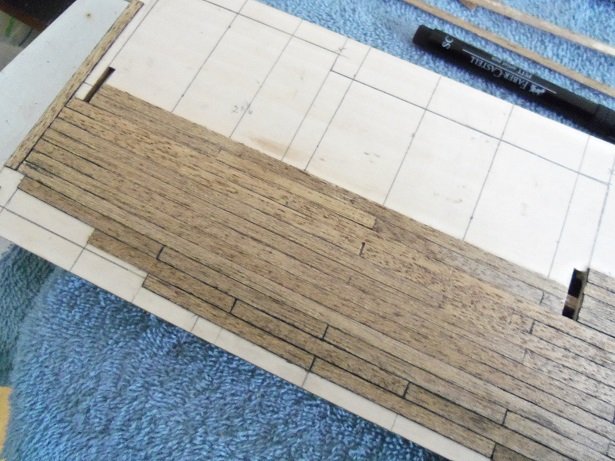
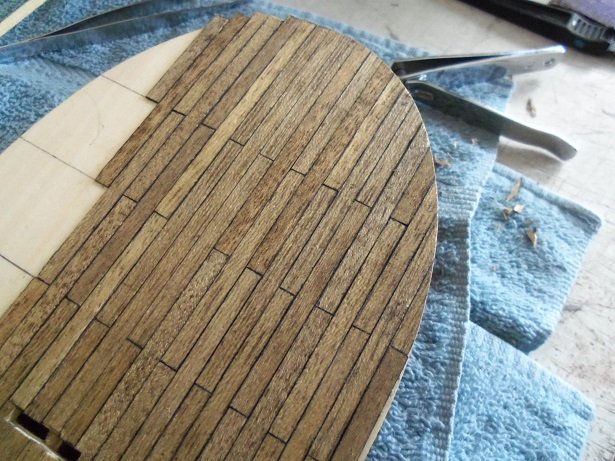
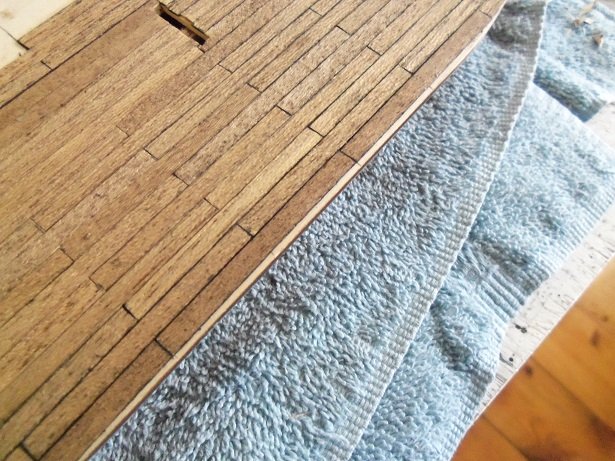
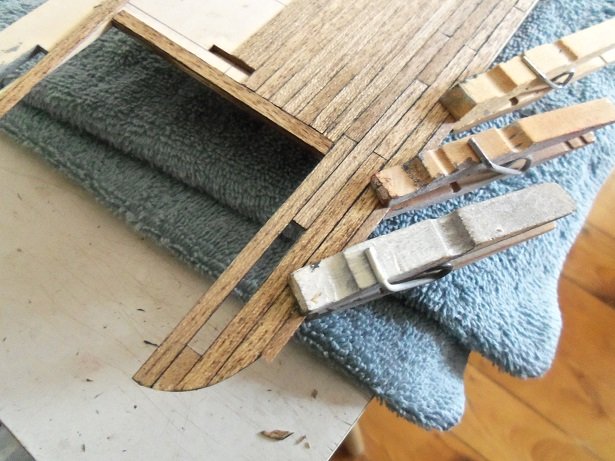
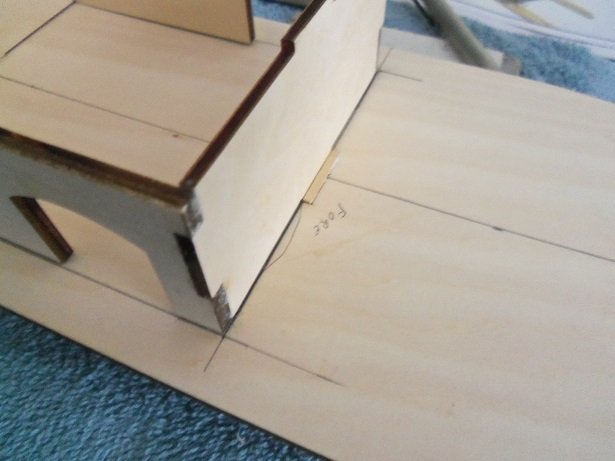
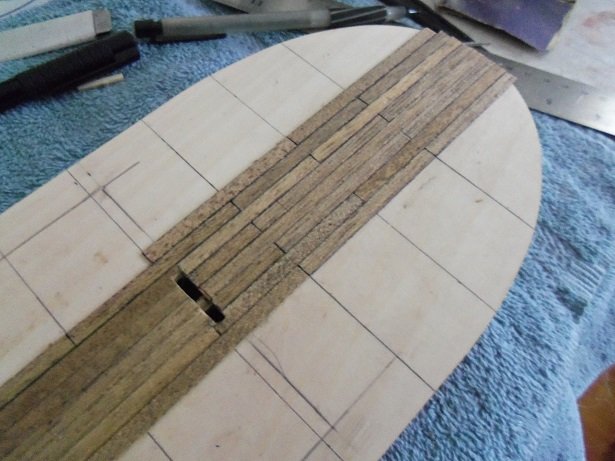
this morning I got back to the planking. getting to the paddle wheel opening, I lined the center edge with a strip. when I plank those two extensions, it will box in the opening. I did the same thing with the aft structure, making sure that any part of the planking that will lie outside the structure, is done with the archive pen. around the bow of the deck, planking hung over the edge. I use the convex nail clippers to trim it, and sandpaper to make the edge smooth. along the side of the deck, a very small sliver of bare plywood can be seen. odd that it's not consistent. the sliver stops further back and starts again at the stern. to fill this in, I have some 3 mm blonde thin strip. a strip was stained to fill them in. these two areas were filled in and they will be trimmed when dry. back at the stern, the starboard extension was planked. these are kind of a nuisance.......I hit this one earlier and cracked the glue. this should fix it. I'm thinking that the difference in planking width accounts for this.....we all know that there is a tolerance, as much as 1 mm in some cases. most of the time, I compare the width of the planking I use........you never know. I recall one bundle of planking I got one time was so badly cut and varied so much, that I actually opted to use other planking I had on hand. I should be able to get more done today.....I'm shooting to get the entire deck finished. more soon
-
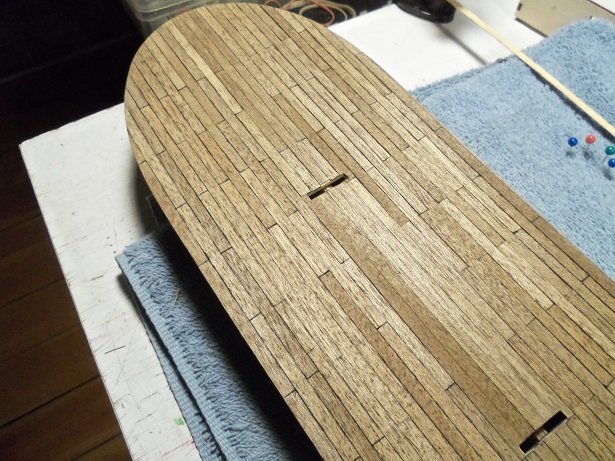
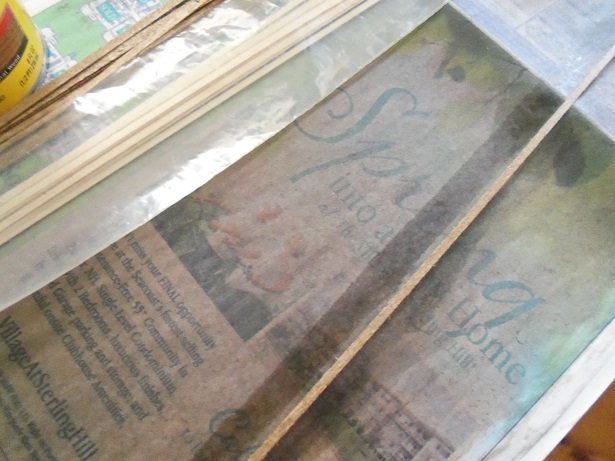
hello John....and thanks for the good word there's a lot of planking that will slow me down a little. I've also decided to lean more towards stain than paint. I think it will make it a bit more interesting. as always, thanks to all for the likes. I would have had this posted earlier, but I got bumped off the site. I kept getting that error message. so I'm gonna hurry and get this up before anything else happens deck planking has begun.......I didn't have any oak stain, but I have a new can of Special Walnut I also have a can of Mahogany.......so the plan I have in my head is a go. I'm not sure I'll do it, but I also wanted to streak in some gray into the walnut, which I was thinking to do, even if I had oak. I'll see how the two look together. I guess the first thing to do is set up a place to stain. easy enough to do....... as I mentioned earlier, I happen to have an ample supply of the blonde .5 x 5 mm thin strip. they are about 880 mm in length. the supplied thin strip bundle is only 550 mm long. I'll use what I have, mainly because I've had it for quite some time...and not sure how long the gent who sent it to me had it for {thanks again Mark}. earlier I stated that both enlarged slots are inside the structure....no so. the forward slot is outside, and to deter any trouble from it, it was filled in. it will be sanded flush later on when dry. I marked off the structures with the intent to plank around them, but I ended up having second thoughts. last time I did it, I lost track of the staggers and blew it big time. the outside of the structures are to be planked as well, so what I did here is wrong to begin with. I set the butt stagger meter to six and marked off these lines as well. then it later dawned on me that this would result in very long planks, so I bisected all of the lines by half, marking these lines as well. now the deck looks like a lined mess the center plank was continuous, interrupted by the slots. from then outward, the staggering began. I am using an archive pen to do the calking. I stopped doing it though, since it dawned on me too that it won't be seen. I didn't do the butt staggering as well for the same reason, but I did enough so I could use it as a reference. from where you see the progress here, I continued on the starboard side, filling in aftward, as I needed to base the planking..

-
something one sometimes hates to do.......but if it has to be done your planking over it anyway bob...no harm no foul. not to mention how many bulwark posts there are...that would have been a complete bugger! I also see how they seem to be segmented.....is that for the gun ports? great progress Bob!
- 359 replies
-
- 2
-
-
- prince de neufchatel
- model shipways
- (and 1 more)
-
polka dot is good......
-
thank you OC......yea, still more to do yet. I took Sunday and today off........feels great. but I'm job hunting.....I'm done with the B.S. yesterday was spent on planking the Tumbl'in Dice.....not much on Norden. I'm working still on the stand.....not much left to do. I hope to have a update for her soon though. thanks for the good word
- 378 replies
-
- 4
-
-
- t78 norden
- billing boats
- (and 1 more)
-
wish I had windows like those.......I'd be a very happy camper she's look'in great..the windows and doors came out nice as well. did you run out of black door knobs?
-
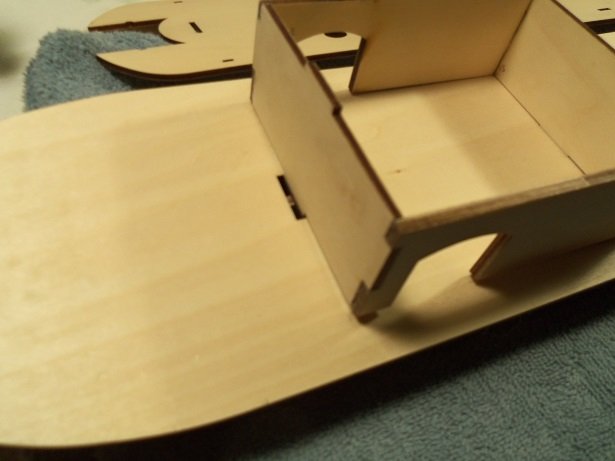
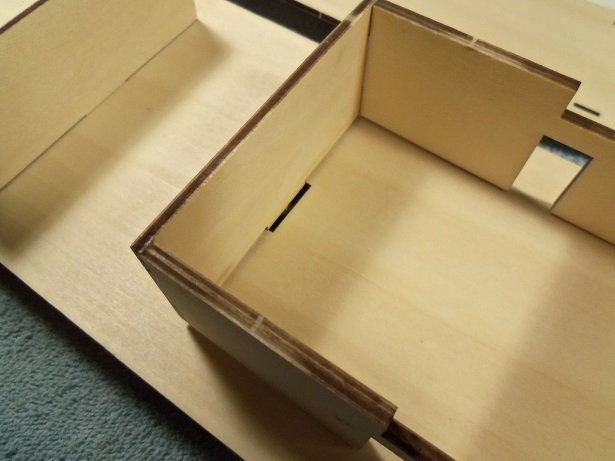
I could have Mike, but I think it would be harder to center the structures. alignment is very important. the good thing is that both of the enlarged slots have the deficit showing inside the structures........no windows or visibility, they will never be seen. hello Patrick.......yes I have. I was just going to experiment with some of the problems with this kit, but we all know that once something is started, it will never stop. glad to have you following along
-
nice work Mike.......I agree, they should look very good when in place
-
I knew it she's look'in great in her camo! nicely done. good silhouette of her side view......I see you have the same problem I do. with this new table I have, the built in light is directly above and shadows any side views. I miss my crane lights
- 378 replies
-
- 6
-
-
- java
- pacific crossroads
- (and 2 more)
-
...and glad to have you along as well Mark. thanks for the good word
- 378 replies
-
- 6
-
-
- t78 norden
- billing boats
- (and 1 more)
-
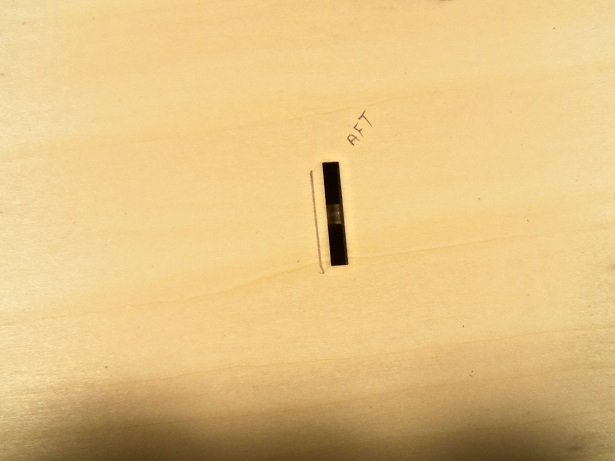
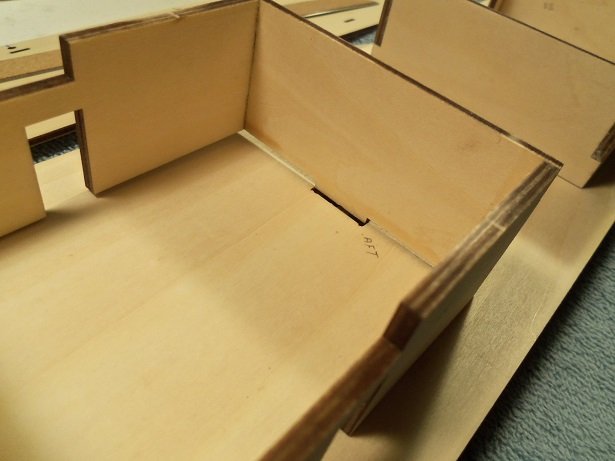
thanks Mark and Piet.....yep! this is the mahogany I got out of the Nordkap kit. I'll order some different planking later. too beautiful a wood to be painted over! thanks for the good word gents and thanks to you folks who hit the like button as promised, I have the pictures from the fitting job. in order to fit the structures, I chose to cement the deck on to the bottom. there is a curvature in the deck that may help with the fitting. both of the structures were set up on the deck. the second level deck was dry fitted, to insure it would fit afterwards. the mis alignments ended up like this...... the fore slot for the front structure needs to be trimmed aftward. it was marked. the fore slot for the aft structure needs to be trimmed forward. it too was marked. after the cutting was done.....I discovered another small problem. the aft structure, which is a bit more complex, doesn't sit well with the curvature of the deck. the way the side walls are shaped {with the doors and the vent slots}, has some flex when pushed in place. it alters the door openings. the tab on the stern wall complicates things, so sanding the curve along the base of the structure might be tough. I'm thinking that when fully assembled, the flex might not be so prominent, and it can be cemented in place easier. it's really not that much......
-
funny....I looked for those pieces I know now that I have to make the cleats for the bars. you may end up doing what I did for the structures......I cut the slots for them to fit. did you dry fit the second level deck? there will be issues there to, if the structures are in the correct alignment. what did you stain the deck with?